×
Skip to content
Say goodbye to giant tablets that are impossible to swallow!
When You Support a Small Business You're Supporting Someone's Dream
So, from the bottom of our hearts, thank you for supporting our dream ❤️
9
{"item":{"id":7753761849533,"title":"Moode Prenatal Vitamin","handle":"moode-prenatal-vitamin","description":"\u003cp data-mce-fragment=\"1\"\u003e60 flavourless hard capsules. Vegan and free from gluten, dairy, soy, sulfites, artificial flavours and GMOs. Australian made.\u003c\/p\u003e\n\u003cp data-mce-fragment=\"1\"\u003eWe’re famous for:\u003c\/p\u003e\n\u003cul data-mce-fragment=\"1\"\u003e\n\u003cli data-mce-fragment=\"1\"\u003eMini- capsules. So they’re always easy to swallow\u003c\/li\u003e\n\u003cli data-mce-fragment=\"1\"\u003eFolinic acid, for its increased bioavailability\u003c\/li\u003e\n\u003cli data-mce-fragment=\"1\"\u003eChampioning Choline, with 300mg in every dose\u003c\/li\u003e\n\u003cli data-mce-fragment=\"1\"\u003eIron free formulation, avoiding gastrointestinal upset\u003c\/li\u003e\n\u003cli data-mce-fragment=\"1\"\u003eConsidering nausea (and not adding to it)\u003c\/li\u003e\n\u003c\/ul\u003e\n\u003cp data-mce-fragment=\"1\"\u003eBest taken 3+ months before conception, and right throughout pregnancy, postpartum and breastfeeding.\u003c\/p\u003e\n\u003cp data-mce-fragment=\"1\"\u003eAlways read the label and follow the directions for use.\u003c\/p\u003e\n\u003c!----\u003e","published_at":"2024-05-27T11:21:26+08:00","created_at":"2024-05-18T11:40:02+08:00","vendor":"Moode","type":"","tags":["Breastfeeding","Bundles","Mum","Pre-Conception","Pregnancy","Pregnancy Health"],"price":5600,"price_min":5600,"price_max":23800,"available":true,"price_varies":true,"compare_at_price":null,"compare_at_price_min":0,"compare_at_price_max":0,"compare_at_price_varies":false,"variants":[{"id":43940607557821,"title":"1 Pack","option1":"1 Pack","option2":null,"option3":null,"sku":"","requires_shipping":true,"taxable":false,"featured_image":null,"available":true,"name":"Moode Prenatal Vitamin - 1 Pack","public_title":"1 Pack","options":["1 Pack"],"price":5600,"weight":85,"compare_at_price":null,"inventory_management":"shopify","barcode":"07557821","requires_selling_plan":false,"selling_plan_allocations":[],"quantity_rule":{"min":1,"max":null,"increment":1}},{"id":43940607393981,"title":"3 Pack","option1":"3 Pack","option2":null,"option3":null,"sku":"","requires_shipping":true,"taxable":false,"featured_image":null,"available":true,"name":"Moode Prenatal Vitamin - 3 Pack","public_title":"3 Pack","options":["3 Pack"],"price":15200,"weight":85,"compare_at_price":null,"inventory_management":"shopify","barcode":"07393981","requires_selling_plan":false,"selling_plan_allocations":[],"quantity_rule":{"min":1,"max":null,"increment":1}},{"id":43940607426749,"title":"5 Pack","option1":"5 Pack","option2":null,"option3":null,"sku":"","requires_shipping":true,"taxable":false,"featured_image":null,"available":true,"name":"Moode Prenatal Vitamin - 5 Pack","public_title":"5 Pack","options":["5 Pack"],"price":23800,"weight":85,"compare_at_price":null,"inventory_management":"shopify","barcode":"07426749","requires_selling_plan":false,"selling_plan_allocations":[],"quantity_rule":{"min":1,"max":null,"increment":1}}],"images":["\/\/www.thebirthstore.com.au\/cdn\/shop\/files\/3_Flavours_to_choose_from_13.png?v=1763527420","\/\/www.thebirthstore.com.au\/cdn\/shop\/files\/moode-prenatal-vitamin-7137092.jpg?v=1763562955","\/\/www.thebirthstore.com.au\/cdn\/shop\/files\/moode-prenatal-vitamin-2933155.jpg?v=1763562954","\/\/www.thebirthstore.com.au\/cdn\/shop\/files\/moode-prenatal-vitamin-4065182.jpg?v=1763562956","\/\/www.thebirthstore.com.au\/cdn\/shop\/files\/moode-prenatal-vitamin-7273534.jpg?v=1763562955"],"featured_image":"\/\/www.thebirthstore.com.au\/cdn\/shop\/files\/3_Flavours_to_choose_from_13.png?v=1763527420","options":["Size"],"media":[{"alt":null,"id":30155224285373,"position":1,"preview_image":{"aspect_ratio":1.0,"height":1080,"width":1080,"src":"\/\/www.thebirthstore.com.au\/cdn\/shop\/files\/3_Flavours_to_choose_from_13.png?v=1763527420"},"aspect_ratio":1.0,"height":1080,"media_type":"image","src":"\/\/www.thebirthstore.com.au\/cdn\/shop\/files\/3_Flavours_to_choose_from_13.png?v=1763527420","width":1080},{"alt":"Moode Prenatal Vitamin - The Birth Store - Moode","id":30154584064189,"position":2,"preview_image":{"aspect_ratio":1.5,"height":1365,"width":2048,"src":"\/\/www.thebirthstore.com.au\/cdn\/shop\/files\/moode-prenatal-vitamin-7137092.jpg?v=1763562955"},"aspect_ratio":1.5,"height":1365,"media_type":"image","src":"\/\/www.thebirthstore.com.au\/cdn\/shop\/files\/moode-prenatal-vitamin-7137092.jpg?v=1763562955","width":2048},{"alt":"Moode Prenatal Vitamin - The Birth Store - Moode","id":30154584129725,"position":3,"preview_image":{"aspect_ratio":0.8,"height":1436,"width":1149,"src":"\/\/www.thebirthstore.com.au\/cdn\/shop\/files\/moode-prenatal-vitamin-2933155.jpg?v=1763562954"},"aspect_ratio":0.8,"height":1436,"media_type":"image","src":"\/\/www.thebirthstore.com.au\/cdn\/shop\/files\/moode-prenatal-vitamin-2933155.jpg?v=1763562954","width":1149},{"alt":"Moode Prenatal Vitamin - The Birth Store - Moode","id":30154584096957,"position":4,"preview_image":{"aspect_ratio":0.667,"height":2048,"width":1365,"src":"\/\/www.thebirthstore.com.au\/cdn\/shop\/files\/moode-prenatal-vitamin-4065182.jpg?v=1763562956"},"aspect_ratio":0.667,"height":2048,"media_type":"image","src":"\/\/www.thebirthstore.com.au\/cdn\/shop\/files\/moode-prenatal-vitamin-4065182.jpg?v=1763562956","width":1365},{"alt":"Moode Prenatal Vitamin - The Birth Store - Moode","id":30154584162493,"position":5,"preview_image":{"aspect_ratio":0.8,"height":2048,"width":1638,"src":"\/\/www.thebirthstore.com.au\/cdn\/shop\/files\/moode-prenatal-vitamin-7273534.jpg?v=1763562955"},"aspect_ratio":0.8,"height":2048,"media_type":"image","src":"\/\/www.thebirthstore.com.au\/cdn\/shop\/files\/moode-prenatal-vitamin-7273534.jpg?v=1763562955","width":1638}],"requires_selling_plan":false,"selling_plan_groups":[],"content":"\u003cp data-mce-fragment=\"1\"\u003e60 flavourless hard capsules. Vegan and free from gluten, dairy, soy, sulfites, artificial flavours and GMOs. Australian made.\u003c\/p\u003e\n\u003cp data-mce-fragment=\"1\"\u003eWe’re famous for:\u003c\/p\u003e\n\u003cul data-mce-fragment=\"1\"\u003e\n\u003cli data-mce-fragment=\"1\"\u003eMini- capsules. So they’re always easy to swallow\u003c\/li\u003e\n\u003cli data-mce-fragment=\"1\"\u003eFolinic acid, for its increased bioavailability\u003c\/li\u003e\n\u003cli data-mce-fragment=\"1\"\u003eChampioning Choline, with 300mg in every dose\u003c\/li\u003e\n\u003cli data-mce-fragment=\"1\"\u003eIron free formulation, avoiding gastrointestinal upset\u003c\/li\u003e\n\u003cli data-mce-fragment=\"1\"\u003eConsidering nausea (and not adding to it)\u003c\/li\u003e\n\u003c\/ul\u003e\n\u003cp data-mce-fragment=\"1\"\u003eBest taken 3+ months before conception, and right throughout pregnancy, postpartum and breastfeeding.\u003c\/p\u003e\n\u003cp data-mce-fragment=\"1\"\u003eAlways read the label and follow the directions for use.\u003c\/p\u003e\n\u003c!----\u003e"},"options":[{"name":"Size","position":1,"values":["1 Pack","3 Pack","5 Pack"]}],"custom_metafields":{},"metafields":{"badge":"\u003cdiv style='display:none' class='jdgm-prev-badge' data-average-rating='0.00' data-number-of-reviews='0' data-number-of-questions='0'\u003e \u003cspan class='jdgm-prev-badge__stars' data-score='0.00' tabindex='0' aria-label='0.00 stars' role='button'\u003e \u003cspan class='jdgm-star jdgm--off'\u003e\u003c\/span\u003e\u003cspan class='jdgm-star jdgm--off'\u003e\u003c\/span\u003e\u003cspan class='jdgm-star jdgm--off'\u003e\u003c\/span\u003e\u003cspan class='jdgm-star jdgm--off'\u003e\u003c\/span\u003e\u003cspan class='jdgm-star jdgm--off'\u003e\u003c\/span\u003e \u003c\/span\u003e \u003cspan class='jdgm-prev-badge__text'\u003e No reviews \u003c\/span\u003e \u003c\/div\u003e","widget":"\u003cdiv class='jdgm-rev-widg' data-updated-at='2025-06-13T16:13:40Z' data-average-rating='0.00' data-number-of-reviews='0' data-number-of-questions='0'\u003e \u003cstyle class='jdgm-temp-hiding-style'\u003e.jdgm-rev-widg{ display: none }\u003c\/style\u003e \u003cdiv class='jdgm-rev-widg__header'\u003e \u003ch2 class='jdgm-rev-widg__title'\u003eCustomer Reviews\u003c\/h2\u003e \u003cdiv class='jdgm-rev-widg__summary'\u003e \u003cdiv class='jdgm-rev-widg__summary-stars' aria-label='Average rating is 0.00 stars' role='img'\u003e \u003cspan class='jdgm-star jdgm--off'\u003e\u003c\/span\u003e\u003cspan class='jdgm-star jdgm--off'\u003e\u003c\/span\u003e\u003cspan class='jdgm-star jdgm--off'\u003e\u003c\/span\u003e\u003cspan class='jdgm-star jdgm--off'\u003e\u003c\/span\u003e\u003cspan class='jdgm-star jdgm--off'\u003e\u003c\/span\u003e \u003c\/div\u003e \u003cdiv class='jdgm-rev-widg__summary-text'\u003eBe the first to write a review\u003c\/div\u003e \u003c\/div\u003e \u003ca style='display: none' href='#' class='jdgm-write-rev-link' role='button'\u003eWrite a review\u003c\/a\u003e \u003cdiv class='jdgm-histogram jdgm-temp-hidden'\u003e \u003cdiv class='jdgm-histogram__row' data-rating='5' data-frequency='0' data-percentage='0'\u003e \u003cdiv class='jdgm-histogram__star' role='button' aria-label=\"0% (0) reviews with 5 star rating\" tabindex='0' \u003e\u003cspan class='jdgm-star jdgm--on'\u003e\u003c\/span\u003e\u003cspan class='jdgm-star jdgm--on'\u003e\u003c\/span\u003e\u003cspan class='jdgm-star jdgm--on'\u003e\u003c\/span\u003e\u003cspan class='jdgm-star jdgm--on'\u003e\u003c\/span\u003e\u003cspan class='jdgm-star jdgm--on'\u003e\u003c\/span\u003e\u003c\/div\u003e \u003cdiv class='jdgm-histogram__bar'\u003e \u003cdiv class='jdgm-histogram__bar-content' style='width: 0%;'\u003e \u003c\/div\u003e \u003c\/div\u003e \u003cdiv class='jdgm-histogram__percentage'\u003e0%\u003c\/div\u003e \u003cdiv class='jdgm-histogram__frequency'\u003e(0)\u003c\/div\u003e \u003c\/div\u003e \u003cdiv class='jdgm-histogram__row' data-rating='4' data-frequency='0' data-percentage='0'\u003e \u003cdiv class='jdgm-histogram__star' role='button' aria-label=\"0% (0) reviews with 4 star rating\" tabindex='0' \u003e\u003cspan class='jdgm-star jdgm--on'\u003e\u003c\/span\u003e\u003cspan class='jdgm-star jdgm--on'\u003e\u003c\/span\u003e\u003cspan class='jdgm-star jdgm--on'\u003e\u003c\/span\u003e\u003cspan class='jdgm-star jdgm--on'\u003e\u003c\/span\u003e\u003cspan class='jdgm-star jdgm--off'\u003e\u003c\/span\u003e\u003c\/div\u003e \u003cdiv class='jdgm-histogram__bar'\u003e \u003cdiv class='jdgm-histogram__bar-content' style='width: 0%;'\u003e \u003c\/div\u003e \u003c\/div\u003e \u003cdiv class='jdgm-histogram__percentage'\u003e0%\u003c\/div\u003e \u003cdiv class='jdgm-histogram__frequency'\u003e(0)\u003c\/div\u003e \u003c\/div\u003e \u003cdiv class='jdgm-histogram__row' data-rating='3' data-frequency='0' data-percentage='0'\u003e \u003cdiv class='jdgm-histogram__star' role='button' aria-label=\"0% (0) reviews with 3 star rating\" tabindex='0' \u003e\u003cspan class='jdgm-star jdgm--on'\u003e\u003c\/span\u003e\u003cspan class='jdgm-star jdgm--on'\u003e\u003c\/span\u003e\u003cspan class='jdgm-star jdgm--on'\u003e\u003c\/span\u003e\u003cspan class='jdgm-star jdgm--off'\u003e\u003c\/span\u003e\u003cspan class='jdgm-star jdgm--off'\u003e\u003c\/span\u003e\u003c\/div\u003e \u003cdiv class='jdgm-histogram__bar'\u003e \u003cdiv class='jdgm-histogram__bar-content' style='width: 0%;'\u003e \u003c\/div\u003e \u003c\/div\u003e \u003cdiv class='jdgm-histogram__percentage'\u003e0%\u003c\/div\u003e \u003cdiv class='jdgm-histogram__frequency'\u003e(0)\u003c\/div\u003e \u003c\/div\u003e \u003cdiv class='jdgm-histogram__row' data-rating='2' data-frequency='0' data-percentage='0'\u003e \u003cdiv class='jdgm-histogram__star' role='button' aria-label=\"0% (0) reviews with 2 star rating\" tabindex='0' \u003e\u003cspan class='jdgm-star jdgm--on'\u003e\u003c\/span\u003e\u003cspan class='jdgm-star jdgm--on'\u003e\u003c\/span\u003e\u003cspan class='jdgm-star jdgm--off'\u003e\u003c\/span\u003e\u003cspan class='jdgm-star jdgm--off'\u003e\u003c\/span\u003e\u003cspan class='jdgm-star jdgm--off'\u003e\u003c\/span\u003e\u003c\/div\u003e \u003cdiv class='jdgm-histogram__bar'\u003e \u003cdiv class='jdgm-histogram__bar-content' style='width: 0%;'\u003e \u003c\/div\u003e \u003c\/div\u003e \u003cdiv class='jdgm-histogram__percentage'\u003e0%\u003c\/div\u003e \u003cdiv class='jdgm-histogram__frequency'\u003e(0)\u003c\/div\u003e \u003c\/div\u003e \u003cdiv class='jdgm-histogram__row' data-rating='1' data-frequency='0' data-percentage='0'\u003e \u003cdiv class='jdgm-histogram__star' role='button' aria-label=\"0% (0) reviews with 1 star rating\" tabindex='0' \u003e\u003cspan class='jdgm-star jdgm--on'\u003e\u003c\/span\u003e\u003cspan class='jdgm-star jdgm--off'\u003e\u003c\/span\u003e\u003cspan class='jdgm-star jdgm--off'\u003e\u003c\/span\u003e\u003cspan class='jdgm-star jdgm--off'\u003e\u003c\/span\u003e\u003cspan class='jdgm-star jdgm--off'\u003e\u003c\/span\u003e\u003c\/div\u003e \u003cdiv class='jdgm-histogram__bar'\u003e \u003cdiv class='jdgm-histogram__bar-content' style='width: 0%;'\u003e \u003c\/div\u003e \u003c\/div\u003e \u003cdiv class='jdgm-histogram__percentage'\u003e0%\u003c\/div\u003e \u003cdiv class='jdgm-histogram__frequency'\u003e(0)\u003c\/div\u003e \u003c\/div\u003e \u003cdiv class='jdgm-histogram__row jdgm-histogram__clear-filter' data-rating=null tabindex='0'\u003e\u003c\/div\u003e \u003c\/div\u003e \u003cdiv class='jdgm-rev-widg__sort-wrapper'\u003e\u003c\/div\u003e \u003c\/div\u003e \u003cdiv class='jdgm-rev-widg__body'\u003e \u003cdiv class='jdgm-rev-widg__reviews'\u003e\u003c\/div\u003e \u003cdiv class='jdgm-paginate' data-per-page='10' data-url='https:\/\/api.judge.me\/reviews\/reviews_for_widget' style=\"display: none;\"\u003e\u003c\/div\u003e \u003c\/div\u003e \u003cdiv class='jdgm-rev-widg__paginate-spinner-wrapper'\u003e \u003cdiv class='jdgm-spinner'\u003e\u003c\/div\u003e \u003c\/div\u003e \u003c\/div\u003e"},"default_reviews_metafields":{},"collections":[{"id":281712427197,"handle":"breastfeeding","title":"Breastfeeding","updated_at":"2026-07-27T19:09:18+08:00","body_html":"","published_at":"2021-12-20T14:19:33+08:00","sort_order":"best-selling","template_suffix":"breastfeeding-collection","disjunctive":false,"rules":[{"column":"tag","relation":"equals","condition":"Breastfeeding"}],"published_scope":"global","image":{"created_at":"2024-05-06T11:59:34+08:00","alt":"Breastfeeding - The Birth Store","width":620,"height":635,"src":"\/\/www.thebirthstore.com.au\/cdn\/shop\/collections\/breastfeeding-793872.jpg?v=1714967974"}},{"id":283018526909,"handle":"bundles","title":"Bundles","updated_at":"2026-06-27T19:08:41+08:00","body_html":"\u003cp\u003eMake shopping for your bump, birth and beyond easier with our bundle packs. With a pack available for every stage, you can get everything you need with no fuss and with our bundle packs, you even save money.\u003c\/p\u003e","published_at":"2022-02-01T22:33:09+08:00","sort_order":"best-selling","template_suffix":"swaddles-collection","disjunctive":false,"rules":[{"column":"tag","relation":"equals","condition":"Bundles"}],"published_scope":"global","image":{"created_at":"2024-05-06T11:59:39+08:00","alt":"Bundles - The Birth Store","width":2048,"height":1365,"src":"\/\/www.thebirthstore.com.au\/cdn\/shop\/collections\/bundles-299009.jpg?v=1714967980"}},{"id":261657460925,"handle":"buy","title":"Buy","updated_at":"2026-07-27T19:09:18+08:00","body_html":"\u003cp\u003eBrowse all of our pregnancy, labour \u0026amp; birth, postpartum and baby essentials here.\u003cbr\u003e\u003c\/p\u003e\n\u003cp\u003e\u003cspan\u003eYou can even buy now and pay later with Afterpay!\u003c\/span\u003e\u003c\/p\u003e","published_at":"2021-03-10T12:05:31+08:00","sort_order":"best-selling","template_suffix":"shop-all-collection","disjunctive":false,"rules":[{"column":"title","relation":"not_contains","condition":"Hire"}],"published_scope":"global","image":{"created_at":"2024-05-06T11:59:42+08:00","alt":"Buy - The Birth Store","width":2048,"height":2048,"src":"\/\/www.thebirthstore.com.au\/cdn\/shop\/collections\/buy-964856.jpg?v=1714967982"}},{"id":261658149053,"handle":"pregnancy-and-maternity-products","title":"Pregnancy","updated_at":"2026-07-27T19:09:18+08:00","body_html":"\u003cp\u003eShop your pregnancy essentials below. Looking for something we don't currently stock? Please reach out and let us know.\u003cbr\u003e\u003c\/p\u003e\n\u003cp\u003e\u003cspan\u003eYou can even buy now and pay later with Afterpay!\u003c\/span\u003e\u003c\/p\u003e","published_at":"2021-03-10T12:34:22+08:00","sort_order":"best-selling","template_suffix":"pregnancy-collection","disjunctive":false,"rules":[{"column":"tag","relation":"equals","condition":"Pregnancy"}],"published_scope":"global","image":{"created_at":"2024-05-06T12:00:40+08:00","alt":"Pregnancy - The Birth Store","width":1024,"height":1536,"src":"\/\/www.thebirthstore.com.au\/cdn\/shop\/collections\/pregnancy-899677.jpg?v=1714968040"}},{"id":295224901821,"handle":"pregnancy-health","title":"Pregnancy Health","updated_at":"2026-07-27T19:09:18+08:00","body_html":"","published_at":"2023-11-10T20:48:51+08:00","sort_order":"best-selling","template_suffix":"swaddles-collection","disjunctive":false,"rules":[{"column":"tag","relation":"equals","condition":"Pregnancy Health"}],"published_scope":"global","image":{"created_at":"2024-05-06T12:00:41+08:00","alt":"Pregnancy Health - The Birth Store","width":608,"height":410,"src":"\/\/www.thebirthstore.com.au\/cdn\/shop\/collections\/pregnancy-health-343983.jpg?v=1714968042"}},{"id":326523846845,"handle":"pregnancy-health-1","updated_at":"2026-07-27T19:09:18+08:00","published_at":"2025-10-30T10:44:54+08:00","sort_order":"best-selling","template_suffix":"","published_scope":"global","title":"Pregnancy Health","body_html":"","image":{"created_at":"2025-11-20T21:33:56+08:00","alt":"Pregnancy Health - The Birth Store","width":522,"height":525,"src":"\/\/www.thebirthstore.com.au\/cdn\/shop\/collections\/pregnancy-health-1617860.jpg?v=1763645636"}},{"id":291456483517,"handle":"shop-all","title":"Shop All - Mum","updated_at":"2026-07-27T19:09:18+08:00","body_html":"","published_at":"2022-12-23T22:04:39+08:00","sort_order":"best-selling","template_suffix":"shop-all-collection","disjunctive":false,"rules":[{"column":"variant_price","relation":"greater_than","condition":"1"},{"column":"title","relation":"not_contains","condition":"Batteries"},{"column":"tag","relation":"equals","condition":"Mum"}],"published_scope":"global","image":{"created_at":"2024-05-06T12:00:54+08:00","alt":"Shop All - The Birth Store","width":1365,"height":2048,"src":"\/\/www.thebirthstore.com.au\/cdn\/shop\/collections\/shop-all-693176.jpg?v=1714968055"}},{"id":310045933757,"handle":"shop-all-sale","title":"Shop All Sale","updated_at":"2026-07-27T19:09:18+08:00","body_html":"","published_at":"2024-11-12T13:22:43+08:00","sort_order":"alpha-asc","template_suffix":"","disjunctive":true,"rules":[{"column":"tag","relation":"equals","condition":"Bundles"},{"column":"vendor","relation":"equals","condition":"Franjos Kitchen"},{"column":"vendor","relation":"equals","condition":"Adored Illustrations"},{"column":"vendor","relation":"equals","condition":"Amazing Oils"},{"column":"vendor","relation":"equals","condition":"Ice Ice Booby"},{"column":"vendor","relation":"equals","condition":"Made to Milk"},{"column":"vendor","relation":"equals","condition":"Milky Goodness"},{"column":"vendor","relation":"equals","condition":"Seasons of Mama"},{"column":"vendor","relation":"equals","condition":"Silverette"},{"column":"vendor","relation":"equals","condition":"Snuggle Hunny"},{"column":"vendor","relation":"equals","condition":"Yung Bod"},{"column":"vendor","relation":"equals","condition":"Bare Love"},{"column":"vendor","relation":"equals","condition":"Haakaa"},{"column":"vendor","relation":"equals","condition":"Mere Botanicals"},{"column":"vendor","relation":"equals","condition":"The Birth Store Hire"},{"column":"vendor","relation":"equals","condition":"The Birth Store"}],"published_scope":"global","image":{"created_at":"2024-11-13T10:58:16+08:00","alt":"Shop All Sale - The Birth Store","width":2048,"height":1365,"src":"\/\/www.thebirthstore.com.au\/cdn\/shop\/collections\/shop-all-sale-297361.jpg?v=1731466697"}}]}
{"item":{"id":7513280315581,"title":"Labour \u0026 Birth Box - Wooden Birth Comb","handle":"labour-birth-box-wooden-birth-comb","description":"\u003cp\u003e\u003cmeta charset=\"utf-8\"\u003e\u003cspan\u003eThere are so many beautiful products on the market now to help support you in labour \u0026amp; birth. We have created a kit with a couple of our favourite products from our range and other small Australian businesses to support you in labour \u0026amp; birth.\u003c\/span\u003e\u003c\/p\u003e","published_at":"2023-10-03T14:00:51+08:00","created_at":"2023-10-03T13:30:48+08:00","vendor":"Bundles","type":"","tags":["Baby Shower Gifts","Birth","Bundles","Hospital Bag","Labour Preparation","Labour Progression","Nausea","Pain Relief","Pregnancy"],"price":7600,"price_min":7600,"price_max":7600,"available":true,"price_varies":false,"compare_at_price":8495,"compare_at_price_min":8495,"compare_at_price_max":8495,"compare_at_price_varies":false,"variants":[{"id":43056985669821,"title":"Default Title","option1":"Default Title","option2":null,"option3":null,"sku":"","requires_shipping":true,"taxable":false,"featured_image":null,"available":true,"name":"Labour \u0026 Birth Box - Wooden Birth Comb","public_title":null,"options":["Default Title"],"price":7600,"weight":265,"compare_at_price":8495,"inventory_management":"shopify","barcode":"04109245","requires_selling_plan":false,"selling_plan_allocations":[],"quantity_rule":{"min":1,"max":null,"increment":1}}],"images":["\/\/www.thebirthstore.com.au\/cdn\/shop\/files\/labour-birth-box-wooden-birth-comb-132802.jpg?v=1780886521","\/\/www.thebirthstore.com.au\/cdn\/shop\/files\/labour-birth-box-wooden-birth-comb-447199.jpg?v=1714967987","\/\/www.thebirthstore.com.au\/cdn\/shop\/files\/labour-birth-box-wooden-birth-comb-801370.jpg?v=1714967987","\/\/www.thebirthstore.com.au\/cdn\/shop\/files\/labour-birth-box-wooden-birth-comb-860343.jpg?v=1714967987"],"featured_image":"\/\/www.thebirthstore.com.au\/cdn\/shop\/files\/labour-birth-box-wooden-birth-comb-132802.jpg?v=1780886521","options":["Title"],"media":[{"alt":"Labour \u0026 Birth Box - Wooden Birth Comb - The Birth Store-The Birth Store","id":27007588368573,"position":1,"preview_image":{"aspect_ratio":1.007,"height":545,"width":549,"src":"\/\/www.thebirthstore.com.au\/cdn\/shop\/files\/labour-birth-box-wooden-birth-comb-132802.jpg?v=1780886521"},"aspect_ratio":1.007,"height":545,"media_type":"image","src":"\/\/www.thebirthstore.com.au\/cdn\/shop\/files\/labour-birth-box-wooden-birth-comb-132802.jpg?v=1780886521","width":549},{"alt":"Labour \u0026 Birth Box - Wooden Birth Comb - The Birth Store-The Birth Store","id":27007588466877,"position":2,"preview_image":{"aspect_ratio":1.0,"height":2048,"width":2048,"src":"\/\/www.thebirthstore.com.au\/cdn\/shop\/files\/labour-birth-box-wooden-birth-comb-447199.jpg?v=1714967987"},"aspect_ratio":1.0,"height":2048,"media_type":"image","src":"\/\/www.thebirthstore.com.au\/cdn\/shop\/files\/labour-birth-box-wooden-birth-comb-447199.jpg?v=1714967987","width":2048},{"alt":"Labour \u0026 Birth Box - Wooden Birth Comb - The Birth Store-The Birth Store","id":27007588499645,"position":3,"preview_image":{"aspect_ratio":0.667,"height":2048,"width":1365,"src":"\/\/www.thebirthstore.com.au\/cdn\/shop\/files\/labour-birth-box-wooden-birth-comb-801370.jpg?v=1714967987"},"aspect_ratio":0.667,"height":2048,"media_type":"image","src":"\/\/www.thebirthstore.com.au\/cdn\/shop\/files\/labour-birth-box-wooden-birth-comb-801370.jpg?v=1714967987","width":1365},{"alt":"Labour \u0026 Birth Box - Wooden Birth Comb - The Birth Store-The Birth Store","id":27007588532413,"position":4,"preview_image":{"aspect_ratio":1.0,"height":600,"width":600,"src":"\/\/www.thebirthstore.com.au\/cdn\/shop\/files\/labour-birth-box-wooden-birth-comb-860343.jpg?v=1714967987"},"aspect_ratio":1.0,"height":600,"media_type":"image","src":"\/\/www.thebirthstore.com.au\/cdn\/shop\/files\/labour-birth-box-wooden-birth-comb-860343.jpg?v=1714967987","width":600}],"requires_selling_plan":false,"selling_plan_groups":[],"content":"\u003cp\u003e\u003cmeta charset=\"utf-8\"\u003e\u003cspan\u003eThere are so many beautiful products on the market now to help support you in labour \u0026amp; birth. We have created a kit with a couple of our favourite products from our range and other small Australian businesses to support you in labour \u0026amp; birth.\u003c\/span\u003e\u003c\/p\u003e"},"options":[{"name":"Title","position":1,"values":["Default Title"]}],"custom_metafields":{},"metafields":{"badge":"\u003cdiv style='display:none' class='jdgm-prev-badge' data-average-rating='0.00' data-number-of-reviews='0' data-number-of-questions='0'\u003e \u003cspan class='jdgm-prev-badge__stars' data-score='0.00' tabindex='0' aria-label='0.00 stars' role='button'\u003e \u003cspan class='jdgm-star jdgm--off'\u003e\u003c\/span\u003e\u003cspan class='jdgm-star jdgm--off'\u003e\u003c\/span\u003e\u003cspan class='jdgm-star jdgm--off'\u003e\u003c\/span\u003e\u003cspan class='jdgm-star jdgm--off'\u003e\u003c\/span\u003e\u003cspan class='jdgm-star jdgm--off'\u003e\u003c\/span\u003e \u003c\/span\u003e \u003cspan class='jdgm-prev-badge__text'\u003e No reviews \u003c\/span\u003e \u003c\/div\u003e","widget":"\u003cdiv class='jdgm-rev-widg' data-updated-at='2025-06-13T16:13:40Z' data-average-rating='0.00' data-number-of-reviews='0' data-number-of-questions='0'\u003e \u003cstyle class='jdgm-temp-hiding-style'\u003e.jdgm-rev-widg{ display: none }\u003c\/style\u003e \u003cdiv class='jdgm-rev-widg__header'\u003e \u003ch2 class='jdgm-rev-widg__title'\u003eCustomer Reviews\u003c\/h2\u003e \u003cdiv class='jdgm-rev-widg__summary'\u003e \u003cdiv class='jdgm-rev-widg__summary-stars' aria-label='Average rating is 0.00 stars' role='img'\u003e \u003cspan class='jdgm-star jdgm--off'\u003e\u003c\/span\u003e\u003cspan class='jdgm-star jdgm--off'\u003e\u003c\/span\u003e\u003cspan class='jdgm-star jdgm--off'\u003e\u003c\/span\u003e\u003cspan class='jdgm-star jdgm--off'\u003e\u003c\/span\u003e\u003cspan class='jdgm-star jdgm--off'\u003e\u003c\/span\u003e \u003c\/div\u003e \u003cdiv class='jdgm-rev-widg__summary-text'\u003eBe the first to write a review\u003c\/div\u003e \u003c\/div\u003e \u003ca style='display: none' href='#' class='jdgm-write-rev-link' role='button'\u003eWrite a review\u003c\/a\u003e \u003cdiv class='jdgm-histogram jdgm-temp-hidden'\u003e \u003cdiv class='jdgm-histogram__row' data-rating='5' data-frequency='0' data-percentage='0'\u003e \u003cdiv class='jdgm-histogram__star' role='button' aria-label=\"0% (0) reviews with 5 star rating\" tabindex='0' \u003e\u003cspan class='jdgm-star jdgm--on'\u003e\u003c\/span\u003e\u003cspan class='jdgm-star jdgm--on'\u003e\u003c\/span\u003e\u003cspan class='jdgm-star jdgm--on'\u003e\u003c\/span\u003e\u003cspan class='jdgm-star jdgm--on'\u003e\u003c\/span\u003e\u003cspan class='jdgm-star jdgm--on'\u003e\u003c\/span\u003e\u003c\/div\u003e \u003cdiv class='jdgm-histogram__bar'\u003e \u003cdiv class='jdgm-histogram__bar-content' style='width: 0%;'\u003e \u003c\/div\u003e \u003c\/div\u003e \u003cdiv class='jdgm-histogram__percentage'\u003e0%\u003c\/div\u003e \u003cdiv class='jdgm-histogram__frequency'\u003e(0)\u003c\/div\u003e \u003c\/div\u003e \u003cdiv class='jdgm-histogram__row' data-rating='4' data-frequency='0' data-percentage='0'\u003e \u003cdiv class='jdgm-histogram__star' role='button' aria-label=\"0% (0) reviews with 4 star rating\" tabindex='0' \u003e\u003cspan class='jdgm-star jdgm--on'\u003e\u003c\/span\u003e\u003cspan class='jdgm-star jdgm--on'\u003e\u003c\/span\u003e\u003cspan class='jdgm-star jdgm--on'\u003e\u003c\/span\u003e\u003cspan class='jdgm-star jdgm--on'\u003e\u003c\/span\u003e\u003cspan class='jdgm-star jdgm--off'\u003e\u003c\/span\u003e\u003c\/div\u003e \u003cdiv class='jdgm-histogram__bar'\u003e \u003cdiv class='jdgm-histogram__bar-content' style='width: 0%;'\u003e \u003c\/div\u003e \u003c\/div\u003e \u003cdiv class='jdgm-histogram__percentage'\u003e0%\u003c\/div\u003e \u003cdiv class='jdgm-histogram__frequency'\u003e(0)\u003c\/div\u003e \u003c\/div\u003e \u003cdiv class='jdgm-histogram__row' data-rating='3' data-frequency='0' data-percentage='0'\u003e \u003cdiv class='jdgm-histogram__star' role='button' aria-label=\"0% (0) reviews with 3 star rating\" tabindex='0' \u003e\u003cspan class='jdgm-star jdgm--on'\u003e\u003c\/span\u003e\u003cspan class='jdgm-star jdgm--on'\u003e\u003c\/span\u003e\u003cspan class='jdgm-star jdgm--on'\u003e\u003c\/span\u003e\u003cspan class='jdgm-star jdgm--off'\u003e\u003c\/span\u003e\u003cspan class='jdgm-star jdgm--off'\u003e\u003c\/span\u003e\u003c\/div\u003e \u003cdiv class='jdgm-histogram__bar'\u003e \u003cdiv class='jdgm-histogram__bar-content' style='width: 0%;'\u003e \u003c\/div\u003e \u003c\/div\u003e \u003cdiv class='jdgm-histogram__percentage'\u003e0%\u003c\/div\u003e \u003cdiv class='jdgm-histogram__frequency'\u003e(0)\u003c\/div\u003e \u003c\/div\u003e \u003cdiv class='jdgm-histogram__row' data-rating='2' data-frequency='0' data-percentage='0'\u003e \u003cdiv class='jdgm-histogram__star' role='button' aria-label=\"0% (0) reviews with 2 star rating\" tabindex='0' \u003e\u003cspan class='jdgm-star jdgm--on'\u003e\u003c\/span\u003e\u003cspan class='jdgm-star jdgm--on'\u003e\u003c\/span\u003e\u003cspan class='jdgm-star jdgm--off'\u003e\u003c\/span\u003e\u003cspan class='jdgm-star jdgm--off'\u003e\u003c\/span\u003e\u003cspan class='jdgm-star jdgm--off'\u003e\u003c\/span\u003e\u003c\/div\u003e \u003cdiv class='jdgm-histogram__bar'\u003e \u003cdiv class='jdgm-histogram__bar-content' style='width: 0%;'\u003e \u003c\/div\u003e \u003c\/div\u003e \u003cdiv class='jdgm-histogram__percentage'\u003e0%\u003c\/div\u003e \u003cdiv class='jdgm-histogram__frequency'\u003e(0)\u003c\/div\u003e \u003c\/div\u003e \u003cdiv class='jdgm-histogram__row' data-rating='1' data-frequency='0' data-percentage='0'\u003e \u003cdiv class='jdgm-histogram__star' role='button' aria-label=\"0% (0) reviews with 1 star rating\" tabindex='0' \u003e\u003cspan class='jdgm-star jdgm--on'\u003e\u003c\/span\u003e\u003cspan class='jdgm-star jdgm--off'\u003e\u003c\/span\u003e\u003cspan class='jdgm-star jdgm--off'\u003e\u003c\/span\u003e\u003cspan class='jdgm-star jdgm--off'\u003e\u003c\/span\u003e\u003cspan class='jdgm-star jdgm--off'\u003e\u003c\/span\u003e\u003c\/div\u003e \u003cdiv class='jdgm-histogram__bar'\u003e \u003cdiv class='jdgm-histogram__bar-content' style='width: 0%;'\u003e \u003c\/div\u003e \u003c\/div\u003e \u003cdiv class='jdgm-histogram__percentage'\u003e0%\u003c\/div\u003e \u003cdiv class='jdgm-histogram__frequency'\u003e(0)\u003c\/div\u003e \u003c\/div\u003e \u003cdiv class='jdgm-histogram__row jdgm-histogram__clear-filter' data-rating=null tabindex='0'\u003e\u003c\/div\u003e \u003c\/div\u003e \u003cdiv class='jdgm-rev-widg__sort-wrapper'\u003e\u003c\/div\u003e \u003c\/div\u003e \u003cdiv class='jdgm-rev-widg__body'\u003e \u003cdiv class='jdgm-rev-widg__reviews'\u003e\u003c\/div\u003e \u003cdiv class='jdgm-paginate' data-per-page='10' data-url='https:\/\/api.judge.me\/reviews\/reviews_for_widget' style=\"display: none;\"\u003e\u003c\/div\u003e \u003c\/div\u003e \u003cdiv class='jdgm-rev-widg__paginate-spinner-wrapper'\u003e \u003cdiv class='jdgm-spinner'\u003e\u003c\/div\u003e \u003c\/div\u003e \u003c\/div\u003e"},"default_reviews_metafields":{},"collections":[{"id":283018526909,"handle":"bundles","title":"Bundles","updated_at":"2026-06-27T19:08:41+08:00","body_html":"\u003cp\u003eMake shopping for your bump, birth and beyond easier with our bundle packs. With a pack available for every stage, you can get everything you need with no fuss and with our bundle packs, you even save money.\u003c\/p\u003e","published_at":"2022-02-01T22:33:09+08:00","sort_order":"best-selling","template_suffix":"swaddles-collection","disjunctive":false,"rules":[{"column":"tag","relation":"equals","condition":"Bundles"}],"published_scope":"global","image":{"created_at":"2024-05-06T11:59:39+08:00","alt":"Bundles - The Birth Store","width":2048,"height":1365,"src":"\/\/www.thebirthstore.com.au\/cdn\/shop\/collections\/bundles-299009.jpg?v=1714967980"}},{"id":261657460925,"handle":"buy","title":"Buy","updated_at":"2026-07-27T19:09:18+08:00","body_html":"\u003cp\u003eBrowse all of our pregnancy, labour \u0026amp; birth, postpartum and baby essentials here.\u003cbr\u003e\u003c\/p\u003e\n\u003cp\u003e\u003cspan\u003eYou can even buy now and pay later with Afterpay!\u003c\/span\u003e\u003c\/p\u003e","published_at":"2021-03-10T12:05:31+08:00","sort_order":"best-selling","template_suffix":"shop-all-collection","disjunctive":false,"rules":[{"column":"title","relation":"not_contains","condition":"Hire"}],"published_scope":"global","image":{"created_at":"2024-05-06T11:59:42+08:00","alt":"Buy - The Birth Store","width":2048,"height":2048,"src":"\/\/www.thebirthstore.com.au\/cdn\/shop\/collections\/buy-964856.jpg?v=1714967982"}},{"id":337429201085,"handle":"hospital-bag","title":"Hospital Bag","updated_at":"2026-07-27T19:09:18+08:00","body_html":"","published_at":"2026-06-03T11:36:29+08:00","sort_order":"most-relevant","template_suffix":"","disjunctive":false,"rules":[{"column":"tag","relation":"equals","condition":"Hospital Bag"}],"published_scope":"global"},{"id":261658214589,"handle":"labour-and-birth-buy","title":"Labour \u0026 Birth","updated_at":"2026-07-27T19:09:18+08:00","body_html":"\u003cp\u003eWe stock a large range of Elle TENS machines for you to buy for your labour and birth. We stock the Elle TENS, Elle TENS 2 and Elle TENS Plus, we also hire these out if that suits you better, please head over to our TENS machine hire page for more information. We ship Australia wide or have options for local delivery\/pick-up in Perth if you are due ASAP. We also stock other items for your labour and birth. \u003c\/p\u003e\n\u003cp\u003eLooking for something we don't currently stock? Please reach out and let us know.\u003c\/p\u003e\n\u003cp\u003e\u003cspan\u003eYou can even buy now and pay later with Afterpay!\u003c\/span\u003e\u003c\/p\u003e","published_at":"2021-03-10T12:34:43+08:00","sort_order":"best-selling","template_suffix":"labour-birth-collection","disjunctive":false,"rules":[{"column":"tag","relation":"equals","condition":"Birth"}],"published_scope":"global","image":{"created_at":"2024-05-06T12:00:09+08:00","alt":"Labour \u0026 Birth - The Birth Store","width":1080,"height":981,"src":"\/\/www.thebirthstore.com.au\/cdn\/shop\/collections\/labour-birth-342038.jpg?v=1714968009"}},{"id":281712558269,"handle":"labour-aids","title":"Labour Aids","updated_at":"2026-07-27T19:09:18+08:00","body_html":"","published_at":"2021-12-20T14:22:16+08:00","sort_order":"best-selling","template_suffix":"labour-aids-collection","disjunctive":false,"rules":[{"column":"tag","relation":"equals","condition":"Labour Progression"}],"published_scope":"global","image":{"created_at":"2024-05-06T12:00:11+08:00","alt":"Labour Aids - The Birth Store","width":1365,"height":2048,"src":"\/\/www.thebirthstore.com.au\/cdn\/shop\/collections\/labour-aids-211824.jpg?v=1714968012"}},{"id":281712525501,"handle":"labour-preparation","title":"Labour Preparation","updated_at":"2026-07-27T19:09:18+08:00","body_html":"","published_at":"2021-12-20T14:20:12+08:00","sort_order":"best-selling","template_suffix":"labour-preparation-collec","disjunctive":false,"rules":[{"column":"tag","relation":"equals","condition":"Labour Preparation"}],"published_scope":"global","image":{"created_at":"2024-05-06T12:00:13+08:00","alt":"Labour Preparation - The Birth Store","width":1024,"height":1536,"src":"\/\/www.thebirthstore.com.au\/cdn\/shop\/collections\/labour-preparation-271961.jpg?v=1714968013"}},{"id":295224836285,"handle":"nausea","title":"Nausea","updated_at":"2026-07-27T19:09:18+08:00","body_html":"","published_at":"2023-11-10T20:47:34+08:00","sort_order":"best-selling","template_suffix":"nausea-collection","disjunctive":false,"rules":[{"column":"tag","relation":"equals","condition":"Nausea"}],"published_scope":"global","image":{"created_at":"2024-05-06T12:00:24+08:00","alt":"Nausea - The Birth Store","width":610,"height":915,"src":"\/\/www.thebirthstore.com.au\/cdn\/shop\/collections\/nausea-404101.jpg?v=1714968024"}},{"id":281712591037,"handle":"pain-relief","title":"Pain Relief","updated_at":"2026-07-27T19:09:18+08:00","body_html":"","published_at":"2021-12-20T14:22:45+08:00","sort_order":"best-selling","template_suffix":"pain-relief-collection","disjunctive":false,"rules":[{"column":"tag","relation":"equals","condition":"Pain Relief"}],"published_scope":"global","image":{"created_at":"2024-05-06T12:00:27+08:00","alt":"Pain Relief - The Birth Store","width":1365,"height":2048,"src":"\/\/www.thebirthstore.com.au\/cdn\/shop\/collections\/pain-relief-878865.jpg?v=1714968027"}},{"id":261658149053,"handle":"pregnancy-and-maternity-products","title":"Pregnancy","updated_at":"2026-07-27T19:09:18+08:00","body_html":"\u003cp\u003eShop your pregnancy essentials below. Looking for something we don't currently stock? Please reach out and let us know.\u003cbr\u003e\u003c\/p\u003e\n\u003cp\u003e\u003cspan\u003eYou can even buy now and pay later with Afterpay!\u003c\/span\u003e\u003c\/p\u003e","published_at":"2021-03-10T12:34:22+08:00","sort_order":"best-selling","template_suffix":"pregnancy-collection","disjunctive":false,"rules":[{"column":"tag","relation":"equals","condition":"Pregnancy"}],"published_scope":"global","image":{"created_at":"2024-05-06T12:00:40+08:00","alt":"Pregnancy - The Birth Store","width":1024,"height":1536,"src":"\/\/www.thebirthstore.com.au\/cdn\/shop\/collections\/pregnancy-899677.jpg?v=1714968040"}},{"id":310045933757,"handle":"shop-all-sale","title":"Shop All Sale","updated_at":"2026-07-27T19:09:18+08:00","body_html":"","published_at":"2024-11-12T13:22:43+08:00","sort_order":"alpha-asc","template_suffix":"","disjunctive":true,"rules":[{"column":"tag","relation":"equals","condition":"Bundles"},{"column":"vendor","relation":"equals","condition":"Franjos Kitchen"},{"column":"vendor","relation":"equals","condition":"Adored Illustrations"},{"column":"vendor","relation":"equals","condition":"Amazing Oils"},{"column":"vendor","relation":"equals","condition":"Ice Ice Booby"},{"column":"vendor","relation":"equals","condition":"Made to Milk"},{"column":"vendor","relation":"equals","condition":"Milky Goodness"},{"column":"vendor","relation":"equals","condition":"Seasons of Mama"},{"column":"vendor","relation":"equals","condition":"Silverette"},{"column":"vendor","relation":"equals","condition":"Snuggle Hunny"},{"column":"vendor","relation":"equals","condition":"Yung Bod"},{"column":"vendor","relation":"equals","condition":"Bare Love"},{"column":"vendor","relation":"equals","condition":"Haakaa"},{"column":"vendor","relation":"equals","condition":"Mere Botanicals"},{"column":"vendor","relation":"equals","condition":"The Birth Store Hire"},{"column":"vendor","relation":"equals","condition":"The Birth Store"}],"published_scope":"global","image":{"created_at":"2024-11-13T10:58:16+08:00","alt":"Shop All Sale - The Birth Store","width":2048,"height":1365,"src":"\/\/www.thebirthstore.com.au\/cdn\/shop\/collections\/shop-all-sale-297361.jpg?v=1731466697"}}]}
{"item":{"id":7513281331389,"title":"C-Section Birth Recovery Kit - Cream \u0026 Roller","handle":"c-section-birth-recovery-kit-cream-roller","description":"\u003cp\u003e\u003cmeta charset=\"utf-8\"\u003e\u003cspan\u003eThere are so many beautiful products on the market now to help with healing and comfort after your birth. We have created a kit with a couple of our favourite products from small Australian businesses to aid you in you the recovery journey you deserve - the one kit to fill all your recovery needs!\u003c\/span\u003e\u003c\/p\u003e","published_at":"2023-10-03T14:34:50+08:00","created_at":"2023-10-03T13:34:40+08:00","vendor":"Bundles","type":"","tags":["Baby Shower Gifts","Bundles","C-Section Birth Recovery","Hemorrhoids","Hospital Bag","Post-Partum"],"price":13975,"price_min":13975,"price_max":13975,"available":false,"price_varies":false,"compare_at_price":15685,"compare_at_price_min":15685,"compare_at_price_max":15685,"compare_at_price_varies":false,"variants":[{"id":43056991731901,"title":"Medium","option1":"Medium","option2":null,"option3":null,"sku":"","requires_shipping":true,"taxable":false,"featured_image":null,"available":false,"name":"C-Section Birth Recovery Kit - Cream \u0026 Roller - Medium","public_title":"Medium","options":["Medium"],"price":13975,"weight":1160,"compare_at_price":15685,"inventory_management":"shopify","barcode":"91731901","requires_selling_plan":false,"selling_plan_allocations":[],"quantity_rule":{"min":1,"max":null,"increment":1}},{"id":43056991764669,"title":"Large","option1":"Large","option2":null,"option3":null,"sku":"","requires_shipping":true,"taxable":false,"featured_image":null,"available":false,"name":"C-Section Birth Recovery Kit - Cream \u0026 Roller - Large","public_title":"Large","options":["Large"],"price":13975,"weight":1270,"compare_at_price":15685,"inventory_management":"shopify","barcode":"91764669","requires_selling_plan":false,"selling_plan_allocations":[],"quantity_rule":{"min":1,"max":null,"increment":1}}],"images":["\/\/www.thebirthstore.com.au\/cdn\/shop\/files\/c-section-birth-recovery-kit-cream-roller-738399.jpg?v=1714967949","\/\/www.thebirthstore.com.au\/cdn\/shop\/files\/c-section-birth-recovery-kit-cream-roller-753872.jpg?v=1714967949","\/\/www.thebirthstore.com.au\/cdn\/shop\/files\/c-section-birth-recovery-kit-cream-roller-652326.jpg?v=1714967949"],"featured_image":"\/\/www.thebirthstore.com.au\/cdn\/shop\/files\/c-section-birth-recovery-kit-cream-roller-738399.jpg?v=1714967949","options":["Disposable Maternity \u0026 Postpartum Underwear (Size)"],"media":[{"alt":"C-Section Birth Recovery Kit - Cream \u0026 Roller - The Birth Store-The Birth Store","id":27007579848893,"position":1,"preview_image":{"aspect_ratio":1.0,"height":1080,"width":1080,"src":"\/\/www.thebirthstore.com.au\/cdn\/shop\/files\/c-section-birth-recovery-kit-cream-roller-738399.jpg?v=1714967949"},"aspect_ratio":1.0,"height":1080,"media_type":"image","src":"\/\/www.thebirthstore.com.au\/cdn\/shop\/files\/c-section-birth-recovery-kit-cream-roller-738399.jpg?v=1714967949","width":1080},{"alt":"C-Section Birth Recovery Kit - Cream \u0026 Roller - The Birth Store-The Birth Store","id":27007579881661,"position":2,"preview_image":{"aspect_ratio":0.662,"height":976,"width":646,"src":"\/\/www.thebirthstore.com.au\/cdn\/shop\/files\/c-section-birth-recovery-kit-cream-roller-753872.jpg?v=1714967949"},"aspect_ratio":0.662,"height":976,"media_type":"image","src":"\/\/www.thebirthstore.com.au\/cdn\/shop\/files\/c-section-birth-recovery-kit-cream-roller-753872.jpg?v=1714967949","width":646},{"alt":"C-Section Birth Recovery Kit - Cream \u0026 Roller - The Birth Store-The Birth Store","id":27007579914429,"position":3,"preview_image":{"aspect_ratio":0.671,"height":957,"width":642,"src":"\/\/www.thebirthstore.com.au\/cdn\/shop\/files\/c-section-birth-recovery-kit-cream-roller-652326.jpg?v=1714967949"},"aspect_ratio":0.671,"height":957,"media_type":"image","src":"\/\/www.thebirthstore.com.au\/cdn\/shop\/files\/c-section-birth-recovery-kit-cream-roller-652326.jpg?v=1714967949","width":642}],"requires_selling_plan":false,"selling_plan_groups":[],"content":"\u003cp\u003e\u003cmeta charset=\"utf-8\"\u003e\u003cspan\u003eThere are so many beautiful products on the market now to help with healing and comfort after your birth. We have created a kit with a couple of our favourite products from small Australian businesses to aid you in you the recovery journey you deserve - the one kit to fill all your recovery needs!\u003c\/span\u003e\u003c\/p\u003e"},"options":[{"name":"Disposable Maternity \u0026 Postpartum Underwear (Size)","position":1,"values":["Medium","Large"]}],"custom_metafields":{},"metafields":{"badge":"\u003cdiv style='display:none' class='jdgm-prev-badge' data-average-rating='0.00' data-number-of-reviews='0' data-number-of-questions='0'\u003e \u003cspan class='jdgm-prev-badge__stars' data-score='0.00' tabindex='0' aria-label='0.00 stars' role='button'\u003e \u003cspan class='jdgm-star jdgm--off'\u003e\u003c\/span\u003e\u003cspan class='jdgm-star jdgm--off'\u003e\u003c\/span\u003e\u003cspan class='jdgm-star jdgm--off'\u003e\u003c\/span\u003e\u003cspan class='jdgm-star jdgm--off'\u003e\u003c\/span\u003e\u003cspan class='jdgm-star jdgm--off'\u003e\u003c\/span\u003e \u003c\/span\u003e \u003cspan class='jdgm-prev-badge__text'\u003e No reviews \u003c\/span\u003e \u003c\/div\u003e","widget":"\u003cdiv class='jdgm-rev-widg' data-updated-at='2025-06-13T16:13:40Z' data-average-rating='0.00' data-number-of-reviews='0' data-number-of-questions='0'\u003e \u003cstyle class='jdgm-temp-hiding-style'\u003e.jdgm-rev-widg{ display: none }\u003c\/style\u003e \u003cdiv class='jdgm-rev-widg__header'\u003e \u003ch2 class='jdgm-rev-widg__title'\u003eCustomer Reviews\u003c\/h2\u003e \u003cdiv class='jdgm-rev-widg__summary'\u003e \u003cdiv class='jdgm-rev-widg__summary-stars' aria-label='Average rating is 0.00 stars' role='img'\u003e \u003cspan class='jdgm-star jdgm--off'\u003e\u003c\/span\u003e\u003cspan class='jdgm-star jdgm--off'\u003e\u003c\/span\u003e\u003cspan class='jdgm-star jdgm--off'\u003e\u003c\/span\u003e\u003cspan class='jdgm-star jdgm--off'\u003e\u003c\/span\u003e\u003cspan class='jdgm-star jdgm--off'\u003e\u003c\/span\u003e \u003c\/div\u003e \u003cdiv class='jdgm-rev-widg__summary-text'\u003eBe the first to write a review\u003c\/div\u003e \u003c\/div\u003e \u003ca style='display: none' href='#' class='jdgm-write-rev-link' role='button'\u003eWrite a review\u003c\/a\u003e \u003cdiv class='jdgm-histogram jdgm-temp-hidden'\u003e \u003cdiv class='jdgm-histogram__row' data-rating='5' data-frequency='0' data-percentage='0'\u003e \u003cdiv class='jdgm-histogram__star' role='button' aria-label=\"0% (0) reviews with 5 star rating\" tabindex='0' \u003e\u003cspan class='jdgm-star jdgm--on'\u003e\u003c\/span\u003e\u003cspan class='jdgm-star jdgm--on'\u003e\u003c\/span\u003e\u003cspan class='jdgm-star jdgm--on'\u003e\u003c\/span\u003e\u003cspan class='jdgm-star jdgm--on'\u003e\u003c\/span\u003e\u003cspan class='jdgm-star jdgm--on'\u003e\u003c\/span\u003e\u003c\/div\u003e \u003cdiv class='jdgm-histogram__bar'\u003e \u003cdiv class='jdgm-histogram__bar-content' style='width: 0%;'\u003e \u003c\/div\u003e \u003c\/div\u003e \u003cdiv class='jdgm-histogram__percentage'\u003e0%\u003c\/div\u003e \u003cdiv class='jdgm-histogram__frequency'\u003e(0)\u003c\/div\u003e \u003c\/div\u003e \u003cdiv class='jdgm-histogram__row' data-rating='4' data-frequency='0' data-percentage='0'\u003e \u003cdiv class='jdgm-histogram__star' role='button' aria-label=\"0% (0) reviews with 4 star rating\" tabindex='0' \u003e\u003cspan class='jdgm-star jdgm--on'\u003e\u003c\/span\u003e\u003cspan class='jdgm-star jdgm--on'\u003e\u003c\/span\u003e\u003cspan class='jdgm-star jdgm--on'\u003e\u003c\/span\u003e\u003cspan class='jdgm-star jdgm--on'\u003e\u003c\/span\u003e\u003cspan class='jdgm-star jdgm--off'\u003e\u003c\/span\u003e\u003c\/div\u003e \u003cdiv class='jdgm-histogram__bar'\u003e \u003cdiv class='jdgm-histogram__bar-content' style='width: 0%;'\u003e \u003c\/div\u003e \u003c\/div\u003e \u003cdiv class='jdgm-histogram__percentage'\u003e0%\u003c\/div\u003e \u003cdiv class='jdgm-histogram__frequency'\u003e(0)\u003c\/div\u003e \u003c\/div\u003e \u003cdiv class='jdgm-histogram__row' data-rating='3' data-frequency='0' data-percentage='0'\u003e \u003cdiv class='jdgm-histogram__star' role='button' aria-label=\"0% (0) reviews with 3 star rating\" tabindex='0' \u003e\u003cspan class='jdgm-star jdgm--on'\u003e\u003c\/span\u003e\u003cspan class='jdgm-star jdgm--on'\u003e\u003c\/span\u003e\u003cspan class='jdgm-star jdgm--on'\u003e\u003c\/span\u003e\u003cspan class='jdgm-star jdgm--off'\u003e\u003c\/span\u003e\u003cspan class='jdgm-star jdgm--off'\u003e\u003c\/span\u003e\u003c\/div\u003e \u003cdiv class='jdgm-histogram__bar'\u003e \u003cdiv class='jdgm-histogram__bar-content' style='width: 0%;'\u003e \u003c\/div\u003e \u003c\/div\u003e \u003cdiv class='jdgm-histogram__percentage'\u003e0%\u003c\/div\u003e \u003cdiv class='jdgm-histogram__frequency'\u003e(0)\u003c\/div\u003e \u003c\/div\u003e \u003cdiv class='jdgm-histogram__row' data-rating='2' data-frequency='0' data-percentage='0'\u003e \u003cdiv class='jdgm-histogram__star' role='button' aria-label=\"0% (0) reviews with 2 star rating\" tabindex='0' \u003e\u003cspan class='jdgm-star jdgm--on'\u003e\u003c\/span\u003e\u003cspan class='jdgm-star jdgm--on'\u003e\u003c\/span\u003e\u003cspan class='jdgm-star jdgm--off'\u003e\u003c\/span\u003e\u003cspan class='jdgm-star jdgm--off'\u003e\u003c\/span\u003e\u003cspan class='jdgm-star jdgm--off'\u003e\u003c\/span\u003e\u003c\/div\u003e \u003cdiv class='jdgm-histogram__bar'\u003e \u003cdiv class='jdgm-histogram__bar-content' style='width: 0%;'\u003e \u003c\/div\u003e \u003c\/div\u003e \u003cdiv class='jdgm-histogram__percentage'\u003e0%\u003c\/div\u003e \u003cdiv class='jdgm-histogram__frequency'\u003e(0)\u003c\/div\u003e \u003c\/div\u003e \u003cdiv class='jdgm-histogram__row' data-rating='1' data-frequency='0' data-percentage='0'\u003e \u003cdiv class='jdgm-histogram__star' role='button' aria-label=\"0% (0) reviews with 1 star rating\" tabindex='0' \u003e\u003cspan class='jdgm-star jdgm--on'\u003e\u003c\/span\u003e\u003cspan class='jdgm-star jdgm--off'\u003e\u003c\/span\u003e\u003cspan class='jdgm-star jdgm--off'\u003e\u003c\/span\u003e\u003cspan class='jdgm-star jdgm--off'\u003e\u003c\/span\u003e\u003cspan class='jdgm-star jdgm--off'\u003e\u003c\/span\u003e\u003c\/div\u003e \u003cdiv class='jdgm-histogram__bar'\u003e \u003cdiv class='jdgm-histogram__bar-content' style='width: 0%;'\u003e \u003c\/div\u003e \u003c\/div\u003e \u003cdiv class='jdgm-histogram__percentage'\u003e0%\u003c\/div\u003e \u003cdiv class='jdgm-histogram__frequency'\u003e(0)\u003c\/div\u003e \u003c\/div\u003e \u003cdiv class='jdgm-histogram__row jdgm-histogram__clear-filter' data-rating=null tabindex='0'\u003e\u003c\/div\u003e \u003c\/div\u003e \u003cdiv class='jdgm-rev-widg__sort-wrapper'\u003e\u003c\/div\u003e \u003c\/div\u003e \u003cdiv class='jdgm-rev-widg__body'\u003e \u003cdiv class='jdgm-rev-widg__reviews'\u003e\u003c\/div\u003e \u003cdiv class='jdgm-paginate' data-per-page='10' data-url='https:\/\/api.judge.me\/reviews\/reviews_for_widget' style=\"display: none;\"\u003e\u003c\/div\u003e \u003c\/div\u003e \u003cdiv class='jdgm-rev-widg__paginate-spinner-wrapper'\u003e \u003cdiv class='jdgm-spinner'\u003e\u003c\/div\u003e \u003c\/div\u003e \u003c\/div\u003e"},"default_reviews_metafields":{},"collections":[{"id":283018526909,"handle":"bundles","title":"Bundles","updated_at":"2026-06-27T19:08:41+08:00","body_html":"\u003cp\u003eMake shopping for your bump, birth and beyond easier with our bundle packs. With a pack available for every stage, you can get everything you need with no fuss and with our bundle packs, you even save money.\u003c\/p\u003e","published_at":"2022-02-01T22:33:09+08:00","sort_order":"best-selling","template_suffix":"swaddles-collection","disjunctive":false,"rules":[{"column":"tag","relation":"equals","condition":"Bundles"}],"published_scope":"global","image":{"created_at":"2024-05-06T11:59:39+08:00","alt":"Bundles - The Birth Store","width":2048,"height":1365,"src":"\/\/www.thebirthstore.com.au\/cdn\/shop\/collections\/bundles-299009.jpg?v=1714967980"}},{"id":261657460925,"handle":"buy","title":"Buy","updated_at":"2026-07-27T19:09:18+08:00","body_html":"\u003cp\u003eBrowse all of our pregnancy, labour \u0026amp; birth, postpartum and baby essentials here.\u003cbr\u003e\u003c\/p\u003e\n\u003cp\u003e\u003cspan\u003eYou can even buy now and pay later with Afterpay!\u003c\/span\u003e\u003c\/p\u003e","published_at":"2021-03-10T12:05:31+08:00","sort_order":"best-selling","template_suffix":"shop-all-collection","disjunctive":false,"rules":[{"column":"title","relation":"not_contains","condition":"Hire"}],"published_scope":"global","image":{"created_at":"2024-05-06T11:59:42+08:00","alt":"Buy - The Birth Store","width":2048,"height":2048,"src":"\/\/www.thebirthstore.com.au\/cdn\/shop\/collections\/buy-964856.jpg?v=1714967982"}},{"id":281712361661,"handle":"c-section-birth-recovery","title":"C-Section Birth Recovery","updated_at":"2026-07-27T19:09:18+08:00","body_html":"","published_at":"2021-12-20T14:19:01+08:00","sort_order":"best-selling","template_suffix":"swaddles-collection","disjunctive":false,"rules":[{"column":"tag","relation":"equals","condition":"C-Section Birth Recovery"}],"published_scope":"global","image":{"created_at":"2024-05-06T11:59:49+08:00","alt":"C-Section Birth Recovery - The Birth Store","width":1366,"height":2048,"src":"\/\/www.thebirthstore.com.au\/cdn\/shop\/collections\/c-section-birth-recovery-359249.jpg?v=1714967990"}},{"id":281712066749,"handle":"hemorrhoid-care","title":"Haemorrhoid Care","updated_at":"2026-07-27T19:09:18+08:00","body_html":"","published_at":"2021-12-20T14:16:30+08:00","sort_order":"best-selling","template_suffix":"swaddles-collection","disjunctive":false,"rules":[{"column":"tag","relation":"equals","condition":"Hemorrhoids"}],"published_scope":"global","image":{"created_at":"2024-05-06T12:00:00+08:00","alt":"Haemorrhoid Care - The Birth Store","width":763,"height":556,"src":"\/\/www.thebirthstore.com.au\/cdn\/shop\/collections\/haemorrhoid-care-562138.jpg?v=1714968001"}},{"id":337429201085,"handle":"hospital-bag","title":"Hospital Bag","updated_at":"2026-07-27T19:09:18+08:00","body_html":"","published_at":"2026-06-03T11:36:29+08:00","sort_order":"most-relevant","template_suffix":"","disjunctive":false,"rules":[{"column":"tag","relation":"equals","condition":"Hospital Bag"}],"published_scope":"global"},{"id":261658083517,"handle":"post-partum","title":"Postpartum","updated_at":"2026-07-27T19:09:18+08:00","body_html":"\u003cp\u003eShop your postpartum and hospital bag essentials below. Looking for something we don't currently stock? Please reach out and let us know.\u003cbr\u003e\u003c\/p\u003e\n\u003cp\u003e\u003cspan\u003eYou can even buy now and pay later with Afterpay!\u003c\/span\u003e\u003c\/p\u003e","published_at":"2021-03-10T12:33:47+08:00","sort_order":"best-selling","template_suffix":"postpartum-collection","disjunctive":false,"rules":[{"column":"tag","relation":"equals","condition":"Post-Partum"}],"published_scope":"global","image":{"created_at":"2024-05-06T12:00:36+08:00","alt":"Postpartum - The Birth Store","width":611,"height":702,"src":"\/\/www.thebirthstore.com.au\/cdn\/shop\/collections\/postpartum-150119.jpg?v=1714968037"}},{"id":310045933757,"handle":"shop-all-sale","title":"Shop All Sale","updated_at":"2026-07-27T19:09:18+08:00","body_html":"","published_at":"2024-11-12T13:22:43+08:00","sort_order":"alpha-asc","template_suffix":"","disjunctive":true,"rules":[{"column":"tag","relation":"equals","condition":"Bundles"},{"column":"vendor","relation":"equals","condition":"Franjos Kitchen"},{"column":"vendor","relation":"equals","condition":"Adored Illustrations"},{"column":"vendor","relation":"equals","condition":"Amazing Oils"},{"column":"vendor","relation":"equals","condition":"Ice Ice Booby"},{"column":"vendor","relation":"equals","condition":"Made to Milk"},{"column":"vendor","relation":"equals","condition":"Milky Goodness"},{"column":"vendor","relation":"equals","condition":"Seasons of Mama"},{"column":"vendor","relation":"equals","condition":"Silverette"},{"column":"vendor","relation":"equals","condition":"Snuggle Hunny"},{"column":"vendor","relation":"equals","condition":"Yung Bod"},{"column":"vendor","relation":"equals","condition":"Bare Love"},{"column":"vendor","relation":"equals","condition":"Haakaa"},{"column":"vendor","relation":"equals","condition":"Mere Botanicals"},{"column":"vendor","relation":"equals","condition":"The Birth Store Hire"},{"column":"vendor","relation":"equals","condition":"The Birth Store"}],"published_scope":"global","image":{"created_at":"2024-11-13T10:58:16+08:00","alt":"Shop All Sale - The Birth Store","width":2048,"height":1365,"src":"\/\/www.thebirthstore.com.au\/cdn\/shop\/collections\/shop-all-sale-297361.jpg?v=1731466697"}}]}
{"item":{"id":7513281200317,"title":"C-Section Birth Recovery Kit - Silicone Strips","handle":"c-section-birth-recovery-kit-silicone-strips","description":"\u003cp\u003e\u003cmeta charset=\"utf-8\"\u003e\u003cspan\u003eThere are so many beautiful products on the market now to help with healing and comfort after your birth. We have created a kit with a couple of our favourite products from small Australian businesses to aid you in you the recovery journey you deserve - the one kit to fill all your recovery needs!\u003c\/span\u003e\u003c\/p\u003e","published_at":"2023-10-03T14:26:20+08:00","created_at":"2023-10-03T13:33:54+08:00","vendor":"Bundles","type":"","tags":["Baby Shower Gifts","Bundles","C-Section Birth Recovery","Hemorrhoids","Hospital Bag","Post-Partum"],"price":10385,"price_min":10385,"price_max":10385,"available":false,"price_varies":false,"compare_at_price":10185,"compare_at_price_min":10185,"compare_at_price_max":10185,"compare_at_price_varies":false,"variants":[{"id":43056990847165,"title":"Medium","option1":"Medium","option2":null,"option3":null,"sku":"","requires_shipping":true,"taxable":false,"featured_image":null,"available":false,"name":"C-Section Birth Recovery Kit - Silicone Strips - Medium","public_title":"Medium","options":["Medium"],"price":10385,"weight":906,"compare_at_price":10185,"inventory_management":"shopify","barcode":"90847165","requires_selling_plan":false,"selling_plan_allocations":[],"quantity_rule":{"min":1,"max":null,"increment":1}},{"id":43056990879933,"title":"Large","option1":"Large","option2":null,"option3":null,"sku":"","requires_shipping":true,"taxable":false,"featured_image":null,"available":false,"name":"C-Section Birth Recovery Kit - Silicone Strips - Large","public_title":"Large","options":["Large"],"price":10385,"weight":1020,"compare_at_price":10185,"inventory_management":"shopify","barcode":"90879933","requires_selling_plan":false,"selling_plan_allocations":[],"quantity_rule":{"min":1,"max":null,"increment":1}}],"images":["\/\/www.thebirthstore.com.au\/cdn\/shop\/files\/c-section-birth-recovery-kit-silicone-strips-465947.jpg?v=1714967950","\/\/www.thebirthstore.com.au\/cdn\/shop\/files\/c-section-birth-recovery-kit-silicone-strips-178982.jpg?v=1714967950","\/\/www.thebirthstore.com.au\/cdn\/shop\/files\/c-section-birth-recovery-kit-silicone-strips-963539.jpg?v=1714967950","\/\/www.thebirthstore.com.au\/cdn\/shop\/files\/c-section-birth-recovery-kit-silicone-strips-308719.jpg?v=1714967950"],"featured_image":"\/\/www.thebirthstore.com.au\/cdn\/shop\/files\/c-section-birth-recovery-kit-silicone-strips-465947.jpg?v=1714967950","options":["Disposable Maternity \u0026 Postpartum Underwear (Size)"],"media":[{"alt":"C-Section Birth Recovery Kit - Silicone Strips - The Birth Store-The Birth Store","id":27007580045501,"position":1,"preview_image":{"aspect_ratio":1.0,"height":1080,"width":1080,"src":"\/\/www.thebirthstore.com.au\/cdn\/shop\/files\/c-section-birth-recovery-kit-silicone-strips-465947.jpg?v=1714967950"},"aspect_ratio":1.0,"height":1080,"media_type":"image","src":"\/\/www.thebirthstore.com.au\/cdn\/shop\/files\/c-section-birth-recovery-kit-silicone-strips-465947.jpg?v=1714967950","width":1080},{"alt":"C-Section Birth Recovery Kit - Silicone Strips - The Birth Store-The Birth Store","id":27007580078269,"position":2,"preview_image":{"aspect_ratio":0.667,"height":1536,"width":1024,"src":"\/\/www.thebirthstore.com.au\/cdn\/shop\/files\/c-section-birth-recovery-kit-silicone-strips-178982.jpg?v=1714967950"},"aspect_ratio":0.667,"height":1536,"media_type":"image","src":"\/\/www.thebirthstore.com.au\/cdn\/shop\/files\/c-section-birth-recovery-kit-silicone-strips-178982.jpg?v=1714967950","width":1024},{"alt":"C-Section Birth Recovery Kit - Silicone Strips - The Birth Store-The Birth Store","id":27007580111037,"position":3,"preview_image":{"aspect_ratio":0.667,"height":915,"width":610,"src":"\/\/www.thebirthstore.com.au\/cdn\/shop\/files\/c-section-birth-recovery-kit-silicone-strips-963539.jpg?v=1714967950"},"aspect_ratio":0.667,"height":915,"media_type":"image","src":"\/\/www.thebirthstore.com.au\/cdn\/shop\/files\/c-section-birth-recovery-kit-silicone-strips-963539.jpg?v=1714967950","width":610},{"alt":"C-Section Birth Recovery Kit - Silicone Strips - The Birth Store-The Birth Store","id":27007580143805,"position":4,"preview_image":{"aspect_ratio":0.667,"height":2048,"width":1365,"src":"\/\/www.thebirthstore.com.au\/cdn\/shop\/files\/c-section-birth-recovery-kit-silicone-strips-308719.jpg?v=1714967950"},"aspect_ratio":0.667,"height":2048,"media_type":"image","src":"\/\/www.thebirthstore.com.au\/cdn\/shop\/files\/c-section-birth-recovery-kit-silicone-strips-308719.jpg?v=1714967950","width":1365}],"requires_selling_plan":false,"selling_plan_groups":[],"content":"\u003cp\u003e\u003cmeta charset=\"utf-8\"\u003e\u003cspan\u003eThere are so many beautiful products on the market now to help with healing and comfort after your birth. We have created a kit with a couple of our favourite products from small Australian businesses to aid you in you the recovery journey you deserve - the one kit to fill all your recovery needs!\u003c\/span\u003e\u003c\/p\u003e"},"options":[{"name":"Disposable Maternity \u0026 Postpartum Underwear (Size)","position":1,"values":["Medium","Large"]}],"custom_metafields":{},"metafields":{"badge":"\u003cdiv style='display:none' class='jdgm-prev-badge' data-average-rating='0.00' data-number-of-reviews='0' data-number-of-questions='0'\u003e \u003cspan class='jdgm-prev-badge__stars' data-score='0.00' tabindex='0' aria-label='0.00 stars' role='button'\u003e \u003cspan class='jdgm-star jdgm--off'\u003e\u003c\/span\u003e\u003cspan class='jdgm-star jdgm--off'\u003e\u003c\/span\u003e\u003cspan class='jdgm-star jdgm--off'\u003e\u003c\/span\u003e\u003cspan class='jdgm-star jdgm--off'\u003e\u003c\/span\u003e\u003cspan class='jdgm-star jdgm--off'\u003e\u003c\/span\u003e \u003c\/span\u003e \u003cspan class='jdgm-prev-badge__text'\u003e No reviews \u003c\/span\u003e \u003c\/div\u003e","widget":"\u003cdiv class='jdgm-rev-widg' data-updated-at='2025-06-13T16:13:40Z' data-average-rating='0.00' data-number-of-reviews='0' data-number-of-questions='0'\u003e \u003cstyle class='jdgm-temp-hiding-style'\u003e.jdgm-rev-widg{ display: none }\u003c\/style\u003e \u003cdiv class='jdgm-rev-widg__header'\u003e \u003ch2 class='jdgm-rev-widg__title'\u003eCustomer Reviews\u003c\/h2\u003e \u003cdiv class='jdgm-rev-widg__summary'\u003e \u003cdiv class='jdgm-rev-widg__summary-stars' aria-label='Average rating is 0.00 stars' role='img'\u003e \u003cspan class='jdgm-star jdgm--off'\u003e\u003c\/span\u003e\u003cspan class='jdgm-star jdgm--off'\u003e\u003c\/span\u003e\u003cspan class='jdgm-star jdgm--off'\u003e\u003c\/span\u003e\u003cspan class='jdgm-star jdgm--off'\u003e\u003c\/span\u003e\u003cspan class='jdgm-star jdgm--off'\u003e\u003c\/span\u003e \u003c\/div\u003e \u003cdiv class='jdgm-rev-widg__summary-text'\u003eBe the first to write a review\u003c\/div\u003e \u003c\/div\u003e \u003ca style='display: none' href='#' class='jdgm-write-rev-link' role='button'\u003eWrite a review\u003c\/a\u003e \u003cdiv class='jdgm-histogram jdgm-temp-hidden'\u003e \u003cdiv class='jdgm-histogram__row' data-rating='5' data-frequency='0' data-percentage='0'\u003e \u003cdiv class='jdgm-histogram__star' role='button' aria-label=\"0% (0) reviews with 5 star rating\" tabindex='0' \u003e\u003cspan class='jdgm-star jdgm--on'\u003e\u003c\/span\u003e\u003cspan class='jdgm-star jdgm--on'\u003e\u003c\/span\u003e\u003cspan class='jdgm-star jdgm--on'\u003e\u003c\/span\u003e\u003cspan class='jdgm-star jdgm--on'\u003e\u003c\/span\u003e\u003cspan class='jdgm-star jdgm--on'\u003e\u003c\/span\u003e\u003c\/div\u003e \u003cdiv class='jdgm-histogram__bar'\u003e \u003cdiv class='jdgm-histogram__bar-content' style='width: 0%;'\u003e \u003c\/div\u003e \u003c\/div\u003e \u003cdiv class='jdgm-histogram__percentage'\u003e0%\u003c\/div\u003e \u003cdiv class='jdgm-histogram__frequency'\u003e(0)\u003c\/div\u003e \u003c\/div\u003e \u003cdiv class='jdgm-histogram__row' data-rating='4' data-frequency='0' data-percentage='0'\u003e \u003cdiv class='jdgm-histogram__star' role='button' aria-label=\"0% (0) reviews with 4 star rating\" tabindex='0' \u003e\u003cspan class='jdgm-star jdgm--on'\u003e\u003c\/span\u003e\u003cspan class='jdgm-star jdgm--on'\u003e\u003c\/span\u003e\u003cspan class='jdgm-star jdgm--on'\u003e\u003c\/span\u003e\u003cspan class='jdgm-star jdgm--on'\u003e\u003c\/span\u003e\u003cspan class='jdgm-star jdgm--off'\u003e\u003c\/span\u003e\u003c\/div\u003e \u003cdiv class='jdgm-histogram__bar'\u003e \u003cdiv class='jdgm-histogram__bar-content' style='width: 0%;'\u003e \u003c\/div\u003e \u003c\/div\u003e \u003cdiv class='jdgm-histogram__percentage'\u003e0%\u003c\/div\u003e \u003cdiv class='jdgm-histogram__frequency'\u003e(0)\u003c\/div\u003e \u003c\/div\u003e \u003cdiv class='jdgm-histogram__row' data-rating='3' data-frequency='0' data-percentage='0'\u003e \u003cdiv class='jdgm-histogram__star' role='button' aria-label=\"0% (0) reviews with 3 star rating\" tabindex='0' \u003e\u003cspan class='jdgm-star jdgm--on'\u003e\u003c\/span\u003e\u003cspan class='jdgm-star jdgm--on'\u003e\u003c\/span\u003e\u003cspan class='jdgm-star jdgm--on'\u003e\u003c\/span\u003e\u003cspan class='jdgm-star jdgm--off'\u003e\u003c\/span\u003e\u003cspan class='jdgm-star jdgm--off'\u003e\u003c\/span\u003e\u003c\/div\u003e \u003cdiv class='jdgm-histogram__bar'\u003e \u003cdiv class='jdgm-histogram__bar-content' style='width: 0%;'\u003e \u003c\/div\u003e \u003c\/div\u003e \u003cdiv class='jdgm-histogram__percentage'\u003e0%\u003c\/div\u003e \u003cdiv class='jdgm-histogram__frequency'\u003e(0)\u003c\/div\u003e \u003c\/div\u003e \u003cdiv class='jdgm-histogram__row' data-rating='2' data-frequency='0' data-percentage='0'\u003e \u003cdiv class='jdgm-histogram__star' role='button' aria-label=\"0% (0) reviews with 2 star rating\" tabindex='0' \u003e\u003cspan class='jdgm-star jdgm--on'\u003e\u003c\/span\u003e\u003cspan class='jdgm-star jdgm--on'\u003e\u003c\/span\u003e\u003cspan class='jdgm-star jdgm--off'\u003e\u003c\/span\u003e\u003cspan class='jdgm-star jdgm--off'\u003e\u003c\/span\u003e\u003cspan class='jdgm-star jdgm--off'\u003e\u003c\/span\u003e\u003c\/div\u003e \u003cdiv class='jdgm-histogram__bar'\u003e \u003cdiv class='jdgm-histogram__bar-content' style='width: 0%;'\u003e \u003c\/div\u003e \u003c\/div\u003e \u003cdiv class='jdgm-histogram__percentage'\u003e0%\u003c\/div\u003e \u003cdiv class='jdgm-histogram__frequency'\u003e(0)\u003c\/div\u003e \u003c\/div\u003e \u003cdiv class='jdgm-histogram__row' data-rating='1' data-frequency='0' data-percentage='0'\u003e \u003cdiv class='jdgm-histogram__star' role='button' aria-label=\"0% (0) reviews with 1 star rating\" tabindex='0' \u003e\u003cspan class='jdgm-star jdgm--on'\u003e\u003c\/span\u003e\u003cspan class='jdgm-star jdgm--off'\u003e\u003c\/span\u003e\u003cspan class='jdgm-star jdgm--off'\u003e\u003c\/span\u003e\u003cspan class='jdgm-star jdgm--off'\u003e\u003c\/span\u003e\u003cspan class='jdgm-star jdgm--off'\u003e\u003c\/span\u003e\u003c\/div\u003e \u003cdiv class='jdgm-histogram__bar'\u003e \u003cdiv class='jdgm-histogram__bar-content' style='width: 0%;'\u003e \u003c\/div\u003e \u003c\/div\u003e \u003cdiv class='jdgm-histogram__percentage'\u003e0%\u003c\/div\u003e \u003cdiv class='jdgm-histogram__frequency'\u003e(0)\u003c\/div\u003e \u003c\/div\u003e \u003cdiv class='jdgm-histogram__row jdgm-histogram__clear-filter' data-rating=null tabindex='0'\u003e\u003c\/div\u003e \u003c\/div\u003e \u003cdiv class='jdgm-rev-widg__sort-wrapper'\u003e\u003c\/div\u003e \u003c\/div\u003e \u003cdiv class='jdgm-rev-widg__body'\u003e \u003cdiv class='jdgm-rev-widg__reviews'\u003e\u003c\/div\u003e \u003cdiv class='jdgm-paginate' data-per-page='10' data-url='https:\/\/api.judge.me\/reviews\/reviews_for_widget' style=\"display: none;\"\u003e\u003c\/div\u003e \u003c\/div\u003e \u003cdiv class='jdgm-rev-widg__paginate-spinner-wrapper'\u003e \u003cdiv class='jdgm-spinner'\u003e\u003c\/div\u003e \u003c\/div\u003e \u003c\/div\u003e"},"default_reviews_metafields":{},"collections":[{"id":283018526909,"handle":"bundles","title":"Bundles","updated_at":"2026-06-27T19:08:41+08:00","body_html":"\u003cp\u003eMake shopping for your bump, birth and beyond easier with our bundle packs. With a pack available for every stage, you can get everything you need with no fuss and with our bundle packs, you even save money.\u003c\/p\u003e","published_at":"2022-02-01T22:33:09+08:00","sort_order":"best-selling","template_suffix":"swaddles-collection","disjunctive":false,"rules":[{"column":"tag","relation":"equals","condition":"Bundles"}],"published_scope":"global","image":{"created_at":"2024-05-06T11:59:39+08:00","alt":"Bundles - The Birth Store","width":2048,"height":1365,"src":"\/\/www.thebirthstore.com.au\/cdn\/shop\/collections\/bundles-299009.jpg?v=1714967980"}},{"id":261657460925,"handle":"buy","title":"Buy","updated_at":"2026-07-27T19:09:18+08:00","body_html":"\u003cp\u003eBrowse all of our pregnancy, labour \u0026amp; birth, postpartum and baby essentials here.\u003cbr\u003e\u003c\/p\u003e\n\u003cp\u003e\u003cspan\u003eYou can even buy now and pay later with Afterpay!\u003c\/span\u003e\u003c\/p\u003e","published_at":"2021-03-10T12:05:31+08:00","sort_order":"best-selling","template_suffix":"shop-all-collection","disjunctive":false,"rules":[{"column":"title","relation":"not_contains","condition":"Hire"}],"published_scope":"global","image":{"created_at":"2024-05-06T11:59:42+08:00","alt":"Buy - The Birth Store","width":2048,"height":2048,"src":"\/\/www.thebirthstore.com.au\/cdn\/shop\/collections\/buy-964856.jpg?v=1714967982"}},{"id":281712361661,"handle":"c-section-birth-recovery","title":"C-Section Birth Recovery","updated_at":"2026-07-27T19:09:18+08:00","body_html":"","published_at":"2021-12-20T14:19:01+08:00","sort_order":"best-selling","template_suffix":"swaddles-collection","disjunctive":false,"rules":[{"column":"tag","relation":"equals","condition":"C-Section Birth Recovery"}],"published_scope":"global","image":{"created_at":"2024-05-06T11:59:49+08:00","alt":"C-Section Birth Recovery - The Birth Store","width":1366,"height":2048,"src":"\/\/www.thebirthstore.com.au\/cdn\/shop\/collections\/c-section-birth-recovery-359249.jpg?v=1714967990"}},{"id":281712066749,"handle":"hemorrhoid-care","title":"Haemorrhoid Care","updated_at":"2026-07-27T19:09:18+08:00","body_html":"","published_at":"2021-12-20T14:16:30+08:00","sort_order":"best-selling","template_suffix":"swaddles-collection","disjunctive":false,"rules":[{"column":"tag","relation":"equals","condition":"Hemorrhoids"}],"published_scope":"global","image":{"created_at":"2024-05-06T12:00:00+08:00","alt":"Haemorrhoid Care - The Birth Store","width":763,"height":556,"src":"\/\/www.thebirthstore.com.au\/cdn\/shop\/collections\/haemorrhoid-care-562138.jpg?v=1714968001"}},{"id":337429201085,"handle":"hospital-bag","title":"Hospital Bag","updated_at":"2026-07-27T19:09:18+08:00","body_html":"","published_at":"2026-06-03T11:36:29+08:00","sort_order":"most-relevant","template_suffix":"","disjunctive":false,"rules":[{"column":"tag","relation":"equals","condition":"Hospital Bag"}],"published_scope":"global"},{"id":261658083517,"handle":"post-partum","title":"Postpartum","updated_at":"2026-07-27T19:09:18+08:00","body_html":"\u003cp\u003eShop your postpartum and hospital bag essentials below. Looking for something we don't currently stock? Please reach out and let us know.\u003cbr\u003e\u003c\/p\u003e\n\u003cp\u003e\u003cspan\u003eYou can even buy now and pay later with Afterpay!\u003c\/span\u003e\u003c\/p\u003e","published_at":"2021-03-10T12:33:47+08:00","sort_order":"best-selling","template_suffix":"postpartum-collection","disjunctive":false,"rules":[{"column":"tag","relation":"equals","condition":"Post-Partum"}],"published_scope":"global","image":{"created_at":"2024-05-06T12:00:36+08:00","alt":"Postpartum - The Birth Store","width":611,"height":702,"src":"\/\/www.thebirthstore.com.au\/cdn\/shop\/collections\/postpartum-150119.jpg?v=1714968037"}},{"id":310045933757,"handle":"shop-all-sale","title":"Shop All Sale","updated_at":"2026-07-27T19:09:18+08:00","body_html":"","published_at":"2024-11-12T13:22:43+08:00","sort_order":"alpha-asc","template_suffix":"","disjunctive":true,"rules":[{"column":"tag","relation":"equals","condition":"Bundles"},{"column":"vendor","relation":"equals","condition":"Franjos Kitchen"},{"column":"vendor","relation":"equals","condition":"Adored Illustrations"},{"column":"vendor","relation":"equals","condition":"Amazing Oils"},{"column":"vendor","relation":"equals","condition":"Ice Ice Booby"},{"column":"vendor","relation":"equals","condition":"Made to Milk"},{"column":"vendor","relation":"equals","condition":"Milky Goodness"},{"column":"vendor","relation":"equals","condition":"Seasons of Mama"},{"column":"vendor","relation":"equals","condition":"Silverette"},{"column":"vendor","relation":"equals","condition":"Snuggle Hunny"},{"column":"vendor","relation":"equals","condition":"Yung Bod"},{"column":"vendor","relation":"equals","condition":"Bare Love"},{"column":"vendor","relation":"equals","condition":"Haakaa"},{"column":"vendor","relation":"equals","condition":"Mere Botanicals"},{"column":"vendor","relation":"equals","condition":"The Birth Store Hire"},{"column":"vendor","relation":"equals","condition":"The Birth Store"}],"published_scope":"global","image":{"created_at":"2024-11-13T10:58:16+08:00","alt":"Shop All Sale - The Birth Store","width":2048,"height":1365,"src":"\/\/www.thebirthstore.com.au\/cdn\/shop\/collections\/shop-all-sale-297361.jpg?v=1731466697"}}]}
{"item":{"id":7513283821757,"title":"Labour \u0026 Birth Box - Seasons of Mama Birth Comb","handle":"labour-birth-box-seasons-of-mama-birth-comb-1","description":"\u003cp\u003e\u003cmeta charset=\"utf-8\"\u003e\u003cspan\u003eThere are so many beautiful products on the market now to help support you in labour \u0026amp; birth. We have created a kit with a couple of our favourite products from our range and other small Australian businesses to support you in labour \u0026amp; birth.\u003c\/span\u003e\u003c\/p\u003e","published_at":"2026-06-08T10:38:45+08:00","created_at":"2023-10-03T13:48:09+08:00","vendor":"Bundles","type":"","tags":["Baby Shower Gifts","Birth","Bundles","Hospital Bag","Labour Progression","Nausea","Pain Relief"],"price":7600,"price_min":7600,"price_max":7600,"available":true,"price_varies":false,"compare_at_price":8495,"compare_at_price_min":8495,"compare_at_price_max":8495,"compare_at_price_varies":false,"variants":[{"id":43057014800573,"title":"Pearl","option1":"Pearl","option2":null,"option3":null,"sku":"","requires_shipping":true,"taxable":false,"featured_image":{"id":34641019863229,"product_id":7513283821757,"position":2,"created_at":"2024-05-06T11:59:48+08:00","updated_at":"2024-05-06T11:59:48+08:00","alt":"Labour \u0026 Birth Box - Seasons of Mama Birth Comb - The Birth Store-The Birth Store","width":1080,"height":981,"src":"\/\/www.thebirthstore.com.au\/cdn\/shop\/files\/labour-birth-box-seasons-of-mama-birth-comb-900991.jpg?v=1714967988","variant_ids":[43057014800573]},"available":false,"name":"Labour \u0026 Birth Box - Seasons of Mama Birth Comb - Pearl","public_title":"Pearl","options":["Pearl"],"price":7600,"weight":273,"compare_at_price":8495,"inventory_management":"shopify","barcode":"14800573","featured_media":{"alt":"Labour \u0026 Birth Box - Seasons of Mama Birth Comb - The Birth Store-The Birth Store","id":27007588925629,"position":2,"preview_image":{"aspect_ratio":1.101,"height":981,"width":1080,"src":"\/\/www.thebirthstore.com.au\/cdn\/shop\/files\/labour-birth-box-seasons-of-mama-birth-comb-900991.jpg?v=1714967988"}},"requires_selling_plan":false,"selling_plan_allocations":[],"quantity_rule":{"min":1,"max":null,"increment":1}},{"id":43057014833341,"title":"Tortoise Shell","option1":"Tortoise Shell","option2":null,"option3":null,"sku":"","requires_shipping":true,"taxable":false,"featured_image":{"id":34641020125373,"product_id":7513283821757,"position":5,"created_at":"2024-05-06T11:59:48+08:00","updated_at":"2024-05-06T11:59:48+08:00","alt":"Labour \u0026 Birth Box - Seasons of Mama Birth Comb - The Birth Store-The Birth Store","width":1000,"height":1500,"src":"\/\/www.thebirthstore.com.au\/cdn\/shop\/files\/labour-birth-box-seasons-of-mama-birth-comb-936354.jpg?v=1714967988","variant_ids":[43057014833341]},"available":true,"name":"Labour \u0026 Birth Box - Seasons of Mama Birth Comb - Tortoise Shell","public_title":"Tortoise Shell","options":["Tortoise Shell"],"price":7600,"weight":273,"compare_at_price":8495,"inventory_management":"shopify","barcode":"14833341","featured_media":{"alt":"Labour \u0026 Birth Box - Seasons of Mama Birth Comb - The Birth Store-The Birth Store","id":27007589220541,"position":5,"preview_image":{"aspect_ratio":0.667,"height":1500,"width":1000,"src":"\/\/www.thebirthstore.com.au\/cdn\/shop\/files\/labour-birth-box-seasons-of-mama-birth-comb-936354.jpg?v=1714967988"}},"requires_selling_plan":false,"selling_plan_allocations":[],"quantity_rule":{"min":1,"max":null,"increment":1}}],"images":["\/\/www.thebirthstore.com.au\/cdn\/shop\/files\/labour-birth-box-seasons-of-mama-birth-comb-965981.jpg?v=1780886244","\/\/www.thebirthstore.com.au\/cdn\/shop\/files\/labour-birth-box-seasons-of-mama-birth-comb-900991.jpg?v=1714967988","\/\/www.thebirthstore.com.au\/cdn\/shop\/files\/labour-birth-box-seasons-of-mama-birth-comb-927526.jpg?v=1714967988","\/\/www.thebirthstore.com.au\/cdn\/shop\/files\/labour-birth-box-seasons-of-mama-birth-comb-588874.jpg?v=1714967988","\/\/www.thebirthstore.com.au\/cdn\/shop\/files\/labour-birth-box-seasons-of-mama-birth-comb-936354.jpg?v=1714967988"],"featured_image":"\/\/www.thebirthstore.com.au\/cdn\/shop\/files\/labour-birth-box-seasons-of-mama-birth-comb-965981.jpg?v=1780886244","options":["Reflexology Labour \u0026 Birth Comb (Style)"],"media":[{"alt":"Labour \u0026 Birth Box - Seasons of Mama Birth Comb - The Birth Store-The Birth Store","id":27007588794557,"position":1,"preview_image":{"aspect_ratio":1.004,"height":526,"width":528,"src":"\/\/www.thebirthstore.com.au\/cdn\/shop\/files\/labour-birth-box-seasons-of-mama-birth-comb-965981.jpg?v=1780886244"},"aspect_ratio":1.004,"height":526,"media_type":"image","src":"\/\/www.thebirthstore.com.au\/cdn\/shop\/files\/labour-birth-box-seasons-of-mama-birth-comb-965981.jpg?v=1780886244","width":528},{"alt":"Labour \u0026 Birth Box - Seasons of Mama Birth Comb - The Birth Store-The Birth Store","id":27007588925629,"position":2,"preview_image":{"aspect_ratio":1.101,"height":981,"width":1080,"src":"\/\/www.thebirthstore.com.au\/cdn\/shop\/files\/labour-birth-box-seasons-of-mama-birth-comb-900991.jpg?v=1714967988"},"aspect_ratio":1.101,"height":981,"media_type":"image","src":"\/\/www.thebirthstore.com.au\/cdn\/shop\/files\/labour-birth-box-seasons-of-mama-birth-comb-900991.jpg?v=1714967988","width":1080},{"alt":"Labour \u0026 Birth Box - Seasons of Mama Birth Comb - The Birth Store-The Birth Store","id":27007588958397,"position":3,"preview_image":{"aspect_ratio":1.0,"height":2048,"width":2048,"src":"\/\/www.thebirthstore.com.au\/cdn\/shop\/files\/labour-birth-box-seasons-of-mama-birth-comb-927526.jpg?v=1714967988"},"aspect_ratio":1.0,"height":2048,"media_type":"image","src":"\/\/www.thebirthstore.com.au\/cdn\/shop\/files\/labour-birth-box-seasons-of-mama-birth-comb-927526.jpg?v=1714967988","width":2048},{"alt":"Labour \u0026 Birth Box - Seasons of Mama Birth Comb - The Birth Store-The Birth Store","id":27007589089469,"position":4,"preview_image":{"aspect_ratio":0.667,"height":2048,"width":1365,"src":"\/\/www.thebirthstore.com.au\/cdn\/shop\/files\/labour-birth-box-seasons-of-mama-birth-comb-588874.jpg?v=1714967988"},"aspect_ratio":0.667,"height":2048,"media_type":"image","src":"\/\/www.thebirthstore.com.au\/cdn\/shop\/files\/labour-birth-box-seasons-of-mama-birth-comb-588874.jpg?v=1714967988","width":1365},{"alt":"Labour \u0026 Birth Box - Seasons of Mama Birth Comb - The Birth Store-The Birth Store","id":27007589220541,"position":5,"preview_image":{"aspect_ratio":0.667,"height":1500,"width":1000,"src":"\/\/www.thebirthstore.com.au\/cdn\/shop\/files\/labour-birth-box-seasons-of-mama-birth-comb-936354.jpg?v=1714967988"},"aspect_ratio":0.667,"height":1500,"media_type":"image","src":"\/\/www.thebirthstore.com.au\/cdn\/shop\/files\/labour-birth-box-seasons-of-mama-birth-comb-936354.jpg?v=1714967988","width":1000}],"requires_selling_plan":false,"selling_plan_groups":[],"content":"\u003cp\u003e\u003cmeta charset=\"utf-8\"\u003e\u003cspan\u003eThere are so many beautiful products on the market now to help support you in labour \u0026amp; birth. We have created a kit with a couple of our favourite products from our range and other small Australian businesses to support you in labour \u0026amp; birth.\u003c\/span\u003e\u003c\/p\u003e"},"options":[{"name":"Reflexology Labour \u0026 Birth Comb (Style)","position":1,"values":["Pearl","Tortoise Shell"]}],"custom_metafields":{},"metafields":{"badge":"\u003cdiv style='display:none' class='jdgm-prev-badge' data-average-rating='0.00' data-number-of-reviews='0' data-number-of-questions='0'\u003e \u003cspan class='jdgm-prev-badge__stars' data-score='0.00' tabindex='0' aria-label='0.00 stars' role='button'\u003e \u003cspan class='jdgm-star jdgm--off'\u003e\u003c\/span\u003e\u003cspan class='jdgm-star jdgm--off'\u003e\u003c\/span\u003e\u003cspan class='jdgm-star jdgm--off'\u003e\u003c\/span\u003e\u003cspan class='jdgm-star jdgm--off'\u003e\u003c\/span\u003e\u003cspan class='jdgm-star jdgm--off'\u003e\u003c\/span\u003e \u003c\/span\u003e \u003cspan class='jdgm-prev-badge__text'\u003e No reviews \u003c\/span\u003e \u003c\/div\u003e","widget":"\u003cdiv class='jdgm-rev-widg' data-updated-at='2026-06-08T05:17:15Z' data-average-rating='0.00' data-number-of-reviews='0' data-number-of-questions='0' data-image-url='https:\/\/cdn.shopify.com\/s\/files\/1\/0527\/3393\/5805\/files\/labour-birth-box-seasons-of-mama-birth-comb-965981.jpg?v=1714967988'\u003e \u003cstyle class='jdgm-temp-hiding-style'\u003e.jdgm-rev-widg{ display: none }\u003c\/style\u003e \u003cdiv class='jdgm-rev-widg__header'\u003e \u003ch2 class='jdgm-rev-widg__title'\u003eCustomer Reviews\u003c\/h2\u003e \u003cdiv class='jdgm-rev-widg__summary'\u003e \u003cdiv class='jdgm-rev-widg__summary-stars' aria-label='Average rating is 0.00 stars' role='img'\u003e \u003cspan class='jdgm-star jdgm--off'\u003e\u003c\/span\u003e\u003cspan class='jdgm-star jdgm--off'\u003e\u003c\/span\u003e\u003cspan class='jdgm-star jdgm--off'\u003e\u003c\/span\u003e\u003cspan class='jdgm-star jdgm--off'\u003e\u003c\/span\u003e\u003cspan class='jdgm-star jdgm--off'\u003e\u003c\/span\u003e \u003c\/div\u003e \u003cdiv class='jdgm-rev-widg__summary-text'\u003eBe the first to write a review\u003c\/div\u003e \u003c\/div\u003e \u003ca style='display: none' href='#' class='jdgm-write-rev-link' role='button'\u003eWrite a review\u003c\/a\u003e \u003cdiv class='jdgm-histogram jdgm-temp-hidden'\u003e \u003cdiv class='jdgm-histogram__row' data-rating='5' data-frequency='0' data-percentage='0'\u003e \u003cdiv class='jdgm-histogram__star' role='button' aria-label=\"0% (0) reviews with 5 star rating\" tabindex='0' \u003e\u003cspan class='jdgm-star jdgm--on'\u003e\u003c\/span\u003e\u003cspan class='jdgm-star jdgm--on'\u003e\u003c\/span\u003e\u003cspan class='jdgm-star jdgm--on'\u003e\u003c\/span\u003e\u003cspan class='jdgm-star jdgm--on'\u003e\u003c\/span\u003e\u003cspan class='jdgm-star jdgm--on'\u003e\u003c\/span\u003e\u003c\/div\u003e \u003cdiv class='jdgm-histogram__bar'\u003e \u003cdiv class='jdgm-histogram__bar-content' style='width: 0%;'\u003e \u003c\/div\u003e \u003c\/div\u003e \u003cdiv class='jdgm-histogram__percentage'\u003e0%\u003c\/div\u003e \u003cdiv class='jdgm-histogram__frequency'\u003e(0)\u003c\/div\u003e \u003c\/div\u003e \u003cdiv class='jdgm-histogram__row' data-rating='4' data-frequency='0' data-percentage='0'\u003e \u003cdiv class='jdgm-histogram__star' role='button' aria-label=\"0% (0) reviews with 4 star rating\" tabindex='0' \u003e\u003cspan class='jdgm-star jdgm--on'\u003e\u003c\/span\u003e\u003cspan class='jdgm-star jdgm--on'\u003e\u003c\/span\u003e\u003cspan class='jdgm-star jdgm--on'\u003e\u003c\/span\u003e\u003cspan class='jdgm-star jdgm--on'\u003e\u003c\/span\u003e\u003cspan class='jdgm-star jdgm--off'\u003e\u003c\/span\u003e\u003c\/div\u003e \u003cdiv class='jdgm-histogram__bar'\u003e \u003cdiv class='jdgm-histogram__bar-content' style='width: 0%;'\u003e \u003c\/div\u003e \u003c\/div\u003e \u003cdiv class='jdgm-histogram__percentage'\u003e0%\u003c\/div\u003e \u003cdiv class='jdgm-histogram__frequency'\u003e(0)\u003c\/div\u003e \u003c\/div\u003e \u003cdiv class='jdgm-histogram__row' data-rating='3' data-frequency='0' data-percentage='0'\u003e \u003cdiv class='jdgm-histogram__star' role='button' aria-label=\"0% (0) reviews with 3 star rating\" tabindex='0' \u003e\u003cspan class='jdgm-star jdgm--on'\u003e\u003c\/span\u003e\u003cspan class='jdgm-star jdgm--on'\u003e\u003c\/span\u003e\u003cspan class='jdgm-star jdgm--on'\u003e\u003c\/span\u003e\u003cspan class='jdgm-star jdgm--off'\u003e\u003c\/span\u003e\u003cspan class='jdgm-star jdgm--off'\u003e\u003c\/span\u003e\u003c\/div\u003e \u003cdiv class='jdgm-histogram__bar'\u003e \u003cdiv class='jdgm-histogram__bar-content' style='width: 0%;'\u003e \u003c\/div\u003e \u003c\/div\u003e \u003cdiv class='jdgm-histogram__percentage'\u003e0%\u003c\/div\u003e \u003cdiv class='jdgm-histogram__frequency'\u003e(0)\u003c\/div\u003e \u003c\/div\u003e \u003cdiv class='jdgm-histogram__row' data-rating='2' data-frequency='0' data-percentage='0'\u003e \u003cdiv class='jdgm-histogram__star' role='button' aria-label=\"0% (0) reviews with 2 star rating\" tabindex='0' \u003e\u003cspan class='jdgm-star jdgm--on'\u003e\u003c\/span\u003e\u003cspan class='jdgm-star jdgm--on'\u003e\u003c\/span\u003e\u003cspan class='jdgm-star jdgm--off'\u003e\u003c\/span\u003e\u003cspan class='jdgm-star jdgm--off'\u003e\u003c\/span\u003e\u003cspan class='jdgm-star jdgm--off'\u003e\u003c\/span\u003e\u003c\/div\u003e \u003cdiv class='jdgm-histogram__bar'\u003e \u003cdiv class='jdgm-histogram__bar-content' style='width: 0%;'\u003e \u003c\/div\u003e \u003c\/div\u003e \u003cdiv class='jdgm-histogram__percentage'\u003e0%\u003c\/div\u003e \u003cdiv class='jdgm-histogram__frequency'\u003e(0)\u003c\/div\u003e \u003c\/div\u003e \u003cdiv class='jdgm-histogram__row' data-rating='1' data-frequency='0' data-percentage='0'\u003e \u003cdiv class='jdgm-histogram__star' role='button' aria-label=\"0% (0) reviews with 1 star rating\" tabindex='0' \u003e\u003cspan class='jdgm-star jdgm--on'\u003e\u003c\/span\u003e\u003cspan class='jdgm-star jdgm--off'\u003e\u003c\/span\u003e\u003cspan class='jdgm-star jdgm--off'\u003e\u003c\/span\u003e\u003cspan class='jdgm-star jdgm--off'\u003e\u003c\/span\u003e\u003cspan class='jdgm-star jdgm--off'\u003e\u003c\/span\u003e\u003c\/div\u003e \u003cdiv class='jdgm-histogram__bar'\u003e \u003cdiv class='jdgm-histogram__bar-content' style='width: 0%;'\u003e \u003c\/div\u003e \u003c\/div\u003e \u003cdiv class='jdgm-histogram__percentage'\u003e0%\u003c\/div\u003e \u003cdiv class='jdgm-histogram__frequency'\u003e(0)\u003c\/div\u003e \u003c\/div\u003e \u003cdiv class='jdgm-histogram__row jdgm-histogram__clear-filter' data-rating=null tabindex='0'\u003e\u003c\/div\u003e \u003c\/div\u003e \u003cdiv class='jdgm-rev-widg__sort-wrapper'\u003e\u003c\/div\u003e \u003c\/div\u003e \u003cdiv class='jdgm-rev-widg__body'\u003e \u003cdiv class='jdgm-rev-widg__reviews'\u003e\u003c\/div\u003e \u003cdiv class='jdgm-paginate' data-per-page='10' data-url='https:\/\/api.judge.me\/reviews\/reviews_for_widget' style=\"display: none;\"\u003e\u003c\/div\u003e \u003c\/div\u003e \u003cdiv class='jdgm-rev-widg__paginate-spinner-wrapper'\u003e \u003cdiv class='jdgm-spinner'\u003e\u003c\/div\u003e \u003c\/div\u003e \u003c\/div\u003e"},"default_reviews_metafields":{},"collections":[{"id":283018526909,"handle":"bundles","title":"Bundles","updated_at":"2026-06-27T19:08:41+08:00","body_html":"\u003cp\u003eMake shopping for your bump, birth and beyond easier with our bundle packs. With a pack available for every stage, you can get everything you need with no fuss and with our bundle packs, you even save money.\u003c\/p\u003e","published_at":"2022-02-01T22:33:09+08:00","sort_order":"best-selling","template_suffix":"swaddles-collection","disjunctive":false,"rules":[{"column":"tag","relation":"equals","condition":"Bundles"}],"published_scope":"global","image":{"created_at":"2024-05-06T11:59:39+08:00","alt":"Bundles - The Birth Store","width":2048,"height":1365,"src":"\/\/www.thebirthstore.com.au\/cdn\/shop\/collections\/bundles-299009.jpg?v=1714967980"}},{"id":261657460925,"handle":"buy","title":"Buy","updated_at":"2026-07-27T19:09:18+08:00","body_html":"\u003cp\u003eBrowse all of our pregnancy, labour \u0026amp; birth, postpartum and baby essentials here.\u003cbr\u003e\u003c\/p\u003e\n\u003cp\u003e\u003cspan\u003eYou can even buy now and pay later with Afterpay!\u003c\/span\u003e\u003c\/p\u003e","published_at":"2021-03-10T12:05:31+08:00","sort_order":"best-selling","template_suffix":"shop-all-collection","disjunctive":false,"rules":[{"column":"title","relation":"not_contains","condition":"Hire"}],"published_scope":"global","image":{"created_at":"2024-05-06T11:59:42+08:00","alt":"Buy - The Birth Store","width":2048,"height":2048,"src":"\/\/www.thebirthstore.com.au\/cdn\/shop\/collections\/buy-964856.jpg?v=1714967982"}},{"id":337429201085,"handle":"hospital-bag","title":"Hospital Bag","updated_at":"2026-07-27T19:09:18+08:00","body_html":"","published_at":"2026-06-03T11:36:29+08:00","sort_order":"most-relevant","template_suffix":"","disjunctive":false,"rules":[{"column":"tag","relation":"equals","condition":"Hospital Bag"}],"published_scope":"global"},{"id":261658214589,"handle":"labour-and-birth-buy","title":"Labour \u0026 Birth","updated_at":"2026-07-27T19:09:18+08:00","body_html":"\u003cp\u003eWe stock a large range of Elle TENS machines for you to buy for your labour and birth. We stock the Elle TENS, Elle TENS 2 and Elle TENS Plus, we also hire these out if that suits you better, please head over to our TENS machine hire page for more information. We ship Australia wide or have options for local delivery\/pick-up in Perth if you are due ASAP. We also stock other items for your labour and birth. \u003c\/p\u003e\n\u003cp\u003eLooking for something we don't currently stock? Please reach out and let us know.\u003c\/p\u003e\n\u003cp\u003e\u003cspan\u003eYou can even buy now and pay later with Afterpay!\u003c\/span\u003e\u003c\/p\u003e","published_at":"2021-03-10T12:34:43+08:00","sort_order":"best-selling","template_suffix":"labour-birth-collection","disjunctive":false,"rules":[{"column":"tag","relation":"equals","condition":"Birth"}],"published_scope":"global","image":{"created_at":"2024-05-06T12:00:09+08:00","alt":"Labour \u0026 Birth - The Birth Store","width":1080,"height":981,"src":"\/\/www.thebirthstore.com.au\/cdn\/shop\/collections\/labour-birth-342038.jpg?v=1714968009"}},{"id":281712558269,"handle":"labour-aids","title":"Labour Aids","updated_at":"2026-07-27T19:09:18+08:00","body_html":"","published_at":"2021-12-20T14:22:16+08:00","sort_order":"best-selling","template_suffix":"labour-aids-collection","disjunctive":false,"rules":[{"column":"tag","relation":"equals","condition":"Labour Progression"}],"published_scope":"global","image":{"created_at":"2024-05-06T12:00:11+08:00","alt":"Labour Aids - The Birth Store","width":1365,"height":2048,"src":"\/\/www.thebirthstore.com.au\/cdn\/shop\/collections\/labour-aids-211824.jpg?v=1714968012"}},{"id":295224836285,"handle":"nausea","title":"Nausea","updated_at":"2026-07-27T19:09:18+08:00","body_html":"","published_at":"2023-11-10T20:47:34+08:00","sort_order":"best-selling","template_suffix":"nausea-collection","disjunctive":false,"rules":[{"column":"tag","relation":"equals","condition":"Nausea"}],"published_scope":"global","image":{"created_at":"2024-05-06T12:00:24+08:00","alt":"Nausea - The Birth Store","width":610,"height":915,"src":"\/\/www.thebirthstore.com.au\/cdn\/shop\/collections\/nausea-404101.jpg?v=1714968024"}},{"id":281712591037,"handle":"pain-relief","title":"Pain Relief","updated_at":"2026-07-27T19:09:18+08:00","body_html":"","published_at":"2021-12-20T14:22:45+08:00","sort_order":"best-selling","template_suffix":"pain-relief-collection","disjunctive":false,"rules":[{"column":"tag","relation":"equals","condition":"Pain Relief"}],"published_scope":"global","image":{"created_at":"2024-05-06T12:00:27+08:00","alt":"Pain Relief - The Birth Store","width":1365,"height":2048,"src":"\/\/www.thebirthstore.com.au\/cdn\/shop\/collections\/pain-relief-878865.jpg?v=1714968027"}},{"id":310045933757,"handle":"shop-all-sale","title":"Shop All Sale","updated_at":"2026-07-27T19:09:18+08:00","body_html":"","published_at":"2024-11-12T13:22:43+08:00","sort_order":"alpha-asc","template_suffix":"","disjunctive":true,"rules":[{"column":"tag","relation":"equals","condition":"Bundles"},{"column":"vendor","relation":"equals","condition":"Franjos Kitchen"},{"column":"vendor","relation":"equals","condition":"Adored Illustrations"},{"column":"vendor","relation":"equals","condition":"Amazing Oils"},{"column":"vendor","relation":"equals","condition":"Ice Ice Booby"},{"column":"vendor","relation":"equals","condition":"Made to Milk"},{"column":"vendor","relation":"equals","condition":"Milky Goodness"},{"column":"vendor","relation":"equals","condition":"Seasons of Mama"},{"column":"vendor","relation":"equals","condition":"Silverette"},{"column":"vendor","relation":"equals","condition":"Snuggle Hunny"},{"column":"vendor","relation":"equals","condition":"Yung Bod"},{"column":"vendor","relation":"equals","condition":"Bare Love"},{"column":"vendor","relation":"equals","condition":"Haakaa"},{"column":"vendor","relation":"equals","condition":"Mere Botanicals"},{"column":"vendor","relation":"equals","condition":"The Birth Store Hire"},{"column":"vendor","relation":"equals","condition":"The Birth Store"}],"published_scope":"global","image":{"created_at":"2024-11-13T10:58:16+08:00","alt":"Shop All Sale - The Birth Store","width":2048,"height":1365,"src":"\/\/www.thebirthstore.com.au\/cdn\/shop\/collections\/shop-all-sale-297361.jpg?v=1731466697"}}]}
{"item":{"id":7513280381117,"title":"Labour \u0026 Birth Box - Spiky Ball","handle":"labour-birth-box-spiky-ball","description":"\u003cp\u003e\u003cmeta charset=\"utf-8\"\u003e\u003cspan\u003eThere are so many beautiful products on the market now to help support you in labour \u0026amp; birth. We have created a kit with a couple of our favourite products from our range and other small Australian businesses to support you in labour \u0026amp; birth.\u003c\/span\u003e\u003c\/p\u003e","published_at":"2023-10-03T14:04:09+08:00","created_at":"2023-10-03T13:31:42+08:00","vendor":"Bundles","type":"","tags":["Baby Shower Gifts","Birth","Bundles","Hospital Bag","Labour Preparation","Labour Progression","Nausea","Pain Relief","Pregnancy"],"price":6200,"price_min":6200,"price_max":6200,"available":true,"price_varies":false,"compare_at_price":6900,"compare_at_price_min":6900,"compare_at_price_max":6900,"compare_at_price_varies":false,"variants":[{"id":43056986161341,"title":"Black","option1":"Black","option2":null,"option3":null,"sku":"","requires_shipping":true,"taxable":false,"featured_image":null,"available":true,"name":"Labour \u0026 Birth Box - Spiky Ball - Black","public_title":"Black","options":["Black"],"price":6200,"weight":267,"compare_at_price":6900,"inventory_management":"shopify","barcode":"86161341","requires_selling_plan":false,"selling_plan_allocations":[],"quantity_rule":{"min":1,"max":null,"increment":1}},{"id":43056986194109,"title":"Purple","option1":"Purple","option2":null,"option3":null,"sku":"","requires_shipping":true,"taxable":false,"featured_image":null,"available":true,"name":"Labour \u0026 Birth Box - Spiky Ball - Purple","public_title":"Purple","options":["Purple"],"price":6200,"weight":267,"compare_at_price":6900,"inventory_management":"shopify","barcode":"86194109","requires_selling_plan":false,"selling_plan_allocations":[],"quantity_rule":{"min":1,"max":null,"increment":1}},{"id":43056986226877,"title":"Pink","option1":"Pink","option2":null,"option3":null,"sku":"","requires_shipping":true,"taxable":false,"featured_image":null,"available":true,"name":"Labour \u0026 Birth Box - Spiky Ball - Pink","public_title":"Pink","options":["Pink"],"price":6200,"weight":267,"compare_at_price":6900,"inventory_management":"shopify","barcode":"86226877","requires_selling_plan":false,"selling_plan_allocations":[],"quantity_rule":{"min":1,"max":null,"increment":1}},{"id":43056986259645,"title":"Blue","option1":"Blue","option2":null,"option3":null,"sku":"","requires_shipping":true,"taxable":false,"featured_image":null,"available":true,"name":"Labour \u0026 Birth Box - Spiky Ball - Blue","public_title":"Blue","options":["Blue"],"price":6200,"weight":267,"compare_at_price":6900,"inventory_management":"shopify","barcode":"86259645","requires_selling_plan":false,"selling_plan_allocations":[],"quantity_rule":{"min":1,"max":null,"increment":1}}],"images":["\/\/www.thebirthstore.com.au\/cdn\/shop\/files\/labour-birth-box-spiky-ball-2914052.png?v=1780886364","\/\/www.thebirthstore.com.au\/cdn\/shop\/files\/labour-birth-box-spiky-ball-404808.jpg?v=1758807490","\/\/www.thebirthstore.com.au\/cdn\/shop\/files\/clary-sage-oil-10ml-814641.jpg?v=1750217972","\/\/www.thebirthstore.com.au\/cdn\/shop\/files\/labour-birth-roller-blends-10mls-160488.jpg?v=1750217900"],"featured_image":"\/\/www.thebirthstore.com.au\/cdn\/shop\/files\/labour-birth-box-spiky-ball-2914052.png?v=1780886364","options":["Spiky Massage Ball (Colour)"],"media":[{"alt":"Labour \u0026 Birth Box - Spiky Ball - The Birth Store - Bundles","id":29672202600637,"position":1,"preview_image":{"aspect_ratio":1.0,"height":828,"width":828,"src":"\/\/www.thebirthstore.com.au\/cdn\/shop\/files\/labour-birth-box-spiky-ball-2914052.png?v=1780886364"},"aspect_ratio":1.0,"height":828,"media_type":"image","src":"\/\/www.thebirthstore.com.au\/cdn\/shop\/files\/labour-birth-box-spiky-ball-2914052.png?v=1780886364","width":828},{"alt":"Labour \u0026 Birth Box - Spiky Ball - The Birth Store-The Birth Store","id":27007587188925,"position":2,"preview_image":{"aspect_ratio":0.786,"height":2048,"width":1609,"src":"\/\/www.thebirthstore.com.au\/cdn\/shop\/files\/labour-birth-box-spiky-ball-404808.jpg?v=1758807490"},"aspect_ratio":0.786,"height":2048,"media_type":"image","src":"\/\/www.thebirthstore.com.au\/cdn\/shop\/files\/labour-birth-box-spiky-ball-404808.jpg?v=1758807490","width":1609},{"alt":"Clary Sage Oil - 10ml - The Birth Store-The Birth Store","id":27007581225149,"position":3,"preview_image":{"aspect_ratio":0.667,"height":2048,"width":1365,"src":"\/\/www.thebirthstore.com.au\/cdn\/shop\/files\/clary-sage-oil-10ml-814641.jpg?v=1750217972"},"aspect_ratio":0.667,"height":2048,"media_type":"image","src":"\/\/www.thebirthstore.com.au\/cdn\/shop\/files\/clary-sage-oil-10ml-814641.jpg?v=1750217972","width":1365},{"alt":"Labour \u0026 Birth Roller Blends - 10mls - The Birth Store-The Birth Store","id":27007590400189,"position":4,"preview_image":{"aspect_ratio":1.0,"height":2048,"width":2048,"src":"\/\/www.thebirthstore.com.au\/cdn\/shop\/files\/labour-birth-roller-blends-10mls-160488.jpg?v=1750217900"},"aspect_ratio":1.0,"height":2048,"media_type":"image","src":"\/\/www.thebirthstore.com.au\/cdn\/shop\/files\/labour-birth-roller-blends-10mls-160488.jpg?v=1750217900","width":2048}],"requires_selling_plan":false,"selling_plan_groups":[],"content":"\u003cp\u003e\u003cmeta charset=\"utf-8\"\u003e\u003cspan\u003eThere are so many beautiful products on the market now to help support you in labour \u0026amp; birth. We have created a kit with a couple of our favourite products from our range and other small Australian businesses to support you in labour \u0026amp; birth.\u003c\/span\u003e\u003c\/p\u003e"},"options":[{"name":"Spiky Massage Ball (Colour)","position":1,"values":["Black","Purple","Pink","Blue"]}],"custom_metafields":{},"metafields":{"badge":"\u003cdiv style='display:none' class='jdgm-prev-badge' data-average-rating='0.00' data-number-of-reviews='0' data-number-of-questions='0'\u003e \u003cspan class='jdgm-prev-badge__stars' data-score='0.00' tabindex='0' aria-label='0.00 stars' role='button'\u003e \u003cspan class='jdgm-star jdgm--off'\u003e\u003c\/span\u003e\u003cspan class='jdgm-star jdgm--off'\u003e\u003c\/span\u003e\u003cspan class='jdgm-star jdgm--off'\u003e\u003c\/span\u003e\u003cspan class='jdgm-star jdgm--off'\u003e\u003c\/span\u003e\u003cspan class='jdgm-star jdgm--off'\u003e\u003c\/span\u003e \u003c\/span\u003e \u003cspan class='jdgm-prev-badge__text'\u003e No reviews \u003c\/span\u003e \u003c\/div\u003e","widget":"\u003cdiv class='jdgm-rev-widg' data-updated-at='2025-06-13T16:13:40Z' data-average-rating='0.00' data-number-of-reviews='0' data-number-of-questions='0'\u003e \u003cstyle class='jdgm-temp-hiding-style'\u003e.jdgm-rev-widg{ display: none }\u003c\/style\u003e \u003cdiv class='jdgm-rev-widg__header'\u003e \u003ch2 class='jdgm-rev-widg__title'\u003eCustomer Reviews\u003c\/h2\u003e \u003cdiv class='jdgm-rev-widg__summary'\u003e \u003cdiv class='jdgm-rev-widg__summary-stars' aria-label='Average rating is 0.00 stars' role='img'\u003e \u003cspan class='jdgm-star jdgm--off'\u003e\u003c\/span\u003e\u003cspan class='jdgm-star jdgm--off'\u003e\u003c\/span\u003e\u003cspan class='jdgm-star jdgm--off'\u003e\u003c\/span\u003e\u003cspan class='jdgm-star jdgm--off'\u003e\u003c\/span\u003e\u003cspan class='jdgm-star jdgm--off'\u003e\u003c\/span\u003e \u003c\/div\u003e \u003cdiv class='jdgm-rev-widg__summary-text'\u003eBe the first to write a review\u003c\/div\u003e \u003c\/div\u003e \u003ca style='display: none' href='#' class='jdgm-write-rev-link' role='button'\u003eWrite a review\u003c\/a\u003e \u003cdiv class='jdgm-histogram jdgm-temp-hidden'\u003e \u003cdiv class='jdgm-histogram__row' data-rating='5' data-frequency='0' data-percentage='0'\u003e \u003cdiv class='jdgm-histogram__star' role='button' aria-label=\"0% (0) reviews with 5 star rating\" tabindex='0' \u003e\u003cspan class='jdgm-star jdgm--on'\u003e\u003c\/span\u003e\u003cspan class='jdgm-star jdgm--on'\u003e\u003c\/span\u003e\u003cspan class='jdgm-star jdgm--on'\u003e\u003c\/span\u003e\u003cspan class='jdgm-star jdgm--on'\u003e\u003c\/span\u003e\u003cspan class='jdgm-star jdgm--on'\u003e\u003c\/span\u003e\u003c\/div\u003e \u003cdiv class='jdgm-histogram__bar'\u003e \u003cdiv class='jdgm-histogram__bar-content' style='width: 0%;'\u003e \u003c\/div\u003e \u003c\/div\u003e \u003cdiv class='jdgm-histogram__percentage'\u003e0%\u003c\/div\u003e \u003cdiv class='jdgm-histogram__frequency'\u003e(0)\u003c\/div\u003e \u003c\/div\u003e \u003cdiv class='jdgm-histogram__row' data-rating='4' data-frequency='0' data-percentage='0'\u003e \u003cdiv class='jdgm-histogram__star' role='button' aria-label=\"0% (0) reviews with 4 star rating\" tabindex='0' \u003e\u003cspan class='jdgm-star jdgm--on'\u003e\u003c\/span\u003e\u003cspan class='jdgm-star jdgm--on'\u003e\u003c\/span\u003e\u003cspan class='jdgm-star jdgm--on'\u003e\u003c\/span\u003e\u003cspan class='jdgm-star jdgm--on'\u003e\u003c\/span\u003e\u003cspan class='jdgm-star jdgm--off'\u003e\u003c\/span\u003e\u003c\/div\u003e \u003cdiv class='jdgm-histogram__bar'\u003e \u003cdiv class='jdgm-histogram__bar-content' style='width: 0%;'\u003e \u003c\/div\u003e \u003c\/div\u003e \u003cdiv class='jdgm-histogram__percentage'\u003e0%\u003c\/div\u003e \u003cdiv class='jdgm-histogram__frequency'\u003e(0)\u003c\/div\u003e \u003c\/div\u003e \u003cdiv class='jdgm-histogram__row' data-rating='3' data-frequency='0' data-percentage='0'\u003e \u003cdiv class='jdgm-histogram__star' role='button' aria-label=\"0% (0) reviews with 3 star rating\" tabindex='0' \u003e\u003cspan class='jdgm-star jdgm--on'\u003e\u003c\/span\u003e\u003cspan class='jdgm-star jdgm--on'\u003e\u003c\/span\u003e\u003cspan class='jdgm-star jdgm--on'\u003e\u003c\/span\u003e\u003cspan class='jdgm-star jdgm--off'\u003e\u003c\/span\u003e\u003cspan class='jdgm-star jdgm--off'\u003e\u003c\/span\u003e\u003c\/div\u003e \u003cdiv class='jdgm-histogram__bar'\u003e \u003cdiv class='jdgm-histogram__bar-content' style='width: 0%;'\u003e \u003c\/div\u003e \u003c\/div\u003e \u003cdiv class='jdgm-histogram__percentage'\u003e0%\u003c\/div\u003e \u003cdiv class='jdgm-histogram__frequency'\u003e(0)\u003c\/div\u003e \u003c\/div\u003e \u003cdiv class='jdgm-histogram__row' data-rating='2' data-frequency='0' data-percentage='0'\u003e \u003cdiv class='jdgm-histogram__star' role='button' aria-label=\"0% (0) reviews with 2 star rating\" tabindex='0' \u003e\u003cspan class='jdgm-star jdgm--on'\u003e\u003c\/span\u003e\u003cspan class='jdgm-star jdgm--on'\u003e\u003c\/span\u003e\u003cspan class='jdgm-star jdgm--off'\u003e\u003c\/span\u003e\u003cspan class='jdgm-star jdgm--off'\u003e\u003c\/span\u003e\u003cspan class='jdgm-star jdgm--off'\u003e\u003c\/span\u003e\u003c\/div\u003e \u003cdiv class='jdgm-histogram__bar'\u003e \u003cdiv class='jdgm-histogram__bar-content' style='width: 0%;'\u003e \u003c\/div\u003e \u003c\/div\u003e \u003cdiv class='jdgm-histogram__percentage'\u003e0%\u003c\/div\u003e \u003cdiv class='jdgm-histogram__frequency'\u003e(0)\u003c\/div\u003e \u003c\/div\u003e \u003cdiv class='jdgm-histogram__row' data-rating='1' data-frequency='0' data-percentage='0'\u003e \u003cdiv class='jdgm-histogram__star' role='button' aria-label=\"0% (0) reviews with 1 star rating\" tabindex='0' \u003e\u003cspan class='jdgm-star jdgm--on'\u003e\u003c\/span\u003e\u003cspan class='jdgm-star jdgm--off'\u003e\u003c\/span\u003e\u003cspan class='jdgm-star jdgm--off'\u003e\u003c\/span\u003e\u003cspan class='jdgm-star jdgm--off'\u003e\u003c\/span\u003e\u003cspan class='jdgm-star jdgm--off'\u003e\u003c\/span\u003e\u003c\/div\u003e \u003cdiv class='jdgm-histogram__bar'\u003e \u003cdiv class='jdgm-histogram__bar-content' style='width: 0%;'\u003e \u003c\/div\u003e \u003c\/div\u003e \u003cdiv class='jdgm-histogram__percentage'\u003e0%\u003c\/div\u003e \u003cdiv class='jdgm-histogram__frequency'\u003e(0)\u003c\/div\u003e \u003c\/div\u003e \u003cdiv class='jdgm-histogram__row jdgm-histogram__clear-filter' data-rating=null tabindex='0'\u003e\u003c\/div\u003e \u003c\/div\u003e \u003cdiv class='jdgm-rev-widg__sort-wrapper'\u003e\u003c\/div\u003e \u003c\/div\u003e \u003cdiv class='jdgm-rev-widg__body'\u003e \u003cdiv class='jdgm-rev-widg__reviews'\u003e\u003c\/div\u003e \u003cdiv class='jdgm-paginate' data-per-page='10' data-url='https:\/\/api.judge.me\/reviews\/reviews_for_widget' style=\"display: none;\"\u003e\u003c\/div\u003e \u003c\/div\u003e \u003cdiv class='jdgm-rev-widg__paginate-spinner-wrapper'\u003e \u003cdiv class='jdgm-spinner'\u003e\u003c\/div\u003e \u003c\/div\u003e \u003c\/div\u003e"},"default_reviews_metafields":{},"collections":[{"id":283018526909,"handle":"bundles","title":"Bundles","updated_at":"2026-06-27T19:08:41+08:00","body_html":"\u003cp\u003eMake shopping for your bump, birth and beyond easier with our bundle packs. With a pack available for every stage, you can get everything you need with no fuss and with our bundle packs, you even save money.\u003c\/p\u003e","published_at":"2022-02-01T22:33:09+08:00","sort_order":"best-selling","template_suffix":"swaddles-collection","disjunctive":false,"rules":[{"column":"tag","relation":"equals","condition":"Bundles"}],"published_scope":"global","image":{"created_at":"2024-05-06T11:59:39+08:00","alt":"Bundles - The Birth Store","width":2048,"height":1365,"src":"\/\/www.thebirthstore.com.au\/cdn\/shop\/collections\/bundles-299009.jpg?v=1714967980"}},{"id":261657460925,"handle":"buy","title":"Buy","updated_at":"2026-07-27T19:09:18+08:00","body_html":"\u003cp\u003eBrowse all of our pregnancy, labour \u0026amp; birth, postpartum and baby essentials here.\u003cbr\u003e\u003c\/p\u003e\n\u003cp\u003e\u003cspan\u003eYou can even buy now and pay later with Afterpay!\u003c\/span\u003e\u003c\/p\u003e","published_at":"2021-03-10T12:05:31+08:00","sort_order":"best-selling","template_suffix":"shop-all-collection","disjunctive":false,"rules":[{"column":"title","relation":"not_contains","condition":"Hire"}],"published_scope":"global","image":{"created_at":"2024-05-06T11:59:42+08:00","alt":"Buy - The Birth Store","width":2048,"height":2048,"src":"\/\/www.thebirthstore.com.au\/cdn\/shop\/collections\/buy-964856.jpg?v=1714967982"}},{"id":337429201085,"handle":"hospital-bag","title":"Hospital Bag","updated_at":"2026-07-27T19:09:18+08:00","body_html":"","published_at":"2026-06-03T11:36:29+08:00","sort_order":"most-relevant","template_suffix":"","disjunctive":false,"rules":[{"column":"tag","relation":"equals","condition":"Hospital Bag"}],"published_scope":"global"},{"id":261658214589,"handle":"labour-and-birth-buy","title":"Labour \u0026 Birth","updated_at":"2026-07-27T19:09:18+08:00","body_html":"\u003cp\u003eWe stock a large range of Elle TENS machines for you to buy for your labour and birth. We stock the Elle TENS, Elle TENS 2 and Elle TENS Plus, we also hire these out if that suits you better, please head over to our TENS machine hire page for more information. We ship Australia wide or have options for local delivery\/pick-up in Perth if you are due ASAP. We also stock other items for your labour and birth. \u003c\/p\u003e\n\u003cp\u003eLooking for something we don't currently stock? Please reach out and let us know.\u003c\/p\u003e\n\u003cp\u003e\u003cspan\u003eYou can even buy now and pay later with Afterpay!\u003c\/span\u003e\u003c\/p\u003e","published_at":"2021-03-10T12:34:43+08:00","sort_order":"best-selling","template_suffix":"labour-birth-collection","disjunctive":false,"rules":[{"column":"tag","relation":"equals","condition":"Birth"}],"published_scope":"global","image":{"created_at":"2024-05-06T12:00:09+08:00","alt":"Labour \u0026 Birth - The Birth Store","width":1080,"height":981,"src":"\/\/www.thebirthstore.com.au\/cdn\/shop\/collections\/labour-birth-342038.jpg?v=1714968009"}},{"id":281712558269,"handle":"labour-aids","title":"Labour Aids","updated_at":"2026-07-27T19:09:18+08:00","body_html":"","published_at":"2021-12-20T14:22:16+08:00","sort_order":"best-selling","template_suffix":"labour-aids-collection","disjunctive":false,"rules":[{"column":"tag","relation":"equals","condition":"Labour Progression"}],"published_scope":"global","image":{"created_at":"2024-05-06T12:00:11+08:00","alt":"Labour Aids - The Birth Store","width":1365,"height":2048,"src":"\/\/www.thebirthstore.com.au\/cdn\/shop\/collections\/labour-aids-211824.jpg?v=1714968012"}},{"id":281712525501,"handle":"labour-preparation","title":"Labour Preparation","updated_at":"2026-07-27T19:09:18+08:00","body_html":"","published_at":"2021-12-20T14:20:12+08:00","sort_order":"best-selling","template_suffix":"labour-preparation-collec","disjunctive":false,"rules":[{"column":"tag","relation":"equals","condition":"Labour Preparation"}],"published_scope":"global","image":{"created_at":"2024-05-06T12:00:13+08:00","alt":"Labour Preparation - The Birth Store","width":1024,"height":1536,"src":"\/\/www.thebirthstore.com.au\/cdn\/shop\/collections\/labour-preparation-271961.jpg?v=1714968013"}},{"id":295224836285,"handle":"nausea","title":"Nausea","updated_at":"2026-07-27T19:09:18+08:00","body_html":"","published_at":"2023-11-10T20:47:34+08:00","sort_order":"best-selling","template_suffix":"nausea-collection","disjunctive":false,"rules":[{"column":"tag","relation":"equals","condition":"Nausea"}],"published_scope":"global","image":{"created_at":"2024-05-06T12:00:24+08:00","alt":"Nausea - The Birth Store","width":610,"height":915,"src":"\/\/www.thebirthstore.com.au\/cdn\/shop\/collections\/nausea-404101.jpg?v=1714968024"}},{"id":281712591037,"handle":"pain-relief","title":"Pain Relief","updated_at":"2026-07-27T19:09:18+08:00","body_html":"","published_at":"2021-12-20T14:22:45+08:00","sort_order":"best-selling","template_suffix":"pain-relief-collection","disjunctive":false,"rules":[{"column":"tag","relation":"equals","condition":"Pain Relief"}],"published_scope":"global","image":{"created_at":"2024-05-06T12:00:27+08:00","alt":"Pain Relief - The Birth Store","width":1365,"height":2048,"src":"\/\/www.thebirthstore.com.au\/cdn\/shop\/collections\/pain-relief-878865.jpg?v=1714968027"}},{"id":261658149053,"handle":"pregnancy-and-maternity-products","title":"Pregnancy","updated_at":"2026-07-27T19:09:18+08:00","body_html":"\u003cp\u003eShop your pregnancy essentials below. Looking for something we don't currently stock? Please reach out and let us know.\u003cbr\u003e\u003c\/p\u003e\n\u003cp\u003e\u003cspan\u003eYou can even buy now and pay later with Afterpay!\u003c\/span\u003e\u003c\/p\u003e","published_at":"2021-03-10T12:34:22+08:00","sort_order":"best-selling","template_suffix":"pregnancy-collection","disjunctive":false,"rules":[{"column":"tag","relation":"equals","condition":"Pregnancy"}],"published_scope":"global","image":{"created_at":"2024-05-06T12:00:40+08:00","alt":"Pregnancy - The Birth Store","width":1024,"height":1536,"src":"\/\/www.thebirthstore.com.au\/cdn\/shop\/collections\/pregnancy-899677.jpg?v=1714968040"}},{"id":310045933757,"handle":"shop-all-sale","title":"Shop All Sale","updated_at":"2026-07-27T19:09:18+08:00","body_html":"","published_at":"2024-11-12T13:22:43+08:00","sort_order":"alpha-asc","template_suffix":"","disjunctive":true,"rules":[{"column":"tag","relation":"equals","condition":"Bundles"},{"column":"vendor","relation":"equals","condition":"Franjos Kitchen"},{"column":"vendor","relation":"equals","condition":"Adored Illustrations"},{"column":"vendor","relation":"equals","condition":"Amazing Oils"},{"column":"vendor","relation":"equals","condition":"Ice Ice Booby"},{"column":"vendor","relation":"equals","condition":"Made to Milk"},{"column":"vendor","relation":"equals","condition":"Milky Goodness"},{"column":"vendor","relation":"equals","condition":"Seasons of Mama"},{"column":"vendor","relation":"equals","condition":"Silverette"},{"column":"vendor","relation":"equals","condition":"Snuggle Hunny"},{"column":"vendor","relation":"equals","condition":"Yung Bod"},{"column":"vendor","relation":"equals","condition":"Bare Love"},{"column":"vendor","relation":"equals","condition":"Haakaa"},{"column":"vendor","relation":"equals","condition":"Mere Botanicals"},{"column":"vendor","relation":"equals","condition":"The Birth Store Hire"},{"column":"vendor","relation":"equals","condition":"The Birth Store"}],"published_scope":"global","image":{"created_at":"2024-11-13T10:58:16+08:00","alt":"Shop All Sale - The Birth Store","width":2048,"height":1365,"src":"\/\/www.thebirthstore.com.au\/cdn\/shop\/collections\/shop-all-sale-297361.jpg?v=1731466697"}}]}
{"item":{"id":7513280250045,"title":"Labour Preparation Pack - Capsules","handle":"labour-preparation-pack-capsules","description":"\u003cp\u003e\u003cmeta charset=\"utf-8\"\u003e\u003cspan\u003eThere are so many wonderful products on the market now, to help you prepare for your labour and birth. We have created a pack with a couple of our favourite products from small Australian businesses to aid you in preparing for arguably the most memorable day of your life - the one pack to fill all your labour preparation needs!\u003c\/span\u003e\u003c\/p\u003e","published_at":"2023-10-03T13:58:28+08:00","created_at":"2023-10-03T13:29:54+08:00","vendor":"Bundles","type":"","tags":["Baby Shower Gifts","Bundles","Labour Preparation","Labour Progression","Pregnancy"],"price":4897,"price_min":4897,"price_max":4897,"available":false,"price_varies":false,"compare_at_price":5565,"compare_at_price_min":5565,"compare_at_price_max":5565,"compare_at_price_varies":false,"variants":[{"id":43056985243837,"title":"Default Title","option1":"Default Title","option2":null,"option3":null,"sku":"","requires_shipping":true,"taxable":false,"featured_image":null,"available":false,"name":"Labour Preparation Pack - Capsules","public_title":null,"options":["Default Title"],"price":4897,"weight":250,"compare_at_price":5565,"inventory_management":"shopify","barcode":"05878717","requires_selling_plan":false,"selling_plan_allocations":[],"quantity_rule":{"min":1,"max":null,"increment":1}}],"images":["\/\/www.thebirthstore.com.au\/cdn\/shop\/files\/labour-preparation-pack-capsules-709119.jpg?v=1714967975","\/\/www.thebirthstore.com.au\/cdn\/shop\/files\/labour-preparation-pack-capsules-332316.jpg?v=1714967975"],"featured_image":"\/\/www.thebirthstore.com.au\/cdn\/shop\/files\/labour-preparation-pack-capsules-709119.jpg?v=1714967975","options":["Title"],"media":[{"alt":"Labour Preparation Pack - Capsules - The Birth Store-The Birth Store","id":27007587942589,"position":1,"preview_image":{"aspect_ratio":1.0,"height":2048,"width":2048,"src":"\/\/www.thebirthstore.com.au\/cdn\/shop\/files\/labour-preparation-pack-capsules-709119.jpg?v=1714967975"},"aspect_ratio":1.0,"height":2048,"media_type":"image","src":"\/\/www.thebirthstore.com.au\/cdn\/shop\/files\/labour-preparation-pack-capsules-709119.jpg?v=1714967975","width":2048},{"alt":"Labour Preparation Pack - Capsules - The Birth Store-The Birth Store","id":27007587975357,"position":2,"preview_image":{"aspect_ratio":0.667,"height":2048,"width":1365,"src":"\/\/www.thebirthstore.com.au\/cdn\/shop\/files\/labour-preparation-pack-capsules-332316.jpg?v=1714967975"},"aspect_ratio":0.667,"height":2048,"media_type":"image","src":"\/\/www.thebirthstore.com.au\/cdn\/shop\/files\/labour-preparation-pack-capsules-332316.jpg?v=1714967975","width":1365}],"requires_selling_plan":false,"selling_plan_groups":[],"content":"\u003cp\u003e\u003cmeta charset=\"utf-8\"\u003e\u003cspan\u003eThere are so many wonderful products on the market now, to help you prepare for your labour and birth. We have created a pack with a couple of our favourite products from small Australian businesses to aid you in preparing for arguably the most memorable day of your life - the one pack to fill all your labour preparation needs!\u003c\/span\u003e\u003c\/p\u003e"},"options":[{"name":"Title","position":1,"values":["Default Title"]}],"custom_metafields":{},"metafields":{"badge":"\u003cdiv style='display:none' class='jdgm-prev-badge' data-average-rating='0.00' data-number-of-reviews='0' data-number-of-questions='0'\u003e \u003cspan class='jdgm-prev-badge__stars' data-score='0.00' tabindex='0' aria-label='0.00 stars' role='button'\u003e \u003cspan class='jdgm-star jdgm--off'\u003e\u003c\/span\u003e\u003cspan class='jdgm-star jdgm--off'\u003e\u003c\/span\u003e\u003cspan class='jdgm-star jdgm--off'\u003e\u003c\/span\u003e\u003cspan class='jdgm-star jdgm--off'\u003e\u003c\/span\u003e\u003cspan class='jdgm-star jdgm--off'\u003e\u003c\/span\u003e \u003c\/span\u003e \u003cspan class='jdgm-prev-badge__text'\u003e No reviews \u003c\/span\u003e \u003c\/div\u003e","widget":"\u003cdiv class='jdgm-rev-widg' data-updated-at='2025-06-13T16:13:40Z' data-average-rating='0.00' data-number-of-reviews='0' data-number-of-questions='0'\u003e \u003cstyle class='jdgm-temp-hiding-style'\u003e.jdgm-rev-widg{ display: none }\u003c\/style\u003e \u003cdiv class='jdgm-rev-widg__header'\u003e \u003ch2 class='jdgm-rev-widg__title'\u003eCustomer Reviews\u003c\/h2\u003e \u003cdiv class='jdgm-rev-widg__summary'\u003e \u003cdiv class='jdgm-rev-widg__summary-stars' aria-label='Average rating is 0.00 stars' role='img'\u003e \u003cspan class='jdgm-star jdgm--off'\u003e\u003c\/span\u003e\u003cspan class='jdgm-star jdgm--off'\u003e\u003c\/span\u003e\u003cspan class='jdgm-star jdgm--off'\u003e\u003c\/span\u003e\u003cspan class='jdgm-star jdgm--off'\u003e\u003c\/span\u003e\u003cspan class='jdgm-star jdgm--off'\u003e\u003c\/span\u003e \u003c\/div\u003e \u003cdiv class='jdgm-rev-widg__summary-text'\u003eBe the first to write a review\u003c\/div\u003e \u003c\/div\u003e \u003ca style='display: none' href='#' class='jdgm-write-rev-link' role='button'\u003eWrite a review\u003c\/a\u003e \u003cdiv class='jdgm-histogram jdgm-temp-hidden'\u003e \u003cdiv class='jdgm-histogram__row' data-rating='5' data-frequency='0' data-percentage='0'\u003e \u003cdiv class='jdgm-histogram__star' role='button' aria-label=\"0% (0) reviews with 5 star rating\" tabindex='0' \u003e\u003cspan class='jdgm-star jdgm--on'\u003e\u003c\/span\u003e\u003cspan class='jdgm-star jdgm--on'\u003e\u003c\/span\u003e\u003cspan class='jdgm-star jdgm--on'\u003e\u003c\/span\u003e\u003cspan class='jdgm-star jdgm--on'\u003e\u003c\/span\u003e\u003cspan class='jdgm-star jdgm--on'\u003e\u003c\/span\u003e\u003c\/div\u003e \u003cdiv class='jdgm-histogram__bar'\u003e \u003cdiv class='jdgm-histogram__bar-content' style='width: 0%;'\u003e \u003c\/div\u003e \u003c\/div\u003e \u003cdiv class='jdgm-histogram__percentage'\u003e0%\u003c\/div\u003e \u003cdiv class='jdgm-histogram__frequency'\u003e(0)\u003c\/div\u003e \u003c\/div\u003e \u003cdiv class='jdgm-histogram__row' data-rating='4' data-frequency='0' data-percentage='0'\u003e \u003cdiv class='jdgm-histogram__star' role='button' aria-label=\"0% (0) reviews with 4 star rating\" tabindex='0' \u003e\u003cspan class='jdgm-star jdgm--on'\u003e\u003c\/span\u003e\u003cspan class='jdgm-star jdgm--on'\u003e\u003c\/span\u003e\u003cspan class='jdgm-star jdgm--on'\u003e\u003c\/span\u003e\u003cspan class='jdgm-star jdgm--on'\u003e\u003c\/span\u003e\u003cspan class='jdgm-star jdgm--off'\u003e\u003c\/span\u003e\u003c\/div\u003e \u003cdiv class='jdgm-histogram__bar'\u003e \u003cdiv class='jdgm-histogram__bar-content' style='width: 0%;'\u003e \u003c\/div\u003e \u003c\/div\u003e \u003cdiv class='jdgm-histogram__percentage'\u003e0%\u003c\/div\u003e \u003cdiv class='jdgm-histogram__frequency'\u003e(0)\u003c\/div\u003e \u003c\/div\u003e \u003cdiv class='jdgm-histogram__row' data-rating='3' data-frequency='0' data-percentage='0'\u003e \u003cdiv class='jdgm-histogram__star' role='button' aria-label=\"0% (0) reviews with 3 star rating\" tabindex='0' \u003e\u003cspan class='jdgm-star jdgm--on'\u003e\u003c\/span\u003e\u003cspan class='jdgm-star jdgm--on'\u003e\u003c\/span\u003e\u003cspan class='jdgm-star jdgm--on'\u003e\u003c\/span\u003e\u003cspan class='jdgm-star jdgm--off'\u003e\u003c\/span\u003e\u003cspan class='jdgm-star jdgm--off'\u003e\u003c\/span\u003e\u003c\/div\u003e \u003cdiv class='jdgm-histogram__bar'\u003e \u003cdiv class='jdgm-histogram__bar-content' style='width: 0%;'\u003e \u003c\/div\u003e \u003c\/div\u003e \u003cdiv class='jdgm-histogram__percentage'\u003e0%\u003c\/div\u003e \u003cdiv class='jdgm-histogram__frequency'\u003e(0)\u003c\/div\u003e \u003c\/div\u003e \u003cdiv class='jdgm-histogram__row' data-rating='2' data-frequency='0' data-percentage='0'\u003e \u003cdiv class='jdgm-histogram__star' role='button' aria-label=\"0% (0) reviews with 2 star rating\" tabindex='0' \u003e\u003cspan class='jdgm-star jdgm--on'\u003e\u003c\/span\u003e\u003cspan class='jdgm-star jdgm--on'\u003e\u003c\/span\u003e\u003cspan class='jdgm-star jdgm--off'\u003e\u003c\/span\u003e\u003cspan class='jdgm-star jdgm--off'\u003e\u003c\/span\u003e\u003cspan class='jdgm-star jdgm--off'\u003e\u003c\/span\u003e\u003c\/div\u003e \u003cdiv class='jdgm-histogram__bar'\u003e \u003cdiv class='jdgm-histogram__bar-content' style='width: 0%;'\u003e \u003c\/div\u003e \u003c\/div\u003e \u003cdiv class='jdgm-histogram__percentage'\u003e0%\u003c\/div\u003e \u003cdiv class='jdgm-histogram__frequency'\u003e(0)\u003c\/div\u003e \u003c\/div\u003e \u003cdiv class='jdgm-histogram__row' data-rating='1' data-frequency='0' data-percentage='0'\u003e \u003cdiv class='jdgm-histogram__star' role='button' aria-label=\"0% (0) reviews with 1 star rating\" tabindex='0' \u003e\u003cspan class='jdgm-star jdgm--on'\u003e\u003c\/span\u003e\u003cspan class='jdgm-star jdgm--off'\u003e\u003c\/span\u003e\u003cspan class='jdgm-star jdgm--off'\u003e\u003c\/span\u003e\u003cspan class='jdgm-star jdgm--off'\u003e\u003c\/span\u003e\u003cspan class='jdgm-star jdgm--off'\u003e\u003c\/span\u003e\u003c\/div\u003e \u003cdiv class='jdgm-histogram__bar'\u003e \u003cdiv class='jdgm-histogram__bar-content' style='width: 0%;'\u003e \u003c\/div\u003e \u003c\/div\u003e \u003cdiv class='jdgm-histogram__percentage'\u003e0%\u003c\/div\u003e \u003cdiv class='jdgm-histogram__frequency'\u003e(0)\u003c\/div\u003e \u003c\/div\u003e \u003cdiv class='jdgm-histogram__row jdgm-histogram__clear-filter' data-rating=null tabindex='0'\u003e\u003c\/div\u003e \u003c\/div\u003e \u003cdiv class='jdgm-rev-widg__sort-wrapper'\u003e\u003c\/div\u003e \u003c\/div\u003e \u003cdiv class='jdgm-rev-widg__body'\u003e \u003cdiv class='jdgm-rev-widg__reviews'\u003e\u003c\/div\u003e \u003cdiv class='jdgm-paginate' data-per-page='10' data-url='https:\/\/api.judge.me\/reviews\/reviews_for_widget' style=\"display: none;\"\u003e\u003c\/div\u003e \u003c\/div\u003e \u003cdiv class='jdgm-rev-widg__paginate-spinner-wrapper'\u003e \u003cdiv class='jdgm-spinner'\u003e\u003c\/div\u003e \u003c\/div\u003e \u003c\/div\u003e"},"default_reviews_metafields":{},"collections":[{"id":283018526909,"handle":"bundles","title":"Bundles","updated_at":"2026-06-27T19:08:41+08:00","body_html":"\u003cp\u003eMake shopping for your bump, birth and beyond easier with our bundle packs. With a pack available for every stage, you can get everything you need with no fuss and with our bundle packs, you even save money.\u003c\/p\u003e","published_at":"2022-02-01T22:33:09+08:00","sort_order":"best-selling","template_suffix":"swaddles-collection","disjunctive":false,"rules":[{"column":"tag","relation":"equals","condition":"Bundles"}],"published_scope":"global","image":{"created_at":"2024-05-06T11:59:39+08:00","alt":"Bundles - The Birth Store","width":2048,"height":1365,"src":"\/\/www.thebirthstore.com.au\/cdn\/shop\/collections\/bundles-299009.jpg?v=1714967980"}},{"id":261657460925,"handle":"buy","title":"Buy","updated_at":"2026-07-27T19:09:18+08:00","body_html":"\u003cp\u003eBrowse all of our pregnancy, labour \u0026amp; birth, postpartum and baby essentials here.\u003cbr\u003e\u003c\/p\u003e\n\u003cp\u003e\u003cspan\u003eYou can even buy now and pay later with Afterpay!\u003c\/span\u003e\u003c\/p\u003e","published_at":"2021-03-10T12:05:31+08:00","sort_order":"best-selling","template_suffix":"shop-all-collection","disjunctive":false,"rules":[{"column":"title","relation":"not_contains","condition":"Hire"}],"published_scope":"global","image":{"created_at":"2024-05-06T11:59:42+08:00","alt":"Buy - The Birth Store","width":2048,"height":2048,"src":"\/\/www.thebirthstore.com.au\/cdn\/shop\/collections\/buy-964856.jpg?v=1714967982"}},{"id":281712558269,"handle":"labour-aids","title":"Labour Aids","updated_at":"2026-07-27T19:09:18+08:00","body_html":"","published_at":"2021-12-20T14:22:16+08:00","sort_order":"best-selling","template_suffix":"labour-aids-collection","disjunctive":false,"rules":[{"column":"tag","relation":"equals","condition":"Labour Progression"}],"published_scope":"global","image":{"created_at":"2024-05-06T12:00:11+08:00","alt":"Labour Aids - The Birth Store","width":1365,"height":2048,"src":"\/\/www.thebirthstore.com.au\/cdn\/shop\/collections\/labour-aids-211824.jpg?v=1714968012"}},{"id":281712525501,"handle":"labour-preparation","title":"Labour Preparation","updated_at":"2026-07-27T19:09:18+08:00","body_html":"","published_at":"2021-12-20T14:20:12+08:00","sort_order":"best-selling","template_suffix":"labour-preparation-collec","disjunctive":false,"rules":[{"column":"tag","relation":"equals","condition":"Labour Preparation"}],"published_scope":"global","image":{"created_at":"2024-05-06T12:00:13+08:00","alt":"Labour Preparation - The Birth Store","width":1024,"height":1536,"src":"\/\/www.thebirthstore.com.au\/cdn\/shop\/collections\/labour-preparation-271961.jpg?v=1714968013"}},{"id":261658149053,"handle":"pregnancy-and-maternity-products","title":"Pregnancy","updated_at":"2026-07-27T19:09:18+08:00","body_html":"\u003cp\u003eShop your pregnancy essentials below. Looking for something we don't currently stock? Please reach out and let us know.\u003cbr\u003e\u003c\/p\u003e\n\u003cp\u003e\u003cspan\u003eYou can even buy now and pay later with Afterpay!\u003c\/span\u003e\u003c\/p\u003e","published_at":"2021-03-10T12:34:22+08:00","sort_order":"best-selling","template_suffix":"pregnancy-collection","disjunctive":false,"rules":[{"column":"tag","relation":"equals","condition":"Pregnancy"}],"published_scope":"global","image":{"created_at":"2024-05-06T12:00:40+08:00","alt":"Pregnancy - The Birth Store","width":1024,"height":1536,"src":"\/\/www.thebirthstore.com.au\/cdn\/shop\/collections\/pregnancy-899677.jpg?v=1714968040"}},{"id":310045933757,"handle":"shop-all-sale","title":"Shop All Sale","updated_at":"2026-07-27T19:09:18+08:00","body_html":"","published_at":"2024-11-12T13:22:43+08:00","sort_order":"alpha-asc","template_suffix":"","disjunctive":true,"rules":[{"column":"tag","relation":"equals","condition":"Bundles"},{"column":"vendor","relation":"equals","condition":"Franjos Kitchen"},{"column":"vendor","relation":"equals","condition":"Adored Illustrations"},{"column":"vendor","relation":"equals","condition":"Amazing Oils"},{"column":"vendor","relation":"equals","condition":"Ice Ice Booby"},{"column":"vendor","relation":"equals","condition":"Made to Milk"},{"column":"vendor","relation":"equals","condition":"Milky Goodness"},{"column":"vendor","relation":"equals","condition":"Seasons of Mama"},{"column":"vendor","relation":"equals","condition":"Silverette"},{"column":"vendor","relation":"equals","condition":"Snuggle Hunny"},{"column":"vendor","relation":"equals","condition":"Yung Bod"},{"column":"vendor","relation":"equals","condition":"Bare Love"},{"column":"vendor","relation":"equals","condition":"Haakaa"},{"column":"vendor","relation":"equals","condition":"Mere Botanicals"},{"column":"vendor","relation":"equals","condition":"The Birth Store Hire"},{"column":"vendor","relation":"equals","condition":"The Birth Store"}],"published_scope":"global","image":{"created_at":"2024-11-13T10:58:16+08:00","alt":"Shop All Sale - The Birth Store","width":2048,"height":1365,"src":"\/\/www.thebirthstore.com.au\/cdn\/shop\/collections\/shop-all-sale-297361.jpg?v=1731466697"}}]}
{"item":{"id":7513280151741,"title":"Labour Preparation Pack - Tea","handle":"labour-preparation-pack-tea","description":"\u003cp\u003e\u003cmeta charset=\"utf-8\"\u003e\u003cspan\u003eThere are so many wonderful products on the market now, to help you prepare for your labour and birth. We have created a pack with a couple of our favourite products from small Australian businesses to aid you in preparing for arguably the most memorable day of your life - the one pack to fill all your labour preparation needs!\u003c\/span\u003e\u003c\/p\u003e","published_at":"2023-10-03T13:54:19+08:00","created_at":"2023-10-03T13:29:12+08:00","vendor":"Bundles","type":"","tags":["Baby Shower Gifts","Bundles","Labour Preparation","Labour Progression","Pregnancy"],"price":5416,"price_min":5416,"price_max":5416,"available":false,"price_varies":false,"compare_at_price":6155,"compare_at_price_min":6155,"compare_at_price_max":6155,"compare_at_price_varies":false,"variants":[{"id":43056984981693,"title":"Default Title","option1":"Default Title","option2":null,"option3":null,"sku":"","requires_shipping":true,"taxable":false,"featured_image":null,"available":false,"name":"Labour Preparation Pack - Tea","public_title":null,"options":["Default Title"],"price":5416,"weight":333,"compare_at_price":6155,"inventory_management":"shopify","barcode":"09384893","requires_selling_plan":false,"selling_plan_allocations":[],"quantity_rule":{"min":1,"max":null,"increment":1}}],"images":["\/\/www.thebirthstore.com.au\/cdn\/shop\/files\/labour-preparation-pack-tea-826901.jpg?v=1714967975","\/\/www.thebirthstore.com.au\/cdn\/shop\/files\/0J3A7064-Edit-Edit_b93f3f6f-63da-463e-aa28-c91d68b5aba8.jpg?v=1701351433"],"featured_image":"\/\/www.thebirthstore.com.au\/cdn\/shop\/files\/labour-preparation-pack-tea-826901.jpg?v=1714967975","options":["Title"],"media":[{"alt":"Labour Preparation Pack - Tea - The Birth Store-The Birth Store","id":27007587549373,"position":1,"preview_image":{"aspect_ratio":1.0,"height":2048,"width":2048,"src":"\/\/www.thebirthstore.com.au\/cdn\/shop\/files\/labour-preparation-pack-tea-826901.jpg?v=1714967975"},"aspect_ratio":1.0,"height":2048,"media_type":"image","src":"\/\/www.thebirthstore.com.au\/cdn\/shop\/files\/labour-preparation-pack-tea-826901.jpg?v=1714967975","width":2048},{"alt":null,"id":26241934950589,"position":2,"preview_image":{"aspect_ratio":0.667,"height":3600,"width":2400,"src":"\/\/www.thebirthstore.com.au\/cdn\/shop\/files\/0J3A7064-Edit-Edit_b93f3f6f-63da-463e-aa28-c91d68b5aba8.jpg?v=1701351433"},"aspect_ratio":0.667,"height":3600,"media_type":"image","src":"\/\/www.thebirthstore.com.au\/cdn\/shop\/files\/0J3A7064-Edit-Edit_b93f3f6f-63da-463e-aa28-c91d68b5aba8.jpg?v=1701351433","width":2400}],"requires_selling_plan":false,"selling_plan_groups":[],"content":"\u003cp\u003e\u003cmeta charset=\"utf-8\"\u003e\u003cspan\u003eThere are so many wonderful products on the market now, to help you prepare for your labour and birth. We have created a pack with a couple of our favourite products from small Australian businesses to aid you in preparing for arguably the most memorable day of your life - the one pack to fill all your labour preparation needs!\u003c\/span\u003e\u003c\/p\u003e"},"options":[{"name":"Title","position":1,"values":["Default Title"]}],"custom_metafields":{},"metafields":{"badge":"\u003cdiv style='display:none' class='jdgm-prev-badge' data-average-rating='0.00' data-number-of-reviews='0' data-number-of-questions='0'\u003e \u003cspan class='jdgm-prev-badge__stars' data-score='0.00' tabindex='0' aria-label='0.00 stars' role='button'\u003e \u003cspan class='jdgm-star jdgm--off'\u003e\u003c\/span\u003e\u003cspan class='jdgm-star jdgm--off'\u003e\u003c\/span\u003e\u003cspan class='jdgm-star jdgm--off'\u003e\u003c\/span\u003e\u003cspan class='jdgm-star jdgm--off'\u003e\u003c\/span\u003e\u003cspan class='jdgm-star jdgm--off'\u003e\u003c\/span\u003e \u003c\/span\u003e \u003cspan class='jdgm-prev-badge__text'\u003e No reviews \u003c\/span\u003e \u003c\/div\u003e","widget":"\u003cdiv class='jdgm-rev-widg' data-updated-at='2025-06-13T16:13:40Z' data-average-rating='0.00' data-number-of-reviews='0' data-number-of-questions='0'\u003e \u003cstyle class='jdgm-temp-hiding-style'\u003e.jdgm-rev-widg{ display: none }\u003c\/style\u003e \u003cdiv class='jdgm-rev-widg__header'\u003e \u003ch2 class='jdgm-rev-widg__title'\u003eCustomer Reviews\u003c\/h2\u003e \u003cdiv class='jdgm-rev-widg__summary'\u003e \u003cdiv class='jdgm-rev-widg__summary-stars' aria-label='Average rating is 0.00 stars' role='img'\u003e \u003cspan class='jdgm-star jdgm--off'\u003e\u003c\/span\u003e\u003cspan class='jdgm-star jdgm--off'\u003e\u003c\/span\u003e\u003cspan class='jdgm-star jdgm--off'\u003e\u003c\/span\u003e\u003cspan class='jdgm-star jdgm--off'\u003e\u003c\/span\u003e\u003cspan class='jdgm-star jdgm--off'\u003e\u003c\/span\u003e \u003c\/div\u003e \u003cdiv class='jdgm-rev-widg__summary-text'\u003eBe the first to write a review\u003c\/div\u003e \u003c\/div\u003e \u003ca style='display: none' href='#' class='jdgm-write-rev-link' role='button'\u003eWrite a review\u003c\/a\u003e \u003cdiv class='jdgm-histogram jdgm-temp-hidden'\u003e \u003cdiv class='jdgm-histogram__row' data-rating='5' data-frequency='0' data-percentage='0'\u003e \u003cdiv class='jdgm-histogram__star' role='button' aria-label=\"0% (0) reviews with 5 star rating\" tabindex='0' \u003e\u003cspan class='jdgm-star jdgm--on'\u003e\u003c\/span\u003e\u003cspan class='jdgm-star jdgm--on'\u003e\u003c\/span\u003e\u003cspan class='jdgm-star jdgm--on'\u003e\u003c\/span\u003e\u003cspan class='jdgm-star jdgm--on'\u003e\u003c\/span\u003e\u003cspan class='jdgm-star jdgm--on'\u003e\u003c\/span\u003e\u003c\/div\u003e \u003cdiv class='jdgm-histogram__bar'\u003e \u003cdiv class='jdgm-histogram__bar-content' style='width: 0%;'\u003e \u003c\/div\u003e \u003c\/div\u003e \u003cdiv class='jdgm-histogram__percentage'\u003e0%\u003c\/div\u003e \u003cdiv class='jdgm-histogram__frequency'\u003e(0)\u003c\/div\u003e \u003c\/div\u003e \u003cdiv class='jdgm-histogram__row' data-rating='4' data-frequency='0' data-percentage='0'\u003e \u003cdiv class='jdgm-histogram__star' role='button' aria-label=\"0% (0) reviews with 4 star rating\" tabindex='0' \u003e\u003cspan class='jdgm-star jdgm--on'\u003e\u003c\/span\u003e\u003cspan class='jdgm-star jdgm--on'\u003e\u003c\/span\u003e\u003cspan class='jdgm-star jdgm--on'\u003e\u003c\/span\u003e\u003cspan class='jdgm-star jdgm--on'\u003e\u003c\/span\u003e\u003cspan class='jdgm-star jdgm--off'\u003e\u003c\/span\u003e\u003c\/div\u003e \u003cdiv class='jdgm-histogram__bar'\u003e \u003cdiv class='jdgm-histogram__bar-content' style='width: 0%;'\u003e \u003c\/div\u003e \u003c\/div\u003e \u003cdiv class='jdgm-histogram__percentage'\u003e0%\u003c\/div\u003e \u003cdiv class='jdgm-histogram__frequency'\u003e(0)\u003c\/div\u003e \u003c\/div\u003e \u003cdiv class='jdgm-histogram__row' data-rating='3' data-frequency='0' data-percentage='0'\u003e \u003cdiv class='jdgm-histogram__star' role='button' aria-label=\"0% (0) reviews with 3 star rating\" tabindex='0' \u003e\u003cspan class='jdgm-star jdgm--on'\u003e\u003c\/span\u003e\u003cspan class='jdgm-star jdgm--on'\u003e\u003c\/span\u003e\u003cspan class='jdgm-star jdgm--on'\u003e\u003c\/span\u003e\u003cspan class='jdgm-star jdgm--off'\u003e\u003c\/span\u003e\u003cspan class='jdgm-star jdgm--off'\u003e\u003c\/span\u003e\u003c\/div\u003e \u003cdiv class='jdgm-histogram__bar'\u003e \u003cdiv class='jdgm-histogram__bar-content' style='width: 0%;'\u003e \u003c\/div\u003e \u003c\/div\u003e \u003cdiv class='jdgm-histogram__percentage'\u003e0%\u003c\/div\u003e \u003cdiv class='jdgm-histogram__frequency'\u003e(0)\u003c\/div\u003e \u003c\/div\u003e \u003cdiv class='jdgm-histogram__row' data-rating='2' data-frequency='0' data-percentage='0'\u003e \u003cdiv class='jdgm-histogram__star' role='button' aria-label=\"0% (0) reviews with 2 star rating\" tabindex='0' \u003e\u003cspan class='jdgm-star jdgm--on'\u003e\u003c\/span\u003e\u003cspan class='jdgm-star jdgm--on'\u003e\u003c\/span\u003e\u003cspan class='jdgm-star jdgm--off'\u003e\u003c\/span\u003e\u003cspan class='jdgm-star jdgm--off'\u003e\u003c\/span\u003e\u003cspan class='jdgm-star jdgm--off'\u003e\u003c\/span\u003e\u003c\/div\u003e \u003cdiv class='jdgm-histogram__bar'\u003e \u003cdiv class='jdgm-histogram__bar-content' style='width: 0%;'\u003e \u003c\/div\u003e \u003c\/div\u003e \u003cdiv class='jdgm-histogram__percentage'\u003e0%\u003c\/div\u003e \u003cdiv class='jdgm-histogram__frequency'\u003e(0)\u003c\/div\u003e \u003c\/div\u003e \u003cdiv class='jdgm-histogram__row' data-rating='1' data-frequency='0' data-percentage='0'\u003e \u003cdiv class='jdgm-histogram__star' role='button' aria-label=\"0% (0) reviews with 1 star rating\" tabindex='0' \u003e\u003cspan class='jdgm-star jdgm--on'\u003e\u003c\/span\u003e\u003cspan class='jdgm-star jdgm--off'\u003e\u003c\/span\u003e\u003cspan class='jdgm-star jdgm--off'\u003e\u003c\/span\u003e\u003cspan class='jdgm-star jdgm--off'\u003e\u003c\/span\u003e\u003cspan class='jdgm-star jdgm--off'\u003e\u003c\/span\u003e\u003c\/div\u003e \u003cdiv class='jdgm-histogram__bar'\u003e \u003cdiv class='jdgm-histogram__bar-content' style='width: 0%;'\u003e \u003c\/div\u003e \u003c\/div\u003e \u003cdiv class='jdgm-histogram__percentage'\u003e0%\u003c\/div\u003e \u003cdiv class='jdgm-histogram__frequency'\u003e(0)\u003c\/div\u003e \u003c\/div\u003e \u003cdiv class='jdgm-histogram__row jdgm-histogram__clear-filter' data-rating=null tabindex='0'\u003e\u003c\/div\u003e \u003c\/div\u003e \u003cdiv class='jdgm-rev-widg__sort-wrapper'\u003e\u003c\/div\u003e \u003c\/div\u003e \u003cdiv class='jdgm-rev-widg__body'\u003e \u003cdiv class='jdgm-rev-widg__reviews'\u003e\u003c\/div\u003e \u003cdiv class='jdgm-paginate' data-per-page='10' data-url='https:\/\/api.judge.me\/reviews\/reviews_for_widget' style=\"display: none;\"\u003e\u003c\/div\u003e \u003c\/div\u003e \u003cdiv class='jdgm-rev-widg__paginate-spinner-wrapper'\u003e \u003cdiv class='jdgm-spinner'\u003e\u003c\/div\u003e \u003c\/div\u003e \u003c\/div\u003e"},"default_reviews_metafields":{},"collections":[{"id":283018526909,"handle":"bundles","title":"Bundles","updated_at":"2026-06-27T19:08:41+08:00","body_html":"\u003cp\u003eMake shopping for your bump, birth and beyond easier with our bundle packs. With a pack available for every stage, you can get everything you need with no fuss and with our bundle packs, you even save money.\u003c\/p\u003e","published_at":"2022-02-01T22:33:09+08:00","sort_order":"best-selling","template_suffix":"swaddles-collection","disjunctive":false,"rules":[{"column":"tag","relation":"equals","condition":"Bundles"}],"published_scope":"global","image":{"created_at":"2024-05-06T11:59:39+08:00","alt":"Bundles - The Birth Store","width":2048,"height":1365,"src":"\/\/www.thebirthstore.com.au\/cdn\/shop\/collections\/bundles-299009.jpg?v=1714967980"}},{"id":261657460925,"handle":"buy","title":"Buy","updated_at":"2026-07-27T19:09:18+08:00","body_html":"\u003cp\u003eBrowse all of our pregnancy, labour \u0026amp; birth, postpartum and baby essentials here.\u003cbr\u003e\u003c\/p\u003e\n\u003cp\u003e\u003cspan\u003eYou can even buy now and pay later with Afterpay!\u003c\/span\u003e\u003c\/p\u003e","published_at":"2021-03-10T12:05:31+08:00","sort_order":"best-selling","template_suffix":"shop-all-collection","disjunctive":false,"rules":[{"column":"title","relation":"not_contains","condition":"Hire"}],"published_scope":"global","image":{"created_at":"2024-05-06T11:59:42+08:00","alt":"Buy - The Birth Store","width":2048,"height":2048,"src":"\/\/www.thebirthstore.com.au\/cdn\/shop\/collections\/buy-964856.jpg?v=1714967982"}},{"id":281712558269,"handle":"labour-aids","title":"Labour Aids","updated_at":"2026-07-27T19:09:18+08:00","body_html":"","published_at":"2021-12-20T14:22:16+08:00","sort_order":"best-selling","template_suffix":"labour-aids-collection","disjunctive":false,"rules":[{"column":"tag","relation":"equals","condition":"Labour Progression"}],"published_scope":"global","image":{"created_at":"2024-05-06T12:00:11+08:00","alt":"Labour Aids - The Birth Store","width":1365,"height":2048,"src":"\/\/www.thebirthstore.com.au\/cdn\/shop\/collections\/labour-aids-211824.jpg?v=1714968012"}},{"id":281712525501,"handle":"labour-preparation","title":"Labour Preparation","updated_at":"2026-07-27T19:09:18+08:00","body_html":"","published_at":"2021-12-20T14:20:12+08:00","sort_order":"best-selling","template_suffix":"labour-preparation-collec","disjunctive":false,"rules":[{"column":"tag","relation":"equals","condition":"Labour Preparation"}],"published_scope":"global","image":{"created_at":"2024-05-06T12:00:13+08:00","alt":"Labour Preparation - The Birth Store","width":1024,"height":1536,"src":"\/\/www.thebirthstore.com.au\/cdn\/shop\/collections\/labour-preparation-271961.jpg?v=1714968013"}},{"id":261658149053,"handle":"pregnancy-and-maternity-products","title":"Pregnancy","updated_at":"2026-07-27T19:09:18+08:00","body_html":"\u003cp\u003eShop your pregnancy essentials below. Looking for something we don't currently stock? Please reach out and let us know.\u003cbr\u003e\u003c\/p\u003e\n\u003cp\u003e\u003cspan\u003eYou can even buy now and pay later with Afterpay!\u003c\/span\u003e\u003c\/p\u003e","published_at":"2021-03-10T12:34:22+08:00","sort_order":"best-selling","template_suffix":"pregnancy-collection","disjunctive":false,"rules":[{"column":"tag","relation":"equals","condition":"Pregnancy"}],"published_scope":"global","image":{"created_at":"2024-05-06T12:00:40+08:00","alt":"Pregnancy - The Birth Store","width":1024,"height":1536,"src":"\/\/www.thebirthstore.com.au\/cdn\/shop\/collections\/pregnancy-899677.jpg?v=1714968040"}},{"id":310045933757,"handle":"shop-all-sale","title":"Shop All Sale","updated_at":"2026-07-27T19:09:18+08:00","body_html":"","published_at":"2024-11-12T13:22:43+08:00","sort_order":"alpha-asc","template_suffix":"","disjunctive":true,"rules":[{"column":"tag","relation":"equals","condition":"Bundles"},{"column":"vendor","relation":"equals","condition":"Franjos Kitchen"},{"column":"vendor","relation":"equals","condition":"Adored Illustrations"},{"column":"vendor","relation":"equals","condition":"Amazing Oils"},{"column":"vendor","relation":"equals","condition":"Ice Ice Booby"},{"column":"vendor","relation":"equals","condition":"Made to Milk"},{"column":"vendor","relation":"equals","condition":"Milky Goodness"},{"column":"vendor","relation":"equals","condition":"Seasons of Mama"},{"column":"vendor","relation":"equals","condition":"Silverette"},{"column":"vendor","relation":"equals","condition":"Snuggle Hunny"},{"column":"vendor","relation":"equals","condition":"Yung Bod"},{"column":"vendor","relation":"equals","condition":"Bare Love"},{"column":"vendor","relation":"equals","condition":"Haakaa"},{"column":"vendor","relation":"equals","condition":"Mere Botanicals"},{"column":"vendor","relation":"equals","condition":"The Birth Store Hire"},{"column":"vendor","relation":"equals","condition":"The Birth Store"}],"published_scope":"global","image":{"created_at":"2024-11-13T10:58:16+08:00","alt":"Shop All Sale - The Birth Store","width":2048,"height":1365,"src":"\/\/www.thebirthstore.com.au\/cdn\/shop\/collections\/shop-all-sale-297361.jpg?v=1731466697"}}]}
{"item":{"id":7513256493245,"title":"Vaginal Birth Recovery Kit","handle":"vaginal-birth-recovery-kit","description":"\u003cp\u003e\u003cmeta charset=\"utf-8\"\u003e\u003cspan\u003eThere are so many beautiful products on the market now to help with breastfeeding. We have created the ultimate convenience bundle with our favourite products from small Australian businesses to aid you in your breastfeeding journey that you deserve - the one bundle to fill all your breastfeeding needs!\u003c\/span\u003e\u003c\/p\u003e","published_at":"2023-10-03T12:41:15+08:00","created_at":"2023-10-03T12:11:27+08:00","vendor":"Bundles","type":"","tags":["Baby Shower Gifts","Bundles","Hemorrhoids","Hospital Bag","Pain Relief","Peri Care","Post-Partum","Vaginal Birth Recovery"],"price":10400,"price_min":10400,"price_max":10400,"available":true,"price_varies":false,"compare_at_price":13689,"compare_at_price_min":13689,"compare_at_price_max":13689,"compare_at_price_varies":false,"variants":[{"id":43056791322813,"title":"Medium","option1":"Medium","option2":null,"option3":null,"sku":"12268477","requires_shipping":true,"taxable":false,"featured_image":null,"available":true,"name":"Vaginal Birth Recovery Kit - Medium","public_title":"Medium","options":["Medium"],"price":10400,"weight":1471,"compare_at_price":13689,"inventory_management":"shopify","barcode":"91322813","requires_selling_plan":false,"selling_plan_allocations":[],"quantity_rule":{"min":1,"max":null,"increment":1}},{"id":43056791355581,"title":"Large","option1":"Large","option2":null,"option3":null,"sku":"08602557","requires_shipping":true,"taxable":false,"featured_image":null,"available":true,"name":"Vaginal Birth Recovery Kit - Large","public_title":"Large","options":["Large"],"price":10400,"weight":1583,"compare_at_price":13689,"inventory_management":"shopify","barcode":"91355581","requires_selling_plan":false,"selling_plan_allocations":[],"quantity_rule":{"min":1,"max":null,"increment":1}}],"images":["\/\/www.thebirthstore.com.au\/cdn\/shop\/files\/vaginal-birth-recovery-kit-5745733.png?v=1772594652"],"featured_image":"\/\/www.thebirthstore.com.au\/cdn\/shop\/files\/vaginal-birth-recovery-kit-5745733.png?v=1772594652","options":["Disposable Maternity \u0026 Postpartum Underwear (Size)"],"media":[{"alt":"Vaginal Birth Recovery Kit - The Birth Store - Bundles","id":30877268738237,"position":1,"preview_image":{"aspect_ratio":1.0,"height":1080,"width":1080,"src":"\/\/www.thebirthstore.com.au\/cdn\/shop\/files\/vaginal-birth-recovery-kit-5745733.png?v=1772594652"},"aspect_ratio":1.0,"height":1080,"media_type":"image","src":"\/\/www.thebirthstore.com.au\/cdn\/shop\/files\/vaginal-birth-recovery-kit-5745733.png?v=1772594652","width":1080}],"requires_selling_plan":false,"selling_plan_groups":[],"content":"\u003cp\u003e\u003cmeta charset=\"utf-8\"\u003e\u003cspan\u003eThere are so many beautiful products on the market now to help with breastfeeding. We have created the ultimate convenience bundle with our favourite products from small Australian businesses to aid you in your breastfeeding journey that you deserve - the one bundle to fill all your breastfeeding needs!\u003c\/span\u003e\u003c\/p\u003e"},"options":[{"name":"Disposable Maternity \u0026 Postpartum Underwear (Size)","position":1,"values":["Medium","Large"]}],"custom_metafields":{},"metafields":{"badge":"\u003cdiv style='display:none' class='jdgm-prev-badge' data-average-rating='5.00' data-number-of-reviews='1' data-number-of-questions='0'\u003e \u003cspan class='jdgm-prev-badge__stars' data-score='5.00' tabindex='0' aria-label='5.00 stars' role='button'\u003e \u003cspan class='jdgm-star jdgm--on'\u003e\u003c\/span\u003e\u003cspan class='jdgm-star jdgm--on'\u003e\u003c\/span\u003e\u003cspan class='jdgm-star jdgm--on'\u003e\u003c\/span\u003e\u003cspan class='jdgm-star jdgm--on'\u003e\u003c\/span\u003e\u003cspan class='jdgm-star jdgm--on'\u003e\u003c\/span\u003e \u003c\/span\u003e \u003cspan class='jdgm-prev-badge__text'\u003e 1 review \u003c\/span\u003e \u003c\/div\u003e","review_snippet_widget":"\u003cdiv class='jdgm-widget jdgm-review-snippet-widget'\u003e \u003cstyle\u003e\n .jdgm-review-snippet-widget{position:relative}.jdgm-review-snippet-widget:hover{cursor:pointer}@media only screen and (max-width: 767px){.jdgm-review-snippet-widget .jdgm-rev-snippet-widget__cards-container{left:unset;right:unset}}.jdgm-review-snippet-widget .jdgm-rev-snippet-card{background:#fff}.jdgm-review-snippet-widget .jdgm-star{color:#399}.jdgm-review-snippet-widget .jdgm-rev-snippet-card{border-radius:8px;background:#fff}.jdgm-review-snippet-widget .jdgm-rev-snippet-card__rev-prod-wrapper{border-radius:8px}.jdgm-review-snippet-widget .jdgm-rev-snippet-card__rev-content-wrapper{max-width:360px}.jdgm-review-snippet-widget .jdgm-rev-snippet-widget__prev-btn,.jdgm-review-snippet-widget .jdgm-rev-snippet-widget__next-btn{border-radius:50%;background:#fff}.jdgm-review-snippet-widget .jdgm-rev-snippet-widget__prev-btn\u003esvg,.jdgm-review-snippet-widget .jdgm-rev-snippet-widget__next-btn\u003esvg{fill:#000}.jdgm-review-snippet-widget .jdgm-rev-snippet-widget__prev-btn{left:0;top:40%}.jdgm-review-snippet-widget .jdgm-rev-snippet-widget__next-btn{right:0;top:40%}.jdgm-full-rev-modal.review-snippet-widget .jm-mfp-content{border-radius:8px}.jdgm-full-rev-modal.review-snippet-widget .jdgm-full-rev__icon{border-radius:8px}.jdgm-full-rev-modal.review-snippet-widget .jdgm-full-rev[data-verified-buyer=\"true\"] .jdgm-full-rev__icon::after{border-radius:8px}.jdgm-full-rev-modal.review-snippet-widget .jdgm-rev__buyer-badge{border-radius:calc( 8px \/ 2 )}.jdgm-full-rev-modal.review-snippet-widget .jdgm-full-rev__pic-img{border-radius:8px}.jdgm-full-rev-modal.review-snippet-widget .jdgm-full-rev__reply{border-radius:8px}.jdgm-full-rev-modal.review-snippet-widget .jdgm-full-rev__replier::before{content:'thebirthstore.com.au'}.jdgm-full-rev-modal.review-snippet-widget .jdgm-full-rev__product-button{border-radius:calc( 8px * 6 )}\n\n \u003c\/style\u003e \u003ci class=\"jdgm-rev-snippet-widget__prev-btn\" style='display: none;'\u003e \u003csvg xmlns=\"http:\/\/www.w3.org\/2000\/svg\" height=\"12\" viewBox=\"0 0 8 12\" width=\"8\" fill=\"#000\"\u003e\u003cpath d=\"M3.09961 6.00005L6.99961 9.90005C7.18294 10.0834 7.27461 10.3167 7.27461 10.6C7.27461 10.8834 7.18294 11.1167 6.99961 11.3C6.81628 11.4834 6.58294 11.575 6.29961 11.575C6.01628 11.575 5.78294 11.4834 5.59961 11.3L0.999609 6.70005C0.899609 6.60005 0.828776 6.49172 0.787109 6.37505C0.745443 6.25838 0.724609 6.13338 0.724609 6.00005C0.724609 5.86672 0.745443 5.74172 0.787109 5.62505C0.828776 5.50838 0.899609 5.40005 0.999609 5.30005L5.59961 0.700049C5.78294 0.516715 6.01628 0.425049 6.29961 0.425049C6.58294 0.425049 6.81628 0.516715 6.99961 0.700049C7.18294 0.883382 7.27461 1.11672 7.27461 1.40005C7.27461 1.68338 7.18294 1.91672 6.99961 2.10005L3.09961 6.00005Z\"\/\u003e\u003c\/svg\u003e \u003c\/i\u003e \u003ci class=\"jdgm-rev-snippet-widget__next-btn\" style='display: none;'\u003e \u003csvg xmlns=\"http:\/\/www.w3.org\/2000\/svg\" height=\"12\" viewBox=\"0 0 8 12\" width=\"8\" fill=\"#000\"\u003e\u003cpath d=\"M4.89961 6.00005L0.999609 2.10005C0.816276 1.91672 0.724609 1.68338 0.724609 1.40005C0.724609 1.11672 0.816276 0.883382 0.999609 0.700049C1.18294 0.516715 1.41628 0.425049 1.69961 0.425049C1.98294 0.425049 2.21628 0.516715 2.39961 0.700049L6.99961 5.30005C7.09961 5.40005 7.17044 5.50838 7.21211 5.62505C7.25378 5.74172 7.27461 5.86672 7.27461 6.00005C7.27461 6.13338 7.25378 6.25838 7.21211 6.37505C7.17044 6.49172 7.09961 6.60005 6.99961 6.70005L2.39961 11.3C2.21628 11.4834 1.98294 11.575 1.69961 11.575C1.41628 11.575 1.18294 11.4834 0.999609 11.3C0.816276 11.1167 0.724609 10.8834 0.724609 10.6C0.724609 10.3167 0.816276 10.0834 0.999609 9.90005L4.89961 6.00005Z\"\/\u003e\u003c\/svg\u003e \u003c\/i\u003e \u003cdiv style=\"overflow: hidden;\"\u003e \u003cdiv class='jdgm-rev-snippet-widget__cards-container'\u003e \u003cdiv class='jdgm-rev-snippet-card' data-review-id='06a8b7c6-c6ce-47bc-9dfa-7bdd5392d997' style='display: none;'\u003e \u003cdiv class=\"jdgm-rev-snippet-card__rev-prod-wrapper\"\u003e \u003cdiv class='jdgm-rev-snippet-card__pic-wrapper'\u003e \u003cimg class='jdgm-rev-snippet-card__pic' title='Review picture' alt='Review picture' data-src='https:\/\/judgeme.imgix.net\/labour-tens-machine-hire-the-birth-store\/1696309390__huge__original.jpeg?auto=format\u0026amp;w=100'\/\u003e \u003c\/div\u003e \u003ca class='jdgm-rev-snippet-card__rev-content-wrapper jdgm-rev-snippet-card__full-review-link' style='text-decoration: none; color: inherit;margin-right: 20px;' role='button' data-review-id='06a8b7c6-c6ce-47bc-9dfa-7bdd5392d997'\u003e \u003cdiv class='jdgm-rev-snippet-card__rev-header'\u003e \u003cdiv class='jdgm-rev-snippet-card__rev-rating' aria-label='5 stars' role='img'\u003e \u003cspan class='jdgm-star jdgm--on'\u003e\u003c\/span\u003e\u003cspan class='jdgm-star jdgm--on'\u003e\u003c\/span\u003e\u003cspan class='jdgm-star jdgm--on'\u003e\u003c\/span\u003e\u003cspan class='jdgm-star jdgm--on'\u003e\u003c\/span\u003e\u003cspan class='jdgm-star jdgm--on'\u003e\u003c\/span\u003e \u003c\/div\u003e \u003cdiv class='jdgm-rev-snippet-card__reviewer'\u003e S. \u003c\/div\u003e \u003c\/div\u003e \u003cdiv class='jdgm-rev-snippet-card__rev-content'\u003e \u003cspan class='jdgm-rev-snippet-card__rev-body'\u003e \u003cp\u003eThis birth recovery kit was so perfect after my recent birth. Peri bottles and ice packs are underrated- these were wonderful in reducing soreness. The spray and wipes were excellent and helped in a fast recovery. The bath salts are pure luxury and have the most wonderful fragrance. This would make an incredibly thoughtful baby shower gift\u003c\/p\u003e \u003c\/span\u003e \u003c\/div\u003e \u003c\/a\u003e \u003c\/div\u003e \u003c\/div\u003e \u003c\/div\u003e \u003c\/div\u003e \u003c\/div\u003e","widget":"\u003cdiv class='jdgm-rev-widg' data-updated-at='2025-06-13T16:12:53Z' data-average-rating='5.00' data-number-of-reviews='1' data-number-of-questions='0'\u003e \u003cstyle class='jdgm-temp-hiding-style'\u003e.jdgm-rev-widg{ display: none }\u003c\/style\u003e \u003cdiv class='jdgm-rev-widg__header'\u003e \u003ch2 class='jdgm-rev-widg__title'\u003eCustomer Reviews\u003c\/h2\u003e \u003cdiv class='jdgm-rev-widg__summary'\u003e \u003cdiv class='jdgm-rev-widg__summary-stars' aria-label='Average rating is 5.00 stars' role='img'\u003e \u003cspan class='jdgm-star jdgm--on'\u003e\u003c\/span\u003e\u003cspan class='jdgm-star jdgm--on'\u003e\u003c\/span\u003e\u003cspan class='jdgm-star jdgm--on'\u003e\u003c\/span\u003e\u003cspan class='jdgm-star jdgm--on'\u003e\u003c\/span\u003e\u003cspan class='jdgm-star jdgm--on'\u003e\u003c\/span\u003e \u003c\/div\u003e \u003cdiv class='jdgm-rev-widg__summary-text'\u003eBased on 1 review\u003c\/div\u003e \u003c\/div\u003e \u003ca style='display: none' href='#' class='jdgm-write-rev-link' role='button'\u003eWrite a review\u003c\/a\u003e \u003cdiv class='jdgm-histogram jdgm-temp-hidden'\u003e \u003cdiv class='jdgm-histogram__row' data-rating='5' data-frequency='1' data-percentage='100'\u003e \u003cdiv class='jdgm-histogram__star' role='button' aria-label=\"100% (1) reviews with 5 star rating\" tabindex='0' \u003e\u003cspan class='jdgm-star jdgm--on'\u003e\u003c\/span\u003e\u003cspan class='jdgm-star jdgm--on'\u003e\u003c\/span\u003e\u003cspan class='jdgm-star jdgm--on'\u003e\u003c\/span\u003e\u003cspan class='jdgm-star jdgm--on'\u003e\u003c\/span\u003e\u003cspan class='jdgm-star jdgm--on'\u003e\u003c\/span\u003e\u003c\/div\u003e \u003cdiv class='jdgm-histogram__bar'\u003e \u003cdiv class='jdgm-histogram__bar-content' style='width: 100%;'\u003e \u003c\/div\u003e \u003c\/div\u003e \u003cdiv class='jdgm-histogram__percentage'\u003e100%\u003c\/div\u003e \u003cdiv class='jdgm-histogram__frequency'\u003e(1)\u003c\/div\u003e \u003c\/div\u003e \u003cdiv class='jdgm-histogram__row' data-rating='4' data-frequency='0' data-percentage='0'\u003e \u003cdiv class='jdgm-histogram__star' role='button' aria-label=\"0% (0) reviews with 4 star rating\" tabindex='0' \u003e\u003cspan class='jdgm-star jdgm--on'\u003e\u003c\/span\u003e\u003cspan class='jdgm-star jdgm--on'\u003e\u003c\/span\u003e\u003cspan class='jdgm-star jdgm--on'\u003e\u003c\/span\u003e\u003cspan class='jdgm-star jdgm--on'\u003e\u003c\/span\u003e\u003cspan class='jdgm-star jdgm--off'\u003e\u003c\/span\u003e\u003c\/div\u003e \u003cdiv class='jdgm-histogram__bar'\u003e \u003cdiv class='jdgm-histogram__bar-content' style='width: 0%;'\u003e \u003c\/div\u003e \u003c\/div\u003e \u003cdiv class='jdgm-histogram__percentage'\u003e0%\u003c\/div\u003e \u003cdiv class='jdgm-histogram__frequency'\u003e(0)\u003c\/div\u003e \u003c\/div\u003e \u003cdiv class='jdgm-histogram__row' data-rating='3' data-frequency='0' data-percentage='0'\u003e \u003cdiv class='jdgm-histogram__star' role='button' aria-label=\"0% (0) reviews with 3 star rating\" tabindex='0' \u003e\u003cspan class='jdgm-star jdgm--on'\u003e\u003c\/span\u003e\u003cspan class='jdgm-star jdgm--on'\u003e\u003c\/span\u003e\u003cspan class='jdgm-star jdgm--on'\u003e\u003c\/span\u003e\u003cspan class='jdgm-star jdgm--off'\u003e\u003c\/span\u003e\u003cspan class='jdgm-star jdgm--off'\u003e\u003c\/span\u003e\u003c\/div\u003e \u003cdiv class='jdgm-histogram__bar'\u003e \u003cdiv class='jdgm-histogram__bar-content' style='width: 0%;'\u003e \u003c\/div\u003e \u003c\/div\u003e \u003cdiv class='jdgm-histogram__percentage'\u003e0%\u003c\/div\u003e \u003cdiv class='jdgm-histogram__frequency'\u003e(0)\u003c\/div\u003e \u003c\/div\u003e \u003cdiv class='jdgm-histogram__row' data-rating='2' data-frequency='0' data-percentage='0'\u003e \u003cdiv class='jdgm-histogram__star' role='button' aria-label=\"0% (0) reviews with 2 star rating\" tabindex='0' \u003e\u003cspan class='jdgm-star jdgm--on'\u003e\u003c\/span\u003e\u003cspan class='jdgm-star jdgm--on'\u003e\u003c\/span\u003e\u003cspan class='jdgm-star jdgm--off'\u003e\u003c\/span\u003e\u003cspan class='jdgm-star jdgm--off'\u003e\u003c\/span\u003e\u003cspan class='jdgm-star jdgm--off'\u003e\u003c\/span\u003e\u003c\/div\u003e \u003cdiv class='jdgm-histogram__bar'\u003e \u003cdiv class='jdgm-histogram__bar-content' style='width: 0%;'\u003e \u003c\/div\u003e \u003c\/div\u003e \u003cdiv class='jdgm-histogram__percentage'\u003e0%\u003c\/div\u003e \u003cdiv class='jdgm-histogram__frequency'\u003e(0)\u003c\/div\u003e \u003c\/div\u003e \u003cdiv class='jdgm-histogram__row' data-rating='1' data-frequency='0' data-percentage='0'\u003e \u003cdiv class='jdgm-histogram__star' role='button' aria-label=\"0% (0) reviews with 1 star rating\" tabindex='0' \u003e\u003cspan class='jdgm-star jdgm--on'\u003e\u003c\/span\u003e\u003cspan class='jdgm-star jdgm--off'\u003e\u003c\/span\u003e\u003cspan class='jdgm-star jdgm--off'\u003e\u003c\/span\u003e\u003cspan class='jdgm-star jdgm--off'\u003e\u003c\/span\u003e\u003cspan class='jdgm-star jdgm--off'\u003e\u003c\/span\u003e\u003c\/div\u003e \u003cdiv class='jdgm-histogram__bar'\u003e \u003cdiv class='jdgm-histogram__bar-content' style='width: 0%;'\u003e \u003c\/div\u003e \u003c\/div\u003e \u003cdiv class='jdgm-histogram__percentage'\u003e0%\u003c\/div\u003e \u003cdiv class='jdgm-histogram__frequency'\u003e(0)\u003c\/div\u003e \u003c\/div\u003e \u003cdiv class='jdgm-histogram__row jdgm-histogram__clear-filter' data-rating=null tabindex='0'\u003e\u003c\/div\u003e \u003c\/div\u003e \u003cdiv class='jdgm-gallery' data-url='reviews\/reviews_for_widget' data-per-page='10'\u003e \u003cdiv class='jdgm-gallery-data jdgm-hidden' data-json='[{\u0026quot;uuid\u0026quot;:\u0026quot;06a8b7c6-c6ce-47bc-9dfa-7bdd5392d997\u0026quot;,\u0026quot;reviewer_name\u0026quot;:\u0026quot;S.R.\u0026quot;,\u0026quot;title\u0026quot;:\u0026quot;All the essentials\u0026quot;,\u0026quot;body_html\u0026quot;:\u0026quot;\\u003cp\\u003eThis birth recovery kit was so perfect after my recent birth. Peri bottles and ice packs are underrated- these were wonderful in reducing soreness. The spray and wipes were excellent and helped in a fast recovery. The bath salts are pure luxury and have the most wonderful fragrance. This would make an incredibly thoughtful baby shower gift\\u003c\/p\\u003e\u0026quot;,\u0026quot;verified_buyer\u0026quot;:false,\u0026quot;location\u0026quot;:\u0026quot;\u0026quot;,\u0026quot;video_external_ids\u0026quot;:[],\u0026quot;media_platform_hosted_video_infos\u0026quot;:[],\u0026quot;cf_answers\u0026quot;:[],\u0026quot;rating\u0026quot;:\u0026quot;5\u0026quot;,\u0026quot;created_at\u0026quot;:\u0026quot;2023-10-03 05:03:10 UTC\u0026quot;,\u0026quot;pictures_urls\u0026quot;:[{\u0026quot;compact\u0026quot;:\u0026quot;https:\/\/judgeme.imgix.net\/labour-tens-machine-hire-the-birth-store\/1696309390__huge__original.jpeg?auto=format\\u0026w=160\u0026quot;,\u0026quot;original\u0026quot;:\u0026quot;https:\/\/judgeme.imgix.net\/labour-tens-machine-hire-the-birth-store\/1696309390__huge__original.jpeg?auto=format\u0026quot;}]}]'\u003e\u003c\/div\u003e \u003c\/div\u003e \u003cdiv class='jdgm-rev-widg__sort-wrapper'\u003e\u003c\/div\u003e \u003c\/div\u003e \u003cdiv class='jdgm-rev-widg__body'\u003e \u003cdiv class='jdgm-rev-widg__reviews'\u003e\u003cdiv class='jdgm-rev jdgm-divider-top' data-verified-buyer='false' data-review-id='06a8b7c6-c6ce-47bc-9dfa-7bdd5392d997' data-review-language='' data-product-title='Vaginal Birth Recovery Kit' data-product-url='\/products\/vaginal-birth-recovery-kit' data-thumb-up-count='0' data-thumb-down-count='0'\u003e \u003cdiv class='jdgm-rev__header'\u003e \u003cdiv class='jdgm-rev__icon' \u003e S \u003c\/div\u003e \u003cspan class='jdgm-rev__rating' data-score='5' tabindex='0' aria-label='5 star review' role='img'\u003e \u003cspan class='jdgm-star jdgm--on'\u003e\u003c\/span\u003e\u003cspan class='jdgm-star jdgm--on'\u003e\u003c\/span\u003e\u003cspan class='jdgm-star jdgm--on'\u003e\u003c\/span\u003e\u003cspan class='jdgm-star jdgm--on'\u003e\u003c\/span\u003e\u003cspan class='jdgm-star jdgm--on'\u003e\u003c\/span\u003e \u003c\/span\u003e \u003cspan class='jdgm-rev__timestamp jdgm-spinner' data-content='2023-10-03 05:03:10 UTC'\u003e\u003c\/span\u003e \u003cdiv class='jdgm-rev__br'\u003e\u003c\/div\u003e \u003cspan class='jdgm-rev__buyer-badge-wrapper'\u003e \u003c\/span\u003e \u003cspan class='jdgm-rev__author-wrapper'\u003e \u003cspan class='jdgm-rev__author'\u003eS.R.\u003c\/span\u003e \u003cspan class='jdgm-rev__location' \u003e \u003c\/span\u003e \u003c\/span\u003e \u003c\/div\u003e \u003cdiv class='jdgm-rev__content'\u003e \u003cdiv class='jdgm-rev__custom-form'\u003e \u003c\/div\u003e \u003cb class='jdgm-rev__title'\u003eAll the essentials\u003c\/b\u003e \u003cdiv class='jdgm-rev__body'\u003e\u003cp\u003eThis birth recovery kit was so perfect after my recent birth. Peri bottles and ice packs are underrated- these were wonderful in reducing soreness. The spray and wipes were excellent and helped in a fast recovery. The bath salts are pure luxury and have the most wonderful fragrance. This would make an incredibly thoughtful baby shower gift\u003c\/p\u003e\u003c\/div\u003e \u003cdiv class='jdgm-rev__pics'\u003e \u003ca class='jdgm-rev__pic-link jdgm--loading' target='_blank' rel='nofollow' href='https:\/\/judgeme.imgix.net\/labour-tens-machine-hire-the-birth-store\/1696309390__huge__original.jpeg?auto=format' data-mfp-src='https:\/\/judgeme.imgix.net\/labour-tens-machine-hire-the-birth-store\/1696309390__huge__original.jpeg?auto=format\u0026amp;w=1024' aria-label='Link to user picture 1'\u003e \u003cimg class='jdgm-rev__pic-img' alt='User picture' data-src='https:\/\/judgeme.imgix.net\/labour-tens-machine-hire-the-birth-store\/1696309390__huge__original.jpeg?auto=format\u0026amp;w=160'\u003e \u003c\/a\u003e \u003c\/div\u003e \u003cdiv class='jdgm-rev__vids'\u003e \u003c\/div\u003e \u003cdiv class='jdgm-rev__transparency-badge-wrapper'\u003e \u003c\/div\u003e \u003c\/div\u003e \u003cdiv class='jdgm-rev__actions'\u003e \u003cdiv class='jdgm-rev__social'\u003e\u003c\/div\u003e \u003cdiv class='jdgm-rev__votes'\u003e\u003c\/div\u003e \u003c\/div\u003e \u003cdiv class='jdgm-rev__reply'\u003e \u003c\/div\u003e \u003c\/div\u003e\u003c\/div\u003e \u003cdiv class='jdgm-paginate' data-per-page='10' data-url='https:\/\/api.judge.me\/reviews\/reviews_for_widget' style=\"display: none;\"\u003e\u003c\/div\u003e \u003c\/div\u003e \u003cdiv class='jdgm-rev-widg__paginate-spinner-wrapper'\u003e \u003cdiv class='jdgm-spinner'\u003e\u003c\/div\u003e \u003c\/div\u003e \u003c\/div\u003e"},"default_reviews_metafields":{"rating":{"scale_min":"1.0","scale_max":"5.0","value":"5.0"},"rating_count":1},"collections":[{"id":283018526909,"handle":"bundles","title":"Bundles","updated_at":"2026-06-27T19:08:41+08:00","body_html":"\u003cp\u003eMake shopping for your bump, birth and beyond easier with our bundle packs. With a pack available for every stage, you can get everything you need with no fuss and with our bundle packs, you even save money.\u003c\/p\u003e","published_at":"2022-02-01T22:33:09+08:00","sort_order":"best-selling","template_suffix":"swaddles-collection","disjunctive":false,"rules":[{"column":"tag","relation":"equals","condition":"Bundles"}],"published_scope":"global","image":{"created_at":"2024-05-06T11:59:39+08:00","alt":"Bundles - The Birth Store","width":2048,"height":1365,"src":"\/\/www.thebirthstore.com.au\/cdn\/shop\/collections\/bundles-299009.jpg?v=1714967980"}},{"id":261657460925,"handle":"buy","title":"Buy","updated_at":"2026-07-27T19:09:18+08:00","body_html":"\u003cp\u003eBrowse all of our pregnancy, labour \u0026amp; birth, postpartum and baby essentials here.\u003cbr\u003e\u003c\/p\u003e\n\u003cp\u003e\u003cspan\u003eYou can even buy now and pay later with Afterpay!\u003c\/span\u003e\u003c\/p\u003e","published_at":"2021-03-10T12:05:31+08:00","sort_order":"best-selling","template_suffix":"shop-all-collection","disjunctive":false,"rules":[{"column":"title","relation":"not_contains","condition":"Hire"}],"published_scope":"global","image":{"created_at":"2024-05-06T11:59:42+08:00","alt":"Buy - The Birth Store","width":2048,"height":2048,"src":"\/\/www.thebirthstore.com.au\/cdn\/shop\/collections\/buy-964856.jpg?v=1714967982"}},{"id":281712066749,"handle":"hemorrhoid-care","title":"Haemorrhoid Care","updated_at":"2026-07-27T19:09:18+08:00","body_html":"","published_at":"2021-12-20T14:16:30+08:00","sort_order":"best-selling","template_suffix":"swaddles-collection","disjunctive":false,"rules":[{"column":"tag","relation":"equals","condition":"Hemorrhoids"}],"published_scope":"global","image":{"created_at":"2024-05-06T12:00:00+08:00","alt":"Haemorrhoid Care - The Birth Store","width":763,"height":556,"src":"\/\/www.thebirthstore.com.au\/cdn\/shop\/collections\/haemorrhoid-care-562138.jpg?v=1714968001"}},{"id":337429201085,"handle":"hospital-bag","title":"Hospital Bag","updated_at":"2026-07-27T19:09:18+08:00","body_html":"","published_at":"2026-06-03T11:36:29+08:00","sort_order":"most-relevant","template_suffix":"","disjunctive":false,"rules":[{"column":"tag","relation":"equals","condition":"Hospital Bag"}],"published_scope":"global"},{"id":281712591037,"handle":"pain-relief","title":"Pain Relief","updated_at":"2026-07-27T19:09:18+08:00","body_html":"","published_at":"2021-12-20T14:22:45+08:00","sort_order":"best-selling","template_suffix":"pain-relief-collection","disjunctive":false,"rules":[{"column":"tag","relation":"equals","condition":"Pain Relief"}],"published_scope":"global","image":{"created_at":"2024-05-06T12:00:27+08:00","alt":"Pain Relief - The Birth Store","width":1365,"height":2048,"src":"\/\/www.thebirthstore.com.au\/cdn\/shop\/collections\/pain-relief-878865.jpg?v=1714968027"}},{"id":295224705213,"handle":"perineal-care","title":"Perineal Care","updated_at":"2026-07-27T19:09:18+08:00","body_html":"","published_at":"2023-11-10T20:43:30+08:00","sort_order":"best-selling","template_suffix":"perineal-care-collection","disjunctive":false,"rules":[{"column":"tag","relation":"equals","condition":"Peri Care"}],"published_scope":"global","image":{"created_at":"2024-05-06T12:00:33+08:00","alt":"Perineal Care - The Birth Store","width":1024,"height":1536,"src":"\/\/www.thebirthstore.com.au\/cdn\/shop\/collections\/perineal-care-657628.jpg?v=1714968034"}},{"id":261658083517,"handle":"post-partum","title":"Postpartum","updated_at":"2026-07-27T19:09:18+08:00","body_html":"\u003cp\u003eShop your postpartum and hospital bag essentials below. Looking for something we don't currently stock? Please reach out and let us know.\u003cbr\u003e\u003c\/p\u003e\n\u003cp\u003e\u003cspan\u003eYou can even buy now and pay later with Afterpay!\u003c\/span\u003e\u003c\/p\u003e","published_at":"2021-03-10T12:33:47+08:00","sort_order":"best-selling","template_suffix":"postpartum-collection","disjunctive":false,"rules":[{"column":"tag","relation":"equals","condition":"Post-Partum"}],"published_scope":"global","image":{"created_at":"2024-05-06T12:00:36+08:00","alt":"Postpartum - The Birth Store","width":611,"height":702,"src":"\/\/www.thebirthstore.com.au\/cdn\/shop\/collections\/postpartum-150119.jpg?v=1714968037"}},{"id":310045933757,"handle":"shop-all-sale","title":"Shop All Sale","updated_at":"2026-07-27T19:09:18+08:00","body_html":"","published_at":"2024-11-12T13:22:43+08:00","sort_order":"alpha-asc","template_suffix":"","disjunctive":true,"rules":[{"column":"tag","relation":"equals","condition":"Bundles"},{"column":"vendor","relation":"equals","condition":"Franjos Kitchen"},{"column":"vendor","relation":"equals","condition":"Adored Illustrations"},{"column":"vendor","relation":"equals","condition":"Amazing Oils"},{"column":"vendor","relation":"equals","condition":"Ice Ice Booby"},{"column":"vendor","relation":"equals","condition":"Made to Milk"},{"column":"vendor","relation":"equals","condition":"Milky Goodness"},{"column":"vendor","relation":"equals","condition":"Seasons of Mama"},{"column":"vendor","relation":"equals","condition":"Silverette"},{"column":"vendor","relation":"equals","condition":"Snuggle Hunny"},{"column":"vendor","relation":"equals","condition":"Yung Bod"},{"column":"vendor","relation":"equals","condition":"Bare Love"},{"column":"vendor","relation":"equals","condition":"Haakaa"},{"column":"vendor","relation":"equals","condition":"Mere Botanicals"},{"column":"vendor","relation":"equals","condition":"The Birth Store Hire"},{"column":"vendor","relation":"equals","condition":"The Birth Store"}],"published_scope":"global","image":{"created_at":"2024-11-13T10:58:16+08:00","alt":"Shop All Sale - The Birth Store","width":2048,"height":1365,"src":"\/\/www.thebirthstore.com.au\/cdn\/shop\/collections\/shop-all-sale-297361.jpg?v=1731466697"}},{"id":281712197821,"handle":"vaginal-birth-recovery","title":"Vaginal Birth Recovery","updated_at":"2026-07-27T19:09:18+08:00","body_html":"","published_at":"2021-12-20T14:18:23+08:00","sort_order":"best-selling","template_suffix":"swaddles-collection","disjunctive":true,"rules":[{"column":"tag","relation":"equals","condition":"Vaginal Birth Recovery"},{"column":"tag","relation":"equals","condition":"Vaginal Birth Recover"}],"published_scope":"global","image":{"created_at":"2024-05-06T12:01:03+08:00","alt":"Vaginal Birth Recovery - The Birth Store","width":2048,"height":2048,"src":"\/\/www.thebirthstore.com.au\/cdn\/shop\/collections\/vaginal-birth-recovery-449034.jpg?v=1714968063"}}]}


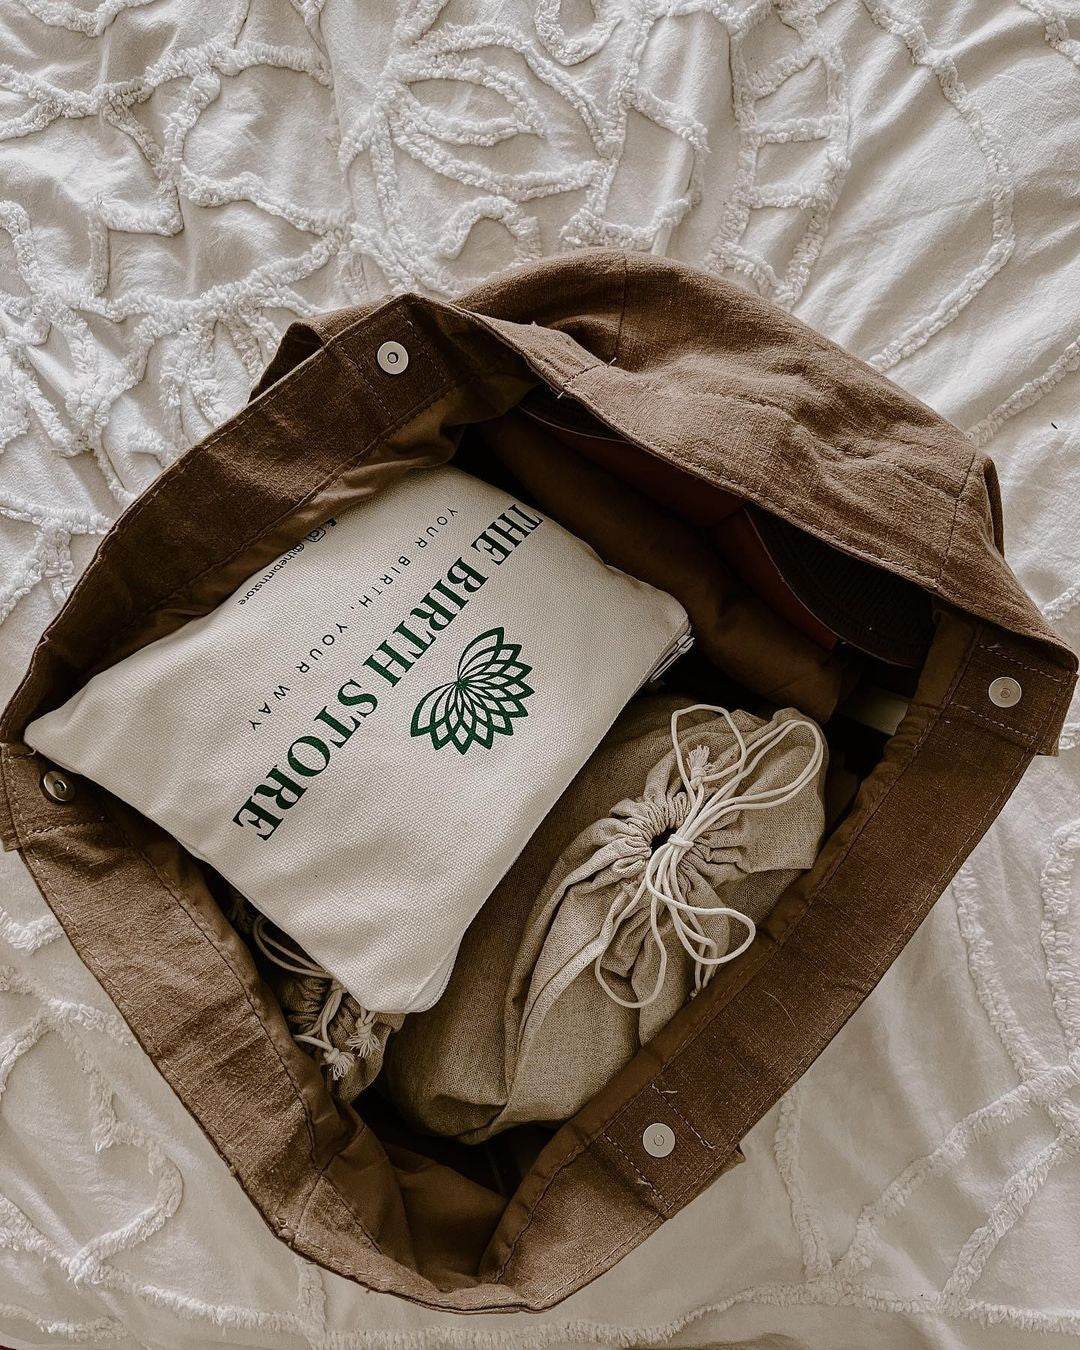
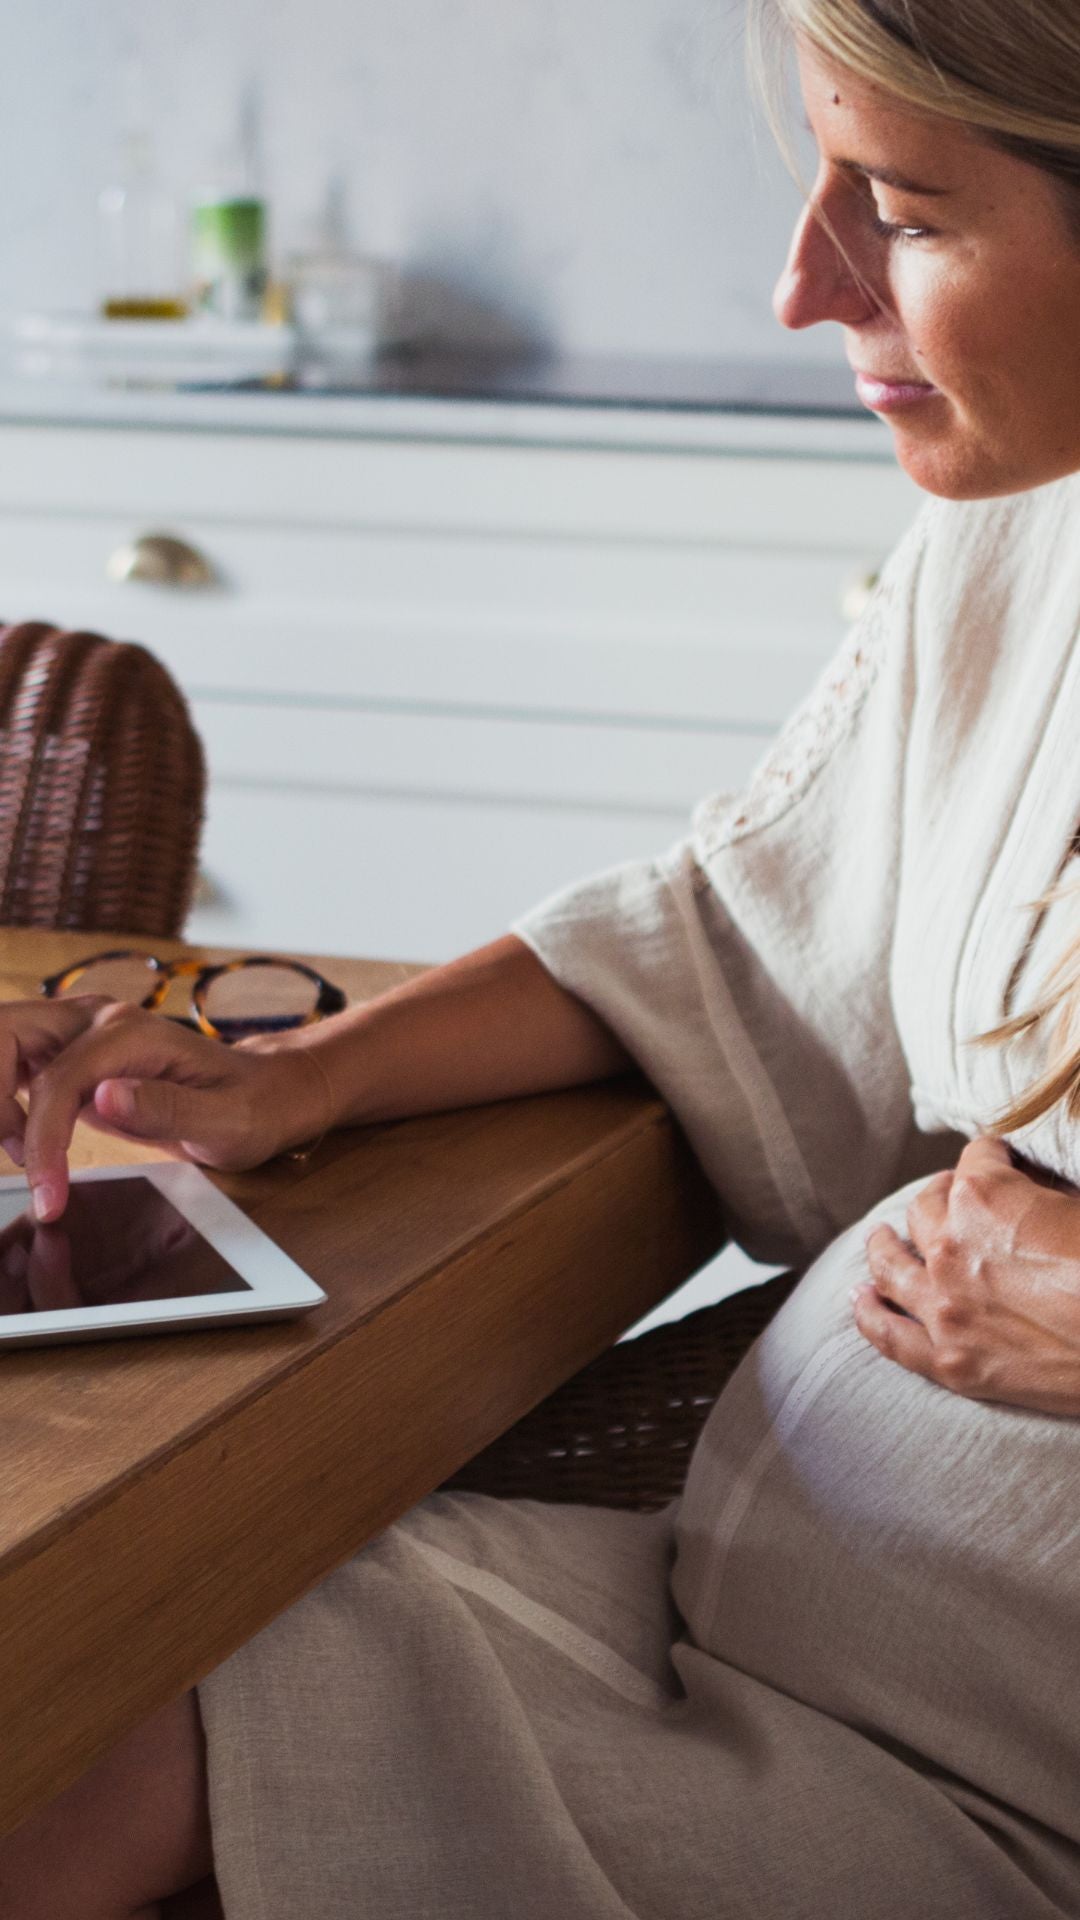

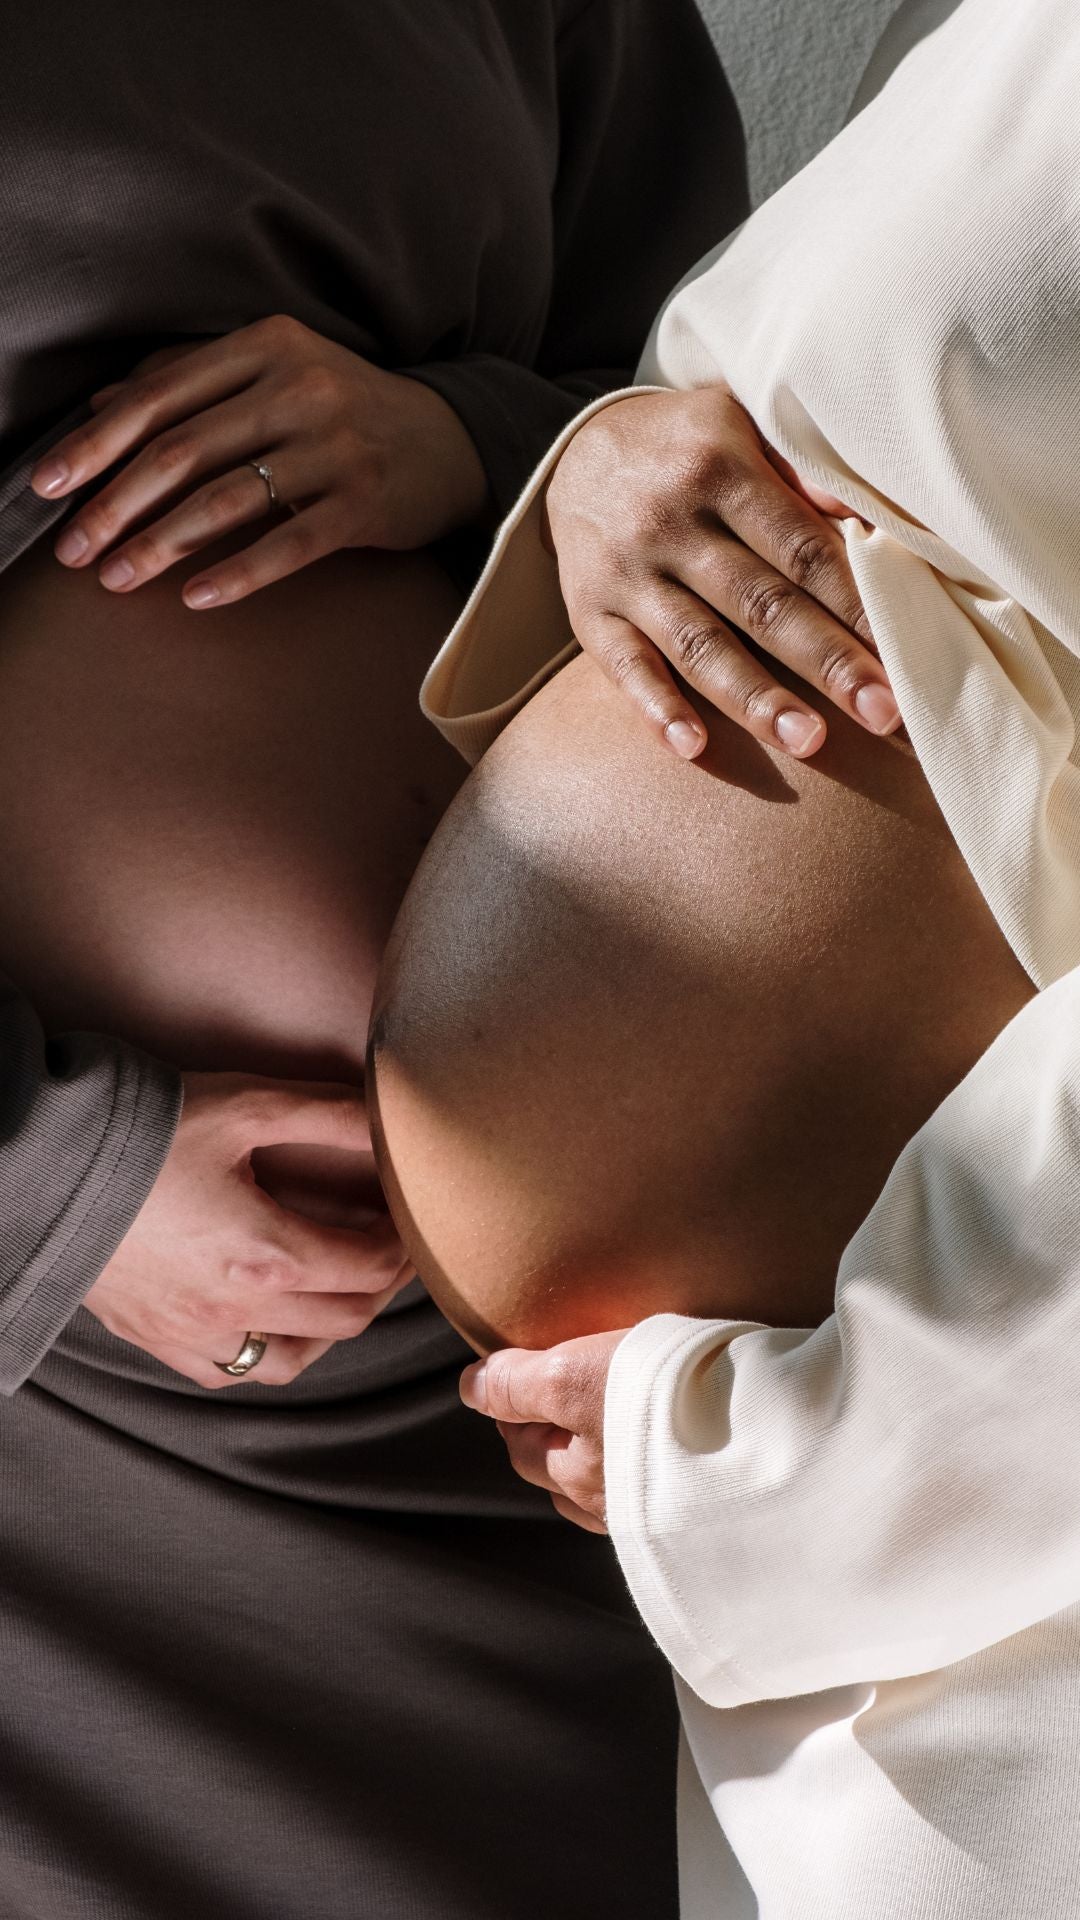
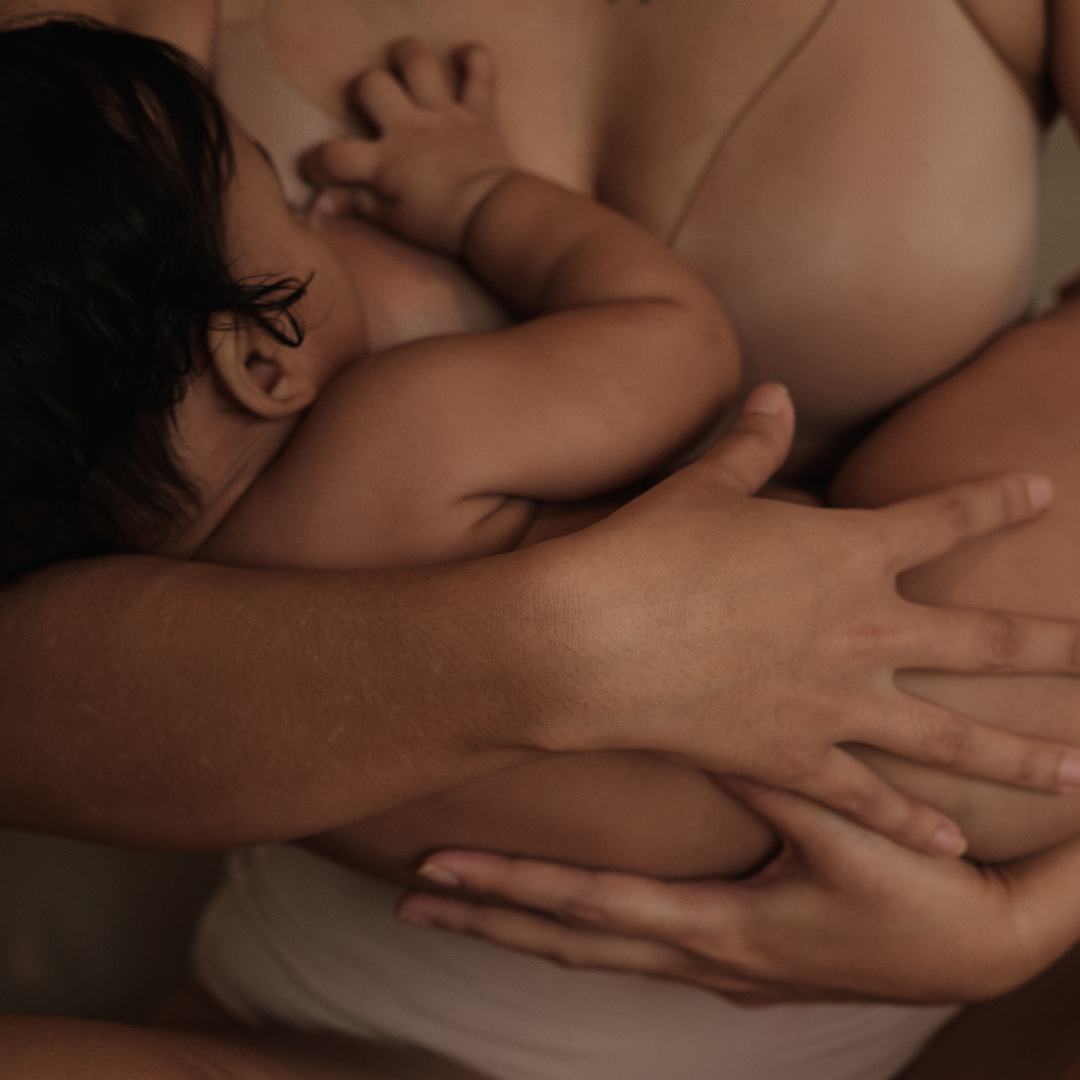


