×
Skip to content
Your hire includes everything you need to use it and send it back ~ nothing extra to pay.
Birth is unpredictable. Hiring your TENS doesn’t have to be.
You won't find an easier way to hire a TENS for your birth.
The TENS machine helps distract your mind, build endorphins (our body's natural pain relievers) and flood your nervous system, limiting your ability to send pain signals to your spinal cord and brain.
Our brain can only focus on so much information at a time; once your brain is at capacity, it will shut out the signals that haven't reached it yet. The nerve signals from the TENS machine essentially take up that 'room' in your brain, so there is less 'room' for the pain to be received.
How does the TENS work?
Your TENS is super easy to use, you just have someone place the electrodes on your back, as shown here, pop the batteries in the machine and then plug the wires into the machine and electrodes.
From there, you just turn it on and using the +/- buttons you
It is recommended to start using it as early as you can when you're in labour, we recommend using it as soon as you think you're in labour.
How do I use it?
The TENS machine shouldn't hurt you; you are in total control of the sensation you're feeling. Our TENS machines have varying power levels, meaning you can always power right down if needed.
Your machine will automatically start on a medium level of power as this is the preferred option and feels like a soft buzz or tingle for most people. However, a button on your machine (OM +/-) will allow you to turn the machine down to an even lower level. This will all be easily explained in the manual, which can be found at the start of the page.
Does the TENS machine hurt?
Yes! That's the best thing; it is a non-invasive and safe pain relief option that will give you genuine support in labour.
There are no known risks to you and your baby besides the rare risk of allergic reaction to the electrodes. With the exception of a few medical conditions or situations which may mean you shouldn't use the TENS.
We recommend reading the contraindications in the manual before using your machine; for up-to-date info you can find the link to your manual on this page above.
Is it safe?
1
Stick on
Attach the re-usable electrode pads to your upper and lower back.
2
Switch on
TENS sends small pulses through the electrodes which feel like small vibrations.
3
Relief
The pulses interrupt the pain signals travelling to your brain, bringing instant relief.
4
Boost
Click the boost button during each contraction for a flood of extra sensation that cancels pain.
Features
Elle TENS
Perfect Mama
Elle TENS 2
Elle TENS Plus
Price
$49 - $69
$59 - $79
$59 - $79
$69 - $89
TGA Registered (Machine + Electrodes)
Labour Pain Mode
Standard Pain Mode
Boost Button
Opti-Max Technology (Extra Power)
Contraction Timer
Screen Light
WHAT'S IN THE BAG
Everything you need, nothing you don’t.
🗹 TENS Machine (4 to choose from)
🗹 4x Large Medical Grade Maternity Electrodes (TGA Registered #488888)
🗹 4x AA Batteries
🗹 2x Lead-wires
🗹 Simple Instructions
🗹 Pre-paid Return Satchel
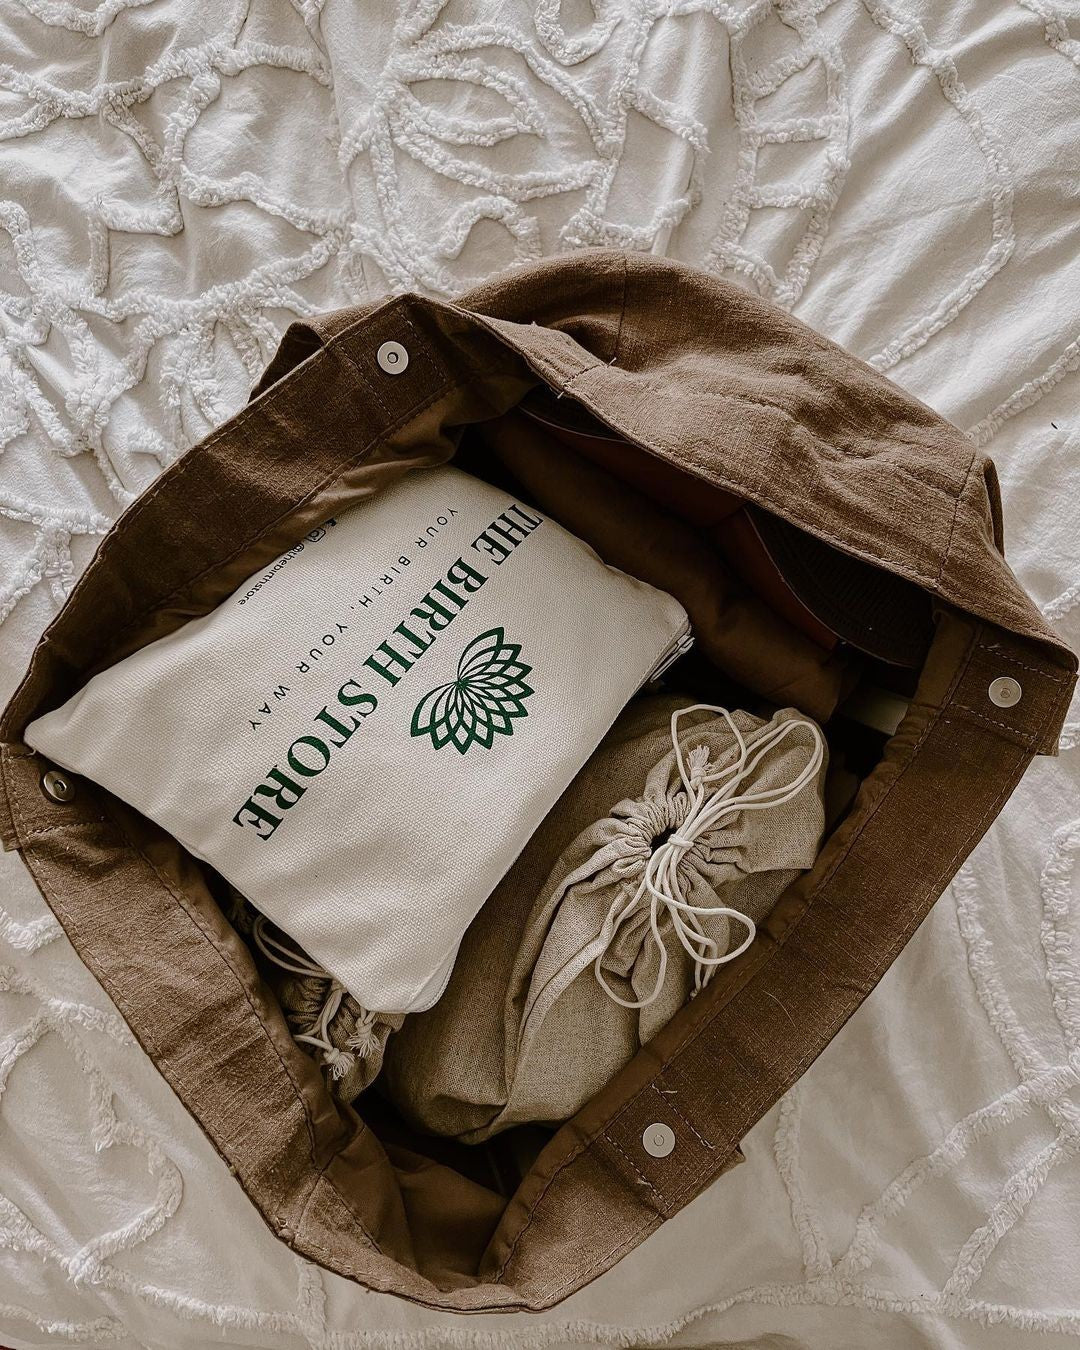
🗹 The Birth Store Bag & Birth
🗹 Affirmation Lanyard
We will send it to arrive on or close to the first day of your hire period
We'll remind you when it's time to send it back in the prepaid satchel
Shahoei et al. (2017) Santana et al. (2016) Shaban et al. 2013
This study compared the percentage of severe pain scores reported by those without a TENS versus those with a TENS... 49% not using a TENS
At the same time, only 20% of people using a TENS at 4cm dilated said their pain was severe
Findings: The mean of the severity of labor pain indicated a statistically significant difference after the intervention. The severity of pain indicated a statistically significant difference in the second stage of labor, and 4 hours after the labor in the groups. The duration of the first stage of labor was significantly different between the groups.
Conclusion: The application of transcutaneous electrical nerve stimulation affected pain relief in the first and second stages of labor and 4 hours after labor.
This study compared the percentage of high pain scores from one group of people, measuring the scores before using a TENS and then 30 minutes after using a TENS... Before 83%
After 20% of people said their pain was a seven or higher
Conclusion: TENS produces a significant decrease in pain during labour and postpones the need for pharmacological analgesia for pain relief.
This study compares the use of TENS machine to Pethidine/Demerol (a pharmacological pain relief option used in hospitals), where it was found that TENS offered the same level of pain relief as this common drug... Researchers in Egypt randomly assigned 100 people in active labour to either receive low-intensity TENS applied to the back, or to receive Pethidine/Demerol, which is an injectable narcotic. TENS was used in the experimental group until the participants reached 10 centimetres dilation.
They found a decrease in pain scores in both groups, but there was no significant difference between the groups . Forty-eight hours after the birth, the people who were randomly assigned to receive TENS during labor were much more satisfied with their birth, on average, compared to the people who received the injectable pain medication. Of those who received TENS, 83% reported being satisfied, compared with only 10% of those who received Demerol.
In addition to low satisfaction, the people who received Demerol also reported side effects such as drowsiness, nausea and vomiting. Babies in the Demerol group also had lower Apgar scores after birth. There were no bad side effects reported in the TENS group.
"The majority of women who used the TENS said they would use it in future labours"
- Cochrane Database Syst Rev. 2009; (2): CD007214.
it doesn't end there
Have more questions?
Reach out to us today to find out more, and we'll answer all your remaining questions.
Contact Us
When You Support a Small Business You're Supporting Someone's Dream
So, from the bottom of our hearts, thank you for supporting our dream ❤️
34
{"item":{"id":8009000714429,"title":"Labour TENS Machine Hire","handle":"labour-birth-tens-machine-hire","description":"","published_at":"2025-05-21T13:50:10+08:00","created_at":"2025-05-21T13:50:10+08:00","vendor":"The Birth Store Hire","type":"","tags":["Birth","GST FREE","Hospital Bag","Mum","Pain Relief","TENS Hire"],"price":4900,"price_min":4900,"price_max":8900,"available":true,"price_varies":true,"compare_at_price":null,"compare_at_price_min":0,"compare_at_price_max":0,"compare_at_price_varies":false,"variants":[{"id":45080046010557,"title":"Elle TENS \/ 4 Weeks","option1":"Elle TENS","option2":"4 Weeks","option3":null,"sku":"","requires_shipping":true,"taxable":false,"featured_image":{"id":38194356781245,"product_id":8009000714429,"position":6,"created_at":"2025-08-29T13:56:08+08:00","updated_at":"2025-08-30T07:57:06+08:00","alt":"Labour TENS Machine Hire - The Birth Store - The Birth Store","width":1080,"height":1080,"src":"\/\/www.thebirthstore.com.au\/cdn\/shop\/files\/labour-tens-machine-hire-6971704.png?v=1756511826","variant_ids":[45080046010557,45080046043325,45080046076093]},"available":true,"name":"Labour TENS Machine Hire - Elle TENS \/ 4 Weeks","public_title":"Elle TENS \/ 4 Weeks","options":["Elle TENS","4 Weeks"],"price":4900,"weight":350,"compare_at_price":null,"inventory_management":"shopify","barcode":"46010557","featured_media":{"alt":"Labour TENS Machine Hire - The Birth Store - The Birth Store","id":29468042821821,"position":8,"preview_image":{"aspect_ratio":1.0,"height":1080,"width":1080,"src":"\/\/www.thebirthstore.com.au\/cdn\/shop\/files\/labour-tens-machine-hire-6971704.png?v=1756511826"}},"requires_selling_plan":false,"selling_plan_allocations":[],"quantity_rule":{"min":1,"max":null,"increment":1}},{"id":45080046043325,"title":"Elle TENS \/ 6 Weeks","option1":"Elle TENS","option2":"6 Weeks","option3":null,"sku":"","requires_shipping":true,"taxable":false,"featured_image":{"id":38194356781245,"product_id":8009000714429,"position":6,"created_at":"2025-08-29T13:56:08+08:00","updated_at":"2025-08-30T07:57:06+08:00","alt":"Labour TENS Machine Hire - The Birth Store - The Birth Store","width":1080,"height":1080,"src":"\/\/www.thebirthstore.com.au\/cdn\/shop\/files\/labour-tens-machine-hire-6971704.png?v=1756511826","variant_ids":[45080046010557,45080046043325,45080046076093]},"available":true,"name":"Labour TENS Machine Hire - Elle TENS \/ 6 Weeks","public_title":"Elle TENS \/ 6 Weeks","options":["Elle TENS","6 Weeks"],"price":5900,"weight":350,"compare_at_price":null,"inventory_management":"shopify","barcode":"46043325","featured_media":{"alt":"Labour TENS Machine Hire - The Birth Store - The Birth Store","id":29468042821821,"position":8,"preview_image":{"aspect_ratio":1.0,"height":1080,"width":1080,"src":"\/\/www.thebirthstore.com.au\/cdn\/shop\/files\/labour-tens-machine-hire-6971704.png?v=1756511826"}},"requires_selling_plan":false,"selling_plan_allocations":[],"quantity_rule":{"min":1,"max":null,"increment":1}},{"id":45080046076093,"title":"Elle TENS \/ 8 Weeks","option1":"Elle TENS","option2":"8 Weeks","option3":null,"sku":"","requires_shipping":true,"taxable":false,"featured_image":{"id":38194356781245,"product_id":8009000714429,"position":6,"created_at":"2025-08-29T13:56:08+08:00","updated_at":"2025-08-30T07:57:06+08:00","alt":"Labour TENS Machine Hire - The Birth Store - The Birth Store","width":1080,"height":1080,"src":"\/\/www.thebirthstore.com.au\/cdn\/shop\/files\/labour-tens-machine-hire-6971704.png?v=1756511826","variant_ids":[45080046010557,45080046043325,45080046076093]},"available":true,"name":"Labour TENS Machine Hire - Elle TENS \/ 8 Weeks","public_title":"Elle TENS \/ 8 Weeks","options":["Elle TENS","8 Weeks"],"price":6900,"weight":350,"compare_at_price":null,"inventory_management":"shopify","barcode":"46076093","featured_media":{"alt":"Labour TENS Machine Hire - The Birth Store - The Birth Store","id":29468042821821,"position":8,"preview_image":{"aspect_ratio":1.0,"height":1080,"width":1080,"src":"\/\/www.thebirthstore.com.au\/cdn\/shop\/files\/labour-tens-machine-hire-6971704.png?v=1756511826"}},"requires_selling_plan":false,"selling_plan_allocations":[],"quantity_rule":{"min":1,"max":null,"increment":1}},{"id":45080046108861,"title":"Elle TENS 2 \/ 4 Weeks","option1":"Elle TENS 2","option2":"4 Weeks","option3":null,"sku":"","requires_shipping":true,"taxable":false,"featured_image":{"id":38194357895357,"product_id":8009000714429,"position":7,"created_at":"2025-08-29T13:56:19+08:00","updated_at":"2025-08-30T07:57:06+08:00","alt":"Labour TENS Machine Hire - The Birth Store - The Birth Store","width":1080,"height":1080,"src":"\/\/www.thebirthstore.com.au\/cdn\/shop\/files\/labour-tens-machine-hire-3380341.png?v=1756511826","variant_ids":[45080046108861,45080046141629,45080046174397]},"available":true,"name":"Labour TENS Machine Hire - Elle TENS 2 \/ 4 Weeks","public_title":"Elle TENS 2 \/ 4 Weeks","options":["Elle TENS 2","4 Weeks"],"price":5900,"weight":350,"compare_at_price":null,"inventory_management":"shopify","barcode":"46108861","featured_media":{"alt":"Labour TENS Machine Hire - The Birth Store - The Birth Store","id":29468043673789,"position":9,"preview_image":{"aspect_ratio":1.0,"height":1080,"width":1080,"src":"\/\/www.thebirthstore.com.au\/cdn\/shop\/files\/labour-tens-machine-hire-3380341.png?v=1756511826"}},"requires_selling_plan":false,"selling_plan_allocations":[],"quantity_rule":{"min":1,"max":null,"increment":1}},{"id":45080046141629,"title":"Elle TENS 2 \/ 6 Weeks","option1":"Elle TENS 2","option2":"6 Weeks","option3":null,"sku":"","requires_shipping":true,"taxable":false,"featured_image":{"id":38194357895357,"product_id":8009000714429,"position":7,"created_at":"2025-08-29T13:56:19+08:00","updated_at":"2025-08-30T07:57:06+08:00","alt":"Labour TENS Machine Hire - The Birth Store - The Birth Store","width":1080,"height":1080,"src":"\/\/www.thebirthstore.com.au\/cdn\/shop\/files\/labour-tens-machine-hire-3380341.png?v=1756511826","variant_ids":[45080046108861,45080046141629,45080046174397]},"available":true,"name":"Labour TENS Machine Hire - Elle TENS 2 \/ 6 Weeks","public_title":"Elle TENS 2 \/ 6 Weeks","options":["Elle TENS 2","6 Weeks"],"price":6900,"weight":350,"compare_at_price":null,"inventory_management":"shopify","barcode":"46141629","featured_media":{"alt":"Labour TENS Machine Hire - The Birth Store - The Birth Store","id":29468043673789,"position":9,"preview_image":{"aspect_ratio":1.0,"height":1080,"width":1080,"src":"\/\/www.thebirthstore.com.au\/cdn\/shop\/files\/labour-tens-machine-hire-3380341.png?v=1756511826"}},"requires_selling_plan":false,"selling_plan_allocations":[],"quantity_rule":{"min":1,"max":null,"increment":1}},{"id":45080046174397,"title":"Elle TENS 2 \/ 8 Weeks","option1":"Elle TENS 2","option2":"8 Weeks","option3":null,"sku":"","requires_shipping":true,"taxable":false,"featured_image":{"id":38194357895357,"product_id":8009000714429,"position":7,"created_at":"2025-08-29T13:56:19+08:00","updated_at":"2025-08-30T07:57:06+08:00","alt":"Labour TENS Machine Hire - The Birth Store - The Birth Store","width":1080,"height":1080,"src":"\/\/www.thebirthstore.com.au\/cdn\/shop\/files\/labour-tens-machine-hire-3380341.png?v=1756511826","variant_ids":[45080046108861,45080046141629,45080046174397]},"available":true,"name":"Labour TENS Machine Hire - Elle TENS 2 \/ 8 Weeks","public_title":"Elle TENS 2 \/ 8 Weeks","options":["Elle TENS 2","8 Weeks"],"price":7900,"weight":350,"compare_at_price":null,"inventory_management":"shopify","barcode":"46174397","featured_media":{"alt":"Labour TENS Machine Hire - The Birth Store - The Birth Store","id":29468043673789,"position":9,"preview_image":{"aspect_ratio":1.0,"height":1080,"width":1080,"src":"\/\/www.thebirthstore.com.au\/cdn\/shop\/files\/labour-tens-machine-hire-3380341.png?v=1756511826"}},"requires_selling_plan":false,"selling_plan_allocations":[],"quantity_rule":{"min":1,"max":null,"increment":1}},{"id":45080046207165,"title":"Elle TENS Plus \/ 4 Weeks","option1":"Elle TENS Plus","option2":"4 Weeks","option3":null,"sku":"","requires_shipping":true,"taxable":false,"featured_image":{"id":38194359697597,"product_id":8009000714429,"position":9,"created_at":"2025-08-29T13:56:42+08:00","updated_at":"2025-08-30T07:57:06+08:00","alt":"Labour TENS Machine Hire - The Birth Store - The Birth Store","width":1080,"height":1080,"src":"\/\/www.thebirthstore.com.au\/cdn\/shop\/files\/labour-tens-machine-hire-4267878.png?v=1756511826","variant_ids":[45080046207165,45080046239933,45080046272701]},"available":true,"name":"Labour TENS Machine Hire - Elle TENS Plus \/ 4 Weeks","public_title":"Elle TENS Plus \/ 4 Weeks","options":["Elle TENS Plus","4 Weeks"],"price":6900,"weight":350,"compare_at_price":null,"inventory_management":"shopify","barcode":"46207165","featured_media":{"alt":"Labour TENS Machine Hire - The Birth Store - The Birth Store","id":29468045639869,"position":11,"preview_image":{"aspect_ratio":1.0,"height":1080,"width":1080,"src":"\/\/www.thebirthstore.com.au\/cdn\/shop\/files\/labour-tens-machine-hire-4267878.png?v=1756511826"}},"requires_selling_plan":false,"selling_plan_allocations":[],"quantity_rule":{"min":1,"max":null,"increment":1}},{"id":45080046239933,"title":"Elle TENS Plus \/ 6 Weeks","option1":"Elle TENS Plus","option2":"6 Weeks","option3":null,"sku":"","requires_shipping":true,"taxable":false,"featured_image":{"id":38194359697597,"product_id":8009000714429,"position":9,"created_at":"2025-08-29T13:56:42+08:00","updated_at":"2025-08-30T07:57:06+08:00","alt":"Labour TENS Machine Hire - The Birth Store - The Birth Store","width":1080,"height":1080,"src":"\/\/www.thebirthstore.com.au\/cdn\/shop\/files\/labour-tens-machine-hire-4267878.png?v=1756511826","variant_ids":[45080046207165,45080046239933,45080046272701]},"available":true,"name":"Labour TENS Machine Hire - Elle TENS Plus \/ 6 Weeks","public_title":"Elle TENS Plus \/ 6 Weeks","options":["Elle TENS Plus","6 Weeks"],"price":7900,"weight":350,"compare_at_price":null,"inventory_management":"shopify","barcode":"46239933","featured_media":{"alt":"Labour TENS Machine Hire - The Birth Store - The Birth Store","id":29468045639869,"position":11,"preview_image":{"aspect_ratio":1.0,"height":1080,"width":1080,"src":"\/\/www.thebirthstore.com.au\/cdn\/shop\/files\/labour-tens-machine-hire-4267878.png?v=1756511826"}},"requires_selling_plan":false,"selling_plan_allocations":[],"quantity_rule":{"min":1,"max":null,"increment":1}},{"id":45080046272701,"title":"Elle TENS Plus \/ 8 Weeks","option1":"Elle TENS Plus","option2":"8 Weeks","option3":null,"sku":"","requires_shipping":true,"taxable":false,"featured_image":{"id":38194359697597,"product_id":8009000714429,"position":9,"created_at":"2025-08-29T13:56:42+08:00","updated_at":"2025-08-30T07:57:06+08:00","alt":"Labour TENS Machine Hire - The Birth Store - The Birth Store","width":1080,"height":1080,"src":"\/\/www.thebirthstore.com.au\/cdn\/shop\/files\/labour-tens-machine-hire-4267878.png?v=1756511826","variant_ids":[45080046207165,45080046239933,45080046272701]},"available":true,"name":"Labour TENS Machine Hire - Elle TENS Plus \/ 8 Weeks","public_title":"Elle TENS Plus \/ 8 Weeks","options":["Elle TENS Plus","8 Weeks"],"price":8900,"weight":350,"compare_at_price":null,"inventory_management":"shopify","barcode":"46272701","featured_media":{"alt":"Labour TENS Machine Hire - The Birth Store - The Birth Store","id":29468045639869,"position":11,"preview_image":{"aspect_ratio":1.0,"height":1080,"width":1080,"src":"\/\/www.thebirthstore.com.au\/cdn\/shop\/files\/labour-tens-machine-hire-4267878.png?v=1756511826"}},"requires_selling_plan":false,"selling_plan_allocations":[],"quantity_rule":{"min":1,"max":null,"increment":1}}],"images":["\/\/www.thebirthstore.com.au\/cdn\/shop\/files\/labour-tens-machine-hire-6853036.png?v=1756511826","\/\/www.thebirthstore.com.au\/cdn\/shop\/files\/labour-tens-machine-hire-414227.jpg?v=1756446767","\/\/www.thebirthstore.com.au\/cdn\/shop\/files\/labour-tens-machine-hire-543609.jpg?v=1756446767","\/\/www.thebirthstore.com.au\/cdn\/shop\/files\/labour-tens-machine-hire-857177.jpg?v=1756446767","\/\/www.thebirthstore.com.au\/cdn\/shop\/files\/labour-tens-machine-hire-430497.jpg?v=1756446767","\/\/www.thebirthstore.com.au\/cdn\/shop\/files\/labour-tens-machine-hire-6971704.png?v=1756511826","\/\/www.thebirthstore.com.au\/cdn\/shop\/files\/labour-tens-machine-hire-3380341.png?v=1756511826","\/\/www.thebirthstore.com.au\/cdn\/shop\/files\/labour-tens-machine-hire-9652507.png?v=1756511826","\/\/www.thebirthstore.com.au\/cdn\/shop\/files\/labour-tens-machine-hire-4267878.png?v=1756511826"],"featured_image":"\/\/www.thebirthstore.com.au\/cdn\/shop\/files\/labour-tens-machine-hire-6853036.png?v=1756511826","options":["Choose Your Machine","Choose Your Hire Length"],"media":[{"alt":"Labour TENS Machine Hire - The Birth Store - The Birth Store","id":29467981873341,"position":1,"preview_image":{"aspect_ratio":1.0,"height":1080,"width":1080,"src":"\/\/www.thebirthstore.com.au\/cdn\/shop\/files\/labour-tens-machine-hire-6853036.png?v=1756511826"},"aspect_ratio":1.0,"height":1080,"media_type":"image","src":"\/\/www.thebirthstore.com.au\/cdn\/shop\/files\/labour-tens-machine-hire-6853036.png?v=1756511826","width":1080},{"alt":"Labour TENS Machine Hire - The Birth Store - The Birth Store","id":28800742883517,"position":2,"preview_image":{"aspect_ratio":0.667,"height":990,"width":660,"src":"\/\/www.thebirthstore.com.au\/cdn\/shop\/files\/labour-tens-machine-hire-414227.jpg?v=1756446767"},"aspect_ratio":0.667,"height":990,"media_type":"image","src":"\/\/www.thebirthstore.com.au\/cdn\/shop\/files\/labour-tens-machine-hire-414227.jpg?v=1756446767","width":660},{"alt":"Labour TENS Machine Hire - The Birth Store - The Birth Store","id":28800734036157,"position":3,"preview_image":{"aspect_ratio":0.8,"height":1800,"width":1440,"src":"\/\/www.thebirthstore.com.au\/cdn\/shop\/files\/labour-tens-machine-hire-543609.jpg?v=1756446767"},"aspect_ratio":0.8,"height":1800,"media_type":"image","src":"\/\/www.thebirthstore.com.au\/cdn\/shop\/files\/labour-tens-machine-hire-543609.jpg?v=1756446767","width":1440},{"alt":"Labour TENS Machine Hire - The Birth Store - The Birth Store","id":28800751796413,"position":4,"preview_image":{"aspect_ratio":0.75,"height":2048,"width":1536,"src":"\/\/www.thebirthstore.com.au\/cdn\/shop\/files\/labour-tens-machine-hire-857177.jpg?v=1756446767"},"aspect_ratio":0.75,"height":2048,"media_type":"image","src":"\/\/www.thebirthstore.com.au\/cdn\/shop\/files\/labour-tens-machine-hire-857177.jpg?v=1756446767","width":1536},{"alt":null,"id":28800734953661,"position":5,"preview_image":{"aspect_ratio":0.563,"height":1920,"width":1080,"src":"\/\/www.thebirthstore.com.au\/cdn\/shop\/files\/preview_images\/4a0cbcc0853c429aa70edc55130dbc6a.thumbnail.0000000000.jpg?v=1747837646"},"aspect_ratio":0.563,"duration":21920,"media_type":"video","sources":[{"format":"mp4","height":480,"mime_type":"video\/mp4","url":"\/\/www.thebirthstore.com.au\/cdn\/shop\/videos\/c\/vp\/4a0cbcc0853c429aa70edc55130dbc6a\/4a0cbcc0853c429aa70edc55130dbc6a.SD-480p-1.5Mbps-47978508.mp4?v=0","width":270},{"format":"mp4","height":1080,"mime_type":"video\/mp4","url":"\/\/www.thebirthstore.com.au\/cdn\/shop\/videos\/c\/vp\/4a0cbcc0853c429aa70edc55130dbc6a\/4a0cbcc0853c429aa70edc55130dbc6a.HD-1080p-7.2Mbps-47978508.mp4?v=0","width":606},{"format":"mp4","height":720,"mime_type":"video\/mp4","url":"\/\/www.thebirthstore.com.au\/cdn\/shop\/videos\/c\/vp\/4a0cbcc0853c429aa70edc55130dbc6a\/4a0cbcc0853c429aa70edc55130dbc6a.HD-720p-4.5Mbps-47978508.mp4?v=0","width":404},{"format":"m3u8","height":1080,"mime_type":"application\/x-mpegURL","url":"\/\/www.thebirthstore.com.au\/cdn\/shop\/videos\/c\/vp\/4a0cbcc0853c429aa70edc55130dbc6a\/4a0cbcc0853c429aa70edc55130dbc6a.m3u8?v=0","width":606}]},{"alt":"Labour TENS Machine Hire - The Birth Store - The Birth Store","id":28800751829181,"position":6,"preview_image":{"aspect_ratio":0.75,"height":2048,"width":1536,"src":"\/\/www.thebirthstore.com.au\/cdn\/shop\/files\/labour-tens-machine-hire-430497.jpg?v=1756446767"},"aspect_ratio":0.75,"height":2048,"media_type":"image","src":"\/\/www.thebirthstore.com.au\/cdn\/shop\/files\/labour-tens-machine-hire-430497.jpg?v=1756446767","width":1536},{"alt":null,"id":28770263662781,"position":7,"preview_image":{"aspect_ratio":0.563,"height":1920,"width":1080,"src":"\/\/www.thebirthstore.com.au\/cdn\/shop\/files\/preview_images\/32dcf082a8e24b0db258d949cda0bdf5.thumbnail.0000000000.jpg?v=1747288006"},"aspect_ratio":0.563,"duration":7150,"media_type":"video","sources":[{"format":"mp4","height":480,"mime_type":"video\/mp4","url":"\/\/www.thebirthstore.com.au\/cdn\/shop\/videos\/c\/vp\/32dcf082a8e24b0db258d949cda0bdf5\/32dcf082a8e24b0db258d949cda0bdf5.SD-480p-0.9Mbps-47614201.mp4?v=0","width":270},{"format":"mp4","height":1080,"mime_type":"video\/mp4","url":"\/\/www.thebirthstore.com.au\/cdn\/shop\/videos\/c\/vp\/32dcf082a8e24b0db258d949cda0bdf5\/32dcf082a8e24b0db258d949cda0bdf5.HD-1080p-2.5Mbps-47614201.mp4?v=0","width":606},{"format":"mp4","height":720,"mime_type":"video\/mp4","url":"\/\/www.thebirthstore.com.au\/cdn\/shop\/videos\/c\/vp\/32dcf082a8e24b0db258d949cda0bdf5\/32dcf082a8e24b0db258d949cda0bdf5.HD-720p-1.6Mbps-47614201.mp4?v=0","width":404},{"format":"m3u8","height":1080,"mime_type":"application\/x-mpegURL","url":"\/\/www.thebirthstore.com.au\/cdn\/shop\/videos\/c\/vp\/32dcf082a8e24b0db258d949cda0bdf5\/32dcf082a8e24b0db258d949cda0bdf5.m3u8?v=0","width":606}]},{"alt":"Labour TENS Machine Hire - The Birth Store - The Birth Store","id":29468042821821,"position":8,"preview_image":{"aspect_ratio":1.0,"height":1080,"width":1080,"src":"\/\/www.thebirthstore.com.au\/cdn\/shop\/files\/labour-tens-machine-hire-6971704.png?v=1756511826"},"aspect_ratio":1.0,"height":1080,"media_type":"image","src":"\/\/www.thebirthstore.com.au\/cdn\/shop\/files\/labour-tens-machine-hire-6971704.png?v=1756511826","width":1080},{"alt":"Labour TENS Machine Hire - The Birth Store - The Birth Store","id":29468043673789,"position":9,"preview_image":{"aspect_ratio":1.0,"height":1080,"width":1080,"src":"\/\/www.thebirthstore.com.au\/cdn\/shop\/files\/labour-tens-machine-hire-3380341.png?v=1756511826"},"aspect_ratio":1.0,"height":1080,"media_type":"image","src":"\/\/www.thebirthstore.com.au\/cdn\/shop\/files\/labour-tens-machine-hire-3380341.png?v=1756511826","width":1080},{"alt":"Labour TENS Machine Hire - The Birth Store - The Birth Store","id":29468045017277,"position":10,"preview_image":{"aspect_ratio":1.0,"height":1080,"width":1080,"src":"\/\/www.thebirthstore.com.au\/cdn\/shop\/files\/labour-tens-machine-hire-9652507.png?v=1756511826"},"aspect_ratio":1.0,"height":1080,"media_type":"image","src":"\/\/www.thebirthstore.com.au\/cdn\/shop\/files\/labour-tens-machine-hire-9652507.png?v=1756511826","width":1080},{"alt":"Labour TENS Machine Hire - The Birth Store - The Birth Store","id":29468045639869,"position":11,"preview_image":{"aspect_ratio":1.0,"height":1080,"width":1080,"src":"\/\/www.thebirthstore.com.au\/cdn\/shop\/files\/labour-tens-machine-hire-4267878.png?v=1756511826"},"aspect_ratio":1.0,"height":1080,"media_type":"image","src":"\/\/www.thebirthstore.com.au\/cdn\/shop\/files\/labour-tens-machine-hire-4267878.png?v=1756511826","width":1080}],"requires_selling_plan":false,"selling_plan_groups":[],"content":""},"options":[{"name":"Choose Your Machine","position":1,"values":["Elle TENS","Elle TENS 2","Elle TENS Plus"]},{"name":"Choose Your Hire Length","position":2,"values":["4 Weeks","6 Weeks","8 Weeks"]}],"custom_metafields":{},"metafields":{"badge":"\u003cdiv style='display:none' class='jdgm-prev-badge' data-average-rating='4.91' data-number-of-reviews='1020' data-number-of-questions='0'\u003e \u003cspan class='jdgm-prev-badge__stars' data-score='4.91' tabindex='0' aria-label='4.91 stars' role='button'\u003e \u003cspan class='jdgm-star jdgm--on'\u003e\u003c\/span\u003e\u003cspan class='jdgm-star jdgm--on'\u003e\u003c\/span\u003e\u003cspan class='jdgm-star jdgm--on'\u003e\u003c\/span\u003e\u003cspan class='jdgm-star jdgm--on'\u003e\u003c\/span\u003e\u003cspan class='jdgm-star jdgm--on'\u003e\u003c\/span\u003e \u003c\/span\u003e \u003cspan class='jdgm-prev-badge__text'\u003e 1020 reviews \u003c\/span\u003e \u003c\/div\u003e","widget":"\u003cdiv class='jdgm-rev-widg' data-updated-at='2026-11-14T01:09:30Z' data-average-rating='4.91' data-number-of-reviews='1020' data-number-of-questions='0' data-image-url='https:\/\/cdn.shopify.com\/s\/files\/1\/0527\/3393\/5805\/files\/labour-tens-machine-hire-6853036.png?v=1756511826'\u003e \u003cstyle class='jdgm-temp-hiding-style'\u003e.jdgm-rev-widg{ display: none }\u003c\/style\u003e \u003cdiv class='jdgm-rev-widg__header'\u003e \u003ch2 class='jdgm-rev-widg__title'\u003eCustomer Reviews\u003c\/h2\u003e \u003cdiv class='jdgm-rev-widg__summary'\u003e \u003cdiv class='jdgm-rev-widg__summary-stars'\u003e \u003cspan class='jdgm-rev-widg__summary-stars-img' aria-label='Average rating is 4.91 stars' role='img'\u003e \u003cspan class='jdgm-star jdgm--on'\u003e\u003c\/span\u003e\u003cspan class='jdgm-star jdgm--on'\u003e\u003c\/span\u003e\u003cspan class='jdgm-star jdgm--on'\u003e\u003c\/span\u003e\u003cspan class='jdgm-star jdgm--on'\u003e\u003c\/span\u003e\u003cspan class='jdgm-star jdgm--on'\u003e\u003c\/span\u003e \u003c\/span\u003e \u003c\/div\u003e \u003cdiv class='jdgm-rev-widg__summary-text'\u003eBased on 1020 reviews\u003c\/div\u003e \u003c\/div\u003e \u003ca style='display: none' href='#' class='jdgm-write-rev-link' role='button'\u003eWrite a review\u003c\/a\u003e \u003cdiv class='jdgm-histogram jdgm-temp-hidden'\u003e \u003cdiv class='jdgm-histogram__row' data-rating='5' data-frequency='983' data-percentage='96'\u003e \u003cdiv class='jdgm-histogram__star' role='button' aria-label=\"96% (983) reviews with 5 star rating\" tabindex='0' \u003e\u003cspan class='jdgm-star jdgm--on'\u003e\u003c\/span\u003e\u003cspan class='jdgm-star jdgm--on'\u003e\u003c\/span\u003e\u003cspan class='jdgm-star jdgm--on'\u003e\u003c\/span\u003e\u003cspan class='jdgm-star jdgm--on'\u003e\u003c\/span\u003e\u003cspan class='jdgm-star jdgm--on'\u003e\u003c\/span\u003e\u003c\/div\u003e \u003cdiv class='jdgm-histogram__bar'\u003e \u003cdiv class='jdgm-histogram__bar-content' style='width: 96%;'\u003e \u003c\/div\u003e \u003c\/div\u003e \u003cdiv class='jdgm-histogram__percentage'\u003e96%\u003c\/div\u003e \u003cdiv class='jdgm-histogram__frequency'\u003e(983)\u003c\/div\u003e \u003c\/div\u003e \u003cdiv class='jdgm-histogram__row' data-rating='4' data-frequency='11' data-percentage='1'\u003e \u003cdiv class='jdgm-histogram__star' role='button' aria-label=\"1% (11) reviews with 4 star rating\" tabindex='0' \u003e\u003cspan class='jdgm-star jdgm--on'\u003e\u003c\/span\u003e\u003cspan class='jdgm-star jdgm--on'\u003e\u003c\/span\u003e\u003cspan class='jdgm-star jdgm--on'\u003e\u003c\/span\u003e\u003cspan class='jdgm-star jdgm--on'\u003e\u003c\/span\u003e\u003cspan class='jdgm-star jdgm--off'\u003e\u003c\/span\u003e\u003c\/div\u003e \u003cdiv class='jdgm-histogram__bar'\u003e \u003cdiv class='jdgm-histogram__bar-content' style='width: 1%;'\u003e \u003c\/div\u003e \u003c\/div\u003e \u003cdiv class='jdgm-histogram__percentage'\u003e1%\u003c\/div\u003e \u003cdiv class='jdgm-histogram__frequency'\u003e(11)\u003c\/div\u003e \u003c\/div\u003e \u003cdiv class='jdgm-histogram__row' data-rating='3' data-frequency='10' data-percentage='1'\u003e \u003cdiv class='jdgm-histogram__star' role='button' aria-label=\"1% (10) reviews with 3 star rating\" tabindex='0' \u003e\u003cspan class='jdgm-star jdgm--on'\u003e\u003c\/span\u003e\u003cspan class='jdgm-star jdgm--on'\u003e\u003c\/span\u003e\u003cspan class='jdgm-star jdgm--on'\u003e\u003c\/span\u003e\u003cspan class='jdgm-star jdgm--off'\u003e\u003c\/span\u003e\u003cspan class='jdgm-star jdgm--off'\u003e\u003c\/span\u003e\u003c\/div\u003e \u003cdiv class='jdgm-histogram__bar'\u003e \u003cdiv class='jdgm-histogram__bar-content' style='width: 1%;'\u003e \u003c\/div\u003e \u003c\/div\u003e \u003cdiv class='jdgm-histogram__percentage'\u003e1%\u003c\/div\u003e \u003cdiv class='jdgm-histogram__frequency'\u003e(10)\u003c\/div\u003e \u003c\/div\u003e \u003cdiv class='jdgm-histogram__row' data-rating='2' data-frequency='5' data-percentage='0'\u003e \u003cdiv class='jdgm-histogram__star' role='button' aria-label=\"0% (5) reviews with 2 star rating\" tabindex='0' \u003e\u003cspan class='jdgm-star jdgm--on'\u003e\u003c\/span\u003e\u003cspan class='jdgm-star jdgm--on'\u003e\u003c\/span\u003e\u003cspan class='jdgm-star jdgm--off'\u003e\u003c\/span\u003e\u003cspan class='jdgm-star jdgm--off'\u003e\u003c\/span\u003e\u003cspan class='jdgm-star jdgm--off'\u003e\u003c\/span\u003e\u003c\/div\u003e \u003cdiv class='jdgm-histogram__bar'\u003e \u003cdiv class='jdgm-histogram__bar-content' style='width: 0%;'\u003e \u003c\/div\u003e \u003c\/div\u003e \u003cdiv class='jdgm-histogram__percentage'\u003e0%\u003c\/div\u003e \u003cdiv class='jdgm-histogram__frequency'\u003e(5)\u003c\/div\u003e \u003c\/div\u003e \u003cdiv class='jdgm-histogram__row' data-rating='1' data-frequency='11' data-percentage='1'\u003e \u003cdiv class='jdgm-histogram__star' role='button' aria-label=\"1% (11) reviews with 1 star rating\" tabindex='0' \u003e\u003cspan class='jdgm-star jdgm--on'\u003e\u003c\/span\u003e\u003cspan class='jdgm-star jdgm--off'\u003e\u003c\/span\u003e\u003cspan class='jdgm-star jdgm--off'\u003e\u003c\/span\u003e\u003cspan class='jdgm-star jdgm--off'\u003e\u003c\/span\u003e\u003cspan class='jdgm-star jdgm--off'\u003e\u003c\/span\u003e\u003c\/div\u003e \u003cdiv class='jdgm-histogram__bar'\u003e \u003cdiv class='jdgm-histogram__bar-content' style='width: 1%;'\u003e \u003c\/div\u003e \u003c\/div\u003e \u003cdiv class='jdgm-histogram__percentage'\u003e1%\u003c\/div\u003e \u003cdiv class='jdgm-histogram__frequency'\u003e(11)\u003c\/div\u003e \u003c\/div\u003e \u003cdiv class='jdgm-histogram__row jdgm-histogram__clear-filter' data-rating=null tabindex='0'\u003e\u003c\/div\u003e \u003c\/div\u003e \u003cdiv class='jdgm-gallery' data-url='reviews\/reviews_for_widget' data-per-page='10'\u003e \u003cdiv class='jdgm-gallery-data jdgm-hidden' data-json='[{\u0026quot;uuid\u0026quot;:\u0026quot;2d1c0621-601e-42d2-8d93-69f7f0e527ea\u0026quot;,\u0026quot;reviewer_name\u0026quot;:\u0026quot;Shan\u0026quot;,\u0026quot;reviewer_initial\u0026quot;:\u0026quot;S\u0026quot;,\u0026quot;title\u0026quot;:\u0026quot;AMAZING!!!!\u0026quot;,\u0026quot;body_html\u0026quot;:\u0026quot;\\u003cp\\u003eThis was an absolute saviour for me. I had an induction and was really hesitant as it wasn’t what I had planned, but I used this and some birth combs all the way up to transition until I got into the shower so had to take it off which I was super hesitant about as it was just so so amazing. The boost button during contractions really made the biggest difference for me and I attribute this to allowing me to have a natural birth with no epidural, just some gas during transition! So thanks to the birth store. Also super easy to use and return with everything included.\\u003c\/p\\u003e\u0026quot;,\u0026quot;verified_buyer\u0026quot;:true,\u0026quot;location\u0026quot;:\u0026quot;\u0026quot;,\u0026quot;video_external_ids\u0026quot;:[],\u0026quot;video_thumbnail_urls\u0026quot;:[],\u0026quot;media_platform_hosted_video_infos\u0026quot;:[],\u0026quot;cf_answers\u0026quot;:[],\u0026quot;shop_reply_name\u0026quot;:\u0026quot;The Birth Store\u0026quot;,\u0026quot;rating\u0026quot;:\u0026quot;5\u0026quot;,\u0026quot;created_at\u0026quot;:\u0026quot;2026-05-17 11:32:32 UTC\u0026quot;,\u0026quot;pictures_urls\u0026quot;:[{\u0026quot;compact\u0026quot;:\u0026quot;https:\/\/review-images.judgeme.com\/the-birth-store\/1779017553__9e4bb02c-8f9c-4c85-8171-5301112df2de__original.jpeg?quality=80\\u0026width=160\u0026quot;,\u0026quot;original\u0026quot;:\u0026quot;https:\/\/review-images.judgeme.com\/the-birth-store\/1779017553__9e4bb02c-8f9c-4c85-8171-5301112df2de__original.jpeg?quality=80\\u0026width=1024\u0026quot;}]},{\u0026quot;uuid\u0026quot;:\u0026quot;183e1b00-b8b7-4a0e-b808-b84d49b47d54\u0026quot;,\u0026quot;reviewer_name\u0026quot;:\u0026quot;Charlie Deacon\u0026quot;,\u0026quot;reviewer_initial\u0026quot;:\u0026quot;C\u0026quot;,\u0026quot;title\u0026quot;:\u0026quot;Magical ✨\u0026quot;,\u0026quot;body_html\u0026quot;:\u0026quot;\\u003cp\\u003eAbsolutely amazing experience borrowing the TENS machine for labour! It was honestly a lifesaver and helped me so much through contractions, especially in the early stages. Super easy to use, gave incredible relief, and made me feel so much more in control during labour. I couldn’t recommend it enough to any expecting mums. Thank you again! 🤍\\u003c\/p\\u003e\u0026quot;,\u0026quot;verified_buyer\u0026quot;:true,\u0026quot;location\u0026quot;:\u0026quot;\u0026quot;,\u0026quot;video_external_ids\u0026quot;:[],\u0026quot;video_thumbnail_urls\u0026quot;:[],\u0026quot;media_platform_hosted_video_infos\u0026quot;:[],\u0026quot;cf_answers\u0026quot;:[],\u0026quot;shop_reply_name\u0026quot;:\u0026quot;The Birth Store\u0026quot;,\u0026quot;rating\u0026quot;:\u0026quot;5\u0026quot;,\u0026quot;created_at\u0026quot;:\u0026quot;2026-05-12 22:27:07 UTC\u0026quot;,\u0026quot;pictures_urls\u0026quot;:[{\u0026quot;compact\u0026quot;:\u0026quot;https:\/\/review-images.judgeme.com\/the-birth-store\/1778624827__img_2139__original.jpeg?quality=80\\u0026width=160\u0026quot;,\u0026quot;original\u0026quot;:\u0026quot;https:\/\/review-images.judgeme.com\/the-birth-store\/1778624827__img_2139__original.jpeg?quality=80\\u0026width=1024\u0026quot;},{\u0026quot;compact\u0026quot;:\u0026quot;https:\/\/review-images.judgeme.com\/the-birth-store\/1778624830__fullsizerender__original.jpeg?quality=80\\u0026width=160\u0026quot;,\u0026quot;original\u0026quot;:\u0026quot;https:\/\/review-images.judgeme.com\/the-birth-store\/1778624830__fullsizerender__original.jpeg?quality=80\\u0026width=1024\u0026quot;}]},{\u0026quot;uuid\u0026quot;:\u0026quot;1ff82573-8e65-49b6-a218-3c4a965f76f4\u0026quot;,\u0026quot;reviewer_name\u0026quot;:\u0026quot;Natalie R\u0026quot;,\u0026quot;reviewer_initial\u0026quot;:\u0026quot;N\u0026quot;,\u0026quot;title\u0026quot;:\u0026quot;So thankful for this purchase!\u0026quot;,\u0026quot;body_html\u0026quot;:\u0026quot;\\u003cp\\u003eFrom the beginning of pregnancy I knew I wanted to hire a tens machine, it was a labour non-negotiable. The Birth store was super easy and allowed me to organise it in advance and be confident it would be here when I needed it. My labour was a long 17 active hours (and 35hrs total), the tens machine was with me through it all! Except the bath and shower of course. For anyone unsure, do it, you won’t be disappointed. The process is so easy, I was sad to send it back, so many beautiful (and painful) memories.\\u003c\/p\\u003e\u0026quot;,\u0026quot;verified_buyer\u0026quot;:true,\u0026quot;location\u0026quot;:\u0026quot;\u0026quot;,\u0026quot;video_external_ids\u0026quot;:[],\u0026quot;video_thumbnail_urls\u0026quot;:[],\u0026quot;media_platform_hosted_video_infos\u0026quot;:[],\u0026quot;cf_answers\u0026quot;:[],\u0026quot;reply_content\u0026quot;:\u0026quot;\\u003cp\\u003eThank you for sharing your experience, Natalie. We\u0026#39;re so glad the TENS machine could support you through such a long labour and that the process felt easy and reliable for you. Wishing you and your family so many beautiful moments ahead. 🙏\\u003c\/p\\u003e\u0026quot;,\u0026quot;shop_reply_name\u0026quot;:\u0026quot;The Birth Store\u0026quot;,\u0026quot;rating\u0026quot;:\u0026quot;5\u0026quot;,\u0026quot;created_at\u0026quot;:\u0026quot;2026-01-21 06:10:36 UTC\u0026quot;,\u0026quot;pictures_urls\u0026quot;:[{\u0026quot;compact\u0026quot;:\u0026quot;https:\/\/review-images.judgeme.com\/the-birth-store\/1768975836__img_3692__original.jpeg?quality=80\\u0026width=160\u0026quot;,\u0026quot;original\u0026quot;:\u0026quot;https:\/\/review-images.judgeme.com\/the-birth-store\/1768975836__img_3692__original.jpeg?quality=80\\u0026width=1024\u0026quot;}]},{\u0026quot;uuid\u0026quot;:\u0026quot;82ea54fc-245d-4a17-8459-7dff7b3ab60d\u0026quot;,\u0026quot;reviewer_name\u0026quot;:\u0026quot;C.M.\u0026quot;,\u0026quot;reviewer_initial\u0026quot;:\u0026quot;C\u0026quot;,\u0026quot;title\u0026quot;:\u0026quot;Life-saver!!!\u0026quot;,\u0026quot;body_html\u0026quot;:\u0026quot;\\u003cp\\u003eIt was a very last minute decision to hire this little beauty for my 2nd birth. So glad I did! I loved how easy it was to use. Honestly, I didn’t like the sensation of it initially. I only had it on a very low intensity at first \\u0026amp; I gradually worked my way up the levels. As my labour progressed at home I quickly fell in love with the distraction \\u0026amp; relief. It made the dreaded car ride to hospital manageable, enjoyable even! LOVED using the boost function, super helpful. I ended up keeping my TENS on for my entire birth, which was not the initial plan. My body was then relaxed \\u0026amp; tension-free enough to do its thing with the Fetal Ejection Reflex. So only a 1 minute pushing stage, compared to 2hrs with my first baby! This godsend of a device helped me to surrender much more effectively \\u0026amp; it beautifully aided the calm, natural birth of my daughter. \\n\\u003cbr \/\\u003eTruly invaluable, worth every penny, and THE must-have tool in your labour kit!\\u003c\/p\\u003e\u0026quot;,\u0026quot;verified_buyer\u0026quot;:true,\u0026quot;location\u0026quot;:\u0026quot;\u0026quot;,\u0026quot;video_external_ids\u0026quot;:[],\u0026quot;video_thumbnail_urls\u0026quot;:[],\u0026quot;media_platform_hosted_video_infos\u0026quot;:[],\u0026quot;cf_answers\u0026quot;:[],\u0026quot;reply_content\u0026quot;:\u0026quot;\\u003cp\\u003eDear C.M., thank you so much for sharing your beautiful and detailed experience with us. We are truly delighted to hear how the TENS machine supported you throughout your labour and made such a positive difference, your kind words and recommendation mean so much to us. ❤️\\u003c\/p\\u003e\u0026quot;,\u0026quot;shop_reply_name\u0026quot;:\u0026quot;The Birth Store\u0026quot;,\u0026quot;rating\u0026quot;:\u0026quot;5\u0026quot;,\u0026quot;created_at\u0026quot;:\u0026quot;2024-12-17 10:31:59 UTC\u0026quot;,\u0026quot;pictures_urls\u0026quot;:[{\u0026quot;compact\u0026quot;:\u0026quot;https:\/\/review-images.judgeme.com\/the-birth-store\/1734431520__img_2846__original.jpeg?quality=80\\u0026width=160\u0026quot;,\u0026quot;original\u0026quot;:\u0026quot;https:\/\/review-images.judgeme.com\/the-birth-store\/1734431520__img_2846__original.jpeg?quality=80\\u0026width=1024\u0026quot;}]},{\u0026quot;uuid\u0026quot;:\u0026quot;f00f0360-b8b9-47f8-b4df-ac16ffcb0fe0\u0026quot;,\u0026quot;reviewer_name\u0026quot;:\u0026quot;Amanda Cao\u0026quot;,\u0026quot;reviewer_initial\u0026quot;:\u0026quot;A\u0026quot;,\u0026quot;title\u0026quot;:\u0026quot;Great tool for birth\u0026quot;,\u0026quot;body_html\u0026quot;:\u0026quot;\\u003cp\\u003eI loved using the TENS machine for my recent birth - it was the only pain relief I utilised and definitely helped take the edge off my contractions. \\u003c\/p\\u003e\\n\\n\\u003cp\\u003eI laboured for 8 hours and it helped get me through the first 6-7 hours. By the time I\u0026#39;d gotten to the pushing stage in the last hour, I\u0026#39;d forgotten all about it - but it helped me get there!\\n\\u003cbr \/\\u003eI personally find the first stage of labour the hardest mentally, so it was a relief to get through it.\\u003c\/p\\u003e\\n\\n\\u003cp\\u003eThe TENS machine is simple and straightforward to use.\\n\\u003cbr \/\\u003eI initially turned on the boost function during a contraction, then switched it off when my contraction tapered off. When my labour progressed and contractions got considerably intense, I just kept the boost function on and increased \\u0026amp; decreased the intensity as needed. \\u003c\/p\\u003e\\n\\n\\u003cp\\u003eIt also arrived very quickly in the mail, and is very easy to return. Don\u0026#39;t accidentally throw out the bubble wrap like I did though haha - you need it to protect the machine when returning it. Not a hassle, I just bought some more, but for the environmentalist in me it was just a waste of plastic when I could\u0026#39;ve just kept the original. \\u003c\/p\\u003e\\n\\n\\u003cp\\u003eI know some people (like me!) find a TENS machine very helpful during labour, others find it less so - the birth experience can be unpredictable. However it\u0026#39;s worth having as an option and I\u0026#39;d definitely recommend giving it a go! \\n\\u003cbr \/\\u003eIf you\u0026#39;re a pregnant person reading this - best of luck and sending love, you\u0026#39;ve got this ❤️\\u003c\/p\\u003e\u0026quot;,\u0026quot;verified_buyer\u0026quot;:true,\u0026quot;location\u0026quot;:\u0026quot;\u0026quot;,\u0026quot;video_external_ids\u0026quot;:[],\u0026quot;video_thumbnail_urls\u0026quot;:[],\u0026quot;media_platform_hosted_video_infos\u0026quot;:[],\u0026quot;cf_answers\u0026quot;:[],\u0026quot;reply_content\u0026quot;:\u0026quot;\\u003cp\\u003eThank you so much for sharing your experience so thoughtfully, Amanda. We’re so glad to hear the TENS machine supported you through those earlier stages of labour and helped you stay focused and get through the more intense moments. Your detailed insight will be incredibly helpful for other mums preparing for birth and exploring their options ❤️\\u003c\/p\\u003e\u0026quot;,\u0026quot;shop_reply_name\u0026quot;:\u0026quot;The Birth Store\u0026quot;,\u0026quot;rating\u0026quot;:\u0026quot;5\u0026quot;,\u0026quot;created_at\u0026quot;:\u0026quot;2024-10-15 17:06:16 UTC\u0026quot;,\u0026quot;pictures_urls\u0026quot;:[{\u0026quot;compact\u0026quot;:\u0026quot;https:\/\/review-images.judgeme.com\/the-birth-store\/1729011976__1000031964__original.jpg?quality=80\\u0026width=160\u0026quot;,\u0026quot;original\u0026quot;:\u0026quot;https:\/\/review-images.judgeme.com\/the-birth-store\/1729011976__1000031964__original.jpg?quality=80\\u0026width=1024\u0026quot;}]},{\u0026quot;uuid\u0026quot;:\u0026quot;de212dc0-8385-44f5-95a7-ecf1ed6a7c7f\u0026quot;,\u0026quot;reviewer_name\u0026quot;:\u0026quot;Rashaun Newbigging\u0026quot;,\u0026quot;reviewer_initial\u0026quot;:\u0026quot;R\u0026quot;,\u0026quot;title\u0026quot;:\u0026quot;The only thing that got me through!\u0026quot;,\u0026quot;body_html\u0026quot;:\u0026quot;\\u003cp\\u003eI started using my tens machine when contractions got painful, arrived at the hospital and was already 6cm dilated.\\n\\u003cbr \/\\u003ePushed through with the tens until I was 9cm dilated and required the epidural for theatre. \\n\\u003cbr \/\\u003eI truly don’t think I would have been able to get as far as I did without the tens machine! \\n\\u003cbr \/\\u003eHighly recommend!\\u003c\/p\\u003e\u0026quot;,\u0026quot;verified_buyer\u0026quot;:true,\u0026quot;location\u0026quot;:\u0026quot;\u0026quot;,\u0026quot;video_external_ids\u0026quot;:[],\u0026quot;video_thumbnail_urls\u0026quot;:[],\u0026quot;media_platform_hosted_video_infos\u0026quot;:[],\u0026quot;cf_answers\u0026quot;:[],\u0026quot;reply_content\u0026quot;:\u0026quot;\\u003cp\\u003eThank you so much for sharing your experience with us, Rashaun. We’re so glad to hear the TENS machine supported you through those intense stages of labour and helped you get as far as you did. Your story will be so encouraging for other mums preparing for their own birth journey ❤️\\u003c\/p\\u003e\u0026quot;,\u0026quot;shop_reply_name\u0026quot;:\u0026quot;The Birth Store\u0026quot;,\u0026quot;rating\u0026quot;:\u0026quot;5\u0026quot;,\u0026quot;created_at\u0026quot;:\u0026quot;2024-09-03 23:47:30 UTC\u0026quot;,\u0026quot;pictures_urls\u0026quot;:[{\u0026quot;compact\u0026quot;:\u0026quot;https:\/\/review-images.judgeme.com\/the-birth-store\/1725407435__img_2376__original.jpeg?quality=80\\u0026width=160\u0026quot;,\u0026quot;original\u0026quot;:\u0026quot;https:\/\/review-images.judgeme.com\/the-birth-store\/1725407435__img_2376__original.jpeg?quality=80\\u0026width=1024\u0026quot;}]},{\u0026quot;uuid\u0026quot;:\u0026quot;58fef555-7a45-4799-8be6-c0ec93624377\u0026quot;,\u0026quot;reviewer_name\u0026quot;:\u0026quot;Rajwinder Jerome\u0026quot;,\u0026quot;reviewer_initial\u0026quot;:\u0026quot;R\u0026quot;,\u0026quot;title\u0026quot;:\u0026quot;Highly recommended\u0026quot;,\u0026quot;body_html\u0026quot;:\u0026quot;\\u003cp\\u003eTENS machine helped me with my 56+hours labor without needing any epidural. It was my first pregnancy and I used TENS alongwith gas during intense contraction and it worked as a charm. Highly recommend this esp first time Moms❤\\u003c\/p\\u003e\u0026quot;,\u0026quot;verified_buyer\u0026quot;:true,\u0026quot;location\u0026quot;:\u0026quot;\u0026quot;,\u0026quot;video_external_ids\u0026quot;:[],\u0026quot;video_thumbnail_urls\u0026quot;:[],\u0026quot;media_platform_hosted_video_infos\u0026quot;:[],\u0026quot;cf_answers\u0026quot;:[],\u0026quot;reply_content\u0026quot;:\u0026quot;\\u003cp\\u003eRajwinder, thank you so much for sharing your experience, it truly means a lot to hear how the TENS supported you through such a long and intense labour. We’re so glad it helped you manage those contractions alongside gas and supported you in avoiding an epidural, especially for your first birth. We really appreciate your recommendation and kind words ❤️\\u003c\/p\\u003e\u0026quot;,\u0026quot;shop_reply_name\u0026quot;:\u0026quot;The Birth Store\u0026quot;,\u0026quot;rating\u0026quot;:\u0026quot;5\u0026quot;,\u0026quot;created_at\u0026quot;:\u0026quot;2024-06-01 03:00:39 UTC\u0026quot;,\u0026quot;pictures_urls\u0026quot;:[{\u0026quot;compact\u0026quot;:\u0026quot;https:\/\/review-images.judgeme.com\/the-birth-store\/1717210840__pxl_20240525_151201149mp__original.jpg?quality=80\\u0026width=160\u0026quot;,\u0026quot;original\u0026quot;:\u0026quot;https:\/\/review-images.judgeme.com\/the-birth-store\/1717210840__pxl_20240525_151201149mp__original.jpg?quality=80\\u0026width=1024\u0026quot;}]},{\u0026quot;uuid\u0026quot;:\u0026quot;d883a03d-ae98-45da-af28-33620a34f32d\u0026quot;,\u0026quot;reviewer_name\u0026quot;:\u0026quot;Kimese Hogan\u0026quot;,\u0026quot;reviewer_initial\u0026quot;:\u0026quot;K\u0026quot;,\u0026quot;title\u0026quot;:\u0026quot;Amazing\u0026quot;,\u0026quot;body_html\u0026quot;:\u0026quot;\\u003cp\\u003eThis was my 8th natural birth, First time using a tens machine. I rate it 1000% it helped me manage my contractions to a comfortable level. Worth every dollar. I’m even considering purchasing one now.\\u003c\/p\\u003e\u0026quot;,\u0026quot;verified_buyer\u0026quot;:true,\u0026quot;location\u0026quot;:\u0026quot;\u0026quot;,\u0026quot;video_external_ids\u0026quot;:[],\u0026quot;video_thumbnail_urls\u0026quot;:[],\u0026quot;media_platform_hosted_video_infos\u0026quot;:[],\u0026quot;cf_answers\u0026quot;:[],\u0026quot;reply_content\u0026quot;:\u0026quot;\\u003cp\\u003eWOW! You warrior - well done to you. We are so happy to hear you loved your TENS!\\u003c\/p\\u003e\u0026quot;,\u0026quot;shop_reply_name\u0026quot;:\u0026quot;The Birth Store\u0026quot;,\u0026quot;rating\u0026quot;:\u0026quot;5\u0026quot;,\u0026quot;created_at\u0026quot;:\u0026quot;2024-04-16 02:57:45 UTC\u0026quot;,\u0026quot;pictures_urls\u0026quot;:[{\u0026quot;compact\u0026quot;:\u0026quot;https:\/\/review-images.judgeme.com\/the-birth-store\/1713236505__img_1172__original.jpeg?quality=80\\u0026width=160\u0026quot;,\u0026quot;original\u0026quot;:\u0026quot;https:\/\/review-images.judgeme.com\/the-birth-store\/1713236505__img_1172__original.jpeg?quality=80\\u0026width=1024\u0026quot;}]},{\u0026quot;uuid\u0026quot;:\u0026quot;c56ac4a8-2905-4c79-aca1-4370523102ec\u0026quot;,\u0026quot;reviewer_name\u0026quot;:\u0026quot;Rebekah McIntosh\u0026quot;,\u0026quot;reviewer_initial\u0026quot;:\u0026quot;R\u0026quot;,\u0026quot;title\u0026quot;:\u0026quot;Absolutely would recommend !\u0026quot;,\u0026quot;body_html\u0026quot;:\u0026quot;\\u003cp\\u003eI was unsure if I would use it - however I thought because it wasn’t overly expensive to hire that I would just get it in case I wanted to use it. And man was I glad that I did. I used it at home for 3 hours before heading to hospital and was told I was 8cm dilated. I was only using half of the boost as well. I truly believe this is how I got that far along with the pain and can’t imagine how I’d felt if I used all of the boost! Amazing and have already recommended to friends who are due to give birth soon!\\u003c\/p\\u003e\u0026quot;,\u0026quot;verified_buyer\u0026quot;:true,\u0026quot;location\u0026quot;:\u0026quot;\u0026quot;,\u0026quot;video_external_ids\u0026quot;:[],\u0026quot;video_thumbnail_urls\u0026quot;:[],\u0026quot;media_platform_hosted_video_infos\u0026quot;:[],\u0026quot;cf_answers\u0026quot;:[],\u0026quot;reply_content\u0026quot;:\u0026quot;\\u003cp\\u003eHi Rebekah, thats amazing news. We are so happy you could labour at home as long as possible. We hope all is going well for you and bubs ;)\\u003c\/p\\u003e\u0026quot;,\u0026quot;shop_reply_name\u0026quot;:\u0026quot;The Birth Store\u0026quot;,\u0026quot;rating\u0026quot;:\u0026quot;5\u0026quot;,\u0026quot;created_at\u0026quot;:\u0026quot;2024-03-06 06:09:27 UTC\u0026quot;,\u0026quot;pictures_urls\u0026quot;:[{\u0026quot;compact\u0026quot;:\u0026quot;https:\/\/review-images.judgeme.com\/labour-tens-machine-hire-the-birth-store\/1709705367__img_6517__original.jpeg?quality=80\\u0026width=160\u0026quot;,\u0026quot;original\u0026quot;:\u0026quot;https:\/\/review-images.judgeme.com\/labour-tens-machine-hire-the-birth-store\/1709705367__img_6517__original.jpeg?quality=80\\u0026width=1024\u0026quot;}]},{\u0026quot;uuid\u0026quot;:\u0026quot;1713c38a-5bea-4624-b699-4bb13f7628ae\u0026quot;,\u0026quot;reviewer_name\u0026quot;:\u0026quot;Cassie Fox\u0026quot;,\u0026quot;reviewer_initial\u0026quot;:\u0026quot;C\u0026quot;,\u0026quot;title\u0026quot;:\u0026quot;Highly recommend!\u0026quot;,\u0026quot;body_html\u0026quot;:\u0026quot;\\u003cp\\u003eFirst timing using a tens in labour (third birth), and I wish I’d had one for my others! Very fast labour and the only tool I used was the Elle tens. The whole hire experience was very straight forward and I love the inclusion of the post bag to make returns fast and easy.\\u003c\/p\\u003e\u0026quot;,\u0026quot;verified_buyer\u0026quot;:true,\u0026quot;location\u0026quot;:\u0026quot;\u0026quot;,\u0026quot;video_external_ids\u0026quot;:[],\u0026quot;video_thumbnail_urls\u0026quot;:[],\u0026quot;media_platform_hosted_video_infos\u0026quot;:[],\u0026quot;cf_answers\u0026quot;:[],\u0026quot;reply_content\u0026quot;:\u0026quot;\\u003cp\\u003eHi Cass, we are so happy the TENS helped you and glad you liked our return process. We hope your new baby is settling into the family :)\\u003c\/p\\u003e\u0026quot;,\u0026quot;shop_reply_name\u0026quot;:\u0026quot;The Birth Store\u0026quot;,\u0026quot;rating\u0026quot;:\u0026quot;5\u0026quot;,\u0026quot;created_at\u0026quot;:\u0026quot;2024-02-14 06:50:30 UTC\u0026quot;,\u0026quot;pictures_urls\u0026quot;:[{\u0026quot;compact\u0026quot;:\u0026quot;https:\/\/review-images.judgeme.com\/labour-tens-machine-hire-the-birth-store\/1707893431__img_1131__original.jpeg?quality=80\\u0026width=160\u0026quot;,\u0026quot;original\u0026quot;:\u0026quot;https:\/\/review-images.judgeme.com\/labour-tens-machine-hire-the-birth-store\/1707893431__img_1131__original.jpeg?quality=80\\u0026width=1024\u0026quot;}]}]'\u003e\u003c\/div\u003e \u003c\/div\u003e \u003cdiv class=\"jdgm-medals-wrapper jdgm-hidden\" data-updated-at='2026-11-14T01:09:30Z'\u003e \u003cstyle type=\"text\/css\"\u003e\u003c\/style\u003e \u003cdiv class=\"jdgm-medals\" data-link=\"https:\/\/app.judge.me\/reviews\/stores\/www.thebirthstore.com.au\"\u003e \u003cdiv class=\"jdgm-medals__container\"\u003e \u003cdiv class=\"jdgm-medal-wrapper\" title=\"Silver Authentic Shop. At least 90% of published reviews are verified reviews\"\u003e \u003ca class=\"jdgm-medal jdgm--loading\" data-value=\"90.6\" data-type=\"auth\" data-tier=\"silver\" aria-label=\"Judge.me Silver Authentic Shop medal\"\u003e \u003cdiv class=\"jdgm-medal__image\" data-url=\"auth\/silver.svg\" data-alt=\"Judge.me Silver Authentic Shop medal\"\u003e\u003c\/div\u003e \u003cdiv class=\"jdgm-medal__value \"\u003e90.6\u003c\/div\u003e \u003c\/a\u003e \u003c\/div\u003e \u003cdiv class=\"jdgm-medal-wrapper\" title=\"Platinum Transparent Shop. Published at least 99% of verified reviews received in total\"\u003e \u003ca class=\"jdgm-medal jdgm--loading\" data-value=\"99.9\" data-type=\"tran\" data-tier=\"platinum\" aria-label=\"Judge.me Platinum Transparent Shop medal\"\u003e \u003cdiv class=\"jdgm-medal__image\" data-url=\"tran\/platinum.svg\" data-alt=\"Judge.me Platinum Transparent Shop medal\"\u003e\u003c\/div\u003e \u003cdiv class=\"jdgm-medal__value \"\u003e99.9\u003c\/div\u003e \u003c\/a\u003e \u003c\/div\u003e \u003c\/div\u003e \u003c\/div\u003e \u003c\/div\u003e \u003cdiv class='jdgm-rev-widg__sort-wrapper'\u003e\u003c\/div\u003e \u003c\/div\u003e \u003cdiv class='jdgm-rev-widg__body'\u003e \u003cdiv class='jdgm-rev-widg__reviews'\u003e\u003cdiv class='jdgm-rev jdgm-divider-top' data-verified-buyer='true' data-review-id='18bb10da-ba20-4f70-8fa1-52ffc7405da8' data-review-language='' data-product-title='Labour TENS Machine Hire' data-product-url='\/products\/labour-birth-tens-machine-hire' data-thumb-up-count='0' data-thumb-down-count='0'\u003e \u003cdiv class='jdgm-rev__header'\u003e \u003cdiv class='jdgm-rev__icon' \u003e N \u003c\/div\u003e \u003cspan class='jdgm-rev__rating' data-score='5' tabindex='0' aria-label='5 star review' role='img'\u003e \u003cspan class='jdgm-star jdgm--on'\u003e\u003c\/span\u003e\u003cspan class='jdgm-star jdgm--on'\u003e\u003c\/span\u003e\u003cspan class='jdgm-star jdgm--on'\u003e\u003c\/span\u003e\u003cspan class='jdgm-star jdgm--on'\u003e\u003c\/span\u003e\u003cspan class='jdgm-star jdgm--on'\u003e\u003c\/span\u003e \u003c\/span\u003e \u003ctime class='jdgm-rev__timestamp jdgm-spinner' datetime='2026-11-14T01:02:55Z' data-content='2026-11-14 01:02:55 UTC'\u003e\u003c\/time\u003e \u003cdiv class='jdgm-rev__br'\u003e\u003c\/div\u003e \u003cspan class='jdgm-rev__buyer-badge-wrapper'\u003e \u003cspan class='jdgm-rev__buyer-badge'\u003e\u003c\/span\u003e \u003c\/span\u003e \u003cspan class='jdgm-rev__author-wrapper'\u003e \u003cspan class='jdgm-rev__author'\u003eNidhi Rao\u003c\/span\u003e \u003cspan class='jdgm-rev__location' \u003e \u003c\/span\u003e \u003c\/span\u003e \u003c\/div\u003e \u003cdiv class='jdgm-rev__content'\u003e \u003cdiv class='jdgm-rev__custom-form'\u003e \u003c\/div\u003e \u003cstrong class='jdgm-rev__title'\u003eTens machine\u003c\/strong\u003e \u003cdiv class='jdgm-rev__body'\u003e\u003cp\u003eIt went really well , very useful and everything was organised perfectly\u003c\/p\u003e\u003c\/div\u003e \u003cdiv class='jdgm-rev__pics'\u003e \u003c\/div\u003e \u003cdiv class='jdgm-rev__vids'\u003e \u003c\/div\u003e \u003cdiv class='jdgm-rev__transparency-badge-wrapper'\u003e \u003cdiv class='jdgm-rev__transparency-badge' data-badge-type=review_collected_via_store_invitation\u003e\u003c\/div\u003e \u003c\/div\u003e \u003c\/div\u003e \u003cdiv class='jdgm-rev__actions'\u003e \u003cdiv class='jdgm-rev__social'\u003e\u003c\/div\u003e \u003cdiv class='jdgm-rev__votes'\u003e\u003c\/div\u003e \u003c\/div\u003e \u003cdiv class='jdgm-rev__reply'\u003e \u003c\/div\u003e \u003c\/div\u003e\u003cdiv class='jdgm-rev jdgm-divider-top' data-verified-buyer='true' data-review-id='65c4bf64-be6f-459e-ac2c-794138b7735f' data-review-language='' data-product-title='Labour TENS Machine Hire' data-product-url='\/products\/labour-birth-tens-machine-hire' data-thumb-up-count='0' data-thumb-down-count='0'\u003e \u003cdiv class='jdgm-rev__header'\u003e \u003cdiv class='jdgm-rev__icon' \u003e C \u003c\/div\u003e \u003cspan class='jdgm-rev__rating' data-score='5' tabindex='0' aria-label='5 star review' role='img'\u003e \u003cspan class='jdgm-star jdgm--on'\u003e\u003c\/span\u003e\u003cspan class='jdgm-star jdgm--on'\u003e\u003c\/span\u003e\u003cspan class='jdgm-star jdgm--on'\u003e\u003c\/span\u003e\u003cspan class='jdgm-star jdgm--on'\u003e\u003c\/span\u003e\u003cspan class='jdgm-star jdgm--on'\u003e\u003c\/span\u003e \u003c\/span\u003e \u003ctime class='jdgm-rev__timestamp jdgm-spinner' datetime='2026-11-12T03:29:24Z' data-content='2026-11-12 03:29:24 UTC'\u003e\u003c\/time\u003e \u003cdiv class='jdgm-rev__br'\u003e\u003c\/div\u003e \u003cspan class='jdgm-rev__buyer-badge-wrapper'\u003e \u003cspan class='jdgm-rev__buyer-badge'\u003e\u003c\/span\u003e \u003c\/span\u003e \u003cspan class='jdgm-rev__author-wrapper'\u003e \u003cspan class='jdgm-rev__author'\u003eCourtney Collis\u003c\/span\u003e \u003cspan class='jdgm-rev__location' \u003e \u003c\/span\u003e \u003c\/span\u003e \u003c\/div\u003e \u003cdiv class='jdgm-rev__content'\u003e \u003cdiv class='jdgm-rev__custom-form'\u003e \u003c\/div\u003e \u003cstrong class='jdgm-rev__title'\u003eBest home birth\u003c\/strong\u003e \u003cdiv class='jdgm-rev__body'\u003e\u003cp\u003eThis is a must have when in labour! All I used was the TENS, birth comb and water. Couldn’t have gotten through my 2 births without it\u003c\/p\u003e\u003c\/div\u003e \u003cdiv class='jdgm-rev__pics'\u003e \u003c\/div\u003e \u003cdiv class='jdgm-rev__vids'\u003e \u003c\/div\u003e \u003cdiv class='jdgm-rev__transparency-badge-wrapper'\u003e \u003cdiv class='jdgm-rev__transparency-badge' data-badge-type=review_collected_via_store_invitation\u003e\u003c\/div\u003e \u003c\/div\u003e \u003c\/div\u003e \u003cdiv class='jdgm-rev__actions'\u003e \u003cdiv class='jdgm-rev__social'\u003e\u003c\/div\u003e \u003cdiv class='jdgm-rev__votes'\u003e\u003c\/div\u003e \u003c\/div\u003e \u003cdiv class='jdgm-rev__reply'\u003e \u003cdiv class='jdgm-rev__replier-wrapper'\u003e \u003cb class='jdgm-rev__replier'\u003e\u003c\/b\u003e \u003c\/div\u003e \u003cdiv class='jdgm-rev__reply-content' data-digital-source-type=\"https:\/\/schema.org\/TrainedAlgorithmicMediaDigitalSource\"\u003e\u003cp\u003eThank you so much, Courtney, for your lovely review ❤️ We’re so glad the TENS machine, alongside your birth comb and water, helped support you through both of your births. It’s wonderful to hear that it made such a positive difference, and we really appreciate you sharing your experience with us!\u003c\/p\u003e\u003c\/div\u003e \u003c\/div\u003e \u003c\/div\u003e\u003cdiv class='jdgm-rev jdgm-divider-top' data-verified-buyer='true' data-review-id='76f0c4ee-bc09-4496-bb5b-28029b69a076' data-review-language='' data-product-title='Labour TENS Machine Hire' data-product-url='\/products\/labour-birth-tens-machine-hire' data-thumb-up-count='0' data-thumb-down-count='0'\u003e \u003cdiv class='jdgm-rev__header'\u003e \u003cdiv class='jdgm-rev__icon' \u003e J \u003c\/div\u003e \u003cspan class='jdgm-rev__rating' data-score='5' tabindex='0' aria-label='5 star review' role='img'\u003e \u003cspan class='jdgm-star jdgm--on'\u003e\u003c\/span\u003e\u003cspan class='jdgm-star jdgm--on'\u003e\u003c\/span\u003e\u003cspan class='jdgm-star jdgm--on'\u003e\u003c\/span\u003e\u003cspan class='jdgm-star jdgm--on'\u003e\u003c\/span\u003e\u003cspan class='jdgm-star jdgm--on'\u003e\u003c\/span\u003e \u003c\/span\u003e \u003ctime class='jdgm-rev__timestamp jdgm-spinner' datetime='2026-11-10T10:55:59Z' data-content='2026-11-10 10:55:59 UTC'\u003e\u003c\/time\u003e \u003cdiv class='jdgm-rev__br'\u003e\u003c\/div\u003e \u003cspan class='jdgm-rev__buyer-badge-wrapper'\u003e \u003cspan class='jdgm-rev__buyer-badge'\u003e\u003c\/span\u003e \u003c\/span\u003e \u003cspan class='jdgm-rev__author-wrapper'\u003e \u003cspan class='jdgm-rev__author'\u003eJess Targett\u003c\/span\u003e \u003cspan class='jdgm-rev__location' \u003e \u003c\/span\u003e \u003c\/span\u003e \u003c\/div\u003e \u003cdiv class='jdgm-rev__content'\u003e \u003cdiv class='jdgm-rev__custom-form'\u003e \u003c\/div\u003e \u003cstrong class='jdgm-rev__title'\u003e\u003c\/strong\u003e \u003cdiv class='jdgm-rev__body'\u003e\u003cp\u003eLabour TENS Machine Hire\u003c\/p\u003e\u003c\/div\u003e \u003cdiv class='jdgm-rev__pics'\u003e \u003c\/div\u003e \u003cdiv class='jdgm-rev__vids'\u003e \u003c\/div\u003e \u003cdiv class='jdgm-rev__transparency-badge-wrapper'\u003e \u003cdiv class='jdgm-rev__transparency-badge' data-badge-type=review_collected_via_store_invitation\u003e\u003c\/div\u003e \u003c\/div\u003e \u003c\/div\u003e \u003cdiv class='jdgm-rev__actions'\u003e \u003cdiv class='jdgm-rev__social'\u003e\u003c\/div\u003e \u003cdiv class='jdgm-rev__votes'\u003e\u003c\/div\u003e \u003c\/div\u003e \u003cdiv class='jdgm-rev__reply'\u003e \u003c\/div\u003e \u003c\/div\u003e\u003cdiv class='jdgm-rev jdgm-divider-top' data-verified-buyer='true' data-review-id='2e7b0287-c81f-49b4-8247-03e12df869ff' data-review-language='' data-product-title='Labour TENS Machine Hire' data-product-url='\/products\/labour-birth-tens-machine-hire' data-thumb-up-count='0' data-thumb-down-count='0'\u003e \u003cdiv class='jdgm-rev__header'\u003e \u003cdiv class='jdgm-rev__icon' \u003e C \u003c\/div\u003e \u003cspan class='jdgm-rev__rating' data-score='5' tabindex='0' aria-label='5 star review' role='img'\u003e \u003cspan class='jdgm-star jdgm--on'\u003e\u003c\/span\u003e\u003cspan class='jdgm-star jdgm--on'\u003e\u003c\/span\u003e\u003cspan class='jdgm-star jdgm--on'\u003e\u003c\/span\u003e\u003cspan class='jdgm-star jdgm--on'\u003e\u003c\/span\u003e\u003cspan class='jdgm-star jdgm--on'\u003e\u003c\/span\u003e \u003c\/span\u003e \u003ctime class='jdgm-rev__timestamp jdgm-spinner' datetime='2026-11-08T23:44:07Z' data-content='2026-11-08 23:44:07 UTC'\u003e\u003c\/time\u003e \u003cdiv class='jdgm-rev__br'\u003e\u003c\/div\u003e \u003cspan class='jdgm-rev__buyer-badge-wrapper'\u003e \u003cspan class='jdgm-rev__buyer-badge'\u003e\u003c\/span\u003e \u003c\/span\u003e \u003cspan class='jdgm-rev__author-wrapper'\u003e \u003cspan class='jdgm-rev__author'\u003eChantelle Murray\u003c\/span\u003e \u003cspan class='jdgm-rev__location' \u003e \u003c\/span\u003e \u003c\/span\u003e \u003c\/div\u003e \u003cdiv class='jdgm-rev__content'\u003e \u003cdiv class='jdgm-rev__custom-form'\u003e \u003c\/div\u003e \u003cstrong class='jdgm-rev__title'\u003eEarly delivery a\u003c\/strong\u003e \u003cdiv class='jdgm-rev__body'\u003e\u003cp\u003eHiring was super easy. It was delivered very early having peace of mind and it allowed for heaps of time after birth to be able to return, especially since I gave birth at 41+5 and still have time after. The machine worked well and was great being able to time everything.\u003c\/p\u003e\u003c\/div\u003e \u003cdiv class='jdgm-rev__pics'\u003e \u003c\/div\u003e \u003cdiv class='jdgm-rev__vids'\u003e \u003c\/div\u003e \u003cdiv class='jdgm-rev__transparency-badge-wrapper'\u003e \u003cdiv class='jdgm-rev__transparency-badge' data-badge-type=review_collected_via_store_invitation\u003e\u003c\/div\u003e \u003c\/div\u003e \u003c\/div\u003e \u003cdiv class='jdgm-rev__actions'\u003e \u003cdiv class='jdgm-rev__social'\u003e\u003c\/div\u003e \u003cdiv class='jdgm-rev__votes'\u003e\u003c\/div\u003e \u003c\/div\u003e \u003cdiv class='jdgm-rev__reply'\u003e \u003cdiv class='jdgm-rev__replier-wrapper'\u003e \u003cb class='jdgm-rev__replier'\u003e\u003c\/b\u003e \u003c\/div\u003e \u003cdiv class='jdgm-rev__reply-content' data-digital-source-type=\"https:\/\/schema.org\/TrainedAlgorithmicMediaDigitalSource\"\u003e\u003cp\u003eThank you so much, Chantelle, for your lovely review ❤️ We’re so glad the early delivery gave you peace of mind and that you had plenty of time to return the machine after welcoming your baby. It’s wonderful to hear that you found the hire process easy and the contraction timing feature helpful too. We really appreciate your feedback!\u003c\/p\u003e\u003c\/div\u003e \u003c\/div\u003e \u003c\/div\u003e\u003cdiv class='jdgm-rev jdgm-divider-top' data-verified-buyer='true' data-review-id='b4ee3a53-d6c3-448f-a06d-c0aca466e660' data-review-language='' data-product-title='Labour TENS Machine Hire' data-product-url='\/products\/labour-birth-tens-machine-hire' data-thumb-up-count='0' data-thumb-down-count='0'\u003e \u003cdiv class='jdgm-rev__header'\u003e \u003cdiv class='jdgm-rev__icon' \u003e D \u003c\/div\u003e \u003cspan class='jdgm-rev__rating' data-score='5' tabindex='0' aria-label='5 star review' role='img'\u003e \u003cspan class='jdgm-star jdgm--on'\u003e\u003c\/span\u003e\u003cspan class='jdgm-star jdgm--on'\u003e\u003c\/span\u003e\u003cspan class='jdgm-star jdgm--on'\u003e\u003c\/span\u003e\u003cspan class='jdgm-star jdgm--on'\u003e\u003c\/span\u003e\u003cspan class='jdgm-star jdgm--on'\u003e\u003c\/span\u003e \u003c\/span\u003e \u003ctime class='jdgm-rev__timestamp jdgm-spinner' datetime='2026-11-08T22:11:17Z' data-content='2026-11-08 22:11:17 UTC'\u003e\u003c\/time\u003e \u003cdiv class='jdgm-rev__br'\u003e\u003c\/div\u003e \u003cspan class='jdgm-rev__buyer-badge-wrapper'\u003e \u003cspan class='jdgm-rev__buyer-badge'\u003e\u003c\/span\u003e \u003c\/span\u003e \u003cspan class='jdgm-rev__author-wrapper'\u003e \u003cspan class='jdgm-rev__author'\u003eDaiana\u003c\/span\u003e \u003cspan class='jdgm-rev__location' \u003e \u003c\/span\u003e \u003c\/span\u003e \u003c\/div\u003e \u003cdiv class='jdgm-rev__content'\u003e \u003cdiv class='jdgm-rev__custom-form'\u003e \u003c\/div\u003e \u003cstrong class='jdgm-rev__title'\u003eCan’t do without\u003c\/strong\u003e \u003cdiv class='jdgm-rev__body'\u003e\u003cp\u003eUsed it for my previous birth and was able to manage pain up until pushing, I knew I wanted it again for my third birth! I turned it on as soon as my contractions started and it was such a relief; it’s the best form of pain management if you don’t want to go natural. The boost button is the real deal!\u003c\/p\u003e\u003c\/div\u003e \u003cdiv class='jdgm-rev__pics'\u003e \u003c\/div\u003e \u003cdiv class='jdgm-rev__vids'\u003e \u003c\/div\u003e \u003cdiv class='jdgm-rev__transparency-badge-wrapper'\u003e \u003cdiv class='jdgm-rev__transparency-badge' data-badge-type=review_collected_from_store_visitor\u003e\u003c\/div\u003e \u003c\/div\u003e \u003c\/div\u003e \u003cdiv class='jdgm-rev__actions'\u003e \u003cdiv class='jdgm-rev__social'\u003e\u003c\/div\u003e \u003cdiv class='jdgm-rev__votes'\u003e\u003c\/div\u003e \u003c\/div\u003e \u003cdiv class='jdgm-rev__reply'\u003e \u003cdiv class='jdgm-rev__replier-wrapper'\u003e \u003cb class='jdgm-rev__replier'\u003e\u003c\/b\u003e \u003c\/div\u003e \u003cdiv class='jdgm-rev__reply-content' data-digital-source-type=\"https:\/\/schema.org\/TrainedAlgorithmicMediaDigitalSource\"\u003e\u003cp\u003eThank you so much, Daiana, for your lovely review ❤️ We’re so glad the TENS machine provided such helpful relief during both of your labours and that the boost button made a real difference when managing contractions. We truly appreciate your continued trust and are so happy you chose to use it again for your third birth!\u003c\/p\u003e\u003c\/div\u003e \u003c\/div\u003e \u003c\/div\u003e\u003cdiv class='jdgm-rev jdgm-divider-top' data-verified-buyer='true' data-review-id='a7f2c6cd-39e2-4674-a503-5c690114f628' data-review-language='' data-product-title='Labour TENS Machine Hire' data-product-url='\/products\/labour-birth-tens-machine-hire' data-thumb-up-count='0' data-thumb-down-count='0'\u003e \u003cdiv class='jdgm-rev__header'\u003e \u003cdiv class='jdgm-rev__icon' \u003e D \u003c\/div\u003e \u003cspan class='jdgm-rev__rating' data-score='5' tabindex='0' aria-label='5 star review' role='img'\u003e \u003cspan class='jdgm-star jdgm--on'\u003e\u003c\/span\u003e\u003cspan class='jdgm-star jdgm--on'\u003e\u003c\/span\u003e\u003cspan class='jdgm-star jdgm--on'\u003e\u003c\/span\u003e\u003cspan class='jdgm-star jdgm--on'\u003e\u003c\/span\u003e\u003cspan class='jdgm-star jdgm--on'\u003e\u003c\/span\u003e \u003c\/span\u003e \u003ctime class='jdgm-rev__timestamp jdgm-spinner' datetime='2026-11-08T22:09:32Z' data-content='2026-11-08 22:09:32 UTC'\u003e\u003c\/time\u003e \u003cdiv class='jdgm-rev__br'\u003e\u003c\/div\u003e \u003cspan class='jdgm-rev__buyer-badge-wrapper'\u003e \u003cspan class='jdgm-rev__buyer-badge'\u003e\u003c\/span\u003e \u003c\/span\u003e \u003cspan class='jdgm-rev__author-wrapper'\u003e \u003cspan class='jdgm-rev__author'\u003eDaiana\u003c\/span\u003e \u003cspan class='jdgm-rev__location' \u003e \u003c\/span\u003e \u003c\/span\u003e \u003c\/div\u003e \u003cdiv class='jdgm-rev__content'\u003e \u003cdiv class='jdgm-rev__custom-form'\u003e \u003c\/div\u003e \u003cstrong class='jdgm-rev__title'\u003eCan’t do without\u003c\/strong\u003e \u003cdiv class='jdgm-rev__body'\u003e\u003cp\u003eUsed it for my previous birth and was able to manage pain up until pushing, I knew I wanted it again for my third birth! I turned it on as soon as my contractions started and it was such a relief; it’s the best form of pain management if you don’t want to go natural. The boost button is the real deal!\u003c\/p\u003e\u003c\/div\u003e \u003cdiv class='jdgm-rev__pics'\u003e \u003c\/div\u003e \u003cdiv class='jdgm-rev__vids'\u003e \u003c\/div\u003e \u003cdiv class='jdgm-rev__transparency-badge-wrapper'\u003e \u003cdiv class='jdgm-rev__transparency-badge' data-badge-type=review_collected_via_store_invitation\u003e\u003c\/div\u003e \u003c\/div\u003e \u003c\/div\u003e \u003cdiv class='jdgm-rev__actions'\u003e \u003cdiv class='jdgm-rev__social'\u003e\u003c\/div\u003e \u003cdiv class='jdgm-rev__votes'\u003e\u003c\/div\u003e \u003c\/div\u003e \u003cdiv class='jdgm-rev__reply'\u003e \u003cdiv class='jdgm-rev__replier-wrapper'\u003e \u003cb class='jdgm-rev__replier'\u003e\u003c\/b\u003e \u003c\/div\u003e \u003cdiv class='jdgm-rev__reply-content' data-digital-source-type=\"https:\/\/schema.org\/TrainedAlgorithmicMediaDigitalSource\"\u003e\u003cp\u003eThank you so much, Daiana, for sharing your experience ❤️ We’re so glad the TENS machine supported you through another labour and helped make your contractions more manageable from the very beginning. It’s wonderful to hear how much you loved the boost button too. We truly appreciate your continued support!\u003c\/p\u003e\u003c\/div\u003e \u003c\/div\u003e \u003c\/div\u003e\u003cdiv class='jdgm-rev jdgm-divider-top' data-verified-buyer='true' data-review-id='03d0f541-fb6e-4c0d-bb92-3bf657529272' data-review-language='' data-product-title='Labour TENS Machine Hire' data-product-url='\/products\/labour-birth-tens-machine-hire' data-thumb-up-count='0' data-thumb-down-count='0'\u003e \u003cdiv class='jdgm-rev__header'\u003e \u003cdiv class='jdgm-rev__icon' \u003e E \u003c\/div\u003e \u003cspan class='jdgm-rev__rating' data-score='4' tabindex='0' aria-label='4 star review' role='img'\u003e \u003cspan class='jdgm-star jdgm--on'\u003e\u003c\/span\u003e\u003cspan class='jdgm-star jdgm--on'\u003e\u003c\/span\u003e\u003cspan class='jdgm-star jdgm--on'\u003e\u003c\/span\u003e\u003cspan class='jdgm-star jdgm--on'\u003e\u003c\/span\u003e\u003cspan class='jdgm-star jdgm--off'\u003e\u003c\/span\u003e \u003c\/span\u003e \u003ctime class='jdgm-rev__timestamp jdgm-spinner' datetime='2026-11-08T21:16:45Z' data-content='2026-11-08 21:16:45 UTC'\u003e\u003c\/time\u003e \u003cdiv class='jdgm-rev__br'\u003e\u003c\/div\u003e \u003cspan class='jdgm-rev__buyer-badge-wrapper'\u003e \u003cspan class='jdgm-rev__buyer-badge'\u003e\u003c\/span\u003e \u003c\/span\u003e \u003cspan class='jdgm-rev__author-wrapper'\u003e \u003cspan class='jdgm-rev__author'\u003eEllen Pither\u003c\/span\u003e \u003cspan class='jdgm-rev__location' \u003e \u003c\/span\u003e \u003c\/span\u003e \u003c\/div\u003e \u003cdiv class='jdgm-rev__content'\u003e \u003cdiv class='jdgm-rev__custom-form'\u003e \u003c\/div\u003e \u003cstrong class='jdgm-rev__title'\u003e\u003c\/strong\u003e \u003cdiv class='jdgm-rev__body'\u003e\u003cp\u003eReally enjoyed this product\u003c\/p\u003e\u003c\/div\u003e \u003cdiv class='jdgm-rev__pics'\u003e \u003c\/div\u003e \u003cdiv class='jdgm-rev__vids'\u003e \u003c\/div\u003e \u003cdiv class='jdgm-rev__transparency-badge-wrapper'\u003e \u003cdiv class='jdgm-rev__transparency-badge' data-badge-type=review_collected_via_store_invitation\u003e\u003c\/div\u003e \u003c\/div\u003e \u003c\/div\u003e \u003cdiv class='jdgm-rev__actions'\u003e \u003cdiv class='jdgm-rev__social'\u003e\u003c\/div\u003e \u003cdiv class='jdgm-rev__votes'\u003e\u003c\/div\u003e \u003c\/div\u003e \u003cdiv class='jdgm-rev__reply'\u003e \u003cdiv class='jdgm-rev__replier-wrapper'\u003e \u003cb class='jdgm-rev__replier'\u003e\u003c\/b\u003e \u003c\/div\u003e \u003cdiv class='jdgm-rev__reply-content' data-digital-source-type=\"https:\/\/schema.org\/TrainedAlgorithmicMediaDigitalSource\"\u003e\u003cp\u003eThank you so much, Ellen, for your lovely review ❤️ We’re so glad you enjoyed using the TENS machine and had a positive experience. We really appreciate your support and feedback!\u003c\/p\u003e\u003c\/div\u003e \u003c\/div\u003e \u003c\/div\u003e\u003cdiv class='jdgm-rev jdgm-divider-top' data-verified-buyer='true' data-review-id='fb9c7e4c-209e-4d95-bd85-305c24994e70' data-review-language='' data-product-title='Labour TENS Machine Hire' data-product-url='\/products\/labour-birth-tens-machine-hire' data-thumb-up-count='0' data-thumb-down-count='0'\u003e \u003cdiv class='jdgm-rev__header'\u003e \u003cdiv class='jdgm-rev__icon' \u003e D \u003c\/div\u003e \u003cspan class='jdgm-rev__rating' data-score='5' tabindex='0' aria-label='5 star review' role='img'\u003e \u003cspan class='jdgm-star jdgm--on'\u003e\u003c\/span\u003e\u003cspan class='jdgm-star jdgm--on'\u003e\u003c\/span\u003e\u003cspan class='jdgm-star jdgm--on'\u003e\u003c\/span\u003e\u003cspan class='jdgm-star jdgm--on'\u003e\u003c\/span\u003e\u003cspan class='jdgm-star jdgm--on'\u003e\u003c\/span\u003e \u003c\/span\u003e \u003ctime class='jdgm-rev__timestamp jdgm-spinner' datetime='2026-10-31T22:05:55Z' data-content='2026-10-31 22:05:55 UTC'\u003e\u003c\/time\u003e \u003cdiv class='jdgm-rev__br'\u003e\u003c\/div\u003e \u003cspan class='jdgm-rev__buyer-badge-wrapper'\u003e \u003cspan class='jdgm-rev__buyer-badge'\u003e\u003c\/span\u003e \u003c\/span\u003e \u003cspan class='jdgm-rev__author-wrapper'\u003e \u003cspan class='jdgm-rev__author'\u003eDannica Ford\u003c\/span\u003e \u003cspan class='jdgm-rev__location' \u003e \u003c\/span\u003e \u003c\/span\u003e \u003c\/div\u003e \u003cdiv class='jdgm-rev__content'\u003e \u003cdiv class='jdgm-rev__custom-form'\u003e \u003c\/div\u003e \u003cstrong class='jdgm-rev__title'\u003e\u003c\/strong\u003e \u003cdiv class='jdgm-rev__body'\u003e\u003cp\u003eLabour TENS Machine Hire\u003c\/p\u003e\u003c\/div\u003e \u003cdiv class='jdgm-rev__pics'\u003e \u003c\/div\u003e \u003cdiv class='jdgm-rev__vids'\u003e \u003c\/div\u003e \u003cdiv class='jdgm-rev__transparency-badge-wrapper'\u003e \u003cdiv class='jdgm-rev__transparency-badge' data-badge-type=review_collected_via_store_invitation\u003e\u003c\/div\u003e \u003c\/div\u003e \u003c\/div\u003e \u003cdiv class='jdgm-rev__actions'\u003e \u003cdiv class='jdgm-rev__social'\u003e\u003c\/div\u003e \u003cdiv class='jdgm-rev__votes'\u003e\u003c\/div\u003e \u003c\/div\u003e \u003cdiv class='jdgm-rev__reply'\u003e \u003cdiv class='jdgm-rev__replier-wrapper'\u003e \u003cb class='jdgm-rev__replier'\u003e\u003c\/b\u003e \u003c\/div\u003e \u003cdiv class='jdgm-rev__reply-content' data-digital-source-type=\"https:\/\/schema.org\/TrainedAlgorithmicMediaDigitalSource\"\u003e\u003cp\u003eThank you so much, Dannica, for your review ❤️ We really appreciate your support and are so glad you chose The Birth Store for your Labour TENS Machine hire.\u003c\/p\u003e\u003c\/div\u003e \u003c\/div\u003e \u003c\/div\u003e\u003cdiv class='jdgm-rev jdgm-divider-top' data-verified-buyer='true' data-review-id='6d8f2982-6f7b-4922-8ac1-b18b83314c2d' data-review-language='' data-product-title='Labour TENS Machine Hire' data-product-url='\/products\/labour-birth-tens-machine-hire' data-thumb-up-count='0' data-thumb-down-count='0'\u003e \u003cdiv class='jdgm-rev__header'\u003e \u003cdiv class='jdgm-rev__icon' \u003e G \u003c\/div\u003e \u003cspan class='jdgm-rev__rating' data-score='5' tabindex='0' aria-label='5 star review' role='img'\u003e \u003cspan class='jdgm-star jdgm--on'\u003e\u003c\/span\u003e\u003cspan class='jdgm-star jdgm--on'\u003e\u003c\/span\u003e\u003cspan class='jdgm-star jdgm--on'\u003e\u003c\/span\u003e\u003cspan class='jdgm-star jdgm--on'\u003e\u003c\/span\u003e\u003cspan class='jdgm-star jdgm--on'\u003e\u003c\/span\u003e \u003c\/span\u003e \u003ctime class='jdgm-rev__timestamp jdgm-spinner' datetime='2026-10-31T05:12:45Z' data-content='2026-10-31 05:12:45 UTC'\u003e\u003c\/time\u003e \u003cdiv class='jdgm-rev__br'\u003e\u003c\/div\u003e \u003cspan class='jdgm-rev__buyer-badge-wrapper'\u003e \u003cspan class='jdgm-rev__buyer-badge'\u003e\u003c\/span\u003e \u003c\/span\u003e \u003cspan class='jdgm-rev__author-wrapper'\u003e \u003cspan class='jdgm-rev__author'\u003eGemma\u003c\/span\u003e \u003cspan class='jdgm-rev__location' \u003e \u003c\/span\u003e \u003c\/span\u003e \u003c\/div\u003e \u003cdiv class='jdgm-rev__content'\u003e \u003cdiv class='jdgm-rev__custom-form'\u003e \u003c\/div\u003e \u003cstrong class='jdgm-rev__title'\u003eLOVE\u003c\/strong\u003e \u003cdiv class='jdgm-rev__body'\u003e\u003cp\u003eThe TENS saved me during my induced labour. Couldn’t have done it without it and will absolutely hire for future births\u003c\/p\u003e\u003c\/div\u003e \u003cdiv class='jdgm-rev__pics'\u003e \u003c\/div\u003e \u003cdiv class='jdgm-rev__vids'\u003e \u003c\/div\u003e \u003cdiv class='jdgm-rev__transparency-badge-wrapper'\u003e \u003cdiv class='jdgm-rev__transparency-badge' data-badge-type=review_collected_from_store_visitor\u003e\u003c\/div\u003e \u003c\/div\u003e \u003c\/div\u003e \u003cdiv class='jdgm-rev__actions'\u003e \u003cdiv class='jdgm-rev__social'\u003e\u003c\/div\u003e \u003cdiv class='jdgm-rev__votes'\u003e\u003c\/div\u003e \u003c\/div\u003e \u003cdiv class='jdgm-rev__reply'\u003e \u003cdiv class='jdgm-rev__replier-wrapper'\u003e \u003cb class='jdgm-rev__replier'\u003e\u003c\/b\u003e \u003c\/div\u003e \u003cdiv class='jdgm-rev__reply-content' data-digital-source-type=\"https:\/\/schema.org\/TrainedAlgorithmicMediaDigitalSource\"\u003e\u003cp\u003eThank you so much, Gemma, for your lovely review ❤️ We’re so glad the TENS machine provided such valuable support during your induced labour and made a real difference for you. We truly appreciate your kind words and would be delighted to support you again in the future!\u003c\/p\u003e\u003c\/div\u003e \u003c\/div\u003e \u003c\/div\u003e\u003cdiv class='jdgm-rev jdgm-divider-top' data-verified-buyer='true' data-review-id='9746fd9e-ddf9-4840-9af9-75b27c5cf1c8' data-review-language='' data-product-title='Labour TENS Machine Hire' data-product-url='\/products\/labour-birth-tens-machine-hire' data-thumb-up-count='0' data-thumb-down-count='0'\u003e \u003cdiv class='jdgm-rev__header'\u003e \u003cdiv class='jdgm-rev__icon' \u003e T \u003c\/div\u003e \u003cspan class='jdgm-rev__rating' data-score='5' tabindex='0' aria-label='5 star review' role='img'\u003e \u003cspan class='jdgm-star jdgm--on'\u003e\u003c\/span\u003e\u003cspan class='jdgm-star jdgm--on'\u003e\u003c\/span\u003e\u003cspan class='jdgm-star jdgm--on'\u003e\u003c\/span\u003e\u003cspan class='jdgm-star jdgm--on'\u003e\u003c\/span\u003e\u003cspan class='jdgm-star jdgm--on'\u003e\u003c\/span\u003e \u003c\/span\u003e \u003ctime class='jdgm-rev__timestamp jdgm-spinner' datetime='2026-10-30T07:02:07Z' data-content='2026-10-30 07:02:07 UTC'\u003e\u003c\/time\u003e \u003cdiv class='jdgm-rev__br'\u003e\u003c\/div\u003e \u003cspan class='jdgm-rev__buyer-badge-wrapper'\u003e \u003cspan class='jdgm-rev__buyer-badge'\u003e\u003c\/span\u003e \u003c\/span\u003e \u003cspan class='jdgm-rev__author-wrapper'\u003e \u003cspan class='jdgm-rev__author'\u003eTyler Jewaskiewitz\u003c\/span\u003e \u003cspan class='jdgm-rev__location' \u003e \u003c\/span\u003e \u003c\/span\u003e \u003c\/div\u003e \u003cdiv class='jdgm-rev__content'\u003e \u003cdiv class='jdgm-rev__custom-form'\u003e \u003c\/div\u003e \u003cstrong class='jdgm-rev__title'\u003eCouldn’t of done labour without it\u003c\/strong\u003e \u003cdiv class='jdgm-rev__body'\u003e\u003cp\u003eSuch an amazing tool to use. Was such a help!\u003c\/p\u003e\u003c\/div\u003e \u003cdiv class='jdgm-rev__pics'\u003e \u003c\/div\u003e \u003cdiv class='jdgm-rev__vids'\u003e \u003c\/div\u003e \u003cdiv class='jdgm-rev__transparency-badge-wrapper'\u003e \u003cdiv class='jdgm-rev__transparency-badge' data-badge-type=review_collected_via_store_invitation\u003e\u003c\/div\u003e \u003c\/div\u003e \u003c\/div\u003e \u003cdiv class='jdgm-rev__actions'\u003e \u003cdiv class='jdgm-rev__social'\u003e\u003c\/div\u003e \u003cdiv class='jdgm-rev__votes'\u003e\u003c\/div\u003e \u003c\/div\u003e \u003cdiv class='jdgm-rev__reply'\u003e \u003cdiv class='jdgm-rev__replier-wrapper'\u003e \u003cb class='jdgm-rev__replier'\u003e\u003c\/b\u003e \u003c\/div\u003e \u003cdiv class='jdgm-rev__reply-content' data-digital-source-type=\"https:\/\/schema.org\/TrainedAlgorithmicMediaDigitalSource\"\u003e\u003cp\u003eThank you so much, Tyler, for your lovely review ❤️ We’re so glad the TENS machine was such a helpful tool during your labour and made a positive difference. We really appreciate you sharing your experience with us!\u003c\/p\u003e\u003c\/div\u003e \u003c\/div\u003e \u003c\/div\u003e\u003c\/div\u003e \u003cdiv class='jdgm-paginate' data-per-page='10' data-url='https:\/\/api.judge.me\/reviews\/reviews_for_widget' \u003e\u003cbutton type='button' class='jdgm-paginate__page jdgm-curt' data-page='1' aria-label='Page 1' aria-current='page'\u003e1\u003c\/button\u003e\u003cbutton type='button' class='jdgm-paginate__page ' data-page='2' aria-label='Page 2' \u003e2\u003c\/button\u003e\u003cbutton type='button' class='jdgm-paginate__page ' data-page='3' aria-label='Page 3' \u003e3\u003c\/button\u003e\u003cbutton type='button' class='jdgm-paginate__page jdgm-paginate__next-page' data-page='2' aria-label='Page 2' \u003e\u003c\/button\u003e\u003cbutton type='button' class='jdgm-paginate__page jdgm-paginate__last-page' data-page='100' aria-label='Page 100' \u003e\u003c\/button\u003e\u003c\/div\u003e \u003c\/div\u003e \u003cdiv class='jdgm-rev-widg__paginate-spinner-wrapper'\u003e \u003cdiv class='jdgm-spinner'\u003e\u003c\/div\u003e \u003c\/div\u003e \u003c\/div\u003e"},"default_reviews_metafields":{"rating":{"scale_min":"1.0","scale_max":"5.0","value":"4.91"},"rating_count":1020},"collections":[{"id":512654540989,"handle":"lastof26-10","title":"10%","updated_at":"2026-11-14T20:08:00+08:00","body_html":null,"published_at":"2026-10-12T19:06:42+08:00","sort_order":"best-selling","template_suffix":null,"disjunctive":false,"rules":[],"published_scope":"global"},{"id":337429201085,"handle":"hospital-bag","title":"Hospital Bag","updated_at":"2026-11-14T20:08:00+08:00","body_html":"","published_at":"2026-06-03T11:36:29+08:00","sort_order":"most-relevant","template_suffix":"","disjunctive":false,"rules":[],"published_scope":"global"},{"id":261658214589,"handle":"labour-and-birth-buy","title":"Labour \u0026 Birth","updated_at":"2026-11-14T20:08:00+08:00","body_html":"\u003cp\u003eWe stock a large range of Elle TENS machines for you to buy for your labour and birth. We stock the Elle TENS, Elle TENS 2 and Elle TENS Plus, we also hire these out if that suits you better, please head over to our TENS machine hire page for more information. We ship Australia wide or have options for local delivery\/pick-up in Perth if you are due ASAP. We also stock other items for your labour and birth. \u003c\/p\u003e\n\u003cp\u003eLooking for something we don't currently stock? Please reach out and let us know.\u003c\/p\u003e\n\u003cp\u003e\u003cspan\u003eYou can even buy now and pay later with Afterpay!\u003c\/span\u003e\u003c\/p\u003e","published_at":"2021-03-10T12:34:43+08:00","sort_order":"best-selling","template_suffix":"labour-birth-collection","disjunctive":false,"rules":[],"published_scope":"global","image":{"created_at":"2024-05-06T12:00:09+08:00","alt":"Labour \u0026 Birth - The Birth Store","width":1080,"height":981,"src":"\/\/www.thebirthstore.com.au\/cdn\/shop\/collections\/labour-birth-342038.jpg?v=1714968009"}},{"id":512272957629,"handle":"labour-birth-essentials","title":"Labour \u0026 Birth Essentials","updated_at":"2026-11-14T20:08:00+08:00","body_html":null,"published_at":"2026-10-06T21:00:01+08:00","sort_order":"most-relevant","template_suffix":"labournbirthemail","disjunctive":false,"rules":[],"published_scope":"global"},{"id":261226856637,"handle":"labour-tens-machine-hire","title":"Labour TENS Machine Hire","updated_at":"2026-11-14T20:08:00+08:00","body_html":"\u003cp\u003e \u003c\/p\u003e\n\u003cblockquote\u003e\u003c\/blockquote\u003e","published_at":"2021-03-05T22:34:14+08:00","sort_order":"best-selling","template_suffix":"tens-machine-hire-collect","disjunctive":false,"rules":[],"published_scope":"global","image":{"created_at":"2024-05-06T12:00:15+08:00","alt":"Labour TENS Machine Hire - The Birth Store","width":1920,"height":1280,"src":"\/\/www.thebirthstore.com.au\/cdn\/shop\/collections\/labour-tens-machine-hire-546345.jpg?v=1714968015"}},{"id":281712591037,"handle":"pain-relief","title":"Pain Relief","updated_at":"2026-11-14T20:08:00+08:00","body_html":"","published_at":"2021-12-20T14:22:45+08:00","sort_order":"best-selling","template_suffix":"pain-relief-collection","disjunctive":false,"rules":[],"published_scope":"global","image":{"created_at":"2024-05-06T12:00:27+08:00","alt":"Pain Relief - The Birth Store","width":1365,"height":2048,"src":"\/\/www.thebirthstore.com.au\/cdn\/shop\/collections\/pain-relief-878865.jpg?v=1714968027"}},{"id":291456483517,"handle":"shop-all","title":"Shop All - Mum","updated_at":"2026-11-14T20:08:00+08:00","body_html":"","published_at":"2022-12-23T22:04:39+08:00","sort_order":"best-selling","template_suffix":"shop-all-collection","disjunctive":false,"rules":[],"published_scope":"global","image":{"created_at":"2024-05-06T12:00:54+08:00","alt":"Shop All - The Birth Store","width":1365,"height":2048,"src":"\/\/www.thebirthstore.com.au\/cdn\/shop\/collections\/shop-all-693176.jpg?v=1714968055"}},{"id":310045933757,"handle":"shop-all-sale","title":"Shop All Sale","updated_at":"2026-11-14T20:08:00+08:00","body_html":"","published_at":"2024-11-12T13:22:43+08:00","sort_order":"best-selling","template_suffix":"","disjunctive":true,"rules":[],"published_scope":"global","image":{"created_at":"2024-11-13T10:58:16+08:00","alt":"Shop All Sale - The Birth Store","width":2048,"height":1365,"src":"\/\/www.thebirthstore.com.au\/cdn\/shop\/collections\/shop-all-sale-297361.jpg?v=1731466697"}}]}
{"item":{"id":7356719726781,"title":"Untouched TENS Machine Hire Money Back Guarantee","handle":"unused-money-back-guarantee","description":"\u003cp\u003eWe understand that birth can be unpredictable and that, in some cases, you may deliver before the machine is received, meaning you may no longer need the TENS machine.\u003c\/p\u003e\n\u003cp\u003e \u003c\/p\u003e\n\u003cp\u003eAs the TENS hire is a service, once your machine has left our warehouse, that service has been delivered, and we can no longer provide a refund. Until now...\u003c\/p\u003e\n\u003cp\u003e \u003c\/p\u003e\n\u003cp\u003eWe recommend purchasing this money-back guarantee to cover yourself should you not be able to use your machine.\u003c\/p\u003e\n\u003cp\u003e \u003c\/p\u003e\n\u003cp\u003eThis money-back guarantee is designed for those who want it to cover the majority of the costs associated with sending the machine to you so that we can refund you, pending eligibility, without increasing the overall cost for everyone.\u003c\/p\u003e\n\u003cp\u003e \u003c\/p\u003e\n\u003cp\u003eNote: The intention of this MBG is to cover those who give birth before they receive the hire, for those who don't even have a chance to use the TENS machine because it hasn't arrived in time, it is not intended for those who had the TENS machine there ready to go and at least had peace of mind that it was there if they needed it. Though, as we don't ask for proof of birth dates to confirm it was received after your birth, the requirements instead are that your machine and all it's accessories must be completely unopened and in the same condition we sent them in.\u003c\/p\u003e\n\u003cp\u003e \u003c\/p\u003e\n\u003cp\u003e\u003cstrong\u003eIf you hire the TENS machine and you don't use it at all, once we receive it back, you'll receive a refund on your hire, minus the below cost:\u003c\/strong\u003e\u003c\/p\u003e\n\u003cp\u003e\u003cstrong\u003e✗\u003c\/strong\u003e Pre-paid return shipping ($12.50)\u003c\/p\u003e\n\u003cp\u003e \u003c\/p\u003e\n\u003cp\u003eThe above relates to the cost of your hire, if you paid shipping for the machine to get to you or if you purchased other products, this is not included in the refund.\u003c\/p\u003e\n\u003cp\u003e \u003c\/p\u003e\n\u003cp\u003e\u003cstrong\u003eTo be eligible for a refund, your return must meet the eligibility criteria:\u003c\/strong\u003e\u003c\/p\u003e\n\u003cp\u003e\u003cstrong\u003e✓\u003c\/strong\u003e Original TENS electrodes \u0026amp; batteries returned in unused and unopened condition\u003c\/p\u003e\n\u003cp\u003e\u003cstrong\u003e✓\u003c\/strong\u003e TENS machine in original condition and unused\u003c\/p\u003e\n\u003cp\u003e\u003cstrong\u003e✓\u003c\/strong\u003e All parts provided with the TENS machine to be returned\u003c\/p\u003e\n\u003cp\u003e\u003cstrong\u003e✓\u003c\/strong\u003e The purchase of this money-back guarantee must be dated at some point before your machine leaves our warehouse (you'll get an email to confirm when this has occurred) - we recommend purchasing this with the original hire of your machine\u003c\/p\u003e\n\u003cp\u003e\u003cstrong\u003e✓\u003c\/strong\u003e TENS machine must be returned by the return date, or $10 increments per week overdue will be taken off the refund total (i.e. 1-6 days overdue, less $10; 7-13 days overdue, less $20 etc.)\u003c\/p\u003e\n\u003cp\u003e\u003cstrong\u003e✓\u003c\/strong\u003e\u003cspan\u003e You must start the claim process before you send your TENS machine back to us\u003c\/span\u003e\u003c\/p\u003e\n\u003cp\u003e \u003c\/p\u003e\n\u003cp\u003e\u003cstrong\u003eThe process to apply for this guarantee is as follows:\u003c\/strong\u003e\u003c\/p\u003e\n\u003col\u003e\n\u003cli\u003eRequest a refund by emailing \u003cu\u003ehello@thebirthstore.com.au\u003c\/u\u003e and quoting your order number or full name\u003c\/li\u003e\n\u003cli\u003eSend the machine back in original condition using the pre-paid return satchel ASAP\u003c\/li\u003e\n\u003cli\u003eUpon receiving the machine back, eligibility will be assessed as per the above conditions\u003c\/li\u003e\n\u003cli\u003ePending approval, your refund will be processed less the $12.50 (return shipping cost mentioned above) and any potential overdue fees (as mentioned above)\u003c\/li\u003e\n\u003cli\u003eShould the machine be shown to be used, or in any other condition that goes against our eligibility criteria, you will be notified via email of the outcome\u003c\/li\u003e\n\u003c\/ol\u003e\n\u003cp\u003eAfter you purchase the money-back guarantee, you'll be emailed a digital file to download and keep with the information on how you can claim on your guarantee should you need to.\u003c\/p\u003e\n\u003col\u003e\u003c\/ol\u003e","published_at":"2022-09-22T21:35:55+08:00","created_at":"2022-09-22T21:35:54+08:00","vendor":"The Birth Store Hire","type":"","tags":["Mum","Pain Relief","TENS Hire"],"price":499,"price_min":499,"price_max":499,"available":true,"price_varies":false,"compare_at_price":null,"compare_at_price_min":0,"compare_at_price_max":0,"compare_at_price_varies":false,"variants":[{"id":42345398403261,"title":"Default Title","option1":"Default Title","option2":null,"option3":null,"sku":"","requires_shipping":false,"taxable":false,"featured_image":null,"available":true,"name":"Untouched TENS Machine Hire Money Back Guarantee","public_title":null,"options":["Default Title"],"price":499,"weight":0,"compare_at_price":null,"inventory_management":null,"barcode":"98403261","requires_selling_plan":false,"selling_plan_allocations":[],"quantity_rule":{"min":1,"max":null,"increment":1}}],"images":["\/\/www.thebirthstore.com.au\/cdn\/shop\/files\/untouched-tens-machine-hire-money-back-guarantee-8043399.png?v=1774998786"],"featured_image":"\/\/www.thebirthstore.com.au\/cdn\/shop\/files\/untouched-tens-machine-hire-money-back-guarantee-8043399.png?v=1774998786","options":["Title"],"media":[{"alt":"Untouched TENS Machine Hire Money Back Guarantee - The Birth Store - The Birth Store Hire","id":31069301014717,"position":1,"preview_image":{"aspect_ratio":1.0,"height":500,"width":500,"src":"\/\/www.thebirthstore.com.au\/cdn\/shop\/files\/untouched-tens-machine-hire-money-back-guarantee-8043399.png?v=1774998786"},"aspect_ratio":1.0,"height":500,"media_type":"image","src":"\/\/www.thebirthstore.com.au\/cdn\/shop\/files\/untouched-tens-machine-hire-money-back-guarantee-8043399.png?v=1774998786","width":500}],"requires_selling_plan":false,"selling_plan_groups":[],"content":"\u003cp\u003eWe understand that birth can be unpredictable and that, in some cases, you may deliver before the machine is received, meaning you may no longer need the TENS machine.\u003c\/p\u003e\n\u003cp\u003e \u003c\/p\u003e\n\u003cp\u003eAs the TENS hire is a service, once your machine has left our warehouse, that service has been delivered, and we can no longer provide a refund. Until now...\u003c\/p\u003e\n\u003cp\u003e \u003c\/p\u003e\n\u003cp\u003eWe recommend purchasing this money-back guarantee to cover yourself should you not be able to use your machine.\u003c\/p\u003e\n\u003cp\u003e \u003c\/p\u003e\n\u003cp\u003eThis money-back guarantee is designed for those who want it to cover the majority of the costs associated with sending the machine to you so that we can refund you, pending eligibility, without increasing the overall cost for everyone.\u003c\/p\u003e\n\u003cp\u003e \u003c\/p\u003e\n\u003cp\u003eNote: The intention of this MBG is to cover those who give birth before they receive the hire, for those who don't even have a chance to use the TENS machine because it hasn't arrived in time, it is not intended for those who had the TENS machine there ready to go and at least had peace of mind that it was there if they needed it. Though, as we don't ask for proof of birth dates to confirm it was received after your birth, the requirements instead are that your machine and all it's accessories must be completely unopened and in the same condition we sent them in.\u003c\/p\u003e\n\u003cp\u003e \u003c\/p\u003e\n\u003cp\u003e\u003cstrong\u003eIf you hire the TENS machine and you don't use it at all, once we receive it back, you'll receive a refund on your hire, minus the below cost:\u003c\/strong\u003e\u003c\/p\u003e\n\u003cp\u003e\u003cstrong\u003e✗\u003c\/strong\u003e Pre-paid return shipping ($12.50)\u003c\/p\u003e\n\u003cp\u003e \u003c\/p\u003e\n\u003cp\u003eThe above relates to the cost of your hire, if you paid shipping for the machine to get to you or if you purchased other products, this is not included in the refund.\u003c\/p\u003e\n\u003cp\u003e \u003c\/p\u003e\n\u003cp\u003e\u003cstrong\u003eTo be eligible for a refund, your return must meet the eligibility criteria:\u003c\/strong\u003e\u003c\/p\u003e\n\u003cp\u003e\u003cstrong\u003e✓\u003c\/strong\u003e Original TENS electrodes \u0026amp; batteries returned in unused and unopened condition\u003c\/p\u003e\n\u003cp\u003e\u003cstrong\u003e✓\u003c\/strong\u003e TENS machine in original condition and unused\u003c\/p\u003e\n\u003cp\u003e\u003cstrong\u003e✓\u003c\/strong\u003e All parts provided with the TENS machine to be returned\u003c\/p\u003e\n\u003cp\u003e\u003cstrong\u003e✓\u003c\/strong\u003e The purchase of this money-back guarantee must be dated at some point before your machine leaves our warehouse (you'll get an email to confirm when this has occurred) - we recommend purchasing this with the original hire of your machine\u003c\/p\u003e\n\u003cp\u003e\u003cstrong\u003e✓\u003c\/strong\u003e TENS machine must be returned by the return date, or $10 increments per week overdue will be taken off the refund total (i.e. 1-6 days overdue, less $10; 7-13 days overdue, less $20 etc.)\u003c\/p\u003e\n\u003cp\u003e\u003cstrong\u003e✓\u003c\/strong\u003e\u003cspan\u003e You must start the claim process before you send your TENS machine back to us\u003c\/span\u003e\u003c\/p\u003e\n\u003cp\u003e \u003c\/p\u003e\n\u003cp\u003e\u003cstrong\u003eThe process to apply for this guarantee is as follows:\u003c\/strong\u003e\u003c\/p\u003e\n\u003col\u003e\n\u003cli\u003eRequest a refund by emailing \u003cu\u003ehello@thebirthstore.com.au\u003c\/u\u003e and quoting your order number or full name\u003c\/li\u003e\n\u003cli\u003eSend the machine back in original condition using the pre-paid return satchel ASAP\u003c\/li\u003e\n\u003cli\u003eUpon receiving the machine back, eligibility will be assessed as per the above conditions\u003c\/li\u003e\n\u003cli\u003ePending approval, your refund will be processed less the $12.50 (return shipping cost mentioned above) and any potential overdue fees (as mentioned above)\u003c\/li\u003e\n\u003cli\u003eShould the machine be shown to be used, or in any other condition that goes against our eligibility criteria, you will be notified via email of the outcome\u003c\/li\u003e\n\u003c\/ol\u003e\n\u003cp\u003eAfter you purchase the money-back guarantee, you'll be emailed a digital file to download and keep with the information on how you can claim on your guarantee should you need to.\u003c\/p\u003e\n\u003col\u003e\u003c\/ol\u003e"},"options":[{"name":"Title","position":1,"values":["Default Title"]}],"custom_metafields":{},"metafields":{"badge":"\u003cdiv style='display:none' class='jdgm-prev-badge' data-average-rating='4.81' data-number-of-reviews='42' data-number-of-questions='0'\u003e \u003cspan class='jdgm-prev-badge__stars' data-score='4.81' tabindex='0' aria-label='4.81 stars' role='button'\u003e \u003cspan class='jdgm-star jdgm--on'\u003e\u003c\/span\u003e\u003cspan class='jdgm-star jdgm--on'\u003e\u003c\/span\u003e\u003cspan class='jdgm-star jdgm--on'\u003e\u003c\/span\u003e\u003cspan class='jdgm-star jdgm--on'\u003e\u003c\/span\u003e\u003cspan class='jdgm-star jdgm--on'\u003e\u003c\/span\u003e \u003c\/span\u003e \u003cspan class='jdgm-prev-badge__text'\u003e 42 reviews \u003c\/span\u003e \u003c\/div\u003e","review_snippet_widget":"\u003cdiv class='jdgm-widget jdgm-review-snippet-widget'\u003e \u003cstyle\u003e\n .jdgm-review-snippet-widget{position:relative}.jdgm-review-snippet-widget:hover{cursor:pointer}@media only screen and (max-width: 767px){.jdgm-review-snippet-widget .jdgm-rev-snippet-widget__cards-container{left:unset;right:unset}}.jdgm-review-snippet-widget .jdgm-rev-snippet-card{background:#fff}.jdgm-review-snippet-widget .jdgm-star{color:#399}.jdgm-review-snippet-widget .jdgm-rev-snippet-card{border-radius:8px;background:#fff}.jdgm-review-snippet-widget .jdgm-rev-snippet-card__rev-prod-wrapper{border-radius:8px}.jdgm-review-snippet-widget .jdgm-rev-snippet-card__rev-content-wrapper{max-width:360px}.jdgm-review-snippet-widget .jdgm-rev-snippet-widget__prev-btn,.jdgm-review-snippet-widget .jdgm-rev-snippet-widget__next-btn{border-radius:50%;background:#fff}.jdgm-review-snippet-widget .jdgm-rev-snippet-widget__prev-btn\u003esvg,.jdgm-review-snippet-widget .jdgm-rev-snippet-widget__next-btn\u003esvg{fill:#000}.jdgm-review-snippet-widget .jdgm-rev-snippet-widget__prev-btn{left:0;top:40%}.jdgm-review-snippet-widget .jdgm-rev-snippet-widget__next-btn{right:0;top:40%}.jdgm-full-rev-modal.review-snippet-widget .jm-mfp-content{border-radius:8px}.jdgm-full-rev-modal.review-snippet-widget .jdgm-full-rev__icon{border-radius:8px}.jdgm-full-rev-modal.review-snippet-widget .jdgm-full-rev[data-verified-buyer=\"true\"] .jdgm-full-rev__icon::after{border-radius:8px}.jdgm-full-rev-modal.review-snippet-widget .jdgm-rev__buyer-badge{border-radius:calc( 8px \/ 2 )}.jdgm-full-rev-modal.review-snippet-widget .jdgm-full-rev__pic-img{border-radius:8px}.jdgm-full-rev-modal.review-snippet-widget .jdgm-full-rev__reply{border-radius:8px}.jdgm-full-rev-modal.review-snippet-widget .jdgm-full-rev__replier::before{content:'thebirthstore.com.au'}.jdgm-full-rev-modal.review-snippet-widget .jdgm-full-rev__product-button{border-radius:calc( 8px * 6 )}\n\n \u003c\/style\u003e \u003ci class=\"jdgm-rev-snippet-widget__prev-btn\" style='display: none;'\u003e \u003csvg xmlns=\"http:\/\/www.w3.org\/2000\/svg\" height=\"12\" viewBox=\"0 0 8 12\" width=\"8\" fill=\"#000\"\u003e\u003cpath d=\"M3.09961 6.00005L6.99961 9.90005C7.18294 10.0834 7.27461 10.3167 7.27461 10.6C7.27461 10.8834 7.18294 11.1167 6.99961 11.3C6.81628 11.4834 6.58294 11.575 6.29961 11.575C6.01628 11.575 5.78294 11.4834 5.59961 11.3L0.999609 6.70005C0.899609 6.60005 0.828776 6.49172 0.787109 6.37505C0.745443 6.25838 0.724609 6.13338 0.724609 6.00005C0.724609 5.86672 0.745443 5.74172 0.787109 5.62505C0.828776 5.50838 0.899609 5.40005 0.999609 5.30005L5.59961 0.700049C5.78294 0.516715 6.01628 0.425049 6.29961 0.425049C6.58294 0.425049 6.81628 0.516715 6.99961 0.700049C7.18294 0.883382 7.27461 1.11672 7.27461 1.40005C7.27461 1.68338 7.18294 1.91672 6.99961 2.10005L3.09961 6.00005Z\"\/\u003e\u003c\/svg\u003e \u003c\/i\u003e \u003ci class=\"jdgm-rev-snippet-widget__next-btn\" style='display: none;'\u003e \u003csvg xmlns=\"http:\/\/www.w3.org\/2000\/svg\" height=\"12\" viewBox=\"0 0 8 12\" width=\"8\" fill=\"#000\"\u003e\u003cpath d=\"M4.89961 6.00005L0.999609 2.10005C0.816276 1.91672 0.724609 1.68338 0.724609 1.40005C0.724609 1.11672 0.816276 0.883382 0.999609 0.700049C1.18294 0.516715 1.41628 0.425049 1.69961 0.425049C1.98294 0.425049 2.21628 0.516715 2.39961 0.700049L6.99961 5.30005C7.09961 5.40005 7.17044 5.50838 7.21211 5.62505C7.25378 5.74172 7.27461 5.86672 7.27461 6.00005C7.27461 6.13338 7.25378 6.25838 7.21211 6.37505C7.17044 6.49172 7.09961 6.60005 6.99961 6.70005L2.39961 11.3C2.21628 11.4834 1.98294 11.575 1.69961 11.575C1.41628 11.575 1.18294 11.4834 0.999609 11.3C0.816276 11.1167 0.724609 10.8834 0.724609 10.6C0.724609 10.3167 0.816276 10.0834 0.999609 9.90005L4.89961 6.00005Z\"\/\u003e\u003c\/svg\u003e \u003c\/i\u003e \u003cdiv style=\"overflow: hidden;\"\u003e \u003cdiv class='jdgm-rev-snippet-widget__cards-container'\u003e \u003cdiv class='jdgm-rev-snippet-card' data-review-id='658b478f-20ba-449b-8a11-0bf16899e364' style='display: none;'\u003e \u003cdiv class=\"jdgm-rev-snippet-card__rev-prod-wrapper\"\u003e \u003ca class='jdgm-rev-snippet-card__rev-content-wrapper jdgm-rev-snippet-card__full-review-link' style='text-decoration: none; color: inherit;padding: 0 34px;' role='button' data-review-id='658b478f-20ba-449b-8a11-0bf16899e364'\u003e \u003cdiv class='jdgm-rev-snippet-card__rev-header'\u003e \u003cdiv class='jdgm-rev-snippet-card__rev-rating' aria-label='5 stars' role='img'\u003e \u003cspan class='jdgm-star jdgm--on'\u003e\u003c\/span\u003e\u003cspan class='jdgm-star jdgm--on'\u003e\u003c\/span\u003e\u003cspan class='jdgm-star jdgm--on'\u003e\u003c\/span\u003e\u003cspan class='jdgm-star jdgm--on'\u003e\u003c\/span\u003e\u003cspan class='jdgm-star jdgm--on'\u003e\u003c\/span\u003e \u003c\/div\u003e \u003cdiv class='jdgm-rev-snippet-card__reviewer'\u003e Nina Markovic \u003c\/div\u003e \u003c\/div\u003e \u003cdiv class='jdgm-rev-snippet-card__rev-content'\u003e \u003cspan class='jdgm-rev-snippet-card__rev-body'\u003e \u003cp\u003eI didn’t end up needing to use the tense machine that I ordered but because I paid the extra $5 money back guarantee I received a full refund of the hire fees when I sent the machine back. Everything was super straightforward and easy. Thank you!☺️\u003c\/p\u003e \u003c\/span\u003e \u003c\/div\u003e \u003c\/a\u003e \u003c\/div\u003e \u003c\/div\u003e\u003cdiv class='jdgm-rev-snippet-card' data-review-id='6a602d7c-52f5-4c10-960e-6cf2417a2d91' style='display: none;'\u003e \u003cdiv class=\"jdgm-rev-snippet-card__rev-prod-wrapper\"\u003e \u003ca class='jdgm-rev-snippet-card__rev-content-wrapper jdgm-rev-snippet-card__full-review-link' style='text-decoration: none; color: inherit;padding: 0 34px;' role='button' data-review-id='6a602d7c-52f5-4c10-960e-6cf2417a2d91'\u003e \u003cdiv class='jdgm-rev-snippet-card__rev-header'\u003e \u003cdiv class='jdgm-rev-snippet-card__rev-rating' aria-label='5 stars' role='img'\u003e \u003cspan class='jdgm-star jdgm--on'\u003e\u003c\/span\u003e\u003cspan class='jdgm-star jdgm--on'\u003e\u003c\/span\u003e\u003cspan class='jdgm-star jdgm--on'\u003e\u003c\/span\u003e\u003cspan class='jdgm-star jdgm--on'\u003e\u003c\/span\u003e\u003cspan class='jdgm-star jdgm--on'\u003e\u003c\/span\u003e \u003c\/div\u003e \u003cdiv class='jdgm-rev-snippet-card__reviewer'\u003e BROOKE \u003c\/div\u003e \u003c\/div\u003e \u003cdiv class='jdgm-rev-snippet-card__rev-content'\u003e \u003cspan class='jdgm-rev-snippet-card__rev-body'\u003e \u003cp\u003eWe ended up electing for a c-section late in the piece and the process of claiming the money back guarantee for the untouched tens machine was so easy and the money back was provided quickly. Really appreciated this option particularly as we didn’t get the birth we originally wanted!\u003c\/p\u003e \u003c\/span\u003e \u003c\/div\u003e \u003c\/a\u003e \u003c\/div\u003e \u003c\/div\u003e\u003cdiv class='jdgm-rev-snippet-card' data-review-id='27779ea9-9afd-4cae-a100-fa880f490224' style='display: none;'\u003e \u003cdiv class=\"jdgm-rev-snippet-card__rev-prod-wrapper\"\u003e \u003ca class='jdgm-rev-snippet-card__rev-content-wrapper jdgm-rev-snippet-card__full-review-link' style='text-decoration: none; color: inherit;padding: 0 34px;' role='button' data-review-id='27779ea9-9afd-4cae-a100-fa880f490224'\u003e \u003cdiv class='jdgm-rev-snippet-card__rev-header'\u003e \u003cdiv class='jdgm-rev-snippet-card__rev-rating' aria-label='5 stars' role='img'\u003e \u003cspan class='jdgm-star jdgm--on'\u003e\u003c\/span\u003e\u003cspan class='jdgm-star jdgm--on'\u003e\u003c\/span\u003e\u003cspan class='jdgm-star jdgm--on'\u003e\u003c\/span\u003e\u003cspan class='jdgm-star jdgm--on'\u003e\u003c\/span\u003e\u003cspan class='jdgm-star jdgm--on'\u003e\u003c\/span\u003e \u003c\/div\u003e \u003cdiv class='jdgm-rev-snippet-card__reviewer'\u003e Rachael Gillespie \u003c\/div\u003e \u003c\/div\u003e \u003cdiv class='jdgm-rev-snippet-card__rev-content'\u003e \u003cspan class='jdgm-rev-snippet-card__rev-body'\u003e \u003cp\u003eThe TENS machine was the only pain relief I used and needed for labour and birth. It was effective and easy to use. The process of hiring and returning the machine was so simple, streamline and logical. The staff had excellent customer service.\u003c\/p\u003e \u003c\/span\u003e \u003c\/div\u003e \u003c\/a\u003e \u003c\/div\u003e \u003c\/div\u003e\u003cdiv class='jdgm-rev-snippet-card' data-review-id='504a24f2-7a23-4681-b27c-babf8aa5f64d' style='display: none;'\u003e \u003cdiv class=\"jdgm-rev-snippet-card__rev-prod-wrapper\"\u003e \u003ca class='jdgm-rev-snippet-card__rev-content-wrapper jdgm-rev-snippet-card__full-review-link' style='text-decoration: none; color: inherit;padding: 0 34px;' role='button' data-review-id='504a24f2-7a23-4681-b27c-babf8aa5f64d'\u003e \u003cdiv class='jdgm-rev-snippet-card__rev-header'\u003e \u003cdiv class='jdgm-rev-snippet-card__rev-rating' aria-label='5 stars' role='img'\u003e \u003cspan class='jdgm-star jdgm--on'\u003e\u003c\/span\u003e\u003cspan class='jdgm-star jdgm--on'\u003e\u003c\/span\u003e\u003cspan class='jdgm-star jdgm--on'\u003e\u003c\/span\u003e\u003cspan class='jdgm-star jdgm--on'\u003e\u003c\/span\u003e\u003cspan class='jdgm-star jdgm--on'\u003e\u003c\/span\u003e \u003c\/div\u003e \u003cdiv class='jdgm-rev-snippet-card__reviewer'\u003e Kai \u003c\/div\u003e \u003c\/div\u003e \u003cdiv class='jdgm-rev-snippet-card__rev-content'\u003e \u003cspan class='jdgm-rev-snippet-card__rev-body'\u003e \u003cp\u003eI wasn't sure if I wanted to invest in buying a tens machine, so a rental worked well for me. I was a bit nervous of the whole rental and return process the Birth store makes it SO easy to do, even in such a stressful time such as pre and post birth. I appreciated the simple pre paid return bag. \u003c\/p\u003e\n\n\u003cp\u003eThe machine itself helped me so much, I used it from early labour right until the moment the baby was born. It was very grounding, gave me the sense of control over the surges. \u003c\/p\u003e\n\n\u003cp\u003eHighly recommend a tens machine, specifically through the Birth Store\u003c\/p\u003e \u003c\/span\u003e \u003c\/div\u003e \u003c\/a\u003e \u003c\/div\u003e \u003c\/div\u003e\u003cdiv class='jdgm-rev-snippet-card' data-review-id='338dd826-b84f-5b46-a02a-d8aad323295a' style='display: none;'\u003e \u003cdiv class=\"jdgm-rev-snippet-card__rev-prod-wrapper\"\u003e \u003ca class='jdgm-rev-snippet-card__rev-content-wrapper jdgm-rev-snippet-card__full-review-link' style='text-decoration: none; color: inherit;padding: 0 34px;' role='button' data-review-id='338dd826-b84f-5b46-a02a-d8aad323295a'\u003e \u003cdiv class='jdgm-rev-snippet-card__rev-header'\u003e \u003cdiv class='jdgm-rev-snippet-card__rev-rating' aria-label='5 stars' role='img'\u003e \u003cspan class='jdgm-star jdgm--on'\u003e\u003c\/span\u003e\u003cspan class='jdgm-star jdgm--on'\u003e\u003c\/span\u003e\u003cspan class='jdgm-star jdgm--on'\u003e\u003c\/span\u003e\u003cspan class='jdgm-star jdgm--on'\u003e\u003c\/span\u003e\u003cspan class='jdgm-star jdgm--on'\u003e\u003c\/span\u003e \u003c\/div\u003e \u003cdiv class='jdgm-rev-snippet-card__reviewer'\u003e Jenna \u003c\/div\u003e \u003c\/div\u003e \u003cdiv class='jdgm-rev-snippet-card__rev-content'\u003e \u003cspan class='jdgm-rev-snippet-card__rev-body'\u003e \u003cp\u003eThe TENS machine arrived in time for my birth but was glad this was an option and thought it was a great money back guarantee as with my first pregnancy I ordered a machine but didn’t end up using it\u003c\/p\u003e \u003c\/span\u003e \u003c\/div\u003e \u003c\/a\u003e \u003c\/div\u003e \u003c\/div\u003e \u003c\/div\u003e \u003c\/div\u003e \u003c\/div\u003e","widget":"\u003cdiv class='jdgm-rev-widg' data-updated-at='2026-11-03T12:34:53Z' data-average-rating='4.81' data-number-of-reviews='42' data-number-of-questions='0' data-image-url='https:\/\/cdn.shopify.com\/s\/files\/1\/0527\/3393\/5805\/files\/untouched-tens-machine-hire-money-back-guarantee-8043399.png?v=1774998786'\u003e \u003cstyle class='jdgm-temp-hiding-style'\u003e.jdgm-rev-widg{ display: none }\u003c\/style\u003e \u003cdiv class='jdgm-rev-widg__header'\u003e \u003ch2 class='jdgm-rev-widg__title'\u003eCustomer Reviews\u003c\/h2\u003e \u003cdiv class='jdgm-rev-widg__summary'\u003e \u003cdiv class='jdgm-rev-widg__summary-stars'\u003e \u003cspan class='jdgm-rev-widg__summary-stars-img' aria-label='Average rating is 4.81 stars' role='img'\u003e \u003cspan class='jdgm-star jdgm--on'\u003e\u003c\/span\u003e\u003cspan class='jdgm-star jdgm--on'\u003e\u003c\/span\u003e\u003cspan class='jdgm-star jdgm--on'\u003e\u003c\/span\u003e\u003cspan class='jdgm-star jdgm--on'\u003e\u003c\/span\u003e\u003cspan class='jdgm-star jdgm--on'\u003e\u003c\/span\u003e \u003c\/span\u003e \u003c\/div\u003e \u003cdiv class='jdgm-rev-widg__summary-text'\u003eBased on 42 reviews\u003c\/div\u003e \u003c\/div\u003e \u003ca style='display: none' href='#' class='jdgm-write-rev-link' role='button'\u003eWrite a review\u003c\/a\u003e \u003cdiv class='jdgm-histogram jdgm-temp-hidden'\u003e \u003cdiv class='jdgm-histogram__row' data-rating='5' data-frequency='39' data-percentage='93'\u003e \u003cdiv class='jdgm-histogram__star' role='button' aria-label=\"93% (39) reviews with 5 star rating\" tabindex='0' \u003e\u003cspan class='jdgm-star jdgm--on'\u003e\u003c\/span\u003e\u003cspan class='jdgm-star jdgm--on'\u003e\u003c\/span\u003e\u003cspan class='jdgm-star jdgm--on'\u003e\u003c\/span\u003e\u003cspan class='jdgm-star jdgm--on'\u003e\u003c\/span\u003e\u003cspan class='jdgm-star jdgm--on'\u003e\u003c\/span\u003e\u003c\/div\u003e \u003cdiv class='jdgm-histogram__bar'\u003e \u003cdiv class='jdgm-histogram__bar-content' style='width: 93%;'\u003e \u003c\/div\u003e \u003c\/div\u003e \u003cdiv class='jdgm-histogram__percentage'\u003e93%\u003c\/div\u003e \u003cdiv class='jdgm-histogram__frequency'\u003e(39)\u003c\/div\u003e \u003c\/div\u003e \u003cdiv class='jdgm-histogram__row' data-rating='4' data-frequency='1' data-percentage='2'\u003e \u003cdiv class='jdgm-histogram__star' role='button' aria-label=\"2% (1) reviews with 4 star rating\" tabindex='0' \u003e\u003cspan class='jdgm-star jdgm--on'\u003e\u003c\/span\u003e\u003cspan class='jdgm-star jdgm--on'\u003e\u003c\/span\u003e\u003cspan class='jdgm-star jdgm--on'\u003e\u003c\/span\u003e\u003cspan class='jdgm-star jdgm--on'\u003e\u003c\/span\u003e\u003cspan class='jdgm-star jdgm--off'\u003e\u003c\/span\u003e\u003c\/div\u003e \u003cdiv class='jdgm-histogram__bar'\u003e \u003cdiv class='jdgm-histogram__bar-content' style='width: 2%;'\u003e \u003c\/div\u003e \u003c\/div\u003e \u003cdiv class='jdgm-histogram__percentage'\u003e2%\u003c\/div\u003e \u003cdiv class='jdgm-histogram__frequency'\u003e(1)\u003c\/div\u003e \u003c\/div\u003e \u003cdiv class='jdgm-histogram__row' data-rating='3' data-frequency='0' data-percentage='0'\u003e \u003cdiv class='jdgm-histogram__star' role='button' aria-label=\"0% (0) reviews with 3 star rating\" tabindex='0' \u003e\u003cspan class='jdgm-star jdgm--on'\u003e\u003c\/span\u003e\u003cspan class='jdgm-star jdgm--on'\u003e\u003c\/span\u003e\u003cspan class='jdgm-star jdgm--on'\u003e\u003c\/span\u003e\u003cspan class='jdgm-star jdgm--off'\u003e\u003c\/span\u003e\u003cspan class='jdgm-star jdgm--off'\u003e\u003c\/span\u003e\u003c\/div\u003e \u003cdiv class='jdgm-histogram__bar'\u003e \u003cdiv class='jdgm-histogram__bar-content' style='width: 0%;'\u003e \u003c\/div\u003e \u003c\/div\u003e \u003cdiv class='jdgm-histogram__percentage'\u003e0%\u003c\/div\u003e \u003cdiv class='jdgm-histogram__frequency'\u003e(0)\u003c\/div\u003e \u003c\/div\u003e \u003cdiv class='jdgm-histogram__row' data-rating='2' data-frequency='1' data-percentage='2'\u003e \u003cdiv class='jdgm-histogram__star' role='button' aria-label=\"2% (1) reviews with 2 star rating\" tabindex='0' \u003e\u003cspan class='jdgm-star jdgm--on'\u003e\u003c\/span\u003e\u003cspan class='jdgm-star jdgm--on'\u003e\u003c\/span\u003e\u003cspan class='jdgm-star jdgm--off'\u003e\u003c\/span\u003e\u003cspan class='jdgm-star jdgm--off'\u003e\u003c\/span\u003e\u003cspan class='jdgm-star jdgm--off'\u003e\u003c\/span\u003e\u003c\/div\u003e \u003cdiv class='jdgm-histogram__bar'\u003e \u003cdiv class='jdgm-histogram__bar-content' style='width: 2%;'\u003e \u003c\/div\u003e \u003c\/div\u003e \u003cdiv class='jdgm-histogram__percentage'\u003e2%\u003c\/div\u003e \u003cdiv class='jdgm-histogram__frequency'\u003e(1)\u003c\/div\u003e \u003c\/div\u003e \u003cdiv class='jdgm-histogram__row' data-rating='1' data-frequency='1' data-percentage='2'\u003e \u003cdiv class='jdgm-histogram__star' role='button' aria-label=\"2% (1) reviews with 1 star rating\" tabindex='0' \u003e\u003cspan class='jdgm-star jdgm--on'\u003e\u003c\/span\u003e\u003cspan class='jdgm-star jdgm--off'\u003e\u003c\/span\u003e\u003cspan class='jdgm-star jdgm--off'\u003e\u003c\/span\u003e\u003cspan class='jdgm-star jdgm--off'\u003e\u003c\/span\u003e\u003cspan class='jdgm-star jdgm--off'\u003e\u003c\/span\u003e\u003c\/div\u003e \u003cdiv class='jdgm-histogram__bar'\u003e \u003cdiv class='jdgm-histogram__bar-content' style='width: 2%;'\u003e \u003c\/div\u003e \u003c\/div\u003e \u003cdiv class='jdgm-histogram__percentage'\u003e2%\u003c\/div\u003e \u003cdiv class='jdgm-histogram__frequency'\u003e(1)\u003c\/div\u003e \u003c\/div\u003e \u003cdiv class='jdgm-histogram__row jdgm-histogram__clear-filter' data-rating=null tabindex='0'\u003e\u003c\/div\u003e \u003c\/div\u003e \u003cdiv class=\"jdgm-medals-wrapper jdgm-hidden\" data-updated-at='2026-11-03T12:34:53Z'\u003e \u003cstyle type=\"text\/css\"\u003e\u003c\/style\u003e \u003cdiv class=\"jdgm-medals\" data-link=\"https:\/\/app.judge.me\/reviews\/stores\/www.thebirthstore.com.au\"\u003e \u003cdiv class=\"jdgm-medals__container\"\u003e \u003cdiv class=\"jdgm-medal-wrapper\" title=\"Diamond Authentic Shop. 100% of published reviews are verified reviews\"\u003e \u003ca class=\"jdgm-medal jdgm--loading\" data-value=\"100.0\" data-type=\"auth\" data-tier=\"diamond\" aria-label=\"Judge.me Diamond Authentic Shop medal\"\u003e \u003cdiv class=\"jdgm-medal__image\" data-url=\"auth\/diamond.svg\" data-alt=\"Judge.me Diamond Authentic Shop medal\"\u003e\u003c\/div\u003e \u003cdiv class=\"jdgm-medal__value \"\u003e100.0\u003c\/div\u003e \u003c\/a\u003e \u003c\/div\u003e \u003cdiv class=\"jdgm-medal-wrapper\" title=\"Diamond Transparent Shop. Published 100% of verified reviews received in total\"\u003e \u003ca class=\"jdgm-medal jdgm--loading\" data-value=\"100.0\" data-type=\"tran\" data-tier=\"diamond\" aria-label=\"Judge.me Diamond Transparent Shop medal\"\u003e \u003cdiv class=\"jdgm-medal__image\" data-url=\"tran\/diamond.svg\" data-alt=\"Judge.me Diamond Transparent Shop medal\"\u003e\u003c\/div\u003e \u003cdiv class=\"jdgm-medal__value \"\u003e100.0\u003c\/div\u003e \u003c\/a\u003e \u003c\/div\u003e \u003c\/div\u003e \u003c\/div\u003e \u003c\/div\u003e \u003cdiv class='jdgm-rev-widg__sort-wrapper'\u003e\u003c\/div\u003e \u003c\/div\u003e \u003cdiv class='jdgm-rev-widg__body'\u003e \u003cdiv class='jdgm-rev-widg__reviews'\u003e\u003cdiv class='jdgm-rev jdgm-divider-top' data-verified-buyer='true' data-review-id='3842869e-9a0c-4db7-8368-358e6a49a2c8' data-review-language='' data-product-title='Untouched TENS Machine Hire Money Back Guarantee' data-product-url='\/products\/unused-money-back-guarantee' data-thumb-up-count='0' data-thumb-down-count='0'\u003e \u003cdiv class='jdgm-rev__header'\u003e \u003cdiv class='jdgm-rev__icon' \u003e N \u003c\/div\u003e \u003cspan class='jdgm-rev__rating' data-score='5' tabindex='0' aria-label='5 star review' role='img'\u003e \u003cspan class='jdgm-star jdgm--on'\u003e\u003c\/span\u003e\u003cspan class='jdgm-star jdgm--on'\u003e\u003c\/span\u003e\u003cspan class='jdgm-star jdgm--on'\u003e\u003c\/span\u003e\u003cspan class='jdgm-star jdgm--on'\u003e\u003c\/span\u003e\u003cspan class='jdgm-star jdgm--on'\u003e\u003c\/span\u003e \u003c\/span\u003e \u003ctime class='jdgm-rev__timestamp jdgm-spinner' datetime='2026-10-30T22:08:02Z' data-content='2026-10-30 22:08:02 UTC'\u003e\u003c\/time\u003e \u003cdiv class='jdgm-rev__br'\u003e\u003c\/div\u003e \u003cspan class='jdgm-rev__buyer-badge-wrapper'\u003e \u003cspan class='jdgm-rev__buyer-badge'\u003e\u003c\/span\u003e \u003c\/span\u003e \u003cspan class='jdgm-rev__author-wrapper'\u003e \u003cspan class='jdgm-rev__author'\u003eNatasha\u003c\/span\u003e \u003cspan class='jdgm-rev__location' \u003e \u003c\/span\u003e \u003c\/span\u003e \u003c\/div\u003e \u003cdiv class='jdgm-rev__content'\u003e \u003cdiv class='jdgm-rev__custom-form'\u003e \u003c\/div\u003e \u003cb class='jdgm-rev__title'\u003eHighly Recommend !!\u003c\/b\u003e \u003cdiv class='jdgm-rev__body'\u003e\u003cp\u003eThis is the second time I’ve hired your TENS machine and it was amazing. I could not imagine labouring without it. The hire and returns process is easy as always. Thank you again xx\u003c\/p\u003e\u003c\/div\u003e \u003cdiv class='jdgm-rev__pics'\u003e \u003c\/div\u003e \u003cdiv class='jdgm-rev__vids'\u003e \u003c\/div\u003e \u003cdiv class='jdgm-rev__transparency-badge-wrapper'\u003e \u003cdiv class='jdgm-rev__transparency-badge' data-badge-type=review_collected_via_store_invitation\u003e\u003c\/div\u003e \u003c\/div\u003e \u003c\/div\u003e \u003cdiv class='jdgm-rev__actions'\u003e \u003cdiv class='jdgm-rev__social'\u003e\u003c\/div\u003e \u003cdiv class='jdgm-rev__votes'\u003e\u003c\/div\u003e \u003c\/div\u003e \u003cdiv class='jdgm-rev__reply'\u003e \u003cdiv class='jdgm-rev__replier-wrapper'\u003e \u003cb class='jdgm-rev__replier'\u003e\u003c\/b\u003e \u003c\/div\u003e \u003cdiv class='jdgm-rev__reply-content' data-digital-source-type=\"https:\/\/schema.org\/TrainedAlgorithmicMediaDigitalSource\"\u003e\u003cp\u003eThank you so much, Natasha, for your wonderful review ❤️ We’re so glad the TENS machine supported you through another labour and that you found the hire and return process easy once again. We truly appreciate your continued trust and support, and we’re so happy you chose The Birth Store for a second time!\u003c\/p\u003e\u003c\/div\u003e \u003c\/div\u003e \u003c\/div\u003e\u003cdiv class='jdgm-rev jdgm-divider-top' data-verified-buyer='true' data-review-id='c712fa2d-9171-4b80-a3ab-11b9d4dba38c' data-review-language='' data-product-title='Untouched TENS Machine Hire Money Back Guarantee' data-product-url='\/products\/unused-money-back-guarantee' data-thumb-up-count='0' data-thumb-down-count='0'\u003e \u003cdiv class='jdgm-rev__header'\u003e \u003cdiv class='jdgm-rev__icon' \u003e T \u003c\/div\u003e \u003cspan class='jdgm-rev__rating' data-score='5' tabindex='0' aria-label='5 star review' role='img'\u003e \u003cspan class='jdgm-star jdgm--on'\u003e\u003c\/span\u003e\u003cspan class='jdgm-star jdgm--on'\u003e\u003c\/span\u003e\u003cspan class='jdgm-star jdgm--on'\u003e\u003c\/span\u003e\u003cspan class='jdgm-star jdgm--on'\u003e\u003c\/span\u003e\u003cspan class='jdgm-star jdgm--on'\u003e\u003c\/span\u003e \u003c\/span\u003e \u003ctime class='jdgm-rev__timestamp jdgm-spinner' datetime='2026-10-06T06:19:53Z' data-content='2026-10-06 06:19:53 UTC'\u003e\u003c\/time\u003e \u003cdiv class='jdgm-rev__br'\u003e\u003c\/div\u003e \u003cspan class='jdgm-rev__buyer-badge-wrapper'\u003e \u003cspan class='jdgm-rev__buyer-badge'\u003e\u003c\/span\u003e \u003c\/span\u003e \u003cspan class='jdgm-rev__author-wrapper'\u003e \u003cspan class='jdgm-rev__author'\u003eTracey H\u003c\/span\u003e \u003cspan class='jdgm-rev__location' \u003e \u003c\/span\u003e \u003c\/span\u003e \u003c\/div\u003e \u003cdiv class='jdgm-rev__content'\u003e \u003cdiv class='jdgm-rev__custom-form'\u003e \u003c\/div\u003e \u003cb class='jdgm-rev__title'\u003eEasy\u003c\/b\u003e \u003cdiv class='jdgm-rev__body'\u003e\u003cp\u003eI ordered the tens machine but didn’t get to use it. The team were really helpful and processed my refund using the untouched guarantee quickly, and had really good communication. Would recommend hiring from the birth store and purchasing the guarantee for peace of mind.\u003c\/p\u003e\u003c\/div\u003e \u003cdiv class='jdgm-rev__pics'\u003e \u003c\/div\u003e \u003cdiv class='jdgm-rev__vids'\u003e \u003c\/div\u003e \u003cdiv class='jdgm-rev__transparency-badge-wrapper'\u003e \u003cdiv class='jdgm-rev__transparency-badge' data-badge-type=review_collected_via_store_invitation\u003e\u003c\/div\u003e \u003c\/div\u003e \u003c\/div\u003e \u003cdiv class='jdgm-rev__actions'\u003e \u003cdiv class='jdgm-rev__social'\u003e\u003c\/div\u003e \u003cdiv class='jdgm-rev__votes'\u003e\u003c\/div\u003e \u003c\/div\u003e \u003cdiv class='jdgm-rev__reply'\u003e \u003cdiv class='jdgm-rev__replier-wrapper'\u003e \u003cb class='jdgm-rev__replier'\u003e\u003c\/b\u003e \u003c\/div\u003e \u003cdiv class='jdgm-rev__reply-content' data-digital-source-type=\"https:\/\/schema.org\/TrainedAlgorithmicMediaDigitalSource\"\u003e\u003cp\u003eThank you so much, Tracey, for your lovely review ❤️ We’re so glad the untouched guarantee gave you peace of mind and that you found the refund process quick and easy. We really appreciate your recommendation and kind words about our team.\u003c\/p\u003e\u003c\/div\u003e \u003c\/div\u003e \u003c\/div\u003e\u003cdiv class='jdgm-rev jdgm-divider-top' data-verified-buyer='true' data-review-id='cf7b1b2e-a7a6-4bd5-b865-6aed570cef55' data-review-language='' data-product-title='Untouched TENS Machine Hire Money Back Guarantee' data-product-url='\/products\/unused-money-back-guarantee' data-thumb-up-count='0' data-thumb-down-count='0'\u003e \u003cdiv class='jdgm-rev__header'\u003e \u003cdiv class='jdgm-rev__icon' \u003e N \u003c\/div\u003e \u003cspan class='jdgm-rev__rating' data-score='5' tabindex='0' aria-label='5 star review' role='img'\u003e \u003cspan class='jdgm-star jdgm--on'\u003e\u003c\/span\u003e\u003cspan class='jdgm-star jdgm--on'\u003e\u003c\/span\u003e\u003cspan class='jdgm-star jdgm--on'\u003e\u003c\/span\u003e\u003cspan class='jdgm-star jdgm--on'\u003e\u003c\/span\u003e\u003cspan class='jdgm-star jdgm--on'\u003e\u003c\/span\u003e \u003c\/span\u003e \u003ctime class='jdgm-rev__timestamp jdgm-spinner' datetime='2026-09-29T11:35:01Z' data-content='2026-09-29 11:35:01 UTC'\u003e\u003c\/time\u003e \u003cdiv class='jdgm-rev__br'\u003e\u003c\/div\u003e \u003cspan class='jdgm-rev__buyer-badge-wrapper'\u003e \u003cspan class='jdgm-rev__buyer-badge'\u003e\u003c\/span\u003e \u003c\/span\u003e \u003cspan class='jdgm-rev__author-wrapper'\u003e \u003cspan class='jdgm-rev__author'\u003eNeha Sinha\u003c\/span\u003e \u003cspan class='jdgm-rev__location' \u003e \u003c\/span\u003e \u003c\/span\u003e \u003c\/div\u003e \u003cdiv class='jdgm-rev__content'\u003e \u003cdiv class='jdgm-rev__custom-form'\u003e \u003c\/div\u003e \u003cb class='jdgm-rev__title'\u003e\u003c\/b\u003e \u003cdiv class='jdgm-rev__body'\u003e\u003cp\u003eUntouched TENS Machine Hire Money Back Guarantee\u003c\/p\u003e\u003c\/div\u003e \u003cdiv class='jdgm-rev__pics'\u003e \u003c\/div\u003e \u003cdiv class='jdgm-rev__vids'\u003e \u003c\/div\u003e \u003cdiv class='jdgm-rev__transparency-badge-wrapper'\u003e \u003cdiv class='jdgm-rev__transparency-badge' data-badge-type=review_collected_via_store_invitation\u003e\u003c\/div\u003e \u003c\/div\u003e \u003c\/div\u003e \u003cdiv class='jdgm-rev__actions'\u003e \u003cdiv class='jdgm-rev__social'\u003e\u003c\/div\u003e \u003cdiv class='jdgm-rev__votes'\u003e\u003c\/div\u003e \u003c\/div\u003e \u003cdiv class='jdgm-rev__reply'\u003e \u003cdiv class='jdgm-rev__replier-wrapper'\u003e \u003cb class='jdgm-rev__replier'\u003e\u003c\/b\u003e \u003c\/div\u003e \u003cdiv class='jdgm-rev__reply-content' data-digital-source-type=\"https:\/\/schema.org\/TrainedAlgorithmicMediaDigitalSource\"\u003e\u003cp\u003eThank you so much, Neha, for your review ❤️ We really appreciate your support and are grateful you chose The Birth Store.\u003c\/p\u003e\u003c\/div\u003e \u003c\/div\u003e \u003c\/div\u003e\u003cdiv class='jdgm-rev jdgm-divider-top' data-verified-buyer='true' data-review-id='ac1a2cc3-0bec-4be8-b1c5-ebec82d3aca6' data-review-language='' data-product-title='Untouched TENS Machine Hire Money Back Guarantee' data-product-url='\/products\/unused-money-back-guarantee' data-thumb-up-count='0' data-thumb-down-count='0'\u003e \u003cdiv class='jdgm-rev__header'\u003e \u003cdiv class='jdgm-rev__icon' \u003e S \u003c\/div\u003e \u003cspan class='jdgm-rev__rating' data-score='5' tabindex='0' aria-label='5 star review' role='img'\u003e \u003cspan class='jdgm-star jdgm--on'\u003e\u003c\/span\u003e\u003cspan class='jdgm-star jdgm--on'\u003e\u003c\/span\u003e\u003cspan class='jdgm-star jdgm--on'\u003e\u003c\/span\u003e\u003cspan class='jdgm-star jdgm--on'\u003e\u003c\/span\u003e\u003cspan class='jdgm-star jdgm--on'\u003e\u003c\/span\u003e \u003c\/span\u003e \u003ctime class='jdgm-rev__timestamp jdgm-spinner' datetime='2026-09-16T12:02:01Z' data-content='2026-09-16 12:02:01 UTC'\u003e\u003c\/time\u003e \u003cdiv class='jdgm-rev__br'\u003e\u003c\/div\u003e \u003cspan class='jdgm-rev__buyer-badge-wrapper'\u003e \u003cspan class='jdgm-rev__buyer-badge'\u003e\u003c\/span\u003e \u003c\/span\u003e \u003cspan class='jdgm-rev__author-wrapper'\u003e \u003cspan class='jdgm-rev__author'\u003eSitar Regev\u003c\/span\u003e \u003cspan class='jdgm-rev__location' \u003e \u003c\/span\u003e \u003c\/span\u003e \u003c\/div\u003e \u003cdiv class='jdgm-rev__content'\u003e \u003cdiv class='jdgm-rev__custom-form'\u003e \u003c\/div\u003e \u003cb class='jdgm-rev__title'\u003e\u003c\/b\u003e \u003cdiv class='jdgm-rev__body'\u003e\u003cp\u003eUntouched TENS Machine Hire Money Back Guarantee\u003c\/p\u003e\u003c\/div\u003e \u003cdiv class='jdgm-rev__pics'\u003e \u003c\/div\u003e \u003cdiv class='jdgm-rev__vids'\u003e \u003c\/div\u003e \u003cdiv class='jdgm-rev__transparency-badge-wrapper'\u003e \u003cdiv class='jdgm-rev__transparency-badge' data-badge-type=review_collected_via_store_invitation\u003e\u003c\/div\u003e \u003c\/div\u003e \u003c\/div\u003e \u003cdiv class='jdgm-rev__actions'\u003e \u003cdiv class='jdgm-rev__social'\u003e\u003c\/div\u003e \u003cdiv class='jdgm-rev__votes'\u003e\u003c\/div\u003e \u003c\/div\u003e \u003cdiv class='jdgm-rev__reply'\u003e \u003cdiv class='jdgm-rev__replier-wrapper'\u003e \u003cb class='jdgm-rev__replier'\u003e\u003c\/b\u003e \u003c\/div\u003e \u003cdiv class='jdgm-rev__reply-content' data-digital-source-type=\"https:\/\/schema.org\/TrainedAlgorithmicMediaDigitalSource\"\u003e\u003cp\u003eThank you so much, Sitar, for your review ❤️ We really appreciate your support and are grateful you chose The Birth Store.\u003c\/p\u003e\u003c\/div\u003e \u003c\/div\u003e \u003c\/div\u003e\u003cdiv class='jdgm-rev jdgm-divider-top' data-verified-buyer='true' data-review-id='a532ca43-7f03-4772-94a9-7849915b4319' data-review-language='' data-product-title='Untouched TENS Machine Hire Money Back Guarantee' data-product-url='\/products\/unused-money-back-guarantee' data-thumb-up-count='0' data-thumb-down-count='0'\u003e \u003cdiv class='jdgm-rev__header'\u003e \u003cdiv class='jdgm-rev__icon' \u003e K \u003c\/div\u003e \u003cspan class='jdgm-rev__rating' data-score='5' tabindex='0' aria-label='5 star review' role='img'\u003e \u003cspan class='jdgm-star jdgm--on'\u003e\u003c\/span\u003e\u003cspan class='jdgm-star jdgm--on'\u003e\u003c\/span\u003e\u003cspan class='jdgm-star jdgm--on'\u003e\u003c\/span\u003e\u003cspan class='jdgm-star jdgm--on'\u003e\u003c\/span\u003e\u003cspan class='jdgm-star jdgm--on'\u003e\u003c\/span\u003e \u003c\/span\u003e \u003ctime class='jdgm-rev__timestamp jdgm-spinner' datetime='2026-09-13T02:38:53Z' data-content='2026-09-13 02:38:53 UTC'\u003e\u003c\/time\u003e \u003cdiv class='jdgm-rev__br'\u003e\u003c\/div\u003e \u003cspan class='jdgm-rev__buyer-badge-wrapper'\u003e \u003cspan class='jdgm-rev__buyer-badge'\u003e\u003c\/span\u003e \u003c\/span\u003e \u003cspan class='jdgm-rev__author-wrapper'\u003e \u003cspan class='jdgm-rev__author'\u003eKerri\u003c\/span\u003e \u003cspan class='jdgm-rev__location' \u003e \u003c\/span\u003e \u003c\/span\u003e \u003c\/div\u003e \u003cdiv class='jdgm-rev__content'\u003e \u003cdiv class='jdgm-rev__custom-form'\u003e \u003c\/div\u003e \u003cb class='jdgm-rev__title'\u003eTens machine natural birth\u003c\/b\u003e \u003cdiv class='jdgm-rev__body'\u003e\u003cp\u003eI hired the tens machine for my birth, unfortunately I had to be induced for the safety of baby with the balloon and the misoprotol and wow was this medication intense..... 4 contractions back to back within the first 10min and no relief from contractions from then on they were back to back for 10hrs. No pain relief within the 10hrs just the tens machine to get me through.. unfortunately I was not dilating from the induction and was placed on the oxytocin drip where I then had to get an epidural due to unexpected complications for myself not for baby and baby was born 9 and a half hours later.\u003c\/p\u003e\n\n\u003cp\u003eI would definitely recommend the tens machine as it got me through for the first 10 hours of labour and would definitely hire it for my next pregnancies.\u003c\/p\u003e\n\n\u003cp\u003eThank you so much for the opportunity to hire this machine ❤️\u003c\/p\u003e\u003c\/div\u003e \u003cdiv class='jdgm-rev__pics'\u003e \u003c\/div\u003e \u003cdiv class='jdgm-rev__vids'\u003e \u003c\/div\u003e \u003cdiv class='jdgm-rev__transparency-badge-wrapper'\u003e \u003cdiv class='jdgm-rev__transparency-badge' data-badge-type=review_collected_via_store_invitation\u003e\u003c\/div\u003e \u003c\/div\u003e \u003c\/div\u003e \u003cdiv class='jdgm-rev__actions'\u003e \u003cdiv class='jdgm-rev__social'\u003e\u003c\/div\u003e \u003cdiv class='jdgm-rev__votes'\u003e\u003c\/div\u003e \u003c\/div\u003e \u003cdiv class='jdgm-rev__reply'\u003e \u003cdiv class='jdgm-rev__replier-wrapper'\u003e \u003cb class='jdgm-rev__replier'\u003e\u003c\/b\u003e \u003c\/div\u003e \u003cdiv class='jdgm-rev__reply-content' data-digital-source-type=\"https:\/\/schema.org\/TrainedAlgorithmicMediaDigitalSource\"\u003e\u003cp\u003eThank you so much, Kerri, for sharing your birth experience with us ❤️ We’re so glad the TENS machine was able to support you through those intense first 10 hours of labour and help you cope before needing further pain relief. We really appreciate your recommendation and would be honoured to support you again in the future.\u003c\/p\u003e\u003c\/div\u003e \u003c\/div\u003e \u003c\/div\u003e\u003cdiv class='jdgm-rev jdgm-divider-top' data-verified-buyer='true' data-review-id='67f0d02d-1a3e-48a6-a56a-a7f6c49fc32d' data-review-language='' data-product-title='Untouched TENS Machine Hire Money Back Guarantee' data-product-url='\/products\/unused-money-back-guarantee' data-thumb-up-count='0' data-thumb-down-count='0'\u003e \u003cdiv class='jdgm-rev__header'\u003e \u003cdiv class='jdgm-rev__icon' \u003e A \u003c\/div\u003e \u003cspan class='jdgm-rev__rating' data-score='5' tabindex='0' aria-label='5 star review' role='img'\u003e \u003cspan class='jdgm-star jdgm--on'\u003e\u003c\/span\u003e\u003cspan class='jdgm-star jdgm--on'\u003e\u003c\/span\u003e\u003cspan class='jdgm-star jdgm--on'\u003e\u003c\/span\u003e\u003cspan class='jdgm-star jdgm--on'\u003e\u003c\/span\u003e\u003cspan class='jdgm-star jdgm--on'\u003e\u003c\/span\u003e \u003c\/span\u003e \u003ctime class='jdgm-rev__timestamp jdgm-spinner' datetime='2026-08-28T09:25:51Z' data-content='2026-08-28 09:25:51 UTC'\u003e\u003c\/time\u003e \u003cdiv class='jdgm-rev__br'\u003e\u003c\/div\u003e \u003cspan class='jdgm-rev__buyer-badge-wrapper'\u003e \u003cspan class='jdgm-rev__buyer-badge'\u003e\u003c\/span\u003e \u003c\/span\u003e \u003cspan class='jdgm-rev__author-wrapper'\u003e \u003cspan class='jdgm-rev__author'\u003eAnastasija Maric\u003c\/span\u003e \u003cspan class='jdgm-rev__location' \u003e \u003c\/span\u003e \u003c\/span\u003e \u003c\/div\u003e \u003cdiv class='jdgm-rev__content'\u003e \u003cdiv class='jdgm-rev__custom-form'\u003e \u003c\/div\u003e \u003cb class='jdgm-rev__title'\u003eHighly recommend!\u003c\/b\u003e \u003cdiv class='jdgm-rev__body'\u003e\u003cp\u003eThe machine is incredible and would recommend everyone to have it with them during labour. I was able to successfully labour at home for several hours and was dilated 7cm when I arrived at the hospital all because the tens machine provided so much relief. Can’t recommend the machine more and the hire process was super easy and convenient. My baby girl came a few days later and i was worried I would have to return the hire before she arrived however, was able to purchase more days for cheap which was so handy. Last note is that everything is included when shipping it back so you don’t have to think much amongst everything else.\u003c\/p\u003e\u003c\/div\u003e \u003cdiv class='jdgm-rev__pics'\u003e \u003c\/div\u003e \u003cdiv class='jdgm-rev__vids'\u003e \u003c\/div\u003e \u003cdiv class='jdgm-rev__transparency-badge-wrapper'\u003e \u003cdiv class='jdgm-rev__transparency-badge' data-badge-type=review_collected_via_store_invitation\u003e\u003c\/div\u003e \u003c\/div\u003e \u003c\/div\u003e \u003cdiv class='jdgm-rev__actions'\u003e \u003cdiv class='jdgm-rev__social'\u003e\u003c\/div\u003e \u003cdiv class='jdgm-rev__votes'\u003e\u003c\/div\u003e \u003c\/div\u003e \u003cdiv class='jdgm-rev__reply'\u003e \u003cdiv class='jdgm-rev__replier-wrapper'\u003e \u003cb class='jdgm-rev__replier'\u003e\u003c\/b\u003e \u003c\/div\u003e \u003cdiv class='jdgm-rev__reply-content' data-digital-source-type=\"https:\/\/schema.org\/TrainedAlgorithmicMediaDigitalSource\"\u003e\u003cp\u003eThank you so much, Anastasija, for sharing your wonderful experience ❤️ We’re so glad the TENS machine provided so much relief and supported you through those hours of labour at home. It’s also lovely to hear that extending the hire and returning the machine were easy and convenient. We really appreciate your recommendation.\u003c\/p\u003e\u003c\/div\u003e \u003c\/div\u003e \u003c\/div\u003e\u003cdiv class='jdgm-rev jdgm-divider-top' data-verified-buyer='true' data-review-id='f9df30d9-7ab0-4613-b4fa-280d5c4e6c35' data-review-language='' data-product-title='Untouched TENS Machine Hire Money Back Guarantee' data-product-url='\/products\/unused-money-back-guarantee' data-thumb-up-count='0' data-thumb-down-count='0'\u003e \u003cdiv class='jdgm-rev__header'\u003e \u003cdiv class='jdgm-rev__icon' \u003e L \u003c\/div\u003e \u003cspan class='jdgm-rev__rating' data-score='5' tabindex='0' aria-label='5 star review' role='img'\u003e \u003cspan class='jdgm-star jdgm--on'\u003e\u003c\/span\u003e\u003cspan class='jdgm-star jdgm--on'\u003e\u003c\/span\u003e\u003cspan class='jdgm-star jdgm--on'\u003e\u003c\/span\u003e\u003cspan class='jdgm-star jdgm--on'\u003e\u003c\/span\u003e\u003cspan class='jdgm-star jdgm--on'\u003e\u003c\/span\u003e \u003c\/span\u003e \u003ctime class='jdgm-rev__timestamp jdgm-spinner' datetime='2026-08-17T06:13:02Z' data-content='2026-08-17 06:13:02 UTC'\u003e\u003c\/time\u003e \u003cdiv class='jdgm-rev__br'\u003e\u003c\/div\u003e \u003cspan class='jdgm-rev__buyer-badge-wrapper'\u003e \u003cspan class='jdgm-rev__buyer-badge'\u003e\u003c\/span\u003e \u003c\/span\u003e \u003cspan class='jdgm-rev__author-wrapper'\u003e \u003cspan class='jdgm-rev__author'\u003eLady Uzu\u003c\/span\u003e \u003cspan class='jdgm-rev__location' \u003e \u003c\/span\u003e \u003c\/span\u003e \u003c\/div\u003e \u003cdiv class='jdgm-rev__content'\u003e \u003cdiv class='jdgm-rev__custom-form'\u003e \u003c\/div\u003e \u003cb class='jdgm-rev__title'\u003eFirst time mum\u003c\/b\u003e \u003cdiv class='jdgm-rev__body'\u003e\u003cp\u003eOrdering online - super quick \u0026amp; easy\u003c\/p\u003e\n\n\u003cp\u003eShipping - quick without any hassle\u003c\/p\u003e\n\n\u003cp\u003eUsing it - super helpful during the beginning of my labour (I would say until I was about 8cm) and then the contractions became a lot more intense and the tens machine no longer worked but up until then it genuinely helped SO much. Mind you, I didn't use it until I was about 6CM and as soon as I put it on, the contractions became more bearable, I wish I started it earlier. Would highly recommend for first time mamas (or second, third or more lol)!\u003c\/p\u003e\u003c\/div\u003e \u003cdiv class='jdgm-rev__pics'\u003e \u003c\/div\u003e \u003cdiv class='jdgm-rev__vids'\u003e \u003c\/div\u003e \u003cdiv class='jdgm-rev__transparency-badge-wrapper'\u003e \u003cdiv class='jdgm-rev__transparency-badge' data-badge-type=review_collected_via_store_invitation\u003e\u003c\/div\u003e \u003c\/div\u003e \u003c\/div\u003e \u003cdiv class='jdgm-rev__actions'\u003e \u003cdiv class='jdgm-rev__social'\u003e\u003c\/div\u003e \u003cdiv class='jdgm-rev__votes'\u003e\u003c\/div\u003e \u003c\/div\u003e \u003cdiv class='jdgm-rev__reply'\u003e \u003cdiv class='jdgm-rev__replier-wrapper'\u003e \u003cb class='jdgm-rev__replier'\u003e\u003c\/b\u003e \u003c\/div\u003e \u003cdiv class='jdgm-rev__reply-content' data-digital-source-type=\"https:\/\/schema.org\/TrainedAlgorithmicMediaDigitalSource\"\u003e\u003cp\u003eThank you so much, Lady Uzu, for sharing your experience ❤️ We’re so glad the TENS machine helped make your contractions more manageable during your first labour. It’s also wonderful to hear that you found the ordering and delivery process quick and easy. We really appreciate your recommendation and helpful advice for other mums.\u003c\/p\u003e\u003c\/div\u003e \u003c\/div\u003e \u003c\/div\u003e\u003cdiv class='jdgm-rev jdgm-divider-top' data-verified-buyer='true' data-review-id='e132b104-c2d3-4df6-abc6-284f67253b6e' data-review-language='' data-product-title='Untouched TENS Machine Hire Money Back Guarantee' data-product-url='\/products\/unused-money-back-guarantee' data-thumb-up-count='0' data-thumb-down-count='0'\u003e \u003cdiv class='jdgm-rev__header'\u003e \u003cdiv class='jdgm-rev__icon' \u003e C \u003c\/div\u003e \u003cspan class='jdgm-rev__rating' data-score='1' tabindex='0' aria-label='1 star review' role='img'\u003e \u003cspan class='jdgm-star jdgm--on'\u003e\u003c\/span\u003e\u003cspan class='jdgm-star jdgm--off'\u003e\u003c\/span\u003e\u003cspan class='jdgm-star jdgm--off'\u003e\u003c\/span\u003e\u003cspan class='jdgm-star jdgm--off'\u003e\u003c\/span\u003e\u003cspan class='jdgm-star jdgm--off'\u003e\u003c\/span\u003e \u003c\/span\u003e \u003ctime class='jdgm-rev__timestamp jdgm-spinner' datetime='2026-07-15T03:16:35Z' data-content='2026-07-15 03:16:35 UTC'\u003e\u003c\/time\u003e \u003cdiv class='jdgm-rev__br'\u003e\u003c\/div\u003e \u003cspan class='jdgm-rev__buyer-badge-wrapper'\u003e \u003cspan class='jdgm-rev__buyer-badge'\u003e\u003c\/span\u003e \u003c\/span\u003e \u003cspan class='jdgm-rev__author-wrapper'\u003e \u003cspan class='jdgm-rev__author'\u003eChristine Heyward\u003c\/span\u003e \u003cspan class='jdgm-rev__location' \u003e \u003c\/span\u003e \u003c\/span\u003e \u003c\/div\u003e \u003cdiv class='jdgm-rev__content'\u003e \u003cdiv class='jdgm-rev__custom-form'\u003e \u003c\/div\u003e \u003cb class='jdgm-rev__title'\u003e\u003c\/b\u003e \u003cdiv class='jdgm-rev__body'\u003e\u003cp\u003eNot worth the $$\u003c\/p\u003e\u003c\/div\u003e \u003cdiv class='jdgm-rev__pics'\u003e \u003c\/div\u003e \u003cdiv class='jdgm-rev__vids'\u003e \u003c\/div\u003e \u003cdiv class='jdgm-rev__transparency-badge-wrapper'\u003e \u003cdiv class='jdgm-rev__transparency-badge' data-badge-type=review_collected_via_store_invitation\u003e\u003c\/div\u003e \u003c\/div\u003e \u003c\/div\u003e \u003cdiv class='jdgm-rev__actions'\u003e \u003cdiv class='jdgm-rev__social'\u003e\u003c\/div\u003e \u003cdiv class='jdgm-rev__votes'\u003e\u003c\/div\u003e \u003c\/div\u003e \u003cdiv class='jdgm-rev__reply'\u003e \u003cdiv class='jdgm-rev__replier-wrapper'\u003e \u003cb class='jdgm-rev__replier'\u003e\u003c\/b\u003e \u003c\/div\u003e \u003cdiv class='jdgm-rev__reply-content' data-digital-source-type=\"https:\/\/schema.org\/TrainedAlgorithmicMediaDigitalSource\"\u003e\u003cp\u003eThank you for sharing your feedback, Christine. We’re sorry to hear that you didn’t feel the Untouched TENS Machine Hire Money Back Guarantee was worth the cost. We’d really appreciate the opportunity to understand your experience better, so please feel free to reach out to our team directly. Your feedback is important to us.\u003c\/p\u003e\u003c\/div\u003e \u003c\/div\u003e \u003c\/div\u003e\u003cdiv class='jdgm-rev jdgm-divider-top' data-verified-buyer='true' data-review-id='77680a7d-391d-4212-9337-73196aa3c9a9' data-review-language='' data-product-title='Untouched TENS Machine Hire Money Back Guarantee' data-product-url='\/products\/unused-money-back-guarantee' data-thumb-up-count='0' data-thumb-down-count='0'\u003e \u003cdiv class='jdgm-rev__header'\u003e \u003cdiv class='jdgm-rev__icon' \u003e A \u003c\/div\u003e \u003cspan class='jdgm-rev__rating' data-score='5' tabindex='0' aria-label='5 star review' role='img'\u003e \u003cspan class='jdgm-star jdgm--on'\u003e\u003c\/span\u003e\u003cspan class='jdgm-star jdgm--on'\u003e\u003c\/span\u003e\u003cspan class='jdgm-star jdgm--on'\u003e\u003c\/span\u003e\u003cspan class='jdgm-star jdgm--on'\u003e\u003c\/span\u003e\u003cspan class='jdgm-star jdgm--on'\u003e\u003c\/span\u003e \u003c\/span\u003e \u003ctime class='jdgm-rev__timestamp jdgm-spinner' datetime='2026-07-01T01:28:55Z' data-content='2026-07-01 01:28:55 UTC'\u003e\u003c\/time\u003e \u003cdiv class='jdgm-rev__br'\u003e\u003c\/div\u003e \u003cspan class='jdgm-rev__buyer-badge-wrapper'\u003e \u003cspan class='jdgm-rev__buyer-badge'\u003e\u003c\/span\u003e \u003c\/span\u003e \u003cspan class='jdgm-rev__author-wrapper'\u003e \u003cspan class='jdgm-rev__author'\u003eAgnes Simione de Queiroz\u003c\/span\u003e \u003cspan class='jdgm-rev__location' \u003e \u003c\/span\u003e \u003c\/span\u003e \u003c\/div\u003e \u003cdiv class='jdgm-rev__content'\u003e \u003cdiv class='jdgm-rev__custom-form'\u003e \u003c\/div\u003e \u003cb class='jdgm-rev__title'\u003e\u003c\/b\u003e \u003cdiv class='jdgm-rev__body'\u003e\u003cp\u003eUntouched TENS Machine Hire Money Back Guarantee\u003c\/p\u003e\u003c\/div\u003e \u003cdiv class='jdgm-rev__pics'\u003e \u003c\/div\u003e \u003cdiv class='jdgm-rev__vids'\u003e \u003c\/div\u003e \u003cdiv class='jdgm-rev__transparency-badge-wrapper'\u003e \u003cdiv class='jdgm-rev__transparency-badge' data-badge-type=review_collected_via_store_invitation\u003e\u003c\/div\u003e \u003c\/div\u003e \u003c\/div\u003e \u003cdiv class='jdgm-rev__actions'\u003e \u003cdiv class='jdgm-rev__social'\u003e\u003c\/div\u003e \u003cdiv class='jdgm-rev__votes'\u003e\u003c\/div\u003e \u003c\/div\u003e \u003cdiv class='jdgm-rev__reply'\u003e \u003c\/div\u003e \u003c\/div\u003e\u003cdiv class='jdgm-rev jdgm-divider-top' data-verified-buyer='true' data-review-id='69870d5a-7e7b-4622-a26c-8bf33a97033b' data-review-language='' data-product-title='Untouched TENS Machine Hire Money Back Guarantee' data-product-url='\/products\/unused-money-back-guarantee' data-thumb-up-count='0' data-thumb-down-count='0'\u003e \u003cdiv class='jdgm-rev__header'\u003e \u003cdiv class='jdgm-rev__icon' \u003e G \u003c\/div\u003e \u003cspan class='jdgm-rev__rating' data-score='5' tabindex='0' aria-label='5 star review' role='img'\u003e \u003cspan class='jdgm-star jdgm--on'\u003e\u003c\/span\u003e\u003cspan class='jdgm-star jdgm--on'\u003e\u003c\/span\u003e\u003cspan class='jdgm-star jdgm--on'\u003e\u003c\/span\u003e\u003cspan class='jdgm-star jdgm--on'\u003e\u003c\/span\u003e\u003cspan class='jdgm-star jdgm--on'\u003e\u003c\/span\u003e \u003c\/span\u003e \u003ctime class='jdgm-rev__timestamp jdgm-spinner' datetime='2026-06-20T12:29:48Z' data-content='2026-06-20 12:29:48 UTC'\u003e\u003c\/time\u003e \u003cdiv class='jdgm-rev__br'\u003e\u003c\/div\u003e \u003cspan class='jdgm-rev__buyer-badge-wrapper'\u003e \u003cspan class='jdgm-rev__buyer-badge'\u003e\u003c\/span\u003e \u003c\/span\u003e \u003cspan class='jdgm-rev__author-wrapper'\u003e \u003cspan class='jdgm-rev__author'\u003eGen K\u003c\/span\u003e \u003cspan class='jdgm-rev__location' \u003e \u003c\/span\u003e \u003c\/span\u003e \u003c\/div\u003e \u003cdiv class='jdgm-rev__content'\u003e \u003cdiv class='jdgm-rev__custom-form'\u003e \u003c\/div\u003e \u003cb class='jdgm-rev__title'\u003eGreat product, great service\u003c\/b\u003e \u003cdiv class='jdgm-rev__body'\u003e\u003cp\u003eHighly recommend! The elle tens was great during my labour and the process of getting and returning the machine was very easy and convenient.\u003c\/p\u003e\u003c\/div\u003e \u003cdiv class='jdgm-rev__pics'\u003e \u003c\/div\u003e \u003cdiv class='jdgm-rev__vids'\u003e \u003c\/div\u003e \u003cdiv class='jdgm-rev__transparency-badge-wrapper'\u003e \u003cdiv class='jdgm-rev__transparency-badge' data-badge-type=review_collected_via_store_invitation\u003e\u003c\/div\u003e \u003c\/div\u003e \u003c\/div\u003e \u003cdiv class='jdgm-rev__actions'\u003e \u003cdiv class='jdgm-rev__social'\u003e\u003c\/div\u003e \u003cdiv class='jdgm-rev__votes'\u003e\u003c\/div\u003e \u003c\/div\u003e \u003cdiv class='jdgm-rev__reply'\u003e \u003c\/div\u003e \u003c\/div\u003e\u003c\/div\u003e \u003cdiv class='jdgm-paginate' data-per-page='10' data-url='https:\/\/api.judge.me\/reviews\/reviews_for_widget' \u003e\u003cbutton type='button' class='jdgm-paginate__page jdgm-curt' data-page='1' aria-label='Page 1' aria-current='page'\u003e1\u003c\/button\u003e\u003cbutton type='button' class='jdgm-paginate__page ' data-page='2' aria-label='Page 2' \u003e2\u003c\/button\u003e\u003cbutton type='button' class='jdgm-paginate__page ' data-page='3' aria-label='Page 3' \u003e3\u003c\/button\u003e\u003cbutton type='button' class='jdgm-paginate__page jdgm-paginate__next-page' data-page='2' aria-label='Page 2' \u003e\u003c\/button\u003e\u003cbutton type='button' class='jdgm-paginate__page jdgm-paginate__last-page' data-page='5' aria-label='Page 5' \u003e\u003c\/button\u003e\u003c\/div\u003e \u003c\/div\u003e \u003cdiv class='jdgm-rev-widg__paginate-spinner-wrapper'\u003e \u003cdiv class='jdgm-spinner'\u003e\u003c\/div\u003e \u003c\/div\u003e \u003c\/div\u003e"},"default_reviews_metafields":{"rating":{"scale_min":"1.0","scale_max":"5.0","value":"4.81"},"rating_count":42},"collections":[{"id":512654540989,"handle":"lastof26-10","title":"10%","updated_at":"2026-11-14T20:08:00+08:00","body_html":null,"published_at":"2026-10-12T19:06:42+08:00","sort_order":"best-selling","template_suffix":null,"disjunctive":false,"rules":[],"published_scope":"global"},{"id":261226856637,"handle":"labour-tens-machine-hire","title":"Labour TENS Machine Hire","updated_at":"2026-11-14T20:08:00+08:00","body_html":"\u003cp\u003e \u003c\/p\u003e\n\u003cblockquote\u003e\u003c\/blockquote\u003e","published_at":"2021-03-05T22:34:14+08:00","sort_order":"best-selling","template_suffix":"tens-machine-hire-collect","disjunctive":false,"rules":[],"published_scope":"global","image":{"created_at":"2024-05-06T12:00:15+08:00","alt":"Labour TENS Machine Hire - The Birth Store","width":1920,"height":1280,"src":"\/\/www.thebirthstore.com.au\/cdn\/shop\/collections\/labour-tens-machine-hire-546345.jpg?v=1714968015"}},{"id":281712591037,"handle":"pain-relief","title":"Pain Relief","updated_at":"2026-11-14T20:08:00+08:00","body_html":"","published_at":"2021-12-20T14:22:45+08:00","sort_order":"best-selling","template_suffix":"pain-relief-collection","disjunctive":false,"rules":[],"published_scope":"global","image":{"created_at":"2024-05-06T12:00:27+08:00","alt":"Pain Relief - The Birth Store","width":1365,"height":2048,"src":"\/\/www.thebirthstore.com.au\/cdn\/shop\/collections\/pain-relief-878865.jpg?v=1714968027"}},{"id":291456483517,"handle":"shop-all","title":"Shop All - Mum","updated_at":"2026-11-14T20:08:00+08:00","body_html":"","published_at":"2022-12-23T22:04:39+08:00","sort_order":"best-selling","template_suffix":"shop-all-collection","disjunctive":false,"rules":[],"published_scope":"global","image":{"created_at":"2024-05-06T12:00:54+08:00","alt":"Shop All - The Birth Store","width":1365,"height":2048,"src":"\/\/www.thebirthstore.com.au\/cdn\/shop\/collections\/shop-all-693176.jpg?v=1714968055"}}]}
{"item":{"id":6742564110525,"title":"Disposable Maternity \u0026 Postpartum Underwear","handle":"disposable-maternity-underwear","description":"\u003cp data-mce-fragment=\"1\"\u003e\u003cspan data-mce-fragment=\"1\"\u003eDesigned by a midwife, these disposable maternity underwear are perfect for your postpartum period or for when your waters break.\u003c\/span\u003e\u003c\/p\u003e\n\u003cp data-mce-fragment=\"1\"\u003e\u003cbr\u003e\u003c\/p\u003e\n\u003cp data-mce-fragment=\"1\"\u003e\u003cspan style=\"text-decoration: underline;\"\u003e\u003cstrong\u003eDetails on this product:\u003c\/strong\u003e\u003c\/span\u003e\u003c\/p\u003e\n\u003cul\u003e\n\u003cli\u003e\u003cspan data-mce-fragment=\"1\"\u003eReplaces bulky pads\u003c\/span\u003e\u003c\/li\u003e\n\u003cli\u003e\u003cspan data-mce-fragment=\"1\"\u003eDesigned for pregnancy and postpartum\u003c\/span\u003e\u003c\/li\u003e\n\u003cli\u003e\u003cspan data-mce-fragment=\"1\"\u003eDesigned to be worn comfortably, even after a C-section\u003c\/span\u003e\u003c\/li\u003e\n\u003cli\u003e\u003cspan data-mce-fragment=\"1\"\u003eSecure and comfortable\u003c\/span\u003e\u003c\/li\u003e\n\u003cli\u003e\u003cspan data-mce-fragment=\"1\"\u003eAbsorbent and leak-free\u003c\/span\u003e\u003c\/li\u003e\n\u003cli\u003e\u003cspan data-mce-fragment=\"1\"\u003eCan be worn during the day and overnight\u003c\/span\u003e\u003c\/li\u003e\n\u003cli\u003e\u003cspan data-mce-fragment=\"1\"\u003ePerfectly designed for your postpartum period\u003c\/span\u003e\u003c\/li\u003e\n\u003c\/ul\u003e\n\u003cp data-mce-fragment=\"1\"\u003e \u003c\/p\u003e\n\u003cp data-mce-fragment=\"1\"\u003e \u003c\/p\u003e\n\u003cp data-mce-fragment=\"1\"\u003e\u003cspan data-mce-fragment=\"1\"\u003eMost people find wearing disposable underwear more comfortable during the postpartum bleeding stage, however most on the market are designed for urine, not blood and are not designed with pregnant bodies in mind - until now! These are a must-have for your hospital bag.\u003c\/span\u003e\u003c\/p\u003e\n\u003cp data-mce-fragment=\"1\"\u003e \u003c\/p\u003e\n\u003cp data-mce-fragment=\"1\"\u003e\u003cspan style=\"text-decoration: underline;\"\u003e\u003cstrong\u003eSizing:\u003c\/strong\u003e\u003c\/span\u003e\u003c\/p\u003e\n\u003cp data-mce-fragment=\"1\"\u003eMedium - Large: \u003cspan data-mce-fragment=\"1\"\u003eFits waist 75-110cm\u003c\/span\u003e\u003c\/p\u003e\n\u003cp data-mce-fragment=\"1\"\u003eLarge - X Large: \u003cspan data-mce-fragment=\"1\"\u003eFits waist 100-140cm\u003c\/span\u003e\u003c\/p\u003e\n\u003cp data-mce-fragment=\"1\"\u003e \u003c\/p\u003e\n\u003cp data-mce-fragment=\"1\"\u003e\u003cstrong\u003eYou can even buy now and pay later with Afterpay!\u003c\/strong\u003e\u003c\/p\u003e","published_at":"2021-05-31T14:44:48+08:00","created_at":"2021-05-31T14:44:46+08:00","vendor":"Partum Panties","type":"Maternity Underwear","tags":["C-Section Birth Recovery","GST FREE","Hospital Bag","Mum","Peri Care","Post-Partum","Vaginal Birth Recovery"],"price":1495,"price_min":1495,"price_max":1495,"available":true,"price_varies":false,"compare_at_price":null,"compare_at_price_min":0,"compare_at_price_max":0,"compare_at_price_varies":false,"variants":[{"id":39915746230461,"title":"Medium","option1":"Medium","option2":null,"option3":null,"sku":"","requires_shipping":true,"taxable":false,"featured_image":{"id":34641015799997,"product_id":6742564110525,"position":3,"created_at":"2024-05-06T11:59:26+08:00","updated_at":"2024-05-06T11:59:26+08:00","alt":"Disposable Maternity \u0026 Postpartum Underwear - The Birth Store-Partum Panties","width":1080,"height":1080,"src":"\/\/www.thebirthstore.com.au\/cdn\/shop\/files\/disposable-maternity-postpartum-underwear-672912.jpg?v=1714967966","variant_ids":[39915746230461]},"available":true,"name":"Disposable Maternity \u0026 Postpartum Underwear - Medium","public_title":"Medium","options":["Medium"],"price":1495,"weight":253,"compare_at_price":null,"inventory_management":"shopify","barcode":"46230461","featured_media":{"alt":"Disposable Maternity \u0026 Postpartum Underwear - The Birth Store-Partum Panties","id":27007584829629,"position":3,"preview_image":{"aspect_ratio":1.0,"height":1080,"width":1080,"src":"\/\/www.thebirthstore.com.au\/cdn\/shop\/files\/disposable-maternity-postpartum-underwear-672912.jpg?v=1714967966"}},"requires_selling_plan":false,"selling_plan_allocations":[],"quantity_rule":{"min":1,"max":null,"increment":1}},{"id":39915746263229,"title":"Large","option1":"Large","option2":null,"option3":null,"sku":"","requires_shipping":true,"taxable":false,"featured_image":{"id":34641015898301,"product_id":6742564110525,"position":4,"created_at":"2024-05-06T11:59:26+08:00","updated_at":"2024-05-06T11:59:26+08:00","alt":"Disposable Maternity \u0026 Postpartum Underwear - The Birth Store-Partum Panties","width":1080,"height":1080,"src":"\/\/www.thebirthstore.com.au\/cdn\/shop\/files\/disposable-maternity-postpartum-underwear-373383.jpg?v=1714967966","variant_ids":[39915746263229]},"available":true,"name":"Disposable Maternity \u0026 Postpartum Underwear - Large","public_title":"Large","options":["Large"],"price":1495,"weight":313,"compare_at_price":null,"inventory_management":"shopify","barcode":"46263229","featured_media":{"alt":"Disposable Maternity \u0026 Postpartum Underwear - The Birth Store-Partum Panties","id":27007584895165,"position":4,"preview_image":{"aspect_ratio":1.0,"height":1080,"width":1080,"src":"\/\/www.thebirthstore.com.au\/cdn\/shop\/files\/disposable-maternity-postpartum-underwear-373383.jpg?v=1714967966"}},"requires_selling_plan":false,"selling_plan_allocations":[],"quantity_rule":{"min":1,"max":null,"increment":1}}],"images":["\/\/www.thebirthstore.com.au\/cdn\/shop\/files\/disposable-maternity-postpartum-underwear-211419.jpg?v=1714967966","\/\/www.thebirthstore.com.au\/cdn\/shop\/files\/disposable-maternity-postpartum-underwear-906336.jpg?v=1714967966","\/\/www.thebirthstore.com.au\/cdn\/shop\/files\/disposable-maternity-postpartum-underwear-672912.jpg?v=1714967966","\/\/www.thebirthstore.com.au\/cdn\/shop\/files\/disposable-maternity-postpartum-underwear-373383.jpg?v=1714967966","\/\/www.thebirthstore.com.au\/cdn\/shop\/files\/disposable-maternity-postpartum-underwear-777313.jpg?v=1714967966","\/\/www.thebirthstore.com.au\/cdn\/shop\/files\/disposable-maternity-postpartum-underwear-328661.jpg?v=1714967966","\/\/www.thebirthstore.com.au\/cdn\/shop\/files\/disposable-maternity-postpartum-underwear-122092.jpg?v=1714967966","\/\/www.thebirthstore.com.au\/cdn\/shop\/files\/disposable-maternity-postpartum-underwear-550091.jpg?v=1714967966"],"featured_image":"\/\/www.thebirthstore.com.au\/cdn\/shop\/files\/disposable-maternity-postpartum-underwear-211419.jpg?v=1714967966","options":["Size"],"media":[{"alt":"Disposable Maternity \u0026 Postpartum Underwear - The Birth Store-Partum Panties","id":27007584731325,"position":1,"preview_image":{"aspect_ratio":1.0,"height":877,"width":877,"src":"\/\/www.thebirthstore.com.au\/cdn\/shop\/files\/disposable-maternity-postpartum-underwear-211419.jpg?v=1714967966"},"aspect_ratio":1.0,"height":877,"media_type":"image","src":"\/\/www.thebirthstore.com.au\/cdn\/shop\/files\/disposable-maternity-postpartum-underwear-211419.jpg?v=1714967966","width":877},{"alt":"Disposable Maternity \u0026 Postpartum Underwear - The Birth Store-Partum Panties","id":27007584764093,"position":2,"preview_image":{"aspect_ratio":0.667,"height":2048,"width":1365,"src":"\/\/www.thebirthstore.com.au\/cdn\/shop\/files\/disposable-maternity-postpartum-underwear-906336.jpg?v=1714967966"},"aspect_ratio":0.667,"height":2048,"media_type":"image","src":"\/\/www.thebirthstore.com.au\/cdn\/shop\/files\/disposable-maternity-postpartum-underwear-906336.jpg?v=1714967966","width":1365},{"alt":"Disposable Maternity \u0026 Postpartum Underwear - The Birth Store-Partum Panties","id":27007584829629,"position":3,"preview_image":{"aspect_ratio":1.0,"height":1080,"width":1080,"src":"\/\/www.thebirthstore.com.au\/cdn\/shop\/files\/disposable-maternity-postpartum-underwear-672912.jpg?v=1714967966"},"aspect_ratio":1.0,"height":1080,"media_type":"image","src":"\/\/www.thebirthstore.com.au\/cdn\/shop\/files\/disposable-maternity-postpartum-underwear-672912.jpg?v=1714967966","width":1080},{"alt":"Disposable Maternity \u0026 Postpartum Underwear - The Birth Store-Partum Panties","id":27007584895165,"position":4,"preview_image":{"aspect_ratio":1.0,"height":1080,"width":1080,"src":"\/\/www.thebirthstore.com.au\/cdn\/shop\/files\/disposable-maternity-postpartum-underwear-373383.jpg?v=1714967966"},"aspect_ratio":1.0,"height":1080,"media_type":"image","src":"\/\/www.thebirthstore.com.au\/cdn\/shop\/files\/disposable-maternity-postpartum-underwear-373383.jpg?v=1714967966","width":1080},{"alt":"Disposable Maternity \u0026 Postpartum Underwear - The Birth Store-Partum Panties","id":27007584960701,"position":5,"preview_image":{"aspect_ratio":0.667,"height":2048,"width":1365,"src":"\/\/www.thebirthstore.com.au\/cdn\/shop\/files\/disposable-maternity-postpartum-underwear-777313.jpg?v=1714967966"},"aspect_ratio":0.667,"height":2048,"media_type":"image","src":"\/\/www.thebirthstore.com.au\/cdn\/shop\/files\/disposable-maternity-postpartum-underwear-777313.jpg?v=1714967966","width":1365},{"alt":"Disposable Maternity \u0026 Postpartum Underwear - The Birth Store-Partum Panties","id":27007585059005,"position":6,"preview_image":{"aspect_ratio":0.667,"height":2048,"width":1365,"src":"\/\/www.thebirthstore.com.au\/cdn\/shop\/files\/disposable-maternity-postpartum-underwear-328661.jpg?v=1714967966"},"aspect_ratio":0.667,"height":2048,"media_type":"image","src":"\/\/www.thebirthstore.com.au\/cdn\/shop\/files\/disposable-maternity-postpartum-underwear-328661.jpg?v=1714967966","width":1365},{"alt":"Disposable Maternity \u0026 Postpartum Underwear - The Birth Store-Partum Panties","id":27007585157309,"position":7,"preview_image":{"aspect_ratio":0.667,"height":2048,"width":1365,"src":"\/\/www.thebirthstore.com.au\/cdn\/shop\/files\/disposable-maternity-postpartum-underwear-122092.jpg?v=1714967966"},"aspect_ratio":0.667,"height":2048,"media_type":"image","src":"\/\/www.thebirthstore.com.au\/cdn\/shop\/files\/disposable-maternity-postpartum-underwear-122092.jpg?v=1714967966","width":1365},{"alt":"Disposable Maternity \u0026 Postpartum Underwear - The Birth Store-Partum Panties","id":27007585222845,"position":8,"preview_image":{"aspect_ratio":1.499,"height":1334,"width":2000,"src":"\/\/www.thebirthstore.com.au\/cdn\/shop\/files\/disposable-maternity-postpartum-underwear-550091.jpg?v=1714967966"},"aspect_ratio":1.499,"height":1334,"media_type":"image","src":"\/\/www.thebirthstore.com.au\/cdn\/shop\/files\/disposable-maternity-postpartum-underwear-550091.jpg?v=1714967966","width":2000}],"requires_selling_plan":false,"selling_plan_groups":[],"content":"\u003cp data-mce-fragment=\"1\"\u003e\u003cspan data-mce-fragment=\"1\"\u003eDesigned by a midwife, these disposable maternity underwear are perfect for your postpartum period or for when your waters break.\u003c\/span\u003e\u003c\/p\u003e\n\u003cp data-mce-fragment=\"1\"\u003e\u003cbr\u003e\u003c\/p\u003e\n\u003cp data-mce-fragment=\"1\"\u003e\u003cspan style=\"text-decoration: underline;\"\u003e\u003cstrong\u003eDetails on this product:\u003c\/strong\u003e\u003c\/span\u003e\u003c\/p\u003e\n\u003cul\u003e\n\u003cli\u003e\u003cspan data-mce-fragment=\"1\"\u003eReplaces bulky pads\u003c\/span\u003e\u003c\/li\u003e\n\u003cli\u003e\u003cspan data-mce-fragment=\"1\"\u003eDesigned for pregnancy and postpartum\u003c\/span\u003e\u003c\/li\u003e\n\u003cli\u003e\u003cspan data-mce-fragment=\"1\"\u003eDesigned to be worn comfortably, even after a C-section\u003c\/span\u003e\u003c\/li\u003e\n\u003cli\u003e\u003cspan data-mce-fragment=\"1\"\u003eSecure and comfortable\u003c\/span\u003e\u003c\/li\u003e\n\u003cli\u003e\u003cspan data-mce-fragment=\"1\"\u003eAbsorbent and leak-free\u003c\/span\u003e\u003c\/li\u003e\n\u003cli\u003e\u003cspan data-mce-fragment=\"1\"\u003eCan be worn during the day and overnight\u003c\/span\u003e\u003c\/li\u003e\n\u003cli\u003e\u003cspan data-mce-fragment=\"1\"\u003ePerfectly designed for your postpartum period\u003c\/span\u003e\u003c\/li\u003e\n\u003c\/ul\u003e\n\u003cp data-mce-fragment=\"1\"\u003e \u003c\/p\u003e\n\u003cp data-mce-fragment=\"1\"\u003e \u003c\/p\u003e\n\u003cp data-mce-fragment=\"1\"\u003e\u003cspan data-mce-fragment=\"1\"\u003eMost people find wearing disposable underwear more comfortable during the postpartum bleeding stage, however most on the market are designed for urine, not blood and are not designed with pregnant bodies in mind - until now! These are a must-have for your hospital bag.\u003c\/span\u003e\u003c\/p\u003e\n\u003cp data-mce-fragment=\"1\"\u003e \u003c\/p\u003e\n\u003cp data-mce-fragment=\"1\"\u003e\u003cspan style=\"text-decoration: underline;\"\u003e\u003cstrong\u003eSizing:\u003c\/strong\u003e\u003c\/span\u003e\u003c\/p\u003e\n\u003cp data-mce-fragment=\"1\"\u003eMedium - Large: \u003cspan data-mce-fragment=\"1\"\u003eFits waist 75-110cm\u003c\/span\u003e\u003c\/p\u003e\n\u003cp data-mce-fragment=\"1\"\u003eLarge - X Large: \u003cspan data-mce-fragment=\"1\"\u003eFits waist 100-140cm\u003c\/span\u003e\u003c\/p\u003e\n\u003cp data-mce-fragment=\"1\"\u003e \u003c\/p\u003e\n\u003cp data-mce-fragment=\"1\"\u003e\u003cstrong\u003eYou can even buy now and pay later with Afterpay!\u003c\/strong\u003e\u003c\/p\u003e"},"options":[{"name":"Size","position":1,"values":["Medium","Large"]}],"custom_metafields":{},"metafields":{"badge":"\u003cdiv style='display:none' class='jdgm-prev-badge' data-average-rating='4.83' data-number-of-reviews='6' data-number-of-questions='0'\u003e \u003cspan class='jdgm-prev-badge__stars' data-score='4.83' tabindex='0' aria-label='4.83 stars' role='button'\u003e \u003cspan class='jdgm-star jdgm--on'\u003e\u003c\/span\u003e\u003cspan class='jdgm-star jdgm--on'\u003e\u003c\/span\u003e\u003cspan class='jdgm-star jdgm--on'\u003e\u003c\/span\u003e\u003cspan class='jdgm-star jdgm--on'\u003e\u003c\/span\u003e\u003cspan class='jdgm-star jdgm--on'\u003e\u003c\/span\u003e \u003c\/span\u003e \u003cspan class='jdgm-prev-badge__text'\u003e 6 reviews \u003c\/span\u003e \u003c\/div\u003e","review_snippet_widget":"\u003cdiv class='jdgm-widget jdgm-review-snippet-widget'\u003e \u003cstyle\u003e\n .jdgm-review-snippet-widget{position:relative}.jdgm-review-snippet-widget:hover{cursor:pointer}@media only screen and (max-width: 767px){.jdgm-review-snippet-widget .jdgm-rev-snippet-widget__cards-container{left:unset;right:unset}}.jdgm-review-snippet-widget .jdgm-rev-snippet-card{background:#fff}.jdgm-review-snippet-widget .jdgm-star{color:#399}.jdgm-review-snippet-widget .jdgm-rev-snippet-card{border-radius:8px;background:#fff}.jdgm-review-snippet-widget .jdgm-rev-snippet-card__rev-prod-wrapper{border-radius:8px}.jdgm-review-snippet-widget .jdgm-rev-snippet-card__rev-content-wrapper{max-width:360px}.jdgm-review-snippet-widget .jdgm-rev-snippet-widget__prev-btn,.jdgm-review-snippet-widget .jdgm-rev-snippet-widget__next-btn{border-radius:50%;background:#fff}.jdgm-review-snippet-widget .jdgm-rev-snippet-widget__prev-btn\u003esvg,.jdgm-review-snippet-widget .jdgm-rev-snippet-widget__next-btn\u003esvg{fill:#000}.jdgm-review-snippet-widget .jdgm-rev-snippet-widget__prev-btn{left:0;top:40%}.jdgm-review-snippet-widget .jdgm-rev-snippet-widget__next-btn{right:0;top:40%}.jdgm-full-rev-modal.review-snippet-widget .jm-mfp-content{border-radius:8px}.jdgm-full-rev-modal.review-snippet-widget .jdgm-full-rev__icon{border-radius:8px}.jdgm-full-rev-modal.review-snippet-widget .jdgm-full-rev[data-verified-buyer=\"true\"] .jdgm-full-rev__icon::after{border-radius:8px}.jdgm-full-rev-modal.review-snippet-widget .jdgm-rev__buyer-badge{border-radius:calc( 8px \/ 2 )}.jdgm-full-rev-modal.review-snippet-widget .jdgm-full-rev__pic-img{border-radius:8px}.jdgm-full-rev-modal.review-snippet-widget .jdgm-full-rev__reply{border-radius:8px}.jdgm-full-rev-modal.review-snippet-widget .jdgm-full-rev__replier::before{content:'thebirthstore.com.au'}.jdgm-full-rev-modal.review-snippet-widget .jdgm-full-rev__product-button{border-radius:calc( 8px * 6 )}\n\n \u003c\/style\u003e \u003ci class=\"jdgm-rev-snippet-widget__prev-btn\" style='display: none;'\u003e \u003csvg xmlns=\"http:\/\/www.w3.org\/2000\/svg\" height=\"12\" viewBox=\"0 0 8 12\" width=\"8\" fill=\"#000\"\u003e\u003cpath d=\"M3.09961 6.00005L6.99961 9.90005C7.18294 10.0834 7.27461 10.3167 7.27461 10.6C7.27461 10.8834 7.18294 11.1167 6.99961 11.3C6.81628 11.4834 6.58294 11.575 6.29961 11.575C6.01628 11.575 5.78294 11.4834 5.59961 11.3L0.999609 6.70005C0.899609 6.60005 0.828776 6.49172 0.787109 6.37505C0.745443 6.25838 0.724609 6.13338 0.724609 6.00005C0.724609 5.86672 0.745443 5.74172 0.787109 5.62505C0.828776 5.50838 0.899609 5.40005 0.999609 5.30005L5.59961 0.700049C5.78294 0.516715 6.01628 0.425049 6.29961 0.425049C6.58294 0.425049 6.81628 0.516715 6.99961 0.700049C7.18294 0.883382 7.27461 1.11672 7.27461 1.40005C7.27461 1.68338 7.18294 1.91672 6.99961 2.10005L3.09961 6.00005Z\"\/\u003e\u003c\/svg\u003e \u003c\/i\u003e \u003ci class=\"jdgm-rev-snippet-widget__next-btn\" style='display: none;'\u003e \u003csvg xmlns=\"http:\/\/www.w3.org\/2000\/svg\" height=\"12\" viewBox=\"0 0 8 12\" width=\"8\" fill=\"#000\"\u003e\u003cpath d=\"M4.89961 6.00005L0.999609 2.10005C0.816276 1.91672 0.724609 1.68338 0.724609 1.40005C0.724609 1.11672 0.816276 0.883382 0.999609 0.700049C1.18294 0.516715 1.41628 0.425049 1.69961 0.425049C1.98294 0.425049 2.21628 0.516715 2.39961 0.700049L6.99961 5.30005C7.09961 5.40005 7.17044 5.50838 7.21211 5.62505C7.25378 5.74172 7.27461 5.86672 7.27461 6.00005C7.27461 6.13338 7.25378 6.25838 7.21211 6.37505C7.17044 6.49172 7.09961 6.60005 6.99961 6.70005L2.39961 11.3C2.21628 11.4834 1.98294 11.575 1.69961 11.575C1.41628 11.575 1.18294 11.4834 0.999609 11.3C0.816276 11.1167 0.724609 10.8834 0.724609 10.6C0.724609 10.3167 0.816276 10.0834 0.999609 9.90005L4.89961 6.00005Z\"\/\u003e\u003c\/svg\u003e \u003c\/i\u003e \u003cdiv style=\"overflow: hidden;\"\u003e \u003cdiv class='jdgm-rev-snippet-widget__cards-container'\u003e \u003cdiv class='jdgm-rev-snippet-card' data-review-id='252d5246-e28d-458d-bbe2-63573178b4f3' style='display: none;'\u003e \u003cdiv class=\"jdgm-rev-snippet-card__rev-prod-wrapper\"\u003e \u003ca class='jdgm-rev-snippet-card__rev-content-wrapper jdgm-rev-snippet-card__full-review-link' style='text-decoration: none; color: inherit;padding: 0 34px;' role='button' data-review-id='252d5246-e28d-458d-bbe2-63573178b4f3'\u003e \u003cdiv class='jdgm-rev-snippet-card__rev-header'\u003e \u003cdiv class='jdgm-rev-snippet-card__rev-rating' aria-label='5 stars' role='img'\u003e \u003cspan class='jdgm-star jdgm--on'\u003e\u003c\/span\u003e\u003cspan class='jdgm-star jdgm--on'\u003e\u003c\/span\u003e\u003cspan class='jdgm-star jdgm--on'\u003e\u003c\/span\u003e\u003cspan class='jdgm-star jdgm--on'\u003e\u003c\/span\u003e\u003cspan class='jdgm-star jdgm--on'\u003e\u003c\/span\u003e \u003c\/div\u003e \u003cdiv class='jdgm-rev-snippet-card__reviewer'\u003e Kali Welstead \u003c\/div\u003e \u003c\/div\u003e \u003cdiv class='jdgm-rev-snippet-card__rev-content'\u003e \u003cspan class='jdgm-rev-snippet-card__rev-body'\u003e \u003cp\u003eI hired the tens machine for the birth of my baby boy. The whole process was straight forward and the birth store even provided a pre filled \/ prepaid envelope to return the tens machine. I managed 3 days of labour just using the tens. My boy was delivered via vacuum and I managed with gas (only at the very end) and the tens! It was a life saver I don’t think I would have handled an unmedicated labour without it.\u003c\/p\u003e \u003c\/span\u003e \u003c\/div\u003e \u003c\/a\u003e \u003c\/div\u003e \u003c\/div\u003e\u003cdiv class='jdgm-rev-snippet-card' data-review-id='0072085e-16df-4337-a839-fcca94c84ea0' style='display: none;'\u003e \u003cdiv class=\"jdgm-rev-snippet-card__rev-prod-wrapper\"\u003e \u003ca class='jdgm-rev-snippet-card__rev-content-wrapper jdgm-rev-snippet-card__full-review-link' style='text-decoration: none; color: inherit;padding: 0 34px;' role='button' data-review-id='0072085e-16df-4337-a839-fcca94c84ea0'\u003e \u003cdiv class='jdgm-rev-snippet-card__rev-header'\u003e \u003cdiv class='jdgm-rev-snippet-card__rev-rating' aria-label='5 stars' role='img'\u003e \u003cspan class='jdgm-star jdgm--on'\u003e\u003c\/span\u003e\u003cspan class='jdgm-star jdgm--on'\u003e\u003c\/span\u003e\u003cspan class='jdgm-star jdgm--on'\u003e\u003c\/span\u003e\u003cspan class='jdgm-star jdgm--on'\u003e\u003c\/span\u003e\u003cspan class='jdgm-star jdgm--on'\u003e\u003c\/span\u003e \u003c\/div\u003e \u003cdiv class='jdgm-rev-snippet-card__reviewer'\u003e Marissa Robertson \u003c\/div\u003e \u003c\/div\u003e \u003cdiv class='jdgm-rev-snippet-card__rev-content'\u003e \u003cspan class='jdgm-rev-snippet-card__rev-body'\u003e \u003cp\u003eNow these aren't the most attractive undies you'll ever wear but OMG the amount of blood you lose and for myself having to put a ice pack in these aswell they have been a god send to not have to worry about pads or leaking when you've got so much on your mind already. I used all 15 I bought!\u003c\/p\u003e \u003c\/span\u003e \u003c\/div\u003e \u003c\/a\u003e \u003c\/div\u003e \u003c\/div\u003e\u003cdiv class='jdgm-rev-snippet-card' data-review-id='be288c4c-7515-4177-b63f-fbd5e044244f' style='display: none;'\u003e \u003cdiv class=\"jdgm-rev-snippet-card__rev-prod-wrapper\"\u003e \u003ca class='jdgm-rev-snippet-card__rev-content-wrapper jdgm-rev-snippet-card__full-review-link' style='text-decoration: none; color: inherit;padding: 0 34px;' role='button' data-review-id='be288c4c-7515-4177-b63f-fbd5e044244f'\u003e \u003cdiv class='jdgm-rev-snippet-card__rev-header'\u003e \u003cdiv class='jdgm-rev-snippet-card__rev-rating' aria-label='5 stars' role='img'\u003e \u003cspan class='jdgm-star jdgm--on'\u003e\u003c\/span\u003e\u003cspan class='jdgm-star jdgm--on'\u003e\u003c\/span\u003e\u003cspan class='jdgm-star jdgm--on'\u003e\u003c\/span\u003e\u003cspan class='jdgm-star jdgm--on'\u003e\u003c\/span\u003e\u003cspan class='jdgm-star jdgm--on'\u003e\u003c\/span\u003e \u003c\/div\u003e \u003cdiv class='jdgm-rev-snippet-card__reviewer'\u003e Bri \u003c\/div\u003e \u003c\/div\u003e \u003cdiv class='jdgm-rev-snippet-card__rev-content'\u003e \u003cspan class='jdgm-rev-snippet-card__rev-body'\u003e \u003cp\u003eThey were super comfortable with nice soft lining which was great over my c section incision. They have a good stretchy waist line and fitted really well over my post baby bump. \n\u003cbr \/\u003eAbsolutely loved this product and highly recommend it to all Mummas for post partum!\u003c\/p\u003e \u003c\/span\u003e \u003c\/div\u003e \u003c\/a\u003e \u003c\/div\u003e \u003c\/div\u003e \u003c\/div\u003e \u003c\/div\u003e \u003c\/div\u003e","widget":"\u003cdiv class='jdgm-rev-widg' data-updated-at='2026-10-17T20:48:50Z' data-average-rating='4.83' data-number-of-reviews='6' data-number-of-questions='0' data-image-url='https:\/\/cdn.shopify.com\/s\/files\/1\/0527\/3393\/5805\/files\/disposable-maternity-postpartum-underwear-211419.jpg?v=1714967966'\u003e \u003cstyle class='jdgm-temp-hiding-style'\u003e.jdgm-rev-widg{ display: none }\u003c\/style\u003e \u003cdiv class='jdgm-rev-widg__header'\u003e \u003ch2 class='jdgm-rev-widg__title'\u003eCustomer Reviews\u003c\/h2\u003e \u003cdiv class='jdgm-rev-widg__summary'\u003e \u003cdiv class='jdgm-rev-widg__summary-stars' aria-label='Average rating is 4.83 stars' role='img'\u003e \u003cspan class='jdgm-star jdgm--on'\u003e\u003c\/span\u003e\u003cspan class='jdgm-star jdgm--on'\u003e\u003c\/span\u003e\u003cspan class='jdgm-star jdgm--on'\u003e\u003c\/span\u003e\u003cspan class='jdgm-star jdgm--on'\u003e\u003c\/span\u003e\u003cspan class='jdgm-star jdgm--on'\u003e\u003c\/span\u003e \u003c\/div\u003e \u003cdiv class='jdgm-rev-widg__summary-text'\u003eBased on 6 reviews\u003c\/div\u003e \u003c\/div\u003e \u003ca style='display: none' href='#' class='jdgm-write-rev-link' role='button'\u003eWrite a review\u003c\/a\u003e \u003cdiv class='jdgm-histogram jdgm-temp-hidden'\u003e \u003cdiv class='jdgm-histogram__row' data-rating='5' data-frequency='5' data-percentage='83'\u003e \u003cdiv class='jdgm-histogram__star' role='button' aria-label=\"83% (5) reviews with 5 star rating\" tabindex='0' \u003e\u003cspan class='jdgm-star jdgm--on'\u003e\u003c\/span\u003e\u003cspan class='jdgm-star jdgm--on'\u003e\u003c\/span\u003e\u003cspan class='jdgm-star jdgm--on'\u003e\u003c\/span\u003e\u003cspan class='jdgm-star jdgm--on'\u003e\u003c\/span\u003e\u003cspan class='jdgm-star jdgm--on'\u003e\u003c\/span\u003e\u003c\/div\u003e \u003cdiv class='jdgm-histogram__bar'\u003e \u003cdiv class='jdgm-histogram__bar-content' style='width: 83%;'\u003e \u003c\/div\u003e \u003c\/div\u003e \u003cdiv class='jdgm-histogram__percentage'\u003e83%\u003c\/div\u003e \u003cdiv class='jdgm-histogram__frequency'\u003e(5)\u003c\/div\u003e \u003c\/div\u003e \u003cdiv class='jdgm-histogram__row' data-rating='4' data-frequency='1' data-percentage='17'\u003e \u003cdiv class='jdgm-histogram__star' role='button' aria-label=\"17% (1) reviews with 4 star rating\" tabindex='0' \u003e\u003cspan class='jdgm-star jdgm--on'\u003e\u003c\/span\u003e\u003cspan class='jdgm-star jdgm--on'\u003e\u003c\/span\u003e\u003cspan class='jdgm-star jdgm--on'\u003e\u003c\/span\u003e\u003cspan class='jdgm-star jdgm--on'\u003e\u003c\/span\u003e\u003cspan class='jdgm-star jdgm--off'\u003e\u003c\/span\u003e\u003c\/div\u003e \u003cdiv class='jdgm-histogram__bar'\u003e \u003cdiv class='jdgm-histogram__bar-content' style='width: 17%;'\u003e \u003c\/div\u003e \u003c\/div\u003e \u003cdiv class='jdgm-histogram__percentage'\u003e17%\u003c\/div\u003e \u003cdiv class='jdgm-histogram__frequency'\u003e(1)\u003c\/div\u003e \u003c\/div\u003e \u003cdiv class='jdgm-histogram__row' data-rating='3' data-frequency='0' data-percentage='0'\u003e \u003cdiv class='jdgm-histogram__star' role='button' aria-label=\"0% (0) reviews with 3 star rating\" tabindex='0' \u003e\u003cspan class='jdgm-star jdgm--on'\u003e\u003c\/span\u003e\u003cspan class='jdgm-star jdgm--on'\u003e\u003c\/span\u003e\u003cspan class='jdgm-star jdgm--on'\u003e\u003c\/span\u003e\u003cspan class='jdgm-star jdgm--off'\u003e\u003c\/span\u003e\u003cspan class='jdgm-star jdgm--off'\u003e\u003c\/span\u003e\u003c\/div\u003e \u003cdiv class='jdgm-histogram__bar'\u003e \u003cdiv class='jdgm-histogram__bar-content' style='width: 0%;'\u003e \u003c\/div\u003e \u003c\/div\u003e \u003cdiv class='jdgm-histogram__percentage'\u003e0%\u003c\/div\u003e \u003cdiv class='jdgm-histogram__frequency'\u003e(0)\u003c\/div\u003e \u003c\/div\u003e \u003cdiv class='jdgm-histogram__row' data-rating='2' data-frequency='0' data-percentage='0'\u003e \u003cdiv class='jdgm-histogram__star' role='button' aria-label=\"0% (0) reviews with 2 star rating\" tabindex='0' \u003e\u003cspan class='jdgm-star jdgm--on'\u003e\u003c\/span\u003e\u003cspan class='jdgm-star jdgm--on'\u003e\u003c\/span\u003e\u003cspan class='jdgm-star jdgm--off'\u003e\u003c\/span\u003e\u003cspan class='jdgm-star jdgm--off'\u003e\u003c\/span\u003e\u003cspan class='jdgm-star jdgm--off'\u003e\u003c\/span\u003e\u003c\/div\u003e \u003cdiv class='jdgm-histogram__bar'\u003e \u003cdiv class='jdgm-histogram__bar-content' style='width: 0%;'\u003e \u003c\/div\u003e \u003c\/div\u003e \u003cdiv class='jdgm-histogram__percentage'\u003e0%\u003c\/div\u003e \u003cdiv class='jdgm-histogram__frequency'\u003e(0)\u003c\/div\u003e \u003c\/div\u003e \u003cdiv class='jdgm-histogram__row' data-rating='1' data-frequency='0' data-percentage='0'\u003e \u003cdiv class='jdgm-histogram__star' role='button' aria-label=\"0% (0) reviews with 1 star rating\" tabindex='0' \u003e\u003cspan class='jdgm-star jdgm--on'\u003e\u003c\/span\u003e\u003cspan class='jdgm-star jdgm--off'\u003e\u003c\/span\u003e\u003cspan class='jdgm-star jdgm--off'\u003e\u003c\/span\u003e\u003cspan class='jdgm-star jdgm--off'\u003e\u003c\/span\u003e\u003cspan class='jdgm-star jdgm--off'\u003e\u003c\/span\u003e\u003c\/div\u003e \u003cdiv class='jdgm-histogram__bar'\u003e \u003cdiv class='jdgm-histogram__bar-content' style='width: 0%;'\u003e \u003c\/div\u003e \u003c\/div\u003e \u003cdiv class='jdgm-histogram__percentage'\u003e0%\u003c\/div\u003e \u003cdiv class='jdgm-histogram__frequency'\u003e(0)\u003c\/div\u003e \u003c\/div\u003e \u003cdiv class='jdgm-histogram__row jdgm-histogram__clear-filter' data-rating=null tabindex='0'\u003e\u003c\/div\u003e \u003c\/div\u003e \u003cdiv class='jdgm-rev-widg__sort-wrapper'\u003e\u003c\/div\u003e \u003c\/div\u003e \u003cdiv class='jdgm-rev-widg__body'\u003e \u003cdiv class='jdgm-rev-widg__reviews'\u003e\u003cdiv class='jdgm-rev jdgm-divider-top' data-verified-buyer='true' data-review-id='6fa7c082-3087-4a45-a448-391eff0103d7' data-review-language='' data-product-title='Disposable Maternity \u0026amp; Postpartum Underwear' data-product-url='\/products\/disposable-maternity-underwear' data-thumb-up-count='0' data-thumb-down-count='0'\u003e \u003cdiv class='jdgm-rev__header'\u003e \u003cdiv class='jdgm-rev__icon' \u003e M \u003c\/div\u003e \u003cspan class='jdgm-rev__rating' data-score='5' tabindex='0' aria-label='5 star review' role='img'\u003e \u003cspan class='jdgm-star jdgm--on'\u003e\u003c\/span\u003e\u003cspan class='jdgm-star jdgm--on'\u003e\u003c\/span\u003e\u003cspan class='jdgm-star jdgm--on'\u003e\u003c\/span\u003e\u003cspan class='jdgm-star jdgm--on'\u003e\u003c\/span\u003e\u003cspan class='jdgm-star jdgm--on'\u003e\u003c\/span\u003e \u003c\/span\u003e \u003ctime class='jdgm-rev__timestamp jdgm-spinner' datetime='2026-03-17T01:25:20Z' data-content='2026-03-17 01:25:20 UTC'\u003e\u003c\/time\u003e \u003cdiv class='jdgm-rev__br'\u003e\u003c\/div\u003e \u003cspan class='jdgm-rev__buyer-badge-wrapper'\u003e \u003cspan class='jdgm-rev__buyer-badge'\u003e\u003c\/span\u003e \u003c\/span\u003e \u003cspan class='jdgm-rev__author-wrapper'\u003e \u003cspan class='jdgm-rev__author'\u003eMez Perry\u003c\/span\u003e \u003cspan class='jdgm-rev__location' \u003e \u003c\/span\u003e \u003c\/span\u003e \u003c\/div\u003e \u003cdiv class='jdgm-rev__content'\u003e \u003cdiv class='jdgm-rev__custom-form'\u003e \u003c\/div\u003e \u003cb class='jdgm-rev__title'\u003eOMG!\u003c\/b\u003e \u003cdiv class='jdgm-rev__body'\u003e\u003cp\u003eI thought these weren’t going to fit and they would feel weird because well there adult diapers really. But how I was WRONG!\n\u003cbr \/\u003eI had an episiotomy and a tear so my downstairs wasn’t doing to crash hot. These were soo easy to use and they were SUPER SUPER SUPER comfy! They hold ALOT of liquid and come off super easy if needed. Also easy to pull down\/up with newborn in your arms! Super stretchy! I ordered an XL just Incase because I got to 120kg when pregnant and I’m 6ft. They fit perfectly without cutting in or slipping. \n\u003cbr \/\u003eIf I ever have another child these will be the first thing in my cart along with the witch hazel wipes and mere spray!\u003c\/p\u003e\u003c\/div\u003e \u003cdiv class='jdgm-rev__pics'\u003e \u003c\/div\u003e \u003cdiv class='jdgm-rev__vids'\u003e \u003c\/div\u003e \u003cdiv class='jdgm-rev__transparency-badge-wrapper'\u003e \u003cdiv class='jdgm-rev__transparency-badge' data-badge-type=review_collected_via_store_invitation\u003e\u003c\/div\u003e \u003c\/div\u003e \u003c\/div\u003e \u003cdiv class='jdgm-rev__actions'\u003e \u003cdiv class='jdgm-rev__social'\u003e\u003c\/div\u003e \u003cdiv class='jdgm-rev__votes'\u003e\u003c\/div\u003e \u003c\/div\u003e \u003cdiv class='jdgm-rev__reply'\u003e \u003cdiv class='jdgm-rev__replier-wrapper'\u003e \u003cb class='jdgm-rev__replier'\u003e\u003c\/b\u003e \u003c\/div\u003e \u003cdiv class='jdgm-rev__reply-content'\u003e\u003cp\u003eWe’re so pleased to hear they worked so well for you, Mez. ❤️ Recovery can be a challenging time, so it truly means a lot to know our product brought you comfort and ease, especially while caring for your newborn. Thank you for sharing your experience.\u003c\/p\u003e\u003c\/div\u003e \u003c\/div\u003e \u003c\/div\u003e\u003cdiv class='jdgm-rev jdgm-divider-top' data-verified-buyer='true' data-review-id='111742c7-d471-456e-93fa-5b0bc4e2ae4d' data-review-language='' data-product-title='Disposable Maternity \u0026amp; Postpartum Underwear' data-product-url='\/products\/disposable-maternity-underwear' data-thumb-up-count='0' data-thumb-down-count='0'\u003e \u003cdiv class='jdgm-rev__header'\u003e \u003cdiv class='jdgm-rev__icon' \u003e K \u003c\/div\u003e \u003cspan class='jdgm-rev__rating' data-score='4' tabindex='0' aria-label='4 star review' role='img'\u003e \u003cspan class='jdgm-star jdgm--on'\u003e\u003c\/span\u003e\u003cspan class='jdgm-star jdgm--on'\u003e\u003c\/span\u003e\u003cspan class='jdgm-star jdgm--on'\u003e\u003c\/span\u003e\u003cspan class='jdgm-star jdgm--on'\u003e\u003c\/span\u003e\u003cspan class='jdgm-star jdgm--off'\u003e\u003c\/span\u003e \u003c\/span\u003e \u003ctime class='jdgm-rev__timestamp jdgm-spinner' datetime='2025-01-10T05:55:06Z' data-content='2025-01-10 05:55:06 UTC'\u003e\u003c\/time\u003e \u003cdiv class='jdgm-rev__br'\u003e\u003c\/div\u003e \u003cspan class='jdgm-rev__buyer-badge-wrapper'\u003e \u003cspan class='jdgm-rev__buyer-badge'\u003e\u003c\/span\u003e \u003c\/span\u003e \u003cspan class='jdgm-rev__author-wrapper'\u003e \u003cspan class='jdgm-rev__author'\u003eKate Mutimer\u003c\/span\u003e \u003cspan class='jdgm-rev__location' \u003e \u003c\/span\u003e \u003c\/span\u003e \u003c\/div\u003e \u003cdiv class='jdgm-rev__content'\u003e \u003cdiv class='jdgm-rev__custom-form'\u003e \u003c\/div\u003e \u003cb class='jdgm-rev__title'\u003eInitial Comfort\u003c\/b\u003e \u003cdiv class='jdgm-rev__body'\u003e\u003cp\u003eI had no worries using these immediately postpartum, no leaks or fuss with layers or anything fiddly when you want to focus on getting rest and looking after bub. I was around a size 14 at the end of pregnancy and these were a bit big. Not a flaw, just might be good to know.\u003c\/p\u003e\u003c\/div\u003e \u003cdiv class='jdgm-rev__pics'\u003e \u003c\/div\u003e \u003cdiv class='jdgm-rev__vids'\u003e \u003c\/div\u003e \u003cdiv class='jdgm-rev__transparency-badge-wrapper'\u003e \u003cdiv class='jdgm-rev__transparency-badge' data-badge-type=review_collected_via_store_invitation\u003e\u003c\/div\u003e \u003c\/div\u003e \u003c\/div\u003e \u003cdiv class='jdgm-rev__actions'\u003e \u003cdiv class='jdgm-rev__social'\u003e\u003c\/div\u003e \u003cdiv class='jdgm-rev__votes'\u003e\u003c\/div\u003e \u003c\/div\u003e \u003cdiv class='jdgm-rev__reply'\u003e \u003cdiv class='jdgm-rev__replier-wrapper'\u003e \u003cb class='jdgm-rev__replier'\u003e\u003c\/b\u003e \u003c\/div\u003e \u003cdiv class='jdgm-rev__reply-content'\u003e\u003cp\u003eDear Kate, thank you so much for your thoughtful feedback. We are so pleased to hear that they provided comfort and ease during those early postpartum days, and we truly appreciate you sharing your note on sizing as it can be helpful for others. ❤️\u003c\/p\u003e\u003c\/div\u003e \u003c\/div\u003e \u003c\/div\u003e\u003cdiv class='jdgm-rev jdgm-divider-top' data-verified-buyer='true' data-review-id='8ee83f74-daa6-4446-a1fc-068c07fcd44b' data-review-language='' data-product-title='Disposable Maternity \u0026amp; Postpartum Underwear' data-product-url='\/products\/disposable-maternity-underwear' data-thumb-up-count='0' data-thumb-down-count='0'\u003e \u003cdiv class='jdgm-rev__header'\u003e \u003cdiv class='jdgm-rev__icon' \u003e C \u003c\/div\u003e \u003cspan class='jdgm-rev__rating' data-score='5' tabindex='0' aria-label='5 star review' role='img'\u003e \u003cspan class='jdgm-star jdgm--on'\u003e\u003c\/span\u003e\u003cspan class='jdgm-star jdgm--on'\u003e\u003c\/span\u003e\u003cspan class='jdgm-star jdgm--on'\u003e\u003c\/span\u003e\u003cspan class='jdgm-star jdgm--on'\u003e\u003c\/span\u003e\u003cspan class='jdgm-star jdgm--on'\u003e\u003c\/span\u003e \u003c\/span\u003e \u003ctime class='jdgm-rev__timestamp jdgm-spinner' datetime='2024-09-15T03:20:25Z' data-content='2024-09-15 03:20:25 UTC'\u003e\u003c\/time\u003e \u003cdiv class='jdgm-rev__br'\u003e\u003c\/div\u003e \u003cspan class='jdgm-rev__buyer-badge-wrapper'\u003e \u003cspan class='jdgm-rev__buyer-badge'\u003e\u003c\/span\u003e \u003c\/span\u003e \u003cspan class='jdgm-rev__author-wrapper'\u003e \u003cspan class='jdgm-rev__author'\u003eClio Denton\u003c\/span\u003e \u003cspan class='jdgm-rev__location' \u003e \u003c\/span\u003e \u003c\/span\u003e \u003c\/div\u003e \u003cdiv class='jdgm-rev__content'\u003e \u003cdiv class='jdgm-rev__custom-form'\u003e \u003c\/div\u003e \u003cb class='jdgm-rev__title'\u003e\u003c\/b\u003e \u003cdiv class='jdgm-rev__body'\u003e\u003cp\u003eDisposable Maternity \u0026amp; Postpartum Underwear\u003c\/p\u003e\u003c\/div\u003e \u003cdiv class='jdgm-rev__pics'\u003e \u003c\/div\u003e \u003cdiv class='jdgm-rev__vids'\u003e \u003c\/div\u003e \u003cdiv class='jdgm-rev__transparency-badge-wrapper'\u003e \u003cdiv class='jdgm-rev__transparency-badge' data-badge-type=review_collected_via_store_invitation\u003e\u003c\/div\u003e \u003c\/div\u003e \u003c\/div\u003e \u003cdiv class='jdgm-rev__actions'\u003e \u003cdiv class='jdgm-rev__social'\u003e\u003c\/div\u003e \u003cdiv class='jdgm-rev__votes'\u003e\u003c\/div\u003e \u003c\/div\u003e \u003cdiv class='jdgm-rev__reply'\u003e \u003cdiv class='jdgm-rev__replier-wrapper'\u003e \u003cb class='jdgm-rev__replier'\u003e\u003c\/b\u003e \u003c\/div\u003e \u003cdiv class='jdgm-rev__reply-content'\u003e\u003cp\u003eThank you so much for mentioning this, Clio. We know how important comfort and practicality are during the postpartum period, and it’s great to see these essentials being highlighted. Your input will definitely help other mums feel more prepared and supported ❤️\u003c\/p\u003e\u003c\/div\u003e \u003c\/div\u003e \u003c\/div\u003e\u003cdiv class='jdgm-rev jdgm-divider-top' data-verified-buyer='true' data-review-id='252d5246-e28d-458d-bbe2-63573178b4f3' data-review-language='' data-product-title='Disposable Maternity \u0026amp; Postpartum Underwear' data-product-url='\/products\/disposable-maternity-underwear' data-thumb-up-count='0' data-thumb-down-count='0'\u003e \u003cdiv class='jdgm-rev__header'\u003e \u003cdiv class='jdgm-rev__icon' \u003e K \u003c\/div\u003e \u003cspan class='jdgm-rev__rating' data-score='5' tabindex='0' aria-label='5 star review' role='img'\u003e \u003cspan class='jdgm-star jdgm--on'\u003e\u003c\/span\u003e\u003cspan class='jdgm-star jdgm--on'\u003e\u003c\/span\u003e\u003cspan class='jdgm-star jdgm--on'\u003e\u003c\/span\u003e\u003cspan class='jdgm-star jdgm--on'\u003e\u003c\/span\u003e\u003cspan class='jdgm-star jdgm--on'\u003e\u003c\/span\u003e \u003c\/span\u003e \u003ctime class='jdgm-rev__timestamp jdgm-spinner' datetime='2023-12-01T05:25:35Z' data-content='2023-12-01 05:25:35 UTC'\u003e\u003c\/time\u003e \u003cdiv class='jdgm-rev__br'\u003e\u003c\/div\u003e \u003cspan class='jdgm-rev__buyer-badge-wrapper'\u003e \u003cspan class='jdgm-rev__buyer-badge'\u003e\u003c\/span\u003e \u003c\/span\u003e \u003cspan class='jdgm-rev__author-wrapper'\u003e \u003cspan class='jdgm-rev__author'\u003eKali Welstead\u003c\/span\u003e \u003cspan class='jdgm-rev__location' \u003e \u003c\/span\u003e \u003c\/span\u003e \u003c\/div\u003e \u003cdiv class='jdgm-rev__content'\u003e \u003cdiv class='jdgm-rev__custom-form'\u003e \u003c\/div\u003e \u003cb class='jdgm-rev__title'\u003eTens machine was a life saver\u003c\/b\u003e \u003cdiv class='jdgm-rev__body'\u003e\u003cp\u003eI hired the tens machine for the birth of my baby boy. The whole process was straight forward and the birth store even provided a pre filled \/ prepaid envelope to return the tens machine. I managed 3 days of labour just using the tens. My boy was delivered via vacuum and I managed with gas (only at the very end) and the tens! It was a life saver I don’t think I would have handled an unmedicated labour without it.\u003c\/p\u003e\u003c\/div\u003e \u003cdiv class='jdgm-rev__pics'\u003e \u003c\/div\u003e \u003cdiv class='jdgm-rev__vids'\u003e \u003c\/div\u003e \u003cdiv class='jdgm-rev__transparency-badge-wrapper'\u003e \u003cdiv class='jdgm-rev__transparency-badge' data-badge-type=review_collected_via_store_invitation\u003e\u003c\/div\u003e \u003c\/div\u003e \u003c\/div\u003e \u003cdiv class='jdgm-rev__actions'\u003e \u003cdiv class='jdgm-rev__social'\u003e\u003c\/div\u003e \u003cdiv class='jdgm-rev__votes'\u003e\u003c\/div\u003e \u003c\/div\u003e \u003cdiv class='jdgm-rev__reply'\u003e \u003cdiv class='jdgm-rev__replier-wrapper'\u003e \u003cb class='jdgm-rev__replier'\u003e\u003c\/b\u003e \u003c\/div\u003e \u003cdiv class='jdgm-rev__reply-content'\u003e\u003cp\u003eHi Kali, 3 days! You absolute warrior! We are so happy the TENS could get you through such a marathon labour. We hope all is going well for you and bubs.\u003c\/p\u003e\u003c\/div\u003e \u003c\/div\u003e \u003c\/div\u003e\u003cdiv class='jdgm-rev jdgm-divider-top' data-verified-buyer='false' data-review-id='0072085e-16df-4337-a839-fcca94c84ea0' data-review-language='' data-product-title='Disposable Maternity \u0026amp; Postpartum Underwear' data-product-url='\/products\/disposable-maternity-underwear' data-thumb-up-count='0' data-thumb-down-count='0'\u003e \u003cdiv class='jdgm-rev__header'\u003e \u003cdiv class='jdgm-rev__icon' \u003e M \u003c\/div\u003e \u003cspan class='jdgm-rev__rating' data-score='5' tabindex='0' aria-label='5 star review' role='img'\u003e \u003cspan class='jdgm-star jdgm--on'\u003e\u003c\/span\u003e\u003cspan class='jdgm-star jdgm--on'\u003e\u003c\/span\u003e\u003cspan class='jdgm-star jdgm--on'\u003e\u003c\/span\u003e\u003cspan class='jdgm-star jdgm--on'\u003e\u003c\/span\u003e\u003cspan class='jdgm-star jdgm--on'\u003e\u003c\/span\u003e \u003c\/span\u003e \u003ctime class='jdgm-rev__timestamp jdgm-spinner' datetime='2023-04-20T03:30:52Z' data-content='2023-04-20 03:30:52 UTC'\u003e\u003c\/time\u003e \u003cdiv class='jdgm-rev__br'\u003e\u003c\/div\u003e \u003cspan class='jdgm-rev__buyer-badge-wrapper'\u003e \u003c\/span\u003e \u003cspan class='jdgm-rev__author-wrapper'\u003e \u003cspan class='jdgm-rev__author'\u003eMarissa\u003c\/span\u003e \u003cspan class='jdgm-rev__location' \u003e \u003c\/span\u003e \u003c\/span\u003e \u003c\/div\u003e \u003cdiv class='jdgm-rev__content'\u003e \u003cdiv class='jdgm-rev__custom-form'\u003e \u003c\/div\u003e \u003cb class='jdgm-rev__title'\u003eDefinetly a must!\u003c\/b\u003e \u003cdiv class='jdgm-rev__body'\u003e\u003cp\u003eNow these aren't the most attractive undies you'll ever wear but OMG the amount of blood you lose and for myself having to put a ice pack in these aswell they have been a god send to not have to worry about pads or leaking when you've got so much on your mind already. I used all 15 I bought!\u003c\/p\u003e\u003c\/div\u003e \u003cdiv class='jdgm-rev__pics'\u003e \u003c\/div\u003e \u003cdiv class='jdgm-rev__vids'\u003e \u003c\/div\u003e \u003cdiv class='jdgm-rev__transparency-badge-wrapper'\u003e \u003cdiv class='jdgm-rev__transparency-badge' data-badge-type=review_collected_from_store_visitor\u003e\u003c\/div\u003e \u003c\/div\u003e \u003c\/div\u003e \u003cdiv class='jdgm-rev__actions'\u003e \u003cdiv class='jdgm-rev__social'\u003e\u003c\/div\u003e \u003cdiv class='jdgm-rev__votes'\u003e\u003c\/div\u003e \u003c\/div\u003e \u003cdiv class='jdgm-rev__reply'\u003e \u003c\/div\u003e \u003c\/div\u003e\u003cdiv class='jdgm-rev jdgm-divider-top' data-verified-buyer='true' data-review-id='be288c4c-7515-4177-b63f-fbd5e044244f' data-review-language='' data-product-title='Disposable Maternity \u0026amp; Postpartum Underwear' data-product-url='\/products\/disposable-maternity-underwear' data-thumb-up-count='0' data-thumb-down-count='0'\u003e \u003cdiv class='jdgm-rev__header'\u003e \u003cdiv class='jdgm-rev__icon' \u003e B \u003c\/div\u003e \u003cspan class='jdgm-rev__rating' data-score='5' tabindex='0' aria-label='5 star review' role='img'\u003e \u003cspan class='jdgm-star jdgm--on'\u003e\u003c\/span\u003e\u003cspan class='jdgm-star jdgm--on'\u003e\u003c\/span\u003e\u003cspan class='jdgm-star jdgm--on'\u003e\u003c\/span\u003e\u003cspan class='jdgm-star jdgm--on'\u003e\u003c\/span\u003e\u003cspan class='jdgm-star jdgm--on'\u003e\u003c\/span\u003e \u003c\/span\u003e \u003ctime class='jdgm-rev__timestamp jdgm-spinner' datetime='2022-07-15T22:22:22Z' data-content='2022-07-15 22:22:22 UTC'\u003e\u003c\/time\u003e \u003cdiv class='jdgm-rev__br'\u003e\u003c\/div\u003e \u003cspan class='jdgm-rev__buyer-badge-wrapper'\u003e \u003cspan class='jdgm-rev__buyer-badge'\u003e\u003c\/span\u003e \u003c\/span\u003e \u003cspan class='jdgm-rev__author-wrapper'\u003e \u003cspan class='jdgm-rev__author'\u003eBri\u003c\/span\u003e \u003cspan class='jdgm-rev__location' \u003e \u003c\/span\u003e \u003c\/span\u003e \u003c\/div\u003e \u003cdiv class='jdgm-rev__content'\u003e \u003cdiv class='jdgm-rev__custom-form'\u003e \u003c\/div\u003e \u003cb class='jdgm-rev__title'\u003ePost Partum Panties Rock!\u003c\/b\u003e \u003cdiv class='jdgm-rev__body'\u003e\u003cp\u003eThey were super comfortable with nice soft lining which was great over my c section incision. They have a good stretchy waist line and fitted really well over my post baby bump. \n\u003cbr \/\u003eAbsolutely loved this product and highly recommend it to all Mummas for post partum!\u003c\/p\u003e\u003c\/div\u003e \u003cdiv class='jdgm-rev__pics'\u003e \u003c\/div\u003e \u003cdiv class='jdgm-rev__vids'\u003e \u003c\/div\u003e \u003cdiv class='jdgm-rev__transparency-badge-wrapper'\u003e \u003cdiv class='jdgm-rev__transparency-badge' data-badge-type=review_collected_via_store_invitation\u003e\u003c\/div\u003e \u003c\/div\u003e \u003c\/div\u003e \u003cdiv class='jdgm-rev__actions'\u003e \u003cdiv class='jdgm-rev__social'\u003e\u003c\/div\u003e \u003cdiv class='jdgm-rev__votes'\u003e\u003c\/div\u003e \u003c\/div\u003e \u003cdiv class='jdgm-rev__reply'\u003e \u003c\/div\u003e \u003c\/div\u003e\u003c\/div\u003e \u003cdiv class='jdgm-paginate' data-per-page='10' data-url='https:\/\/api.judge.me\/reviews\/reviews_for_widget' style=\"display: none;\"\u003e\u003c\/div\u003e \u003c\/div\u003e \u003cdiv class='jdgm-rev-widg__paginate-spinner-wrapper'\u003e \u003cdiv class='jdgm-spinner'\u003e\u003c\/div\u003e \u003c\/div\u003e \u003c\/div\u003e"},"default_reviews_metafields":{"rating":{"scale_min":"1.0","scale_max":"5.0","value":"4.83"},"rating_count":6},"collections":[{"id":512654540989,"handle":"lastof26-10","title":"10%","updated_at":"2026-11-14T20:08:00+08:00","body_html":null,"published_at":"2026-10-12T19:06:42+08:00","sort_order":"best-selling","template_suffix":null,"disjunctive":false,"rules":[],"published_scope":"global"},{"id":261657460925,"handle":"buy","title":"Buy","updated_at":"2026-11-14T20:08:00+08:00","body_html":"\u003cp\u003eBrowse all of our pregnancy, labour \u0026amp; birth, postpartum and baby essentials here.\u003cbr\u003e\u003c\/p\u003e\n\u003cp\u003e\u003cspan\u003eYou can even buy now and pay later with Afterpay!\u003c\/span\u003e\u003c\/p\u003e","published_at":"2021-03-10T12:05:31+08:00","sort_order":"best-selling","template_suffix":"shop-all-collection","disjunctive":false,"rules":[],"published_scope":"global","image":{"created_at":"2024-05-06T11:59:42+08:00","alt":"Buy - The Birth Store","width":2048,"height":2048,"src":"\/\/www.thebirthstore.com.au\/cdn\/shop\/collections\/buy-964856.jpg?v=1714967982"}},{"id":281712361661,"handle":"c-section-birth-recovery","title":"C-Section Birth Recovery","updated_at":"2026-11-12T20:07:50+08:00","body_html":"","published_at":"2021-12-20T14:19:01+08:00","sort_order":"best-selling","template_suffix":"swaddles-collection","disjunctive":false,"rules":[],"published_scope":"global","image":{"created_at":"2024-05-06T11:59:49+08:00","alt":"C-Section Birth Recovery - The Birth Store","width":1366,"height":2048,"src":"\/\/www.thebirthstore.com.au\/cdn\/shop\/collections\/c-section-birth-recovery-359249.jpg?v=1714967990"}},{"id":337429201085,"handle":"hospital-bag","title":"Hospital Bag","updated_at":"2026-11-14T20:08:00+08:00","body_html":"","published_at":"2026-06-03T11:36:29+08:00","sort_order":"most-relevant","template_suffix":"","disjunctive":false,"rules":[],"published_scope":"global"},{"id":295224705213,"handle":"perineal-care","title":"Perineal Care","updated_at":"2026-11-12T20:07:50+08:00","body_html":"","published_at":"2023-11-10T20:43:30+08:00","sort_order":"best-selling","template_suffix":"perineal-care-collection","disjunctive":false,"rules":[],"published_scope":"global","image":{"created_at":"2024-05-06T12:00:33+08:00","alt":"Perineal Care - The Birth Store","width":1024,"height":1536,"src":"\/\/www.thebirthstore.com.au\/cdn\/shop\/collections\/perineal-care-657628.jpg?v=1714968034"}},{"id":261658083517,"handle":"post-partum","title":"Postpartum","updated_at":"2026-11-14T20:08:00+08:00","body_html":"\u003cp\u003eShop your postpartum and hospital bag essentials below. Looking for something we don't currently stock? Please reach out and let us know.\u003cbr\u003e\u003c\/p\u003e\n\u003cp\u003e\u003cspan\u003eYou can even buy now and pay later with Afterpay!\u003c\/span\u003e\u003c\/p\u003e","published_at":"2021-03-10T12:33:47+08:00","sort_order":"best-selling","template_suffix":"postpartum-collection","disjunctive":false,"rules":[],"published_scope":"global","image":{"created_at":"2024-05-06T12:00:36+08:00","alt":"Postpartum - The Birth Store","width":611,"height":702,"src":"\/\/www.thebirthstore.com.au\/cdn\/shop\/collections\/postpartum-150119.jpg?v=1714968037"}},{"id":291456483517,"handle":"shop-all","title":"Shop All - Mum","updated_at":"2026-11-14T20:08:00+08:00","body_html":"","published_at":"2022-12-23T22:04:39+08:00","sort_order":"best-selling","template_suffix":"shop-all-collection","disjunctive":false,"rules":[],"published_scope":"global","image":{"created_at":"2024-05-06T12:00:54+08:00","alt":"Shop All - The Birth Store","width":1365,"height":2048,"src":"\/\/www.thebirthstore.com.au\/cdn\/shop\/collections\/shop-all-693176.jpg?v=1714968055"}},{"id":310045933757,"handle":"shop-all-sale","title":"Shop All Sale","updated_at":"2026-11-14T20:08:00+08:00","body_html":"","published_at":"2024-11-12T13:22:43+08:00","sort_order":"best-selling","template_suffix":"","disjunctive":true,"rules":[],"published_scope":"global","image":{"created_at":"2024-11-13T10:58:16+08:00","alt":"Shop All Sale - The Birth Store","width":2048,"height":1365,"src":"\/\/www.thebirthstore.com.au\/cdn\/shop\/collections\/shop-all-sale-297361.jpg?v=1731466697"}},{"id":281712197821,"handle":"vaginal-birth-recovery","title":"Vaginal Birth Recovery","updated_at":"2026-11-12T20:07:50+08:00","body_html":"","published_at":"2021-12-20T14:18:23+08:00","sort_order":"best-selling","template_suffix":"swaddles-collection","disjunctive":true,"rules":[],"published_scope":"global","image":{"created_at":"2024-05-06T12:01:03+08:00","alt":"Vaginal Birth Recovery - The Birth Store","width":2048,"height":2048,"src":"\/\/www.thebirthstore.com.au\/cdn\/shop\/collections\/vaginal-birth-recovery-449034.jpg?v=1714968063"}}]}
{"item":{"id":7917653557437,"title":"Mini + Me Hydramama","handle":"mini-me-hydramama","description":"\u003ch1 class=\"text-left margin-b-20 col8 black\"\u003eHydramama®\u003c\/h1\u003e\n\u003ch2 class=\"text-left margin-b-20 primary\"\u003eSay Hello to your Hydration Hero\u003cspan\u003e\u003c\/span\u003e\n\u003c\/h2\u003e\n\u003cp dir=\"ltr\"\u003e\u003cspan\u003eHydramama is a zero sugar hydration drink made with Sodium, Potassium, Magnesium, Vitamin B6, Vitamin C and Methylated Folate. Designed with expecting and new parents in mind, from pre-conception right through to postpartum and beyond.\u003c\/span\u003e\u003c\/p\u003e\n\u003cp dir=\"ltr\"\u003e\u003cspan\u003e\u003cbr\u003e\u003c\/span\u003e\u003cspan\u003eCreated by a mum who’s been there, and backed by midwives.\u003c\/span\u003e\u003c\/p\u003e\n\u003cp\u003e\u003cb\u003e\u003cbr\u003e\u003c\/b\u003e\u003c\/p\u003e\n\u003ch3 dir=\"ltr\"\u003e\n\u003cspan\u003eDescription \/ Why it is great:\u003c\/span\u003e\u003cb\u003e\u003c\/b\u003e\n\u003c\/h3\u003e\n\u003cp dir=\"ltr\"\u003e\u003cspan\u003eHydramama is a formulated beverage designed with expecting and new parents in mind, from pre-conception right through to postpartum and beyond.\u003c\/span\u003e\u003cb\u003e\u003c\/b\u003e\u003c\/p\u003e\n\u003cp dir=\"ltr\"\u003e\u003cspan\u003eFormulated with Magnesium, Sodium, Potassium, Vitamin C, Vitamin B6 and bioavailable Methylated Folate, and available in 10 delicious flavours, it’s simple to mix and easy to love. \u003c\/span\u003e\u003cb\u003e\u003c\/b\u003e\u003c\/p\u003e\n\u003cp dir=\"ltr\"\u003e\u003cspan\u003e🥇 CLEAN + CONSCIOUS AWARDS 2024: Gold in the \"Best Women's Health Product\" category.\u003c\/span\u003e\u003c\/p\u003e\n\u003cp dir=\"ltr\"\u003e\u003cspan\u003e🥇 BOUNTY BABY AWARDS 2025: Gold Medal in \"Best Product or Service for Mum\" category.\u003c\/span\u003e\u003c\/p\u003e\n\u003cp dir=\"ltr\"\u003e\u003cspan\u003e🥈 BOUNTY BABY AWARDS 2025: Silver Medal in \"Best Vitamin or Supplement for Mum\" category.\u003c\/span\u003e\u003c\/p\u003e\n\u003cp dir=\"ltr\"\u003e\u003cspan\u003e🥈 BOUNTY BABY AWARDS 2024: Silver Medal in \"Best Vitamin or Supplement for Mum\" category.\u003c\/span\u003e\u003c\/p\u003e\n\u003cp dir=\"ltr\"\u003e\u003cspan\u003e🥉 BOUNTY BABY AWARDS 2024\" Bronze Medal in \"Best Product or Service for Mum\" category.\u003c\/span\u003e\u003c\/p\u003e\n\u003cp\u003e\u003cb\u003e\u003cbr\u003e\u003c\/b\u003e\u003c\/p\u003e\n\u003ch3 dir=\"ltr\"\u003e\u003cspan\u003eWhy Hydramama?\u003c\/span\u003e\u003c\/h3\u003e\n\u003cp dir=\"ltr\"\u003e\u003cspan\u003eClean hydration support, every day. Some days, water just doesn't cut it. Designed with real parents at the centre, Hydramama is a great-tasting, sugar-free hydration drink, simple to use and make a part of your daily routine.\u003c\/span\u003e\u003cb\u003e\u003c\/b\u003e\u003c\/p\u003e\n\u003cp dir=\"ltr\"\u003e\u003cspan\u003eHydramama is carefully formulated with the nutritional needs of women in mind, a true hydration support for motherhood. Suitable for use during pregnancy, while breastfeeding, and for the whole family. \u003c\/span\u003e\u003c\/p\u003e\n\u003cp\u003e\u003cb\u003e\u003cbr\u003e\u003c\/b\u003e\u003c\/p\u003e\n\u003ch3 dir=\"ltr\"\u003e\u003cspan\u003eFormulated with: \u003c\/span\u003e\u003c\/h3\u003e\n\u003cul\u003e\n\u003cli dir=\"ltr\"\u003e\n\u003cp dir=\"ltr\" role=\"presentation\"\u003e\u003cspan\u003eMagnesium + sodium + potassium: magnesium supports electrolyte balance and nerve and muscle function.\u003c\/span\u003e\u003c\/p\u003e\n\u003c\/li\u003e\n\u003cli dir=\"ltr\"\u003e\n\u003cp dir=\"ltr\" role=\"presentation\"\u003e\u003cspan\u003eMethylated Folate \u0026amp; Vitamin B6: containing a bioavailable source of folate alongside vitamin B6, nutrients involved in energy metabolism and general wellness.\u003c\/span\u003e\u003c\/p\u003e\n\u003c\/li\u003e\n\u003cli dir=\"ltr\"\u003e\n\u003cp dir=\"ltr\" role=\"presentation\"\u003e\u003cspan\u003eVitamin C: helps to reduce tiredness and fatigue and support immunity.\u003c\/span\u003e\u003c\/p\u003e\n\u003c\/li\u003e\n\u003c\/ul\u003e\n\u003cp\u003e\u003cb\u003e\u003cbr\u003e\u003c\/b\u003e\u003c\/p\u003e\n\u003cp dir=\"ltr\"\u003e\u003cspan\u003eZero sugar, no artificial colours, full of flavour. The Hydramama range offers clean, refreshing hydration support.\u003c\/span\u003e\u003cb\u003e\u003c\/b\u003e\u003c\/p\u003e\n\u003cp dir=\"ltr\"\u003e\u003cspan\u003eHydramama is proudly Endorsed by the Australian College of Midwives, and designed to support parents from pre-conception to postpartum and beyond. \u003c\/span\u003e\u003c\/p\u003e\n\u003cp\u003e\u003cb\u003e\u003cbr\u003e\u003c\/b\u003e\u003c\/p\u003e\n\u003ch3 dir=\"ltr\"\u003e\u003cspan\u003eHow to Use\u003c\/span\u003e\u003c\/h3\u003e\n\u003cp dir=\"ltr\"\u003e\u003cspan\u003eMix one sachet (8g) into 250-600mL of cold water. Enjoy as required. Suitable for pregnancy, breastfeeding and for children, following advice from your healthcare professional.\u003c\/span\u003e\u003cb\u003e\u003c\/b\u003e\u003c\/p\u003e\n\u003cp dir=\"ltr\"\u003e \u003c\/p\u003e\n\u003ch3 dir=\"ltr\"\u003e\u003cspan\u003eWhat’s Inside Hydramama?\u003c\/span\u003e\u003c\/h3\u003e\n\u003ch5 dir=\"ltr\"\u003e\u003cspan\u003eMagnesium + Minerals (Sodium + Potassium) \u003c\/span\u003e\u003c\/h5\u003e\n\u003cp dir=\"ltr\"\u003e\u003cspan\u003eMagnesium supports electrolyte balance, as well as nerve and muscle function. It also contributes to a reduction of tiredness and fatigue and supports psychological function.\u003c\/span\u003e\u003cb\u003e\u003c\/b\u003e\u003c\/p\u003e\n\u003ch5 dir=\"ltr\"\u003e\u003cspan\u003eVitamin C\u003c\/span\u003e\u003c\/h5\u003e\n\u003cp dir=\"ltr\"\u003e\u003cspan\u003eVitamin C contributes to energy metabolism, immune system function, and connective tissue function. It also contributes to a reduction of tiredness and fatigue.\u003c\/span\u003e\u003cb\u003e\u003c\/b\u003e\u003c\/p\u003e\n\u003ch5 dir=\"ltr\"\u003e\u003cspan\u003eVitamin B6\u003c\/span\u003e\u003c\/h5\u003e\n\u003cp dir=\"ltr\"\u003e\u003cspan\u003eVitamin B6 contributes to normal energy metabolism, nervous system function, red blood cell formation, and the regulation of hormonal activity.\u003c\/span\u003e\u003cb\u003e\u003c\/b\u003e\u003c\/p\u003e\n\u003ch5 dir=\"ltr\"\u003e\u003cspan\u003eBioavailable Methylated Folate\u003c\/span\u003e\u003c\/h5\u003e\n\u003cp dir=\"ltr\"\u003e\u003cspan\u003eContains bioavailable folate (50µg per serve, 25% RDI). Folate contributes to maternal tissue growth during pregnancy, normal blood formation, and a reduction of tiredness and fatigue.\u003c\/span\u003e\u003c\/p\u003e\n\u003cp\u003e\u003cb\u003e\u003cbr\u003e\u003c\/b\u003e\u003c\/p\u003e\n\u003cp dir=\"ltr\"\u003e\u003cem\u003e*Please note: Hydramama is designed to complement a balanced diet and is not intended as a replacement for prenatal vitamins.\u003c\/em\u003e\u003c\/p\u003e\n\u003cp\u003e\u003cb\u003e\u003cbr\u003e\u003c\/b\u003e\u003c\/p\u003e\n\u003ch3 dir=\"ltr\"\u003e\u003cspan\u003eIngredients:\u003c\/span\u003e\u003c\/h3\u003e\n\u003cp dir=\"ltr\"\u003e\u003cspan\u003eNatural Sweetener (Erythritol), Mineral Salts (Sodium Chloride, Potassium Phosphate, Magnesium Glycinate, Sodium Citrate), Food Acid (Citric), Natural Flavours, Natural Colour, Vitamins [Ascorbic Acid, Pyridoxine Hydrochloride (Vitamin B6), L-Methyl Folate Calcium (Vitamin B9)].\u003c\/span\u003e\u003cb\u003e\u003c\/b\u003e\u003c\/p\u003e\n\u003cp dir=\"ltr\"\u003e\u003cspan\u003eFormulated beverage when made up as per instruction. This product should be consumed alongside a nutritious diet. Store below 25°C in a cool dry place, away from direct sunlight.\u003c\/span\u003e\u003c\/p\u003e\n\u003cp dir=\"ltr\"\u003e\u003cspan\u003eHydramama is a formulated beverage when prepared as directed, made in accordance with the Food Standards Code (FSANZ) for Australia and New Zealand. It is intended to be enjoyed alongside a balanced diet. If you are pregnant or breastfeeding, considering use for a child, have any underlying health conditions, take medications or supplements, consult a healthcare professional before use.\u003c\/span\u003e\u003c\/p\u003e","published_at":"2024-11-23T13:00:02+08:00","created_at":"2024-11-23T11:40:52+08:00","vendor":"Mini + Me","type":"","tags":["Baby Shower Gifts - Mum","Birth","Breastfeeding","Hospital Bag","Lactation Products","Mum","Nausea","Post-Partum","Pre-Conception","Pregnancy","Pregnancy Health"],"price":3999,"price_min":3999,"price_max":3999,"available":true,"price_varies":false,"compare_at_price":null,"compare_at_price_min":0,"compare_at_price_max":0,"compare_at_price_varies":false,"variants":[{"id":44666117587133,"title":"Blackcurrant","option1":"Blackcurrant","option2":null,"option3":null,"sku":"","requires_shipping":true,"taxable":false,"featured_image":{"id":38742134784189,"product_id":7917653557437,"position":23,"created_at":"2025-11-03T10:37:07+08:00","updated_at":"2025-11-03T12:22:56+08:00","alt":"Mini + Me Hydramama - The Birth Store - Mini + Me","width":1080,"height":1080,"src":"\/\/www.thebirthstore.com.au\/cdn\/shop\/files\/mini-me-hydramama-9530031.png?v=1762143776","variant_ids":[44666117587133]},"available":true,"name":"Mini + Me Hydramama - Blackcurrant","public_title":"Blackcurrant","options":["Blackcurrant"],"price":3999,"weight":300,"compare_at_price":null,"inventory_management":"shopify","barcode":"17587133","featured_media":{"alt":"Mini + Me Hydramama - The Birth Store - Mini + Me","id":29991211434173,"position":23,"preview_image":{"aspect_ratio":1.0,"height":1080,"width":1080,"src":"\/\/www.thebirthstore.com.au\/cdn\/shop\/files\/mini-me-hydramama-9530031.png?v=1762143776"}},"requires_selling_plan":false,"selling_plan_allocations":[],"quantity_rule":{"min":1,"max":null,"increment":1}},{"id":44666117619901,"title":"Lemonade","option1":"Lemonade","option2":null,"option3":null,"sku":"","requires_shipping":true,"taxable":false,"featured_image":{"id":38742138552509,"product_id":7917653557437,"position":24,"created_at":"2025-11-03T10:38:33+08:00","updated_at":"2025-11-03T12:22:56+08:00","alt":"Mini + Me Hydramama - The Birth Store - Mini + Me","width":1080,"height":1080,"src":"\/\/www.thebirthstore.com.au\/cdn\/shop\/files\/mini-me-hydramama-6807804.png?v=1762143776","variant_ids":[44666117619901]},"available":true,"name":"Mini + Me Hydramama - Lemonade","public_title":"Lemonade","options":["Lemonade"],"price":3999,"weight":300,"compare_at_price":null,"inventory_management":"shopify","barcode":"17619901","featured_media":{"alt":"Mini + Me Hydramama - The Birth Store - Mini + Me","id":29991214710973,"position":24,"preview_image":{"aspect_ratio":1.0,"height":1080,"width":1080,"src":"\/\/www.thebirthstore.com.au\/cdn\/shop\/files\/mini-me-hydramama-6807804.png?v=1762143776"}},"requires_selling_plan":false,"selling_plan_allocations":[],"quantity_rule":{"min":1,"max":null,"increment":1}},{"id":44666329694397,"title":"Cola","option1":"Cola","option2":null,"option3":null,"sku":"","requires_shipping":true,"taxable":false,"featured_image":{"id":38742136848573,"product_id":7917653557437,"position":25,"created_at":"2025-11-03T10:37:50+08:00","updated_at":"2025-11-03T12:22:56+08:00","alt":"Mini + Me Hydramama - The Birth Store - Mini + Me","width":1080,"height":1080,"src":"\/\/www.thebirthstore.com.au\/cdn\/shop\/files\/mini-me-hydramama-7128187.png?v=1762143776","variant_ids":[44666329694397]},"available":true,"name":"Mini + Me Hydramama - Cola","public_title":"Cola","options":["Cola"],"price":3999,"weight":300,"compare_at_price":null,"inventory_management":"shopify","barcode":"29694397","featured_media":{"alt":"Mini + Me Hydramama - The Birth Store - Mini + Me","id":29991213105341,"position":25,"preview_image":{"aspect_ratio":1.0,"height":1080,"width":1080,"src":"\/\/www.thebirthstore.com.au\/cdn\/shop\/files\/mini-me-hydramama-7128187.png?v=1762143776"}},"requires_selling_plan":false,"selling_plan_allocations":[],"quantity_rule":{"min":1,"max":null,"increment":1}},{"id":44666361577661,"title":"Watermelon + Lime","option1":"Watermelon + Lime","option2":null,"option3":null,"sku":"","requires_shipping":true,"taxable":false,"featured_image":{"id":38742143762621,"product_id":7917653557437,"position":26,"created_at":"2025-11-03T10:40:55+08:00","updated_at":"2025-11-03T12:22:57+08:00","alt":"Mini + Me Hydramama - The Birth Store - Mini + Me","width":1080,"height":1080,"src":"\/\/www.thebirthstore.com.au\/cdn\/shop\/files\/mini-me-hydramama-5447464.png?v=1762143777","variant_ids":[44666361577661]},"available":true,"name":"Mini + Me Hydramama - Watermelon + Lime","public_title":"Watermelon + Lime","options":["Watermelon + Lime"],"price":3999,"weight":300,"compare_at_price":null,"inventory_management":"shopify","barcode":"61577661","featured_media":{"alt":"Mini + Me Hydramama - The Birth Store - Mini + Me","id":29991218905277,"position":26,"preview_image":{"aspect_ratio":1.0,"height":1080,"width":1080,"src":"\/\/www.thebirthstore.com.au\/cdn\/shop\/files\/mini-me-hydramama-5447464.png?v=1762143777"}},"requires_selling_plan":false,"selling_plan_allocations":[],"quantity_rule":{"min":1,"max":null,"increment":1}},{"id":44666362200253,"title":"Passionfruit + Orange","option1":"Passionfruit + Orange","option2":null,"option3":null,"sku":"","requires_shipping":true,"taxable":false,"featured_image":{"id":38742137962685,"product_id":7917653557437,"position":27,"created_at":"2025-11-03T10:38:18+08:00","updated_at":"2025-11-03T12:22:57+08:00","alt":"Mini + Me Hydramama - The Birth Store - Mini + Me","width":1080,"height":1080,"src":"\/\/www.thebirthstore.com.au\/cdn\/shop\/files\/mini-me-hydramama-5259142.png?v=1762143777","variant_ids":[44666362200253]},"available":false,"name":"Mini + Me Hydramama - Passionfruit + Orange","public_title":"Passionfruit + Orange","options":["Passionfruit + Orange"],"price":3999,"weight":300,"compare_at_price":null,"inventory_management":"shopify","barcode":"62200253","featured_media":{"alt":"Mini + Me Hydramama - The Birth Store - Mini + Me","id":29991214284989,"position":27,"preview_image":{"aspect_ratio":1.0,"height":1080,"width":1080,"src":"\/\/www.thebirthstore.com.au\/cdn\/shop\/files\/mini-me-hydramama-5259142.png?v=1762143777"}},"requires_selling_plan":false,"selling_plan_allocations":[],"quantity_rule":{"min":1,"max":null,"increment":1}},{"id":44666363150525,"title":"Apple + Ginger","option1":"Apple + Ginger","option2":null,"option3":null,"sku":"","requires_shipping":true,"taxable":false,"featured_image":{"id":38742135636157,"product_id":7917653557437,"position":28,"created_at":"2025-11-03T10:37:26+08:00","updated_at":"2025-11-03T12:22:57+08:00","alt":"Mini + Me Hydramama - The Birth Store - Mini + Me","width":1080,"height":1080,"src":"\/\/www.thebirthstore.com.au\/cdn\/shop\/files\/mini-me-hydramama-4894441.png?v=1762143777","variant_ids":[44666363150525]},"available":true,"name":"Mini + Me Hydramama - Apple + Ginger","public_title":"Apple + Ginger","options":["Apple + Ginger"],"price":3999,"weight":300,"compare_at_price":null,"inventory_management":"shopify","barcode":"63150525","featured_media":{"alt":"Mini + Me Hydramama - The Birth Store - Mini + Me","id":29991212155069,"position":28,"preview_image":{"aspect_ratio":1.0,"height":1080,"width":1080,"src":"\/\/www.thebirthstore.com.au\/cdn\/shop\/files\/mini-me-hydramama-4894441.png?v=1762143777"}},"requires_selling_plan":false,"selling_plan_allocations":[],"quantity_rule":{"min":1,"max":null,"increment":1}},{"id":44729555714237,"title":"Peach Iced Tea","option1":"Peach Iced Tea","option2":null,"option3":null,"sku":"","requires_shipping":true,"taxable":false,"featured_image":{"id":38742139568317,"product_id":7917653557437,"position":29,"created_at":"2025-11-03T10:38:58+08:00","updated_at":"2025-11-03T12:22:58+08:00","alt":"Mini + Me Hydramama - The Birth Store - Mini + Me","width":1080,"height":1080,"src":"\/\/www.thebirthstore.com.au\/cdn\/shop\/files\/mini-me-hydramama-9357362.png?v=1762143778","variant_ids":[44729555714237]},"available":true,"name":"Mini + Me Hydramama - Peach Iced Tea","public_title":"Peach Iced Tea","options":["Peach Iced Tea"],"price":3999,"weight":300,"compare_at_price":null,"inventory_management":"shopify","barcode":"55714237","featured_media":{"alt":"Mini + Me Hydramama - The Birth Store - Mini + Me","id":29991215497405,"position":29,"preview_image":{"aspect_ratio":1.0,"height":1080,"width":1080,"src":"\/\/www.thebirthstore.com.au\/cdn\/shop\/files\/mini-me-hydramama-9357362.png?v=1762143778"}},"requires_selling_plan":false,"selling_plan_allocations":[],"quantity_rule":{"min":1,"max":null,"increment":1}},{"id":44729560006845,"title":"Tropical","option1":"Tropical","option2":null,"option3":null,"sku":"","requires_shipping":true,"taxable":false,"featured_image":{"id":38742142189757,"product_id":7917653557437,"position":30,"created_at":"2025-11-03T10:40:14+08:00","updated_at":"2025-11-03T12:22:58+08:00","alt":"Mini + Me Hydramama - The Birth Store - Mini + Me","width":1080,"height":1080,"src":"\/\/www.thebirthstore.com.au\/cdn\/shop\/files\/mini-me-hydramama-3590130.png?v=1762143778","variant_ids":[44729560006845]},"available":false,"name":"Mini + Me Hydramama - Tropical","public_title":"Tropical","options":["Tropical"],"price":3999,"weight":300,"compare_at_price":null,"inventory_management":"shopify","barcode":"60006845","featured_media":{"alt":"Mini + Me Hydramama - The Birth Store - Mini + Me","id":29991217725629,"position":30,"preview_image":{"aspect_ratio":1.0,"height":1080,"width":1080,"src":"\/\/www.thebirthstore.com.au\/cdn\/shop\/files\/mini-me-hydramama-3590130.png?v=1762143778"}},"requires_selling_plan":false,"selling_plan_allocations":[],"quantity_rule":{"min":1,"max":null,"increment":1}},{"id":46726916800701,"title":"Mixed Berry","option1":"Mixed Berry","option2":null,"option3":null,"sku":null,"requires_shipping":true,"taxable":false,"featured_image":{"id":40210116477117,"product_id":7917653557437,"position":31,"created_at":"2026-05-06T12:02:47+08:00","updated_at":"2026-05-06T18:32:05+08:00","alt":"Mini + Me Hydramama - The Birth Store - Mini + Me","width":1000,"height":1000,"src":"\/\/www.thebirthstore.com.au\/cdn\/shop\/files\/mini-me-hydramama-7796965.png?v=1778063525","variant_ids":[46726916800701]},"available":true,"name":"Mini + Me Hydramama - Mixed Berry","public_title":"Mixed Berry","options":["Mixed Berry"],"price":3999,"weight":300,"compare_at_price":null,"inventory_management":"shopify","barcode":"16800701","featured_media":{"alt":"Mini + Me Hydramama - The Birth Store - Mini + Me","id":31321970802877,"position":31,"preview_image":{"aspect_ratio":1.0,"height":1000,"width":1000,"src":"\/\/www.thebirthstore.com.au\/cdn\/shop\/files\/mini-me-hydramama-7796965.png?v=1778063525"}},"requires_selling_plan":false,"selling_plan_allocations":[],"quantity_rule":{"min":1,"max":null,"increment":1}},{"id":47018543415485,"title":"Grape","option1":"Grape","option2":null,"option3":null,"sku":null,"requires_shipping":true,"taxable":false,"featured_image":{"id":40564915929277,"product_id":7917653557437,"position":32,"created_at":"2026-06-27T12:32:46+08:00","updated_at":"2026-06-28T12:25:06+08:00","alt":"Mini + Me Hydramama - The Birth Store-Mini + Me","width":1680,"height":1680,"src":"\/\/www.thebirthstore.com.au\/cdn\/shop\/files\/mini-me-hydramama-1313056.webp?v=1782620706","variant_ids":[47018543415485]},"available":true,"name":"Mini + Me Hydramama - Grape","public_title":"Grape","options":["Grape"],"price":3999,"weight":300,"compare_at_price":null,"inventory_management":"shopify","barcode":"43415485","featured_media":{"alt":"Mini + Me Hydramama - The Birth Store-Mini + Me","id":31659165712573,"position":32,"preview_image":{"aspect_ratio":1.0,"height":1680,"width":1680,"src":"\/\/www.thebirthstore.com.au\/cdn\/shop\/files\/mini-me-hydramama-1313056.webp?v=1782620706"}},"requires_selling_plan":false,"selling_plan_allocations":[],"quantity_rule":{"min":1,"max":null,"increment":1}}],"images":["\/\/www.thebirthstore.com.au\/cdn\/shop\/files\/mini-me-hydramama-978042.jpg?v=1732461065","\/\/www.thebirthstore.com.au\/cdn\/shop\/files\/mini-me-hydramama-533803.webp?v=1732378254","\/\/www.thebirthstore.com.au\/cdn\/shop\/files\/mini-me-hydramama-916939.jpg?v=1732378254","\/\/www.thebirthstore.com.au\/cdn\/shop\/files\/mini-me-hydramama-8621853.png?v=1778560746","\/\/www.thebirthstore.com.au\/cdn\/shop\/files\/mini-me-hydramama-393133.webp?v=1732378254","\/\/www.thebirthstore.com.au\/cdn\/shop\/files\/mini-me-hydramama-487372.webp?v=1732378254","\/\/www.thebirthstore.com.au\/cdn\/shop\/files\/mini-me-hydramama-287801.webp?v=1732378254","\/\/www.thebirthstore.com.au\/cdn\/shop\/files\/mini-me-hydramama-843305.webp?v=1732378254","\/\/www.thebirthstore.com.au\/cdn\/shop\/files\/mini-me-hydramama-509062.webp?v=1732378254","\/\/www.thebirthstore.com.au\/cdn\/shop\/files\/mini-me-hydramama-292065.webp?v=1732378254","\/\/www.thebirthstore.com.au\/cdn\/shop\/files\/mini-me-hydramama-296847.jpg?v=1732378254","\/\/www.thebirthstore.com.au\/cdn\/shop\/files\/mini-me-hydramama-521878.webp?v=1732378254","\/\/www.thebirthstore.com.au\/cdn\/shop\/files\/mini-me-hydramama-632449.webp?v=1732378254","\/\/www.thebirthstore.com.au\/cdn\/shop\/files\/mini-me-hydramama-327387.webp?v=1732378254","\/\/www.thebirthstore.com.au\/cdn\/shop\/files\/mini-me-hydramama-366357.webp?v=1732378254","\/\/www.thebirthstore.com.au\/cdn\/shop\/files\/mini-me-hydramama-130389.webp?v=1732378254","\/\/www.thebirthstore.com.au\/cdn\/shop\/files\/mini-me-hydramama-651803.webp?v=1732378254","\/\/www.thebirthstore.com.au\/cdn\/shop\/files\/mini-me-hydramama-908370.webp?v=1732626991","\/\/www.thebirthstore.com.au\/cdn\/shop\/files\/mini-me-hydramama-611420.webp?v=1734946846","\/\/www.thebirthstore.com.au\/cdn\/shop\/files\/Passionfruit_Orange.webp?v=1734933927","\/\/www.thebirthstore.com.au\/cdn\/shop\/files\/mini-me-hydramama-115601.webp?v=1734946846","\/\/www.thebirthstore.com.au\/cdn\/shop\/files\/mini-me-hydramama-962335.webp?v=1734946846","\/\/www.thebirthstore.com.au\/cdn\/shop\/files\/mini-me-hydramama-9530031.png?v=1762143776","\/\/www.thebirthstore.com.au\/cdn\/shop\/files\/mini-me-hydramama-6807804.png?v=1762143776","\/\/www.thebirthstore.com.au\/cdn\/shop\/files\/mini-me-hydramama-7128187.png?v=1762143776","\/\/www.thebirthstore.com.au\/cdn\/shop\/files\/mini-me-hydramama-5447464.png?v=1762143777","\/\/www.thebirthstore.com.au\/cdn\/shop\/files\/mini-me-hydramama-5259142.png?v=1762143777","\/\/www.thebirthstore.com.au\/cdn\/shop\/files\/mini-me-hydramama-4894441.png?v=1762143777","\/\/www.thebirthstore.com.au\/cdn\/shop\/files\/mini-me-hydramama-9357362.png?v=1762143778","\/\/www.thebirthstore.com.au\/cdn\/shop\/files\/mini-me-hydramama-3590130.png?v=1762143778","\/\/www.thebirthstore.com.au\/cdn\/shop\/files\/mini-me-hydramama-7796965.png?v=1778063525","\/\/www.thebirthstore.com.au\/cdn\/shop\/files\/mini-me-hydramama-1313056.webp?v=1782620706"],"featured_image":"\/\/www.thebirthstore.com.au\/cdn\/shop\/files\/mini-me-hydramama-978042.jpg?v=1732461065","options":["Flavour"],"media":[{"alt":"Mini + Me Hydramama - The Birth Store - Mini + Me","id":27925714305213,"position":1,"preview_image":{"aspect_ratio":1.0,"height":1080,"width":1080,"src":"\/\/www.thebirthstore.com.au\/cdn\/shop\/files\/mini-me-hydramama-978042.jpg?v=1732461065"},"aspect_ratio":1.0,"height":1080,"media_type":"image","src":"\/\/www.thebirthstore.com.au\/cdn\/shop\/files\/mini-me-hydramama-978042.jpg?v=1732461065","width":1080},{"alt":"Mini + Me Hydramama - The Birth Store - Mini + Me","id":27923398688957,"position":2,"preview_image":{"aspect_ratio":1.0,"height":1080,"width":1080,"src":"\/\/www.thebirthstore.com.au\/cdn\/shop\/files\/mini-me-hydramama-533803.webp?v=1732378254"},"aspect_ratio":1.0,"height":1080,"media_type":"image","src":"\/\/www.thebirthstore.com.au\/cdn\/shop\/files\/mini-me-hydramama-533803.webp?v=1732378254","width":1080},{"alt":"Mini + Me Hydramama - The Birth Store - Mini + Me","id":27923398656189,"position":3,"preview_image":{"aspect_ratio":1.681,"height":545,"width":916,"src":"\/\/www.thebirthstore.com.au\/cdn\/shop\/files\/mini-me-hydramama-916939.jpg?v=1732378254"},"aspect_ratio":1.681,"height":545,"media_type":"image","src":"\/\/www.thebirthstore.com.au\/cdn\/shop\/files\/mini-me-hydramama-916939.jpg?v=1732378254","width":916},{"alt":"Mini + Me Hydramama - The Birth Store - Mini + Me","id":31355251654845,"position":4,"preview_image":{"aspect_ratio":1.0,"height":2000,"width":2000,"src":"\/\/www.thebirthstore.com.au\/cdn\/shop\/files\/mini-me-hydramama-8621853.png?v=1778560746"},"aspect_ratio":1.0,"height":2000,"media_type":"image","src":"\/\/www.thebirthstore.com.au\/cdn\/shop\/files\/mini-me-hydramama-8621853.png?v=1778560746","width":2000},{"alt":"Mini + Me Hydramama - The Birth Store - Mini + Me","id":27923398721725,"position":5,"preview_image":{"aspect_ratio":1.0,"height":1080,"width":1080,"src":"\/\/www.thebirthstore.com.au\/cdn\/shop\/files\/mini-me-hydramama-393133.webp?v=1732378254"},"aspect_ratio":1.0,"height":1080,"media_type":"image","src":"\/\/www.thebirthstore.com.au\/cdn\/shop\/files\/mini-me-hydramama-393133.webp?v=1732378254","width":1080},{"alt":"Mini + Me Hydramama - The Birth Store - Mini + Me","id":27923398754493,"position":6,"preview_image":{"aspect_ratio":1.0,"height":1445,"width":1445,"src":"\/\/www.thebirthstore.com.au\/cdn\/shop\/files\/mini-me-hydramama-487372.webp?v=1732378254"},"aspect_ratio":1.0,"height":1445,"media_type":"image","src":"\/\/www.thebirthstore.com.au\/cdn\/shop\/files\/mini-me-hydramama-487372.webp?v=1732378254","width":1445},{"alt":"Mini + Me Hydramama - The Birth Store - Mini + Me","id":27923398787261,"position":7,"preview_image":{"aspect_ratio":1.0,"height":1445,"width":1445,"src":"\/\/www.thebirthstore.com.au\/cdn\/shop\/files\/mini-me-hydramama-287801.webp?v=1732378254"},"aspect_ratio":1.0,"height":1445,"media_type":"image","src":"\/\/www.thebirthstore.com.au\/cdn\/shop\/files\/mini-me-hydramama-287801.webp?v=1732378254","width":1445},{"alt":"Mini + Me Hydramama - The Birth Store - Mini + Me","id":27923398820029,"position":8,"preview_image":{"aspect_ratio":1.0,"height":1080,"width":1080,"src":"\/\/www.thebirthstore.com.au\/cdn\/shop\/files\/mini-me-hydramama-843305.webp?v=1732378254"},"aspect_ratio":1.0,"height":1080,"media_type":"image","src":"\/\/www.thebirthstore.com.au\/cdn\/shop\/files\/mini-me-hydramama-843305.webp?v=1732378254","width":1080},{"alt":"Mini + Me Hydramama - The Birth Store - Mini + Me","id":27923398885565,"position":9,"preview_image":{"aspect_ratio":1.0,"height":1080,"width":1080,"src":"\/\/www.thebirthstore.com.au\/cdn\/shop\/files\/mini-me-hydramama-509062.webp?v=1732378254"},"aspect_ratio":1.0,"height":1080,"media_type":"image","src":"\/\/www.thebirthstore.com.au\/cdn\/shop\/files\/mini-me-hydramama-509062.webp?v=1732378254","width":1080},{"alt":"Mini + Me Hydramama - The Birth Store - Mini + Me","id":27923398918333,"position":10,"preview_image":{"aspect_ratio":1.0,"height":1445,"width":1445,"src":"\/\/www.thebirthstore.com.au\/cdn\/shop\/files\/mini-me-hydramama-292065.webp?v=1732378254"},"aspect_ratio":1.0,"height":1445,"media_type":"image","src":"\/\/www.thebirthstore.com.au\/cdn\/shop\/files\/mini-me-hydramama-292065.webp?v=1732378254","width":1445},{"alt":"Mini + Me Hydramama - The Birth Store - Mini + Me","id":27923398951101,"position":11,"preview_image":{"aspect_ratio":1.681,"height":545,"width":916,"src":"\/\/www.thebirthstore.com.au\/cdn\/shop\/files\/mini-me-hydramama-296847.jpg?v=1732378254"},"aspect_ratio":1.681,"height":545,"media_type":"image","src":"\/\/www.thebirthstore.com.au\/cdn\/shop\/files\/mini-me-hydramama-296847.jpg?v=1732378254","width":916},{"alt":"Mini + Me Hydramama - The Birth Store - Mini + Me","id":27923398983869,"position":12,"preview_image":{"aspect_ratio":1.0,"height":1080,"width":1080,"src":"\/\/www.thebirthstore.com.au\/cdn\/shop\/files\/mini-me-hydramama-521878.webp?v=1732378254"},"aspect_ratio":1.0,"height":1080,"media_type":"image","src":"\/\/www.thebirthstore.com.au\/cdn\/shop\/files\/mini-me-hydramama-521878.webp?v=1732378254","width":1080},{"alt":"Mini + Me Hydramama - The Birth Store - Mini + Me","id":27923399016637,"position":13,"preview_image":{"aspect_ratio":1.0,"height":1445,"width":1445,"src":"\/\/www.thebirthstore.com.au\/cdn\/shop\/files\/mini-me-hydramama-632449.webp?v=1732378254"},"aspect_ratio":1.0,"height":1445,"media_type":"image","src":"\/\/www.thebirthstore.com.au\/cdn\/shop\/files\/mini-me-hydramama-632449.webp?v=1732378254","width":1445},{"alt":"Mini + Me Hydramama - The Birth Store - Mini + Me","id":27923399049405,"position":14,"preview_image":{"aspect_ratio":1.0,"height":1080,"width":1080,"src":"\/\/www.thebirthstore.com.au\/cdn\/shop\/files\/mini-me-hydramama-327387.webp?v=1732378254"},"aspect_ratio":1.0,"height":1080,"media_type":"image","src":"\/\/www.thebirthstore.com.au\/cdn\/shop\/files\/mini-me-hydramama-327387.webp?v=1732378254","width":1080},{"alt":"Mini + Me Hydramama - The Birth Store - Mini + Me","id":27923399082173,"position":15,"preview_image":{"aspect_ratio":1.0,"height":1445,"width":1445,"src":"\/\/www.thebirthstore.com.au\/cdn\/shop\/files\/mini-me-hydramama-366357.webp?v=1732378254"},"aspect_ratio":1.0,"height":1445,"media_type":"image","src":"\/\/www.thebirthstore.com.au\/cdn\/shop\/files\/mini-me-hydramama-366357.webp?v=1732378254","width":1445},{"alt":"Mini + Me Hydramama - The Birth Store - Mini + Me","id":27923399114941,"position":16,"preview_image":{"aspect_ratio":1.0,"height":1080,"width":1080,"src":"\/\/www.thebirthstore.com.au\/cdn\/shop\/files\/mini-me-hydramama-130389.webp?v=1732378254"},"aspect_ratio":1.0,"height":1080,"media_type":"image","src":"\/\/www.thebirthstore.com.au\/cdn\/shop\/files\/mini-me-hydramama-130389.webp?v=1732378254","width":1080},{"alt":"Mini + Me Hydramama - The Birth Store - Mini + Me","id":27923399147709,"position":17,"preview_image":{"aspect_ratio":1.0,"height":1445,"width":1445,"src":"\/\/www.thebirthstore.com.au\/cdn\/shop\/files\/mini-me-hydramama-651803.webp?v=1732378254"},"aspect_ratio":1.0,"height":1445,"media_type":"image","src":"\/\/www.thebirthstore.com.au\/cdn\/shop\/files\/mini-me-hydramama-651803.webp?v=1732378254","width":1445},{"alt":"Mini + Me Hydramama - The Birth Store - Mini + Me","id":27930820018365,"position":18,"preview_image":{"aspect_ratio":1.0,"height":700,"width":700,"src":"\/\/www.thebirthstore.com.au\/cdn\/shop\/files\/mini-me-hydramama-908370.webp?v=1732626991"},"aspect_ratio":1.0,"height":700,"media_type":"image","src":"\/\/www.thebirthstore.com.au\/cdn\/shop\/files\/mini-me-hydramama-908370.webp?v=1732626991","width":700},{"alt":"Mini + Me Hydramama - The Birth Store - Mini + Me","id":28045888913597,"position":19,"preview_image":{"aspect_ratio":1.0,"height":1080,"width":1080,"src":"\/\/www.thebirthstore.com.au\/cdn\/shop\/files\/mini-me-hydramama-611420.webp?v=1734946846"},"aspect_ratio":1.0,"height":1080,"media_type":"image","src":"\/\/www.thebirthstore.com.au\/cdn\/shop\/files\/mini-me-hydramama-611420.webp?v=1734946846","width":1080},{"alt":null,"id":28045193511101,"position":20,"preview_image":{"aspect_ratio":1.0,"height":1080,"width":1080,"src":"\/\/www.thebirthstore.com.au\/cdn\/shop\/files\/Passionfruit_Orange.webp?v=1734933927"},"aspect_ratio":1.0,"height":1080,"media_type":"image","src":"\/\/www.thebirthstore.com.au\/cdn\/shop\/files\/Passionfruit_Orange.webp?v=1734933927","width":1080},{"alt":"Mini + Me Hydramama - The Birth Store - Mini + Me","id":28045888946365,"position":21,"preview_image":{"aspect_ratio":1.0,"height":1680,"width":1680,"src":"\/\/www.thebirthstore.com.au\/cdn\/shop\/files\/mini-me-hydramama-115601.webp?v=1734946846"},"aspect_ratio":1.0,"height":1680,"media_type":"image","src":"\/\/www.thebirthstore.com.au\/cdn\/shop\/files\/mini-me-hydramama-115601.webp?v=1734946846","width":1680},{"alt":"Mini + Me Hydramama - The Birth Store - Mini + Me","id":28045888979133,"position":22,"preview_image":{"aspect_ratio":1.0,"height":1680,"width":1680,"src":"\/\/www.thebirthstore.com.au\/cdn\/shop\/files\/mini-me-hydramama-962335.webp?v=1734946846"},"aspect_ratio":1.0,"height":1680,"media_type":"image","src":"\/\/www.thebirthstore.com.au\/cdn\/shop\/files\/mini-me-hydramama-962335.webp?v=1734946846","width":1680},{"alt":"Mini + Me Hydramama - The Birth Store - Mini + Me","id":29991211434173,"position":23,"preview_image":{"aspect_ratio":1.0,"height":1080,"width":1080,"src":"\/\/www.thebirthstore.com.au\/cdn\/shop\/files\/mini-me-hydramama-9530031.png?v=1762143776"},"aspect_ratio":1.0,"height":1080,"media_type":"image","src":"\/\/www.thebirthstore.com.au\/cdn\/shop\/files\/mini-me-hydramama-9530031.png?v=1762143776","width":1080},{"alt":"Mini + Me Hydramama - The Birth Store - Mini + Me","id":29991214710973,"position":24,"preview_image":{"aspect_ratio":1.0,"height":1080,"width":1080,"src":"\/\/www.thebirthstore.com.au\/cdn\/shop\/files\/mini-me-hydramama-6807804.png?v=1762143776"},"aspect_ratio":1.0,"height":1080,"media_type":"image","src":"\/\/www.thebirthstore.com.au\/cdn\/shop\/files\/mini-me-hydramama-6807804.png?v=1762143776","width":1080},{"alt":"Mini + Me Hydramama - The Birth Store - Mini + Me","id":29991213105341,"position":25,"preview_image":{"aspect_ratio":1.0,"height":1080,"width":1080,"src":"\/\/www.thebirthstore.com.au\/cdn\/shop\/files\/mini-me-hydramama-7128187.png?v=1762143776"},"aspect_ratio":1.0,"height":1080,"media_type":"image","src":"\/\/www.thebirthstore.com.au\/cdn\/shop\/files\/mini-me-hydramama-7128187.png?v=1762143776","width":1080},{"alt":"Mini + Me Hydramama - The Birth Store - Mini + Me","id":29991218905277,"position":26,"preview_image":{"aspect_ratio":1.0,"height":1080,"width":1080,"src":"\/\/www.thebirthstore.com.au\/cdn\/shop\/files\/mini-me-hydramama-5447464.png?v=1762143777"},"aspect_ratio":1.0,"height":1080,"media_type":"image","src":"\/\/www.thebirthstore.com.au\/cdn\/shop\/files\/mini-me-hydramama-5447464.png?v=1762143777","width":1080},{"alt":"Mini + Me Hydramama - The Birth Store - Mini + Me","id":29991214284989,"position":27,"preview_image":{"aspect_ratio":1.0,"height":1080,"width":1080,"src":"\/\/www.thebirthstore.com.au\/cdn\/shop\/files\/mini-me-hydramama-5259142.png?v=1762143777"},"aspect_ratio":1.0,"height":1080,"media_type":"image","src":"\/\/www.thebirthstore.com.au\/cdn\/shop\/files\/mini-me-hydramama-5259142.png?v=1762143777","width":1080},{"alt":"Mini + Me Hydramama - The Birth Store - Mini + Me","id":29991212155069,"position":28,"preview_image":{"aspect_ratio":1.0,"height":1080,"width":1080,"src":"\/\/www.thebirthstore.com.au\/cdn\/shop\/files\/mini-me-hydramama-4894441.png?v=1762143777"},"aspect_ratio":1.0,"height":1080,"media_type":"image","src":"\/\/www.thebirthstore.com.au\/cdn\/shop\/files\/mini-me-hydramama-4894441.png?v=1762143777","width":1080},{"alt":"Mini + Me Hydramama - The Birth Store - Mini + Me","id":29991215497405,"position":29,"preview_image":{"aspect_ratio":1.0,"height":1080,"width":1080,"src":"\/\/www.thebirthstore.com.au\/cdn\/shop\/files\/mini-me-hydramama-9357362.png?v=1762143778"},"aspect_ratio":1.0,"height":1080,"media_type":"image","src":"\/\/www.thebirthstore.com.au\/cdn\/shop\/files\/mini-me-hydramama-9357362.png?v=1762143778","width":1080},{"alt":"Mini + Me Hydramama - The Birth Store - Mini + Me","id":29991217725629,"position":30,"preview_image":{"aspect_ratio":1.0,"height":1080,"width":1080,"src":"\/\/www.thebirthstore.com.au\/cdn\/shop\/files\/mini-me-hydramama-3590130.png?v=1762143778"},"aspect_ratio":1.0,"height":1080,"media_type":"image","src":"\/\/www.thebirthstore.com.au\/cdn\/shop\/files\/mini-me-hydramama-3590130.png?v=1762143778","width":1080},{"alt":"Mini + Me Hydramama - The Birth Store - Mini + Me","id":31321970802877,"position":31,"preview_image":{"aspect_ratio":1.0,"height":1000,"width":1000,"src":"\/\/www.thebirthstore.com.au\/cdn\/shop\/files\/mini-me-hydramama-7796965.png?v=1778063525"},"aspect_ratio":1.0,"height":1000,"media_type":"image","src":"\/\/www.thebirthstore.com.au\/cdn\/shop\/files\/mini-me-hydramama-7796965.png?v=1778063525","width":1000},{"alt":"Mini + Me Hydramama - The Birth Store-Mini + Me","id":31659165712573,"position":32,"preview_image":{"aspect_ratio":1.0,"height":1680,"width":1680,"src":"\/\/www.thebirthstore.com.au\/cdn\/shop\/files\/mini-me-hydramama-1313056.webp?v=1782620706"},"aspect_ratio":1.0,"height":1680,"media_type":"image","src":"\/\/www.thebirthstore.com.au\/cdn\/shop\/files\/mini-me-hydramama-1313056.webp?v=1782620706","width":1680}],"requires_selling_plan":false,"selling_plan_groups":[],"content":"\u003ch1 class=\"text-left margin-b-20 col8 black\"\u003eHydramama®\u003c\/h1\u003e\n\u003ch2 class=\"text-left margin-b-20 primary\"\u003eSay Hello to your Hydration Hero\u003cspan\u003e\u003c\/span\u003e\n\u003c\/h2\u003e\n\u003cp dir=\"ltr\"\u003e\u003cspan\u003eHydramama is a zero sugar hydration drink made with Sodium, Potassium, Magnesium, Vitamin B6, Vitamin C and Methylated Folate. Designed with expecting and new parents in mind, from pre-conception right through to postpartum and beyond.\u003c\/span\u003e\u003c\/p\u003e\n\u003cp dir=\"ltr\"\u003e\u003cspan\u003e\u003cbr\u003e\u003c\/span\u003e\u003cspan\u003eCreated by a mum who’s been there, and backed by midwives.\u003c\/span\u003e\u003c\/p\u003e\n\u003cp\u003e\u003cb\u003e\u003cbr\u003e\u003c\/b\u003e\u003c\/p\u003e\n\u003ch3 dir=\"ltr\"\u003e\n\u003cspan\u003eDescription \/ Why it is great:\u003c\/span\u003e\u003cb\u003e\u003c\/b\u003e\n\u003c\/h3\u003e\n\u003cp dir=\"ltr\"\u003e\u003cspan\u003eHydramama is a formulated beverage designed with expecting and new parents in mind, from pre-conception right through to postpartum and beyond.\u003c\/span\u003e\u003cb\u003e\u003c\/b\u003e\u003c\/p\u003e\n\u003cp dir=\"ltr\"\u003e\u003cspan\u003eFormulated with Magnesium, Sodium, Potassium, Vitamin C, Vitamin B6 and bioavailable Methylated Folate, and available in 10 delicious flavours, it’s simple to mix and easy to love. \u003c\/span\u003e\u003cb\u003e\u003c\/b\u003e\u003c\/p\u003e\n\u003cp dir=\"ltr\"\u003e\u003cspan\u003e🥇 CLEAN + CONSCIOUS AWARDS 2024: Gold in the \"Best Women's Health Product\" category.\u003c\/span\u003e\u003c\/p\u003e\n\u003cp dir=\"ltr\"\u003e\u003cspan\u003e🥇 BOUNTY BABY AWARDS 2025: Gold Medal in \"Best Product or Service for Mum\" category.\u003c\/span\u003e\u003c\/p\u003e\n\u003cp dir=\"ltr\"\u003e\u003cspan\u003e🥈 BOUNTY BABY AWARDS 2025: Silver Medal in \"Best Vitamin or Supplement for Mum\" category.\u003c\/span\u003e\u003c\/p\u003e\n\u003cp dir=\"ltr\"\u003e\u003cspan\u003e🥈 BOUNTY BABY AWARDS 2024: Silver Medal in \"Best Vitamin or Supplement for Mum\" category.\u003c\/span\u003e\u003c\/p\u003e\n\u003cp dir=\"ltr\"\u003e\u003cspan\u003e🥉 BOUNTY BABY AWARDS 2024\" Bronze Medal in \"Best Product or Service for Mum\" category.\u003c\/span\u003e\u003c\/p\u003e\n\u003cp\u003e\u003cb\u003e\u003cbr\u003e\u003c\/b\u003e\u003c\/p\u003e\n\u003ch3 dir=\"ltr\"\u003e\u003cspan\u003eWhy Hydramama?\u003c\/span\u003e\u003c\/h3\u003e\n\u003cp dir=\"ltr\"\u003e\u003cspan\u003eClean hydration support, every day. Some days, water just doesn't cut it. Designed with real parents at the centre, Hydramama is a great-tasting, sugar-free hydration drink, simple to use and make a part of your daily routine.\u003c\/span\u003e\u003cb\u003e\u003c\/b\u003e\u003c\/p\u003e\n\u003cp dir=\"ltr\"\u003e\u003cspan\u003eHydramama is carefully formulated with the nutritional needs of women in mind, a true hydration support for motherhood. Suitable for use during pregnancy, while breastfeeding, and for the whole family. \u003c\/span\u003e\u003c\/p\u003e\n\u003cp\u003e\u003cb\u003e\u003cbr\u003e\u003c\/b\u003e\u003c\/p\u003e\n\u003ch3 dir=\"ltr\"\u003e\u003cspan\u003eFormulated with: \u003c\/span\u003e\u003c\/h3\u003e\n\u003cul\u003e\n\u003cli dir=\"ltr\"\u003e\n\u003cp dir=\"ltr\" role=\"presentation\"\u003e\u003cspan\u003eMagnesium + sodium + potassium: magnesium supports electrolyte balance and nerve and muscle function.\u003c\/span\u003e\u003c\/p\u003e\n\u003c\/li\u003e\n\u003cli dir=\"ltr\"\u003e\n\u003cp dir=\"ltr\" role=\"presentation\"\u003e\u003cspan\u003eMethylated Folate \u0026amp; Vitamin B6: containing a bioavailable source of folate alongside vitamin B6, nutrients involved in energy metabolism and general wellness.\u003c\/span\u003e\u003c\/p\u003e\n\u003c\/li\u003e\n\u003cli dir=\"ltr\"\u003e\n\u003cp dir=\"ltr\" role=\"presentation\"\u003e\u003cspan\u003eVitamin C: helps to reduce tiredness and fatigue and support immunity.\u003c\/span\u003e\u003c\/p\u003e\n\u003c\/li\u003e\n\u003c\/ul\u003e\n\u003cp\u003e\u003cb\u003e\u003cbr\u003e\u003c\/b\u003e\u003c\/p\u003e\n\u003cp dir=\"ltr\"\u003e\u003cspan\u003eZero sugar, no artificial colours, full of flavour. The Hydramama range offers clean, refreshing hydration support.\u003c\/span\u003e\u003cb\u003e\u003c\/b\u003e\u003c\/p\u003e\n\u003cp dir=\"ltr\"\u003e\u003cspan\u003eHydramama is proudly Endorsed by the Australian College of Midwives, and designed to support parents from pre-conception to postpartum and beyond. \u003c\/span\u003e\u003c\/p\u003e\n\u003cp\u003e\u003cb\u003e\u003cbr\u003e\u003c\/b\u003e\u003c\/p\u003e\n\u003ch3 dir=\"ltr\"\u003e\u003cspan\u003eHow to Use\u003c\/span\u003e\u003c\/h3\u003e\n\u003cp dir=\"ltr\"\u003e\u003cspan\u003eMix one sachet (8g) into 250-600mL of cold water. Enjoy as required. Suitable for pregnancy, breastfeeding and for children, following advice from your healthcare professional.\u003c\/span\u003e\u003cb\u003e\u003c\/b\u003e\u003c\/p\u003e\n\u003cp dir=\"ltr\"\u003e \u003c\/p\u003e\n\u003ch3 dir=\"ltr\"\u003e\u003cspan\u003eWhat’s Inside Hydramama?\u003c\/span\u003e\u003c\/h3\u003e\n\u003ch5 dir=\"ltr\"\u003e\u003cspan\u003eMagnesium + Minerals (Sodium + Potassium) \u003c\/span\u003e\u003c\/h5\u003e\n\u003cp dir=\"ltr\"\u003e\u003cspan\u003eMagnesium supports electrolyte balance, as well as nerve and muscle function. It also contributes to a reduction of tiredness and fatigue and supports psychological function.\u003c\/span\u003e\u003cb\u003e\u003c\/b\u003e\u003c\/p\u003e\n\u003ch5 dir=\"ltr\"\u003e\u003cspan\u003eVitamin C\u003c\/span\u003e\u003c\/h5\u003e\n\u003cp dir=\"ltr\"\u003e\u003cspan\u003eVitamin C contributes to energy metabolism, immune system function, and connective tissue function. It also contributes to a reduction of tiredness and fatigue.\u003c\/span\u003e\u003cb\u003e\u003c\/b\u003e\u003c\/p\u003e\n\u003ch5 dir=\"ltr\"\u003e\u003cspan\u003eVitamin B6\u003c\/span\u003e\u003c\/h5\u003e\n\u003cp dir=\"ltr\"\u003e\u003cspan\u003eVitamin B6 contributes to normal energy metabolism, nervous system function, red blood cell formation, and the regulation of hormonal activity.\u003c\/span\u003e\u003cb\u003e\u003c\/b\u003e\u003c\/p\u003e\n\u003ch5 dir=\"ltr\"\u003e\u003cspan\u003eBioavailable Methylated Folate\u003c\/span\u003e\u003c\/h5\u003e\n\u003cp dir=\"ltr\"\u003e\u003cspan\u003eContains bioavailable folate (50µg per serve, 25% RDI). Folate contributes to maternal tissue growth during pregnancy, normal blood formation, and a reduction of tiredness and fatigue.\u003c\/span\u003e\u003c\/p\u003e\n\u003cp\u003e\u003cb\u003e\u003cbr\u003e\u003c\/b\u003e\u003c\/p\u003e\n\u003cp dir=\"ltr\"\u003e\u003cem\u003e*Please note: Hydramama is designed to complement a balanced diet and is not intended as a replacement for prenatal vitamins.\u003c\/em\u003e\u003c\/p\u003e\n\u003cp\u003e\u003cb\u003e\u003cbr\u003e\u003c\/b\u003e\u003c\/p\u003e\n\u003ch3 dir=\"ltr\"\u003e\u003cspan\u003eIngredients:\u003c\/span\u003e\u003c\/h3\u003e\n\u003cp dir=\"ltr\"\u003e\u003cspan\u003eNatural Sweetener (Erythritol), Mineral Salts (Sodium Chloride, Potassium Phosphate, Magnesium Glycinate, Sodium Citrate), Food Acid (Citric), Natural Flavours, Natural Colour, Vitamins [Ascorbic Acid, Pyridoxine Hydrochloride (Vitamin B6), L-Methyl Folate Calcium (Vitamin B9)].\u003c\/span\u003e\u003cb\u003e\u003c\/b\u003e\u003c\/p\u003e\n\u003cp dir=\"ltr\"\u003e\u003cspan\u003eFormulated beverage when made up as per instruction. This product should be consumed alongside a nutritious diet. Store below 25°C in a cool dry place, away from direct sunlight.\u003c\/span\u003e\u003c\/p\u003e\n\u003cp dir=\"ltr\"\u003e\u003cspan\u003eHydramama is a formulated beverage when prepared as directed, made in accordance with the Food Standards Code (FSANZ) for Australia and New Zealand. It is intended to be enjoyed alongside a balanced diet. If you are pregnant or breastfeeding, considering use for a child, have any underlying health conditions, take medications or supplements, consult a healthcare professional before use.\u003c\/span\u003e\u003c\/p\u003e"},"options":[{"name":"Flavour","position":1,"values":["Blackcurrant","Lemonade","Cola","Watermelon + Lime","Passionfruit + Orange","Apple + Ginger","Peach Iced Tea","Tropical","Mixed Berry","Grape"]}],"custom_metafields":{},"metafields":{"badge":"\u003cdiv style='display:none' class='jdgm-prev-badge' data-average-rating='5.00' data-number-of-reviews='1' data-number-of-questions='0'\u003e \u003cspan class='jdgm-prev-badge__stars' data-score='5.00' tabindex='0' aria-label='5.00 stars' role='button'\u003e \u003cspan class='jdgm-star jdgm--on'\u003e\u003c\/span\u003e\u003cspan class='jdgm-star jdgm--on'\u003e\u003c\/span\u003e\u003cspan class='jdgm-star jdgm--on'\u003e\u003c\/span\u003e\u003cspan class='jdgm-star jdgm--on'\u003e\u003c\/span\u003e\u003cspan class='jdgm-star jdgm--on'\u003e\u003c\/span\u003e \u003c\/span\u003e \u003cspan class='jdgm-prev-badge__text'\u003e 1 review \u003c\/span\u003e \u003c\/div\u003e","widget":"\u003cdiv class='jdgm-rev-widg' data-updated-at='2026-10-17T20:49:01Z' data-average-rating='5.00' data-number-of-reviews='1' data-number-of-questions='0' data-image-url='https:\/\/cdn.shopify.com\/s\/files\/1\/0527\/3393\/5805\/files\/mini-me-hydramama-978042.jpg?v=1732461065'\u003e \u003cstyle class='jdgm-temp-hiding-style'\u003e.jdgm-rev-widg{ display: none }\u003c\/style\u003e \u003cdiv class='jdgm-rev-widg__header'\u003e \u003ch2 class='jdgm-rev-widg__title'\u003eCustomer Reviews\u003c\/h2\u003e \u003cdiv class='jdgm-rev-widg__summary'\u003e \u003cdiv class='jdgm-rev-widg__summary-stars' aria-label='Average rating is 5.00 stars' role='img'\u003e \u003cspan class='jdgm-star jdgm--on'\u003e\u003c\/span\u003e\u003cspan class='jdgm-star jdgm--on'\u003e\u003c\/span\u003e\u003cspan class='jdgm-star jdgm--on'\u003e\u003c\/span\u003e\u003cspan class='jdgm-star jdgm--on'\u003e\u003c\/span\u003e\u003cspan class='jdgm-star jdgm--on'\u003e\u003c\/span\u003e \u003c\/div\u003e \u003cdiv class='jdgm-rev-widg__summary-text'\u003eBased on 1 review\u003c\/div\u003e \u003c\/div\u003e \u003ca style='display: none' href='#' class='jdgm-write-rev-link' role='button'\u003eWrite a review\u003c\/a\u003e \u003cdiv class='jdgm-histogram jdgm-temp-hidden'\u003e \u003cdiv class='jdgm-histogram__row' data-rating='5' data-frequency='1' data-percentage='100'\u003e \u003cdiv class='jdgm-histogram__star' role='button' aria-label=\"100% (1) reviews with 5 star rating\" tabindex='0' \u003e\u003cspan class='jdgm-star jdgm--on'\u003e\u003c\/span\u003e\u003cspan class='jdgm-star jdgm--on'\u003e\u003c\/span\u003e\u003cspan class='jdgm-star jdgm--on'\u003e\u003c\/span\u003e\u003cspan class='jdgm-star jdgm--on'\u003e\u003c\/span\u003e\u003cspan class='jdgm-star jdgm--on'\u003e\u003c\/span\u003e\u003c\/div\u003e \u003cdiv class='jdgm-histogram__bar'\u003e \u003cdiv class='jdgm-histogram__bar-content' style='width: 100%;'\u003e \u003c\/div\u003e \u003c\/div\u003e \u003cdiv class='jdgm-histogram__percentage'\u003e100%\u003c\/div\u003e \u003cdiv class='jdgm-histogram__frequency'\u003e(1)\u003c\/div\u003e \u003c\/div\u003e \u003cdiv class='jdgm-histogram__row' data-rating='4' data-frequency='0' data-percentage='0'\u003e \u003cdiv class='jdgm-histogram__star' role='button' aria-label=\"0% (0) reviews with 4 star rating\" tabindex='0' \u003e\u003cspan class='jdgm-star jdgm--on'\u003e\u003c\/span\u003e\u003cspan class='jdgm-star jdgm--on'\u003e\u003c\/span\u003e\u003cspan class='jdgm-star jdgm--on'\u003e\u003c\/span\u003e\u003cspan class='jdgm-star jdgm--on'\u003e\u003c\/span\u003e\u003cspan class='jdgm-star jdgm--off'\u003e\u003c\/span\u003e\u003c\/div\u003e \u003cdiv class='jdgm-histogram__bar'\u003e \u003cdiv class='jdgm-histogram__bar-content' style='width: 0%;'\u003e \u003c\/div\u003e \u003c\/div\u003e \u003cdiv class='jdgm-histogram__percentage'\u003e0%\u003c\/div\u003e \u003cdiv class='jdgm-histogram__frequency'\u003e(0)\u003c\/div\u003e \u003c\/div\u003e \u003cdiv class='jdgm-histogram__row' data-rating='3' data-frequency='0' data-percentage='0'\u003e \u003cdiv class='jdgm-histogram__star' role='button' aria-label=\"0% (0) reviews with 3 star rating\" tabindex='0' \u003e\u003cspan class='jdgm-star jdgm--on'\u003e\u003c\/span\u003e\u003cspan class='jdgm-star jdgm--on'\u003e\u003c\/span\u003e\u003cspan class='jdgm-star jdgm--on'\u003e\u003c\/span\u003e\u003cspan class='jdgm-star jdgm--off'\u003e\u003c\/span\u003e\u003cspan class='jdgm-star jdgm--off'\u003e\u003c\/span\u003e\u003c\/div\u003e \u003cdiv class='jdgm-histogram__bar'\u003e \u003cdiv class='jdgm-histogram__bar-content' style='width: 0%;'\u003e \u003c\/div\u003e \u003c\/div\u003e \u003cdiv class='jdgm-histogram__percentage'\u003e0%\u003c\/div\u003e \u003cdiv class='jdgm-histogram__frequency'\u003e(0)\u003c\/div\u003e \u003c\/div\u003e \u003cdiv class='jdgm-histogram__row' data-rating='2' data-frequency='0' data-percentage='0'\u003e \u003cdiv class='jdgm-histogram__star' role='button' aria-label=\"0% (0) reviews with 2 star rating\" tabindex='0' \u003e\u003cspan class='jdgm-star jdgm--on'\u003e\u003c\/span\u003e\u003cspan class='jdgm-star jdgm--on'\u003e\u003c\/span\u003e\u003cspan class='jdgm-star jdgm--off'\u003e\u003c\/span\u003e\u003cspan class='jdgm-star jdgm--off'\u003e\u003c\/span\u003e\u003cspan class='jdgm-star jdgm--off'\u003e\u003c\/span\u003e\u003c\/div\u003e \u003cdiv class='jdgm-histogram__bar'\u003e \u003cdiv class='jdgm-histogram__bar-content' style='width: 0%;'\u003e \u003c\/div\u003e \u003c\/div\u003e \u003cdiv class='jdgm-histogram__percentage'\u003e0%\u003c\/div\u003e \u003cdiv class='jdgm-histogram__frequency'\u003e(0)\u003c\/div\u003e \u003c\/div\u003e \u003cdiv class='jdgm-histogram__row' data-rating='1' data-frequency='0' data-percentage='0'\u003e \u003cdiv class='jdgm-histogram__star' role='button' aria-label=\"0% (0) reviews with 1 star rating\" tabindex='0' \u003e\u003cspan class='jdgm-star jdgm--on'\u003e\u003c\/span\u003e\u003cspan class='jdgm-star jdgm--off'\u003e\u003c\/span\u003e\u003cspan class='jdgm-star jdgm--off'\u003e\u003c\/span\u003e\u003cspan class='jdgm-star jdgm--off'\u003e\u003c\/span\u003e\u003cspan class='jdgm-star jdgm--off'\u003e\u003c\/span\u003e\u003c\/div\u003e \u003cdiv class='jdgm-histogram__bar'\u003e \u003cdiv class='jdgm-histogram__bar-content' style='width: 0%;'\u003e \u003c\/div\u003e \u003c\/div\u003e \u003cdiv class='jdgm-histogram__percentage'\u003e0%\u003c\/div\u003e \u003cdiv class='jdgm-histogram__frequency'\u003e(0)\u003c\/div\u003e \u003c\/div\u003e \u003cdiv class='jdgm-histogram__row jdgm-histogram__clear-filter' data-rating=null tabindex='0'\u003e\u003c\/div\u003e \u003c\/div\u003e \u003cdiv class='jdgm-rev-widg__sort-wrapper'\u003e\u003c\/div\u003e \u003c\/div\u003e \u003cdiv class='jdgm-rev-widg__body'\u003e \u003cdiv class='jdgm-rev-widg__reviews'\u003e\u003cdiv class='jdgm-rev jdgm-divider-top' data-verified-buyer='true' data-review-id='fb8761c7-a9d7-47d2-b424-872858d59b68' data-review-language='' data-product-title='Mini + Me Hydramama' data-product-url='\/products\/mini-me-hydramama' data-thumb-up-count='0' data-thumb-down-count='0'\u003e \u003cdiv class='jdgm-rev__header'\u003e \u003cdiv class='jdgm-rev__icon' \u003e R \u003c\/div\u003e \u003cspan class='jdgm-rev__rating' data-score='5' tabindex='0' aria-label='5 star review' role='img'\u003e \u003cspan class='jdgm-star jdgm--on'\u003e\u003c\/span\u003e\u003cspan class='jdgm-star jdgm--on'\u003e\u003c\/span\u003e\u003cspan class='jdgm-star jdgm--on'\u003e\u003c\/span\u003e\u003cspan class='jdgm-star jdgm--on'\u003e\u003c\/span\u003e\u003cspan class='jdgm-star jdgm--on'\u003e\u003c\/span\u003e \u003c\/span\u003e \u003ctime class='jdgm-rev__timestamp jdgm-spinner' datetime='2025-08-20T06:33:19Z' data-content='2025-08-20 06:33:19 UTC'\u003e\u003c\/time\u003e \u003cdiv class='jdgm-rev__br'\u003e\u003c\/div\u003e \u003cspan class='jdgm-rev__buyer-badge-wrapper'\u003e \u003cspan class='jdgm-rev__buyer-badge'\u003e\u003c\/span\u003e \u003c\/span\u003e \u003cspan class='jdgm-rev__author-wrapper'\u003e \u003cspan class='jdgm-rev__author'\u003eRuhamah Tennant\u003c\/span\u003e \u003cspan class='jdgm-rev__location' \u003e \u003c\/span\u003e \u003c\/span\u003e \u003c\/div\u003e \u003cdiv class='jdgm-rev__content'\u003e \u003cdiv class='jdgm-rev__custom-form'\u003e \u003c\/div\u003e \u003cb class='jdgm-rev__title'\u003e\u003c\/b\u003e \u003cdiv class='jdgm-rev__body'\u003e\u003cp\u003eMini + Me Hydramama\u003c\/p\u003e\u003c\/div\u003e \u003cdiv class='jdgm-rev__pics'\u003e \u003c\/div\u003e \u003cdiv class='jdgm-rev__vids'\u003e \u003c\/div\u003e \u003cdiv class='jdgm-rev__transparency-badge-wrapper'\u003e \u003cdiv class='jdgm-rev__transparency-badge' data-badge-type=review_collected_via_store_invitation\u003e\u003c\/div\u003e \u003c\/div\u003e \u003c\/div\u003e \u003cdiv class='jdgm-rev__actions'\u003e \u003cdiv class='jdgm-rev__social'\u003e\u003c\/div\u003e \u003cdiv class='jdgm-rev__votes'\u003e\u003c\/div\u003e \u003c\/div\u003e \u003cdiv class='jdgm-rev__reply'\u003e \u003cdiv class='jdgm-rev__replier-wrapper'\u003e \u003cb class='jdgm-rev__replier'\u003e\u003c\/b\u003e \u003c\/div\u003e \u003cdiv class='jdgm-rev__reply-content'\u003e\u003cp\u003eWe’re so glad you chose the Mini + Me Hydramama, Ruhamah. ❤️ Thank you for your support, we hope you loved it.\u003c\/p\u003e\u003c\/div\u003e \u003c\/div\u003e \u003c\/div\u003e\u003c\/div\u003e \u003cdiv class='jdgm-paginate' data-per-page='10' data-url='https:\/\/api.judge.me\/reviews\/reviews_for_widget' style=\"display: none;\"\u003e\u003c\/div\u003e \u003c\/div\u003e \u003cdiv class='jdgm-rev-widg__paginate-spinner-wrapper'\u003e \u003cdiv class='jdgm-spinner'\u003e\u003c\/div\u003e \u003c\/div\u003e \u003c\/div\u003e"},"default_reviews_metafields":{"rating":{"scale_min":"1.0","scale_max":"5.0","value":"5.0"},"rating_count":1},"collections":[{"id":512654540989,"handle":"lastof26-10","title":"10%","updated_at":"2026-11-14T20:08:00+08:00","body_html":null,"published_at":"2026-10-12T19:06:42+08:00","sort_order":"best-selling","template_suffix":null,"disjunctive":false,"rules":[],"published_scope":"global"},{"id":281356533949,"handle":"baby-shower-gifts","title":"Baby Shower Gifts - Mum","updated_at":"2026-11-14T20:08:00+08:00","body_html":"\u003cp\u003eLooking for a unique baby shower gift? Or an all-in-one bundle pack to suit all your needs? We've got just the thing!\u003c\/p\u003e","published_at":"2021-12-06T13:43:56+08:00","sort_order":"best-selling","template_suffix":"baby-shower-gifts","disjunctive":true,"rules":[],"published_scope":"global","image":{"created_at":"2024-05-06T11:59:28+08:00","alt":"Baby Shower Gifts - The Birth Store","width":1200,"height":1800,"src":"\/\/www.thebirthstore.com.au\/cdn\/shop\/collections\/baby-shower-gifts-401770.jpg?v=1761791272"}},{"id":281712427197,"handle":"breastfeeding","title":"Breastfeeding","updated_at":"2026-11-14T20:08:00+08:00","body_html":"","published_at":"2021-12-20T14:19:33+08:00","sort_order":"best-selling","template_suffix":"breastfeeding-collection","disjunctive":false,"rules":[],"published_scope":"global","image":{"created_at":"2024-05-06T11:59:34+08:00","alt":"Breastfeeding - The Birth Store","width":620,"height":635,"src":"\/\/www.thebirthstore.com.au\/cdn\/shop\/collections\/breastfeeding-793872.jpg?v=1714967974"}},{"id":261657460925,"handle":"buy","title":"Buy","updated_at":"2026-11-14T20:08:00+08:00","body_html":"\u003cp\u003eBrowse all of our pregnancy, labour \u0026amp; birth, postpartum and baby essentials here.\u003cbr\u003e\u003c\/p\u003e\n\u003cp\u003e\u003cspan\u003eYou can even buy now and pay later with Afterpay!\u003c\/span\u003e\u003c\/p\u003e","published_at":"2021-03-10T12:05:31+08:00","sort_order":"best-selling","template_suffix":"shop-all-collection","disjunctive":false,"rules":[],"published_scope":"global","image":{"created_at":"2024-05-06T11:59:42+08:00","alt":"Buy - The Birth Store","width":2048,"height":2048,"src":"\/\/www.thebirthstore.com.au\/cdn\/shop\/collections\/buy-964856.jpg?v=1714967982"}},{"id":337429201085,"handle":"hospital-bag","title":"Hospital Bag","updated_at":"2026-11-14T20:08:00+08:00","body_html":"","published_at":"2026-06-03T11:36:29+08:00","sort_order":"most-relevant","template_suffix":"","disjunctive":false,"rules":[],"published_scope":"global"},{"id":261658214589,"handle":"labour-and-birth-buy","title":"Labour \u0026 Birth","updated_at":"2026-11-14T20:08:00+08:00","body_html":"\u003cp\u003eWe stock a large range of Elle TENS machines for you to buy for your labour and birth. We stock the Elle TENS, Elle TENS 2 and Elle TENS Plus, we also hire these out if that suits you better, please head over to our TENS machine hire page for more information. We ship Australia wide or have options for local delivery\/pick-up in Perth if you are due ASAP. We also stock other items for your labour and birth. \u003c\/p\u003e\n\u003cp\u003eLooking for something we don't currently stock? Please reach out and let us know.\u003c\/p\u003e\n\u003cp\u003e\u003cspan\u003eYou can even buy now and pay later with Afterpay!\u003c\/span\u003e\u003c\/p\u003e","published_at":"2021-03-10T12:34:43+08:00","sort_order":"best-selling","template_suffix":"labour-birth-collection","disjunctive":false,"rules":[],"published_scope":"global","image":{"created_at":"2024-05-06T12:00:09+08:00","alt":"Labour \u0026 Birth - The Birth Store","width":1080,"height":981,"src":"\/\/www.thebirthstore.com.au\/cdn\/shop\/collections\/labour-birth-342038.jpg?v=1714968009"}},{"id":512272957629,"handle":"labour-birth-essentials","title":"Labour \u0026 Birth Essentials","updated_at":"2026-11-14T20:08:00+08:00","body_html":null,"published_at":"2026-10-06T21:00:01+08:00","sort_order":"most-relevant","template_suffix":"labournbirthemail","disjunctive":false,"rules":[],"published_scope":"global"},{"id":292919476413,"handle":"lactation-products","title":"Lactation Products","updated_at":"2026-11-14T20:08:00+08:00","body_html":"","published_at":"2023-03-22T12:22:41+08:00","sort_order":"best-selling","template_suffix":"lactation-products-collec","disjunctive":false,"rules":[],"published_scope":"global","image":{"created_at":"2024-05-06T12:00:19+08:00","alt":"Lactation Products - The Birth Store","width":1034,"height":922,"src":"\/\/www.thebirthstore.com.au\/cdn\/shop\/collections\/lactation-products-752907.jpg?v=1714968019"}},{"id":295224836285,"handle":"nausea","title":"Nausea","updated_at":"2026-11-14T20:08:00+08:00","body_html":"","published_at":"2023-11-10T20:47:34+08:00","sort_order":"best-selling","template_suffix":"nausea-collection","disjunctive":false,"rules":[],"published_scope":"global","image":{"created_at":"2024-05-06T12:00:24+08:00","alt":"Nausea - The Birth Store","width":610,"height":915,"src":"\/\/www.thebirthstore.com.au\/cdn\/shop\/collections\/nausea-404101.jpg?v=1714968024"}},{"id":261658083517,"handle":"post-partum","title":"Postpartum","updated_at":"2026-11-14T20:08:00+08:00","body_html":"\u003cp\u003eShop your postpartum and hospital bag essentials below. Looking for something we don't currently stock? Please reach out and let us know.\u003cbr\u003e\u003c\/p\u003e\n\u003cp\u003e\u003cspan\u003eYou can even buy now and pay later with Afterpay!\u003c\/span\u003e\u003c\/p\u003e","published_at":"2021-03-10T12:33:47+08:00","sort_order":"best-selling","template_suffix":"postpartum-collection","disjunctive":false,"rules":[],"published_scope":"global","image":{"created_at":"2024-05-06T12:00:36+08:00","alt":"Postpartum - The Birth Store","width":611,"height":702,"src":"\/\/www.thebirthstore.com.au\/cdn\/shop\/collections\/postpartum-150119.jpg?v=1714968037"}},{"id":261658149053,"handle":"pregnancy-and-maternity-products","title":"Pregnancy","updated_at":"2026-11-14T20:08:00+08:00","body_html":"\u003cp\u003eShop your pregnancy essentials below. Looking for something we don't currently stock? Please reach out and let us know.\u003cbr\u003e\u003c\/p\u003e\n\u003cp\u003e\u003cspan\u003eYou can even buy now and pay later with Afterpay!\u003c\/span\u003e\u003c\/p\u003e","published_at":"2021-03-10T12:34:22+08:00","sort_order":"best-selling","template_suffix":"pregnancy-collection","disjunctive":false,"rules":[],"published_scope":"global","image":{"created_at":"2024-05-06T12:00:40+08:00","alt":"Pregnancy - The Birth Store","width":1024,"height":1536,"src":"\/\/www.thebirthstore.com.au\/cdn\/shop\/collections\/pregnancy-899677.jpg?v=1714968040"}},{"id":295224901821,"handle":"pregnancy-health","title":"Pregnancy Health","updated_at":"2026-11-14T20:08:00+08:00","body_html":"","published_at":"2023-11-10T20:48:51+08:00","sort_order":"best-selling","template_suffix":"swaddles-collection","disjunctive":false,"rules":[],"published_scope":"global","image":{"created_at":"2024-05-06T12:00:41+08:00","alt":"Pregnancy Health - The Birth Store","width":608,"height":410,"src":"\/\/www.thebirthstore.com.au\/cdn\/shop\/collections\/pregnancy-health-343983.jpg?v=1714968042"}},{"id":326523846845,"handle":"pregnancy-health-1","updated_at":"2026-11-14T20:08:00+08:00","published_at":"2025-10-30T10:44:54+08:00","sort_order":"best-selling","template_suffix":"","published_scope":"global","title":"Pregnancy Health","body_html":"","image":{"created_at":"2025-11-20T21:33:56+08:00","alt":"Pregnancy Health - The Birth Store","width":522,"height":525,"src":"\/\/www.thebirthstore.com.au\/cdn\/shop\/collections\/pregnancy-health-1617860.jpg?v=1763645636"}},{"id":291456483517,"handle":"shop-all","title":"Shop All - Mum","updated_at":"2026-11-14T20:08:00+08:00","body_html":"","published_at":"2022-12-23T22:04:39+08:00","sort_order":"best-selling","template_suffix":"shop-all-collection","disjunctive":false,"rules":[],"published_scope":"global","image":{"created_at":"2024-05-06T12:00:54+08:00","alt":"Shop All - The Birth Store","width":1365,"height":2048,"src":"\/\/www.thebirthstore.com.au\/cdn\/shop\/collections\/shop-all-693176.jpg?v=1714968055"}},{"id":310045933757,"handle":"shop-all-sale","title":"Shop All Sale","updated_at":"2026-11-14T20:08:00+08:00","body_html":"","published_at":"2024-11-12T13:22:43+08:00","sort_order":"best-selling","template_suffix":"","disjunctive":true,"rules":[],"published_scope":"global","image":{"created_at":"2024-11-13T10:58:16+08:00","alt":"Shop All Sale - The Birth Store","width":2048,"height":1365,"src":"\/\/www.thebirthstore.com.au\/cdn\/shop\/collections\/shop-all-sale-297361.jpg?v=1731466697"}}]}
{"item":{"id":7054922711229,"title":"Healing Peri Spray 30ml","handle":"healing-peri-spray-30ml","description":"\u003cspan data-mce-fragment=\"1\"\u003eHealing Peri Spray has been designed by a Naturopath to help gently ease and sooth personal discomfort after the birth. Our Peri spray in a nourishing solution formulated to keep your perineum clean, toned, refreshed and comfortable post birth.\u003c\/span\u003e\u003cbr data-mce-fragment=\"1\"\u003e\u003cbr data-mce-fragment=\"1\"\u003e\u003cspan data-mce-fragment=\"1\"\u003e\u003cstrong\u003eIngredients:\u003c\/strong\u003e Hamamelis virginiana\u003c\/span\u003e\u003cstrong data-mce-fragment=\"1\"\u003e\u003cspan data-mce-fragment=\"1\"\u003e \u003c\/span\u003e(Witch hazel)\u003c\/strong\u003e\u003cspan data-mce-fragment=\"1\"\u003e, Aloe barbadensis \u003c\/span\u003e\u003cstrong data-mce-fragment=\"1\"\u003e(Aloe Vera)\u003c\/strong\u003e\u003cspan data-mce-fragment=\"1\"\u003e leaf juice, Equisetum arvense \u003c\/span\u003e\u003cstrong data-mce-fragment=\"1\"\u003e(Horse tail)\u003c\/strong\u003e\u003cspan data-mce-fragment=\"1\"\u003e extract, Natural Vitamin E (Mixed Tocopherols 70%), Grapefruit seed extract\u003c\/span\u003e\u003cbr data-mce-fragment=\"1\"\u003e\u003cbr data-mce-fragment=\"1\"\u003e\u003cspan data-mce-fragment=\"1\"\u003e\u003cstrong\u003eDirections:\u003c\/strong\u003e Spray onto the perineum post birth multiple times per day. Can be used on a caesarean section wound. Store in the fridge for added benefit. Do not ingest. Always perform a patch test before use. If reaction occurs, seek medical attention.\u003c\/span\u003e\u003cbr data-mce-fragment=\"1\"\u003e\u003cbr data-mce-fragment=\"1\"\u003e\u003cspan data-mce-fragment=\"1\"\u003eFree from silicones, parabens, PEGs, sulfates (SLS\/SLES), GMOs, mineral oils, petrolatum, synthetic colours and fragrances, or animal testing.\u003c\/span\u003e","published_at":"2021-11-18T14:34:37+08:00","created_at":"2021-11-02T12:57:31+08:00","vendor":"Mere Botanicals","type":"","tags":["Hemorrhoids","Hospital Bag","Mum","Peri Care","Post-Partum","PREORDER","Skin Care","Vaginal Birth Recovery"],"price":2295,"price_min":2295,"price_max":2295,"available":true,"price_varies":false,"compare_at_price":null,"compare_at_price_min":0,"compare_at_price_max":0,"compare_at_price_varies":false,"variants":[{"id":40977720082621,"title":"Default Title","option1":"Default Title","option2":null,"option3":null,"sku":"","requires_shipping":true,"taxable":false,"featured_image":null,"available":true,"name":"Healing Peri Spray 30ml","public_title":null,"options":["Default Title"],"price":2295,"weight":95,"compare_at_price":null,"inventory_management":"shopify","barcode":"20082621","requires_selling_plan":false,"selling_plan_allocations":[],"quantity_rule":{"min":1,"max":null,"increment":1}}],"images":["\/\/www.thebirthstore.com.au\/cdn\/shop\/files\/healing-peri-spray-30ml-711171.jpg?v=1714967969","\/\/www.thebirthstore.com.au\/cdn\/shop\/files\/healing-peri-spray-30ml-769794.jpg?v=1714967969","\/\/www.thebirthstore.com.au\/cdn\/shop\/files\/healing-peri-spray-30ml-412478.jpg?v=1714967969","\/\/www.thebirthstore.com.au\/cdn\/shop\/files\/healing-peri-spray-30ml-325764.jpg?v=1714967969"],"featured_image":"\/\/www.thebirthstore.com.au\/cdn\/shop\/files\/healing-peri-spray-30ml-711171.jpg?v=1714967969","options":["Title"],"media":[{"alt":"Healing Peri Spray 30ml - The Birth Store-Mere Botanicals","id":27007585681597,"position":1,"preview_image":{"aspect_ratio":1.0,"height":882,"width":882,"src":"\/\/www.thebirthstore.com.au\/cdn\/shop\/files\/healing-peri-spray-30ml-711171.jpg?v=1714967969"},"aspect_ratio":1.0,"height":882,"media_type":"image","src":"\/\/www.thebirthstore.com.au\/cdn\/shop\/files\/healing-peri-spray-30ml-711171.jpg?v=1714967969","width":882},{"alt":"Healing Peri Spray 30ml - The Birth Store-Mere Botanicals","id":27007585714365,"position":2,"preview_image":{"aspect_ratio":0.667,"height":1350,"width":900,"src":"\/\/www.thebirthstore.com.au\/cdn\/shop\/files\/healing-peri-spray-30ml-769794.jpg?v=1714967969"},"aspect_ratio":0.667,"height":1350,"media_type":"image","src":"\/\/www.thebirthstore.com.au\/cdn\/shop\/files\/healing-peri-spray-30ml-769794.jpg?v=1714967969","width":900},{"alt":"Healing Peri Spray 30ml - The Birth Store-Mere Botanicals","id":27007585747133,"position":3,"preview_image":{"aspect_ratio":1.5,"height":600,"width":900,"src":"\/\/www.thebirthstore.com.au\/cdn\/shop\/files\/healing-peri-spray-30ml-412478.jpg?v=1714967969"},"aspect_ratio":1.5,"height":600,"media_type":"image","src":"\/\/www.thebirthstore.com.au\/cdn\/shop\/files\/healing-peri-spray-30ml-412478.jpg?v=1714967969","width":900},{"alt":"Healing Peri Spray 30ml - The Birth Store-Mere Botanicals","id":27007585779901,"position":4,"preview_image":{"aspect_ratio":1.0,"height":70,"width":70,"src":"\/\/www.thebirthstore.com.au\/cdn\/shop\/files\/healing-peri-spray-30ml-325764.jpg?v=1714967969"},"aspect_ratio":1.0,"height":70,"media_type":"image","src":"\/\/www.thebirthstore.com.au\/cdn\/shop\/files\/healing-peri-spray-30ml-325764.jpg?v=1714967969","width":70}],"requires_selling_plan":false,"selling_plan_groups":[],"content":"\u003cspan data-mce-fragment=\"1\"\u003eHealing Peri Spray has been designed by a Naturopath to help gently ease and sooth personal discomfort after the birth. Our Peri spray in a nourishing solution formulated to keep your perineum clean, toned, refreshed and comfortable post birth.\u003c\/span\u003e\u003cbr data-mce-fragment=\"1\"\u003e\u003cbr data-mce-fragment=\"1\"\u003e\u003cspan data-mce-fragment=\"1\"\u003e\u003cstrong\u003eIngredients:\u003c\/strong\u003e Hamamelis virginiana\u003c\/span\u003e\u003cstrong data-mce-fragment=\"1\"\u003e\u003cspan data-mce-fragment=\"1\"\u003e \u003c\/span\u003e(Witch hazel)\u003c\/strong\u003e\u003cspan data-mce-fragment=\"1\"\u003e, Aloe barbadensis \u003c\/span\u003e\u003cstrong data-mce-fragment=\"1\"\u003e(Aloe Vera)\u003c\/strong\u003e\u003cspan data-mce-fragment=\"1\"\u003e leaf juice, Equisetum arvense \u003c\/span\u003e\u003cstrong data-mce-fragment=\"1\"\u003e(Horse tail)\u003c\/strong\u003e\u003cspan data-mce-fragment=\"1\"\u003e extract, Natural Vitamin E (Mixed Tocopherols 70%), Grapefruit seed extract\u003c\/span\u003e\u003cbr data-mce-fragment=\"1\"\u003e\u003cbr data-mce-fragment=\"1\"\u003e\u003cspan data-mce-fragment=\"1\"\u003e\u003cstrong\u003eDirections:\u003c\/strong\u003e Spray onto the perineum post birth multiple times per day. Can be used on a caesarean section wound. Store in the fridge for added benefit. Do not ingest. Always perform a patch test before use. If reaction occurs, seek medical attention.\u003c\/span\u003e\u003cbr data-mce-fragment=\"1\"\u003e\u003cbr data-mce-fragment=\"1\"\u003e\u003cspan data-mce-fragment=\"1\"\u003eFree from silicones, parabens, PEGs, sulfates (SLS\/SLES), GMOs, mineral oils, petrolatum, synthetic colours and fragrances, or animal testing.\u003c\/span\u003e"},"options":[{"name":"Title","position":1,"values":["Default Title"]}],"custom_metafields":{},"metafields":{"badge":"\u003cdiv style='display:none' class='jdgm-prev-badge' data-average-rating='5.00' data-number-of-reviews='3' data-number-of-questions='0'\u003e \u003cspan class='jdgm-prev-badge__stars' data-score='5.00' tabindex='0' aria-label='5.00 stars' role='button'\u003e \u003cspan class='jdgm-star jdgm--on'\u003e\u003c\/span\u003e\u003cspan class='jdgm-star jdgm--on'\u003e\u003c\/span\u003e\u003cspan class='jdgm-star jdgm--on'\u003e\u003c\/span\u003e\u003cspan class='jdgm-star jdgm--on'\u003e\u003c\/span\u003e\u003cspan class='jdgm-star jdgm--on'\u003e\u003c\/span\u003e \u003c\/span\u003e \u003cspan class='jdgm-prev-badge__text'\u003e 3 reviews \u003c\/span\u003e \u003c\/div\u003e","review_snippet_widget":"\u003cdiv class='jdgm-widget jdgm-review-snippet-widget'\u003e \u003cstyle\u003e\n .jdgm-review-snippet-widget{position:relative}.jdgm-review-snippet-widget:hover{cursor:pointer}@media only screen and (max-width: 767px){.jdgm-review-snippet-widget .jdgm-rev-snippet-widget__cards-container{left:unset;right:unset}}.jdgm-review-snippet-widget .jdgm-rev-snippet-card{background:#fff}.jdgm-review-snippet-widget .jdgm-star{color:#399}.jdgm-review-snippet-widget .jdgm-rev-snippet-card{border-radius:8px;background:#fff}.jdgm-review-snippet-widget .jdgm-rev-snippet-card__rev-prod-wrapper{border-radius:8px}.jdgm-review-snippet-widget .jdgm-rev-snippet-card__rev-content-wrapper{max-width:360px}.jdgm-review-snippet-widget .jdgm-rev-snippet-widget__prev-btn,.jdgm-review-snippet-widget .jdgm-rev-snippet-widget__next-btn{border-radius:50%;background:#fff}.jdgm-review-snippet-widget .jdgm-rev-snippet-widget__prev-btn\u003esvg,.jdgm-review-snippet-widget .jdgm-rev-snippet-widget__next-btn\u003esvg{fill:#000}.jdgm-review-snippet-widget .jdgm-rev-snippet-widget__prev-btn{left:0;top:40%}.jdgm-review-snippet-widget .jdgm-rev-snippet-widget__next-btn{right:0;top:40%}.jdgm-full-rev-modal.review-snippet-widget .jm-mfp-content{border-radius:8px}.jdgm-full-rev-modal.review-snippet-widget .jdgm-full-rev__icon{border-radius:8px}.jdgm-full-rev-modal.review-snippet-widget .jdgm-full-rev[data-verified-buyer=\"true\"] .jdgm-full-rev__icon::after{border-radius:8px}.jdgm-full-rev-modal.review-snippet-widget .jdgm-rev__buyer-badge{border-radius:calc( 8px \/ 2 )}.jdgm-full-rev-modal.review-snippet-widget .jdgm-full-rev__pic-img{border-radius:8px}.jdgm-full-rev-modal.review-snippet-widget .jdgm-full-rev__reply{border-radius:8px}.jdgm-full-rev-modal.review-snippet-widget .jdgm-full-rev__replier::before{content:'thebirthstore.com.au'}.jdgm-full-rev-modal.review-snippet-widget .jdgm-full-rev__product-button{border-radius:calc( 8px * 6 )}\n\n \u003c\/style\u003e \u003ci class=\"jdgm-rev-snippet-widget__prev-btn\" style='display: none;'\u003e \u003csvg xmlns=\"http:\/\/www.w3.org\/2000\/svg\" height=\"12\" viewBox=\"0 0 8 12\" width=\"8\" fill=\"#000\"\u003e\u003cpath d=\"M3.09961 6.00005L6.99961 9.90005C7.18294 10.0834 7.27461 10.3167 7.27461 10.6C7.27461 10.8834 7.18294 11.1167 6.99961 11.3C6.81628 11.4834 6.58294 11.575 6.29961 11.575C6.01628 11.575 5.78294 11.4834 5.59961 11.3L0.999609 6.70005C0.899609 6.60005 0.828776 6.49172 0.787109 6.37505C0.745443 6.25838 0.724609 6.13338 0.724609 6.00005C0.724609 5.86672 0.745443 5.74172 0.787109 5.62505C0.828776 5.50838 0.899609 5.40005 0.999609 5.30005L5.59961 0.700049C5.78294 0.516715 6.01628 0.425049 6.29961 0.425049C6.58294 0.425049 6.81628 0.516715 6.99961 0.700049C7.18294 0.883382 7.27461 1.11672 7.27461 1.40005C7.27461 1.68338 7.18294 1.91672 6.99961 2.10005L3.09961 6.00005Z\"\/\u003e\u003c\/svg\u003e \u003c\/i\u003e \u003ci class=\"jdgm-rev-snippet-widget__next-btn\" style='display: none;'\u003e \u003csvg xmlns=\"http:\/\/www.w3.org\/2000\/svg\" height=\"12\" viewBox=\"0 0 8 12\" width=\"8\" fill=\"#000\"\u003e\u003cpath d=\"M4.89961 6.00005L0.999609 2.10005C0.816276 1.91672 0.724609 1.68338 0.724609 1.40005C0.724609 1.11672 0.816276 0.883382 0.999609 0.700049C1.18294 0.516715 1.41628 0.425049 1.69961 0.425049C1.98294 0.425049 2.21628 0.516715 2.39961 0.700049L6.99961 5.30005C7.09961 5.40005 7.17044 5.50838 7.21211 5.62505C7.25378 5.74172 7.27461 5.86672 7.27461 6.00005C7.27461 6.13338 7.25378 6.25838 7.21211 6.37505C7.17044 6.49172 7.09961 6.60005 6.99961 6.70005L2.39961 11.3C2.21628 11.4834 1.98294 11.575 1.69961 11.575C1.41628 11.575 1.18294 11.4834 0.999609 11.3C0.816276 11.1167 0.724609 10.8834 0.724609 10.6C0.724609 10.3167 0.816276 10.0834 0.999609 9.90005L4.89961 6.00005Z\"\/\u003e\u003c\/svg\u003e \u003c\/i\u003e \u003cdiv style=\"overflow: hidden;\"\u003e \u003cdiv class='jdgm-rev-snippet-widget__cards-container'\u003e \u003cdiv class='jdgm-rev-snippet-card' data-review-id='8c42b294-0db7-48d9-95b8-eab958d5e4fc' style='display: none;'\u003e \u003cdiv class=\"jdgm-rev-snippet-card__rev-prod-wrapper\"\u003e \u003ca class='jdgm-rev-snippet-card__rev-content-wrapper jdgm-rev-snippet-card__full-review-link' style='text-decoration: none; color: inherit;padding: 0 34px;' role='button' data-review-id='8c42b294-0db7-48d9-95b8-eab958d5e4fc'\u003e \u003cdiv class='jdgm-rev-snippet-card__rev-header'\u003e \u003cdiv class='jdgm-rev-snippet-card__rev-rating' aria-label='5 stars' role='img'\u003e \u003cspan class='jdgm-star jdgm--on'\u003e\u003c\/span\u003e\u003cspan class='jdgm-star jdgm--on'\u003e\u003c\/span\u003e\u003cspan class='jdgm-star jdgm--on'\u003e\u003c\/span\u003e\u003cspan class='jdgm-star jdgm--on'\u003e\u003c\/span\u003e\u003cspan class='jdgm-star jdgm--on'\u003e\u003c\/span\u003e \u003c\/div\u003e \u003cdiv class='jdgm-rev-snippet-card__reviewer'\u003e Roxy \u003c\/div\u003e \u003c\/div\u003e \u003cdiv class='jdgm-rev-snippet-card__rev-content'\u003e \u003cspan class='jdgm-rev-snippet-card__rev-body'\u003e \u003cp\u003ethis is a must for postpartum recovery.\u003c\/p\u003e \u003c\/span\u003e \u003c\/div\u003e \u003c\/a\u003e \u003c\/div\u003e \u003c\/div\u003e\u003cdiv class='jdgm-rev-snippet-card' data-review-id='29f6b21d-91a2-4ff9-97bc-88d4d9d96cd8' style='display: none;'\u003e \u003cdiv class=\"jdgm-rev-snippet-card__rev-prod-wrapper\"\u003e \u003ca class='jdgm-rev-snippet-card__rev-content-wrapper jdgm-rev-snippet-card__full-review-link' style='text-decoration: none; color: inherit;padding: 0 34px;' role='button' data-review-id='29f6b21d-91a2-4ff9-97bc-88d4d9d96cd8'\u003e \u003cdiv class='jdgm-rev-snippet-card__rev-header'\u003e \u003cdiv class='jdgm-rev-snippet-card__rev-rating' aria-label='5 stars' role='img'\u003e \u003cspan class='jdgm-star jdgm--on'\u003e\u003c\/span\u003e\u003cspan class='jdgm-star jdgm--on'\u003e\u003c\/span\u003e\u003cspan class='jdgm-star jdgm--on'\u003e\u003c\/span\u003e\u003cspan class='jdgm-star jdgm--on'\u003e\u003c\/span\u003e\u003cspan class='jdgm-star jdgm--on'\u003e\u003c\/span\u003e \u003c\/div\u003e \u003cdiv class='jdgm-rev-snippet-card__reviewer'\u003e Marissa Robertson \u003c\/div\u003e \u003c\/div\u003e \u003cdiv class='jdgm-rev-snippet-card__rev-content'\u003e \u003cspan class='jdgm-rev-snippet-card__rev-body'\u003e \u003cp\u003eNow everything will be swollen and sore and this is an easy spray to put on don't have to touch anything sensitive at all. (Espsecially if you end uo with stiches like i did) And doesn't burn! I'm glad my baby brain added this into the cart.\u003c\/p\u003e \u003c\/span\u003e \u003c\/div\u003e \u003c\/a\u003e \u003c\/div\u003e \u003c\/div\u003e \u003c\/div\u003e \u003c\/div\u003e \u003c\/div\u003e","widget":"\u003cdiv class='jdgm-rev-widg' data-updated-at='2026-10-17T20:48:52Z' data-average-rating='5.00' data-number-of-reviews='3' data-number-of-questions='0' data-image-url='https:\/\/cdn.shopify.com\/s\/files\/1\/0527\/3393\/5805\/files\/healing-peri-spray-30ml-711171.jpg?v=1714967969'\u003e \u003cstyle class='jdgm-temp-hiding-style'\u003e.jdgm-rev-widg{ display: none }\u003c\/style\u003e \u003cdiv class='jdgm-rev-widg__header'\u003e \u003ch2 class='jdgm-rev-widg__title'\u003eCustomer Reviews\u003c\/h2\u003e \u003cdiv class='jdgm-rev-widg__summary'\u003e \u003cdiv class='jdgm-rev-widg__summary-stars' aria-label='Average rating is 5.00 stars' role='img'\u003e \u003cspan class='jdgm-star jdgm--on'\u003e\u003c\/span\u003e\u003cspan class='jdgm-star jdgm--on'\u003e\u003c\/span\u003e\u003cspan class='jdgm-star jdgm--on'\u003e\u003c\/span\u003e\u003cspan class='jdgm-star jdgm--on'\u003e\u003c\/span\u003e\u003cspan class='jdgm-star jdgm--on'\u003e\u003c\/span\u003e \u003c\/div\u003e \u003cdiv class='jdgm-rev-widg__summary-text'\u003eBased on 3 reviews\u003c\/div\u003e \u003c\/div\u003e \u003ca style='display: none' href='#' class='jdgm-write-rev-link' role='button'\u003eWrite a review\u003c\/a\u003e \u003cdiv class='jdgm-histogram jdgm-temp-hidden'\u003e \u003cdiv class='jdgm-histogram__row' data-rating='5' data-frequency='3' data-percentage='100'\u003e \u003cdiv class='jdgm-histogram__star' role='button' aria-label=\"100% (3) reviews with 5 star rating\" tabindex='0' \u003e\u003cspan class='jdgm-star jdgm--on'\u003e\u003c\/span\u003e\u003cspan class='jdgm-star jdgm--on'\u003e\u003c\/span\u003e\u003cspan class='jdgm-star jdgm--on'\u003e\u003c\/span\u003e\u003cspan class='jdgm-star jdgm--on'\u003e\u003c\/span\u003e\u003cspan class='jdgm-star jdgm--on'\u003e\u003c\/span\u003e\u003c\/div\u003e \u003cdiv class='jdgm-histogram__bar'\u003e \u003cdiv class='jdgm-histogram__bar-content' style='width: 100%;'\u003e \u003c\/div\u003e \u003c\/div\u003e \u003cdiv class='jdgm-histogram__percentage'\u003e100%\u003c\/div\u003e \u003cdiv class='jdgm-histogram__frequency'\u003e(3)\u003c\/div\u003e \u003c\/div\u003e \u003cdiv class='jdgm-histogram__row' data-rating='4' data-frequency='0' data-percentage='0'\u003e \u003cdiv class='jdgm-histogram__star' role='button' aria-label=\"0% (0) reviews with 4 star rating\" tabindex='0' \u003e\u003cspan class='jdgm-star jdgm--on'\u003e\u003c\/span\u003e\u003cspan class='jdgm-star jdgm--on'\u003e\u003c\/span\u003e\u003cspan class='jdgm-star jdgm--on'\u003e\u003c\/span\u003e\u003cspan class='jdgm-star jdgm--on'\u003e\u003c\/span\u003e\u003cspan class='jdgm-star jdgm--off'\u003e\u003c\/span\u003e\u003c\/div\u003e \u003cdiv class='jdgm-histogram__bar'\u003e \u003cdiv class='jdgm-histogram__bar-content' style='width: 0%;'\u003e \u003c\/div\u003e \u003c\/div\u003e \u003cdiv class='jdgm-histogram__percentage'\u003e0%\u003c\/div\u003e \u003cdiv class='jdgm-histogram__frequency'\u003e(0)\u003c\/div\u003e \u003c\/div\u003e \u003cdiv class='jdgm-histogram__row' data-rating='3' data-frequency='0' data-percentage='0'\u003e \u003cdiv class='jdgm-histogram__star' role='button' aria-label=\"0% (0) reviews with 3 star rating\" tabindex='0' \u003e\u003cspan class='jdgm-star jdgm--on'\u003e\u003c\/span\u003e\u003cspan class='jdgm-star jdgm--on'\u003e\u003c\/span\u003e\u003cspan class='jdgm-star jdgm--on'\u003e\u003c\/span\u003e\u003cspan class='jdgm-star jdgm--off'\u003e\u003c\/span\u003e\u003cspan class='jdgm-star jdgm--off'\u003e\u003c\/span\u003e\u003c\/div\u003e \u003cdiv class='jdgm-histogram__bar'\u003e \u003cdiv class='jdgm-histogram__bar-content' style='width: 0%;'\u003e \u003c\/div\u003e \u003c\/div\u003e \u003cdiv class='jdgm-histogram__percentage'\u003e0%\u003c\/div\u003e \u003cdiv class='jdgm-histogram__frequency'\u003e(0)\u003c\/div\u003e \u003c\/div\u003e \u003cdiv class='jdgm-histogram__row' data-rating='2' data-frequency='0' data-percentage='0'\u003e \u003cdiv class='jdgm-histogram__star' role='button' aria-label=\"0% (0) reviews with 2 star rating\" tabindex='0' \u003e\u003cspan class='jdgm-star jdgm--on'\u003e\u003c\/span\u003e\u003cspan class='jdgm-star jdgm--on'\u003e\u003c\/span\u003e\u003cspan class='jdgm-star jdgm--off'\u003e\u003c\/span\u003e\u003cspan class='jdgm-star jdgm--off'\u003e\u003c\/span\u003e\u003cspan class='jdgm-star jdgm--off'\u003e\u003c\/span\u003e\u003c\/div\u003e \u003cdiv class='jdgm-histogram__bar'\u003e \u003cdiv class='jdgm-histogram__bar-content' style='width: 0%;'\u003e \u003c\/div\u003e \u003c\/div\u003e \u003cdiv class='jdgm-histogram__percentage'\u003e0%\u003c\/div\u003e \u003cdiv class='jdgm-histogram__frequency'\u003e(0)\u003c\/div\u003e \u003c\/div\u003e \u003cdiv class='jdgm-histogram__row' data-rating='1' data-frequency='0' data-percentage='0'\u003e \u003cdiv class='jdgm-histogram__star' role='button' aria-label=\"0% (0) reviews with 1 star rating\" tabindex='0' \u003e\u003cspan class='jdgm-star jdgm--on'\u003e\u003c\/span\u003e\u003cspan class='jdgm-star jdgm--off'\u003e\u003c\/span\u003e\u003cspan class='jdgm-star jdgm--off'\u003e\u003c\/span\u003e\u003cspan class='jdgm-star jdgm--off'\u003e\u003c\/span\u003e\u003cspan class='jdgm-star jdgm--off'\u003e\u003c\/span\u003e\u003c\/div\u003e \u003cdiv class='jdgm-histogram__bar'\u003e \u003cdiv class='jdgm-histogram__bar-content' style='width: 0%;'\u003e \u003c\/div\u003e \u003c\/div\u003e \u003cdiv class='jdgm-histogram__percentage'\u003e0%\u003c\/div\u003e \u003cdiv class='jdgm-histogram__frequency'\u003e(0)\u003c\/div\u003e \u003c\/div\u003e \u003cdiv class='jdgm-histogram__row jdgm-histogram__clear-filter' data-rating=null tabindex='0'\u003e\u003c\/div\u003e \u003c\/div\u003e \u003cdiv class='jdgm-rev-widg__sort-wrapper'\u003e\u003c\/div\u003e \u003c\/div\u003e \u003cdiv class='jdgm-rev-widg__body'\u003e \u003cdiv class='jdgm-rev-widg__reviews'\u003e\u003cdiv class='jdgm-rev jdgm-divider-top' data-verified-buyer='true' data-review-id='52bffd4e-ae63-4d72-ad6f-99df68fa9987' data-review-language='' data-product-title='Healing Peri Spray 30ml' data-product-url='\/products\/healing-peri-spray-30ml' data-thumb-up-count='0' data-thumb-down-count='0'\u003e \u003cdiv class='jdgm-rev__header'\u003e \u003cdiv class='jdgm-rev__icon' \u003e L \u003c\/div\u003e \u003cspan class='jdgm-rev__rating' data-score='5' tabindex='0' aria-label='5 star review' role='img'\u003e \u003cspan class='jdgm-star jdgm--on'\u003e\u003c\/span\u003e\u003cspan class='jdgm-star jdgm--on'\u003e\u003c\/span\u003e\u003cspan class='jdgm-star jdgm--on'\u003e\u003c\/span\u003e\u003cspan class='jdgm-star jdgm--on'\u003e\u003c\/span\u003e\u003cspan class='jdgm-star jdgm--on'\u003e\u003c\/span\u003e \u003c\/span\u003e \u003ctime class='jdgm-rev__timestamp jdgm-spinner' datetime='2026-04-26T22:22:50Z' data-content='2026-04-26 22:22:50 UTC'\u003e\u003c\/time\u003e \u003cdiv class='jdgm-rev__br'\u003e\u003c\/div\u003e \u003cspan class='jdgm-rev__buyer-badge-wrapper'\u003e \u003cspan class='jdgm-rev__buyer-badge'\u003e\u003c\/span\u003e \u003c\/span\u003e \u003cspan class='jdgm-rev__author-wrapper'\u003e \u003cspan class='jdgm-rev__author'\u003eLauren Harper\u003c\/span\u003e \u003cspan class='jdgm-rev__location' \u003e \u003c\/span\u003e \u003c\/span\u003e \u003c\/div\u003e \u003cdiv class='jdgm-rev__content'\u003e \u003cdiv class='jdgm-rev__custom-form'\u003e \u003c\/div\u003e \u003cb class='jdgm-rev__title'\u003e\u003c\/b\u003e \u003cdiv class='jdgm-rev__body'\u003e\u003cp\u003eHealing Peri Spray 30ml\u003c\/p\u003e\u003c\/div\u003e \u003cdiv class='jdgm-rev__pics'\u003e \u003c\/div\u003e \u003cdiv class='jdgm-rev__vids'\u003e \u003c\/div\u003e \u003cdiv class='jdgm-rev__transparency-badge-wrapper'\u003e \u003cdiv class='jdgm-rev__transparency-badge' data-badge-type=review_collected_via_store_invitation\u003e\u003c\/div\u003e \u003c\/div\u003e \u003c\/div\u003e \u003cdiv class='jdgm-rev__actions'\u003e \u003cdiv class='jdgm-rev__social'\u003e\u003c\/div\u003e \u003cdiv class='jdgm-rev__votes'\u003e\u003c\/div\u003e \u003c\/div\u003e \u003cdiv class='jdgm-rev__reply'\u003e \u003c\/div\u003e \u003c\/div\u003e\u003cdiv class='jdgm-rev jdgm-divider-top' data-verified-buyer='true' data-review-id='8c42b294-0db7-48d9-95b8-eab958d5e4fc' data-review-language='' data-product-title='Healing Peri Spray 30ml' data-product-url='\/products\/healing-peri-spray-30ml' data-thumb-up-count='0' data-thumb-down-count='0'\u003e \u003cdiv class='jdgm-rev__header'\u003e \u003cdiv class='jdgm-rev__icon' \u003e R \u003c\/div\u003e \u003cspan class='jdgm-rev__rating' data-score='5' tabindex='0' aria-label='5 star review' role='img'\u003e \u003cspan class='jdgm-star jdgm--on'\u003e\u003c\/span\u003e\u003cspan class='jdgm-star jdgm--on'\u003e\u003c\/span\u003e\u003cspan class='jdgm-star jdgm--on'\u003e\u003c\/span\u003e\u003cspan class='jdgm-star jdgm--on'\u003e\u003c\/span\u003e\u003cspan class='jdgm-star jdgm--on'\u003e\u003c\/span\u003e \u003c\/span\u003e \u003ctime class='jdgm-rev__timestamp jdgm-spinner' datetime='2024-06-29T04:10:58Z' data-content='2024-06-29 04:10:58 UTC'\u003e\u003c\/time\u003e \u003cdiv class='jdgm-rev__br'\u003e\u003c\/div\u003e \u003cspan class='jdgm-rev__buyer-badge-wrapper'\u003e \u003cspan class='jdgm-rev__buyer-badge'\u003e\u003c\/span\u003e \u003c\/span\u003e \u003cspan class='jdgm-rev__author-wrapper'\u003e \u003cspan class='jdgm-rev__author'\u003eRoxanne Van rensburg\u003c\/span\u003e \u003cspan class='jdgm-rev__location' \u003e \u003c\/span\u003e \u003c\/span\u003e \u003c\/div\u003e \u003cdiv class='jdgm-rev__content'\u003e \u003cdiv class='jdgm-rev__custom-form'\u003e \u003c\/div\u003e \u003cb class='jdgm-rev__title'\u003eGreat product\u003c\/b\u003e \u003cdiv class='jdgm-rev__body'\u003e\u003cp\u003ethis is a must for postpartum recovery.\u003c\/p\u003e\u003c\/div\u003e \u003cdiv class='jdgm-rev__pics'\u003e \u003c\/div\u003e \u003cdiv class='jdgm-rev__vids'\u003e \u003c\/div\u003e \u003cdiv class='jdgm-rev__transparency-badge-wrapper'\u003e \u003cdiv class='jdgm-rev__transparency-badge' data-badge-type=review_collected_via_store_invitation\u003e\u003c\/div\u003e \u003c\/div\u003e \u003c\/div\u003e \u003cdiv class='jdgm-rev__actions'\u003e \u003cdiv class='jdgm-rev__social'\u003e\u003c\/div\u003e \u003cdiv class='jdgm-rev__votes'\u003e\u003c\/div\u003e \u003c\/div\u003e \u003cdiv class='jdgm-rev__reply'\u003e \u003cdiv class='jdgm-rev__replier-wrapper'\u003e \u003cb class='jdgm-rev__replier'\u003e\u003c\/b\u003e \u003c\/div\u003e \u003cdiv class='jdgm-rev__reply-content'\u003e\u003cp\u003eRoxanne, thank you so much for your kind words, we’re so glad to hear the product supported you during your postpartum recovery. It means a lot to know it made a difference for you, and we truly appreciate your recommendation ❤️\u003c\/p\u003e\u003c\/div\u003e \u003c\/div\u003e \u003c\/div\u003e\u003cdiv class='jdgm-rev jdgm-divider-top' data-verified-buyer='false' data-review-id='29f6b21d-91a2-4ff9-97bc-88d4d9d96cd8' data-review-language='' data-product-title='Healing Peri Spray 30ml' data-product-url='\/products\/healing-peri-spray-30ml' data-thumb-up-count='0' data-thumb-down-count='0'\u003e \u003cdiv class='jdgm-rev__header'\u003e \u003cdiv class='jdgm-rev__icon' \u003e M \u003c\/div\u003e \u003cspan class='jdgm-rev__rating' data-score='5' tabindex='0' aria-label='5 star review' role='img'\u003e \u003cspan class='jdgm-star jdgm--on'\u003e\u003c\/span\u003e\u003cspan class='jdgm-star jdgm--on'\u003e\u003c\/span\u003e\u003cspan class='jdgm-star jdgm--on'\u003e\u003c\/span\u003e\u003cspan class='jdgm-star jdgm--on'\u003e\u003c\/span\u003e\u003cspan class='jdgm-star jdgm--on'\u003e\u003c\/span\u003e \u003c\/span\u003e \u003ctime class='jdgm-rev__timestamp jdgm-spinner' datetime='2023-04-20T03:34:20Z' data-content='2023-04-20 03:34:20 UTC'\u003e\u003c\/time\u003e \u003cdiv class='jdgm-rev__br'\u003e\u003c\/div\u003e \u003cspan class='jdgm-rev__buyer-badge-wrapper'\u003e \u003c\/span\u003e \u003cspan class='jdgm-rev__author-wrapper'\u003e \u003cspan class='jdgm-rev__author'\u003eMarissa\u003c\/span\u003e \u003cspan class='jdgm-rev__location' \u003e \u003c\/span\u003e \u003c\/span\u003e \u003c\/div\u003e \u003cdiv class='jdgm-rev__content'\u003e \u003cdiv class='jdgm-rev__custom-form'\u003e \u003c\/div\u003e \u003cb class='jdgm-rev__title'\u003eYou\u0026#39;ll appreciate this!\u003c\/b\u003e \u003cdiv class='jdgm-rev__body'\u003e\u003cp\u003eNow everything will be swollen and sore and this is an easy spray to put on don't have to touch anything sensitive at all. (Espsecially if you end uo with stiches like i did) And doesn't burn! I'm glad my baby brain added this into the cart.\u003c\/p\u003e\u003c\/div\u003e \u003cdiv class='jdgm-rev__pics'\u003e \u003c\/div\u003e \u003cdiv class='jdgm-rev__vids'\u003e \u003c\/div\u003e \u003cdiv class='jdgm-rev__transparency-badge-wrapper'\u003e \u003cdiv class='jdgm-rev__transparency-badge' data-badge-type=review_collected_from_store_visitor\u003e\u003c\/div\u003e \u003c\/div\u003e \u003c\/div\u003e \u003cdiv class='jdgm-rev__actions'\u003e \u003cdiv class='jdgm-rev__social'\u003e\u003c\/div\u003e \u003cdiv class='jdgm-rev__votes'\u003e\u003c\/div\u003e \u003c\/div\u003e \u003cdiv class='jdgm-rev__reply'\u003e \u003c\/div\u003e \u003c\/div\u003e\u003c\/div\u003e \u003cdiv class='jdgm-paginate' data-per-page='10' data-url='https:\/\/api.judge.me\/reviews\/reviews_for_widget' style=\"display: none;\"\u003e\u003c\/div\u003e \u003c\/div\u003e \u003cdiv class='jdgm-rev-widg__paginate-spinner-wrapper'\u003e \u003cdiv class='jdgm-spinner'\u003e\u003c\/div\u003e \u003c\/div\u003e \u003c\/div\u003e"},"default_reviews_metafields":{"rating":{"scale_min":"1.0","scale_max":"5.0","value":"5.0"},"rating_count":3},"collections":[{"id":512654540989,"handle":"lastof26-10","title":"10%","updated_at":"2026-11-14T20:08:00+08:00","body_html":null,"published_at":"2026-10-12T19:06:42+08:00","sort_order":"best-selling","template_suffix":null,"disjunctive":false,"rules":[],"published_scope":"global"},{"id":261657460925,"handle":"buy","title":"Buy","updated_at":"2026-11-14T20:08:00+08:00","body_html":"\u003cp\u003eBrowse all of our pregnancy, labour \u0026amp; birth, postpartum and baby essentials here.\u003cbr\u003e\u003c\/p\u003e\n\u003cp\u003e\u003cspan\u003eYou can even buy now and pay later with Afterpay!\u003c\/span\u003e\u003c\/p\u003e","published_at":"2021-03-10T12:05:31+08:00","sort_order":"best-selling","template_suffix":"shop-all-collection","disjunctive":false,"rules":[],"published_scope":"global","image":{"created_at":"2024-05-06T11:59:42+08:00","alt":"Buy - The Birth Store","width":2048,"height":2048,"src":"\/\/www.thebirthstore.com.au\/cdn\/shop\/collections\/buy-964856.jpg?v=1714967982"}},{"id":343549608125,"handle":"expo-preorder","title":"Expo Preorder","updated_at":"2026-11-10T20:07:02+08:00","body_html":"\u003cp\u003eMissed out at the expo? We've got you! Use code EXPO30 for 30% off our sold-out favourites, or EXPOKIT to get our Vaginal Birth Recovery Kit at the exclusive expo price.\u003c\/p\u003e","published_at":"2026-08-31T11:34:10+08:00","sort_order":"most-relevant","template_suffix":null,"disjunctive":false,"rules":[],"published_scope":"global"},{"id":281712066749,"handle":"hemorrhoid-care","title":"Haemorrhoid Care","updated_at":"2026-11-12T20:07:50+08:00","body_html":"","published_at":"2021-12-20T14:16:30+08:00","sort_order":"best-selling","template_suffix":"swaddles-collection","disjunctive":false,"rules":[],"published_scope":"global","image":{"created_at":"2024-05-06T12:00:00+08:00","alt":"Haemorrhoid Care - The Birth Store","width":763,"height":556,"src":"\/\/www.thebirthstore.com.au\/cdn\/shop\/collections\/haemorrhoid-care-562138.jpg?v=1714968001"}},{"id":337429201085,"handle":"hospital-bag","title":"Hospital Bag","updated_at":"2026-11-14T20:08:00+08:00","body_html":"","published_at":"2026-06-03T11:36:29+08:00","sort_order":"most-relevant","template_suffix":"","disjunctive":false,"rules":[],"published_scope":"global"},{"id":295224705213,"handle":"perineal-care","title":"Perineal Care","updated_at":"2026-11-12T20:07:50+08:00","body_html":"","published_at":"2023-11-10T20:43:30+08:00","sort_order":"best-selling","template_suffix":"perineal-care-collection","disjunctive":false,"rules":[],"published_scope":"global","image":{"created_at":"2024-05-06T12:00:33+08:00","alt":"Perineal Care - The Birth Store","width":1024,"height":1536,"src":"\/\/www.thebirthstore.com.au\/cdn\/shop\/collections\/perineal-care-657628.jpg?v=1714968034"}},{"id":261658083517,"handle":"post-partum","title":"Postpartum","updated_at":"2026-11-14T20:08:00+08:00","body_html":"\u003cp\u003eShop your postpartum and hospital bag essentials below. Looking for something we don't currently stock? Please reach out and let us know.\u003cbr\u003e\u003c\/p\u003e\n\u003cp\u003e\u003cspan\u003eYou can even buy now and pay later with Afterpay!\u003c\/span\u003e\u003c\/p\u003e","published_at":"2021-03-10T12:33:47+08:00","sort_order":"best-selling","template_suffix":"postpartum-collection","disjunctive":false,"rules":[],"published_scope":"global","image":{"created_at":"2024-05-06T12:00:36+08:00","alt":"Postpartum - The Birth Store","width":611,"height":702,"src":"\/\/www.thebirthstore.com.au\/cdn\/shop\/collections\/postpartum-150119.jpg?v=1714968037"}},{"id":291456483517,"handle":"shop-all","title":"Shop All - Mum","updated_at":"2026-11-14T20:08:00+08:00","body_html":"","published_at":"2022-12-23T22:04:39+08:00","sort_order":"best-selling","template_suffix":"shop-all-collection","disjunctive":false,"rules":[],"published_scope":"global","image":{"created_at":"2024-05-06T12:00:54+08:00","alt":"Shop All - The Birth Store","width":1365,"height":2048,"src":"\/\/www.thebirthstore.com.au\/cdn\/shop\/collections\/shop-all-693176.jpg?v=1714968055"}},{"id":310045933757,"handle":"shop-all-sale","title":"Shop All Sale","updated_at":"2026-11-14T20:08:00+08:00","body_html":"","published_at":"2024-11-12T13:22:43+08:00","sort_order":"best-selling","template_suffix":"","disjunctive":true,"rules":[],"published_scope":"global","image":{"created_at":"2024-11-13T10:58:16+08:00","alt":"Shop All Sale - The Birth Store","width":2048,"height":1365,"src":"\/\/www.thebirthstore.com.au\/cdn\/shop\/collections\/shop-all-sale-297361.jpg?v=1731466697"}},{"id":324680483005,"handle":"skin-care","title":"Skin Care","updated_at":"2026-11-11T20:07:57+08:00","body_html":"","published_at":"2025-09-23T22:14:11+08:00","sort_order":"best-selling","template_suffix":"","disjunctive":false,"rules":[],"published_scope":"global","image":{"created_at":"2025-10-30T16:17:08+08:00","alt":"Skin Care - The Birth Store","width":800,"height":800,"src":"\/\/www.thebirthstore.com.au\/cdn\/shop\/collections\/skin-care-6874549.jpg?v=1761812228"}},{"id":281712197821,"handle":"vaginal-birth-recovery","title":"Vaginal Birth Recovery","updated_at":"2026-11-12T20:07:50+08:00","body_html":"","published_at":"2021-12-20T14:18:23+08:00","sort_order":"best-selling","template_suffix":"swaddles-collection","disjunctive":true,"rules":[],"published_scope":"global","image":{"created_at":"2024-05-06T12:01:03+08:00","alt":"Vaginal Birth Recovery - The Birth Store","width":2048,"height":2048,"src":"\/\/www.thebirthstore.com.au\/cdn\/shop\/collections\/vaginal-birth-recovery-449034.jpg?v=1714968063"}}]}
{"item":{"id":7054911963325,"title":"Organic Raspberry Leaf Tea 60gm","handle":"organic-raspberry-leaf-tea-60gm","description":"\u003cspan data-mce-fragment=\"1\"\u003eOrganic Raspberry leaf tea has been traditionally used during the later stages of pregnancy to support a healthy pregnancy and strengthen and tone the uterus in preparation for childbirth. Raspberry leaf is also used to support and strengthen uterine health post birth.\u003c\/span\u003e\u003cbr data-mce-fragment=\"1\"\u003e\u003cspan data-mce-fragment=\"1\"\u003e\u003c\/span\u003e\u003cspan data-mce-fragment=\"1\"\u003e\u003c\/span\u003e\u003cbr data-mce-fragment=\"1\"\u003e\u003cspan data-mce-fragment=\"1\"\u003e\u003c\/span\u003e\u003cspan data-mce-fragment=\"1\"\u003e\u003cstrong\u003eDirections for use: \u003c\/strong\u003e\u003cbr data-mce-fragment=\"1\"\u003ePlace 1 teaspoon of dried herb into an infuser, tea pot or plunger.\u003cbr data-mce-fragment=\"1\"\u003eAdd 1 cup of freshly boiled water.\u003cbr data-mce-fragment=\"1\"\u003eSteep for 5-10 minutes.\u003c\/span\u003e\u003cspan data-mce-fragment=\"1\"\u003e\u003cbr data-mce-fragment=\"1\"\u003e\u003c\/span\u003e\u003cspan data-mce-fragment=\"1\"\u003eStrain.\u003c\/span\u003e\u003cbr data-mce-fragment=\"1\"\u003e\u003cspan data-mce-fragment=\"1\"\u003eDrink 1-3 cups per day.\u003c\/span\u003e\u003cspan data-mce-fragment=\"1\"\u003e\u003cbr data-mce-fragment=\"1\"\u003e\u003c\/span\u003e\u003cspan data-mce-fragment=\"1\"\u003e\u003cbr data-mce-fragment=\"1\"\u003eTraditionally, Raspberry Lead Tea is started at 32 weeks\u003cbr data-mce-fragment=\"1\"\u003e\u003c\/span\u003e\u003cspan data-mce-fragment=\"1\"\u003e32 weeks: drink 1 cup daily\u003c\/span\u003e\u003cbr data-mce-fragment=\"1\"\u003e\u003cspan data-mce-fragment=\"1\"\u003e33 weeks: drink 2 cups daily\u003c\/span\u003e\u003cbr data-mce-fragment=\"1\"\u003e\u003cspan data-mce-fragment=\"1\"\u003e34 weeks - birth: drink 3 cups daily\u003c\/span\u003e\u003cbr data-mce-fragment=\"1\"\u003e\u003cbr data-mce-fragment=\"1\"\u003e\u003cspan data-mce-fragment=\"1\"\u003eIngredients: Organic Raspberry loose leaf tea (Rubus idaeus) (Non-Irradiated)\u003cbr data-mce-fragment=\"1\"\u003e\u003cbr data-mce-fragment=\"1\"\u003e\/ Organic\u003cbr data-mce-fragment=\"1\"\u003e\u003c\/span\u003e\u003cspan data-mce-fragment=\"1\"\u003e\/ Caffeine free\u003cbr data-mce-fragment=\"1\"\u003e\/ Non-irradiated\u003cbr data-mce-fragment=\"1\"\u003e\/ Gluten and Dairy Fre\u003cbr data-mce-fragment=\"1\"\u003e\/ vegan \u003cbr data-mce-fragment=\"1\"\u003e\/ No GMO\u003cbr data-mce-fragment=\"1\"\u003e\u003c\/span\u003e\u003cspan data-mce-fragment=\"1\"\u003e\u003c\/span\u003e\u003cbr data-mce-fragment=\"1\"\u003e\u003cspan data-mce-fragment=\"1\"\u003eApprox. 90 serves.\u003c\/span\u003e\u003cbr data-mce-fragment=\"1\"\u003e\u003cspan data-mce-fragment=\"1\"\u003e\u003c\/span\u003e\u003cspan data-mce-fragment=\"1\"\u003e\u003c\/span\u003e\u003cbr data-mce-fragment=\"1\"\u003e\u003cspan data-mce-fragment=\"1\"\u003e\u003cstrong\u003e**Refrain from drinking until your third trimester. If pregnant or nursing, consult your healthcare provider before use.\u003c\/strong\u003e\u003cbr data-mce-fragment=\"1\"\u003e\u003cbr data-mce-fragment=\"1\"\u003eFree from sulfates (SLS\/SLES), silicones, parabens, PEGs, GMOs, mineral oils, petrolatum, synthetic colours and fragrances, or animal testing. This bag is compostable.\u003c\/span\u003e","published_at":"2021-11-18T14:32:31+08:00","created_at":"2021-11-02T12:53:22+08:00","vendor":"Mere Botanicals","type":"","tags":["Labour Preparation","Mum","Pregnancy"],"price":1795,"price_min":1795,"price_max":1795,"available":true,"price_varies":false,"compare_at_price":null,"compare_at_price_min":0,"compare_at_price_max":0,"compare_at_price_varies":false,"variants":[{"id":40977707958461,"title":"Default Title","option1":"Default Title","option2":null,"option3":null,"sku":"","requires_shipping":true,"taxable":false,"featured_image":null,"available":true,"name":"Organic Raspberry Leaf Tea 60gm","public_title":null,"options":["Default Title"],"price":1795,"weight":70,"compare_at_price":null,"inventory_management":"shopify","barcode":"07958461","requires_selling_plan":false,"selling_plan_allocations":[],"quantity_rule":{"min":1,"max":null,"increment":1}}],"images":["\/\/www.thebirthstore.com.au\/cdn\/shop\/files\/organic-raspberry-leaf-tea-60gm-210095.jpg?v=1714968005","\/\/www.thebirthstore.com.au\/cdn\/shop\/files\/organic-raspberry-leaf-tea-60gm-381547.jpg?v=1714968005","\/\/www.thebirthstore.com.au\/cdn\/shop\/files\/organic-raspberry-leaf-tea-60gm-607454.jpg?v=1714968005","\/\/www.thebirthstore.com.au\/cdn\/shop\/files\/organic-raspberry-leaf-tea-60gm-715188.jpg?v=1714968005"],"featured_image":"\/\/www.thebirthstore.com.au\/cdn\/shop\/files\/organic-raspberry-leaf-tea-60gm-210095.jpg?v=1714968005","options":["Title"],"media":[{"alt":"Organic Raspberry Leaf Tea 60gm - The Birth Store-Mere Botanicals","id":27007594823869,"position":1,"preview_image":{"aspect_ratio":1.0,"height":833,"width":833,"src":"\/\/www.thebirthstore.com.au\/cdn\/shop\/files\/organic-raspberry-leaf-tea-60gm-210095.jpg?v=1714968005"},"aspect_ratio":1.0,"height":833,"media_type":"image","src":"\/\/www.thebirthstore.com.au\/cdn\/shop\/files\/organic-raspberry-leaf-tea-60gm-210095.jpg?v=1714968005","width":833},{"alt":"Organic Raspberry Leaf Tea 60gm - The Birth Store-Mere Botanicals","id":27007594889405,"position":2,"preview_image":{"aspect_ratio":0.667,"height":2048,"width":1365,"src":"\/\/www.thebirthstore.com.au\/cdn\/shop\/files\/organic-raspberry-leaf-tea-60gm-381547.jpg?v=1714968005"},"aspect_ratio":0.667,"height":2048,"media_type":"image","src":"\/\/www.thebirthstore.com.au\/cdn\/shop\/files\/organic-raspberry-leaf-tea-60gm-381547.jpg?v=1714968005","width":1365},{"alt":"Organic Raspberry Leaf Tea 60gm - The Birth Store-Mere Botanicals","id":27007594922173,"position":3,"preview_image":{"aspect_ratio":0.667,"height":2048,"width":1365,"src":"\/\/www.thebirthstore.com.au\/cdn\/shop\/files\/organic-raspberry-leaf-tea-60gm-607454.jpg?v=1714968005"},"aspect_ratio":0.667,"height":2048,"media_type":"image","src":"\/\/www.thebirthstore.com.au\/cdn\/shop\/files\/organic-raspberry-leaf-tea-60gm-607454.jpg?v=1714968005","width":1365},{"alt":"Organic Raspberry Leaf Tea 60gm - The Birth Store-Mere Botanicals","id":27007594987709,"position":4,"preview_image":{"aspect_ratio":0.667,"height":1536,"width":1024,"src":"\/\/www.thebirthstore.com.au\/cdn\/shop\/files\/organic-raspberry-leaf-tea-60gm-715188.jpg?v=1714968005"},"aspect_ratio":0.667,"height":1536,"media_type":"image","src":"\/\/www.thebirthstore.com.au\/cdn\/shop\/files\/organic-raspberry-leaf-tea-60gm-715188.jpg?v=1714968005","width":1024}],"requires_selling_plan":false,"selling_plan_groups":[],"content":"\u003cspan data-mce-fragment=\"1\"\u003eOrganic Raspberry leaf tea has been traditionally used during the later stages of pregnancy to support a healthy pregnancy and strengthen and tone the uterus in preparation for childbirth. Raspberry leaf is also used to support and strengthen uterine health post birth.\u003c\/span\u003e\u003cbr data-mce-fragment=\"1\"\u003e\u003cspan data-mce-fragment=\"1\"\u003e\u003c\/span\u003e\u003cspan data-mce-fragment=\"1\"\u003e\u003c\/span\u003e\u003cbr data-mce-fragment=\"1\"\u003e\u003cspan data-mce-fragment=\"1\"\u003e\u003c\/span\u003e\u003cspan data-mce-fragment=\"1\"\u003e\u003cstrong\u003eDirections for use: \u003c\/strong\u003e\u003cbr data-mce-fragment=\"1\"\u003ePlace 1 teaspoon of dried herb into an infuser, tea pot or plunger.\u003cbr data-mce-fragment=\"1\"\u003eAdd 1 cup of freshly boiled water.\u003cbr data-mce-fragment=\"1\"\u003eSteep for 5-10 minutes.\u003c\/span\u003e\u003cspan data-mce-fragment=\"1\"\u003e\u003cbr data-mce-fragment=\"1\"\u003e\u003c\/span\u003e\u003cspan data-mce-fragment=\"1\"\u003eStrain.\u003c\/span\u003e\u003cbr data-mce-fragment=\"1\"\u003e\u003cspan data-mce-fragment=\"1\"\u003eDrink 1-3 cups per day.\u003c\/span\u003e\u003cspan data-mce-fragment=\"1\"\u003e\u003cbr data-mce-fragment=\"1\"\u003e\u003c\/span\u003e\u003cspan data-mce-fragment=\"1\"\u003e\u003cbr data-mce-fragment=\"1\"\u003eTraditionally, Raspberry Lead Tea is started at 32 weeks\u003cbr data-mce-fragment=\"1\"\u003e\u003c\/span\u003e\u003cspan data-mce-fragment=\"1\"\u003e32 weeks: drink 1 cup daily\u003c\/span\u003e\u003cbr data-mce-fragment=\"1\"\u003e\u003cspan data-mce-fragment=\"1\"\u003e33 weeks: drink 2 cups daily\u003c\/span\u003e\u003cbr data-mce-fragment=\"1\"\u003e\u003cspan data-mce-fragment=\"1\"\u003e34 weeks - birth: drink 3 cups daily\u003c\/span\u003e\u003cbr data-mce-fragment=\"1\"\u003e\u003cbr data-mce-fragment=\"1\"\u003e\u003cspan data-mce-fragment=\"1\"\u003eIngredients: Organic Raspberry loose leaf tea (Rubus idaeus) (Non-Irradiated)\u003cbr data-mce-fragment=\"1\"\u003e\u003cbr data-mce-fragment=\"1\"\u003e\/ Organic\u003cbr data-mce-fragment=\"1\"\u003e\u003c\/span\u003e\u003cspan data-mce-fragment=\"1\"\u003e\/ Caffeine free\u003cbr data-mce-fragment=\"1\"\u003e\/ Non-irradiated\u003cbr data-mce-fragment=\"1\"\u003e\/ Gluten and Dairy Fre\u003cbr data-mce-fragment=\"1\"\u003e\/ vegan \u003cbr data-mce-fragment=\"1\"\u003e\/ No GMO\u003cbr data-mce-fragment=\"1\"\u003e\u003c\/span\u003e\u003cspan data-mce-fragment=\"1\"\u003e\u003c\/span\u003e\u003cbr data-mce-fragment=\"1\"\u003e\u003cspan data-mce-fragment=\"1\"\u003eApprox. 90 serves.\u003c\/span\u003e\u003cbr data-mce-fragment=\"1\"\u003e\u003cspan data-mce-fragment=\"1\"\u003e\u003c\/span\u003e\u003cspan data-mce-fragment=\"1\"\u003e\u003c\/span\u003e\u003cbr data-mce-fragment=\"1\"\u003e\u003cspan data-mce-fragment=\"1\"\u003e\u003cstrong\u003e**Refrain from drinking until your third trimester. If pregnant or nursing, consult your healthcare provider before use.\u003c\/strong\u003e\u003cbr data-mce-fragment=\"1\"\u003e\u003cbr data-mce-fragment=\"1\"\u003eFree from sulfates (SLS\/SLES), silicones, parabens, PEGs, GMOs, mineral oils, petrolatum, synthetic colours and fragrances, or animal testing. This bag is compostable.\u003c\/span\u003e"},"options":[{"name":"Title","position":1,"values":["Default Title"]}],"custom_metafields":{},"metafields":{"badge":"\u003cdiv style='display:none' class='jdgm-prev-badge' data-average-rating='0.00' data-number-of-reviews='0' data-number-of-questions='0'\u003e \u003cspan class='jdgm-prev-badge__stars' data-score='0.00' tabindex='0' aria-label='0.00 stars' role='button'\u003e \u003cspan class='jdgm-star jdgm--off'\u003e\u003c\/span\u003e\u003cspan class='jdgm-star jdgm--off'\u003e\u003c\/span\u003e\u003cspan class='jdgm-star jdgm--off'\u003e\u003c\/span\u003e\u003cspan class='jdgm-star jdgm--off'\u003e\u003c\/span\u003e\u003cspan class='jdgm-star jdgm--off'\u003e\u003c\/span\u003e \u003c\/span\u003e \u003cspan class='jdgm-prev-badge__text'\u003e No reviews \u003c\/span\u003e \u003c\/div\u003e","widget":"\u003cdiv class='jdgm-rev-widg' data-updated-at='2025-06-13T16:12:10Z' data-average-rating='0.00' data-number-of-reviews='0' data-number-of-questions='0'\u003e \u003cstyle class='jdgm-temp-hiding-style'\u003e.jdgm-rev-widg{ display: none }\u003c\/style\u003e \u003cdiv class='jdgm-rev-widg__header'\u003e \u003ch2 class='jdgm-rev-widg__title'\u003eCustomer Reviews\u003c\/h2\u003e \u003cdiv class='jdgm-rev-widg__summary'\u003e \u003cdiv class='jdgm-rev-widg__summary-stars' aria-label='Average rating is 0.00 stars' role='img'\u003e \u003cspan class='jdgm-star jdgm--off'\u003e\u003c\/span\u003e\u003cspan class='jdgm-star jdgm--off'\u003e\u003c\/span\u003e\u003cspan class='jdgm-star jdgm--off'\u003e\u003c\/span\u003e\u003cspan class='jdgm-star jdgm--off'\u003e\u003c\/span\u003e\u003cspan class='jdgm-star jdgm--off'\u003e\u003c\/span\u003e \u003c\/div\u003e \u003cdiv class='jdgm-rev-widg__summary-text'\u003eBe the first to write a review\u003c\/div\u003e \u003c\/div\u003e \u003ca style='display: none' href='#' class='jdgm-write-rev-link' role='button'\u003eWrite a review\u003c\/a\u003e \u003cdiv class='jdgm-histogram jdgm-temp-hidden'\u003e \u003cdiv class='jdgm-histogram__row' data-rating='5' data-frequency='0' data-percentage='0'\u003e \u003cdiv class='jdgm-histogram__star' role='button' aria-label=\"0% (0) reviews with 5 star rating\" tabindex='0' \u003e\u003cspan class='jdgm-star jdgm--on'\u003e\u003c\/span\u003e\u003cspan class='jdgm-star jdgm--on'\u003e\u003c\/span\u003e\u003cspan class='jdgm-star jdgm--on'\u003e\u003c\/span\u003e\u003cspan class='jdgm-star jdgm--on'\u003e\u003c\/span\u003e\u003cspan class='jdgm-star jdgm--on'\u003e\u003c\/span\u003e\u003c\/div\u003e \u003cdiv class='jdgm-histogram__bar'\u003e \u003cdiv class='jdgm-histogram__bar-content' style='width: 0%;'\u003e \u003c\/div\u003e \u003c\/div\u003e \u003cdiv class='jdgm-histogram__percentage'\u003e0%\u003c\/div\u003e \u003cdiv class='jdgm-histogram__frequency'\u003e(0)\u003c\/div\u003e \u003c\/div\u003e \u003cdiv class='jdgm-histogram__row' data-rating='4' data-frequency='0' data-percentage='0'\u003e \u003cdiv class='jdgm-histogram__star' role='button' aria-label=\"0% (0) reviews with 4 star rating\" tabindex='0' \u003e\u003cspan class='jdgm-star jdgm--on'\u003e\u003c\/span\u003e\u003cspan class='jdgm-star jdgm--on'\u003e\u003c\/span\u003e\u003cspan class='jdgm-star jdgm--on'\u003e\u003c\/span\u003e\u003cspan class='jdgm-star jdgm--on'\u003e\u003c\/span\u003e\u003cspan class='jdgm-star jdgm--off'\u003e\u003c\/span\u003e\u003c\/div\u003e \u003cdiv class='jdgm-histogram__bar'\u003e \u003cdiv class='jdgm-histogram__bar-content' style='width: 0%;'\u003e \u003c\/div\u003e \u003c\/div\u003e \u003cdiv class='jdgm-histogram__percentage'\u003e0%\u003c\/div\u003e \u003cdiv class='jdgm-histogram__frequency'\u003e(0)\u003c\/div\u003e \u003c\/div\u003e \u003cdiv class='jdgm-histogram__row' data-rating='3' data-frequency='0' data-percentage='0'\u003e \u003cdiv class='jdgm-histogram__star' role='button' aria-label=\"0% (0) reviews with 3 star rating\" tabindex='0' \u003e\u003cspan class='jdgm-star jdgm--on'\u003e\u003c\/span\u003e\u003cspan class='jdgm-star jdgm--on'\u003e\u003c\/span\u003e\u003cspan class='jdgm-star jdgm--on'\u003e\u003c\/span\u003e\u003cspan class='jdgm-star jdgm--off'\u003e\u003c\/span\u003e\u003cspan class='jdgm-star jdgm--off'\u003e\u003c\/span\u003e\u003c\/div\u003e \u003cdiv class='jdgm-histogram__bar'\u003e \u003cdiv class='jdgm-histogram__bar-content' style='width: 0%;'\u003e \u003c\/div\u003e \u003c\/div\u003e \u003cdiv class='jdgm-histogram__percentage'\u003e0%\u003c\/div\u003e \u003cdiv class='jdgm-histogram__frequency'\u003e(0)\u003c\/div\u003e \u003c\/div\u003e \u003cdiv class='jdgm-histogram__row' data-rating='2' data-frequency='0' data-percentage='0'\u003e \u003cdiv class='jdgm-histogram__star' role='button' aria-label=\"0% (0) reviews with 2 star rating\" tabindex='0' \u003e\u003cspan class='jdgm-star jdgm--on'\u003e\u003c\/span\u003e\u003cspan class='jdgm-star jdgm--on'\u003e\u003c\/span\u003e\u003cspan class='jdgm-star jdgm--off'\u003e\u003c\/span\u003e\u003cspan class='jdgm-star jdgm--off'\u003e\u003c\/span\u003e\u003cspan class='jdgm-star jdgm--off'\u003e\u003c\/span\u003e\u003c\/div\u003e \u003cdiv class='jdgm-histogram__bar'\u003e \u003cdiv class='jdgm-histogram__bar-content' style='width: 0%;'\u003e \u003c\/div\u003e \u003c\/div\u003e \u003cdiv class='jdgm-histogram__percentage'\u003e0%\u003c\/div\u003e \u003cdiv class='jdgm-histogram__frequency'\u003e(0)\u003c\/div\u003e \u003c\/div\u003e \u003cdiv class='jdgm-histogram__row' data-rating='1' data-frequency='0' data-percentage='0'\u003e \u003cdiv class='jdgm-histogram__star' role='button' aria-label=\"0% (0) reviews with 1 star rating\" tabindex='0' \u003e\u003cspan class='jdgm-star jdgm--on'\u003e\u003c\/span\u003e\u003cspan class='jdgm-star jdgm--off'\u003e\u003c\/span\u003e\u003cspan class='jdgm-star jdgm--off'\u003e\u003c\/span\u003e\u003cspan class='jdgm-star jdgm--off'\u003e\u003c\/span\u003e\u003cspan class='jdgm-star jdgm--off'\u003e\u003c\/span\u003e\u003c\/div\u003e \u003cdiv class='jdgm-histogram__bar'\u003e \u003cdiv class='jdgm-histogram__bar-content' style='width: 0%;'\u003e \u003c\/div\u003e \u003c\/div\u003e \u003cdiv class='jdgm-histogram__percentage'\u003e0%\u003c\/div\u003e \u003cdiv class='jdgm-histogram__frequency'\u003e(0)\u003c\/div\u003e \u003c\/div\u003e \u003cdiv class='jdgm-histogram__row jdgm-histogram__clear-filter' data-rating=null tabindex='0'\u003e\u003c\/div\u003e \u003c\/div\u003e \u003cdiv class='jdgm-rev-widg__sort-wrapper'\u003e\u003c\/div\u003e \u003c\/div\u003e \u003cdiv class='jdgm-rev-widg__body'\u003e \u003cdiv class='jdgm-rev-widg__reviews'\u003e\u003c\/div\u003e \u003cdiv class='jdgm-paginate' data-per-page='10' data-url='https:\/\/api.judge.me\/reviews\/reviews_for_widget' style=\"display: none;\"\u003e\u003c\/div\u003e \u003c\/div\u003e \u003cdiv class='jdgm-rev-widg__paginate-spinner-wrapper'\u003e \u003cdiv class='jdgm-spinner'\u003e\u003c\/div\u003e \u003c\/div\u003e \u003c\/div\u003e"},"default_reviews_metafields":{},"collections":[{"id":512654540989,"handle":"lastof26-10","title":"10%","updated_at":"2026-11-14T20:08:00+08:00","body_html":null,"published_at":"2026-10-12T19:06:42+08:00","sort_order":"best-selling","template_suffix":null,"disjunctive":false,"rules":[],"published_scope":"global"},{"id":261657460925,"handle":"buy","title":"Buy","updated_at":"2026-11-14T20:08:00+08:00","body_html":"\u003cp\u003eBrowse all of our pregnancy, labour \u0026amp; birth, postpartum and baby essentials here.\u003cbr\u003e\u003c\/p\u003e\n\u003cp\u003e\u003cspan\u003eYou can even buy now and pay later with Afterpay!\u003c\/span\u003e\u003c\/p\u003e","published_at":"2021-03-10T12:05:31+08:00","sort_order":"best-selling","template_suffix":"shop-all-collection","disjunctive":false,"rules":[],"published_scope":"global","image":{"created_at":"2024-05-06T11:59:42+08:00","alt":"Buy - The Birth Store","width":2048,"height":2048,"src":"\/\/www.thebirthstore.com.au\/cdn\/shop\/collections\/buy-964856.jpg?v=1714967982"}},{"id":512272957629,"handle":"labour-birth-essentials","title":"Labour \u0026 Birth Essentials","updated_at":"2026-11-14T20:08:00+08:00","body_html":null,"published_at":"2026-10-06T21:00:01+08:00","sort_order":"most-relevant","template_suffix":"labournbirthemail","disjunctive":false,"rules":[],"published_scope":"global"},{"id":281712525501,"handle":"labour-preparation","title":"Labour Preparation","updated_at":"2026-11-14T20:08:00+08:00","body_html":"","published_at":"2021-12-20T14:20:12+08:00","sort_order":"best-selling","template_suffix":"labour-preparation-collec","disjunctive":false,"rules":[],"published_scope":"global","image":{"created_at":"2024-05-06T12:00:13+08:00","alt":"Labour Preparation - The Birth Store","width":1024,"height":1536,"src":"\/\/www.thebirthstore.com.au\/cdn\/shop\/collections\/labour-preparation-271961.jpg?v=1714968013"}},{"id":261658149053,"handle":"pregnancy-and-maternity-products","title":"Pregnancy","updated_at":"2026-11-14T20:08:00+08:00","body_html":"\u003cp\u003eShop your pregnancy essentials below. Looking for something we don't currently stock? Please reach out and let us know.\u003cbr\u003e\u003c\/p\u003e\n\u003cp\u003e\u003cspan\u003eYou can even buy now and pay later with Afterpay!\u003c\/span\u003e\u003c\/p\u003e","published_at":"2021-03-10T12:34:22+08:00","sort_order":"best-selling","template_suffix":"pregnancy-collection","disjunctive":false,"rules":[],"published_scope":"global","image":{"created_at":"2024-05-06T12:00:40+08:00","alt":"Pregnancy - The Birth Store","width":1024,"height":1536,"src":"\/\/www.thebirthstore.com.au\/cdn\/shop\/collections\/pregnancy-899677.jpg?v=1714968040"}},{"id":291456483517,"handle":"shop-all","title":"Shop All - Mum","updated_at":"2026-11-14T20:08:00+08:00","body_html":"","published_at":"2022-12-23T22:04:39+08:00","sort_order":"best-selling","template_suffix":"shop-all-collection","disjunctive":false,"rules":[],"published_scope":"global","image":{"created_at":"2024-05-06T12:00:54+08:00","alt":"Shop All - The Birth Store","width":1365,"height":2048,"src":"\/\/www.thebirthstore.com.au\/cdn\/shop\/collections\/shop-all-693176.jpg?v=1714968055"}},{"id":310045933757,"handle":"shop-all-sale","title":"Shop All Sale","updated_at":"2026-11-14T20:08:00+08:00","body_html":"","published_at":"2024-11-12T13:22:43+08:00","sort_order":"best-selling","template_suffix":"","disjunctive":true,"rules":[],"published_scope":"global","image":{"created_at":"2024-11-13T10:58:16+08:00","alt":"Shop All Sale - The Birth Store","width":2048,"height":1365,"src":"\/\/www.thebirthstore.com.au\/cdn\/shop\/collections\/shop-all-sale-297361.jpg?v=1731466697"}}]}
{"item":{"id":7192263884989,"title":"TENS Machine Hire Extension","handle":"tens-machine-hire-extension","description":"\u003cp\u003eNeed more time with your TENS machine? This listing adds 1 week onto your TENS hire that you've already purchased, if you need it for longer. Should you need more time than that, please increase quantity as needed.\u003c\/p\u003e\n\u003cp\u003eYou can purchase this alongside your hire to create a longer or more unique timeframe suitable to your situation, or you can come back to this later if you've realised you've not hired long enough. If you already have a TENS machine and want to add time to it, it's best to email us first to double check we are able to facilitate a longer hire.\u003c\/p\u003e\n\u003cp\u003e\u003cstrong\u003eNote\u003c\/strong\u003e: This cannot be purchased as TENS Hire alone, you will need to hire one of our machines \u003ca href=\"https:\/\/www.thebirthstore.com.au\/collections\/labour-tens-machine-hire\" target=\"_blank\" rel=\"noopener noreferrer\"\u003ehere \u003c\/a\u003efor 4, 6 or 8 weeks, and only use this to add time as required.\u003c\/p\u003e","published_at":"2022-03-16T09:07:19+08:00","created_at":"2022-03-14T08:55:56+08:00","vendor":"The Birth Store Hire","type":"","tags":["Birth","GST FREE","Mum","Pain Relief","TENS Hire"],"price":1000,"price_min":1000,"price_max":1000,"available":true,"price_varies":false,"compare_at_price":1000,"compare_at_price_min":1000,"compare_at_price_max":1000,"compare_at_price_varies":false,"variants":[{"id":41589754331325,"title":"Default Title","option1":"Default Title","option2":null,"option3":null,"sku":"","requires_shipping":false,"taxable":false,"featured_image":null,"available":true,"name":"TENS Machine Hire Extension","public_title":null,"options":["Default Title"],"price":1000,"weight":0,"compare_at_price":1000,"inventory_management":null,"barcode":"54331325","requires_selling_plan":false,"selling_plan_allocations":[],"quantity_rule":{"min":1,"max":null,"increment":1}}],"images":["\/\/www.thebirthstore.com.au\/cdn\/shop\/files\/tens-machine-hire-extension-837845.jpg?v=1714968054"],"featured_image":"\/\/www.thebirthstore.com.au\/cdn\/shop\/files\/tens-machine-hire-extension-837845.jpg?v=1714968054","options":["Title"],"media":[{"alt":"TENS Machine Hire Extension - The Birth Store-The Birth Store","id":27007601475773,"position":1,"preview_image":{"aspect_ratio":1.0,"height":1080,"width":1080,"src":"\/\/www.thebirthstore.com.au\/cdn\/shop\/files\/tens-machine-hire-extension-837845.jpg?v=1714968054"},"aspect_ratio":1.0,"height":1080,"media_type":"image","src":"\/\/www.thebirthstore.com.au\/cdn\/shop\/files\/tens-machine-hire-extension-837845.jpg?v=1714968054","width":1080}],"requires_selling_plan":false,"selling_plan_groups":[],"content":"\u003cp\u003eNeed more time with your TENS machine? This listing adds 1 week onto your TENS hire that you've already purchased, if you need it for longer. Should you need more time than that, please increase quantity as needed.\u003c\/p\u003e\n\u003cp\u003eYou can purchase this alongside your hire to create a longer or more unique timeframe suitable to your situation, or you can come back to this later if you've realised you've not hired long enough. If you already have a TENS machine and want to add time to it, it's best to email us first to double check we are able to facilitate a longer hire.\u003c\/p\u003e\n\u003cp\u003e\u003cstrong\u003eNote\u003c\/strong\u003e: This cannot be purchased as TENS Hire alone, you will need to hire one of our machines \u003ca href=\"https:\/\/www.thebirthstore.com.au\/collections\/labour-tens-machine-hire\" target=\"_blank\" rel=\"noopener noreferrer\"\u003ehere \u003c\/a\u003efor 4, 6 or 8 weeks, and only use this to add time as required.\u003c\/p\u003e"},"options":[{"name":"Title","position":1,"values":["Default Title"]}],"custom_metafields":{},"metafields":{"badge":"\u003cdiv style='display:none' class='jdgm-prev-badge' data-average-rating='5.00' data-number-of-reviews='4' data-number-of-questions='0'\u003e \u003cspan class='jdgm-prev-badge__stars' data-score='5.00' tabindex='0' aria-label='5.00 stars' role='button'\u003e \u003cspan class='jdgm-star jdgm--on'\u003e\u003c\/span\u003e\u003cspan class='jdgm-star jdgm--on'\u003e\u003c\/span\u003e\u003cspan class='jdgm-star jdgm--on'\u003e\u003c\/span\u003e\u003cspan class='jdgm-star jdgm--on'\u003e\u003c\/span\u003e\u003cspan class='jdgm-star jdgm--on'\u003e\u003c\/span\u003e \u003c\/span\u003e \u003cspan class='jdgm-prev-badge__text'\u003e 4 reviews \u003c\/span\u003e \u003c\/div\u003e","review_snippet_widget":"\u003cdiv class='jdgm-widget jdgm-review-snippet-widget'\u003e \u003cstyle\u003e\n .jdgm-review-snippet-widget{position:relative}.jdgm-review-snippet-widget:hover{cursor:pointer}@media only screen and (max-width: 767px){.jdgm-review-snippet-widget .jdgm-rev-snippet-widget__cards-container{left:unset;right:unset}}.jdgm-review-snippet-widget .jdgm-rev-snippet-card{background:#fff}.jdgm-review-snippet-widget .jdgm-star{color:#399}.jdgm-review-snippet-widget .jdgm-rev-snippet-card{border-radius:8px;background:#fff}.jdgm-review-snippet-widget .jdgm-rev-snippet-card__rev-prod-wrapper{border-radius:8px}.jdgm-review-snippet-widget .jdgm-rev-snippet-card__rev-content-wrapper{max-width:360px}.jdgm-review-snippet-widget .jdgm-rev-snippet-widget__prev-btn,.jdgm-review-snippet-widget .jdgm-rev-snippet-widget__next-btn{border-radius:50%;background:#fff}.jdgm-review-snippet-widget .jdgm-rev-snippet-widget__prev-btn\u003esvg,.jdgm-review-snippet-widget .jdgm-rev-snippet-widget__next-btn\u003esvg{fill:#000}.jdgm-review-snippet-widget .jdgm-rev-snippet-widget__prev-btn{left:0;top:40%}.jdgm-review-snippet-widget .jdgm-rev-snippet-widget__next-btn{right:0;top:40%}.jdgm-full-rev-modal.review-snippet-widget .jm-mfp-content{border-radius:8px}.jdgm-full-rev-modal.review-snippet-widget .jdgm-full-rev__icon{border-radius:8px}.jdgm-full-rev-modal.review-snippet-widget .jdgm-full-rev[data-verified-buyer=\"true\"] .jdgm-full-rev__icon::after{border-radius:8px}.jdgm-full-rev-modal.review-snippet-widget .jdgm-rev__buyer-badge{border-radius:calc( 8px \/ 2 )}.jdgm-full-rev-modal.review-snippet-widget .jdgm-full-rev__pic-img{border-radius:8px}.jdgm-full-rev-modal.review-snippet-widget .jdgm-full-rev__reply{border-radius:8px}.jdgm-full-rev-modal.review-snippet-widget .jdgm-full-rev__replier::before{content:'thebirthstore.com.au'}.jdgm-full-rev-modal.review-snippet-widget .jdgm-full-rev__product-button{border-radius:calc( 8px * 6 )}\n\n \u003c\/style\u003e \u003ci class=\"jdgm-rev-snippet-widget__prev-btn\" style='display: none;'\u003e \u003csvg xmlns=\"http:\/\/www.w3.org\/2000\/svg\" height=\"12\" viewBox=\"0 0 8 12\" width=\"8\" fill=\"#000\"\u003e\u003cpath d=\"M3.09961 6.00005L6.99961 9.90005C7.18294 10.0834 7.27461 10.3167 7.27461 10.6C7.27461 10.8834 7.18294 11.1167 6.99961 11.3C6.81628 11.4834 6.58294 11.575 6.29961 11.575C6.01628 11.575 5.78294 11.4834 5.59961 11.3L0.999609 6.70005C0.899609 6.60005 0.828776 6.49172 0.787109 6.37505C0.745443 6.25838 0.724609 6.13338 0.724609 6.00005C0.724609 5.86672 0.745443 5.74172 0.787109 5.62505C0.828776 5.50838 0.899609 5.40005 0.999609 5.30005L5.59961 0.700049C5.78294 0.516715 6.01628 0.425049 6.29961 0.425049C6.58294 0.425049 6.81628 0.516715 6.99961 0.700049C7.18294 0.883382 7.27461 1.11672 7.27461 1.40005C7.27461 1.68338 7.18294 1.91672 6.99961 2.10005L3.09961 6.00005Z\"\/\u003e\u003c\/svg\u003e \u003c\/i\u003e \u003ci class=\"jdgm-rev-snippet-widget__next-btn\" style='display: none;'\u003e \u003csvg xmlns=\"http:\/\/www.w3.org\/2000\/svg\" height=\"12\" viewBox=\"0 0 8 12\" width=\"8\" fill=\"#000\"\u003e\u003cpath d=\"M4.89961 6.00005L0.999609 2.10005C0.816276 1.91672 0.724609 1.68338 0.724609 1.40005C0.724609 1.11672 0.816276 0.883382 0.999609 0.700049C1.18294 0.516715 1.41628 0.425049 1.69961 0.425049C1.98294 0.425049 2.21628 0.516715 2.39961 0.700049L6.99961 5.30005C7.09961 5.40005 7.17044 5.50838 7.21211 5.62505C7.25378 5.74172 7.27461 5.86672 7.27461 6.00005C7.27461 6.13338 7.25378 6.25838 7.21211 6.37505C7.17044 6.49172 7.09961 6.60005 6.99961 6.70005L2.39961 11.3C2.21628 11.4834 1.98294 11.575 1.69961 11.575C1.41628 11.575 1.18294 11.4834 0.999609 11.3C0.816276 11.1167 0.724609 10.8834 0.724609 10.6C0.724609 10.3167 0.816276 10.0834 0.999609 9.90005L4.89961 6.00005Z\"\/\u003e\u003c\/svg\u003e \u003c\/i\u003e \u003cdiv style=\"overflow: hidden;\"\u003e \u003cdiv class='jdgm-rev-snippet-widget__cards-container'\u003e \u003cdiv class='jdgm-rev-snippet-card' data-review-id='c34f0f30-271d-4d10-8959-3b59f97a6e86' style='display: none;'\u003e \u003cdiv class=\"jdgm-rev-snippet-card__rev-prod-wrapper\"\u003e \u003ca class='jdgm-rev-snippet-card__rev-content-wrapper jdgm-rev-snippet-card__full-review-link' style='text-decoration: none; color: inherit;padding: 0 34px;' role='button' data-review-id='c34f0f30-271d-4d10-8959-3b59f97a6e86'\u003e \u003cdiv class='jdgm-rev-snippet-card__rev-header'\u003e \u003cdiv class='jdgm-rev-snippet-card__rev-rating' aria-label='5 stars' role='img'\u003e \u003cspan class='jdgm-star jdgm--on'\u003e\u003c\/span\u003e\u003cspan class='jdgm-star jdgm--on'\u003e\u003c\/span\u003e\u003cspan class='jdgm-star jdgm--on'\u003e\u003c\/span\u003e\u003cspan class='jdgm-star jdgm--on'\u003e\u003c\/span\u003e\u003cspan class='jdgm-star jdgm--on'\u003e\u003c\/span\u003e \u003c\/div\u003e \u003cdiv class='jdgm-rev-snippet-card__reviewer'\u003e Gemma Topic \u003c\/div\u003e \u003c\/div\u003e \u003cdiv class='jdgm-rev-snippet-card__rev-content'\u003e \u003cspan class='jdgm-rev-snippet-card__rev-body'\u003e \u003cp\u003eI was able to manage the first 14hrs of labour with the tens alone, i found that it also helped with keeping track of my contractions. Would definitely recommend and will hire again next time round.\u003c\/p\u003e \u003c\/span\u003e \u003c\/div\u003e \u003c\/a\u003e \u003c\/div\u003e \u003c\/div\u003e\u003cdiv class='jdgm-rev-snippet-card' data-review-id='cbb550f6-b0b3-4dd9-b775-ed9579e21e43' style='display: none;'\u003e \u003cdiv class=\"jdgm-rev-snippet-card__rev-prod-wrapper\"\u003e \u003ca class='jdgm-rev-snippet-card__rev-content-wrapper jdgm-rev-snippet-card__full-review-link' style='text-decoration: none; color: inherit;padding: 0 34px;' role='button' data-review-id='cbb550f6-b0b3-4dd9-b775-ed9579e21e43'\u003e \u003cdiv class='jdgm-rev-snippet-card__rev-header'\u003e \u003cdiv class='jdgm-rev-snippet-card__rev-rating' aria-label='5 stars' role='img'\u003e \u003cspan class='jdgm-star jdgm--on'\u003e\u003c\/span\u003e\u003cspan class='jdgm-star jdgm--on'\u003e\u003c\/span\u003e\u003cspan class='jdgm-star jdgm--on'\u003e\u003c\/span\u003e\u003cspan class='jdgm-star jdgm--on'\u003e\u003c\/span\u003e\u003cspan class='jdgm-star jdgm--on'\u003e\u003c\/span\u003e \u003c\/div\u003e \u003cdiv class='jdgm-rev-snippet-card__reviewer'\u003e Tamara Villanueva Collao \u003c\/div\u003e \u003c\/div\u003e \u003cdiv class='jdgm-rev-snippet-card__rev-content'\u003e \u003cspan class='jdgm-rev-snippet-card__rev-body'\u003e \u003cp\u003eThis was AMAZING in my labour! \n\u003cbr \/\u003eThank you so much!\u003c\/p\u003e \u003c\/span\u003e \u003c\/div\u003e \u003c\/a\u003e \u003c\/div\u003e \u003c\/div\u003e \u003c\/div\u003e \u003c\/div\u003e \u003c\/div\u003e","widget":"\u003cdiv class='jdgm-rev-widg' data-updated-at='2026-11-04T06:28:07Z' data-average-rating='5.00' data-number-of-reviews='4' data-number-of-questions='0' data-image-url='https:\/\/cdn.shopify.com\/s\/files\/1\/0527\/3393\/5805\/files\/tens-machine-hire-extension-837845.jpg?v=1714968054'\u003e \u003cstyle class='jdgm-temp-hiding-style'\u003e.jdgm-rev-widg{ display: none }\u003c\/style\u003e \u003cdiv class='jdgm-rev-widg__header'\u003e \u003ch2 class='jdgm-rev-widg__title'\u003eCustomer Reviews\u003c\/h2\u003e \u003cdiv class='jdgm-rev-widg__summary'\u003e \u003cdiv class='jdgm-rev-widg__summary-stars'\u003e \u003cspan class='jdgm-rev-widg__summary-stars-img' aria-label='Average rating is 5.00 stars' role='img'\u003e \u003cspan class='jdgm-star jdgm--on'\u003e\u003c\/span\u003e\u003cspan class='jdgm-star jdgm--on'\u003e\u003c\/span\u003e\u003cspan class='jdgm-star jdgm--on'\u003e\u003c\/span\u003e\u003cspan class='jdgm-star jdgm--on'\u003e\u003c\/span\u003e\u003cspan class='jdgm-star jdgm--on'\u003e\u003c\/span\u003e \u003c\/span\u003e \u003c\/div\u003e \u003cdiv class='jdgm-rev-widg__summary-text'\u003eBased on 4 reviews\u003c\/div\u003e \u003c\/div\u003e \u003ca style='display: none' href='#' class='jdgm-write-rev-link' role='button'\u003eWrite a review\u003c\/a\u003e \u003cdiv class='jdgm-histogram jdgm-temp-hidden'\u003e \u003cdiv class='jdgm-histogram__row' data-rating='5' data-frequency='4' data-percentage='100'\u003e \u003cdiv class='jdgm-histogram__star' role='button' aria-label=\"100% (4) reviews with 5 star rating\" tabindex='0' \u003e\u003cspan class='jdgm-star jdgm--on'\u003e\u003c\/span\u003e\u003cspan class='jdgm-star jdgm--on'\u003e\u003c\/span\u003e\u003cspan class='jdgm-star jdgm--on'\u003e\u003c\/span\u003e\u003cspan class='jdgm-star jdgm--on'\u003e\u003c\/span\u003e\u003cspan class='jdgm-star jdgm--on'\u003e\u003c\/span\u003e\u003c\/div\u003e \u003cdiv class='jdgm-histogram__bar'\u003e \u003cdiv class='jdgm-histogram__bar-content' style='width: 100%;'\u003e \u003c\/div\u003e \u003c\/div\u003e \u003cdiv class='jdgm-histogram__percentage'\u003e100%\u003c\/div\u003e \u003cdiv class='jdgm-histogram__frequency'\u003e(4)\u003c\/div\u003e \u003c\/div\u003e \u003cdiv class='jdgm-histogram__row' data-rating='4' data-frequency='0' data-percentage='0'\u003e \u003cdiv class='jdgm-histogram__star' role='button' aria-label=\"0% (0) reviews with 4 star rating\" tabindex='0' \u003e\u003cspan class='jdgm-star jdgm--on'\u003e\u003c\/span\u003e\u003cspan class='jdgm-star jdgm--on'\u003e\u003c\/span\u003e\u003cspan class='jdgm-star jdgm--on'\u003e\u003c\/span\u003e\u003cspan class='jdgm-star jdgm--on'\u003e\u003c\/span\u003e\u003cspan class='jdgm-star jdgm--off'\u003e\u003c\/span\u003e\u003c\/div\u003e \u003cdiv class='jdgm-histogram__bar'\u003e \u003cdiv class='jdgm-histogram__bar-content' style='width: 0%;'\u003e \u003c\/div\u003e \u003c\/div\u003e \u003cdiv class='jdgm-histogram__percentage'\u003e0%\u003c\/div\u003e \u003cdiv class='jdgm-histogram__frequency'\u003e(0)\u003c\/div\u003e \u003c\/div\u003e \u003cdiv class='jdgm-histogram__row' data-rating='3' data-frequency='0' data-percentage='0'\u003e \u003cdiv class='jdgm-histogram__star' role='button' aria-label=\"0% (0) reviews with 3 star rating\" tabindex='0' \u003e\u003cspan class='jdgm-star jdgm--on'\u003e\u003c\/span\u003e\u003cspan class='jdgm-star jdgm--on'\u003e\u003c\/span\u003e\u003cspan class='jdgm-star jdgm--on'\u003e\u003c\/span\u003e\u003cspan class='jdgm-star jdgm--off'\u003e\u003c\/span\u003e\u003cspan class='jdgm-star jdgm--off'\u003e\u003c\/span\u003e\u003c\/div\u003e \u003cdiv class='jdgm-histogram__bar'\u003e \u003cdiv class='jdgm-histogram__bar-content' style='width: 0%;'\u003e \u003c\/div\u003e \u003c\/div\u003e \u003cdiv class='jdgm-histogram__percentage'\u003e0%\u003c\/div\u003e \u003cdiv class='jdgm-histogram__frequency'\u003e(0)\u003c\/div\u003e \u003c\/div\u003e \u003cdiv class='jdgm-histogram__row' data-rating='2' data-frequency='0' data-percentage='0'\u003e \u003cdiv class='jdgm-histogram__star' role='button' aria-label=\"0% (0) reviews with 2 star rating\" tabindex='0' \u003e\u003cspan class='jdgm-star jdgm--on'\u003e\u003c\/span\u003e\u003cspan class='jdgm-star jdgm--on'\u003e\u003c\/span\u003e\u003cspan class='jdgm-star jdgm--off'\u003e\u003c\/span\u003e\u003cspan class='jdgm-star jdgm--off'\u003e\u003c\/span\u003e\u003cspan class='jdgm-star jdgm--off'\u003e\u003c\/span\u003e\u003c\/div\u003e \u003cdiv class='jdgm-histogram__bar'\u003e \u003cdiv class='jdgm-histogram__bar-content' style='width: 0%;'\u003e \u003c\/div\u003e \u003c\/div\u003e \u003cdiv class='jdgm-histogram__percentage'\u003e0%\u003c\/div\u003e \u003cdiv class='jdgm-histogram__frequency'\u003e(0)\u003c\/div\u003e \u003c\/div\u003e \u003cdiv class='jdgm-histogram__row' data-rating='1' data-frequency='0' data-percentage='0'\u003e \u003cdiv class='jdgm-histogram__star' role='button' aria-label=\"0% (0) reviews with 1 star rating\" tabindex='0' \u003e\u003cspan class='jdgm-star jdgm--on'\u003e\u003c\/span\u003e\u003cspan class='jdgm-star jdgm--off'\u003e\u003c\/span\u003e\u003cspan class='jdgm-star jdgm--off'\u003e\u003c\/span\u003e\u003cspan class='jdgm-star jdgm--off'\u003e\u003c\/span\u003e\u003cspan class='jdgm-star jdgm--off'\u003e\u003c\/span\u003e\u003c\/div\u003e \u003cdiv class='jdgm-histogram__bar'\u003e \u003cdiv class='jdgm-histogram__bar-content' style='width: 0%;'\u003e \u003c\/div\u003e \u003c\/div\u003e \u003cdiv class='jdgm-histogram__percentage'\u003e0%\u003c\/div\u003e \u003cdiv class='jdgm-histogram__frequency'\u003e(0)\u003c\/div\u003e \u003c\/div\u003e \u003cdiv class='jdgm-histogram__row jdgm-histogram__clear-filter' data-rating=null tabindex='0'\u003e\u003c\/div\u003e \u003c\/div\u003e \u003cdiv class='jdgm-rev-widg__sort-wrapper'\u003e\u003c\/div\u003e \u003c\/div\u003e \u003cdiv class='jdgm-rev-widg__body'\u003e \u003cdiv class='jdgm-rev-widg__reviews'\u003e\u003cdiv class='jdgm-rev jdgm-divider-top' data-verified-buyer='true' data-review-id='bde07531-73d8-424c-90a9-901954de08bb' data-review-language='' data-product-title='TENS Machine Hire Extension' data-product-url='\/products\/tens-machine-hire-extension' data-thumb-up-count='0' data-thumb-down-count='0'\u003e \u003cdiv class='jdgm-rev__header'\u003e \u003cdiv class='jdgm-rev__icon' \u003e F \u003c\/div\u003e \u003cspan class='jdgm-rev__rating' data-score='5' tabindex='0' aria-label='5 star review' role='img'\u003e \u003cspan class='jdgm-star jdgm--on'\u003e\u003c\/span\u003e\u003cspan class='jdgm-star jdgm--on'\u003e\u003c\/span\u003e\u003cspan class='jdgm-star jdgm--on'\u003e\u003c\/span\u003e\u003cspan class='jdgm-star jdgm--on'\u003e\u003c\/span\u003e\u003cspan class='jdgm-star jdgm--on'\u003e\u003c\/span\u003e \u003c\/span\u003e \u003ctime class='jdgm-rev__timestamp jdgm-spinner' datetime='2026-11-04T00:32:43Z' data-content='2026-11-04 00:32:43 UTC'\u003e\u003c\/time\u003e \u003cdiv class='jdgm-rev__br'\u003e\u003c\/div\u003e \u003cspan class='jdgm-rev__buyer-badge-wrapper'\u003e \u003cspan class='jdgm-rev__buyer-badge'\u003e\u003c\/span\u003e \u003c\/span\u003e \u003cspan class='jdgm-rev__author-wrapper'\u003e \u003cspan class='jdgm-rev__author'\u003eFabiola Belen Inostroza levy\u003c\/span\u003e \u003cspan class='jdgm-rev__location' \u003e \u003c\/span\u003e \u003c\/span\u003e \u003c\/div\u003e \u003cdiv class='jdgm-rev__content'\u003e \u003cdiv class='jdgm-rev__custom-form'\u003e \u003c\/div\u003e \u003cb class='jdgm-rev__title'\u003e\u003c\/b\u003e \u003cdiv class='jdgm-rev__body'\u003e\u003cp\u003eTENS Machine Hire Extension\u003c\/p\u003e\u003c\/div\u003e \u003cdiv class='jdgm-rev__pics'\u003e \u003c\/div\u003e \u003cdiv class='jdgm-rev__vids'\u003e \u003c\/div\u003e \u003cdiv class='jdgm-rev__transparency-badge-wrapper'\u003e \u003cdiv class='jdgm-rev__transparency-badge' data-badge-type=review_collected_via_store_invitation\u003e\u003c\/div\u003e \u003c\/div\u003e \u003c\/div\u003e \u003cdiv class='jdgm-rev__actions'\u003e \u003cdiv class='jdgm-rev__social'\u003e\u003c\/div\u003e \u003cdiv class='jdgm-rev__votes'\u003e\u003c\/div\u003e \u003c\/div\u003e \u003cdiv class='jdgm-rev__reply'\u003e \u003cdiv class='jdgm-rev__replier-wrapper'\u003e \u003cb class='jdgm-rev__replier'\u003e\u003c\/b\u003e \u003c\/div\u003e \u003cdiv class='jdgm-rev__reply-content' data-digital-source-type=\"https:\/\/schema.org\/TrainedAlgorithmicMediaDigitalSource\"\u003e\u003cp\u003eThank you so much, Fabiola, for your review ❤️ We really appreciate your support and are glad you chose The Birth Store for your TENS Machine Hire Extension. We hope the extra time made things a little easier for you!\u003c\/p\u003e\u003c\/div\u003e \u003c\/div\u003e \u003c\/div\u003e\u003cdiv class='jdgm-rev jdgm-divider-top' data-verified-buyer='true' data-review-id='ca00bdbc-c3e0-44bd-b316-593ea264b9fe' data-review-language='' data-product-title='TENS Machine Hire Extension' data-product-url='\/products\/tens-machine-hire-extension' data-thumb-up-count='0' data-thumb-down-count='0'\u003e \u003cdiv class='jdgm-rev__header'\u003e \u003cdiv class='jdgm-rev__icon' \u003e N \u003c\/div\u003e \u003cspan class='jdgm-rev__rating' data-score='5' tabindex='0' aria-label='5 star review' role='img'\u003e \u003cspan class='jdgm-star jdgm--on'\u003e\u003c\/span\u003e\u003cspan class='jdgm-star jdgm--on'\u003e\u003c\/span\u003e\u003cspan class='jdgm-star jdgm--on'\u003e\u003c\/span\u003e\u003cspan class='jdgm-star jdgm--on'\u003e\u003c\/span\u003e\u003cspan class='jdgm-star jdgm--on'\u003e\u003c\/span\u003e \u003c\/span\u003e \u003ctime class='jdgm-rev__timestamp jdgm-spinner' datetime='2026-07-14T22:25:55Z' data-content='2026-07-14 22:25:55 UTC'\u003e\u003c\/time\u003e \u003cdiv class='jdgm-rev__br'\u003e\u003c\/div\u003e \u003cspan class='jdgm-rev__buyer-badge-wrapper'\u003e \u003cspan class='jdgm-rev__buyer-badge'\u003e\u003c\/span\u003e \u003c\/span\u003e \u003cspan class='jdgm-rev__author-wrapper'\u003e \u003cspan class='jdgm-rev__author'\u003eNeeda\u003c\/span\u003e \u003cspan class='jdgm-rev__location' \u003e \u003c\/span\u003e \u003c\/span\u003e \u003c\/div\u003e \u003cdiv class='jdgm-rev__content'\u003e \u003cdiv class='jdgm-rev__custom-form'\u003e \u003c\/div\u003e \u003cb class='jdgm-rev__title'\u003eEasy to extend\u003c\/b\u003e \u003cdiv class='jdgm-rev__body'\u003e\u003cp\u003eEasy and affordable\u003c\/p\u003e\u003c\/div\u003e \u003cdiv class='jdgm-rev__pics'\u003e \u003c\/div\u003e \u003cdiv class='jdgm-rev__vids'\u003e \u003c\/div\u003e \u003cdiv class='jdgm-rev__transparency-badge-wrapper'\u003e \u003cdiv class='jdgm-rev__transparency-badge' data-badge-type=review_collected_via_store_invitation\u003e\u003c\/div\u003e \u003c\/div\u003e \u003c\/div\u003e \u003cdiv class='jdgm-rev__actions'\u003e \u003cdiv class='jdgm-rev__social'\u003e\u003c\/div\u003e \u003cdiv class='jdgm-rev__votes'\u003e\u003c\/div\u003e \u003c\/div\u003e \u003cdiv class='jdgm-rev__reply'\u003e \u003cdiv class='jdgm-rev__replier-wrapper'\u003e \u003cb class='jdgm-rev__replier'\u003e\u003c\/b\u003e \u003c\/div\u003e \u003cdiv class='jdgm-rev__reply-content' data-digital-source-type=\"https:\/\/schema.org\/TrainedAlgorithmicMediaDigitalSource\"\u003e\u003cp\u003eThank you so much, Needa, for your lovely review ❤️ We’re so glad you found extending your TENS machine hire easy and affordable. We really appreciate your support and feedback!\u003c\/p\u003e\u003c\/div\u003e \u003c\/div\u003e \u003c\/div\u003e\u003cdiv class='jdgm-rev jdgm-divider-top' data-verified-buyer='true' data-review-id='c34f0f30-271d-4d10-8959-3b59f97a6e86' data-review-language='' data-product-title='TENS Machine Hire Extension' data-product-url='\/products\/tens-machine-hire-extension' data-thumb-up-count='0' data-thumb-down-count='0'\u003e \u003cdiv class='jdgm-rev__header'\u003e \u003cdiv class='jdgm-rev__icon' \u003e G \u003c\/div\u003e \u003cspan class='jdgm-rev__rating' data-score='5' tabindex='0' aria-label='5 star review' role='img'\u003e \u003cspan class='jdgm-star jdgm--on'\u003e\u003c\/span\u003e\u003cspan class='jdgm-star jdgm--on'\u003e\u003c\/span\u003e\u003cspan class='jdgm-star jdgm--on'\u003e\u003c\/span\u003e\u003cspan class='jdgm-star jdgm--on'\u003e\u003c\/span\u003e\u003cspan class='jdgm-star jdgm--on'\u003e\u003c\/span\u003e \u003c\/span\u003e \u003ctime class='jdgm-rev__timestamp jdgm-spinner' datetime='2023-06-26T06:36:48Z' data-content='2023-06-26 06:36:48 UTC'\u003e\u003c\/time\u003e \u003cdiv class='jdgm-rev__br'\u003e\u003c\/div\u003e \u003cspan class='jdgm-rev__buyer-badge-wrapper'\u003e \u003cspan class='jdgm-rev__buyer-badge'\u003e\u003c\/span\u003e \u003c\/span\u003e \u003cspan class='jdgm-rev__author-wrapper'\u003e \u003cspan class='jdgm-rev__author'\u003eGemma Topic\u003c\/span\u003e \u003cspan class='jdgm-rev__location' \u003e \u003c\/span\u003e \u003c\/span\u003e \u003c\/div\u003e \u003cdiv class='jdgm-rev__content'\u003e \u003cdiv class='jdgm-rev__custom-form'\u003e \u003c\/div\u003e \u003cb class='jdgm-rev__title'\u003eGame changer\u003c\/b\u003e \u003cdiv class='jdgm-rev__body'\u003e\u003cp\u003eI was able to manage the first 14hrs of labour with the tens alone, i found that it also helped with keeping track of my contractions. Would definitely recommend and will hire again next time round.\u003c\/p\u003e\u003c\/div\u003e \u003cdiv class='jdgm-rev__pics'\u003e \u003c\/div\u003e \u003cdiv class='jdgm-rev__vids'\u003e \u003c\/div\u003e \u003cdiv class='jdgm-rev__transparency-badge-wrapper'\u003e \u003cdiv class='jdgm-rev__transparency-badge' data-badge-type=review_collected_via_store_invitation\u003e\u003c\/div\u003e \u003c\/div\u003e \u003c\/div\u003e \u003cdiv class='jdgm-rev__actions'\u003e \u003cdiv class='jdgm-rev__social'\u003e\u003c\/div\u003e \u003cdiv class='jdgm-rev__votes'\u003e\u003c\/div\u003e \u003c\/div\u003e \u003cdiv class='jdgm-rev__reply'\u003e \u003c\/div\u003e \u003c\/div\u003e\u003cdiv class='jdgm-rev jdgm-divider-top' data-verified-buyer='true' data-review-id='cbb550f6-b0b3-4dd9-b775-ed9579e21e43' data-review-language='' data-product-title='TENS Machine Hire Extension' data-product-url='\/products\/tens-machine-hire-extension' data-thumb-up-count='0' data-thumb-down-count='0'\u003e \u003cdiv class='jdgm-rev__header'\u003e \u003cdiv class='jdgm-rev__icon' \u003e T \u003c\/div\u003e \u003cspan class='jdgm-rev__rating' data-score='5' tabindex='0' aria-label='5 star review' role='img'\u003e \u003cspan class='jdgm-star jdgm--on'\u003e\u003c\/span\u003e\u003cspan class='jdgm-star jdgm--on'\u003e\u003c\/span\u003e\u003cspan class='jdgm-star jdgm--on'\u003e\u003c\/span\u003e\u003cspan class='jdgm-star jdgm--on'\u003e\u003c\/span\u003e\u003cspan class='jdgm-star jdgm--on'\u003e\u003c\/span\u003e \u003c\/span\u003e \u003ctime class='jdgm-rev__timestamp jdgm-spinner' datetime='2022-11-06T04:26:11Z' data-content='2022-11-06 04:26:11 UTC'\u003e\u003c\/time\u003e \u003cdiv class='jdgm-rev__br'\u003e\u003c\/div\u003e \u003cspan class='jdgm-rev__buyer-badge-wrapper'\u003e \u003cspan class='jdgm-rev__buyer-badge'\u003e\u003c\/span\u003e \u003c\/span\u003e \u003cspan class='jdgm-rev__author-wrapper'\u003e \u003cspan class='jdgm-rev__author'\u003eTamara Villanueva Collao\u003c\/span\u003e \u003cspan class='jdgm-rev__location' \u003e \u003c\/span\u003e \u003c\/span\u003e \u003c\/div\u003e \u003cdiv class='jdgm-rev__content'\u003e \u003cdiv class='jdgm-rev__custom-form'\u003e \u003c\/div\u003e \u003cb class='jdgm-rev__title'\u003eAmazing\u003c\/b\u003e \u003cdiv class='jdgm-rev__body'\u003e\u003cp\u003eThis was AMAZING in my labour! \n\u003cbr \/\u003eThank you so much!\u003c\/p\u003e\u003c\/div\u003e \u003cdiv class='jdgm-rev__pics'\u003e \u003c\/div\u003e \u003cdiv class='jdgm-rev__vids'\u003e \u003c\/div\u003e \u003cdiv class='jdgm-rev__transparency-badge-wrapper'\u003e \u003cdiv class='jdgm-rev__transparency-badge' data-badge-type=review_collected_via_store_invitation\u003e\u003c\/div\u003e \u003c\/div\u003e \u003c\/div\u003e \u003cdiv class='jdgm-rev__actions'\u003e \u003cdiv class='jdgm-rev__social'\u003e\u003c\/div\u003e \u003cdiv class='jdgm-rev__votes'\u003e\u003c\/div\u003e \u003c\/div\u003e \u003cdiv class='jdgm-rev__reply'\u003e \u003cdiv class='jdgm-rev__replier-wrapper'\u003e \u003cb class='jdgm-rev__replier'\u003e\u003c\/b\u003e \u003c\/div\u003e \u003cdiv class='jdgm-rev__reply-content'\u003e\u003cp\u003eThank you so much for your review, I’m so glad you loved it!\u003c\/p\u003e\u003c\/div\u003e \u003c\/div\u003e \u003c\/div\u003e\u003c\/div\u003e \u003cdiv class='jdgm-paginate' data-per-page='10' data-url='https:\/\/api.judge.me\/reviews\/reviews_for_widget' style=\"display: none;\"\u003e\u003c\/div\u003e \u003c\/div\u003e \u003cdiv class='jdgm-rev-widg__paginate-spinner-wrapper'\u003e \u003cdiv class='jdgm-spinner'\u003e\u003c\/div\u003e \u003c\/div\u003e \u003c\/div\u003e"},"default_reviews_metafields":{"rating":{"scale_min":"1.0","scale_max":"5.0","value":"5.0"},"rating_count":4},"collections":[{"id":512654540989,"handle":"lastof26-10","title":"10%","updated_at":"2026-11-14T20:08:00+08:00","body_html":null,"published_at":"2026-10-12T19:06:42+08:00","sort_order":"best-selling","template_suffix":null,"disjunctive":false,"rules":[],"published_scope":"global"},{"id":261658214589,"handle":"labour-and-birth-buy","title":"Labour \u0026 Birth","updated_at":"2026-11-14T20:08:00+08:00","body_html":"\u003cp\u003eWe stock a large range of Elle TENS machines for you to buy for your labour and birth. We stock the Elle TENS, Elle TENS 2 and Elle TENS Plus, we also hire these out if that suits you better, please head over to our TENS machine hire page for more information. We ship Australia wide or have options for local delivery\/pick-up in Perth if you are due ASAP. We also stock other items for your labour and birth. \u003c\/p\u003e\n\u003cp\u003eLooking for something we don't currently stock? Please reach out and let us know.\u003c\/p\u003e\n\u003cp\u003e\u003cspan\u003eYou can even buy now and pay later with Afterpay!\u003c\/span\u003e\u003c\/p\u003e","published_at":"2021-03-10T12:34:43+08:00","sort_order":"best-selling","template_suffix":"labour-birth-collection","disjunctive":false,"rules":[],"published_scope":"global","image":{"created_at":"2024-05-06T12:00:09+08:00","alt":"Labour \u0026 Birth - The Birth Store","width":1080,"height":981,"src":"\/\/www.thebirthstore.com.au\/cdn\/shop\/collections\/labour-birth-342038.jpg?v=1714968009"}},{"id":512272957629,"handle":"labour-birth-essentials","title":"Labour \u0026 Birth Essentials","updated_at":"2026-11-14T20:08:00+08:00","body_html":null,"published_at":"2026-10-06T21:00:01+08:00","sort_order":"most-relevant","template_suffix":"labournbirthemail","disjunctive":false,"rules":[],"published_scope":"global"},{"id":261226856637,"handle":"labour-tens-machine-hire","title":"Labour TENS Machine Hire","updated_at":"2026-11-14T20:08:00+08:00","body_html":"\u003cp\u003e \u003c\/p\u003e\n\u003cblockquote\u003e\u003c\/blockquote\u003e","published_at":"2021-03-05T22:34:14+08:00","sort_order":"best-selling","template_suffix":"tens-machine-hire-collect","disjunctive":false,"rules":[],"published_scope":"global","image":{"created_at":"2024-05-06T12:00:15+08:00","alt":"Labour TENS Machine Hire - The Birth Store","width":1920,"height":1280,"src":"\/\/www.thebirthstore.com.au\/cdn\/shop\/collections\/labour-tens-machine-hire-546345.jpg?v=1714968015"}},{"id":281712591037,"handle":"pain-relief","title":"Pain Relief","updated_at":"2026-11-14T20:08:00+08:00","body_html":"","published_at":"2021-12-20T14:22:45+08:00","sort_order":"best-selling","template_suffix":"pain-relief-collection","disjunctive":false,"rules":[],"published_scope":"global","image":{"created_at":"2024-05-06T12:00:27+08:00","alt":"Pain Relief - The Birth Store","width":1365,"height":2048,"src":"\/\/www.thebirthstore.com.au\/cdn\/shop\/collections\/pain-relief-878865.jpg?v=1714968027"}},{"id":291456483517,"handle":"shop-all","title":"Shop All - Mum","updated_at":"2026-11-14T20:08:00+08:00","body_html":"","published_at":"2022-12-23T22:04:39+08:00","sort_order":"best-selling","template_suffix":"shop-all-collection","disjunctive":false,"rules":[],"published_scope":"global","image":{"created_at":"2024-05-06T12:00:54+08:00","alt":"Shop All - The Birth Store","width":1365,"height":2048,"src":"\/\/www.thebirthstore.com.au\/cdn\/shop\/collections\/shop-all-693176.jpg?v=1714968055"}},{"id":310045933757,"handle":"shop-all-sale","title":"Shop All Sale","updated_at":"2026-11-14T20:08:00+08:00","body_html":"","published_at":"2024-11-12T13:22:43+08:00","sort_order":"best-selling","template_suffix":"","disjunctive":true,"rules":[],"published_scope":"global","image":{"created_at":"2024-11-13T10:58:16+08:00","alt":"Shop All Sale - The Birth Store","width":2048,"height":1365,"src":"\/\/www.thebirthstore.com.au\/cdn\/shop\/collections\/shop-all-sale-297361.jpg?v=1731466697"}}]}
{"item":{"id":7054942765245,"title":"Labour Aid 40gm","handle":"labour-aid-40gm","description":"\u003cp data-mce-fragment=\"1\"\u003e\u003cspan data-sheets-value='{\"1\":2,\"2\":\"An electrolyte drink to help aid hydration during labour.\"}' data-sheets-userformat='{\"2\":6659,\"3\":{\"1\":0},\"4\":[null,2,16777215],\"12\":0,\"14\":[null,2,0],\"15\":\"\\\"Times New Roman\\\"\"}' data-mce-fragment=\"1\"\u003eAn electrolyte drink to help aid hydration during labour.\u003cbr data-mce-fragment=\"1\"\u003e\u003cbr data-mce-fragment=\"1\"\u003e\u003c\/span\u003eOrange flavour.\u003cbr data-mce-fragment=\"1\"\u003e\u003cbr data-mce-fragment=\"1\"\u003e\u003cspan data-sheets-value='{\"1\":2,\"2\":\"Directions: Mix 2 tsp with 350ml - 600ml of water or juice and take as required. Take up to 4 doses daily. \"}' data-sheets-userformat='{\"2\":6659,\"3\":{\"1\":0},\"4\":[null,2,16777215],\"12\":0,\"14\":[null,2,0],\"15\":\"\\\"Times New Roman\\\"\"}' data-mce-fragment=\"1\"\u003e\u003cstrong\u003eDirections:\u003c\/strong\u003e Mix 3 tsp with 350ml of water or juice and take as required. Take up to 4 doses daily.\u003cbr data-mce-fragment=\"1\"\u003e\u003cbr data-mce-fragment=\"1\"\u003eEach 10gm dose contains:\u003c\/span\u003e\u003c\/p\u003e\n\u003cp data-mce-fragment=\"1\"\u003eCalcium citrate 1.5g\u003cbr data-mce-fragment=\"1\"\u003eEqiv. Elemental CALCIUM 315mg\u003cbr data-mce-fragment=\"1\"\u003eSodium ascorbate 1.5g\u003cbr data-mce-fragment=\"1\"\u003e\u003cspan data-mce-fragment=\"1\"\u003eEqiv. Elemental SODIUM 166.5mg\u003cbr data-mce-fragment=\"1\"\u003eEqiv. Elemental ASCORBATE 1.33mg\u003cbr data-mce-fragment=\"1\"\u003e\u003c\/span\u003ePotassium citrate 1g\u003cbr data-mce-fragment=\"1\"\u003e\u003cspan data-mce-fragment=\"1\"\u003eEqiv. Elemental POTASSIUM 392mg\u003cbr data-mce-fragment=\"1\"\u003e\u003c\/span\u003eMagnesium amino acid chelate 500mg\u003cbr data-mce-fragment=\"1\"\u003e\u003cspan data-mce-fragment=\"1\"\u003eEqiv. Elemental MAGNESIUM 150mg\u003c\/span\u003e\u003cspan data-sheets-value='{\"1\":2,\"2\":\"Directions: Mix 2 tsp with 350ml - 600ml of water or juice and take as required. Take up to 4 doses daily. \"}' data-sheets-userformat='{\"2\":6659,\"3\":{\"1\":0},\"4\":[null,2,16777215],\"12\":0,\"14\":[null,2,0],\"15\":\"\\\"Times New Roman\\\"\"}' data-mce-fragment=\"1\"\u003e\u003cbr data-mce-fragment=\"1\"\u003e\u003cbr data-mce-fragment=\"1\"\u003e\u003cbr data-mce-fragment=\"1\"\u003eExcipients: Malic acid (derived from apples), Organic natural orange flavour, Fructose and Xylitol. Store below 30°c in an air tight container. Made in Australia from local and imported ingredients. This bag is compostable.\u003cbr data-mce-fragment=\"1\"\u003e\u003cbr data-mce-fragment=\"1\"\u003eNo added artificial flavouring or colouring. Free from gluten, wheat, dairy, lactose, eggs, nuts and yeast.\u003c\/span\u003e\u003c\/p\u003e","published_at":"2021-11-18T14:35:21+08:00","created_at":"2021-11-02T13:13:19+08:00","vendor":"Mere Botanicals","type":"","tags":["Birth","Hospital Bag","Mum","Pregnancy"],"price":1595,"price_min":1595,"price_max":1595,"available":true,"price_varies":false,"compare_at_price":1595,"compare_at_price_min":1595,"compare_at_price_max":1595,"compare_at_price_varies":false,"variants":[{"id":40977745248445,"title":"Default Title","option1":"Default Title","option2":null,"option3":null,"sku":"","requires_shipping":true,"taxable":false,"featured_image":null,"available":true,"name":"Labour Aid 40gm","public_title":null,"options":["Default Title"],"price":1595,"weight":49,"compare_at_price":1595,"inventory_management":"shopify","barcode":"45248445","requires_selling_plan":false,"selling_plan_allocations":[],"quantity_rule":{"min":1,"max":null,"increment":1}}],"images":["\/\/www.thebirthstore.com.au\/cdn\/shop\/files\/labour-aid-40gm-548936.jpg?v=1714967973","\/\/www.thebirthstore.com.au\/cdn\/shop\/files\/labour-aid-40gm-950584.jpg?v=1714967973","\/\/www.thebirthstore.com.au\/cdn\/shop\/files\/labour-aid-40gm-542973.jpg?v=1714967973"],"featured_image":"\/\/www.thebirthstore.com.au\/cdn\/shop\/files\/labour-aid-40gm-548936.jpg?v=1714967973","options":["Title"],"media":[{"alt":"Labour Aid 40gm - The Birth Store-Mere Botanicals","id":27007587057853,"position":1,"preview_image":{"aspect_ratio":1.0,"height":828,"width":828,"src":"\/\/www.thebirthstore.com.au\/cdn\/shop\/files\/labour-aid-40gm-548936.jpg?v=1714967973"},"aspect_ratio":1.0,"height":828,"media_type":"image","src":"\/\/www.thebirthstore.com.au\/cdn\/shop\/files\/labour-aid-40gm-548936.jpg?v=1714967973","width":828},{"alt":"Labour Aid 40gm - The Birth Store-Mere Botanicals","id":27007587221693,"position":2,"preview_image":{"aspect_ratio":0.667,"height":2048,"width":1365,"src":"\/\/www.thebirthstore.com.au\/cdn\/shop\/files\/labour-aid-40gm-950584.jpg?v=1714967973"},"aspect_ratio":0.667,"height":2048,"media_type":"image","src":"\/\/www.thebirthstore.com.au\/cdn\/shop\/files\/labour-aid-40gm-950584.jpg?v=1714967973","width":1365},{"alt":"Labour Aid 40gm - The Birth Store-Mere Botanicals","id":27007587254461,"position":3,"preview_image":{"aspect_ratio":0.667,"height":1350,"width":900,"src":"\/\/www.thebirthstore.com.au\/cdn\/shop\/files\/labour-aid-40gm-542973.jpg?v=1714967973"},"aspect_ratio":0.667,"height":1350,"media_type":"image","src":"\/\/www.thebirthstore.com.au\/cdn\/shop\/files\/labour-aid-40gm-542973.jpg?v=1714967973","width":900}],"requires_selling_plan":false,"selling_plan_groups":[],"content":"\u003cp data-mce-fragment=\"1\"\u003e\u003cspan data-sheets-value='{\"1\":2,\"2\":\"An electrolyte drink to help aid hydration during labour.\"}' data-sheets-userformat='{\"2\":6659,\"3\":{\"1\":0},\"4\":[null,2,16777215],\"12\":0,\"14\":[null,2,0],\"15\":\"\\\"Times New Roman\\\"\"}' data-mce-fragment=\"1\"\u003eAn electrolyte drink to help aid hydration during labour.\u003cbr data-mce-fragment=\"1\"\u003e\u003cbr data-mce-fragment=\"1\"\u003e\u003c\/span\u003eOrange flavour.\u003cbr data-mce-fragment=\"1\"\u003e\u003cbr data-mce-fragment=\"1\"\u003e\u003cspan data-sheets-value='{\"1\":2,\"2\":\"Directions: Mix 2 tsp with 350ml - 600ml of water or juice and take as required. Take up to 4 doses daily. \"}' data-sheets-userformat='{\"2\":6659,\"3\":{\"1\":0},\"4\":[null,2,16777215],\"12\":0,\"14\":[null,2,0],\"15\":\"\\\"Times New Roman\\\"\"}' data-mce-fragment=\"1\"\u003e\u003cstrong\u003eDirections:\u003c\/strong\u003e Mix 3 tsp with 350ml of water or juice and take as required. Take up to 4 doses daily.\u003cbr data-mce-fragment=\"1\"\u003e\u003cbr data-mce-fragment=\"1\"\u003eEach 10gm dose contains:\u003c\/span\u003e\u003c\/p\u003e\n\u003cp data-mce-fragment=\"1\"\u003eCalcium citrate 1.5g\u003cbr data-mce-fragment=\"1\"\u003eEqiv. Elemental CALCIUM 315mg\u003cbr data-mce-fragment=\"1\"\u003eSodium ascorbate 1.5g\u003cbr data-mce-fragment=\"1\"\u003e\u003cspan data-mce-fragment=\"1\"\u003eEqiv. Elemental SODIUM 166.5mg\u003cbr data-mce-fragment=\"1\"\u003eEqiv. Elemental ASCORBATE 1.33mg\u003cbr data-mce-fragment=\"1\"\u003e\u003c\/span\u003ePotassium citrate 1g\u003cbr data-mce-fragment=\"1\"\u003e\u003cspan data-mce-fragment=\"1\"\u003eEqiv. Elemental POTASSIUM 392mg\u003cbr data-mce-fragment=\"1\"\u003e\u003c\/span\u003eMagnesium amino acid chelate 500mg\u003cbr data-mce-fragment=\"1\"\u003e\u003cspan data-mce-fragment=\"1\"\u003eEqiv. Elemental MAGNESIUM 150mg\u003c\/span\u003e\u003cspan data-sheets-value='{\"1\":2,\"2\":\"Directions: Mix 2 tsp with 350ml - 600ml of water or juice and take as required. Take up to 4 doses daily. \"}' data-sheets-userformat='{\"2\":6659,\"3\":{\"1\":0},\"4\":[null,2,16777215],\"12\":0,\"14\":[null,2,0],\"15\":\"\\\"Times New Roman\\\"\"}' data-mce-fragment=\"1\"\u003e\u003cbr data-mce-fragment=\"1\"\u003e\u003cbr data-mce-fragment=\"1\"\u003e\u003cbr data-mce-fragment=\"1\"\u003eExcipients: Malic acid (derived from apples), Organic natural orange flavour, Fructose and Xylitol. Store below 30°c in an air tight container. Made in Australia from local and imported ingredients. This bag is compostable.\u003cbr data-mce-fragment=\"1\"\u003e\u003cbr data-mce-fragment=\"1\"\u003eNo added artificial flavouring or colouring. Free from gluten, wheat, dairy, lactose, eggs, nuts and yeast.\u003c\/span\u003e\u003c\/p\u003e"},"options":[{"name":"Title","position":1,"values":["Default Title"]}],"custom_metafields":{},"metafields":{"badge":"\u003cdiv style='display:none' class='jdgm-prev-badge' data-average-rating='0.00' data-number-of-reviews='0' data-number-of-questions='0'\u003e \u003cspan class='jdgm-prev-badge__stars' data-score='0.00' tabindex='0' aria-label='0.00 stars' role='button'\u003e \u003cspan class='jdgm-star jdgm--off'\u003e\u003c\/span\u003e\u003cspan class='jdgm-star jdgm--off'\u003e\u003c\/span\u003e\u003cspan class='jdgm-star jdgm--off'\u003e\u003c\/span\u003e\u003cspan class='jdgm-star jdgm--off'\u003e\u003c\/span\u003e\u003cspan class='jdgm-star jdgm--off'\u003e\u003c\/span\u003e \u003c\/span\u003e \u003cspan class='jdgm-prev-badge__text'\u003e No reviews \u003c\/span\u003e \u003c\/div\u003e","widget":"\u003cdiv class='jdgm-rev-widg' data-updated-at='2025-06-13T16:12:10Z' data-average-rating='0.00' data-number-of-reviews='0' data-number-of-questions='0'\u003e \u003cstyle class='jdgm-temp-hiding-style'\u003e.jdgm-rev-widg{ display: none }\u003c\/style\u003e \u003cdiv class='jdgm-rev-widg__header'\u003e \u003ch2 class='jdgm-rev-widg__title'\u003eCustomer Reviews\u003c\/h2\u003e \u003cdiv class='jdgm-rev-widg__summary'\u003e \u003cdiv class='jdgm-rev-widg__summary-stars' aria-label='Average rating is 0.00 stars' role='img'\u003e \u003cspan class='jdgm-star jdgm--off'\u003e\u003c\/span\u003e\u003cspan class='jdgm-star jdgm--off'\u003e\u003c\/span\u003e\u003cspan class='jdgm-star jdgm--off'\u003e\u003c\/span\u003e\u003cspan class='jdgm-star jdgm--off'\u003e\u003c\/span\u003e\u003cspan class='jdgm-star jdgm--off'\u003e\u003c\/span\u003e \u003c\/div\u003e \u003cdiv class='jdgm-rev-widg__summary-text'\u003eBe the first to write a review\u003c\/div\u003e \u003c\/div\u003e \u003ca style='display: none' href='#' class='jdgm-write-rev-link' role='button'\u003eWrite a review\u003c\/a\u003e \u003cdiv class='jdgm-histogram jdgm-temp-hidden'\u003e \u003cdiv class='jdgm-histogram__row' data-rating='5' data-frequency='0' data-percentage='0'\u003e \u003cdiv class='jdgm-histogram__star' role='button' aria-label=\"0% (0) reviews with 5 star rating\" tabindex='0' \u003e\u003cspan class='jdgm-star jdgm--on'\u003e\u003c\/span\u003e\u003cspan class='jdgm-star jdgm--on'\u003e\u003c\/span\u003e\u003cspan class='jdgm-star jdgm--on'\u003e\u003c\/span\u003e\u003cspan class='jdgm-star jdgm--on'\u003e\u003c\/span\u003e\u003cspan class='jdgm-star jdgm--on'\u003e\u003c\/span\u003e\u003c\/div\u003e \u003cdiv class='jdgm-histogram__bar'\u003e \u003cdiv class='jdgm-histogram__bar-content' style='width: 0%;'\u003e \u003c\/div\u003e \u003c\/div\u003e \u003cdiv class='jdgm-histogram__percentage'\u003e0%\u003c\/div\u003e \u003cdiv class='jdgm-histogram__frequency'\u003e(0)\u003c\/div\u003e \u003c\/div\u003e \u003cdiv class='jdgm-histogram__row' data-rating='4' data-frequency='0' data-percentage='0'\u003e \u003cdiv class='jdgm-histogram__star' role='button' aria-label=\"0% (0) reviews with 4 star rating\" tabindex='0' \u003e\u003cspan class='jdgm-star jdgm--on'\u003e\u003c\/span\u003e\u003cspan class='jdgm-star jdgm--on'\u003e\u003c\/span\u003e\u003cspan class='jdgm-star jdgm--on'\u003e\u003c\/span\u003e\u003cspan class='jdgm-star jdgm--on'\u003e\u003c\/span\u003e\u003cspan class='jdgm-star jdgm--off'\u003e\u003c\/span\u003e\u003c\/div\u003e \u003cdiv class='jdgm-histogram__bar'\u003e \u003cdiv class='jdgm-histogram__bar-content' style='width: 0%;'\u003e \u003c\/div\u003e \u003c\/div\u003e \u003cdiv class='jdgm-histogram__percentage'\u003e0%\u003c\/div\u003e \u003cdiv class='jdgm-histogram__frequency'\u003e(0)\u003c\/div\u003e \u003c\/div\u003e \u003cdiv class='jdgm-histogram__row' data-rating='3' data-frequency='0' data-percentage='0'\u003e \u003cdiv class='jdgm-histogram__star' role='button' aria-label=\"0% (0) reviews with 3 star rating\" tabindex='0' \u003e\u003cspan class='jdgm-star jdgm--on'\u003e\u003c\/span\u003e\u003cspan class='jdgm-star jdgm--on'\u003e\u003c\/span\u003e\u003cspan class='jdgm-star jdgm--on'\u003e\u003c\/span\u003e\u003cspan class='jdgm-star jdgm--off'\u003e\u003c\/span\u003e\u003cspan class='jdgm-star jdgm--off'\u003e\u003c\/span\u003e\u003c\/div\u003e \u003cdiv class='jdgm-histogram__bar'\u003e \u003cdiv class='jdgm-histogram__bar-content' style='width: 0%;'\u003e \u003c\/div\u003e \u003c\/div\u003e \u003cdiv class='jdgm-histogram__percentage'\u003e0%\u003c\/div\u003e \u003cdiv class='jdgm-histogram__frequency'\u003e(0)\u003c\/div\u003e \u003c\/div\u003e \u003cdiv class='jdgm-histogram__row' data-rating='2' data-frequency='0' data-percentage='0'\u003e \u003cdiv class='jdgm-histogram__star' role='button' aria-label=\"0% (0) reviews with 2 star rating\" tabindex='0' \u003e\u003cspan class='jdgm-star jdgm--on'\u003e\u003c\/span\u003e\u003cspan class='jdgm-star jdgm--on'\u003e\u003c\/span\u003e\u003cspan class='jdgm-star jdgm--off'\u003e\u003c\/span\u003e\u003cspan class='jdgm-star jdgm--off'\u003e\u003c\/span\u003e\u003cspan class='jdgm-star jdgm--off'\u003e\u003c\/span\u003e\u003c\/div\u003e \u003cdiv class='jdgm-histogram__bar'\u003e \u003cdiv class='jdgm-histogram__bar-content' style='width: 0%;'\u003e \u003c\/div\u003e \u003c\/div\u003e \u003cdiv class='jdgm-histogram__percentage'\u003e0%\u003c\/div\u003e \u003cdiv class='jdgm-histogram__frequency'\u003e(0)\u003c\/div\u003e \u003c\/div\u003e \u003cdiv class='jdgm-histogram__row' data-rating='1' data-frequency='0' data-percentage='0'\u003e \u003cdiv class='jdgm-histogram__star' role='button' aria-label=\"0% (0) reviews with 1 star rating\" tabindex='0' \u003e\u003cspan class='jdgm-star jdgm--on'\u003e\u003c\/span\u003e\u003cspan class='jdgm-star jdgm--off'\u003e\u003c\/span\u003e\u003cspan class='jdgm-star jdgm--off'\u003e\u003c\/span\u003e\u003cspan class='jdgm-star jdgm--off'\u003e\u003c\/span\u003e\u003cspan class='jdgm-star jdgm--off'\u003e\u003c\/span\u003e\u003c\/div\u003e \u003cdiv class='jdgm-histogram__bar'\u003e \u003cdiv class='jdgm-histogram__bar-content' style='width: 0%;'\u003e \u003c\/div\u003e \u003c\/div\u003e \u003cdiv class='jdgm-histogram__percentage'\u003e0%\u003c\/div\u003e \u003cdiv class='jdgm-histogram__frequency'\u003e(0)\u003c\/div\u003e \u003c\/div\u003e \u003cdiv class='jdgm-histogram__row jdgm-histogram__clear-filter' data-rating=null tabindex='0'\u003e\u003c\/div\u003e \u003c\/div\u003e \u003cdiv class='jdgm-rev-widg__sort-wrapper'\u003e\u003c\/div\u003e \u003c\/div\u003e \u003cdiv class='jdgm-rev-widg__body'\u003e \u003cdiv class='jdgm-rev-widg__reviews'\u003e\u003c\/div\u003e \u003cdiv class='jdgm-paginate' data-per-page='10' data-url='https:\/\/api.judge.me\/reviews\/reviews_for_widget' style=\"display: none;\"\u003e\u003c\/div\u003e \u003c\/div\u003e \u003cdiv class='jdgm-rev-widg__paginate-spinner-wrapper'\u003e \u003cdiv class='jdgm-spinner'\u003e\u003c\/div\u003e \u003c\/div\u003e \u003c\/div\u003e"},"default_reviews_metafields":{},"collections":[{"id":512654540989,"handle":"lastof26-10","title":"10%","updated_at":"2026-11-14T20:08:00+08:00","body_html":null,"published_at":"2026-10-12T19:06:42+08:00","sort_order":"best-selling","template_suffix":null,"disjunctive":false,"rules":[],"published_scope":"global"},{"id":261657460925,"handle":"buy","title":"Buy","updated_at":"2026-11-14T20:08:00+08:00","body_html":"\u003cp\u003eBrowse all of our pregnancy, labour \u0026amp; birth, postpartum and baby essentials here.\u003cbr\u003e\u003c\/p\u003e\n\u003cp\u003e\u003cspan\u003eYou can even buy now and pay later with Afterpay!\u003c\/span\u003e\u003c\/p\u003e","published_at":"2021-03-10T12:05:31+08:00","sort_order":"best-selling","template_suffix":"shop-all-collection","disjunctive":false,"rules":[],"published_scope":"global","image":{"created_at":"2024-05-06T11:59:42+08:00","alt":"Buy - The Birth Store","width":2048,"height":2048,"src":"\/\/www.thebirthstore.com.au\/cdn\/shop\/collections\/buy-964856.jpg?v=1714967982"}},{"id":337429201085,"handle":"hospital-bag","title":"Hospital Bag","updated_at":"2026-11-14T20:08:00+08:00","body_html":"","published_at":"2026-06-03T11:36:29+08:00","sort_order":"most-relevant","template_suffix":"","disjunctive":false,"rules":[],"published_scope":"global"},{"id":261658214589,"handle":"labour-and-birth-buy","title":"Labour \u0026 Birth","updated_at":"2026-11-14T20:08:00+08:00","body_html":"\u003cp\u003eWe stock a large range of Elle TENS machines for you to buy for your labour and birth. We stock the Elle TENS, Elle TENS 2 and Elle TENS Plus, we also hire these out if that suits you better, please head over to our TENS machine hire page for more information. We ship Australia wide or have options for local delivery\/pick-up in Perth if you are due ASAP. We also stock other items for your labour and birth. \u003c\/p\u003e\n\u003cp\u003eLooking for something we don't currently stock? Please reach out and let us know.\u003c\/p\u003e\n\u003cp\u003e\u003cspan\u003eYou can even buy now and pay later with Afterpay!\u003c\/span\u003e\u003c\/p\u003e","published_at":"2021-03-10T12:34:43+08:00","sort_order":"best-selling","template_suffix":"labour-birth-collection","disjunctive":false,"rules":[],"published_scope":"global","image":{"created_at":"2024-05-06T12:00:09+08:00","alt":"Labour \u0026 Birth - The Birth Store","width":1080,"height":981,"src":"\/\/www.thebirthstore.com.au\/cdn\/shop\/collections\/labour-birth-342038.jpg?v=1714968009"}},{"id":512272957629,"handle":"labour-birth-essentials","title":"Labour \u0026 Birth Essentials","updated_at":"2026-11-14T20:08:00+08:00","body_html":null,"published_at":"2026-10-06T21:00:01+08:00","sort_order":"most-relevant","template_suffix":"labournbirthemail","disjunctive":false,"rules":[],"published_scope":"global"},{"id":338215862461,"handle":"labour10","updated_at":"2026-11-14T20:08:00+08:00","published_at":"2026-06-16T20:22:45+08:00","sort_order":"most-relevant","template_suffix":"","published_scope":"global","title":"LABOUR10","body_html":""},{"id":261658149053,"handle":"pregnancy-and-maternity-products","title":"Pregnancy","updated_at":"2026-11-14T20:08:00+08:00","body_html":"\u003cp\u003eShop your pregnancy essentials below. Looking for something we don't currently stock? Please reach out and let us know.\u003cbr\u003e\u003c\/p\u003e\n\u003cp\u003e\u003cspan\u003eYou can even buy now and pay later with Afterpay!\u003c\/span\u003e\u003c\/p\u003e","published_at":"2021-03-10T12:34:22+08:00","sort_order":"best-selling","template_suffix":"pregnancy-collection","disjunctive":false,"rules":[],"published_scope":"global","image":{"created_at":"2024-05-06T12:00:40+08:00","alt":"Pregnancy - The Birth Store","width":1024,"height":1536,"src":"\/\/www.thebirthstore.com.au\/cdn\/shop\/collections\/pregnancy-899677.jpg?v=1714968040"}},{"id":291456483517,"handle":"shop-all","title":"Shop All - Mum","updated_at":"2026-11-14T20:08:00+08:00","body_html":"","published_at":"2022-12-23T22:04:39+08:00","sort_order":"best-selling","template_suffix":"shop-all-collection","disjunctive":false,"rules":[],"published_scope":"global","image":{"created_at":"2024-05-06T12:00:54+08:00","alt":"Shop All - The Birth Store","width":1365,"height":2048,"src":"\/\/www.thebirthstore.com.au\/cdn\/shop\/collections\/shop-all-693176.jpg?v=1714968055"}},{"id":310045933757,"handle":"shop-all-sale","title":"Shop All Sale","updated_at":"2026-11-14T20:08:00+08:00","body_html":"","published_at":"2024-11-12T13:22:43+08:00","sort_order":"best-selling","template_suffix":"","disjunctive":true,"rules":[],"published_scope":"global","image":{"created_at":"2024-11-13T10:58:16+08:00","alt":"Shop All Sale - The Birth Store","width":2048,"height":1365,"src":"\/\/www.thebirthstore.com.au\/cdn\/shop\/collections\/shop-all-sale-297361.jpg?v=1731466697"}}]}
{"item":{"id":7054916190397,"title":"Perineal Massage Oil 100ml","handle":"perineal-massage-oil-100ml","description":"\u003cspan data-mce-fragment=\"1\" data-sheets-userformat='{\"2\":6657,\"3\":{\"1\":0},\"12\":0,\"14\":[null,2,0],\"15\":\"\\\"Times New Roman\\\"\"}' data-sheets-value='{\"1\":2,\"2\":\"Nourish and prepare the delicate perineal skin in preparation for birth with regular massage with our peri massage oil of Sweet almond oil combined with Calendula and Hypericum infused oils to keep skin soft, flexible and relaxed, ready for childbirth.\"}'\u003eNourish and prepare the delicate perineal skin in preparation for birth with regular massage with our peri massage oil of Sweet almond oil combined with Calendula and Hypericum infused oils to keep skin soft, flexible and relaxed, ready for childbirth.\u003c\/span\u003e\u003cbr data-mce-fragment=\"1\"\u003e\u003cbr data-mce-fragment=\"1\"\u003e\u003cstrong\u003eIngredients:\u003c\/strong\u003e\u003cspan data-mce-fragment=\"1\"\u003e Amygdalus Dulcis \u003cstrong data-mce-fragment=\"1\"\u003e(Sweet Almond)\u003c\/strong\u003e oil, Organic Calendula officinalis \u003cstrong data-mce-fragment=\"1\"\u003e(Calendula)\u003c\/strong\u003e oil, Hypericum perforatum \u003cstrong data-mce-fragment=\"1\"\u003e(St. John’s Wort)\u003c\/strong\u003e oil, Natural Rosemary antioxdidant.\u003c\/span\u003e\u003cbr data-mce-fragment=\"1\"\u003e\u003cbr data-mce-fragment=\"1\"\u003e\u003cstrong\u003eDirections: \u003c\/strong\u003e\u003cspan data-mce-fragment=\"1\"\u003eUse peri massage oil from 34 weeks, 3-4 times per week, for 5-10 minutes. Ideally use in the shower or after a bath. Pour a small amount of oil into your hand and cover your thumb and index finger and massage the perinuem, vaginal opening and wall gently. This should not be painful. Do not ingest. Always perform a patch test before use. If reaction occurs, seek medical attention.\u003cbr data-mce-fragment=\"1\"\u003e\u003cbr data-mce-fragment=\"1\"\u003ePerineal Massage oil can also be used as a baby oil and also for cradle cap. \u003cbr data-mce-fragment=\"1\"\u003e\u003cbr data-mce-fragment=\"1\"\u003eFree from silicones, parabens, PEGs, sulfates (SLS\/SLES), GMOs, mineral oils, petrolatum, synthetic colours and fragrances, or animal testing. This product contains nut oils.\u003c\/span\u003e","published_at":"2021-11-18T14:33:09+08:00","created_at":"2021-11-02T12:55:08+08:00","vendor":"Mere Botanicals","type":"","tags":["Labour Preparation","Mum","Peri Care","Pregnancy","Skin Care"],"price":2995,"price_min":2995,"price_max":2995,"available":false,"price_varies":false,"compare_at_price":null,"compare_at_price_min":0,"compare_at_price_max":0,"compare_at_price_varies":false,"variants":[{"id":40977713266877,"title":"Default Title","option1":"Default Title","option2":null,"option3":null,"sku":"","requires_shipping":true,"taxable":false,"featured_image":null,"available":false,"name":"Perineal Massage Oil 100ml","public_title":null,"options":["Default Title"],"price":2995,"weight":200,"compare_at_price":null,"inventory_management":"shopify","barcode":"13266877","requires_selling_plan":false,"selling_plan_allocations":[],"quantity_rule":{"min":1,"max":null,"increment":1}}],"images":["\/\/www.thebirthstore.com.au\/cdn\/shop\/files\/perineal-massage-oil-100ml-317617.jpg?v=1714968005","\/\/www.thebirthstore.com.au\/cdn\/shop\/files\/perineal-massage-oil-100ml-853825.jpg?v=1714968005","\/\/www.thebirthstore.com.au\/cdn\/shop\/files\/perineal-massage-oil-100ml-683161.jpg?v=1714968005"],"featured_image":"\/\/www.thebirthstore.com.au\/cdn\/shop\/files\/perineal-massage-oil-100ml-317617.jpg?v=1714968005","options":["Title"],"media":[{"alt":"Perineal Massage Oil 100ml - The Birth Store-Mere Botanicals","id":27007594856637,"position":1,"preview_image":{"aspect_ratio":1.0,"height":787,"width":787,"src":"\/\/www.thebirthstore.com.au\/cdn\/shop\/files\/perineal-massage-oil-100ml-317617.jpg?v=1714968005"},"aspect_ratio":1.0,"height":787,"media_type":"image","src":"\/\/www.thebirthstore.com.au\/cdn\/shop\/files\/perineal-massage-oil-100ml-317617.jpg?v=1714968005","width":787},{"alt":"Perineal Massage Oil 100ml - The Birth Store-Mere Botanicals","id":27007594954941,"position":2,"preview_image":{"aspect_ratio":0.888,"height":1318,"width":1170,"src":"\/\/www.thebirthstore.com.au\/cdn\/shop\/files\/perineal-massage-oil-100ml-853825.jpg?v=1714968005"},"aspect_ratio":0.888,"height":1318,"media_type":"image","src":"\/\/www.thebirthstore.com.au\/cdn\/shop\/files\/perineal-massage-oil-100ml-853825.jpg?v=1714968005","width":1170},{"alt":"Perineal Massage Oil 100ml - The Birth Store-Mere Botanicals","id":27007595020477,"position":3,"preview_image":{"aspect_ratio":1.5,"height":1365,"width":2048,"src":"\/\/www.thebirthstore.com.au\/cdn\/shop\/files\/perineal-massage-oil-100ml-683161.jpg?v=1714968005"},"aspect_ratio":1.5,"height":1365,"media_type":"image","src":"\/\/www.thebirthstore.com.au\/cdn\/shop\/files\/perineal-massage-oil-100ml-683161.jpg?v=1714968005","width":2048}],"requires_selling_plan":false,"selling_plan_groups":[],"content":"\u003cspan data-mce-fragment=\"1\" data-sheets-userformat='{\"2\":6657,\"3\":{\"1\":0},\"12\":0,\"14\":[null,2,0],\"15\":\"\\\"Times New Roman\\\"\"}' data-sheets-value='{\"1\":2,\"2\":\"Nourish and prepare the delicate perineal skin in preparation for birth with regular massage with our peri massage oil of Sweet almond oil combined with Calendula and Hypericum infused oils to keep skin soft, flexible and relaxed, ready for childbirth.\"}'\u003eNourish and prepare the delicate perineal skin in preparation for birth with regular massage with our peri massage oil of Sweet almond oil combined with Calendula and Hypericum infused oils to keep skin soft, flexible and relaxed, ready for childbirth.\u003c\/span\u003e\u003cbr data-mce-fragment=\"1\"\u003e\u003cbr data-mce-fragment=\"1\"\u003e\u003cstrong\u003eIngredients:\u003c\/strong\u003e\u003cspan data-mce-fragment=\"1\"\u003e Amygdalus Dulcis \u003cstrong data-mce-fragment=\"1\"\u003e(Sweet Almond)\u003c\/strong\u003e oil, Organic Calendula officinalis \u003cstrong data-mce-fragment=\"1\"\u003e(Calendula)\u003c\/strong\u003e oil, Hypericum perforatum \u003cstrong data-mce-fragment=\"1\"\u003e(St. John’s Wort)\u003c\/strong\u003e oil, Natural Rosemary antioxdidant.\u003c\/span\u003e\u003cbr data-mce-fragment=\"1\"\u003e\u003cbr data-mce-fragment=\"1\"\u003e\u003cstrong\u003eDirections: \u003c\/strong\u003e\u003cspan data-mce-fragment=\"1\"\u003eUse peri massage oil from 34 weeks, 3-4 times per week, for 5-10 minutes. Ideally use in the shower or after a bath. Pour a small amount of oil into your hand and cover your thumb and index finger and massage the perinuem, vaginal opening and wall gently. This should not be painful. Do not ingest. Always perform a patch test before use. If reaction occurs, seek medical attention.\u003cbr data-mce-fragment=\"1\"\u003e\u003cbr data-mce-fragment=\"1\"\u003ePerineal Massage oil can also be used as a baby oil and also for cradle cap. \u003cbr data-mce-fragment=\"1\"\u003e\u003cbr data-mce-fragment=\"1\"\u003eFree from silicones, parabens, PEGs, sulfates (SLS\/SLES), GMOs, mineral oils, petrolatum, synthetic colours and fragrances, or animal testing. This product contains nut oils.\u003c\/span\u003e"},"options":[{"name":"Title","position":1,"values":["Default Title"]}],"custom_metafields":{},"metafields":{"badge":"\u003cdiv style='display:none' class='jdgm-prev-badge' data-average-rating='0.00' data-number-of-reviews='0' data-number-of-questions='0'\u003e \u003cspan class='jdgm-prev-badge__stars' data-score='0.00' tabindex='0' aria-label='0.00 stars' role='button'\u003e \u003cspan class='jdgm-star jdgm--off'\u003e\u003c\/span\u003e\u003cspan class='jdgm-star jdgm--off'\u003e\u003c\/span\u003e\u003cspan class='jdgm-star jdgm--off'\u003e\u003c\/span\u003e\u003cspan class='jdgm-star jdgm--off'\u003e\u003c\/span\u003e\u003cspan class='jdgm-star jdgm--off'\u003e\u003c\/span\u003e \u003c\/span\u003e \u003cspan class='jdgm-prev-badge__text'\u003e No reviews \u003c\/span\u003e \u003c\/div\u003e","widget":"\u003cdiv class='jdgm-rev-widg' data-updated-at='2025-06-13T16:12:10Z' data-average-rating='0.00' data-number-of-reviews='0' data-number-of-questions='0'\u003e \u003cstyle class='jdgm-temp-hiding-style'\u003e.jdgm-rev-widg{ display: none }\u003c\/style\u003e \u003cdiv class='jdgm-rev-widg__header'\u003e \u003ch2 class='jdgm-rev-widg__title'\u003eCustomer Reviews\u003c\/h2\u003e \u003cdiv class='jdgm-rev-widg__summary'\u003e \u003cdiv class='jdgm-rev-widg__summary-stars' aria-label='Average rating is 0.00 stars' role='img'\u003e \u003cspan class='jdgm-star jdgm--off'\u003e\u003c\/span\u003e\u003cspan class='jdgm-star jdgm--off'\u003e\u003c\/span\u003e\u003cspan class='jdgm-star jdgm--off'\u003e\u003c\/span\u003e\u003cspan class='jdgm-star jdgm--off'\u003e\u003c\/span\u003e\u003cspan class='jdgm-star jdgm--off'\u003e\u003c\/span\u003e \u003c\/div\u003e \u003cdiv class='jdgm-rev-widg__summary-text'\u003eBe the first to write a review\u003c\/div\u003e \u003c\/div\u003e \u003ca style='display: none' href='#' class='jdgm-write-rev-link' role='button'\u003eWrite a review\u003c\/a\u003e \u003cdiv class='jdgm-histogram jdgm-temp-hidden'\u003e \u003cdiv class='jdgm-histogram__row' data-rating='5' data-frequency='0' data-percentage='0'\u003e \u003cdiv class='jdgm-histogram__star' role='button' aria-label=\"0% (0) reviews with 5 star rating\" tabindex='0' \u003e\u003cspan class='jdgm-star jdgm--on'\u003e\u003c\/span\u003e\u003cspan class='jdgm-star jdgm--on'\u003e\u003c\/span\u003e\u003cspan class='jdgm-star jdgm--on'\u003e\u003c\/span\u003e\u003cspan class='jdgm-star jdgm--on'\u003e\u003c\/span\u003e\u003cspan class='jdgm-star jdgm--on'\u003e\u003c\/span\u003e\u003c\/div\u003e \u003cdiv class='jdgm-histogram__bar'\u003e \u003cdiv class='jdgm-histogram__bar-content' style='width: 0%;'\u003e \u003c\/div\u003e \u003c\/div\u003e \u003cdiv class='jdgm-histogram__percentage'\u003e0%\u003c\/div\u003e \u003cdiv class='jdgm-histogram__frequency'\u003e(0)\u003c\/div\u003e \u003c\/div\u003e \u003cdiv class='jdgm-histogram__row' data-rating='4' data-frequency='0' data-percentage='0'\u003e \u003cdiv class='jdgm-histogram__star' role='button' aria-label=\"0% (0) reviews with 4 star rating\" tabindex='0' \u003e\u003cspan class='jdgm-star jdgm--on'\u003e\u003c\/span\u003e\u003cspan class='jdgm-star jdgm--on'\u003e\u003c\/span\u003e\u003cspan class='jdgm-star jdgm--on'\u003e\u003c\/span\u003e\u003cspan class='jdgm-star jdgm--on'\u003e\u003c\/span\u003e\u003cspan class='jdgm-star jdgm--off'\u003e\u003c\/span\u003e\u003c\/div\u003e \u003cdiv class='jdgm-histogram__bar'\u003e \u003cdiv class='jdgm-histogram__bar-content' style='width: 0%;'\u003e \u003c\/div\u003e \u003c\/div\u003e \u003cdiv class='jdgm-histogram__percentage'\u003e0%\u003c\/div\u003e \u003cdiv class='jdgm-histogram__frequency'\u003e(0)\u003c\/div\u003e \u003c\/div\u003e \u003cdiv class='jdgm-histogram__row' data-rating='3' data-frequency='0' data-percentage='0'\u003e \u003cdiv class='jdgm-histogram__star' role='button' aria-label=\"0% (0) reviews with 3 star rating\" tabindex='0' \u003e\u003cspan class='jdgm-star jdgm--on'\u003e\u003c\/span\u003e\u003cspan class='jdgm-star jdgm--on'\u003e\u003c\/span\u003e\u003cspan class='jdgm-star jdgm--on'\u003e\u003c\/span\u003e\u003cspan class='jdgm-star jdgm--off'\u003e\u003c\/span\u003e\u003cspan class='jdgm-star jdgm--off'\u003e\u003c\/span\u003e\u003c\/div\u003e \u003cdiv class='jdgm-histogram__bar'\u003e \u003cdiv class='jdgm-histogram__bar-content' style='width: 0%;'\u003e \u003c\/div\u003e \u003c\/div\u003e \u003cdiv class='jdgm-histogram__percentage'\u003e0%\u003c\/div\u003e \u003cdiv class='jdgm-histogram__frequency'\u003e(0)\u003c\/div\u003e \u003c\/div\u003e \u003cdiv class='jdgm-histogram__row' data-rating='2' data-frequency='0' data-percentage='0'\u003e \u003cdiv class='jdgm-histogram__star' role='button' aria-label=\"0% (0) reviews with 2 star rating\" tabindex='0' \u003e\u003cspan class='jdgm-star jdgm--on'\u003e\u003c\/span\u003e\u003cspan class='jdgm-star jdgm--on'\u003e\u003c\/span\u003e\u003cspan class='jdgm-star jdgm--off'\u003e\u003c\/span\u003e\u003cspan class='jdgm-star jdgm--off'\u003e\u003c\/span\u003e\u003cspan class='jdgm-star jdgm--off'\u003e\u003c\/span\u003e\u003c\/div\u003e \u003cdiv class='jdgm-histogram__bar'\u003e \u003cdiv class='jdgm-histogram__bar-content' style='width: 0%;'\u003e \u003c\/div\u003e \u003c\/div\u003e \u003cdiv class='jdgm-histogram__percentage'\u003e0%\u003c\/div\u003e \u003cdiv class='jdgm-histogram__frequency'\u003e(0)\u003c\/div\u003e \u003c\/div\u003e \u003cdiv class='jdgm-histogram__row' data-rating='1' data-frequency='0' data-percentage='0'\u003e \u003cdiv class='jdgm-histogram__star' role='button' aria-label=\"0% (0) reviews with 1 star rating\" tabindex='0' \u003e\u003cspan class='jdgm-star jdgm--on'\u003e\u003c\/span\u003e\u003cspan class='jdgm-star jdgm--off'\u003e\u003c\/span\u003e\u003cspan class='jdgm-star jdgm--off'\u003e\u003c\/span\u003e\u003cspan class='jdgm-star jdgm--off'\u003e\u003c\/span\u003e\u003cspan class='jdgm-star jdgm--off'\u003e\u003c\/span\u003e\u003c\/div\u003e \u003cdiv class='jdgm-histogram__bar'\u003e \u003cdiv class='jdgm-histogram__bar-content' style='width: 0%;'\u003e \u003c\/div\u003e \u003c\/div\u003e \u003cdiv class='jdgm-histogram__percentage'\u003e0%\u003c\/div\u003e \u003cdiv class='jdgm-histogram__frequency'\u003e(0)\u003c\/div\u003e \u003c\/div\u003e \u003cdiv class='jdgm-histogram__row jdgm-histogram__clear-filter' data-rating=null tabindex='0'\u003e\u003c\/div\u003e \u003c\/div\u003e \u003cdiv class='jdgm-rev-widg__sort-wrapper'\u003e\u003c\/div\u003e \u003c\/div\u003e \u003cdiv class='jdgm-rev-widg__body'\u003e \u003cdiv class='jdgm-rev-widg__reviews'\u003e\u003c\/div\u003e \u003cdiv class='jdgm-paginate' data-per-page='10' data-url='https:\/\/api.judge.me\/reviews\/reviews_for_widget' style=\"display: none;\"\u003e\u003c\/div\u003e \u003c\/div\u003e \u003cdiv class='jdgm-rev-widg__paginate-spinner-wrapper'\u003e \u003cdiv class='jdgm-spinner'\u003e\u003c\/div\u003e \u003c\/div\u003e \u003c\/div\u003e"},"default_reviews_metafields":{},"collections":[{"id":512654540989,"handle":"lastof26-10","title":"10%","updated_at":"2026-11-14T20:08:00+08:00","body_html":null,"published_at":"2026-10-12T19:06:42+08:00","sort_order":"best-selling","template_suffix":null,"disjunctive":false,"rules":[],"published_scope":"global"},{"id":261657460925,"handle":"buy","title":"Buy","updated_at":"2026-11-14T20:08:00+08:00","body_html":"\u003cp\u003eBrowse all of our pregnancy, labour \u0026amp; birth, postpartum and baby essentials here.\u003cbr\u003e\u003c\/p\u003e\n\u003cp\u003e\u003cspan\u003eYou can even buy now and pay later with Afterpay!\u003c\/span\u003e\u003c\/p\u003e","published_at":"2021-03-10T12:05:31+08:00","sort_order":"best-selling","template_suffix":"shop-all-collection","disjunctive":false,"rules":[],"published_scope":"global","image":{"created_at":"2024-05-06T11:59:42+08:00","alt":"Buy - The Birth Store","width":2048,"height":2048,"src":"\/\/www.thebirthstore.com.au\/cdn\/shop\/collections\/buy-964856.jpg?v=1714967982"}},{"id":512272957629,"handle":"labour-birth-essentials","title":"Labour \u0026 Birth Essentials","updated_at":"2026-11-14T20:08:00+08:00","body_html":null,"published_at":"2026-10-06T21:00:01+08:00","sort_order":"most-relevant","template_suffix":"labournbirthemail","disjunctive":false,"rules":[],"published_scope":"global"},{"id":281712525501,"handle":"labour-preparation","title":"Labour Preparation","updated_at":"2026-11-14T20:08:00+08:00","body_html":"","published_at":"2021-12-20T14:20:12+08:00","sort_order":"best-selling","template_suffix":"labour-preparation-collec","disjunctive":false,"rules":[],"published_scope":"global","image":{"created_at":"2024-05-06T12:00:13+08:00","alt":"Labour Preparation - The Birth Store","width":1024,"height":1536,"src":"\/\/www.thebirthstore.com.au\/cdn\/shop\/collections\/labour-preparation-271961.jpg?v=1714968013"}},{"id":295224705213,"handle":"perineal-care","title":"Perineal Care","updated_at":"2026-11-12T20:07:50+08:00","body_html":"","published_at":"2023-11-10T20:43:30+08:00","sort_order":"best-selling","template_suffix":"perineal-care-collection","disjunctive":false,"rules":[],"published_scope":"global","image":{"created_at":"2024-05-06T12:00:33+08:00","alt":"Perineal Care - The Birth Store","width":1024,"height":1536,"src":"\/\/www.thebirthstore.com.au\/cdn\/shop\/collections\/perineal-care-657628.jpg?v=1714968034"}},{"id":261658149053,"handle":"pregnancy-and-maternity-products","title":"Pregnancy","updated_at":"2026-11-14T20:08:00+08:00","body_html":"\u003cp\u003eShop your pregnancy essentials below. Looking for something we don't currently stock? Please reach out and let us know.\u003cbr\u003e\u003c\/p\u003e\n\u003cp\u003e\u003cspan\u003eYou can even buy now and pay later with Afterpay!\u003c\/span\u003e\u003c\/p\u003e","published_at":"2021-03-10T12:34:22+08:00","sort_order":"best-selling","template_suffix":"pregnancy-collection","disjunctive":false,"rules":[],"published_scope":"global","image":{"created_at":"2024-05-06T12:00:40+08:00","alt":"Pregnancy - The Birth Store","width":1024,"height":1536,"src":"\/\/www.thebirthstore.com.au\/cdn\/shop\/collections\/pregnancy-899677.jpg?v=1714968040"}},{"id":291456483517,"handle":"shop-all","title":"Shop All - Mum","updated_at":"2026-11-14T20:08:00+08:00","body_html":"","published_at":"2022-12-23T22:04:39+08:00","sort_order":"best-selling","template_suffix":"shop-all-collection","disjunctive":false,"rules":[],"published_scope":"global","image":{"created_at":"2024-05-06T12:00:54+08:00","alt":"Shop All - The Birth Store","width":1365,"height":2048,"src":"\/\/www.thebirthstore.com.au\/cdn\/shop\/collections\/shop-all-693176.jpg?v=1714968055"}},{"id":310045933757,"handle":"shop-all-sale","title":"Shop All Sale","updated_at":"2026-11-14T20:08:00+08:00","body_html":"","published_at":"2024-11-12T13:22:43+08:00","sort_order":"best-selling","template_suffix":"","disjunctive":true,"rules":[],"published_scope":"global","image":{"created_at":"2024-11-13T10:58:16+08:00","alt":"Shop All Sale - The Birth Store","width":2048,"height":1365,"src":"\/\/www.thebirthstore.com.au\/cdn\/shop\/collections\/shop-all-sale-297361.jpg?v=1731466697"}},{"id":324680483005,"handle":"skin-care","title":"Skin Care","updated_at":"2026-11-11T20:07:57+08:00","body_html":"","published_at":"2025-09-23T22:14:11+08:00","sort_order":"best-selling","template_suffix":"","disjunctive":false,"rules":[],"published_scope":"global","image":{"created_at":"2025-10-30T16:17:08+08:00","alt":"Skin Care - The Birth Store","width":800,"height":800,"src":"\/\/www.thebirthstore.com.au\/cdn\/shop\/collections\/skin-care-6874549.jpg?v=1761812228"}}]}
{"item":{"id":7374036467901,"title":"TOM Organic Maternity Pads","handle":"tom-organic-maternity-pads","description":"\u003cp\u003e\u003cspan data-mce-fragment=\"1\"\u003eDescribed as 'like sitting on a cloud', TOM Organic Maternity Pads are breathable, comfortable and ultra absorbent. \u003c\/span\u003e\u003c\/p\u003e\n\u003cp\u003e\u003cspan data-mce-fragment=\"1\"\u003eIdeal for the first few days and weeks post birth, these pads are made with elasticised wingless technology for optimum comfort and performance. \u003c\/span\u003e\u003c\/p\u003e\n\u003cp\u003e\u003cspan data-mce-fragment=\"1\"\u003eWe recommend purchasing 2-3 packs of maternity pads and changing every 1-2 hours post birth. \u003c\/span\u003e\u003c\/p\u003e\n\u003cp\u003e\u003cspan data-mce-fragment=\"1\"\u003eMade with certified organic cotton for the softest, breathable protection that won't irritate sensitive post-partum skin.\u003c\/span\u003e\u003c\/p\u003e\n\u003cp\u003e\u003cbr data-mce-fragment=\"1\"\u003e\u003cspan data-mce-fragment=\"1\"\u003eBreathable, hypoallergenic\u003c\/span\u003e\u003cbr data-mce-fragment=\"1\"\u003e\u003cspan data-mce-fragment=\"1\"\u003eOrganic cotton\u003c\/span\u003e\u003c\/p\u003e","published_at":"2022-10-15T16:21:57+08:00","created_at":"2022-10-14T13:16:17+08:00","vendor":"Tom Organic","type":"","tags":["GST FREE","Hospital Bag","Mum","Peri Care","Post-Partum"],"price":1195,"price_min":1195,"price_max":1195,"available":true,"price_varies":false,"compare_at_price":null,"compare_at_price_min":0,"compare_at_price_max":0,"compare_at_price_varies":false,"variants":[{"id":42410795237565,"title":"Default Title","option1":"Default Title","option2":null,"option3":null,"sku":"","requires_shipping":true,"taxable":false,"featured_image":null,"available":true,"name":"TOM Organic Maternity Pads","public_title":null,"options":["Default Title"],"price":1195,"weight":180,"compare_at_price":null,"inventory_management":"shopify","barcode":"95237565","requires_selling_plan":false,"selling_plan_allocations":[],"quantity_rule":{"min":1,"max":null,"increment":1}}],"images":["\/\/www.thebirthstore.com.au\/cdn\/shop\/files\/tom-organic-maternity-pads-634840.png?v=1744452807","\/\/www.thebirthstore.com.au\/cdn\/shop\/files\/tom-organic-maternity-pads-284662.jpg?v=1744452807","\/\/www.thebirthstore.com.au\/cdn\/shop\/files\/tom-organic-maternity-pads-560978.jpg?v=1744452807"],"featured_image":"\/\/www.thebirthstore.com.au\/cdn\/shop\/files\/tom-organic-maternity-pads-634840.png?v=1744452807","options":["Title"],"media":[{"alt":"TOM Organic Maternity Pads - The Birth Store - Tom Organic","id":28564469219517,"position":1,"preview_image":{"aspect_ratio":1.0,"height":1080,"width":1080,"src":"\/\/www.thebirthstore.com.au\/cdn\/shop\/files\/tom-organic-maternity-pads-634840.png?v=1744452807"},"aspect_ratio":1.0,"height":1080,"media_type":"image","src":"\/\/www.thebirthstore.com.au\/cdn\/shop\/files\/tom-organic-maternity-pads-634840.png?v=1744452807","width":1080},{"alt":"TOM Organic Maternity Pads - The Birth Store - Tom Organic","id":28564469973181,"position":2,"preview_image":{"aspect_ratio":1.0,"height":1200,"width":1200,"src":"\/\/www.thebirthstore.com.au\/cdn\/shop\/files\/tom-organic-maternity-pads-284662.jpg?v=1744452807"},"aspect_ratio":1.0,"height":1200,"media_type":"image","src":"\/\/www.thebirthstore.com.au\/cdn\/shop\/files\/tom-organic-maternity-pads-284662.jpg?v=1744452807","width":1200},{"alt":"TOM Organic Maternity Pads - The Birth Store - Tom Organic","id":28564470235325,"position":3,"preview_image":{"aspect_ratio":1.0,"height":1200,"width":1200,"src":"\/\/www.thebirthstore.com.au\/cdn\/shop\/files\/tom-organic-maternity-pads-560978.jpg?v=1744452807"},"aspect_ratio":1.0,"height":1200,"media_type":"image","src":"\/\/www.thebirthstore.com.au\/cdn\/shop\/files\/tom-organic-maternity-pads-560978.jpg?v=1744452807","width":1200}],"requires_selling_plan":false,"selling_plan_groups":[],"content":"\u003cp\u003e\u003cspan data-mce-fragment=\"1\"\u003eDescribed as 'like sitting on a cloud', TOM Organic Maternity Pads are breathable, comfortable and ultra absorbent. \u003c\/span\u003e\u003c\/p\u003e\n\u003cp\u003e\u003cspan data-mce-fragment=\"1\"\u003eIdeal for the first few days and weeks post birth, these pads are made with elasticised wingless technology for optimum comfort and performance. \u003c\/span\u003e\u003c\/p\u003e\n\u003cp\u003e\u003cspan data-mce-fragment=\"1\"\u003eWe recommend purchasing 2-3 packs of maternity pads and changing every 1-2 hours post birth. \u003c\/span\u003e\u003c\/p\u003e\n\u003cp\u003e\u003cspan data-mce-fragment=\"1\"\u003eMade with certified organic cotton for the softest, breathable protection that won't irritate sensitive post-partum skin.\u003c\/span\u003e\u003c\/p\u003e\n\u003cp\u003e\u003cbr data-mce-fragment=\"1\"\u003e\u003cspan data-mce-fragment=\"1\"\u003eBreathable, hypoallergenic\u003c\/span\u003e\u003cbr data-mce-fragment=\"1\"\u003e\u003cspan data-mce-fragment=\"1\"\u003eOrganic cotton\u003c\/span\u003e\u003c\/p\u003e"},"options":[{"name":"Title","position":1,"values":["Default Title"]}],"custom_metafields":{},"metafields":{"badge":"\u003cdiv style='display:none' class='jdgm-prev-badge' data-average-rating='0.00' data-number-of-reviews='0' data-number-of-questions='0'\u003e \u003cspan class='jdgm-prev-badge__stars' data-score='0.00' tabindex='0' aria-label='0.00 stars' role='button'\u003e \u003cspan class='jdgm-star jdgm--off'\u003e\u003c\/span\u003e\u003cspan class='jdgm-star jdgm--off'\u003e\u003c\/span\u003e\u003cspan class='jdgm-star jdgm--off'\u003e\u003c\/span\u003e\u003cspan class='jdgm-star jdgm--off'\u003e\u003c\/span\u003e\u003cspan class='jdgm-star jdgm--off'\u003e\u003c\/span\u003e \u003c\/span\u003e \u003cspan class='jdgm-prev-badge__text'\u003e No reviews \u003c\/span\u003e \u003c\/div\u003e","widget":"\u003cdiv class='jdgm-rev-widg' data-updated-at='2025-06-13T16:12:10Z' data-average-rating='0.00' data-number-of-reviews='0' data-number-of-questions='0'\u003e \u003cstyle class='jdgm-temp-hiding-style'\u003e.jdgm-rev-widg{ display: none }\u003c\/style\u003e \u003cdiv class='jdgm-rev-widg__header'\u003e \u003ch2 class='jdgm-rev-widg__title'\u003eCustomer Reviews\u003c\/h2\u003e \u003cdiv class='jdgm-rev-widg__summary'\u003e \u003cdiv class='jdgm-rev-widg__summary-stars' aria-label='Average rating is 0.00 stars' role='img'\u003e \u003cspan class='jdgm-star jdgm--off'\u003e\u003c\/span\u003e\u003cspan class='jdgm-star jdgm--off'\u003e\u003c\/span\u003e\u003cspan class='jdgm-star jdgm--off'\u003e\u003c\/span\u003e\u003cspan class='jdgm-star jdgm--off'\u003e\u003c\/span\u003e\u003cspan class='jdgm-star jdgm--off'\u003e\u003c\/span\u003e \u003c\/div\u003e \u003cdiv class='jdgm-rev-widg__summary-text'\u003eBe the first to write a review\u003c\/div\u003e \u003c\/div\u003e \u003ca style='display: none' href='#' class='jdgm-write-rev-link' role='button'\u003eWrite a review\u003c\/a\u003e \u003cdiv class='jdgm-histogram jdgm-temp-hidden'\u003e \u003cdiv class='jdgm-histogram__row' data-rating='5' data-frequency='0' data-percentage='0'\u003e \u003cdiv class='jdgm-histogram__star' role='button' aria-label=\"0% (0) reviews with 5 star rating\" tabindex='0' \u003e\u003cspan class='jdgm-star jdgm--on'\u003e\u003c\/span\u003e\u003cspan class='jdgm-star jdgm--on'\u003e\u003c\/span\u003e\u003cspan class='jdgm-star jdgm--on'\u003e\u003c\/span\u003e\u003cspan class='jdgm-star jdgm--on'\u003e\u003c\/span\u003e\u003cspan class='jdgm-star jdgm--on'\u003e\u003c\/span\u003e\u003c\/div\u003e \u003cdiv class='jdgm-histogram__bar'\u003e \u003cdiv class='jdgm-histogram__bar-content' style='width: 0%;'\u003e \u003c\/div\u003e \u003c\/div\u003e \u003cdiv class='jdgm-histogram__percentage'\u003e0%\u003c\/div\u003e \u003cdiv class='jdgm-histogram__frequency'\u003e(0)\u003c\/div\u003e \u003c\/div\u003e \u003cdiv class='jdgm-histogram__row' data-rating='4' data-frequency='0' data-percentage='0'\u003e \u003cdiv class='jdgm-histogram__star' role='button' aria-label=\"0% (0) reviews with 4 star rating\" tabindex='0' \u003e\u003cspan class='jdgm-star jdgm--on'\u003e\u003c\/span\u003e\u003cspan class='jdgm-star jdgm--on'\u003e\u003c\/span\u003e\u003cspan class='jdgm-star jdgm--on'\u003e\u003c\/span\u003e\u003cspan class='jdgm-star jdgm--on'\u003e\u003c\/span\u003e\u003cspan class='jdgm-star jdgm--off'\u003e\u003c\/span\u003e\u003c\/div\u003e \u003cdiv class='jdgm-histogram__bar'\u003e \u003cdiv class='jdgm-histogram__bar-content' style='width: 0%;'\u003e \u003c\/div\u003e \u003c\/div\u003e \u003cdiv class='jdgm-histogram__percentage'\u003e0%\u003c\/div\u003e \u003cdiv class='jdgm-histogram__frequency'\u003e(0)\u003c\/div\u003e \u003c\/div\u003e \u003cdiv class='jdgm-histogram__row' data-rating='3' data-frequency='0' data-percentage='0'\u003e \u003cdiv class='jdgm-histogram__star' role='button' aria-label=\"0% (0) reviews with 3 star rating\" tabindex='0' \u003e\u003cspan class='jdgm-star jdgm--on'\u003e\u003c\/span\u003e\u003cspan class='jdgm-star jdgm--on'\u003e\u003c\/span\u003e\u003cspan class='jdgm-star jdgm--on'\u003e\u003c\/span\u003e\u003cspan class='jdgm-star jdgm--off'\u003e\u003c\/span\u003e\u003cspan class='jdgm-star jdgm--off'\u003e\u003c\/span\u003e\u003c\/div\u003e \u003cdiv class='jdgm-histogram__bar'\u003e \u003cdiv class='jdgm-histogram__bar-content' style='width: 0%;'\u003e \u003c\/div\u003e \u003c\/div\u003e \u003cdiv class='jdgm-histogram__percentage'\u003e0%\u003c\/div\u003e \u003cdiv class='jdgm-histogram__frequency'\u003e(0)\u003c\/div\u003e \u003c\/div\u003e \u003cdiv class='jdgm-histogram__row' data-rating='2' data-frequency='0' data-percentage='0'\u003e \u003cdiv class='jdgm-histogram__star' role='button' aria-label=\"0% (0) reviews with 2 star rating\" tabindex='0' \u003e\u003cspan class='jdgm-star jdgm--on'\u003e\u003c\/span\u003e\u003cspan class='jdgm-star jdgm--on'\u003e\u003c\/span\u003e\u003cspan class='jdgm-star jdgm--off'\u003e\u003c\/span\u003e\u003cspan class='jdgm-star jdgm--off'\u003e\u003c\/span\u003e\u003cspan class='jdgm-star jdgm--off'\u003e\u003c\/span\u003e\u003c\/div\u003e \u003cdiv class='jdgm-histogram__bar'\u003e \u003cdiv class='jdgm-histogram__bar-content' style='width: 0%;'\u003e \u003c\/div\u003e \u003c\/div\u003e \u003cdiv class='jdgm-histogram__percentage'\u003e0%\u003c\/div\u003e \u003cdiv class='jdgm-histogram__frequency'\u003e(0)\u003c\/div\u003e \u003c\/div\u003e \u003cdiv class='jdgm-histogram__row' data-rating='1' data-frequency='0' data-percentage='0'\u003e \u003cdiv class='jdgm-histogram__star' role='button' aria-label=\"0% (0) reviews with 1 star rating\" tabindex='0' \u003e\u003cspan class='jdgm-star jdgm--on'\u003e\u003c\/span\u003e\u003cspan class='jdgm-star jdgm--off'\u003e\u003c\/span\u003e\u003cspan class='jdgm-star jdgm--off'\u003e\u003c\/span\u003e\u003cspan class='jdgm-star jdgm--off'\u003e\u003c\/span\u003e\u003cspan class='jdgm-star jdgm--off'\u003e\u003c\/span\u003e\u003c\/div\u003e \u003cdiv class='jdgm-histogram__bar'\u003e \u003cdiv class='jdgm-histogram__bar-content' style='width: 0%;'\u003e \u003c\/div\u003e \u003c\/div\u003e \u003cdiv class='jdgm-histogram__percentage'\u003e0%\u003c\/div\u003e \u003cdiv class='jdgm-histogram__frequency'\u003e(0)\u003c\/div\u003e \u003c\/div\u003e \u003cdiv class='jdgm-histogram__row jdgm-histogram__clear-filter' data-rating=null tabindex='0'\u003e\u003c\/div\u003e \u003c\/div\u003e \u003cdiv class='jdgm-rev-widg__sort-wrapper'\u003e\u003c\/div\u003e \u003c\/div\u003e \u003cdiv class='jdgm-rev-widg__body'\u003e \u003cdiv class='jdgm-rev-widg__reviews'\u003e\u003c\/div\u003e \u003cdiv class='jdgm-paginate' data-per-page='10' data-url='https:\/\/api.judge.me\/reviews\/reviews_for_widget' style=\"display: none;\"\u003e\u003c\/div\u003e \u003c\/div\u003e \u003cdiv class='jdgm-rev-widg__paginate-spinner-wrapper'\u003e \u003cdiv class='jdgm-spinner'\u003e\u003c\/div\u003e \u003c\/div\u003e \u003c\/div\u003e"},"default_reviews_metafields":{},"collections":[{"id":512654540989,"handle":"lastof26-10","title":"10%","updated_at":"2026-11-14T20:08:00+08:00","body_html":null,"published_at":"2026-10-12T19:06:42+08:00","sort_order":"best-selling","template_suffix":null,"disjunctive":false,"rules":[],"published_scope":"global"},{"id":261657460925,"handle":"buy","title":"Buy","updated_at":"2026-11-14T20:08:00+08:00","body_html":"\u003cp\u003eBrowse all of our pregnancy, labour \u0026amp; birth, postpartum and baby essentials here.\u003cbr\u003e\u003c\/p\u003e\n\u003cp\u003e\u003cspan\u003eYou can even buy now and pay later with Afterpay!\u003c\/span\u003e\u003c\/p\u003e","published_at":"2021-03-10T12:05:31+08:00","sort_order":"best-selling","template_suffix":"shop-all-collection","disjunctive":false,"rules":[],"published_scope":"global","image":{"created_at":"2024-05-06T11:59:42+08:00","alt":"Buy - The Birth Store","width":2048,"height":2048,"src":"\/\/www.thebirthstore.com.au\/cdn\/shop\/collections\/buy-964856.jpg?v=1714967982"}},{"id":337429201085,"handle":"hospital-bag","title":"Hospital Bag","updated_at":"2026-11-14T20:08:00+08:00","body_html":"","published_at":"2026-06-03T11:36:29+08:00","sort_order":"most-relevant","template_suffix":"","disjunctive":false,"rules":[],"published_scope":"global"},{"id":295224705213,"handle":"perineal-care","title":"Perineal Care","updated_at":"2026-11-12T20:07:50+08:00","body_html":"","published_at":"2023-11-10T20:43:30+08:00","sort_order":"best-selling","template_suffix":"perineal-care-collection","disjunctive":false,"rules":[],"published_scope":"global","image":{"created_at":"2024-05-06T12:00:33+08:00","alt":"Perineal Care - The Birth Store","width":1024,"height":1536,"src":"\/\/www.thebirthstore.com.au\/cdn\/shop\/collections\/perineal-care-657628.jpg?v=1714968034"}},{"id":261658083517,"handle":"post-partum","title":"Postpartum","updated_at":"2026-11-14T20:08:00+08:00","body_html":"\u003cp\u003eShop your postpartum and hospital bag essentials below. Looking for something we don't currently stock? Please reach out and let us know.\u003cbr\u003e\u003c\/p\u003e\n\u003cp\u003e\u003cspan\u003eYou can even buy now and pay later with Afterpay!\u003c\/span\u003e\u003c\/p\u003e","published_at":"2021-03-10T12:33:47+08:00","sort_order":"best-selling","template_suffix":"postpartum-collection","disjunctive":false,"rules":[],"published_scope":"global","image":{"created_at":"2024-05-06T12:00:36+08:00","alt":"Postpartum - The Birth Store","width":611,"height":702,"src":"\/\/www.thebirthstore.com.au\/cdn\/shop\/collections\/postpartum-150119.jpg?v=1714968037"}},{"id":291456483517,"handle":"shop-all","title":"Shop All - Mum","updated_at":"2026-11-14T20:08:00+08:00","body_html":"","published_at":"2022-12-23T22:04:39+08:00","sort_order":"best-selling","template_suffix":"shop-all-collection","disjunctive":false,"rules":[],"published_scope":"global","image":{"created_at":"2024-05-06T12:00:54+08:00","alt":"Shop All - The Birth Store","width":1365,"height":2048,"src":"\/\/www.thebirthstore.com.au\/cdn\/shop\/collections\/shop-all-693176.jpg?v=1714968055"}},{"id":310045933757,"handle":"shop-all-sale","title":"Shop All Sale","updated_at":"2026-11-14T20:08:00+08:00","body_html":"","published_at":"2024-11-12T13:22:43+08:00","sort_order":"best-selling","template_suffix":"","disjunctive":true,"rules":[],"published_scope":"global","image":{"created_at":"2024-11-13T10:58:16+08:00","alt":"Shop All Sale - The Birth Store","width":2048,"height":1365,"src":"\/\/www.thebirthstore.com.au\/cdn\/shop\/collections\/shop-all-sale-297361.jpg?v=1731466697"}}]}
{"item":{"id":7410253889725,"title":"Qiara Pregnancy \u0026 Breastfeeding","handle":"qiara-pregnancy-breastfeeding","description":"\u003cp\u003e\u003cmeta charset=\"utf-8\"\u003e\u003cspan\u003eQiara Pregnancy \u0026amp; Breastfeeding contains a probiotic strain, isolated from breastmilk, formulated for your needs.\u003c\/span\u003e\u003c\/p\u003e","published_at":"2022-12-12T00:00:00+08:00","created_at":"2022-12-05T20:43:56+08:00","vendor":"Qiara","type":"","tags":["Baby Shower Gifts - Mum","Breastfeeding","Hospital Bag","Mastitis","Mum","Post-Partum","Pregnancy","Pregnancy Health"],"price":8495,"price_min":8495,"price_max":8495,"available":true,"price_varies":false,"compare_at_price":null,"compare_at_price_min":0,"compare_at_price_max":0,"compare_at_price_varies":false,"variants":[{"id":42533813878973,"title":"Default Title","option1":"Default Title","option2":null,"option3":null,"sku":"","requires_shipping":true,"taxable":false,"featured_image":null,"available":true,"name":"Qiara Pregnancy \u0026 Breastfeeding","public_title":null,"options":["Default Title"],"price":8495,"weight":200,"compare_at_price":null,"inventory_management":"shopify","barcode":"13878973","requires_selling_plan":false,"selling_plan_allocations":[],"quantity_rule":{"min":1,"max":null,"increment":1}}],"images":["\/\/www.thebirthstore.com.au\/cdn\/shop\/files\/qiara-pregnancy-breastfeeding-263434.jpg?v=1714968410","\/\/www.thebirthstore.com.au\/cdn\/shop\/files\/qiara-pregnancy-breastfeeding-691027.jpg?v=1714968410","\/\/www.thebirthstore.com.au\/cdn\/shop\/files\/qiara-pregnancy-breastfeeding-423262.jpg?v=1714968410","\/\/www.thebirthstore.com.au\/cdn\/shop\/files\/qiara-pregnancy-breastfeeding-828022.jpg?v=1714968410"],"featured_image":"\/\/www.thebirthstore.com.au\/cdn\/shop\/files\/qiara-pregnancy-breastfeeding-263434.jpg?v=1714968410","options":["Title"],"media":[{"alt":"Qiara Pregnancy \u0026 Breastfeeding - The Birth Store-Qiara","id":27007596265661,"position":1,"preview_image":{"aspect_ratio":1.0,"height":2048,"width":2048,"src":"\/\/www.thebirthstore.com.au\/cdn\/shop\/files\/qiara-pregnancy-breastfeeding-263434.jpg?v=1714968410"},"aspect_ratio":1.0,"height":2048,"media_type":"image","src":"\/\/www.thebirthstore.com.au\/cdn\/shop\/files\/qiara-pregnancy-breastfeeding-263434.jpg?v=1714968410","width":2048},{"alt":"Qiara Pregnancy \u0026 Breastfeeding - The Birth Store-Qiara","id":27007596331197,"position":2,"preview_image":{"aspect_ratio":1.0,"height":800,"width":800,"src":"\/\/www.thebirthstore.com.au\/cdn\/shop\/files\/qiara-pregnancy-breastfeeding-691027.jpg?v=1714968410"},"aspect_ratio":1.0,"height":800,"media_type":"image","src":"\/\/www.thebirthstore.com.au\/cdn\/shop\/files\/qiara-pregnancy-breastfeeding-691027.jpg?v=1714968410","width":800},{"alt":"Qiara Pregnancy \u0026 Breastfeeding - The Birth Store-Qiara","id":27007596363965,"position":3,"preview_image":{"aspect_ratio":0.643,"height":800,"width":514,"src":"\/\/www.thebirthstore.com.au\/cdn\/shop\/files\/qiara-pregnancy-breastfeeding-423262.jpg?v=1714968410"},"aspect_ratio":0.643,"height":800,"media_type":"image","src":"\/\/www.thebirthstore.com.au\/cdn\/shop\/files\/qiara-pregnancy-breastfeeding-423262.jpg?v=1714968410","width":514},{"alt":"Qiara Pregnancy \u0026 Breastfeeding - The Birth Store-Qiara","id":27007596396733,"position":4,"preview_image":{"aspect_ratio":0.994,"height":525,"width":522,"src":"\/\/www.thebirthstore.com.au\/cdn\/shop\/files\/qiara-pregnancy-breastfeeding-828022.jpg?v=1714968410"},"aspect_ratio":0.994,"height":525,"media_type":"image","src":"\/\/www.thebirthstore.com.au\/cdn\/shop\/files\/qiara-pregnancy-breastfeeding-828022.jpg?v=1714968410","width":522},{"alt":null,"id":26241679392957,"position":5,"preview_image":{"aspect_ratio":1.777,"height":166,"width":295,"src":"\/\/www.thebirthstore.com.au\/cdn\/shop\/files\/preview_images\/1163351671-2ea2175640fa7f808998e27a8898ad26c000f80c59189e38cd0338914f6b9eb6-d_295x166_54a1d571-ce9a-4861-8573-9a46633ab8bd.jpg?v=1701343810"},"aspect_ratio":1.775,"external_id":"177510272","host":"vimeo","media_type":"external_video"}],"requires_selling_plan":false,"selling_plan_groups":[],"content":"\u003cp\u003e\u003cmeta charset=\"utf-8\"\u003e\u003cspan\u003eQiara Pregnancy \u0026amp; Breastfeeding contains a probiotic strain, isolated from breastmilk, formulated for your needs.\u003c\/span\u003e\u003c\/p\u003e"},"options":[{"name":"Title","position":1,"values":["Default Title"]}],"custom_metafields":{},"metafields":{"badge":"\u003cdiv style='display:none' class='jdgm-prev-badge' data-average-rating='5.00' data-number-of-reviews='1' data-number-of-questions='0'\u003e \u003cspan class='jdgm-prev-badge__stars' data-score='5.00' tabindex='0' aria-label='5.00 stars' role='button'\u003e \u003cspan class='jdgm-star jdgm--on'\u003e\u003c\/span\u003e\u003cspan class='jdgm-star jdgm--on'\u003e\u003c\/span\u003e\u003cspan class='jdgm-star jdgm--on'\u003e\u003c\/span\u003e\u003cspan class='jdgm-star jdgm--on'\u003e\u003c\/span\u003e\u003cspan class='jdgm-star jdgm--on'\u003e\u003c\/span\u003e \u003c\/span\u003e \u003cspan class='jdgm-prev-badge__text'\u003e 1 review \u003c\/span\u003e \u003c\/div\u003e","widget":"\u003cdiv class='jdgm-rev-widg' data-updated-at='2026-10-17T20:48:57Z' data-average-rating='5.00' data-number-of-reviews='1' data-number-of-questions='0' data-image-url='https:\/\/cdn.shopify.com\/s\/files\/1\/0527\/3393\/5805\/files\/qiara-pregnancy-breastfeeding-263434.jpg?v=1714968410'\u003e \u003cstyle class='jdgm-temp-hiding-style'\u003e.jdgm-rev-widg{ display: none }\u003c\/style\u003e \u003cdiv class='jdgm-rev-widg__header'\u003e \u003ch2 class='jdgm-rev-widg__title'\u003eCustomer Reviews\u003c\/h2\u003e \u003cdiv class='jdgm-rev-widg__summary'\u003e \u003cdiv class='jdgm-rev-widg__summary-stars' aria-label='Average rating is 5.00 stars' role='img'\u003e \u003cspan class='jdgm-star jdgm--on'\u003e\u003c\/span\u003e\u003cspan class='jdgm-star jdgm--on'\u003e\u003c\/span\u003e\u003cspan class='jdgm-star jdgm--on'\u003e\u003c\/span\u003e\u003cspan class='jdgm-star jdgm--on'\u003e\u003c\/span\u003e\u003cspan class='jdgm-star jdgm--on'\u003e\u003c\/span\u003e \u003c\/div\u003e \u003cdiv class='jdgm-rev-widg__summary-text'\u003eBased on 1 review\u003c\/div\u003e \u003c\/div\u003e \u003ca style='display: none' href='#' class='jdgm-write-rev-link' role='button'\u003eWrite a review\u003c\/a\u003e \u003cdiv class='jdgm-histogram jdgm-temp-hidden'\u003e \u003cdiv class='jdgm-histogram__row' data-rating='5' data-frequency='1' data-percentage='100'\u003e \u003cdiv class='jdgm-histogram__star' role='button' aria-label=\"100% (1) reviews with 5 star rating\" tabindex='0' \u003e\u003cspan class='jdgm-star jdgm--on'\u003e\u003c\/span\u003e\u003cspan class='jdgm-star jdgm--on'\u003e\u003c\/span\u003e\u003cspan class='jdgm-star jdgm--on'\u003e\u003c\/span\u003e\u003cspan class='jdgm-star jdgm--on'\u003e\u003c\/span\u003e\u003cspan class='jdgm-star jdgm--on'\u003e\u003c\/span\u003e\u003c\/div\u003e \u003cdiv class='jdgm-histogram__bar'\u003e \u003cdiv class='jdgm-histogram__bar-content' style='width: 100%;'\u003e \u003c\/div\u003e \u003c\/div\u003e \u003cdiv class='jdgm-histogram__percentage'\u003e100%\u003c\/div\u003e \u003cdiv class='jdgm-histogram__frequency'\u003e(1)\u003c\/div\u003e \u003c\/div\u003e \u003cdiv class='jdgm-histogram__row' data-rating='4' data-frequency='0' data-percentage='0'\u003e \u003cdiv class='jdgm-histogram__star' role='button' aria-label=\"0% (0) reviews with 4 star rating\" tabindex='0' \u003e\u003cspan class='jdgm-star jdgm--on'\u003e\u003c\/span\u003e\u003cspan class='jdgm-star jdgm--on'\u003e\u003c\/span\u003e\u003cspan class='jdgm-star jdgm--on'\u003e\u003c\/span\u003e\u003cspan class='jdgm-star jdgm--on'\u003e\u003c\/span\u003e\u003cspan class='jdgm-star jdgm--off'\u003e\u003c\/span\u003e\u003c\/div\u003e \u003cdiv class='jdgm-histogram__bar'\u003e \u003cdiv class='jdgm-histogram__bar-content' style='width: 0%;'\u003e \u003c\/div\u003e \u003c\/div\u003e \u003cdiv class='jdgm-histogram__percentage'\u003e0%\u003c\/div\u003e \u003cdiv class='jdgm-histogram__frequency'\u003e(0)\u003c\/div\u003e \u003c\/div\u003e \u003cdiv class='jdgm-histogram__row' data-rating='3' data-frequency='0' data-percentage='0'\u003e \u003cdiv class='jdgm-histogram__star' role='button' aria-label=\"0% (0) reviews with 3 star rating\" tabindex='0' \u003e\u003cspan class='jdgm-star jdgm--on'\u003e\u003c\/span\u003e\u003cspan class='jdgm-star jdgm--on'\u003e\u003c\/span\u003e\u003cspan class='jdgm-star jdgm--on'\u003e\u003c\/span\u003e\u003cspan class='jdgm-star jdgm--off'\u003e\u003c\/span\u003e\u003cspan class='jdgm-star jdgm--off'\u003e\u003c\/span\u003e\u003c\/div\u003e \u003cdiv class='jdgm-histogram__bar'\u003e \u003cdiv class='jdgm-histogram__bar-content' style='width: 0%;'\u003e \u003c\/div\u003e \u003c\/div\u003e \u003cdiv class='jdgm-histogram__percentage'\u003e0%\u003c\/div\u003e \u003cdiv class='jdgm-histogram__frequency'\u003e(0)\u003c\/div\u003e \u003c\/div\u003e \u003cdiv class='jdgm-histogram__row' data-rating='2' data-frequency='0' data-percentage='0'\u003e \u003cdiv class='jdgm-histogram__star' role='button' aria-label=\"0% (0) reviews with 2 star rating\" tabindex='0' \u003e\u003cspan class='jdgm-star jdgm--on'\u003e\u003c\/span\u003e\u003cspan class='jdgm-star jdgm--on'\u003e\u003c\/span\u003e\u003cspan class='jdgm-star jdgm--off'\u003e\u003c\/span\u003e\u003cspan class='jdgm-star jdgm--off'\u003e\u003c\/span\u003e\u003cspan class='jdgm-star jdgm--off'\u003e\u003c\/span\u003e\u003c\/div\u003e \u003cdiv class='jdgm-histogram__bar'\u003e \u003cdiv class='jdgm-histogram__bar-content' style='width: 0%;'\u003e \u003c\/div\u003e \u003c\/div\u003e \u003cdiv class='jdgm-histogram__percentage'\u003e0%\u003c\/div\u003e \u003cdiv class='jdgm-histogram__frequency'\u003e(0)\u003c\/div\u003e \u003c\/div\u003e \u003cdiv class='jdgm-histogram__row' data-rating='1' data-frequency='0' data-percentage='0'\u003e \u003cdiv class='jdgm-histogram__star' role='button' aria-label=\"0% (0) reviews with 1 star rating\" tabindex='0' \u003e\u003cspan class='jdgm-star jdgm--on'\u003e\u003c\/span\u003e\u003cspan class='jdgm-star jdgm--off'\u003e\u003c\/span\u003e\u003cspan class='jdgm-star jdgm--off'\u003e\u003c\/span\u003e\u003cspan class='jdgm-star jdgm--off'\u003e\u003c\/span\u003e\u003cspan class='jdgm-star jdgm--off'\u003e\u003c\/span\u003e\u003c\/div\u003e \u003cdiv class='jdgm-histogram__bar'\u003e \u003cdiv class='jdgm-histogram__bar-content' style='width: 0%;'\u003e \u003c\/div\u003e \u003c\/div\u003e \u003cdiv class='jdgm-histogram__percentage'\u003e0%\u003c\/div\u003e \u003cdiv class='jdgm-histogram__frequency'\u003e(0)\u003c\/div\u003e \u003c\/div\u003e \u003cdiv class='jdgm-histogram__row jdgm-histogram__clear-filter' data-rating=null tabindex='0'\u003e\u003c\/div\u003e \u003c\/div\u003e \u003cdiv class='jdgm-rev-widg__sort-wrapper'\u003e\u003c\/div\u003e \u003c\/div\u003e \u003cdiv class='jdgm-rev-widg__body'\u003e \u003cdiv class='jdgm-rev-widg__reviews'\u003e\u003cdiv class='jdgm-rev jdgm-divider-top' data-verified-buyer='true' data-review-id='9a8404ee-dc82-4bd5-ae37-1f80f555e75c' data-review-language='' data-product-title='Qiara Pregnancy \u0026amp; Breastfeeding' data-product-url='\/products\/qiara-pregnancy-breastfeeding' data-thumb-up-count='0' data-thumb-down-count='0'\u003e \u003cdiv class='jdgm-rev__header'\u003e \u003cdiv class='jdgm-rev__icon' \u003e J \u003c\/div\u003e \u003cspan class='jdgm-rev__rating' data-score='5' tabindex='0' aria-label='5 star review' role='img'\u003e \u003cspan class='jdgm-star jdgm--on'\u003e\u003c\/span\u003e\u003cspan class='jdgm-star jdgm--on'\u003e\u003c\/span\u003e\u003cspan class='jdgm-star jdgm--on'\u003e\u003c\/span\u003e\u003cspan class='jdgm-star jdgm--on'\u003e\u003c\/span\u003e\u003cspan class='jdgm-star jdgm--on'\u003e\u003c\/span\u003e \u003c\/span\u003e \u003ctime class='jdgm-rev__timestamp jdgm-spinner' datetime='2025-07-06T02:30:08Z' data-content='2025-07-06 02:30:08 UTC'\u003e\u003c\/time\u003e \u003cdiv class='jdgm-rev__br'\u003e\u003c\/div\u003e \u003cspan class='jdgm-rev__buyer-badge-wrapper'\u003e \u003cspan class='jdgm-rev__buyer-badge'\u003e\u003c\/span\u003e \u003c\/span\u003e \u003cspan class='jdgm-rev__author-wrapper'\u003e \u003cspan class='jdgm-rev__author'\u003eJess Loren\u003c\/span\u003e \u003cspan class='jdgm-rev__location' \u003e \u003c\/span\u003e \u003c\/span\u003e \u003c\/div\u003e \u003cdiv class='jdgm-rev__content'\u003e \u003cdiv class='jdgm-rev__custom-form'\u003e \u003c\/div\u003e \u003cb class='jdgm-rev__title'\u003ePerfect purchase\u003c\/b\u003e \u003cdiv class='jdgm-rev__body'\u003e\u003cp\u003eThe birth store was easy to use and easy for pick up (although a bit hard to find)\n\u003cbr \/\u003eMy Qiara probiotics were great, I didn’t notice a huge impact whilst taking them although I’m certain it helped my newborn with colic symptoms. Either way they are flavourless and easy to consume.\n\u003cbr \/\u003eWould buy from the birth store again.\u003c\/p\u003e\u003c\/div\u003e \u003cdiv class='jdgm-rev__pics'\u003e \u003c\/div\u003e \u003cdiv class='jdgm-rev__vids'\u003e \u003c\/div\u003e \u003cdiv class='jdgm-rev__transparency-badge-wrapper'\u003e \u003cdiv class='jdgm-rev__transparency-badge' data-badge-type=review_collected_via_store_invitation\u003e\u003c\/div\u003e \u003c\/div\u003e \u003c\/div\u003e \u003cdiv class='jdgm-rev__actions'\u003e \u003cdiv class='jdgm-rev__social'\u003e\u003c\/div\u003e \u003cdiv class='jdgm-rev__votes'\u003e\u003c\/div\u003e \u003c\/div\u003e \u003cdiv class='jdgm-rev__reply'\u003e \u003cdiv class='jdgm-rev__replier-wrapper'\u003e \u003cb class='jdgm-rev__replier'\u003e\u003c\/b\u003e \u003c\/div\u003e \u003cdiv class='jdgm-rev__reply-content'\u003e\u003cp\u003eHi Jess, thank you so much for your kind words, we’re so glad you had a positive experience and that the Qiara probiotics were easy to take and helpful for your newborn, we really appreciate your feedback and support ❤️\u003c\/p\u003e\u003c\/div\u003e \u003c\/div\u003e \u003c\/div\u003e\u003c\/div\u003e \u003cdiv class='jdgm-paginate' data-per-page='10' data-url='https:\/\/api.judge.me\/reviews\/reviews_for_widget' style=\"display: none;\"\u003e\u003c\/div\u003e \u003c\/div\u003e \u003cdiv class='jdgm-rev-widg__paginate-spinner-wrapper'\u003e \u003cdiv class='jdgm-spinner'\u003e\u003c\/div\u003e \u003c\/div\u003e \u003c\/div\u003e"},"default_reviews_metafields":{"rating":{"scale_min":"1.0","scale_max":"5.0","value":"5.0"},"rating_count":1},"collections":[{"id":512654540989,"handle":"lastof26-10","title":"10%","updated_at":"2026-11-14T20:08:00+08:00","body_html":null,"published_at":"2026-10-12T19:06:42+08:00","sort_order":"best-selling","template_suffix":null,"disjunctive":false,"rules":[],"published_scope":"global"},{"id":281356533949,"handle":"baby-shower-gifts","title":"Baby Shower Gifts - Mum","updated_at":"2026-11-14T20:08:00+08:00","body_html":"\u003cp\u003eLooking for a unique baby shower gift? Or an all-in-one bundle pack to suit all your needs? We've got just the thing!\u003c\/p\u003e","published_at":"2021-12-06T13:43:56+08:00","sort_order":"best-selling","template_suffix":"baby-shower-gifts","disjunctive":true,"rules":[],"published_scope":"global","image":{"created_at":"2024-05-06T11:59:28+08:00","alt":"Baby Shower Gifts - The Birth Store","width":1200,"height":1800,"src":"\/\/www.thebirthstore.com.au\/cdn\/shop\/collections\/baby-shower-gifts-401770.jpg?v=1761791272"}},{"id":281712427197,"handle":"breastfeeding","title":"Breastfeeding","updated_at":"2026-11-14T20:08:00+08:00","body_html":"","published_at":"2021-12-20T14:19:33+08:00","sort_order":"best-selling","template_suffix":"breastfeeding-collection","disjunctive":false,"rules":[],"published_scope":"global","image":{"created_at":"2024-05-06T11:59:34+08:00","alt":"Breastfeeding - The Birth Store","width":620,"height":635,"src":"\/\/www.thebirthstore.com.au\/cdn\/shop\/collections\/breastfeeding-793872.jpg?v=1714967974"}},{"id":261657460925,"handle":"buy","title":"Buy","updated_at":"2026-11-14T20:08:00+08:00","body_html":"\u003cp\u003eBrowse all of our pregnancy, labour \u0026amp; birth, postpartum and baby essentials here.\u003cbr\u003e\u003c\/p\u003e\n\u003cp\u003e\u003cspan\u003eYou can even buy now and pay later with Afterpay!\u003c\/span\u003e\u003c\/p\u003e","published_at":"2021-03-10T12:05:31+08:00","sort_order":"best-selling","template_suffix":"shop-all-collection","disjunctive":false,"rules":[],"published_scope":"global","image":{"created_at":"2024-05-06T11:59:42+08:00","alt":"Buy - The Birth Store","width":2048,"height":2048,"src":"\/\/www.thebirthstore.com.au\/cdn\/shop\/collections\/buy-964856.jpg?v=1714967982"}},{"id":337429201085,"handle":"hospital-bag","title":"Hospital Bag","updated_at":"2026-11-14T20:08:00+08:00","body_html":"","published_at":"2026-06-03T11:36:29+08:00","sort_order":"most-relevant","template_suffix":"","disjunctive":false,"rules":[],"published_scope":"global"},{"id":290869313725,"handle":"mastitis-blocked-ducts","title":"Mastitis \u0026 Blocked Ducts","updated_at":"2026-11-10T20:07:02+08:00","body_html":"","published_at":"2022-11-17T10:50:01+08:00","sort_order":"best-selling","template_suffix":"swaddles-collection","disjunctive":false,"rules":[],"published_scope":"global","image":{"created_at":"2024-05-06T12:00:21+08:00","alt":"Mastitis \u0026 Blocked Ducts - The Birth Store","width":494,"height":487,"src":"\/\/www.thebirthstore.com.au\/cdn\/shop\/collections\/mastitis-blocked-ducts-488726.jpg?v=1714968021"}},{"id":261658083517,"handle":"post-partum","title":"Postpartum","updated_at":"2026-11-14T20:08:00+08:00","body_html":"\u003cp\u003eShop your postpartum and hospital bag essentials below. Looking for something we don't currently stock? Please reach out and let us know.\u003cbr\u003e\u003c\/p\u003e\n\u003cp\u003e\u003cspan\u003eYou can even buy now and pay later with Afterpay!\u003c\/span\u003e\u003c\/p\u003e","published_at":"2021-03-10T12:33:47+08:00","sort_order":"best-selling","template_suffix":"postpartum-collection","disjunctive":false,"rules":[],"published_scope":"global","image":{"created_at":"2024-05-06T12:00:36+08:00","alt":"Postpartum - The Birth Store","width":611,"height":702,"src":"\/\/www.thebirthstore.com.au\/cdn\/shop\/collections\/postpartum-150119.jpg?v=1714968037"}},{"id":261658149053,"handle":"pregnancy-and-maternity-products","title":"Pregnancy","updated_at":"2026-11-14T20:08:00+08:00","body_html":"\u003cp\u003eShop your pregnancy essentials below. Looking for something we don't currently stock? Please reach out and let us know.\u003cbr\u003e\u003c\/p\u003e\n\u003cp\u003e\u003cspan\u003eYou can even buy now and pay later with Afterpay!\u003c\/span\u003e\u003c\/p\u003e","published_at":"2021-03-10T12:34:22+08:00","sort_order":"best-selling","template_suffix":"pregnancy-collection","disjunctive":false,"rules":[],"published_scope":"global","image":{"created_at":"2024-05-06T12:00:40+08:00","alt":"Pregnancy - The Birth Store","width":1024,"height":1536,"src":"\/\/www.thebirthstore.com.au\/cdn\/shop\/collections\/pregnancy-899677.jpg?v=1714968040"}},{"id":295224901821,"handle":"pregnancy-health","title":"Pregnancy Health","updated_at":"2026-11-14T20:08:00+08:00","body_html":"","published_at":"2023-11-10T20:48:51+08:00","sort_order":"best-selling","template_suffix":"swaddles-collection","disjunctive":false,"rules":[],"published_scope":"global","image":{"created_at":"2024-05-06T12:00:41+08:00","alt":"Pregnancy Health - The Birth Store","width":608,"height":410,"src":"\/\/www.thebirthstore.com.au\/cdn\/shop\/collections\/pregnancy-health-343983.jpg?v=1714968042"}},{"id":326523846845,"handle":"pregnancy-health-1","updated_at":"2026-11-14T20:08:00+08:00","published_at":"2025-10-30T10:44:54+08:00","sort_order":"best-selling","template_suffix":"","published_scope":"global","title":"Pregnancy Health","body_html":"","image":{"created_at":"2025-11-20T21:33:56+08:00","alt":"Pregnancy Health - The Birth Store","width":522,"height":525,"src":"\/\/www.thebirthstore.com.au\/cdn\/shop\/collections\/pregnancy-health-1617860.jpg?v=1763645636"}},{"id":291456483517,"handle":"shop-all","title":"Shop All - Mum","updated_at":"2026-11-14T20:08:00+08:00","body_html":"","published_at":"2022-12-23T22:04:39+08:00","sort_order":"best-selling","template_suffix":"shop-all-collection","disjunctive":false,"rules":[],"published_scope":"global","image":{"created_at":"2024-05-06T12:00:54+08:00","alt":"Shop All - The Birth Store","width":1365,"height":2048,"src":"\/\/www.thebirthstore.com.au\/cdn\/shop\/collections\/shop-all-693176.jpg?v=1714968055"}},{"id":310045933757,"handle":"shop-all-sale","title":"Shop All Sale","updated_at":"2026-11-14T20:08:00+08:00","body_html":"","published_at":"2024-11-12T13:22:43+08:00","sort_order":"best-selling","template_suffix":"","disjunctive":true,"rules":[],"published_scope":"global","image":{"created_at":"2024-11-13T10:58:16+08:00","alt":"Shop All Sale - The Birth Store","width":2048,"height":1365,"src":"\/\/www.thebirthstore.com.au\/cdn\/shop\/collections\/shop-all-sale-297361.jpg?v=1731466697"}}]}
{"item":{"id":7054943387837,"title":"Postpartum Bath Salts 350gm","handle":"postpartum-bath-salts-350gm","description":"\u003cp data-mce-fragment=\"1\"\u003e\u003cspan data-sheets-value='{\"1\":2,\"2\":\"Created with the perfect botnanical blend of soothing and nourishing herbs that nurture delicate and stretched skin, supporting its return to normal. Embrace the calming properties of lavender, with the comforting and healing benefits of calendula, chamomile and yarrow, with the added mineral powers of the Magnesium salts. This beautiful blend, combined with soaking in a warm bath after birth helps your body to repair and it also provides an opportunity for you to sit and fully relax those muscles that have worked so hard to birth your baby. \"}' data-sheets-userformat='{\"2\":14849,\"3\":{\"1\":0},\"12\":0,\"14\":{\"1\":2,\"2\":0},\"15\":\"Arial\",\"16\":12}' data-mce-fragment=\"1\"\u003eCreated with the perfect botanical blend of soothing and nourishing herbs that nurture delicate and stretched skin, supporting it's return to normal. Embrace the calming properties of lavender, with the comforting and healing benefits of calendula, chamomile and yarrow, with the added mineral powers of the Magnesium salts. This beautiful blend, combined with soaking in a warm bath after birth helps your body to repair and it also provides an opportunity for you to sit and fully relax those muscles that have worked so hard to birth your baby.\u003c\/span\u003e\u003c\/p\u003e\n\u003cp data-mce-fragment=\"1\"\u003e\u003cspan data-sheets-value='{\"1\":2,\"2\":\"Magnesium Sulphate Heptahydrate, Calendula officinalis (Calendula) Flower, Chamomilla recutita (Matricaria) Flower, Achillea millefolium (Yarrow) flowers, Lavandula officinalis (Lavender) Flower, Lavandula officinalis (Lavender) Essential oil\"}' data-sheets-userformat='{\"2\":14755,\"3\":{\"1\":0},\"4\":{\"1\":2,\"2\":16777215},\"8\":{\"1\":[{\"1\":2,\"2\":0,\"5\":{\"1\":0}},{\"1\":0,\"2\":0,\"3\":3},{\"1\":1,\"2\":0,\"4\":1}]},\"10\":2,\"11\":0,\"14\":{\"1\":2,\"2\":0},\"15\":\"Arial\",\"16\":12}' data-mce-fragment=\"1\"\u003e\u003cstrong\u003eIngredients:\u003c\/strong\u003e \u003cstrong data-mce-fragment=\"1\"\u003eMagnesium\u003c\/strong\u003e Sulphate Heptahydrate, Calendula officinalis \u003cstrong data-mce-fragment=\"1\"\u003e(Calendula)\u003c\/strong\u003e Flower, Chamomilla recutita \u003cstrong data-mce-fragment=\"1\"\u003e(Chamomile)\u003c\/strong\u003e Flower, Achillea millefolium \u003cstrong data-mce-fragment=\"1\"\u003e(Yarrow)\u003c\/strong\u003e flowers, Lavandula officinalis \u003cstrong data-mce-fragment=\"1\"\u003e(Lavender)\u003c\/strong\u003e Flower, Lavandula officinalis \u003cstrong data-mce-fragment=\"1\"\u003e(Lavender)\u003c\/strong\u003e Essential oil\u003c\/span\u003e\u003c\/p\u003e\n\u003cp data-mce-fragment=\"1\"\u003e\u003cspan data-sheets-value='{\"1\":2,\"2\":\"Magnesium Sulphate Heptahydrate, Calendula officinalis (Calendula) Flower, Chamomilla recutita (Matricaria) Flower, Achillea millefolium (Yarrow) flowers, Lavandula officinalis (Lavender) Flower, Lavandula officinalis (Lavender) Essential oil\"}' data-sheets-userformat='{\"2\":14755,\"3\":{\"1\":0},\"4\":{\"1\":2,\"2\":16777215},\"8\":{\"1\":[{\"1\":2,\"2\":0,\"5\":{\"1\":0}},{\"1\":0,\"2\":0,\"3\":3},{\"1\":1,\"2\":0,\"4\":1}]},\"10\":2,\"11\":0,\"14\":{\"1\":2,\"2\":0},\"15\":\"Arial\",\"16\":12}' data-mce-fragment=\"1\"\u003e\u003cstrong\u003eDirections:\u003c\/strong\u003e Mix 1\/3 of the pack in 1 litre of boiling water and allow it to steep for twenty minutes. Pour the blend into a bath that just covers your hips and inscision in the case of a C-section. Sit, soak, and relax for twenty minutes. Complete for 3 consecutive days after birth.\u003c\/span\u003e\u003c\/p\u003e\n\u003cp data-mce-fragment=\"1\"\u003e\u003cspan data-sheets-value='{\"1\":2,\"2\":\"Magnesium Sulphate Heptahydrate, Calendula officinalis (Calendula) Flower, Chamomilla recutita (Matricaria) Flower, Achillea millefolium (Yarrow) flowers, Lavandula officinalis (Lavender) Flower, Lavandula officinalis (Lavender) Essential oil\"}' data-sheets-userformat='{\"2\":14755,\"3\":{\"1\":0},\"4\":{\"1\":2,\"2\":16777215},\"8\":{\"1\":[{\"1\":2,\"2\":0,\"5\":{\"1\":0}},{\"1\":0,\"2\":0,\"3\":3},{\"1\":1,\"2\":0,\"4\":1}]},\"10\":2,\"11\":0,\"14\":{\"1\":2,\"2\":0},\"15\":\"Arial\",\"16\":12}' data-mce-fragment=\"1\"\u003eFor external use only. Not to be used during pregnancy\u003cbr data-mce-fragment=\"1\"\u003e\u003cbr data-mce-fragment=\"1\"\u003eFree from sulfates (SLS\/SLES), silicones, parabens, PEGs, GMOs, mineral oils, petrolatum, synthetic colours and fragrances, or animal testing. Do not ingest. This bag is compostable.\u003c\/span\u003e\u003c\/p\u003e","published_at":"2021-11-18T14:36:23+08:00","created_at":"2021-11-02T13:15:54+08:00","vendor":"Mere Botanicals","type":"","tags":["C-Section Birth Recovery","Hemorrhoids","Mum","Peri Care","Post-Partum","Vaginal Birth Recovery"],"price":2995,"price_min":2995,"price_max":2995,"available":false,"price_varies":false,"compare_at_price":2995,"compare_at_price_min":2995,"compare_at_price_max":2995,"compare_at_price_varies":false,"variants":[{"id":40977747280061,"title":"Default Title","option1":"Default Title","option2":null,"option3":null,"sku":"","requires_shipping":true,"taxable":false,"featured_image":null,"available":false,"name":"Postpartum Bath Salts 350gm","public_title":null,"options":["Default Title"],"price":2995,"weight":363,"compare_at_price":2995,"inventory_management":"shopify","barcode":"47280061","requires_selling_plan":false,"selling_plan_allocations":[],"quantity_rule":{"min":1,"max":null,"increment":1}}],"images":["\/\/www.thebirthstore.com.au\/cdn\/shop\/files\/postpartum-bath-salts-350gm-523726.jpg?v=1714968007","\/\/www.thebirthstore.com.au\/cdn\/shop\/files\/postpartum-bath-salts-350gm-752590.jpg?v=1714968007","\/\/www.thebirthstore.com.au\/cdn\/shop\/files\/postpartum-bath-salts-350gm-837387.jpg?v=1714968007"],"featured_image":"\/\/www.thebirthstore.com.au\/cdn\/shop\/files\/postpartum-bath-salts-350gm-523726.jpg?v=1714968007","options":["Title"],"media":[{"alt":"Postpartum Bath Salts 350gm - The Birth Store-Mere Botanicals","id":27007595086013,"position":1,"preview_image":{"aspect_ratio":1.0,"height":2048,"width":2048,"src":"\/\/www.thebirthstore.com.au\/cdn\/shop\/files\/postpartum-bath-salts-350gm-523726.jpg?v=1714968007"},"aspect_ratio":1.0,"height":2048,"media_type":"image","src":"\/\/www.thebirthstore.com.au\/cdn\/shop\/files\/postpartum-bath-salts-350gm-523726.jpg?v=1714968007","width":2048},{"alt":"Postpartum Bath Salts 350gm - The Birth Store-Mere Botanicals","id":27007595118781,"position":2,"preview_image":{"aspect_ratio":0.667,"height":1536,"width":1024,"src":"\/\/www.thebirthstore.com.au\/cdn\/shop\/files\/postpartum-bath-salts-350gm-752590.jpg?v=1714968007"},"aspect_ratio":0.667,"height":1536,"media_type":"image","src":"\/\/www.thebirthstore.com.au\/cdn\/shop\/files\/postpartum-bath-salts-350gm-752590.jpg?v=1714968007","width":1024},{"alt":"Postpartum Bath Salts 350gm - The Birth Store-Mere Botanicals","id":27007595151549,"position":3,"preview_image":{"aspect_ratio":0.667,"height":1536,"width":1024,"src":"\/\/www.thebirthstore.com.au\/cdn\/shop\/files\/postpartum-bath-salts-350gm-837387.jpg?v=1714968007"},"aspect_ratio":0.667,"height":1536,"media_type":"image","src":"\/\/www.thebirthstore.com.au\/cdn\/shop\/files\/postpartum-bath-salts-350gm-837387.jpg?v=1714968007","width":1024}],"requires_selling_plan":false,"selling_plan_groups":[],"content":"\u003cp data-mce-fragment=\"1\"\u003e\u003cspan data-sheets-value='{\"1\":2,\"2\":\"Created with the perfect botnanical blend of soothing and nourishing herbs that nurture delicate and stretched skin, supporting its return to normal. Embrace the calming properties of lavender, with the comforting and healing benefits of calendula, chamomile and yarrow, with the added mineral powers of the Magnesium salts. This beautiful blend, combined with soaking in a warm bath after birth helps your body to repair and it also provides an opportunity for you to sit and fully relax those muscles that have worked so hard to birth your baby. \"}' data-sheets-userformat='{\"2\":14849,\"3\":{\"1\":0},\"12\":0,\"14\":{\"1\":2,\"2\":0},\"15\":\"Arial\",\"16\":12}' data-mce-fragment=\"1\"\u003eCreated with the perfect botanical blend of soothing and nourishing herbs that nurture delicate and stretched skin, supporting it's return to normal. Embrace the calming properties of lavender, with the comforting and healing benefits of calendula, chamomile and yarrow, with the added mineral powers of the Magnesium salts. This beautiful blend, combined with soaking in a warm bath after birth helps your body to repair and it also provides an opportunity for you to sit and fully relax those muscles that have worked so hard to birth your baby.\u003c\/span\u003e\u003c\/p\u003e\n\u003cp data-mce-fragment=\"1\"\u003e\u003cspan data-sheets-value='{\"1\":2,\"2\":\"Magnesium Sulphate Heptahydrate, Calendula officinalis (Calendula) Flower, Chamomilla recutita (Matricaria) Flower, Achillea millefolium (Yarrow) flowers, Lavandula officinalis (Lavender) Flower, Lavandula officinalis (Lavender) Essential oil\"}' data-sheets-userformat='{\"2\":14755,\"3\":{\"1\":0},\"4\":{\"1\":2,\"2\":16777215},\"8\":{\"1\":[{\"1\":2,\"2\":0,\"5\":{\"1\":0}},{\"1\":0,\"2\":0,\"3\":3},{\"1\":1,\"2\":0,\"4\":1}]},\"10\":2,\"11\":0,\"14\":{\"1\":2,\"2\":0},\"15\":\"Arial\",\"16\":12}' data-mce-fragment=\"1\"\u003e\u003cstrong\u003eIngredients:\u003c\/strong\u003e \u003cstrong data-mce-fragment=\"1\"\u003eMagnesium\u003c\/strong\u003e Sulphate Heptahydrate, Calendula officinalis \u003cstrong data-mce-fragment=\"1\"\u003e(Calendula)\u003c\/strong\u003e Flower, Chamomilla recutita \u003cstrong data-mce-fragment=\"1\"\u003e(Chamomile)\u003c\/strong\u003e Flower, Achillea millefolium \u003cstrong data-mce-fragment=\"1\"\u003e(Yarrow)\u003c\/strong\u003e flowers, Lavandula officinalis \u003cstrong data-mce-fragment=\"1\"\u003e(Lavender)\u003c\/strong\u003e Flower, Lavandula officinalis \u003cstrong data-mce-fragment=\"1\"\u003e(Lavender)\u003c\/strong\u003e Essential oil\u003c\/span\u003e\u003c\/p\u003e\n\u003cp data-mce-fragment=\"1\"\u003e\u003cspan data-sheets-value='{\"1\":2,\"2\":\"Magnesium Sulphate Heptahydrate, Calendula officinalis (Calendula) Flower, Chamomilla recutita (Matricaria) Flower, Achillea millefolium (Yarrow) flowers, Lavandula officinalis (Lavender) Flower, Lavandula officinalis (Lavender) Essential oil\"}' data-sheets-userformat='{\"2\":14755,\"3\":{\"1\":0},\"4\":{\"1\":2,\"2\":16777215},\"8\":{\"1\":[{\"1\":2,\"2\":0,\"5\":{\"1\":0}},{\"1\":0,\"2\":0,\"3\":3},{\"1\":1,\"2\":0,\"4\":1}]},\"10\":2,\"11\":0,\"14\":{\"1\":2,\"2\":0},\"15\":\"Arial\",\"16\":12}' data-mce-fragment=\"1\"\u003e\u003cstrong\u003eDirections:\u003c\/strong\u003e Mix 1\/3 of the pack in 1 litre of boiling water and allow it to steep for twenty minutes. Pour the blend into a bath that just covers your hips and inscision in the case of a C-section. Sit, soak, and relax for twenty minutes. Complete for 3 consecutive days after birth.\u003c\/span\u003e\u003c\/p\u003e\n\u003cp data-mce-fragment=\"1\"\u003e\u003cspan data-sheets-value='{\"1\":2,\"2\":\"Magnesium Sulphate Heptahydrate, Calendula officinalis (Calendula) Flower, Chamomilla recutita (Matricaria) Flower, Achillea millefolium (Yarrow) flowers, Lavandula officinalis (Lavender) Flower, Lavandula officinalis (Lavender) Essential oil\"}' data-sheets-userformat='{\"2\":14755,\"3\":{\"1\":0},\"4\":{\"1\":2,\"2\":16777215},\"8\":{\"1\":[{\"1\":2,\"2\":0,\"5\":{\"1\":0}},{\"1\":0,\"2\":0,\"3\":3},{\"1\":1,\"2\":0,\"4\":1}]},\"10\":2,\"11\":0,\"14\":{\"1\":2,\"2\":0},\"15\":\"Arial\",\"16\":12}' data-mce-fragment=\"1\"\u003eFor external use only. Not to be used during pregnancy\u003cbr data-mce-fragment=\"1\"\u003e\u003cbr data-mce-fragment=\"1\"\u003eFree from sulfates (SLS\/SLES), silicones, parabens, PEGs, GMOs, mineral oils, petrolatum, synthetic colours and fragrances, or animal testing. Do not ingest. This bag is compostable.\u003c\/span\u003e\u003c\/p\u003e"},"options":[{"name":"Title","position":1,"values":["Default Title"]}],"custom_metafields":{},"metafields":{"badge":"\u003cdiv style='display:none' class='jdgm-prev-badge' data-average-rating='0.00' data-number-of-reviews='0' data-number-of-questions='0'\u003e \u003cspan class='jdgm-prev-badge__stars' data-score='0.00' tabindex='0' aria-label='0.00 stars' role='button'\u003e \u003cspan class='jdgm-star jdgm--off'\u003e\u003c\/span\u003e\u003cspan class='jdgm-star jdgm--off'\u003e\u003c\/span\u003e\u003cspan class='jdgm-star jdgm--off'\u003e\u003c\/span\u003e\u003cspan class='jdgm-star jdgm--off'\u003e\u003c\/span\u003e\u003cspan class='jdgm-star jdgm--off'\u003e\u003c\/span\u003e \u003c\/span\u003e \u003cspan class='jdgm-prev-badge__text'\u003e No reviews \u003c\/span\u003e \u003c\/div\u003e","widget":"\u003cdiv class='jdgm-rev-widg' data-updated-at='2025-06-13T16:12:10Z' data-average-rating='0.00' data-number-of-reviews='0' data-number-of-questions='0'\u003e \u003cstyle class='jdgm-temp-hiding-style'\u003e.jdgm-rev-widg{ display: none }\u003c\/style\u003e \u003cdiv class='jdgm-rev-widg__header'\u003e \u003ch2 class='jdgm-rev-widg__title'\u003eCustomer Reviews\u003c\/h2\u003e \u003cdiv class='jdgm-rev-widg__summary'\u003e \u003cdiv class='jdgm-rev-widg__summary-stars' aria-label='Average rating is 0.00 stars' role='img'\u003e \u003cspan class='jdgm-star jdgm--off'\u003e\u003c\/span\u003e\u003cspan class='jdgm-star jdgm--off'\u003e\u003c\/span\u003e\u003cspan class='jdgm-star jdgm--off'\u003e\u003c\/span\u003e\u003cspan class='jdgm-star jdgm--off'\u003e\u003c\/span\u003e\u003cspan class='jdgm-star jdgm--off'\u003e\u003c\/span\u003e \u003c\/div\u003e \u003cdiv class='jdgm-rev-widg__summary-text'\u003eBe the first to write a review\u003c\/div\u003e \u003c\/div\u003e \u003ca style='display: none' href='#' class='jdgm-write-rev-link' role='button'\u003eWrite a review\u003c\/a\u003e \u003cdiv class='jdgm-histogram jdgm-temp-hidden'\u003e \u003cdiv class='jdgm-histogram__row' data-rating='5' data-frequency='0' data-percentage='0'\u003e \u003cdiv class='jdgm-histogram__star' role='button' aria-label=\"0% (0) reviews with 5 star rating\" tabindex='0' \u003e\u003cspan class='jdgm-star jdgm--on'\u003e\u003c\/span\u003e\u003cspan class='jdgm-star jdgm--on'\u003e\u003c\/span\u003e\u003cspan class='jdgm-star jdgm--on'\u003e\u003c\/span\u003e\u003cspan class='jdgm-star jdgm--on'\u003e\u003c\/span\u003e\u003cspan class='jdgm-star jdgm--on'\u003e\u003c\/span\u003e\u003c\/div\u003e \u003cdiv class='jdgm-histogram__bar'\u003e \u003cdiv class='jdgm-histogram__bar-content' style='width: 0%;'\u003e \u003c\/div\u003e \u003c\/div\u003e \u003cdiv class='jdgm-histogram__percentage'\u003e0%\u003c\/div\u003e \u003cdiv class='jdgm-histogram__frequency'\u003e(0)\u003c\/div\u003e \u003c\/div\u003e \u003cdiv class='jdgm-histogram__row' data-rating='4' data-frequency='0' data-percentage='0'\u003e \u003cdiv class='jdgm-histogram__star' role='button' aria-label=\"0% (0) reviews with 4 star rating\" tabindex='0' \u003e\u003cspan class='jdgm-star jdgm--on'\u003e\u003c\/span\u003e\u003cspan class='jdgm-star jdgm--on'\u003e\u003c\/span\u003e\u003cspan class='jdgm-star jdgm--on'\u003e\u003c\/span\u003e\u003cspan class='jdgm-star jdgm--on'\u003e\u003c\/span\u003e\u003cspan class='jdgm-star jdgm--off'\u003e\u003c\/span\u003e\u003c\/div\u003e \u003cdiv class='jdgm-histogram__bar'\u003e \u003cdiv class='jdgm-histogram__bar-content' style='width: 0%;'\u003e \u003c\/div\u003e \u003c\/div\u003e \u003cdiv class='jdgm-histogram__percentage'\u003e0%\u003c\/div\u003e \u003cdiv class='jdgm-histogram__frequency'\u003e(0)\u003c\/div\u003e \u003c\/div\u003e \u003cdiv class='jdgm-histogram__row' data-rating='3' data-frequency='0' data-percentage='0'\u003e \u003cdiv class='jdgm-histogram__star' role='button' aria-label=\"0% (0) reviews with 3 star rating\" tabindex='0' \u003e\u003cspan class='jdgm-star jdgm--on'\u003e\u003c\/span\u003e\u003cspan class='jdgm-star jdgm--on'\u003e\u003c\/span\u003e\u003cspan class='jdgm-star jdgm--on'\u003e\u003c\/span\u003e\u003cspan class='jdgm-star jdgm--off'\u003e\u003c\/span\u003e\u003cspan class='jdgm-star jdgm--off'\u003e\u003c\/span\u003e\u003c\/div\u003e \u003cdiv class='jdgm-histogram__bar'\u003e \u003cdiv class='jdgm-histogram__bar-content' style='width: 0%;'\u003e \u003c\/div\u003e \u003c\/div\u003e \u003cdiv class='jdgm-histogram__percentage'\u003e0%\u003c\/div\u003e \u003cdiv class='jdgm-histogram__frequency'\u003e(0)\u003c\/div\u003e \u003c\/div\u003e \u003cdiv class='jdgm-histogram__row' data-rating='2' data-frequency='0' data-percentage='0'\u003e \u003cdiv class='jdgm-histogram__star' role='button' aria-label=\"0% (0) reviews with 2 star rating\" tabindex='0' \u003e\u003cspan class='jdgm-star jdgm--on'\u003e\u003c\/span\u003e\u003cspan class='jdgm-star jdgm--on'\u003e\u003c\/span\u003e\u003cspan class='jdgm-star jdgm--off'\u003e\u003c\/span\u003e\u003cspan class='jdgm-star jdgm--off'\u003e\u003c\/span\u003e\u003cspan class='jdgm-star jdgm--off'\u003e\u003c\/span\u003e\u003c\/div\u003e \u003cdiv class='jdgm-histogram__bar'\u003e \u003cdiv class='jdgm-histogram__bar-content' style='width: 0%;'\u003e \u003c\/div\u003e \u003c\/div\u003e \u003cdiv class='jdgm-histogram__percentage'\u003e0%\u003c\/div\u003e \u003cdiv class='jdgm-histogram__frequency'\u003e(0)\u003c\/div\u003e \u003c\/div\u003e \u003cdiv class='jdgm-histogram__row' data-rating='1' data-frequency='0' data-percentage='0'\u003e \u003cdiv class='jdgm-histogram__star' role='button' aria-label=\"0% (0) reviews with 1 star rating\" tabindex='0' \u003e\u003cspan class='jdgm-star jdgm--on'\u003e\u003c\/span\u003e\u003cspan class='jdgm-star jdgm--off'\u003e\u003c\/span\u003e\u003cspan class='jdgm-star jdgm--off'\u003e\u003c\/span\u003e\u003cspan class='jdgm-star jdgm--off'\u003e\u003c\/span\u003e\u003cspan class='jdgm-star jdgm--off'\u003e\u003c\/span\u003e\u003c\/div\u003e \u003cdiv class='jdgm-histogram__bar'\u003e \u003cdiv class='jdgm-histogram__bar-content' style='width: 0%;'\u003e \u003c\/div\u003e \u003c\/div\u003e \u003cdiv class='jdgm-histogram__percentage'\u003e0%\u003c\/div\u003e \u003cdiv class='jdgm-histogram__frequency'\u003e(0)\u003c\/div\u003e \u003c\/div\u003e \u003cdiv class='jdgm-histogram__row jdgm-histogram__clear-filter' data-rating=null tabindex='0'\u003e\u003c\/div\u003e \u003c\/div\u003e \u003cdiv class='jdgm-rev-widg__sort-wrapper'\u003e\u003c\/div\u003e \u003c\/div\u003e \u003cdiv class='jdgm-rev-widg__body'\u003e \u003cdiv class='jdgm-rev-widg__reviews'\u003e\u003c\/div\u003e \u003cdiv class='jdgm-paginate' data-per-page='10' data-url='https:\/\/api.judge.me\/reviews\/reviews_for_widget' style=\"display: none;\"\u003e\u003c\/div\u003e \u003c\/div\u003e \u003cdiv class='jdgm-rev-widg__paginate-spinner-wrapper'\u003e \u003cdiv class='jdgm-spinner'\u003e\u003c\/div\u003e \u003c\/div\u003e \u003c\/div\u003e"},"default_reviews_metafields":{},"collections":[{"id":512654540989,"handle":"lastof26-10","title":"10%","updated_at":"2026-11-14T20:08:00+08:00","body_html":null,"published_at":"2026-10-12T19:06:42+08:00","sort_order":"best-selling","template_suffix":null,"disjunctive":false,"rules":[],"published_scope":"global"},{"id":261657460925,"handle":"buy","title":"Buy","updated_at":"2026-11-14T20:08:00+08:00","body_html":"\u003cp\u003eBrowse all of our pregnancy, labour \u0026amp; birth, postpartum and baby essentials here.\u003cbr\u003e\u003c\/p\u003e\n\u003cp\u003e\u003cspan\u003eYou can even buy now and pay later with Afterpay!\u003c\/span\u003e\u003c\/p\u003e","published_at":"2021-03-10T12:05:31+08:00","sort_order":"best-selling","template_suffix":"shop-all-collection","disjunctive":false,"rules":[],"published_scope":"global","image":{"created_at":"2024-05-06T11:59:42+08:00","alt":"Buy - The Birth Store","width":2048,"height":2048,"src":"\/\/www.thebirthstore.com.au\/cdn\/shop\/collections\/buy-964856.jpg?v=1714967982"}},{"id":281712361661,"handle":"c-section-birth-recovery","title":"C-Section Birth Recovery","updated_at":"2026-11-12T20:07:50+08:00","body_html":"","published_at":"2021-12-20T14:19:01+08:00","sort_order":"best-selling","template_suffix":"swaddles-collection","disjunctive":false,"rules":[],"published_scope":"global","image":{"created_at":"2024-05-06T11:59:49+08:00","alt":"C-Section Birth Recovery - The Birth Store","width":1366,"height":2048,"src":"\/\/www.thebirthstore.com.au\/cdn\/shop\/collections\/c-section-birth-recovery-359249.jpg?v=1714967990"}},{"id":281712066749,"handle":"hemorrhoid-care","title":"Haemorrhoid Care","updated_at":"2026-11-12T20:07:50+08:00","body_html":"","published_at":"2021-12-20T14:16:30+08:00","sort_order":"best-selling","template_suffix":"swaddles-collection","disjunctive":false,"rules":[],"published_scope":"global","image":{"created_at":"2024-05-06T12:00:00+08:00","alt":"Haemorrhoid Care - The Birth Store","width":763,"height":556,"src":"\/\/www.thebirthstore.com.au\/cdn\/shop\/collections\/haemorrhoid-care-562138.jpg?v=1714968001"}},{"id":295224705213,"handle":"perineal-care","title":"Perineal Care","updated_at":"2026-11-12T20:07:50+08:00","body_html":"","published_at":"2023-11-10T20:43:30+08:00","sort_order":"best-selling","template_suffix":"perineal-care-collection","disjunctive":false,"rules":[],"published_scope":"global","image":{"created_at":"2024-05-06T12:00:33+08:00","alt":"Perineal Care - The Birth Store","width":1024,"height":1536,"src":"\/\/www.thebirthstore.com.au\/cdn\/shop\/collections\/perineal-care-657628.jpg?v=1714968034"}},{"id":261658083517,"handle":"post-partum","title":"Postpartum","updated_at":"2026-11-14T20:08:00+08:00","body_html":"\u003cp\u003eShop your postpartum and hospital bag essentials below. Looking for something we don't currently stock? Please reach out and let us know.\u003cbr\u003e\u003c\/p\u003e\n\u003cp\u003e\u003cspan\u003eYou can even buy now and pay later with Afterpay!\u003c\/span\u003e\u003c\/p\u003e","published_at":"2021-03-10T12:33:47+08:00","sort_order":"best-selling","template_suffix":"postpartum-collection","disjunctive":false,"rules":[],"published_scope":"global","image":{"created_at":"2024-05-06T12:00:36+08:00","alt":"Postpartum - The Birth Store","width":611,"height":702,"src":"\/\/www.thebirthstore.com.au\/cdn\/shop\/collections\/postpartum-150119.jpg?v=1714968037"}},{"id":291456483517,"handle":"shop-all","title":"Shop All - Mum","updated_at":"2026-11-14T20:08:00+08:00","body_html":"","published_at":"2022-12-23T22:04:39+08:00","sort_order":"best-selling","template_suffix":"shop-all-collection","disjunctive":false,"rules":[],"published_scope":"global","image":{"created_at":"2024-05-06T12:00:54+08:00","alt":"Shop All - The Birth Store","width":1365,"height":2048,"src":"\/\/www.thebirthstore.com.au\/cdn\/shop\/collections\/shop-all-693176.jpg?v=1714968055"}},{"id":310045933757,"handle":"shop-all-sale","title":"Shop All Sale","updated_at":"2026-11-14T20:08:00+08:00","body_html":"","published_at":"2024-11-12T13:22:43+08:00","sort_order":"best-selling","template_suffix":"","disjunctive":true,"rules":[],"published_scope":"global","image":{"created_at":"2024-11-13T10:58:16+08:00","alt":"Shop All Sale - The Birth Store","width":2048,"height":1365,"src":"\/\/www.thebirthstore.com.au\/cdn\/shop\/collections\/shop-all-sale-297361.jpg?v=1731466697"}},{"id":281712197821,"handle":"vaginal-birth-recovery","title":"Vaginal Birth Recovery","updated_at":"2026-11-12T20:07:50+08:00","body_html":"","published_at":"2021-12-20T14:18:23+08:00","sort_order":"best-selling","template_suffix":"swaddles-collection","disjunctive":true,"rules":[],"published_scope":"global","image":{"created_at":"2024-05-06T12:01:03+08:00","alt":"Vaginal Birth Recovery - The Birth Store","width":2048,"height":2048,"src":"\/\/www.thebirthstore.com.au\/cdn\/shop\/collections\/vaginal-birth-recovery-449034.jpg?v=1714968063"}}]}
{"item":{"id":7988900692157,"title":"Large Lupin Hot \u0026 Cold Pack","handle":"large-lupin-hot-cold-pack","description":"\u003cp\u003e\u003cspan\u003eAll Heat\/cold packs are made in Australia using locally grown lupins. They can be used hot and cold, as the lupin seeds are whole and can be frozen and heated safely.\u003c\/span\u003e\u003cbr\u003e\u003cbr\u003e\u003cstrong\u003eThey are packed full of benefits:\u003c\/strong\u003e\u003cbr\u003e\u003cbr\u003e\u003cspan\u003e- Wheat Free\u003c\/span\u003e\u003cbr\u003e\u003cspan\u003e- Odour Free\u003c\/span\u003e\u003cbr\u003e\u003cspan\u003e- Chemical Free\u003c\/span\u003e\u003cbr\u003e\u003cspan\u003e- Doesn't sweat when heated\u003c\/span\u003e\u003cbr\u003e\u003cspan\u003e- Lighter than wheat and retains heat longer\u003c\/span\u003e\u003cbr\u003e\u003cspan\u003e- Can be placed in the freezer as a cold pack\u003c\/span\u003e\u003cbr\u003e\u003cspan\u003e- Soothes aches and pains\u003c\/span\u003e\u003cbr\u003e\u003cspan\u003e- Keeps you warm in winter or cool in summer\u003c\/span\u003e\u003cbr\u003e\u003cspan\u003e- Put your heat pack in a plastic bag\/Ziplock and place in the freezer, the plastic bag will keep out the moisture from the freezer yet keeping your pack icy cold.\u003c\/span\u003e\u003cbr\u003e\u003cspan\u003e- Sectioned into 3 parts to get an even heat distribution throughout heat pack\u003c\/span\u003e\u003cbr\u003e\u003cspan\u003e- Comes in a range of vibrantly colourful fabrics\u003c\/span\u003e\u003cbr\u003e\u003cbr\u003e\u003cspan\u003eThis heat pack is roughly 40cm long x 16cm wide and weighs 1kg.\u003c\/span\u003e\u003c\/p\u003e","published_at":"2025-04-12T11:00:08+08:00","created_at":"2025-04-12T11:00:09+08:00","vendor":"Oscar \u0026 Harley","type":"","tags":["Baby Shower Gifts - Mum","Hospital Bag","Mum","Pain Relief","Post-Partum","Pregnancy"],"price":3500,"price_min":3500,"price_max":3500,"available":true,"price_varies":false,"compare_at_price":null,"compare_at_price_min":0,"compare_at_price_max":0,"compare_at_price_varies":false,"variants":[{"id":44968687173821,"title":"Daisy Mustard","option1":"Daisy Mustard","option2":null,"option3":null,"sku":"","requires_shipping":true,"taxable":false,"featured_image":{"id":38920963031229,"product_id":7988900692157,"position":8,"created_at":"2025-11-19T19:03:31+08:00","updated_at":"2025-11-19T22:35:51+08:00","alt":"Large Lupin Hot \u0026 Cold Pack - The Birth Store - Oscar \u0026 Harley","width":1080,"height":1080,"src":"\/\/www.thebirthstore.com.au\/cdn\/shop\/files\/large-lupin-hot-cold-pack-9195960.png?v=1763562951","variant_ids":[44968687173821]},"available":true,"name":"Large Lupin Hot \u0026 Cold Pack - Daisy Mustard","public_title":"Daisy Mustard","options":["Daisy Mustard"],"price":3500,"weight":500,"compare_at_price":null,"inventory_management":"shopify","barcode":"87173821","featured_media":{"alt":"Large Lupin Hot \u0026 Cold Pack - The Birth Store - Oscar \u0026 Harley","id":30156845744317,"position":8,"preview_image":{"aspect_ratio":1.0,"height":1080,"width":1080,"src":"\/\/www.thebirthstore.com.au\/cdn\/shop\/files\/large-lupin-hot-cold-pack-9195960.png?v=1763562951"}},"requires_selling_plan":false,"selling_plan_allocations":[],"quantity_rule":{"min":1,"max":null,"increment":1}},{"id":44968687206589,"title":"Sol","option1":"Sol","option2":null,"option3":null,"sku":"","requires_shipping":true,"taxable":false,"featured_image":{"id":38920970502333,"product_id":7988900692157,"position":9,"created_at":"2025-11-19T19:03:57+08:00","updated_at":"2025-11-19T19:03:59+08:00","alt":null,"width":1080,"height":1080,"src":"\/\/www.thebirthstore.com.au\/cdn\/shop\/files\/3_Flavours_to_choose_from_32.png?v=1763550239","variant_ids":[44968687206589]},"available":false,"name":"Large Lupin Hot \u0026 Cold Pack - Sol","public_title":"Sol","options":["Sol"],"price":3500,"weight":500,"compare_at_price":null,"inventory_management":"shopify","barcode":"87206589","featured_media":{"alt":null,"id":30156853084349,"position":9,"preview_image":{"aspect_ratio":1.0,"height":1080,"width":1080,"src":"\/\/www.thebirthstore.com.au\/cdn\/shop\/files\/3_Flavours_to_choose_from_32.png?v=1763550239"}},"requires_selling_plan":false,"selling_plan_allocations":[],"quantity_rule":{"min":1,"max":null,"increment":1}},{"id":45817878446269,"title":"Checkered","option1":"Checkered","option2":null,"option3":null,"sku":null,"requires_shipping":true,"taxable":false,"featured_image":{"id":38738853626045,"product_id":7988900692157,"position":1,"created_at":"2025-11-02T23:26:41+08:00","updated_at":"2025-11-19T19:05:17+08:00","alt":"Large Lupin Hot \u0026 Cold Pack - The Birth Store - Oscar \u0026 Harley","width":1080,"height":1080,"src":"\/\/www.thebirthstore.com.au\/cdn\/shop\/files\/large-lupin-hot-cold-pack-7738197.png?v=1763550317","variant_ids":[45817878446269]},"available":true,"name":"Large Lupin Hot \u0026 Cold Pack - Checkered","public_title":"Checkered","options":["Checkered"],"price":3500,"weight":1010,"compare_at_price":null,"inventory_management":"shopify","barcode":"78446269","featured_media":{"alt":"Large Lupin Hot \u0026 Cold Pack - The Birth Store - Oscar \u0026 Harley","id":29988526620861,"position":1,"preview_image":{"aspect_ratio":1.0,"height":1080,"width":1080,"src":"\/\/www.thebirthstore.com.au\/cdn\/shop\/files\/large-lupin-hot-cold-pack-7738197.png?v=1763550317"}},"requires_selling_plan":false,"selling_plan_allocations":[],"quantity_rule":{"min":1,"max":null,"increment":1}},{"id":45818254721213,"title":"Flowers","option1":"Flowers","option2":null,"option3":null,"sku":null,"requires_shipping":true,"taxable":false,"featured_image":{"id":38738852741309,"product_id":7988900692157,"position":7,"created_at":"2025-11-02T23:26:02+08:00","updated_at":"2025-11-03T12:22:55+08:00","alt":"Large Lupin Hot \u0026 Cold Pack - The Birth Store - Oscar \u0026 Harley","width":1080,"height":1080,"src":"\/\/www.thebirthstore.com.au\/cdn\/shop\/files\/large-lupin-hot-cold-pack-4859308.png?v=1762143775","variant_ids":[45818254721213]},"available":true,"name":"Large Lupin Hot \u0026 Cold Pack - Flowers","public_title":"Flowers","options":["Flowers"],"price":3500,"weight":1010,"compare_at_price":null,"inventory_management":"shopify","barcode":"54721213","featured_media":{"alt":"Large Lupin Hot \u0026 Cold Pack - The Birth Store - Oscar \u0026 Harley","id":29988526096573,"position":7,"preview_image":{"aspect_ratio":1.0,"height":1080,"width":1080,"src":"\/\/www.thebirthstore.com.au\/cdn\/shop\/files\/large-lupin-hot-cold-pack-4859308.png?v=1762143775"}},"requires_selling_plan":false,"selling_plan_allocations":[],"quantity_rule":{"min":1,"max":null,"increment":1}},{"id":67706606715069,"title":"Cactus","option1":"Cactus","option2":null,"option3":null,"sku":null,"requires_shipping":true,"taxable":false,"featured_image":{"id":43069782622397,"product_id":7988900692157,"position":10,"created_at":"2026-10-09T14:59:58+08:00","updated_at":"2026-10-10T02:13:20+08:00","alt":"Large Lupin Hot \u0026 Cold Pack - The Birth Store-Oscar \u0026 Harley","width":1000,"height":1000,"src":"\/\/www.thebirthstore.com.au\/cdn\/shop\/files\/large-lupin-hot-cold-pack-9921636.webp?v=1791569600","variant_ids":[67706606715069]},"available":true,"name":"Large Lupin Hot \u0026 Cold Pack - Cactus","public_title":"Cactus","options":["Cactus"],"price":3500,"weight":500,"compare_at_price":null,"inventory_management":"shopify","barcode":"06715069","featured_media":{"alt":"Large Lupin Hot \u0026 Cold Pack - The Birth Store-Oscar \u0026 Harley","id":47139261513917,"position":10,"preview_image":{"aspect_ratio":1.0,"height":1000,"width":1000,"src":"\/\/www.thebirthstore.com.au\/cdn\/shop\/files\/large-lupin-hot-cold-pack-9921636.webp?v=1791569600"}},"requires_selling_plan":false,"selling_plan_allocations":[],"quantity_rule":{"min":1,"max":null,"increment":1}}],"images":["\/\/www.thebirthstore.com.au\/cdn\/shop\/files\/large-lupin-hot-cold-pack-7738197.png?v=1763550317","\/\/www.thebirthstore.com.au\/cdn\/shop\/files\/large-lupin-hot-cold-pack-722810.jpg?v=1763550317","\/\/www.thebirthstore.com.au\/cdn\/shop\/files\/large-lupin-hot-cold-pack-473430.jpg?v=1763550317","\/\/www.thebirthstore.com.au\/cdn\/shop\/files\/large-lupin-hot-cold-pack-676626.jpg?v=1763550317","\/\/www.thebirthstore.com.au\/cdn\/shop\/files\/large-lupin-hot-cold-pack-760908.jpg?v=1763550317","\/\/www.thebirthstore.com.au\/cdn\/shop\/files\/large-lupin-hot-cold-pack-3556638.webp?v=1763550317","\/\/www.thebirthstore.com.au\/cdn\/shop\/files\/large-lupin-hot-cold-pack-4859308.png?v=1762143775","\/\/www.thebirthstore.com.au\/cdn\/shop\/files\/large-lupin-hot-cold-pack-9195960.png?v=1763562951","\/\/www.thebirthstore.com.au\/cdn\/shop\/files\/3_Flavours_to_choose_from_32.png?v=1763550239","\/\/www.thebirthstore.com.au\/cdn\/shop\/files\/large-lupin-hot-cold-pack-9921636.webp?v=1791569600"],"featured_image":"\/\/www.thebirthstore.com.au\/cdn\/shop\/files\/large-lupin-hot-cold-pack-7738197.png?v=1763550317","options":["Colour"],"media":[{"alt":"Large Lupin Hot \u0026 Cold Pack - The Birth Store - Oscar \u0026 Harley","id":29988526620861,"position":1,"preview_image":{"aspect_ratio":1.0,"height":1080,"width":1080,"src":"\/\/www.thebirthstore.com.au\/cdn\/shop\/files\/large-lupin-hot-cold-pack-7738197.png?v=1763550317"},"aspect_ratio":1.0,"height":1080,"media_type":"image","src":"\/\/www.thebirthstore.com.au\/cdn\/shop\/files\/large-lupin-hot-cold-pack-7738197.png?v=1763550317","width":1080},{"alt":"Large Lupin Hot \u0026 Cold Pack - The Birth Store - The Birth Store","id":28564307280061,"position":2,"preview_image":{"aspect_ratio":1.0,"height":720,"width":720,"src":"\/\/www.thebirthstore.com.au\/cdn\/shop\/files\/large-lupin-hot-cold-pack-722810.jpg?v=1763550317"},"aspect_ratio":1.0,"height":720,"media_type":"image","src":"\/\/www.thebirthstore.com.au\/cdn\/shop\/files\/large-lupin-hot-cold-pack-722810.jpg?v=1763550317","width":720},{"alt":"Large Lupin Hot \u0026 Cold Pack - The Birth Store - The Birth Store","id":28564288176317,"position":3,"preview_image":{"aspect_ratio":1.0,"height":720,"width":720,"src":"\/\/www.thebirthstore.com.au\/cdn\/shop\/files\/large-lupin-hot-cold-pack-473430.jpg?v=1763550317"},"aspect_ratio":1.0,"height":720,"media_type":"image","src":"\/\/www.thebirthstore.com.au\/cdn\/shop\/files\/large-lupin-hot-cold-pack-473430.jpg?v=1763550317","width":720},{"alt":"Large Lupin Hot \u0026 Cold Pack - The Birth Store - The Birth Store","id":28564284407997,"position":4,"preview_image":{"aspect_ratio":1.0,"height":720,"width":720,"src":"\/\/www.thebirthstore.com.au\/cdn\/shop\/files\/large-lupin-hot-cold-pack-676626.jpg?v=1763550317"},"aspect_ratio":1.0,"height":720,"media_type":"image","src":"\/\/www.thebirthstore.com.au\/cdn\/shop\/files\/large-lupin-hot-cold-pack-676626.jpg?v=1763550317","width":720},{"alt":"Large Lupin Hot \u0026 Cold Pack - The Birth Store - The Birth Store","id":28564282933437,"position":5,"preview_image":{"aspect_ratio":1.0,"height":720,"width":720,"src":"\/\/www.thebirthstore.com.au\/cdn\/shop\/files\/large-lupin-hot-cold-pack-760908.jpg?v=1763550317"},"aspect_ratio":1.0,"height":720,"media_type":"image","src":"\/\/www.thebirthstore.com.au\/cdn\/shop\/files\/large-lupin-hot-cold-pack-760908.jpg?v=1763550317","width":720},{"alt":"Large Lupin Hot \u0026 Cold Pack - The Birth Store - Oscar \u0026 Harley","id":29880108843197,"position":6,"preview_image":{"aspect_ratio":1.0,"height":2048,"width":2048,"src":"\/\/www.thebirthstore.com.au\/cdn\/shop\/files\/large-lupin-hot-cold-pack-3556638.webp?v=1763550317"},"aspect_ratio":1.0,"height":2048,"media_type":"image","src":"\/\/www.thebirthstore.com.au\/cdn\/shop\/files\/large-lupin-hot-cold-pack-3556638.webp?v=1763550317","width":2048},{"alt":"Large Lupin Hot \u0026 Cold Pack - The Birth Store - Oscar \u0026 Harley","id":29988526096573,"position":7,"preview_image":{"aspect_ratio":1.0,"height":1080,"width":1080,"src":"\/\/www.thebirthstore.com.au\/cdn\/shop\/files\/large-lupin-hot-cold-pack-4859308.png?v=1762143775"},"aspect_ratio":1.0,"height":1080,"media_type":"image","src":"\/\/www.thebirthstore.com.au\/cdn\/shop\/files\/large-lupin-hot-cold-pack-4859308.png?v=1762143775","width":1080},{"alt":"Large Lupin Hot \u0026 Cold Pack - The Birth Store - Oscar \u0026 Harley","id":30156845744317,"position":8,"preview_image":{"aspect_ratio":1.0,"height":1080,"width":1080,"src":"\/\/www.thebirthstore.com.au\/cdn\/shop\/files\/large-lupin-hot-cold-pack-9195960.png?v=1763562951"},"aspect_ratio":1.0,"height":1080,"media_type":"image","src":"\/\/www.thebirthstore.com.au\/cdn\/shop\/files\/large-lupin-hot-cold-pack-9195960.png?v=1763562951","width":1080},{"alt":null,"id":30156853084349,"position":9,"preview_image":{"aspect_ratio":1.0,"height":1080,"width":1080,"src":"\/\/www.thebirthstore.com.au\/cdn\/shop\/files\/3_Flavours_to_choose_from_32.png?v=1763550239"},"aspect_ratio":1.0,"height":1080,"media_type":"image","src":"\/\/www.thebirthstore.com.au\/cdn\/shop\/files\/3_Flavours_to_choose_from_32.png?v=1763550239","width":1080},{"alt":"Large Lupin Hot \u0026 Cold Pack - The Birth Store-Oscar \u0026 Harley","id":47139261513917,"position":10,"preview_image":{"aspect_ratio":1.0,"height":1000,"width":1000,"src":"\/\/www.thebirthstore.com.au\/cdn\/shop\/files\/large-lupin-hot-cold-pack-9921636.webp?v=1791569600"},"aspect_ratio":1.0,"height":1000,"media_type":"image","src":"\/\/www.thebirthstore.com.au\/cdn\/shop\/files\/large-lupin-hot-cold-pack-9921636.webp?v=1791569600","width":1000}],"requires_selling_plan":false,"selling_plan_groups":[],"content":"\u003cp\u003e\u003cspan\u003eAll Heat\/cold packs are made in Australia using locally grown lupins. They can be used hot and cold, as the lupin seeds are whole and can be frozen and heated safely.\u003c\/span\u003e\u003cbr\u003e\u003cbr\u003e\u003cstrong\u003eThey are packed full of benefits:\u003c\/strong\u003e\u003cbr\u003e\u003cbr\u003e\u003cspan\u003e- Wheat Free\u003c\/span\u003e\u003cbr\u003e\u003cspan\u003e- Odour Free\u003c\/span\u003e\u003cbr\u003e\u003cspan\u003e- Chemical Free\u003c\/span\u003e\u003cbr\u003e\u003cspan\u003e- Doesn't sweat when heated\u003c\/span\u003e\u003cbr\u003e\u003cspan\u003e- Lighter than wheat and retains heat longer\u003c\/span\u003e\u003cbr\u003e\u003cspan\u003e- Can be placed in the freezer as a cold pack\u003c\/span\u003e\u003cbr\u003e\u003cspan\u003e- Soothes aches and pains\u003c\/span\u003e\u003cbr\u003e\u003cspan\u003e- Keeps you warm in winter or cool in summer\u003c\/span\u003e\u003cbr\u003e\u003cspan\u003e- Put your heat pack in a plastic bag\/Ziplock and place in the freezer, the plastic bag will keep out the moisture from the freezer yet keeping your pack icy cold.\u003c\/span\u003e\u003cbr\u003e\u003cspan\u003e- Sectioned into 3 parts to get an even heat distribution throughout heat pack\u003c\/span\u003e\u003cbr\u003e\u003cspan\u003e- Comes in a range of vibrantly colourful fabrics\u003c\/span\u003e\u003cbr\u003e\u003cbr\u003e\u003cspan\u003eThis heat pack is roughly 40cm long x 16cm wide and weighs 1kg.\u003c\/span\u003e\u003c\/p\u003e"},"options":[{"name":"Colour","position":1,"values":["Daisy Mustard","Sol","Checkered","Flowers","Cactus"]}],"custom_metafields":{},"metafields":{"badge":"\u003cdiv style='display:none' class='jdgm-prev-badge' data-average-rating='0.00' data-number-of-reviews='0' data-number-of-questions='0'\u003e \u003cspan class='jdgm-prev-badge__stars' data-score='0.00' tabindex='0' aria-label='0.00 stars' role='button'\u003e \u003cspan class='jdgm-star jdgm--off'\u003e\u003c\/span\u003e\u003cspan class='jdgm-star jdgm--off'\u003e\u003c\/span\u003e\u003cspan class='jdgm-star jdgm--off'\u003e\u003c\/span\u003e\u003cspan class='jdgm-star jdgm--off'\u003e\u003c\/span\u003e\u003cspan class='jdgm-star jdgm--off'\u003e\u003c\/span\u003e \u003c\/span\u003e \u003cspan class='jdgm-prev-badge__text'\u003e No reviews \u003c\/span\u003e \u003c\/div\u003e","widget":"\u003cdiv class='jdgm-rev-widg' data-updated-at='2025-06-13T16:13:40Z' data-average-rating='0.00' data-number-of-reviews='0' data-number-of-questions='0'\u003e \u003cstyle class='jdgm-temp-hiding-style'\u003e.jdgm-rev-widg{ display: none }\u003c\/style\u003e \u003cdiv class='jdgm-rev-widg__header'\u003e \u003ch2 class='jdgm-rev-widg__title'\u003eCustomer Reviews\u003c\/h2\u003e \u003cdiv class='jdgm-rev-widg__summary'\u003e \u003cdiv class='jdgm-rev-widg__summary-stars' aria-label='Average rating is 0.00 stars' role='img'\u003e \u003cspan class='jdgm-star jdgm--off'\u003e\u003c\/span\u003e\u003cspan class='jdgm-star jdgm--off'\u003e\u003c\/span\u003e\u003cspan class='jdgm-star jdgm--off'\u003e\u003c\/span\u003e\u003cspan class='jdgm-star jdgm--off'\u003e\u003c\/span\u003e\u003cspan class='jdgm-star jdgm--off'\u003e\u003c\/span\u003e \u003c\/div\u003e \u003cdiv class='jdgm-rev-widg__summary-text'\u003eBe the first to write a review\u003c\/div\u003e \u003c\/div\u003e \u003ca style='display: none' href='#' class='jdgm-write-rev-link' role='button'\u003eWrite a review\u003c\/a\u003e \u003cdiv class='jdgm-histogram jdgm-temp-hidden'\u003e \u003cdiv class='jdgm-histogram__row' data-rating='5' data-frequency='0' data-percentage='0'\u003e \u003cdiv class='jdgm-histogram__star' role='button' aria-label=\"0% (0) reviews with 5 star rating\" tabindex='0' \u003e\u003cspan class='jdgm-star jdgm--on'\u003e\u003c\/span\u003e\u003cspan class='jdgm-star jdgm--on'\u003e\u003c\/span\u003e\u003cspan class='jdgm-star jdgm--on'\u003e\u003c\/span\u003e\u003cspan class='jdgm-star jdgm--on'\u003e\u003c\/span\u003e\u003cspan class='jdgm-star jdgm--on'\u003e\u003c\/span\u003e\u003c\/div\u003e \u003cdiv class='jdgm-histogram__bar'\u003e \u003cdiv class='jdgm-histogram__bar-content' style='width: 0%;'\u003e \u003c\/div\u003e \u003c\/div\u003e \u003cdiv class='jdgm-histogram__percentage'\u003e0%\u003c\/div\u003e \u003cdiv class='jdgm-histogram__frequency'\u003e(0)\u003c\/div\u003e \u003c\/div\u003e \u003cdiv class='jdgm-histogram__row' data-rating='4' data-frequency='0' data-percentage='0'\u003e \u003cdiv class='jdgm-histogram__star' role='button' aria-label=\"0% (0) reviews with 4 star rating\" tabindex='0' \u003e\u003cspan class='jdgm-star jdgm--on'\u003e\u003c\/span\u003e\u003cspan class='jdgm-star jdgm--on'\u003e\u003c\/span\u003e\u003cspan class='jdgm-star jdgm--on'\u003e\u003c\/span\u003e\u003cspan class='jdgm-star jdgm--on'\u003e\u003c\/span\u003e\u003cspan class='jdgm-star jdgm--off'\u003e\u003c\/span\u003e\u003c\/div\u003e \u003cdiv class='jdgm-histogram__bar'\u003e \u003cdiv class='jdgm-histogram__bar-content' style='width: 0%;'\u003e \u003c\/div\u003e \u003c\/div\u003e \u003cdiv class='jdgm-histogram__percentage'\u003e0%\u003c\/div\u003e \u003cdiv class='jdgm-histogram__frequency'\u003e(0)\u003c\/div\u003e \u003c\/div\u003e \u003cdiv class='jdgm-histogram__row' data-rating='3' data-frequency='0' data-percentage='0'\u003e \u003cdiv class='jdgm-histogram__star' role='button' aria-label=\"0% (0) reviews with 3 star rating\" tabindex='0' \u003e\u003cspan class='jdgm-star jdgm--on'\u003e\u003c\/span\u003e\u003cspan class='jdgm-star jdgm--on'\u003e\u003c\/span\u003e\u003cspan class='jdgm-star jdgm--on'\u003e\u003c\/span\u003e\u003cspan class='jdgm-star jdgm--off'\u003e\u003c\/span\u003e\u003cspan class='jdgm-star jdgm--off'\u003e\u003c\/span\u003e\u003c\/div\u003e \u003cdiv class='jdgm-histogram__bar'\u003e \u003cdiv class='jdgm-histogram__bar-content' style='width: 0%;'\u003e \u003c\/div\u003e \u003c\/div\u003e \u003cdiv class='jdgm-histogram__percentage'\u003e0%\u003c\/div\u003e \u003cdiv class='jdgm-histogram__frequency'\u003e(0)\u003c\/div\u003e \u003c\/div\u003e \u003cdiv class='jdgm-histogram__row' data-rating='2' data-frequency='0' data-percentage='0'\u003e \u003cdiv class='jdgm-histogram__star' role='button' aria-label=\"0% (0) reviews with 2 star rating\" tabindex='0' \u003e\u003cspan class='jdgm-star jdgm--on'\u003e\u003c\/span\u003e\u003cspan class='jdgm-star jdgm--on'\u003e\u003c\/span\u003e\u003cspan class='jdgm-star jdgm--off'\u003e\u003c\/span\u003e\u003cspan class='jdgm-star jdgm--off'\u003e\u003c\/span\u003e\u003cspan class='jdgm-star jdgm--off'\u003e\u003c\/span\u003e\u003c\/div\u003e \u003cdiv class='jdgm-histogram__bar'\u003e \u003cdiv class='jdgm-histogram__bar-content' style='width: 0%;'\u003e \u003c\/div\u003e \u003c\/div\u003e \u003cdiv class='jdgm-histogram__percentage'\u003e0%\u003c\/div\u003e \u003cdiv class='jdgm-histogram__frequency'\u003e(0)\u003c\/div\u003e \u003c\/div\u003e \u003cdiv class='jdgm-histogram__row' data-rating='1' data-frequency='0' data-percentage='0'\u003e \u003cdiv class='jdgm-histogram__star' role='button' aria-label=\"0% (0) reviews with 1 star rating\" tabindex='0' \u003e\u003cspan class='jdgm-star jdgm--on'\u003e\u003c\/span\u003e\u003cspan class='jdgm-star jdgm--off'\u003e\u003c\/span\u003e\u003cspan class='jdgm-star jdgm--off'\u003e\u003c\/span\u003e\u003cspan class='jdgm-star jdgm--off'\u003e\u003c\/span\u003e\u003cspan class='jdgm-star jdgm--off'\u003e\u003c\/span\u003e\u003c\/div\u003e \u003cdiv class='jdgm-histogram__bar'\u003e \u003cdiv class='jdgm-histogram__bar-content' style='width: 0%;'\u003e \u003c\/div\u003e \u003c\/div\u003e \u003cdiv class='jdgm-histogram__percentage'\u003e0%\u003c\/div\u003e \u003cdiv class='jdgm-histogram__frequency'\u003e(0)\u003c\/div\u003e \u003c\/div\u003e \u003cdiv class='jdgm-histogram__row jdgm-histogram__clear-filter' data-rating=null tabindex='0'\u003e\u003c\/div\u003e \u003c\/div\u003e \u003cdiv class='jdgm-rev-widg__sort-wrapper'\u003e\u003c\/div\u003e \u003c\/div\u003e \u003cdiv class='jdgm-rev-widg__body'\u003e \u003cdiv class='jdgm-rev-widg__reviews'\u003e\u003c\/div\u003e \u003cdiv class='jdgm-paginate' data-per-page='10' data-url='https:\/\/api.judge.me\/reviews\/reviews_for_widget' style=\"display: none;\"\u003e\u003c\/div\u003e \u003c\/div\u003e \u003cdiv class='jdgm-rev-widg__paginate-spinner-wrapper'\u003e \u003cdiv class='jdgm-spinner'\u003e\u003c\/div\u003e \u003c\/div\u003e \u003c\/div\u003e"},"default_reviews_metafields":{},"collections":[{"id":512654540989,"handle":"lastof26-10","title":"10%","updated_at":"2026-11-14T20:08:00+08:00","body_html":null,"published_at":"2026-10-12T19:06:42+08:00","sort_order":"best-selling","template_suffix":null,"disjunctive":false,"rules":[],"published_scope":"global"},{"id":281356533949,"handle":"baby-shower-gifts","title":"Baby Shower Gifts - Mum","updated_at":"2026-11-14T20:08:00+08:00","body_html":"\u003cp\u003eLooking for a unique baby shower gift? Or an all-in-one bundle pack to suit all your needs? We've got just the thing!\u003c\/p\u003e","published_at":"2021-12-06T13:43:56+08:00","sort_order":"best-selling","template_suffix":"baby-shower-gifts","disjunctive":true,"rules":[],"published_scope":"global","image":{"created_at":"2024-05-06T11:59:28+08:00","alt":"Baby Shower Gifts - The Birth Store","width":1200,"height":1800,"src":"\/\/www.thebirthstore.com.au\/cdn\/shop\/collections\/baby-shower-gifts-401770.jpg?v=1761791272"}},{"id":261657460925,"handle":"buy","title":"Buy","updated_at":"2026-11-14T20:08:00+08:00","body_html":"\u003cp\u003eBrowse all of our pregnancy, labour \u0026amp; birth, postpartum and baby essentials here.\u003cbr\u003e\u003c\/p\u003e\n\u003cp\u003e\u003cspan\u003eYou can even buy now and pay later with Afterpay!\u003c\/span\u003e\u003c\/p\u003e","published_at":"2021-03-10T12:05:31+08:00","sort_order":"best-selling","template_suffix":"shop-all-collection","disjunctive":false,"rules":[],"published_scope":"global","image":{"created_at":"2024-05-06T11:59:42+08:00","alt":"Buy - The Birth Store","width":2048,"height":2048,"src":"\/\/www.thebirthstore.com.au\/cdn\/shop\/collections\/buy-964856.jpg?v=1714967982"}},{"id":337429201085,"handle":"hospital-bag","title":"Hospital Bag","updated_at":"2026-11-14T20:08:00+08:00","body_html":"","published_at":"2026-06-03T11:36:29+08:00","sort_order":"most-relevant","template_suffix":"","disjunctive":false,"rules":[],"published_scope":"global"},{"id":319580635325,"handle":"ice-heat-packs","updated_at":"2026-11-11T20:07:57+08:00","published_at":"2025-06-08T20:45:57+08:00","sort_order":"best-selling","template_suffix":"","published_scope":"global","title":"Ice \u0026 Heat Packs","body_html":"","image":{"created_at":"2025-10-30T16:16:45+08:00","alt":"Ice \u0026 Heat Packs - The Birth Store","width":1024,"height":684,"src":"\/\/www.thebirthstore.com.au\/cdn\/shop\/collections\/ice-heat-packs-1501133.jpg?v=1761812205"}},{"id":281712591037,"handle":"pain-relief","title":"Pain Relief","updated_at":"2026-11-14T20:08:00+08:00","body_html":"","published_at":"2021-12-20T14:22:45+08:00","sort_order":"best-selling","template_suffix":"pain-relief-collection","disjunctive":false,"rules":[],"published_scope":"global","image":{"created_at":"2024-05-06T12:00:27+08:00","alt":"Pain Relief - The Birth Store","width":1365,"height":2048,"src":"\/\/www.thebirthstore.com.au\/cdn\/shop\/collections\/pain-relief-878865.jpg?v=1714968027"}},{"id":261658083517,"handle":"post-partum","title":"Postpartum","updated_at":"2026-11-14T20:08:00+08:00","body_html":"\u003cp\u003eShop your postpartum and hospital bag essentials below. Looking for something we don't currently stock? Please reach out and let us know.\u003cbr\u003e\u003c\/p\u003e\n\u003cp\u003e\u003cspan\u003eYou can even buy now and pay later with Afterpay!\u003c\/span\u003e\u003c\/p\u003e","published_at":"2021-03-10T12:33:47+08:00","sort_order":"best-selling","template_suffix":"postpartum-collection","disjunctive":false,"rules":[],"published_scope":"global","image":{"created_at":"2024-05-06T12:00:36+08:00","alt":"Postpartum - The Birth Store","width":611,"height":702,"src":"\/\/www.thebirthstore.com.au\/cdn\/shop\/collections\/postpartum-150119.jpg?v=1714968037"}},{"id":261658149053,"handle":"pregnancy-and-maternity-products","title":"Pregnancy","updated_at":"2026-11-14T20:08:00+08:00","body_html":"\u003cp\u003eShop your pregnancy essentials below. Looking for something we don't currently stock? Please reach out and let us know.\u003cbr\u003e\u003c\/p\u003e\n\u003cp\u003e\u003cspan\u003eYou can even buy now and pay later with Afterpay!\u003c\/span\u003e\u003c\/p\u003e","published_at":"2021-03-10T12:34:22+08:00","sort_order":"best-selling","template_suffix":"pregnancy-collection","disjunctive":false,"rules":[],"published_scope":"global","image":{"created_at":"2024-05-06T12:00:40+08:00","alt":"Pregnancy - The Birth Store","width":1024,"height":1536,"src":"\/\/www.thebirthstore.com.au\/cdn\/shop\/collections\/pregnancy-899677.jpg?v=1714968040"}},{"id":291456483517,"handle":"shop-all","title":"Shop All - Mum","updated_at":"2026-11-14T20:08:00+08:00","body_html":"","published_at":"2022-12-23T22:04:39+08:00","sort_order":"best-selling","template_suffix":"shop-all-collection","disjunctive":false,"rules":[],"published_scope":"global","image":{"created_at":"2024-05-06T12:00:54+08:00","alt":"Shop All - The Birth Store","width":1365,"height":2048,"src":"\/\/www.thebirthstore.com.au\/cdn\/shop\/collections\/shop-all-693176.jpg?v=1714968055"}},{"id":310045933757,"handle":"shop-all-sale","title":"Shop All Sale","updated_at":"2026-11-14T20:08:00+08:00","body_html":"","published_at":"2024-11-12T13:22:43+08:00","sort_order":"best-selling","template_suffix":"","disjunctive":true,"rules":[],"published_scope":"global","image":{"created_at":"2024-11-13T10:58:16+08:00","alt":"Shop All Sale - The Birth Store","width":2048,"height":1365,"src":"\/\/www.thebirthstore.com.au\/cdn\/shop\/collections\/shop-all-sale-297361.jpg?v=1731466697"}}]}
{"item":{"id":7439743680701,"title":"SRC Recovery Shorts - Mini","handle":"src-recovery-short-mini","description":"\u003cp\u003e\u003cmeta charset=\"utf-8\"\u003e\u003cspan\u003eThis product is stocked at a 3\u003c\/span\u003e\u003csup\u003erd\u003c\/sup\u003e\u003cspan\u003e party warehouse, if ordering with other products you’ll receive two packages. This product will have a turn around time of 10 days if pickup is selected on checkout. Any questions, please contact us \u003ca href=\"https:\/\/www.thebirthstore.com.au\/pages\/contact-us\" title=\"Contact Us\" target=\"_blank\"\u003ehere\u003c\/a\u003e.\u003c\/span\u003e\u003cbr\u003e\u003c\/p\u003e","published_at":"2023-03-13T14:07:20+08:00","created_at":"2023-02-13T22:36:31+08:00","vendor":"SRC Health","type":"Recovery Shorts","tags":["Hospital Bag","Mum","Pelvic Floor","Post-Partum","Support Clothing"],"price":19900,"price_min":19900,"price_max":19900,"available":true,"price_varies":false,"compare_at_price":null,"compare_at_price_min":0,"compare_at_price_max":0,"compare_at_price_varies":false,"variants":[{"id":42658960048317,"title":"XXS \/ Champagne","option1":"XXS","option2":"Champagne","option3":null,"sku":"","requires_shipping":true,"taxable":false,"featured_image":{"id":34641032413373,"product_id":7439743680701,"position":4,"created_at":"2024-05-06T12:00:54+08:00","updated_at":"2024-05-06T12:00:54+08:00","alt":"SRC Recovery Shorts - Mini - The Birth Store-SRC Health","width":1080,"height":1080,"src":"\/\/www.thebirthstore.com.au\/cdn\/shop\/files\/src-recovery-shorts-mini-153344.jpg?v=1714968054","variant_ids":[42658960048317,42658960113853,42658960179389,42658960244925,42658960310461,42658960375997,42658960441533]},"available":true,"name":"SRC Recovery Shorts - Mini - XXS \/ Champagne","public_title":"XXS \/ Champagne","options":["XXS","Champagne"],"price":19900,"weight":0,"compare_at_price":null,"inventory_management":null,"barcode":"60048317","featured_media":{"alt":"SRC Recovery Shorts - Mini - The Birth Store-SRC Health","id":27007601443005,"position":4,"preview_image":{"aspect_ratio":1.0,"height":1080,"width":1080,"src":"\/\/www.thebirthstore.com.au\/cdn\/shop\/files\/src-recovery-shorts-mini-153344.jpg?v=1714968054"}},"requires_selling_plan":false,"selling_plan_allocations":[],"quantity_rule":{"min":1,"max":null,"increment":1}},{"id":42658960081085,"title":"XXS \/ Black","option1":"XXS","option2":"Black","option3":null,"sku":"","requires_shipping":true,"taxable":false,"featured_image":{"id":34641032315069,"product_id":7439743680701,"position":1,"created_at":"2024-05-06T12:00:54+08:00","updated_at":"2024-05-06T12:00:54+08:00","alt":"SRC Recovery Shorts - Mini - The Birth Store-SRC Health","width":1080,"height":1080,"src":"\/\/www.thebirthstore.com.au\/cdn\/shop\/files\/src-recovery-shorts-mini-371255.jpg?v=1714968054","variant_ids":[42658960081085,42658960146621,42658960212157,42658960277693,42658960343229,42658960408765,42658960474301]},"available":true,"name":"SRC Recovery Shorts - Mini - XXS \/ Black","public_title":"XXS \/ Black","options":["XXS","Black"],"price":19900,"weight":0,"compare_at_price":null,"inventory_management":null,"barcode":"60081085","featured_media":{"alt":"SRC Recovery Shorts - Mini - The Birth Store-SRC Health","id":27007601344701,"position":1,"preview_image":{"aspect_ratio":1.0,"height":1080,"width":1080,"src":"\/\/www.thebirthstore.com.au\/cdn\/shop\/files\/src-recovery-shorts-mini-371255.jpg?v=1714968054"}},"requires_selling_plan":false,"selling_plan_allocations":[],"quantity_rule":{"min":1,"max":null,"increment":1}},{"id":42658960113853,"title":"XS \/ Champagne","option1":"XS","option2":"Champagne","option3":null,"sku":"","requires_shipping":true,"taxable":false,"featured_image":{"id":34641032413373,"product_id":7439743680701,"position":4,"created_at":"2024-05-06T12:00:54+08:00","updated_at":"2024-05-06T12:00:54+08:00","alt":"SRC Recovery Shorts - Mini - The Birth Store-SRC Health","width":1080,"height":1080,"src":"\/\/www.thebirthstore.com.au\/cdn\/shop\/files\/src-recovery-shorts-mini-153344.jpg?v=1714968054","variant_ids":[42658960048317,42658960113853,42658960179389,42658960244925,42658960310461,42658960375997,42658960441533]},"available":true,"name":"SRC Recovery Shorts - Mini - XS \/ Champagne","public_title":"XS \/ Champagne","options":["XS","Champagne"],"price":19900,"weight":0,"compare_at_price":null,"inventory_management":null,"barcode":"60113853","featured_media":{"alt":"SRC Recovery Shorts - Mini - The Birth Store-SRC Health","id":27007601443005,"position":4,"preview_image":{"aspect_ratio":1.0,"height":1080,"width":1080,"src":"\/\/www.thebirthstore.com.au\/cdn\/shop\/files\/src-recovery-shorts-mini-153344.jpg?v=1714968054"}},"requires_selling_plan":false,"selling_plan_allocations":[],"quantity_rule":{"min":1,"max":null,"increment":1}},{"id":42658960146621,"title":"XS \/ Black","option1":"XS","option2":"Black","option3":null,"sku":"","requires_shipping":true,"taxable":false,"featured_image":{"id":34641032315069,"product_id":7439743680701,"position":1,"created_at":"2024-05-06T12:00:54+08:00","updated_at":"2024-05-06T12:00:54+08:00","alt":"SRC Recovery Shorts - Mini - The Birth Store-SRC Health","width":1080,"height":1080,"src":"\/\/www.thebirthstore.com.au\/cdn\/shop\/files\/src-recovery-shorts-mini-371255.jpg?v=1714968054","variant_ids":[42658960081085,42658960146621,42658960212157,42658960277693,42658960343229,42658960408765,42658960474301]},"available":true,"name":"SRC Recovery Shorts - Mini - XS \/ Black","public_title":"XS \/ Black","options":["XS","Black"],"price":19900,"weight":0,"compare_at_price":null,"inventory_management":null,"barcode":"60146621","featured_media":{"alt":"SRC Recovery Shorts - Mini - The Birth Store-SRC Health","id":27007601344701,"position":1,"preview_image":{"aspect_ratio":1.0,"height":1080,"width":1080,"src":"\/\/www.thebirthstore.com.au\/cdn\/shop\/files\/src-recovery-shorts-mini-371255.jpg?v=1714968054"}},"requires_selling_plan":false,"selling_plan_allocations":[],"quantity_rule":{"min":1,"max":null,"increment":1}},{"id":42658960179389,"title":"S \/ Champagne","option1":"S","option2":"Champagne","option3":null,"sku":"","requires_shipping":true,"taxable":false,"featured_image":{"id":34641032413373,"product_id":7439743680701,"position":4,"created_at":"2024-05-06T12:00:54+08:00","updated_at":"2024-05-06T12:00:54+08:00","alt":"SRC Recovery Shorts - Mini - The Birth Store-SRC Health","width":1080,"height":1080,"src":"\/\/www.thebirthstore.com.au\/cdn\/shop\/files\/src-recovery-shorts-mini-153344.jpg?v=1714968054","variant_ids":[42658960048317,42658960113853,42658960179389,42658960244925,42658960310461,42658960375997,42658960441533]},"available":true,"name":"SRC Recovery Shorts - Mini - S \/ Champagne","public_title":"S \/ Champagne","options":["S","Champagne"],"price":19900,"weight":0,"compare_at_price":null,"inventory_management":null,"barcode":"60179389","featured_media":{"alt":"SRC Recovery Shorts - Mini - The Birth Store-SRC Health","id":27007601443005,"position":4,"preview_image":{"aspect_ratio":1.0,"height":1080,"width":1080,"src":"\/\/www.thebirthstore.com.au\/cdn\/shop\/files\/src-recovery-shorts-mini-153344.jpg?v=1714968054"}},"requires_selling_plan":false,"selling_plan_allocations":[],"quantity_rule":{"min":1,"max":null,"increment":1}},{"id":42658960212157,"title":"S \/ Black","option1":"S","option2":"Black","option3":null,"sku":"","requires_shipping":true,"taxable":false,"featured_image":{"id":34641032315069,"product_id":7439743680701,"position":1,"created_at":"2024-05-06T12:00:54+08:00","updated_at":"2024-05-06T12:00:54+08:00","alt":"SRC Recovery Shorts - Mini - The Birth Store-SRC Health","width":1080,"height":1080,"src":"\/\/www.thebirthstore.com.au\/cdn\/shop\/files\/src-recovery-shorts-mini-371255.jpg?v=1714968054","variant_ids":[42658960081085,42658960146621,42658960212157,42658960277693,42658960343229,42658960408765,42658960474301]},"available":true,"name":"SRC Recovery Shorts - Mini - S \/ Black","public_title":"S \/ Black","options":["S","Black"],"price":19900,"weight":0,"compare_at_price":null,"inventory_management":null,"barcode":"60212157","featured_media":{"alt":"SRC Recovery Shorts - Mini - The Birth Store-SRC Health","id":27007601344701,"position":1,"preview_image":{"aspect_ratio":1.0,"height":1080,"width":1080,"src":"\/\/www.thebirthstore.com.au\/cdn\/shop\/files\/src-recovery-shorts-mini-371255.jpg?v=1714968054"}},"requires_selling_plan":false,"selling_plan_allocations":[],"quantity_rule":{"min":1,"max":null,"increment":1}},{"id":42658960244925,"title":"M \/ Champagne","option1":"M","option2":"Champagne","option3":null,"sku":"","requires_shipping":true,"taxable":false,"featured_image":{"id":34641032413373,"product_id":7439743680701,"position":4,"created_at":"2024-05-06T12:00:54+08:00","updated_at":"2024-05-06T12:00:54+08:00","alt":"SRC Recovery Shorts - Mini - The Birth Store-SRC Health","width":1080,"height":1080,"src":"\/\/www.thebirthstore.com.au\/cdn\/shop\/files\/src-recovery-shorts-mini-153344.jpg?v=1714968054","variant_ids":[42658960048317,42658960113853,42658960179389,42658960244925,42658960310461,42658960375997,42658960441533]},"available":true,"name":"SRC Recovery Shorts - Mini - M \/ Champagne","public_title":"M \/ Champagne","options":["M","Champagne"],"price":19900,"weight":0,"compare_at_price":null,"inventory_management":null,"barcode":"60244925","featured_media":{"alt":"SRC Recovery Shorts - Mini - The Birth Store-SRC Health","id":27007601443005,"position":4,"preview_image":{"aspect_ratio":1.0,"height":1080,"width":1080,"src":"\/\/www.thebirthstore.com.au\/cdn\/shop\/files\/src-recovery-shorts-mini-153344.jpg?v=1714968054"}},"requires_selling_plan":false,"selling_plan_allocations":[],"quantity_rule":{"min":1,"max":null,"increment":1}},{"id":42658960277693,"title":"M \/ Black","option1":"M","option2":"Black","option3":null,"sku":"","requires_shipping":true,"taxable":false,"featured_image":{"id":34641032315069,"product_id":7439743680701,"position":1,"created_at":"2024-05-06T12:00:54+08:00","updated_at":"2024-05-06T12:00:54+08:00","alt":"SRC Recovery Shorts - Mini - The Birth Store-SRC Health","width":1080,"height":1080,"src":"\/\/www.thebirthstore.com.au\/cdn\/shop\/files\/src-recovery-shorts-mini-371255.jpg?v=1714968054","variant_ids":[42658960081085,42658960146621,42658960212157,42658960277693,42658960343229,42658960408765,42658960474301]},"available":true,"name":"SRC Recovery Shorts - Mini - M \/ Black","public_title":"M \/ Black","options":["M","Black"],"price":19900,"weight":0,"compare_at_price":null,"inventory_management":null,"barcode":"60277693","featured_media":{"alt":"SRC Recovery Shorts - Mini - The Birth Store-SRC Health","id":27007601344701,"position":1,"preview_image":{"aspect_ratio":1.0,"height":1080,"width":1080,"src":"\/\/www.thebirthstore.com.au\/cdn\/shop\/files\/src-recovery-shorts-mini-371255.jpg?v=1714968054"}},"requires_selling_plan":false,"selling_plan_allocations":[],"quantity_rule":{"min":1,"max":null,"increment":1}},{"id":42658960310461,"title":"L \/ Champagne","option1":"L","option2":"Champagne","option3":null,"sku":"","requires_shipping":true,"taxable":false,"featured_image":{"id":34641032413373,"product_id":7439743680701,"position":4,"created_at":"2024-05-06T12:00:54+08:00","updated_at":"2024-05-06T12:00:54+08:00","alt":"SRC Recovery Shorts - Mini - The Birth Store-SRC Health","width":1080,"height":1080,"src":"\/\/www.thebirthstore.com.au\/cdn\/shop\/files\/src-recovery-shorts-mini-153344.jpg?v=1714968054","variant_ids":[42658960048317,42658960113853,42658960179389,42658960244925,42658960310461,42658960375997,42658960441533]},"available":true,"name":"SRC Recovery Shorts - Mini - L \/ Champagne","public_title":"L \/ Champagne","options":["L","Champagne"],"price":19900,"weight":0,"compare_at_price":null,"inventory_management":null,"barcode":"60310461","featured_media":{"alt":"SRC Recovery Shorts - Mini - The Birth Store-SRC Health","id":27007601443005,"position":4,"preview_image":{"aspect_ratio":1.0,"height":1080,"width":1080,"src":"\/\/www.thebirthstore.com.au\/cdn\/shop\/files\/src-recovery-shorts-mini-153344.jpg?v=1714968054"}},"requires_selling_plan":false,"selling_plan_allocations":[],"quantity_rule":{"min":1,"max":null,"increment":1}},{"id":42658960343229,"title":"L \/ Black","option1":"L","option2":"Black","option3":null,"sku":"","requires_shipping":true,"taxable":false,"featured_image":{"id":34641032315069,"product_id":7439743680701,"position":1,"created_at":"2024-05-06T12:00:54+08:00","updated_at":"2024-05-06T12:00:54+08:00","alt":"SRC Recovery Shorts - Mini - The Birth Store-SRC Health","width":1080,"height":1080,"src":"\/\/www.thebirthstore.com.au\/cdn\/shop\/files\/src-recovery-shorts-mini-371255.jpg?v=1714968054","variant_ids":[42658960081085,42658960146621,42658960212157,42658960277693,42658960343229,42658960408765,42658960474301]},"available":true,"name":"SRC Recovery Shorts - Mini - L \/ Black","public_title":"L \/ Black","options":["L","Black"],"price":19900,"weight":0,"compare_at_price":null,"inventory_management":null,"barcode":"60343229","featured_media":{"alt":"SRC Recovery Shorts - Mini - The Birth Store-SRC Health","id":27007601344701,"position":1,"preview_image":{"aspect_ratio":1.0,"height":1080,"width":1080,"src":"\/\/www.thebirthstore.com.au\/cdn\/shop\/files\/src-recovery-shorts-mini-371255.jpg?v=1714968054"}},"requires_selling_plan":false,"selling_plan_allocations":[],"quantity_rule":{"min":1,"max":null,"increment":1}},{"id":42658960375997,"title":"XL \/ Champagne","option1":"XL","option2":"Champagne","option3":null,"sku":"","requires_shipping":true,"taxable":false,"featured_image":{"id":34641032413373,"product_id":7439743680701,"position":4,"created_at":"2024-05-06T12:00:54+08:00","updated_at":"2024-05-06T12:00:54+08:00","alt":"SRC Recovery Shorts - Mini - The Birth Store-SRC Health","width":1080,"height":1080,"src":"\/\/www.thebirthstore.com.au\/cdn\/shop\/files\/src-recovery-shorts-mini-153344.jpg?v=1714968054","variant_ids":[42658960048317,42658960113853,42658960179389,42658960244925,42658960310461,42658960375997,42658960441533]},"available":true,"name":"SRC Recovery Shorts - Mini - XL \/ Champagne","public_title":"XL \/ Champagne","options":["XL","Champagne"],"price":19900,"weight":0,"compare_at_price":null,"inventory_management":null,"barcode":"60375997","featured_media":{"alt":"SRC Recovery Shorts - Mini - The Birth Store-SRC Health","id":27007601443005,"position":4,"preview_image":{"aspect_ratio":1.0,"height":1080,"width":1080,"src":"\/\/www.thebirthstore.com.au\/cdn\/shop\/files\/src-recovery-shorts-mini-153344.jpg?v=1714968054"}},"requires_selling_plan":false,"selling_plan_allocations":[],"quantity_rule":{"min":1,"max":null,"increment":1}},{"id":42658960408765,"title":"XL \/ Black","option1":"XL","option2":"Black","option3":null,"sku":"","requires_shipping":true,"taxable":false,"featured_image":{"id":34641032315069,"product_id":7439743680701,"position":1,"created_at":"2024-05-06T12:00:54+08:00","updated_at":"2024-05-06T12:00:54+08:00","alt":"SRC Recovery Shorts - Mini - The Birth Store-SRC Health","width":1080,"height":1080,"src":"\/\/www.thebirthstore.com.au\/cdn\/shop\/files\/src-recovery-shorts-mini-371255.jpg?v=1714968054","variant_ids":[42658960081085,42658960146621,42658960212157,42658960277693,42658960343229,42658960408765,42658960474301]},"available":true,"name":"SRC Recovery Shorts - Mini - XL \/ Black","public_title":"XL \/ Black","options":["XL","Black"],"price":19900,"weight":0,"compare_at_price":null,"inventory_management":null,"barcode":"60408765","featured_media":{"alt":"SRC Recovery Shorts - Mini - The Birth Store-SRC Health","id":27007601344701,"position":1,"preview_image":{"aspect_ratio":1.0,"height":1080,"width":1080,"src":"\/\/www.thebirthstore.com.au\/cdn\/shop\/files\/src-recovery-shorts-mini-371255.jpg?v=1714968054"}},"requires_selling_plan":false,"selling_plan_allocations":[],"quantity_rule":{"min":1,"max":null,"increment":1}},{"id":42658960441533,"title":"XXL \/ Champagne","option1":"XXL","option2":"Champagne","option3":null,"sku":"","requires_shipping":true,"taxable":false,"featured_image":{"id":34641032413373,"product_id":7439743680701,"position":4,"created_at":"2024-05-06T12:00:54+08:00","updated_at":"2024-05-06T12:00:54+08:00","alt":"SRC Recovery Shorts - Mini - The Birth Store-SRC Health","width":1080,"height":1080,"src":"\/\/www.thebirthstore.com.au\/cdn\/shop\/files\/src-recovery-shorts-mini-153344.jpg?v=1714968054","variant_ids":[42658960048317,42658960113853,42658960179389,42658960244925,42658960310461,42658960375997,42658960441533]},"available":true,"name":"SRC Recovery Shorts - Mini - XXL \/ Champagne","public_title":"XXL \/ Champagne","options":["XXL","Champagne"],"price":19900,"weight":0,"compare_at_price":null,"inventory_management":null,"barcode":"60441533","featured_media":{"alt":"SRC Recovery Shorts - Mini - The Birth Store-SRC Health","id":27007601443005,"position":4,"preview_image":{"aspect_ratio":1.0,"height":1080,"width":1080,"src":"\/\/www.thebirthstore.com.au\/cdn\/shop\/files\/src-recovery-shorts-mini-153344.jpg?v=1714968054"}},"requires_selling_plan":false,"selling_plan_allocations":[],"quantity_rule":{"min":1,"max":null,"increment":1}},{"id":42658960474301,"title":"XXL \/ Black","option1":"XXL","option2":"Black","option3":null,"sku":"","requires_shipping":true,"taxable":false,"featured_image":{"id":34641032315069,"product_id":7439743680701,"position":1,"created_at":"2024-05-06T12:00:54+08:00","updated_at":"2024-05-06T12:00:54+08:00","alt":"SRC Recovery Shorts - Mini - The Birth Store-SRC Health","width":1080,"height":1080,"src":"\/\/www.thebirthstore.com.au\/cdn\/shop\/files\/src-recovery-shorts-mini-371255.jpg?v=1714968054","variant_ids":[42658960081085,42658960146621,42658960212157,42658960277693,42658960343229,42658960408765,42658960474301]},"available":true,"name":"SRC Recovery Shorts - Mini - XXL \/ Black","public_title":"XXL \/ Black","options":["XXL","Black"],"price":19900,"weight":0,"compare_at_price":null,"inventory_management":null,"barcode":"60474301","featured_media":{"alt":"SRC Recovery Shorts - Mini - The Birth Store-SRC Health","id":27007601344701,"position":1,"preview_image":{"aspect_ratio":1.0,"height":1080,"width":1080,"src":"\/\/www.thebirthstore.com.au\/cdn\/shop\/files\/src-recovery-shorts-mini-371255.jpg?v=1714968054"}},"requires_selling_plan":false,"selling_plan_allocations":[],"quantity_rule":{"min":1,"max":null,"increment":1}}],"images":["\/\/www.thebirthstore.com.au\/cdn\/shop\/files\/src-recovery-shorts-mini-371255.jpg?v=1714968054","\/\/www.thebirthstore.com.au\/cdn\/shop\/files\/src-recovery-shorts-mini-241254.jpg?v=1714968054","\/\/www.thebirthstore.com.au\/cdn\/shop\/files\/src-recovery-shorts-mini-764674.jpg?v=1714968054","\/\/www.thebirthstore.com.au\/cdn\/shop\/files\/src-recovery-shorts-mini-153344.jpg?v=1714968054","\/\/www.thebirthstore.com.au\/cdn\/shop\/files\/src-recovery-shorts-mini-847837.jpg?v=1714968054","\/\/www.thebirthstore.com.au\/cdn\/shop\/files\/src-recovery-shorts-mini-144195.jpg?v=1714968054","\/\/www.thebirthstore.com.au\/cdn\/shop\/files\/src-recovery-shorts-mini-653179.jpg?v=1714968054"],"featured_image":"\/\/www.thebirthstore.com.au\/cdn\/shop\/files\/src-recovery-shorts-mini-371255.jpg?v=1714968054","options":["Size","Colour"],"media":[{"alt":"SRC Recovery Shorts - Mini - The Birth Store-SRC Health","id":27007601344701,"position":1,"preview_image":{"aspect_ratio":1.0,"height":1080,"width":1080,"src":"\/\/www.thebirthstore.com.au\/cdn\/shop\/files\/src-recovery-shorts-mini-371255.jpg?v=1714968054"},"aspect_ratio":1.0,"height":1080,"media_type":"image","src":"\/\/www.thebirthstore.com.au\/cdn\/shop\/files\/src-recovery-shorts-mini-371255.jpg?v=1714968054","width":1080},{"alt":"SRC Recovery Shorts - Mini - The Birth Store-SRC Health","id":27007601377469,"position":2,"preview_image":{"aspect_ratio":1.0,"height":1080,"width":1080,"src":"\/\/www.thebirthstore.com.au\/cdn\/shop\/files\/src-recovery-shorts-mini-241254.jpg?v=1714968054"},"aspect_ratio":1.0,"height":1080,"media_type":"image","src":"\/\/www.thebirthstore.com.au\/cdn\/shop\/files\/src-recovery-shorts-mini-241254.jpg?v=1714968054","width":1080},{"alt":"SRC Recovery Shorts - Mini - The Birth Store-SRC Health","id":27007601410237,"position":3,"preview_image":{"aspect_ratio":1.0,"height":1080,"width":1080,"src":"\/\/www.thebirthstore.com.au\/cdn\/shop\/files\/src-recovery-shorts-mini-764674.jpg?v=1714968054"},"aspect_ratio":1.0,"height":1080,"media_type":"image","src":"\/\/www.thebirthstore.com.au\/cdn\/shop\/files\/src-recovery-shorts-mini-764674.jpg?v=1714968054","width":1080},{"alt":"SRC Recovery Shorts - Mini - The Birth Store-SRC Health","id":27007601443005,"position":4,"preview_image":{"aspect_ratio":1.0,"height":1080,"width":1080,"src":"\/\/www.thebirthstore.com.au\/cdn\/shop\/files\/src-recovery-shorts-mini-153344.jpg?v=1714968054"},"aspect_ratio":1.0,"height":1080,"media_type":"image","src":"\/\/www.thebirthstore.com.au\/cdn\/shop\/files\/src-recovery-shorts-mini-153344.jpg?v=1714968054","width":1080},{"alt":"SRC Recovery Shorts - Mini - The Birth Store-SRC Health","id":27007601508541,"position":5,"preview_image":{"aspect_ratio":1.0,"height":1080,"width":1080,"src":"\/\/www.thebirthstore.com.au\/cdn\/shop\/files\/src-recovery-shorts-mini-847837.jpg?v=1714968054"},"aspect_ratio":1.0,"height":1080,"media_type":"image","src":"\/\/www.thebirthstore.com.au\/cdn\/shop\/files\/src-recovery-shorts-mini-847837.jpg?v=1714968054","width":1080},{"alt":"SRC Recovery Shorts - Mini - The Birth Store-SRC Health","id":27007601541309,"position":6,"preview_image":{"aspect_ratio":1.0,"height":1080,"width":1080,"src":"\/\/www.thebirthstore.com.au\/cdn\/shop\/files\/src-recovery-shorts-mini-144195.jpg?v=1714968054"},"aspect_ratio":1.0,"height":1080,"media_type":"image","src":"\/\/www.thebirthstore.com.au\/cdn\/shop\/files\/src-recovery-shorts-mini-144195.jpg?v=1714968054","width":1080},{"alt":"SRC Recovery Shorts - Mini - The Birth Store-SRC Health","id":27007601574077,"position":7,"preview_image":{"aspect_ratio":1.582,"height":948,"width":1500,"src":"\/\/www.thebirthstore.com.au\/cdn\/shop\/files\/src-recovery-shorts-mini-653179.jpg?v=1714968054"},"aspect_ratio":1.582,"height":948,"media_type":"image","src":"\/\/www.thebirthstore.com.au\/cdn\/shop\/files\/src-recovery-shorts-mini-653179.jpg?v=1714968054","width":1500}],"requires_selling_plan":false,"selling_plan_groups":[],"content":"\u003cp\u003e\u003cmeta charset=\"utf-8\"\u003e\u003cspan\u003eThis product is stocked at a 3\u003c\/span\u003e\u003csup\u003erd\u003c\/sup\u003e\u003cspan\u003e party warehouse, if ordering with other products you’ll receive two packages. This product will have a turn around time of 10 days if pickup is selected on checkout. Any questions, please contact us \u003ca href=\"https:\/\/www.thebirthstore.com.au\/pages\/contact-us\" title=\"Contact Us\" target=\"_blank\"\u003ehere\u003c\/a\u003e.\u003c\/span\u003e\u003cbr\u003e\u003c\/p\u003e"},"options":[{"name":"Size","position":1,"values":["XXS","XS","S","M","L","XL","XXL"]},{"name":"Colour","position":2,"values":["Champagne","Black"]}],"custom_metafields":{},"metafields":{"badge":"\u003cdiv style='display:none' class='jdgm-prev-badge' data-average-rating='0.00' data-number-of-reviews='0' data-number-of-questions='0'\u003e \u003cspan class='jdgm-prev-badge__stars' data-score='0.00' tabindex='0' aria-label='0.00 stars' role='button'\u003e \u003cspan class='jdgm-star jdgm--off'\u003e\u003c\/span\u003e\u003cspan class='jdgm-star jdgm--off'\u003e\u003c\/span\u003e\u003cspan class='jdgm-star jdgm--off'\u003e\u003c\/span\u003e\u003cspan class='jdgm-star jdgm--off'\u003e\u003c\/span\u003e\u003cspan class='jdgm-star jdgm--off'\u003e\u003c\/span\u003e \u003c\/span\u003e \u003cspan class='jdgm-prev-badge__text'\u003e No reviews \u003c\/span\u003e \u003c\/div\u003e","widget":"\u003cdiv class='jdgm-rev-widg' data-updated-at='2025-06-13T16:12:10Z' data-average-rating='0.00' data-number-of-reviews='0' data-number-of-questions='0'\u003e \u003cstyle class='jdgm-temp-hiding-style'\u003e.jdgm-rev-widg{ display: none }\u003c\/style\u003e \u003cdiv class='jdgm-rev-widg__header'\u003e \u003ch2 class='jdgm-rev-widg__title'\u003eCustomer Reviews\u003c\/h2\u003e \u003cdiv class='jdgm-rev-widg__summary'\u003e \u003cdiv class='jdgm-rev-widg__summary-stars' aria-label='Average rating is 0.00 stars' role='img'\u003e \u003cspan class='jdgm-star jdgm--off'\u003e\u003c\/span\u003e\u003cspan class='jdgm-star jdgm--off'\u003e\u003c\/span\u003e\u003cspan class='jdgm-star jdgm--off'\u003e\u003c\/span\u003e\u003cspan class='jdgm-star jdgm--off'\u003e\u003c\/span\u003e\u003cspan class='jdgm-star jdgm--off'\u003e\u003c\/span\u003e \u003c\/div\u003e \u003cdiv class='jdgm-rev-widg__summary-text'\u003eBe the first to write a review\u003c\/div\u003e \u003c\/div\u003e \u003ca style='display: none' href='#' class='jdgm-write-rev-link' role='button'\u003eWrite a review\u003c\/a\u003e \u003cdiv class='jdgm-histogram jdgm-temp-hidden'\u003e \u003cdiv class='jdgm-histogram__row' data-rating='5' data-frequency='0' data-percentage='0'\u003e \u003cdiv class='jdgm-histogram__star' role='button' aria-label=\"0% (0) reviews with 5 star rating\" tabindex='0' \u003e\u003cspan class='jdgm-star jdgm--on'\u003e\u003c\/span\u003e\u003cspan class='jdgm-star jdgm--on'\u003e\u003c\/span\u003e\u003cspan class='jdgm-star jdgm--on'\u003e\u003c\/span\u003e\u003cspan class='jdgm-star jdgm--on'\u003e\u003c\/span\u003e\u003cspan class='jdgm-star jdgm--on'\u003e\u003c\/span\u003e\u003c\/div\u003e \u003cdiv class='jdgm-histogram__bar'\u003e \u003cdiv class='jdgm-histogram__bar-content' style='width: 0%;'\u003e \u003c\/div\u003e \u003c\/div\u003e \u003cdiv class='jdgm-histogram__percentage'\u003e0%\u003c\/div\u003e \u003cdiv class='jdgm-histogram__frequency'\u003e(0)\u003c\/div\u003e \u003c\/div\u003e \u003cdiv class='jdgm-histogram__row' data-rating='4' data-frequency='0' data-percentage='0'\u003e \u003cdiv class='jdgm-histogram__star' role='button' aria-label=\"0% (0) reviews with 4 star rating\" tabindex='0' \u003e\u003cspan class='jdgm-star jdgm--on'\u003e\u003c\/span\u003e\u003cspan class='jdgm-star jdgm--on'\u003e\u003c\/span\u003e\u003cspan class='jdgm-star jdgm--on'\u003e\u003c\/span\u003e\u003cspan class='jdgm-star jdgm--on'\u003e\u003c\/span\u003e\u003cspan class='jdgm-star jdgm--off'\u003e\u003c\/span\u003e\u003c\/div\u003e \u003cdiv class='jdgm-histogram__bar'\u003e \u003cdiv class='jdgm-histogram__bar-content' style='width: 0%;'\u003e \u003c\/div\u003e \u003c\/div\u003e \u003cdiv class='jdgm-histogram__percentage'\u003e0%\u003c\/div\u003e \u003cdiv class='jdgm-histogram__frequency'\u003e(0)\u003c\/div\u003e \u003c\/div\u003e \u003cdiv class='jdgm-histogram__row' data-rating='3' data-frequency='0' data-percentage='0'\u003e \u003cdiv class='jdgm-histogram__star' role='button' aria-label=\"0% (0) reviews with 3 star rating\" tabindex='0' \u003e\u003cspan class='jdgm-star jdgm--on'\u003e\u003c\/span\u003e\u003cspan class='jdgm-star jdgm--on'\u003e\u003c\/span\u003e\u003cspan class='jdgm-star jdgm--on'\u003e\u003c\/span\u003e\u003cspan class='jdgm-star jdgm--off'\u003e\u003c\/span\u003e\u003cspan class='jdgm-star jdgm--off'\u003e\u003c\/span\u003e\u003c\/div\u003e \u003cdiv class='jdgm-histogram__bar'\u003e \u003cdiv class='jdgm-histogram__bar-content' style='width: 0%;'\u003e \u003c\/div\u003e \u003c\/div\u003e \u003cdiv class='jdgm-histogram__percentage'\u003e0%\u003c\/div\u003e \u003cdiv class='jdgm-histogram__frequency'\u003e(0)\u003c\/div\u003e \u003c\/div\u003e \u003cdiv class='jdgm-histogram__row' data-rating='2' data-frequency='0' data-percentage='0'\u003e \u003cdiv class='jdgm-histogram__star' role='button' aria-label=\"0% (0) reviews with 2 star rating\" tabindex='0' \u003e\u003cspan class='jdgm-star jdgm--on'\u003e\u003c\/span\u003e\u003cspan class='jdgm-star jdgm--on'\u003e\u003c\/span\u003e\u003cspan class='jdgm-star jdgm--off'\u003e\u003c\/span\u003e\u003cspan class='jdgm-star jdgm--off'\u003e\u003c\/span\u003e\u003cspan class='jdgm-star jdgm--off'\u003e\u003c\/span\u003e\u003c\/div\u003e \u003cdiv class='jdgm-histogram__bar'\u003e \u003cdiv class='jdgm-histogram__bar-content' style='width: 0%;'\u003e \u003c\/div\u003e \u003c\/div\u003e \u003cdiv class='jdgm-histogram__percentage'\u003e0%\u003c\/div\u003e \u003cdiv class='jdgm-histogram__frequency'\u003e(0)\u003c\/div\u003e \u003c\/div\u003e \u003cdiv class='jdgm-histogram__row' data-rating='1' data-frequency='0' data-percentage='0'\u003e \u003cdiv class='jdgm-histogram__star' role='button' aria-label=\"0% (0) reviews with 1 star rating\" tabindex='0' \u003e\u003cspan class='jdgm-star jdgm--on'\u003e\u003c\/span\u003e\u003cspan class='jdgm-star jdgm--off'\u003e\u003c\/span\u003e\u003cspan class='jdgm-star jdgm--off'\u003e\u003c\/span\u003e\u003cspan class='jdgm-star jdgm--off'\u003e\u003c\/span\u003e\u003cspan class='jdgm-star jdgm--off'\u003e\u003c\/span\u003e\u003c\/div\u003e \u003cdiv class='jdgm-histogram__bar'\u003e \u003cdiv class='jdgm-histogram__bar-content' style='width: 0%;'\u003e \u003c\/div\u003e \u003c\/div\u003e \u003cdiv class='jdgm-histogram__percentage'\u003e0%\u003c\/div\u003e \u003cdiv class='jdgm-histogram__frequency'\u003e(0)\u003c\/div\u003e \u003c\/div\u003e \u003cdiv class='jdgm-histogram__row jdgm-histogram__clear-filter' data-rating=null tabindex='0'\u003e\u003c\/div\u003e \u003c\/div\u003e \u003cdiv class='jdgm-rev-widg__sort-wrapper'\u003e\u003c\/div\u003e \u003c\/div\u003e \u003cdiv class='jdgm-rev-widg__body'\u003e \u003cdiv class='jdgm-rev-widg__reviews'\u003e\u003c\/div\u003e \u003cdiv class='jdgm-paginate' data-per-page='10' data-url='https:\/\/api.judge.me\/reviews\/reviews_for_widget' style=\"display: none;\"\u003e\u003c\/div\u003e \u003c\/div\u003e \u003cdiv class='jdgm-rev-widg__paginate-spinner-wrapper'\u003e \u003cdiv class='jdgm-spinner'\u003e\u003c\/div\u003e \u003c\/div\u003e \u003c\/div\u003e"},"default_reviews_metafields":{},"collections":[{"id":512654540989,"handle":"lastof26-10","title":"10%","updated_at":"2026-11-14T20:08:00+08:00","body_html":null,"published_at":"2026-10-12T19:06:42+08:00","sort_order":"best-selling","template_suffix":null,"disjunctive":false,"rules":[],"published_scope":"global"},{"id":261657460925,"handle":"buy","title":"Buy","updated_at":"2026-11-14T20:08:00+08:00","body_html":"\u003cp\u003eBrowse all of our pregnancy, labour \u0026amp; birth, postpartum and baby essentials here.\u003cbr\u003e\u003c\/p\u003e\n\u003cp\u003e\u003cspan\u003eYou can even buy now and pay later with Afterpay!\u003c\/span\u003e\u003c\/p\u003e","published_at":"2021-03-10T12:05:31+08:00","sort_order":"best-selling","template_suffix":"shop-all-collection","disjunctive":false,"rules":[],"published_scope":"global","image":{"created_at":"2024-05-06T11:59:42+08:00","alt":"Buy - The Birth Store","width":2048,"height":2048,"src":"\/\/www.thebirthstore.com.au\/cdn\/shop\/collections\/buy-964856.jpg?v=1714967982"}},{"id":293309022397,"handle":"clothing","title":"Clothing","updated_at":"2026-11-09T10:38:40+08:00","body_html":"","published_at":"2023-05-03T11:41:12+08:00","sort_order":"best-selling","template_suffix":"swaddles-collection","disjunctive":true,"rules":[],"published_scope":"global","image":{"created_at":"2024-05-06T11:59:52+08:00","alt":"Clothing - The Birth Store","width":676,"height":581,"src":"\/\/www.thebirthstore.com.au\/cdn\/shop\/collections\/clothing-483293.jpg?v=1714967992"}},{"id":337429201085,"handle":"hospital-bag","title":"Hospital Bag","updated_at":"2026-11-14T20:08:00+08:00","body_html":"","published_at":"2026-06-03T11:36:29+08:00","sort_order":"most-relevant","template_suffix":"","disjunctive":false,"rules":[],"published_scope":"global"},{"id":281712689341,"handle":"pelvic-floor-health","title":"Pelvic Floor Health","updated_at":"2026-11-12T20:07:50+08:00","body_html":"","published_at":"2021-12-20T14:23:41+08:00","sort_order":"best-selling","template_suffix":"swaddles-collection","disjunctive":false,"rules":[],"published_scope":"global","image":{"created_at":"2024-05-06T12:00:29+08:00","alt":"Pelvic Floor Health - The Birth Store","width":536,"height":589,"src":"\/\/www.thebirthstore.com.au\/cdn\/shop\/collections\/pelvic-floor-health-890736.jpg?v=1714968030"}},{"id":261658083517,"handle":"post-partum","title":"Postpartum","updated_at":"2026-11-14T20:08:00+08:00","body_html":"\u003cp\u003eShop your postpartum and hospital bag essentials below. Looking for something we don't currently stock? Please reach out and let us know.\u003cbr\u003e\u003c\/p\u003e\n\u003cp\u003e\u003cspan\u003eYou can even buy now and pay later with Afterpay!\u003c\/span\u003e\u003c\/p\u003e","published_at":"2021-03-10T12:33:47+08:00","sort_order":"best-selling","template_suffix":"postpartum-collection","disjunctive":false,"rules":[],"published_scope":"global","image":{"created_at":"2024-05-06T12:00:36+08:00","alt":"Postpartum - The Birth Store","width":611,"height":702,"src":"\/\/www.thebirthstore.com.au\/cdn\/shop\/collections\/postpartum-150119.jpg?v=1714968037"}},{"id":291456483517,"handle":"shop-all","title":"Shop All - Mum","updated_at":"2026-11-14T20:08:00+08:00","body_html":"","published_at":"2022-12-23T22:04:39+08:00","sort_order":"best-selling","template_suffix":"shop-all-collection","disjunctive":false,"rules":[],"published_scope":"global","image":{"created_at":"2024-05-06T12:00:54+08:00","alt":"Shop All - The Birth Store","width":1365,"height":2048,"src":"\/\/www.thebirthstore.com.au\/cdn\/shop\/collections\/shop-all-693176.jpg?v=1714968055"}},{"id":310045933757,"handle":"shop-all-sale","title":"Shop All Sale","updated_at":"2026-11-14T20:08:00+08:00","body_html":"","published_at":"2024-11-12T13:22:43+08:00","sort_order":"best-selling","template_suffix":"","disjunctive":true,"rules":[],"published_scope":"global","image":{"created_at":"2024-11-13T10:58:16+08:00","alt":"Shop All Sale - The Birth Store","width":2048,"height":1365,"src":"\/\/www.thebirthstore.com.au\/cdn\/shop\/collections\/shop-all-sale-297361.jpg?v=1731466697"}},{"id":292595433661,"handle":"support-clothing","title":"Support Clothing","updated_at":"2026-11-08T20:07:47+08:00","body_html":"Maternity, breastfeeding, supportive, postpartum clothing and more - we've got it all, or we will have soon! Keep an eye out for new arrivals and grab yourself some incredible must-have staple items.","published_at":"2023-02-20T12:49:47+08:00","sort_order":"best-selling","template_suffix":"swaddles-collection","disjunctive":false,"rules":[],"published_scope":"global","image":{"created_at":"2024-05-06T12:00:59+08:00","alt":"Support Clothing - The Birth Store","width":586,"height":879,"src":"\/\/www.thebirthstore.com.au\/cdn\/shop\/collections\/support-clothing-743676.jpg?v=1714968059"}}]}
{"item":{"id":7439748038845,"title":"SRC Restore Support Mini Shorts - Uterine Prolapse \u0026 Continence Treatment","handle":"src-restore-support-shorts-uterine-prolapse-continence-treatment","description":"\u003cmeta charset=\"utf-8\"\u003e\u003cspan data-mce-fragment=\"1\"\u003eThis product is stocked at a 3\u003c\/span\u003e\u003csup data-mce-fragment=\"1\"\u003erd\u003c\/sup\u003e\u003cspan data-mce-fragment=\"1\"\u003e party warehouse, if ordering with other products you’ll receive two packages. This product will have a turn around time of 10 days if pickup is selected on checkout. Any questions, please contact us \u003ca href=\"https:\/\/www.thebirthstore.com.au\/pages\/contact-us\" title=\"Contact Us\" data-mce-fragment=\"1\" target=\"_blank\" data-mce-href=\"https:\/\/www.thebirthstore.com.au\/pages\/contact-us\"\u003ehere\u003c\/a\u003e.\u003c\/span\u003e\u003cbr\u003e","published_at":"2023-03-13T14:09:02+08:00","created_at":"2023-02-13T22:49:59+08:00","vendor":"SRC Health","type":"Support Shorts","tags":["Mum","Pain Relief","Pelvic Floor","Post-Partum","Support Clothing"],"price":9999,"price_min":9999,"price_max":9999,"available":true,"price_varies":false,"compare_at_price":9999,"compare_at_price_min":9999,"compare_at_price_max":9999,"compare_at_price_varies":false,"variants":[{"id":42658993209533,"title":"XXS \/ Champagne","option1":"XXS","option2":"Champagne","option3":null,"sku":"","requires_shipping":true,"taxable":false,"featured_image":{"id":34641032970429,"product_id":7439748038845,"position":5,"created_at":"2024-05-06T12:00:57+08:00","updated_at":"2024-05-06T12:00:57+08:00","alt":"SRC Restore Support Mini Shorts - Uterine Prolapse \u0026 Continence Treatment - The Birth Store-SRC Health","width":1080,"height":1080,"src":"\/\/www.thebirthstore.com.au\/cdn\/shop\/files\/src-restore-support-mini-shorts-uterine-prolapse-continence-treatment-558477.jpg?v=1714968057","variant_ids":[42658993209533,42658993242301,42658993275069,42658993307837]},"available":true,"name":"SRC Restore Support Mini Shorts - Uterine Prolapse \u0026 Continence Treatment - XXS \/ Champagne","public_title":"XXS \/ Champagne","options":["XXS","Champagne"],"price":9999,"weight":0,"compare_at_price":9999,"inventory_management":null,"barcode":"93209533","featured_media":{"alt":"SRC Restore Support Mini Shorts - Uterine Prolapse \u0026 Continence Treatment - The Birth Store-SRC Health","id":27007602000061,"position":5,"preview_image":{"aspect_ratio":1.0,"height":1080,"width":1080,"src":"\/\/www.thebirthstore.com.au\/cdn\/shop\/files\/src-restore-support-mini-shorts-uterine-prolapse-continence-treatment-558477.jpg?v=1714968057"}},"requires_selling_plan":false,"selling_plan_allocations":[],"quantity_rule":{"min":1,"max":null,"increment":1}},{"id":42658991177917,"title":"XXS \/ Black","option1":"XXS","option2":"Black","option3":null,"sku":"","requires_shipping":true,"taxable":false,"featured_image":{"id":34641032773821,"product_id":7439748038845,"position":1,"created_at":"2024-05-06T12:00:56+08:00","updated_at":"2024-05-06T12:00:56+08:00","alt":"SRC Restore Support Mini Shorts - Uterine Prolapse \u0026 Continence Treatment - The Birth Store-SRC Health","width":1080,"height":1080,"src":"\/\/www.thebirthstore.com.au\/cdn\/shop\/files\/src-restore-support-mini-shorts-uterine-prolapse-continence-treatment-120633.jpg?v=1714968056","variant_ids":[42658991177917,42658991243453,42658991308989,42658991374525]},"available":true,"name":"SRC Restore Support Mini Shorts - Uterine Prolapse \u0026 Continence Treatment - XXS \/ Black","public_title":"XXS \/ Black","options":["XXS","Black"],"price":9999,"weight":0,"compare_at_price":9999,"inventory_management":null,"barcode":"91177917","featured_media":{"alt":"SRC Restore Support Mini Shorts - Uterine Prolapse \u0026 Continence Treatment - The Birth Store-SRC Health","id":27007601803453,"position":1,"preview_image":{"aspect_ratio":1.0,"height":1080,"width":1080,"src":"\/\/www.thebirthstore.com.au\/cdn\/shop\/files\/src-restore-support-mini-shorts-uterine-prolapse-continence-treatment-120633.jpg?v=1714968056"}},"requires_selling_plan":false,"selling_plan_allocations":[],"quantity_rule":{"min":1,"max":null,"increment":1}},{"id":42658993242301,"title":"XS \/ Champagne","option1":"XS","option2":"Champagne","option3":null,"sku":"","requires_shipping":true,"taxable":false,"featured_image":{"id":34641032970429,"product_id":7439748038845,"position":5,"created_at":"2024-05-06T12:00:57+08:00","updated_at":"2024-05-06T12:00:57+08:00","alt":"SRC Restore Support Mini Shorts - Uterine Prolapse \u0026 Continence Treatment - The Birth Store-SRC Health","width":1080,"height":1080,"src":"\/\/www.thebirthstore.com.au\/cdn\/shop\/files\/src-restore-support-mini-shorts-uterine-prolapse-continence-treatment-558477.jpg?v=1714968057","variant_ids":[42658993209533,42658993242301,42658993275069,42658993307837]},"available":true,"name":"SRC Restore Support Mini Shorts - Uterine Prolapse \u0026 Continence Treatment - XS \/ Champagne","public_title":"XS \/ Champagne","options":["XS","Champagne"],"price":9999,"weight":0,"compare_at_price":9999,"inventory_management":null,"barcode":"93242301","featured_media":{"alt":"SRC Restore Support Mini Shorts - Uterine Prolapse \u0026 Continence Treatment - The Birth Store-SRC Health","id":27007602000061,"position":5,"preview_image":{"aspect_ratio":1.0,"height":1080,"width":1080,"src":"\/\/www.thebirthstore.com.au\/cdn\/shop\/files\/src-restore-support-mini-shorts-uterine-prolapse-continence-treatment-558477.jpg?v=1714968057"}},"requires_selling_plan":false,"selling_plan_allocations":[],"quantity_rule":{"min":1,"max":null,"increment":1}},{"id":42658991243453,"title":"XS \/ Black","option1":"XS","option2":"Black","option3":null,"sku":"","requires_shipping":true,"taxable":false,"featured_image":{"id":34641032773821,"product_id":7439748038845,"position":1,"created_at":"2024-05-06T12:00:56+08:00","updated_at":"2024-05-06T12:00:56+08:00","alt":"SRC Restore Support Mini Shorts - Uterine Prolapse \u0026 Continence Treatment - The Birth Store-SRC Health","width":1080,"height":1080,"src":"\/\/www.thebirthstore.com.au\/cdn\/shop\/files\/src-restore-support-mini-shorts-uterine-prolapse-continence-treatment-120633.jpg?v=1714968056","variant_ids":[42658991177917,42658991243453,42658991308989,42658991374525]},"available":true,"name":"SRC Restore Support Mini Shorts - Uterine Prolapse \u0026 Continence Treatment - XS \/ Black","public_title":"XS \/ Black","options":["XS","Black"],"price":9999,"weight":0,"compare_at_price":9999,"inventory_management":null,"barcode":"91243453","featured_media":{"alt":"SRC Restore Support Mini Shorts - Uterine Prolapse \u0026 Continence Treatment - The Birth Store-SRC Health","id":27007601803453,"position":1,"preview_image":{"aspect_ratio":1.0,"height":1080,"width":1080,"src":"\/\/www.thebirthstore.com.au\/cdn\/shop\/files\/src-restore-support-mini-shorts-uterine-prolapse-continence-treatment-120633.jpg?v=1714968056"}},"requires_selling_plan":false,"selling_plan_allocations":[],"quantity_rule":{"min":1,"max":null,"increment":1}},{"id":42658993275069,"title":"S \/ Champagne","option1":"S","option2":"Champagne","option3":null,"sku":"","requires_shipping":true,"taxable":false,"featured_image":{"id":34641032970429,"product_id":7439748038845,"position":5,"created_at":"2024-05-06T12:00:57+08:00","updated_at":"2024-05-06T12:00:57+08:00","alt":"SRC Restore Support Mini Shorts - Uterine Prolapse \u0026 Continence Treatment - The Birth Store-SRC Health","width":1080,"height":1080,"src":"\/\/www.thebirthstore.com.au\/cdn\/shop\/files\/src-restore-support-mini-shorts-uterine-prolapse-continence-treatment-558477.jpg?v=1714968057","variant_ids":[42658993209533,42658993242301,42658993275069,42658993307837]},"available":true,"name":"SRC Restore Support Mini Shorts - Uterine Prolapse \u0026 Continence Treatment - S \/ Champagne","public_title":"S \/ Champagne","options":["S","Champagne"],"price":9999,"weight":0,"compare_at_price":9999,"inventory_management":null,"barcode":"93275069","featured_media":{"alt":"SRC Restore Support Mini Shorts - Uterine Prolapse \u0026 Continence Treatment - The Birth Store-SRC Health","id":27007602000061,"position":5,"preview_image":{"aspect_ratio":1.0,"height":1080,"width":1080,"src":"\/\/www.thebirthstore.com.au\/cdn\/shop\/files\/src-restore-support-mini-shorts-uterine-prolapse-continence-treatment-558477.jpg?v=1714968057"}},"requires_selling_plan":false,"selling_plan_allocations":[],"quantity_rule":{"min":1,"max":null,"increment":1}},{"id":42658991308989,"title":"S \/ Black","option1":"S","option2":"Black","option3":null,"sku":"","requires_shipping":true,"taxable":false,"featured_image":{"id":34641032773821,"product_id":7439748038845,"position":1,"created_at":"2024-05-06T12:00:56+08:00","updated_at":"2024-05-06T12:00:56+08:00","alt":"SRC Restore Support Mini Shorts - Uterine Prolapse \u0026 Continence Treatment - The Birth Store-SRC Health","width":1080,"height":1080,"src":"\/\/www.thebirthstore.com.au\/cdn\/shop\/files\/src-restore-support-mini-shorts-uterine-prolapse-continence-treatment-120633.jpg?v=1714968056","variant_ids":[42658991177917,42658991243453,42658991308989,42658991374525]},"available":true,"name":"SRC Restore Support Mini Shorts - Uterine Prolapse \u0026 Continence Treatment - S \/ Black","public_title":"S \/ Black","options":["S","Black"],"price":9999,"weight":0,"compare_at_price":9999,"inventory_management":null,"barcode":"91308989","featured_media":{"alt":"SRC Restore Support Mini Shorts - Uterine Prolapse \u0026 Continence Treatment - The Birth Store-SRC Health","id":27007601803453,"position":1,"preview_image":{"aspect_ratio":1.0,"height":1080,"width":1080,"src":"\/\/www.thebirthstore.com.au\/cdn\/shop\/files\/src-restore-support-mini-shorts-uterine-prolapse-continence-treatment-120633.jpg?v=1714968056"}},"requires_selling_plan":false,"selling_plan_allocations":[],"quantity_rule":{"min":1,"max":null,"increment":1}},{"id":42658993307837,"title":"M \/ Champagne","option1":"M","option2":"Champagne","option3":null,"sku":"","requires_shipping":true,"taxable":false,"featured_image":{"id":34641032970429,"product_id":7439748038845,"position":5,"created_at":"2024-05-06T12:00:57+08:00","updated_at":"2024-05-06T12:00:57+08:00","alt":"SRC Restore Support Mini Shorts - Uterine Prolapse \u0026 Continence Treatment - The Birth Store-SRC Health","width":1080,"height":1080,"src":"\/\/www.thebirthstore.com.au\/cdn\/shop\/files\/src-restore-support-mini-shorts-uterine-prolapse-continence-treatment-558477.jpg?v=1714968057","variant_ids":[42658993209533,42658993242301,42658993275069,42658993307837]},"available":true,"name":"SRC Restore Support Mini Shorts - Uterine Prolapse \u0026 Continence Treatment - M \/ Champagne","public_title":"M \/ Champagne","options":["M","Champagne"],"price":9999,"weight":0,"compare_at_price":9999,"inventory_management":null,"barcode":"93307837","featured_media":{"alt":"SRC Restore Support Mini Shorts - Uterine Prolapse \u0026 Continence Treatment - The Birth Store-SRC Health","id":27007602000061,"position":5,"preview_image":{"aspect_ratio":1.0,"height":1080,"width":1080,"src":"\/\/www.thebirthstore.com.au\/cdn\/shop\/files\/src-restore-support-mini-shorts-uterine-prolapse-continence-treatment-558477.jpg?v=1714968057"}},"requires_selling_plan":false,"selling_plan_allocations":[],"quantity_rule":{"min":1,"max":null,"increment":1}},{"id":42658991374525,"title":"M \/ Black","option1":"M","option2":"Black","option3":null,"sku":"","requires_shipping":true,"taxable":false,"featured_image":{"id":34641032773821,"product_id":7439748038845,"position":1,"created_at":"2024-05-06T12:00:56+08:00","updated_at":"2024-05-06T12:00:56+08:00","alt":"SRC Restore Support Mini Shorts - Uterine Prolapse \u0026 Continence Treatment - The Birth Store-SRC Health","width":1080,"height":1080,"src":"\/\/www.thebirthstore.com.au\/cdn\/shop\/files\/src-restore-support-mini-shorts-uterine-prolapse-continence-treatment-120633.jpg?v=1714968056","variant_ids":[42658991177917,42658991243453,42658991308989,42658991374525]},"available":true,"name":"SRC Restore Support Mini Shorts - Uterine Prolapse \u0026 Continence Treatment - M \/ Black","public_title":"M \/ Black","options":["M","Black"],"price":9999,"weight":0,"compare_at_price":9999,"inventory_management":null,"barcode":"91374525","featured_media":{"alt":"SRC Restore Support Mini Shorts - Uterine Prolapse \u0026 Continence Treatment - The Birth Store-SRC Health","id":27007601803453,"position":1,"preview_image":{"aspect_ratio":1.0,"height":1080,"width":1080,"src":"\/\/www.thebirthstore.com.au\/cdn\/shop\/files\/src-restore-support-mini-shorts-uterine-prolapse-continence-treatment-120633.jpg?v=1714968056"}},"requires_selling_plan":false,"selling_plan_allocations":[],"quantity_rule":{"min":1,"max":null,"increment":1}},{"id":42658993340605,"title":"L \/ Champagne","option1":"L","option2":"Champagne","option3":null,"sku":"","requires_shipping":true,"taxable":false,"featured_image":{"id":34641033068733,"product_id":7439748038845,"position":7,"created_at":"2024-05-06T12:00:57+08:00","updated_at":"2024-05-06T12:00:57+08:00","alt":"SRC Restore Support Mini Shorts - Uterine Prolapse \u0026 Continence Treatment - The Birth Store-SRC Health","width":1080,"height":1080,"src":"\/\/www.thebirthstore.com.au\/cdn\/shop\/files\/src-restore-support-mini-shorts-uterine-prolapse-continence-treatment-713141.jpg?v=1714968057","variant_ids":[42658993340605,42658993373373,42658993406141]},"available":true,"name":"SRC Restore Support Mini Shorts - Uterine Prolapse \u0026 Continence Treatment - L \/ Champagne","public_title":"L \/ Champagne","options":["L","Champagne"],"price":9999,"weight":0,"compare_at_price":9999,"inventory_management":null,"barcode":"93340605","featured_media":{"alt":"SRC Restore Support Mini Shorts - Uterine Prolapse \u0026 Continence Treatment - The Birth Store-SRC Health","id":27007602131133,"position":7,"preview_image":{"aspect_ratio":1.0,"height":1080,"width":1080,"src":"\/\/www.thebirthstore.com.au\/cdn\/shop\/files\/src-restore-support-mini-shorts-uterine-prolapse-continence-treatment-713141.jpg?v=1714968057"}},"requires_selling_plan":false,"selling_plan_allocations":[],"quantity_rule":{"min":1,"max":null,"increment":1}},{"id":42658991440061,"title":"L \/ Black","option1":"L","option2":"Black","option3":null,"sku":"","requires_shipping":true,"taxable":false,"featured_image":{"id":34641032904893,"product_id":7439748038845,"position":4,"created_at":"2024-05-06T12:00:56+08:00","updated_at":"2024-05-06T12:00:57+08:00","alt":"SRC Restore Support Mini Shorts - Uterine Prolapse \u0026 Continence Treatment - The Birth Store-SRC Health","width":1080,"height":1080,"src":"\/\/www.thebirthstore.com.au\/cdn\/shop\/files\/src-restore-support-mini-shorts-uterine-prolapse-continence-treatment-815204.jpg?v=1714968057","variant_ids":[42658991440061,42658991505597,42658991571133]},"available":true,"name":"SRC Restore Support Mini Shorts - Uterine Prolapse \u0026 Continence Treatment - L \/ Black","public_title":"L \/ Black","options":["L","Black"],"price":9999,"weight":0,"compare_at_price":9999,"inventory_management":null,"barcode":"91440061","featured_media":{"alt":"SRC Restore Support Mini Shorts - Uterine Prolapse \u0026 Continence Treatment - The Birth Store-SRC Health","id":27007601934525,"position":4,"preview_image":{"aspect_ratio":1.0,"height":1080,"width":1080,"src":"\/\/www.thebirthstore.com.au\/cdn\/shop\/files\/src-restore-support-mini-shorts-uterine-prolapse-continence-treatment-815204.jpg?v=1714968057"}},"requires_selling_plan":false,"selling_plan_allocations":[],"quantity_rule":{"min":1,"max":null,"increment":1}},{"id":42658993373373,"title":"XL \/ Champagne","option1":"XL","option2":"Champagne","option3":null,"sku":"","requires_shipping":true,"taxable":false,"featured_image":{"id":34641033068733,"product_id":7439748038845,"position":7,"created_at":"2024-05-06T12:00:57+08:00","updated_at":"2024-05-06T12:00:57+08:00","alt":"SRC Restore Support Mini Shorts - Uterine Prolapse \u0026 Continence Treatment - The Birth Store-SRC Health","width":1080,"height":1080,"src":"\/\/www.thebirthstore.com.au\/cdn\/shop\/files\/src-restore-support-mini-shorts-uterine-prolapse-continence-treatment-713141.jpg?v=1714968057","variant_ids":[42658993340605,42658993373373,42658993406141]},"available":true,"name":"SRC Restore Support Mini Shorts - Uterine Prolapse \u0026 Continence Treatment - XL \/ Champagne","public_title":"XL \/ Champagne","options":["XL","Champagne"],"price":9999,"weight":0,"compare_at_price":9999,"inventory_management":null,"barcode":"93373373","featured_media":{"alt":"SRC Restore Support Mini Shorts - Uterine Prolapse \u0026 Continence Treatment - The Birth Store-SRC Health","id":27007602131133,"position":7,"preview_image":{"aspect_ratio":1.0,"height":1080,"width":1080,"src":"\/\/www.thebirthstore.com.au\/cdn\/shop\/files\/src-restore-support-mini-shorts-uterine-prolapse-continence-treatment-713141.jpg?v=1714968057"}},"requires_selling_plan":false,"selling_plan_allocations":[],"quantity_rule":{"min":1,"max":null,"increment":1}},{"id":42658991505597,"title":"XL \/ Black","option1":"XL","option2":"Black","option3":null,"sku":"","requires_shipping":true,"taxable":false,"featured_image":{"id":34641032904893,"product_id":7439748038845,"position":4,"created_at":"2024-05-06T12:00:56+08:00","updated_at":"2024-05-06T12:00:57+08:00","alt":"SRC Restore Support Mini Shorts - Uterine Prolapse \u0026 Continence Treatment - The Birth Store-SRC Health","width":1080,"height":1080,"src":"\/\/www.thebirthstore.com.au\/cdn\/shop\/files\/src-restore-support-mini-shorts-uterine-prolapse-continence-treatment-815204.jpg?v=1714968057","variant_ids":[42658991440061,42658991505597,42658991571133]},"available":true,"name":"SRC Restore Support Mini Shorts - Uterine Prolapse \u0026 Continence Treatment - XL \/ Black","public_title":"XL \/ Black","options":["XL","Black"],"price":9999,"weight":0,"compare_at_price":9999,"inventory_management":null,"barcode":"91505597","featured_media":{"alt":"SRC Restore Support Mini Shorts - Uterine Prolapse \u0026 Continence Treatment - The Birth Store-SRC Health","id":27007601934525,"position":4,"preview_image":{"aspect_ratio":1.0,"height":1080,"width":1080,"src":"\/\/www.thebirthstore.com.au\/cdn\/shop\/files\/src-restore-support-mini-shorts-uterine-prolapse-continence-treatment-815204.jpg?v=1714968057"}},"requires_selling_plan":false,"selling_plan_allocations":[],"quantity_rule":{"min":1,"max":null,"increment":1}},{"id":42658993406141,"title":"XXL \/ Champagne","option1":"XXL","option2":"Champagne","option3":null,"sku":"","requires_shipping":true,"taxable":false,"featured_image":{"id":34641033068733,"product_id":7439748038845,"position":7,"created_at":"2024-05-06T12:00:57+08:00","updated_at":"2024-05-06T12:00:57+08:00","alt":"SRC Restore Support Mini Shorts - Uterine Prolapse \u0026 Continence Treatment - The Birth Store-SRC Health","width":1080,"height":1080,"src":"\/\/www.thebirthstore.com.au\/cdn\/shop\/files\/src-restore-support-mini-shorts-uterine-prolapse-continence-treatment-713141.jpg?v=1714968057","variant_ids":[42658993340605,42658993373373,42658993406141]},"available":true,"name":"SRC Restore Support Mini Shorts - Uterine Prolapse \u0026 Continence Treatment - XXL \/ Champagne","public_title":"XXL \/ Champagne","options":["XXL","Champagne"],"price":9999,"weight":0,"compare_at_price":9999,"inventory_management":null,"barcode":"93406141","featured_media":{"alt":"SRC Restore Support Mini Shorts - Uterine Prolapse \u0026 Continence Treatment - The Birth Store-SRC Health","id":27007602131133,"position":7,"preview_image":{"aspect_ratio":1.0,"height":1080,"width":1080,"src":"\/\/www.thebirthstore.com.au\/cdn\/shop\/files\/src-restore-support-mini-shorts-uterine-prolapse-continence-treatment-713141.jpg?v=1714968057"}},"requires_selling_plan":false,"selling_plan_allocations":[],"quantity_rule":{"min":1,"max":null,"increment":1}},{"id":42658991571133,"title":"XXL \/ Black","option1":"XXL","option2":"Black","option3":null,"sku":"","requires_shipping":true,"taxable":false,"featured_image":{"id":34641032904893,"product_id":7439748038845,"position":4,"created_at":"2024-05-06T12:00:56+08:00","updated_at":"2024-05-06T12:00:57+08:00","alt":"SRC Restore Support Mini Shorts - Uterine Prolapse \u0026 Continence Treatment - The Birth Store-SRC Health","width":1080,"height":1080,"src":"\/\/www.thebirthstore.com.au\/cdn\/shop\/files\/src-restore-support-mini-shorts-uterine-prolapse-continence-treatment-815204.jpg?v=1714968057","variant_ids":[42658991440061,42658991505597,42658991571133]},"available":true,"name":"SRC Restore Support Mini Shorts - Uterine Prolapse \u0026 Continence Treatment - XXL \/ Black","public_title":"XXL \/ Black","options":["XXL","Black"],"price":9999,"weight":0,"compare_at_price":9999,"inventory_management":null,"barcode":"91571133","featured_media":{"alt":"SRC Restore Support Mini Shorts - Uterine Prolapse \u0026 Continence Treatment - The Birth Store-SRC Health","id":27007601934525,"position":4,"preview_image":{"aspect_ratio":1.0,"height":1080,"width":1080,"src":"\/\/www.thebirthstore.com.au\/cdn\/shop\/files\/src-restore-support-mini-shorts-uterine-prolapse-continence-treatment-815204.jpg?v=1714968057"}},"requires_selling_plan":false,"selling_plan_allocations":[],"quantity_rule":{"min":1,"max":null,"increment":1}},{"id":45872452305085,"title":"XXXL \/ Black","option1":"XXXL","option2":"Black","option3":null,"sku":null,"requires_shipping":true,"taxable":false,"featured_image":null,"available":true,"name":"SRC Restore Support Mini Shorts - Uterine Prolapse \u0026 Continence Treatment - XXXL \/ Black","public_title":"XXXL \/ Black","options":["XXXL","Black"],"price":9999,"weight":0,"compare_at_price":9999,"inventory_management":null,"barcode":"52305085","requires_selling_plan":false,"selling_plan_allocations":[],"quantity_rule":{"min":1,"max":null,"increment":1}}],"images":["\/\/www.thebirthstore.com.au\/cdn\/shop\/files\/src-restore-support-mini-shorts-uterine-prolapse-continence-treatment-120633.jpg?v=1714968056","\/\/www.thebirthstore.com.au\/cdn\/shop\/files\/src-restore-support-mini-shorts-uterine-prolapse-continence-treatment-863948.jpg?v=1714968056","\/\/www.thebirthstore.com.au\/cdn\/shop\/files\/src-restore-support-mini-shorts-uterine-prolapse-continence-treatment-109130.jpg?v=1714968056","\/\/www.thebirthstore.com.au\/cdn\/shop\/files\/src-restore-support-mini-shorts-uterine-prolapse-continence-treatment-815204.jpg?v=1714968057","\/\/www.thebirthstore.com.au\/cdn\/shop\/files\/src-restore-support-mini-shorts-uterine-prolapse-continence-treatment-558477.jpg?v=1714968057","\/\/www.thebirthstore.com.au\/cdn\/shop\/files\/src-restore-support-mini-shorts-uterine-prolapse-continence-treatment-627077.jpg?v=1714968057","\/\/www.thebirthstore.com.au\/cdn\/shop\/files\/src-restore-support-mini-shorts-uterine-prolapse-continence-treatment-713141.jpg?v=1714968057","\/\/www.thebirthstore.com.au\/cdn\/shop\/files\/src-restore-support-mini-shorts-uterine-prolapse-continence-treatment-915244.jpg?v=1714968057","\/\/www.thebirthstore.com.au\/cdn\/shop\/files\/src-restore-support-mini-shorts-uterine-prolapse-continence-treatment-237129.png?v=1714968057"],"featured_image":"\/\/www.thebirthstore.com.au\/cdn\/shop\/files\/src-restore-support-mini-shorts-uterine-prolapse-continence-treatment-120633.jpg?v=1714968056","options":["Size","Colour"],"media":[{"alt":"SRC Restore Support Mini Shorts - Uterine Prolapse \u0026 Continence Treatment - The Birth Store-SRC Health","id":27007601803453,"position":1,"preview_image":{"aspect_ratio":1.0,"height":1080,"width":1080,"src":"\/\/www.thebirthstore.com.au\/cdn\/shop\/files\/src-restore-support-mini-shorts-uterine-prolapse-continence-treatment-120633.jpg?v=1714968056"},"aspect_ratio":1.0,"height":1080,"media_type":"image","src":"\/\/www.thebirthstore.com.au\/cdn\/shop\/files\/src-restore-support-mini-shorts-uterine-prolapse-continence-treatment-120633.jpg?v=1714968056","width":1080},{"alt":"SRC Restore Support Mini Shorts - Uterine Prolapse \u0026 Continence Treatment - The Birth Store-SRC Health","id":27007601868989,"position":2,"preview_image":{"aspect_ratio":1.0,"height":1080,"width":1080,"src":"\/\/www.thebirthstore.com.au\/cdn\/shop\/files\/src-restore-support-mini-shorts-uterine-prolapse-continence-treatment-863948.jpg?v=1714968056"},"aspect_ratio":1.0,"height":1080,"media_type":"image","src":"\/\/www.thebirthstore.com.au\/cdn\/shop\/files\/src-restore-support-mini-shorts-uterine-prolapse-continence-treatment-863948.jpg?v=1714968056","width":1080},{"alt":"SRC Restore Support Mini Shorts - Uterine Prolapse \u0026 Continence Treatment - The Birth Store-SRC Health","id":27007601901757,"position":3,"preview_image":{"aspect_ratio":1.0,"height":1080,"width":1080,"src":"\/\/www.thebirthstore.com.au\/cdn\/shop\/files\/src-restore-support-mini-shorts-uterine-prolapse-continence-treatment-109130.jpg?v=1714968056"},"aspect_ratio":1.0,"height":1080,"media_type":"image","src":"\/\/www.thebirthstore.com.au\/cdn\/shop\/files\/src-restore-support-mini-shorts-uterine-prolapse-continence-treatment-109130.jpg?v=1714968056","width":1080},{"alt":"SRC Restore Support Mini Shorts - Uterine Prolapse \u0026 Continence Treatment - The Birth Store-SRC Health","id":27007601934525,"position":4,"preview_image":{"aspect_ratio":1.0,"height":1080,"width":1080,"src":"\/\/www.thebirthstore.com.au\/cdn\/shop\/files\/src-restore-support-mini-shorts-uterine-prolapse-continence-treatment-815204.jpg?v=1714968057"},"aspect_ratio":1.0,"height":1080,"media_type":"image","src":"\/\/www.thebirthstore.com.au\/cdn\/shop\/files\/src-restore-support-mini-shorts-uterine-prolapse-continence-treatment-815204.jpg?v=1714968057","width":1080},{"alt":"SRC Restore Support Mini Shorts - Uterine Prolapse \u0026 Continence Treatment - The Birth Store-SRC Health","id":27007602000061,"position":5,"preview_image":{"aspect_ratio":1.0,"height":1080,"width":1080,"src":"\/\/www.thebirthstore.com.au\/cdn\/shop\/files\/src-restore-support-mini-shorts-uterine-prolapse-continence-treatment-558477.jpg?v=1714968057"},"aspect_ratio":1.0,"height":1080,"media_type":"image","src":"\/\/www.thebirthstore.com.au\/cdn\/shop\/files\/src-restore-support-mini-shorts-uterine-prolapse-continence-treatment-558477.jpg?v=1714968057","width":1080},{"alt":"SRC Restore Support Mini Shorts - Uterine Prolapse \u0026 Continence Treatment - The Birth Store-SRC Health","id":27007602065597,"position":6,"preview_image":{"aspect_ratio":1.0,"height":1080,"width":1080,"src":"\/\/www.thebirthstore.com.au\/cdn\/shop\/files\/src-restore-support-mini-shorts-uterine-prolapse-continence-treatment-627077.jpg?v=1714968057"},"aspect_ratio":1.0,"height":1080,"media_type":"image","src":"\/\/www.thebirthstore.com.au\/cdn\/shop\/files\/src-restore-support-mini-shorts-uterine-prolapse-continence-treatment-627077.jpg?v=1714968057","width":1080},{"alt":"SRC Restore Support Mini Shorts - Uterine Prolapse \u0026 Continence Treatment - The Birth Store-SRC Health","id":27007602131133,"position":7,"preview_image":{"aspect_ratio":1.0,"height":1080,"width":1080,"src":"\/\/www.thebirthstore.com.au\/cdn\/shop\/files\/src-restore-support-mini-shorts-uterine-prolapse-continence-treatment-713141.jpg?v=1714968057"},"aspect_ratio":1.0,"height":1080,"media_type":"image","src":"\/\/www.thebirthstore.com.au\/cdn\/shop\/files\/src-restore-support-mini-shorts-uterine-prolapse-continence-treatment-713141.jpg?v=1714968057","width":1080},{"alt":"SRC Restore Support Mini Shorts - Uterine Prolapse \u0026 Continence Treatment - The Birth Store-SRC Health","id":27007602196669,"position":8,"preview_image":{"aspect_ratio":1.0,"height":1080,"width":1080,"src":"\/\/www.thebirthstore.com.au\/cdn\/shop\/files\/src-restore-support-mini-shorts-uterine-prolapse-continence-treatment-915244.jpg?v=1714968057"},"aspect_ratio":1.0,"height":1080,"media_type":"image","src":"\/\/www.thebirthstore.com.au\/cdn\/shop\/files\/src-restore-support-mini-shorts-uterine-prolapse-continence-treatment-915244.jpg?v=1714968057","width":1080},{"alt":"SRC Restore Support Mini Shorts - Uterine Prolapse \u0026 Continence Treatment - The Birth Store-SRC Health","id":27007602262205,"position":9,"preview_image":{"aspect_ratio":1.881,"height":797,"width":1499,"src":"\/\/www.thebirthstore.com.au\/cdn\/shop\/files\/src-restore-support-mini-shorts-uterine-prolapse-continence-treatment-237129.png?v=1714968057"},"aspect_ratio":1.881,"height":797,"media_type":"image","src":"\/\/www.thebirthstore.com.au\/cdn\/shop\/files\/src-restore-support-mini-shorts-uterine-prolapse-continence-treatment-237129.png?v=1714968057","width":1499}],"requires_selling_plan":false,"selling_plan_groups":[],"content":"\u003cmeta charset=\"utf-8\"\u003e\u003cspan data-mce-fragment=\"1\"\u003eThis product is stocked at a 3\u003c\/span\u003e\u003csup data-mce-fragment=\"1\"\u003erd\u003c\/sup\u003e\u003cspan data-mce-fragment=\"1\"\u003e party warehouse, if ordering with other products you’ll receive two packages. This product will have a turn around time of 10 days if pickup is selected on checkout. Any questions, please contact us \u003ca href=\"https:\/\/www.thebirthstore.com.au\/pages\/contact-us\" title=\"Contact Us\" data-mce-fragment=\"1\" target=\"_blank\" data-mce-href=\"https:\/\/www.thebirthstore.com.au\/pages\/contact-us\"\u003ehere\u003c\/a\u003e.\u003c\/span\u003e\u003cbr\u003e"},"options":[{"name":"Size","position":1,"values":["XXS","XS","S","M","L","XL","XXL","XXXL"]},{"name":"Colour","position":2,"values":["Champagne","Black"]}],"custom_metafields":{},"metafields":{"badge":"\u003cdiv style='display:none' class='jdgm-prev-badge' data-average-rating='5.00' data-number-of-reviews='2' data-number-of-questions='0'\u003e \u003cspan class='jdgm-prev-badge__stars' data-score='5.00' tabindex='0' aria-label='5.00 stars' role='button'\u003e \u003cspan class='jdgm-star jdgm--on'\u003e\u003c\/span\u003e\u003cspan class='jdgm-star jdgm--on'\u003e\u003c\/span\u003e\u003cspan class='jdgm-star jdgm--on'\u003e\u003c\/span\u003e\u003cspan class='jdgm-star jdgm--on'\u003e\u003c\/span\u003e\u003cspan class='jdgm-star jdgm--on'\u003e\u003c\/span\u003e \u003c\/span\u003e \u003cspan class='jdgm-prev-badge__text'\u003e 2 reviews \u003c\/span\u003e \u003c\/div\u003e","widget":"\u003cdiv class='jdgm-rev-widg' data-updated-at='2026-10-17T20:48:57Z' data-average-rating='5.00' data-number-of-reviews='2' data-number-of-questions='0' data-image-url='https:\/\/cdn.shopify.com\/s\/files\/1\/0527\/3393\/5805\/files\/src-restore-support-mini-shorts-uterine-prolapse-continence-treatment-120633.jpg?v=1714968056'\u003e \u003cstyle class='jdgm-temp-hiding-style'\u003e.jdgm-rev-widg{ display: none }\u003c\/style\u003e \u003cdiv class='jdgm-rev-widg__header'\u003e \u003ch2 class='jdgm-rev-widg__title'\u003eCustomer Reviews\u003c\/h2\u003e \u003cdiv class='jdgm-rev-widg__summary'\u003e \u003cdiv class='jdgm-rev-widg__summary-stars' aria-label='Average rating is 5.00 stars' role='img'\u003e \u003cspan class='jdgm-star jdgm--on'\u003e\u003c\/span\u003e\u003cspan class='jdgm-star jdgm--on'\u003e\u003c\/span\u003e\u003cspan class='jdgm-star jdgm--on'\u003e\u003c\/span\u003e\u003cspan class='jdgm-star jdgm--on'\u003e\u003c\/span\u003e\u003cspan class='jdgm-star jdgm--on'\u003e\u003c\/span\u003e \u003c\/div\u003e \u003cdiv class='jdgm-rev-widg__summary-text'\u003eBased on 2 reviews\u003c\/div\u003e \u003c\/div\u003e \u003ca style='display: none' href='#' class='jdgm-write-rev-link' role='button'\u003eWrite a review\u003c\/a\u003e \u003cdiv class='jdgm-histogram jdgm-temp-hidden'\u003e \u003cdiv class='jdgm-histogram__row' data-rating='5' data-frequency='2' data-percentage='100'\u003e \u003cdiv class='jdgm-histogram__star' role='button' aria-label=\"100% (2) reviews with 5 star rating\" tabindex='0' \u003e\u003cspan class='jdgm-star jdgm--on'\u003e\u003c\/span\u003e\u003cspan class='jdgm-star jdgm--on'\u003e\u003c\/span\u003e\u003cspan class='jdgm-star jdgm--on'\u003e\u003c\/span\u003e\u003cspan class='jdgm-star jdgm--on'\u003e\u003c\/span\u003e\u003cspan class='jdgm-star jdgm--on'\u003e\u003c\/span\u003e\u003c\/div\u003e \u003cdiv class='jdgm-histogram__bar'\u003e \u003cdiv class='jdgm-histogram__bar-content' style='width: 100%;'\u003e \u003c\/div\u003e \u003c\/div\u003e \u003cdiv class='jdgm-histogram__percentage'\u003e100%\u003c\/div\u003e \u003cdiv class='jdgm-histogram__frequency'\u003e(2)\u003c\/div\u003e \u003c\/div\u003e \u003cdiv class='jdgm-histogram__row' data-rating='4' data-frequency='0' data-percentage='0'\u003e \u003cdiv class='jdgm-histogram__star' role='button' aria-label=\"0% (0) reviews with 4 star rating\" tabindex='0' \u003e\u003cspan class='jdgm-star jdgm--on'\u003e\u003c\/span\u003e\u003cspan class='jdgm-star jdgm--on'\u003e\u003c\/span\u003e\u003cspan class='jdgm-star jdgm--on'\u003e\u003c\/span\u003e\u003cspan class='jdgm-star jdgm--on'\u003e\u003c\/span\u003e\u003cspan class='jdgm-star jdgm--off'\u003e\u003c\/span\u003e\u003c\/div\u003e \u003cdiv class='jdgm-histogram__bar'\u003e \u003cdiv class='jdgm-histogram__bar-content' style='width: 0%;'\u003e \u003c\/div\u003e \u003c\/div\u003e \u003cdiv class='jdgm-histogram__percentage'\u003e0%\u003c\/div\u003e \u003cdiv class='jdgm-histogram__frequency'\u003e(0)\u003c\/div\u003e \u003c\/div\u003e \u003cdiv class='jdgm-histogram__row' data-rating='3' data-frequency='0' data-percentage='0'\u003e \u003cdiv class='jdgm-histogram__star' role='button' aria-label=\"0% (0) reviews with 3 star rating\" tabindex='0' \u003e\u003cspan class='jdgm-star jdgm--on'\u003e\u003c\/span\u003e\u003cspan class='jdgm-star jdgm--on'\u003e\u003c\/span\u003e\u003cspan class='jdgm-star jdgm--on'\u003e\u003c\/span\u003e\u003cspan class='jdgm-star jdgm--off'\u003e\u003c\/span\u003e\u003cspan class='jdgm-star jdgm--off'\u003e\u003c\/span\u003e\u003c\/div\u003e \u003cdiv class='jdgm-histogram__bar'\u003e \u003cdiv class='jdgm-histogram__bar-content' style='width: 0%;'\u003e \u003c\/div\u003e \u003c\/div\u003e \u003cdiv class='jdgm-histogram__percentage'\u003e0%\u003c\/div\u003e \u003cdiv class='jdgm-histogram__frequency'\u003e(0)\u003c\/div\u003e \u003c\/div\u003e \u003cdiv class='jdgm-histogram__row' data-rating='2' data-frequency='0' data-percentage='0'\u003e \u003cdiv class='jdgm-histogram__star' role='button' aria-label=\"0% (0) reviews with 2 star rating\" tabindex='0' \u003e\u003cspan class='jdgm-star jdgm--on'\u003e\u003c\/span\u003e\u003cspan class='jdgm-star jdgm--on'\u003e\u003c\/span\u003e\u003cspan class='jdgm-star jdgm--off'\u003e\u003c\/span\u003e\u003cspan class='jdgm-star jdgm--off'\u003e\u003c\/span\u003e\u003cspan class='jdgm-star jdgm--off'\u003e\u003c\/span\u003e\u003c\/div\u003e \u003cdiv class='jdgm-histogram__bar'\u003e \u003cdiv class='jdgm-histogram__bar-content' style='width: 0%;'\u003e \u003c\/div\u003e \u003c\/div\u003e \u003cdiv class='jdgm-histogram__percentage'\u003e0%\u003c\/div\u003e \u003cdiv class='jdgm-histogram__frequency'\u003e(0)\u003c\/div\u003e \u003c\/div\u003e \u003cdiv class='jdgm-histogram__row' data-rating='1' data-frequency='0' data-percentage='0'\u003e \u003cdiv class='jdgm-histogram__star' role='button' aria-label=\"0% (0) reviews with 1 star rating\" tabindex='0' \u003e\u003cspan class='jdgm-star jdgm--on'\u003e\u003c\/span\u003e\u003cspan class='jdgm-star jdgm--off'\u003e\u003c\/span\u003e\u003cspan class='jdgm-star jdgm--off'\u003e\u003c\/span\u003e\u003cspan class='jdgm-star jdgm--off'\u003e\u003c\/span\u003e\u003cspan class='jdgm-star jdgm--off'\u003e\u003c\/span\u003e\u003c\/div\u003e \u003cdiv class='jdgm-histogram__bar'\u003e \u003cdiv class='jdgm-histogram__bar-content' style='width: 0%;'\u003e \u003c\/div\u003e \u003c\/div\u003e \u003cdiv class='jdgm-histogram__percentage'\u003e0%\u003c\/div\u003e \u003cdiv class='jdgm-histogram__frequency'\u003e(0)\u003c\/div\u003e \u003c\/div\u003e \u003cdiv class='jdgm-histogram__row jdgm-histogram__clear-filter' data-rating=null tabindex='0'\u003e\u003c\/div\u003e \u003c\/div\u003e \u003cdiv class='jdgm-rev-widg__sort-wrapper'\u003e\u003c\/div\u003e \u003c\/div\u003e \u003cdiv class='jdgm-rev-widg__body'\u003e \u003cdiv class='jdgm-rev-widg__reviews'\u003e\u003cdiv class='jdgm-rev jdgm-divider-top' data-verified-buyer='true' data-review-id='8c135989-ee8e-45b6-83e0-78a085d4002c' data-review-language='' data-product-title='SRC Restore Support Mini Shorts - Uterine Prolapse \u0026amp; Continence Treatment' data-product-url='\/products\/src-restore-support-shorts-uterine-prolapse-continence-treatment' data-thumb-up-count='0' data-thumb-down-count='0'\u003e \u003cdiv class='jdgm-rev__header'\u003e \u003cdiv class='jdgm-rev__icon' \u003e C \u003c\/div\u003e \u003cspan class='jdgm-rev__rating' data-score='5' tabindex='0' aria-label='5 star review' role='img'\u003e \u003cspan class='jdgm-star jdgm--on'\u003e\u003c\/span\u003e\u003cspan class='jdgm-star jdgm--on'\u003e\u003c\/span\u003e\u003cspan class='jdgm-star jdgm--on'\u003e\u003c\/span\u003e\u003cspan class='jdgm-star jdgm--on'\u003e\u003c\/span\u003e\u003cspan class='jdgm-star jdgm--on'\u003e\u003c\/span\u003e \u003c\/span\u003e \u003ctime class='jdgm-rev__timestamp jdgm-spinner' datetime='2026-01-21T01:44:16Z' data-content='2026-01-21 01:44:16 UTC'\u003e\u003c\/time\u003e \u003cdiv class='jdgm-rev__br'\u003e\u003c\/div\u003e \u003cspan class='jdgm-rev__buyer-badge-wrapper'\u003e \u003cspan class='jdgm-rev__buyer-badge'\u003e\u003c\/span\u003e \u003c\/span\u003e \u003cspan class='jdgm-rev__author-wrapper'\u003e \u003cspan class='jdgm-rev__author'\u003eCarolyn Allen\u003c\/span\u003e \u003cspan class='jdgm-rev__location' \u003e \u003c\/span\u003e \u003c\/span\u003e \u003c\/div\u003e \u003cdiv class='jdgm-rev__content'\u003e \u003cdiv class='jdgm-rev__custom-form'\u003e \u003c\/div\u003e \u003cb class='jdgm-rev__title'\u003eCompfy\u003c\/b\u003e \u003cdiv class='jdgm-rev__body'\u003e\u003cp\u003eMini shorts, support you and are comfortable to wear.\u003c\/p\u003e\u003c\/div\u003e \u003cdiv class='jdgm-rev__pics'\u003e \u003c\/div\u003e \u003cdiv class='jdgm-rev__vids'\u003e \u003c\/div\u003e \u003cdiv class='jdgm-rev__transparency-badge-wrapper'\u003e \u003cdiv class='jdgm-rev__transparency-badge' data-badge-type=review_collected_via_store_invitation\u003e\u003c\/div\u003e \u003c\/div\u003e \u003c\/div\u003e \u003cdiv class='jdgm-rev__actions'\u003e \u003cdiv class='jdgm-rev__social'\u003e\u003c\/div\u003e \u003cdiv class='jdgm-rev__votes'\u003e\u003c\/div\u003e \u003c\/div\u003e \u003cdiv class='jdgm-rev__reply'\u003e \u003cdiv class='jdgm-rev__replier-wrapper'\u003e \u003cb class='jdgm-rev__replier'\u003e\u003c\/b\u003e \u003c\/div\u003e \u003cdiv class='jdgm-rev__reply-content'\u003e\u003cp\u003eThank you for sharing, Carolyn. We're so glad you found the mini shorts supportive and comfortable to wear. 🙏\u003c\/p\u003e\u003c\/div\u003e \u003c\/div\u003e \u003c\/div\u003e\u003cdiv class='jdgm-rev jdgm-divider-top' data-verified-buyer='true' data-review-id='37cc0fe9-7a48-41c6-a273-6f1f1a522fc8' data-review-language='' data-product-title='SRC Restore Support Mini Shorts - Uterine Prolapse \u0026amp; Continence Treatment' data-product-url='\/products\/src-restore-support-shorts-uterine-prolapse-continence-treatment' data-thumb-up-count='0' data-thumb-down-count='0'\u003e \u003cdiv class='jdgm-rev__header'\u003e \u003cdiv class='jdgm-rev__icon' \u003e S \u003c\/div\u003e \u003cspan class='jdgm-rev__rating' data-score='5' tabindex='0' aria-label='5 star review' role='img'\u003e \u003cspan class='jdgm-star jdgm--on'\u003e\u003c\/span\u003e\u003cspan class='jdgm-star jdgm--on'\u003e\u003c\/span\u003e\u003cspan class='jdgm-star jdgm--on'\u003e\u003c\/span\u003e\u003cspan class='jdgm-star jdgm--on'\u003e\u003c\/span\u003e\u003cspan class='jdgm-star jdgm--on'\u003e\u003c\/span\u003e \u003c\/span\u003e \u003ctime class='jdgm-rev__timestamp jdgm-spinner' datetime='2025-04-11T08:32:37Z' data-content='2025-04-11 08:32:37 UTC'\u003e\u003c\/time\u003e \u003cdiv class='jdgm-rev__br'\u003e\u003c\/div\u003e \u003cspan class='jdgm-rev__buyer-badge-wrapper'\u003e \u003cspan class='jdgm-rev__buyer-badge'\u003e\u003c\/span\u003e \u003c\/span\u003e \u003cspan class='jdgm-rev__author-wrapper'\u003e \u003cspan class='jdgm-rev__author'\u003eSally R\u003c\/span\u003e \u003cspan class='jdgm-rev__location' \u003e \u003c\/span\u003e \u003c\/span\u003e \u003c\/div\u003e \u003cdiv class='jdgm-rev__content'\u003e \u003cdiv class='jdgm-rev__custom-form'\u003e \u003c\/div\u003e \u003cb class='jdgm-rev__title'\u003eSupport Mini Shorts\u003c\/b\u003e \u003cdiv class='jdgm-rev__body'\u003e\u003cp\u003eAwesome ~ heading to the website to purchase another pair\u003c\/p\u003e\u003c\/div\u003e \u003cdiv class='jdgm-rev__pics'\u003e \u003c\/div\u003e \u003cdiv class='jdgm-rev__vids'\u003e \u003c\/div\u003e \u003cdiv class='jdgm-rev__transparency-badge-wrapper'\u003e \u003cdiv class='jdgm-rev__transparency-badge' data-badge-type=review_collected_via_store_invitation\u003e\u003c\/div\u003e \u003c\/div\u003e \u003c\/div\u003e \u003cdiv class='jdgm-rev__actions'\u003e \u003cdiv class='jdgm-rev__social'\u003e\u003c\/div\u003e \u003cdiv class='jdgm-rev__votes'\u003e\u003c\/div\u003e \u003c\/div\u003e \u003cdiv class='jdgm-rev__reply'\u003e \u003cdiv class='jdgm-rev__replier-wrapper'\u003e \u003cb class='jdgm-rev__replier'\u003e\u003c\/b\u003e \u003c\/div\u003e \u003cdiv class='jdgm-rev__reply-content'\u003e\u003cp\u003eThank you so much for your lovely feedback, Sally. We’re so glad you’re loving the Support Mini Shorts and that you’re coming back for another pair. We really appreciate your support ❤️\u003c\/p\u003e\u003c\/div\u003e \u003c\/div\u003e \u003c\/div\u003e\u003c\/div\u003e \u003cdiv class='jdgm-paginate' data-per-page='10' data-url='https:\/\/api.judge.me\/reviews\/reviews_for_widget' style=\"display: none;\"\u003e\u003c\/div\u003e \u003c\/div\u003e \u003cdiv class='jdgm-rev-widg__paginate-spinner-wrapper'\u003e \u003cdiv class='jdgm-spinner'\u003e\u003c\/div\u003e \u003c\/div\u003e \u003c\/div\u003e"},"default_reviews_metafields":{"rating":{"scale_min":"1.0","scale_max":"5.0","value":"5.0"},"rating_count":2},"collections":[{"id":512654540989,"handle":"lastof26-10","title":"10%","updated_at":"2026-11-14T20:08:00+08:00","body_html":null,"published_at":"2026-10-12T19:06:42+08:00","sort_order":"best-selling","template_suffix":null,"disjunctive":false,"rules":[],"published_scope":"global"},{"id":261657460925,"handle":"buy","title":"Buy","updated_at":"2026-11-14T20:08:00+08:00","body_html":"\u003cp\u003eBrowse all of our pregnancy, labour \u0026amp; birth, postpartum and baby essentials here.\u003cbr\u003e\u003c\/p\u003e\n\u003cp\u003e\u003cspan\u003eYou can even buy now and pay later with Afterpay!\u003c\/span\u003e\u003c\/p\u003e","published_at":"2021-03-10T12:05:31+08:00","sort_order":"best-selling","template_suffix":"shop-all-collection","disjunctive":false,"rules":[],"published_scope":"global","image":{"created_at":"2024-05-06T11:59:42+08:00","alt":"Buy - The Birth Store","width":2048,"height":2048,"src":"\/\/www.thebirthstore.com.au\/cdn\/shop\/collections\/buy-964856.jpg?v=1714967982"}},{"id":293309022397,"handle":"clothing","title":"Clothing","updated_at":"2026-11-09T10:38:40+08:00","body_html":"","published_at":"2023-05-03T11:41:12+08:00","sort_order":"best-selling","template_suffix":"swaddles-collection","disjunctive":true,"rules":[],"published_scope":"global","image":{"created_at":"2024-05-06T11:59:52+08:00","alt":"Clothing - The Birth Store","width":676,"height":581,"src":"\/\/www.thebirthstore.com.au\/cdn\/shop\/collections\/clothing-483293.jpg?v=1714967992"}},{"id":281712591037,"handle":"pain-relief","title":"Pain Relief","updated_at":"2026-11-14T20:08:00+08:00","body_html":"","published_at":"2021-12-20T14:22:45+08:00","sort_order":"best-selling","template_suffix":"pain-relief-collection","disjunctive":false,"rules":[],"published_scope":"global","image":{"created_at":"2024-05-06T12:00:27+08:00","alt":"Pain Relief - The Birth Store","width":1365,"height":2048,"src":"\/\/www.thebirthstore.com.au\/cdn\/shop\/collections\/pain-relief-878865.jpg?v=1714968027"}},{"id":281712689341,"handle":"pelvic-floor-health","title":"Pelvic Floor Health","updated_at":"2026-11-12T20:07:50+08:00","body_html":"","published_at":"2021-12-20T14:23:41+08:00","sort_order":"best-selling","template_suffix":"swaddles-collection","disjunctive":false,"rules":[],"published_scope":"global","image":{"created_at":"2024-05-06T12:00:29+08:00","alt":"Pelvic Floor Health - The Birth Store","width":536,"height":589,"src":"\/\/www.thebirthstore.com.au\/cdn\/shop\/collections\/pelvic-floor-health-890736.jpg?v=1714968030"}},{"id":261658083517,"handle":"post-partum","title":"Postpartum","updated_at":"2026-11-14T20:08:00+08:00","body_html":"\u003cp\u003eShop your postpartum and hospital bag essentials below. Looking for something we don't currently stock? Please reach out and let us know.\u003cbr\u003e\u003c\/p\u003e\n\u003cp\u003e\u003cspan\u003eYou can even buy now and pay later with Afterpay!\u003c\/span\u003e\u003c\/p\u003e","published_at":"2021-03-10T12:33:47+08:00","sort_order":"best-selling","template_suffix":"postpartum-collection","disjunctive":false,"rules":[],"published_scope":"global","image":{"created_at":"2024-05-06T12:00:36+08:00","alt":"Postpartum - The Birth Store","width":611,"height":702,"src":"\/\/www.thebirthstore.com.au\/cdn\/shop\/collections\/postpartum-150119.jpg?v=1714968037"}},{"id":291456483517,"handle":"shop-all","title":"Shop All - Mum","updated_at":"2026-11-14T20:08:00+08:00","body_html":"","published_at":"2022-12-23T22:04:39+08:00","sort_order":"best-selling","template_suffix":"shop-all-collection","disjunctive":false,"rules":[],"published_scope":"global","image":{"created_at":"2024-05-06T12:00:54+08:00","alt":"Shop All - The Birth Store","width":1365,"height":2048,"src":"\/\/www.thebirthstore.com.au\/cdn\/shop\/collections\/shop-all-693176.jpg?v=1714968055"}},{"id":310045933757,"handle":"shop-all-sale","title":"Shop All Sale","updated_at":"2026-11-14T20:08:00+08:00","body_html":"","published_at":"2024-11-12T13:22:43+08:00","sort_order":"best-selling","template_suffix":"","disjunctive":true,"rules":[],"published_scope":"global","image":{"created_at":"2024-11-13T10:58:16+08:00","alt":"Shop All Sale - The Birth Store","width":2048,"height":1365,"src":"\/\/www.thebirthstore.com.au\/cdn\/shop\/collections\/shop-all-sale-297361.jpg?v=1731466697"}},{"id":292595433661,"handle":"support-clothing","title":"Support Clothing","updated_at":"2026-11-08T20:07:47+08:00","body_html":"Maternity, breastfeeding, supportive, postpartum clothing and more - we've got it all, or we will have soon! Keep an eye out for new arrivals and grab yourself some incredible must-have staple items.","published_at":"2023-02-20T12:49:47+08:00","sort_order":"best-selling","template_suffix":"swaddles-collection","disjunctive":false,"rules":[],"published_scope":"global","image":{"created_at":"2024-05-06T12:00:59+08:00","alt":"Support Clothing - The Birth Store","width":586,"height":879,"src":"\/\/www.thebirthstore.com.au\/cdn\/shop\/collections\/support-clothing-743676.jpg?v=1714968059"}}]}
{"item":{"id":7439747088573,"title":"SRC Pregnancy Shorts - Mini Over the Bump","handle":"src-pregnancy-short-mini-over-the-bump","description":"\u003cp\u003e\u003cmeta charset=\"utf-8\"\u003e\u003cspan\u003eThis product is stocked at a 3\u003c\/span\u003e\u003csup\u003erd\u003c\/sup\u003e\u003cspan\u003e party warehouse, if ordering with other products you’ll receive two packages. This product will have a turn around time of 10 days if pickup is selected on checkout. Any questions, please contact us \u003ca href=\"https:\/\/www.thebirthstore.com.au\/pages\/contact-us\" title=\"Contact Us\" target=\"_blank\"\u003ehere\u003c\/a\u003e.\u003c\/span\u003e\u003cbr\u003e\u003c\/p\u003e","published_at":"2023-03-13T14:11:23+08:00","created_at":"2023-02-13T22:46:50+08:00","vendor":"SRC Health","type":"Pregnancy Shorts","tags":["Maternity Clothing","Mum","Pain Relief","Pelvic Floor","Pregnancy","Support Clothing"],"price":19900,"price_min":19900,"price_max":19900,"available":true,"price_varies":false,"compare_at_price":null,"compare_at_price_min":0,"compare_at_price_max":0,"compare_at_price_varies":false,"variants":[{"id":42658981576893,"title":"XXS \/ Champagne","option1":"XXS","option2":"Champagne","option3":null,"sku":"","requires_shipping":true,"taxable":false,"featured_image":{"id":34641031102653,"product_id":7439747088573,"position":2,"created_at":"2024-05-06T12:00:45+08:00","updated_at":"2024-05-06T12:00:45+08:00","alt":"SRC Pregnancy Shorts - Mini Over the Bump - The Birth Store-SRC Health","width":1080,"height":1080,"src":"\/\/www.thebirthstore.com.au\/cdn\/shop\/files\/src-pregnancy-shorts-mini-over-the-bump-684263.jpg?v=1714968045","variant_ids":[42658981576893,42658981642429,42658981707965,42658981773501,42658981839037,42658981904573,42658981970109]},"available":true,"name":"SRC Pregnancy Shorts - Mini Over the Bump - XXS \/ Champagne","public_title":"XXS \/ Champagne","options":["XXS","Champagne"],"price":19900,"weight":0,"compare_at_price":null,"inventory_management":null,"barcode":"81576893","featured_media":{"alt":"SRC Pregnancy Shorts - Mini Over the Bump - The Birth Store-SRC Health","id":27007600132285,"position":2,"preview_image":{"aspect_ratio":1.0,"height":1080,"width":1080,"src":"\/\/www.thebirthstore.com.au\/cdn\/shop\/files\/src-pregnancy-shorts-mini-over-the-bump-684263.jpg?v=1714968045"}},"requires_selling_plan":false,"selling_plan_allocations":[],"quantity_rule":{"min":1,"max":null,"increment":1}},{"id":42658981609661,"title":"XXS \/ Black","option1":"XXS","option2":"Black","option3":null,"sku":"","requires_shipping":true,"taxable":false,"featured_image":{"id":34641031168189,"product_id":7439747088573,"position":3,"created_at":"2024-05-06T12:00:45+08:00","updated_at":"2024-05-06T12:00:45+08:00","alt":"SRC Pregnancy Shorts - Mini Over the Bump - The Birth Store-SRC Health","width":1080,"height":1080,"src":"\/\/www.thebirthstore.com.au\/cdn\/shop\/files\/src-pregnancy-shorts-mini-over-the-bump-667876.jpg?v=1714968045","variant_ids":[42658981609661,42658981675197,42658981740733,42658981806269,42658981871805,42658981937341,42658982002877]},"available":true,"name":"SRC Pregnancy Shorts - Mini Over the Bump - XXS \/ Black","public_title":"XXS \/ Black","options":["XXS","Black"],"price":19900,"weight":0,"compare_at_price":null,"inventory_management":null,"barcode":"81609661","featured_media":{"alt":"SRC Pregnancy Shorts - Mini Over the Bump - The Birth Store-SRC Health","id":27007600197821,"position":3,"preview_image":{"aspect_ratio":1.0,"height":1080,"width":1080,"src":"\/\/www.thebirthstore.com.au\/cdn\/shop\/files\/src-pregnancy-shorts-mini-over-the-bump-667876.jpg?v=1714968045"}},"requires_selling_plan":false,"selling_plan_allocations":[],"quantity_rule":{"min":1,"max":null,"increment":1}},{"id":42658981642429,"title":"XS \/ Champagne","option1":"XS","option2":"Champagne","option3":null,"sku":"","requires_shipping":true,"taxable":false,"featured_image":{"id":34641031102653,"product_id":7439747088573,"position":2,"created_at":"2024-05-06T12:00:45+08:00","updated_at":"2024-05-06T12:00:45+08:00","alt":"SRC Pregnancy Shorts - Mini Over the Bump - The Birth Store-SRC Health","width":1080,"height":1080,"src":"\/\/www.thebirthstore.com.au\/cdn\/shop\/files\/src-pregnancy-shorts-mini-over-the-bump-684263.jpg?v=1714968045","variant_ids":[42658981576893,42658981642429,42658981707965,42658981773501,42658981839037,42658981904573,42658981970109]},"available":true,"name":"SRC Pregnancy Shorts - Mini Over the Bump - XS \/ Champagne","public_title":"XS \/ Champagne","options":["XS","Champagne"],"price":19900,"weight":0,"compare_at_price":null,"inventory_management":null,"barcode":"81642429","featured_media":{"alt":"SRC Pregnancy Shorts - Mini Over the Bump - The Birth Store-SRC Health","id":27007600132285,"position":2,"preview_image":{"aspect_ratio":1.0,"height":1080,"width":1080,"src":"\/\/www.thebirthstore.com.au\/cdn\/shop\/files\/src-pregnancy-shorts-mini-over-the-bump-684263.jpg?v=1714968045"}},"requires_selling_plan":false,"selling_plan_allocations":[],"quantity_rule":{"min":1,"max":null,"increment":1}},{"id":42658981675197,"title":"XS \/ Black","option1":"XS","option2":"Black","option3":null,"sku":"","requires_shipping":true,"taxable":false,"featured_image":{"id":34641031168189,"product_id":7439747088573,"position":3,"created_at":"2024-05-06T12:00:45+08:00","updated_at":"2024-05-06T12:00:45+08:00","alt":"SRC Pregnancy Shorts - Mini Over the Bump - The Birth Store-SRC Health","width":1080,"height":1080,"src":"\/\/www.thebirthstore.com.au\/cdn\/shop\/files\/src-pregnancy-shorts-mini-over-the-bump-667876.jpg?v=1714968045","variant_ids":[42658981609661,42658981675197,42658981740733,42658981806269,42658981871805,42658981937341,42658982002877]},"available":true,"name":"SRC Pregnancy Shorts - Mini Over the Bump - XS \/ Black","public_title":"XS \/ Black","options":["XS","Black"],"price":19900,"weight":0,"compare_at_price":null,"inventory_management":null,"barcode":"81675197","featured_media":{"alt":"SRC Pregnancy Shorts - Mini Over the Bump - The Birth Store-SRC Health","id":27007600197821,"position":3,"preview_image":{"aspect_ratio":1.0,"height":1080,"width":1080,"src":"\/\/www.thebirthstore.com.au\/cdn\/shop\/files\/src-pregnancy-shorts-mini-over-the-bump-667876.jpg?v=1714968045"}},"requires_selling_plan":false,"selling_plan_allocations":[],"quantity_rule":{"min":1,"max":null,"increment":1}},{"id":42658981707965,"title":"S \/ Champagne","option1":"S","option2":"Champagne","option3":null,"sku":"","requires_shipping":true,"taxable":false,"featured_image":{"id":34641031102653,"product_id":7439747088573,"position":2,"created_at":"2024-05-06T12:00:45+08:00","updated_at":"2024-05-06T12:00:45+08:00","alt":"SRC Pregnancy Shorts - Mini Over the Bump - The Birth Store-SRC Health","width":1080,"height":1080,"src":"\/\/www.thebirthstore.com.au\/cdn\/shop\/files\/src-pregnancy-shorts-mini-over-the-bump-684263.jpg?v=1714968045","variant_ids":[42658981576893,42658981642429,42658981707965,42658981773501,42658981839037,42658981904573,42658981970109]},"available":true,"name":"SRC Pregnancy Shorts - Mini Over the Bump - S \/ Champagne","public_title":"S \/ Champagne","options":["S","Champagne"],"price":19900,"weight":0,"compare_at_price":null,"inventory_management":null,"barcode":"81707965","featured_media":{"alt":"SRC Pregnancy Shorts - Mini Over the Bump - The Birth Store-SRC Health","id":27007600132285,"position":2,"preview_image":{"aspect_ratio":1.0,"height":1080,"width":1080,"src":"\/\/www.thebirthstore.com.au\/cdn\/shop\/files\/src-pregnancy-shorts-mini-over-the-bump-684263.jpg?v=1714968045"}},"requires_selling_plan":false,"selling_plan_allocations":[],"quantity_rule":{"min":1,"max":null,"increment":1}},{"id":42658981740733,"title":"S \/ Black","option1":"S","option2":"Black","option3":null,"sku":"","requires_shipping":true,"taxable":false,"featured_image":{"id":34641031168189,"product_id":7439747088573,"position":3,"created_at":"2024-05-06T12:00:45+08:00","updated_at":"2024-05-06T12:00:45+08:00","alt":"SRC Pregnancy Shorts - Mini Over the Bump - The Birth Store-SRC Health","width":1080,"height":1080,"src":"\/\/www.thebirthstore.com.au\/cdn\/shop\/files\/src-pregnancy-shorts-mini-over-the-bump-667876.jpg?v=1714968045","variant_ids":[42658981609661,42658981675197,42658981740733,42658981806269,42658981871805,42658981937341,42658982002877]},"available":true,"name":"SRC Pregnancy Shorts - Mini Over the Bump - S \/ Black","public_title":"S \/ Black","options":["S","Black"],"price":19900,"weight":0,"compare_at_price":null,"inventory_management":null,"barcode":"81740733","featured_media":{"alt":"SRC Pregnancy Shorts - Mini Over the Bump - The Birth Store-SRC Health","id":27007600197821,"position":3,"preview_image":{"aspect_ratio":1.0,"height":1080,"width":1080,"src":"\/\/www.thebirthstore.com.au\/cdn\/shop\/files\/src-pregnancy-shorts-mini-over-the-bump-667876.jpg?v=1714968045"}},"requires_selling_plan":false,"selling_plan_allocations":[],"quantity_rule":{"min":1,"max":null,"increment":1}},{"id":42658981773501,"title":"M \/ Champagne","option1":"M","option2":"Champagne","option3":null,"sku":"","requires_shipping":true,"taxable":false,"featured_image":{"id":34641031102653,"product_id":7439747088573,"position":2,"created_at":"2024-05-06T12:00:45+08:00","updated_at":"2024-05-06T12:00:45+08:00","alt":"SRC Pregnancy Shorts - Mini Over the Bump - The Birth Store-SRC Health","width":1080,"height":1080,"src":"\/\/www.thebirthstore.com.au\/cdn\/shop\/files\/src-pregnancy-shorts-mini-over-the-bump-684263.jpg?v=1714968045","variant_ids":[42658981576893,42658981642429,42658981707965,42658981773501,42658981839037,42658981904573,42658981970109]},"available":true,"name":"SRC Pregnancy Shorts - Mini Over the Bump - M \/ Champagne","public_title":"M \/ Champagne","options":["M","Champagne"],"price":19900,"weight":0,"compare_at_price":null,"inventory_management":null,"barcode":"81773501","featured_media":{"alt":"SRC Pregnancy Shorts - Mini Over the Bump - The Birth Store-SRC Health","id":27007600132285,"position":2,"preview_image":{"aspect_ratio":1.0,"height":1080,"width":1080,"src":"\/\/www.thebirthstore.com.au\/cdn\/shop\/files\/src-pregnancy-shorts-mini-over-the-bump-684263.jpg?v=1714968045"}},"requires_selling_plan":false,"selling_plan_allocations":[],"quantity_rule":{"min":1,"max":null,"increment":1}},{"id":42658981806269,"title":"M \/ Black","option1":"M","option2":"Black","option3":null,"sku":"","requires_shipping":true,"taxable":false,"featured_image":{"id":34641031168189,"product_id":7439747088573,"position":3,"created_at":"2024-05-06T12:00:45+08:00","updated_at":"2024-05-06T12:00:45+08:00","alt":"SRC Pregnancy Shorts - Mini Over the Bump - The Birth Store-SRC Health","width":1080,"height":1080,"src":"\/\/www.thebirthstore.com.au\/cdn\/shop\/files\/src-pregnancy-shorts-mini-over-the-bump-667876.jpg?v=1714968045","variant_ids":[42658981609661,42658981675197,42658981740733,42658981806269,42658981871805,42658981937341,42658982002877]},"available":true,"name":"SRC Pregnancy Shorts - Mini Over the Bump - M \/ Black","public_title":"M \/ Black","options":["M","Black"],"price":19900,"weight":0,"compare_at_price":null,"inventory_management":null,"barcode":"81806269","featured_media":{"alt":"SRC Pregnancy Shorts - Mini Over the Bump - The Birth Store-SRC Health","id":27007600197821,"position":3,"preview_image":{"aspect_ratio":1.0,"height":1080,"width":1080,"src":"\/\/www.thebirthstore.com.au\/cdn\/shop\/files\/src-pregnancy-shorts-mini-over-the-bump-667876.jpg?v=1714968045"}},"requires_selling_plan":false,"selling_plan_allocations":[],"quantity_rule":{"min":1,"max":null,"increment":1}},{"id":42658981839037,"title":"L \/ Champagne","option1":"L","option2":"Champagne","option3":null,"sku":"","requires_shipping":true,"taxable":false,"featured_image":{"id":34641031102653,"product_id":7439747088573,"position":2,"created_at":"2024-05-06T12:00:45+08:00","updated_at":"2024-05-06T12:00:45+08:00","alt":"SRC Pregnancy Shorts - Mini Over the Bump - The Birth Store-SRC Health","width":1080,"height":1080,"src":"\/\/www.thebirthstore.com.au\/cdn\/shop\/files\/src-pregnancy-shorts-mini-over-the-bump-684263.jpg?v=1714968045","variant_ids":[42658981576893,42658981642429,42658981707965,42658981773501,42658981839037,42658981904573,42658981970109]},"available":true,"name":"SRC Pregnancy Shorts - Mini Over the Bump - L \/ Champagne","public_title":"L \/ Champagne","options":["L","Champagne"],"price":19900,"weight":0,"compare_at_price":null,"inventory_management":null,"barcode":"81839037","featured_media":{"alt":"SRC Pregnancy Shorts - Mini Over the Bump - The Birth Store-SRC Health","id":27007600132285,"position":2,"preview_image":{"aspect_ratio":1.0,"height":1080,"width":1080,"src":"\/\/www.thebirthstore.com.au\/cdn\/shop\/files\/src-pregnancy-shorts-mini-over-the-bump-684263.jpg?v=1714968045"}},"requires_selling_plan":false,"selling_plan_allocations":[],"quantity_rule":{"min":1,"max":null,"increment":1}},{"id":42658981871805,"title":"L \/ Black","option1":"L","option2":"Black","option3":null,"sku":"","requires_shipping":true,"taxable":false,"featured_image":{"id":34641031168189,"product_id":7439747088573,"position":3,"created_at":"2024-05-06T12:00:45+08:00","updated_at":"2024-05-06T12:00:45+08:00","alt":"SRC Pregnancy Shorts - Mini Over the Bump - The Birth Store-SRC Health","width":1080,"height":1080,"src":"\/\/www.thebirthstore.com.au\/cdn\/shop\/files\/src-pregnancy-shorts-mini-over-the-bump-667876.jpg?v=1714968045","variant_ids":[42658981609661,42658981675197,42658981740733,42658981806269,42658981871805,42658981937341,42658982002877]},"available":true,"name":"SRC Pregnancy Shorts - Mini Over the Bump - L \/ Black","public_title":"L \/ Black","options":["L","Black"],"price":19900,"weight":0,"compare_at_price":null,"inventory_management":null,"barcode":"81871805","featured_media":{"alt":"SRC Pregnancy Shorts - Mini Over the Bump - The Birth Store-SRC Health","id":27007600197821,"position":3,"preview_image":{"aspect_ratio":1.0,"height":1080,"width":1080,"src":"\/\/www.thebirthstore.com.au\/cdn\/shop\/files\/src-pregnancy-shorts-mini-over-the-bump-667876.jpg?v=1714968045"}},"requires_selling_plan":false,"selling_plan_allocations":[],"quantity_rule":{"min":1,"max":null,"increment":1}},{"id":42658981904573,"title":"XL \/ Champagne","option1":"XL","option2":"Champagne","option3":null,"sku":"","requires_shipping":true,"taxable":false,"featured_image":{"id":34641031102653,"product_id":7439747088573,"position":2,"created_at":"2024-05-06T12:00:45+08:00","updated_at":"2024-05-06T12:00:45+08:00","alt":"SRC Pregnancy Shorts - Mini Over the Bump - The Birth Store-SRC Health","width":1080,"height":1080,"src":"\/\/www.thebirthstore.com.au\/cdn\/shop\/files\/src-pregnancy-shorts-mini-over-the-bump-684263.jpg?v=1714968045","variant_ids":[42658981576893,42658981642429,42658981707965,42658981773501,42658981839037,42658981904573,42658981970109]},"available":true,"name":"SRC Pregnancy Shorts - Mini Over the Bump - XL \/ Champagne","public_title":"XL \/ Champagne","options":["XL","Champagne"],"price":19900,"weight":0,"compare_at_price":null,"inventory_management":null,"barcode":"81904573","featured_media":{"alt":"SRC Pregnancy Shorts - Mini Over the Bump - The Birth Store-SRC Health","id":27007600132285,"position":2,"preview_image":{"aspect_ratio":1.0,"height":1080,"width":1080,"src":"\/\/www.thebirthstore.com.au\/cdn\/shop\/files\/src-pregnancy-shorts-mini-over-the-bump-684263.jpg?v=1714968045"}},"requires_selling_plan":false,"selling_plan_allocations":[],"quantity_rule":{"min":1,"max":null,"increment":1}},{"id":42658981937341,"title":"XL \/ Black","option1":"XL","option2":"Black","option3":null,"sku":"","requires_shipping":true,"taxable":false,"featured_image":{"id":34641031168189,"product_id":7439747088573,"position":3,"created_at":"2024-05-06T12:00:45+08:00","updated_at":"2024-05-06T12:00:45+08:00","alt":"SRC Pregnancy Shorts - Mini Over the Bump - The Birth Store-SRC Health","width":1080,"height":1080,"src":"\/\/www.thebirthstore.com.au\/cdn\/shop\/files\/src-pregnancy-shorts-mini-over-the-bump-667876.jpg?v=1714968045","variant_ids":[42658981609661,42658981675197,42658981740733,42658981806269,42658981871805,42658981937341,42658982002877]},"available":true,"name":"SRC Pregnancy Shorts - Mini Over the Bump - XL \/ Black","public_title":"XL \/ Black","options":["XL","Black"],"price":19900,"weight":0,"compare_at_price":null,"inventory_management":null,"barcode":"81937341","featured_media":{"alt":"SRC Pregnancy Shorts - Mini Over the Bump - The Birth Store-SRC Health","id":27007600197821,"position":3,"preview_image":{"aspect_ratio":1.0,"height":1080,"width":1080,"src":"\/\/www.thebirthstore.com.au\/cdn\/shop\/files\/src-pregnancy-shorts-mini-over-the-bump-667876.jpg?v=1714968045"}},"requires_selling_plan":false,"selling_plan_allocations":[],"quantity_rule":{"min":1,"max":null,"increment":1}},{"id":42658981970109,"title":"XXL \/ Champagne","option1":"XXL","option2":"Champagne","option3":null,"sku":"","requires_shipping":true,"taxable":false,"featured_image":{"id":34641031102653,"product_id":7439747088573,"position":2,"created_at":"2024-05-06T12:00:45+08:00","updated_at":"2024-05-06T12:00:45+08:00","alt":"SRC Pregnancy Shorts - Mini Over the Bump - The Birth Store-SRC Health","width":1080,"height":1080,"src":"\/\/www.thebirthstore.com.au\/cdn\/shop\/files\/src-pregnancy-shorts-mini-over-the-bump-684263.jpg?v=1714968045","variant_ids":[42658981576893,42658981642429,42658981707965,42658981773501,42658981839037,42658981904573,42658981970109]},"available":true,"name":"SRC Pregnancy Shorts - Mini Over the Bump - XXL \/ Champagne","public_title":"XXL \/ Champagne","options":["XXL","Champagne"],"price":19900,"weight":0,"compare_at_price":null,"inventory_management":null,"barcode":"81970109","featured_media":{"alt":"SRC Pregnancy Shorts - Mini Over the Bump - The Birth Store-SRC Health","id":27007600132285,"position":2,"preview_image":{"aspect_ratio":1.0,"height":1080,"width":1080,"src":"\/\/www.thebirthstore.com.au\/cdn\/shop\/files\/src-pregnancy-shorts-mini-over-the-bump-684263.jpg?v=1714968045"}},"requires_selling_plan":false,"selling_plan_allocations":[],"quantity_rule":{"min":1,"max":null,"increment":1}},{"id":42658982002877,"title":"XXL \/ Black","option1":"XXL","option2":"Black","option3":null,"sku":"","requires_shipping":true,"taxable":false,"featured_image":{"id":34641031168189,"product_id":7439747088573,"position":3,"created_at":"2024-05-06T12:00:45+08:00","updated_at":"2024-05-06T12:00:45+08:00","alt":"SRC Pregnancy Shorts - Mini Over the Bump - The Birth Store-SRC Health","width":1080,"height":1080,"src":"\/\/www.thebirthstore.com.au\/cdn\/shop\/files\/src-pregnancy-shorts-mini-over-the-bump-667876.jpg?v=1714968045","variant_ids":[42658981609661,42658981675197,42658981740733,42658981806269,42658981871805,42658981937341,42658982002877]},"available":true,"name":"SRC Pregnancy Shorts - Mini Over the Bump - XXL \/ Black","public_title":"XXL \/ Black","options":["XXL","Black"],"price":19900,"weight":0,"compare_at_price":null,"inventory_management":null,"barcode":"82002877","featured_media":{"alt":"SRC Pregnancy Shorts - Mini Over the Bump - The Birth Store-SRC Health","id":27007600197821,"position":3,"preview_image":{"aspect_ratio":1.0,"height":1080,"width":1080,"src":"\/\/www.thebirthstore.com.au\/cdn\/shop\/files\/src-pregnancy-shorts-mini-over-the-bump-667876.jpg?v=1714968045"}},"requires_selling_plan":false,"selling_plan_allocations":[],"quantity_rule":{"min":1,"max":null,"increment":1}}],"images":["\/\/www.thebirthstore.com.au\/cdn\/shop\/files\/src-pregnancy-shorts-mini-over-the-bump-853155.jpg?v=1714968045","\/\/www.thebirthstore.com.au\/cdn\/shop\/files\/src-pregnancy-shorts-mini-over-the-bump-684263.jpg?v=1714968045","\/\/www.thebirthstore.com.au\/cdn\/shop\/files\/src-pregnancy-shorts-mini-over-the-bump-667876.jpg?v=1714968045","\/\/www.thebirthstore.com.au\/cdn\/shop\/files\/src-pregnancy-shorts-mini-over-the-bump-240451.jpg?v=1714968046","\/\/www.thebirthstore.com.au\/cdn\/shop\/files\/src-pregnancy-shorts-mini-over-the-bump-570673.png?v=1714968046"],"featured_image":"\/\/www.thebirthstore.com.au\/cdn\/shop\/files\/src-pregnancy-shorts-mini-over-the-bump-853155.jpg?v=1714968045","options":["Size","Colour"],"media":[{"alt":"SRC Pregnancy Shorts - Mini Over the Bump - The Birth Store-SRC Health","id":27007600001213,"position":1,"preview_image":{"aspect_ratio":1.0,"height":1080,"width":1080,"src":"\/\/www.thebirthstore.com.au\/cdn\/shop\/files\/src-pregnancy-shorts-mini-over-the-bump-853155.jpg?v=1714968045"},"aspect_ratio":1.0,"height":1080,"media_type":"image","src":"\/\/www.thebirthstore.com.au\/cdn\/shop\/files\/src-pregnancy-shorts-mini-over-the-bump-853155.jpg?v=1714968045","width":1080},{"alt":"SRC Pregnancy Shorts - Mini Over the Bump - The Birth Store-SRC Health","id":27007600132285,"position":2,"preview_image":{"aspect_ratio":1.0,"height":1080,"width":1080,"src":"\/\/www.thebirthstore.com.au\/cdn\/shop\/files\/src-pregnancy-shorts-mini-over-the-bump-684263.jpg?v=1714968045"},"aspect_ratio":1.0,"height":1080,"media_type":"image","src":"\/\/www.thebirthstore.com.au\/cdn\/shop\/files\/src-pregnancy-shorts-mini-over-the-bump-684263.jpg?v=1714968045","width":1080},{"alt":"SRC Pregnancy Shorts - Mini Over the Bump - The Birth Store-SRC Health","id":27007600197821,"position":3,"preview_image":{"aspect_ratio":1.0,"height":1080,"width":1080,"src":"\/\/www.thebirthstore.com.au\/cdn\/shop\/files\/src-pregnancy-shorts-mini-over-the-bump-667876.jpg?v=1714968045"},"aspect_ratio":1.0,"height":1080,"media_type":"image","src":"\/\/www.thebirthstore.com.au\/cdn\/shop\/files\/src-pregnancy-shorts-mini-over-the-bump-667876.jpg?v=1714968045","width":1080},{"alt":"SRC Pregnancy Shorts - Mini Over the Bump - The Birth Store-SRC Health","id":27007600230589,"position":4,"preview_image":{"aspect_ratio":1.0,"height":1080,"width":1080,"src":"\/\/www.thebirthstore.com.au\/cdn\/shop\/files\/src-pregnancy-shorts-mini-over-the-bump-240451.jpg?v=1714968046"},"aspect_ratio":1.0,"height":1080,"media_type":"image","src":"\/\/www.thebirthstore.com.au\/cdn\/shop\/files\/src-pregnancy-shorts-mini-over-the-bump-240451.jpg?v=1714968046","width":1080},{"alt":"SRC Pregnancy Shorts - Mini Over the Bump - The Birth Store-SRC Health","id":27007600263357,"position":5,"preview_image":{"aspect_ratio":1.582,"height":948,"width":1500,"src":"\/\/www.thebirthstore.com.au\/cdn\/shop\/files\/src-pregnancy-shorts-mini-over-the-bump-570673.png?v=1714968046"},"aspect_ratio":1.582,"height":948,"media_type":"image","src":"\/\/www.thebirthstore.com.au\/cdn\/shop\/files\/src-pregnancy-shorts-mini-over-the-bump-570673.png?v=1714968046","width":1500}],"requires_selling_plan":false,"selling_plan_groups":[],"content":"\u003cp\u003e\u003cmeta charset=\"utf-8\"\u003e\u003cspan\u003eThis product is stocked at a 3\u003c\/span\u003e\u003csup\u003erd\u003c\/sup\u003e\u003cspan\u003e party warehouse, if ordering with other products you’ll receive two packages. This product will have a turn around time of 10 days if pickup is selected on checkout. Any questions, please contact us \u003ca href=\"https:\/\/www.thebirthstore.com.au\/pages\/contact-us\" title=\"Contact Us\" target=\"_blank\"\u003ehere\u003c\/a\u003e.\u003c\/span\u003e\u003cbr\u003e\u003c\/p\u003e"},"options":[{"name":"Size","position":1,"values":["XXS","XS","S","M","L","XL","XXL"]},{"name":"Colour","position":2,"values":["Champagne","Black"]}],"custom_metafields":{},"metafields":{"badge":"\u003cdiv style='display:none' class='jdgm-prev-badge' data-average-rating='0.00' data-number-of-reviews='0' data-number-of-questions='0'\u003e \u003cspan class='jdgm-prev-badge__stars' data-score='0.00' tabindex='0' aria-label='0.00 stars' role='button'\u003e \u003cspan class='jdgm-star jdgm--off'\u003e\u003c\/span\u003e\u003cspan class='jdgm-star jdgm--off'\u003e\u003c\/span\u003e\u003cspan class='jdgm-star jdgm--off'\u003e\u003c\/span\u003e\u003cspan class='jdgm-star jdgm--off'\u003e\u003c\/span\u003e\u003cspan class='jdgm-star jdgm--off'\u003e\u003c\/span\u003e \u003c\/span\u003e \u003cspan class='jdgm-prev-badge__text'\u003e No reviews \u003c\/span\u003e \u003c\/div\u003e","widget":"\u003cdiv class='jdgm-rev-widg' data-updated-at='2025-06-13T16:12:10Z' data-average-rating='0.00' data-number-of-reviews='0' data-number-of-questions='0'\u003e \u003cstyle class='jdgm-temp-hiding-style'\u003e.jdgm-rev-widg{ display: none }\u003c\/style\u003e \u003cdiv class='jdgm-rev-widg__header'\u003e \u003ch2 class='jdgm-rev-widg__title'\u003eCustomer Reviews\u003c\/h2\u003e \u003cdiv class='jdgm-rev-widg__summary'\u003e \u003cdiv class='jdgm-rev-widg__summary-stars' aria-label='Average rating is 0.00 stars' role='img'\u003e \u003cspan class='jdgm-star jdgm--off'\u003e\u003c\/span\u003e\u003cspan class='jdgm-star jdgm--off'\u003e\u003c\/span\u003e\u003cspan class='jdgm-star jdgm--off'\u003e\u003c\/span\u003e\u003cspan class='jdgm-star jdgm--off'\u003e\u003c\/span\u003e\u003cspan class='jdgm-star jdgm--off'\u003e\u003c\/span\u003e \u003c\/div\u003e \u003cdiv class='jdgm-rev-widg__summary-text'\u003eBe the first to write a review\u003c\/div\u003e \u003c\/div\u003e \u003ca style='display: none' href='#' class='jdgm-write-rev-link' role='button'\u003eWrite a review\u003c\/a\u003e \u003cdiv class='jdgm-histogram jdgm-temp-hidden'\u003e \u003cdiv class='jdgm-histogram__row' data-rating='5' data-frequency='0' data-percentage='0'\u003e \u003cdiv class='jdgm-histogram__star' role='button' aria-label=\"0% (0) reviews with 5 star rating\" tabindex='0' \u003e\u003cspan class='jdgm-star jdgm--on'\u003e\u003c\/span\u003e\u003cspan class='jdgm-star jdgm--on'\u003e\u003c\/span\u003e\u003cspan class='jdgm-star jdgm--on'\u003e\u003c\/span\u003e\u003cspan class='jdgm-star jdgm--on'\u003e\u003c\/span\u003e\u003cspan class='jdgm-star jdgm--on'\u003e\u003c\/span\u003e\u003c\/div\u003e \u003cdiv class='jdgm-histogram__bar'\u003e \u003cdiv class='jdgm-histogram__bar-content' style='width: 0%;'\u003e \u003c\/div\u003e \u003c\/div\u003e \u003cdiv class='jdgm-histogram__percentage'\u003e0%\u003c\/div\u003e \u003cdiv class='jdgm-histogram__frequency'\u003e(0)\u003c\/div\u003e \u003c\/div\u003e \u003cdiv class='jdgm-histogram__row' data-rating='4' data-frequency='0' data-percentage='0'\u003e \u003cdiv class='jdgm-histogram__star' role='button' aria-label=\"0% (0) reviews with 4 star rating\" tabindex='0' \u003e\u003cspan class='jdgm-star jdgm--on'\u003e\u003c\/span\u003e\u003cspan class='jdgm-star jdgm--on'\u003e\u003c\/span\u003e\u003cspan class='jdgm-star jdgm--on'\u003e\u003c\/span\u003e\u003cspan class='jdgm-star jdgm--on'\u003e\u003c\/span\u003e\u003cspan class='jdgm-star jdgm--off'\u003e\u003c\/span\u003e\u003c\/div\u003e \u003cdiv class='jdgm-histogram__bar'\u003e \u003cdiv class='jdgm-histogram__bar-content' style='width: 0%;'\u003e \u003c\/div\u003e \u003c\/div\u003e \u003cdiv class='jdgm-histogram__percentage'\u003e0%\u003c\/div\u003e \u003cdiv class='jdgm-histogram__frequency'\u003e(0)\u003c\/div\u003e \u003c\/div\u003e \u003cdiv class='jdgm-histogram__row' data-rating='3' data-frequency='0' data-percentage='0'\u003e \u003cdiv class='jdgm-histogram__star' role='button' aria-label=\"0% (0) reviews with 3 star rating\" tabindex='0' \u003e\u003cspan class='jdgm-star jdgm--on'\u003e\u003c\/span\u003e\u003cspan class='jdgm-star jdgm--on'\u003e\u003c\/span\u003e\u003cspan class='jdgm-star jdgm--on'\u003e\u003c\/span\u003e\u003cspan class='jdgm-star jdgm--off'\u003e\u003c\/span\u003e\u003cspan class='jdgm-star jdgm--off'\u003e\u003c\/span\u003e\u003c\/div\u003e \u003cdiv class='jdgm-histogram__bar'\u003e \u003cdiv class='jdgm-histogram__bar-content' style='width: 0%;'\u003e \u003c\/div\u003e \u003c\/div\u003e \u003cdiv class='jdgm-histogram__percentage'\u003e0%\u003c\/div\u003e \u003cdiv class='jdgm-histogram__frequency'\u003e(0)\u003c\/div\u003e \u003c\/div\u003e \u003cdiv class='jdgm-histogram__row' data-rating='2' data-frequency='0' data-percentage='0'\u003e \u003cdiv class='jdgm-histogram__star' role='button' aria-label=\"0% (0) reviews with 2 star rating\" tabindex='0' \u003e\u003cspan class='jdgm-star jdgm--on'\u003e\u003c\/span\u003e\u003cspan class='jdgm-star jdgm--on'\u003e\u003c\/span\u003e\u003cspan class='jdgm-star jdgm--off'\u003e\u003c\/span\u003e\u003cspan class='jdgm-star jdgm--off'\u003e\u003c\/span\u003e\u003cspan class='jdgm-star jdgm--off'\u003e\u003c\/span\u003e\u003c\/div\u003e \u003cdiv class='jdgm-histogram__bar'\u003e \u003cdiv class='jdgm-histogram__bar-content' style='width: 0%;'\u003e \u003c\/div\u003e \u003c\/div\u003e \u003cdiv class='jdgm-histogram__percentage'\u003e0%\u003c\/div\u003e \u003cdiv class='jdgm-histogram__frequency'\u003e(0)\u003c\/div\u003e \u003c\/div\u003e \u003cdiv class='jdgm-histogram__row' data-rating='1' data-frequency='0' data-percentage='0'\u003e \u003cdiv class='jdgm-histogram__star' role='button' aria-label=\"0% (0) reviews with 1 star rating\" tabindex='0' \u003e\u003cspan class='jdgm-star jdgm--on'\u003e\u003c\/span\u003e\u003cspan class='jdgm-star jdgm--off'\u003e\u003c\/span\u003e\u003cspan class='jdgm-star jdgm--off'\u003e\u003c\/span\u003e\u003cspan class='jdgm-star jdgm--off'\u003e\u003c\/span\u003e\u003cspan class='jdgm-star jdgm--off'\u003e\u003c\/span\u003e\u003c\/div\u003e \u003cdiv class='jdgm-histogram__bar'\u003e \u003cdiv class='jdgm-histogram__bar-content' style='width: 0%;'\u003e \u003c\/div\u003e \u003c\/div\u003e \u003cdiv class='jdgm-histogram__percentage'\u003e0%\u003c\/div\u003e \u003cdiv class='jdgm-histogram__frequency'\u003e(0)\u003c\/div\u003e \u003c\/div\u003e \u003cdiv class='jdgm-histogram__row jdgm-histogram__clear-filter' data-rating=null tabindex='0'\u003e\u003c\/div\u003e \u003c\/div\u003e \u003cdiv class='jdgm-rev-widg__sort-wrapper'\u003e\u003c\/div\u003e \u003c\/div\u003e \u003cdiv class='jdgm-rev-widg__body'\u003e \u003cdiv class='jdgm-rev-widg__reviews'\u003e\u003c\/div\u003e \u003cdiv class='jdgm-paginate' data-per-page='10' data-url='https:\/\/api.judge.me\/reviews\/reviews_for_widget' style=\"display: none;\"\u003e\u003c\/div\u003e \u003c\/div\u003e \u003cdiv class='jdgm-rev-widg__paginate-spinner-wrapper'\u003e \u003cdiv class='jdgm-spinner'\u003e\u003c\/div\u003e \u003c\/div\u003e \u003c\/div\u003e"},"default_reviews_metafields":{},"collections":[{"id":512654540989,"handle":"lastof26-10","title":"10%","updated_at":"2026-11-14T20:08:00+08:00","body_html":null,"published_at":"2026-10-12T19:06:42+08:00","sort_order":"best-selling","template_suffix":null,"disjunctive":false,"rules":[],"published_scope":"global"},{"id":261657460925,"handle":"buy","title":"Buy","updated_at":"2026-11-14T20:08:00+08:00","body_html":"\u003cp\u003eBrowse all of our pregnancy, labour \u0026amp; birth, postpartum and baby essentials here.\u003cbr\u003e\u003c\/p\u003e\n\u003cp\u003e\u003cspan\u003eYou can even buy now and pay later with Afterpay!\u003c\/span\u003e\u003c\/p\u003e","published_at":"2021-03-10T12:05:31+08:00","sort_order":"best-selling","template_suffix":"shop-all-collection","disjunctive":false,"rules":[],"published_scope":"global","image":{"created_at":"2024-05-06T11:59:42+08:00","alt":"Buy - The Birth Store","width":2048,"height":2048,"src":"\/\/www.thebirthstore.com.au\/cdn\/shop\/collections\/buy-964856.jpg?v=1714967982"}},{"id":293309022397,"handle":"clothing","title":"Clothing","updated_at":"2026-11-09T10:38:40+08:00","body_html":"","published_at":"2023-05-03T11:41:12+08:00","sort_order":"best-selling","template_suffix":"swaddles-collection","disjunctive":true,"rules":[],"published_scope":"global","image":{"created_at":"2024-05-06T11:59:52+08:00","alt":"Clothing - The Birth Store","width":676,"height":581,"src":"\/\/www.thebirthstore.com.au\/cdn\/shop\/collections\/clothing-483293.jpg?v=1714967992"}},{"id":326572048573,"handle":"maternity-clothing","title":"Maternity Clothing","updated_at":"2026-11-07T20:07:16+08:00","body_html":"","published_at":"2025-10-31T12:50:20+08:00","sort_order":"best-selling","template_suffix":"","disjunctive":false,"rules":[],"published_scope":"global","image":{"created_at":"2025-11-20T21:34:30+08:00","alt":"Maternity Clothing - The Birth Store","width":1920,"height":1281,"src":"\/\/www.thebirthstore.com.au\/cdn\/shop\/collections\/maternity-clothing-6954274.webp?v=1763645670"}},{"id":281712591037,"handle":"pain-relief","title":"Pain Relief","updated_at":"2026-11-14T20:08:00+08:00","body_html":"","published_at":"2021-12-20T14:22:45+08:00","sort_order":"best-selling","template_suffix":"pain-relief-collection","disjunctive":false,"rules":[],"published_scope":"global","image":{"created_at":"2024-05-06T12:00:27+08:00","alt":"Pain Relief - The Birth Store","width":1365,"height":2048,"src":"\/\/www.thebirthstore.com.au\/cdn\/shop\/collections\/pain-relief-878865.jpg?v=1714968027"}},{"id":281712689341,"handle":"pelvic-floor-health","title":"Pelvic Floor Health","updated_at":"2026-11-12T20:07:50+08:00","body_html":"","published_at":"2021-12-20T14:23:41+08:00","sort_order":"best-selling","template_suffix":"swaddles-collection","disjunctive":false,"rules":[],"published_scope":"global","image":{"created_at":"2024-05-06T12:00:29+08:00","alt":"Pelvic Floor Health - The Birth Store","width":536,"height":589,"src":"\/\/www.thebirthstore.com.au\/cdn\/shop\/collections\/pelvic-floor-health-890736.jpg?v=1714968030"}},{"id":261658149053,"handle":"pregnancy-and-maternity-products","title":"Pregnancy","updated_at":"2026-11-14T20:08:00+08:00","body_html":"\u003cp\u003eShop your pregnancy essentials below. Looking for something we don't currently stock? Please reach out and let us know.\u003cbr\u003e\u003c\/p\u003e\n\u003cp\u003e\u003cspan\u003eYou can even buy now and pay later with Afterpay!\u003c\/span\u003e\u003c\/p\u003e","published_at":"2021-03-10T12:34:22+08:00","sort_order":"best-selling","template_suffix":"pregnancy-collection","disjunctive":false,"rules":[],"published_scope":"global","image":{"created_at":"2024-05-06T12:00:40+08:00","alt":"Pregnancy - The Birth Store","width":1024,"height":1536,"src":"\/\/www.thebirthstore.com.au\/cdn\/shop\/collections\/pregnancy-899677.jpg?v=1714968040"}},{"id":291456483517,"handle":"shop-all","title":"Shop All - Mum","updated_at":"2026-11-14T20:08:00+08:00","body_html":"","published_at":"2022-12-23T22:04:39+08:00","sort_order":"best-selling","template_suffix":"shop-all-collection","disjunctive":false,"rules":[],"published_scope":"global","image":{"created_at":"2024-05-06T12:00:54+08:00","alt":"Shop All - The Birth Store","width":1365,"height":2048,"src":"\/\/www.thebirthstore.com.au\/cdn\/shop\/collections\/shop-all-693176.jpg?v=1714968055"}},{"id":310045933757,"handle":"shop-all-sale","title":"Shop All Sale","updated_at":"2026-11-14T20:08:00+08:00","body_html":"","published_at":"2024-11-12T13:22:43+08:00","sort_order":"best-selling","template_suffix":"","disjunctive":true,"rules":[],"published_scope":"global","image":{"created_at":"2024-11-13T10:58:16+08:00","alt":"Shop All Sale - The Birth Store","width":2048,"height":1365,"src":"\/\/www.thebirthstore.com.au\/cdn\/shop\/collections\/shop-all-sale-297361.jpg?v=1731466697"}},{"id":292595433661,"handle":"support-clothing","title":"Support Clothing","updated_at":"2026-11-08T20:07:47+08:00","body_html":"Maternity, breastfeeding, supportive, postpartum clothing and more - we've got it all, or we will have soon! Keep an eye out for new arrivals and grab yourself some incredible must-have staple items.","published_at":"2023-02-20T12:49:47+08:00","sort_order":"best-selling","template_suffix":"swaddles-collection","disjunctive":false,"rules":[],"published_scope":"global","image":{"created_at":"2024-05-06T12:00:59+08:00","alt":"Support Clothing - The Birth Store","width":586,"height":879,"src":"\/\/www.thebirthstore.com.au\/cdn\/shop\/collections\/support-clothing-743676.jpg?v=1714968059"}}]}
{"item":{"id":7439743746237,"title":"SRC Recovery Shorts","handle":"src-recovery-shorts","description":"\u003cp\u003e\u003cmeta charset=\"utf-8\"\u003e\u003cspan\u003eThis product is stocked at a 3\u003c\/span\u003e\u003csup\u003erd\u003c\/sup\u003e\u003cspan\u003e party warehouse, if ordering with other products you’ll receive two packages. This product will have a turn around time of 10 days if pickup is selected on checkout. Any questions, please contact us \u003ca href=\"https:\/\/www.thebirthstore.com.au\/pages\/contact-us\" title=\"Contact Us\" target=\"_blank\"\u003ehere\u003c\/a\u003e.\u003c\/span\u003e\u003cbr\u003e\u003c\/p\u003e","published_at":"2023-03-13T14:12:40+08:00","created_at":"2023-02-13T22:37:10+08:00","vendor":"SRC Health","type":"Recovery Shorts","tags":["Hospital Bag","Mum","Pain Relief","Pelvic Floor","Post-Partum","Support Clothing"],"price":19900,"price_min":19900,"price_max":19900,"available":true,"price_varies":false,"compare_at_price":null,"compare_at_price_min":0,"compare_at_price_max":0,"compare_at_price_varies":false,"variants":[{"id":42658960867517,"title":"XXS \/ Champagne","option1":"XXS","option2":"Champagne","option3":null,"sku":null,"requires_shipping":true,"taxable":false,"featured_image":{"id":34641031921853,"product_id":7439743746237,"position":2,"created_at":"2024-05-06T12:00:50+08:00","updated_at":"2024-05-06T12:00:50+08:00","alt":"SRC Recovery Shorts - The Birth Store-SRC Health","width":1080,"height":1080,"src":"\/\/www.thebirthstore.com.au\/cdn\/shop\/files\/src-recovery-shorts-677358.jpg?v=1714968050","variant_ids":[42658960867517,42658960933053,42658960998589,42658961064125,42658961129661,42658961195197,42658961260733,45872450994365]},"available":true,"name":"SRC Recovery Shorts - XXS \/ Champagne","public_title":"XXS \/ Champagne","options":["XXS","Champagne"],"price":19900,"weight":0,"compare_at_price":null,"inventory_management":null,"barcode":"60867517","featured_media":{"alt":"SRC Recovery Shorts - The Birth Store-SRC Health","id":27007600951485,"position":2,"preview_image":{"aspect_ratio":1.0,"height":1080,"width":1080,"src":"\/\/www.thebirthstore.com.au\/cdn\/shop\/files\/src-recovery-shorts-677358.jpg?v=1714968050"}},"requires_selling_plan":false,"selling_plan_allocations":[],"quantity_rule":{"min":1,"max":null,"increment":1}},{"id":42658960900285,"title":"XXS \/ Black","option1":"XXS","option2":"Black","option3":null,"sku":null,"requires_shipping":true,"taxable":false,"featured_image":{"id":34641031889085,"product_id":7439743746237,"position":1,"created_at":"2024-05-06T12:00:50+08:00","updated_at":"2024-05-06T12:00:50+08:00","alt":"SRC Recovery Shorts - The Birth Store-SRC Health","width":1080,"height":1080,"src":"\/\/www.thebirthstore.com.au\/cdn\/shop\/files\/src-recovery-shorts-666702.jpg?v=1714968050","variant_ids":[42658960900285,42658960965821,42658961031357,42658961096893,42658961162429,42658961227965,42658961293501]},"available":true,"name":"SRC Recovery Shorts - XXS \/ Black","public_title":"XXS \/ Black","options":["XXS","Black"],"price":19900,"weight":0,"compare_at_price":null,"inventory_management":null,"barcode":"60900285","featured_media":{"alt":"SRC Recovery Shorts - The Birth Store-SRC Health","id":27007600918717,"position":1,"preview_image":{"aspect_ratio":1.0,"height":1080,"width":1080,"src":"\/\/www.thebirthstore.com.au\/cdn\/shop\/files\/src-recovery-shorts-666702.jpg?v=1714968050"}},"requires_selling_plan":false,"selling_plan_allocations":[],"quantity_rule":{"min":1,"max":null,"increment":1}},{"id":42658960933053,"title":"XS \/ Champagne","option1":"XS","option2":"Champagne","option3":null,"sku":null,"requires_shipping":true,"taxable":false,"featured_image":{"id":34641031921853,"product_id":7439743746237,"position":2,"created_at":"2024-05-06T12:00:50+08:00","updated_at":"2024-05-06T12:00:50+08:00","alt":"SRC Recovery Shorts - The Birth Store-SRC Health","width":1080,"height":1080,"src":"\/\/www.thebirthstore.com.au\/cdn\/shop\/files\/src-recovery-shorts-677358.jpg?v=1714968050","variant_ids":[42658960867517,42658960933053,42658960998589,42658961064125,42658961129661,42658961195197,42658961260733,45872450994365]},"available":true,"name":"SRC Recovery Shorts - XS \/ Champagne","public_title":"XS \/ Champagne","options":["XS","Champagne"],"price":19900,"weight":0,"compare_at_price":null,"inventory_management":null,"barcode":"60933053","featured_media":{"alt":"SRC Recovery Shorts - The Birth Store-SRC Health","id":27007600951485,"position":2,"preview_image":{"aspect_ratio":1.0,"height":1080,"width":1080,"src":"\/\/www.thebirthstore.com.au\/cdn\/shop\/files\/src-recovery-shorts-677358.jpg?v=1714968050"}},"requires_selling_plan":false,"selling_plan_allocations":[],"quantity_rule":{"min":1,"max":null,"increment":1}},{"id":42658960965821,"title":"XS \/ Black","option1":"XS","option2":"Black","option3":null,"sku":null,"requires_shipping":true,"taxable":false,"featured_image":{"id":34641031889085,"product_id":7439743746237,"position":1,"created_at":"2024-05-06T12:00:50+08:00","updated_at":"2024-05-06T12:00:50+08:00","alt":"SRC Recovery Shorts - The Birth Store-SRC Health","width":1080,"height":1080,"src":"\/\/www.thebirthstore.com.au\/cdn\/shop\/files\/src-recovery-shorts-666702.jpg?v=1714968050","variant_ids":[42658960900285,42658960965821,42658961031357,42658961096893,42658961162429,42658961227965,42658961293501]},"available":true,"name":"SRC Recovery Shorts - XS \/ Black","public_title":"XS \/ Black","options":["XS","Black"],"price":19900,"weight":0,"compare_at_price":null,"inventory_management":null,"barcode":"60965821","featured_media":{"alt":"SRC Recovery Shorts - The Birth Store-SRC Health","id":27007600918717,"position":1,"preview_image":{"aspect_ratio":1.0,"height":1080,"width":1080,"src":"\/\/www.thebirthstore.com.au\/cdn\/shop\/files\/src-recovery-shorts-666702.jpg?v=1714968050"}},"requires_selling_plan":false,"selling_plan_allocations":[],"quantity_rule":{"min":1,"max":null,"increment":1}},{"id":42658960998589,"title":"S \/ Champagne","option1":"S","option2":"Champagne","option3":null,"sku":null,"requires_shipping":true,"taxable":false,"featured_image":{"id":34641031921853,"product_id":7439743746237,"position":2,"created_at":"2024-05-06T12:00:50+08:00","updated_at":"2024-05-06T12:00:50+08:00","alt":"SRC Recovery Shorts - The Birth Store-SRC Health","width":1080,"height":1080,"src":"\/\/www.thebirthstore.com.au\/cdn\/shop\/files\/src-recovery-shorts-677358.jpg?v=1714968050","variant_ids":[42658960867517,42658960933053,42658960998589,42658961064125,42658961129661,42658961195197,42658961260733,45872450994365]},"available":true,"name":"SRC Recovery Shorts - S \/ Champagne","public_title":"S \/ Champagne","options":["S","Champagne"],"price":19900,"weight":0,"compare_at_price":null,"inventory_management":null,"barcode":"60998589","featured_media":{"alt":"SRC Recovery Shorts - The Birth Store-SRC Health","id":27007600951485,"position":2,"preview_image":{"aspect_ratio":1.0,"height":1080,"width":1080,"src":"\/\/www.thebirthstore.com.au\/cdn\/shop\/files\/src-recovery-shorts-677358.jpg?v=1714968050"}},"requires_selling_plan":false,"selling_plan_allocations":[],"quantity_rule":{"min":1,"max":null,"increment":1}},{"id":42658961031357,"title":"S \/ Black","option1":"S","option2":"Black","option3":null,"sku":null,"requires_shipping":true,"taxable":false,"featured_image":{"id":34641031889085,"product_id":7439743746237,"position":1,"created_at":"2024-05-06T12:00:50+08:00","updated_at":"2024-05-06T12:00:50+08:00","alt":"SRC Recovery Shorts - The Birth Store-SRC Health","width":1080,"height":1080,"src":"\/\/www.thebirthstore.com.au\/cdn\/shop\/files\/src-recovery-shorts-666702.jpg?v=1714968050","variant_ids":[42658960900285,42658960965821,42658961031357,42658961096893,42658961162429,42658961227965,42658961293501]},"available":true,"name":"SRC Recovery Shorts - S \/ Black","public_title":"S \/ Black","options":["S","Black"],"price":19900,"weight":0,"compare_at_price":null,"inventory_management":null,"barcode":"61031357","featured_media":{"alt":"SRC Recovery Shorts - The Birth Store-SRC Health","id":27007600918717,"position":1,"preview_image":{"aspect_ratio":1.0,"height":1080,"width":1080,"src":"\/\/www.thebirthstore.com.au\/cdn\/shop\/files\/src-recovery-shorts-666702.jpg?v=1714968050"}},"requires_selling_plan":false,"selling_plan_allocations":[],"quantity_rule":{"min":1,"max":null,"increment":1}},{"id":42658961064125,"title":"M \/ Champagne","option1":"M","option2":"Champagne","option3":null,"sku":null,"requires_shipping":true,"taxable":false,"featured_image":{"id":34641031921853,"product_id":7439743746237,"position":2,"created_at":"2024-05-06T12:00:50+08:00","updated_at":"2024-05-06T12:00:50+08:00","alt":"SRC Recovery Shorts - The Birth Store-SRC Health","width":1080,"height":1080,"src":"\/\/www.thebirthstore.com.au\/cdn\/shop\/files\/src-recovery-shorts-677358.jpg?v=1714968050","variant_ids":[42658960867517,42658960933053,42658960998589,42658961064125,42658961129661,42658961195197,42658961260733,45872450994365]},"available":true,"name":"SRC Recovery Shorts - M \/ Champagne","public_title":"M \/ Champagne","options":["M","Champagne"],"price":19900,"weight":0,"compare_at_price":null,"inventory_management":null,"barcode":"61064125","featured_media":{"alt":"SRC Recovery Shorts - The Birth Store-SRC Health","id":27007600951485,"position":2,"preview_image":{"aspect_ratio":1.0,"height":1080,"width":1080,"src":"\/\/www.thebirthstore.com.au\/cdn\/shop\/files\/src-recovery-shorts-677358.jpg?v=1714968050"}},"requires_selling_plan":false,"selling_plan_allocations":[],"quantity_rule":{"min":1,"max":null,"increment":1}},{"id":42658961096893,"title":"M \/ Black","option1":"M","option2":"Black","option3":null,"sku":null,"requires_shipping":true,"taxable":false,"featured_image":{"id":34641031889085,"product_id":7439743746237,"position":1,"created_at":"2024-05-06T12:00:50+08:00","updated_at":"2024-05-06T12:00:50+08:00","alt":"SRC Recovery Shorts - The Birth Store-SRC Health","width":1080,"height":1080,"src":"\/\/www.thebirthstore.com.au\/cdn\/shop\/files\/src-recovery-shorts-666702.jpg?v=1714968050","variant_ids":[42658960900285,42658960965821,42658961031357,42658961096893,42658961162429,42658961227965,42658961293501]},"available":true,"name":"SRC Recovery Shorts - M \/ Black","public_title":"M \/ Black","options":["M","Black"],"price":19900,"weight":0,"compare_at_price":null,"inventory_management":null,"barcode":"61096893","featured_media":{"alt":"SRC Recovery Shorts - The Birth Store-SRC Health","id":27007600918717,"position":1,"preview_image":{"aspect_ratio":1.0,"height":1080,"width":1080,"src":"\/\/www.thebirthstore.com.au\/cdn\/shop\/files\/src-recovery-shorts-666702.jpg?v=1714968050"}},"requires_selling_plan":false,"selling_plan_allocations":[],"quantity_rule":{"min":1,"max":null,"increment":1}},{"id":42658961129661,"title":"L \/ Champagne","option1":"L","option2":"Champagne","option3":null,"sku":null,"requires_shipping":true,"taxable":false,"featured_image":{"id":34641031921853,"product_id":7439743746237,"position":2,"created_at":"2024-05-06T12:00:50+08:00","updated_at":"2024-05-06T12:00:50+08:00","alt":"SRC Recovery Shorts - The Birth Store-SRC Health","width":1080,"height":1080,"src":"\/\/www.thebirthstore.com.au\/cdn\/shop\/files\/src-recovery-shorts-677358.jpg?v=1714968050","variant_ids":[42658960867517,42658960933053,42658960998589,42658961064125,42658961129661,42658961195197,42658961260733,45872450994365]},"available":true,"name":"SRC Recovery Shorts - L \/ Champagne","public_title":"L \/ Champagne","options":["L","Champagne"],"price":19900,"weight":0,"compare_at_price":null,"inventory_management":null,"barcode":"61129661","featured_media":{"alt":"SRC Recovery Shorts - The Birth Store-SRC Health","id":27007600951485,"position":2,"preview_image":{"aspect_ratio":1.0,"height":1080,"width":1080,"src":"\/\/www.thebirthstore.com.au\/cdn\/shop\/files\/src-recovery-shorts-677358.jpg?v=1714968050"}},"requires_selling_plan":false,"selling_plan_allocations":[],"quantity_rule":{"min":1,"max":null,"increment":1}},{"id":42658961162429,"title":"L \/ Black","option1":"L","option2":"Black","option3":null,"sku":null,"requires_shipping":true,"taxable":false,"featured_image":{"id":34641031889085,"product_id":7439743746237,"position":1,"created_at":"2024-05-06T12:00:50+08:00","updated_at":"2024-05-06T12:00:50+08:00","alt":"SRC Recovery Shorts - The Birth Store-SRC Health","width":1080,"height":1080,"src":"\/\/www.thebirthstore.com.au\/cdn\/shop\/files\/src-recovery-shorts-666702.jpg?v=1714968050","variant_ids":[42658960900285,42658960965821,42658961031357,42658961096893,42658961162429,42658961227965,42658961293501]},"available":true,"name":"SRC Recovery Shorts - L \/ Black","public_title":"L \/ Black","options":["L","Black"],"price":19900,"weight":0,"compare_at_price":null,"inventory_management":null,"barcode":"61162429","featured_media":{"alt":"SRC Recovery Shorts - The Birth Store-SRC Health","id":27007600918717,"position":1,"preview_image":{"aspect_ratio":1.0,"height":1080,"width":1080,"src":"\/\/www.thebirthstore.com.au\/cdn\/shop\/files\/src-recovery-shorts-666702.jpg?v=1714968050"}},"requires_selling_plan":false,"selling_plan_allocations":[],"quantity_rule":{"min":1,"max":null,"increment":1}},{"id":42658961195197,"title":"XL \/ Champagne","option1":"XL","option2":"Champagne","option3":null,"sku":null,"requires_shipping":true,"taxable":false,"featured_image":{"id":34641031921853,"product_id":7439743746237,"position":2,"created_at":"2024-05-06T12:00:50+08:00","updated_at":"2024-05-06T12:00:50+08:00","alt":"SRC Recovery Shorts - The Birth Store-SRC Health","width":1080,"height":1080,"src":"\/\/www.thebirthstore.com.au\/cdn\/shop\/files\/src-recovery-shorts-677358.jpg?v=1714968050","variant_ids":[42658960867517,42658960933053,42658960998589,42658961064125,42658961129661,42658961195197,42658961260733,45872450994365]},"available":true,"name":"SRC Recovery Shorts - XL \/ Champagne","public_title":"XL \/ Champagne","options":["XL","Champagne"],"price":19900,"weight":0,"compare_at_price":null,"inventory_management":null,"barcode":"61195197","featured_media":{"alt":"SRC Recovery Shorts - The Birth Store-SRC Health","id":27007600951485,"position":2,"preview_image":{"aspect_ratio":1.0,"height":1080,"width":1080,"src":"\/\/www.thebirthstore.com.au\/cdn\/shop\/files\/src-recovery-shorts-677358.jpg?v=1714968050"}},"requires_selling_plan":false,"selling_plan_allocations":[],"quantity_rule":{"min":1,"max":null,"increment":1}},{"id":42658961227965,"title":"XL \/ Black","option1":"XL","option2":"Black","option3":null,"sku":null,"requires_shipping":true,"taxable":false,"featured_image":{"id":34641031889085,"product_id":7439743746237,"position":1,"created_at":"2024-05-06T12:00:50+08:00","updated_at":"2024-05-06T12:00:50+08:00","alt":"SRC Recovery Shorts - The Birth Store-SRC Health","width":1080,"height":1080,"src":"\/\/www.thebirthstore.com.au\/cdn\/shop\/files\/src-recovery-shorts-666702.jpg?v=1714968050","variant_ids":[42658960900285,42658960965821,42658961031357,42658961096893,42658961162429,42658961227965,42658961293501]},"available":true,"name":"SRC Recovery Shorts - XL \/ Black","public_title":"XL \/ Black","options":["XL","Black"],"price":19900,"weight":0,"compare_at_price":null,"inventory_management":null,"barcode":"61227965","featured_media":{"alt":"SRC Recovery Shorts - The Birth Store-SRC Health","id":27007600918717,"position":1,"preview_image":{"aspect_ratio":1.0,"height":1080,"width":1080,"src":"\/\/www.thebirthstore.com.au\/cdn\/shop\/files\/src-recovery-shorts-666702.jpg?v=1714968050"}},"requires_selling_plan":false,"selling_plan_allocations":[],"quantity_rule":{"min":1,"max":null,"increment":1}},{"id":42658961260733,"title":"XXL \/ Champagne","option1":"XXL","option2":"Champagne","option3":null,"sku":null,"requires_shipping":true,"taxable":false,"featured_image":{"id":34641031921853,"product_id":7439743746237,"position":2,"created_at":"2024-05-06T12:00:50+08:00","updated_at":"2024-05-06T12:00:50+08:00","alt":"SRC Recovery Shorts - The Birth Store-SRC Health","width":1080,"height":1080,"src":"\/\/www.thebirthstore.com.au\/cdn\/shop\/files\/src-recovery-shorts-677358.jpg?v=1714968050","variant_ids":[42658960867517,42658960933053,42658960998589,42658961064125,42658961129661,42658961195197,42658961260733,45872450994365]},"available":true,"name":"SRC Recovery Shorts - XXL \/ Champagne","public_title":"XXL \/ Champagne","options":["XXL","Champagne"],"price":19900,"weight":0,"compare_at_price":null,"inventory_management":null,"barcode":"61260733","featured_media":{"alt":"SRC Recovery Shorts - The Birth Store-SRC Health","id":27007600951485,"position":2,"preview_image":{"aspect_ratio":1.0,"height":1080,"width":1080,"src":"\/\/www.thebirthstore.com.au\/cdn\/shop\/files\/src-recovery-shorts-677358.jpg?v=1714968050"}},"requires_selling_plan":false,"selling_plan_allocations":[],"quantity_rule":{"min":1,"max":null,"increment":1}},{"id":42658961293501,"title":"XXL \/ Black","option1":"XXL","option2":"Black","option3":null,"sku":null,"requires_shipping":true,"taxable":false,"featured_image":{"id":34641031889085,"product_id":7439743746237,"position":1,"created_at":"2024-05-06T12:00:50+08:00","updated_at":"2024-05-06T12:00:50+08:00","alt":"SRC Recovery Shorts - The Birth Store-SRC Health","width":1080,"height":1080,"src":"\/\/www.thebirthstore.com.au\/cdn\/shop\/files\/src-recovery-shorts-666702.jpg?v=1714968050","variant_ids":[42658960900285,42658960965821,42658961031357,42658961096893,42658961162429,42658961227965,42658961293501]},"available":true,"name":"SRC Recovery Shorts - XXL \/ Black","public_title":"XXL \/ Black","options":["XXL","Black"],"price":19900,"weight":0,"compare_at_price":null,"inventory_management":null,"barcode":"61293501","featured_media":{"alt":"SRC Recovery Shorts - The Birth Store-SRC Health","id":27007600918717,"position":1,"preview_image":{"aspect_ratio":1.0,"height":1080,"width":1080,"src":"\/\/www.thebirthstore.com.au\/cdn\/shop\/files\/src-recovery-shorts-666702.jpg?v=1714968050"}},"requires_selling_plan":false,"selling_plan_allocations":[],"quantity_rule":{"min":1,"max":null,"increment":1}},{"id":45872450994365,"title":"XXXL \/ Black","option1":"XXXL","option2":"Black","option3":null,"sku":null,"requires_shipping":true,"taxable":false,"featured_image":{"id":34641031921853,"product_id":7439743746237,"position":2,"created_at":"2024-05-06T12:00:50+08:00","updated_at":"2024-05-06T12:00:50+08:00","alt":"SRC Recovery Shorts - The Birth Store-SRC Health","width":1080,"height":1080,"src":"\/\/www.thebirthstore.com.au\/cdn\/shop\/files\/src-recovery-shorts-677358.jpg?v=1714968050","variant_ids":[42658960867517,42658960933053,42658960998589,42658961064125,42658961129661,42658961195197,42658961260733,45872450994365]},"available":true,"name":"SRC Recovery Shorts - XXXL \/ Black","public_title":"XXXL \/ Black","options":["XXXL","Black"],"price":19900,"weight":0,"compare_at_price":null,"inventory_management":null,"barcode":"50994365","featured_media":{"alt":"SRC Recovery Shorts - The Birth Store-SRC Health","id":27007600951485,"position":2,"preview_image":{"aspect_ratio":1.0,"height":1080,"width":1080,"src":"\/\/www.thebirthstore.com.au\/cdn\/shop\/files\/src-recovery-shorts-677358.jpg?v=1714968050"}},"requires_selling_plan":false,"selling_plan_allocations":[],"quantity_rule":{"min":1,"max":null,"increment":1}}],"images":["\/\/www.thebirthstore.com.au\/cdn\/shop\/files\/src-recovery-shorts-666702.jpg?v=1714968050","\/\/www.thebirthstore.com.au\/cdn\/shop\/files\/src-recovery-shorts-677358.jpg?v=1714968050","\/\/www.thebirthstore.com.au\/cdn\/shop\/files\/src-recovery-shorts-808759.jpg?v=1714968050","\/\/www.thebirthstore.com.au\/cdn\/shop\/files\/src-recovery-shorts-592840.jpg?v=1714968050","\/\/www.thebirthstore.com.au\/cdn\/shop\/files\/src-recovery-shorts-496819.jpg?v=1714968050"],"featured_image":"\/\/www.thebirthstore.com.au\/cdn\/shop\/files\/src-recovery-shorts-666702.jpg?v=1714968050","options":["Size","Colour"],"media":[{"alt":"SRC Recovery Shorts - The Birth Store-SRC Health","id":27007600918717,"position":1,"preview_image":{"aspect_ratio":1.0,"height":1080,"width":1080,"src":"\/\/www.thebirthstore.com.au\/cdn\/shop\/files\/src-recovery-shorts-666702.jpg?v=1714968050"},"aspect_ratio":1.0,"height":1080,"media_type":"image","src":"\/\/www.thebirthstore.com.au\/cdn\/shop\/files\/src-recovery-shorts-666702.jpg?v=1714968050","width":1080},{"alt":"SRC Recovery Shorts - The Birth Store-SRC Health","id":27007600951485,"position":2,"preview_image":{"aspect_ratio":1.0,"height":1080,"width":1080,"src":"\/\/www.thebirthstore.com.au\/cdn\/shop\/files\/src-recovery-shorts-677358.jpg?v=1714968050"},"aspect_ratio":1.0,"height":1080,"media_type":"image","src":"\/\/www.thebirthstore.com.au\/cdn\/shop\/files\/src-recovery-shorts-677358.jpg?v=1714968050","width":1080},{"alt":"SRC Recovery Shorts - The Birth Store-SRC Health","id":27007600984253,"position":3,"preview_image":{"aspect_ratio":1.0,"height":1080,"width":1080,"src":"\/\/www.thebirthstore.com.au\/cdn\/shop\/files\/src-recovery-shorts-808759.jpg?v=1714968050"},"aspect_ratio":1.0,"height":1080,"media_type":"image","src":"\/\/www.thebirthstore.com.au\/cdn\/shop\/files\/src-recovery-shorts-808759.jpg?v=1714968050","width":1080},{"alt":"SRC Recovery Shorts - The Birth Store-SRC Health","id":27007601017021,"position":4,"preview_image":{"aspect_ratio":1.0,"height":1080,"width":1080,"src":"\/\/www.thebirthstore.com.au\/cdn\/shop\/files\/src-recovery-shorts-592840.jpg?v=1714968050"},"aspect_ratio":1.0,"height":1080,"media_type":"image","src":"\/\/www.thebirthstore.com.au\/cdn\/shop\/files\/src-recovery-shorts-592840.jpg?v=1714968050","width":1080},{"alt":"SRC Recovery Shorts - The Birth Store-SRC Health","id":27007601049789,"position":5,"preview_image":{"aspect_ratio":1.582,"height":948,"width":1500,"src":"\/\/www.thebirthstore.com.au\/cdn\/shop\/files\/src-recovery-shorts-496819.jpg?v=1714968050"},"aspect_ratio":1.582,"height":948,"media_type":"image","src":"\/\/www.thebirthstore.com.au\/cdn\/shop\/files\/src-recovery-shorts-496819.jpg?v=1714968050","width":1500}],"requires_selling_plan":false,"selling_plan_groups":[],"content":"\u003cp\u003e\u003cmeta charset=\"utf-8\"\u003e\u003cspan\u003eThis product is stocked at a 3\u003c\/span\u003e\u003csup\u003erd\u003c\/sup\u003e\u003cspan\u003e party warehouse, if ordering with other products you’ll receive two packages. This product will have a turn around time of 10 days if pickup is selected on checkout. Any questions, please contact us \u003ca href=\"https:\/\/www.thebirthstore.com.au\/pages\/contact-us\" title=\"Contact Us\" target=\"_blank\"\u003ehere\u003c\/a\u003e.\u003c\/span\u003e\u003cbr\u003e\u003c\/p\u003e"},"options":[{"name":"Size","position":1,"values":["XXS","XS","S","M","L","XL","XXL","XXXL"]},{"name":"Colour","position":2,"values":["Champagne","Black"]}],"custom_metafields":{},"metafields":{"badge":"\u003cdiv style='display:none' class='jdgm-prev-badge' data-average-rating='0.00' data-number-of-reviews='0' data-number-of-questions='0'\u003e \u003cspan class='jdgm-prev-badge__stars' data-score='0.00' tabindex='0' aria-label='0.00 stars' role='button'\u003e \u003cspan class='jdgm-star jdgm--off'\u003e\u003c\/span\u003e\u003cspan class='jdgm-star jdgm--off'\u003e\u003c\/span\u003e\u003cspan class='jdgm-star jdgm--off'\u003e\u003c\/span\u003e\u003cspan class='jdgm-star jdgm--off'\u003e\u003c\/span\u003e\u003cspan class='jdgm-star jdgm--off'\u003e\u003c\/span\u003e \u003c\/span\u003e \u003cspan class='jdgm-prev-badge__text'\u003e No reviews \u003c\/span\u003e \u003c\/div\u003e","widget":"\u003cdiv class='jdgm-rev-widg' data-updated-at='2025-06-13T16:12:10Z' data-average-rating='0.00' data-number-of-reviews='0' data-number-of-questions='0'\u003e \u003cstyle class='jdgm-temp-hiding-style'\u003e.jdgm-rev-widg{ display: none }\u003c\/style\u003e \u003cdiv class='jdgm-rev-widg__header'\u003e \u003ch2 class='jdgm-rev-widg__title'\u003eCustomer Reviews\u003c\/h2\u003e \u003cdiv class='jdgm-rev-widg__summary'\u003e \u003cdiv class='jdgm-rev-widg__summary-stars' aria-label='Average rating is 0.00 stars' role='img'\u003e \u003cspan class='jdgm-star jdgm--off'\u003e\u003c\/span\u003e\u003cspan class='jdgm-star jdgm--off'\u003e\u003c\/span\u003e\u003cspan class='jdgm-star jdgm--off'\u003e\u003c\/span\u003e\u003cspan class='jdgm-star jdgm--off'\u003e\u003c\/span\u003e\u003cspan class='jdgm-star jdgm--off'\u003e\u003c\/span\u003e \u003c\/div\u003e \u003cdiv class='jdgm-rev-widg__summary-text'\u003eBe the first to write a review\u003c\/div\u003e \u003c\/div\u003e \u003ca style='display: none' href='#' class='jdgm-write-rev-link' role='button'\u003eWrite a review\u003c\/a\u003e \u003cdiv class='jdgm-histogram jdgm-temp-hidden'\u003e \u003cdiv class='jdgm-histogram__row' data-rating='5' data-frequency='0' data-percentage='0'\u003e \u003cdiv class='jdgm-histogram__star' role='button' aria-label=\"0% (0) reviews with 5 star rating\" tabindex='0' \u003e\u003cspan class='jdgm-star jdgm--on'\u003e\u003c\/span\u003e\u003cspan class='jdgm-star jdgm--on'\u003e\u003c\/span\u003e\u003cspan class='jdgm-star jdgm--on'\u003e\u003c\/span\u003e\u003cspan class='jdgm-star jdgm--on'\u003e\u003c\/span\u003e\u003cspan class='jdgm-star jdgm--on'\u003e\u003c\/span\u003e\u003c\/div\u003e \u003cdiv class='jdgm-histogram__bar'\u003e \u003cdiv class='jdgm-histogram__bar-content' style='width: 0%;'\u003e \u003c\/div\u003e \u003c\/div\u003e \u003cdiv class='jdgm-histogram__percentage'\u003e0%\u003c\/div\u003e \u003cdiv class='jdgm-histogram__frequency'\u003e(0)\u003c\/div\u003e \u003c\/div\u003e \u003cdiv class='jdgm-histogram__row' data-rating='4' data-frequency='0' data-percentage='0'\u003e \u003cdiv class='jdgm-histogram__star' role='button' aria-label=\"0% (0) reviews with 4 star rating\" tabindex='0' \u003e\u003cspan class='jdgm-star jdgm--on'\u003e\u003c\/span\u003e\u003cspan class='jdgm-star jdgm--on'\u003e\u003c\/span\u003e\u003cspan class='jdgm-star jdgm--on'\u003e\u003c\/span\u003e\u003cspan class='jdgm-star jdgm--on'\u003e\u003c\/span\u003e\u003cspan class='jdgm-star jdgm--off'\u003e\u003c\/span\u003e\u003c\/div\u003e \u003cdiv class='jdgm-histogram__bar'\u003e \u003cdiv class='jdgm-histogram__bar-content' style='width: 0%;'\u003e \u003c\/div\u003e \u003c\/div\u003e \u003cdiv class='jdgm-histogram__percentage'\u003e0%\u003c\/div\u003e \u003cdiv class='jdgm-histogram__frequency'\u003e(0)\u003c\/div\u003e \u003c\/div\u003e \u003cdiv class='jdgm-histogram__row' data-rating='3' data-frequency='0' data-percentage='0'\u003e \u003cdiv class='jdgm-histogram__star' role='button' aria-label=\"0% (0) reviews with 3 star rating\" tabindex='0' \u003e\u003cspan class='jdgm-star jdgm--on'\u003e\u003c\/span\u003e\u003cspan class='jdgm-star jdgm--on'\u003e\u003c\/span\u003e\u003cspan class='jdgm-star jdgm--on'\u003e\u003c\/span\u003e\u003cspan class='jdgm-star jdgm--off'\u003e\u003c\/span\u003e\u003cspan class='jdgm-star jdgm--off'\u003e\u003c\/span\u003e\u003c\/div\u003e \u003cdiv class='jdgm-histogram__bar'\u003e \u003cdiv class='jdgm-histogram__bar-content' style='width: 0%;'\u003e \u003c\/div\u003e \u003c\/div\u003e \u003cdiv class='jdgm-histogram__percentage'\u003e0%\u003c\/div\u003e \u003cdiv class='jdgm-histogram__frequency'\u003e(0)\u003c\/div\u003e \u003c\/div\u003e \u003cdiv class='jdgm-histogram__row' data-rating='2' data-frequency='0' data-percentage='0'\u003e \u003cdiv class='jdgm-histogram__star' role='button' aria-label=\"0% (0) reviews with 2 star rating\" tabindex='0' \u003e\u003cspan class='jdgm-star jdgm--on'\u003e\u003c\/span\u003e\u003cspan class='jdgm-star jdgm--on'\u003e\u003c\/span\u003e\u003cspan class='jdgm-star jdgm--off'\u003e\u003c\/span\u003e\u003cspan class='jdgm-star jdgm--off'\u003e\u003c\/span\u003e\u003cspan class='jdgm-star jdgm--off'\u003e\u003c\/span\u003e\u003c\/div\u003e \u003cdiv class='jdgm-histogram__bar'\u003e \u003cdiv class='jdgm-histogram__bar-content' style='width: 0%;'\u003e \u003c\/div\u003e \u003c\/div\u003e \u003cdiv class='jdgm-histogram__percentage'\u003e0%\u003c\/div\u003e \u003cdiv class='jdgm-histogram__frequency'\u003e(0)\u003c\/div\u003e \u003c\/div\u003e \u003cdiv class='jdgm-histogram__row' data-rating='1' data-frequency='0' data-percentage='0'\u003e \u003cdiv class='jdgm-histogram__star' role='button' aria-label=\"0% (0) reviews with 1 star rating\" tabindex='0' \u003e\u003cspan class='jdgm-star jdgm--on'\u003e\u003c\/span\u003e\u003cspan class='jdgm-star jdgm--off'\u003e\u003c\/span\u003e\u003cspan class='jdgm-star jdgm--off'\u003e\u003c\/span\u003e\u003cspan class='jdgm-star jdgm--off'\u003e\u003c\/span\u003e\u003cspan class='jdgm-star jdgm--off'\u003e\u003c\/span\u003e\u003c\/div\u003e \u003cdiv class='jdgm-histogram__bar'\u003e \u003cdiv class='jdgm-histogram__bar-content' style='width: 0%;'\u003e \u003c\/div\u003e \u003c\/div\u003e \u003cdiv class='jdgm-histogram__percentage'\u003e0%\u003c\/div\u003e \u003cdiv class='jdgm-histogram__frequency'\u003e(0)\u003c\/div\u003e \u003c\/div\u003e \u003cdiv class='jdgm-histogram__row jdgm-histogram__clear-filter' data-rating=null tabindex='0'\u003e\u003c\/div\u003e \u003c\/div\u003e \u003cdiv class='jdgm-rev-widg__sort-wrapper'\u003e\u003c\/div\u003e \u003c\/div\u003e \u003cdiv class='jdgm-rev-widg__body'\u003e \u003cdiv class='jdgm-rev-widg__reviews'\u003e\u003c\/div\u003e \u003cdiv class='jdgm-paginate' data-per-page='10' data-url='https:\/\/api.judge.me\/reviews\/reviews_for_widget' style=\"display: none;\"\u003e\u003c\/div\u003e \u003c\/div\u003e \u003cdiv class='jdgm-rev-widg__paginate-spinner-wrapper'\u003e \u003cdiv class='jdgm-spinner'\u003e\u003c\/div\u003e \u003c\/div\u003e \u003c\/div\u003e"},"default_reviews_metafields":{},"collections":[{"id":512654540989,"handle":"lastof26-10","title":"10%","updated_at":"2026-11-14T20:08:00+08:00","body_html":null,"published_at":"2026-10-12T19:06:42+08:00","sort_order":"best-selling","template_suffix":null,"disjunctive":false,"rules":[],"published_scope":"global"},{"id":261657460925,"handle":"buy","title":"Buy","updated_at":"2026-11-14T20:08:00+08:00","body_html":"\u003cp\u003eBrowse all of our pregnancy, labour \u0026amp; birth, postpartum and baby essentials here.\u003cbr\u003e\u003c\/p\u003e\n\u003cp\u003e\u003cspan\u003eYou can even buy now and pay later with Afterpay!\u003c\/span\u003e\u003c\/p\u003e","published_at":"2021-03-10T12:05:31+08:00","sort_order":"best-selling","template_suffix":"shop-all-collection","disjunctive":false,"rules":[],"published_scope":"global","image":{"created_at":"2024-05-06T11:59:42+08:00","alt":"Buy - The Birth Store","width":2048,"height":2048,"src":"\/\/www.thebirthstore.com.au\/cdn\/shop\/collections\/buy-964856.jpg?v=1714967982"}},{"id":293309022397,"handle":"clothing","title":"Clothing","updated_at":"2026-11-09T10:38:40+08:00","body_html":"","published_at":"2023-05-03T11:41:12+08:00","sort_order":"best-selling","template_suffix":"swaddles-collection","disjunctive":true,"rules":[],"published_scope":"global","image":{"created_at":"2024-05-06T11:59:52+08:00","alt":"Clothing - The Birth Store","width":676,"height":581,"src":"\/\/www.thebirthstore.com.au\/cdn\/shop\/collections\/clothing-483293.jpg?v=1714967992"}},{"id":337429201085,"handle":"hospital-bag","title":"Hospital Bag","updated_at":"2026-11-14T20:08:00+08:00","body_html":"","published_at":"2026-06-03T11:36:29+08:00","sort_order":"most-relevant","template_suffix":"","disjunctive":false,"rules":[],"published_scope":"global"},{"id":281712591037,"handle":"pain-relief","title":"Pain Relief","updated_at":"2026-11-14T20:08:00+08:00","body_html":"","published_at":"2021-12-20T14:22:45+08:00","sort_order":"best-selling","template_suffix":"pain-relief-collection","disjunctive":false,"rules":[],"published_scope":"global","image":{"created_at":"2024-05-06T12:00:27+08:00","alt":"Pain Relief - The Birth Store","width":1365,"height":2048,"src":"\/\/www.thebirthstore.com.au\/cdn\/shop\/collections\/pain-relief-878865.jpg?v=1714968027"}},{"id":281712689341,"handle":"pelvic-floor-health","title":"Pelvic Floor Health","updated_at":"2026-11-12T20:07:50+08:00","body_html":"","published_at":"2021-12-20T14:23:41+08:00","sort_order":"best-selling","template_suffix":"swaddles-collection","disjunctive":false,"rules":[],"published_scope":"global","image":{"created_at":"2024-05-06T12:00:29+08:00","alt":"Pelvic Floor Health - The Birth Store","width":536,"height":589,"src":"\/\/www.thebirthstore.com.au\/cdn\/shop\/collections\/pelvic-floor-health-890736.jpg?v=1714968030"}},{"id":261658083517,"handle":"post-partum","title":"Postpartum","updated_at":"2026-11-14T20:08:00+08:00","body_html":"\u003cp\u003eShop your postpartum and hospital bag essentials below. Looking for something we don't currently stock? Please reach out and let us know.\u003cbr\u003e\u003c\/p\u003e\n\u003cp\u003e\u003cspan\u003eYou can even buy now and pay later with Afterpay!\u003c\/span\u003e\u003c\/p\u003e","published_at":"2021-03-10T12:33:47+08:00","sort_order":"best-selling","template_suffix":"postpartum-collection","disjunctive":false,"rules":[],"published_scope":"global","image":{"created_at":"2024-05-06T12:00:36+08:00","alt":"Postpartum - The Birth Store","width":611,"height":702,"src":"\/\/www.thebirthstore.com.au\/cdn\/shop\/collections\/postpartum-150119.jpg?v=1714968037"}},{"id":291456483517,"handle":"shop-all","title":"Shop All - Mum","updated_at":"2026-11-14T20:08:00+08:00","body_html":"","published_at":"2022-12-23T22:04:39+08:00","sort_order":"best-selling","template_suffix":"shop-all-collection","disjunctive":false,"rules":[],"published_scope":"global","image":{"created_at":"2024-05-06T12:00:54+08:00","alt":"Shop All - The Birth Store","width":1365,"height":2048,"src":"\/\/www.thebirthstore.com.au\/cdn\/shop\/collections\/shop-all-693176.jpg?v=1714968055"}},{"id":310045933757,"handle":"shop-all-sale","title":"Shop All Sale","updated_at":"2026-11-14T20:08:00+08:00","body_html":"","published_at":"2024-11-12T13:22:43+08:00","sort_order":"best-selling","template_suffix":"","disjunctive":true,"rules":[],"published_scope":"global","image":{"created_at":"2024-11-13T10:58:16+08:00","alt":"Shop All Sale - The Birth Store","width":2048,"height":1365,"src":"\/\/www.thebirthstore.com.au\/cdn\/shop\/collections\/shop-all-sale-297361.jpg?v=1731466697"}},{"id":292595433661,"handle":"support-clothing","title":"Support Clothing","updated_at":"2026-11-08T20:07:47+08:00","body_html":"Maternity, breastfeeding, supportive, postpartum clothing and more - we've got it all, or we will have soon! Keep an eye out for new arrivals and grab yourself some incredible must-have staple items.","published_at":"2023-02-20T12:49:47+08:00","sort_order":"best-selling","template_suffix":"swaddles-collection","disjunctive":false,"rules":[],"published_scope":"global","image":{"created_at":"2024-05-06T12:00:59+08:00","alt":"Support Clothing - The Birth Store","width":586,"height":879,"src":"\/\/www.thebirthstore.com.au\/cdn\/shop\/collections\/support-clothing-743676.jpg?v=1714968059"}}]}
{"item":{"id":8130025095357,"title":"Breastfeeding Tee","handle":"breastfeeding-tee","description":"\u003cdiv class=\"jdgm-rev__body\"\u003e\n\u003cp\u003e\u003cem\u003eThis is the best quality t-shirt I have ever bought, and the fact it’s breastfeeding friendly too? Even better! Probably could have sized down but being plus size, it makes it easier for feeding for it to be a bit bigger. Highly recommend! - Charlotte\u003c\/em\u003e\u003c\/p\u003e\n\u003cp\u003e \u003c\/p\u003e\n\u003c\/div\u003e\n\u003cp\u003eIntroducing the first size inclusive breastfeeding tee, ranging from XS-6XL. \u003c\/p\u003e\n\u003cp\u003eThis collection of breastfeeding tees features a simple embroidered logo on the front.\u003cbr\u003e\u003c\/p\u003e\n\u003cp\u003eThe tee features a curved hem, with two invisible zips for easy and discreet access when feeding. The fabric is 220gsm, and 95% Cotton \u0026amp; 5% Spandex.\u003c\/p\u003e\n\u003cp\u003e\u003cstrong\u003eModel Information:\u003c\/strong\u003e\u003c\/p\u003e\n\u003cul\u003e\n\u003cli\u003e\n\u003cstrong\u003eSize Worn:\u003c\/strong\u003e\u003cspan\u003e \u003c\/span\u003eXL around a 14-16 They are a true to size fit.\u003c\/li\u003e\n\u003c\/ul\u003e\n\u003cp\u003e\u003cstrong\u003eApprox. garment measurements in cm:\u003c\/strong\u003e\u003c\/p\u003e\n\u003cp\u003e\u003cspan\u003eThese tees are designed to be a true fit, in most cases you can stick with your regular size. \u003c\/span\u003e\u003cspan\u003e If you prefer an oversized fit, we recommend sizing up. \u003c\/span\u003e\u003c\/p\u003e\n\u003cdiv class=\"flex-1 overflow-hidden\"\u003e\n\u003cdiv class=\"h-full\"\u003e\n\u003cdiv class=\"react-scroll-to-bottom--css-twmwd-79elbk h-full\"\u003e\n\u003cdiv class=\"react-scroll-to-bottom--css-twmwd-1n7m0yu\"\u003e\n\u003cdiv class=\"flex flex-col text-sm md:pb-9\"\u003e\n\u003carticle data-scroll-anchor=\"true\" data-testid=\"conversation-turn-7\" dir=\"auto\" class=\"w-full text-token-text-primary focus-visible:outline-2 focus-visible:outline-offset-[-4px]\" tabindex=\"0\"\u003e\n\u003cdiv class=\"text-base py-[18px] px-3 md:px-4 m-auto md:px-5\"\u003e\n\u003cdiv class=\"mx-auto flex flex-1 gap-4 text-base md:gap-5 lg:gap-6 md:max-w-3xl\"\u003e\n\u003cdiv class=\"group\/conversation-turn relative flex w-full min-w-0 flex-col agent-turn\"\u003e\n\u003cdiv class=\"flex-col gap-1 md:gap-3\"\u003e\n\u003cdiv class=\"flex max-w-full flex-col flex-grow\"\u003e\n\u003cdiv class=\"min-h-[20px] text-message flex w-full flex-col items-end gap-2 break-words [.text-message+\u0026amp;]:mt-5 overflow-x-auto whitespace-pre-wrap\" dir=\"auto\" data-message-id=\"2ff8d175-80d9-4490-8924-f36e768e13a0\" data-message-author-role=\"assistant\"\u003e\n\u003cdiv class=\"flex w-full flex-col gap-1 empty:hidden first:pt-[3px]\"\u003e\n\u003cul\u003e\n\u003cli\u003e220gsm\u003c\/li\u003e\n\u003cli\u003e95% Cotton 5% Spandex\u003c\/li\u003e\n\u003c\/ul\u003e\n\u003c\/div\u003e\n\u003c\/div\u003e\n\u003c\/div\u003e\n\u003c\/div\u003e\n\u003c\/div\u003e\n\u003c\/div\u003e\n\u003c\/div\u003e\n\u003c\/article\u003e\n\u003c\/div\u003e\n\u003c\/div\u003e\n\u003c\/div\u003e\n\u003c\/div\u003e\n\u003c\/div\u003e\n\u003ctable width=\"100%\"\u003e\n\u003ctbody\u003e\n\u003ctr\u003e\n\u003ctd\u003eBF Tee\u003c\/td\u003e\n\u003ctd\u003e Bust \u003c\/td\u003e\n\u003ctd\u003e Bottom\u003c\/td\u003e\n\u003ctd\u003eLength \u003c\/td\u003e\n\u003c\/tr\u003e\n\u003ctr\u003e\n\u003ctd\u003eXS - 6\/8\u003c\/td\u003e\n\u003ctd\u003e 96\u003c\/td\u003e\n\u003ctd\u003e100\u003c\/td\u003e\n\u003ctd\u003e67\u003c\/td\u003e\n\u003c\/tr\u003e\n\u003ctr\u003e\n\u003ctd\u003eS - 8-10\u003c\/td\u003e\n\u003ctd\u003e101\u003c\/td\u003e\n\u003ctd\u003e105\u003c\/td\u003e\n\u003ctd\u003e68\u003c\/td\u003e\n\u003c\/tr\u003e\n\u003ctr\u003e\n\u003ctd\u003eM - 10-12\u003c\/td\u003e\n\u003ctd\u003e106\u003c\/td\u003e\n\u003ctd\u003e110\u003c\/td\u003e\n\u003ctd\u003e69\u003c\/td\u003e\n\u003c\/tr\u003e\n\u003ctr\u003e\n\u003ctd\u003eL - 12-14\u003c\/td\u003e\n\u003ctd\u003e111\u003c\/td\u003e\n\u003ctd\u003e115\u003c\/td\u003e\n\u003ctd\u003e70\u003c\/td\u003e\n\u003c\/tr\u003e\n\u003ctr\u003e\n\u003ctd\u003eXL - 14-16\u003c\/td\u003e\n\u003ctd\u003e116\u003c\/td\u003e\n\u003ctd\u003e120\u003c\/td\u003e\n\u003ctd\u003e71\u003c\/td\u003e\n\u003c\/tr\u003e\n\u003ctr\u003e\n\u003ctd\u003e2XL -16-18\u003c\/td\u003e\n\u003ctd\u003e121\u003c\/td\u003e\n\u003ctd\u003e125\u003c\/td\u003e\n\u003ctd\u003e72\u003c\/td\u003e\n\u003c\/tr\u003e\n\u003ctr\u003e\n\u003ctd\u003e3XL -18-20\u003c\/td\u003e\n\u003ctd\u003e126\u003c\/td\u003e\n\u003ctd\u003e130\u003c\/td\u003e\n\u003ctd\u003e73\u003c\/td\u003e\n\u003c\/tr\u003e\n\u003ctr\u003e\n\u003ctd\u003e4XL 20-22\u003c\/td\u003e\n\u003ctd\u003e131\u003c\/td\u003e\n\u003ctd\u003e135\u003c\/td\u003e\n\u003ctd\u003e74\u003c\/td\u003e\n\u003c\/tr\u003e\n\u003ctr\u003e\n\u003ctd\u003e5XL -22-24\u003c\/td\u003e\n\u003ctd\u003e136\u003c\/td\u003e\n\u003ctd\u003e140\u003c\/td\u003e\n\u003ctd\u003e75\u003c\/td\u003e\n\u003c\/tr\u003e\n\u003ctr\u003e\n\u003ctd\u003e6XL -24-26\u003c\/td\u003e\n\u003ctd\u003e141\u003c\/td\u003e\n\u003ctd\u003e145\u003c\/td\u003e\n\u003ctd\u003e76\u003c\/td\u003e\n\u003c\/tr\u003e\n\u003c\/tbody\u003e\n\u003c\/table\u003e","published_at":"2025-11-07T11:13:09+08:00","created_at":"2025-11-05T14:01:00+08:00","vendor":"Rumi + Sol","type":"","tags":["Baby Shower Gifts - Mum","Breastfeeding","Breastfeeding Clothing","Mum"],"price":5999,"price_min":5999,"price_max":5999,"available":true,"price_varies":false,"compare_at_price":null,"compare_at_price_min":0,"compare_at_price_max":0,"compare_at_price_varies":false,"variants":[{"id":45877790572733,"title":"Black \/ XS","option1":"Black","option2":"XS","option3":null,"sku":null,"requires_shipping":true,"taxable":false,"featured_image":{"id":38794530947261,"product_id":8130025095357,"position":1,"created_at":"2025-11-07T11:38:59+08:00","updated_at":"2025-11-08T07:28:00+08:00","alt":"Breastfeeding Tee - The Birth Store - Rumi + Sol","width":1080,"height":1080,"src":"\/\/www.thebirthstore.com.au\/cdn\/shop\/files\/breastfeeding-tee-6975681.png?v=1762558080","variant_ids":[45877790572733,45877790605501,45877790638269,45877790671037,45877790703805,45877790736573,45877790769341,45877790802109,45877790834877,45877790867645]},"available":true,"name":"Breastfeeding Tee - Black \/ XS","public_title":"Black \/ XS","options":["Black","XS"],"price":5999,"weight":0,"compare_at_price":null,"inventory_management":"shopify","barcode":"90572733","featured_media":{"alt":"Breastfeeding Tee - The Birth Store - Rumi + Sol","id":30038773629117,"position":1,"preview_image":{"aspect_ratio":1.0,"height":1080,"width":1080,"src":"\/\/www.thebirthstore.com.au\/cdn\/shop\/files\/breastfeeding-tee-6975681.png?v=1762558080"}},"requires_selling_plan":false,"selling_plan_allocations":[],"quantity_rule":{"min":1,"max":null,"increment":1}},{"id":45877790605501,"title":"Black \/ S","option1":"Black","option2":"S","option3":null,"sku":null,"requires_shipping":true,"taxable":false,"featured_image":{"id":38794530947261,"product_id":8130025095357,"position":1,"created_at":"2025-11-07T11:38:59+08:00","updated_at":"2025-11-08T07:28:00+08:00","alt":"Breastfeeding Tee - The Birth Store - Rumi + Sol","width":1080,"height":1080,"src":"\/\/www.thebirthstore.com.au\/cdn\/shop\/files\/breastfeeding-tee-6975681.png?v=1762558080","variant_ids":[45877790572733,45877790605501,45877790638269,45877790671037,45877790703805,45877790736573,45877790769341,45877790802109,45877790834877,45877790867645]},"available":false,"name":"Breastfeeding Tee - Black \/ S","public_title":"Black \/ S","options":["Black","S"],"price":5999,"weight":0,"compare_at_price":null,"inventory_management":"shopify","barcode":"90605501","featured_media":{"alt":"Breastfeeding Tee - The Birth Store - Rumi + Sol","id":30038773629117,"position":1,"preview_image":{"aspect_ratio":1.0,"height":1080,"width":1080,"src":"\/\/www.thebirthstore.com.au\/cdn\/shop\/files\/breastfeeding-tee-6975681.png?v=1762558080"}},"requires_selling_plan":false,"selling_plan_allocations":[],"quantity_rule":{"min":1,"max":null,"increment":1}},{"id":45877790638269,"title":"Black \/ M","option1":"Black","option2":"M","option3":null,"sku":null,"requires_shipping":true,"taxable":false,"featured_image":{"id":38794530947261,"product_id":8130025095357,"position":1,"created_at":"2025-11-07T11:38:59+08:00","updated_at":"2025-11-08T07:28:00+08:00","alt":"Breastfeeding Tee - The Birth Store - Rumi + Sol","width":1080,"height":1080,"src":"\/\/www.thebirthstore.com.au\/cdn\/shop\/files\/breastfeeding-tee-6975681.png?v=1762558080","variant_ids":[45877790572733,45877790605501,45877790638269,45877790671037,45877790703805,45877790736573,45877790769341,45877790802109,45877790834877,45877790867645]},"available":false,"name":"Breastfeeding Tee - Black \/ M","public_title":"Black \/ M","options":["Black","M"],"price":5999,"weight":0,"compare_at_price":null,"inventory_management":"shopify","barcode":"90638269","featured_media":{"alt":"Breastfeeding Tee - The Birth Store - Rumi + Sol","id":30038773629117,"position":1,"preview_image":{"aspect_ratio":1.0,"height":1080,"width":1080,"src":"\/\/www.thebirthstore.com.au\/cdn\/shop\/files\/breastfeeding-tee-6975681.png?v=1762558080"}},"requires_selling_plan":false,"selling_plan_allocations":[],"quantity_rule":{"min":1,"max":null,"increment":1}},{"id":45877790671037,"title":"Black \/ L","option1":"Black","option2":"L","option3":null,"sku":null,"requires_shipping":true,"taxable":false,"featured_image":{"id":38794530947261,"product_id":8130025095357,"position":1,"created_at":"2025-11-07T11:38:59+08:00","updated_at":"2025-11-08T07:28:00+08:00","alt":"Breastfeeding Tee - The Birth Store - Rumi + Sol","width":1080,"height":1080,"src":"\/\/www.thebirthstore.com.au\/cdn\/shop\/files\/breastfeeding-tee-6975681.png?v=1762558080","variant_ids":[45877790572733,45877790605501,45877790638269,45877790671037,45877790703805,45877790736573,45877790769341,45877790802109,45877790834877,45877790867645]},"available":false,"name":"Breastfeeding Tee - Black \/ L","public_title":"Black \/ L","options":["Black","L"],"price":5999,"weight":0,"compare_at_price":null,"inventory_management":"shopify","barcode":"90671037","featured_media":{"alt":"Breastfeeding Tee - The Birth Store - Rumi + Sol","id":30038773629117,"position":1,"preview_image":{"aspect_ratio":1.0,"height":1080,"width":1080,"src":"\/\/www.thebirthstore.com.au\/cdn\/shop\/files\/breastfeeding-tee-6975681.png?v=1762558080"}},"requires_selling_plan":false,"selling_plan_allocations":[],"quantity_rule":{"min":1,"max":null,"increment":1}},{"id":45877790703805,"title":"Black \/ XL","option1":"Black","option2":"XL","option3":null,"sku":null,"requires_shipping":true,"taxable":false,"featured_image":{"id":38794530947261,"product_id":8130025095357,"position":1,"created_at":"2025-11-07T11:38:59+08:00","updated_at":"2025-11-08T07:28:00+08:00","alt":"Breastfeeding Tee - The Birth Store - Rumi + Sol","width":1080,"height":1080,"src":"\/\/www.thebirthstore.com.au\/cdn\/shop\/files\/breastfeeding-tee-6975681.png?v=1762558080","variant_ids":[45877790572733,45877790605501,45877790638269,45877790671037,45877790703805,45877790736573,45877790769341,45877790802109,45877790834877,45877790867645]},"available":false,"name":"Breastfeeding Tee - Black \/ XL","public_title":"Black \/ XL","options":["Black","XL"],"price":5999,"weight":0,"compare_at_price":null,"inventory_management":"shopify","barcode":"90703805","featured_media":{"alt":"Breastfeeding Tee - The Birth Store - Rumi + Sol","id":30038773629117,"position":1,"preview_image":{"aspect_ratio":1.0,"height":1080,"width":1080,"src":"\/\/www.thebirthstore.com.au\/cdn\/shop\/files\/breastfeeding-tee-6975681.png?v=1762558080"}},"requires_selling_plan":false,"selling_plan_allocations":[],"quantity_rule":{"min":1,"max":null,"increment":1}},{"id":45877790736573,"title":"Black \/ 2XL","option1":"Black","option2":"2XL","option3":null,"sku":null,"requires_shipping":true,"taxable":false,"featured_image":{"id":38794530947261,"product_id":8130025095357,"position":1,"created_at":"2025-11-07T11:38:59+08:00","updated_at":"2025-11-08T07:28:00+08:00","alt":"Breastfeeding Tee - The Birth Store - Rumi + Sol","width":1080,"height":1080,"src":"\/\/www.thebirthstore.com.au\/cdn\/shop\/files\/breastfeeding-tee-6975681.png?v=1762558080","variant_ids":[45877790572733,45877790605501,45877790638269,45877790671037,45877790703805,45877790736573,45877790769341,45877790802109,45877790834877,45877790867645]},"available":false,"name":"Breastfeeding Tee - Black \/ 2XL","public_title":"Black \/ 2XL","options":["Black","2XL"],"price":5999,"weight":0,"compare_at_price":null,"inventory_management":"shopify","barcode":"90736573","featured_media":{"alt":"Breastfeeding Tee - The Birth Store - Rumi + Sol","id":30038773629117,"position":1,"preview_image":{"aspect_ratio":1.0,"height":1080,"width":1080,"src":"\/\/www.thebirthstore.com.au\/cdn\/shop\/files\/breastfeeding-tee-6975681.png?v=1762558080"}},"requires_selling_plan":false,"selling_plan_allocations":[],"quantity_rule":{"min":1,"max":null,"increment":1}},{"id":45877790769341,"title":"Black \/ 3XL","option1":"Black","option2":"3XL","option3":null,"sku":null,"requires_shipping":true,"taxable":false,"featured_image":{"id":38794530947261,"product_id":8130025095357,"position":1,"created_at":"2025-11-07T11:38:59+08:00","updated_at":"2025-11-08T07:28:00+08:00","alt":"Breastfeeding Tee - The Birth Store - Rumi + Sol","width":1080,"height":1080,"src":"\/\/www.thebirthstore.com.au\/cdn\/shop\/files\/breastfeeding-tee-6975681.png?v=1762558080","variant_ids":[45877790572733,45877790605501,45877790638269,45877790671037,45877790703805,45877790736573,45877790769341,45877790802109,45877790834877,45877790867645]},"available":true,"name":"Breastfeeding Tee - Black \/ 3XL","public_title":"Black \/ 3XL","options":["Black","3XL"],"price":5999,"weight":0,"compare_at_price":null,"inventory_management":"shopify","barcode":"90769341","featured_media":{"alt":"Breastfeeding Tee - The Birth Store - Rumi + Sol","id":30038773629117,"position":1,"preview_image":{"aspect_ratio":1.0,"height":1080,"width":1080,"src":"\/\/www.thebirthstore.com.au\/cdn\/shop\/files\/breastfeeding-tee-6975681.png?v=1762558080"}},"requires_selling_plan":false,"selling_plan_allocations":[],"quantity_rule":{"min":1,"max":null,"increment":1}},{"id":45877790802109,"title":"Black \/ 4XL","option1":"Black","option2":"4XL","option3":null,"sku":null,"requires_shipping":true,"taxable":false,"featured_image":{"id":38794530947261,"product_id":8130025095357,"position":1,"created_at":"2025-11-07T11:38:59+08:00","updated_at":"2025-11-08T07:28:00+08:00","alt":"Breastfeeding Tee - The Birth Store - Rumi + Sol","width":1080,"height":1080,"src":"\/\/www.thebirthstore.com.au\/cdn\/shop\/files\/breastfeeding-tee-6975681.png?v=1762558080","variant_ids":[45877790572733,45877790605501,45877790638269,45877790671037,45877790703805,45877790736573,45877790769341,45877790802109,45877790834877,45877790867645]},"available":true,"name":"Breastfeeding Tee - Black \/ 4XL","public_title":"Black \/ 4XL","options":["Black","4XL"],"price":5999,"weight":0,"compare_at_price":null,"inventory_management":"shopify","barcode":"90802109","featured_media":{"alt":"Breastfeeding Tee - The Birth Store - Rumi + Sol","id":30038773629117,"position":1,"preview_image":{"aspect_ratio":1.0,"height":1080,"width":1080,"src":"\/\/www.thebirthstore.com.au\/cdn\/shop\/files\/breastfeeding-tee-6975681.png?v=1762558080"}},"requires_selling_plan":false,"selling_plan_allocations":[],"quantity_rule":{"min":1,"max":null,"increment":1}},{"id":45877790834877,"title":"Black \/ 5XL","option1":"Black","option2":"5XL","option3":null,"sku":null,"requires_shipping":true,"taxable":false,"featured_image":{"id":38794530947261,"product_id":8130025095357,"position":1,"created_at":"2025-11-07T11:38:59+08:00","updated_at":"2025-11-08T07:28:00+08:00","alt":"Breastfeeding Tee - The Birth Store - Rumi + Sol","width":1080,"height":1080,"src":"\/\/www.thebirthstore.com.au\/cdn\/shop\/files\/breastfeeding-tee-6975681.png?v=1762558080","variant_ids":[45877790572733,45877790605501,45877790638269,45877790671037,45877790703805,45877790736573,45877790769341,45877790802109,45877790834877,45877790867645]},"available":false,"name":"Breastfeeding Tee - Black \/ 5XL","public_title":"Black \/ 5XL","options":["Black","5XL"],"price":5999,"weight":0,"compare_at_price":null,"inventory_management":"shopify","barcode":"90834877","featured_media":{"alt":"Breastfeeding Tee - The Birth Store - Rumi + Sol","id":30038773629117,"position":1,"preview_image":{"aspect_ratio":1.0,"height":1080,"width":1080,"src":"\/\/www.thebirthstore.com.au\/cdn\/shop\/files\/breastfeeding-tee-6975681.png?v=1762558080"}},"requires_selling_plan":false,"selling_plan_allocations":[],"quantity_rule":{"min":1,"max":null,"increment":1}},{"id":45877790867645,"title":"Black \/ 6XL","option1":"Black","option2":"6XL","option3":null,"sku":null,"requires_shipping":true,"taxable":false,"featured_image":{"id":38794530947261,"product_id":8130025095357,"position":1,"created_at":"2025-11-07T11:38:59+08:00","updated_at":"2025-11-08T07:28:00+08:00","alt":"Breastfeeding Tee - The Birth Store - Rumi + Sol","width":1080,"height":1080,"src":"\/\/www.thebirthstore.com.au\/cdn\/shop\/files\/breastfeeding-tee-6975681.png?v=1762558080","variant_ids":[45877790572733,45877790605501,45877790638269,45877790671037,45877790703805,45877790736573,45877790769341,45877790802109,45877790834877,45877790867645]},"available":false,"name":"Breastfeeding Tee - Black \/ 6XL","public_title":"Black \/ 6XL","options":["Black","6XL"],"price":5999,"weight":0,"compare_at_price":null,"inventory_management":"shopify","barcode":"90867645","featured_media":{"alt":"Breastfeeding Tee - The Birth Store - Rumi + Sol","id":30038773629117,"position":1,"preview_image":{"aspect_ratio":1.0,"height":1080,"width":1080,"src":"\/\/www.thebirthstore.com.au\/cdn\/shop\/files\/breastfeeding-tee-6975681.png?v=1762558080"}},"requires_selling_plan":false,"selling_plan_allocations":[],"quantity_rule":{"min":1,"max":null,"increment":1}},{"id":45877790900413,"title":"Pink \/ XS","option1":"Pink","option2":"XS","option3":null,"sku":null,"requires_shipping":true,"taxable":false,"featured_image":{"id":38794525573309,"product_id":8130025095357,"position":2,"created_at":"2025-11-07T11:34:13+08:00","updated_at":"2025-11-08T07:28:00+08:00","alt":"Breastfeeding Tee - The Birth Store - Rumi + Sol","width":1080,"height":1080,"src":"\/\/www.thebirthstore.com.au\/cdn\/shop\/files\/breastfeeding-tee-8872935.png?v=1762558080","variant_ids":[45877790900413,45877790933181,45877790965949,45877790998717,45877791031485,45877791064253,45877791097021,45877791129789,45877791162557,45877791195325]},"available":true,"name":"Breastfeeding Tee - Pink \/ XS","public_title":"Pink \/ XS","options":["Pink","XS"],"price":5999,"weight":0,"compare_at_price":null,"inventory_management":"shopify","barcode":"90900413","featured_media":{"alt":"Breastfeeding Tee - The Birth Store - Rumi + Sol","id":30038768255165,"position":2,"preview_image":{"aspect_ratio":1.0,"height":1080,"width":1080,"src":"\/\/www.thebirthstore.com.au\/cdn\/shop\/files\/breastfeeding-tee-8872935.png?v=1762558080"}},"requires_selling_plan":false,"selling_plan_allocations":[],"quantity_rule":{"min":1,"max":null,"increment":1}},{"id":45877790933181,"title":"Pink \/ S","option1":"Pink","option2":"S","option3":null,"sku":null,"requires_shipping":true,"taxable":false,"featured_image":{"id":38794525573309,"product_id":8130025095357,"position":2,"created_at":"2025-11-07T11:34:13+08:00","updated_at":"2025-11-08T07:28:00+08:00","alt":"Breastfeeding Tee - The Birth Store - Rumi + Sol","width":1080,"height":1080,"src":"\/\/www.thebirthstore.com.au\/cdn\/shop\/files\/breastfeeding-tee-8872935.png?v=1762558080","variant_ids":[45877790900413,45877790933181,45877790965949,45877790998717,45877791031485,45877791064253,45877791097021,45877791129789,45877791162557,45877791195325]},"available":true,"name":"Breastfeeding Tee - Pink \/ S","public_title":"Pink \/ S","options":["Pink","S"],"price":5999,"weight":0,"compare_at_price":null,"inventory_management":"shopify","barcode":"90933181","featured_media":{"alt":"Breastfeeding Tee - The Birth Store - Rumi + Sol","id":30038768255165,"position":2,"preview_image":{"aspect_ratio":1.0,"height":1080,"width":1080,"src":"\/\/www.thebirthstore.com.au\/cdn\/shop\/files\/breastfeeding-tee-8872935.png?v=1762558080"}},"requires_selling_plan":false,"selling_plan_allocations":[],"quantity_rule":{"min":1,"max":null,"increment":1}},{"id":45877790965949,"title":"Pink \/ M","option1":"Pink","option2":"M","option3":null,"sku":null,"requires_shipping":true,"taxable":false,"featured_image":{"id":38794525573309,"product_id":8130025095357,"position":2,"created_at":"2025-11-07T11:34:13+08:00","updated_at":"2025-11-08T07:28:00+08:00","alt":"Breastfeeding Tee - The Birth Store - Rumi + Sol","width":1080,"height":1080,"src":"\/\/www.thebirthstore.com.au\/cdn\/shop\/files\/breastfeeding-tee-8872935.png?v=1762558080","variant_ids":[45877790900413,45877790933181,45877790965949,45877790998717,45877791031485,45877791064253,45877791097021,45877791129789,45877791162557,45877791195325]},"available":false,"name":"Breastfeeding Tee - Pink \/ M","public_title":"Pink \/ M","options":["Pink","M"],"price":5999,"weight":0,"compare_at_price":null,"inventory_management":"shopify","barcode":"90965949","featured_media":{"alt":"Breastfeeding Tee - The Birth Store - Rumi + Sol","id":30038768255165,"position":2,"preview_image":{"aspect_ratio":1.0,"height":1080,"width":1080,"src":"\/\/www.thebirthstore.com.au\/cdn\/shop\/files\/breastfeeding-tee-8872935.png?v=1762558080"}},"requires_selling_plan":false,"selling_plan_allocations":[],"quantity_rule":{"min":1,"max":null,"increment":1}},{"id":45877790998717,"title":"Pink \/ L","option1":"Pink","option2":"L","option3":null,"sku":null,"requires_shipping":true,"taxable":false,"featured_image":{"id":38794525573309,"product_id":8130025095357,"position":2,"created_at":"2025-11-07T11:34:13+08:00","updated_at":"2025-11-08T07:28:00+08:00","alt":"Breastfeeding Tee - The Birth Store - Rumi + Sol","width":1080,"height":1080,"src":"\/\/www.thebirthstore.com.au\/cdn\/shop\/files\/breastfeeding-tee-8872935.png?v=1762558080","variant_ids":[45877790900413,45877790933181,45877790965949,45877790998717,45877791031485,45877791064253,45877791097021,45877791129789,45877791162557,45877791195325]},"available":false,"name":"Breastfeeding Tee - Pink \/ L","public_title":"Pink \/ L","options":["Pink","L"],"price":5999,"weight":0,"compare_at_price":null,"inventory_management":"shopify","barcode":"90998717","featured_media":{"alt":"Breastfeeding Tee - The Birth Store - Rumi + Sol","id":30038768255165,"position":2,"preview_image":{"aspect_ratio":1.0,"height":1080,"width":1080,"src":"\/\/www.thebirthstore.com.au\/cdn\/shop\/files\/breastfeeding-tee-8872935.png?v=1762558080"}},"requires_selling_plan":false,"selling_plan_allocations":[],"quantity_rule":{"min":1,"max":null,"increment":1}},{"id":45877791031485,"title":"Pink \/ XL","option1":"Pink","option2":"XL","option3":null,"sku":null,"requires_shipping":true,"taxable":false,"featured_image":{"id":38794525573309,"product_id":8130025095357,"position":2,"created_at":"2025-11-07T11:34:13+08:00","updated_at":"2025-11-08T07:28:00+08:00","alt":"Breastfeeding Tee - The Birth Store - Rumi + Sol","width":1080,"height":1080,"src":"\/\/www.thebirthstore.com.au\/cdn\/shop\/files\/breastfeeding-tee-8872935.png?v=1762558080","variant_ids":[45877790900413,45877790933181,45877790965949,45877790998717,45877791031485,45877791064253,45877791097021,45877791129789,45877791162557,45877791195325]},"available":true,"name":"Breastfeeding Tee - Pink \/ XL","public_title":"Pink \/ XL","options":["Pink","XL"],"price":5999,"weight":0,"compare_at_price":null,"inventory_management":"shopify","barcode":"91031485","featured_media":{"alt":"Breastfeeding Tee - The Birth Store - Rumi + Sol","id":30038768255165,"position":2,"preview_image":{"aspect_ratio":1.0,"height":1080,"width":1080,"src":"\/\/www.thebirthstore.com.au\/cdn\/shop\/files\/breastfeeding-tee-8872935.png?v=1762558080"}},"requires_selling_plan":false,"selling_plan_allocations":[],"quantity_rule":{"min":1,"max":null,"increment":1}},{"id":45877791064253,"title":"Pink \/ 2XL","option1":"Pink","option2":"2XL","option3":null,"sku":null,"requires_shipping":true,"taxable":false,"featured_image":{"id":38794525573309,"product_id":8130025095357,"position":2,"created_at":"2025-11-07T11:34:13+08:00","updated_at":"2025-11-08T07:28:00+08:00","alt":"Breastfeeding Tee - The Birth Store - Rumi + Sol","width":1080,"height":1080,"src":"\/\/www.thebirthstore.com.au\/cdn\/shop\/files\/breastfeeding-tee-8872935.png?v=1762558080","variant_ids":[45877790900413,45877790933181,45877790965949,45877790998717,45877791031485,45877791064253,45877791097021,45877791129789,45877791162557,45877791195325]},"available":false,"name":"Breastfeeding Tee - Pink \/ 2XL","public_title":"Pink \/ 2XL","options":["Pink","2XL"],"price":5999,"weight":0,"compare_at_price":null,"inventory_management":"shopify","barcode":"91064253","featured_media":{"alt":"Breastfeeding Tee - The Birth Store - Rumi + Sol","id":30038768255165,"position":2,"preview_image":{"aspect_ratio":1.0,"height":1080,"width":1080,"src":"\/\/www.thebirthstore.com.au\/cdn\/shop\/files\/breastfeeding-tee-8872935.png?v=1762558080"}},"requires_selling_plan":false,"selling_plan_allocations":[],"quantity_rule":{"min":1,"max":null,"increment":1}},{"id":45877791097021,"title":"Pink \/ 3XL","option1":"Pink","option2":"3XL","option3":null,"sku":null,"requires_shipping":true,"taxable":false,"featured_image":{"id":38794525573309,"product_id":8130025095357,"position":2,"created_at":"2025-11-07T11:34:13+08:00","updated_at":"2025-11-08T07:28:00+08:00","alt":"Breastfeeding Tee - The Birth Store - Rumi + Sol","width":1080,"height":1080,"src":"\/\/www.thebirthstore.com.au\/cdn\/shop\/files\/breastfeeding-tee-8872935.png?v=1762558080","variant_ids":[45877790900413,45877790933181,45877790965949,45877790998717,45877791031485,45877791064253,45877791097021,45877791129789,45877791162557,45877791195325]},"available":false,"name":"Breastfeeding Tee - Pink \/ 3XL","public_title":"Pink \/ 3XL","options":["Pink","3XL"],"price":5999,"weight":0,"compare_at_price":null,"inventory_management":"shopify","barcode":"91097021","featured_media":{"alt":"Breastfeeding Tee - The Birth Store - Rumi + Sol","id":30038768255165,"position":2,"preview_image":{"aspect_ratio":1.0,"height":1080,"width":1080,"src":"\/\/www.thebirthstore.com.au\/cdn\/shop\/files\/breastfeeding-tee-8872935.png?v=1762558080"}},"requires_selling_plan":false,"selling_plan_allocations":[],"quantity_rule":{"min":1,"max":null,"increment":1}},{"id":45877791129789,"title":"Pink \/ 4XL","option1":"Pink","option2":"4XL","option3":null,"sku":null,"requires_shipping":true,"taxable":false,"featured_image":{"id":38794525573309,"product_id":8130025095357,"position":2,"created_at":"2025-11-07T11:34:13+08:00","updated_at":"2025-11-08T07:28:00+08:00","alt":"Breastfeeding Tee - The Birth Store - Rumi + Sol","width":1080,"height":1080,"src":"\/\/www.thebirthstore.com.au\/cdn\/shop\/files\/breastfeeding-tee-8872935.png?v=1762558080","variant_ids":[45877790900413,45877790933181,45877790965949,45877790998717,45877791031485,45877791064253,45877791097021,45877791129789,45877791162557,45877791195325]},"available":true,"name":"Breastfeeding Tee - Pink \/ 4XL","public_title":"Pink \/ 4XL","options":["Pink","4XL"],"price":5999,"weight":0,"compare_at_price":null,"inventory_management":"shopify","barcode":"91129789","featured_media":{"alt":"Breastfeeding Tee - The Birth Store - Rumi + Sol","id":30038768255165,"position":2,"preview_image":{"aspect_ratio":1.0,"height":1080,"width":1080,"src":"\/\/www.thebirthstore.com.au\/cdn\/shop\/files\/breastfeeding-tee-8872935.png?v=1762558080"}},"requires_selling_plan":false,"selling_plan_allocations":[],"quantity_rule":{"min":1,"max":null,"increment":1}},{"id":45877791162557,"title":"Pink \/ 5XL","option1":"Pink","option2":"5XL","option3":null,"sku":null,"requires_shipping":true,"taxable":false,"featured_image":{"id":38794525573309,"product_id":8130025095357,"position":2,"created_at":"2025-11-07T11:34:13+08:00","updated_at":"2025-11-08T07:28:00+08:00","alt":"Breastfeeding Tee - The Birth Store - Rumi + Sol","width":1080,"height":1080,"src":"\/\/www.thebirthstore.com.au\/cdn\/shop\/files\/breastfeeding-tee-8872935.png?v=1762558080","variant_ids":[45877790900413,45877790933181,45877790965949,45877790998717,45877791031485,45877791064253,45877791097021,45877791129789,45877791162557,45877791195325]},"available":false,"name":"Breastfeeding Tee - Pink \/ 5XL","public_title":"Pink \/ 5XL","options":["Pink","5XL"],"price":5999,"weight":0,"compare_at_price":null,"inventory_management":"shopify","barcode":"91162557","featured_media":{"alt":"Breastfeeding Tee - The Birth Store - Rumi + Sol","id":30038768255165,"position":2,"preview_image":{"aspect_ratio":1.0,"height":1080,"width":1080,"src":"\/\/www.thebirthstore.com.au\/cdn\/shop\/files\/breastfeeding-tee-8872935.png?v=1762558080"}},"requires_selling_plan":false,"selling_plan_allocations":[],"quantity_rule":{"min":1,"max":null,"increment":1}},{"id":45877791195325,"title":"Pink \/ 6XL","option1":"Pink","option2":"6XL","option3":null,"sku":null,"requires_shipping":true,"taxable":false,"featured_image":{"id":38794525573309,"product_id":8130025095357,"position":2,"created_at":"2025-11-07T11:34:13+08:00","updated_at":"2025-11-08T07:28:00+08:00","alt":"Breastfeeding Tee - The Birth Store - Rumi + Sol","width":1080,"height":1080,"src":"\/\/www.thebirthstore.com.au\/cdn\/shop\/files\/breastfeeding-tee-8872935.png?v=1762558080","variant_ids":[45877790900413,45877790933181,45877790965949,45877790998717,45877791031485,45877791064253,45877791097021,45877791129789,45877791162557,45877791195325]},"available":false,"name":"Breastfeeding Tee - Pink \/ 6XL","public_title":"Pink \/ 6XL","options":["Pink","6XL"],"price":5999,"weight":0,"compare_at_price":null,"inventory_management":"shopify","barcode":"91195325","featured_media":{"alt":"Breastfeeding Tee - The Birth Store - Rumi + Sol","id":30038768255165,"position":2,"preview_image":{"aspect_ratio":1.0,"height":1080,"width":1080,"src":"\/\/www.thebirthstore.com.au\/cdn\/shop\/files\/breastfeeding-tee-8872935.png?v=1762558080"}},"requires_selling_plan":false,"selling_plan_allocations":[],"quantity_rule":{"min":1,"max":null,"increment":1}},{"id":45877791228093,"title":"Powder Blue \/ XS","option1":"Powder Blue","option2":"XS","option3":null,"sku":null,"requires_shipping":true,"taxable":false,"featured_image":{"id":38794528555197,"product_id":8130025095357,"position":3,"created_at":"2025-11-07T11:36:16+08:00","updated_at":"2025-11-08T07:28:00+08:00","alt":"Breastfeeding Tee - The Birth Store - Rumi + Sol","width":1080,"height":1080,"src":"\/\/www.thebirthstore.com.au\/cdn\/shop\/files\/breastfeeding-tee-8346192.png?v=1762558080","variant_ids":[45877791228093,45877791260861,45877791293629,45877791326397,45877791359165,45877791391933,45877791424701,45877791457469,45877791490237,45877791523005]},"available":true,"name":"Breastfeeding Tee - Powder Blue \/ XS","public_title":"Powder Blue \/ XS","options":["Powder Blue","XS"],"price":5999,"weight":0,"compare_at_price":null,"inventory_management":"shopify","barcode":"91228093","featured_media":{"alt":"Breastfeeding Tee - The Birth Store - Rumi + Sol","id":30038771237053,"position":3,"preview_image":{"aspect_ratio":1.0,"height":1080,"width":1080,"src":"\/\/www.thebirthstore.com.au\/cdn\/shop\/files\/breastfeeding-tee-8346192.png?v=1762558080"}},"requires_selling_plan":false,"selling_plan_allocations":[],"quantity_rule":{"min":1,"max":null,"increment":1}},{"id":45877791260861,"title":"Powder Blue \/ S","option1":"Powder Blue","option2":"S","option3":null,"sku":null,"requires_shipping":true,"taxable":false,"featured_image":{"id":38794528555197,"product_id":8130025095357,"position":3,"created_at":"2025-11-07T11:36:16+08:00","updated_at":"2025-11-08T07:28:00+08:00","alt":"Breastfeeding Tee - The Birth Store - Rumi + Sol","width":1080,"height":1080,"src":"\/\/www.thebirthstore.com.au\/cdn\/shop\/files\/breastfeeding-tee-8346192.png?v=1762558080","variant_ids":[45877791228093,45877791260861,45877791293629,45877791326397,45877791359165,45877791391933,45877791424701,45877791457469,45877791490237,45877791523005]},"available":false,"name":"Breastfeeding Tee - Powder Blue \/ S","public_title":"Powder Blue \/ S","options":["Powder Blue","S"],"price":5999,"weight":0,"compare_at_price":null,"inventory_management":"shopify","barcode":"91260861","featured_media":{"alt":"Breastfeeding Tee - The Birth Store - Rumi + Sol","id":30038771237053,"position":3,"preview_image":{"aspect_ratio":1.0,"height":1080,"width":1080,"src":"\/\/www.thebirthstore.com.au\/cdn\/shop\/files\/breastfeeding-tee-8346192.png?v=1762558080"}},"requires_selling_plan":false,"selling_plan_allocations":[],"quantity_rule":{"min":1,"max":null,"increment":1}},{"id":45877791293629,"title":"Powder Blue \/ M","option1":"Powder Blue","option2":"M","option3":null,"sku":null,"requires_shipping":true,"taxable":false,"featured_image":{"id":38794528555197,"product_id":8130025095357,"position":3,"created_at":"2025-11-07T11:36:16+08:00","updated_at":"2025-11-08T07:28:00+08:00","alt":"Breastfeeding Tee - The Birth Store - Rumi + Sol","width":1080,"height":1080,"src":"\/\/www.thebirthstore.com.au\/cdn\/shop\/files\/breastfeeding-tee-8346192.png?v=1762558080","variant_ids":[45877791228093,45877791260861,45877791293629,45877791326397,45877791359165,45877791391933,45877791424701,45877791457469,45877791490237,45877791523005]},"available":false,"name":"Breastfeeding Tee - Powder Blue \/ M","public_title":"Powder Blue \/ M","options":["Powder Blue","M"],"price":5999,"weight":0,"compare_at_price":null,"inventory_management":"shopify","barcode":"91293629","featured_media":{"alt":"Breastfeeding Tee - The Birth Store - Rumi + Sol","id":30038771237053,"position":3,"preview_image":{"aspect_ratio":1.0,"height":1080,"width":1080,"src":"\/\/www.thebirthstore.com.au\/cdn\/shop\/files\/breastfeeding-tee-8346192.png?v=1762558080"}},"requires_selling_plan":false,"selling_plan_allocations":[],"quantity_rule":{"min":1,"max":null,"increment":1}},{"id":45877791326397,"title":"Powder Blue \/ L","option1":"Powder Blue","option2":"L","option3":null,"sku":null,"requires_shipping":true,"taxable":false,"featured_image":{"id":38794528555197,"product_id":8130025095357,"position":3,"created_at":"2025-11-07T11:36:16+08:00","updated_at":"2025-11-08T07:28:00+08:00","alt":"Breastfeeding Tee - The Birth Store - Rumi + Sol","width":1080,"height":1080,"src":"\/\/www.thebirthstore.com.au\/cdn\/shop\/files\/breastfeeding-tee-8346192.png?v=1762558080","variant_ids":[45877791228093,45877791260861,45877791293629,45877791326397,45877791359165,45877791391933,45877791424701,45877791457469,45877791490237,45877791523005]},"available":false,"name":"Breastfeeding Tee - Powder Blue \/ L","public_title":"Powder Blue \/ L","options":["Powder Blue","L"],"price":5999,"weight":0,"compare_at_price":null,"inventory_management":"shopify","barcode":"91326397","featured_media":{"alt":"Breastfeeding Tee - The Birth Store - Rumi + Sol","id":30038771237053,"position":3,"preview_image":{"aspect_ratio":1.0,"height":1080,"width":1080,"src":"\/\/www.thebirthstore.com.au\/cdn\/shop\/files\/breastfeeding-tee-8346192.png?v=1762558080"}},"requires_selling_plan":false,"selling_plan_allocations":[],"quantity_rule":{"min":1,"max":null,"increment":1}},{"id":45877791359165,"title":"Powder Blue \/ XL","option1":"Powder Blue","option2":"XL","option3":null,"sku":null,"requires_shipping":true,"taxable":false,"featured_image":{"id":38794528555197,"product_id":8130025095357,"position":3,"created_at":"2025-11-07T11:36:16+08:00","updated_at":"2025-11-08T07:28:00+08:00","alt":"Breastfeeding Tee - The Birth Store - Rumi + Sol","width":1080,"height":1080,"src":"\/\/www.thebirthstore.com.au\/cdn\/shop\/files\/breastfeeding-tee-8346192.png?v=1762558080","variant_ids":[45877791228093,45877791260861,45877791293629,45877791326397,45877791359165,45877791391933,45877791424701,45877791457469,45877791490237,45877791523005]},"available":false,"name":"Breastfeeding Tee - Powder Blue \/ XL","public_title":"Powder Blue \/ XL","options":["Powder Blue","XL"],"price":5999,"weight":0,"compare_at_price":null,"inventory_management":"shopify","barcode":"91359165","featured_media":{"alt":"Breastfeeding Tee - The Birth Store - Rumi + Sol","id":30038771237053,"position":3,"preview_image":{"aspect_ratio":1.0,"height":1080,"width":1080,"src":"\/\/www.thebirthstore.com.au\/cdn\/shop\/files\/breastfeeding-tee-8346192.png?v=1762558080"}},"requires_selling_plan":false,"selling_plan_allocations":[],"quantity_rule":{"min":1,"max":null,"increment":1}},{"id":45877791391933,"title":"Powder Blue \/ 2XL","option1":"Powder Blue","option2":"2XL","option3":null,"sku":null,"requires_shipping":true,"taxable":false,"featured_image":{"id":38794528555197,"product_id":8130025095357,"position":3,"created_at":"2025-11-07T11:36:16+08:00","updated_at":"2025-11-08T07:28:00+08:00","alt":"Breastfeeding Tee - The Birth Store - Rumi + Sol","width":1080,"height":1080,"src":"\/\/www.thebirthstore.com.au\/cdn\/shop\/files\/breastfeeding-tee-8346192.png?v=1762558080","variant_ids":[45877791228093,45877791260861,45877791293629,45877791326397,45877791359165,45877791391933,45877791424701,45877791457469,45877791490237,45877791523005]},"available":false,"name":"Breastfeeding Tee - Powder Blue \/ 2XL","public_title":"Powder Blue \/ 2XL","options":["Powder Blue","2XL"],"price":5999,"weight":0,"compare_at_price":null,"inventory_management":"shopify","barcode":"91391933","featured_media":{"alt":"Breastfeeding Tee - The Birth Store - Rumi + Sol","id":30038771237053,"position":3,"preview_image":{"aspect_ratio":1.0,"height":1080,"width":1080,"src":"\/\/www.thebirthstore.com.au\/cdn\/shop\/files\/breastfeeding-tee-8346192.png?v=1762558080"}},"requires_selling_plan":false,"selling_plan_allocations":[],"quantity_rule":{"min":1,"max":null,"increment":1}},{"id":45877791424701,"title":"Powder Blue \/ 3XL","option1":"Powder Blue","option2":"3XL","option3":null,"sku":null,"requires_shipping":true,"taxable":false,"featured_image":{"id":38794528555197,"product_id":8130025095357,"position":3,"created_at":"2025-11-07T11:36:16+08:00","updated_at":"2025-11-08T07:28:00+08:00","alt":"Breastfeeding Tee - The Birth Store - Rumi + Sol","width":1080,"height":1080,"src":"\/\/www.thebirthstore.com.au\/cdn\/shop\/files\/breastfeeding-tee-8346192.png?v=1762558080","variant_ids":[45877791228093,45877791260861,45877791293629,45877791326397,45877791359165,45877791391933,45877791424701,45877791457469,45877791490237,45877791523005]},"available":false,"name":"Breastfeeding Tee - Powder Blue \/ 3XL","public_title":"Powder Blue \/ 3XL","options":["Powder Blue","3XL"],"price":5999,"weight":0,"compare_at_price":null,"inventory_management":"shopify","barcode":"91424701","featured_media":{"alt":"Breastfeeding Tee - The Birth Store - Rumi + Sol","id":30038771237053,"position":3,"preview_image":{"aspect_ratio":1.0,"height":1080,"width":1080,"src":"\/\/www.thebirthstore.com.au\/cdn\/shop\/files\/breastfeeding-tee-8346192.png?v=1762558080"}},"requires_selling_plan":false,"selling_plan_allocations":[],"quantity_rule":{"min":1,"max":null,"increment":1}},{"id":45877791457469,"title":"Powder Blue \/ 4XL","option1":"Powder Blue","option2":"4XL","option3":null,"sku":null,"requires_shipping":true,"taxable":false,"featured_image":{"id":38794528555197,"product_id":8130025095357,"position":3,"created_at":"2025-11-07T11:36:16+08:00","updated_at":"2025-11-08T07:28:00+08:00","alt":"Breastfeeding Tee - The Birth Store - Rumi + Sol","width":1080,"height":1080,"src":"\/\/www.thebirthstore.com.au\/cdn\/shop\/files\/breastfeeding-tee-8346192.png?v=1762558080","variant_ids":[45877791228093,45877791260861,45877791293629,45877791326397,45877791359165,45877791391933,45877791424701,45877791457469,45877791490237,45877791523005]},"available":false,"name":"Breastfeeding Tee - Powder Blue \/ 4XL","public_title":"Powder Blue \/ 4XL","options":["Powder Blue","4XL"],"price":5999,"weight":0,"compare_at_price":null,"inventory_management":"shopify","barcode":"91457469","featured_media":{"alt":"Breastfeeding Tee - The Birth Store - Rumi + Sol","id":30038771237053,"position":3,"preview_image":{"aspect_ratio":1.0,"height":1080,"width":1080,"src":"\/\/www.thebirthstore.com.au\/cdn\/shop\/files\/breastfeeding-tee-8346192.png?v=1762558080"}},"requires_selling_plan":false,"selling_plan_allocations":[],"quantity_rule":{"min":1,"max":null,"increment":1}},{"id":45877791490237,"title":"Powder Blue \/ 5XL","option1":"Powder Blue","option2":"5XL","option3":null,"sku":null,"requires_shipping":true,"taxable":false,"featured_image":{"id":38794528555197,"product_id":8130025095357,"position":3,"created_at":"2025-11-07T11:36:16+08:00","updated_at":"2025-11-08T07:28:00+08:00","alt":"Breastfeeding Tee - The Birth Store - Rumi + Sol","width":1080,"height":1080,"src":"\/\/www.thebirthstore.com.au\/cdn\/shop\/files\/breastfeeding-tee-8346192.png?v=1762558080","variant_ids":[45877791228093,45877791260861,45877791293629,45877791326397,45877791359165,45877791391933,45877791424701,45877791457469,45877791490237,45877791523005]},"available":false,"name":"Breastfeeding Tee - Powder Blue \/ 5XL","public_title":"Powder Blue \/ 5XL","options":["Powder Blue","5XL"],"price":5999,"weight":0,"compare_at_price":null,"inventory_management":"shopify","barcode":"91490237","featured_media":{"alt":"Breastfeeding Tee - The Birth Store - Rumi + Sol","id":30038771237053,"position":3,"preview_image":{"aspect_ratio":1.0,"height":1080,"width":1080,"src":"\/\/www.thebirthstore.com.au\/cdn\/shop\/files\/breastfeeding-tee-8346192.png?v=1762558080"}},"requires_selling_plan":false,"selling_plan_allocations":[],"quantity_rule":{"min":1,"max":null,"increment":1}},{"id":45877791523005,"title":"Powder Blue \/ 6XL","option1":"Powder Blue","option2":"6XL","option3":null,"sku":null,"requires_shipping":true,"taxable":false,"featured_image":{"id":38794528555197,"product_id":8130025095357,"position":3,"created_at":"2025-11-07T11:36:16+08:00","updated_at":"2025-11-08T07:28:00+08:00","alt":"Breastfeeding Tee - The Birth Store - Rumi + Sol","width":1080,"height":1080,"src":"\/\/www.thebirthstore.com.au\/cdn\/shop\/files\/breastfeeding-tee-8346192.png?v=1762558080","variant_ids":[45877791228093,45877791260861,45877791293629,45877791326397,45877791359165,45877791391933,45877791424701,45877791457469,45877791490237,45877791523005]},"available":false,"name":"Breastfeeding Tee - Powder Blue \/ 6XL","public_title":"Powder Blue \/ 6XL","options":["Powder Blue","6XL"],"price":5999,"weight":0,"compare_at_price":null,"inventory_management":"shopify","barcode":"91523005","featured_media":{"alt":"Breastfeeding Tee - The Birth Store - Rumi + Sol","id":30038771237053,"position":3,"preview_image":{"aspect_ratio":1.0,"height":1080,"width":1080,"src":"\/\/www.thebirthstore.com.au\/cdn\/shop\/files\/breastfeeding-tee-8346192.png?v=1762558080"}},"requires_selling_plan":false,"selling_plan_allocations":[],"quantity_rule":{"min":1,"max":null,"increment":1}},{"id":45877791555773,"title":"Purple \/ XS","option1":"Purple","option2":"XS","option3":null,"sku":null,"requires_shipping":true,"taxable":false,"featured_image":{"id":38794518593725,"product_id":8130025095357,"position":4,"created_at":"2025-11-07T11:31:34+08:00","updated_at":"2025-11-08T07:28:01+08:00","alt":"Breastfeeding Tee - The Birth Store - Rumi + Sol","width":1080,"height":1080,"src":"\/\/www.thebirthstore.com.au\/cdn\/shop\/files\/breastfeeding-tee-3353121.png?v=1762558081","variant_ids":[45877791555773,45877791588541,45877791621309,45877791654077,45877791686845,45877791719613,45877791752381,45877791785149,45877791817917,45877791850685]},"available":false,"name":"Breastfeeding Tee - Purple \/ XS","public_title":"Purple \/ XS","options":["Purple","XS"],"price":5999,"weight":0,"compare_at_price":null,"inventory_management":"shopify","barcode":"91555773","featured_media":{"alt":"Breastfeeding Tee - The Birth Store - Rumi + Sol","id":30038761275581,"position":4,"preview_image":{"aspect_ratio":1.0,"height":1080,"width":1080,"src":"\/\/www.thebirthstore.com.au\/cdn\/shop\/files\/breastfeeding-tee-3353121.png?v=1762558081"}},"requires_selling_plan":false,"selling_plan_allocations":[],"quantity_rule":{"min":1,"max":null,"increment":1}},{"id":45877791588541,"title":"Purple \/ S","option1":"Purple","option2":"S","option3":null,"sku":null,"requires_shipping":true,"taxable":false,"featured_image":{"id":38794518593725,"product_id":8130025095357,"position":4,"created_at":"2025-11-07T11:31:34+08:00","updated_at":"2025-11-08T07:28:01+08:00","alt":"Breastfeeding Tee - The Birth Store - Rumi + Sol","width":1080,"height":1080,"src":"\/\/www.thebirthstore.com.au\/cdn\/shop\/files\/breastfeeding-tee-3353121.png?v=1762558081","variant_ids":[45877791555773,45877791588541,45877791621309,45877791654077,45877791686845,45877791719613,45877791752381,45877791785149,45877791817917,45877791850685]},"available":false,"name":"Breastfeeding Tee - Purple \/ S","public_title":"Purple \/ S","options":["Purple","S"],"price":5999,"weight":0,"compare_at_price":null,"inventory_management":"shopify","barcode":"91588541","featured_media":{"alt":"Breastfeeding Tee - The Birth Store - Rumi + Sol","id":30038761275581,"position":4,"preview_image":{"aspect_ratio":1.0,"height":1080,"width":1080,"src":"\/\/www.thebirthstore.com.au\/cdn\/shop\/files\/breastfeeding-tee-3353121.png?v=1762558081"}},"requires_selling_plan":false,"selling_plan_allocations":[],"quantity_rule":{"min":1,"max":null,"increment":1}},{"id":45877791621309,"title":"Purple \/ M","option1":"Purple","option2":"M","option3":null,"sku":null,"requires_shipping":true,"taxable":false,"featured_image":{"id":38794518593725,"product_id":8130025095357,"position":4,"created_at":"2025-11-07T11:31:34+08:00","updated_at":"2025-11-08T07:28:01+08:00","alt":"Breastfeeding Tee - The Birth Store - Rumi + Sol","width":1080,"height":1080,"src":"\/\/www.thebirthstore.com.au\/cdn\/shop\/files\/breastfeeding-tee-3353121.png?v=1762558081","variant_ids":[45877791555773,45877791588541,45877791621309,45877791654077,45877791686845,45877791719613,45877791752381,45877791785149,45877791817917,45877791850685]},"available":false,"name":"Breastfeeding Tee - Purple \/ M","public_title":"Purple \/ M","options":["Purple","M"],"price":5999,"weight":0,"compare_at_price":null,"inventory_management":"shopify","barcode":"91621309","featured_media":{"alt":"Breastfeeding Tee - The Birth Store - Rumi + Sol","id":30038761275581,"position":4,"preview_image":{"aspect_ratio":1.0,"height":1080,"width":1080,"src":"\/\/www.thebirthstore.com.au\/cdn\/shop\/files\/breastfeeding-tee-3353121.png?v=1762558081"}},"requires_selling_plan":false,"selling_plan_allocations":[],"quantity_rule":{"min":1,"max":null,"increment":1}},{"id":45877791654077,"title":"Purple \/ L","option1":"Purple","option2":"L","option3":null,"sku":null,"requires_shipping":true,"taxable":false,"featured_image":{"id":38794518593725,"product_id":8130025095357,"position":4,"created_at":"2025-11-07T11:31:34+08:00","updated_at":"2025-11-08T07:28:01+08:00","alt":"Breastfeeding Tee - The Birth Store - Rumi + Sol","width":1080,"height":1080,"src":"\/\/www.thebirthstore.com.au\/cdn\/shop\/files\/breastfeeding-tee-3353121.png?v=1762558081","variant_ids":[45877791555773,45877791588541,45877791621309,45877791654077,45877791686845,45877791719613,45877791752381,45877791785149,45877791817917,45877791850685]},"available":false,"name":"Breastfeeding Tee - Purple \/ L","public_title":"Purple \/ L","options":["Purple","L"],"price":5999,"weight":0,"compare_at_price":null,"inventory_management":"shopify","barcode":"91654077","featured_media":{"alt":"Breastfeeding Tee - The Birth Store - Rumi + Sol","id":30038761275581,"position":4,"preview_image":{"aspect_ratio":1.0,"height":1080,"width":1080,"src":"\/\/www.thebirthstore.com.au\/cdn\/shop\/files\/breastfeeding-tee-3353121.png?v=1762558081"}},"requires_selling_plan":false,"selling_plan_allocations":[],"quantity_rule":{"min":1,"max":null,"increment":1}},{"id":45877791686845,"title":"Purple \/ XL","option1":"Purple","option2":"XL","option3":null,"sku":null,"requires_shipping":true,"taxable":false,"featured_image":{"id":38794518593725,"product_id":8130025095357,"position":4,"created_at":"2025-11-07T11:31:34+08:00","updated_at":"2025-11-08T07:28:01+08:00","alt":"Breastfeeding Tee - The Birth Store - Rumi + Sol","width":1080,"height":1080,"src":"\/\/www.thebirthstore.com.au\/cdn\/shop\/files\/breastfeeding-tee-3353121.png?v=1762558081","variant_ids":[45877791555773,45877791588541,45877791621309,45877791654077,45877791686845,45877791719613,45877791752381,45877791785149,45877791817917,45877791850685]},"available":false,"name":"Breastfeeding Tee - Purple \/ XL","public_title":"Purple \/ XL","options":["Purple","XL"],"price":5999,"weight":0,"compare_at_price":null,"inventory_management":"shopify","barcode":"91686845","featured_media":{"alt":"Breastfeeding Tee - The Birth Store - Rumi + Sol","id":30038761275581,"position":4,"preview_image":{"aspect_ratio":1.0,"height":1080,"width":1080,"src":"\/\/www.thebirthstore.com.au\/cdn\/shop\/files\/breastfeeding-tee-3353121.png?v=1762558081"}},"requires_selling_plan":false,"selling_plan_allocations":[],"quantity_rule":{"min":1,"max":null,"increment":1}},{"id":45877791719613,"title":"Purple \/ 2XL","option1":"Purple","option2":"2XL","option3":null,"sku":null,"requires_shipping":true,"taxable":false,"featured_image":{"id":38794518593725,"product_id":8130025095357,"position":4,"created_at":"2025-11-07T11:31:34+08:00","updated_at":"2025-11-08T07:28:01+08:00","alt":"Breastfeeding Tee - The Birth Store - Rumi + Sol","width":1080,"height":1080,"src":"\/\/www.thebirthstore.com.au\/cdn\/shop\/files\/breastfeeding-tee-3353121.png?v=1762558081","variant_ids":[45877791555773,45877791588541,45877791621309,45877791654077,45877791686845,45877791719613,45877791752381,45877791785149,45877791817917,45877791850685]},"available":false,"name":"Breastfeeding Tee - Purple \/ 2XL","public_title":"Purple \/ 2XL","options":["Purple","2XL"],"price":5999,"weight":0,"compare_at_price":null,"inventory_management":"shopify","barcode":"91719613","featured_media":{"alt":"Breastfeeding Tee - The Birth Store - Rumi + Sol","id":30038761275581,"position":4,"preview_image":{"aspect_ratio":1.0,"height":1080,"width":1080,"src":"\/\/www.thebirthstore.com.au\/cdn\/shop\/files\/breastfeeding-tee-3353121.png?v=1762558081"}},"requires_selling_plan":false,"selling_plan_allocations":[],"quantity_rule":{"min":1,"max":null,"increment":1}},{"id":45877791752381,"title":"Purple \/ 3XL","option1":"Purple","option2":"3XL","option3":null,"sku":null,"requires_shipping":true,"taxable":false,"featured_image":{"id":38794518593725,"product_id":8130025095357,"position":4,"created_at":"2025-11-07T11:31:34+08:00","updated_at":"2025-11-08T07:28:01+08:00","alt":"Breastfeeding Tee - The Birth Store - Rumi + Sol","width":1080,"height":1080,"src":"\/\/www.thebirthstore.com.au\/cdn\/shop\/files\/breastfeeding-tee-3353121.png?v=1762558081","variant_ids":[45877791555773,45877791588541,45877791621309,45877791654077,45877791686845,45877791719613,45877791752381,45877791785149,45877791817917,45877791850685]},"available":false,"name":"Breastfeeding Tee - Purple \/ 3XL","public_title":"Purple \/ 3XL","options":["Purple","3XL"],"price":5999,"weight":0,"compare_at_price":null,"inventory_management":"shopify","barcode":"91752381","featured_media":{"alt":"Breastfeeding Tee - The Birth Store - Rumi + Sol","id":30038761275581,"position":4,"preview_image":{"aspect_ratio":1.0,"height":1080,"width":1080,"src":"\/\/www.thebirthstore.com.au\/cdn\/shop\/files\/breastfeeding-tee-3353121.png?v=1762558081"}},"requires_selling_plan":false,"selling_plan_allocations":[],"quantity_rule":{"min":1,"max":null,"increment":1}},{"id":45877791785149,"title":"Purple \/ 4XL","option1":"Purple","option2":"4XL","option3":null,"sku":null,"requires_shipping":true,"taxable":false,"featured_image":{"id":38794518593725,"product_id":8130025095357,"position":4,"created_at":"2025-11-07T11:31:34+08:00","updated_at":"2025-11-08T07:28:01+08:00","alt":"Breastfeeding Tee - The Birth Store - Rumi + Sol","width":1080,"height":1080,"src":"\/\/www.thebirthstore.com.au\/cdn\/shop\/files\/breastfeeding-tee-3353121.png?v=1762558081","variant_ids":[45877791555773,45877791588541,45877791621309,45877791654077,45877791686845,45877791719613,45877791752381,45877791785149,45877791817917,45877791850685]},"available":false,"name":"Breastfeeding Tee - Purple \/ 4XL","public_title":"Purple \/ 4XL","options":["Purple","4XL"],"price":5999,"weight":0,"compare_at_price":null,"inventory_management":"shopify","barcode":"91785149","featured_media":{"alt":"Breastfeeding Tee - The Birth Store - Rumi + Sol","id":30038761275581,"position":4,"preview_image":{"aspect_ratio":1.0,"height":1080,"width":1080,"src":"\/\/www.thebirthstore.com.au\/cdn\/shop\/files\/breastfeeding-tee-3353121.png?v=1762558081"}},"requires_selling_plan":false,"selling_plan_allocations":[],"quantity_rule":{"min":1,"max":null,"increment":1}},{"id":45877791817917,"title":"Purple \/ 5XL","option1":"Purple","option2":"5XL","option3":null,"sku":null,"requires_shipping":true,"taxable":false,"featured_image":{"id":38794518593725,"product_id":8130025095357,"position":4,"created_at":"2025-11-07T11:31:34+08:00","updated_at":"2025-11-08T07:28:01+08:00","alt":"Breastfeeding Tee - The Birth Store - Rumi + Sol","width":1080,"height":1080,"src":"\/\/www.thebirthstore.com.au\/cdn\/shop\/files\/breastfeeding-tee-3353121.png?v=1762558081","variant_ids":[45877791555773,45877791588541,45877791621309,45877791654077,45877791686845,45877791719613,45877791752381,45877791785149,45877791817917,45877791850685]},"available":false,"name":"Breastfeeding Tee - Purple \/ 5XL","public_title":"Purple \/ 5XL","options":["Purple","5XL"],"price":5999,"weight":0,"compare_at_price":null,"inventory_management":"shopify","barcode":"91817917","featured_media":{"alt":"Breastfeeding Tee - The Birth Store - Rumi + Sol","id":30038761275581,"position":4,"preview_image":{"aspect_ratio":1.0,"height":1080,"width":1080,"src":"\/\/www.thebirthstore.com.au\/cdn\/shop\/files\/breastfeeding-tee-3353121.png?v=1762558081"}},"requires_selling_plan":false,"selling_plan_allocations":[],"quantity_rule":{"min":1,"max":null,"increment":1}},{"id":45877791850685,"title":"Purple \/ 6XL","option1":"Purple","option2":"6XL","option3":null,"sku":null,"requires_shipping":true,"taxable":false,"featured_image":{"id":38794518593725,"product_id":8130025095357,"position":4,"created_at":"2025-11-07T11:31:34+08:00","updated_at":"2025-11-08T07:28:01+08:00","alt":"Breastfeeding Tee - The Birth Store - Rumi + Sol","width":1080,"height":1080,"src":"\/\/www.thebirthstore.com.au\/cdn\/shop\/files\/breastfeeding-tee-3353121.png?v=1762558081","variant_ids":[45877791555773,45877791588541,45877791621309,45877791654077,45877791686845,45877791719613,45877791752381,45877791785149,45877791817917,45877791850685]},"available":true,"name":"Breastfeeding Tee - Purple \/ 6XL","public_title":"Purple \/ 6XL","options":["Purple","6XL"],"price":5999,"weight":0,"compare_at_price":null,"inventory_management":"shopify","barcode":"91850685","featured_media":{"alt":"Breastfeeding Tee - The Birth Store - Rumi + Sol","id":30038761275581,"position":4,"preview_image":{"aspect_ratio":1.0,"height":1080,"width":1080,"src":"\/\/www.thebirthstore.com.au\/cdn\/shop\/files\/breastfeeding-tee-3353121.png?v=1762558081"}},"requires_selling_plan":false,"selling_plan_allocations":[],"quantity_rule":{"min":1,"max":null,"increment":1}}],"images":["\/\/www.thebirthstore.com.au\/cdn\/shop\/files\/breastfeeding-tee-6975681.png?v=1762558080","\/\/www.thebirthstore.com.au\/cdn\/shop\/files\/breastfeeding-tee-8872935.png?v=1762558080","\/\/www.thebirthstore.com.au\/cdn\/shop\/files\/breastfeeding-tee-8346192.png?v=1762558080","\/\/www.thebirthstore.com.au\/cdn\/shop\/files\/breastfeeding-tee-3353121.png?v=1762558081","\/\/www.thebirthstore.com.au\/cdn\/shop\/files\/breastfeeding-tee-9251028.jpg?v=1762558080","\/\/www.thebirthstore.com.au\/cdn\/shop\/files\/breastfeeding-tee-9540492.png?v=1762558081","\/\/www.thebirthstore.com.au\/cdn\/shop\/files\/breastfeeding-tee-7414994.png?v=1762558081","\/\/www.thebirthstore.com.au\/cdn\/shop\/files\/breastfeeding-tee-4401040.jpg?v=1762558081","\/\/www.thebirthstore.com.au\/cdn\/shop\/files\/breastfeeding-tee-5972726.png?v=1762558081","\/\/www.thebirthstore.com.au\/cdn\/shop\/files\/breastfeeding-tee-7103276.png?v=1762558081","\/\/www.thebirthstore.com.au\/cdn\/shop\/files\/breastfeeding-tee-1462127.png?v=1762558143","\/\/www.thebirthstore.com.au\/cdn\/shop\/files\/breastfeeding-tee-1495724.jpg?v=1762558143","\/\/www.thebirthstore.com.au\/cdn\/shop\/files\/breastfeeding-tee-6161982.png?v=1762558144","\/\/www.thebirthstore.com.au\/cdn\/shop\/files\/breastfeeding-tee-7783237.png?v=1762558144"],"featured_image":"\/\/www.thebirthstore.com.au\/cdn\/shop\/files\/breastfeeding-tee-6975681.png?v=1762558080","options":["Colour","Size"],"media":[{"alt":"Breastfeeding Tee - The Birth Store - Rumi + Sol","id":30038773629117,"position":1,"preview_image":{"aspect_ratio":1.0,"height":1080,"width":1080,"src":"\/\/www.thebirthstore.com.au\/cdn\/shop\/files\/breastfeeding-tee-6975681.png?v=1762558080"},"aspect_ratio":1.0,"height":1080,"media_type":"image","src":"\/\/www.thebirthstore.com.au\/cdn\/shop\/files\/breastfeeding-tee-6975681.png?v=1762558080","width":1080},{"alt":"Breastfeeding Tee - The Birth Store - Rumi + Sol","id":30038768255165,"position":2,"preview_image":{"aspect_ratio":1.0,"height":1080,"width":1080,"src":"\/\/www.thebirthstore.com.au\/cdn\/shop\/files\/breastfeeding-tee-8872935.png?v=1762558080"},"aspect_ratio":1.0,"height":1080,"media_type":"image","src":"\/\/www.thebirthstore.com.au\/cdn\/shop\/files\/breastfeeding-tee-8872935.png?v=1762558080","width":1080},{"alt":"Breastfeeding Tee - The Birth Store - Rumi + Sol","id":30038771237053,"position":3,"preview_image":{"aspect_ratio":1.0,"height":1080,"width":1080,"src":"\/\/www.thebirthstore.com.au\/cdn\/shop\/files\/breastfeeding-tee-8346192.png?v=1762558080"},"aspect_ratio":1.0,"height":1080,"media_type":"image","src":"\/\/www.thebirthstore.com.au\/cdn\/shop\/files\/breastfeeding-tee-8346192.png?v=1762558080","width":1080},{"alt":"Breastfeeding Tee - The Birth Store - Rumi + Sol","id":30038761275581,"position":4,"preview_image":{"aspect_ratio":1.0,"height":1080,"width":1080,"src":"\/\/www.thebirthstore.com.au\/cdn\/shop\/files\/breastfeeding-tee-3353121.png?v=1762558081"},"aspect_ratio":1.0,"height":1080,"media_type":"image","src":"\/\/www.thebirthstore.com.au\/cdn\/shop\/files\/breastfeeding-tee-3353121.png?v=1762558081","width":1080},{"alt":"Breastfeeding Tee - The Birth Store - Rumi + Sol","id":30038716055741,"position":5,"preview_image":{"aspect_ratio":0.667,"height":2048,"width":1365,"src":"\/\/www.thebirthstore.com.au\/cdn\/shop\/files\/breastfeeding-tee-9251028.jpg?v=1762558080"},"aspect_ratio":0.667,"height":2048,"media_type":"image","src":"\/\/www.thebirthstore.com.au\/cdn\/shop\/files\/breastfeeding-tee-9251028.jpg?v=1762558080","width":1365},{"alt":"Breastfeeding Tee - The Birth Store - Rumi + Sol","id":30038721265853,"position":6,"preview_image":{"aspect_ratio":1.0,"height":1080,"width":1080,"src":"\/\/www.thebirthstore.com.au\/cdn\/shop\/files\/breastfeeding-tee-9540492.png?v=1762558081"},"aspect_ratio":1.0,"height":1080,"media_type":"image","src":"\/\/www.thebirthstore.com.au\/cdn\/shop\/files\/breastfeeding-tee-9540492.png?v=1762558081","width":1080},{"alt":"Breastfeeding Tee - The Birth Store - Rumi + Sol","id":30038731161789,"position":7,"preview_image":{"aspect_ratio":1.0,"height":1080,"width":1080,"src":"\/\/www.thebirthstore.com.au\/cdn\/shop\/files\/breastfeeding-tee-7414994.png?v=1762558081"},"aspect_ratio":1.0,"height":1080,"media_type":"image","src":"\/\/www.thebirthstore.com.au\/cdn\/shop\/files\/breastfeeding-tee-7414994.png?v=1762558081","width":1080},{"alt":"Breastfeeding Tee - The Birth Store - Rumi + Sol","id":30038738600125,"position":8,"preview_image":{"aspect_ratio":1.0,"height":1080,"width":1080,"src":"\/\/www.thebirthstore.com.au\/cdn\/shop\/files\/breastfeeding-tee-4401040.jpg?v=1762558081"},"aspect_ratio":1.0,"height":1080,"media_type":"image","src":"\/\/www.thebirthstore.com.au\/cdn\/shop\/files\/breastfeeding-tee-4401040.jpg?v=1762558081","width":1080},{"alt":"Breastfeeding Tee - The Birth Store - Rumi + Sol","id":30038763962557,"position":9,"preview_image":{"aspect_ratio":1.0,"height":1080,"width":1080,"src":"\/\/www.thebirthstore.com.au\/cdn\/shop\/files\/breastfeeding-tee-5972726.png?v=1762558081"},"aspect_ratio":1.0,"height":1080,"media_type":"image","src":"\/\/www.thebirthstore.com.au\/cdn\/shop\/files\/breastfeeding-tee-5972726.png?v=1762558081","width":1080},{"alt":"Breastfeeding Tee - The Birth Store - Rumi + Sol","id":30038764552381,"position":10,"preview_image":{"aspect_ratio":1.0,"height":1080,"width":1080,"src":"\/\/www.thebirthstore.com.au\/cdn\/shop\/files\/breastfeeding-tee-7103276.png?v=1762558081"},"aspect_ratio":1.0,"height":1080,"media_type":"image","src":"\/\/www.thebirthstore.com.au\/cdn\/shop\/files\/breastfeeding-tee-7103276.png?v=1762558081","width":1080},{"alt":"Breastfeeding Tee - The Birth Store - Rumi + Sol","id":30038770745533,"position":11,"preview_image":{"aspect_ratio":0.715,"height":1080,"width":772,"src":"\/\/www.thebirthstore.com.au\/cdn\/shop\/files\/breastfeeding-tee-1462127.png?v=1762558143"},"aspect_ratio":0.715,"height":1080,"media_type":"image","src":"\/\/www.thebirthstore.com.au\/cdn\/shop\/files\/breastfeeding-tee-1462127.png?v=1762558143","width":772},{"alt":"Breastfeeding Tee - The Birth Store - Rumi + Sol","id":30038772973757,"position":12,"preview_image":{"aspect_ratio":0.667,"height":2048,"width":1365,"src":"\/\/www.thebirthstore.com.au\/cdn\/shop\/files\/breastfeeding-tee-1495724.jpg?v=1762558143"},"aspect_ratio":0.667,"height":2048,"media_type":"image","src":"\/\/www.thebirthstore.com.au\/cdn\/shop\/files\/breastfeeding-tee-1495724.jpg?v=1762558143","width":1365},{"alt":"Breastfeeding Tee - The Birth Store - Rumi + Sol","id":30038773268669,"position":13,"preview_image":{"aspect_ratio":1.0,"height":1080,"width":1080,"src":"\/\/www.thebirthstore.com.au\/cdn\/shop\/files\/breastfeeding-tee-6161982.png?v=1762558144"},"aspect_ratio":1.0,"height":1080,"media_type":"image","src":"\/\/www.thebirthstore.com.au\/cdn\/shop\/files\/breastfeeding-tee-6161982.png?v=1762558144","width":1080},{"alt":"Breastfeeding Tee - The Birth Store - Rumi + Sol","id":30038773432509,"position":14,"preview_image":{"aspect_ratio":1.0,"height":1080,"width":1080,"src":"\/\/www.thebirthstore.com.au\/cdn\/shop\/files\/breastfeeding-tee-7783237.png?v=1762558144"},"aspect_ratio":1.0,"height":1080,"media_type":"image","src":"\/\/www.thebirthstore.com.au\/cdn\/shop\/files\/breastfeeding-tee-7783237.png?v=1762558144","width":1080}],"requires_selling_plan":false,"selling_plan_groups":[],"content":"\u003cdiv class=\"jdgm-rev__body\"\u003e\n\u003cp\u003e\u003cem\u003eThis is the best quality t-shirt I have ever bought, and the fact it’s breastfeeding friendly too? Even better! Probably could have sized down but being plus size, it makes it easier for feeding for it to be a bit bigger. Highly recommend! - Charlotte\u003c\/em\u003e\u003c\/p\u003e\n\u003cp\u003e \u003c\/p\u003e\n\u003c\/div\u003e\n\u003cp\u003eIntroducing the first size inclusive breastfeeding tee, ranging from XS-6XL. \u003c\/p\u003e\n\u003cp\u003eThis collection of breastfeeding tees features a simple embroidered logo on the front.\u003cbr\u003e\u003c\/p\u003e\n\u003cp\u003eThe tee features a curved hem, with two invisible zips for easy and discreet access when feeding. The fabric is 220gsm, and 95% Cotton \u0026amp; 5% Spandex.\u003c\/p\u003e\n\u003cp\u003e\u003cstrong\u003eModel Information:\u003c\/strong\u003e\u003c\/p\u003e\n\u003cul\u003e\n\u003cli\u003e\n\u003cstrong\u003eSize Worn:\u003c\/strong\u003e\u003cspan\u003e \u003c\/span\u003eXL around a 14-16 They are a true to size fit.\u003c\/li\u003e\n\u003c\/ul\u003e\n\u003cp\u003e\u003cstrong\u003eApprox. garment measurements in cm:\u003c\/strong\u003e\u003c\/p\u003e\n\u003cp\u003e\u003cspan\u003eThese tees are designed to be a true fit, in most cases you can stick with your regular size. \u003c\/span\u003e\u003cspan\u003e If you prefer an oversized fit, we recommend sizing up. \u003c\/span\u003e\u003c\/p\u003e\n\u003cdiv class=\"flex-1 overflow-hidden\"\u003e\n\u003cdiv class=\"h-full\"\u003e\n\u003cdiv class=\"react-scroll-to-bottom--css-twmwd-79elbk h-full\"\u003e\n\u003cdiv class=\"react-scroll-to-bottom--css-twmwd-1n7m0yu\"\u003e\n\u003cdiv class=\"flex flex-col text-sm md:pb-9\"\u003e\n\u003carticle data-scroll-anchor=\"true\" data-testid=\"conversation-turn-7\" dir=\"auto\" class=\"w-full text-token-text-primary focus-visible:outline-2 focus-visible:outline-offset-[-4px]\" tabindex=\"0\"\u003e\n\u003cdiv class=\"text-base py-[18px] px-3 md:px-4 m-auto md:px-5\"\u003e\n\u003cdiv class=\"mx-auto flex flex-1 gap-4 text-base md:gap-5 lg:gap-6 md:max-w-3xl\"\u003e\n\u003cdiv class=\"group\/conversation-turn relative flex w-full min-w-0 flex-col agent-turn\"\u003e\n\u003cdiv class=\"flex-col gap-1 md:gap-3\"\u003e\n\u003cdiv class=\"flex max-w-full flex-col flex-grow\"\u003e\n\u003cdiv class=\"min-h-[20px] text-message flex w-full flex-col items-end gap-2 break-words [.text-message+\u0026amp;]:mt-5 overflow-x-auto whitespace-pre-wrap\" dir=\"auto\" data-message-id=\"2ff8d175-80d9-4490-8924-f36e768e13a0\" data-message-author-role=\"assistant\"\u003e\n\u003cdiv class=\"flex w-full flex-col gap-1 empty:hidden first:pt-[3px]\"\u003e\n\u003cul\u003e\n\u003cli\u003e220gsm\u003c\/li\u003e\n\u003cli\u003e95% Cotton 5% Spandex\u003c\/li\u003e\n\u003c\/ul\u003e\n\u003c\/div\u003e\n\u003c\/div\u003e\n\u003c\/div\u003e\n\u003c\/div\u003e\n\u003c\/div\u003e\n\u003c\/div\u003e\n\u003c\/div\u003e\n\u003c\/article\u003e\n\u003c\/div\u003e\n\u003c\/div\u003e\n\u003c\/div\u003e\n\u003c\/div\u003e\n\u003c\/div\u003e\n\u003ctable width=\"100%\"\u003e\n\u003ctbody\u003e\n\u003ctr\u003e\n\u003ctd\u003eBF Tee\u003c\/td\u003e\n\u003ctd\u003e Bust \u003c\/td\u003e\n\u003ctd\u003e Bottom\u003c\/td\u003e\n\u003ctd\u003eLength \u003c\/td\u003e\n\u003c\/tr\u003e\n\u003ctr\u003e\n\u003ctd\u003eXS - 6\/8\u003c\/td\u003e\n\u003ctd\u003e 96\u003c\/td\u003e\n\u003ctd\u003e100\u003c\/td\u003e\n\u003ctd\u003e67\u003c\/td\u003e\n\u003c\/tr\u003e\n\u003ctr\u003e\n\u003ctd\u003eS - 8-10\u003c\/td\u003e\n\u003ctd\u003e101\u003c\/td\u003e\n\u003ctd\u003e105\u003c\/td\u003e\n\u003ctd\u003e68\u003c\/td\u003e\n\u003c\/tr\u003e\n\u003ctr\u003e\n\u003ctd\u003eM - 10-12\u003c\/td\u003e\n\u003ctd\u003e106\u003c\/td\u003e\n\u003ctd\u003e110\u003c\/td\u003e\n\u003ctd\u003e69\u003c\/td\u003e\n\u003c\/tr\u003e\n\u003ctr\u003e\n\u003ctd\u003eL - 12-14\u003c\/td\u003e\n\u003ctd\u003e111\u003c\/td\u003e\n\u003ctd\u003e115\u003c\/td\u003e\n\u003ctd\u003e70\u003c\/td\u003e\n\u003c\/tr\u003e\n\u003ctr\u003e\n\u003ctd\u003eXL - 14-16\u003c\/td\u003e\n\u003ctd\u003e116\u003c\/td\u003e\n\u003ctd\u003e120\u003c\/td\u003e\n\u003ctd\u003e71\u003c\/td\u003e\n\u003c\/tr\u003e\n\u003ctr\u003e\n\u003ctd\u003e2XL -16-18\u003c\/td\u003e\n\u003ctd\u003e121\u003c\/td\u003e\n\u003ctd\u003e125\u003c\/td\u003e\n\u003ctd\u003e72\u003c\/td\u003e\n\u003c\/tr\u003e\n\u003ctr\u003e\n\u003ctd\u003e3XL -18-20\u003c\/td\u003e\n\u003ctd\u003e126\u003c\/td\u003e\n\u003ctd\u003e130\u003c\/td\u003e\n\u003ctd\u003e73\u003c\/td\u003e\n\u003c\/tr\u003e\n\u003ctr\u003e\n\u003ctd\u003e4XL 20-22\u003c\/td\u003e\n\u003ctd\u003e131\u003c\/td\u003e\n\u003ctd\u003e135\u003c\/td\u003e\n\u003ctd\u003e74\u003c\/td\u003e\n\u003c\/tr\u003e\n\u003ctr\u003e\n\u003ctd\u003e5XL -22-24\u003c\/td\u003e\n\u003ctd\u003e136\u003c\/td\u003e\n\u003ctd\u003e140\u003c\/td\u003e\n\u003ctd\u003e75\u003c\/td\u003e\n\u003c\/tr\u003e\n\u003ctr\u003e\n\u003ctd\u003e6XL -24-26\u003c\/td\u003e\n\u003ctd\u003e141\u003c\/td\u003e\n\u003ctd\u003e145\u003c\/td\u003e\n\u003ctd\u003e76\u003c\/td\u003e\n\u003c\/tr\u003e\n\u003c\/tbody\u003e\n\u003c\/table\u003e"},"options":[{"name":"Colour","position":1,"values":["Black","Pink","Powder Blue","Purple"]},{"name":"Size","position":2,"values":["XS","S","M","L","XL","2XL","3XL","4XL","5XL","6XL"]}],"custom_metafields":{},"metafields":{"badge":"\u003cdiv style='display:none' class='jdgm-prev-badge' data-average-rating='0.00' data-number-of-reviews='0' data-number-of-questions='0'\u003e \u003cspan class='jdgm-prev-badge__stars' data-score='0.00' tabindex='0' aria-label='0.00 stars' role='button'\u003e \u003cspan class='jdgm-star jdgm--off'\u003e\u003c\/span\u003e\u003cspan class='jdgm-star jdgm--off'\u003e\u003c\/span\u003e\u003cspan class='jdgm-star jdgm--off'\u003e\u003c\/span\u003e\u003cspan class='jdgm-star jdgm--off'\u003e\u003c\/span\u003e\u003cspan class='jdgm-star jdgm--off'\u003e\u003c\/span\u003e \u003c\/span\u003e \u003cspan class='jdgm-prev-badge__text'\u003e No reviews \u003c\/span\u003e \u003c\/div\u003e","widget":"\u003cdiv class='jdgm-rev-widg' data-updated-at='2025-11-07T03:13:11Z' data-average-rating='0.00' data-number-of-reviews='0' data-number-of-questions='0' data-image-url=''\u003e \u003cstyle class='jdgm-temp-hiding-style'\u003e.jdgm-rev-widg{ display: none }\u003c\/style\u003e \u003cdiv class='jdgm-rev-widg__header'\u003e \u003ch2 class='jdgm-rev-widg__title'\u003eCustomer Reviews\u003c\/h2\u003e \u003cdiv class='jdgm-rev-widg__summary'\u003e \u003cdiv class='jdgm-rev-widg__summary-stars' aria-label='Average rating is 0.00 stars' role='img'\u003e \u003cspan class='jdgm-star jdgm--off'\u003e\u003c\/span\u003e\u003cspan class='jdgm-star jdgm--off'\u003e\u003c\/span\u003e\u003cspan class='jdgm-star jdgm--off'\u003e\u003c\/span\u003e\u003cspan class='jdgm-star jdgm--off'\u003e\u003c\/span\u003e\u003cspan class='jdgm-star jdgm--off'\u003e\u003c\/span\u003e \u003c\/div\u003e \u003cdiv class='jdgm-rev-widg__summary-text'\u003eBe the first to write a review\u003c\/div\u003e \u003c\/div\u003e \u003ca style='display: none' href='#' class='jdgm-write-rev-link' role='button'\u003eWrite a review\u003c\/a\u003e \u003cdiv class='jdgm-histogram jdgm-temp-hidden'\u003e \u003cdiv class='jdgm-histogram__row' data-rating='5' data-frequency='0' data-percentage='0'\u003e \u003cdiv class='jdgm-histogram__star' role='button' aria-label=\"0% (0) reviews with 5 star rating\" tabindex='0' \u003e\u003cspan class='jdgm-star jdgm--on'\u003e\u003c\/span\u003e\u003cspan class='jdgm-star jdgm--on'\u003e\u003c\/span\u003e\u003cspan class='jdgm-star jdgm--on'\u003e\u003c\/span\u003e\u003cspan class='jdgm-star jdgm--on'\u003e\u003c\/span\u003e\u003cspan class='jdgm-star jdgm--on'\u003e\u003c\/span\u003e\u003c\/div\u003e \u003cdiv class='jdgm-histogram__bar'\u003e \u003cdiv class='jdgm-histogram__bar-content' style='width: 0%;'\u003e \u003c\/div\u003e \u003c\/div\u003e \u003cdiv class='jdgm-histogram__percentage'\u003e0%\u003c\/div\u003e \u003cdiv class='jdgm-histogram__frequency'\u003e(0)\u003c\/div\u003e \u003c\/div\u003e \u003cdiv class='jdgm-histogram__row' data-rating='4' data-frequency='0' data-percentage='0'\u003e \u003cdiv class='jdgm-histogram__star' role='button' aria-label=\"0% (0) reviews with 4 star rating\" tabindex='0' \u003e\u003cspan class='jdgm-star jdgm--on'\u003e\u003c\/span\u003e\u003cspan class='jdgm-star jdgm--on'\u003e\u003c\/span\u003e\u003cspan class='jdgm-star jdgm--on'\u003e\u003c\/span\u003e\u003cspan class='jdgm-star jdgm--on'\u003e\u003c\/span\u003e\u003cspan class='jdgm-star jdgm--off'\u003e\u003c\/span\u003e\u003c\/div\u003e \u003cdiv class='jdgm-histogram__bar'\u003e \u003cdiv class='jdgm-histogram__bar-content' style='width: 0%;'\u003e \u003c\/div\u003e \u003c\/div\u003e \u003cdiv class='jdgm-histogram__percentage'\u003e0%\u003c\/div\u003e \u003cdiv class='jdgm-histogram__frequency'\u003e(0)\u003c\/div\u003e \u003c\/div\u003e \u003cdiv class='jdgm-histogram__row' data-rating='3' data-frequency='0' data-percentage='0'\u003e \u003cdiv class='jdgm-histogram__star' role='button' aria-label=\"0% (0) reviews with 3 star rating\" tabindex='0' \u003e\u003cspan class='jdgm-star jdgm--on'\u003e\u003c\/span\u003e\u003cspan class='jdgm-star jdgm--on'\u003e\u003c\/span\u003e\u003cspan class='jdgm-star jdgm--on'\u003e\u003c\/span\u003e\u003cspan class='jdgm-star jdgm--off'\u003e\u003c\/span\u003e\u003cspan class='jdgm-star jdgm--off'\u003e\u003c\/span\u003e\u003c\/div\u003e \u003cdiv class='jdgm-histogram__bar'\u003e \u003cdiv class='jdgm-histogram__bar-content' style='width: 0%;'\u003e \u003c\/div\u003e \u003c\/div\u003e \u003cdiv class='jdgm-histogram__percentage'\u003e0%\u003c\/div\u003e \u003cdiv class='jdgm-histogram__frequency'\u003e(0)\u003c\/div\u003e \u003c\/div\u003e \u003cdiv class='jdgm-histogram__row' data-rating='2' data-frequency='0' data-percentage='0'\u003e \u003cdiv class='jdgm-histogram__star' role='button' aria-label=\"0% (0) reviews with 2 star rating\" tabindex='0' \u003e\u003cspan class='jdgm-star jdgm--on'\u003e\u003c\/span\u003e\u003cspan class='jdgm-star jdgm--on'\u003e\u003c\/span\u003e\u003cspan class='jdgm-star jdgm--off'\u003e\u003c\/span\u003e\u003cspan class='jdgm-star jdgm--off'\u003e\u003c\/span\u003e\u003cspan class='jdgm-star jdgm--off'\u003e\u003c\/span\u003e\u003c\/div\u003e \u003cdiv class='jdgm-histogram__bar'\u003e \u003cdiv class='jdgm-histogram__bar-content' style='width: 0%;'\u003e \u003c\/div\u003e \u003c\/div\u003e \u003cdiv class='jdgm-histogram__percentage'\u003e0%\u003c\/div\u003e \u003cdiv class='jdgm-histogram__frequency'\u003e(0)\u003c\/div\u003e \u003c\/div\u003e \u003cdiv class='jdgm-histogram__row' data-rating='1' data-frequency='0' data-percentage='0'\u003e \u003cdiv class='jdgm-histogram__star' role='button' aria-label=\"0% (0) reviews with 1 star rating\" tabindex='0' \u003e\u003cspan class='jdgm-star jdgm--on'\u003e\u003c\/span\u003e\u003cspan class='jdgm-star jdgm--off'\u003e\u003c\/span\u003e\u003cspan class='jdgm-star jdgm--off'\u003e\u003c\/span\u003e\u003cspan class='jdgm-star jdgm--off'\u003e\u003c\/span\u003e\u003cspan class='jdgm-star jdgm--off'\u003e\u003c\/span\u003e\u003c\/div\u003e \u003cdiv class='jdgm-histogram__bar'\u003e \u003cdiv class='jdgm-histogram__bar-content' style='width: 0%;'\u003e \u003c\/div\u003e \u003c\/div\u003e \u003cdiv class='jdgm-histogram__percentage'\u003e0%\u003c\/div\u003e \u003cdiv class='jdgm-histogram__frequency'\u003e(0)\u003c\/div\u003e \u003c\/div\u003e \u003cdiv class='jdgm-histogram__row jdgm-histogram__clear-filter' data-rating=null tabindex='0'\u003e\u003c\/div\u003e \u003c\/div\u003e \u003cdiv class='jdgm-rev-widg__sort-wrapper'\u003e\u003c\/div\u003e \u003c\/div\u003e \u003cdiv class='jdgm-rev-widg__body'\u003e \u003cdiv class='jdgm-rev-widg__reviews'\u003e\u003c\/div\u003e \u003cdiv class='jdgm-paginate' data-per-page='10' data-url='https:\/\/api.judge.me\/reviews\/reviews_for_widget' style=\"display: none;\"\u003e\u003c\/div\u003e \u003c\/div\u003e \u003cdiv class='jdgm-rev-widg__paginate-spinner-wrapper'\u003e \u003cdiv class='jdgm-spinner'\u003e\u003c\/div\u003e \u003c\/div\u003e \u003c\/div\u003e"},"default_reviews_metafields":{},"collections":[{"id":512654540989,"handle":"lastof26-10","title":"10%","updated_at":"2026-11-14T20:08:00+08:00","body_html":null,"published_at":"2026-10-12T19:06:42+08:00","sort_order":"best-selling","template_suffix":null,"disjunctive":false,"rules":[],"published_scope":"global"},{"id":281356533949,"handle":"baby-shower-gifts","title":"Baby Shower Gifts - Mum","updated_at":"2026-11-14T20:08:00+08:00","body_html":"\u003cp\u003eLooking for a unique baby shower gift? Or an all-in-one bundle pack to suit all your needs? We've got just the thing!\u003c\/p\u003e","published_at":"2021-12-06T13:43:56+08:00","sort_order":"best-selling","template_suffix":"baby-shower-gifts","disjunctive":true,"rules":[],"published_scope":"global","image":{"created_at":"2024-05-06T11:59:28+08:00","alt":"Baby Shower Gifts - The Birth Store","width":1200,"height":1800,"src":"\/\/www.thebirthstore.com.au\/cdn\/shop\/collections\/baby-shower-gifts-401770.jpg?v=1761791272"}},{"id":281712427197,"handle":"breastfeeding","title":"Breastfeeding","updated_at":"2026-11-14T20:08:00+08:00","body_html":"","published_at":"2021-12-20T14:19:33+08:00","sort_order":"best-selling","template_suffix":"breastfeeding-collection","disjunctive":false,"rules":[],"published_scope":"global","image":{"created_at":"2024-05-06T11:59:34+08:00","alt":"Breastfeeding - The Birth Store","width":620,"height":635,"src":"\/\/www.thebirthstore.com.au\/cdn\/shop\/collections\/breastfeeding-793872.jpg?v=1714967974"}},{"id":293308989629,"handle":"breastfeeding-clothing","title":"Breastfeeding Clothing","updated_at":"2026-11-09T10:38:40+08:00","body_html":"","published_at":"2023-05-03T11:40:00+08:00","sort_order":"best-selling","template_suffix":"swaddles-collection","disjunctive":false,"rules":[],"published_scope":"global","image":{"created_at":"2024-05-06T11:59:36+08:00","alt":"Breastfeeding Clothing - The Birth Store","width":569,"height":674,"src":"\/\/www.thebirthstore.com.au\/cdn\/shop\/collections\/breastfeeding-clothing-671936.jpg?v=1714967977"}},{"id":261657460925,"handle":"buy","title":"Buy","updated_at":"2026-11-14T20:08:00+08:00","body_html":"\u003cp\u003eBrowse all of our pregnancy, labour \u0026amp; birth, postpartum and baby essentials here.\u003cbr\u003e\u003c\/p\u003e\n\u003cp\u003e\u003cspan\u003eYou can even buy now and pay later with Afterpay!\u003c\/span\u003e\u003c\/p\u003e","published_at":"2021-03-10T12:05:31+08:00","sort_order":"best-selling","template_suffix":"shop-all-collection","disjunctive":false,"rules":[],"published_scope":"global","image":{"created_at":"2024-05-06T11:59:42+08:00","alt":"Buy - The Birth Store","width":2048,"height":2048,"src":"\/\/www.thebirthstore.com.au\/cdn\/shop\/collections\/buy-964856.jpg?v=1714967982"}},{"id":293309022397,"handle":"clothing","title":"Clothing","updated_at":"2026-11-09T10:38:40+08:00","body_html":"","published_at":"2023-05-03T11:41:12+08:00","sort_order":"best-selling","template_suffix":"swaddles-collection","disjunctive":true,"rules":[],"published_scope":"global","image":{"created_at":"2024-05-06T11:59:52+08:00","alt":"Clothing - The Birth Store","width":676,"height":581,"src":"\/\/www.thebirthstore.com.au\/cdn\/shop\/collections\/clothing-483293.jpg?v=1714967992"}},{"id":291456483517,"handle":"shop-all","title":"Shop All - Mum","updated_at":"2026-11-14T20:08:00+08:00","body_html":"","published_at":"2022-12-23T22:04:39+08:00","sort_order":"best-selling","template_suffix":"shop-all-collection","disjunctive":false,"rules":[],"published_scope":"global","image":{"created_at":"2024-05-06T12:00:54+08:00","alt":"Shop All - The Birth Store","width":1365,"height":2048,"src":"\/\/www.thebirthstore.com.au\/cdn\/shop\/collections\/shop-all-693176.jpg?v=1714968055"}},{"id":310045933757,"handle":"shop-all-sale","title":"Shop All Sale","updated_at":"2026-11-14T20:08:00+08:00","body_html":"","published_at":"2024-11-12T13:22:43+08:00","sort_order":"best-selling","template_suffix":"","disjunctive":true,"rules":[],"published_scope":"global","image":{"created_at":"2024-11-13T10:58:16+08:00","alt":"Shop All Sale - The Birth Store","width":2048,"height":1365,"src":"\/\/www.thebirthstore.com.au\/cdn\/shop\/collections\/shop-all-sale-297361.jpg?v=1731466697"}}]}
{"item":{"id":7439745974461,"title":"SRC Pregnancy Leggings - Over the Bump","handle":"src-pregnancy-shorts-mini-over-the-bump","description":"\u003cp\u003e \u003c\/p\u003e\n\u003cp\u003e\u003cspan\u003eThis product is stocked at a 3\u003c\/span\u003e\u003csup\u003erd\u003c\/sup\u003e\u003cspan\u003e party warehouse, if ordering with other products you’ll receive two packages. This product will have a turn around time of 10 days if pickup is selected on checkout. Any questions, please contact us \u003ca title=\"Contact Us\" href=\"https:\/\/www.thebirthstore.com.au\/pages\/contact-us\" target=\"_blank\"\u003ehere\u003c\/a\u003e.\u003c\/span\u003e\u003c\/p\u003e","published_at":"2023-03-13T14:10:59+08:00","created_at":"2023-02-13T22:44:27+08:00","vendor":"SRC Health","type":"Pregnancy Leggings","tags":["Maternity Clothing","Mum","Pain Relief","Pelvic Floor","Pregnancy","Support Clothing"],"price":19900,"price_min":19900,"price_max":19900,"available":true,"price_varies":false,"compare_at_price":null,"compare_at_price_min":0,"compare_at_price_max":0,"compare_at_price_varies":false,"variants":[{"id":42658978201789,"title":"XXS","option1":"XXS","option2":null,"option3":null,"sku":"","requires_shipping":true,"taxable":false,"featured_image":null,"available":true,"name":"SRC Pregnancy Leggings - Over the Bump - XXS","public_title":"XXS","options":["XXS"],"price":19900,"weight":0,"compare_at_price":null,"inventory_management":null,"barcode":"78201789","requires_selling_plan":false,"selling_plan_allocations":[],"quantity_rule":{"min":1,"max":null,"increment":1}},{"id":42658978234557,"title":"XS","option1":"XS","option2":null,"option3":null,"sku":"","requires_shipping":true,"taxable":false,"featured_image":null,"available":true,"name":"SRC Pregnancy Leggings - Over the Bump - XS","public_title":"XS","options":["XS"],"price":19900,"weight":0,"compare_at_price":null,"inventory_management":null,"barcode":"78234557","requires_selling_plan":false,"selling_plan_allocations":[],"quantity_rule":{"min":1,"max":null,"increment":1}},{"id":42658978267325,"title":"S","option1":"S","option2":null,"option3":null,"sku":"","requires_shipping":true,"taxable":false,"featured_image":null,"available":true,"name":"SRC Pregnancy Leggings - Over the Bump - S","public_title":"S","options":["S"],"price":19900,"weight":0,"compare_at_price":null,"inventory_management":null,"barcode":"78267325","requires_selling_plan":false,"selling_plan_allocations":[],"quantity_rule":{"min":1,"max":null,"increment":1}},{"id":42658978300093,"title":"M","option1":"M","option2":null,"option3":null,"sku":"","requires_shipping":true,"taxable":false,"featured_image":null,"available":true,"name":"SRC Pregnancy Leggings - Over the Bump - M","public_title":"M","options":["M"],"price":19900,"weight":0,"compare_at_price":null,"inventory_management":null,"barcode":"78300093","requires_selling_plan":false,"selling_plan_allocations":[],"quantity_rule":{"min":1,"max":null,"increment":1}},{"id":42658978332861,"title":"L","option1":"L","option2":null,"option3":null,"sku":"","requires_shipping":true,"taxable":false,"featured_image":null,"available":true,"name":"SRC Pregnancy Leggings - Over the Bump - L","public_title":"L","options":["L"],"price":19900,"weight":0,"compare_at_price":null,"inventory_management":null,"barcode":"78332861","requires_selling_plan":false,"selling_plan_allocations":[],"quantity_rule":{"min":1,"max":null,"increment":1}},{"id":42658978365629,"title":"XL","option1":"XL","option2":null,"option3":null,"sku":"","requires_shipping":true,"taxable":false,"featured_image":null,"available":true,"name":"SRC Pregnancy Leggings - Over the Bump - XL","public_title":"XL","options":["XL"],"price":19900,"weight":0,"compare_at_price":null,"inventory_management":null,"barcode":"78365629","requires_selling_plan":false,"selling_plan_allocations":[],"quantity_rule":{"min":1,"max":null,"increment":1}},{"id":42658978398397,"title":"XXL","option1":"XXL","option2":null,"option3":null,"sku":"","requires_shipping":true,"taxable":false,"featured_image":null,"available":true,"name":"SRC Pregnancy Leggings - Over the Bump - XXL","public_title":"XXL","options":["XXL"],"price":19900,"weight":0,"compare_at_price":null,"inventory_management":null,"barcode":"78398397","requires_selling_plan":false,"selling_plan_allocations":[],"quantity_rule":{"min":1,"max":null,"increment":1}}],"images":["\/\/www.thebirthstore.com.au\/cdn\/shop\/files\/src-pregnancy-leggings-over-the-bump-283276.jpg?v=1714968045","\/\/www.thebirthstore.com.au\/cdn\/shop\/files\/src-pregnancy-leggings-over-the-bump-353136.jpg?v=1714968045","\/\/www.thebirthstore.com.au\/cdn\/shop\/files\/src-pregnancy-leggings-over-the-bump-890532.jpg?v=1714968045","\/\/www.thebirthstore.com.au\/cdn\/shop\/files\/src-pregnancy-leggings-over-the-bump-258003.jpg?v=1714968045","\/\/www.thebirthstore.com.au\/cdn\/shop\/files\/src-pregnancy-leggings-over-the-bump-328001.png?v=1714968045"],"featured_image":"\/\/www.thebirthstore.com.au\/cdn\/shop\/files\/src-pregnancy-leggings-over-the-bump-283276.jpg?v=1714968045","options":["Size"],"media":[{"alt":"SRC Pregnancy Leggings - Over the Bump - The Birth Store-SRC Health","id":27007599968445,"position":1,"preview_image":{"aspect_ratio":1.0,"height":1080,"width":1080,"src":"\/\/www.thebirthstore.com.au\/cdn\/shop\/files\/src-pregnancy-leggings-over-the-bump-283276.jpg?v=1714968045"},"aspect_ratio":1.0,"height":1080,"media_type":"image","src":"\/\/www.thebirthstore.com.au\/cdn\/shop\/files\/src-pregnancy-leggings-over-the-bump-283276.jpg?v=1714968045","width":1080},{"alt":"SRC Pregnancy Leggings - Over the Bump - The Birth Store-SRC Health","id":27007600033981,"position":2,"preview_image":{"aspect_ratio":1.0,"height":1080,"width":1080,"src":"\/\/www.thebirthstore.com.au\/cdn\/shop\/files\/src-pregnancy-leggings-over-the-bump-353136.jpg?v=1714968045"},"aspect_ratio":1.0,"height":1080,"media_type":"image","src":"\/\/www.thebirthstore.com.au\/cdn\/shop\/files\/src-pregnancy-leggings-over-the-bump-353136.jpg?v=1714968045","width":1080},{"alt":"SRC Pregnancy Leggings - Over the Bump - The Birth Store-SRC Health","id":27007600066749,"position":3,"preview_image":{"aspect_ratio":1.0,"height":1080,"width":1080,"src":"\/\/www.thebirthstore.com.au\/cdn\/shop\/files\/src-pregnancy-leggings-over-the-bump-890532.jpg?v=1714968045"},"aspect_ratio":1.0,"height":1080,"media_type":"image","src":"\/\/www.thebirthstore.com.au\/cdn\/shop\/files\/src-pregnancy-leggings-over-the-bump-890532.jpg?v=1714968045","width":1080},{"alt":"SRC Pregnancy Leggings - Over the Bump - The Birth Store-SRC Health","id":27007600099517,"position":4,"preview_image":{"aspect_ratio":1.0,"height":1080,"width":1080,"src":"\/\/www.thebirthstore.com.au\/cdn\/shop\/files\/src-pregnancy-leggings-over-the-bump-258003.jpg?v=1714968045"},"aspect_ratio":1.0,"height":1080,"media_type":"image","src":"\/\/www.thebirthstore.com.au\/cdn\/shop\/files\/src-pregnancy-leggings-over-the-bump-258003.jpg?v=1714968045","width":1080},{"alt":"SRC Pregnancy Leggings - Over the Bump - The Birth Store-SRC Health","id":27007600165053,"position":5,"preview_image":{"aspect_ratio":1.582,"height":948,"width":1500,"src":"\/\/www.thebirthstore.com.au\/cdn\/shop\/files\/src-pregnancy-leggings-over-the-bump-328001.png?v=1714968045"},"aspect_ratio":1.582,"height":948,"media_type":"image","src":"\/\/www.thebirthstore.com.au\/cdn\/shop\/files\/src-pregnancy-leggings-over-the-bump-328001.png?v=1714968045","width":1500}],"requires_selling_plan":false,"selling_plan_groups":[],"content":"\u003cp\u003e \u003c\/p\u003e\n\u003cp\u003e\u003cspan\u003eThis product is stocked at a 3\u003c\/span\u003e\u003csup\u003erd\u003c\/sup\u003e\u003cspan\u003e party warehouse, if ordering with other products you’ll receive two packages. This product will have a turn around time of 10 days if pickup is selected on checkout. Any questions, please contact us \u003ca title=\"Contact Us\" href=\"https:\/\/www.thebirthstore.com.au\/pages\/contact-us\" target=\"_blank\"\u003ehere\u003c\/a\u003e.\u003c\/span\u003e\u003c\/p\u003e"},"options":[{"name":"Size","position":1,"values":["XXS","XS","S","M","L","XL","XXL"]}],"custom_metafields":{},"metafields":{"badge":"\u003cdiv style='display:none' class='jdgm-prev-badge' data-average-rating='0.00' data-number-of-reviews='0' data-number-of-questions='0'\u003e \u003cspan class='jdgm-prev-badge__stars' data-score='0.00' tabindex='0' aria-label='0.00 stars' role='button'\u003e \u003cspan class='jdgm-star jdgm--off'\u003e\u003c\/span\u003e\u003cspan class='jdgm-star jdgm--off'\u003e\u003c\/span\u003e\u003cspan class='jdgm-star jdgm--off'\u003e\u003c\/span\u003e\u003cspan class='jdgm-star jdgm--off'\u003e\u003c\/span\u003e\u003cspan class='jdgm-star jdgm--off'\u003e\u003c\/span\u003e \u003c\/span\u003e \u003cspan class='jdgm-prev-badge__text'\u003e No reviews \u003c\/span\u003e \u003c\/div\u003e","widget":"\u003cdiv class='jdgm-rev-widg' data-updated-at='2025-06-13T16:12:10Z' data-average-rating='0.00' data-number-of-reviews='0' data-number-of-questions='0'\u003e \u003cstyle class='jdgm-temp-hiding-style'\u003e.jdgm-rev-widg{ display: none }\u003c\/style\u003e \u003cdiv class='jdgm-rev-widg__header'\u003e \u003ch2 class='jdgm-rev-widg__title'\u003eCustomer Reviews\u003c\/h2\u003e \u003cdiv class='jdgm-rev-widg__summary'\u003e \u003cdiv class='jdgm-rev-widg__summary-stars' aria-label='Average rating is 0.00 stars' role='img'\u003e \u003cspan class='jdgm-star jdgm--off'\u003e\u003c\/span\u003e\u003cspan class='jdgm-star jdgm--off'\u003e\u003c\/span\u003e\u003cspan class='jdgm-star jdgm--off'\u003e\u003c\/span\u003e\u003cspan class='jdgm-star jdgm--off'\u003e\u003c\/span\u003e\u003cspan class='jdgm-star jdgm--off'\u003e\u003c\/span\u003e \u003c\/div\u003e \u003cdiv class='jdgm-rev-widg__summary-text'\u003eBe the first to write a review\u003c\/div\u003e \u003c\/div\u003e \u003ca style='display: none' href='#' class='jdgm-write-rev-link' role='button'\u003eWrite a review\u003c\/a\u003e \u003cdiv class='jdgm-histogram jdgm-temp-hidden'\u003e \u003cdiv class='jdgm-histogram__row' data-rating='5' data-frequency='0' data-percentage='0'\u003e \u003cdiv class='jdgm-histogram__star' role='button' aria-label=\"0% (0) reviews with 5 star rating\" tabindex='0' \u003e\u003cspan class='jdgm-star jdgm--on'\u003e\u003c\/span\u003e\u003cspan class='jdgm-star jdgm--on'\u003e\u003c\/span\u003e\u003cspan class='jdgm-star jdgm--on'\u003e\u003c\/span\u003e\u003cspan class='jdgm-star jdgm--on'\u003e\u003c\/span\u003e\u003cspan class='jdgm-star jdgm--on'\u003e\u003c\/span\u003e\u003c\/div\u003e \u003cdiv class='jdgm-histogram__bar'\u003e \u003cdiv class='jdgm-histogram__bar-content' style='width: 0%;'\u003e \u003c\/div\u003e \u003c\/div\u003e \u003cdiv class='jdgm-histogram__percentage'\u003e0%\u003c\/div\u003e \u003cdiv class='jdgm-histogram__frequency'\u003e(0)\u003c\/div\u003e \u003c\/div\u003e \u003cdiv class='jdgm-histogram__row' data-rating='4' data-frequency='0' data-percentage='0'\u003e \u003cdiv class='jdgm-histogram__star' role='button' aria-label=\"0% (0) reviews with 4 star rating\" tabindex='0' \u003e\u003cspan class='jdgm-star jdgm--on'\u003e\u003c\/span\u003e\u003cspan class='jdgm-star jdgm--on'\u003e\u003c\/span\u003e\u003cspan class='jdgm-star jdgm--on'\u003e\u003c\/span\u003e\u003cspan class='jdgm-star jdgm--on'\u003e\u003c\/span\u003e\u003cspan class='jdgm-star jdgm--off'\u003e\u003c\/span\u003e\u003c\/div\u003e \u003cdiv class='jdgm-histogram__bar'\u003e \u003cdiv class='jdgm-histogram__bar-content' style='width: 0%;'\u003e \u003c\/div\u003e \u003c\/div\u003e \u003cdiv class='jdgm-histogram__percentage'\u003e0%\u003c\/div\u003e \u003cdiv class='jdgm-histogram__frequency'\u003e(0)\u003c\/div\u003e \u003c\/div\u003e \u003cdiv class='jdgm-histogram__row' data-rating='3' data-frequency='0' data-percentage='0'\u003e \u003cdiv class='jdgm-histogram__star' role='button' aria-label=\"0% (0) reviews with 3 star rating\" tabindex='0' \u003e\u003cspan class='jdgm-star jdgm--on'\u003e\u003c\/span\u003e\u003cspan class='jdgm-star jdgm--on'\u003e\u003c\/span\u003e\u003cspan class='jdgm-star jdgm--on'\u003e\u003c\/span\u003e\u003cspan class='jdgm-star jdgm--off'\u003e\u003c\/span\u003e\u003cspan class='jdgm-star jdgm--off'\u003e\u003c\/span\u003e\u003c\/div\u003e \u003cdiv class='jdgm-histogram__bar'\u003e \u003cdiv class='jdgm-histogram__bar-content' style='width: 0%;'\u003e \u003c\/div\u003e \u003c\/div\u003e \u003cdiv class='jdgm-histogram__percentage'\u003e0%\u003c\/div\u003e \u003cdiv class='jdgm-histogram__frequency'\u003e(0)\u003c\/div\u003e \u003c\/div\u003e \u003cdiv class='jdgm-histogram__row' data-rating='2' data-frequency='0' data-percentage='0'\u003e \u003cdiv class='jdgm-histogram__star' role='button' aria-label=\"0% (0) reviews with 2 star rating\" tabindex='0' \u003e\u003cspan class='jdgm-star jdgm--on'\u003e\u003c\/span\u003e\u003cspan class='jdgm-star jdgm--on'\u003e\u003c\/span\u003e\u003cspan class='jdgm-star jdgm--off'\u003e\u003c\/span\u003e\u003cspan class='jdgm-star jdgm--off'\u003e\u003c\/span\u003e\u003cspan class='jdgm-star jdgm--off'\u003e\u003c\/span\u003e\u003c\/div\u003e \u003cdiv class='jdgm-histogram__bar'\u003e \u003cdiv class='jdgm-histogram__bar-content' style='width: 0%;'\u003e \u003c\/div\u003e \u003c\/div\u003e \u003cdiv class='jdgm-histogram__percentage'\u003e0%\u003c\/div\u003e \u003cdiv class='jdgm-histogram__frequency'\u003e(0)\u003c\/div\u003e \u003c\/div\u003e \u003cdiv class='jdgm-histogram__row' data-rating='1' data-frequency='0' data-percentage='0'\u003e \u003cdiv class='jdgm-histogram__star' role='button' aria-label=\"0% (0) reviews with 1 star rating\" tabindex='0' \u003e\u003cspan class='jdgm-star jdgm--on'\u003e\u003c\/span\u003e\u003cspan class='jdgm-star jdgm--off'\u003e\u003c\/span\u003e\u003cspan class='jdgm-star jdgm--off'\u003e\u003c\/span\u003e\u003cspan class='jdgm-star jdgm--off'\u003e\u003c\/span\u003e\u003cspan class='jdgm-star jdgm--off'\u003e\u003c\/span\u003e\u003c\/div\u003e \u003cdiv class='jdgm-histogram__bar'\u003e \u003cdiv class='jdgm-histogram__bar-content' style='width: 0%;'\u003e \u003c\/div\u003e \u003c\/div\u003e \u003cdiv class='jdgm-histogram__percentage'\u003e0%\u003c\/div\u003e \u003cdiv class='jdgm-histogram__frequency'\u003e(0)\u003c\/div\u003e \u003c\/div\u003e \u003cdiv class='jdgm-histogram__row jdgm-histogram__clear-filter' data-rating=null tabindex='0'\u003e\u003c\/div\u003e \u003c\/div\u003e \u003cdiv class='jdgm-rev-widg__sort-wrapper'\u003e\u003c\/div\u003e \u003c\/div\u003e \u003cdiv class='jdgm-rev-widg__body'\u003e \u003cdiv class='jdgm-rev-widg__reviews'\u003e\u003c\/div\u003e \u003cdiv class='jdgm-paginate' data-per-page='10' data-url='https:\/\/api.judge.me\/reviews\/reviews_for_widget' style=\"display: none;\"\u003e\u003c\/div\u003e \u003c\/div\u003e \u003cdiv class='jdgm-rev-widg__paginate-spinner-wrapper'\u003e \u003cdiv class='jdgm-spinner'\u003e\u003c\/div\u003e \u003c\/div\u003e \u003c\/div\u003e"},"default_reviews_metafields":{},"collections":[{"id":512654540989,"handle":"lastof26-10","title":"10%","updated_at":"2026-11-14T20:08:00+08:00","body_html":null,"published_at":"2026-10-12T19:06:42+08:00","sort_order":"best-selling","template_suffix":null,"disjunctive":false,"rules":[],"published_scope":"global"},{"id":261657460925,"handle":"buy","title":"Buy","updated_at":"2026-11-14T20:08:00+08:00","body_html":"\u003cp\u003eBrowse all of our pregnancy, labour \u0026amp; birth, postpartum and baby essentials here.\u003cbr\u003e\u003c\/p\u003e\n\u003cp\u003e\u003cspan\u003eYou can even buy now and pay later with Afterpay!\u003c\/span\u003e\u003c\/p\u003e","published_at":"2021-03-10T12:05:31+08:00","sort_order":"best-selling","template_suffix":"shop-all-collection","disjunctive":false,"rules":[],"published_scope":"global","image":{"created_at":"2024-05-06T11:59:42+08:00","alt":"Buy - The Birth Store","width":2048,"height":2048,"src":"\/\/www.thebirthstore.com.au\/cdn\/shop\/collections\/buy-964856.jpg?v=1714967982"}},{"id":293309022397,"handle":"clothing","title":"Clothing","updated_at":"2026-11-09T10:38:40+08:00","body_html":"","published_at":"2023-05-03T11:41:12+08:00","sort_order":"best-selling","template_suffix":"swaddles-collection","disjunctive":true,"rules":[],"published_scope":"global","image":{"created_at":"2024-05-06T11:59:52+08:00","alt":"Clothing - The Birth Store","width":676,"height":581,"src":"\/\/www.thebirthstore.com.au\/cdn\/shop\/collections\/clothing-483293.jpg?v=1714967992"}},{"id":326572048573,"handle":"maternity-clothing","title":"Maternity Clothing","updated_at":"2026-11-07T20:07:16+08:00","body_html":"","published_at":"2025-10-31T12:50:20+08:00","sort_order":"best-selling","template_suffix":"","disjunctive":false,"rules":[],"published_scope":"global","image":{"created_at":"2025-11-20T21:34:30+08:00","alt":"Maternity Clothing - The Birth Store","width":1920,"height":1281,"src":"\/\/www.thebirthstore.com.au\/cdn\/shop\/collections\/maternity-clothing-6954274.webp?v=1763645670"}},{"id":281712591037,"handle":"pain-relief","title":"Pain Relief","updated_at":"2026-11-14T20:08:00+08:00","body_html":"","published_at":"2021-12-20T14:22:45+08:00","sort_order":"best-selling","template_suffix":"pain-relief-collection","disjunctive":false,"rules":[],"published_scope":"global","image":{"created_at":"2024-05-06T12:00:27+08:00","alt":"Pain Relief - The Birth Store","width":1365,"height":2048,"src":"\/\/www.thebirthstore.com.au\/cdn\/shop\/collections\/pain-relief-878865.jpg?v=1714968027"}},{"id":281712689341,"handle":"pelvic-floor-health","title":"Pelvic Floor Health","updated_at":"2026-11-12T20:07:50+08:00","body_html":"","published_at":"2021-12-20T14:23:41+08:00","sort_order":"best-selling","template_suffix":"swaddles-collection","disjunctive":false,"rules":[],"published_scope":"global","image":{"created_at":"2024-05-06T12:00:29+08:00","alt":"Pelvic Floor Health - The Birth Store","width":536,"height":589,"src":"\/\/www.thebirthstore.com.au\/cdn\/shop\/collections\/pelvic-floor-health-890736.jpg?v=1714968030"}},{"id":261658149053,"handle":"pregnancy-and-maternity-products","title":"Pregnancy","updated_at":"2026-11-14T20:08:00+08:00","body_html":"\u003cp\u003eShop your pregnancy essentials below. Looking for something we don't currently stock? Please reach out and let us know.\u003cbr\u003e\u003c\/p\u003e\n\u003cp\u003e\u003cspan\u003eYou can even buy now and pay later with Afterpay!\u003c\/span\u003e\u003c\/p\u003e","published_at":"2021-03-10T12:34:22+08:00","sort_order":"best-selling","template_suffix":"pregnancy-collection","disjunctive":false,"rules":[],"published_scope":"global","image":{"created_at":"2024-05-06T12:00:40+08:00","alt":"Pregnancy - The Birth Store","width":1024,"height":1536,"src":"\/\/www.thebirthstore.com.au\/cdn\/shop\/collections\/pregnancy-899677.jpg?v=1714968040"}},{"id":291456483517,"handle":"shop-all","title":"Shop All - Mum","updated_at":"2026-11-14T20:08:00+08:00","body_html":"","published_at":"2022-12-23T22:04:39+08:00","sort_order":"best-selling","template_suffix":"shop-all-collection","disjunctive":false,"rules":[],"published_scope":"global","image":{"created_at":"2024-05-06T12:00:54+08:00","alt":"Shop All - The Birth Store","width":1365,"height":2048,"src":"\/\/www.thebirthstore.com.au\/cdn\/shop\/collections\/shop-all-693176.jpg?v=1714968055"}},{"id":310045933757,"handle":"shop-all-sale","title":"Shop All Sale","updated_at":"2026-11-14T20:08:00+08:00","body_html":"","published_at":"2024-11-12T13:22:43+08:00","sort_order":"best-selling","template_suffix":"","disjunctive":true,"rules":[],"published_scope":"global","image":{"created_at":"2024-11-13T10:58:16+08:00","alt":"Shop All Sale - The Birth Store","width":2048,"height":1365,"src":"\/\/www.thebirthstore.com.au\/cdn\/shop\/collections\/shop-all-sale-297361.jpg?v=1731466697"}},{"id":292595433661,"handle":"support-clothing","title":"Support Clothing","updated_at":"2026-11-08T20:07:47+08:00","body_html":"Maternity, breastfeeding, supportive, postpartum clothing and more - we've got it all, or we will have soon! Keep an eye out for new arrivals and grab yourself some incredible must-have staple items.","published_at":"2023-02-20T12:49:47+08:00","sort_order":"best-selling","template_suffix":"swaddles-collection","disjunctive":false,"rules":[],"published_scope":"global","image":{"created_at":"2024-05-06T12:00:59+08:00","alt":"Support Clothing - The Birth Store","width":586,"height":879,"src":"\/\/www.thebirthstore.com.au\/cdn\/shop\/collections\/support-clothing-743676.jpg?v=1714968059"}}]}
{"item":{"id":8115744145597,"title":"SRC C-Section Recovery Shorts - Mini","handle":"src-c-section-recovery-shorts-mini","description":"\u003cp\u003e\u003cmeta charset=\"utf-8\"\u003e\u003cspan\u003eThis product is stocked at a 3\u003c\/span\u003e\u003csup\u003erd\u003c\/sup\u003e\u003cspan\u003e party warehouse, if ordering with other products you’ll receive two packages. This product will have a turn around time of 10 days if pickup is selected on checkout. Any questions, please contact us \u003ca href=\"https:\/\/www.thebirthstore.com.au\/pages\/contact-us\" title=\"Contact Us\" target=\"_blank\"\u003ehere\u003c\/a\u003e.\u003c\/span\u003e\u003cbr\u003e\u003c\/p\u003e","published_at":"2025-10-25T13:47:34+08:00","created_at":"2025-10-25T13:47:34+08:00","vendor":"SRC Health","type":"Recovery Shorts","tags":["C-Section Birth Recovery","Hospital Bag","Mum","Pelvic Floor","Post-Partum","Support Clothing","Vaginal Birth Recovery"],"price":19900,"price_min":19900,"price_max":19900,"available":true,"price_varies":false,"compare_at_price":null,"compare_at_price_min":0,"compare_at_price_max":0,"compare_at_price_varies":false,"variants":[{"id":45841364779197,"title":"XXS \/ Black","option1":"XXS","option2":"Black","option3":null,"sku":null,"requires_shipping":true,"taxable":false,"featured_image":null,"available":true,"name":"SRC C-Section Recovery Shorts - Mini - XXS \/ Black","public_title":"XXS \/ Black","options":["XXS","Black"],"price":19900,"weight":0,"compare_at_price":null,"inventory_management":null,"barcode":"64779197","requires_selling_plan":false,"selling_plan_allocations":[],"quantity_rule":{"min":1,"max":null,"increment":1}},{"id":45841364844733,"title":"XS \/ Black","option1":"XS","option2":"Black","option3":null,"sku":null,"requires_shipping":true,"taxable":false,"featured_image":null,"available":true,"name":"SRC C-Section Recovery Shorts - Mini - XS \/ Black","public_title":"XS \/ Black","options":["XS","Black"],"price":19900,"weight":0,"compare_at_price":null,"inventory_management":null,"barcode":"64844733","requires_selling_plan":false,"selling_plan_allocations":[],"quantity_rule":{"min":1,"max":null,"increment":1}},{"id":45841364910269,"title":"S \/ Black","option1":"S","option2":"Black","option3":null,"sku":null,"requires_shipping":true,"taxable":false,"featured_image":null,"available":true,"name":"SRC C-Section Recovery Shorts - Mini - S \/ Black","public_title":"S \/ Black","options":["S","Black"],"price":19900,"weight":0,"compare_at_price":null,"inventory_management":null,"barcode":"64910269","requires_selling_plan":false,"selling_plan_allocations":[],"quantity_rule":{"min":1,"max":null,"increment":1}},{"id":45841364975805,"title":"M \/ Black","option1":"M","option2":"Black","option3":null,"sku":null,"requires_shipping":true,"taxable":false,"featured_image":null,"available":true,"name":"SRC C-Section Recovery Shorts - Mini - M \/ Black","public_title":"M \/ Black","options":["M","Black"],"price":19900,"weight":0,"compare_at_price":null,"inventory_management":null,"barcode":"64975805","requires_selling_plan":false,"selling_plan_allocations":[],"quantity_rule":{"min":1,"max":null,"increment":1}},{"id":45841365041341,"title":"L \/ Black","option1":"L","option2":"Black","option3":null,"sku":null,"requires_shipping":true,"taxable":false,"featured_image":null,"available":true,"name":"SRC C-Section Recovery Shorts - Mini - L \/ Black","public_title":"L \/ Black","options":["L","Black"],"price":19900,"weight":0,"compare_at_price":null,"inventory_management":null,"barcode":"65041341","requires_selling_plan":false,"selling_plan_allocations":[],"quantity_rule":{"min":1,"max":null,"increment":1}},{"id":45841365106877,"title":"XL \/ Black","option1":"XL","option2":"Black","option3":null,"sku":null,"requires_shipping":true,"taxable":false,"featured_image":null,"available":true,"name":"SRC C-Section Recovery Shorts - Mini - XL \/ Black","public_title":"XL \/ Black","options":["XL","Black"],"price":19900,"weight":0,"compare_at_price":null,"inventory_management":null,"barcode":"65106877","requires_selling_plan":false,"selling_plan_allocations":[],"quantity_rule":{"min":1,"max":null,"increment":1}},{"id":45841365172413,"title":"XXL \/ Black","option1":"XXL","option2":"Black","option3":null,"sku":null,"requires_shipping":true,"taxable":false,"featured_image":null,"available":true,"name":"SRC C-Section Recovery Shorts - Mini - XXL \/ Black","public_title":"XXL \/ Black","options":["XXL","Black"],"price":19900,"weight":0,"compare_at_price":null,"inventory_management":null,"barcode":"65172413","requires_selling_plan":false,"selling_plan_allocations":[],"quantity_rule":{"min":1,"max":null,"increment":1}}],"images":["\/\/www.thebirthstore.com.au\/cdn\/shop\/files\/src-c-section-recovery-shorts-mini-3383851.png?v=1764307139","\/\/www.thebirthstore.com.au\/cdn\/shop\/files\/src-c-section-recovery-shorts-mini-3774997.jpg?v=1762438527","\/\/www.thebirthstore.com.au\/cdn\/shop\/files\/src-c-section-recovery-shorts-mini-6185634.jpg?v=1761398052"],"featured_image":"\/\/www.thebirthstore.com.au\/cdn\/shop\/files\/src-c-section-recovery-shorts-mini-3383851.png?v=1764307139","options":["Size","Colour"],"media":[{"alt":"SRC C - Section Recovery Shorts - Mini - The Birth Store - SRC Health","id":29906962284733,"position":1,"preview_image":{"aspect_ratio":1.0,"height":800,"width":800,"src":"\/\/www.thebirthstore.com.au\/cdn\/shop\/files\/src-c-section-recovery-shorts-mini-3383851.png?v=1764307139"},"aspect_ratio":1.0,"height":800,"media_type":"image","src":"\/\/www.thebirthstore.com.au\/cdn\/shop\/files\/src-c-section-recovery-shorts-mini-3383851.png?v=1764307139","width":800},{"alt":"SRC C - Section Recovery Shorts - Mini - The Birth Store - SRC Health","id":29906962776253,"position":2,"preview_image":{"aspect_ratio":1.0,"height":1080,"width":1080,"src":"\/\/www.thebirthstore.com.au\/cdn\/shop\/files\/src-c-section-recovery-shorts-mini-3774997.jpg?v=1762438527"},"aspect_ratio":1.0,"height":1080,"media_type":"image","src":"\/\/www.thebirthstore.com.au\/cdn\/shop\/files\/src-c-section-recovery-shorts-mini-3774997.jpg?v=1762438527","width":1080},{"alt":"SRC C - Section Recovery Shorts - Mini - The Birth Store - SRC Health","id":29906965332157,"position":3,"preview_image":{"aspect_ratio":0.667,"height":1200,"width":800,"src":"\/\/www.thebirthstore.com.au\/cdn\/shop\/files\/src-c-section-recovery-shorts-mini-6185634.jpg?v=1761398052"},"aspect_ratio":0.667,"height":1200,"media_type":"image","src":"\/\/www.thebirthstore.com.au\/cdn\/shop\/files\/src-c-section-recovery-shorts-mini-6185634.jpg?v=1761398052","width":800}],"requires_selling_plan":false,"selling_plan_groups":[],"content":"\u003cp\u003e\u003cmeta charset=\"utf-8\"\u003e\u003cspan\u003eThis product is stocked at a 3\u003c\/span\u003e\u003csup\u003erd\u003c\/sup\u003e\u003cspan\u003e party warehouse, if ordering with other products you’ll receive two packages. This product will have a turn around time of 10 days if pickup is selected on checkout. Any questions, please contact us \u003ca href=\"https:\/\/www.thebirthstore.com.au\/pages\/contact-us\" title=\"Contact Us\" target=\"_blank\"\u003ehere\u003c\/a\u003e.\u003c\/span\u003e\u003cbr\u003e\u003c\/p\u003e"},"options":[{"name":"Size","position":1,"values":["XXS","XS","S","M","L","XL","XXL"]},{"name":"Colour","position":2,"values":["Black"]}],"custom_metafields":{},"metafields":{"badge":"\u003cdiv style='display:none' class='jdgm-prev-badge' data-average-rating='0.00' data-number-of-reviews='0' data-number-of-questions='0'\u003e \u003cspan class='jdgm-prev-badge__stars' data-score='0.00' tabindex='0' aria-label='0.00 stars' role='button'\u003e \u003cspan class='jdgm-star jdgm--off'\u003e\u003c\/span\u003e\u003cspan class='jdgm-star jdgm--off'\u003e\u003c\/span\u003e\u003cspan class='jdgm-star jdgm--off'\u003e\u003c\/span\u003e\u003cspan class='jdgm-star jdgm--off'\u003e\u003c\/span\u003e\u003cspan class='jdgm-star jdgm--off'\u003e\u003c\/span\u003e \u003c\/span\u003e \u003cspan class='jdgm-prev-badge__text'\u003e No reviews \u003c\/span\u003e \u003c\/div\u003e","widget":"\u003cdiv class='jdgm-rev-widg' data-updated-at='2025-10-25T05:47:37Z' data-average-rating='0.00' data-number-of-reviews='0' data-number-of-questions='0' data-image-url=''\u003e \u003cstyle class='jdgm-temp-hiding-style'\u003e.jdgm-rev-widg{ display: none }\u003c\/style\u003e \u003cdiv class='jdgm-rev-widg__header'\u003e \u003ch2 class='jdgm-rev-widg__title'\u003eCustomer Reviews\u003c\/h2\u003e \u003cdiv class='jdgm-rev-widg__summary'\u003e \u003cdiv class='jdgm-rev-widg__summary-stars' aria-label='Average rating is 0.00 stars' role='img'\u003e \u003cspan class='jdgm-star jdgm--off'\u003e\u003c\/span\u003e\u003cspan class='jdgm-star jdgm--off'\u003e\u003c\/span\u003e\u003cspan class='jdgm-star jdgm--off'\u003e\u003c\/span\u003e\u003cspan class='jdgm-star jdgm--off'\u003e\u003c\/span\u003e\u003cspan class='jdgm-star jdgm--off'\u003e\u003c\/span\u003e \u003c\/div\u003e \u003cdiv class='jdgm-rev-widg__summary-text'\u003eBe the first to write a review\u003c\/div\u003e \u003c\/div\u003e \u003ca style='display: none' href='#' class='jdgm-write-rev-link' role='button'\u003eWrite a review\u003c\/a\u003e \u003cdiv class='jdgm-histogram jdgm-temp-hidden'\u003e \u003cdiv class='jdgm-histogram__row' data-rating='5' data-frequency='0' data-percentage='0'\u003e \u003cdiv class='jdgm-histogram__star' role='button' aria-label=\"0% (0) reviews with 5 star rating\" tabindex='0' \u003e\u003cspan class='jdgm-star jdgm--on'\u003e\u003c\/span\u003e\u003cspan class='jdgm-star jdgm--on'\u003e\u003c\/span\u003e\u003cspan class='jdgm-star jdgm--on'\u003e\u003c\/span\u003e\u003cspan class='jdgm-star jdgm--on'\u003e\u003c\/span\u003e\u003cspan class='jdgm-star jdgm--on'\u003e\u003c\/span\u003e\u003c\/div\u003e \u003cdiv class='jdgm-histogram__bar'\u003e \u003cdiv class='jdgm-histogram__bar-content' style='width: 0%;'\u003e \u003c\/div\u003e \u003c\/div\u003e \u003cdiv class='jdgm-histogram__percentage'\u003e0%\u003c\/div\u003e \u003cdiv class='jdgm-histogram__frequency'\u003e(0)\u003c\/div\u003e \u003c\/div\u003e \u003cdiv class='jdgm-histogram__row' data-rating='4' data-frequency='0' data-percentage='0'\u003e \u003cdiv class='jdgm-histogram__star' role='button' aria-label=\"0% (0) reviews with 4 star rating\" tabindex='0' \u003e\u003cspan class='jdgm-star jdgm--on'\u003e\u003c\/span\u003e\u003cspan class='jdgm-star jdgm--on'\u003e\u003c\/span\u003e\u003cspan class='jdgm-star jdgm--on'\u003e\u003c\/span\u003e\u003cspan class='jdgm-star jdgm--on'\u003e\u003c\/span\u003e\u003cspan class='jdgm-star jdgm--off'\u003e\u003c\/span\u003e\u003c\/div\u003e \u003cdiv class='jdgm-histogram__bar'\u003e \u003cdiv class='jdgm-histogram__bar-content' style='width: 0%;'\u003e \u003c\/div\u003e \u003c\/div\u003e \u003cdiv class='jdgm-histogram__percentage'\u003e0%\u003c\/div\u003e \u003cdiv class='jdgm-histogram__frequency'\u003e(0)\u003c\/div\u003e \u003c\/div\u003e \u003cdiv class='jdgm-histogram__row' data-rating='3' data-frequency='0' data-percentage='0'\u003e \u003cdiv class='jdgm-histogram__star' role='button' aria-label=\"0% (0) reviews with 3 star rating\" tabindex='0' \u003e\u003cspan class='jdgm-star jdgm--on'\u003e\u003c\/span\u003e\u003cspan class='jdgm-star jdgm--on'\u003e\u003c\/span\u003e\u003cspan class='jdgm-star jdgm--on'\u003e\u003c\/span\u003e\u003cspan class='jdgm-star jdgm--off'\u003e\u003c\/span\u003e\u003cspan class='jdgm-star jdgm--off'\u003e\u003c\/span\u003e\u003c\/div\u003e \u003cdiv class='jdgm-histogram__bar'\u003e \u003cdiv class='jdgm-histogram__bar-content' style='width: 0%;'\u003e \u003c\/div\u003e \u003c\/div\u003e \u003cdiv class='jdgm-histogram__percentage'\u003e0%\u003c\/div\u003e \u003cdiv class='jdgm-histogram__frequency'\u003e(0)\u003c\/div\u003e \u003c\/div\u003e \u003cdiv class='jdgm-histogram__row' data-rating='2' data-frequency='0' data-percentage='0'\u003e \u003cdiv class='jdgm-histogram__star' role='button' aria-label=\"0% (0) reviews with 2 star rating\" tabindex='0' \u003e\u003cspan class='jdgm-star jdgm--on'\u003e\u003c\/span\u003e\u003cspan class='jdgm-star jdgm--on'\u003e\u003c\/span\u003e\u003cspan class='jdgm-star jdgm--off'\u003e\u003c\/span\u003e\u003cspan class='jdgm-star jdgm--off'\u003e\u003c\/span\u003e\u003cspan class='jdgm-star jdgm--off'\u003e\u003c\/span\u003e\u003c\/div\u003e \u003cdiv class='jdgm-histogram__bar'\u003e \u003cdiv class='jdgm-histogram__bar-content' style='width: 0%;'\u003e \u003c\/div\u003e \u003c\/div\u003e \u003cdiv class='jdgm-histogram__percentage'\u003e0%\u003c\/div\u003e \u003cdiv class='jdgm-histogram__frequency'\u003e(0)\u003c\/div\u003e \u003c\/div\u003e \u003cdiv class='jdgm-histogram__row' data-rating='1' data-frequency='0' data-percentage='0'\u003e \u003cdiv class='jdgm-histogram__star' role='button' aria-label=\"0% (0) reviews with 1 star rating\" tabindex='0' \u003e\u003cspan class='jdgm-star jdgm--on'\u003e\u003c\/span\u003e\u003cspan class='jdgm-star jdgm--off'\u003e\u003c\/span\u003e\u003cspan class='jdgm-star jdgm--off'\u003e\u003c\/span\u003e\u003cspan class='jdgm-star jdgm--off'\u003e\u003c\/span\u003e\u003cspan class='jdgm-star jdgm--off'\u003e\u003c\/span\u003e\u003c\/div\u003e \u003cdiv class='jdgm-histogram__bar'\u003e \u003cdiv class='jdgm-histogram__bar-content' style='width: 0%;'\u003e \u003c\/div\u003e \u003c\/div\u003e \u003cdiv class='jdgm-histogram__percentage'\u003e0%\u003c\/div\u003e \u003cdiv class='jdgm-histogram__frequency'\u003e(0)\u003c\/div\u003e \u003c\/div\u003e \u003cdiv class='jdgm-histogram__row jdgm-histogram__clear-filter' data-rating=null tabindex='0'\u003e\u003c\/div\u003e \u003c\/div\u003e \u003cdiv class='jdgm-rev-widg__sort-wrapper'\u003e\u003c\/div\u003e \u003c\/div\u003e \u003cdiv class='jdgm-rev-widg__body'\u003e \u003cdiv class='jdgm-rev-widg__reviews'\u003e\u003c\/div\u003e \u003cdiv class='jdgm-paginate' data-per-page='10' data-url='https:\/\/api.judge.me\/reviews\/reviews_for_widget' style=\"display: none;\"\u003e\u003c\/div\u003e \u003c\/div\u003e \u003cdiv class='jdgm-rev-widg__paginate-spinner-wrapper'\u003e \u003cdiv class='jdgm-spinner'\u003e\u003c\/div\u003e \u003c\/div\u003e \u003c\/div\u003e"},"default_reviews_metafields":{},"collections":[{"id":512654540989,"handle":"lastof26-10","title":"10%","updated_at":"2026-11-14T20:08:00+08:00","body_html":null,"published_at":"2026-10-12T19:06:42+08:00","sort_order":"best-selling","template_suffix":null,"disjunctive":false,"rules":[],"published_scope":"global"},{"id":261657460925,"handle":"buy","title":"Buy","updated_at":"2026-11-14T20:08:00+08:00","body_html":"\u003cp\u003eBrowse all of our pregnancy, labour \u0026amp; birth, postpartum and baby essentials here.\u003cbr\u003e\u003c\/p\u003e\n\u003cp\u003e\u003cspan\u003eYou can even buy now and pay later with Afterpay!\u003c\/span\u003e\u003c\/p\u003e","published_at":"2021-03-10T12:05:31+08:00","sort_order":"best-selling","template_suffix":"shop-all-collection","disjunctive":false,"rules":[],"published_scope":"global","image":{"created_at":"2024-05-06T11:59:42+08:00","alt":"Buy - The Birth Store","width":2048,"height":2048,"src":"\/\/www.thebirthstore.com.au\/cdn\/shop\/collections\/buy-964856.jpg?v=1714967982"}},{"id":281712361661,"handle":"c-section-birth-recovery","title":"C-Section Birth Recovery","updated_at":"2026-11-12T20:07:50+08:00","body_html":"","published_at":"2021-12-20T14:19:01+08:00","sort_order":"best-selling","template_suffix":"swaddles-collection","disjunctive":false,"rules":[],"published_scope":"global","image":{"created_at":"2024-05-06T11:59:49+08:00","alt":"C-Section Birth Recovery - The Birth Store","width":1366,"height":2048,"src":"\/\/www.thebirthstore.com.au\/cdn\/shop\/collections\/c-section-birth-recovery-359249.jpg?v=1714967990"}},{"id":293309022397,"handle":"clothing","title":"Clothing","updated_at":"2026-11-09T10:38:40+08:00","body_html":"","published_at":"2023-05-03T11:41:12+08:00","sort_order":"best-selling","template_suffix":"swaddles-collection","disjunctive":true,"rules":[],"published_scope":"global","image":{"created_at":"2024-05-06T11:59:52+08:00","alt":"Clothing - The Birth Store","width":676,"height":581,"src":"\/\/www.thebirthstore.com.au\/cdn\/shop\/collections\/clothing-483293.jpg?v=1714967992"}},{"id":337429201085,"handle":"hospital-bag","title":"Hospital Bag","updated_at":"2026-11-14T20:08:00+08:00","body_html":"","published_at":"2026-06-03T11:36:29+08:00","sort_order":"most-relevant","template_suffix":"","disjunctive":false,"rules":[],"published_scope":"global"},{"id":281712689341,"handle":"pelvic-floor-health","title":"Pelvic Floor Health","updated_at":"2026-11-12T20:07:50+08:00","body_html":"","published_at":"2021-12-20T14:23:41+08:00","sort_order":"best-selling","template_suffix":"swaddles-collection","disjunctive":false,"rules":[],"published_scope":"global","image":{"created_at":"2024-05-06T12:00:29+08:00","alt":"Pelvic Floor Health - The Birth Store","width":536,"height":589,"src":"\/\/www.thebirthstore.com.au\/cdn\/shop\/collections\/pelvic-floor-health-890736.jpg?v=1714968030"}},{"id":261658083517,"handle":"post-partum","title":"Postpartum","updated_at":"2026-11-14T20:08:00+08:00","body_html":"\u003cp\u003eShop your postpartum and hospital bag essentials below. Looking for something we don't currently stock? Please reach out and let us know.\u003cbr\u003e\u003c\/p\u003e\n\u003cp\u003e\u003cspan\u003eYou can even buy now and pay later with Afterpay!\u003c\/span\u003e\u003c\/p\u003e","published_at":"2021-03-10T12:33:47+08:00","sort_order":"best-selling","template_suffix":"postpartum-collection","disjunctive":false,"rules":[],"published_scope":"global","image":{"created_at":"2024-05-06T12:00:36+08:00","alt":"Postpartum - The Birth Store","width":611,"height":702,"src":"\/\/www.thebirthstore.com.au\/cdn\/shop\/collections\/postpartum-150119.jpg?v=1714968037"}},{"id":291456483517,"handle":"shop-all","title":"Shop All - Mum","updated_at":"2026-11-14T20:08:00+08:00","body_html":"","published_at":"2022-12-23T22:04:39+08:00","sort_order":"best-selling","template_suffix":"shop-all-collection","disjunctive":false,"rules":[],"published_scope":"global","image":{"created_at":"2024-05-06T12:00:54+08:00","alt":"Shop All - The Birth Store","width":1365,"height":2048,"src":"\/\/www.thebirthstore.com.au\/cdn\/shop\/collections\/shop-all-693176.jpg?v=1714968055"}},{"id":310045933757,"handle":"shop-all-sale","title":"Shop All Sale","updated_at":"2026-11-14T20:08:00+08:00","body_html":"","published_at":"2024-11-12T13:22:43+08:00","sort_order":"best-selling","template_suffix":"","disjunctive":true,"rules":[],"published_scope":"global","image":{"created_at":"2024-11-13T10:58:16+08:00","alt":"Shop All Sale - The Birth Store","width":2048,"height":1365,"src":"\/\/www.thebirthstore.com.au\/cdn\/shop\/collections\/shop-all-sale-297361.jpg?v=1731466697"}},{"id":292595433661,"handle":"support-clothing","title":"Support Clothing","updated_at":"2026-11-08T20:07:47+08:00","body_html":"Maternity, breastfeeding, supportive, postpartum clothing and more - we've got it all, or we will have soon! Keep an eye out for new arrivals and grab yourself some incredible must-have staple items.","published_at":"2023-02-20T12:49:47+08:00","sort_order":"best-selling","template_suffix":"swaddles-collection","disjunctive":false,"rules":[],"published_scope":"global","image":{"created_at":"2024-05-06T12:00:59+08:00","alt":"Support Clothing - The Birth Store","width":586,"height":879,"src":"\/\/www.thebirthstore.com.au\/cdn\/shop\/collections\/support-clothing-743676.jpg?v=1714968059"}},{"id":281712197821,"handle":"vaginal-birth-recovery","title":"Vaginal Birth Recovery","updated_at":"2026-11-12T20:07:50+08:00","body_html":"","published_at":"2021-12-20T14:18:23+08:00","sort_order":"best-selling","template_suffix":"swaddles-collection","disjunctive":true,"rules":[],"published_scope":"global","image":{"created_at":"2024-05-06T12:01:03+08:00","alt":"Vaginal Birth Recovery - The Birth Store","width":2048,"height":2048,"src":"\/\/www.thebirthstore.com.au\/cdn\/shop\/collections\/vaginal-birth-recovery-449034.jpg?v=1714968063"}}]}
{"item":{"id":7439748694205,"title":"SRC Pregnancy Shorts - Over the Bump","handle":"src-pregnancy-shorts-over-the-bump","description":"\u003cp\u003e\u003cspan\u003eThis product is stocked at a 3\u003c\/span\u003e\u003csup\u003erd\u003c\/sup\u003e\u003cspan\u003e party warehouse, if ordering with other products you’ll receive two packages. This product will have a turn around time of 10 days if pickup is selected on checkout. Any questions, please contact us \u003ca title=\"Contact Us\" href=\"https:\/\/www.thebirthstore.com.au\/pages\/contact-us\" target=\"_blank\"\u003ehere\u003c\/a\u003e.\u003c\/span\u003e\u003cbr\u003e\u003c\/p\u003e\n\u003cp\u003e\u003cspan\u003e\u003cem\u003e\u003cstrong\u003eINSTORE AVAILABILITY - \u003c\/strong\u003e\u003c\/em\u003eWe have limited instore availability for these products, please call us on \u003cspan\u003e0458 556 512\u003c\/span\u003e before heading to the store to buy in-store.\u003c\/span\u003e\u003c\/p\u003e","published_at":"2023-03-13T14:11:45+08:00","created_at":"2023-02-13T22:54:07+08:00","vendor":"SRC Health","type":"Pregnancy Shorts","tags":["Maternity Clothing","Mum","Pain Relief","Pelvic Floor","Support Clothing"],"price":19900,"price_min":19900,"price_max":19900,"available":true,"price_varies":false,"compare_at_price":18900,"compare_at_price_min":18900,"compare_at_price_max":18900,"compare_at_price_varies":false,"variants":[{"id":42658993832125,"title":"XXS","option1":"XXS","option2":null,"option3":null,"sku":null,"requires_shipping":true,"taxable":false,"featured_image":null,"available":true,"name":"SRC Pregnancy Shorts - Over the Bump - XXS","public_title":"XXS","options":["XXS"],"price":19900,"weight":0,"compare_at_price":18900,"inventory_management":null,"barcode":"93832125","requires_selling_plan":false,"selling_plan_allocations":[],"quantity_rule":{"min":1,"max":null,"increment":1}},{"id":42658993897661,"title":"XS","option1":"XS","option2":null,"option3":null,"sku":null,"requires_shipping":true,"taxable":false,"featured_image":null,"available":true,"name":"SRC Pregnancy Shorts - Over the Bump - XS","public_title":"XS","options":["XS"],"price":19900,"weight":0,"compare_at_price":18900,"inventory_management":null,"barcode":"93897661","requires_selling_plan":false,"selling_plan_allocations":[],"quantity_rule":{"min":1,"max":null,"increment":1}},{"id":42658993963197,"title":"S","option1":"S","option2":null,"option3":null,"sku":null,"requires_shipping":true,"taxable":false,"featured_image":null,"available":true,"name":"SRC Pregnancy Shorts - Over the Bump - S","public_title":"S","options":["S"],"price":19900,"weight":0,"compare_at_price":18900,"inventory_management":null,"barcode":"93963197","requires_selling_plan":false,"selling_plan_allocations":[],"quantity_rule":{"min":1,"max":null,"increment":1}},{"id":42658994028733,"title":"M","option1":"M","option2":null,"option3":null,"sku":null,"requires_shipping":true,"taxable":false,"featured_image":null,"available":true,"name":"SRC Pregnancy Shorts - Over the Bump - M","public_title":"M","options":["M"],"price":19900,"weight":0,"compare_at_price":18900,"inventory_management":null,"barcode":"94028733","requires_selling_plan":false,"selling_plan_allocations":[],"quantity_rule":{"min":1,"max":null,"increment":1}},{"id":42658994094269,"title":"L","option1":"L","option2":null,"option3":null,"sku":null,"requires_shipping":true,"taxable":false,"featured_image":null,"available":true,"name":"SRC Pregnancy Shorts - Over the Bump - L","public_title":"L","options":["L"],"price":19900,"weight":0,"compare_at_price":18900,"inventory_management":null,"barcode":"94094269","requires_selling_plan":false,"selling_plan_allocations":[],"quantity_rule":{"min":1,"max":null,"increment":1}},{"id":42658994159805,"title":"XL","option1":"XL","option2":null,"option3":null,"sku":null,"requires_shipping":true,"taxable":false,"featured_image":null,"available":true,"name":"SRC Pregnancy Shorts - Over the Bump - XL","public_title":"XL","options":["XL"],"price":19900,"weight":0,"compare_at_price":18900,"inventory_management":null,"barcode":"94159805","requires_selling_plan":false,"selling_plan_allocations":[],"quantity_rule":{"min":1,"max":null,"increment":1}},{"id":42658994225341,"title":"XXL","option1":"XXL","option2":null,"option3":null,"sku":null,"requires_shipping":true,"taxable":false,"featured_image":null,"available":true,"name":"SRC Pregnancy Shorts - Over the Bump - XXL","public_title":"XXL","options":["XXL"],"price":19900,"weight":0,"compare_at_price":18900,"inventory_management":null,"barcode":"94225341","requires_selling_plan":false,"selling_plan_allocations":[],"quantity_rule":{"min":1,"max":null,"increment":1}},{"id":45872449519805,"title":"XXXL","option1":"XXXL","option2":null,"option3":null,"sku":null,"requires_shipping":true,"taxable":false,"featured_image":null,"available":true,"name":"SRC Pregnancy Shorts - Over the Bump - XXXL","public_title":"XXXL","options":["XXXL"],"price":19900,"weight":0,"compare_at_price":18900,"inventory_management":null,"barcode":"49519805","requires_selling_plan":false,"selling_plan_allocations":[],"quantity_rule":{"min":1,"max":null,"increment":1}}],"images":["\/\/www.thebirthstore.com.au\/cdn\/shop\/files\/src-pregnancy-shorts-over-the-bump-491123.jpg?v=1714968045","\/\/www.thebirthstore.com.au\/cdn\/shop\/files\/src-pregnancy-shorts-over-the-bump-465754.jpg?v=1714968045","\/\/www.thebirthstore.com.au\/cdn\/shop\/files\/src-pregnancy-shorts-over-the-bump-751292.png?v=1714968045"],"featured_image":"\/\/www.thebirthstore.com.au\/cdn\/shop\/files\/src-pregnancy-shorts-over-the-bump-491123.jpg?v=1714968045","options":["Size"],"media":[{"alt":"SRC Pregnancy Shorts - Over the Bump - The Birth Store-SRC Health","id":27007599870141,"position":1,"preview_image":{"aspect_ratio":1.0,"height":1080,"width":1080,"src":"\/\/www.thebirthstore.com.au\/cdn\/shop\/files\/src-pregnancy-shorts-over-the-bump-491123.jpg?v=1714968045"},"aspect_ratio":1.0,"height":1080,"media_type":"image","src":"\/\/www.thebirthstore.com.au\/cdn\/shop\/files\/src-pregnancy-shorts-over-the-bump-491123.jpg?v=1714968045","width":1080},{"alt":"SRC Pregnancy Shorts - Over the Bump - The Birth Store-SRC Health","id":27007599902909,"position":2,"preview_image":{"aspect_ratio":1.0,"height":1080,"width":1080,"src":"\/\/www.thebirthstore.com.au\/cdn\/shop\/files\/src-pregnancy-shorts-over-the-bump-465754.jpg?v=1714968045"},"aspect_ratio":1.0,"height":1080,"media_type":"image","src":"\/\/www.thebirthstore.com.au\/cdn\/shop\/files\/src-pregnancy-shorts-over-the-bump-465754.jpg?v=1714968045","width":1080},{"alt":"SRC Pregnancy Shorts - Over the Bump - The Birth Store-SRC Health","id":27007599935677,"position":3,"preview_image":{"aspect_ratio":1.582,"height":948,"width":1500,"src":"\/\/www.thebirthstore.com.au\/cdn\/shop\/files\/src-pregnancy-shorts-over-the-bump-751292.png?v=1714968045"},"aspect_ratio":1.582,"height":948,"media_type":"image","src":"\/\/www.thebirthstore.com.au\/cdn\/shop\/files\/src-pregnancy-shorts-over-the-bump-751292.png?v=1714968045","width":1500}],"requires_selling_plan":false,"selling_plan_groups":[],"content":"\u003cp\u003e\u003cspan\u003eThis product is stocked at a 3\u003c\/span\u003e\u003csup\u003erd\u003c\/sup\u003e\u003cspan\u003e party warehouse, if ordering with other products you’ll receive two packages. This product will have a turn around time of 10 days if pickup is selected on checkout. Any questions, please contact us \u003ca title=\"Contact Us\" href=\"https:\/\/www.thebirthstore.com.au\/pages\/contact-us\" target=\"_blank\"\u003ehere\u003c\/a\u003e.\u003c\/span\u003e\u003cbr\u003e\u003c\/p\u003e\n\u003cp\u003e\u003cspan\u003e\u003cem\u003e\u003cstrong\u003eINSTORE AVAILABILITY - \u003c\/strong\u003e\u003c\/em\u003eWe have limited instore availability for these products, please call us on \u003cspan\u003e0458 556 512\u003c\/span\u003e before heading to the store to buy in-store.\u003c\/span\u003e\u003c\/p\u003e"},"options":[{"name":"Size","position":1,"values":["XXS","XS","S","M","L","XL","XXL","XXXL"]}],"custom_metafields":{},"metafields":{"badge":"\u003cdiv style='display:none' class='jdgm-prev-badge' data-average-rating='0.00' data-number-of-reviews='0' data-number-of-questions='0'\u003e \u003cspan class='jdgm-prev-badge__stars' data-score='0.00' tabindex='0' aria-label='0.00 stars' role='button'\u003e \u003cspan class='jdgm-star jdgm--off'\u003e\u003c\/span\u003e\u003cspan class='jdgm-star jdgm--off'\u003e\u003c\/span\u003e\u003cspan class='jdgm-star jdgm--off'\u003e\u003c\/span\u003e\u003cspan class='jdgm-star jdgm--off'\u003e\u003c\/span\u003e\u003cspan class='jdgm-star jdgm--off'\u003e\u003c\/span\u003e \u003c\/span\u003e \u003cspan class='jdgm-prev-badge__text'\u003e No reviews \u003c\/span\u003e \u003c\/div\u003e","widget":"\u003cdiv class='jdgm-rev-widg' data-updated-at='2025-06-13T16:12:10Z' data-average-rating='0.00' data-number-of-reviews='0' data-number-of-questions='0'\u003e \u003cstyle class='jdgm-temp-hiding-style'\u003e.jdgm-rev-widg{ display: none }\u003c\/style\u003e \u003cdiv class='jdgm-rev-widg__header'\u003e \u003ch2 class='jdgm-rev-widg__title'\u003eCustomer Reviews\u003c\/h2\u003e \u003cdiv class='jdgm-rev-widg__summary'\u003e \u003cdiv class='jdgm-rev-widg__summary-stars' aria-label='Average rating is 0.00 stars' role='img'\u003e \u003cspan class='jdgm-star jdgm--off'\u003e\u003c\/span\u003e\u003cspan class='jdgm-star jdgm--off'\u003e\u003c\/span\u003e\u003cspan class='jdgm-star jdgm--off'\u003e\u003c\/span\u003e\u003cspan class='jdgm-star jdgm--off'\u003e\u003c\/span\u003e\u003cspan class='jdgm-star jdgm--off'\u003e\u003c\/span\u003e \u003c\/div\u003e \u003cdiv class='jdgm-rev-widg__summary-text'\u003eBe the first to write a review\u003c\/div\u003e \u003c\/div\u003e \u003ca style='display: none' href='#' class='jdgm-write-rev-link' role='button'\u003eWrite a review\u003c\/a\u003e \u003cdiv class='jdgm-histogram jdgm-temp-hidden'\u003e \u003cdiv class='jdgm-histogram__row' data-rating='5' data-frequency='0' data-percentage='0'\u003e \u003cdiv class='jdgm-histogram__star' role='button' aria-label=\"0% (0) reviews with 5 star rating\" tabindex='0' \u003e\u003cspan class='jdgm-star jdgm--on'\u003e\u003c\/span\u003e\u003cspan class='jdgm-star jdgm--on'\u003e\u003c\/span\u003e\u003cspan class='jdgm-star jdgm--on'\u003e\u003c\/span\u003e\u003cspan class='jdgm-star jdgm--on'\u003e\u003c\/span\u003e\u003cspan class='jdgm-star jdgm--on'\u003e\u003c\/span\u003e\u003c\/div\u003e \u003cdiv class='jdgm-histogram__bar'\u003e \u003cdiv class='jdgm-histogram__bar-content' style='width: 0%;'\u003e \u003c\/div\u003e \u003c\/div\u003e \u003cdiv class='jdgm-histogram__percentage'\u003e0%\u003c\/div\u003e \u003cdiv class='jdgm-histogram__frequency'\u003e(0)\u003c\/div\u003e \u003c\/div\u003e \u003cdiv class='jdgm-histogram__row' data-rating='4' data-frequency='0' data-percentage='0'\u003e \u003cdiv class='jdgm-histogram__star' role='button' aria-label=\"0% (0) reviews with 4 star rating\" tabindex='0' \u003e\u003cspan class='jdgm-star jdgm--on'\u003e\u003c\/span\u003e\u003cspan class='jdgm-star jdgm--on'\u003e\u003c\/span\u003e\u003cspan class='jdgm-star jdgm--on'\u003e\u003c\/span\u003e\u003cspan class='jdgm-star jdgm--on'\u003e\u003c\/span\u003e\u003cspan class='jdgm-star jdgm--off'\u003e\u003c\/span\u003e\u003c\/div\u003e \u003cdiv class='jdgm-histogram__bar'\u003e \u003cdiv class='jdgm-histogram__bar-content' style='width: 0%;'\u003e \u003c\/div\u003e \u003c\/div\u003e \u003cdiv class='jdgm-histogram__percentage'\u003e0%\u003c\/div\u003e \u003cdiv class='jdgm-histogram__frequency'\u003e(0)\u003c\/div\u003e \u003c\/div\u003e \u003cdiv class='jdgm-histogram__row' data-rating='3' data-frequency='0' data-percentage='0'\u003e \u003cdiv class='jdgm-histogram__star' role='button' aria-label=\"0% (0) reviews with 3 star rating\" tabindex='0' \u003e\u003cspan class='jdgm-star jdgm--on'\u003e\u003c\/span\u003e\u003cspan class='jdgm-star jdgm--on'\u003e\u003c\/span\u003e\u003cspan class='jdgm-star jdgm--on'\u003e\u003c\/span\u003e\u003cspan class='jdgm-star jdgm--off'\u003e\u003c\/span\u003e\u003cspan class='jdgm-star jdgm--off'\u003e\u003c\/span\u003e\u003c\/div\u003e \u003cdiv class='jdgm-histogram__bar'\u003e \u003cdiv class='jdgm-histogram__bar-content' style='width: 0%;'\u003e \u003c\/div\u003e \u003c\/div\u003e \u003cdiv class='jdgm-histogram__percentage'\u003e0%\u003c\/div\u003e \u003cdiv class='jdgm-histogram__frequency'\u003e(0)\u003c\/div\u003e \u003c\/div\u003e \u003cdiv class='jdgm-histogram__row' data-rating='2' data-frequency='0' data-percentage='0'\u003e \u003cdiv class='jdgm-histogram__star' role='button' aria-label=\"0% (0) reviews with 2 star rating\" tabindex='0' \u003e\u003cspan class='jdgm-star jdgm--on'\u003e\u003c\/span\u003e\u003cspan class='jdgm-star jdgm--on'\u003e\u003c\/span\u003e\u003cspan class='jdgm-star jdgm--off'\u003e\u003c\/span\u003e\u003cspan class='jdgm-star jdgm--off'\u003e\u003c\/span\u003e\u003cspan class='jdgm-star jdgm--off'\u003e\u003c\/span\u003e\u003c\/div\u003e \u003cdiv class='jdgm-histogram__bar'\u003e \u003cdiv class='jdgm-histogram__bar-content' style='width: 0%;'\u003e \u003c\/div\u003e \u003c\/div\u003e \u003cdiv class='jdgm-histogram__percentage'\u003e0%\u003c\/div\u003e \u003cdiv class='jdgm-histogram__frequency'\u003e(0)\u003c\/div\u003e \u003c\/div\u003e \u003cdiv class='jdgm-histogram__row' data-rating='1' data-frequency='0' data-percentage='0'\u003e \u003cdiv class='jdgm-histogram__star' role='button' aria-label=\"0% (0) reviews with 1 star rating\" tabindex='0' \u003e\u003cspan class='jdgm-star jdgm--on'\u003e\u003c\/span\u003e\u003cspan class='jdgm-star jdgm--off'\u003e\u003c\/span\u003e\u003cspan class='jdgm-star jdgm--off'\u003e\u003c\/span\u003e\u003cspan class='jdgm-star jdgm--off'\u003e\u003c\/span\u003e\u003cspan class='jdgm-star jdgm--off'\u003e\u003c\/span\u003e\u003c\/div\u003e \u003cdiv class='jdgm-histogram__bar'\u003e \u003cdiv class='jdgm-histogram__bar-content' style='width: 0%;'\u003e \u003c\/div\u003e \u003c\/div\u003e \u003cdiv class='jdgm-histogram__percentage'\u003e0%\u003c\/div\u003e \u003cdiv class='jdgm-histogram__frequency'\u003e(0)\u003c\/div\u003e \u003c\/div\u003e \u003cdiv class='jdgm-histogram__row jdgm-histogram__clear-filter' data-rating=null tabindex='0'\u003e\u003c\/div\u003e \u003c\/div\u003e \u003cdiv class='jdgm-rev-widg__sort-wrapper'\u003e\u003c\/div\u003e \u003c\/div\u003e \u003cdiv class='jdgm-rev-widg__body'\u003e \u003cdiv class='jdgm-rev-widg__reviews'\u003e\u003c\/div\u003e \u003cdiv class='jdgm-paginate' data-per-page='10' data-url='https:\/\/api.judge.me\/reviews\/reviews_for_widget' style=\"display: none;\"\u003e\u003c\/div\u003e \u003c\/div\u003e \u003cdiv class='jdgm-rev-widg__paginate-spinner-wrapper'\u003e \u003cdiv class='jdgm-spinner'\u003e\u003c\/div\u003e \u003c\/div\u003e \u003c\/div\u003e"},"default_reviews_metafields":{},"collections":[{"id":512654540989,"handle":"lastof26-10","title":"10%","updated_at":"2026-11-14T20:08:00+08:00","body_html":null,"published_at":"2026-10-12T19:06:42+08:00","sort_order":"best-selling","template_suffix":null,"disjunctive":false,"rules":[],"published_scope":"global"},{"id":261657460925,"handle":"buy","title":"Buy","updated_at":"2026-11-14T20:08:00+08:00","body_html":"\u003cp\u003eBrowse all of our pregnancy, labour \u0026amp; birth, postpartum and baby essentials here.\u003cbr\u003e\u003c\/p\u003e\n\u003cp\u003e\u003cspan\u003eYou can even buy now and pay later with Afterpay!\u003c\/span\u003e\u003c\/p\u003e","published_at":"2021-03-10T12:05:31+08:00","sort_order":"best-selling","template_suffix":"shop-all-collection","disjunctive":false,"rules":[],"published_scope":"global","image":{"created_at":"2024-05-06T11:59:42+08:00","alt":"Buy - The Birth Store","width":2048,"height":2048,"src":"\/\/www.thebirthstore.com.au\/cdn\/shop\/collections\/buy-964856.jpg?v=1714967982"}},{"id":293309022397,"handle":"clothing","title":"Clothing","updated_at":"2026-11-09T10:38:40+08:00","body_html":"","published_at":"2023-05-03T11:41:12+08:00","sort_order":"best-selling","template_suffix":"swaddles-collection","disjunctive":true,"rules":[],"published_scope":"global","image":{"created_at":"2024-05-06T11:59:52+08:00","alt":"Clothing - The Birth Store","width":676,"height":581,"src":"\/\/www.thebirthstore.com.au\/cdn\/shop\/collections\/clothing-483293.jpg?v=1714967992"}},{"id":326572048573,"handle":"maternity-clothing","title":"Maternity Clothing","updated_at":"2026-11-07T20:07:16+08:00","body_html":"","published_at":"2025-10-31T12:50:20+08:00","sort_order":"best-selling","template_suffix":"","disjunctive":false,"rules":[],"published_scope":"global","image":{"created_at":"2025-11-20T21:34:30+08:00","alt":"Maternity Clothing - The Birth Store","width":1920,"height":1281,"src":"\/\/www.thebirthstore.com.au\/cdn\/shop\/collections\/maternity-clothing-6954274.webp?v=1763645670"}},{"id":281712591037,"handle":"pain-relief","title":"Pain Relief","updated_at":"2026-11-14T20:08:00+08:00","body_html":"","published_at":"2021-12-20T14:22:45+08:00","sort_order":"best-selling","template_suffix":"pain-relief-collection","disjunctive":false,"rules":[],"published_scope":"global","image":{"created_at":"2024-05-06T12:00:27+08:00","alt":"Pain Relief - The Birth Store","width":1365,"height":2048,"src":"\/\/www.thebirthstore.com.au\/cdn\/shop\/collections\/pain-relief-878865.jpg?v=1714968027"}},{"id":281712689341,"handle":"pelvic-floor-health","title":"Pelvic Floor Health","updated_at":"2026-11-12T20:07:50+08:00","body_html":"","published_at":"2021-12-20T14:23:41+08:00","sort_order":"best-selling","template_suffix":"swaddles-collection","disjunctive":false,"rules":[],"published_scope":"global","image":{"created_at":"2024-05-06T12:00:29+08:00","alt":"Pelvic Floor Health - The Birth Store","width":536,"height":589,"src":"\/\/www.thebirthstore.com.au\/cdn\/shop\/collections\/pelvic-floor-health-890736.jpg?v=1714968030"}},{"id":291456483517,"handle":"shop-all","title":"Shop All - Mum","updated_at":"2026-11-14T20:08:00+08:00","body_html":"","published_at":"2022-12-23T22:04:39+08:00","sort_order":"best-selling","template_suffix":"shop-all-collection","disjunctive":false,"rules":[],"published_scope":"global","image":{"created_at":"2024-05-06T12:00:54+08:00","alt":"Shop All - The Birth Store","width":1365,"height":2048,"src":"\/\/www.thebirthstore.com.au\/cdn\/shop\/collections\/shop-all-693176.jpg?v=1714968055"}},{"id":310045933757,"handle":"shop-all-sale","title":"Shop All Sale","updated_at":"2026-11-14T20:08:00+08:00","body_html":"","published_at":"2024-11-12T13:22:43+08:00","sort_order":"best-selling","template_suffix":"","disjunctive":true,"rules":[],"published_scope":"global","image":{"created_at":"2024-11-13T10:58:16+08:00","alt":"Shop All Sale - The Birth Store","width":2048,"height":1365,"src":"\/\/www.thebirthstore.com.au\/cdn\/shop\/collections\/shop-all-sale-297361.jpg?v=1731466697"}},{"id":292595433661,"handle":"support-clothing","title":"Support Clothing","updated_at":"2026-11-08T20:07:47+08:00","body_html":"Maternity, breastfeeding, supportive, postpartum clothing and more - we've got it all, or we will have soon! Keep an eye out for new arrivals and grab yourself some incredible must-have staple items.","published_at":"2023-02-20T12:49:47+08:00","sort_order":"best-selling","template_suffix":"swaddles-collection","disjunctive":false,"rules":[],"published_scope":"global","image":{"created_at":"2024-05-06T12:00:59+08:00","alt":"Support Clothing - The Birth Store","width":586,"height":879,"src":"\/\/www.thebirthstore.com.au\/cdn\/shop\/collections\/support-clothing-743676.jpg?v=1714968059"}}]}
{"item":{"id":7439744139453,"title":"SRC Recovery Leggings","handle":"src-recovery-leggings","description":"\u003cmeta charset=\"utf-8\"\u003e\u003cspan data-mce-fragment=\"1\"\u003eThis product is stocked at a 3\u003c\/span\u003e\u003csup data-mce-fragment=\"1\"\u003erd\u003c\/sup\u003e\u003cspan data-mce-fragment=\"1\"\u003e party warehouse, if ordering with other products you’ll receive two packages. This product will have a turn around time of 10 days if pickup is selected on checkout. Any questions, please contact us \u003ca href=\"https:\/\/www.thebirthstore.com.au\/pages\/contact-us\" title=\"Contact Us\" data-mce-fragment=\"1\" target=\"_blank\" data-mce-href=\"https:\/\/www.thebirthstore.com.au\/pages\/contact-us\"\u003ehere\u003c\/a\u003e.\u003c\/span\u003e\u003cbr\u003e","published_at":"2023-03-13T14:12:28+08:00","created_at":"2023-02-13T22:38:21+08:00","vendor":"SRC Health","type":"Recovery Leggings","tags":["Hospital Bag","Mum","Pain Relief","Pelvic Floor","Post-Partum","Support Clothing"],"price":19900,"price_min":19900,"price_max":19900,"available":true,"price_varies":false,"compare_at_price":19900,"compare_at_price_min":19900,"compare_at_price_max":19900,"compare_at_price_varies":false,"variants":[{"id":42658962145469,"title":"XXS","option1":"XXS","option2":null,"option3":null,"sku":"","requires_shipping":true,"taxable":false,"featured_image":null,"available":true,"name":"SRC Recovery Leggings - XXS","public_title":"XXS","options":["XXS"],"price":19900,"weight":0,"compare_at_price":19900,"inventory_management":null,"barcode":"62145469","requires_selling_plan":false,"selling_plan_allocations":[],"quantity_rule":{"min":1,"max":null,"increment":1}},{"id":42658962211005,"title":"XS","option1":"XS","option2":null,"option3":null,"sku":"","requires_shipping":true,"taxable":false,"featured_image":null,"available":true,"name":"SRC Recovery Leggings - XS","public_title":"XS","options":["XS"],"price":19900,"weight":0,"compare_at_price":19900,"inventory_management":null,"barcode":"62211005","requires_selling_plan":false,"selling_plan_allocations":[],"quantity_rule":{"min":1,"max":null,"increment":1}},{"id":42658962276541,"title":"S","option1":"S","option2":null,"option3":null,"sku":"","requires_shipping":true,"taxable":false,"featured_image":null,"available":true,"name":"SRC Recovery Leggings - S","public_title":"S","options":["S"],"price":19900,"weight":0,"compare_at_price":19900,"inventory_management":null,"barcode":"62276541","requires_selling_plan":false,"selling_plan_allocations":[],"quantity_rule":{"min":1,"max":null,"increment":1}},{"id":42658962342077,"title":"M","option1":"M","option2":null,"option3":null,"sku":"","requires_shipping":true,"taxable":false,"featured_image":null,"available":true,"name":"SRC Recovery Leggings - M","public_title":"M","options":["M"],"price":19900,"weight":0,"compare_at_price":19900,"inventory_management":null,"barcode":"62342077","requires_selling_plan":false,"selling_plan_allocations":[],"quantity_rule":{"min":1,"max":null,"increment":1}},{"id":42658962407613,"title":"L","option1":"L","option2":null,"option3":null,"sku":"","requires_shipping":true,"taxable":false,"featured_image":null,"available":true,"name":"SRC Recovery Leggings - L","public_title":"L","options":["L"],"price":19900,"weight":0,"compare_at_price":19900,"inventory_management":null,"barcode":"62407613","requires_selling_plan":false,"selling_plan_allocations":[],"quantity_rule":{"min":1,"max":null,"increment":1}},{"id":42658962473149,"title":"XL","option1":"XL","option2":null,"option3":null,"sku":"","requires_shipping":true,"taxable":false,"featured_image":null,"available":true,"name":"SRC Recovery Leggings - XL","public_title":"XL","options":["XL"],"price":19900,"weight":0,"compare_at_price":19900,"inventory_management":null,"barcode":"62473149","requires_selling_plan":false,"selling_plan_allocations":[],"quantity_rule":{"min":1,"max":null,"increment":1}},{"id":42658962538685,"title":"XXL","option1":"XXL","option2":null,"option3":null,"sku":"","requires_shipping":true,"taxable":false,"featured_image":null,"available":true,"name":"SRC Recovery Leggings - XXL","public_title":"XXL","options":["XXL"],"price":19900,"weight":0,"compare_at_price":19900,"inventory_management":null,"barcode":"62538685","requires_selling_plan":false,"selling_plan_allocations":[],"quantity_rule":{"min":1,"max":null,"increment":1}}],"images":["\/\/www.thebirthstore.com.au\/cdn\/shop\/files\/src-recovery-leggings-235489.jpg?v=1714968048","\/\/www.thebirthstore.com.au\/cdn\/shop\/files\/src-recovery-leggings-256825.jpg?v=1714968049","\/\/www.thebirthstore.com.au\/cdn\/shop\/files\/src-recovery-leggings-753273.jpg?v=1714968049","\/\/www.thebirthstore.com.au\/cdn\/shop\/files\/src-recovery-leggings-491436.jpg?v=1714968049"],"featured_image":"\/\/www.thebirthstore.com.au\/cdn\/shop\/files\/src-recovery-leggings-235489.jpg?v=1714968048","options":["Size"],"media":[{"alt":"SRC Recovery Leggings - The Birth Store-SRC Health","id":27007600787645,"position":1,"preview_image":{"aspect_ratio":1.0,"height":1080,"width":1080,"src":"\/\/www.thebirthstore.com.au\/cdn\/shop\/files\/src-recovery-leggings-235489.jpg?v=1714968048"},"aspect_ratio":1.0,"height":1080,"media_type":"image","src":"\/\/www.thebirthstore.com.au\/cdn\/shop\/files\/src-recovery-leggings-235489.jpg?v=1714968048","width":1080},{"alt":"SRC Recovery Leggings - The Birth Store-SRC Health","id":27007600820413,"position":2,"preview_image":{"aspect_ratio":1.0,"height":1080,"width":1080,"src":"\/\/www.thebirthstore.com.au\/cdn\/shop\/files\/src-recovery-leggings-256825.jpg?v=1714968049"},"aspect_ratio":1.0,"height":1080,"media_type":"image","src":"\/\/www.thebirthstore.com.au\/cdn\/shop\/files\/src-recovery-leggings-256825.jpg?v=1714968049","width":1080},{"alt":"SRC Recovery Leggings - The Birth Store-SRC Health","id":27007600853181,"position":3,"preview_image":{"aspect_ratio":1.0,"height":1080,"width":1080,"src":"\/\/www.thebirthstore.com.au\/cdn\/shop\/files\/src-recovery-leggings-753273.jpg?v=1714968049"},"aspect_ratio":1.0,"height":1080,"media_type":"image","src":"\/\/www.thebirthstore.com.au\/cdn\/shop\/files\/src-recovery-leggings-753273.jpg?v=1714968049","width":1080},{"alt":"SRC Recovery Leggings - The Birth Store-SRC Health","id":27007600885949,"position":4,"preview_image":{"aspect_ratio":1.582,"height":948,"width":1500,"src":"\/\/www.thebirthstore.com.au\/cdn\/shop\/files\/src-recovery-leggings-491436.jpg?v=1714968049"},"aspect_ratio":1.582,"height":948,"media_type":"image","src":"\/\/www.thebirthstore.com.au\/cdn\/shop\/files\/src-recovery-leggings-491436.jpg?v=1714968049","width":1500}],"requires_selling_plan":false,"selling_plan_groups":[],"content":"\u003cmeta charset=\"utf-8\"\u003e\u003cspan data-mce-fragment=\"1\"\u003eThis product is stocked at a 3\u003c\/span\u003e\u003csup data-mce-fragment=\"1\"\u003erd\u003c\/sup\u003e\u003cspan data-mce-fragment=\"1\"\u003e party warehouse, if ordering with other products you’ll receive two packages. This product will have a turn around time of 10 days if pickup is selected on checkout. Any questions, please contact us \u003ca href=\"https:\/\/www.thebirthstore.com.au\/pages\/contact-us\" title=\"Contact Us\" data-mce-fragment=\"1\" target=\"_blank\" data-mce-href=\"https:\/\/www.thebirthstore.com.au\/pages\/contact-us\"\u003ehere\u003c\/a\u003e.\u003c\/span\u003e\u003cbr\u003e"},"options":[{"name":"Size","position":1,"values":["XXS","XS","S","M","L","XL","XXL"]}],"custom_metafields":{},"metafields":{"badge":"\u003cdiv style='display:none' class='jdgm-prev-badge' data-average-rating='0.00' data-number-of-reviews='0' data-number-of-questions='0'\u003e \u003cspan class='jdgm-prev-badge__stars' data-score='0.00' tabindex='0' aria-label='0.00 stars' role='button'\u003e \u003cspan class='jdgm-star jdgm--off'\u003e\u003c\/span\u003e\u003cspan class='jdgm-star jdgm--off'\u003e\u003c\/span\u003e\u003cspan class='jdgm-star jdgm--off'\u003e\u003c\/span\u003e\u003cspan class='jdgm-star jdgm--off'\u003e\u003c\/span\u003e\u003cspan class='jdgm-star jdgm--off'\u003e\u003c\/span\u003e \u003c\/span\u003e \u003cspan class='jdgm-prev-badge__text'\u003e No reviews \u003c\/span\u003e \u003c\/div\u003e","widget":"\u003cdiv class='jdgm-rev-widg' data-updated-at='2025-06-13T16:12:10Z' data-average-rating='0.00' data-number-of-reviews='0' data-number-of-questions='0'\u003e \u003cstyle class='jdgm-temp-hiding-style'\u003e.jdgm-rev-widg{ display: none }\u003c\/style\u003e \u003cdiv class='jdgm-rev-widg__header'\u003e \u003ch2 class='jdgm-rev-widg__title'\u003eCustomer Reviews\u003c\/h2\u003e \u003cdiv class='jdgm-rev-widg__summary'\u003e \u003cdiv class='jdgm-rev-widg__summary-stars' aria-label='Average rating is 0.00 stars' role='img'\u003e \u003cspan class='jdgm-star jdgm--off'\u003e\u003c\/span\u003e\u003cspan class='jdgm-star jdgm--off'\u003e\u003c\/span\u003e\u003cspan class='jdgm-star jdgm--off'\u003e\u003c\/span\u003e\u003cspan class='jdgm-star jdgm--off'\u003e\u003c\/span\u003e\u003cspan class='jdgm-star jdgm--off'\u003e\u003c\/span\u003e \u003c\/div\u003e \u003cdiv class='jdgm-rev-widg__summary-text'\u003eBe the first to write a review\u003c\/div\u003e \u003c\/div\u003e \u003ca style='display: none' href='#' class='jdgm-write-rev-link' role='button'\u003eWrite a review\u003c\/a\u003e \u003cdiv class='jdgm-histogram jdgm-temp-hidden'\u003e \u003cdiv class='jdgm-histogram__row' data-rating='5' data-frequency='0' data-percentage='0'\u003e \u003cdiv class='jdgm-histogram__star' role='button' aria-label=\"0% (0) reviews with 5 star rating\" tabindex='0' \u003e\u003cspan class='jdgm-star jdgm--on'\u003e\u003c\/span\u003e\u003cspan class='jdgm-star jdgm--on'\u003e\u003c\/span\u003e\u003cspan class='jdgm-star jdgm--on'\u003e\u003c\/span\u003e\u003cspan class='jdgm-star jdgm--on'\u003e\u003c\/span\u003e\u003cspan class='jdgm-star jdgm--on'\u003e\u003c\/span\u003e\u003c\/div\u003e \u003cdiv class='jdgm-histogram__bar'\u003e \u003cdiv class='jdgm-histogram__bar-content' style='width: 0%;'\u003e \u003c\/div\u003e \u003c\/div\u003e \u003cdiv class='jdgm-histogram__percentage'\u003e0%\u003c\/div\u003e \u003cdiv class='jdgm-histogram__frequency'\u003e(0)\u003c\/div\u003e \u003c\/div\u003e \u003cdiv class='jdgm-histogram__row' data-rating='4' data-frequency='0' data-percentage='0'\u003e \u003cdiv class='jdgm-histogram__star' role='button' aria-label=\"0% (0) reviews with 4 star rating\" tabindex='0' \u003e\u003cspan class='jdgm-star jdgm--on'\u003e\u003c\/span\u003e\u003cspan class='jdgm-star jdgm--on'\u003e\u003c\/span\u003e\u003cspan class='jdgm-star jdgm--on'\u003e\u003c\/span\u003e\u003cspan class='jdgm-star jdgm--on'\u003e\u003c\/span\u003e\u003cspan class='jdgm-star jdgm--off'\u003e\u003c\/span\u003e\u003c\/div\u003e \u003cdiv class='jdgm-histogram__bar'\u003e \u003cdiv class='jdgm-histogram__bar-content' style='width: 0%;'\u003e \u003c\/div\u003e \u003c\/div\u003e \u003cdiv class='jdgm-histogram__percentage'\u003e0%\u003c\/div\u003e \u003cdiv class='jdgm-histogram__frequency'\u003e(0)\u003c\/div\u003e \u003c\/div\u003e \u003cdiv class='jdgm-histogram__row' data-rating='3' data-frequency='0' data-percentage='0'\u003e \u003cdiv class='jdgm-histogram__star' role='button' aria-label=\"0% (0) reviews with 3 star rating\" tabindex='0' \u003e\u003cspan class='jdgm-star jdgm--on'\u003e\u003c\/span\u003e\u003cspan class='jdgm-star jdgm--on'\u003e\u003c\/span\u003e\u003cspan class='jdgm-star jdgm--on'\u003e\u003c\/span\u003e\u003cspan class='jdgm-star jdgm--off'\u003e\u003c\/span\u003e\u003cspan class='jdgm-star jdgm--off'\u003e\u003c\/span\u003e\u003c\/div\u003e \u003cdiv class='jdgm-histogram__bar'\u003e \u003cdiv class='jdgm-histogram__bar-content' style='width: 0%;'\u003e \u003c\/div\u003e \u003c\/div\u003e \u003cdiv class='jdgm-histogram__percentage'\u003e0%\u003c\/div\u003e \u003cdiv class='jdgm-histogram__frequency'\u003e(0)\u003c\/div\u003e \u003c\/div\u003e \u003cdiv class='jdgm-histogram__row' data-rating='2' data-frequency='0' data-percentage='0'\u003e \u003cdiv class='jdgm-histogram__star' role='button' aria-label=\"0% (0) reviews with 2 star rating\" tabindex='0' \u003e\u003cspan class='jdgm-star jdgm--on'\u003e\u003c\/span\u003e\u003cspan class='jdgm-star jdgm--on'\u003e\u003c\/span\u003e\u003cspan class='jdgm-star jdgm--off'\u003e\u003c\/span\u003e\u003cspan class='jdgm-star jdgm--off'\u003e\u003c\/span\u003e\u003cspan class='jdgm-star jdgm--off'\u003e\u003c\/span\u003e\u003c\/div\u003e \u003cdiv class='jdgm-histogram__bar'\u003e \u003cdiv class='jdgm-histogram__bar-content' style='width: 0%;'\u003e \u003c\/div\u003e \u003c\/div\u003e \u003cdiv class='jdgm-histogram__percentage'\u003e0%\u003c\/div\u003e \u003cdiv class='jdgm-histogram__frequency'\u003e(0)\u003c\/div\u003e \u003c\/div\u003e \u003cdiv class='jdgm-histogram__row' data-rating='1' data-frequency='0' data-percentage='0'\u003e \u003cdiv class='jdgm-histogram__star' role='button' aria-label=\"0% (0) reviews with 1 star rating\" tabindex='0' \u003e\u003cspan class='jdgm-star jdgm--on'\u003e\u003c\/span\u003e\u003cspan class='jdgm-star jdgm--off'\u003e\u003c\/span\u003e\u003cspan class='jdgm-star jdgm--off'\u003e\u003c\/span\u003e\u003cspan class='jdgm-star jdgm--off'\u003e\u003c\/span\u003e\u003cspan class='jdgm-star jdgm--off'\u003e\u003c\/span\u003e\u003c\/div\u003e \u003cdiv class='jdgm-histogram__bar'\u003e \u003cdiv class='jdgm-histogram__bar-content' style='width: 0%;'\u003e \u003c\/div\u003e \u003c\/div\u003e \u003cdiv class='jdgm-histogram__percentage'\u003e0%\u003c\/div\u003e \u003cdiv class='jdgm-histogram__frequency'\u003e(0)\u003c\/div\u003e \u003c\/div\u003e \u003cdiv class='jdgm-histogram__row jdgm-histogram__clear-filter' data-rating=null tabindex='0'\u003e\u003c\/div\u003e \u003c\/div\u003e \u003cdiv class='jdgm-rev-widg__sort-wrapper'\u003e\u003c\/div\u003e \u003c\/div\u003e \u003cdiv class='jdgm-rev-widg__body'\u003e \u003cdiv class='jdgm-rev-widg__reviews'\u003e\u003c\/div\u003e \u003cdiv class='jdgm-paginate' data-per-page='10' data-url='https:\/\/api.judge.me\/reviews\/reviews_for_widget' style=\"display: none;\"\u003e\u003c\/div\u003e \u003c\/div\u003e \u003cdiv class='jdgm-rev-widg__paginate-spinner-wrapper'\u003e \u003cdiv class='jdgm-spinner'\u003e\u003c\/div\u003e \u003c\/div\u003e \u003c\/div\u003e"},"default_reviews_metafields":{},"collections":[{"id":512654540989,"handle":"lastof26-10","title":"10%","updated_at":"2026-11-14T20:08:00+08:00","body_html":null,"published_at":"2026-10-12T19:06:42+08:00","sort_order":"best-selling","template_suffix":null,"disjunctive":false,"rules":[],"published_scope":"global"},{"id":261657460925,"handle":"buy","title":"Buy","updated_at":"2026-11-14T20:08:00+08:00","body_html":"\u003cp\u003eBrowse all of our pregnancy, labour \u0026amp; birth, postpartum and baby essentials here.\u003cbr\u003e\u003c\/p\u003e\n\u003cp\u003e\u003cspan\u003eYou can even buy now and pay later with Afterpay!\u003c\/span\u003e\u003c\/p\u003e","published_at":"2021-03-10T12:05:31+08:00","sort_order":"best-selling","template_suffix":"shop-all-collection","disjunctive":false,"rules":[],"published_scope":"global","image":{"created_at":"2024-05-06T11:59:42+08:00","alt":"Buy - The Birth Store","width":2048,"height":2048,"src":"\/\/www.thebirthstore.com.au\/cdn\/shop\/collections\/buy-964856.jpg?v=1714967982"}},{"id":293309022397,"handle":"clothing","title":"Clothing","updated_at":"2026-11-09T10:38:40+08:00","body_html":"","published_at":"2023-05-03T11:41:12+08:00","sort_order":"best-selling","template_suffix":"swaddles-collection","disjunctive":true,"rules":[],"published_scope":"global","image":{"created_at":"2024-05-06T11:59:52+08:00","alt":"Clothing - The Birth Store","width":676,"height":581,"src":"\/\/www.thebirthstore.com.au\/cdn\/shop\/collections\/clothing-483293.jpg?v=1714967992"}},{"id":337429201085,"handle":"hospital-bag","title":"Hospital Bag","updated_at":"2026-11-14T20:08:00+08:00","body_html":"","published_at":"2026-06-03T11:36:29+08:00","sort_order":"most-relevant","template_suffix":"","disjunctive":false,"rules":[],"published_scope":"global"},{"id":281712591037,"handle":"pain-relief","title":"Pain Relief","updated_at":"2026-11-14T20:08:00+08:00","body_html":"","published_at":"2021-12-20T14:22:45+08:00","sort_order":"best-selling","template_suffix":"pain-relief-collection","disjunctive":false,"rules":[],"published_scope":"global","image":{"created_at":"2024-05-06T12:00:27+08:00","alt":"Pain Relief - The Birth Store","width":1365,"height":2048,"src":"\/\/www.thebirthstore.com.au\/cdn\/shop\/collections\/pain-relief-878865.jpg?v=1714968027"}},{"id":281712689341,"handle":"pelvic-floor-health","title":"Pelvic Floor Health","updated_at":"2026-11-12T20:07:50+08:00","body_html":"","published_at":"2021-12-20T14:23:41+08:00","sort_order":"best-selling","template_suffix":"swaddles-collection","disjunctive":false,"rules":[],"published_scope":"global","image":{"created_at":"2024-05-06T12:00:29+08:00","alt":"Pelvic Floor Health - The Birth Store","width":536,"height":589,"src":"\/\/www.thebirthstore.com.au\/cdn\/shop\/collections\/pelvic-floor-health-890736.jpg?v=1714968030"}},{"id":261658083517,"handle":"post-partum","title":"Postpartum","updated_at":"2026-11-14T20:08:00+08:00","body_html":"\u003cp\u003eShop your postpartum and hospital bag essentials below. Looking for something we don't currently stock? Please reach out and let us know.\u003cbr\u003e\u003c\/p\u003e\n\u003cp\u003e\u003cspan\u003eYou can even buy now and pay later with Afterpay!\u003c\/span\u003e\u003c\/p\u003e","published_at":"2021-03-10T12:33:47+08:00","sort_order":"best-selling","template_suffix":"postpartum-collection","disjunctive":false,"rules":[],"published_scope":"global","image":{"created_at":"2024-05-06T12:00:36+08:00","alt":"Postpartum - The Birth Store","width":611,"height":702,"src":"\/\/www.thebirthstore.com.au\/cdn\/shop\/collections\/postpartum-150119.jpg?v=1714968037"}},{"id":291456483517,"handle":"shop-all","title":"Shop All - Mum","updated_at":"2026-11-14T20:08:00+08:00","body_html":"","published_at":"2022-12-23T22:04:39+08:00","sort_order":"best-selling","template_suffix":"shop-all-collection","disjunctive":false,"rules":[],"published_scope":"global","image":{"created_at":"2024-05-06T12:00:54+08:00","alt":"Shop All - The Birth Store","width":1365,"height":2048,"src":"\/\/www.thebirthstore.com.au\/cdn\/shop\/collections\/shop-all-693176.jpg?v=1714968055"}},{"id":310045933757,"handle":"shop-all-sale","title":"Shop All Sale","updated_at":"2026-11-14T20:08:00+08:00","body_html":"","published_at":"2024-11-12T13:22:43+08:00","sort_order":"best-selling","template_suffix":"","disjunctive":true,"rules":[],"published_scope":"global","image":{"created_at":"2024-11-13T10:58:16+08:00","alt":"Shop All Sale - The Birth Store","width":2048,"height":1365,"src":"\/\/www.thebirthstore.com.au\/cdn\/shop\/collections\/shop-all-sale-297361.jpg?v=1731466697"}},{"id":292595433661,"handle":"support-clothing","title":"Support Clothing","updated_at":"2026-11-08T20:07:47+08:00","body_html":"Maternity, breastfeeding, supportive, postpartum clothing and more - we've got it all, or we will have soon! Keep an eye out for new arrivals and grab yourself some incredible must-have staple items.","published_at":"2023-02-20T12:49:47+08:00","sort_order":"best-selling","template_suffix":"swaddles-collection","disjunctive":false,"rules":[],"published_scope":"global","image":{"created_at":"2024-05-06T12:00:59+08:00","alt":"Support Clothing - The Birth Store","width":586,"height":879,"src":"\/\/www.thebirthstore.com.au\/cdn\/shop\/collections\/support-clothing-743676.jpg?v=1714968059"}}]}
{"item":{"id":8123468972221,"title":"Premium Thermos","handle":"missta-bottle","description":"\u003cp\u003eThe\u003cspan\u003e \u003c\/span\u003e\u003cstrong\u003eMissta Bottle\u003c\/strong\u003e\u003cspan\u003e \u003c\/span\u003eis a premium thermos designed for formula feeding, featuring an inbuilt thermometer and light system in the lid. It keeps sterilised water warm for up to 12 hours, so you can prepare bottles anytime, anywhere.\u003c\/p\u003e\n\u003cp\u003e\u003cstrong\u003eGreat Value:\u003c\/strong\u003e\u003cspan\u003e \u003c\/span\u003eEvery Missta Bottle comes with a bonus drink bottle lid! Once your formula-feeding days are over, simply switch the lid and continue using it as a regular drink bottle.\u003c\/p\u003e\n\u003cul\u003e\n\u003cli\u003e100% Portable, no charging required\u003c\/li\u003e\n\u003cli\u003eBattery life of safety lid: up to 5 years\u003c\/li\u003e\n\u003cli\u003eLarge 750ml bottle for multiple feeds\u003c\/li\u003e\n\u003cli\u003eKeeps sterilised water warm for \u003cstrong\u003e12 hours\u003c\/strong\u003e\n\u003c\/li\u003e\n\u003cli\u003e3 colour light system (blue, green \u0026amp; red)\u003c\/li\u003e\n\u003cli\u003eInbuilt safety light to ensure safe serving temperature\u003c\/li\u003e\n\u003cli\u003eBPA FREE \u003c\/li\u003e\n\u003c\/ul\u003e","published_at":"2025-11-06T22:14:44+08:00","created_at":"2025-10-31T11:32:53+08:00","vendor":"MISSTA","type":"","tags":["Baby","Baby Shower Gifts - Baby","Bottles","Feeding"],"price":11200,"price_min":11200,"price_max":11200,"available":true,"price_varies":false,"compare_at_price":null,"compare_at_price_min":0,"compare_at_price_max":0,"compare_at_price_varies":false,"variants":[{"id":45861853692093,"title":"Default Title","option1":"Default Title","option2":null,"option3":null,"sku":null,"requires_shipping":true,"taxable":false,"featured_image":null,"available":true,"name":"Premium Thermos","public_title":null,"options":["Default Title"],"price":11200,"weight":770,"compare_at_price":null,"inventory_management":"shopify","barcode":"53692093","requires_selling_plan":false,"selling_plan_allocations":[],"quantity_rule":{"min":1,"max":null,"increment":1}}],"images":["\/\/www.thebirthstore.com.au\/cdn\/shop\/files\/missta-bottle-1090152.webp?v=1762475530","\/\/www.thebirthstore.com.au\/cdn\/shop\/files\/missta-bottle-4302747.webp?v=1762475530","\/\/www.thebirthstore.com.au\/cdn\/shop\/files\/missta-bottle-1610781.webp?v=1762475530","\/\/www.thebirthstore.com.au\/cdn\/shop\/files\/missta-bottle-3864512.webp?v=1762475531","\/\/www.thebirthstore.com.au\/cdn\/shop\/files\/missta-bottle-8191401.webp?v=1762475531","\/\/www.thebirthstore.com.au\/cdn\/shop\/files\/missta-bottle-4063812.webp?v=1762475531","\/\/www.thebirthstore.com.au\/cdn\/shop\/files\/missta-bottle-6751828.webp?v=1762475531"],"featured_image":"\/\/www.thebirthstore.com.au\/cdn\/shop\/files\/missta-bottle-1090152.webp?v=1762475530","options":["Title"],"media":[{"alt":"Missta Bottle - The Birth Store - MISSTA","id":29972957298877,"position":1,"preview_image":{"aspect_ratio":1.0,"height":1080,"width":1080,"src":"\/\/www.thebirthstore.com.au\/cdn\/shop\/files\/missta-bottle-1090152.webp?v=1762475530"},"aspect_ratio":1.0,"height":1080,"media_type":"image","src":"\/\/www.thebirthstore.com.au\/cdn\/shop\/files\/missta-bottle-1090152.webp?v=1762475530","width":1080},{"alt":"Missta Bottle - The Birth Store - MISSTA","id":29972919845053,"position":2,"preview_image":{"aspect_ratio":0.681,"height":1616,"width":1100,"src":"\/\/www.thebirthstore.com.au\/cdn\/shop\/files\/missta-bottle-4302747.webp?v=1762475530"},"aspect_ratio":0.681,"height":1616,"media_type":"image","src":"\/\/www.thebirthstore.com.au\/cdn\/shop\/files\/missta-bottle-4302747.webp?v=1762475530","width":1100},{"alt":"Missta Bottle - The Birth Store - MISSTA","id":29972921057469,"position":3,"preview_image":{"aspect_ratio":0.828,"height":1328,"width":1100,"src":"\/\/www.thebirthstore.com.au\/cdn\/shop\/files\/missta-bottle-1610781.webp?v=1762475530"},"aspect_ratio":0.828,"height":1328,"media_type":"image","src":"\/\/www.thebirthstore.com.au\/cdn\/shop\/files\/missta-bottle-1610781.webp?v=1762475530","width":1100},{"alt":"Missta Bottle - The Birth Store - MISSTA","id":29972924268733,"position":4,"preview_image":{"aspect_ratio":0.8,"height":1350,"width":1080,"src":"\/\/www.thebirthstore.com.au\/cdn\/shop\/files\/missta-bottle-3864512.webp?v=1762475531"},"aspect_ratio":0.8,"height":1350,"media_type":"image","src":"\/\/www.thebirthstore.com.au\/cdn\/shop\/files\/missta-bottle-3864512.webp?v=1762475531","width":1080},{"alt":"Missta Bottle - The Birth Store - MISSTA","id":29972932526269,"position":5,"preview_image":{"aspect_ratio":1.0,"height":1080,"width":1080,"src":"\/\/www.thebirthstore.com.au\/cdn\/shop\/files\/missta-bottle-8191401.webp?v=1762475531"},"aspect_ratio":1.0,"height":1080,"media_type":"image","src":"\/\/www.thebirthstore.com.au\/cdn\/shop\/files\/missta-bottle-8191401.webp?v=1762475531","width":1080},{"alt":"Missta Bottle - The Birth Store - MISSTA","id":29972946256061,"position":6,"preview_image":{"aspect_ratio":1.0,"height":1000,"width":1000,"src":"\/\/www.thebirthstore.com.au\/cdn\/shop\/files\/missta-bottle-4063812.webp?v=1762475531"},"aspect_ratio":1.0,"height":1000,"media_type":"image","src":"\/\/www.thebirthstore.com.au\/cdn\/shop\/files\/missta-bottle-4063812.webp?v=1762475531","width":1000},{"alt":"Missta Bottle - The Birth Store - MISSTA","id":29972952613053,"position":7,"preview_image":{"aspect_ratio":0.8,"height":1350,"width":1080,"src":"\/\/www.thebirthstore.com.au\/cdn\/shop\/files\/missta-bottle-6751828.webp?v=1762475531"},"aspect_ratio":0.8,"height":1350,"media_type":"image","src":"\/\/www.thebirthstore.com.au\/cdn\/shop\/files\/missta-bottle-6751828.webp?v=1762475531","width":1080}],"requires_selling_plan":false,"selling_plan_groups":[],"content":"\u003cp\u003eThe\u003cspan\u003e \u003c\/span\u003e\u003cstrong\u003eMissta Bottle\u003c\/strong\u003e\u003cspan\u003e \u003c\/span\u003eis a premium thermos designed for formula feeding, featuring an inbuilt thermometer and light system in the lid. It keeps sterilised water warm for up to 12 hours, so you can prepare bottles anytime, anywhere.\u003c\/p\u003e\n\u003cp\u003e\u003cstrong\u003eGreat Value:\u003c\/strong\u003e\u003cspan\u003e \u003c\/span\u003eEvery Missta Bottle comes with a bonus drink bottle lid! Once your formula-feeding days are over, simply switch the lid and continue using it as a regular drink bottle.\u003c\/p\u003e\n\u003cul\u003e\n\u003cli\u003e100% Portable, no charging required\u003c\/li\u003e\n\u003cli\u003eBattery life of safety lid: up to 5 years\u003c\/li\u003e\n\u003cli\u003eLarge 750ml bottle for multiple feeds\u003c\/li\u003e\n\u003cli\u003eKeeps sterilised water warm for \u003cstrong\u003e12 hours\u003c\/strong\u003e\n\u003c\/li\u003e\n\u003cli\u003e3 colour light system (blue, green \u0026amp; red)\u003c\/li\u003e\n\u003cli\u003eInbuilt safety light to ensure safe serving temperature\u003c\/li\u003e\n\u003cli\u003eBPA FREE \u003c\/li\u003e\n\u003c\/ul\u003e"},"options":[{"name":"Title","position":1,"values":["Default Title"]}],"custom_metafields":{},"metafields":{"badge":"\u003cdiv style='display:none' class='jdgm-prev-badge' data-average-rating='0.00' data-number-of-reviews='0' data-number-of-questions='0'\u003e \u003cspan class='jdgm-prev-badge__stars' data-score='0.00' tabindex='0' aria-label='0.00 stars' role='button'\u003e \u003cspan class='jdgm-star jdgm--off'\u003e\u003c\/span\u003e\u003cspan class='jdgm-star jdgm--off'\u003e\u003c\/span\u003e\u003cspan class='jdgm-star jdgm--off'\u003e\u003c\/span\u003e\u003cspan class='jdgm-star jdgm--off'\u003e\u003c\/span\u003e\u003cspan class='jdgm-star jdgm--off'\u003e\u003c\/span\u003e \u003c\/span\u003e \u003cspan class='jdgm-prev-badge__text'\u003e No reviews \u003c\/span\u003e \u003c\/div\u003e","widget":"\u003cdiv class='jdgm-rev-widg' data-updated-at='2025-11-06T14:14:47Z' data-average-rating='0.00' data-number-of-reviews='0' data-number-of-questions='0' data-image-url='https:\/\/cdn.shopify.com\/s\/files\/1\/0527\/3393\/5805\/files\/E55E7F4E-5309-48D3-BD87-51D8E6DCACAF_1100x_db6ac791-2552-42b8-813c-181e35087dd7.webp?v=1761881197'\u003e \u003cstyle class='jdgm-temp-hiding-style'\u003e.jdgm-rev-widg{ display: none }\u003c\/style\u003e \u003cdiv class='jdgm-rev-widg__header'\u003e \u003ch2 class='jdgm-rev-widg__title'\u003eCustomer Reviews\u003c\/h2\u003e \u003cdiv class='jdgm-rev-widg__summary'\u003e \u003cdiv class='jdgm-rev-widg__summary-stars' aria-label='Average rating is 0.00 stars' role='img'\u003e \u003cspan class='jdgm-star jdgm--off'\u003e\u003c\/span\u003e\u003cspan class='jdgm-star jdgm--off'\u003e\u003c\/span\u003e\u003cspan class='jdgm-star jdgm--off'\u003e\u003c\/span\u003e\u003cspan class='jdgm-star jdgm--off'\u003e\u003c\/span\u003e\u003cspan class='jdgm-star jdgm--off'\u003e\u003c\/span\u003e \u003c\/div\u003e \u003cdiv class='jdgm-rev-widg__summary-text'\u003eBe the first to write a review\u003c\/div\u003e \u003c\/div\u003e \u003ca style='display: none' href='#' class='jdgm-write-rev-link' role='button'\u003eWrite a review\u003c\/a\u003e \u003cdiv class='jdgm-histogram jdgm-temp-hidden'\u003e \u003cdiv class='jdgm-histogram__row' data-rating='5' data-frequency='0' data-percentage='0'\u003e \u003cdiv class='jdgm-histogram__star' role='button' aria-label=\"0% (0) reviews with 5 star rating\" tabindex='0' \u003e\u003cspan class='jdgm-star jdgm--on'\u003e\u003c\/span\u003e\u003cspan class='jdgm-star jdgm--on'\u003e\u003c\/span\u003e\u003cspan class='jdgm-star jdgm--on'\u003e\u003c\/span\u003e\u003cspan class='jdgm-star jdgm--on'\u003e\u003c\/span\u003e\u003cspan class='jdgm-star jdgm--on'\u003e\u003c\/span\u003e\u003c\/div\u003e \u003cdiv class='jdgm-histogram__bar'\u003e \u003cdiv class='jdgm-histogram__bar-content' style='width: 0%;'\u003e \u003c\/div\u003e \u003c\/div\u003e \u003cdiv class='jdgm-histogram__percentage'\u003e0%\u003c\/div\u003e \u003cdiv class='jdgm-histogram__frequency'\u003e(0)\u003c\/div\u003e \u003c\/div\u003e \u003cdiv class='jdgm-histogram__row' data-rating='4' data-frequency='0' data-percentage='0'\u003e \u003cdiv class='jdgm-histogram__star' role='button' aria-label=\"0% (0) reviews with 4 star rating\" tabindex='0' \u003e\u003cspan class='jdgm-star jdgm--on'\u003e\u003c\/span\u003e\u003cspan class='jdgm-star jdgm--on'\u003e\u003c\/span\u003e\u003cspan class='jdgm-star jdgm--on'\u003e\u003c\/span\u003e\u003cspan class='jdgm-star jdgm--on'\u003e\u003c\/span\u003e\u003cspan class='jdgm-star jdgm--off'\u003e\u003c\/span\u003e\u003c\/div\u003e \u003cdiv class='jdgm-histogram__bar'\u003e \u003cdiv class='jdgm-histogram__bar-content' style='width: 0%;'\u003e \u003c\/div\u003e \u003c\/div\u003e \u003cdiv class='jdgm-histogram__percentage'\u003e0%\u003c\/div\u003e \u003cdiv class='jdgm-histogram__frequency'\u003e(0)\u003c\/div\u003e \u003c\/div\u003e \u003cdiv class='jdgm-histogram__row' data-rating='3' data-frequency='0' data-percentage='0'\u003e \u003cdiv class='jdgm-histogram__star' role='button' aria-label=\"0% (0) reviews with 3 star rating\" tabindex='0' \u003e\u003cspan class='jdgm-star jdgm--on'\u003e\u003c\/span\u003e\u003cspan class='jdgm-star jdgm--on'\u003e\u003c\/span\u003e\u003cspan class='jdgm-star jdgm--on'\u003e\u003c\/span\u003e\u003cspan class='jdgm-star jdgm--off'\u003e\u003c\/span\u003e\u003cspan class='jdgm-star jdgm--off'\u003e\u003c\/span\u003e\u003c\/div\u003e \u003cdiv class='jdgm-histogram__bar'\u003e \u003cdiv class='jdgm-histogram__bar-content' style='width: 0%;'\u003e \u003c\/div\u003e \u003c\/div\u003e \u003cdiv class='jdgm-histogram__percentage'\u003e0%\u003c\/div\u003e \u003cdiv class='jdgm-histogram__frequency'\u003e(0)\u003c\/div\u003e \u003c\/div\u003e \u003cdiv class='jdgm-histogram__row' data-rating='2' data-frequency='0' data-percentage='0'\u003e \u003cdiv class='jdgm-histogram__star' role='button' aria-label=\"0% (0) reviews with 2 star rating\" tabindex='0' \u003e\u003cspan class='jdgm-star jdgm--on'\u003e\u003c\/span\u003e\u003cspan class='jdgm-star jdgm--on'\u003e\u003c\/span\u003e\u003cspan class='jdgm-star jdgm--off'\u003e\u003c\/span\u003e\u003cspan class='jdgm-star jdgm--off'\u003e\u003c\/span\u003e\u003cspan class='jdgm-star jdgm--off'\u003e\u003c\/span\u003e\u003c\/div\u003e \u003cdiv class='jdgm-histogram__bar'\u003e \u003cdiv class='jdgm-histogram__bar-content' style='width: 0%;'\u003e \u003c\/div\u003e \u003c\/div\u003e \u003cdiv class='jdgm-histogram__percentage'\u003e0%\u003c\/div\u003e \u003cdiv class='jdgm-histogram__frequency'\u003e(0)\u003c\/div\u003e \u003c\/div\u003e \u003cdiv class='jdgm-histogram__row' data-rating='1' data-frequency='0' data-percentage='0'\u003e \u003cdiv class='jdgm-histogram__star' role='button' aria-label=\"0% (0) reviews with 1 star rating\" tabindex='0' \u003e\u003cspan class='jdgm-star jdgm--on'\u003e\u003c\/span\u003e\u003cspan class='jdgm-star jdgm--off'\u003e\u003c\/span\u003e\u003cspan class='jdgm-star jdgm--off'\u003e\u003c\/span\u003e\u003cspan class='jdgm-star jdgm--off'\u003e\u003c\/span\u003e\u003cspan class='jdgm-star jdgm--off'\u003e\u003c\/span\u003e\u003c\/div\u003e \u003cdiv class='jdgm-histogram__bar'\u003e \u003cdiv class='jdgm-histogram__bar-content' style='width: 0%;'\u003e \u003c\/div\u003e \u003c\/div\u003e \u003cdiv class='jdgm-histogram__percentage'\u003e0%\u003c\/div\u003e \u003cdiv class='jdgm-histogram__frequency'\u003e(0)\u003c\/div\u003e \u003c\/div\u003e \u003cdiv class='jdgm-histogram__row jdgm-histogram__clear-filter' data-rating=null tabindex='0'\u003e\u003c\/div\u003e \u003c\/div\u003e \u003cdiv class='jdgm-rev-widg__sort-wrapper'\u003e\u003c\/div\u003e \u003c\/div\u003e \u003cdiv class='jdgm-rev-widg__body'\u003e \u003cdiv class='jdgm-rev-widg__reviews'\u003e\u003c\/div\u003e \u003cdiv class='jdgm-paginate' data-per-page='10' data-url='https:\/\/api.judge.me\/reviews\/reviews_for_widget' style=\"display: none;\"\u003e\u003c\/div\u003e \u003c\/div\u003e \u003cdiv class='jdgm-rev-widg__paginate-spinner-wrapper'\u003e \u003cdiv class='jdgm-spinner'\u003e\u003c\/div\u003e \u003c\/div\u003e \u003c\/div\u003e"},"default_reviews_metafields":{},"collections":[{"id":512654540989,"handle":"lastof26-10","title":"10%","updated_at":"2026-11-14T20:08:00+08:00","body_html":null,"published_at":"2026-10-12T19:06:42+08:00","sort_order":"best-selling","template_suffix":null,"disjunctive":false,"rules":[],"published_scope":"global"},{"id":325528486077,"handle":"baby-shower-gifts-baby","title":"Baby Shower Gifts - Baby","updated_at":"2026-11-13T20:08:32+08:00","body_html":"","published_at":"2025-10-11T10:27:03+08:00","sort_order":"best-selling","template_suffix":"baby-collection","disjunctive":true,"rules":[],"published_scope":"global","image":{"created_at":"2025-10-30T16:16:58+08:00","alt":"Baby Shower Gifts - Baby - The Birth Store","width":1638,"height":2048,"src":"\/\/www.thebirthstore.com.au\/cdn\/shop\/collections\/baby-shower-gifts-baby-5416143.jpg?v=1761812219"}},{"id":264450998461,"handle":"baby-collection","title":"Baby-Collection","updated_at":"2026-11-13T20:08:32+08:00","body_html":"\u003cp\u003eShop your baby announcement and milestone essentials below. Looking for something we don't currently stock? Please reach out and let us know.\u003cbr\u003e\u003c\/p\u003e\n\u003cp\u003e\u003cspan\u003eYou can even buy now and pay later with Afterpay!\u003c\/span\u003e\u003c\/p\u003e","published_at":"2021-04-07T22:29:35+08:00","sort_order":"best-selling","template_suffix":"baby-collection","disjunctive":false,"rules":[],"published_scope":"global","image":{"created_at":"2024-05-06T11:59:24+08:00","alt":"Baby - The Birth Store","width":1280,"height":1600,"src":"\/\/www.thebirthstore.com.au\/cdn\/shop\/collections\/baby-398774.jpg?v=1714967964"}},{"id":324679696573,"handle":"bottles","title":"Bottles","updated_at":"2026-11-05T20:10:33+08:00","body_html":"","published_at":"2025-09-23T22:01:03+08:00","sort_order":"best-selling","template_suffix":"baby-collection","disjunctive":false,"rules":[],"published_scope":"global","image":{"created_at":"2025-10-30T16:17:04+08:00","alt":"Bottles - The Birth Store","width":2048,"height":1536,"src":"\/\/www.thebirthstore.com.au\/cdn\/shop\/collections\/bottles-9243044.jpg?v=1761812224"}},{"id":261657460925,"handle":"buy","title":"Buy","updated_at":"2026-11-14T20:08:00+08:00","body_html":"\u003cp\u003eBrowse all of our pregnancy, labour \u0026amp; birth, postpartum and baby essentials here.\u003cbr\u003e\u003c\/p\u003e\n\u003cp\u003e\u003cspan\u003eYou can even buy now and pay later with Afterpay!\u003c\/span\u003e\u003c\/p\u003e","published_at":"2021-03-10T12:05:31+08:00","sort_order":"best-selling","template_suffix":"shop-all-collection","disjunctive":false,"rules":[],"published_scope":"global","image":{"created_at":"2024-05-06T11:59:42+08:00","alt":"Buy - The Birth Store","width":2048,"height":2048,"src":"\/\/www.thebirthstore.com.au\/cdn\/shop\/collections\/buy-964856.jpg?v=1714967982"}},{"id":324679663805,"handle":"feeding","title":"Feeding","updated_at":"2026-11-05T20:10:33+08:00","body_html":"","published_at":"2025-09-23T22:00:53+08:00","sort_order":"best-selling","template_suffix":"baby-collection","disjunctive":false,"rules":[],"published_scope":"global","image":{"created_at":"2025-09-29T00:43:44+08:00","alt":"Feeding - The Birth Store","width":1179,"height":1179,"src":"\/\/www.thebirthstore.com.au\/cdn\/shop\/collections\/feeding-7574401.jpg?v=1759077824"}},{"id":326135316669,"handle":"shop-all-baby","title":"Shop All - Baby","updated_at":"2026-11-13T20:08:32+08:00","body_html":"","published_at":"2025-10-22T11:00:50+08:00","sort_order":"best-selling","template_suffix":"baby-collection","disjunctive":false,"rules":[],"published_scope":"global","image":{"created_at":"2025-10-30T16:17:07+08:00","alt":"Shop All - Baby - The Birth Store","width":1075,"height":1613,"src":"\/\/www.thebirthstore.com.au\/cdn\/shop\/collections\/shop-all-baby-1449113.jpg?v=1761812227"}},{"id":310045933757,"handle":"shop-all-sale","title":"Shop All Sale","updated_at":"2026-11-14T20:08:00+08:00","body_html":"","published_at":"2024-11-12T13:22:43+08:00","sort_order":"best-selling","template_suffix":"","disjunctive":true,"rules":[],"published_scope":"global","image":{"created_at":"2024-11-13T10:58:16+08:00","alt":"Shop All Sale - The Birth Store","width":2048,"height":1365,"src":"\/\/www.thebirthstore.com.au\/cdn\/shop\/collections\/shop-all-sale-297361.jpg?v=1731466697"}}]}
{"item":{"id":8123490730173,"title":"Formula Dispenser","handle":"formula-dispenser","description":"\u003cp\u003e\u003cstrong\u003eFinally – a stylish and practical formula dispenser!\u003c\/strong\u003e\u003c\/p\u003e\n\u003cp\u003eThe\u003cspan\u003e \u003c\/span\u003e\u003cstrong\u003eMissta Formula Dispenser\u003c\/strong\u003e\u003cspan\u003e \u003c\/span\u003emakes feeding on the go effortless with pre-measured compartments for quick bottle prep and a space-saving design. Its secure, spill-proof lid ensures no messy surprises in your baby bag!\u003c\/p\u003e\n\u003cul\u003e\n\u003cli\u003eBPA Free\u003c\/li\u003e\n\u003cli\u003e3 Large Compartments\u003c\/li\u003e\n\u003cli\u003ePractical and Sleek Design\u003c\/li\u003e\n\u003cli\u003eMade from Tritan Plastic base and PPU plastic lid\u003c\/li\u003e\n\u003c\/ul\u003e","published_at":"2025-11-06T22:14:01+08:00","created_at":"2025-10-31T11:40:46+08:00","vendor":"MISSTA","type":"","tags":["Baby","Baby Shower Gifts - Baby","Bottles","Feeding"],"price":2495,"price_min":2495,"price_max":2495,"available":true,"price_varies":false,"compare_at_price":null,"compare_at_price_min":0,"compare_at_price_max":0,"compare_at_price_varies":false,"variants":[{"id":45861876957373,"title":"Default Title","option1":"Default Title","option2":null,"option3":null,"sku":null,"requires_shipping":true,"taxable":false,"featured_image":null,"available":true,"name":"Formula Dispenser","public_title":null,"options":["Default Title"],"price":2495,"weight":150,"compare_at_price":null,"inventory_management":"shopify","barcode":"76957373","requires_selling_plan":false,"selling_plan_allocations":[],"quantity_rule":{"min":1,"max":null,"increment":1}}],"images":["\/\/www.thebirthstore.com.au\/cdn\/shop\/files\/formula-dispenser-6821618.webp?v=1762475528","\/\/www.thebirthstore.com.au\/cdn\/shop\/files\/formula-dispenser-2237411.webp?v=1762475528","\/\/www.thebirthstore.com.au\/cdn\/shop\/files\/formula-dispenser-4042546.webp?v=1762475529","\/\/www.thebirthstore.com.au\/cdn\/shop\/files\/formula-dispenser-3779993.webp?v=1762475529"],"featured_image":"\/\/www.thebirthstore.com.au\/cdn\/shop\/files\/formula-dispenser-6821618.webp?v=1762475528","options":["Title"],"media":[{"alt":"Formula Dispenser - The Birth Store - MISSTA","id":29973450326205,"position":1,"preview_image":{"aspect_ratio":1.0,"height":1080,"width":1080,"src":"\/\/www.thebirthstore.com.au\/cdn\/shop\/files\/formula-dispenser-6821618.webp?v=1762475528"},"aspect_ratio":1.0,"height":1080,"media_type":"image","src":"\/\/www.thebirthstore.com.au\/cdn\/shop\/files\/formula-dispenser-6821618.webp?v=1762475528","width":1080},{"alt":"Formula Dispenser - The Birth Store - MISSTA","id":29973445771453,"position":2,"preview_image":{"aspect_ratio":0.668,"height":800,"width":534,"src":"\/\/www.thebirthstore.com.au\/cdn\/shop\/files\/formula-dispenser-2237411.webp?v=1762475528"},"aspect_ratio":0.668,"height":800,"media_type":"image","src":"\/\/www.thebirthstore.com.au\/cdn\/shop\/files\/formula-dispenser-2237411.webp?v=1762475528","width":534},{"alt":"Formula Dispenser - The Birth Store - MISSTA","id":29973447442621,"position":3,"preview_image":{"aspect_ratio":0.667,"height":1649,"width":1100,"src":"\/\/www.thebirthstore.com.au\/cdn\/shop\/files\/formula-dispenser-4042546.webp?v=1762475529"},"aspect_ratio":0.667,"height":1649,"media_type":"image","src":"\/\/www.thebirthstore.com.au\/cdn\/shop\/files\/formula-dispenser-4042546.webp?v=1762475529","width":1100},{"alt":"Formula Dispenser - The Birth Store - MISSTA","id":29973449310397,"position":4,"preview_image":{"aspect_ratio":0.8,"height":1350,"width":1080,"src":"\/\/www.thebirthstore.com.au\/cdn\/shop\/files\/formula-dispenser-3779993.webp?v=1762475529"},"aspect_ratio":0.8,"height":1350,"media_type":"image","src":"\/\/www.thebirthstore.com.au\/cdn\/shop\/files\/formula-dispenser-3779993.webp?v=1762475529","width":1080}],"requires_selling_plan":false,"selling_plan_groups":[],"content":"\u003cp\u003e\u003cstrong\u003eFinally – a stylish and practical formula dispenser!\u003c\/strong\u003e\u003c\/p\u003e\n\u003cp\u003eThe\u003cspan\u003e \u003c\/span\u003e\u003cstrong\u003eMissta Formula Dispenser\u003c\/strong\u003e\u003cspan\u003e \u003c\/span\u003emakes feeding on the go effortless with pre-measured compartments for quick bottle prep and a space-saving design. Its secure, spill-proof lid ensures no messy surprises in your baby bag!\u003c\/p\u003e\n\u003cul\u003e\n\u003cli\u003eBPA Free\u003c\/li\u003e\n\u003cli\u003e3 Large Compartments\u003c\/li\u003e\n\u003cli\u003ePractical and Sleek Design\u003c\/li\u003e\n\u003cli\u003eMade from Tritan Plastic base and PPU plastic lid\u003c\/li\u003e\n\u003c\/ul\u003e"},"options":[{"name":"Title","position":1,"values":["Default Title"]}],"custom_metafields":{},"metafields":{"badge":"\u003cdiv style='display:none' class='jdgm-prev-badge' data-average-rating='0.00' data-number-of-reviews='0' data-number-of-questions='0'\u003e \u003cspan class='jdgm-prev-badge__stars' data-score='0.00' tabindex='0' aria-label='0.00 stars' role='button'\u003e \u003cspan class='jdgm-star jdgm--off'\u003e\u003c\/span\u003e\u003cspan class='jdgm-star jdgm--off'\u003e\u003c\/span\u003e\u003cspan class='jdgm-star jdgm--off'\u003e\u003c\/span\u003e\u003cspan class='jdgm-star jdgm--off'\u003e\u003c\/span\u003e\u003cspan class='jdgm-star jdgm--off'\u003e\u003c\/span\u003e \u003c\/span\u003e \u003cspan class='jdgm-prev-badge__text'\u003e No reviews \u003c\/span\u003e \u003c\/div\u003e","widget":"\u003cdiv class='jdgm-rev-widg' data-updated-at='2025-11-06T14:14:04Z' data-average-rating='0.00' data-number-of-reviews='0' data-number-of-questions='0' data-image-url='https:\/\/cdn.shopify.com\/s\/files\/1\/0527\/3393\/5805\/files\/Missta0007.webp?v=1761881798'\u003e \u003cstyle class='jdgm-temp-hiding-style'\u003e.jdgm-rev-widg{ display: none }\u003c\/style\u003e \u003cdiv class='jdgm-rev-widg__header'\u003e \u003ch2 class='jdgm-rev-widg__title'\u003eCustomer Reviews\u003c\/h2\u003e \u003cdiv class='jdgm-rev-widg__summary'\u003e \u003cdiv class='jdgm-rev-widg__summary-stars' aria-label='Average rating is 0.00 stars' role='img'\u003e \u003cspan class='jdgm-star jdgm--off'\u003e\u003c\/span\u003e\u003cspan class='jdgm-star jdgm--off'\u003e\u003c\/span\u003e\u003cspan class='jdgm-star jdgm--off'\u003e\u003c\/span\u003e\u003cspan class='jdgm-star jdgm--off'\u003e\u003c\/span\u003e\u003cspan class='jdgm-star jdgm--off'\u003e\u003c\/span\u003e \u003c\/div\u003e \u003cdiv class='jdgm-rev-widg__summary-text'\u003eBe the first to write a review\u003c\/div\u003e \u003c\/div\u003e \u003ca style='display: none' href='#' class='jdgm-write-rev-link' role='button'\u003eWrite a review\u003c\/a\u003e \u003cdiv class='jdgm-histogram jdgm-temp-hidden'\u003e \u003cdiv class='jdgm-histogram__row' data-rating='5' data-frequency='0' data-percentage='0'\u003e \u003cdiv class='jdgm-histogram__star' role='button' aria-label=\"0% (0) reviews with 5 star rating\" tabindex='0' \u003e\u003cspan class='jdgm-star jdgm--on'\u003e\u003c\/span\u003e\u003cspan class='jdgm-star jdgm--on'\u003e\u003c\/span\u003e\u003cspan class='jdgm-star jdgm--on'\u003e\u003c\/span\u003e\u003cspan class='jdgm-star jdgm--on'\u003e\u003c\/span\u003e\u003cspan class='jdgm-star jdgm--on'\u003e\u003c\/span\u003e\u003c\/div\u003e \u003cdiv class='jdgm-histogram__bar'\u003e \u003cdiv class='jdgm-histogram__bar-content' style='width: 0%;'\u003e \u003c\/div\u003e \u003c\/div\u003e \u003cdiv class='jdgm-histogram__percentage'\u003e0%\u003c\/div\u003e \u003cdiv class='jdgm-histogram__frequency'\u003e(0)\u003c\/div\u003e \u003c\/div\u003e \u003cdiv class='jdgm-histogram__row' data-rating='4' data-frequency='0' data-percentage='0'\u003e \u003cdiv class='jdgm-histogram__star' role='button' aria-label=\"0% (0) reviews with 4 star rating\" tabindex='0' \u003e\u003cspan class='jdgm-star jdgm--on'\u003e\u003c\/span\u003e\u003cspan class='jdgm-star jdgm--on'\u003e\u003c\/span\u003e\u003cspan class='jdgm-star jdgm--on'\u003e\u003c\/span\u003e\u003cspan class='jdgm-star jdgm--on'\u003e\u003c\/span\u003e\u003cspan class='jdgm-star jdgm--off'\u003e\u003c\/span\u003e\u003c\/div\u003e \u003cdiv class='jdgm-histogram__bar'\u003e \u003cdiv class='jdgm-histogram__bar-content' style='width: 0%;'\u003e \u003c\/div\u003e \u003c\/div\u003e \u003cdiv class='jdgm-histogram__percentage'\u003e0%\u003c\/div\u003e \u003cdiv class='jdgm-histogram__frequency'\u003e(0)\u003c\/div\u003e \u003c\/div\u003e \u003cdiv class='jdgm-histogram__row' data-rating='3' data-frequency='0' data-percentage='0'\u003e \u003cdiv class='jdgm-histogram__star' role='button' aria-label=\"0% (0) reviews with 3 star rating\" tabindex='0' \u003e\u003cspan class='jdgm-star jdgm--on'\u003e\u003c\/span\u003e\u003cspan class='jdgm-star jdgm--on'\u003e\u003c\/span\u003e\u003cspan class='jdgm-star jdgm--on'\u003e\u003c\/span\u003e\u003cspan class='jdgm-star jdgm--off'\u003e\u003c\/span\u003e\u003cspan class='jdgm-star jdgm--off'\u003e\u003c\/span\u003e\u003c\/div\u003e \u003cdiv class='jdgm-histogram__bar'\u003e \u003cdiv class='jdgm-histogram__bar-content' style='width: 0%;'\u003e \u003c\/div\u003e \u003c\/div\u003e \u003cdiv class='jdgm-histogram__percentage'\u003e0%\u003c\/div\u003e \u003cdiv class='jdgm-histogram__frequency'\u003e(0)\u003c\/div\u003e \u003c\/div\u003e \u003cdiv class='jdgm-histogram__row' data-rating='2' data-frequency='0' data-percentage='0'\u003e \u003cdiv class='jdgm-histogram__star' role='button' aria-label=\"0% (0) reviews with 2 star rating\" tabindex='0' \u003e\u003cspan class='jdgm-star jdgm--on'\u003e\u003c\/span\u003e\u003cspan class='jdgm-star jdgm--on'\u003e\u003c\/span\u003e\u003cspan class='jdgm-star jdgm--off'\u003e\u003c\/span\u003e\u003cspan class='jdgm-star jdgm--off'\u003e\u003c\/span\u003e\u003cspan class='jdgm-star jdgm--off'\u003e\u003c\/span\u003e\u003c\/div\u003e \u003cdiv class='jdgm-histogram__bar'\u003e \u003cdiv class='jdgm-histogram__bar-content' style='width: 0%;'\u003e \u003c\/div\u003e \u003c\/div\u003e \u003cdiv class='jdgm-histogram__percentage'\u003e0%\u003c\/div\u003e \u003cdiv class='jdgm-histogram__frequency'\u003e(0)\u003c\/div\u003e \u003c\/div\u003e \u003cdiv class='jdgm-histogram__row' data-rating='1' data-frequency='0' data-percentage='0'\u003e \u003cdiv class='jdgm-histogram__star' role='button' aria-label=\"0% (0) reviews with 1 star rating\" tabindex='0' \u003e\u003cspan class='jdgm-star jdgm--on'\u003e\u003c\/span\u003e\u003cspan class='jdgm-star jdgm--off'\u003e\u003c\/span\u003e\u003cspan class='jdgm-star jdgm--off'\u003e\u003c\/span\u003e\u003cspan class='jdgm-star jdgm--off'\u003e\u003c\/span\u003e\u003cspan class='jdgm-star jdgm--off'\u003e\u003c\/span\u003e\u003c\/div\u003e \u003cdiv class='jdgm-histogram__bar'\u003e \u003cdiv class='jdgm-histogram__bar-content' style='width: 0%;'\u003e \u003c\/div\u003e \u003c\/div\u003e \u003cdiv class='jdgm-histogram__percentage'\u003e0%\u003c\/div\u003e \u003cdiv class='jdgm-histogram__frequency'\u003e(0)\u003c\/div\u003e \u003c\/div\u003e \u003cdiv class='jdgm-histogram__row jdgm-histogram__clear-filter' data-rating=null tabindex='0'\u003e\u003c\/div\u003e \u003c\/div\u003e \u003cdiv class='jdgm-rev-widg__sort-wrapper'\u003e\u003c\/div\u003e \u003c\/div\u003e \u003cdiv class='jdgm-rev-widg__body'\u003e \u003cdiv class='jdgm-rev-widg__reviews'\u003e\u003c\/div\u003e \u003cdiv class='jdgm-paginate' data-per-page='10' data-url='https:\/\/api.judge.me\/reviews\/reviews_for_widget' style=\"display: none;\"\u003e\u003c\/div\u003e \u003c\/div\u003e \u003cdiv class='jdgm-rev-widg__paginate-spinner-wrapper'\u003e \u003cdiv class='jdgm-spinner'\u003e\u003c\/div\u003e \u003c\/div\u003e \u003c\/div\u003e"},"default_reviews_metafields":{},"collections":[{"id":512654540989,"handle":"lastof26-10","title":"10%","updated_at":"2026-11-14T20:08:00+08:00","body_html":null,"published_at":"2026-10-12T19:06:42+08:00","sort_order":"best-selling","template_suffix":null,"disjunctive":false,"rules":[],"published_scope":"global"},{"id":325528486077,"handle":"baby-shower-gifts-baby","title":"Baby Shower Gifts - Baby","updated_at":"2026-11-13T20:08:32+08:00","body_html":"","published_at":"2025-10-11T10:27:03+08:00","sort_order":"best-selling","template_suffix":"baby-collection","disjunctive":true,"rules":[],"published_scope":"global","image":{"created_at":"2025-10-30T16:16:58+08:00","alt":"Baby Shower Gifts - Baby - The Birth Store","width":1638,"height":2048,"src":"\/\/www.thebirthstore.com.au\/cdn\/shop\/collections\/baby-shower-gifts-baby-5416143.jpg?v=1761812219"}},{"id":264450998461,"handle":"baby-collection","title":"Baby-Collection","updated_at":"2026-11-13T20:08:32+08:00","body_html":"\u003cp\u003eShop your baby announcement and milestone essentials below. Looking for something we don't currently stock? Please reach out and let us know.\u003cbr\u003e\u003c\/p\u003e\n\u003cp\u003e\u003cspan\u003eYou can even buy now and pay later with Afterpay!\u003c\/span\u003e\u003c\/p\u003e","published_at":"2021-04-07T22:29:35+08:00","sort_order":"best-selling","template_suffix":"baby-collection","disjunctive":false,"rules":[],"published_scope":"global","image":{"created_at":"2024-05-06T11:59:24+08:00","alt":"Baby - The Birth Store","width":1280,"height":1600,"src":"\/\/www.thebirthstore.com.au\/cdn\/shop\/collections\/baby-398774.jpg?v=1714967964"}},{"id":324679696573,"handle":"bottles","title":"Bottles","updated_at":"2026-11-05T20:10:33+08:00","body_html":"","published_at":"2025-09-23T22:01:03+08:00","sort_order":"best-selling","template_suffix":"baby-collection","disjunctive":false,"rules":[],"published_scope":"global","image":{"created_at":"2025-10-30T16:17:04+08:00","alt":"Bottles - The Birth Store","width":2048,"height":1536,"src":"\/\/www.thebirthstore.com.au\/cdn\/shop\/collections\/bottles-9243044.jpg?v=1761812224"}},{"id":261657460925,"handle":"buy","title":"Buy","updated_at":"2026-11-14T20:08:00+08:00","body_html":"\u003cp\u003eBrowse all of our pregnancy, labour \u0026amp; birth, postpartum and baby essentials here.\u003cbr\u003e\u003c\/p\u003e\n\u003cp\u003e\u003cspan\u003eYou can even buy now and pay later with Afterpay!\u003c\/span\u003e\u003c\/p\u003e","published_at":"2021-03-10T12:05:31+08:00","sort_order":"best-selling","template_suffix":"shop-all-collection","disjunctive":false,"rules":[],"published_scope":"global","image":{"created_at":"2024-05-06T11:59:42+08:00","alt":"Buy - The Birth Store","width":2048,"height":2048,"src":"\/\/www.thebirthstore.com.au\/cdn\/shop\/collections\/buy-964856.jpg?v=1714967982"}},{"id":324679663805,"handle":"feeding","title":"Feeding","updated_at":"2026-11-05T20:10:33+08:00","body_html":"","published_at":"2025-09-23T22:00:53+08:00","sort_order":"best-selling","template_suffix":"baby-collection","disjunctive":false,"rules":[],"published_scope":"global","image":{"created_at":"2025-09-29T00:43:44+08:00","alt":"Feeding - The Birth Store","width":1179,"height":1179,"src":"\/\/www.thebirthstore.com.au\/cdn\/shop\/collections\/feeding-7574401.jpg?v=1759077824"}},{"id":326135316669,"handle":"shop-all-baby","title":"Shop All - Baby","updated_at":"2026-11-13T20:08:32+08:00","body_html":"","published_at":"2025-10-22T11:00:50+08:00","sort_order":"best-selling","template_suffix":"baby-collection","disjunctive":false,"rules":[],"published_scope":"global","image":{"created_at":"2025-10-30T16:17:07+08:00","alt":"Shop All - Baby - The Birth Store","width":1075,"height":1613,"src":"\/\/www.thebirthstore.com.au\/cdn\/shop\/collections\/shop-all-baby-1449113.jpg?v=1761812227"}},{"id":310045933757,"handle":"shop-all-sale","title":"Shop All Sale","updated_at":"2026-11-14T20:08:00+08:00","body_html":"","published_at":"2024-11-12T13:22:43+08:00","sort_order":"best-selling","template_suffix":"","disjunctive":true,"rules":[],"published_scope":"global","image":{"created_at":"2024-11-13T10:58:16+08:00","alt":"Shop All Sale - The Birth Store","width":2048,"height":1365,"src":"\/\/www.thebirthstore.com.au\/cdn\/shop\/collections\/shop-all-sale-297361.jpg?v=1731466697"}}]}
{"item":{"id":8344105484477,"title":"Breastfeeding Hoodie","handle":"breastfeeding-hoodie","description":"\u003ch3\u003e\u003cspan\u003eEveryday Breastfeeding Jumpers\u003c\/span\u003e\u003c\/h3\u003e\n\u003cp class=\"isSelectedEnd\"\u003e\u003cspan\u003eComfort. Style. Easy Nursing Access.\u003c\/span\u003e\u003c\/p\u003e\n\u003cp class=\"isSelectedEnd\"\u003e\u003cspan\u003eDesigned with busy mums in mind, our Everyday Breastfeeding Jumpers combine effortless style, cosy comfort, and practical functionality. Whether you're lounging at home, running errands, meeting friends, or heading out for a walk, these jumpers keep you warm, comfortable, and ready for every feed.\u003c\/span\u003e\u003c\/p\u003e\n\u003cp class=\"isSelectedEnd\"\u003e\u003cspan\u003eAvailable in both our \u003c\/span\u003e\u003cstrong\u003e\u003cspan\u003e1\/4 Zip Breastfeeding Jumper\u003c\/span\u003e\u003c\/strong\u003e\u003cspan\u003e and \u003c\/span\u003e\u003cstrong\u003e\u003cspan\u003eHooded Breastfeeding Jumper\u003c\/span\u003e\u003c\/strong\u003e\u003cspan\u003e styles, each design features discreet vertical zips for easy, one-handed breastfeeding access without needing to lift or fuss with layers.\u003c\/span\u003e\u003c\/p\u003e\n\u003cp class=\"isSelectedEnd\"\u003e\u003cspan\u003eMade from a premium \u003c\/span\u003e\u003cstrong\u003e\u003cspan\u003e95% cotton \/ 5% spandex blend\u003c\/span\u003e\u003c\/strong\u003e\u003cspan\u003e, these jumpers offer the perfect amount of stretch while maintaining a beautiful thickness that feels soft against your skin and keeps you cosy on cooler days.\u003c\/span\u003e\u003c\/p\u003e\n\u003ch4\u003e\u003cspan\u003eFeatures Mums Love\u003c\/span\u003e\u003c\/h4\u003e\n\u003cul\u003e\n\u003cli\u003e\u003cspan\u003eHidden vertical zips for discreet breastfeeding access\u003c\/span\u003e\u003c\/li\u003e\n\u003cli\u003e\u003cspan\u003eSoft, premium 95% cotton \/ 5% spandex fabric\u003c\/span\u003e\u003c\/li\u003e\n\u003cli\u003e\u003cspan\u003eComfortable stretch that moves with you\u003c\/span\u003e\u003c\/li\u003e\n\u003cli\u003e\u003cspan\u003eWarm yet breathable for year-round wear\u003c\/span\u003e\u003c\/li\u003e\n\u003cli\u003e\u003cspan\u003eDesigned to support you through postpartum and beyond\u003c\/span\u003e\u003c\/li\u003e\n\u003c\/ul\u003e\n\u003ch4\u003e\u003cspan\u003e1\/4 Zip Style Features\u003c\/span\u003e\u003c\/h4\u003e\n\u003cul\u003e\n\u003cli\u003e\u003cspan\u003eModern 1\/4 zip collar\u003c\/span\u003e\u003c\/li\u003e\n\u003cli\u003e\u003cspan\u003eEasy layering for changing weather\u003c\/span\u003e\u003c\/li\u003e\n\u003cli\u003e\u003cspan\u003eRibbed cuffs for a comfortable fit\u003c\/span\u003e\u003c\/li\u003e\n\u003cli\u003e\u003cspan\u003eRelaxed oversized design\u003c\/span\u003e\u003c\/li\u003e\n\u003c\/ul\u003e\n\u003ch4\u003e\u003cspan\u003eHooded Style Features\u003c\/span\u003e\u003c\/h4\u003e\n\u003cul\u003e\n\u003cli\u003e\u003cspan\u003eRelaxed hood for extra warmth and comfort\u003c\/span\u003e\u003c\/li\u003e\n\u003cli\u003e\u003cspan\u003eSpacious front pocket for convenience\u003c\/span\u003e\u003c\/li\u003e\n\u003cli\u003e\u003cspan\u003eRibbed cuffs for a secure fit\u003c\/span\u003e\u003c\/li\u003e\n\u003cli\u003e\u003cspan\u003eEveryday casual styling\u003c\/span\u003e\u003c\/li\u003e\n\u003c\/ul\u003e\n\u003cp class=\"isSelectedEnd\"\u003e\u003cspan\u003eMum life is full-on. Your clothing should be full of comfort, confidence, and ease. These are the jumpers you'll reach for every day.\u003c\/span\u003e\u003c\/p\u003e\n\u003ch4\u003e\u003cspan\u003eSizing Information\u003c\/span\u003e\u003c\/h4\u003e\n\u003cp class=\"isSelectedEnd\"\u003e\u003cspan\u003eBoth styles are designed with a relaxed fit.\u003c\/span\u003e\u003c\/p\u003e\n\u003cp class=\"isSelectedEnd\"\u003e\u003cstrong\u003e\u003cspan\u003e1\/4 Zip Style:\u003c\/span\u003e\u003c\/strong\u003e\u003cspan\u003e This style is intentionally oversized. If you prefer a more fitted look, we recommend sizing down from your usual size.\u003c\/span\u003e\u003c\/p\u003e\n\u003cp class=\"isSelectedEnd\"\u003e\u003cstrong\u003e\u003cspan\u003eHooded Style:\u003c\/span\u003e\u003c\/strong\u003e\u003cspan\u003e Relaxed fit designed for comfort and layering.\u003c\/span\u003e\u003c\/p\u003e\n\u003ch4 class=\"isSelectedEnd\"\u003e\u003cstrong\u003e\u003cspan\u003eModel Information\u003c\/span\u003e\u003c\/strong\u003e\u003c\/h4\u003e\n\u003cul\u003e\n\u003cli\u003e\u003cspan\u003e1\/4 Zip: Brooke (owner) is usually a size 14 and wears between a Medium and Large depending on her preferred fit.\u003c\/span\u003e\u003c\/li\u003e\n\u003cli\u003e\u003cspan\u003eHooded: Brooke (owner) is usually a size 14 and wears a Large.\u003c\/span\u003e\u003c\/li\u003e\n\u003c\/ul\u003e\n\u003cp class=\"isSelectedEnd\"\u003e\u003cspan\u003eColours may appear slightly different across screens; however, we have done our best to accurately represent each colour.\u003c\/span\u003e\u003c\/p\u003e\n\u003ch4\u003e\u003cspan\u003e1\/4 Zip Breastfeeding Jumper Size Chart (cm)\u003c\/span\u003e\u003c\/h4\u003e\n\u003ctable\u003e\n\u003ctbody\u003e\n\u003ctr\u003e\n\u003cth\u003e\u003cspan\u003eSize\u003c\/span\u003e\u003c\/th\u003e\n\u003cth\u003e\u003cspan\u003eAU Size\u003c\/span\u003e\u003c\/th\u003e\n\u003cth\u003e\u003cspan\u003eLength\u003c\/span\u003e\u003c\/th\u003e\n\u003cth\u003e\u003cspan\u003eChest\u003c\/span\u003e\u003c\/th\u003e\n\u003cth\u003e\u003cspan\u003eBottom\u003c\/span\u003e\u003c\/th\u003e\n\u003cth\u003e\u003cspan\u003eShoulder\u003c\/span\u003e\u003c\/th\u003e\n\u003cth\u003e\u003cspan\u003eSleeve\u003c\/span\u003e\u003c\/th\u003e\n\u003c\/tr\u003e\n\u003ctr\u003e\n\u003ctd\u003e\u003cspan\u003eXS\u003c\/span\u003e\u003c\/td\u003e\n\u003ctd\u003e\u003cspan\u003e6\/8\u003c\/span\u003e\u003c\/td\u003e\n\u003ctd\u003e\u003cspan\u003e71\u003c\/span\u003e\u003c\/td\u003e\n\u003ctd\u003e\u003cspan\u003e58\u003c\/span\u003e\u003c\/td\u003e\n\u003ctd\u003e\u003cspan\u003e46\u003c\/span\u003e\u003c\/td\u003e\n\u003ctd\u003e\u003cspan\u003e60\u003c\/span\u003e\u003c\/td\u003e\n\u003ctd\u003e\u003cspan\u003e53.5\u003c\/span\u003e\u003c\/td\u003e\n\u003c\/tr\u003e\n\u003ctr\u003e\n\u003ctd\u003e\u003cspan\u003eS\u003c\/span\u003e\u003c\/td\u003e\n\u003ctd\u003e\u003cspan\u003e8\/10\u003c\/span\u003e\u003c\/td\u003e\n\u003ctd\u003e\u003cspan\u003e72\u003c\/span\u003e\u003c\/td\u003e\n\u003ctd\u003e\u003cspan\u003e60.5\u003c\/span\u003e\u003c\/td\u003e\n\u003ctd\u003e\u003cspan\u003e48.5\u003c\/span\u003e\u003c\/td\u003e\n\u003ctd\u003e\u003cspan\u003e61\u003c\/span\u003e\u003c\/td\u003e\n\u003ctd\u003e\u003cspan\u003e54.5\u003c\/span\u003e\u003c\/td\u003e\n\u003c\/tr\u003e\n\u003ctr\u003e\n\u003ctd\u003e\u003cspan\u003eM\u003c\/span\u003e\u003c\/td\u003e\n\u003ctd\u003e\u003cspan\u003e10\/12\u003c\/span\u003e\u003c\/td\u003e\n\u003ctd\u003e\u003cspan\u003e73\u003c\/span\u003e\u003c\/td\u003e\n\u003ctd\u003e\u003cspan\u003e63\u003c\/span\u003e\u003c\/td\u003e\n\u003ctd\u003e\u003cspan\u003e51\u003c\/span\u003e\u003c\/td\u003e\n\u003ctd\u003e\u003cspan\u003e62\u003c\/span\u003e\u003c\/td\u003e\n\u003ctd\u003e\u003cspan\u003e55.5\u003c\/span\u003e\u003c\/td\u003e\n\u003c\/tr\u003e\n\u003ctr\u003e\n\u003ctd\u003e\u003cspan\u003eL\u003c\/span\u003e\u003c\/td\u003e\n\u003ctd\u003e\u003cspan\u003e12\/14\u003c\/span\u003e\u003c\/td\u003e\n\u003ctd\u003e\u003cspan\u003e74\u003c\/span\u003e\u003c\/td\u003e\n\u003ctd\u003e\u003cspan\u003e65.5\u003c\/span\u003e\u003c\/td\u003e\n\u003ctd\u003e\u003cspan\u003e53.5\u003c\/span\u003e\u003c\/td\u003e\n\u003ctd\u003e\u003cspan\u003e63\u003c\/span\u003e\u003c\/td\u003e\n\u003ctd\u003e\u003cspan\u003e56.5\u003c\/span\u003e\u003c\/td\u003e\n\u003c\/tr\u003e\n\u003ctr\u003e\n\u003ctd\u003e\u003cspan\u003eXL\u003c\/span\u003e\u003c\/td\u003e\n\u003ctd\u003e\u003cspan\u003e14\/16\u003c\/span\u003e\u003c\/td\u003e\n\u003ctd\u003e\u003cspan\u003e75\u003c\/span\u003e\u003c\/td\u003e\n\u003ctd\u003e\u003cspan\u003e68\u003c\/span\u003e\u003c\/td\u003e\n\u003ctd\u003e\u003cspan\u003e56\u003c\/span\u003e\u003c\/td\u003e\n\u003ctd\u003e\u003cspan\u003e64\u003c\/span\u003e\u003c\/td\u003e\n\u003ctd\u003e\u003cspan\u003e57.5\u003c\/span\u003e\u003c\/td\u003e\n\u003c\/tr\u003e\n\u003ctr\u003e\n\u003ctd\u003e\u003cspan\u003e2XL\u003c\/span\u003e\u003c\/td\u003e\n\u003ctd\u003e\u003cspan\u003e16\/18\u003c\/span\u003e\u003c\/td\u003e\n\u003ctd\u003e\u003cspan\u003e76\u003c\/span\u003e\u003c\/td\u003e\n\u003ctd\u003e\u003cspan\u003e70.5\u003c\/span\u003e\u003c\/td\u003e\n\u003ctd\u003e\u003cspan\u003e58.5\u003c\/span\u003e\u003c\/td\u003e\n\u003ctd\u003e\u003cspan\u003e65\u003c\/span\u003e\u003c\/td\u003e\n\u003ctd\u003e\u003cspan\u003e58.5\u003c\/span\u003e\u003c\/td\u003e\n\u003c\/tr\u003e\n\u003ctr\u003e\n\u003ctd\u003e\u003cspan\u003e3XL\u003c\/span\u003e\u003c\/td\u003e\n\u003ctd\u003e\u003cspan\u003e18\/20\u003c\/span\u003e\u003c\/td\u003e\n\u003ctd\u003e\u003cspan\u003e77\u003c\/span\u003e\u003c\/td\u003e\n\u003ctd\u003e\u003cspan\u003e73\u003c\/span\u003e\u003c\/td\u003e\n\u003ctd\u003e\u003cspan\u003e61\u003c\/span\u003e\u003c\/td\u003e\n\u003ctd\u003e\u003cspan\u003e66\u003c\/span\u003e\u003c\/td\u003e\n\u003ctd\u003e\u003cspan\u003e59.5\u003c\/span\u003e\u003c\/td\u003e\n\u003c\/tr\u003e\n\u003ctr\u003e\n\u003ctd\u003e\u003cspan\u003e4XL\u003c\/span\u003e\u003c\/td\u003e\n\u003ctd\u003e\u003cspan\u003e20\/22\u003c\/span\u003e\u003c\/td\u003e\n\u003ctd\u003e\u003cspan\u003e78\u003c\/span\u003e\u003c\/td\u003e\n\u003ctd\u003e\u003cspan\u003e75.5\u003c\/span\u003e\u003c\/td\u003e\n\u003ctd\u003e\u003cspan\u003e63.5\u003c\/span\u003e\u003c\/td\u003e\n\u003ctd\u003e\u003cspan\u003e67\u003c\/span\u003e\u003c\/td\u003e\n\u003ctd\u003e\u003cspan\u003e60.5\u003c\/span\u003e\u003c\/td\u003e\n\u003c\/tr\u003e\n\u003ctr\u003e\n\u003ctd\u003e\u003cspan\u003e5XL\u003c\/span\u003e\u003c\/td\u003e\n\u003ctd\u003e\u003cspan\u003e22\/24\u003c\/span\u003e\u003c\/td\u003e\n\u003ctd\u003e\u003cspan\u003e79\u003c\/span\u003e\u003c\/td\u003e\n\u003ctd\u003e\u003cspan\u003e78\u003c\/span\u003e\u003c\/td\u003e\n\u003ctd\u003e\u003cspan\u003e66\u003c\/span\u003e\u003c\/td\u003e\n\u003ctd\u003e\u003cspan\u003e68\u003c\/span\u003e\u003c\/td\u003e\n\u003ctd\u003e\u003cspan\u003e61.5\u003c\/span\u003e\u003c\/td\u003e\n\u003c\/tr\u003e\n\u003ctr\u003e\n\u003ctd\u003e\u003cspan\u003e6XL\u003c\/span\u003e\u003c\/td\u003e\n\u003ctd\u003e\u003cspan\u003e24\/26\u003c\/span\u003e\u003c\/td\u003e\n\u003ctd\u003e\u003cspan\u003e80\u003c\/span\u003e\u003c\/td\u003e\n\u003ctd\u003e\u003cspan\u003e80.5\u003c\/span\u003e\u003c\/td\u003e\n\u003ctd\u003e\u003cspan\u003e68.5\u003c\/span\u003e\u003c\/td\u003e\n\u003ctd\u003e\u003cspan\u003e69\u003c\/span\u003e\u003c\/td\u003e\n\u003ctd\u003e\u003cspan\u003e62.5\u003c\/span\u003e\u003c\/td\u003e\n\u003c\/tr\u003e\n\u003c\/tbody\u003e\n\u003c\/table\u003e\n\u003ch4\u003e\u003cspan\u003eHooded Breastfeeding Jumper Size Chart (cm)\u003c\/span\u003e\u003c\/h4\u003e\n\u003ctable\u003e\n\u003ctbody\u003e\n\u003ctr\u003e\n\u003ctd\u003e\u003cspan\u003eSize\u003c\/span\u003e\u003c\/td\u003e\n\u003ctd\u003e\u003cspan\u003eAU Size\u003c\/span\u003e\u003c\/td\u003e\n\u003ctd\u003e\u003cspan\u003eLength\u003c\/span\u003e\u003c\/td\u003e\n\u003ctd\u003e\u003cspan\u003eChest\u003c\/span\u003e\u003c\/td\u003e\n\u003ctd\u003e\u003cspan\u003eBottom\u003c\/span\u003e\u003c\/td\u003e\n\u003ctd\u003e\u003cspan\u003eShoulder\u003c\/span\u003e\u003c\/td\u003e\n\u003ctd\u003e\u003cspan\u003eSleeve\u003c\/span\u003e\u003c\/td\u003e\n\u003c\/tr\u003e\n\u003ctr\u003e\n\u003ctd\u003e\u003cspan\u003eXS\u003c\/span\u003e\u003c\/td\u003e\n\u003ctd\u003e\u003cspan\u003e6\/8\u003c\/span\u003e\u003c\/td\u003e\n\u003ctd\u003e\u003cspan\u003e69\u003c\/span\u003e\u003c\/td\u003e\n\u003ctd\u003e\u003cspan\u003e54\u003c\/span\u003e\u003c\/td\u003e\n\u003ctd\u003e\u003cspan\u003e47\u003c\/span\u003e\u003c\/td\u003e\n\u003ctd\u003e\u003cspan\u003e58\u003c\/span\u003e\u003c\/td\u003e\n\u003ctd\u003e\u003cspan\u003e52\u003c\/span\u003e\u003c\/td\u003e\n\u003c\/tr\u003e\n\u003ctr\u003e\n\u003ctd\u003e\u003cspan\u003eS\u003c\/span\u003e\u003c\/td\u003e\n\u003ctd\u003e\u003cspan\u003e8\/10\u003c\/span\u003e\u003c\/td\u003e\n\u003ctd\u003e\u003cspan\u003e70\u003c\/span\u003e\u003c\/td\u003e\n\u003ctd\u003e\u003cspan\u003e56.5\u003c\/span\u003e\u003c\/td\u003e\n\u003ctd\u003e\u003cspan\u003e49.5\u003c\/span\u003e\u003c\/td\u003e\n\u003ctd\u003e\u003cspan\u003e59\u003c\/span\u003e\u003c\/td\u003e\n\u003ctd\u003e\u003cspan\u003e53\u003c\/span\u003e\u003c\/td\u003e\n\u003c\/tr\u003e\n\u003ctr\u003e\n\u003ctd\u003e\u003cspan\u003eM\u003c\/span\u003e\u003c\/td\u003e\n\u003ctd\u003e\u003cspan\u003e10\/12\u003c\/span\u003e\u003c\/td\u003e\n\u003ctd\u003e\u003cspan\u003e71\u003c\/span\u003e\u003c\/td\u003e\n\u003ctd\u003e\u003cspan\u003e59\u003c\/span\u003e\u003c\/td\u003e\n\u003ctd\u003e\u003cspan\u003e52\u003c\/span\u003e\u003c\/td\u003e\n\u003ctd\u003e\u003cspan\u003e60\u003c\/span\u003e\u003c\/td\u003e\n\u003ctd\u003e\u003cspan\u003e54\u003c\/span\u003e\u003c\/td\u003e\n\u003c\/tr\u003e\n\u003ctr\u003e\n\u003ctd\u003e\u003cspan\u003eL\u003c\/span\u003e\u003c\/td\u003e\n\u003ctd\u003e\u003cspan\u003e12\/14\u003c\/span\u003e\u003c\/td\u003e\n\u003ctd\u003e\u003cspan\u003e72\u003c\/span\u003e\u003c\/td\u003e\n\u003ctd\u003e\u003cspan\u003e61.5\u003c\/span\u003e\u003c\/td\u003e\n\u003ctd\u003e\u003cspan\u003e54.5\u003c\/span\u003e\u003c\/td\u003e\n\u003ctd\u003e\u003cspan\u003e61\u003c\/span\u003e\u003c\/td\u003e\n\u003ctd\u003e\u003cspan\u003e55\u003c\/span\u003e\u003c\/td\u003e\n\u003c\/tr\u003e\n\u003ctr\u003e\n\u003ctd\u003e\u003cspan\u003eXL\u003c\/span\u003e\u003c\/td\u003e\n\u003ctd\u003e\u003cspan\u003e14\/16\u003c\/span\u003e\u003c\/td\u003e\n\u003ctd\u003e\u003cspan\u003e73\u003c\/span\u003e\u003c\/td\u003e\n\u003ctd\u003e\u003cspan\u003e64\u003c\/span\u003e\u003c\/td\u003e\n\u003ctd\u003e\u003cspan\u003e57\u003c\/span\u003e\u003c\/td\u003e\n\u003ctd\u003e\u003cspan\u003e62\u003c\/span\u003e\u003c\/td\u003e\n\u003ctd\u003e\u003cspan\u003e56\u003c\/span\u003e\u003c\/td\u003e\n\u003c\/tr\u003e\n\u003ctr\u003e\n\u003ctd\u003e\u003cspan\u003e2XL\u003c\/span\u003e\u003c\/td\u003e\n\u003ctd\u003e\u003cspan\u003e16\/18\u003c\/span\u003e\u003c\/td\u003e\n\u003ctd\u003e\u003cspan\u003e74\u003c\/span\u003e\u003c\/td\u003e\n\u003ctd\u003e\u003cspan\u003e66.5\u003c\/span\u003e\u003c\/td\u003e\n\u003ctd\u003e\u003cspan\u003e59.5\u003c\/span\u003e\u003c\/td\u003e\n\u003ctd\u003e\u003cspan\u003e63\u003c\/span\u003e\u003c\/td\u003e\n\u003ctd\u003e\u003cspan\u003e57\u003c\/span\u003e\u003c\/td\u003e\n\u003c\/tr\u003e\n\u003ctr\u003e\n\u003ctd\u003e\u003cspan\u003e3XL\u003c\/span\u003e\u003c\/td\u003e\n\u003ctd\u003e\u003cspan\u003e18\/20\u003c\/span\u003e\u003c\/td\u003e\n\u003ctd\u003e\u003cspan\u003e75\u003c\/span\u003e\u003c\/td\u003e\n\u003ctd\u003e\u003cspan\u003e69\u003c\/span\u003e\u003c\/td\u003e\n\u003ctd\u003e\u003cspan\u003e62\u003c\/span\u003e\u003c\/td\u003e\n\u003ctd\u003e\u003cspan\u003e64\u003c\/span\u003e\u003c\/td\u003e\n\u003ctd\u003e\u003cspan\u003e58\u003c\/span\u003e\u003c\/td\u003e\n\u003c\/tr\u003e\n\u003ctr\u003e\n\u003ctd\u003e\u003cspan\u003e4XL\u003c\/span\u003e\u003c\/td\u003e\n\u003ctd\u003e\u003cspan\u003e20\/22\u003c\/span\u003e\u003c\/td\u003e\n\u003ctd\u003e\u003cspan\u003e76\u003c\/span\u003e\u003c\/td\u003e\n\u003ctd\u003e\u003cspan\u003e71.5\u003c\/span\u003e\u003c\/td\u003e\n\u003ctd\u003e\u003cspan\u003e64.5\u003c\/span\u003e\u003c\/td\u003e\n\u003ctd\u003e\u003cspan\u003e65\u003c\/span\u003e\u003c\/td\u003e\n\u003ctd\u003e\u003cspan\u003e59\u003c\/span\u003e\u003c\/td\u003e\n\u003c\/tr\u003e\n\u003ctr\u003e\n\u003ctd\u003e\u003cspan\u003e5XL\u003c\/span\u003e\u003c\/td\u003e\n\u003ctd\u003e\u003cspan\u003e22\/24\u003c\/span\u003e\u003c\/td\u003e\n\u003ctd\u003e\u003cspan\u003e77\u003c\/span\u003e\u003c\/td\u003e\n\u003ctd\u003e\u003cspan\u003e74\u003c\/span\u003e\u003c\/td\u003e\n\u003ctd\u003e\u003cspan\u003e67\u003c\/span\u003e\u003c\/td\u003e\n\u003ctd\u003e\u003cspan\u003e66\u003c\/span\u003e\u003c\/td\u003e\n\u003ctd\u003e\u003cspan\u003e60\u003c\/span\u003e\u003c\/td\u003e\n\u003c\/tr\u003e\n\u003ctr\u003e\n\u003ctd\u003e\u003cspan\u003e6XL\u003c\/span\u003e\u003c\/td\u003e\n\u003ctd\u003e\u003cspan\u003e24\/26\u003c\/span\u003e\u003c\/td\u003e\n\u003ctd\u003e\u003cspan\u003e78\u003c\/span\u003e\u003c\/td\u003e\n\u003ctd\u003e\u003cspan\u003e76.5\u003c\/span\u003e\u003c\/td\u003e\n\u003ctd\u003e\u003cspan\u003e69.5\u003c\/span\u003e\u003c\/td\u003e\n\u003ctd\u003e\u003cspan\u003e67\u003c\/span\u003e\u003c\/td\u003e\n\u003ctd\u003e\u003cspan\u003e61\u003c\/span\u003e\u003c\/td\u003e\n\u003c\/tr\u003e\n\u003c\/tbody\u003e\n\u003c\/table\u003e\n\u003cp\u003e\u003cem\u003e\u003cspan\u003eAll measurements are taken flat lay and are in centimetres.\u003c\/span\u003e\u003c\/em\u003e\u003c\/p\u003e","published_at":"2026-07-06T12:39:53+08:00","created_at":"2026-06-19T09:53:56+08:00","vendor":"Rumi + Sol","type":"","tags":["Baby Shower Gifts - Mum","Breastfeeding","Breastfeeding Clothing","Mum"],"price":11995,"price_min":11995,"price_max":11995,"available":true,"price_varies":false,"compare_at_price":null,"compare_at_price_min":0,"compare_at_price_max":0,"compare_at_price_varies":false,"variants":[{"id":46955992875197,"title":"Black \/ XS","option1":"Black","option2":"XS","option3":null,"sku":null,"requires_shipping":true,"taxable":false,"featured_image":{"id":40481857011901,"product_id":8344105484477,"position":2,"created_at":"2026-06-19T09:42:30+08:00","updated_at":"2026-07-07T03:34:25+08:00","alt":"Breastfeeding Hoodie - The Birth Store-Rumi + Sol","width":1365,"height":2048,"src":"\/\/www.thebirthstore.com.au\/cdn\/shop\/files\/breastfeeding-hoodie-3382720.jpg?v=1783366465","variant_ids":[46955992875197,46955992907965,46955992940733,46955992973501,46955993006269,46955993039037,46955993071805,46955993104573,46955993137341,46955993170109]},"available":false,"name":"Breastfeeding Hoodie - Black \/ XS","public_title":"Black \/ XS","options":["Black","XS"],"price":11995,"weight":0,"compare_at_price":null,"inventory_management":"shopify","barcode":"92875197","featured_media":{"alt":"Breastfeeding Hoodie - The Birth Store-Rumi + Sol","id":31579610939581,"position":2,"preview_image":{"aspect_ratio":0.667,"height":2048,"width":1365,"src":"\/\/www.thebirthstore.com.au\/cdn\/shop\/files\/breastfeeding-hoodie-3382720.jpg?v=1783366465"}},"requires_selling_plan":false,"selling_plan_allocations":[],"quantity_rule":{"min":1,"max":null,"increment":1}},{"id":46955992907965,"title":"Black \/ S","option1":"Black","option2":"S","option3":null,"sku":null,"requires_shipping":true,"taxable":false,"featured_image":{"id":40481857011901,"product_id":8344105484477,"position":2,"created_at":"2026-06-19T09:42:30+08:00","updated_at":"2026-07-07T03:34:25+08:00","alt":"Breastfeeding Hoodie - The Birth Store-Rumi + Sol","width":1365,"height":2048,"src":"\/\/www.thebirthstore.com.au\/cdn\/shop\/files\/breastfeeding-hoodie-3382720.jpg?v=1783366465","variant_ids":[46955992875197,46955992907965,46955992940733,46955992973501,46955993006269,46955993039037,46955993071805,46955993104573,46955993137341,46955993170109]},"available":false,"name":"Breastfeeding Hoodie - Black \/ S","public_title":"Black \/ S","options":["Black","S"],"price":11995,"weight":0,"compare_at_price":null,"inventory_management":"shopify","barcode":"92907965","featured_media":{"alt":"Breastfeeding Hoodie - The Birth Store-Rumi + Sol","id":31579610939581,"position":2,"preview_image":{"aspect_ratio":0.667,"height":2048,"width":1365,"src":"\/\/www.thebirthstore.com.au\/cdn\/shop\/files\/breastfeeding-hoodie-3382720.jpg?v=1783366465"}},"requires_selling_plan":false,"selling_plan_allocations":[],"quantity_rule":{"min":1,"max":null,"increment":1}},{"id":46955992940733,"title":"Black \/ M","option1":"Black","option2":"M","option3":null,"sku":null,"requires_shipping":true,"taxable":false,"featured_image":{"id":40481857011901,"product_id":8344105484477,"position":2,"created_at":"2026-06-19T09:42:30+08:00","updated_at":"2026-07-07T03:34:25+08:00","alt":"Breastfeeding Hoodie - The Birth Store-Rumi + Sol","width":1365,"height":2048,"src":"\/\/www.thebirthstore.com.au\/cdn\/shop\/files\/breastfeeding-hoodie-3382720.jpg?v=1783366465","variant_ids":[46955992875197,46955992907965,46955992940733,46955992973501,46955993006269,46955993039037,46955993071805,46955993104573,46955993137341,46955993170109]},"available":true,"name":"Breastfeeding Hoodie - Black \/ M","public_title":"Black \/ M","options":["Black","M"],"price":11995,"weight":0,"compare_at_price":null,"inventory_management":"shopify","barcode":"92940733","featured_media":{"alt":"Breastfeeding Hoodie - The Birth Store-Rumi + Sol","id":31579610939581,"position":2,"preview_image":{"aspect_ratio":0.667,"height":2048,"width":1365,"src":"\/\/www.thebirthstore.com.au\/cdn\/shop\/files\/breastfeeding-hoodie-3382720.jpg?v=1783366465"}},"requires_selling_plan":false,"selling_plan_allocations":[],"quantity_rule":{"min":1,"max":null,"increment":1}},{"id":46955992973501,"title":"Black \/ L","option1":"Black","option2":"L","option3":null,"sku":null,"requires_shipping":true,"taxable":false,"featured_image":{"id":40481857011901,"product_id":8344105484477,"position":2,"created_at":"2026-06-19T09:42:30+08:00","updated_at":"2026-07-07T03:34:25+08:00","alt":"Breastfeeding Hoodie - The Birth Store-Rumi + Sol","width":1365,"height":2048,"src":"\/\/www.thebirthstore.com.au\/cdn\/shop\/files\/breastfeeding-hoodie-3382720.jpg?v=1783366465","variant_ids":[46955992875197,46955992907965,46955992940733,46955992973501,46955993006269,46955993039037,46955993071805,46955993104573,46955993137341,46955993170109]},"available":true,"name":"Breastfeeding Hoodie - Black \/ L","public_title":"Black \/ L","options":["Black","L"],"price":11995,"weight":0,"compare_at_price":null,"inventory_management":"shopify","barcode":"92973501","featured_media":{"alt":"Breastfeeding Hoodie - The Birth Store-Rumi + Sol","id":31579610939581,"position":2,"preview_image":{"aspect_ratio":0.667,"height":2048,"width":1365,"src":"\/\/www.thebirthstore.com.au\/cdn\/shop\/files\/breastfeeding-hoodie-3382720.jpg?v=1783366465"}},"requires_selling_plan":false,"selling_plan_allocations":[],"quantity_rule":{"min":1,"max":null,"increment":1}},{"id":46955993006269,"title":"Black \/ XL","option1":"Black","option2":"XL","option3":null,"sku":null,"requires_shipping":true,"taxable":false,"featured_image":{"id":40481857011901,"product_id":8344105484477,"position":2,"created_at":"2026-06-19T09:42:30+08:00","updated_at":"2026-07-07T03:34:25+08:00","alt":"Breastfeeding Hoodie - The Birth Store-Rumi + Sol","width":1365,"height":2048,"src":"\/\/www.thebirthstore.com.au\/cdn\/shop\/files\/breastfeeding-hoodie-3382720.jpg?v=1783366465","variant_ids":[46955992875197,46955992907965,46955992940733,46955992973501,46955993006269,46955993039037,46955993071805,46955993104573,46955993137341,46955993170109]},"available":true,"name":"Breastfeeding Hoodie - Black \/ XL","public_title":"Black \/ XL","options":["Black","XL"],"price":11995,"weight":0,"compare_at_price":null,"inventory_management":"shopify","barcode":"93006269","featured_media":{"alt":"Breastfeeding Hoodie - The Birth Store-Rumi + Sol","id":31579610939581,"position":2,"preview_image":{"aspect_ratio":0.667,"height":2048,"width":1365,"src":"\/\/www.thebirthstore.com.au\/cdn\/shop\/files\/breastfeeding-hoodie-3382720.jpg?v=1783366465"}},"requires_selling_plan":false,"selling_plan_allocations":[],"quantity_rule":{"min":1,"max":null,"increment":1}},{"id":46955993039037,"title":"Black \/ 2XL","option1":"Black","option2":"2XL","option3":null,"sku":null,"requires_shipping":true,"taxable":false,"featured_image":{"id":40481857011901,"product_id":8344105484477,"position":2,"created_at":"2026-06-19T09:42:30+08:00","updated_at":"2026-07-07T03:34:25+08:00","alt":"Breastfeeding Hoodie - The Birth Store-Rumi + Sol","width":1365,"height":2048,"src":"\/\/www.thebirthstore.com.au\/cdn\/shop\/files\/breastfeeding-hoodie-3382720.jpg?v=1783366465","variant_ids":[46955992875197,46955992907965,46955992940733,46955992973501,46955993006269,46955993039037,46955993071805,46955993104573,46955993137341,46955993170109]},"available":true,"name":"Breastfeeding Hoodie - Black \/ 2XL","public_title":"Black \/ 2XL","options":["Black","2XL"],"price":11995,"weight":0,"compare_at_price":null,"inventory_management":"shopify","barcode":"93039037","featured_media":{"alt":"Breastfeeding Hoodie - The Birth Store-Rumi + Sol","id":31579610939581,"position":2,"preview_image":{"aspect_ratio":0.667,"height":2048,"width":1365,"src":"\/\/www.thebirthstore.com.au\/cdn\/shop\/files\/breastfeeding-hoodie-3382720.jpg?v=1783366465"}},"requires_selling_plan":false,"selling_plan_allocations":[],"quantity_rule":{"min":1,"max":null,"increment":1}},{"id":46955993071805,"title":"Black \/ 3XL","option1":"Black","option2":"3XL","option3":null,"sku":null,"requires_shipping":true,"taxable":false,"featured_image":{"id":40481857011901,"product_id":8344105484477,"position":2,"created_at":"2026-06-19T09:42:30+08:00","updated_at":"2026-07-07T03:34:25+08:00","alt":"Breastfeeding Hoodie - The Birth Store-Rumi + Sol","width":1365,"height":2048,"src":"\/\/www.thebirthstore.com.au\/cdn\/shop\/files\/breastfeeding-hoodie-3382720.jpg?v=1783366465","variant_ids":[46955992875197,46955992907965,46955992940733,46955992973501,46955993006269,46955993039037,46955993071805,46955993104573,46955993137341,46955993170109]},"available":true,"name":"Breastfeeding Hoodie - Black \/ 3XL","public_title":"Black \/ 3XL","options":["Black","3XL"],"price":11995,"weight":0,"compare_at_price":null,"inventory_management":"shopify","barcode":"93071805","featured_media":{"alt":"Breastfeeding Hoodie - The Birth Store-Rumi + Sol","id":31579610939581,"position":2,"preview_image":{"aspect_ratio":0.667,"height":2048,"width":1365,"src":"\/\/www.thebirthstore.com.au\/cdn\/shop\/files\/breastfeeding-hoodie-3382720.jpg?v=1783366465"}},"requires_selling_plan":false,"selling_plan_allocations":[],"quantity_rule":{"min":1,"max":null,"increment":1}},{"id":46955993104573,"title":"Black \/ 4XL","option1":"Black","option2":"4XL","option3":null,"sku":null,"requires_shipping":true,"taxable":false,"featured_image":{"id":40481857011901,"product_id":8344105484477,"position":2,"created_at":"2026-06-19T09:42:30+08:00","updated_at":"2026-07-07T03:34:25+08:00","alt":"Breastfeeding Hoodie - The Birth Store-Rumi + Sol","width":1365,"height":2048,"src":"\/\/www.thebirthstore.com.au\/cdn\/shop\/files\/breastfeeding-hoodie-3382720.jpg?v=1783366465","variant_ids":[46955992875197,46955992907965,46955992940733,46955992973501,46955993006269,46955993039037,46955993071805,46955993104573,46955993137341,46955993170109]},"available":true,"name":"Breastfeeding Hoodie - Black \/ 4XL","public_title":"Black \/ 4XL","options":["Black","4XL"],"price":11995,"weight":0,"compare_at_price":null,"inventory_management":"shopify","barcode":"93104573","featured_media":{"alt":"Breastfeeding Hoodie - The Birth Store-Rumi + Sol","id":31579610939581,"position":2,"preview_image":{"aspect_ratio":0.667,"height":2048,"width":1365,"src":"\/\/www.thebirthstore.com.au\/cdn\/shop\/files\/breastfeeding-hoodie-3382720.jpg?v=1783366465"}},"requires_selling_plan":false,"selling_plan_allocations":[],"quantity_rule":{"min":1,"max":null,"increment":1}},{"id":46955993137341,"title":"Black \/ 5XL","option1":"Black","option2":"5XL","option3":null,"sku":null,"requires_shipping":true,"taxable":false,"featured_image":{"id":40481857011901,"product_id":8344105484477,"position":2,"created_at":"2026-06-19T09:42:30+08:00","updated_at":"2026-07-07T03:34:25+08:00","alt":"Breastfeeding Hoodie - The Birth Store-Rumi + Sol","width":1365,"height":2048,"src":"\/\/www.thebirthstore.com.au\/cdn\/shop\/files\/breastfeeding-hoodie-3382720.jpg?v=1783366465","variant_ids":[46955992875197,46955992907965,46955992940733,46955992973501,46955993006269,46955993039037,46955993071805,46955993104573,46955993137341,46955993170109]},"available":true,"name":"Breastfeeding Hoodie - Black \/ 5XL","public_title":"Black \/ 5XL","options":["Black","5XL"],"price":11995,"weight":0,"compare_at_price":null,"inventory_management":"shopify","barcode":"93137341","featured_media":{"alt":"Breastfeeding Hoodie - The Birth Store-Rumi + Sol","id":31579610939581,"position":2,"preview_image":{"aspect_ratio":0.667,"height":2048,"width":1365,"src":"\/\/www.thebirthstore.com.au\/cdn\/shop\/files\/breastfeeding-hoodie-3382720.jpg?v=1783366465"}},"requires_selling_plan":false,"selling_plan_allocations":[],"quantity_rule":{"min":1,"max":null,"increment":1}},{"id":46955993170109,"title":"Black \/ 6XL","option1":"Black","option2":"6XL","option3":null,"sku":null,"requires_shipping":true,"taxable":false,"featured_image":{"id":40481857011901,"product_id":8344105484477,"position":2,"created_at":"2026-06-19T09:42:30+08:00","updated_at":"2026-07-07T03:34:25+08:00","alt":"Breastfeeding Hoodie - The Birth Store-Rumi + Sol","width":1365,"height":2048,"src":"\/\/www.thebirthstore.com.au\/cdn\/shop\/files\/breastfeeding-hoodie-3382720.jpg?v=1783366465","variant_ids":[46955992875197,46955992907965,46955992940733,46955992973501,46955993006269,46955993039037,46955993071805,46955993104573,46955993137341,46955993170109]},"available":false,"name":"Breastfeeding Hoodie - Black \/ 6XL","public_title":"Black \/ 6XL","options":["Black","6XL"],"price":11995,"weight":0,"compare_at_price":null,"inventory_management":"shopify","barcode":"93170109","featured_media":{"alt":"Breastfeeding Hoodie - The Birth Store-Rumi + Sol","id":31579610939581,"position":2,"preview_image":{"aspect_ratio":0.667,"height":2048,"width":1365,"src":"\/\/www.thebirthstore.com.au\/cdn\/shop\/files\/breastfeeding-hoodie-3382720.jpg?v=1783366465"}},"requires_selling_plan":false,"selling_plan_allocations":[],"quantity_rule":{"min":1,"max":null,"increment":1}},{"id":46955993202877,"title":"Rust \/ XS","option1":"Rust","option2":"XS","option3":null,"sku":null,"requires_shipping":true,"taxable":false,"featured_image":{"id":40481867497661,"product_id":8344105484477,"position":3,"created_at":"2026-06-19T09:42:52+08:00","updated_at":"2026-06-19T09:42:54+08:00","alt":null,"width":1600,"height":2400,"src":"\/\/www.thebirthstore.com.au\/cdn\/shop\/files\/4_1.jpg?v=1781833374","variant_ids":[46955993202877,46955993235645,46955993268413,46955993301181,46955993333949,46955993366717,46955993399485,46955993432253,46955993465021,46955993497789]},"available":false,"name":"Breastfeeding Hoodie - Rust \/ XS","public_title":"Rust \/ XS","options":["Rust","XS"],"price":11995,"weight":0,"compare_at_price":null,"inventory_management":"shopify","barcode":"93202877","featured_media":{"alt":null,"id":31579621425341,"position":3,"preview_image":{"aspect_ratio":0.667,"height":2400,"width":1600,"src":"\/\/www.thebirthstore.com.au\/cdn\/shop\/files\/4_1.jpg?v=1781833374"}},"requires_selling_plan":false,"selling_plan_allocations":[],"quantity_rule":{"min":1,"max":null,"increment":1}},{"id":46955993235645,"title":"Rust \/ S","option1":"Rust","option2":"S","option3":null,"sku":null,"requires_shipping":true,"taxable":false,"featured_image":{"id":40481867497661,"product_id":8344105484477,"position":3,"created_at":"2026-06-19T09:42:52+08:00","updated_at":"2026-06-19T09:42:54+08:00","alt":null,"width":1600,"height":2400,"src":"\/\/www.thebirthstore.com.au\/cdn\/shop\/files\/4_1.jpg?v=1781833374","variant_ids":[46955993202877,46955993235645,46955993268413,46955993301181,46955993333949,46955993366717,46955993399485,46955993432253,46955993465021,46955993497789]},"available":false,"name":"Breastfeeding Hoodie - Rust \/ S","public_title":"Rust \/ S","options":["Rust","S"],"price":11995,"weight":0,"compare_at_price":null,"inventory_management":"shopify","barcode":"93235645","featured_media":{"alt":null,"id":31579621425341,"position":3,"preview_image":{"aspect_ratio":0.667,"height":2400,"width":1600,"src":"\/\/www.thebirthstore.com.au\/cdn\/shop\/files\/4_1.jpg?v=1781833374"}},"requires_selling_plan":false,"selling_plan_allocations":[],"quantity_rule":{"min":1,"max":null,"increment":1}},{"id":46955993268413,"title":"Rust \/ M","option1":"Rust","option2":"M","option3":null,"sku":null,"requires_shipping":true,"taxable":false,"featured_image":{"id":40481867497661,"product_id":8344105484477,"position":3,"created_at":"2026-06-19T09:42:52+08:00","updated_at":"2026-06-19T09:42:54+08:00","alt":null,"width":1600,"height":2400,"src":"\/\/www.thebirthstore.com.au\/cdn\/shop\/files\/4_1.jpg?v=1781833374","variant_ids":[46955993202877,46955993235645,46955993268413,46955993301181,46955993333949,46955993366717,46955993399485,46955993432253,46955993465021,46955993497789]},"available":false,"name":"Breastfeeding Hoodie - Rust \/ M","public_title":"Rust \/ M","options":["Rust","M"],"price":11995,"weight":0,"compare_at_price":null,"inventory_management":"shopify","barcode":"93268413","featured_media":{"alt":null,"id":31579621425341,"position":3,"preview_image":{"aspect_ratio":0.667,"height":2400,"width":1600,"src":"\/\/www.thebirthstore.com.au\/cdn\/shop\/files\/4_1.jpg?v=1781833374"}},"requires_selling_plan":false,"selling_plan_allocations":[],"quantity_rule":{"min":1,"max":null,"increment":1}},{"id":46955993301181,"title":"Rust \/ L","option1":"Rust","option2":"L","option3":null,"sku":null,"requires_shipping":true,"taxable":false,"featured_image":{"id":40481867497661,"product_id":8344105484477,"position":3,"created_at":"2026-06-19T09:42:52+08:00","updated_at":"2026-06-19T09:42:54+08:00","alt":null,"width":1600,"height":2400,"src":"\/\/www.thebirthstore.com.au\/cdn\/shop\/files\/4_1.jpg?v=1781833374","variant_ids":[46955993202877,46955993235645,46955993268413,46955993301181,46955993333949,46955993366717,46955993399485,46955993432253,46955993465021,46955993497789]},"available":false,"name":"Breastfeeding Hoodie - Rust \/ L","public_title":"Rust \/ L","options":["Rust","L"],"price":11995,"weight":0,"compare_at_price":null,"inventory_management":"shopify","barcode":"93301181","featured_media":{"alt":null,"id":31579621425341,"position":3,"preview_image":{"aspect_ratio":0.667,"height":2400,"width":1600,"src":"\/\/www.thebirthstore.com.au\/cdn\/shop\/files\/4_1.jpg?v=1781833374"}},"requires_selling_plan":false,"selling_plan_allocations":[],"quantity_rule":{"min":1,"max":null,"increment":1}},{"id":46955993333949,"title":"Rust \/ XL","option1":"Rust","option2":"XL","option3":null,"sku":null,"requires_shipping":true,"taxable":false,"featured_image":{"id":40481867497661,"product_id":8344105484477,"position":3,"created_at":"2026-06-19T09:42:52+08:00","updated_at":"2026-06-19T09:42:54+08:00","alt":null,"width":1600,"height":2400,"src":"\/\/www.thebirthstore.com.au\/cdn\/shop\/files\/4_1.jpg?v=1781833374","variant_ids":[46955993202877,46955993235645,46955993268413,46955993301181,46955993333949,46955993366717,46955993399485,46955993432253,46955993465021,46955993497789]},"available":false,"name":"Breastfeeding Hoodie - Rust \/ XL","public_title":"Rust \/ XL","options":["Rust","XL"],"price":11995,"weight":0,"compare_at_price":null,"inventory_management":"shopify","barcode":"93333949","featured_media":{"alt":null,"id":31579621425341,"position":3,"preview_image":{"aspect_ratio":0.667,"height":2400,"width":1600,"src":"\/\/www.thebirthstore.com.au\/cdn\/shop\/files\/4_1.jpg?v=1781833374"}},"requires_selling_plan":false,"selling_plan_allocations":[],"quantity_rule":{"min":1,"max":null,"increment":1}},{"id":46955993366717,"title":"Rust \/ 2XL","option1":"Rust","option2":"2XL","option3":null,"sku":null,"requires_shipping":true,"taxable":false,"featured_image":{"id":40481867497661,"product_id":8344105484477,"position":3,"created_at":"2026-06-19T09:42:52+08:00","updated_at":"2026-06-19T09:42:54+08:00","alt":null,"width":1600,"height":2400,"src":"\/\/www.thebirthstore.com.au\/cdn\/shop\/files\/4_1.jpg?v=1781833374","variant_ids":[46955993202877,46955993235645,46955993268413,46955993301181,46955993333949,46955993366717,46955993399485,46955993432253,46955993465021,46955993497789]},"available":true,"name":"Breastfeeding Hoodie - Rust \/ 2XL","public_title":"Rust \/ 2XL","options":["Rust","2XL"],"price":11995,"weight":0,"compare_at_price":null,"inventory_management":"shopify","barcode":"93366717","featured_media":{"alt":null,"id":31579621425341,"position":3,"preview_image":{"aspect_ratio":0.667,"height":2400,"width":1600,"src":"\/\/www.thebirthstore.com.au\/cdn\/shop\/files\/4_1.jpg?v=1781833374"}},"requires_selling_plan":false,"selling_plan_allocations":[],"quantity_rule":{"min":1,"max":null,"increment":1}},{"id":46955993399485,"title":"Rust \/ 3XL","option1":"Rust","option2":"3XL","option3":null,"sku":null,"requires_shipping":true,"taxable":false,"featured_image":{"id":40481867497661,"product_id":8344105484477,"position":3,"created_at":"2026-06-19T09:42:52+08:00","updated_at":"2026-06-19T09:42:54+08:00","alt":null,"width":1600,"height":2400,"src":"\/\/www.thebirthstore.com.au\/cdn\/shop\/files\/4_1.jpg?v=1781833374","variant_ids":[46955993202877,46955993235645,46955993268413,46955993301181,46955993333949,46955993366717,46955993399485,46955993432253,46955993465021,46955993497789]},"available":true,"name":"Breastfeeding Hoodie - Rust \/ 3XL","public_title":"Rust \/ 3XL","options":["Rust","3XL"],"price":11995,"weight":0,"compare_at_price":null,"inventory_management":"shopify","barcode":"93399485","featured_media":{"alt":null,"id":31579621425341,"position":3,"preview_image":{"aspect_ratio":0.667,"height":2400,"width":1600,"src":"\/\/www.thebirthstore.com.au\/cdn\/shop\/files\/4_1.jpg?v=1781833374"}},"requires_selling_plan":false,"selling_plan_allocations":[],"quantity_rule":{"min":1,"max":null,"increment":1}},{"id":46955993432253,"title":"Rust \/ 4XL","option1":"Rust","option2":"4XL","option3":null,"sku":null,"requires_shipping":true,"taxable":false,"featured_image":{"id":40481867497661,"product_id":8344105484477,"position":3,"created_at":"2026-06-19T09:42:52+08:00","updated_at":"2026-06-19T09:42:54+08:00","alt":null,"width":1600,"height":2400,"src":"\/\/www.thebirthstore.com.au\/cdn\/shop\/files\/4_1.jpg?v=1781833374","variant_ids":[46955993202877,46955993235645,46955993268413,46955993301181,46955993333949,46955993366717,46955993399485,46955993432253,46955993465021,46955993497789]},"available":true,"name":"Breastfeeding Hoodie - Rust \/ 4XL","public_title":"Rust \/ 4XL","options":["Rust","4XL"],"price":11995,"weight":0,"compare_at_price":null,"inventory_management":"shopify","barcode":"93432253","featured_media":{"alt":null,"id":31579621425341,"position":3,"preview_image":{"aspect_ratio":0.667,"height":2400,"width":1600,"src":"\/\/www.thebirthstore.com.au\/cdn\/shop\/files\/4_1.jpg?v=1781833374"}},"requires_selling_plan":false,"selling_plan_allocations":[],"quantity_rule":{"min":1,"max":null,"increment":1}},{"id":46955993465021,"title":"Rust \/ 5XL","option1":"Rust","option2":"5XL","option3":null,"sku":null,"requires_shipping":true,"taxable":false,"featured_image":{"id":40481867497661,"product_id":8344105484477,"position":3,"created_at":"2026-06-19T09:42:52+08:00","updated_at":"2026-06-19T09:42:54+08:00","alt":null,"width":1600,"height":2400,"src":"\/\/www.thebirthstore.com.au\/cdn\/shop\/files\/4_1.jpg?v=1781833374","variant_ids":[46955993202877,46955993235645,46955993268413,46955993301181,46955993333949,46955993366717,46955993399485,46955993432253,46955993465021,46955993497789]},"available":true,"name":"Breastfeeding Hoodie - Rust \/ 5XL","public_title":"Rust \/ 5XL","options":["Rust","5XL"],"price":11995,"weight":0,"compare_at_price":null,"inventory_management":"shopify","barcode":"93465021","featured_media":{"alt":null,"id":31579621425341,"position":3,"preview_image":{"aspect_ratio":0.667,"height":2400,"width":1600,"src":"\/\/www.thebirthstore.com.au\/cdn\/shop\/files\/4_1.jpg?v=1781833374"}},"requires_selling_plan":false,"selling_plan_allocations":[],"quantity_rule":{"min":1,"max":null,"increment":1}},{"id":46955993497789,"title":"Rust \/ 6XL","option1":"Rust","option2":"6XL","option3":null,"sku":null,"requires_shipping":true,"taxable":false,"featured_image":{"id":40481867497661,"product_id":8344105484477,"position":3,"created_at":"2026-06-19T09:42:52+08:00","updated_at":"2026-06-19T09:42:54+08:00","alt":null,"width":1600,"height":2400,"src":"\/\/www.thebirthstore.com.au\/cdn\/shop\/files\/4_1.jpg?v=1781833374","variant_ids":[46955993202877,46955993235645,46955993268413,46955993301181,46955993333949,46955993366717,46955993399485,46955993432253,46955993465021,46955993497789]},"available":false,"name":"Breastfeeding Hoodie - Rust \/ 6XL","public_title":"Rust \/ 6XL","options":["Rust","6XL"],"price":11995,"weight":0,"compare_at_price":null,"inventory_management":"shopify","barcode":"93497789","featured_media":{"alt":null,"id":31579621425341,"position":3,"preview_image":{"aspect_ratio":0.667,"height":2400,"width":1600,"src":"\/\/www.thebirthstore.com.au\/cdn\/shop\/files\/4_1.jpg?v=1781833374"}},"requires_selling_plan":false,"selling_plan_allocations":[],"quantity_rule":{"min":1,"max":null,"increment":1}},{"id":46955993530557,"title":"Teal \/ XS","option1":"Teal","option2":"XS","option3":null,"sku":null,"requires_shipping":true,"taxable":false,"featured_image":{"id":40481878507709,"product_id":8344105484477,"position":1,"created_at":"2026-06-19T09:43:22+08:00","updated_at":"2026-07-07T03:34:25+08:00","alt":"Breastfeeding Hoodie - The Birth Store-Rumi + Sol","width":1600,"height":1600,"src":"\/\/www.thebirthstore.com.au\/cdn\/shop\/files\/breastfeeding-hoodie-6415139.jpg?v=1783366465","variant_ids":[46955993530557,46955993563325,46955993596093,46955993628861,46955993661629,46955993694397,46955993727165,46955993759933,46955993792701,46955993825469]},"available":false,"name":"Breastfeeding Hoodie - Teal \/ XS","public_title":"Teal \/ XS","options":["Teal","XS"],"price":11995,"weight":0,"compare_at_price":null,"inventory_management":"shopify","barcode":"93530557","featured_media":{"alt":"Breastfeeding Hoodie - The Birth Store-Rumi + Sol","id":31579631616189,"position":1,"preview_image":{"aspect_ratio":1.0,"height":1600,"width":1600,"src":"\/\/www.thebirthstore.com.au\/cdn\/shop\/files\/breastfeeding-hoodie-6415139.jpg?v=1783366465"}},"requires_selling_plan":false,"selling_plan_allocations":[],"quantity_rule":{"min":1,"max":null,"increment":1}},{"id":46955993563325,"title":"Teal \/ S","option1":"Teal","option2":"S","option3":null,"sku":null,"requires_shipping":true,"taxable":false,"featured_image":{"id":40481878507709,"product_id":8344105484477,"position":1,"created_at":"2026-06-19T09:43:22+08:00","updated_at":"2026-07-07T03:34:25+08:00","alt":"Breastfeeding Hoodie - The Birth Store-Rumi + Sol","width":1600,"height":1600,"src":"\/\/www.thebirthstore.com.au\/cdn\/shop\/files\/breastfeeding-hoodie-6415139.jpg?v=1783366465","variant_ids":[46955993530557,46955993563325,46955993596093,46955993628861,46955993661629,46955993694397,46955993727165,46955993759933,46955993792701,46955993825469]},"available":false,"name":"Breastfeeding Hoodie - Teal \/ S","public_title":"Teal \/ S","options":["Teal","S"],"price":11995,"weight":0,"compare_at_price":null,"inventory_management":"shopify","barcode":"93563325","featured_media":{"alt":"Breastfeeding Hoodie - The Birth Store-Rumi + Sol","id":31579631616189,"position":1,"preview_image":{"aspect_ratio":1.0,"height":1600,"width":1600,"src":"\/\/www.thebirthstore.com.au\/cdn\/shop\/files\/breastfeeding-hoodie-6415139.jpg?v=1783366465"}},"requires_selling_plan":false,"selling_plan_allocations":[],"quantity_rule":{"min":1,"max":null,"increment":1}},{"id":46955993596093,"title":"Teal \/ M","option1":"Teal","option2":"M","option3":null,"sku":null,"requires_shipping":true,"taxable":false,"featured_image":{"id":40481878507709,"product_id":8344105484477,"position":1,"created_at":"2026-06-19T09:43:22+08:00","updated_at":"2026-07-07T03:34:25+08:00","alt":"Breastfeeding Hoodie - The Birth Store-Rumi + Sol","width":1600,"height":1600,"src":"\/\/www.thebirthstore.com.au\/cdn\/shop\/files\/breastfeeding-hoodie-6415139.jpg?v=1783366465","variant_ids":[46955993530557,46955993563325,46955993596093,46955993628861,46955993661629,46955993694397,46955993727165,46955993759933,46955993792701,46955993825469]},"available":false,"name":"Breastfeeding Hoodie - Teal \/ M","public_title":"Teal \/ M","options":["Teal","M"],"price":11995,"weight":0,"compare_at_price":null,"inventory_management":"shopify","barcode":"93596093","featured_media":{"alt":"Breastfeeding Hoodie - The Birth Store-Rumi + Sol","id":31579631616189,"position":1,"preview_image":{"aspect_ratio":1.0,"height":1600,"width":1600,"src":"\/\/www.thebirthstore.com.au\/cdn\/shop\/files\/breastfeeding-hoodie-6415139.jpg?v=1783366465"}},"requires_selling_plan":false,"selling_plan_allocations":[],"quantity_rule":{"min":1,"max":null,"increment":1}},{"id":46955993628861,"title":"Teal \/ L","option1":"Teal","option2":"L","option3":null,"sku":null,"requires_shipping":true,"taxable":false,"featured_image":{"id":40481878507709,"product_id":8344105484477,"position":1,"created_at":"2026-06-19T09:43:22+08:00","updated_at":"2026-07-07T03:34:25+08:00","alt":"Breastfeeding Hoodie - The Birth Store-Rumi + Sol","width":1600,"height":1600,"src":"\/\/www.thebirthstore.com.au\/cdn\/shop\/files\/breastfeeding-hoodie-6415139.jpg?v=1783366465","variant_ids":[46955993530557,46955993563325,46955993596093,46955993628861,46955993661629,46955993694397,46955993727165,46955993759933,46955993792701,46955993825469]},"available":false,"name":"Breastfeeding Hoodie - Teal \/ L","public_title":"Teal \/ L","options":["Teal","L"],"price":11995,"weight":0,"compare_at_price":null,"inventory_management":"shopify","barcode":"93628861","featured_media":{"alt":"Breastfeeding Hoodie - The Birth Store-Rumi + Sol","id":31579631616189,"position":1,"preview_image":{"aspect_ratio":1.0,"height":1600,"width":1600,"src":"\/\/www.thebirthstore.com.au\/cdn\/shop\/files\/breastfeeding-hoodie-6415139.jpg?v=1783366465"}},"requires_selling_plan":false,"selling_plan_allocations":[],"quantity_rule":{"min":1,"max":null,"increment":1}},{"id":46955993661629,"title":"Teal \/ XL","option1":"Teal","option2":"XL","option3":null,"sku":null,"requires_shipping":true,"taxable":false,"featured_image":{"id":40481878507709,"product_id":8344105484477,"position":1,"created_at":"2026-06-19T09:43:22+08:00","updated_at":"2026-07-07T03:34:25+08:00","alt":"Breastfeeding Hoodie - The Birth Store-Rumi + Sol","width":1600,"height":1600,"src":"\/\/www.thebirthstore.com.au\/cdn\/shop\/files\/breastfeeding-hoodie-6415139.jpg?v=1783366465","variant_ids":[46955993530557,46955993563325,46955993596093,46955993628861,46955993661629,46955993694397,46955993727165,46955993759933,46955993792701,46955993825469]},"available":true,"name":"Breastfeeding Hoodie - Teal \/ XL","public_title":"Teal \/ XL","options":["Teal","XL"],"price":11995,"weight":0,"compare_at_price":null,"inventory_management":"shopify","barcode":"93661629","featured_media":{"alt":"Breastfeeding Hoodie - The Birth Store-Rumi + Sol","id":31579631616189,"position":1,"preview_image":{"aspect_ratio":1.0,"height":1600,"width":1600,"src":"\/\/www.thebirthstore.com.au\/cdn\/shop\/files\/breastfeeding-hoodie-6415139.jpg?v=1783366465"}},"requires_selling_plan":false,"selling_plan_allocations":[],"quantity_rule":{"min":1,"max":null,"increment":1}},{"id":46955993694397,"title":"Teal \/ 2XL","option1":"Teal","option2":"2XL","option3":null,"sku":null,"requires_shipping":true,"taxable":false,"featured_image":{"id":40481878507709,"product_id":8344105484477,"position":1,"created_at":"2026-06-19T09:43:22+08:00","updated_at":"2026-07-07T03:34:25+08:00","alt":"Breastfeeding Hoodie - The Birth Store-Rumi + Sol","width":1600,"height":1600,"src":"\/\/www.thebirthstore.com.au\/cdn\/shop\/files\/breastfeeding-hoodie-6415139.jpg?v=1783366465","variant_ids":[46955993530557,46955993563325,46955993596093,46955993628861,46955993661629,46955993694397,46955993727165,46955993759933,46955993792701,46955993825469]},"available":true,"name":"Breastfeeding Hoodie - Teal \/ 2XL","public_title":"Teal \/ 2XL","options":["Teal","2XL"],"price":11995,"weight":0,"compare_at_price":null,"inventory_management":"shopify","barcode":"93694397","featured_media":{"alt":"Breastfeeding Hoodie - The Birth Store-Rumi + Sol","id":31579631616189,"position":1,"preview_image":{"aspect_ratio":1.0,"height":1600,"width":1600,"src":"\/\/www.thebirthstore.com.au\/cdn\/shop\/files\/breastfeeding-hoodie-6415139.jpg?v=1783366465"}},"requires_selling_plan":false,"selling_plan_allocations":[],"quantity_rule":{"min":1,"max":null,"increment":1}},{"id":46955993727165,"title":"Teal \/ 3XL","option1":"Teal","option2":"3XL","option3":null,"sku":null,"requires_shipping":true,"taxable":false,"featured_image":{"id":40481878507709,"product_id":8344105484477,"position":1,"created_at":"2026-06-19T09:43:22+08:00","updated_at":"2026-07-07T03:34:25+08:00","alt":"Breastfeeding Hoodie - The Birth Store-Rumi + Sol","width":1600,"height":1600,"src":"\/\/www.thebirthstore.com.au\/cdn\/shop\/files\/breastfeeding-hoodie-6415139.jpg?v=1783366465","variant_ids":[46955993530557,46955993563325,46955993596093,46955993628861,46955993661629,46955993694397,46955993727165,46955993759933,46955993792701,46955993825469]},"available":false,"name":"Breastfeeding Hoodie - Teal \/ 3XL","public_title":"Teal \/ 3XL","options":["Teal","3XL"],"price":11995,"weight":0,"compare_at_price":null,"inventory_management":"shopify","barcode":"93727165","featured_media":{"alt":"Breastfeeding Hoodie - The Birth Store-Rumi + Sol","id":31579631616189,"position":1,"preview_image":{"aspect_ratio":1.0,"height":1600,"width":1600,"src":"\/\/www.thebirthstore.com.au\/cdn\/shop\/files\/breastfeeding-hoodie-6415139.jpg?v=1783366465"}},"requires_selling_plan":false,"selling_plan_allocations":[],"quantity_rule":{"min":1,"max":null,"increment":1}},{"id":46955993759933,"title":"Teal \/ 4XL","option1":"Teal","option2":"4XL","option3":null,"sku":null,"requires_shipping":true,"taxable":false,"featured_image":{"id":40481878507709,"product_id":8344105484477,"position":1,"created_at":"2026-06-19T09:43:22+08:00","updated_at":"2026-07-07T03:34:25+08:00","alt":"Breastfeeding Hoodie - The Birth Store-Rumi + Sol","width":1600,"height":1600,"src":"\/\/www.thebirthstore.com.au\/cdn\/shop\/files\/breastfeeding-hoodie-6415139.jpg?v=1783366465","variant_ids":[46955993530557,46955993563325,46955993596093,46955993628861,46955993661629,46955993694397,46955993727165,46955993759933,46955993792701,46955993825469]},"available":true,"name":"Breastfeeding Hoodie - Teal \/ 4XL","public_title":"Teal \/ 4XL","options":["Teal","4XL"],"price":11995,"weight":0,"compare_at_price":null,"inventory_management":"shopify","barcode":"93759933","featured_media":{"alt":"Breastfeeding Hoodie - The Birth Store-Rumi + Sol","id":31579631616189,"position":1,"preview_image":{"aspect_ratio":1.0,"height":1600,"width":1600,"src":"\/\/www.thebirthstore.com.au\/cdn\/shop\/files\/breastfeeding-hoodie-6415139.jpg?v=1783366465"}},"requires_selling_plan":false,"selling_plan_allocations":[],"quantity_rule":{"min":1,"max":null,"increment":1}},{"id":46955993792701,"title":"Teal \/ 5XL","option1":"Teal","option2":"5XL","option3":null,"sku":null,"requires_shipping":true,"taxable":false,"featured_image":{"id":40481878507709,"product_id":8344105484477,"position":1,"created_at":"2026-06-19T09:43:22+08:00","updated_at":"2026-07-07T03:34:25+08:00","alt":"Breastfeeding Hoodie - The Birth Store-Rumi + Sol","width":1600,"height":1600,"src":"\/\/www.thebirthstore.com.au\/cdn\/shop\/files\/breastfeeding-hoodie-6415139.jpg?v=1783366465","variant_ids":[46955993530557,46955993563325,46955993596093,46955993628861,46955993661629,46955993694397,46955993727165,46955993759933,46955993792701,46955993825469]},"available":true,"name":"Breastfeeding Hoodie - Teal \/ 5XL","public_title":"Teal \/ 5XL","options":["Teal","5XL"],"price":11995,"weight":0,"compare_at_price":null,"inventory_management":"shopify","barcode":"93792701","featured_media":{"alt":"Breastfeeding Hoodie - The Birth Store-Rumi + Sol","id":31579631616189,"position":1,"preview_image":{"aspect_ratio":1.0,"height":1600,"width":1600,"src":"\/\/www.thebirthstore.com.au\/cdn\/shop\/files\/breastfeeding-hoodie-6415139.jpg?v=1783366465"}},"requires_selling_plan":false,"selling_plan_allocations":[],"quantity_rule":{"min":1,"max":null,"increment":1}},{"id":46955993825469,"title":"Teal \/ 6XL","option1":"Teal","option2":"6XL","option3":null,"sku":null,"requires_shipping":true,"taxable":false,"featured_image":{"id":40481878507709,"product_id":8344105484477,"position":1,"created_at":"2026-06-19T09:43:22+08:00","updated_at":"2026-07-07T03:34:25+08:00","alt":"Breastfeeding Hoodie - The Birth Store-Rumi + Sol","width":1600,"height":1600,"src":"\/\/www.thebirthstore.com.au\/cdn\/shop\/files\/breastfeeding-hoodie-6415139.jpg?v=1783366465","variant_ids":[46955993530557,46955993563325,46955993596093,46955993628861,46955993661629,46955993694397,46955993727165,46955993759933,46955993792701,46955993825469]},"available":false,"name":"Breastfeeding Hoodie - Teal \/ 6XL","public_title":"Teal \/ 6XL","options":["Teal","6XL"],"price":11995,"weight":0,"compare_at_price":null,"inventory_management":"shopify","barcode":"93825469","featured_media":{"alt":"Breastfeeding Hoodie - The Birth Store-Rumi + Sol","id":31579631616189,"position":1,"preview_image":{"aspect_ratio":1.0,"height":1600,"width":1600,"src":"\/\/www.thebirthstore.com.au\/cdn\/shop\/files\/breastfeeding-hoodie-6415139.jpg?v=1783366465"}},"requires_selling_plan":false,"selling_plan_allocations":[],"quantity_rule":{"min":1,"max":null,"increment":1}}],"images":["\/\/www.thebirthstore.com.au\/cdn\/shop\/files\/breastfeeding-hoodie-6415139.jpg?v=1783366465","\/\/www.thebirthstore.com.au\/cdn\/shop\/files\/breastfeeding-hoodie-3382720.jpg?v=1783366465","\/\/www.thebirthstore.com.au\/cdn\/shop\/files\/4_1.jpg?v=1781833374","\/\/www.thebirthstore.com.au\/cdn\/shop\/files\/breastfeeding-hoodie-4412379.jpg?v=1783366466","\/\/www.thebirthstore.com.au\/cdn\/shop\/files\/breastfeeding-hoodie-4552237.jpg?v=1783366466","\/\/www.thebirthstore.com.au\/cdn\/shop\/files\/breastfeeding-hoodie-3859006.jpg?v=1783366466","\/\/www.thebirthstore.com.au\/cdn\/shop\/files\/breastfeeding-hoodie-5923895.jpg?v=1783366466","\/\/www.thebirthstore.com.au\/cdn\/shop\/files\/breastfeeding-hoodie-7803785.jpg?v=1783366466","\/\/www.thebirthstore.com.au\/cdn\/shop\/files\/breastfeeding-hoodie-7945788.jpg?v=1783366467","\/\/www.thebirthstore.com.au\/cdn\/shop\/files\/breastfeeding-hoodie-6832023.jpg?v=1783366467"],"featured_image":"\/\/www.thebirthstore.com.au\/cdn\/shop\/files\/breastfeeding-hoodie-6415139.jpg?v=1783366465","options":["Colour","Size"],"media":[{"alt":"Breastfeeding Hoodie - The Birth Store-Rumi + Sol","id":31579631616189,"position":1,"preview_image":{"aspect_ratio":1.0,"height":1600,"width":1600,"src":"\/\/www.thebirthstore.com.au\/cdn\/shop\/files\/breastfeeding-hoodie-6415139.jpg?v=1783366465"},"aspect_ratio":1.0,"height":1600,"media_type":"image","src":"\/\/www.thebirthstore.com.au\/cdn\/shop\/files\/breastfeeding-hoodie-6415139.jpg?v=1783366465","width":1600},{"alt":"Breastfeeding Hoodie - The Birth Store-Rumi + Sol","id":31579610939581,"position":2,"preview_image":{"aspect_ratio":0.667,"height":2048,"width":1365,"src":"\/\/www.thebirthstore.com.au\/cdn\/shop\/files\/breastfeeding-hoodie-3382720.jpg?v=1783366465"},"aspect_ratio":0.667,"height":2048,"media_type":"image","src":"\/\/www.thebirthstore.com.au\/cdn\/shop\/files\/breastfeeding-hoodie-3382720.jpg?v=1783366465","width":1365},{"alt":null,"id":31579621425341,"position":3,"preview_image":{"aspect_ratio":0.667,"height":2400,"width":1600,"src":"\/\/www.thebirthstore.com.au\/cdn\/shop\/files\/4_1.jpg?v=1781833374"},"aspect_ratio":0.667,"height":2400,"media_type":"image","src":"\/\/www.thebirthstore.com.au\/cdn\/shop\/files\/4_1.jpg?v=1781833374","width":1600},{"alt":"Breastfeeding Hoodie - The Birth Store-Rumi + Sol","id":31579668644029,"position":4,"preview_image":{"aspect_ratio":0.667,"height":2048,"width":1365,"src":"\/\/www.thebirthstore.com.au\/cdn\/shop\/files\/breastfeeding-hoodie-4412379.jpg?v=1783366466"},"aspect_ratio":0.667,"height":2048,"media_type":"image","src":"\/\/www.thebirthstore.com.au\/cdn\/shop\/files\/breastfeeding-hoodie-4412379.jpg?v=1783366466","width":1365},{"alt":"Breastfeeding Hoodie - The Birth Store-Rumi + Sol","id":31579679391933,"position":5,"preview_image":{"aspect_ratio":0.667,"height":2048,"width":1365,"src":"\/\/www.thebirthstore.com.au\/cdn\/shop\/files\/breastfeeding-hoodie-4552237.jpg?v=1783366466"},"aspect_ratio":0.667,"height":2048,"media_type":"image","src":"\/\/www.thebirthstore.com.au\/cdn\/shop\/files\/breastfeeding-hoodie-4552237.jpg?v=1783366466","width":1365},{"alt":"Breastfeeding Hoodie - The Birth Store-Rumi + Sol","id":31579685060797,"position":6,"preview_image":{"aspect_ratio":0.667,"height":2048,"width":1365,"src":"\/\/www.thebirthstore.com.au\/cdn\/shop\/files\/breastfeeding-hoodie-3859006.jpg?v=1783366466"},"aspect_ratio":0.667,"height":2048,"media_type":"image","src":"\/\/www.thebirthstore.com.au\/cdn\/shop\/files\/breastfeeding-hoodie-3859006.jpg?v=1783366466","width":1365},{"alt":"Breastfeeding Hoodie - The Birth Store-Rumi + Sol","id":31579688435901,"position":7,"preview_image":{"aspect_ratio":0.667,"height":2048,"width":1365,"src":"\/\/www.thebirthstore.com.au\/cdn\/shop\/files\/breastfeeding-hoodie-5923895.jpg?v=1783366466"},"aspect_ratio":0.667,"height":2048,"media_type":"image","src":"\/\/www.thebirthstore.com.au\/cdn\/shop\/files\/breastfeeding-hoodie-5923895.jpg?v=1783366466","width":1365},{"alt":"Breastfeeding Hoodie - The Birth Store-Rumi + Sol","id":31579693580477,"position":8,"preview_image":{"aspect_ratio":0.667,"height":2048,"width":1365,"src":"\/\/www.thebirthstore.com.au\/cdn\/shop\/files\/breastfeeding-hoodie-7803785.jpg?v=1783366466"},"aspect_ratio":0.667,"height":2048,"media_type":"image","src":"\/\/www.thebirthstore.com.au\/cdn\/shop\/files\/breastfeeding-hoodie-7803785.jpg?v=1783366466","width":1365},{"alt":"Breastfeeding Hoodie - The Birth Store-Rumi + Sol","id":31579700363453,"position":9,"preview_image":{"aspect_ratio":0.667,"height":2048,"width":1365,"src":"\/\/www.thebirthstore.com.au\/cdn\/shop\/files\/breastfeeding-hoodie-7945788.jpg?v=1783366467"},"aspect_ratio":0.667,"height":2048,"media_type":"image","src":"\/\/www.thebirthstore.com.au\/cdn\/shop\/files\/breastfeeding-hoodie-7945788.jpg?v=1783366467","width":1365},{"alt":"Breastfeeding Hoodie - The Birth Store-Rumi + Sol","id":31579708981437,"position":10,"preview_image":{"aspect_ratio":0.667,"height":2048,"width":1365,"src":"\/\/www.thebirthstore.com.au\/cdn\/shop\/files\/breastfeeding-hoodie-6832023.jpg?v=1783366467"},"aspect_ratio":0.667,"height":2048,"media_type":"image","src":"\/\/www.thebirthstore.com.au\/cdn\/shop\/files\/breastfeeding-hoodie-6832023.jpg?v=1783366467","width":1365}],"requires_selling_plan":false,"selling_plan_groups":[],"content":"\u003ch3\u003e\u003cspan\u003eEveryday Breastfeeding Jumpers\u003c\/span\u003e\u003c\/h3\u003e\n\u003cp class=\"isSelectedEnd\"\u003e\u003cspan\u003eComfort. Style. Easy Nursing Access.\u003c\/span\u003e\u003c\/p\u003e\n\u003cp class=\"isSelectedEnd\"\u003e\u003cspan\u003eDesigned with busy mums in mind, our Everyday Breastfeeding Jumpers combine effortless style, cosy comfort, and practical functionality. Whether you're lounging at home, running errands, meeting friends, or heading out for a walk, these jumpers keep you warm, comfortable, and ready for every feed.\u003c\/span\u003e\u003c\/p\u003e\n\u003cp class=\"isSelectedEnd\"\u003e\u003cspan\u003eAvailable in both our \u003c\/span\u003e\u003cstrong\u003e\u003cspan\u003e1\/4 Zip Breastfeeding Jumper\u003c\/span\u003e\u003c\/strong\u003e\u003cspan\u003e and \u003c\/span\u003e\u003cstrong\u003e\u003cspan\u003eHooded Breastfeeding Jumper\u003c\/span\u003e\u003c\/strong\u003e\u003cspan\u003e styles, each design features discreet vertical zips for easy, one-handed breastfeeding access without needing to lift or fuss with layers.\u003c\/span\u003e\u003c\/p\u003e\n\u003cp class=\"isSelectedEnd\"\u003e\u003cspan\u003eMade from a premium \u003c\/span\u003e\u003cstrong\u003e\u003cspan\u003e95% cotton \/ 5% spandex blend\u003c\/span\u003e\u003c\/strong\u003e\u003cspan\u003e, these jumpers offer the perfect amount of stretch while maintaining a beautiful thickness that feels soft against your skin and keeps you cosy on cooler days.\u003c\/span\u003e\u003c\/p\u003e\n\u003ch4\u003e\u003cspan\u003eFeatures Mums Love\u003c\/span\u003e\u003c\/h4\u003e\n\u003cul\u003e\n\u003cli\u003e\u003cspan\u003eHidden vertical zips for discreet breastfeeding access\u003c\/span\u003e\u003c\/li\u003e\n\u003cli\u003e\u003cspan\u003eSoft, premium 95% cotton \/ 5% spandex fabric\u003c\/span\u003e\u003c\/li\u003e\n\u003cli\u003e\u003cspan\u003eComfortable stretch that moves with you\u003c\/span\u003e\u003c\/li\u003e\n\u003cli\u003e\u003cspan\u003eWarm yet breathable for year-round wear\u003c\/span\u003e\u003c\/li\u003e\n\u003cli\u003e\u003cspan\u003eDesigned to support you through postpartum and beyond\u003c\/span\u003e\u003c\/li\u003e\n\u003c\/ul\u003e\n\u003ch4\u003e\u003cspan\u003e1\/4 Zip Style Features\u003c\/span\u003e\u003c\/h4\u003e\n\u003cul\u003e\n\u003cli\u003e\u003cspan\u003eModern 1\/4 zip collar\u003c\/span\u003e\u003c\/li\u003e\n\u003cli\u003e\u003cspan\u003eEasy layering for changing weather\u003c\/span\u003e\u003c\/li\u003e\n\u003cli\u003e\u003cspan\u003eRibbed cuffs for a comfortable fit\u003c\/span\u003e\u003c\/li\u003e\n\u003cli\u003e\u003cspan\u003eRelaxed oversized design\u003c\/span\u003e\u003c\/li\u003e\n\u003c\/ul\u003e\n\u003ch4\u003e\u003cspan\u003eHooded Style Features\u003c\/span\u003e\u003c\/h4\u003e\n\u003cul\u003e\n\u003cli\u003e\u003cspan\u003eRelaxed hood for extra warmth and comfort\u003c\/span\u003e\u003c\/li\u003e\n\u003cli\u003e\u003cspan\u003eSpacious front pocket for convenience\u003c\/span\u003e\u003c\/li\u003e\n\u003cli\u003e\u003cspan\u003eRibbed cuffs for a secure fit\u003c\/span\u003e\u003c\/li\u003e\n\u003cli\u003e\u003cspan\u003eEveryday casual styling\u003c\/span\u003e\u003c\/li\u003e\n\u003c\/ul\u003e\n\u003cp class=\"isSelectedEnd\"\u003e\u003cspan\u003eMum life is full-on. Your clothing should be full of comfort, confidence, and ease. These are the jumpers you'll reach for every day.\u003c\/span\u003e\u003c\/p\u003e\n\u003ch4\u003e\u003cspan\u003eSizing Information\u003c\/span\u003e\u003c\/h4\u003e\n\u003cp class=\"isSelectedEnd\"\u003e\u003cspan\u003eBoth styles are designed with a relaxed fit.\u003c\/span\u003e\u003c\/p\u003e\n\u003cp class=\"isSelectedEnd\"\u003e\u003cstrong\u003e\u003cspan\u003e1\/4 Zip Style:\u003c\/span\u003e\u003c\/strong\u003e\u003cspan\u003e This style is intentionally oversized. If you prefer a more fitted look, we recommend sizing down from your usual size.\u003c\/span\u003e\u003c\/p\u003e\n\u003cp class=\"isSelectedEnd\"\u003e\u003cstrong\u003e\u003cspan\u003eHooded Style:\u003c\/span\u003e\u003c\/strong\u003e\u003cspan\u003e Relaxed fit designed for comfort and layering.\u003c\/span\u003e\u003c\/p\u003e\n\u003ch4 class=\"isSelectedEnd\"\u003e\u003cstrong\u003e\u003cspan\u003eModel Information\u003c\/span\u003e\u003c\/strong\u003e\u003c\/h4\u003e\n\u003cul\u003e\n\u003cli\u003e\u003cspan\u003e1\/4 Zip: Brooke (owner) is usually a size 14 and wears between a Medium and Large depending on her preferred fit.\u003c\/span\u003e\u003c\/li\u003e\n\u003cli\u003e\u003cspan\u003eHooded: Brooke (owner) is usually a size 14 and wears a Large.\u003c\/span\u003e\u003c\/li\u003e\n\u003c\/ul\u003e\n\u003cp class=\"isSelectedEnd\"\u003e\u003cspan\u003eColours may appear slightly different across screens; however, we have done our best to accurately represent each colour.\u003c\/span\u003e\u003c\/p\u003e\n\u003ch4\u003e\u003cspan\u003e1\/4 Zip Breastfeeding Jumper Size Chart (cm)\u003c\/span\u003e\u003c\/h4\u003e\n\u003ctable\u003e\n\u003ctbody\u003e\n\u003ctr\u003e\n\u003cth\u003e\u003cspan\u003eSize\u003c\/span\u003e\u003c\/th\u003e\n\u003cth\u003e\u003cspan\u003eAU Size\u003c\/span\u003e\u003c\/th\u003e\n\u003cth\u003e\u003cspan\u003eLength\u003c\/span\u003e\u003c\/th\u003e\n\u003cth\u003e\u003cspan\u003eChest\u003c\/span\u003e\u003c\/th\u003e\n\u003cth\u003e\u003cspan\u003eBottom\u003c\/span\u003e\u003c\/th\u003e\n\u003cth\u003e\u003cspan\u003eShoulder\u003c\/span\u003e\u003c\/th\u003e\n\u003cth\u003e\u003cspan\u003eSleeve\u003c\/span\u003e\u003c\/th\u003e\n\u003c\/tr\u003e\n\u003ctr\u003e\n\u003ctd\u003e\u003cspan\u003eXS\u003c\/span\u003e\u003c\/td\u003e\n\u003ctd\u003e\u003cspan\u003e6\/8\u003c\/span\u003e\u003c\/td\u003e\n\u003ctd\u003e\u003cspan\u003e71\u003c\/span\u003e\u003c\/td\u003e\n\u003ctd\u003e\u003cspan\u003e58\u003c\/span\u003e\u003c\/td\u003e\n\u003ctd\u003e\u003cspan\u003e46\u003c\/span\u003e\u003c\/td\u003e\n\u003ctd\u003e\u003cspan\u003e60\u003c\/span\u003e\u003c\/td\u003e\n\u003ctd\u003e\u003cspan\u003e53.5\u003c\/span\u003e\u003c\/td\u003e\n\u003c\/tr\u003e\n\u003ctr\u003e\n\u003ctd\u003e\u003cspan\u003eS\u003c\/span\u003e\u003c\/td\u003e\n\u003ctd\u003e\u003cspan\u003e8\/10\u003c\/span\u003e\u003c\/td\u003e\n\u003ctd\u003e\u003cspan\u003e72\u003c\/span\u003e\u003c\/td\u003e\n\u003ctd\u003e\u003cspan\u003e60.5\u003c\/span\u003e\u003c\/td\u003e\n\u003ctd\u003e\u003cspan\u003e48.5\u003c\/span\u003e\u003c\/td\u003e\n\u003ctd\u003e\u003cspan\u003e61\u003c\/span\u003e\u003c\/td\u003e\n\u003ctd\u003e\u003cspan\u003e54.5\u003c\/span\u003e\u003c\/td\u003e\n\u003c\/tr\u003e\n\u003ctr\u003e\n\u003ctd\u003e\u003cspan\u003eM\u003c\/span\u003e\u003c\/td\u003e\n\u003ctd\u003e\u003cspan\u003e10\/12\u003c\/span\u003e\u003c\/td\u003e\n\u003ctd\u003e\u003cspan\u003e73\u003c\/span\u003e\u003c\/td\u003e\n\u003ctd\u003e\u003cspan\u003e63\u003c\/span\u003e\u003c\/td\u003e\n\u003ctd\u003e\u003cspan\u003e51\u003c\/span\u003e\u003c\/td\u003e\n\u003ctd\u003e\u003cspan\u003e62\u003c\/span\u003e\u003c\/td\u003e\n\u003ctd\u003e\u003cspan\u003e55.5\u003c\/span\u003e\u003c\/td\u003e\n\u003c\/tr\u003e\n\u003ctr\u003e\n\u003ctd\u003e\u003cspan\u003eL\u003c\/span\u003e\u003c\/td\u003e\n\u003ctd\u003e\u003cspan\u003e12\/14\u003c\/span\u003e\u003c\/td\u003e\n\u003ctd\u003e\u003cspan\u003e74\u003c\/span\u003e\u003c\/td\u003e\n\u003ctd\u003e\u003cspan\u003e65.5\u003c\/span\u003e\u003c\/td\u003e\n\u003ctd\u003e\u003cspan\u003e53.5\u003c\/span\u003e\u003c\/td\u003e\n\u003ctd\u003e\u003cspan\u003e63\u003c\/span\u003e\u003c\/td\u003e\n\u003ctd\u003e\u003cspan\u003e56.5\u003c\/span\u003e\u003c\/td\u003e\n\u003c\/tr\u003e\n\u003ctr\u003e\n\u003ctd\u003e\u003cspan\u003eXL\u003c\/span\u003e\u003c\/td\u003e\n\u003ctd\u003e\u003cspan\u003e14\/16\u003c\/span\u003e\u003c\/td\u003e\n\u003ctd\u003e\u003cspan\u003e75\u003c\/span\u003e\u003c\/td\u003e\n\u003ctd\u003e\u003cspan\u003e68\u003c\/span\u003e\u003c\/td\u003e\n\u003ctd\u003e\u003cspan\u003e56\u003c\/span\u003e\u003c\/td\u003e\n\u003ctd\u003e\u003cspan\u003e64\u003c\/span\u003e\u003c\/td\u003e\n\u003ctd\u003e\u003cspan\u003e57.5\u003c\/span\u003e\u003c\/td\u003e\n\u003c\/tr\u003e\n\u003ctr\u003e\n\u003ctd\u003e\u003cspan\u003e2XL\u003c\/span\u003e\u003c\/td\u003e\n\u003ctd\u003e\u003cspan\u003e16\/18\u003c\/span\u003e\u003c\/td\u003e\n\u003ctd\u003e\u003cspan\u003e76\u003c\/span\u003e\u003c\/td\u003e\n\u003ctd\u003e\u003cspan\u003e70.5\u003c\/span\u003e\u003c\/td\u003e\n\u003ctd\u003e\u003cspan\u003e58.5\u003c\/span\u003e\u003c\/td\u003e\n\u003ctd\u003e\u003cspan\u003e65\u003c\/span\u003e\u003c\/td\u003e\n\u003ctd\u003e\u003cspan\u003e58.5\u003c\/span\u003e\u003c\/td\u003e\n\u003c\/tr\u003e\n\u003ctr\u003e\n\u003ctd\u003e\u003cspan\u003e3XL\u003c\/span\u003e\u003c\/td\u003e\n\u003ctd\u003e\u003cspan\u003e18\/20\u003c\/span\u003e\u003c\/td\u003e\n\u003ctd\u003e\u003cspan\u003e77\u003c\/span\u003e\u003c\/td\u003e\n\u003ctd\u003e\u003cspan\u003e73\u003c\/span\u003e\u003c\/td\u003e\n\u003ctd\u003e\u003cspan\u003e61\u003c\/span\u003e\u003c\/td\u003e\n\u003ctd\u003e\u003cspan\u003e66\u003c\/span\u003e\u003c\/td\u003e\n\u003ctd\u003e\u003cspan\u003e59.5\u003c\/span\u003e\u003c\/td\u003e\n\u003c\/tr\u003e\n\u003ctr\u003e\n\u003ctd\u003e\u003cspan\u003e4XL\u003c\/span\u003e\u003c\/td\u003e\n\u003ctd\u003e\u003cspan\u003e20\/22\u003c\/span\u003e\u003c\/td\u003e\n\u003ctd\u003e\u003cspan\u003e78\u003c\/span\u003e\u003c\/td\u003e\n\u003ctd\u003e\u003cspan\u003e75.5\u003c\/span\u003e\u003c\/td\u003e\n\u003ctd\u003e\u003cspan\u003e63.5\u003c\/span\u003e\u003c\/td\u003e\n\u003ctd\u003e\u003cspan\u003e67\u003c\/span\u003e\u003c\/td\u003e\n\u003ctd\u003e\u003cspan\u003e60.5\u003c\/span\u003e\u003c\/td\u003e\n\u003c\/tr\u003e\n\u003ctr\u003e\n\u003ctd\u003e\u003cspan\u003e5XL\u003c\/span\u003e\u003c\/td\u003e\n\u003ctd\u003e\u003cspan\u003e22\/24\u003c\/span\u003e\u003c\/td\u003e\n\u003ctd\u003e\u003cspan\u003e79\u003c\/span\u003e\u003c\/td\u003e\n\u003ctd\u003e\u003cspan\u003e78\u003c\/span\u003e\u003c\/td\u003e\n\u003ctd\u003e\u003cspan\u003e66\u003c\/span\u003e\u003c\/td\u003e\n\u003ctd\u003e\u003cspan\u003e68\u003c\/span\u003e\u003c\/td\u003e\n\u003ctd\u003e\u003cspan\u003e61.5\u003c\/span\u003e\u003c\/td\u003e\n\u003c\/tr\u003e\n\u003ctr\u003e\n\u003ctd\u003e\u003cspan\u003e6XL\u003c\/span\u003e\u003c\/td\u003e\n\u003ctd\u003e\u003cspan\u003e24\/26\u003c\/span\u003e\u003c\/td\u003e\n\u003ctd\u003e\u003cspan\u003e80\u003c\/span\u003e\u003c\/td\u003e\n\u003ctd\u003e\u003cspan\u003e80.5\u003c\/span\u003e\u003c\/td\u003e\n\u003ctd\u003e\u003cspan\u003e68.5\u003c\/span\u003e\u003c\/td\u003e\n\u003ctd\u003e\u003cspan\u003e69\u003c\/span\u003e\u003c\/td\u003e\n\u003ctd\u003e\u003cspan\u003e62.5\u003c\/span\u003e\u003c\/td\u003e\n\u003c\/tr\u003e\n\u003c\/tbody\u003e\n\u003c\/table\u003e\n\u003ch4\u003e\u003cspan\u003eHooded Breastfeeding Jumper Size Chart (cm)\u003c\/span\u003e\u003c\/h4\u003e\n\u003ctable\u003e\n\u003ctbody\u003e\n\u003ctr\u003e\n\u003ctd\u003e\u003cspan\u003eSize\u003c\/span\u003e\u003c\/td\u003e\n\u003ctd\u003e\u003cspan\u003eAU Size\u003c\/span\u003e\u003c\/td\u003e\n\u003ctd\u003e\u003cspan\u003eLength\u003c\/span\u003e\u003c\/td\u003e\n\u003ctd\u003e\u003cspan\u003eChest\u003c\/span\u003e\u003c\/td\u003e\n\u003ctd\u003e\u003cspan\u003eBottom\u003c\/span\u003e\u003c\/td\u003e\n\u003ctd\u003e\u003cspan\u003eShoulder\u003c\/span\u003e\u003c\/td\u003e\n\u003ctd\u003e\u003cspan\u003eSleeve\u003c\/span\u003e\u003c\/td\u003e\n\u003c\/tr\u003e\n\u003ctr\u003e\n\u003ctd\u003e\u003cspan\u003eXS\u003c\/span\u003e\u003c\/td\u003e\n\u003ctd\u003e\u003cspan\u003e6\/8\u003c\/span\u003e\u003c\/td\u003e\n\u003ctd\u003e\u003cspan\u003e69\u003c\/span\u003e\u003c\/td\u003e\n\u003ctd\u003e\u003cspan\u003e54\u003c\/span\u003e\u003c\/td\u003e\n\u003ctd\u003e\u003cspan\u003e47\u003c\/span\u003e\u003c\/td\u003e\n\u003ctd\u003e\u003cspan\u003e58\u003c\/span\u003e\u003c\/td\u003e\n\u003ctd\u003e\u003cspan\u003e52\u003c\/span\u003e\u003c\/td\u003e\n\u003c\/tr\u003e\n\u003ctr\u003e\n\u003ctd\u003e\u003cspan\u003eS\u003c\/span\u003e\u003c\/td\u003e\n\u003ctd\u003e\u003cspan\u003e8\/10\u003c\/span\u003e\u003c\/td\u003e\n\u003ctd\u003e\u003cspan\u003e70\u003c\/span\u003e\u003c\/td\u003e\n\u003ctd\u003e\u003cspan\u003e56.5\u003c\/span\u003e\u003c\/td\u003e\n\u003ctd\u003e\u003cspan\u003e49.5\u003c\/span\u003e\u003c\/td\u003e\n\u003ctd\u003e\u003cspan\u003e59\u003c\/span\u003e\u003c\/td\u003e\n\u003ctd\u003e\u003cspan\u003e53\u003c\/span\u003e\u003c\/td\u003e\n\u003c\/tr\u003e\n\u003ctr\u003e\n\u003ctd\u003e\u003cspan\u003eM\u003c\/span\u003e\u003c\/td\u003e\n\u003ctd\u003e\u003cspan\u003e10\/12\u003c\/span\u003e\u003c\/td\u003e\n\u003ctd\u003e\u003cspan\u003e71\u003c\/span\u003e\u003c\/td\u003e\n\u003ctd\u003e\u003cspan\u003e59\u003c\/span\u003e\u003c\/td\u003e\n\u003ctd\u003e\u003cspan\u003e52\u003c\/span\u003e\u003c\/td\u003e\n\u003ctd\u003e\u003cspan\u003e60\u003c\/span\u003e\u003c\/td\u003e\n\u003ctd\u003e\u003cspan\u003e54\u003c\/span\u003e\u003c\/td\u003e\n\u003c\/tr\u003e\n\u003ctr\u003e\n\u003ctd\u003e\u003cspan\u003eL\u003c\/span\u003e\u003c\/td\u003e\n\u003ctd\u003e\u003cspan\u003e12\/14\u003c\/span\u003e\u003c\/td\u003e\n\u003ctd\u003e\u003cspan\u003e72\u003c\/span\u003e\u003c\/td\u003e\n\u003ctd\u003e\u003cspan\u003e61.5\u003c\/span\u003e\u003c\/td\u003e\n\u003ctd\u003e\u003cspan\u003e54.5\u003c\/span\u003e\u003c\/td\u003e\n\u003ctd\u003e\u003cspan\u003e61\u003c\/span\u003e\u003c\/td\u003e\n\u003ctd\u003e\u003cspan\u003e55\u003c\/span\u003e\u003c\/td\u003e\n\u003c\/tr\u003e\n\u003ctr\u003e\n\u003ctd\u003e\u003cspan\u003eXL\u003c\/span\u003e\u003c\/td\u003e\n\u003ctd\u003e\u003cspan\u003e14\/16\u003c\/span\u003e\u003c\/td\u003e\n\u003ctd\u003e\u003cspan\u003e73\u003c\/span\u003e\u003c\/td\u003e\n\u003ctd\u003e\u003cspan\u003e64\u003c\/span\u003e\u003c\/td\u003e\n\u003ctd\u003e\u003cspan\u003e57\u003c\/span\u003e\u003c\/td\u003e\n\u003ctd\u003e\u003cspan\u003e62\u003c\/span\u003e\u003c\/td\u003e\n\u003ctd\u003e\u003cspan\u003e56\u003c\/span\u003e\u003c\/td\u003e\n\u003c\/tr\u003e\n\u003ctr\u003e\n\u003ctd\u003e\u003cspan\u003e2XL\u003c\/span\u003e\u003c\/td\u003e\n\u003ctd\u003e\u003cspan\u003e16\/18\u003c\/span\u003e\u003c\/td\u003e\n\u003ctd\u003e\u003cspan\u003e74\u003c\/span\u003e\u003c\/td\u003e\n\u003ctd\u003e\u003cspan\u003e66.5\u003c\/span\u003e\u003c\/td\u003e\n\u003ctd\u003e\u003cspan\u003e59.5\u003c\/span\u003e\u003c\/td\u003e\n\u003ctd\u003e\u003cspan\u003e63\u003c\/span\u003e\u003c\/td\u003e\n\u003ctd\u003e\u003cspan\u003e57\u003c\/span\u003e\u003c\/td\u003e\n\u003c\/tr\u003e\n\u003ctr\u003e\n\u003ctd\u003e\u003cspan\u003e3XL\u003c\/span\u003e\u003c\/td\u003e\n\u003ctd\u003e\u003cspan\u003e18\/20\u003c\/span\u003e\u003c\/td\u003e\n\u003ctd\u003e\u003cspan\u003e75\u003c\/span\u003e\u003c\/td\u003e\n\u003ctd\u003e\u003cspan\u003e69\u003c\/span\u003e\u003c\/td\u003e\n\u003ctd\u003e\u003cspan\u003e62\u003c\/span\u003e\u003c\/td\u003e\n\u003ctd\u003e\u003cspan\u003e64\u003c\/span\u003e\u003c\/td\u003e\n\u003ctd\u003e\u003cspan\u003e58\u003c\/span\u003e\u003c\/td\u003e\n\u003c\/tr\u003e\n\u003ctr\u003e\n\u003ctd\u003e\u003cspan\u003e4XL\u003c\/span\u003e\u003c\/td\u003e\n\u003ctd\u003e\u003cspan\u003e20\/22\u003c\/span\u003e\u003c\/td\u003e\n\u003ctd\u003e\u003cspan\u003e76\u003c\/span\u003e\u003c\/td\u003e\n\u003ctd\u003e\u003cspan\u003e71.5\u003c\/span\u003e\u003c\/td\u003e\n\u003ctd\u003e\u003cspan\u003e64.5\u003c\/span\u003e\u003c\/td\u003e\n\u003ctd\u003e\u003cspan\u003e65\u003c\/span\u003e\u003c\/td\u003e\n\u003ctd\u003e\u003cspan\u003e59\u003c\/span\u003e\u003c\/td\u003e\n\u003c\/tr\u003e\n\u003ctr\u003e\n\u003ctd\u003e\u003cspan\u003e5XL\u003c\/span\u003e\u003c\/td\u003e\n\u003ctd\u003e\u003cspan\u003e22\/24\u003c\/span\u003e\u003c\/td\u003e\n\u003ctd\u003e\u003cspan\u003e77\u003c\/span\u003e\u003c\/td\u003e\n\u003ctd\u003e\u003cspan\u003e74\u003c\/span\u003e\u003c\/td\u003e\n\u003ctd\u003e\u003cspan\u003e67\u003c\/span\u003e\u003c\/td\u003e\n\u003ctd\u003e\u003cspan\u003e66\u003c\/span\u003e\u003c\/td\u003e\n\u003ctd\u003e\u003cspan\u003e60\u003c\/span\u003e\u003c\/td\u003e\n\u003c\/tr\u003e\n\u003ctr\u003e\n\u003ctd\u003e\u003cspan\u003e6XL\u003c\/span\u003e\u003c\/td\u003e\n\u003ctd\u003e\u003cspan\u003e24\/26\u003c\/span\u003e\u003c\/td\u003e\n\u003ctd\u003e\u003cspan\u003e78\u003c\/span\u003e\u003c\/td\u003e\n\u003ctd\u003e\u003cspan\u003e76.5\u003c\/span\u003e\u003c\/td\u003e\n\u003ctd\u003e\u003cspan\u003e69.5\u003c\/span\u003e\u003c\/td\u003e\n\u003ctd\u003e\u003cspan\u003e67\u003c\/span\u003e\u003c\/td\u003e\n\u003ctd\u003e\u003cspan\u003e61\u003c\/span\u003e\u003c\/td\u003e\n\u003c\/tr\u003e\n\u003c\/tbody\u003e\n\u003c\/table\u003e\n\u003cp\u003e\u003cem\u003e\u003cspan\u003eAll measurements are taken flat lay and are in centimetres.\u003c\/span\u003e\u003c\/em\u003e\u003c\/p\u003e"},"options":[{"name":"Colour","position":1,"values":["Black","Rust","Teal"]},{"name":"Size","position":2,"values":["XS","S","M","L","XL","2XL","3XL","4XL","5XL","6XL"]}],"custom_metafields":{},"metafields":{"badge":"\u003cdiv style='display:none' class='jdgm-prev-badge' data-average-rating='0.00' data-number-of-reviews='0' data-number-of-questions='0'\u003e \u003cspan class='jdgm-prev-badge__stars' data-score='0.00' tabindex='0' aria-label='0.00 stars' role='button'\u003e \u003cspan class='jdgm-star jdgm--off'\u003e\u003c\/span\u003e\u003cspan class='jdgm-star jdgm--off'\u003e\u003c\/span\u003e\u003cspan class='jdgm-star jdgm--off'\u003e\u003c\/span\u003e\u003cspan class='jdgm-star jdgm--off'\u003e\u003c\/span\u003e\u003cspan class='jdgm-star jdgm--off'\u003e\u003c\/span\u003e \u003c\/span\u003e \u003cspan class='jdgm-prev-badge__text'\u003e No reviews \u003c\/span\u003e \u003c\/div\u003e","widget":"\u003cdiv class='jdgm-rev-widg' data-updated-at='2026-10-21T03:58:05Z' data-average-rating='0.00' data-number-of-reviews='0' data-number-of-questions='0' data-image-url='https:\/\/cdn.shopify.com\/s\/files\/1\/0527\/3393\/5805\/files\/breastfeeding-hoodie-6415139.jpg?v=1783366465'\u003e \u003cstyle class='jdgm-temp-hiding-style'\u003e.jdgm-rev-widg{ display: none }\u003c\/style\u003e \u003cdiv class='jdgm-rev-widg__header'\u003e \u003ch2 class='jdgm-rev-widg__title'\u003eCustomer Reviews\u003c\/h2\u003e \u003cdiv class='jdgm-rev-widg__summary'\u003e \u003cdiv class='jdgm-rev-widg__summary-stars'\u003e \u003cspan class='jdgm-rev-widg__summary-stars-img' aria-label='Average rating is 0.00 stars' role='img'\u003e \u003cspan class='jdgm-star jdgm--off'\u003e\u003c\/span\u003e\u003cspan class='jdgm-star jdgm--off'\u003e\u003c\/span\u003e\u003cspan class='jdgm-star jdgm--off'\u003e\u003c\/span\u003e\u003cspan class='jdgm-star jdgm--off'\u003e\u003c\/span\u003e\u003cspan class='jdgm-star jdgm--off'\u003e\u003c\/span\u003e \u003c\/span\u003e \u003c\/div\u003e \u003cdiv class='jdgm-rev-widg__summary-text'\u003eBe the first to write a review\u003c\/div\u003e \u003c\/div\u003e \u003ca style='display: none' href='#' class='jdgm-write-rev-link' role='button'\u003eWrite a review\u003c\/a\u003e \u003cdiv class='jdgm-histogram jdgm-temp-hidden'\u003e \u003cdiv class='jdgm-histogram__row' data-rating='5' data-frequency='0' data-percentage='0'\u003e \u003cdiv class='jdgm-histogram__star' role='button' aria-label=\"0% (0) reviews with 5 star rating\" tabindex='0' \u003e\u003cspan class='jdgm-star jdgm--on'\u003e\u003c\/span\u003e\u003cspan class='jdgm-star jdgm--on'\u003e\u003c\/span\u003e\u003cspan class='jdgm-star jdgm--on'\u003e\u003c\/span\u003e\u003cspan class='jdgm-star jdgm--on'\u003e\u003c\/span\u003e\u003cspan class='jdgm-star jdgm--on'\u003e\u003c\/span\u003e\u003c\/div\u003e \u003cdiv class='jdgm-histogram__bar'\u003e \u003cdiv class='jdgm-histogram__bar-content' style='width: 0%;'\u003e \u003c\/div\u003e \u003c\/div\u003e \u003cdiv class='jdgm-histogram__percentage'\u003e0%\u003c\/div\u003e \u003cdiv class='jdgm-histogram__frequency'\u003e(0)\u003c\/div\u003e \u003c\/div\u003e \u003cdiv class='jdgm-histogram__row' data-rating='4' data-frequency='0' data-percentage='0'\u003e \u003cdiv class='jdgm-histogram__star' role='button' aria-label=\"0% (0) reviews with 4 star rating\" tabindex='0' \u003e\u003cspan class='jdgm-star jdgm--on'\u003e\u003c\/span\u003e\u003cspan class='jdgm-star jdgm--on'\u003e\u003c\/span\u003e\u003cspan class='jdgm-star jdgm--on'\u003e\u003c\/span\u003e\u003cspan class='jdgm-star jdgm--on'\u003e\u003c\/span\u003e\u003cspan class='jdgm-star jdgm--off'\u003e\u003c\/span\u003e\u003c\/div\u003e \u003cdiv class='jdgm-histogram__bar'\u003e \u003cdiv class='jdgm-histogram__bar-content' style='width: 0%;'\u003e \u003c\/div\u003e \u003c\/div\u003e \u003cdiv class='jdgm-histogram__percentage'\u003e0%\u003c\/div\u003e \u003cdiv class='jdgm-histogram__frequency'\u003e(0)\u003c\/div\u003e \u003c\/div\u003e \u003cdiv class='jdgm-histogram__row' data-rating='3' data-frequency='0' data-percentage='0'\u003e \u003cdiv class='jdgm-histogram__star' role='button' aria-label=\"0% (0) reviews with 3 star rating\" tabindex='0' \u003e\u003cspan class='jdgm-star jdgm--on'\u003e\u003c\/span\u003e\u003cspan class='jdgm-star jdgm--on'\u003e\u003c\/span\u003e\u003cspan class='jdgm-star jdgm--on'\u003e\u003c\/span\u003e\u003cspan class='jdgm-star jdgm--off'\u003e\u003c\/span\u003e\u003cspan class='jdgm-star jdgm--off'\u003e\u003c\/span\u003e\u003c\/div\u003e \u003cdiv class='jdgm-histogram__bar'\u003e \u003cdiv class='jdgm-histogram__bar-content' style='width: 0%;'\u003e \u003c\/div\u003e \u003c\/div\u003e \u003cdiv class='jdgm-histogram__percentage'\u003e0%\u003c\/div\u003e \u003cdiv class='jdgm-histogram__frequency'\u003e(0)\u003c\/div\u003e \u003c\/div\u003e \u003cdiv class='jdgm-histogram__row' data-rating='2' data-frequency='0' data-percentage='0'\u003e \u003cdiv class='jdgm-histogram__star' role='button' aria-label=\"0% (0) reviews with 2 star rating\" tabindex='0' \u003e\u003cspan class='jdgm-star jdgm--on'\u003e\u003c\/span\u003e\u003cspan class='jdgm-star jdgm--on'\u003e\u003c\/span\u003e\u003cspan class='jdgm-star jdgm--off'\u003e\u003c\/span\u003e\u003cspan class='jdgm-star jdgm--off'\u003e\u003c\/span\u003e\u003cspan class='jdgm-star jdgm--off'\u003e\u003c\/span\u003e\u003c\/div\u003e \u003cdiv class='jdgm-histogram__bar'\u003e \u003cdiv class='jdgm-histogram__bar-content' style='width: 0%;'\u003e \u003c\/div\u003e \u003c\/div\u003e \u003cdiv class='jdgm-histogram__percentage'\u003e0%\u003c\/div\u003e \u003cdiv class='jdgm-histogram__frequency'\u003e(0)\u003c\/div\u003e \u003c\/div\u003e \u003cdiv class='jdgm-histogram__row' data-rating='1' data-frequency='0' data-percentage='0'\u003e \u003cdiv class='jdgm-histogram__star' role='button' aria-label=\"0% (0) reviews with 1 star rating\" tabindex='0' \u003e\u003cspan class='jdgm-star jdgm--on'\u003e\u003c\/span\u003e\u003cspan class='jdgm-star jdgm--off'\u003e\u003c\/span\u003e\u003cspan class='jdgm-star jdgm--off'\u003e\u003c\/span\u003e\u003cspan class='jdgm-star jdgm--off'\u003e\u003c\/span\u003e\u003cspan class='jdgm-star jdgm--off'\u003e\u003c\/span\u003e\u003c\/div\u003e \u003cdiv class='jdgm-histogram__bar'\u003e \u003cdiv class='jdgm-histogram__bar-content' style='width: 0%;'\u003e \u003c\/div\u003e \u003c\/div\u003e \u003cdiv class='jdgm-histogram__percentage'\u003e0%\u003c\/div\u003e \u003cdiv class='jdgm-histogram__frequency'\u003e(0)\u003c\/div\u003e \u003c\/div\u003e \u003cdiv class='jdgm-histogram__row jdgm-histogram__clear-filter' data-rating=null tabindex='0'\u003e\u003c\/div\u003e \u003c\/div\u003e \u003cdiv class='jdgm-rev-widg__sort-wrapper'\u003e\u003c\/div\u003e \u003c\/div\u003e \u003cdiv class='jdgm-rev-widg__body'\u003e \u003cdiv class='jdgm-rev-widg__reviews'\u003e\u003c\/div\u003e \u003cdiv class='jdgm-paginate' data-per-page='10' data-url='https:\/\/api.judge.me\/reviews\/reviews_for_widget' style=\"display: none;\"\u003e\u003c\/div\u003e \u003c\/div\u003e \u003cdiv class='jdgm-rev-widg__paginate-spinner-wrapper'\u003e \u003cdiv class='jdgm-spinner'\u003e\u003c\/div\u003e \u003c\/div\u003e \u003c\/div\u003e"},"default_reviews_metafields":{},"collections":[{"id":512654540989,"handle":"lastof26-10","title":"10%","updated_at":"2026-11-14T20:08:00+08:00","body_html":null,"published_at":"2026-10-12T19:06:42+08:00","sort_order":"best-selling","template_suffix":null,"disjunctive":false,"rules":[],"published_scope":"global"},{"id":281356533949,"handle":"baby-shower-gifts","title":"Baby Shower Gifts - Mum","updated_at":"2026-11-14T20:08:00+08:00","body_html":"\u003cp\u003eLooking for a unique baby shower gift? Or an all-in-one bundle pack to suit all your needs? We've got just the thing!\u003c\/p\u003e","published_at":"2021-12-06T13:43:56+08:00","sort_order":"best-selling","template_suffix":"baby-shower-gifts","disjunctive":true,"rules":[],"published_scope":"global","image":{"created_at":"2024-05-06T11:59:28+08:00","alt":"Baby Shower Gifts - The Birth Store","width":1200,"height":1800,"src":"\/\/www.thebirthstore.com.au\/cdn\/shop\/collections\/baby-shower-gifts-401770.jpg?v=1761791272"}},{"id":281712427197,"handle":"breastfeeding","title":"Breastfeeding","updated_at":"2026-11-14T20:08:00+08:00","body_html":"","published_at":"2021-12-20T14:19:33+08:00","sort_order":"best-selling","template_suffix":"breastfeeding-collection","disjunctive":false,"rules":[],"published_scope":"global","image":{"created_at":"2024-05-06T11:59:34+08:00","alt":"Breastfeeding - The Birth Store","width":620,"height":635,"src":"\/\/www.thebirthstore.com.au\/cdn\/shop\/collections\/breastfeeding-793872.jpg?v=1714967974"}},{"id":293308989629,"handle":"breastfeeding-clothing","title":"Breastfeeding Clothing","updated_at":"2026-11-09T10:38:40+08:00","body_html":"","published_at":"2023-05-03T11:40:00+08:00","sort_order":"best-selling","template_suffix":"swaddles-collection","disjunctive":false,"rules":[],"published_scope":"global","image":{"created_at":"2024-05-06T11:59:36+08:00","alt":"Breastfeeding Clothing - The Birth Store","width":569,"height":674,"src":"\/\/www.thebirthstore.com.au\/cdn\/shop\/collections\/breastfeeding-clothing-671936.jpg?v=1714967977"}},{"id":261657460925,"handle":"buy","title":"Buy","updated_at":"2026-11-14T20:08:00+08:00","body_html":"\u003cp\u003eBrowse all of our pregnancy, labour \u0026amp; birth, postpartum and baby essentials here.\u003cbr\u003e\u003c\/p\u003e\n\u003cp\u003e\u003cspan\u003eYou can even buy now and pay later with Afterpay!\u003c\/span\u003e\u003c\/p\u003e","published_at":"2021-03-10T12:05:31+08:00","sort_order":"best-selling","template_suffix":"shop-all-collection","disjunctive":false,"rules":[],"published_scope":"global","image":{"created_at":"2024-05-06T11:59:42+08:00","alt":"Buy - The Birth Store","width":2048,"height":2048,"src":"\/\/www.thebirthstore.com.au\/cdn\/shop\/collections\/buy-964856.jpg?v=1714967982"}},{"id":293309022397,"handle":"clothing","title":"Clothing","updated_at":"2026-11-09T10:38:40+08:00","body_html":"","published_at":"2023-05-03T11:41:12+08:00","sort_order":"best-selling","template_suffix":"swaddles-collection","disjunctive":true,"rules":[],"published_scope":"global","image":{"created_at":"2024-05-06T11:59:52+08:00","alt":"Clothing - The Birth Store","width":676,"height":581,"src":"\/\/www.thebirthstore.com.au\/cdn\/shop\/collections\/clothing-483293.jpg?v=1714967992"}},{"id":291456483517,"handle":"shop-all","title":"Shop All - Mum","updated_at":"2026-11-14T20:08:00+08:00","body_html":"","published_at":"2022-12-23T22:04:39+08:00","sort_order":"best-selling","template_suffix":"shop-all-collection","disjunctive":false,"rules":[],"published_scope":"global","image":{"created_at":"2024-05-06T12:00:54+08:00","alt":"Shop All - The Birth Store","width":1365,"height":2048,"src":"\/\/www.thebirthstore.com.au\/cdn\/shop\/collections\/shop-all-693176.jpg?v=1714968055"}},{"id":310045933757,"handle":"shop-all-sale","title":"Shop All Sale","updated_at":"2026-11-14T20:08:00+08:00","body_html":"","published_at":"2024-11-12T13:22:43+08:00","sort_order":"best-selling","template_suffix":"","disjunctive":true,"rules":[],"published_scope":"global","image":{"created_at":"2024-11-13T10:58:16+08:00","alt":"Shop All Sale - The Birth Store","width":2048,"height":1365,"src":"\/\/www.thebirthstore.com.au\/cdn\/shop\/collections\/shop-all-sale-297361.jpg?v=1731466697"}}]}
{"item":{"id":15500583502013,"title":"Prenatal Trimester 2 \u0026 3 Plus Breastfeeding","handle":"prenatal","description":"\u003cp\u003eAs your baby grows and develops, so too does your demand for nutrients. The need for iron in particular increases in the second and third trimesters, and this is the stage of pregnancy when you’re more likely to tolerate iron supplementation. Our vegan-friendly prenatal and breastfeeding vitamins are designed to support prenatal health by supplying required amounts of vitamins and minerals to contribute to a smooth and successful \u003cspan\u003epregnancy.\u003c\/span\u003e\u003c\/p\u003e\n\u003cp\u003e\u003cspan\u003ePrenatal Trimester 2 \u0026amp; 3 Plus Breastfeeding is a specially formulated pregnancy and breastfeeding vitamin designed to be taken twice a day to enhance prenatal health during pregnancy and maternal health during breastfeeding. \u003c\/span\u003e\u003c\/p\u003e\n\u003cp\u003e\u003cspan\u003eThis pregnancy and breastfeeding vitamin is a step up from the Prenatal Trimester One with Ginger formula, providing even more of the key nutrients required in the last half of pregnancy and breastfeeding, including iodine, choline, zinc, vitamin D, and activated B vitamins. \u003c\/span\u003e\u003c\/p\u003e\n\u003cp\u003e\u003cspan\u003eIt also contains 24mg in a daily dose of bioavailable elemental iron bisglycinate as Ferrochel® . Iron bisglycinate is a well absorbed and well tolerated form of iron. \u003c\/span\u003e\u003c\/p\u003e\n\u003cp\u003e\u003cspan\u003eThis formula does not contain copper. During pregnancy, copper levels rise naturally, so copper supplementation is not usually necessary. \u003c\/span\u003e\u003c\/p\u003e\n\u003cp\u003e\u003cspan\u003eThis careful selection of vitamins, minerals, and antioxidants supports foetal development and placenta growth while maintaining good maternal health. It also helps to enhance postnatal health when you continue to take the pregnancy and breastfeeding vitamin every day following the birth, until your baby is no longer breastfeeding.\u003c\/span\u003e\u003c\/p\u003e\n\u003c!----\u003e","published_at":"2026-11-04T13:45:57+08:00","created_at":"2026-11-04T13:45:57+08:00","vendor":"Naturobest","type":"","tags":["Breastfeeding","Bundles","Mum","new","Pre-Conception","Pregnancy","Pregnancy Health"],"price":4999,"price_min":4999,"price_max":4999,"available":true,"price_varies":false,"compare_at_price":null,"compare_at_price_min":0,"compare_at_price_max":0,"compare_at_price_varies":false,"variants":[{"id":68128319340733,"title":"Default Title","option1":"Default Title","option2":null,"option3":null,"sku":null,"requires_shipping":true,"taxable":false,"featured_image":null,"available":true,"name":"Prenatal Trimester 2 \u0026 3 Plus Breastfeeding","public_title":null,"options":["Default Title"],"price":4999,"weight":85,"compare_at_price":null,"inventory_management":"shopify","barcode":"19340733","requires_selling_plan":false,"selling_plan_allocations":[],"quantity_rule":{"min":1,"max":null,"increment":1}}],"images":["\/\/www.thebirthstore.com.au\/cdn\/shop\/files\/prenatal-trimester-2-3-plus-breastfeeding-4901033.webp?v=1793806807","\/\/www.thebirthstore.com.au\/cdn\/shop\/files\/prenatal-trimester-2-3-plus-breastfeeding-1581766.webp?v=1793806807","\/\/www.thebirthstore.com.au\/cdn\/shop\/files\/prenatal-trimester-2-3-plus-breastfeeding-3968539.webp?v=1793806807"],"featured_image":"\/\/www.thebirthstore.com.au\/cdn\/shop\/files\/prenatal-trimester-2-3-plus-breastfeeding-4901033.webp?v=1793806807","options":["Title"],"media":[{"alt":"Prenatal Trimester 2 \u0026 3 Plus Breastfeeding - The Birth Store-Naturobest","id":48950092398781,"position":1,"preview_image":{"aspect_ratio":1.0,"height":810,"width":810,"src":"\/\/www.thebirthstore.com.au\/cdn\/shop\/files\/prenatal-trimester-2-3-plus-breastfeeding-4901033.webp?v=1793806807"},"aspect_ratio":1.0,"height":810,"media_type":"image","src":"\/\/www.thebirthstore.com.au\/cdn\/shop\/files\/prenatal-trimester-2-3-plus-breastfeeding-4901033.webp?v=1793806807","width":810},{"alt":"Prenatal Trimester 2 \u0026 3 Plus Breastfeeding - The Birth Store-Naturobest","id":48950092431549,"position":2,"preview_image":{"aspect_ratio":1.0,"height":1946,"width":1946,"src":"\/\/www.thebirthstore.com.au\/cdn\/shop\/files\/prenatal-trimester-2-3-plus-breastfeeding-1581766.webp?v=1793806807"},"aspect_ratio":1.0,"height":1946,"media_type":"image","src":"\/\/www.thebirthstore.com.au\/cdn\/shop\/files\/prenatal-trimester-2-3-plus-breastfeeding-1581766.webp?v=1793806807","width":1946},{"alt":"Prenatal Trimester 2 \u0026 3 Plus Breastfeeding - The Birth Store-Naturobest","id":48950156067005,"position":3,"preview_image":{"aspect_ratio":1.0,"height":1946,"width":1946,"src":"\/\/www.thebirthstore.com.au\/cdn\/shop\/files\/prenatal-trimester-2-3-plus-breastfeeding-3968539.webp?v=1793806807"},"aspect_ratio":1.0,"height":1946,"media_type":"image","src":"\/\/www.thebirthstore.com.au\/cdn\/shop\/files\/prenatal-trimester-2-3-plus-breastfeeding-3968539.webp?v=1793806807","width":1946}],"requires_selling_plan":false,"selling_plan_groups":[],"content":"\u003cp\u003eAs your baby grows and develops, so too does your demand for nutrients. The need for iron in particular increases in the second and third trimesters, and this is the stage of pregnancy when you’re more likely to tolerate iron supplementation. Our vegan-friendly prenatal and breastfeeding vitamins are designed to support prenatal health by supplying required amounts of vitamins and minerals to contribute to a smooth and successful \u003cspan\u003epregnancy.\u003c\/span\u003e\u003c\/p\u003e\n\u003cp\u003e\u003cspan\u003ePrenatal Trimester 2 \u0026amp; 3 Plus Breastfeeding is a specially formulated pregnancy and breastfeeding vitamin designed to be taken twice a day to enhance prenatal health during pregnancy and maternal health during breastfeeding. \u003c\/span\u003e\u003c\/p\u003e\n\u003cp\u003e\u003cspan\u003eThis pregnancy and breastfeeding vitamin is a step up from the Prenatal Trimester One with Ginger formula, providing even more of the key nutrients required in the last half of pregnancy and breastfeeding, including iodine, choline, zinc, vitamin D, and activated B vitamins. \u003c\/span\u003e\u003c\/p\u003e\n\u003cp\u003e\u003cspan\u003eIt also contains 24mg in a daily dose of bioavailable elemental iron bisglycinate as Ferrochel® . Iron bisglycinate is a well absorbed and well tolerated form of iron. \u003c\/span\u003e\u003c\/p\u003e\n\u003cp\u003e\u003cspan\u003eThis formula does not contain copper. During pregnancy, copper levels rise naturally, so copper supplementation is not usually necessary. \u003c\/span\u003e\u003c\/p\u003e\n\u003cp\u003e\u003cspan\u003eThis careful selection of vitamins, minerals, and antioxidants supports foetal development and placenta growth while maintaining good maternal health. It also helps to enhance postnatal health when you continue to take the pregnancy and breastfeeding vitamin every day following the birth, until your baby is no longer breastfeeding.\u003c\/span\u003e\u003c\/p\u003e\n\u003c!----\u003e"},"options":[{"name":"Title","position":1,"values":["Default Title"]}],"custom_metafields":{},"metafields":{"badge":"\u003cdiv style='display:none' class='jdgm-prev-badge' data-average-rating='0.00' data-number-of-reviews='0' data-number-of-questions='0'\u003e \u003cspan class='jdgm-prev-badge__stars' data-score='0.00' tabindex='0' aria-label='0.00 stars' role='button'\u003e \u003cspan class='jdgm-star jdgm--off'\u003e\u003c\/span\u003e\u003cspan class='jdgm-star jdgm--off'\u003e\u003c\/span\u003e\u003cspan class='jdgm-star jdgm--off'\u003e\u003c\/span\u003e\u003cspan class='jdgm-star jdgm--off'\u003e\u003c\/span\u003e\u003cspan class='jdgm-star jdgm--off'\u003e\u003c\/span\u003e \u003c\/span\u003e \u003cspan class='jdgm-prev-badge__text'\u003e No reviews \u003c\/span\u003e \u003c\/div\u003e","widget":"\u003cdiv class='jdgm-rev-widg' data-updated-at='2026-11-04T15:40:28Z' data-average-rating='0.00' data-number-of-reviews='0' data-number-of-questions='0' data-image-url='https:\/\/cdn.shopify.com\/s\/files\/1\/0527\/3393\/5805\/files\/prenatal-trimester-2-3-plus-breastfeeding-4901033.webp?v=1793806807'\u003e \u003cstyle class='jdgm-temp-hiding-style'\u003e.jdgm-rev-widg{ display: none }\u003c\/style\u003e \u003cdiv class='jdgm-rev-widg__header'\u003e \u003ch2 class='jdgm-rev-widg__title'\u003eCustomer Reviews\u003c\/h2\u003e \u003cdiv class='jdgm-rev-widg__summary'\u003e \u003cdiv class='jdgm-rev-widg__summary-stars'\u003e \u003cspan class='jdgm-rev-widg__summary-stars-img' aria-label='Average rating is 0.00 stars' role='img'\u003e \u003cspan class='jdgm-star jdgm--off'\u003e\u003c\/span\u003e\u003cspan class='jdgm-star jdgm--off'\u003e\u003c\/span\u003e\u003cspan class='jdgm-star jdgm--off'\u003e\u003c\/span\u003e\u003cspan class='jdgm-star jdgm--off'\u003e\u003c\/span\u003e\u003cspan class='jdgm-star jdgm--off'\u003e\u003c\/span\u003e \u003c\/span\u003e \u003c\/div\u003e \u003cdiv class='jdgm-rev-widg__summary-text'\u003eBe the first to write a review\u003c\/div\u003e \u003c\/div\u003e \u003ca style='display: none' href='#' class='jdgm-write-rev-link' role='button'\u003eWrite a review\u003c\/a\u003e \u003cdiv class='jdgm-histogram jdgm-temp-hidden'\u003e \u003cdiv class='jdgm-histogram__row' data-rating='5' data-frequency='0' data-percentage='0'\u003e \u003cdiv class='jdgm-histogram__star' role='button' aria-label=\"0% (0) reviews with 5 star rating\" tabindex='0' \u003e\u003cspan class='jdgm-star jdgm--on'\u003e\u003c\/span\u003e\u003cspan class='jdgm-star jdgm--on'\u003e\u003c\/span\u003e\u003cspan class='jdgm-star jdgm--on'\u003e\u003c\/span\u003e\u003cspan class='jdgm-star jdgm--on'\u003e\u003c\/span\u003e\u003cspan class='jdgm-star jdgm--on'\u003e\u003c\/span\u003e\u003c\/div\u003e \u003cdiv class='jdgm-histogram__bar'\u003e \u003cdiv class='jdgm-histogram__bar-content' style='width: 0%;'\u003e \u003c\/div\u003e \u003c\/div\u003e \u003cdiv class='jdgm-histogram__percentage'\u003e0%\u003c\/div\u003e \u003cdiv class='jdgm-histogram__frequency'\u003e(0)\u003c\/div\u003e \u003c\/div\u003e \u003cdiv class='jdgm-histogram__row' data-rating='4' data-frequency='0' data-percentage='0'\u003e \u003cdiv class='jdgm-histogram__star' role='button' aria-label=\"0% (0) reviews with 4 star rating\" tabindex='0' \u003e\u003cspan class='jdgm-star jdgm--on'\u003e\u003c\/span\u003e\u003cspan class='jdgm-star jdgm--on'\u003e\u003c\/span\u003e\u003cspan class='jdgm-star jdgm--on'\u003e\u003c\/span\u003e\u003cspan class='jdgm-star jdgm--on'\u003e\u003c\/span\u003e\u003cspan class='jdgm-star jdgm--off'\u003e\u003c\/span\u003e\u003c\/div\u003e \u003cdiv class='jdgm-histogram__bar'\u003e \u003cdiv class='jdgm-histogram__bar-content' style='width: 0%;'\u003e \u003c\/div\u003e \u003c\/div\u003e \u003cdiv class='jdgm-histogram__percentage'\u003e0%\u003c\/div\u003e \u003cdiv class='jdgm-histogram__frequency'\u003e(0)\u003c\/div\u003e \u003c\/div\u003e \u003cdiv class='jdgm-histogram__row' data-rating='3' data-frequency='0' data-percentage='0'\u003e \u003cdiv class='jdgm-histogram__star' role='button' aria-label=\"0% (0) reviews with 3 star rating\" tabindex='0' \u003e\u003cspan class='jdgm-star jdgm--on'\u003e\u003c\/span\u003e\u003cspan class='jdgm-star jdgm--on'\u003e\u003c\/span\u003e\u003cspan class='jdgm-star jdgm--on'\u003e\u003c\/span\u003e\u003cspan class='jdgm-star jdgm--off'\u003e\u003c\/span\u003e\u003cspan class='jdgm-star jdgm--off'\u003e\u003c\/span\u003e\u003c\/div\u003e \u003cdiv class='jdgm-histogram__bar'\u003e \u003cdiv class='jdgm-histogram__bar-content' style='width: 0%;'\u003e \u003c\/div\u003e \u003c\/div\u003e \u003cdiv class='jdgm-histogram__percentage'\u003e0%\u003c\/div\u003e \u003cdiv class='jdgm-histogram__frequency'\u003e(0)\u003c\/div\u003e \u003c\/div\u003e \u003cdiv class='jdgm-histogram__row' data-rating='2' data-frequency='0' data-percentage='0'\u003e \u003cdiv class='jdgm-histogram__star' role='button' aria-label=\"0% (0) reviews with 2 star rating\" tabindex='0' \u003e\u003cspan class='jdgm-star jdgm--on'\u003e\u003c\/span\u003e\u003cspan class='jdgm-star jdgm--on'\u003e\u003c\/span\u003e\u003cspan class='jdgm-star jdgm--off'\u003e\u003c\/span\u003e\u003cspan class='jdgm-star jdgm--off'\u003e\u003c\/span\u003e\u003cspan class='jdgm-star jdgm--off'\u003e\u003c\/span\u003e\u003c\/div\u003e \u003cdiv class='jdgm-histogram__bar'\u003e \u003cdiv class='jdgm-histogram__bar-content' style='width: 0%;'\u003e \u003c\/div\u003e \u003c\/div\u003e \u003cdiv class='jdgm-histogram__percentage'\u003e0%\u003c\/div\u003e \u003cdiv class='jdgm-histogram__frequency'\u003e(0)\u003c\/div\u003e \u003c\/div\u003e \u003cdiv class='jdgm-histogram__row' data-rating='1' data-frequency='0' data-percentage='0'\u003e \u003cdiv class='jdgm-histogram__star' role='button' aria-label=\"0% (0) reviews with 1 star rating\" tabindex='0' \u003e\u003cspan class='jdgm-star jdgm--on'\u003e\u003c\/span\u003e\u003cspan class='jdgm-star jdgm--off'\u003e\u003c\/span\u003e\u003cspan class='jdgm-star jdgm--off'\u003e\u003c\/span\u003e\u003cspan class='jdgm-star jdgm--off'\u003e\u003c\/span\u003e\u003cspan class='jdgm-star jdgm--off'\u003e\u003c\/span\u003e\u003c\/div\u003e \u003cdiv class='jdgm-histogram__bar'\u003e \u003cdiv class='jdgm-histogram__bar-content' style='width: 0%;'\u003e \u003c\/div\u003e \u003c\/div\u003e \u003cdiv class='jdgm-histogram__percentage'\u003e0%\u003c\/div\u003e \u003cdiv class='jdgm-histogram__frequency'\u003e(0)\u003c\/div\u003e \u003c\/div\u003e \u003cdiv class='jdgm-histogram__row jdgm-histogram__clear-filter' data-rating=null tabindex='0'\u003e\u003c\/div\u003e \u003c\/div\u003e \u003cdiv class='jdgm-rev-widg__sort-wrapper'\u003e\u003c\/div\u003e \u003c\/div\u003e \u003cdiv class='jdgm-rev-widg__body'\u003e \u003cdiv class='jdgm-rev-widg__reviews'\u003e\u003c\/div\u003e \u003cdiv class='jdgm-paginate' data-per-page='10' data-url='https:\/\/api.judge.me\/reviews\/reviews_for_widget' style=\"display: none;\"\u003e\u003c\/div\u003e \u003c\/div\u003e \u003cdiv class='jdgm-rev-widg__paginate-spinner-wrapper'\u003e \u003cdiv class='jdgm-spinner'\u003e\u003c\/div\u003e \u003c\/div\u003e \u003c\/div\u003e"},"default_reviews_metafields":{},"collections":[{"id":512654540989,"handle":"lastof26-10","title":"10%","updated_at":"2026-11-14T20:08:00+08:00","body_html":null,"published_at":"2026-10-12T19:06:42+08:00","sort_order":"best-selling","template_suffix":null,"disjunctive":false,"rules":[],"published_scope":"global"},{"id":281712427197,"handle":"breastfeeding","title":"Breastfeeding","updated_at":"2026-11-14T20:08:00+08:00","body_html":"","published_at":"2021-12-20T14:19:33+08:00","sort_order":"best-selling","template_suffix":"breastfeeding-collection","disjunctive":false,"rules":[],"published_scope":"global","image":{"created_at":"2024-05-06T11:59:34+08:00","alt":"Breastfeeding - The Birth Store","width":620,"height":635,"src":"\/\/www.thebirthstore.com.au\/cdn\/shop\/collections\/breastfeeding-793872.jpg?v=1714967974"}},{"id":283018526909,"handle":"bundles","title":"Bundles","updated_at":"2026-11-08T21:24:04+08:00","body_html":"\u003cp\u003eMake shopping for your bump, birth and beyond easier with our bundle packs. With a pack available for every stage, you can get everything you need with no fuss and with our bundle packs, you even save money.\u003c\/p\u003e","published_at":"2022-02-01T22:33:09+08:00","sort_order":"best-selling","template_suffix":"swaddles-collection","disjunctive":false,"rules":[],"published_scope":"global","image":{"created_at":"2024-05-06T11:59:39+08:00","alt":"Bundles - The Birth Store","width":2048,"height":1365,"src":"\/\/www.thebirthstore.com.au\/cdn\/shop\/collections\/bundles-299009.jpg?v=1714967980"}},{"id":261657460925,"handle":"buy","title":"Buy","updated_at":"2026-11-14T20:08:00+08:00","body_html":"\u003cp\u003eBrowse all of our pregnancy, labour \u0026amp; birth, postpartum and baby essentials here.\u003cbr\u003e\u003c\/p\u003e\n\u003cp\u003e\u003cspan\u003eYou can even buy now and pay later with Afterpay!\u003c\/span\u003e\u003c\/p\u003e","published_at":"2021-03-10T12:05:31+08:00","sort_order":"best-selling","template_suffix":"shop-all-collection","disjunctive":false,"rules":[],"published_scope":"global","image":{"created_at":"2024-05-06T11:59:42+08:00","alt":"Buy - The Birth Store","width":2048,"height":2048,"src":"\/\/www.thebirthstore.com.au\/cdn\/shop\/collections\/buy-964856.jpg?v=1714967982"}},{"id":261658149053,"handle":"pregnancy-and-maternity-products","title":"Pregnancy","updated_at":"2026-11-14T20:08:00+08:00","body_html":"\u003cp\u003eShop your pregnancy essentials below. Looking for something we don't currently stock? Please reach out and let us know.\u003cbr\u003e\u003c\/p\u003e\n\u003cp\u003e\u003cspan\u003eYou can even buy now and pay later with Afterpay!\u003c\/span\u003e\u003c\/p\u003e","published_at":"2021-03-10T12:34:22+08:00","sort_order":"best-selling","template_suffix":"pregnancy-collection","disjunctive":false,"rules":[],"published_scope":"global","image":{"created_at":"2024-05-06T12:00:40+08:00","alt":"Pregnancy - The Birth Store","width":1024,"height":1536,"src":"\/\/www.thebirthstore.com.au\/cdn\/shop\/collections\/pregnancy-899677.jpg?v=1714968040"}},{"id":295224901821,"handle":"pregnancy-health","title":"Pregnancy Health","updated_at":"2026-11-14T20:08:00+08:00","body_html":"","published_at":"2023-11-10T20:48:51+08:00","sort_order":"best-selling","template_suffix":"swaddles-collection","disjunctive":false,"rules":[],"published_scope":"global","image":{"created_at":"2024-05-06T12:00:41+08:00","alt":"Pregnancy Health - The Birth Store","width":608,"height":410,"src":"\/\/www.thebirthstore.com.au\/cdn\/shop\/collections\/pregnancy-health-343983.jpg?v=1714968042"}},{"id":326523846845,"handle":"pregnancy-health-1","updated_at":"2026-11-14T20:08:00+08:00","published_at":"2025-10-30T10:44:54+08:00","sort_order":"best-selling","template_suffix":"","published_scope":"global","title":"Pregnancy Health","body_html":"","image":{"created_at":"2025-11-20T21:33:56+08:00","alt":"Pregnancy Health - The Birth Store","width":522,"height":525,"src":"\/\/www.thebirthstore.com.au\/cdn\/shop\/collections\/pregnancy-health-1617860.jpg?v=1763645636"}},{"id":291456483517,"handle":"shop-all","title":"Shop All - Mum","updated_at":"2026-11-14T20:08:00+08:00","body_html":"","published_at":"2022-12-23T22:04:39+08:00","sort_order":"best-selling","template_suffix":"shop-all-collection","disjunctive":false,"rules":[],"published_scope":"global","image":{"created_at":"2024-05-06T12:00:54+08:00","alt":"Shop All - The Birth Store","width":1365,"height":2048,"src":"\/\/www.thebirthstore.com.au\/cdn\/shop\/collections\/shop-all-693176.jpg?v=1714968055"}},{"id":310045933757,"handle":"shop-all-sale","title":"Shop All Sale","updated_at":"2026-11-14T20:08:00+08:00","body_html":"","published_at":"2024-11-12T13:22:43+08:00","sort_order":"best-selling","template_suffix":"","disjunctive":true,"rules":[],"published_scope":"global","image":{"created_at":"2024-11-13T10:58:16+08:00","alt":"Shop All Sale - The Birth Store","width":2048,"height":1365,"src":"\/\/www.thebirthstore.com.au\/cdn\/shop\/collections\/shop-all-sale-297361.jpg?v=1731466697"}}]}
{"item":{"id":7513283821757,"title":"Labour \u0026 Birth Box - Seasons of Mama Birth Comb","handle":"labour-birth-box-seasons-of-mama-birth-comb-1","description":"\u003cp\u003e\u003cmeta charset=\"utf-8\"\u003e\u003cspan\u003eThere are so many beautiful products on the market now to help support you in labour \u0026amp; birth. We have created a kit with a couple of our favourite products from our range and other small Australian businesses to support you in labour \u0026amp; birth.\u003c\/span\u003e\u003c\/p\u003e","published_at":"2026-06-08T10:38:45+08:00","created_at":"2023-10-03T13:48:09+08:00","vendor":"Bundles","type":"","tags":["Baby Shower Gifts","Birth","Bundles","Hospital Bag","Labour Progression","Nausea","Pain Relief"],"price":7600,"price_min":7600,"price_max":7600,"available":false,"price_varies":false,"compare_at_price":8495,"compare_at_price_min":8495,"compare_at_price_max":8495,"compare_at_price_varies":false,"variants":[{"id":43057014800573,"title":"Pearl","option1":"Pearl","option2":null,"option3":null,"sku":"","requires_shipping":true,"taxable":false,"featured_image":{"id":34641019863229,"product_id":7513283821757,"position":2,"created_at":"2024-05-06T11:59:48+08:00","updated_at":"2024-05-06T11:59:48+08:00","alt":"Labour \u0026 Birth Box - Seasons of Mama Birth Comb - The Birth Store-The Birth Store","width":1080,"height":981,"src":"\/\/www.thebirthstore.com.au\/cdn\/shop\/files\/labour-birth-box-seasons-of-mama-birth-comb-900991.jpg?v=1714967988","variant_ids":[43057014800573]},"available":false,"name":"Labour \u0026 Birth Box - Seasons of Mama Birth Comb - Pearl","public_title":"Pearl","options":["Pearl"],"price":7600,"weight":273,"compare_at_price":8495,"inventory_management":"shopify","barcode":"14800573","featured_media":{"alt":"Labour \u0026 Birth Box - Seasons of Mama Birth Comb - The Birth Store-The Birth Store","id":27007588925629,"position":2,"preview_image":{"aspect_ratio":1.101,"height":981,"width":1080,"src":"\/\/www.thebirthstore.com.au\/cdn\/shop\/files\/labour-birth-box-seasons-of-mama-birth-comb-900991.jpg?v=1714967988"}},"requires_selling_plan":false,"selling_plan_allocations":[],"quantity_rule":{"min":1,"max":null,"increment":1}},{"id":43057014833341,"title":"Tortoise Shell","option1":"Tortoise Shell","option2":null,"option3":null,"sku":"","requires_shipping":true,"taxable":false,"featured_image":{"id":34641020125373,"product_id":7513283821757,"position":5,"created_at":"2024-05-06T11:59:48+08:00","updated_at":"2024-05-06T11:59:48+08:00","alt":"Labour \u0026 Birth Box - Seasons of Mama Birth Comb - The Birth Store-The Birth Store","width":1000,"height":1500,"src":"\/\/www.thebirthstore.com.au\/cdn\/shop\/files\/labour-birth-box-seasons-of-mama-birth-comb-936354.jpg?v=1714967988","variant_ids":[43057014833341]},"available":false,"name":"Labour \u0026 Birth Box - Seasons of Mama Birth Comb - Tortoise Shell","public_title":"Tortoise Shell","options":["Tortoise Shell"],"price":7600,"weight":273,"compare_at_price":8495,"inventory_management":"shopify","barcode":"14833341","featured_media":{"alt":"Labour \u0026 Birth Box - Seasons of Mama Birth Comb - The Birth Store-The Birth Store","id":27007589220541,"position":5,"preview_image":{"aspect_ratio":0.667,"height":1500,"width":1000,"src":"\/\/www.thebirthstore.com.au\/cdn\/shop\/files\/labour-birth-box-seasons-of-mama-birth-comb-936354.jpg?v=1714967988"}},"requires_selling_plan":false,"selling_plan_allocations":[],"quantity_rule":{"min":1,"max":null,"increment":1}}],"images":["\/\/www.thebirthstore.com.au\/cdn\/shop\/files\/labour-birth-box-seasons-of-mama-birth-comb-965981.jpg?v=1780886244","\/\/www.thebirthstore.com.au\/cdn\/shop\/files\/labour-birth-box-seasons-of-mama-birth-comb-900991.jpg?v=1714967988","\/\/www.thebirthstore.com.au\/cdn\/shop\/files\/labour-birth-box-seasons-of-mama-birth-comb-927526.jpg?v=1714967988","\/\/www.thebirthstore.com.au\/cdn\/shop\/files\/labour-birth-box-seasons-of-mama-birth-comb-588874.jpg?v=1714967988","\/\/www.thebirthstore.com.au\/cdn\/shop\/files\/labour-birth-box-seasons-of-mama-birth-comb-936354.jpg?v=1714967988"],"featured_image":"\/\/www.thebirthstore.com.au\/cdn\/shop\/files\/labour-birth-box-seasons-of-mama-birth-comb-965981.jpg?v=1780886244","options":["Reflexology Labour \u0026 Birth Comb (Style)"],"media":[{"alt":"Labour \u0026 Birth Box - Seasons of Mama Birth Comb - The Birth Store-The Birth Store","id":27007588794557,"position":1,"preview_image":{"aspect_ratio":1.004,"height":526,"width":528,"src":"\/\/www.thebirthstore.com.au\/cdn\/shop\/files\/labour-birth-box-seasons-of-mama-birth-comb-965981.jpg?v=1780886244"},"aspect_ratio":1.004,"height":526,"media_type":"image","src":"\/\/www.thebirthstore.com.au\/cdn\/shop\/files\/labour-birth-box-seasons-of-mama-birth-comb-965981.jpg?v=1780886244","width":528},{"alt":"Labour \u0026 Birth Box - Seasons of Mama Birth Comb - The Birth Store-The Birth Store","id":27007588925629,"position":2,"preview_image":{"aspect_ratio":1.101,"height":981,"width":1080,"src":"\/\/www.thebirthstore.com.au\/cdn\/shop\/files\/labour-birth-box-seasons-of-mama-birth-comb-900991.jpg?v=1714967988"},"aspect_ratio":1.101,"height":981,"media_type":"image","src":"\/\/www.thebirthstore.com.au\/cdn\/shop\/files\/labour-birth-box-seasons-of-mama-birth-comb-900991.jpg?v=1714967988","width":1080},{"alt":"Labour \u0026 Birth Box - Seasons of Mama Birth Comb - The Birth Store-The Birth Store","id":27007588958397,"position":3,"preview_image":{"aspect_ratio":1.0,"height":2048,"width":2048,"src":"\/\/www.thebirthstore.com.au\/cdn\/shop\/files\/labour-birth-box-seasons-of-mama-birth-comb-927526.jpg?v=1714967988"},"aspect_ratio":1.0,"height":2048,"media_type":"image","src":"\/\/www.thebirthstore.com.au\/cdn\/shop\/files\/labour-birth-box-seasons-of-mama-birth-comb-927526.jpg?v=1714967988","width":2048},{"alt":"Labour \u0026 Birth Box - Seasons of Mama Birth Comb - The Birth Store-The Birth Store","id":27007589089469,"position":4,"preview_image":{"aspect_ratio":0.667,"height":2048,"width":1365,"src":"\/\/www.thebirthstore.com.au\/cdn\/shop\/files\/labour-birth-box-seasons-of-mama-birth-comb-588874.jpg?v=1714967988"},"aspect_ratio":0.667,"height":2048,"media_type":"image","src":"\/\/www.thebirthstore.com.au\/cdn\/shop\/files\/labour-birth-box-seasons-of-mama-birth-comb-588874.jpg?v=1714967988","width":1365},{"alt":"Labour \u0026 Birth Box - Seasons of Mama Birth Comb - The Birth Store-The Birth Store","id":27007589220541,"position":5,"preview_image":{"aspect_ratio":0.667,"height":1500,"width":1000,"src":"\/\/www.thebirthstore.com.au\/cdn\/shop\/files\/labour-birth-box-seasons-of-mama-birth-comb-936354.jpg?v=1714967988"},"aspect_ratio":0.667,"height":1500,"media_type":"image","src":"\/\/www.thebirthstore.com.au\/cdn\/shop\/files\/labour-birth-box-seasons-of-mama-birth-comb-936354.jpg?v=1714967988","width":1000}],"requires_selling_plan":false,"selling_plan_groups":[],"content":"\u003cp\u003e\u003cmeta charset=\"utf-8\"\u003e\u003cspan\u003eThere are so many beautiful products on the market now to help support you in labour \u0026amp; birth. We have created a kit with a couple of our favourite products from our range and other small Australian businesses to support you in labour \u0026amp; birth.\u003c\/span\u003e\u003c\/p\u003e"},"options":[{"name":"Reflexology Labour \u0026 Birth Comb (Style)","position":1,"values":["Pearl","Tortoise Shell"]}],"custom_metafields":{},"metafields":{"badge":"\u003cdiv style='display:none' class='jdgm-prev-badge' data-average-rating='0.00' data-number-of-reviews='0' data-number-of-questions='0'\u003e \u003cspan class='jdgm-prev-badge__stars' data-score='0.00' tabindex='0' aria-label='0.00 stars' role='button'\u003e \u003cspan class='jdgm-star jdgm--off'\u003e\u003c\/span\u003e\u003cspan class='jdgm-star jdgm--off'\u003e\u003c\/span\u003e\u003cspan class='jdgm-star jdgm--off'\u003e\u003c\/span\u003e\u003cspan class='jdgm-star jdgm--off'\u003e\u003c\/span\u003e\u003cspan class='jdgm-star jdgm--off'\u003e\u003c\/span\u003e \u003c\/span\u003e \u003cspan class='jdgm-prev-badge__text'\u003e No reviews \u003c\/span\u003e \u003c\/div\u003e","widget":"\u003cdiv class='jdgm-rev-widg' data-updated-at='2026-06-08T05:17:15Z' data-average-rating='0.00' data-number-of-reviews='0' data-number-of-questions='0' data-image-url='https:\/\/cdn.shopify.com\/s\/files\/1\/0527\/3393\/5805\/files\/labour-birth-box-seasons-of-mama-birth-comb-965981.jpg?v=1714967988'\u003e \u003cstyle class='jdgm-temp-hiding-style'\u003e.jdgm-rev-widg{ display: none }\u003c\/style\u003e \u003cdiv class='jdgm-rev-widg__header'\u003e \u003ch2 class='jdgm-rev-widg__title'\u003eCustomer Reviews\u003c\/h2\u003e \u003cdiv class='jdgm-rev-widg__summary'\u003e \u003cdiv class='jdgm-rev-widg__summary-stars' aria-label='Average rating is 0.00 stars' role='img'\u003e \u003cspan class='jdgm-star jdgm--off'\u003e\u003c\/span\u003e\u003cspan class='jdgm-star jdgm--off'\u003e\u003c\/span\u003e\u003cspan class='jdgm-star jdgm--off'\u003e\u003c\/span\u003e\u003cspan class='jdgm-star jdgm--off'\u003e\u003c\/span\u003e\u003cspan class='jdgm-star jdgm--off'\u003e\u003c\/span\u003e \u003c\/div\u003e \u003cdiv class='jdgm-rev-widg__summary-text'\u003eBe the first to write a review\u003c\/div\u003e \u003c\/div\u003e \u003ca style='display: none' href='#' class='jdgm-write-rev-link' role='button'\u003eWrite a review\u003c\/a\u003e \u003cdiv class='jdgm-histogram jdgm-temp-hidden'\u003e \u003cdiv class='jdgm-histogram__row' data-rating='5' data-frequency='0' data-percentage='0'\u003e \u003cdiv class='jdgm-histogram__star' role='button' aria-label=\"0% (0) reviews with 5 star rating\" tabindex='0' \u003e\u003cspan class='jdgm-star jdgm--on'\u003e\u003c\/span\u003e\u003cspan class='jdgm-star jdgm--on'\u003e\u003c\/span\u003e\u003cspan class='jdgm-star jdgm--on'\u003e\u003c\/span\u003e\u003cspan class='jdgm-star jdgm--on'\u003e\u003c\/span\u003e\u003cspan class='jdgm-star jdgm--on'\u003e\u003c\/span\u003e\u003c\/div\u003e \u003cdiv class='jdgm-histogram__bar'\u003e \u003cdiv class='jdgm-histogram__bar-content' style='width: 0%;'\u003e \u003c\/div\u003e \u003c\/div\u003e \u003cdiv class='jdgm-histogram__percentage'\u003e0%\u003c\/div\u003e \u003cdiv class='jdgm-histogram__frequency'\u003e(0)\u003c\/div\u003e \u003c\/div\u003e \u003cdiv class='jdgm-histogram__row' data-rating='4' data-frequency='0' data-percentage='0'\u003e \u003cdiv class='jdgm-histogram__star' role='button' aria-label=\"0% (0) reviews with 4 star rating\" tabindex='0' \u003e\u003cspan class='jdgm-star jdgm--on'\u003e\u003c\/span\u003e\u003cspan class='jdgm-star jdgm--on'\u003e\u003c\/span\u003e\u003cspan class='jdgm-star jdgm--on'\u003e\u003c\/span\u003e\u003cspan class='jdgm-star jdgm--on'\u003e\u003c\/span\u003e\u003cspan class='jdgm-star jdgm--off'\u003e\u003c\/span\u003e\u003c\/div\u003e \u003cdiv class='jdgm-histogram__bar'\u003e \u003cdiv class='jdgm-histogram__bar-content' style='width: 0%;'\u003e \u003c\/div\u003e \u003c\/div\u003e \u003cdiv class='jdgm-histogram__percentage'\u003e0%\u003c\/div\u003e \u003cdiv class='jdgm-histogram__frequency'\u003e(0)\u003c\/div\u003e \u003c\/div\u003e \u003cdiv class='jdgm-histogram__row' data-rating='3' data-frequency='0' data-percentage='0'\u003e \u003cdiv class='jdgm-histogram__star' role='button' aria-label=\"0% (0) reviews with 3 star rating\" tabindex='0' \u003e\u003cspan class='jdgm-star jdgm--on'\u003e\u003c\/span\u003e\u003cspan class='jdgm-star jdgm--on'\u003e\u003c\/span\u003e\u003cspan class='jdgm-star jdgm--on'\u003e\u003c\/span\u003e\u003cspan class='jdgm-star jdgm--off'\u003e\u003c\/span\u003e\u003cspan class='jdgm-star jdgm--off'\u003e\u003c\/span\u003e\u003c\/div\u003e \u003cdiv class='jdgm-histogram__bar'\u003e \u003cdiv class='jdgm-histogram__bar-content' style='width: 0%;'\u003e \u003c\/div\u003e \u003c\/div\u003e \u003cdiv class='jdgm-histogram__percentage'\u003e0%\u003c\/div\u003e \u003cdiv class='jdgm-histogram__frequency'\u003e(0)\u003c\/div\u003e \u003c\/div\u003e \u003cdiv class='jdgm-histogram__row' data-rating='2' data-frequency='0' data-percentage='0'\u003e \u003cdiv class='jdgm-histogram__star' role='button' aria-label=\"0% (0) reviews with 2 star rating\" tabindex='0' \u003e\u003cspan class='jdgm-star jdgm--on'\u003e\u003c\/span\u003e\u003cspan class='jdgm-star jdgm--on'\u003e\u003c\/span\u003e\u003cspan class='jdgm-star jdgm--off'\u003e\u003c\/span\u003e\u003cspan class='jdgm-star jdgm--off'\u003e\u003c\/span\u003e\u003cspan class='jdgm-star jdgm--off'\u003e\u003c\/span\u003e\u003c\/div\u003e \u003cdiv class='jdgm-histogram__bar'\u003e \u003cdiv class='jdgm-histogram__bar-content' style='width: 0%;'\u003e \u003c\/div\u003e \u003c\/div\u003e \u003cdiv class='jdgm-histogram__percentage'\u003e0%\u003c\/div\u003e \u003cdiv class='jdgm-histogram__frequency'\u003e(0)\u003c\/div\u003e \u003c\/div\u003e \u003cdiv class='jdgm-histogram__row' data-rating='1' data-frequency='0' data-percentage='0'\u003e \u003cdiv class='jdgm-histogram__star' role='button' aria-label=\"0% (0) reviews with 1 star rating\" tabindex='0' \u003e\u003cspan class='jdgm-star jdgm--on'\u003e\u003c\/span\u003e\u003cspan class='jdgm-star jdgm--off'\u003e\u003c\/span\u003e\u003cspan class='jdgm-star jdgm--off'\u003e\u003c\/span\u003e\u003cspan class='jdgm-star jdgm--off'\u003e\u003c\/span\u003e\u003cspan class='jdgm-star jdgm--off'\u003e\u003c\/span\u003e\u003c\/div\u003e \u003cdiv class='jdgm-histogram__bar'\u003e \u003cdiv class='jdgm-histogram__bar-content' style='width: 0%;'\u003e \u003c\/div\u003e \u003c\/div\u003e \u003cdiv class='jdgm-histogram__percentage'\u003e0%\u003c\/div\u003e \u003cdiv class='jdgm-histogram__frequency'\u003e(0)\u003c\/div\u003e \u003c\/div\u003e \u003cdiv class='jdgm-histogram__row jdgm-histogram__clear-filter' data-rating=null tabindex='0'\u003e\u003c\/div\u003e \u003c\/div\u003e \u003cdiv class='jdgm-rev-widg__sort-wrapper'\u003e\u003c\/div\u003e \u003c\/div\u003e \u003cdiv class='jdgm-rev-widg__body'\u003e \u003cdiv class='jdgm-rev-widg__reviews'\u003e\u003c\/div\u003e \u003cdiv class='jdgm-paginate' data-per-page='10' data-url='https:\/\/api.judge.me\/reviews\/reviews_for_widget' style=\"display: none;\"\u003e\u003c\/div\u003e \u003c\/div\u003e \u003cdiv class='jdgm-rev-widg__paginate-spinner-wrapper'\u003e \u003cdiv class='jdgm-spinner'\u003e\u003c\/div\u003e \u003c\/div\u003e \u003c\/div\u003e"},"default_reviews_metafields":{},"collections":[{"id":512654540989,"handle":"lastof26-10","title":"10%","updated_at":"2026-11-14T20:08:00+08:00","body_html":null,"published_at":"2026-10-12T19:06:42+08:00","sort_order":"best-selling","template_suffix":null,"disjunctive":false,"rules":[],"published_scope":"global"},{"id":283018526909,"handle":"bundles","title":"Bundles","updated_at":"2026-11-08T21:24:04+08:00","body_html":"\u003cp\u003eMake shopping for your bump, birth and beyond easier with our bundle packs. With a pack available for every stage, you can get everything you need with no fuss and with our bundle packs, you even save money.\u003c\/p\u003e","published_at":"2022-02-01T22:33:09+08:00","sort_order":"best-selling","template_suffix":"swaddles-collection","disjunctive":false,"rules":[],"published_scope":"global","image":{"created_at":"2024-05-06T11:59:39+08:00","alt":"Bundles - The Birth Store","width":2048,"height":1365,"src":"\/\/www.thebirthstore.com.au\/cdn\/shop\/collections\/bundles-299009.jpg?v=1714967980"}},{"id":261657460925,"handle":"buy","title":"Buy","updated_at":"2026-11-14T20:08:00+08:00","body_html":"\u003cp\u003eBrowse all of our pregnancy, labour \u0026amp; birth, postpartum and baby essentials here.\u003cbr\u003e\u003c\/p\u003e\n\u003cp\u003e\u003cspan\u003eYou can even buy now and pay later with Afterpay!\u003c\/span\u003e\u003c\/p\u003e","published_at":"2021-03-10T12:05:31+08:00","sort_order":"best-selling","template_suffix":"shop-all-collection","disjunctive":false,"rules":[],"published_scope":"global","image":{"created_at":"2024-05-06T11:59:42+08:00","alt":"Buy - The Birth Store","width":2048,"height":2048,"src":"\/\/www.thebirthstore.com.au\/cdn\/shop\/collections\/buy-964856.jpg?v=1714967982"}},{"id":337429201085,"handle":"hospital-bag","title":"Hospital Bag","updated_at":"2026-11-14T20:08:00+08:00","body_html":"","published_at":"2026-06-03T11:36:29+08:00","sort_order":"most-relevant","template_suffix":"","disjunctive":false,"rules":[],"published_scope":"global"},{"id":261658214589,"handle":"labour-and-birth-buy","title":"Labour \u0026 Birth","updated_at":"2026-11-14T20:08:00+08:00","body_html":"\u003cp\u003eWe stock a large range of Elle TENS machines for you to buy for your labour and birth. We stock the Elle TENS, Elle TENS 2 and Elle TENS Plus, we also hire these out if that suits you better, please head over to our TENS machine hire page for more information. We ship Australia wide or have options for local delivery\/pick-up in Perth if you are due ASAP. We also stock other items for your labour and birth. \u003c\/p\u003e\n\u003cp\u003eLooking for something we don't currently stock? Please reach out and let us know.\u003c\/p\u003e\n\u003cp\u003e\u003cspan\u003eYou can even buy now and pay later with Afterpay!\u003c\/span\u003e\u003c\/p\u003e","published_at":"2021-03-10T12:34:43+08:00","sort_order":"best-selling","template_suffix":"labour-birth-collection","disjunctive":false,"rules":[],"published_scope":"global","image":{"created_at":"2024-05-06T12:00:09+08:00","alt":"Labour \u0026 Birth - The Birth Store","width":1080,"height":981,"src":"\/\/www.thebirthstore.com.au\/cdn\/shop\/collections\/labour-birth-342038.jpg?v=1714968009"}},{"id":512272957629,"handle":"labour-birth-essentials","title":"Labour \u0026 Birth Essentials","updated_at":"2026-11-14T20:08:00+08:00","body_html":null,"published_at":"2026-10-06T21:00:01+08:00","sort_order":"most-relevant","template_suffix":"labournbirthemail","disjunctive":false,"rules":[],"published_scope":"global"},{"id":281712558269,"handle":"labour-aids","title":"Labour Aids","updated_at":"2026-11-14T20:08:00+08:00","body_html":"","published_at":"2021-12-20T14:22:16+08:00","sort_order":"best-selling","template_suffix":"labour-aids-collection","disjunctive":false,"rules":[],"published_scope":"global","image":{"created_at":"2024-05-06T12:00:11+08:00","alt":"Labour Aids - The Birth Store","width":1365,"height":2048,"src":"\/\/www.thebirthstore.com.au\/cdn\/shop\/collections\/labour-aids-211824.jpg?v=1714968012"}},{"id":295224836285,"handle":"nausea","title":"Nausea","updated_at":"2026-11-14T20:08:00+08:00","body_html":"","published_at":"2023-11-10T20:47:34+08:00","sort_order":"best-selling","template_suffix":"nausea-collection","disjunctive":false,"rules":[],"published_scope":"global","image":{"created_at":"2024-05-06T12:00:24+08:00","alt":"Nausea - The Birth Store","width":610,"height":915,"src":"\/\/www.thebirthstore.com.au\/cdn\/shop\/collections\/nausea-404101.jpg?v=1714968024"}},{"id":281712591037,"handle":"pain-relief","title":"Pain Relief","updated_at":"2026-11-14T20:08:00+08:00","body_html":"","published_at":"2021-12-20T14:22:45+08:00","sort_order":"best-selling","template_suffix":"pain-relief-collection","disjunctive":false,"rules":[],"published_scope":"global","image":{"created_at":"2024-05-06T12:00:27+08:00","alt":"Pain Relief - The Birth Store","width":1365,"height":2048,"src":"\/\/www.thebirthstore.com.au\/cdn\/shop\/collections\/pain-relief-878865.jpg?v=1714968027"}},{"id":310045933757,"handle":"shop-all-sale","title":"Shop All Sale","updated_at":"2026-11-14T20:08:00+08:00","body_html":"","published_at":"2024-11-12T13:22:43+08:00","sort_order":"best-selling","template_suffix":"","disjunctive":true,"rules":[],"published_scope":"global","image":{"created_at":"2024-11-13T10:58:16+08:00","alt":"Shop All Sale - The Birth Store","width":2048,"height":1365,"src":"\/\/www.thebirthstore.com.au\/cdn\/shop\/collections\/shop-all-sale-297361.jpg?v=1731466697"}}]}
{"item":{"id":7513281331389,"title":"C-Section Birth Recovery Kit - Cream \u0026 Roller","handle":"c-section-birth-recovery-kit-cream-roller","description":"\u003cp\u003e\u003cmeta charset=\"utf-8\"\u003e\u003cspan\u003eThere are so many beautiful products on the market now to help with healing and comfort after your birth. We have created a kit with a couple of our favourite products from small Australian businesses to aid you in you the recovery journey you deserve - the one kit to fill all your recovery needs!\u003c\/span\u003e\u003c\/p\u003e","published_at":"2023-10-03T14:34:50+08:00","created_at":"2023-10-03T13:34:40+08:00","vendor":"Bundles","type":"","tags":["Baby Shower Gifts","Bundles","C-Section Birth Recovery","Hemorrhoids","Hospital Bag","Post-Partum"],"price":13975,"price_min":13975,"price_max":13975,"available":false,"price_varies":false,"compare_at_price":15685,"compare_at_price_min":15685,"compare_at_price_max":15685,"compare_at_price_varies":false,"variants":[{"id":43056991731901,"title":"Medium","option1":"Medium","option2":null,"option3":null,"sku":"","requires_shipping":true,"taxable":false,"featured_image":null,"available":false,"name":"C-Section Birth Recovery Kit - Cream \u0026 Roller - Medium","public_title":"Medium","options":["Medium"],"price":13975,"weight":1160,"compare_at_price":15685,"inventory_management":"shopify","barcode":"91731901","requires_selling_plan":false,"selling_plan_allocations":[],"quantity_rule":{"min":1,"max":null,"increment":1}},{"id":43056991764669,"title":"Large","option1":"Large","option2":null,"option3":null,"sku":"","requires_shipping":true,"taxable":false,"featured_image":null,"available":false,"name":"C-Section Birth Recovery Kit - Cream \u0026 Roller - Large","public_title":"Large","options":["Large"],"price":13975,"weight":1270,"compare_at_price":15685,"inventory_management":"shopify","barcode":"91764669","requires_selling_plan":false,"selling_plan_allocations":[],"quantity_rule":{"min":1,"max":null,"increment":1}}],"images":["\/\/www.thebirthstore.com.au\/cdn\/shop\/files\/c-section-birth-recovery-kit-cream-roller-738399.jpg?v=1714967949","\/\/www.thebirthstore.com.au\/cdn\/shop\/files\/c-section-birth-recovery-kit-cream-roller-753872.jpg?v=1714967949","\/\/www.thebirthstore.com.au\/cdn\/shop\/files\/c-section-birth-recovery-kit-cream-roller-652326.jpg?v=1714967949"],"featured_image":"\/\/www.thebirthstore.com.au\/cdn\/shop\/files\/c-section-birth-recovery-kit-cream-roller-738399.jpg?v=1714967949","options":["Disposable Maternity \u0026 Postpartum Underwear (Size)"],"media":[{"alt":"C-Section Birth Recovery Kit - Cream \u0026 Roller - The Birth Store-The Birth Store","id":27007579848893,"position":1,"preview_image":{"aspect_ratio":1.0,"height":1080,"width":1080,"src":"\/\/www.thebirthstore.com.au\/cdn\/shop\/files\/c-section-birth-recovery-kit-cream-roller-738399.jpg?v=1714967949"},"aspect_ratio":1.0,"height":1080,"media_type":"image","src":"\/\/www.thebirthstore.com.au\/cdn\/shop\/files\/c-section-birth-recovery-kit-cream-roller-738399.jpg?v=1714967949","width":1080},{"alt":"C-Section Birth Recovery Kit - Cream \u0026 Roller - The Birth Store-The Birth Store","id":27007579881661,"position":2,"preview_image":{"aspect_ratio":0.662,"height":976,"width":646,"src":"\/\/www.thebirthstore.com.au\/cdn\/shop\/files\/c-section-birth-recovery-kit-cream-roller-753872.jpg?v=1714967949"},"aspect_ratio":0.662,"height":976,"media_type":"image","src":"\/\/www.thebirthstore.com.au\/cdn\/shop\/files\/c-section-birth-recovery-kit-cream-roller-753872.jpg?v=1714967949","width":646},{"alt":"C-Section Birth Recovery Kit - Cream \u0026 Roller - The Birth Store-The Birth Store","id":27007579914429,"position":3,"preview_image":{"aspect_ratio":0.671,"height":957,"width":642,"src":"\/\/www.thebirthstore.com.au\/cdn\/shop\/files\/c-section-birth-recovery-kit-cream-roller-652326.jpg?v=1714967949"},"aspect_ratio":0.671,"height":957,"media_type":"image","src":"\/\/www.thebirthstore.com.au\/cdn\/shop\/files\/c-section-birth-recovery-kit-cream-roller-652326.jpg?v=1714967949","width":642}],"requires_selling_plan":false,"selling_plan_groups":[],"content":"\u003cp\u003e\u003cmeta charset=\"utf-8\"\u003e\u003cspan\u003eThere are so many beautiful products on the market now to help with healing and comfort after your birth. We have created a kit with a couple of our favourite products from small Australian businesses to aid you in you the recovery journey you deserve - the one kit to fill all your recovery needs!\u003c\/span\u003e\u003c\/p\u003e"},"options":[{"name":"Disposable Maternity \u0026 Postpartum Underwear (Size)","position":1,"values":["Medium","Large"]}],"custom_metafields":{},"metafields":{"badge":"\u003cdiv style='display:none' class='jdgm-prev-badge' data-average-rating='0.00' data-number-of-reviews='0' data-number-of-questions='0'\u003e \u003cspan class='jdgm-prev-badge__stars' data-score='0.00' tabindex='0' aria-label='0.00 stars' role='button'\u003e \u003cspan class='jdgm-star jdgm--off'\u003e\u003c\/span\u003e\u003cspan class='jdgm-star jdgm--off'\u003e\u003c\/span\u003e\u003cspan class='jdgm-star jdgm--off'\u003e\u003c\/span\u003e\u003cspan class='jdgm-star jdgm--off'\u003e\u003c\/span\u003e\u003cspan class='jdgm-star jdgm--off'\u003e\u003c\/span\u003e \u003c\/span\u003e \u003cspan class='jdgm-prev-badge__text'\u003e No reviews \u003c\/span\u003e \u003c\/div\u003e","widget":"\u003cdiv class='jdgm-rev-widg' data-updated-at='2025-06-13T16:13:40Z' data-average-rating='0.00' data-number-of-reviews='0' data-number-of-questions='0'\u003e \u003cstyle class='jdgm-temp-hiding-style'\u003e.jdgm-rev-widg{ display: none }\u003c\/style\u003e \u003cdiv class='jdgm-rev-widg__header'\u003e \u003ch2 class='jdgm-rev-widg__title'\u003eCustomer Reviews\u003c\/h2\u003e \u003cdiv class='jdgm-rev-widg__summary'\u003e \u003cdiv class='jdgm-rev-widg__summary-stars' aria-label='Average rating is 0.00 stars' role='img'\u003e \u003cspan class='jdgm-star jdgm--off'\u003e\u003c\/span\u003e\u003cspan class='jdgm-star jdgm--off'\u003e\u003c\/span\u003e\u003cspan class='jdgm-star jdgm--off'\u003e\u003c\/span\u003e\u003cspan class='jdgm-star jdgm--off'\u003e\u003c\/span\u003e\u003cspan class='jdgm-star jdgm--off'\u003e\u003c\/span\u003e \u003c\/div\u003e \u003cdiv class='jdgm-rev-widg__summary-text'\u003eBe the first to write a review\u003c\/div\u003e \u003c\/div\u003e \u003ca style='display: none' href='#' class='jdgm-write-rev-link' role='button'\u003eWrite a review\u003c\/a\u003e \u003cdiv class='jdgm-histogram jdgm-temp-hidden'\u003e \u003cdiv class='jdgm-histogram__row' data-rating='5' data-frequency='0' data-percentage='0'\u003e \u003cdiv class='jdgm-histogram__star' role='button' aria-label=\"0% (0) reviews with 5 star rating\" tabindex='0' \u003e\u003cspan class='jdgm-star jdgm--on'\u003e\u003c\/span\u003e\u003cspan class='jdgm-star jdgm--on'\u003e\u003c\/span\u003e\u003cspan class='jdgm-star jdgm--on'\u003e\u003c\/span\u003e\u003cspan class='jdgm-star jdgm--on'\u003e\u003c\/span\u003e\u003cspan class='jdgm-star jdgm--on'\u003e\u003c\/span\u003e\u003c\/div\u003e \u003cdiv class='jdgm-histogram__bar'\u003e \u003cdiv class='jdgm-histogram__bar-content' style='width: 0%;'\u003e \u003c\/div\u003e \u003c\/div\u003e \u003cdiv class='jdgm-histogram__percentage'\u003e0%\u003c\/div\u003e \u003cdiv class='jdgm-histogram__frequency'\u003e(0)\u003c\/div\u003e \u003c\/div\u003e \u003cdiv class='jdgm-histogram__row' data-rating='4' data-frequency='0' data-percentage='0'\u003e \u003cdiv class='jdgm-histogram__star' role='button' aria-label=\"0% (0) reviews with 4 star rating\" tabindex='0' \u003e\u003cspan class='jdgm-star jdgm--on'\u003e\u003c\/span\u003e\u003cspan class='jdgm-star jdgm--on'\u003e\u003c\/span\u003e\u003cspan class='jdgm-star jdgm--on'\u003e\u003c\/span\u003e\u003cspan class='jdgm-star jdgm--on'\u003e\u003c\/span\u003e\u003cspan class='jdgm-star jdgm--off'\u003e\u003c\/span\u003e\u003c\/div\u003e \u003cdiv class='jdgm-histogram__bar'\u003e \u003cdiv class='jdgm-histogram__bar-content' style='width: 0%;'\u003e \u003c\/div\u003e \u003c\/div\u003e \u003cdiv class='jdgm-histogram__percentage'\u003e0%\u003c\/div\u003e \u003cdiv class='jdgm-histogram__frequency'\u003e(0)\u003c\/div\u003e \u003c\/div\u003e \u003cdiv class='jdgm-histogram__row' data-rating='3' data-frequency='0' data-percentage='0'\u003e \u003cdiv class='jdgm-histogram__star' role='button' aria-label=\"0% (0) reviews with 3 star rating\" tabindex='0' \u003e\u003cspan class='jdgm-star jdgm--on'\u003e\u003c\/span\u003e\u003cspan class='jdgm-star jdgm--on'\u003e\u003c\/span\u003e\u003cspan class='jdgm-star jdgm--on'\u003e\u003c\/span\u003e\u003cspan class='jdgm-star jdgm--off'\u003e\u003c\/span\u003e\u003cspan class='jdgm-star jdgm--off'\u003e\u003c\/span\u003e\u003c\/div\u003e \u003cdiv class='jdgm-histogram__bar'\u003e \u003cdiv class='jdgm-histogram__bar-content' style='width: 0%;'\u003e \u003c\/div\u003e \u003c\/div\u003e \u003cdiv class='jdgm-histogram__percentage'\u003e0%\u003c\/div\u003e \u003cdiv class='jdgm-histogram__frequency'\u003e(0)\u003c\/div\u003e \u003c\/div\u003e \u003cdiv class='jdgm-histogram__row' data-rating='2' data-frequency='0' data-percentage='0'\u003e \u003cdiv class='jdgm-histogram__star' role='button' aria-label=\"0% (0) reviews with 2 star rating\" tabindex='0' \u003e\u003cspan class='jdgm-star jdgm--on'\u003e\u003c\/span\u003e\u003cspan class='jdgm-star jdgm--on'\u003e\u003c\/span\u003e\u003cspan class='jdgm-star jdgm--off'\u003e\u003c\/span\u003e\u003cspan class='jdgm-star jdgm--off'\u003e\u003c\/span\u003e\u003cspan class='jdgm-star jdgm--off'\u003e\u003c\/span\u003e\u003c\/div\u003e \u003cdiv class='jdgm-histogram__bar'\u003e \u003cdiv class='jdgm-histogram__bar-content' style='width: 0%;'\u003e \u003c\/div\u003e \u003c\/div\u003e \u003cdiv class='jdgm-histogram__percentage'\u003e0%\u003c\/div\u003e \u003cdiv class='jdgm-histogram__frequency'\u003e(0)\u003c\/div\u003e \u003c\/div\u003e \u003cdiv class='jdgm-histogram__row' data-rating='1' data-frequency='0' data-percentage='0'\u003e \u003cdiv class='jdgm-histogram__star' role='button' aria-label=\"0% (0) reviews with 1 star rating\" tabindex='0' \u003e\u003cspan class='jdgm-star jdgm--on'\u003e\u003c\/span\u003e\u003cspan class='jdgm-star jdgm--off'\u003e\u003c\/span\u003e\u003cspan class='jdgm-star jdgm--off'\u003e\u003c\/span\u003e\u003cspan class='jdgm-star jdgm--off'\u003e\u003c\/span\u003e\u003cspan class='jdgm-star jdgm--off'\u003e\u003c\/span\u003e\u003c\/div\u003e \u003cdiv class='jdgm-histogram__bar'\u003e \u003cdiv class='jdgm-histogram__bar-content' style='width: 0%;'\u003e \u003c\/div\u003e \u003c\/div\u003e \u003cdiv class='jdgm-histogram__percentage'\u003e0%\u003c\/div\u003e \u003cdiv class='jdgm-histogram__frequency'\u003e(0)\u003c\/div\u003e \u003c\/div\u003e \u003cdiv class='jdgm-histogram__row jdgm-histogram__clear-filter' data-rating=null tabindex='0'\u003e\u003c\/div\u003e \u003c\/div\u003e \u003cdiv class='jdgm-rev-widg__sort-wrapper'\u003e\u003c\/div\u003e \u003c\/div\u003e \u003cdiv class='jdgm-rev-widg__body'\u003e \u003cdiv class='jdgm-rev-widg__reviews'\u003e\u003c\/div\u003e \u003cdiv class='jdgm-paginate' data-per-page='10' data-url='https:\/\/api.judge.me\/reviews\/reviews_for_widget' style=\"display: none;\"\u003e\u003c\/div\u003e \u003c\/div\u003e \u003cdiv class='jdgm-rev-widg__paginate-spinner-wrapper'\u003e \u003cdiv class='jdgm-spinner'\u003e\u003c\/div\u003e \u003c\/div\u003e \u003c\/div\u003e"},"default_reviews_metafields":{},"collections":[{"id":512654540989,"handle":"lastof26-10","title":"10%","updated_at":"2026-11-14T20:08:00+08:00","body_html":null,"published_at":"2026-10-12T19:06:42+08:00","sort_order":"best-selling","template_suffix":null,"disjunctive":false,"rules":[],"published_scope":"global"},{"id":283018526909,"handle":"bundles","title":"Bundles","updated_at":"2026-11-08T21:24:04+08:00","body_html":"\u003cp\u003eMake shopping for your bump, birth and beyond easier with our bundle packs. With a pack available for every stage, you can get everything you need with no fuss and with our bundle packs, you even save money.\u003c\/p\u003e","published_at":"2022-02-01T22:33:09+08:00","sort_order":"best-selling","template_suffix":"swaddles-collection","disjunctive":false,"rules":[],"published_scope":"global","image":{"created_at":"2024-05-06T11:59:39+08:00","alt":"Bundles - The Birth Store","width":2048,"height":1365,"src":"\/\/www.thebirthstore.com.au\/cdn\/shop\/collections\/bundles-299009.jpg?v=1714967980"}},{"id":261657460925,"handle":"buy","title":"Buy","updated_at":"2026-11-14T20:08:00+08:00","body_html":"\u003cp\u003eBrowse all of our pregnancy, labour \u0026amp; birth, postpartum and baby essentials here.\u003cbr\u003e\u003c\/p\u003e\n\u003cp\u003e\u003cspan\u003eYou can even buy now and pay later with Afterpay!\u003c\/span\u003e\u003c\/p\u003e","published_at":"2021-03-10T12:05:31+08:00","sort_order":"best-selling","template_suffix":"shop-all-collection","disjunctive":false,"rules":[],"published_scope":"global","image":{"created_at":"2024-05-06T11:59:42+08:00","alt":"Buy - The Birth Store","width":2048,"height":2048,"src":"\/\/www.thebirthstore.com.au\/cdn\/shop\/collections\/buy-964856.jpg?v=1714967982"}},{"id":281712361661,"handle":"c-section-birth-recovery","title":"C-Section Birth Recovery","updated_at":"2026-11-12T20:07:50+08:00","body_html":"","published_at":"2021-12-20T14:19:01+08:00","sort_order":"best-selling","template_suffix":"swaddles-collection","disjunctive":false,"rules":[],"published_scope":"global","image":{"created_at":"2024-05-06T11:59:49+08:00","alt":"C-Section Birth Recovery - The Birth Store","width":1366,"height":2048,"src":"\/\/www.thebirthstore.com.au\/cdn\/shop\/collections\/c-section-birth-recovery-359249.jpg?v=1714967990"}},{"id":281712066749,"handle":"hemorrhoid-care","title":"Haemorrhoid Care","updated_at":"2026-11-12T20:07:50+08:00","body_html":"","published_at":"2021-12-20T14:16:30+08:00","sort_order":"best-selling","template_suffix":"swaddles-collection","disjunctive":false,"rules":[],"published_scope":"global","image":{"created_at":"2024-05-06T12:00:00+08:00","alt":"Haemorrhoid Care - The Birth Store","width":763,"height":556,"src":"\/\/www.thebirthstore.com.au\/cdn\/shop\/collections\/haemorrhoid-care-562138.jpg?v=1714968001"}},{"id":337429201085,"handle":"hospital-bag","title":"Hospital Bag","updated_at":"2026-11-14T20:08:00+08:00","body_html":"","published_at":"2026-06-03T11:36:29+08:00","sort_order":"most-relevant","template_suffix":"","disjunctive":false,"rules":[],"published_scope":"global"},{"id":261658083517,"handle":"post-partum","title":"Postpartum","updated_at":"2026-11-14T20:08:00+08:00","body_html":"\u003cp\u003eShop your postpartum and hospital bag essentials below. Looking for something we don't currently stock? Please reach out and let us know.\u003cbr\u003e\u003c\/p\u003e\n\u003cp\u003e\u003cspan\u003eYou can even buy now and pay later with Afterpay!\u003c\/span\u003e\u003c\/p\u003e","published_at":"2021-03-10T12:33:47+08:00","sort_order":"best-selling","template_suffix":"postpartum-collection","disjunctive":false,"rules":[],"published_scope":"global","image":{"created_at":"2024-05-06T12:00:36+08:00","alt":"Postpartum - The Birth Store","width":611,"height":702,"src":"\/\/www.thebirthstore.com.au\/cdn\/shop\/collections\/postpartum-150119.jpg?v=1714968037"}},{"id":310045933757,"handle":"shop-all-sale","title":"Shop All Sale","updated_at":"2026-11-14T20:08:00+08:00","body_html":"","published_at":"2024-11-12T13:22:43+08:00","sort_order":"best-selling","template_suffix":"","disjunctive":true,"rules":[],"published_scope":"global","image":{"created_at":"2024-11-13T10:58:16+08:00","alt":"Shop All Sale - The Birth Store","width":2048,"height":1365,"src":"\/\/www.thebirthstore.com.au\/cdn\/shop\/collections\/shop-all-sale-297361.jpg?v=1731466697"}}]}
{"item":{"id":7513281200317,"title":"C-Section Birth Recovery Kit - Silicone Strips","handle":"c-section-birth-recovery-kit-silicone-strips","description":"\u003cp\u003e\u003cmeta charset=\"utf-8\"\u003e\u003cspan\u003eThere are so many beautiful products on the market now to help with healing and comfort after your birth. We have created a kit with a couple of our favourite products from small Australian businesses to aid you in you the recovery journey you deserve - the one kit to fill all your recovery needs!\u003c\/span\u003e\u003c\/p\u003e","published_at":"2023-10-03T14:26:20+08:00","created_at":"2023-10-03T13:33:54+08:00","vendor":"Bundles","type":"","tags":["Baby Shower Gifts","Bundles","C-Section Birth Recovery","Hemorrhoids","Hospital Bag","Post-Partum"],"price":9300,"price_min":9300,"price_max":9300,"available":false,"price_varies":false,"compare_at_price":10385,"compare_at_price_min":10385,"compare_at_price_max":10385,"compare_at_price_varies":false,"variants":[{"id":43056990847165,"title":"Medium","option1":"Medium","option2":null,"option3":null,"sku":"","requires_shipping":true,"taxable":false,"featured_image":null,"available":false,"name":"C-Section Birth Recovery Kit - Silicone Strips - Medium","public_title":"Medium","options":["Medium"],"price":9300,"weight":906,"compare_at_price":10385,"inventory_management":"shopify","barcode":"90847165","requires_selling_plan":false,"selling_plan_allocations":[],"quantity_rule":{"min":1,"max":null,"increment":1}},{"id":43056990879933,"title":"Large","option1":"Large","option2":null,"option3":null,"sku":"","requires_shipping":true,"taxable":false,"featured_image":null,"available":false,"name":"C-Section Birth Recovery Kit - Silicone Strips - Large","public_title":"Large","options":["Large"],"price":9300,"weight":1020,"compare_at_price":10385,"inventory_management":"shopify","barcode":"90879933","requires_selling_plan":false,"selling_plan_allocations":[],"quantity_rule":{"min":1,"max":null,"increment":1}}],"images":["\/\/www.thebirthstore.com.au\/cdn\/shop\/files\/c-section-birth-recovery-kit-silicone-strips-465947.jpg?v=1714967950","\/\/www.thebirthstore.com.au\/cdn\/shop\/files\/c-section-birth-recovery-kit-silicone-strips-178982.jpg?v=1714967950","\/\/www.thebirthstore.com.au\/cdn\/shop\/files\/c-section-birth-recovery-kit-silicone-strips-963539.jpg?v=1714967950","\/\/www.thebirthstore.com.au\/cdn\/shop\/files\/c-section-birth-recovery-kit-silicone-strips-308719.jpg?v=1714967950"],"featured_image":"\/\/www.thebirthstore.com.au\/cdn\/shop\/files\/c-section-birth-recovery-kit-silicone-strips-465947.jpg?v=1714967950","options":["Disposable Maternity \u0026 Postpartum Underwear (Size)"],"media":[{"alt":"C-Section Birth Recovery Kit - Silicone Strips - The Birth Store-The Birth Store","id":27007580045501,"position":1,"preview_image":{"aspect_ratio":1.0,"height":1080,"width":1080,"src":"\/\/www.thebirthstore.com.au\/cdn\/shop\/files\/c-section-birth-recovery-kit-silicone-strips-465947.jpg?v=1714967950"},"aspect_ratio":1.0,"height":1080,"media_type":"image","src":"\/\/www.thebirthstore.com.au\/cdn\/shop\/files\/c-section-birth-recovery-kit-silicone-strips-465947.jpg?v=1714967950","width":1080},{"alt":"C-Section Birth Recovery Kit - Silicone Strips - The Birth Store-The Birth Store","id":27007580078269,"position":2,"preview_image":{"aspect_ratio":0.667,"height":1536,"width":1024,"src":"\/\/www.thebirthstore.com.au\/cdn\/shop\/files\/c-section-birth-recovery-kit-silicone-strips-178982.jpg?v=1714967950"},"aspect_ratio":0.667,"height":1536,"media_type":"image","src":"\/\/www.thebirthstore.com.au\/cdn\/shop\/files\/c-section-birth-recovery-kit-silicone-strips-178982.jpg?v=1714967950","width":1024},{"alt":"C-Section Birth Recovery Kit - Silicone Strips - The Birth Store-The Birth Store","id":27007580111037,"position":3,"preview_image":{"aspect_ratio":0.667,"height":915,"width":610,"src":"\/\/www.thebirthstore.com.au\/cdn\/shop\/files\/c-section-birth-recovery-kit-silicone-strips-963539.jpg?v=1714967950"},"aspect_ratio":0.667,"height":915,"media_type":"image","src":"\/\/www.thebirthstore.com.au\/cdn\/shop\/files\/c-section-birth-recovery-kit-silicone-strips-963539.jpg?v=1714967950","width":610},{"alt":"C-Section Birth Recovery Kit - Silicone Strips - The Birth Store-The Birth Store","id":27007580143805,"position":4,"preview_image":{"aspect_ratio":0.667,"height":2048,"width":1365,"src":"\/\/www.thebirthstore.com.au\/cdn\/shop\/files\/c-section-birth-recovery-kit-silicone-strips-308719.jpg?v=1714967950"},"aspect_ratio":0.667,"height":2048,"media_type":"image","src":"\/\/www.thebirthstore.com.au\/cdn\/shop\/files\/c-section-birth-recovery-kit-silicone-strips-308719.jpg?v=1714967950","width":1365}],"requires_selling_plan":false,"selling_plan_groups":[],"content":"\u003cp\u003e\u003cmeta charset=\"utf-8\"\u003e\u003cspan\u003eThere are so many beautiful products on the market now to help with healing and comfort after your birth. We have created a kit with a couple of our favourite products from small Australian businesses to aid you in you the recovery journey you deserve - the one kit to fill all your recovery needs!\u003c\/span\u003e\u003c\/p\u003e"},"options":[{"name":"Disposable Maternity \u0026 Postpartum Underwear (Size)","position":1,"values":["Medium","Large"]}],"custom_metafields":{},"metafields":{"badge":"\u003cdiv style='display:none' class='jdgm-prev-badge' data-average-rating='0.00' data-number-of-reviews='0' data-number-of-questions='0'\u003e \u003cspan class='jdgm-prev-badge__stars' data-score='0.00' tabindex='0' aria-label='0.00 stars' role='button'\u003e \u003cspan class='jdgm-star jdgm--off'\u003e\u003c\/span\u003e\u003cspan class='jdgm-star jdgm--off'\u003e\u003c\/span\u003e\u003cspan class='jdgm-star jdgm--off'\u003e\u003c\/span\u003e\u003cspan class='jdgm-star jdgm--off'\u003e\u003c\/span\u003e\u003cspan class='jdgm-star jdgm--off'\u003e\u003c\/span\u003e \u003c\/span\u003e \u003cspan class='jdgm-prev-badge__text'\u003e No reviews \u003c\/span\u003e \u003c\/div\u003e","widget":"\u003cdiv class='jdgm-rev-widg' data-updated-at='2025-06-13T16:13:40Z' data-average-rating='0.00' data-number-of-reviews='0' data-number-of-questions='0'\u003e \u003cstyle class='jdgm-temp-hiding-style'\u003e.jdgm-rev-widg{ display: none }\u003c\/style\u003e \u003cdiv class='jdgm-rev-widg__header'\u003e \u003ch2 class='jdgm-rev-widg__title'\u003eCustomer Reviews\u003c\/h2\u003e \u003cdiv class='jdgm-rev-widg__summary'\u003e \u003cdiv class='jdgm-rev-widg__summary-stars' aria-label='Average rating is 0.00 stars' role='img'\u003e \u003cspan class='jdgm-star jdgm--off'\u003e\u003c\/span\u003e\u003cspan class='jdgm-star jdgm--off'\u003e\u003c\/span\u003e\u003cspan class='jdgm-star jdgm--off'\u003e\u003c\/span\u003e\u003cspan class='jdgm-star jdgm--off'\u003e\u003c\/span\u003e\u003cspan class='jdgm-star jdgm--off'\u003e\u003c\/span\u003e \u003c\/div\u003e \u003cdiv class='jdgm-rev-widg__summary-text'\u003eBe the first to write a review\u003c\/div\u003e \u003c\/div\u003e \u003ca style='display: none' href='#' class='jdgm-write-rev-link' role='button'\u003eWrite a review\u003c\/a\u003e \u003cdiv class='jdgm-histogram jdgm-temp-hidden'\u003e \u003cdiv class='jdgm-histogram__row' data-rating='5' data-frequency='0' data-percentage='0'\u003e \u003cdiv class='jdgm-histogram__star' role='button' aria-label=\"0% (0) reviews with 5 star rating\" tabindex='0' \u003e\u003cspan class='jdgm-star jdgm--on'\u003e\u003c\/span\u003e\u003cspan class='jdgm-star jdgm--on'\u003e\u003c\/span\u003e\u003cspan class='jdgm-star jdgm--on'\u003e\u003c\/span\u003e\u003cspan class='jdgm-star jdgm--on'\u003e\u003c\/span\u003e\u003cspan class='jdgm-star jdgm--on'\u003e\u003c\/span\u003e\u003c\/div\u003e \u003cdiv class='jdgm-histogram__bar'\u003e \u003cdiv class='jdgm-histogram__bar-content' style='width: 0%;'\u003e \u003c\/div\u003e \u003c\/div\u003e \u003cdiv class='jdgm-histogram__percentage'\u003e0%\u003c\/div\u003e \u003cdiv class='jdgm-histogram__frequency'\u003e(0)\u003c\/div\u003e \u003c\/div\u003e \u003cdiv class='jdgm-histogram__row' data-rating='4' data-frequency='0' data-percentage='0'\u003e \u003cdiv class='jdgm-histogram__star' role='button' aria-label=\"0% (0) reviews with 4 star rating\" tabindex='0' \u003e\u003cspan class='jdgm-star jdgm--on'\u003e\u003c\/span\u003e\u003cspan class='jdgm-star jdgm--on'\u003e\u003c\/span\u003e\u003cspan class='jdgm-star jdgm--on'\u003e\u003c\/span\u003e\u003cspan class='jdgm-star jdgm--on'\u003e\u003c\/span\u003e\u003cspan class='jdgm-star jdgm--off'\u003e\u003c\/span\u003e\u003c\/div\u003e \u003cdiv class='jdgm-histogram__bar'\u003e \u003cdiv class='jdgm-histogram__bar-content' style='width: 0%;'\u003e \u003c\/div\u003e \u003c\/div\u003e \u003cdiv class='jdgm-histogram__percentage'\u003e0%\u003c\/div\u003e \u003cdiv class='jdgm-histogram__frequency'\u003e(0)\u003c\/div\u003e \u003c\/div\u003e \u003cdiv class='jdgm-histogram__row' data-rating='3' data-frequency='0' data-percentage='0'\u003e \u003cdiv class='jdgm-histogram__star' role='button' aria-label=\"0% (0) reviews with 3 star rating\" tabindex='0' \u003e\u003cspan class='jdgm-star jdgm--on'\u003e\u003c\/span\u003e\u003cspan class='jdgm-star jdgm--on'\u003e\u003c\/span\u003e\u003cspan class='jdgm-star jdgm--on'\u003e\u003c\/span\u003e\u003cspan class='jdgm-star jdgm--off'\u003e\u003c\/span\u003e\u003cspan class='jdgm-star jdgm--off'\u003e\u003c\/span\u003e\u003c\/div\u003e \u003cdiv class='jdgm-histogram__bar'\u003e \u003cdiv class='jdgm-histogram__bar-content' style='width: 0%;'\u003e \u003c\/div\u003e \u003c\/div\u003e \u003cdiv class='jdgm-histogram__percentage'\u003e0%\u003c\/div\u003e \u003cdiv class='jdgm-histogram__frequency'\u003e(0)\u003c\/div\u003e \u003c\/div\u003e \u003cdiv class='jdgm-histogram__row' data-rating='2' data-frequency='0' data-percentage='0'\u003e \u003cdiv class='jdgm-histogram__star' role='button' aria-label=\"0% (0) reviews with 2 star rating\" tabindex='0' \u003e\u003cspan class='jdgm-star jdgm--on'\u003e\u003c\/span\u003e\u003cspan class='jdgm-star jdgm--on'\u003e\u003c\/span\u003e\u003cspan class='jdgm-star jdgm--off'\u003e\u003c\/span\u003e\u003cspan class='jdgm-star jdgm--off'\u003e\u003c\/span\u003e\u003cspan class='jdgm-star jdgm--off'\u003e\u003c\/span\u003e\u003c\/div\u003e \u003cdiv class='jdgm-histogram__bar'\u003e \u003cdiv class='jdgm-histogram__bar-content' style='width: 0%;'\u003e \u003c\/div\u003e \u003c\/div\u003e \u003cdiv class='jdgm-histogram__percentage'\u003e0%\u003c\/div\u003e \u003cdiv class='jdgm-histogram__frequency'\u003e(0)\u003c\/div\u003e \u003c\/div\u003e \u003cdiv class='jdgm-histogram__row' data-rating='1' data-frequency='0' data-percentage='0'\u003e \u003cdiv class='jdgm-histogram__star' role='button' aria-label=\"0% (0) reviews with 1 star rating\" tabindex='0' \u003e\u003cspan class='jdgm-star jdgm--on'\u003e\u003c\/span\u003e\u003cspan class='jdgm-star jdgm--off'\u003e\u003c\/span\u003e\u003cspan class='jdgm-star jdgm--off'\u003e\u003c\/span\u003e\u003cspan class='jdgm-star jdgm--off'\u003e\u003c\/span\u003e\u003cspan class='jdgm-star jdgm--off'\u003e\u003c\/span\u003e\u003c\/div\u003e \u003cdiv class='jdgm-histogram__bar'\u003e \u003cdiv class='jdgm-histogram__bar-content' style='width: 0%;'\u003e \u003c\/div\u003e \u003c\/div\u003e \u003cdiv class='jdgm-histogram__percentage'\u003e0%\u003c\/div\u003e \u003cdiv class='jdgm-histogram__frequency'\u003e(0)\u003c\/div\u003e \u003c\/div\u003e \u003cdiv class='jdgm-histogram__row jdgm-histogram__clear-filter' data-rating=null tabindex='0'\u003e\u003c\/div\u003e \u003c\/div\u003e \u003cdiv class='jdgm-rev-widg__sort-wrapper'\u003e\u003c\/div\u003e \u003c\/div\u003e \u003cdiv class='jdgm-rev-widg__body'\u003e \u003cdiv class='jdgm-rev-widg__reviews'\u003e\u003c\/div\u003e \u003cdiv class='jdgm-paginate' data-per-page='10' data-url='https:\/\/api.judge.me\/reviews\/reviews_for_widget' style=\"display: none;\"\u003e\u003c\/div\u003e \u003c\/div\u003e \u003cdiv class='jdgm-rev-widg__paginate-spinner-wrapper'\u003e \u003cdiv class='jdgm-spinner'\u003e\u003c\/div\u003e \u003c\/div\u003e \u003c\/div\u003e"},"default_reviews_metafields":{},"collections":[{"id":512654540989,"handle":"lastof26-10","title":"10%","updated_at":"2026-11-14T20:08:00+08:00","body_html":null,"published_at":"2026-10-12T19:06:42+08:00","sort_order":"best-selling","template_suffix":null,"disjunctive":false,"rules":[],"published_scope":"global"},{"id":283018526909,"handle":"bundles","title":"Bundles","updated_at":"2026-11-08T21:24:04+08:00","body_html":"\u003cp\u003eMake shopping for your bump, birth and beyond easier with our bundle packs. With a pack available for every stage, you can get everything you need with no fuss and with our bundle packs, you even save money.\u003c\/p\u003e","published_at":"2022-02-01T22:33:09+08:00","sort_order":"best-selling","template_suffix":"swaddles-collection","disjunctive":false,"rules":[],"published_scope":"global","image":{"created_at":"2024-05-06T11:59:39+08:00","alt":"Bundles - The Birth Store","width":2048,"height":1365,"src":"\/\/www.thebirthstore.com.au\/cdn\/shop\/collections\/bundles-299009.jpg?v=1714967980"}},{"id":261657460925,"handle":"buy","title":"Buy","updated_at":"2026-11-14T20:08:00+08:00","body_html":"\u003cp\u003eBrowse all of our pregnancy, labour \u0026amp; birth, postpartum and baby essentials here.\u003cbr\u003e\u003c\/p\u003e\n\u003cp\u003e\u003cspan\u003eYou can even buy now and pay later with Afterpay!\u003c\/span\u003e\u003c\/p\u003e","published_at":"2021-03-10T12:05:31+08:00","sort_order":"best-selling","template_suffix":"shop-all-collection","disjunctive":false,"rules":[],"published_scope":"global","image":{"created_at":"2024-05-06T11:59:42+08:00","alt":"Buy - The Birth Store","width":2048,"height":2048,"src":"\/\/www.thebirthstore.com.au\/cdn\/shop\/collections\/buy-964856.jpg?v=1714967982"}},{"id":281712361661,"handle":"c-section-birth-recovery","title":"C-Section Birth Recovery","updated_at":"2026-11-12T20:07:50+08:00","body_html":"","published_at":"2021-12-20T14:19:01+08:00","sort_order":"best-selling","template_suffix":"swaddles-collection","disjunctive":false,"rules":[],"published_scope":"global","image":{"created_at":"2024-05-06T11:59:49+08:00","alt":"C-Section Birth Recovery - The Birth Store","width":1366,"height":2048,"src":"\/\/www.thebirthstore.com.au\/cdn\/shop\/collections\/c-section-birth-recovery-359249.jpg?v=1714967990"}},{"id":281712066749,"handle":"hemorrhoid-care","title":"Haemorrhoid Care","updated_at":"2026-11-12T20:07:50+08:00","body_html":"","published_at":"2021-12-20T14:16:30+08:00","sort_order":"best-selling","template_suffix":"swaddles-collection","disjunctive":false,"rules":[],"published_scope":"global","image":{"created_at":"2024-05-06T12:00:00+08:00","alt":"Haemorrhoid Care - The Birth Store","width":763,"height":556,"src":"\/\/www.thebirthstore.com.au\/cdn\/shop\/collections\/haemorrhoid-care-562138.jpg?v=1714968001"}},{"id":337429201085,"handle":"hospital-bag","title":"Hospital Bag","updated_at":"2026-11-14T20:08:00+08:00","body_html":"","published_at":"2026-06-03T11:36:29+08:00","sort_order":"most-relevant","template_suffix":"","disjunctive":false,"rules":[],"published_scope":"global"},{"id":261658083517,"handle":"post-partum","title":"Postpartum","updated_at":"2026-11-14T20:08:00+08:00","body_html":"\u003cp\u003eShop your postpartum and hospital bag essentials below. Looking for something we don't currently stock? Please reach out and let us know.\u003cbr\u003e\u003c\/p\u003e\n\u003cp\u003e\u003cspan\u003eYou can even buy now and pay later with Afterpay!\u003c\/span\u003e\u003c\/p\u003e","published_at":"2021-03-10T12:33:47+08:00","sort_order":"best-selling","template_suffix":"postpartum-collection","disjunctive":false,"rules":[],"published_scope":"global","image":{"created_at":"2024-05-06T12:00:36+08:00","alt":"Postpartum - The Birth Store","width":611,"height":702,"src":"\/\/www.thebirthstore.com.au\/cdn\/shop\/collections\/postpartum-150119.jpg?v=1714968037"}},{"id":310045933757,"handle":"shop-all-sale","title":"Shop All Sale","updated_at":"2026-11-14T20:08:00+08:00","body_html":"","published_at":"2024-11-12T13:22:43+08:00","sort_order":"best-selling","template_suffix":"","disjunctive":true,"rules":[],"published_scope":"global","image":{"created_at":"2024-11-13T10:58:16+08:00","alt":"Shop All Sale - The Birth Store","width":2048,"height":1365,"src":"\/\/www.thebirthstore.com.au\/cdn\/shop\/collections\/shop-all-sale-297361.jpg?v=1731466697"}}]}
{"item":{"id":7513280381117,"title":"Labour \u0026 Birth Box - Spiky Ball","handle":"labour-birth-box-spiky-ball","description":"\u003cp\u003e\u003cmeta charset=\"utf-8\"\u003e\u003cspan\u003eThere are so many beautiful products on the market now to help support you in labour \u0026amp; birth. We have created a kit with a couple of our favourite products from our range and other small Australian businesses to support you in labour \u0026amp; birth.\u003c\/span\u003e\u003c\/p\u003e","published_at":"2023-10-03T14:04:09+08:00","created_at":"2023-10-03T13:31:42+08:00","vendor":"Bundles","type":"","tags":["Baby Shower Gifts","Birth","Bundles","Hospital Bag","Labour Preparation","Labour Progression","Nausea","Pain Relief","Pregnancy"],"price":6200,"price_min":6200,"price_max":6200,"available":true,"price_varies":false,"compare_at_price":6900,"compare_at_price_min":6900,"compare_at_price_max":6900,"compare_at_price_varies":false,"variants":[{"id":43056986161341,"title":"Black","option1":"Black","option2":null,"option3":null,"sku":"","requires_shipping":true,"taxable":false,"featured_image":null,"available":true,"name":"Labour \u0026 Birth Box - Spiky Ball - Black","public_title":"Black","options":["Black"],"price":6200,"weight":267,"compare_at_price":6900,"inventory_management":"shopify","barcode":"86161341","requires_selling_plan":false,"selling_plan_allocations":[],"quantity_rule":{"min":1,"max":null,"increment":1}},{"id":43056986194109,"title":"Purple","option1":"Purple","option2":null,"option3":null,"sku":"","requires_shipping":true,"taxable":false,"featured_image":null,"available":true,"name":"Labour \u0026 Birth Box - Spiky Ball - Purple","public_title":"Purple","options":["Purple"],"price":6200,"weight":267,"compare_at_price":6900,"inventory_management":"shopify","barcode":"86194109","requires_selling_plan":false,"selling_plan_allocations":[],"quantity_rule":{"min":1,"max":null,"increment":1}},{"id":43056986226877,"title":"Pink","option1":"Pink","option2":null,"option3":null,"sku":"","requires_shipping":true,"taxable":false,"featured_image":null,"available":true,"name":"Labour \u0026 Birth Box - Spiky Ball - Pink","public_title":"Pink","options":["Pink"],"price":6200,"weight":267,"compare_at_price":6900,"inventory_management":"shopify","barcode":"86226877","requires_selling_plan":false,"selling_plan_allocations":[],"quantity_rule":{"min":1,"max":null,"increment":1}},{"id":43056986259645,"title":"Blue","option1":"Blue","option2":null,"option3":null,"sku":"","requires_shipping":true,"taxable":false,"featured_image":null,"available":true,"name":"Labour \u0026 Birth Box - Spiky Ball - Blue","public_title":"Blue","options":["Blue"],"price":6200,"weight":267,"compare_at_price":6900,"inventory_management":"shopify","barcode":"86259645","requires_selling_plan":false,"selling_plan_allocations":[],"quantity_rule":{"min":1,"max":null,"increment":1}}],"images":["\/\/www.thebirthstore.com.au\/cdn\/shop\/files\/labour-birth-box-spiky-ball-2914052.png?v=1780886364","\/\/www.thebirthstore.com.au\/cdn\/shop\/files\/labour-birth-box-spiky-ball-404808.jpg?v=1758807490","\/\/www.thebirthstore.com.au\/cdn\/shop\/files\/clary-sage-oil-10ml-814641.jpg?v=1750217972","\/\/www.thebirthstore.com.au\/cdn\/shop\/files\/labour-birth-roller-blends-10mls-160488.jpg?v=1750217900"],"featured_image":"\/\/www.thebirthstore.com.au\/cdn\/shop\/files\/labour-birth-box-spiky-ball-2914052.png?v=1780886364","options":["Spiky Massage Ball (Colour)"],"media":[{"alt":"Labour \u0026 Birth Box - Spiky Ball - The Birth Store - Bundles","id":29672202600637,"position":1,"preview_image":{"aspect_ratio":1.0,"height":828,"width":828,"src":"\/\/www.thebirthstore.com.au\/cdn\/shop\/files\/labour-birth-box-spiky-ball-2914052.png?v=1780886364"},"aspect_ratio":1.0,"height":828,"media_type":"image","src":"\/\/www.thebirthstore.com.au\/cdn\/shop\/files\/labour-birth-box-spiky-ball-2914052.png?v=1780886364","width":828},{"alt":"Labour \u0026 Birth Box - Spiky Ball - The Birth Store-The Birth Store","id":27007587188925,"position":2,"preview_image":{"aspect_ratio":0.786,"height":2048,"width":1609,"src":"\/\/www.thebirthstore.com.au\/cdn\/shop\/files\/labour-birth-box-spiky-ball-404808.jpg?v=1758807490"},"aspect_ratio":0.786,"height":2048,"media_type":"image","src":"\/\/www.thebirthstore.com.au\/cdn\/shop\/files\/labour-birth-box-spiky-ball-404808.jpg?v=1758807490","width":1609},{"alt":"Clary Sage Oil - 10ml - The Birth Store-The Birth Store","id":27007581225149,"position":3,"preview_image":{"aspect_ratio":0.667,"height":2048,"width":1365,"src":"\/\/www.thebirthstore.com.au\/cdn\/shop\/files\/clary-sage-oil-10ml-814641.jpg?v=1750217972"},"aspect_ratio":0.667,"height":2048,"media_type":"image","src":"\/\/www.thebirthstore.com.au\/cdn\/shop\/files\/clary-sage-oil-10ml-814641.jpg?v=1750217972","width":1365},{"alt":"Labour \u0026 Birth Roller Blends - 10mls - The Birth Store-The Birth Store","id":27007590400189,"position":4,"preview_image":{"aspect_ratio":1.0,"height":2048,"width":2048,"src":"\/\/www.thebirthstore.com.au\/cdn\/shop\/files\/labour-birth-roller-blends-10mls-160488.jpg?v=1750217900"},"aspect_ratio":1.0,"height":2048,"media_type":"image","src":"\/\/www.thebirthstore.com.au\/cdn\/shop\/files\/labour-birth-roller-blends-10mls-160488.jpg?v=1750217900","width":2048}],"requires_selling_plan":false,"selling_plan_groups":[],"content":"\u003cp\u003e\u003cmeta charset=\"utf-8\"\u003e\u003cspan\u003eThere are so many beautiful products on the market now to help support you in labour \u0026amp; birth. We have created a kit with a couple of our favourite products from our range and other small Australian businesses to support you in labour \u0026amp; birth.\u003c\/span\u003e\u003c\/p\u003e"},"options":[{"name":"Spiky Massage Ball (Colour)","position":1,"values":["Black","Purple","Pink","Blue"]}],"custom_metafields":{},"metafields":{"badge":"\u003cdiv style='display:none' class='jdgm-prev-badge' data-average-rating='0.00' data-number-of-reviews='0' data-number-of-questions='0'\u003e \u003cspan class='jdgm-prev-badge__stars' data-score='0.00' tabindex='0' aria-label='0.00 stars' role='button'\u003e \u003cspan class='jdgm-star jdgm--off'\u003e\u003c\/span\u003e\u003cspan class='jdgm-star jdgm--off'\u003e\u003c\/span\u003e\u003cspan class='jdgm-star jdgm--off'\u003e\u003c\/span\u003e\u003cspan class='jdgm-star jdgm--off'\u003e\u003c\/span\u003e\u003cspan class='jdgm-star jdgm--off'\u003e\u003c\/span\u003e \u003c\/span\u003e \u003cspan class='jdgm-prev-badge__text'\u003e No reviews \u003c\/span\u003e \u003c\/div\u003e","widget":"\u003cdiv class='jdgm-rev-widg' data-updated-at='2025-06-13T16:13:40Z' data-average-rating='0.00' data-number-of-reviews='0' data-number-of-questions='0'\u003e \u003cstyle class='jdgm-temp-hiding-style'\u003e.jdgm-rev-widg{ display: none }\u003c\/style\u003e \u003cdiv class='jdgm-rev-widg__header'\u003e \u003ch2 class='jdgm-rev-widg__title'\u003eCustomer Reviews\u003c\/h2\u003e \u003cdiv class='jdgm-rev-widg__summary'\u003e \u003cdiv class='jdgm-rev-widg__summary-stars' aria-label='Average rating is 0.00 stars' role='img'\u003e \u003cspan class='jdgm-star jdgm--off'\u003e\u003c\/span\u003e\u003cspan class='jdgm-star jdgm--off'\u003e\u003c\/span\u003e\u003cspan class='jdgm-star jdgm--off'\u003e\u003c\/span\u003e\u003cspan class='jdgm-star jdgm--off'\u003e\u003c\/span\u003e\u003cspan class='jdgm-star jdgm--off'\u003e\u003c\/span\u003e \u003c\/div\u003e \u003cdiv class='jdgm-rev-widg__summary-text'\u003eBe the first to write a review\u003c\/div\u003e \u003c\/div\u003e \u003ca style='display: none' href='#' class='jdgm-write-rev-link' role='button'\u003eWrite a review\u003c\/a\u003e \u003cdiv class='jdgm-histogram jdgm-temp-hidden'\u003e \u003cdiv class='jdgm-histogram__row' data-rating='5' data-frequency='0' data-percentage='0'\u003e \u003cdiv class='jdgm-histogram__star' role='button' aria-label=\"0% (0) reviews with 5 star rating\" tabindex='0' \u003e\u003cspan class='jdgm-star jdgm--on'\u003e\u003c\/span\u003e\u003cspan class='jdgm-star jdgm--on'\u003e\u003c\/span\u003e\u003cspan class='jdgm-star jdgm--on'\u003e\u003c\/span\u003e\u003cspan class='jdgm-star jdgm--on'\u003e\u003c\/span\u003e\u003cspan class='jdgm-star jdgm--on'\u003e\u003c\/span\u003e\u003c\/div\u003e \u003cdiv class='jdgm-histogram__bar'\u003e \u003cdiv class='jdgm-histogram__bar-content' style='width: 0%;'\u003e \u003c\/div\u003e \u003c\/div\u003e \u003cdiv class='jdgm-histogram__percentage'\u003e0%\u003c\/div\u003e \u003cdiv class='jdgm-histogram__frequency'\u003e(0)\u003c\/div\u003e \u003c\/div\u003e \u003cdiv class='jdgm-histogram__row' data-rating='4' data-frequency='0' data-percentage='0'\u003e \u003cdiv class='jdgm-histogram__star' role='button' aria-label=\"0% (0) reviews with 4 star rating\" tabindex='0' \u003e\u003cspan class='jdgm-star jdgm--on'\u003e\u003c\/span\u003e\u003cspan class='jdgm-star jdgm--on'\u003e\u003c\/span\u003e\u003cspan class='jdgm-star jdgm--on'\u003e\u003c\/span\u003e\u003cspan class='jdgm-star jdgm--on'\u003e\u003c\/span\u003e\u003cspan class='jdgm-star jdgm--off'\u003e\u003c\/span\u003e\u003c\/div\u003e \u003cdiv class='jdgm-histogram__bar'\u003e \u003cdiv class='jdgm-histogram__bar-content' style='width: 0%;'\u003e \u003c\/div\u003e \u003c\/div\u003e \u003cdiv class='jdgm-histogram__percentage'\u003e0%\u003c\/div\u003e \u003cdiv class='jdgm-histogram__frequency'\u003e(0)\u003c\/div\u003e \u003c\/div\u003e \u003cdiv class='jdgm-histogram__row' data-rating='3' data-frequency='0' data-percentage='0'\u003e \u003cdiv class='jdgm-histogram__star' role='button' aria-label=\"0% (0) reviews with 3 star rating\" tabindex='0' \u003e\u003cspan class='jdgm-star jdgm--on'\u003e\u003c\/span\u003e\u003cspan class='jdgm-star jdgm--on'\u003e\u003c\/span\u003e\u003cspan class='jdgm-star jdgm--on'\u003e\u003c\/span\u003e\u003cspan class='jdgm-star jdgm--off'\u003e\u003c\/span\u003e\u003cspan class='jdgm-star jdgm--off'\u003e\u003c\/span\u003e\u003c\/div\u003e \u003cdiv class='jdgm-histogram__bar'\u003e \u003cdiv class='jdgm-histogram__bar-content' style='width: 0%;'\u003e \u003c\/div\u003e \u003c\/div\u003e \u003cdiv class='jdgm-histogram__percentage'\u003e0%\u003c\/div\u003e \u003cdiv class='jdgm-histogram__frequency'\u003e(0)\u003c\/div\u003e \u003c\/div\u003e \u003cdiv class='jdgm-histogram__row' data-rating='2' data-frequency='0' data-percentage='0'\u003e \u003cdiv class='jdgm-histogram__star' role='button' aria-label=\"0% (0) reviews with 2 star rating\" tabindex='0' \u003e\u003cspan class='jdgm-star jdgm--on'\u003e\u003c\/span\u003e\u003cspan class='jdgm-star jdgm--on'\u003e\u003c\/span\u003e\u003cspan class='jdgm-star jdgm--off'\u003e\u003c\/span\u003e\u003cspan class='jdgm-star jdgm--off'\u003e\u003c\/span\u003e\u003cspan class='jdgm-star jdgm--off'\u003e\u003c\/span\u003e\u003c\/div\u003e \u003cdiv class='jdgm-histogram__bar'\u003e \u003cdiv class='jdgm-histogram__bar-content' style='width: 0%;'\u003e \u003c\/div\u003e \u003c\/div\u003e \u003cdiv class='jdgm-histogram__percentage'\u003e0%\u003c\/div\u003e \u003cdiv class='jdgm-histogram__frequency'\u003e(0)\u003c\/div\u003e \u003c\/div\u003e \u003cdiv class='jdgm-histogram__row' data-rating='1' data-frequency='0' data-percentage='0'\u003e \u003cdiv class='jdgm-histogram__star' role='button' aria-label=\"0% (0) reviews with 1 star rating\" tabindex='0' \u003e\u003cspan class='jdgm-star jdgm--on'\u003e\u003c\/span\u003e\u003cspan class='jdgm-star jdgm--off'\u003e\u003c\/span\u003e\u003cspan class='jdgm-star jdgm--off'\u003e\u003c\/span\u003e\u003cspan class='jdgm-star jdgm--off'\u003e\u003c\/span\u003e\u003cspan class='jdgm-star jdgm--off'\u003e\u003c\/span\u003e\u003c\/div\u003e \u003cdiv class='jdgm-histogram__bar'\u003e \u003cdiv class='jdgm-histogram__bar-content' style='width: 0%;'\u003e \u003c\/div\u003e \u003c\/div\u003e \u003cdiv class='jdgm-histogram__percentage'\u003e0%\u003c\/div\u003e \u003cdiv class='jdgm-histogram__frequency'\u003e(0)\u003c\/div\u003e \u003c\/div\u003e \u003cdiv class='jdgm-histogram__row jdgm-histogram__clear-filter' data-rating=null tabindex='0'\u003e\u003c\/div\u003e \u003c\/div\u003e \u003cdiv class='jdgm-rev-widg__sort-wrapper'\u003e\u003c\/div\u003e \u003c\/div\u003e \u003cdiv class='jdgm-rev-widg__body'\u003e \u003cdiv class='jdgm-rev-widg__reviews'\u003e\u003c\/div\u003e \u003cdiv class='jdgm-paginate' data-per-page='10' data-url='https:\/\/api.judge.me\/reviews\/reviews_for_widget' style=\"display: none;\"\u003e\u003c\/div\u003e \u003c\/div\u003e \u003cdiv class='jdgm-rev-widg__paginate-spinner-wrapper'\u003e \u003cdiv class='jdgm-spinner'\u003e\u003c\/div\u003e \u003c\/div\u003e \u003c\/div\u003e"},"default_reviews_metafields":{},"collections":[{"id":512654540989,"handle":"lastof26-10","title":"10%","updated_at":"2026-11-14T20:08:00+08:00","body_html":null,"published_at":"2026-10-12T19:06:42+08:00","sort_order":"best-selling","template_suffix":null,"disjunctive":false,"rules":[],"published_scope":"global"},{"id":283018526909,"handle":"bundles","title":"Bundles","updated_at":"2026-11-08T21:24:04+08:00","body_html":"\u003cp\u003eMake shopping for your bump, birth and beyond easier with our bundle packs. With a pack available for every stage, you can get everything you need with no fuss and with our bundle packs, you even save money.\u003c\/p\u003e","published_at":"2022-02-01T22:33:09+08:00","sort_order":"best-selling","template_suffix":"swaddles-collection","disjunctive":false,"rules":[],"published_scope":"global","image":{"created_at":"2024-05-06T11:59:39+08:00","alt":"Bundles - The Birth Store","width":2048,"height":1365,"src":"\/\/www.thebirthstore.com.au\/cdn\/shop\/collections\/bundles-299009.jpg?v=1714967980"}},{"id":261657460925,"handle":"buy","title":"Buy","updated_at":"2026-11-14T20:08:00+08:00","body_html":"\u003cp\u003eBrowse all of our pregnancy, labour \u0026amp; birth, postpartum and baby essentials here.\u003cbr\u003e\u003c\/p\u003e\n\u003cp\u003e\u003cspan\u003eYou can even buy now and pay later with Afterpay!\u003c\/span\u003e\u003c\/p\u003e","published_at":"2021-03-10T12:05:31+08:00","sort_order":"best-selling","template_suffix":"shop-all-collection","disjunctive":false,"rules":[],"published_scope":"global","image":{"created_at":"2024-05-06T11:59:42+08:00","alt":"Buy - The Birth Store","width":2048,"height":2048,"src":"\/\/www.thebirthstore.com.au\/cdn\/shop\/collections\/buy-964856.jpg?v=1714967982"}},{"id":337429201085,"handle":"hospital-bag","title":"Hospital Bag","updated_at":"2026-11-14T20:08:00+08:00","body_html":"","published_at":"2026-06-03T11:36:29+08:00","sort_order":"most-relevant","template_suffix":"","disjunctive":false,"rules":[],"published_scope":"global"},{"id":261658214589,"handle":"labour-and-birth-buy","title":"Labour \u0026 Birth","updated_at":"2026-11-14T20:08:00+08:00","body_html":"\u003cp\u003eWe stock a large range of Elle TENS machines for you to buy for your labour and birth. We stock the Elle TENS, Elle TENS 2 and Elle TENS Plus, we also hire these out if that suits you better, please head over to our TENS machine hire page for more information. We ship Australia wide or have options for local delivery\/pick-up in Perth if you are due ASAP. We also stock other items for your labour and birth. \u003c\/p\u003e\n\u003cp\u003eLooking for something we don't currently stock? Please reach out and let us know.\u003c\/p\u003e\n\u003cp\u003e\u003cspan\u003eYou can even buy now and pay later with Afterpay!\u003c\/span\u003e\u003c\/p\u003e","published_at":"2021-03-10T12:34:43+08:00","sort_order":"best-selling","template_suffix":"labour-birth-collection","disjunctive":false,"rules":[],"published_scope":"global","image":{"created_at":"2024-05-06T12:00:09+08:00","alt":"Labour \u0026 Birth - The Birth Store","width":1080,"height":981,"src":"\/\/www.thebirthstore.com.au\/cdn\/shop\/collections\/labour-birth-342038.jpg?v=1714968009"}},{"id":512272957629,"handle":"labour-birth-essentials","title":"Labour \u0026 Birth Essentials","updated_at":"2026-11-14T20:08:00+08:00","body_html":null,"published_at":"2026-10-06T21:00:01+08:00","sort_order":"most-relevant","template_suffix":"labournbirthemail","disjunctive":false,"rules":[],"published_scope":"global"},{"id":281712558269,"handle":"labour-aids","title":"Labour Aids","updated_at":"2026-11-14T20:08:00+08:00","body_html":"","published_at":"2021-12-20T14:22:16+08:00","sort_order":"best-selling","template_suffix":"labour-aids-collection","disjunctive":false,"rules":[],"published_scope":"global","image":{"created_at":"2024-05-06T12:00:11+08:00","alt":"Labour Aids - The Birth Store","width":1365,"height":2048,"src":"\/\/www.thebirthstore.com.au\/cdn\/shop\/collections\/labour-aids-211824.jpg?v=1714968012"}},{"id":281712525501,"handle":"labour-preparation","title":"Labour Preparation","updated_at":"2026-11-14T20:08:00+08:00","body_html":"","published_at":"2021-12-20T14:20:12+08:00","sort_order":"best-selling","template_suffix":"labour-preparation-collec","disjunctive":false,"rules":[],"published_scope":"global","image":{"created_at":"2024-05-06T12:00:13+08:00","alt":"Labour Preparation - The Birth Store","width":1024,"height":1536,"src":"\/\/www.thebirthstore.com.au\/cdn\/shop\/collections\/labour-preparation-271961.jpg?v=1714968013"}},{"id":295224836285,"handle":"nausea","title":"Nausea","updated_at":"2026-11-14T20:08:00+08:00","body_html":"","published_at":"2023-11-10T20:47:34+08:00","sort_order":"best-selling","template_suffix":"nausea-collection","disjunctive":false,"rules":[],"published_scope":"global","image":{"created_at":"2024-05-06T12:00:24+08:00","alt":"Nausea - The Birth Store","width":610,"height":915,"src":"\/\/www.thebirthstore.com.au\/cdn\/shop\/collections\/nausea-404101.jpg?v=1714968024"}},{"id":281712591037,"handle":"pain-relief","title":"Pain Relief","updated_at":"2026-11-14T20:08:00+08:00","body_html":"","published_at":"2021-12-20T14:22:45+08:00","sort_order":"best-selling","template_suffix":"pain-relief-collection","disjunctive":false,"rules":[],"published_scope":"global","image":{"created_at":"2024-05-06T12:00:27+08:00","alt":"Pain Relief - The Birth Store","width":1365,"height":2048,"src":"\/\/www.thebirthstore.com.au\/cdn\/shop\/collections\/pain-relief-878865.jpg?v=1714968027"}},{"id":261658149053,"handle":"pregnancy-and-maternity-products","title":"Pregnancy","updated_at":"2026-11-14T20:08:00+08:00","body_html":"\u003cp\u003eShop your pregnancy essentials below. Looking for something we don't currently stock? Please reach out and let us know.\u003cbr\u003e\u003c\/p\u003e\n\u003cp\u003e\u003cspan\u003eYou can even buy now and pay later with Afterpay!\u003c\/span\u003e\u003c\/p\u003e","published_at":"2021-03-10T12:34:22+08:00","sort_order":"best-selling","template_suffix":"pregnancy-collection","disjunctive":false,"rules":[],"published_scope":"global","image":{"created_at":"2024-05-06T12:00:40+08:00","alt":"Pregnancy - The Birth Store","width":1024,"height":1536,"src":"\/\/www.thebirthstore.com.au\/cdn\/shop\/collections\/pregnancy-899677.jpg?v=1714968040"}},{"id":310045933757,"handle":"shop-all-sale","title":"Shop All Sale","updated_at":"2026-11-14T20:08:00+08:00","body_html":"","published_at":"2024-11-12T13:22:43+08:00","sort_order":"best-selling","template_suffix":"","disjunctive":true,"rules":[],"published_scope":"global","image":{"created_at":"2024-11-13T10:58:16+08:00","alt":"Shop All Sale - The Birth Store","width":2048,"height":1365,"src":"\/\/www.thebirthstore.com.au\/cdn\/shop\/collections\/shop-all-sale-297361.jpg?v=1731466697"}}]}
{"item":{"id":7513280315581,"title":"Labour \u0026 Birth Box - Wooden Birth Comb","handle":"labour-birth-box-wooden-birth-comb","description":"\u003cp\u003e\u003cmeta charset=\"utf-8\"\u003e\u003cspan\u003eThere are so many beautiful products on the market now to help support you in labour \u0026amp; birth. We have created a kit with a couple of our favourite products from our range and other small Australian businesses to support you in labour \u0026amp; birth.\u003c\/span\u003e\u003c\/p\u003e","published_at":"2023-10-03T14:00:51+08:00","created_at":"2023-10-03T13:30:48+08:00","vendor":"Bundles","type":"","tags":["Baby Shower Gifts","Birth","Bundles","Hospital Bag","Labour Preparation","Labour Progression","Nausea","Pain Relief","Pregnancy"],"price":7600,"price_min":7600,"price_max":7600,"available":true,"price_varies":false,"compare_at_price":8495,"compare_at_price_min":8495,"compare_at_price_max":8495,"compare_at_price_varies":false,"variants":[{"id":43056985669821,"title":"Default Title","option1":"Default Title","option2":null,"option3":null,"sku":"","requires_shipping":true,"taxable":false,"featured_image":null,"available":true,"name":"Labour \u0026 Birth Box - Wooden Birth Comb","public_title":null,"options":["Default Title"],"price":7600,"weight":265,"compare_at_price":8495,"inventory_management":"shopify","barcode":"04109245","requires_selling_plan":false,"selling_plan_allocations":[],"quantity_rule":{"min":1,"max":null,"increment":1}}],"images":["\/\/www.thebirthstore.com.au\/cdn\/shop\/files\/labour-birth-box-wooden-birth-comb-132802.jpg?v=1780886521","\/\/www.thebirthstore.com.au\/cdn\/shop\/files\/labour-birth-box-wooden-birth-comb-447199.jpg?v=1714967987","\/\/www.thebirthstore.com.au\/cdn\/shop\/files\/labour-birth-box-wooden-birth-comb-801370.jpg?v=1714967987","\/\/www.thebirthstore.com.au\/cdn\/shop\/files\/labour-birth-box-wooden-birth-comb-860343.jpg?v=1714967987"],"featured_image":"\/\/www.thebirthstore.com.au\/cdn\/shop\/files\/labour-birth-box-wooden-birth-comb-132802.jpg?v=1780886521","options":["Title"],"media":[{"alt":"Labour \u0026 Birth Box - Wooden Birth Comb - The Birth Store-The Birth Store","id":27007588368573,"position":1,"preview_image":{"aspect_ratio":1.007,"height":545,"width":549,"src":"\/\/www.thebirthstore.com.au\/cdn\/shop\/files\/labour-birth-box-wooden-birth-comb-132802.jpg?v=1780886521"},"aspect_ratio":1.007,"height":545,"media_type":"image","src":"\/\/www.thebirthstore.com.au\/cdn\/shop\/files\/labour-birth-box-wooden-birth-comb-132802.jpg?v=1780886521","width":549},{"alt":"Labour \u0026 Birth Box - Wooden Birth Comb - The Birth Store-The Birth Store","id":27007588466877,"position":2,"preview_image":{"aspect_ratio":1.0,"height":2048,"width":2048,"src":"\/\/www.thebirthstore.com.au\/cdn\/shop\/files\/labour-birth-box-wooden-birth-comb-447199.jpg?v=1714967987"},"aspect_ratio":1.0,"height":2048,"media_type":"image","src":"\/\/www.thebirthstore.com.au\/cdn\/shop\/files\/labour-birth-box-wooden-birth-comb-447199.jpg?v=1714967987","width":2048},{"alt":"Labour \u0026 Birth Box - Wooden Birth Comb - The Birth Store-The Birth Store","id":27007588499645,"position":3,"preview_image":{"aspect_ratio":0.667,"height":2048,"width":1365,"src":"\/\/www.thebirthstore.com.au\/cdn\/shop\/files\/labour-birth-box-wooden-birth-comb-801370.jpg?v=1714967987"},"aspect_ratio":0.667,"height":2048,"media_type":"image","src":"\/\/www.thebirthstore.com.au\/cdn\/shop\/files\/labour-birth-box-wooden-birth-comb-801370.jpg?v=1714967987","width":1365},{"alt":"Labour \u0026 Birth Box - Wooden Birth Comb - The Birth Store-The Birth Store","id":27007588532413,"position":4,"preview_image":{"aspect_ratio":1.0,"height":600,"width":600,"src":"\/\/www.thebirthstore.com.au\/cdn\/shop\/files\/labour-birth-box-wooden-birth-comb-860343.jpg?v=1714967987"},"aspect_ratio":1.0,"height":600,"media_type":"image","src":"\/\/www.thebirthstore.com.au\/cdn\/shop\/files\/labour-birth-box-wooden-birth-comb-860343.jpg?v=1714967987","width":600}],"requires_selling_plan":false,"selling_plan_groups":[],"content":"\u003cp\u003e\u003cmeta charset=\"utf-8\"\u003e\u003cspan\u003eThere are so many beautiful products on the market now to help support you in labour \u0026amp; birth. We have created a kit with a couple of our favourite products from our range and other small Australian businesses to support you in labour \u0026amp; birth.\u003c\/span\u003e\u003c\/p\u003e"},"options":[{"name":"Title","position":1,"values":["Default Title"]}],"custom_metafields":{},"metafields":{"badge":"\u003cdiv style='display:none' class='jdgm-prev-badge' data-average-rating='0.00' data-number-of-reviews='0' data-number-of-questions='0'\u003e \u003cspan class='jdgm-prev-badge__stars' data-score='0.00' tabindex='0' aria-label='0.00 stars' role='button'\u003e \u003cspan class='jdgm-star jdgm--off'\u003e\u003c\/span\u003e\u003cspan class='jdgm-star jdgm--off'\u003e\u003c\/span\u003e\u003cspan class='jdgm-star jdgm--off'\u003e\u003c\/span\u003e\u003cspan class='jdgm-star jdgm--off'\u003e\u003c\/span\u003e\u003cspan class='jdgm-star jdgm--off'\u003e\u003c\/span\u003e \u003c\/span\u003e \u003cspan class='jdgm-prev-badge__text'\u003e No reviews \u003c\/span\u003e \u003c\/div\u003e","widget":"\u003cdiv class='jdgm-rev-widg' data-updated-at='2025-06-13T16:13:40Z' data-average-rating='0.00' data-number-of-reviews='0' data-number-of-questions='0'\u003e \u003cstyle class='jdgm-temp-hiding-style'\u003e.jdgm-rev-widg{ display: none }\u003c\/style\u003e \u003cdiv class='jdgm-rev-widg__header'\u003e \u003ch2 class='jdgm-rev-widg__title'\u003eCustomer Reviews\u003c\/h2\u003e \u003cdiv class='jdgm-rev-widg__summary'\u003e \u003cdiv class='jdgm-rev-widg__summary-stars' aria-label='Average rating is 0.00 stars' role='img'\u003e \u003cspan class='jdgm-star jdgm--off'\u003e\u003c\/span\u003e\u003cspan class='jdgm-star jdgm--off'\u003e\u003c\/span\u003e\u003cspan class='jdgm-star jdgm--off'\u003e\u003c\/span\u003e\u003cspan class='jdgm-star jdgm--off'\u003e\u003c\/span\u003e\u003cspan class='jdgm-star jdgm--off'\u003e\u003c\/span\u003e \u003c\/div\u003e \u003cdiv class='jdgm-rev-widg__summary-text'\u003eBe the first to write a review\u003c\/div\u003e \u003c\/div\u003e \u003ca style='display: none' href='#' class='jdgm-write-rev-link' role='button'\u003eWrite a review\u003c\/a\u003e \u003cdiv class='jdgm-histogram jdgm-temp-hidden'\u003e \u003cdiv class='jdgm-histogram__row' data-rating='5' data-frequency='0' data-percentage='0'\u003e \u003cdiv class='jdgm-histogram__star' role='button' aria-label=\"0% (0) reviews with 5 star rating\" tabindex='0' \u003e\u003cspan class='jdgm-star jdgm--on'\u003e\u003c\/span\u003e\u003cspan class='jdgm-star jdgm--on'\u003e\u003c\/span\u003e\u003cspan class='jdgm-star jdgm--on'\u003e\u003c\/span\u003e\u003cspan class='jdgm-star jdgm--on'\u003e\u003c\/span\u003e\u003cspan class='jdgm-star jdgm--on'\u003e\u003c\/span\u003e\u003c\/div\u003e \u003cdiv class='jdgm-histogram__bar'\u003e \u003cdiv class='jdgm-histogram__bar-content' style='width: 0%;'\u003e \u003c\/div\u003e \u003c\/div\u003e \u003cdiv class='jdgm-histogram__percentage'\u003e0%\u003c\/div\u003e \u003cdiv class='jdgm-histogram__frequency'\u003e(0)\u003c\/div\u003e \u003c\/div\u003e \u003cdiv class='jdgm-histogram__row' data-rating='4' data-frequency='0' data-percentage='0'\u003e \u003cdiv class='jdgm-histogram__star' role='button' aria-label=\"0% (0) reviews with 4 star rating\" tabindex='0' \u003e\u003cspan class='jdgm-star jdgm--on'\u003e\u003c\/span\u003e\u003cspan class='jdgm-star jdgm--on'\u003e\u003c\/span\u003e\u003cspan class='jdgm-star jdgm--on'\u003e\u003c\/span\u003e\u003cspan class='jdgm-star jdgm--on'\u003e\u003c\/span\u003e\u003cspan class='jdgm-star jdgm--off'\u003e\u003c\/span\u003e\u003c\/div\u003e \u003cdiv class='jdgm-histogram__bar'\u003e \u003cdiv class='jdgm-histogram__bar-content' style='width: 0%;'\u003e \u003c\/div\u003e \u003c\/div\u003e \u003cdiv class='jdgm-histogram__percentage'\u003e0%\u003c\/div\u003e \u003cdiv class='jdgm-histogram__frequency'\u003e(0)\u003c\/div\u003e \u003c\/div\u003e \u003cdiv class='jdgm-histogram__row' data-rating='3' data-frequency='0' data-percentage='0'\u003e \u003cdiv class='jdgm-histogram__star' role='button' aria-label=\"0% (0) reviews with 3 star rating\" tabindex='0' \u003e\u003cspan class='jdgm-star jdgm--on'\u003e\u003c\/span\u003e\u003cspan class='jdgm-star jdgm--on'\u003e\u003c\/span\u003e\u003cspan class='jdgm-star jdgm--on'\u003e\u003c\/span\u003e\u003cspan class='jdgm-star jdgm--off'\u003e\u003c\/span\u003e\u003cspan class='jdgm-star jdgm--off'\u003e\u003c\/span\u003e\u003c\/div\u003e \u003cdiv class='jdgm-histogram__bar'\u003e \u003cdiv class='jdgm-histogram__bar-content' style='width: 0%;'\u003e \u003c\/div\u003e \u003c\/div\u003e \u003cdiv class='jdgm-histogram__percentage'\u003e0%\u003c\/div\u003e \u003cdiv class='jdgm-histogram__frequency'\u003e(0)\u003c\/div\u003e \u003c\/div\u003e \u003cdiv class='jdgm-histogram__row' data-rating='2' data-frequency='0' data-percentage='0'\u003e \u003cdiv class='jdgm-histogram__star' role='button' aria-label=\"0% (0) reviews with 2 star rating\" tabindex='0' \u003e\u003cspan class='jdgm-star jdgm--on'\u003e\u003c\/span\u003e\u003cspan class='jdgm-star jdgm--on'\u003e\u003c\/span\u003e\u003cspan class='jdgm-star jdgm--off'\u003e\u003c\/span\u003e\u003cspan class='jdgm-star jdgm--off'\u003e\u003c\/span\u003e\u003cspan class='jdgm-star jdgm--off'\u003e\u003c\/span\u003e\u003c\/div\u003e \u003cdiv class='jdgm-histogram__bar'\u003e \u003cdiv class='jdgm-histogram__bar-content' style='width: 0%;'\u003e \u003c\/div\u003e \u003c\/div\u003e \u003cdiv class='jdgm-histogram__percentage'\u003e0%\u003c\/div\u003e \u003cdiv class='jdgm-histogram__frequency'\u003e(0)\u003c\/div\u003e \u003c\/div\u003e \u003cdiv class='jdgm-histogram__row' data-rating='1' data-frequency='0' data-percentage='0'\u003e \u003cdiv class='jdgm-histogram__star' role='button' aria-label=\"0% (0) reviews with 1 star rating\" tabindex='0' \u003e\u003cspan class='jdgm-star jdgm--on'\u003e\u003c\/span\u003e\u003cspan class='jdgm-star jdgm--off'\u003e\u003c\/span\u003e\u003cspan class='jdgm-star jdgm--off'\u003e\u003c\/span\u003e\u003cspan class='jdgm-star jdgm--off'\u003e\u003c\/span\u003e\u003cspan class='jdgm-star jdgm--off'\u003e\u003c\/span\u003e\u003c\/div\u003e \u003cdiv class='jdgm-histogram__bar'\u003e \u003cdiv class='jdgm-histogram__bar-content' style='width: 0%;'\u003e \u003c\/div\u003e \u003c\/div\u003e \u003cdiv class='jdgm-histogram__percentage'\u003e0%\u003c\/div\u003e \u003cdiv class='jdgm-histogram__frequency'\u003e(0)\u003c\/div\u003e \u003c\/div\u003e \u003cdiv class='jdgm-histogram__row jdgm-histogram__clear-filter' data-rating=null tabindex='0'\u003e\u003c\/div\u003e \u003c\/div\u003e \u003cdiv class='jdgm-rev-widg__sort-wrapper'\u003e\u003c\/div\u003e \u003c\/div\u003e \u003cdiv class='jdgm-rev-widg__body'\u003e \u003cdiv class='jdgm-rev-widg__reviews'\u003e\u003c\/div\u003e \u003cdiv class='jdgm-paginate' data-per-page='10' data-url='https:\/\/api.judge.me\/reviews\/reviews_for_widget' style=\"display: none;\"\u003e\u003c\/div\u003e \u003c\/div\u003e \u003cdiv class='jdgm-rev-widg__paginate-spinner-wrapper'\u003e \u003cdiv class='jdgm-spinner'\u003e\u003c\/div\u003e \u003c\/div\u003e \u003c\/div\u003e"},"default_reviews_metafields":{},"collections":[{"id":512654540989,"handle":"lastof26-10","title":"10%","updated_at":"2026-11-14T20:08:00+08:00","body_html":null,"published_at":"2026-10-12T19:06:42+08:00","sort_order":"best-selling","template_suffix":null,"disjunctive":false,"rules":[],"published_scope":"global"},{"id":283018526909,"handle":"bundles","title":"Bundles","updated_at":"2026-11-08T21:24:04+08:00","body_html":"\u003cp\u003eMake shopping for your bump, birth and beyond easier with our bundle packs. With a pack available for every stage, you can get everything you need with no fuss and with our bundle packs, you even save money.\u003c\/p\u003e","published_at":"2022-02-01T22:33:09+08:00","sort_order":"best-selling","template_suffix":"swaddles-collection","disjunctive":false,"rules":[],"published_scope":"global","image":{"created_at":"2024-05-06T11:59:39+08:00","alt":"Bundles - The Birth Store","width":2048,"height":1365,"src":"\/\/www.thebirthstore.com.au\/cdn\/shop\/collections\/bundles-299009.jpg?v=1714967980"}},{"id":261657460925,"handle":"buy","title":"Buy","updated_at":"2026-11-14T20:08:00+08:00","body_html":"\u003cp\u003eBrowse all of our pregnancy, labour \u0026amp; birth, postpartum and baby essentials here.\u003cbr\u003e\u003c\/p\u003e\n\u003cp\u003e\u003cspan\u003eYou can even buy now and pay later with Afterpay!\u003c\/span\u003e\u003c\/p\u003e","published_at":"2021-03-10T12:05:31+08:00","sort_order":"best-selling","template_suffix":"shop-all-collection","disjunctive":false,"rules":[],"published_scope":"global","image":{"created_at":"2024-05-06T11:59:42+08:00","alt":"Buy - The Birth Store","width":2048,"height":2048,"src":"\/\/www.thebirthstore.com.au\/cdn\/shop\/collections\/buy-964856.jpg?v=1714967982"}},{"id":337429201085,"handle":"hospital-bag","title":"Hospital Bag","updated_at":"2026-11-14T20:08:00+08:00","body_html":"","published_at":"2026-06-03T11:36:29+08:00","sort_order":"most-relevant","template_suffix":"","disjunctive":false,"rules":[],"published_scope":"global"},{"id":261658214589,"handle":"labour-and-birth-buy","title":"Labour \u0026 Birth","updated_at":"2026-11-14T20:08:00+08:00","body_html":"\u003cp\u003eWe stock a large range of Elle TENS machines for you to buy for your labour and birth. We stock the Elle TENS, Elle TENS 2 and Elle TENS Plus, we also hire these out if that suits you better, please head over to our TENS machine hire page for more information. We ship Australia wide or have options for local delivery\/pick-up in Perth if you are due ASAP. We also stock other items for your labour and birth. \u003c\/p\u003e\n\u003cp\u003eLooking for something we don't currently stock? Please reach out and let us know.\u003c\/p\u003e\n\u003cp\u003e\u003cspan\u003eYou can even buy now and pay later with Afterpay!\u003c\/span\u003e\u003c\/p\u003e","published_at":"2021-03-10T12:34:43+08:00","sort_order":"best-selling","template_suffix":"labour-birth-collection","disjunctive":false,"rules":[],"published_scope":"global","image":{"created_at":"2024-05-06T12:00:09+08:00","alt":"Labour \u0026 Birth - The Birth Store","width":1080,"height":981,"src":"\/\/www.thebirthstore.com.au\/cdn\/shop\/collections\/labour-birth-342038.jpg?v=1714968009"}},{"id":512272957629,"handle":"labour-birth-essentials","title":"Labour \u0026 Birth Essentials","updated_at":"2026-11-14T20:08:00+08:00","body_html":null,"published_at":"2026-10-06T21:00:01+08:00","sort_order":"most-relevant","template_suffix":"labournbirthemail","disjunctive":false,"rules":[],"published_scope":"global"},{"id":281712558269,"handle":"labour-aids","title":"Labour Aids","updated_at":"2026-11-14T20:08:00+08:00","body_html":"","published_at":"2021-12-20T14:22:16+08:00","sort_order":"best-selling","template_suffix":"labour-aids-collection","disjunctive":false,"rules":[],"published_scope":"global","image":{"created_at":"2024-05-06T12:00:11+08:00","alt":"Labour Aids - The Birth Store","width":1365,"height":2048,"src":"\/\/www.thebirthstore.com.au\/cdn\/shop\/collections\/labour-aids-211824.jpg?v=1714968012"}},{"id":281712525501,"handle":"labour-preparation","title":"Labour Preparation","updated_at":"2026-11-14T20:08:00+08:00","body_html":"","published_at":"2021-12-20T14:20:12+08:00","sort_order":"best-selling","template_suffix":"labour-preparation-collec","disjunctive":false,"rules":[],"published_scope":"global","image":{"created_at":"2024-05-06T12:00:13+08:00","alt":"Labour Preparation - The Birth Store","width":1024,"height":1536,"src":"\/\/www.thebirthstore.com.au\/cdn\/shop\/collections\/labour-preparation-271961.jpg?v=1714968013"}},{"id":295224836285,"handle":"nausea","title":"Nausea","updated_at":"2026-11-14T20:08:00+08:00","body_html":"","published_at":"2023-11-10T20:47:34+08:00","sort_order":"best-selling","template_suffix":"nausea-collection","disjunctive":false,"rules":[],"published_scope":"global","image":{"created_at":"2024-05-06T12:00:24+08:00","alt":"Nausea - The Birth Store","width":610,"height":915,"src":"\/\/www.thebirthstore.com.au\/cdn\/shop\/collections\/nausea-404101.jpg?v=1714968024"}},{"id":281712591037,"handle":"pain-relief","title":"Pain Relief","updated_at":"2026-11-14T20:08:00+08:00","body_html":"","published_at":"2021-12-20T14:22:45+08:00","sort_order":"best-selling","template_suffix":"pain-relief-collection","disjunctive":false,"rules":[],"published_scope":"global","image":{"created_at":"2024-05-06T12:00:27+08:00","alt":"Pain Relief - The Birth Store","width":1365,"height":2048,"src":"\/\/www.thebirthstore.com.au\/cdn\/shop\/collections\/pain-relief-878865.jpg?v=1714968027"}},{"id":261658149053,"handle":"pregnancy-and-maternity-products","title":"Pregnancy","updated_at":"2026-11-14T20:08:00+08:00","body_html":"\u003cp\u003eShop your pregnancy essentials below. Looking for something we don't currently stock? Please reach out and let us know.\u003cbr\u003e\u003c\/p\u003e\n\u003cp\u003e\u003cspan\u003eYou can even buy now and pay later with Afterpay!\u003c\/span\u003e\u003c\/p\u003e","published_at":"2021-03-10T12:34:22+08:00","sort_order":"best-selling","template_suffix":"pregnancy-collection","disjunctive":false,"rules":[],"published_scope":"global","image":{"created_at":"2024-05-06T12:00:40+08:00","alt":"Pregnancy - The Birth Store","width":1024,"height":1536,"src":"\/\/www.thebirthstore.com.au\/cdn\/shop\/collections\/pregnancy-899677.jpg?v=1714968040"}},{"id":310045933757,"handle":"shop-all-sale","title":"Shop All Sale","updated_at":"2026-11-14T20:08:00+08:00","body_html":"","published_at":"2024-11-12T13:22:43+08:00","sort_order":"best-selling","template_suffix":"","disjunctive":true,"rules":[],"published_scope":"global","image":{"created_at":"2024-11-13T10:58:16+08:00","alt":"Shop All Sale - The Birth Store","width":2048,"height":1365,"src":"\/\/www.thebirthstore.com.au\/cdn\/shop\/collections\/shop-all-sale-297361.jpg?v=1731466697"}}]}
{"item":{"id":7513280250045,"title":"Labour Preparation Pack - Capsules","handle":"labour-preparation-pack-capsules","description":"\u003cp\u003e\u003cmeta charset=\"utf-8\"\u003e\u003cspan\u003eThere are so many wonderful products on the market now, to help you prepare for your labour and birth. We have created a pack with a couple of our favourite products from small Australian businesses to aid you in preparing for arguably the most memorable day of your life - the one pack to fill all your labour preparation needs!\u003c\/span\u003e\u003c\/p\u003e","published_at":"2023-10-03T13:58:28+08:00","created_at":"2023-10-03T13:29:54+08:00","vendor":"Bundles","type":"","tags":["Baby Shower Gifts","Bundles","Labour Preparation","Labour Progression","Pregnancy"],"price":4897,"price_min":4897,"price_max":4897,"available":false,"price_varies":false,"compare_at_price":5565,"compare_at_price_min":5565,"compare_at_price_max":5565,"compare_at_price_varies":false,"variants":[{"id":43056985243837,"title":"Default Title","option1":"Default Title","option2":null,"option3":null,"sku":"","requires_shipping":true,"taxable":false,"featured_image":null,"available":false,"name":"Labour Preparation Pack - Capsules","public_title":null,"options":["Default Title"],"price":4897,"weight":250,"compare_at_price":5565,"inventory_management":"shopify","barcode":"05878717","requires_selling_plan":false,"selling_plan_allocations":[],"quantity_rule":{"min":1,"max":null,"increment":1}}],"images":["\/\/www.thebirthstore.com.au\/cdn\/shop\/files\/labour-preparation-pack-capsules-709119.jpg?v=1714967975","\/\/www.thebirthstore.com.au\/cdn\/shop\/files\/labour-preparation-pack-capsules-332316.jpg?v=1714967975"],"featured_image":"\/\/www.thebirthstore.com.au\/cdn\/shop\/files\/labour-preparation-pack-capsules-709119.jpg?v=1714967975","options":["Title"],"media":[{"alt":"Labour Preparation Pack - Capsules - The Birth Store-The Birth Store","id":27007587942589,"position":1,"preview_image":{"aspect_ratio":1.0,"height":2048,"width":2048,"src":"\/\/www.thebirthstore.com.au\/cdn\/shop\/files\/labour-preparation-pack-capsules-709119.jpg?v=1714967975"},"aspect_ratio":1.0,"height":2048,"media_type":"image","src":"\/\/www.thebirthstore.com.au\/cdn\/shop\/files\/labour-preparation-pack-capsules-709119.jpg?v=1714967975","width":2048},{"alt":"Labour Preparation Pack - Capsules - The Birth Store-The Birth Store","id":27007587975357,"position":2,"preview_image":{"aspect_ratio":0.667,"height":2048,"width":1365,"src":"\/\/www.thebirthstore.com.au\/cdn\/shop\/files\/labour-preparation-pack-capsules-332316.jpg?v=1714967975"},"aspect_ratio":0.667,"height":2048,"media_type":"image","src":"\/\/www.thebirthstore.com.au\/cdn\/shop\/files\/labour-preparation-pack-capsules-332316.jpg?v=1714967975","width":1365}],"requires_selling_plan":false,"selling_plan_groups":[],"content":"\u003cp\u003e\u003cmeta charset=\"utf-8\"\u003e\u003cspan\u003eThere are so many wonderful products on the market now, to help you prepare for your labour and birth. We have created a pack with a couple of our favourite products from small Australian businesses to aid you in preparing for arguably the most memorable day of your life - the one pack to fill all your labour preparation needs!\u003c\/span\u003e\u003c\/p\u003e"},"options":[{"name":"Title","position":1,"values":["Default Title"]}],"custom_metafields":{},"metafields":{"badge":"\u003cdiv style='display:none' class='jdgm-prev-badge' data-average-rating='0.00' data-number-of-reviews='0' data-number-of-questions='0'\u003e \u003cspan class='jdgm-prev-badge__stars' data-score='0.00' tabindex='0' aria-label='0.00 stars' role='button'\u003e \u003cspan class='jdgm-star jdgm--off'\u003e\u003c\/span\u003e\u003cspan class='jdgm-star jdgm--off'\u003e\u003c\/span\u003e\u003cspan class='jdgm-star jdgm--off'\u003e\u003c\/span\u003e\u003cspan class='jdgm-star jdgm--off'\u003e\u003c\/span\u003e\u003cspan class='jdgm-star jdgm--off'\u003e\u003c\/span\u003e \u003c\/span\u003e \u003cspan class='jdgm-prev-badge__text'\u003e No reviews \u003c\/span\u003e \u003c\/div\u003e","widget":"\u003cdiv class='jdgm-rev-widg' data-updated-at='2025-06-13T16:13:40Z' data-average-rating='0.00' data-number-of-reviews='0' data-number-of-questions='0'\u003e \u003cstyle class='jdgm-temp-hiding-style'\u003e.jdgm-rev-widg{ display: none }\u003c\/style\u003e \u003cdiv class='jdgm-rev-widg__header'\u003e \u003ch2 class='jdgm-rev-widg__title'\u003eCustomer Reviews\u003c\/h2\u003e \u003cdiv class='jdgm-rev-widg__summary'\u003e \u003cdiv class='jdgm-rev-widg__summary-stars' aria-label='Average rating is 0.00 stars' role='img'\u003e \u003cspan class='jdgm-star jdgm--off'\u003e\u003c\/span\u003e\u003cspan class='jdgm-star jdgm--off'\u003e\u003c\/span\u003e\u003cspan class='jdgm-star jdgm--off'\u003e\u003c\/span\u003e\u003cspan class='jdgm-star jdgm--off'\u003e\u003c\/span\u003e\u003cspan class='jdgm-star jdgm--off'\u003e\u003c\/span\u003e \u003c\/div\u003e \u003cdiv class='jdgm-rev-widg__summary-text'\u003eBe the first to write a review\u003c\/div\u003e \u003c\/div\u003e \u003ca style='display: none' href='#' class='jdgm-write-rev-link' role='button'\u003eWrite a review\u003c\/a\u003e \u003cdiv class='jdgm-histogram jdgm-temp-hidden'\u003e \u003cdiv class='jdgm-histogram__row' data-rating='5' data-frequency='0' data-percentage='0'\u003e \u003cdiv class='jdgm-histogram__star' role='button' aria-label=\"0% (0) reviews with 5 star rating\" tabindex='0' \u003e\u003cspan class='jdgm-star jdgm--on'\u003e\u003c\/span\u003e\u003cspan class='jdgm-star jdgm--on'\u003e\u003c\/span\u003e\u003cspan class='jdgm-star jdgm--on'\u003e\u003c\/span\u003e\u003cspan class='jdgm-star jdgm--on'\u003e\u003c\/span\u003e\u003cspan class='jdgm-star jdgm--on'\u003e\u003c\/span\u003e\u003c\/div\u003e \u003cdiv class='jdgm-histogram__bar'\u003e \u003cdiv class='jdgm-histogram__bar-content' style='width: 0%;'\u003e \u003c\/div\u003e \u003c\/div\u003e \u003cdiv class='jdgm-histogram__percentage'\u003e0%\u003c\/div\u003e \u003cdiv class='jdgm-histogram__frequency'\u003e(0)\u003c\/div\u003e \u003c\/div\u003e \u003cdiv class='jdgm-histogram__row' data-rating='4' data-frequency='0' data-percentage='0'\u003e \u003cdiv class='jdgm-histogram__star' role='button' aria-label=\"0% (0) reviews with 4 star rating\" tabindex='0' \u003e\u003cspan class='jdgm-star jdgm--on'\u003e\u003c\/span\u003e\u003cspan class='jdgm-star jdgm--on'\u003e\u003c\/span\u003e\u003cspan class='jdgm-star jdgm--on'\u003e\u003c\/span\u003e\u003cspan class='jdgm-star jdgm--on'\u003e\u003c\/span\u003e\u003cspan class='jdgm-star jdgm--off'\u003e\u003c\/span\u003e\u003c\/div\u003e \u003cdiv class='jdgm-histogram__bar'\u003e \u003cdiv class='jdgm-histogram__bar-content' style='width: 0%;'\u003e \u003c\/div\u003e \u003c\/div\u003e \u003cdiv class='jdgm-histogram__percentage'\u003e0%\u003c\/div\u003e \u003cdiv class='jdgm-histogram__frequency'\u003e(0)\u003c\/div\u003e \u003c\/div\u003e \u003cdiv class='jdgm-histogram__row' data-rating='3' data-frequency='0' data-percentage='0'\u003e \u003cdiv class='jdgm-histogram__star' role='button' aria-label=\"0% (0) reviews with 3 star rating\" tabindex='0' \u003e\u003cspan class='jdgm-star jdgm--on'\u003e\u003c\/span\u003e\u003cspan class='jdgm-star jdgm--on'\u003e\u003c\/span\u003e\u003cspan class='jdgm-star jdgm--on'\u003e\u003c\/span\u003e\u003cspan class='jdgm-star jdgm--off'\u003e\u003c\/span\u003e\u003cspan class='jdgm-star jdgm--off'\u003e\u003c\/span\u003e\u003c\/div\u003e \u003cdiv class='jdgm-histogram__bar'\u003e \u003cdiv class='jdgm-histogram__bar-content' style='width: 0%;'\u003e \u003c\/div\u003e \u003c\/div\u003e \u003cdiv class='jdgm-histogram__percentage'\u003e0%\u003c\/div\u003e \u003cdiv class='jdgm-histogram__frequency'\u003e(0)\u003c\/div\u003e \u003c\/div\u003e \u003cdiv class='jdgm-histogram__row' data-rating='2' data-frequency='0' data-percentage='0'\u003e \u003cdiv class='jdgm-histogram__star' role='button' aria-label=\"0% (0) reviews with 2 star rating\" tabindex='0' \u003e\u003cspan class='jdgm-star jdgm--on'\u003e\u003c\/span\u003e\u003cspan class='jdgm-star jdgm--on'\u003e\u003c\/span\u003e\u003cspan class='jdgm-star jdgm--off'\u003e\u003c\/span\u003e\u003cspan class='jdgm-star jdgm--off'\u003e\u003c\/span\u003e\u003cspan class='jdgm-star jdgm--off'\u003e\u003c\/span\u003e\u003c\/div\u003e \u003cdiv class='jdgm-histogram__bar'\u003e \u003cdiv class='jdgm-histogram__bar-content' style='width: 0%;'\u003e \u003c\/div\u003e \u003c\/div\u003e \u003cdiv class='jdgm-histogram__percentage'\u003e0%\u003c\/div\u003e \u003cdiv class='jdgm-histogram__frequency'\u003e(0)\u003c\/div\u003e \u003c\/div\u003e \u003cdiv class='jdgm-histogram__row' data-rating='1' data-frequency='0' data-percentage='0'\u003e \u003cdiv class='jdgm-histogram__star' role='button' aria-label=\"0% (0) reviews with 1 star rating\" tabindex='0' \u003e\u003cspan class='jdgm-star jdgm--on'\u003e\u003c\/span\u003e\u003cspan class='jdgm-star jdgm--off'\u003e\u003c\/span\u003e\u003cspan class='jdgm-star jdgm--off'\u003e\u003c\/span\u003e\u003cspan class='jdgm-star jdgm--off'\u003e\u003c\/span\u003e\u003cspan class='jdgm-star jdgm--off'\u003e\u003c\/span\u003e\u003c\/div\u003e \u003cdiv class='jdgm-histogram__bar'\u003e \u003cdiv class='jdgm-histogram__bar-content' style='width: 0%;'\u003e \u003c\/div\u003e \u003c\/div\u003e \u003cdiv class='jdgm-histogram__percentage'\u003e0%\u003c\/div\u003e \u003cdiv class='jdgm-histogram__frequency'\u003e(0)\u003c\/div\u003e \u003c\/div\u003e \u003cdiv class='jdgm-histogram__row jdgm-histogram__clear-filter' data-rating=null tabindex='0'\u003e\u003c\/div\u003e \u003c\/div\u003e \u003cdiv class='jdgm-rev-widg__sort-wrapper'\u003e\u003c\/div\u003e \u003c\/div\u003e \u003cdiv class='jdgm-rev-widg__body'\u003e \u003cdiv class='jdgm-rev-widg__reviews'\u003e\u003c\/div\u003e \u003cdiv class='jdgm-paginate' data-per-page='10' data-url='https:\/\/api.judge.me\/reviews\/reviews_for_widget' style=\"display: none;\"\u003e\u003c\/div\u003e \u003c\/div\u003e \u003cdiv class='jdgm-rev-widg__paginate-spinner-wrapper'\u003e \u003cdiv class='jdgm-spinner'\u003e\u003c\/div\u003e \u003c\/div\u003e \u003c\/div\u003e"},"default_reviews_metafields":{},"collections":[{"id":512654540989,"handle":"lastof26-10","title":"10%","updated_at":"2026-11-14T20:08:00+08:00","body_html":null,"published_at":"2026-10-12T19:06:42+08:00","sort_order":"best-selling","template_suffix":null,"disjunctive":false,"rules":[],"published_scope":"global"},{"id":283018526909,"handle":"bundles","title":"Bundles","updated_at":"2026-11-08T21:24:04+08:00","body_html":"\u003cp\u003eMake shopping for your bump, birth and beyond easier with our bundle packs. With a pack available for every stage, you can get everything you need with no fuss and with our bundle packs, you even save money.\u003c\/p\u003e","published_at":"2022-02-01T22:33:09+08:00","sort_order":"best-selling","template_suffix":"swaddles-collection","disjunctive":false,"rules":[],"published_scope":"global","image":{"created_at":"2024-05-06T11:59:39+08:00","alt":"Bundles - The Birth Store","width":2048,"height":1365,"src":"\/\/www.thebirthstore.com.au\/cdn\/shop\/collections\/bundles-299009.jpg?v=1714967980"}},{"id":261657460925,"handle":"buy","title":"Buy","updated_at":"2026-11-14T20:08:00+08:00","body_html":"\u003cp\u003eBrowse all of our pregnancy, labour \u0026amp; birth, postpartum and baby essentials here.\u003cbr\u003e\u003c\/p\u003e\n\u003cp\u003e\u003cspan\u003eYou can even buy now and pay later with Afterpay!\u003c\/span\u003e\u003c\/p\u003e","published_at":"2021-03-10T12:05:31+08:00","sort_order":"best-selling","template_suffix":"shop-all-collection","disjunctive":false,"rules":[],"published_scope":"global","image":{"created_at":"2024-05-06T11:59:42+08:00","alt":"Buy - The Birth Store","width":2048,"height":2048,"src":"\/\/www.thebirthstore.com.au\/cdn\/shop\/collections\/buy-964856.jpg?v=1714967982"}},{"id":512272957629,"handle":"labour-birth-essentials","title":"Labour \u0026 Birth Essentials","updated_at":"2026-11-14T20:08:00+08:00","body_html":null,"published_at":"2026-10-06T21:00:01+08:00","sort_order":"most-relevant","template_suffix":"labournbirthemail","disjunctive":false,"rules":[],"published_scope":"global"},{"id":281712558269,"handle":"labour-aids","title":"Labour Aids","updated_at":"2026-11-14T20:08:00+08:00","body_html":"","published_at":"2021-12-20T14:22:16+08:00","sort_order":"best-selling","template_suffix":"labour-aids-collection","disjunctive":false,"rules":[],"published_scope":"global","image":{"created_at":"2024-05-06T12:00:11+08:00","alt":"Labour Aids - The Birth Store","width":1365,"height":2048,"src":"\/\/www.thebirthstore.com.au\/cdn\/shop\/collections\/labour-aids-211824.jpg?v=1714968012"}},{"id":281712525501,"handle":"labour-preparation","title":"Labour Preparation","updated_at":"2026-11-14T20:08:00+08:00","body_html":"","published_at":"2021-12-20T14:20:12+08:00","sort_order":"best-selling","template_suffix":"labour-preparation-collec","disjunctive":false,"rules":[],"published_scope":"global","image":{"created_at":"2024-05-06T12:00:13+08:00","alt":"Labour Preparation - The Birth Store","width":1024,"height":1536,"src":"\/\/www.thebirthstore.com.au\/cdn\/shop\/collections\/labour-preparation-271961.jpg?v=1714968013"}},{"id":261658149053,"handle":"pregnancy-and-maternity-products","title":"Pregnancy","updated_at":"2026-11-14T20:08:00+08:00","body_html":"\u003cp\u003eShop your pregnancy essentials below. Looking for something we don't currently stock? Please reach out and let us know.\u003cbr\u003e\u003c\/p\u003e\n\u003cp\u003e\u003cspan\u003eYou can even buy now and pay later with Afterpay!\u003c\/span\u003e\u003c\/p\u003e","published_at":"2021-03-10T12:34:22+08:00","sort_order":"best-selling","template_suffix":"pregnancy-collection","disjunctive":false,"rules":[],"published_scope":"global","image":{"created_at":"2024-05-06T12:00:40+08:00","alt":"Pregnancy - The Birth Store","width":1024,"height":1536,"src":"\/\/www.thebirthstore.com.au\/cdn\/shop\/collections\/pregnancy-899677.jpg?v=1714968040"}},{"id":310045933757,"handle":"shop-all-sale","title":"Shop All Sale","updated_at":"2026-11-14T20:08:00+08:00","body_html":"","published_at":"2024-11-12T13:22:43+08:00","sort_order":"best-selling","template_suffix":"","disjunctive":true,"rules":[],"published_scope":"global","image":{"created_at":"2024-11-13T10:58:16+08:00","alt":"Shop All Sale - The Birth Store","width":2048,"height":1365,"src":"\/\/www.thebirthstore.com.au\/cdn\/shop\/collections\/shop-all-sale-297361.jpg?v=1731466697"}}]}
{"item":{"id":7513280151741,"title":"Labour Preparation Pack - Tea","handle":"labour-preparation-pack-tea","description":"\u003cp\u003e\u003cmeta charset=\"utf-8\"\u003e\u003cspan\u003eThere are so many wonderful products on the market now, to help you prepare for your labour and birth. We have created a pack with a couple of our favourite products from small Australian businesses to aid you in preparing for arguably the most memorable day of your life - the one pack to fill all your labour preparation needs!\u003c\/span\u003e\u003c\/p\u003e","published_at":"2023-10-03T13:54:19+08:00","created_at":"2023-10-03T13:29:12+08:00","vendor":"Bundles","type":"","tags":["Baby Shower Gifts","Bundles","Labour Preparation","Labour Progression","Pregnancy"],"price":5416,"price_min":5416,"price_max":5416,"available":false,"price_varies":false,"compare_at_price":6155,"compare_at_price_min":6155,"compare_at_price_max":6155,"compare_at_price_varies":false,"variants":[{"id":43056984981693,"title":"Default Title","option1":"Default Title","option2":null,"option3":null,"sku":"","requires_shipping":true,"taxable":false,"featured_image":null,"available":false,"name":"Labour Preparation Pack - Tea","public_title":null,"options":["Default Title"],"price":5416,"weight":333,"compare_at_price":6155,"inventory_management":"shopify","barcode":"09384893","requires_selling_plan":false,"selling_plan_allocations":[],"quantity_rule":{"min":1,"max":null,"increment":1}}],"images":["\/\/www.thebirthstore.com.au\/cdn\/shop\/files\/labour-preparation-pack-tea-826901.jpg?v=1714967975","\/\/www.thebirthstore.com.au\/cdn\/shop\/files\/0J3A7064-Edit-Edit_b93f3f6f-63da-463e-aa28-c91d68b5aba8.jpg?v=1701351433"],"featured_image":"\/\/www.thebirthstore.com.au\/cdn\/shop\/files\/labour-preparation-pack-tea-826901.jpg?v=1714967975","options":["Title"],"media":[{"alt":"Labour Preparation Pack - Tea - The Birth Store-The Birth Store","id":27007587549373,"position":1,"preview_image":{"aspect_ratio":1.0,"height":2048,"width":2048,"src":"\/\/www.thebirthstore.com.au\/cdn\/shop\/files\/labour-preparation-pack-tea-826901.jpg?v=1714967975"},"aspect_ratio":1.0,"height":2048,"media_type":"image","src":"\/\/www.thebirthstore.com.au\/cdn\/shop\/files\/labour-preparation-pack-tea-826901.jpg?v=1714967975","width":2048},{"alt":null,"id":26241934950589,"position":2,"preview_image":{"aspect_ratio":0.667,"height":3600,"width":2400,"src":"\/\/www.thebirthstore.com.au\/cdn\/shop\/files\/0J3A7064-Edit-Edit_b93f3f6f-63da-463e-aa28-c91d68b5aba8.jpg?v=1701351433"},"aspect_ratio":0.667,"height":3600,"media_type":"image","src":"\/\/www.thebirthstore.com.au\/cdn\/shop\/files\/0J3A7064-Edit-Edit_b93f3f6f-63da-463e-aa28-c91d68b5aba8.jpg?v=1701351433","width":2400}],"requires_selling_plan":false,"selling_plan_groups":[],"content":"\u003cp\u003e\u003cmeta charset=\"utf-8\"\u003e\u003cspan\u003eThere are so many wonderful products on the market now, to help you prepare for your labour and birth. We have created a pack with a couple of our favourite products from small Australian businesses to aid you in preparing for arguably the most memorable day of your life - the one pack to fill all your labour preparation needs!\u003c\/span\u003e\u003c\/p\u003e"},"options":[{"name":"Title","position":1,"values":["Default Title"]}],"custom_metafields":{},"metafields":{"badge":"\u003cdiv style='display:none' class='jdgm-prev-badge' data-average-rating='0.00' data-number-of-reviews='0' data-number-of-questions='0'\u003e \u003cspan class='jdgm-prev-badge__stars' data-score='0.00' tabindex='0' aria-label='0.00 stars' role='button'\u003e \u003cspan class='jdgm-star jdgm--off'\u003e\u003c\/span\u003e\u003cspan class='jdgm-star jdgm--off'\u003e\u003c\/span\u003e\u003cspan class='jdgm-star jdgm--off'\u003e\u003c\/span\u003e\u003cspan class='jdgm-star jdgm--off'\u003e\u003c\/span\u003e\u003cspan class='jdgm-star jdgm--off'\u003e\u003c\/span\u003e \u003c\/span\u003e \u003cspan class='jdgm-prev-badge__text'\u003e No reviews \u003c\/span\u003e \u003c\/div\u003e","widget":"\u003cdiv class='jdgm-rev-widg' data-updated-at='2025-06-13T16:13:40Z' data-average-rating='0.00' data-number-of-reviews='0' data-number-of-questions='0'\u003e \u003cstyle class='jdgm-temp-hiding-style'\u003e.jdgm-rev-widg{ display: none }\u003c\/style\u003e \u003cdiv class='jdgm-rev-widg__header'\u003e \u003ch2 class='jdgm-rev-widg__title'\u003eCustomer Reviews\u003c\/h2\u003e \u003cdiv class='jdgm-rev-widg__summary'\u003e \u003cdiv class='jdgm-rev-widg__summary-stars' aria-label='Average rating is 0.00 stars' role='img'\u003e \u003cspan class='jdgm-star jdgm--off'\u003e\u003c\/span\u003e\u003cspan class='jdgm-star jdgm--off'\u003e\u003c\/span\u003e\u003cspan class='jdgm-star jdgm--off'\u003e\u003c\/span\u003e\u003cspan class='jdgm-star jdgm--off'\u003e\u003c\/span\u003e\u003cspan class='jdgm-star jdgm--off'\u003e\u003c\/span\u003e \u003c\/div\u003e \u003cdiv class='jdgm-rev-widg__summary-text'\u003eBe the first to write a review\u003c\/div\u003e \u003c\/div\u003e \u003ca style='display: none' href='#' class='jdgm-write-rev-link' role='button'\u003eWrite a review\u003c\/a\u003e \u003cdiv class='jdgm-histogram jdgm-temp-hidden'\u003e \u003cdiv class='jdgm-histogram__row' data-rating='5' data-frequency='0' data-percentage='0'\u003e \u003cdiv class='jdgm-histogram__star' role='button' aria-label=\"0% (0) reviews with 5 star rating\" tabindex='0' \u003e\u003cspan class='jdgm-star jdgm--on'\u003e\u003c\/span\u003e\u003cspan class='jdgm-star jdgm--on'\u003e\u003c\/span\u003e\u003cspan class='jdgm-star jdgm--on'\u003e\u003c\/span\u003e\u003cspan class='jdgm-star jdgm--on'\u003e\u003c\/span\u003e\u003cspan class='jdgm-star jdgm--on'\u003e\u003c\/span\u003e\u003c\/div\u003e \u003cdiv class='jdgm-histogram__bar'\u003e \u003cdiv class='jdgm-histogram__bar-content' style='width: 0%;'\u003e \u003c\/div\u003e \u003c\/div\u003e \u003cdiv class='jdgm-histogram__percentage'\u003e0%\u003c\/div\u003e \u003cdiv class='jdgm-histogram__frequency'\u003e(0)\u003c\/div\u003e \u003c\/div\u003e \u003cdiv class='jdgm-histogram__row' data-rating='4' data-frequency='0' data-percentage='0'\u003e \u003cdiv class='jdgm-histogram__star' role='button' aria-label=\"0% (0) reviews with 4 star rating\" tabindex='0' \u003e\u003cspan class='jdgm-star jdgm--on'\u003e\u003c\/span\u003e\u003cspan class='jdgm-star jdgm--on'\u003e\u003c\/span\u003e\u003cspan class='jdgm-star jdgm--on'\u003e\u003c\/span\u003e\u003cspan class='jdgm-star jdgm--on'\u003e\u003c\/span\u003e\u003cspan class='jdgm-star jdgm--off'\u003e\u003c\/span\u003e\u003c\/div\u003e \u003cdiv class='jdgm-histogram__bar'\u003e \u003cdiv class='jdgm-histogram__bar-content' style='width: 0%;'\u003e \u003c\/div\u003e \u003c\/div\u003e \u003cdiv class='jdgm-histogram__percentage'\u003e0%\u003c\/div\u003e \u003cdiv class='jdgm-histogram__frequency'\u003e(0)\u003c\/div\u003e \u003c\/div\u003e \u003cdiv class='jdgm-histogram__row' data-rating='3' data-frequency='0' data-percentage='0'\u003e \u003cdiv class='jdgm-histogram__star' role='button' aria-label=\"0% (0) reviews with 3 star rating\" tabindex='0' \u003e\u003cspan class='jdgm-star jdgm--on'\u003e\u003c\/span\u003e\u003cspan class='jdgm-star jdgm--on'\u003e\u003c\/span\u003e\u003cspan class='jdgm-star jdgm--on'\u003e\u003c\/span\u003e\u003cspan class='jdgm-star jdgm--off'\u003e\u003c\/span\u003e\u003cspan class='jdgm-star jdgm--off'\u003e\u003c\/span\u003e\u003c\/div\u003e \u003cdiv class='jdgm-histogram__bar'\u003e \u003cdiv class='jdgm-histogram__bar-content' style='width: 0%;'\u003e \u003c\/div\u003e \u003c\/div\u003e \u003cdiv class='jdgm-histogram__percentage'\u003e0%\u003c\/div\u003e \u003cdiv class='jdgm-histogram__frequency'\u003e(0)\u003c\/div\u003e \u003c\/div\u003e \u003cdiv class='jdgm-histogram__row' data-rating='2' data-frequency='0' data-percentage='0'\u003e \u003cdiv class='jdgm-histogram__star' role='button' aria-label=\"0% (0) reviews with 2 star rating\" tabindex='0' \u003e\u003cspan class='jdgm-star jdgm--on'\u003e\u003c\/span\u003e\u003cspan class='jdgm-star jdgm--on'\u003e\u003c\/span\u003e\u003cspan class='jdgm-star jdgm--off'\u003e\u003c\/span\u003e\u003cspan class='jdgm-star jdgm--off'\u003e\u003c\/span\u003e\u003cspan class='jdgm-star jdgm--off'\u003e\u003c\/span\u003e\u003c\/div\u003e \u003cdiv class='jdgm-histogram__bar'\u003e \u003cdiv class='jdgm-histogram__bar-content' style='width: 0%;'\u003e \u003c\/div\u003e \u003c\/div\u003e \u003cdiv class='jdgm-histogram__percentage'\u003e0%\u003c\/div\u003e \u003cdiv class='jdgm-histogram__frequency'\u003e(0)\u003c\/div\u003e \u003c\/div\u003e \u003cdiv class='jdgm-histogram__row' data-rating='1' data-frequency='0' data-percentage='0'\u003e \u003cdiv class='jdgm-histogram__star' role='button' aria-label=\"0% (0) reviews with 1 star rating\" tabindex='0' \u003e\u003cspan class='jdgm-star jdgm--on'\u003e\u003c\/span\u003e\u003cspan class='jdgm-star jdgm--off'\u003e\u003c\/span\u003e\u003cspan class='jdgm-star jdgm--off'\u003e\u003c\/span\u003e\u003cspan class='jdgm-star jdgm--off'\u003e\u003c\/span\u003e\u003cspan class='jdgm-star jdgm--off'\u003e\u003c\/span\u003e\u003c\/div\u003e \u003cdiv class='jdgm-histogram__bar'\u003e \u003cdiv class='jdgm-histogram__bar-content' style='width: 0%;'\u003e \u003c\/div\u003e \u003c\/div\u003e \u003cdiv class='jdgm-histogram__percentage'\u003e0%\u003c\/div\u003e \u003cdiv class='jdgm-histogram__frequency'\u003e(0)\u003c\/div\u003e \u003c\/div\u003e \u003cdiv class='jdgm-histogram__row jdgm-histogram__clear-filter' data-rating=null tabindex='0'\u003e\u003c\/div\u003e \u003c\/div\u003e \u003cdiv class='jdgm-rev-widg__sort-wrapper'\u003e\u003c\/div\u003e \u003c\/div\u003e \u003cdiv class='jdgm-rev-widg__body'\u003e \u003cdiv class='jdgm-rev-widg__reviews'\u003e\u003c\/div\u003e \u003cdiv class='jdgm-paginate' data-per-page='10' data-url='https:\/\/api.judge.me\/reviews\/reviews_for_widget' style=\"display: none;\"\u003e\u003c\/div\u003e \u003c\/div\u003e \u003cdiv class='jdgm-rev-widg__paginate-spinner-wrapper'\u003e \u003cdiv class='jdgm-spinner'\u003e\u003c\/div\u003e \u003c\/div\u003e \u003c\/div\u003e"},"default_reviews_metafields":{},"collections":[{"id":512654540989,"handle":"lastof26-10","title":"10%","updated_at":"2026-11-14T20:08:00+08:00","body_html":null,"published_at":"2026-10-12T19:06:42+08:00","sort_order":"best-selling","template_suffix":null,"disjunctive":false,"rules":[],"published_scope":"global"},{"id":283018526909,"handle":"bundles","title":"Bundles","updated_at":"2026-11-08T21:24:04+08:00","body_html":"\u003cp\u003eMake shopping for your bump, birth and beyond easier with our bundle packs. With a pack available for every stage, you can get everything you need with no fuss and with our bundle packs, you even save money.\u003c\/p\u003e","published_at":"2022-02-01T22:33:09+08:00","sort_order":"best-selling","template_suffix":"swaddles-collection","disjunctive":false,"rules":[],"published_scope":"global","image":{"created_at":"2024-05-06T11:59:39+08:00","alt":"Bundles - The Birth Store","width":2048,"height":1365,"src":"\/\/www.thebirthstore.com.au\/cdn\/shop\/collections\/bundles-299009.jpg?v=1714967980"}},{"id":261657460925,"handle":"buy","title":"Buy","updated_at":"2026-11-14T20:08:00+08:00","body_html":"\u003cp\u003eBrowse all of our pregnancy, labour \u0026amp; birth, postpartum and baby essentials here.\u003cbr\u003e\u003c\/p\u003e\n\u003cp\u003e\u003cspan\u003eYou can even buy now and pay later with Afterpay!\u003c\/span\u003e\u003c\/p\u003e","published_at":"2021-03-10T12:05:31+08:00","sort_order":"best-selling","template_suffix":"shop-all-collection","disjunctive":false,"rules":[],"published_scope":"global","image":{"created_at":"2024-05-06T11:59:42+08:00","alt":"Buy - The Birth Store","width":2048,"height":2048,"src":"\/\/www.thebirthstore.com.au\/cdn\/shop\/collections\/buy-964856.jpg?v=1714967982"}},{"id":512272957629,"handle":"labour-birth-essentials","title":"Labour \u0026 Birth Essentials","updated_at":"2026-11-14T20:08:00+08:00","body_html":null,"published_at":"2026-10-06T21:00:01+08:00","sort_order":"most-relevant","template_suffix":"labournbirthemail","disjunctive":false,"rules":[],"published_scope":"global"},{"id":281712558269,"handle":"labour-aids","title":"Labour Aids","updated_at":"2026-11-14T20:08:00+08:00","body_html":"","published_at":"2021-12-20T14:22:16+08:00","sort_order":"best-selling","template_suffix":"labour-aids-collection","disjunctive":false,"rules":[],"published_scope":"global","image":{"created_at":"2024-05-06T12:00:11+08:00","alt":"Labour Aids - The Birth Store","width":1365,"height":2048,"src":"\/\/www.thebirthstore.com.au\/cdn\/shop\/collections\/labour-aids-211824.jpg?v=1714968012"}},{"id":281712525501,"handle":"labour-preparation","title":"Labour Preparation","updated_at":"2026-11-14T20:08:00+08:00","body_html":"","published_at":"2021-12-20T14:20:12+08:00","sort_order":"best-selling","template_suffix":"labour-preparation-collec","disjunctive":false,"rules":[],"published_scope":"global","image":{"created_at":"2024-05-06T12:00:13+08:00","alt":"Labour Preparation - The Birth Store","width":1024,"height":1536,"src":"\/\/www.thebirthstore.com.au\/cdn\/shop\/collections\/labour-preparation-271961.jpg?v=1714968013"}},{"id":261658149053,"handle":"pregnancy-and-maternity-products","title":"Pregnancy","updated_at":"2026-11-14T20:08:00+08:00","body_html":"\u003cp\u003eShop your pregnancy essentials below. Looking for something we don't currently stock? Please reach out and let us know.\u003cbr\u003e\u003c\/p\u003e\n\u003cp\u003e\u003cspan\u003eYou can even buy now and pay later with Afterpay!\u003c\/span\u003e\u003c\/p\u003e","published_at":"2021-03-10T12:34:22+08:00","sort_order":"best-selling","template_suffix":"pregnancy-collection","disjunctive":false,"rules":[],"published_scope":"global","image":{"created_at":"2024-05-06T12:00:40+08:00","alt":"Pregnancy - The Birth Store","width":1024,"height":1536,"src":"\/\/www.thebirthstore.com.au\/cdn\/shop\/collections\/pregnancy-899677.jpg?v=1714968040"}},{"id":310045933757,"handle":"shop-all-sale","title":"Shop All Sale","updated_at":"2026-11-14T20:08:00+08:00","body_html":"","published_at":"2024-11-12T13:22:43+08:00","sort_order":"best-selling","template_suffix":"","disjunctive":true,"rules":[],"published_scope":"global","image":{"created_at":"2024-11-13T10:58:16+08:00","alt":"Shop All Sale - The Birth Store","width":2048,"height":1365,"src":"\/\/www.thebirthstore.com.au\/cdn\/shop\/collections\/shop-all-sale-297361.jpg?v=1731466697"}}]}
{"item":{"id":7513256493245,"title":"Vaginal Birth Recovery Kit - PREORDER SHIPS MID NOV","handle":"vaginal-birth-recovery-kit","description":"\u003cp\u003e\u003cmeta charset=\"utf-8\"\u003e\u003cspan\u003eThere are so many beautiful products on the market now to help with breastfeeding. We have created the ultimate convenience bundle with our favourite products from small Australian businesses to aid you in your breastfeeding journey that you deserve - the one bundle to fill all your breastfeeding needs!\u003c\/span\u003e\u003c\/p\u003e","published_at":"2023-10-03T12:41:15+08:00","created_at":"2023-10-03T12:11:27+08:00","vendor":"Bundles","type":"","tags":["Baby Shower Gifts","Bundles","Hemorrhoids","Hospital Bag","Pain Relief","Peri Care","Post-Partum","PREORDER","Vaginal Birth Recovery"],"price":10400,"price_min":10400,"price_max":10400,"available":true,"price_varies":false,"compare_at_price":13689,"compare_at_price_min":13689,"compare_at_price_max":13689,"compare_at_price_varies":false,"variants":[{"id":43056791322813,"title":"Medium","option1":"Medium","option2":null,"option3":null,"sku":"12268477","requires_shipping":true,"taxable":false,"featured_image":null,"available":true,"name":"Vaginal Birth Recovery Kit - PREORDER SHIPS MID NOV - Medium","public_title":"Medium","options":["Medium"],"price":10400,"weight":1471,"compare_at_price":13689,"inventory_management":"shopify","barcode":"91322813","requires_selling_plan":false,"selling_plan_allocations":[],"quantity_rule":{"min":1,"max":null,"increment":1}},{"id":43056791355581,"title":"Large","option1":"Large","option2":null,"option3":null,"sku":"08602557","requires_shipping":true,"taxable":false,"featured_image":null,"available":true,"name":"Vaginal Birth Recovery Kit - PREORDER SHIPS MID NOV - Large","public_title":"Large","options":["Large"],"price":10400,"weight":1583,"compare_at_price":13689,"inventory_management":"shopify","barcode":"91355581","requires_selling_plan":false,"selling_plan_allocations":[],"quantity_rule":{"min":1,"max":null,"increment":1}}],"images":["\/\/www.thebirthstore.com.au\/cdn\/shop\/files\/vaginal-birth-recovery-kit-5745733.png?v=1772594652"],"featured_image":"\/\/www.thebirthstore.com.au\/cdn\/shop\/files\/vaginal-birth-recovery-kit-5745733.png?v=1772594652","options":["Disposable Maternity \u0026 Postpartum Underwear (Size)"],"media":[{"alt":"Vaginal Birth Recovery Kit - The Birth Store - Bundles","id":30877268738237,"position":1,"preview_image":{"aspect_ratio":1.0,"height":1080,"width":1080,"src":"\/\/www.thebirthstore.com.au\/cdn\/shop\/files\/vaginal-birth-recovery-kit-5745733.png?v=1772594652"},"aspect_ratio":1.0,"height":1080,"media_type":"image","src":"\/\/www.thebirthstore.com.au\/cdn\/shop\/files\/vaginal-birth-recovery-kit-5745733.png?v=1772594652","width":1080}],"requires_selling_plan":false,"selling_plan_groups":[],"content":"\u003cp\u003e\u003cmeta charset=\"utf-8\"\u003e\u003cspan\u003eThere are so many beautiful products on the market now to help with breastfeeding. We have created the ultimate convenience bundle with our favourite products from small Australian businesses to aid you in your breastfeeding journey that you deserve - the one bundle to fill all your breastfeeding needs!\u003c\/span\u003e\u003c\/p\u003e"},"options":[{"name":"Disposable Maternity \u0026 Postpartum Underwear (Size)","position":1,"values":["Medium","Large"]}],"custom_metafields":{},"metafields":{"badge":"\u003cdiv style='display:none' class='jdgm-prev-badge' data-average-rating='5.00' data-number-of-reviews='1' data-number-of-questions='0'\u003e \u003cspan class='jdgm-prev-badge__stars' data-score='5.00' tabindex='0' aria-label='5.00 stars' role='button'\u003e \u003cspan class='jdgm-star jdgm--on'\u003e\u003c\/span\u003e\u003cspan class='jdgm-star jdgm--on'\u003e\u003c\/span\u003e\u003cspan class='jdgm-star jdgm--on'\u003e\u003c\/span\u003e\u003cspan class='jdgm-star jdgm--on'\u003e\u003c\/span\u003e\u003cspan class='jdgm-star jdgm--on'\u003e\u003c\/span\u003e \u003c\/span\u003e \u003cspan class='jdgm-prev-badge__text'\u003e 1 review \u003c\/span\u003e \u003c\/div\u003e","review_snippet_widget":"\u003cdiv class='jdgm-widget jdgm-review-snippet-widget'\u003e \u003cstyle\u003e\n .jdgm-review-snippet-widget{position:relative}.jdgm-review-snippet-widget:hover{cursor:pointer}@media only screen and (max-width: 767px){.jdgm-review-snippet-widget .jdgm-rev-snippet-widget__cards-container{left:unset;right:unset}}.jdgm-review-snippet-widget .jdgm-rev-snippet-card{background:#fff}.jdgm-review-snippet-widget .jdgm-star{color:#399}.jdgm-review-snippet-widget .jdgm-rev-snippet-card{border-radius:8px;background:#fff}.jdgm-review-snippet-widget .jdgm-rev-snippet-card__rev-prod-wrapper{border-radius:8px}.jdgm-review-snippet-widget .jdgm-rev-snippet-card__rev-content-wrapper{max-width:360px}.jdgm-review-snippet-widget .jdgm-rev-snippet-widget__prev-btn,.jdgm-review-snippet-widget .jdgm-rev-snippet-widget__next-btn{border-radius:50%;background:#fff}.jdgm-review-snippet-widget .jdgm-rev-snippet-widget__prev-btn\u003esvg,.jdgm-review-snippet-widget .jdgm-rev-snippet-widget__next-btn\u003esvg{fill:#000}.jdgm-review-snippet-widget .jdgm-rev-snippet-widget__prev-btn{left:0;top:40%}.jdgm-review-snippet-widget .jdgm-rev-snippet-widget__next-btn{right:0;top:40%}.jdgm-full-rev-modal.review-snippet-widget .jm-mfp-content{border-radius:8px}.jdgm-full-rev-modal.review-snippet-widget .jdgm-full-rev__icon{border-radius:8px}.jdgm-full-rev-modal.review-snippet-widget .jdgm-full-rev[data-verified-buyer=\"true\"] .jdgm-full-rev__icon::after{border-radius:8px}.jdgm-full-rev-modal.review-snippet-widget .jdgm-rev__buyer-badge{border-radius:calc( 8px \/ 2 )}.jdgm-full-rev-modal.review-snippet-widget .jdgm-full-rev__pic-img{border-radius:8px}.jdgm-full-rev-modal.review-snippet-widget .jdgm-full-rev__reply{border-radius:8px}.jdgm-full-rev-modal.review-snippet-widget .jdgm-full-rev__replier::before{content:'thebirthstore.com.au'}.jdgm-full-rev-modal.review-snippet-widget .jdgm-full-rev__product-button{border-radius:calc( 8px * 6 )}\n\n \u003c\/style\u003e \u003ci class=\"jdgm-rev-snippet-widget__prev-btn\" style='display: none;'\u003e \u003csvg xmlns=\"http:\/\/www.w3.org\/2000\/svg\" height=\"12\" viewBox=\"0 0 8 12\" width=\"8\" fill=\"#000\"\u003e\u003cpath d=\"M3.09961 6.00005L6.99961 9.90005C7.18294 10.0834 7.27461 10.3167 7.27461 10.6C7.27461 10.8834 7.18294 11.1167 6.99961 11.3C6.81628 11.4834 6.58294 11.575 6.29961 11.575C6.01628 11.575 5.78294 11.4834 5.59961 11.3L0.999609 6.70005C0.899609 6.60005 0.828776 6.49172 0.787109 6.37505C0.745443 6.25838 0.724609 6.13338 0.724609 6.00005C0.724609 5.86672 0.745443 5.74172 0.787109 5.62505C0.828776 5.50838 0.899609 5.40005 0.999609 5.30005L5.59961 0.700049C5.78294 0.516715 6.01628 0.425049 6.29961 0.425049C6.58294 0.425049 6.81628 0.516715 6.99961 0.700049C7.18294 0.883382 7.27461 1.11672 7.27461 1.40005C7.27461 1.68338 7.18294 1.91672 6.99961 2.10005L3.09961 6.00005Z\"\/\u003e\u003c\/svg\u003e \u003c\/i\u003e \u003ci class=\"jdgm-rev-snippet-widget__next-btn\" style='display: none;'\u003e \u003csvg xmlns=\"http:\/\/www.w3.org\/2000\/svg\" height=\"12\" viewBox=\"0 0 8 12\" width=\"8\" fill=\"#000\"\u003e\u003cpath d=\"M4.89961 6.00005L0.999609 2.10005C0.816276 1.91672 0.724609 1.68338 0.724609 1.40005C0.724609 1.11672 0.816276 0.883382 0.999609 0.700049C1.18294 0.516715 1.41628 0.425049 1.69961 0.425049C1.98294 0.425049 2.21628 0.516715 2.39961 0.700049L6.99961 5.30005C7.09961 5.40005 7.17044 5.50838 7.21211 5.62505C7.25378 5.74172 7.27461 5.86672 7.27461 6.00005C7.27461 6.13338 7.25378 6.25838 7.21211 6.37505C7.17044 6.49172 7.09961 6.60005 6.99961 6.70005L2.39961 11.3C2.21628 11.4834 1.98294 11.575 1.69961 11.575C1.41628 11.575 1.18294 11.4834 0.999609 11.3C0.816276 11.1167 0.724609 10.8834 0.724609 10.6C0.724609 10.3167 0.816276 10.0834 0.999609 9.90005L4.89961 6.00005Z\"\/\u003e\u003c\/svg\u003e \u003c\/i\u003e \u003cdiv style=\"overflow: hidden;\"\u003e \u003cdiv class='jdgm-rev-snippet-widget__cards-container'\u003e \u003cdiv class='jdgm-rev-snippet-card' data-review-id='06a8b7c6-c6ce-47bc-9dfa-7bdd5392d997' style='display: none;'\u003e \u003cdiv class=\"jdgm-rev-snippet-card__rev-prod-wrapper\"\u003e \u003cdiv class='jdgm-rev-snippet-card__pic-wrapper'\u003e \u003cimg class='jdgm-rev-snippet-card__pic' title='Review picture' alt='Review picture' data-src='https:\/\/judgeme.imgix.net\/labour-tens-machine-hire-the-birth-store\/1696309390__huge__original.jpeg?auto=format\u0026amp;w=100'\/\u003e \u003c\/div\u003e \u003ca class='jdgm-rev-snippet-card__rev-content-wrapper jdgm-rev-snippet-card__full-review-link' style='text-decoration: none; color: inherit;margin-right: 20px;' role='button' data-review-id='06a8b7c6-c6ce-47bc-9dfa-7bdd5392d997'\u003e \u003cdiv class='jdgm-rev-snippet-card__rev-header'\u003e \u003cdiv class='jdgm-rev-snippet-card__rev-rating' aria-label='5 stars' role='img'\u003e \u003cspan class='jdgm-star jdgm--on'\u003e\u003c\/span\u003e\u003cspan class='jdgm-star jdgm--on'\u003e\u003c\/span\u003e\u003cspan class='jdgm-star jdgm--on'\u003e\u003c\/span\u003e\u003cspan class='jdgm-star jdgm--on'\u003e\u003c\/span\u003e\u003cspan class='jdgm-star jdgm--on'\u003e\u003c\/span\u003e \u003c\/div\u003e \u003cdiv class='jdgm-rev-snippet-card__reviewer'\u003e S. \u003c\/div\u003e \u003c\/div\u003e \u003cdiv class='jdgm-rev-snippet-card__rev-content'\u003e \u003cspan class='jdgm-rev-snippet-card__rev-body'\u003e \u003cp\u003eThis birth recovery kit was so perfect after my recent birth. Peri bottles and ice packs are underrated- these were wonderful in reducing soreness. The spray and wipes were excellent and helped in a fast recovery. The bath salts are pure luxury and have the most wonderful fragrance. This would make an incredibly thoughtful baby shower gift\u003c\/p\u003e \u003c\/span\u003e \u003c\/div\u003e \u003c\/a\u003e \u003c\/div\u003e \u003c\/div\u003e \u003c\/div\u003e \u003c\/div\u003e \u003c\/div\u003e","widget":"\u003cdiv class='jdgm-rev-widg' data-updated-at='2026-10-21T04:51:42Z' data-average-rating='5.00' data-number-of-reviews='1' data-number-of-questions='0' data-image-url='https:\/\/cdn.shopify.com\/s\/files\/1\/0527\/3393\/5805\/files\/vaginal-birth-recovery-kit-5745733.png?v=1772594652'\u003e \u003cstyle class='jdgm-temp-hiding-style'\u003e.jdgm-rev-widg{ display: none }\u003c\/style\u003e \u003cdiv class='jdgm-rev-widg__header'\u003e \u003ch2 class='jdgm-rev-widg__title'\u003eCustomer Reviews\u003c\/h2\u003e \u003cdiv class='jdgm-rev-widg__summary'\u003e \u003cdiv class='jdgm-rev-widg__summary-stars'\u003e \u003cspan class='jdgm-rev-widg__summary-stars-img' aria-label='Average rating is 5.00 stars' role='img'\u003e \u003cspan class='jdgm-star jdgm--on'\u003e\u003c\/span\u003e\u003cspan class='jdgm-star jdgm--on'\u003e\u003c\/span\u003e\u003cspan class='jdgm-star jdgm--on'\u003e\u003c\/span\u003e\u003cspan class='jdgm-star jdgm--on'\u003e\u003c\/span\u003e\u003cspan class='jdgm-star jdgm--on'\u003e\u003c\/span\u003e \u003c\/span\u003e \u003c\/div\u003e \u003cdiv class='jdgm-rev-widg__summary-text'\u003eBased on 1 review\u003c\/div\u003e \u003c\/div\u003e \u003ca style='display: none' href='#' class='jdgm-write-rev-link' role='button'\u003eWrite a review\u003c\/a\u003e \u003cdiv class='jdgm-histogram jdgm-temp-hidden'\u003e \u003cdiv class='jdgm-histogram__row' data-rating='5' data-frequency='1' data-percentage='100'\u003e \u003cdiv class='jdgm-histogram__star' role='button' aria-label=\"100% (1) reviews with 5 star rating\" tabindex='0' \u003e\u003cspan class='jdgm-star jdgm--on'\u003e\u003c\/span\u003e\u003cspan class='jdgm-star jdgm--on'\u003e\u003c\/span\u003e\u003cspan class='jdgm-star jdgm--on'\u003e\u003c\/span\u003e\u003cspan class='jdgm-star jdgm--on'\u003e\u003c\/span\u003e\u003cspan class='jdgm-star jdgm--on'\u003e\u003c\/span\u003e\u003c\/div\u003e \u003cdiv class='jdgm-histogram__bar'\u003e \u003cdiv class='jdgm-histogram__bar-content' style='width: 100%;'\u003e \u003c\/div\u003e \u003c\/div\u003e \u003cdiv class='jdgm-histogram__percentage'\u003e100%\u003c\/div\u003e \u003cdiv class='jdgm-histogram__frequency'\u003e(1)\u003c\/div\u003e \u003c\/div\u003e \u003cdiv class='jdgm-histogram__row' data-rating='4' data-frequency='0' data-percentage='0'\u003e \u003cdiv class='jdgm-histogram__star' role='button' aria-label=\"0% (0) reviews with 4 star rating\" tabindex='0' \u003e\u003cspan class='jdgm-star jdgm--on'\u003e\u003c\/span\u003e\u003cspan class='jdgm-star jdgm--on'\u003e\u003c\/span\u003e\u003cspan class='jdgm-star jdgm--on'\u003e\u003c\/span\u003e\u003cspan class='jdgm-star jdgm--on'\u003e\u003c\/span\u003e\u003cspan class='jdgm-star jdgm--off'\u003e\u003c\/span\u003e\u003c\/div\u003e \u003cdiv class='jdgm-histogram__bar'\u003e \u003cdiv class='jdgm-histogram__bar-content' style='width: 0%;'\u003e \u003c\/div\u003e \u003c\/div\u003e \u003cdiv class='jdgm-histogram__percentage'\u003e0%\u003c\/div\u003e \u003cdiv class='jdgm-histogram__frequency'\u003e(0)\u003c\/div\u003e \u003c\/div\u003e \u003cdiv class='jdgm-histogram__row' data-rating='3' data-frequency='0' data-percentage='0'\u003e \u003cdiv class='jdgm-histogram__star' role='button' aria-label=\"0% (0) reviews with 3 star rating\" tabindex='0' \u003e\u003cspan class='jdgm-star jdgm--on'\u003e\u003c\/span\u003e\u003cspan class='jdgm-star jdgm--on'\u003e\u003c\/span\u003e\u003cspan class='jdgm-star jdgm--on'\u003e\u003c\/span\u003e\u003cspan class='jdgm-star jdgm--off'\u003e\u003c\/span\u003e\u003cspan class='jdgm-star jdgm--off'\u003e\u003c\/span\u003e\u003c\/div\u003e \u003cdiv class='jdgm-histogram__bar'\u003e \u003cdiv class='jdgm-histogram__bar-content' style='width: 0%;'\u003e \u003c\/div\u003e \u003c\/div\u003e \u003cdiv class='jdgm-histogram__percentage'\u003e0%\u003c\/div\u003e \u003cdiv class='jdgm-histogram__frequency'\u003e(0)\u003c\/div\u003e \u003c\/div\u003e \u003cdiv class='jdgm-histogram__row' data-rating='2' data-frequency='0' data-percentage='0'\u003e \u003cdiv class='jdgm-histogram__star' role='button' aria-label=\"0% (0) reviews with 2 star rating\" tabindex='0' \u003e\u003cspan class='jdgm-star jdgm--on'\u003e\u003c\/span\u003e\u003cspan class='jdgm-star jdgm--on'\u003e\u003c\/span\u003e\u003cspan class='jdgm-star jdgm--off'\u003e\u003c\/span\u003e\u003cspan class='jdgm-star jdgm--off'\u003e\u003c\/span\u003e\u003cspan class='jdgm-star jdgm--off'\u003e\u003c\/span\u003e\u003c\/div\u003e \u003cdiv class='jdgm-histogram__bar'\u003e \u003cdiv class='jdgm-histogram__bar-content' style='width: 0%;'\u003e \u003c\/div\u003e \u003c\/div\u003e \u003cdiv class='jdgm-histogram__percentage'\u003e0%\u003c\/div\u003e \u003cdiv class='jdgm-histogram__frequency'\u003e(0)\u003c\/div\u003e \u003c\/div\u003e \u003cdiv class='jdgm-histogram__row' data-rating='1' data-frequency='0' data-percentage='0'\u003e \u003cdiv class='jdgm-histogram__star' role='button' aria-label=\"0% (0) reviews with 1 star rating\" tabindex='0' \u003e\u003cspan class='jdgm-star jdgm--on'\u003e\u003c\/span\u003e\u003cspan class='jdgm-star jdgm--off'\u003e\u003c\/span\u003e\u003cspan class='jdgm-star jdgm--off'\u003e\u003c\/span\u003e\u003cspan class='jdgm-star jdgm--off'\u003e\u003c\/span\u003e\u003cspan class='jdgm-star jdgm--off'\u003e\u003c\/span\u003e\u003c\/div\u003e \u003cdiv class='jdgm-histogram__bar'\u003e \u003cdiv class='jdgm-histogram__bar-content' style='width: 0%;'\u003e \u003c\/div\u003e \u003c\/div\u003e \u003cdiv class='jdgm-histogram__percentage'\u003e0%\u003c\/div\u003e \u003cdiv class='jdgm-histogram__frequency'\u003e(0)\u003c\/div\u003e \u003c\/div\u003e \u003cdiv class='jdgm-histogram__row jdgm-histogram__clear-filter' data-rating=null tabindex='0'\u003e\u003c\/div\u003e \u003c\/div\u003e \u003cdiv class='jdgm-gallery' data-url='reviews\/reviews_for_widget' data-per-page='10'\u003e \u003cdiv class='jdgm-gallery-data jdgm-hidden' data-json='[{\u0026quot;uuid\u0026quot;:\u0026quot;06a8b7c6-c6ce-47bc-9dfa-7bdd5392d997\u0026quot;,\u0026quot;reviewer_name\u0026quot;:\u0026quot;S.R.\u0026quot;,\u0026quot;reviewer_initial\u0026quot;:\u0026quot;S\u0026quot;,\u0026quot;title\u0026quot;:\u0026quot;All the essentials\u0026quot;,\u0026quot;body_html\u0026quot;:\u0026quot;\\u003cp\\u003eThis birth recovery kit was so perfect after my recent birth. Peri bottles and ice packs are underrated- these were wonderful in reducing soreness. The spray and wipes were excellent and helped in a fast recovery. The bath salts are pure luxury and have the most wonderful fragrance. This would make an incredibly thoughtful baby shower gift\\u003c\/p\\u003e\u0026quot;,\u0026quot;verified_buyer\u0026quot;:false,\u0026quot;location\u0026quot;:\u0026quot;\u0026quot;,\u0026quot;video_external_ids\u0026quot;:[],\u0026quot;media_platform_hosted_video_infos\u0026quot;:[],\u0026quot;cf_answers\u0026quot;:[],\u0026quot;shop_reply_name\u0026quot;:\u0026quot;The Birth Store\u0026quot;,\u0026quot;rating\u0026quot;:\u0026quot;5\u0026quot;,\u0026quot;created_at\u0026quot;:\u0026quot;2023-10-03 05:03:10 UTC\u0026quot;,\u0026quot;pictures_urls\u0026quot;:[{\u0026quot;compact\u0026quot;:\u0026quot;https:\/\/review-images.judgeme.com\/labour-tens-machine-hire-the-birth-store\/1696309390__huge__original.jpeg?quality=80\\u0026width=160\u0026quot;,\u0026quot;original\u0026quot;:\u0026quot;https:\/\/review-images.judgeme.com\/labour-tens-machine-hire-the-birth-store\/1696309390__huge__original.jpeg?quality=80\\u0026width=1024\u0026quot;}]}]'\u003e\u003c\/div\u003e \u003c\/div\u003e \u003cdiv class='jdgm-rev-widg__sort-wrapper'\u003e\u003c\/div\u003e \u003c\/div\u003e \u003cdiv class='jdgm-rev-widg__body'\u003e \u003cdiv class='jdgm-rev-widg__reviews'\u003e\u003cdiv class='jdgm-rev jdgm-divider-top' data-verified-buyer='false' data-review-id='06a8b7c6-c6ce-47bc-9dfa-7bdd5392d997' data-review-language='' data-product-title='Vaginal Birth Recovery Kit - PREORDER SHIPS MID NOV' data-product-url='\/products\/vaginal-birth-recovery-kit' data-thumb-up-count='0' data-thumb-down-count='0'\u003e \u003cdiv class='jdgm-rev__header'\u003e \u003cdiv class='jdgm-rev__icon' \u003e S \u003c\/div\u003e \u003cspan class='jdgm-rev__rating' data-score='5' tabindex='0' aria-label='5 star review' role='img'\u003e \u003cspan class='jdgm-star jdgm--on'\u003e\u003c\/span\u003e\u003cspan class='jdgm-star jdgm--on'\u003e\u003c\/span\u003e\u003cspan class='jdgm-star jdgm--on'\u003e\u003c\/span\u003e\u003cspan class='jdgm-star jdgm--on'\u003e\u003c\/span\u003e\u003cspan class='jdgm-star jdgm--on'\u003e\u003c\/span\u003e \u003c\/span\u003e \u003ctime class='jdgm-rev__timestamp jdgm-spinner' datetime='2023-10-03T05:03:10Z' data-content='2023-10-03 05:03:10 UTC'\u003e\u003c\/time\u003e \u003cdiv class='jdgm-rev__br'\u003e\u003c\/div\u003e \u003cspan class='jdgm-rev__buyer-badge-wrapper'\u003e \u003c\/span\u003e \u003cspan class='jdgm-rev__author-wrapper'\u003e \u003cspan class='jdgm-rev__author'\u003eS.R.\u003c\/span\u003e \u003cspan class='jdgm-rev__location' \u003e \u003c\/span\u003e \u003c\/span\u003e \u003c\/div\u003e \u003cdiv class='jdgm-rev__content'\u003e \u003cdiv class='jdgm-rev__custom-form'\u003e \u003c\/div\u003e \u003cb class='jdgm-rev__title'\u003eAll the essentials\u003c\/b\u003e \u003cdiv class='jdgm-rev__body'\u003e\u003cp\u003eThis birth recovery kit was so perfect after my recent birth. Peri bottles and ice packs are underrated- these were wonderful in reducing soreness. The spray and wipes were excellent and helped in a fast recovery. The bath salts are pure luxury and have the most wonderful fragrance. This would make an incredibly thoughtful baby shower gift\u003c\/p\u003e\u003c\/div\u003e \u003cdiv class='jdgm-rev__pics'\u003e \u003ca class='jdgm-rev__pic-link jdgm--loading' target='_blank' rel='nofollow' href='https:\/\/review-images.judgeme.com\/labour-tens-machine-hire-the-birth-store\/1696309390__huge__original.jpeg?quality=80\u0026amp;width=1024' data-mfp-src='https:\/\/review-images.judgeme.com\/labour-tens-machine-hire-the-birth-store\/1696309390__huge__original.jpeg?quality=80\u0026amp;width=1024' aria-label='S.R. review photo 1'\u003e \u003cimg class='jdgm-rev__pic-img' alt='S.R. review photo' data-src='https:\/\/review-images.judgeme.com\/labour-tens-machine-hire-the-birth-store\/1696309390__huge__original.jpeg?quality=80\u0026amp;width=160'\u003e \u003c\/a\u003e \u003c\/div\u003e \u003cdiv class='jdgm-rev__vids'\u003e \u003c\/div\u003e \u003cdiv class='jdgm-rev__transparency-badge-wrapper'\u003e \u003cdiv class='jdgm-rev__transparency-badge' data-badge-type=review_collected_from_store_visitor\u003e\u003c\/div\u003e \u003c\/div\u003e \u003c\/div\u003e \u003cdiv class='jdgm-rev__actions'\u003e \u003cdiv class='jdgm-rev__social'\u003e\u003c\/div\u003e \u003cdiv class='jdgm-rev__votes'\u003e\u003c\/div\u003e \u003c\/div\u003e \u003cdiv class='jdgm-rev__reply'\u003e \u003c\/div\u003e \u003c\/div\u003e\u003c\/div\u003e \u003cdiv class='jdgm-paginate' data-per-page='10' data-url='https:\/\/api.judge.me\/reviews\/reviews_for_widget' style=\"display: none;\"\u003e\u003c\/div\u003e \u003c\/div\u003e \u003cdiv class='jdgm-rev-widg__paginate-spinner-wrapper'\u003e \u003cdiv class='jdgm-spinner'\u003e\u003c\/div\u003e \u003c\/div\u003e \u003c\/div\u003e"},"default_reviews_metafields":{"rating":{"scale_min":"1.0","scale_max":"5.0","value":"5.0"},"rating_count":1},"collections":[{"id":512654540989,"handle":"lastof26-10","title":"10%","updated_at":"2026-11-14T20:08:00+08:00","body_html":null,"published_at":"2026-10-12T19:06:42+08:00","sort_order":"best-selling","template_suffix":null,"disjunctive":false,"rules":[],"published_scope":"global"},{"id":283018526909,"handle":"bundles","title":"Bundles","updated_at":"2026-11-08T21:24:04+08:00","body_html":"\u003cp\u003eMake shopping for your bump, birth and beyond easier with our bundle packs. With a pack available for every stage, you can get everything you need with no fuss and with our bundle packs, you even save money.\u003c\/p\u003e","published_at":"2022-02-01T22:33:09+08:00","sort_order":"best-selling","template_suffix":"swaddles-collection","disjunctive":false,"rules":[],"published_scope":"global","image":{"created_at":"2024-05-06T11:59:39+08:00","alt":"Bundles - The Birth Store","width":2048,"height":1365,"src":"\/\/www.thebirthstore.com.au\/cdn\/shop\/collections\/bundles-299009.jpg?v=1714967980"}},{"id":261657460925,"handle":"buy","title":"Buy","updated_at":"2026-11-14T20:08:00+08:00","body_html":"\u003cp\u003eBrowse all of our pregnancy, labour \u0026amp; birth, postpartum and baby essentials here.\u003cbr\u003e\u003c\/p\u003e\n\u003cp\u003e\u003cspan\u003eYou can even buy now and pay later with Afterpay!\u003c\/span\u003e\u003c\/p\u003e","published_at":"2021-03-10T12:05:31+08:00","sort_order":"best-selling","template_suffix":"shop-all-collection","disjunctive":false,"rules":[],"published_scope":"global","image":{"created_at":"2024-05-06T11:59:42+08:00","alt":"Buy - The Birth Store","width":2048,"height":2048,"src":"\/\/www.thebirthstore.com.au\/cdn\/shop\/collections\/buy-964856.jpg?v=1714967982"}},{"id":343549608125,"handle":"expo-preorder","title":"Expo Preorder","updated_at":"2026-11-10T20:07:02+08:00","body_html":"\u003cp\u003eMissed out at the expo? We've got you! Use code EXPO30 for 30% off our sold-out favourites, or EXPOKIT to get our Vaginal Birth Recovery Kit at the exclusive expo price.\u003c\/p\u003e","published_at":"2026-08-31T11:34:10+08:00","sort_order":"most-relevant","template_suffix":null,"disjunctive":false,"rules":[],"published_scope":"global"},{"id":281712066749,"handle":"hemorrhoid-care","title":"Haemorrhoid Care","updated_at":"2026-11-12T20:07:50+08:00","body_html":"","published_at":"2021-12-20T14:16:30+08:00","sort_order":"best-selling","template_suffix":"swaddles-collection","disjunctive":false,"rules":[],"published_scope":"global","image":{"created_at":"2024-05-06T12:00:00+08:00","alt":"Haemorrhoid Care - The Birth Store","width":763,"height":556,"src":"\/\/www.thebirthstore.com.au\/cdn\/shop\/collections\/haemorrhoid-care-562138.jpg?v=1714968001"}},{"id":337429201085,"handle":"hospital-bag","title":"Hospital Bag","updated_at":"2026-11-14T20:08:00+08:00","body_html":"","published_at":"2026-06-03T11:36:29+08:00","sort_order":"most-relevant","template_suffix":"","disjunctive":false,"rules":[],"published_scope":"global"},{"id":281712591037,"handle":"pain-relief","title":"Pain Relief","updated_at":"2026-11-14T20:08:00+08:00","body_html":"","published_at":"2021-12-20T14:22:45+08:00","sort_order":"best-selling","template_suffix":"pain-relief-collection","disjunctive":false,"rules":[],"published_scope":"global","image":{"created_at":"2024-05-06T12:00:27+08:00","alt":"Pain Relief - The Birth Store","width":1365,"height":2048,"src":"\/\/www.thebirthstore.com.au\/cdn\/shop\/collections\/pain-relief-878865.jpg?v=1714968027"}},{"id":295224705213,"handle":"perineal-care","title":"Perineal Care","updated_at":"2026-11-12T20:07:50+08:00","body_html":"","published_at":"2023-11-10T20:43:30+08:00","sort_order":"best-selling","template_suffix":"perineal-care-collection","disjunctive":false,"rules":[],"published_scope":"global","image":{"created_at":"2024-05-06T12:00:33+08:00","alt":"Perineal Care - The Birth Store","width":1024,"height":1536,"src":"\/\/www.thebirthstore.com.au\/cdn\/shop\/collections\/perineal-care-657628.jpg?v=1714968034"}},{"id":261658083517,"handle":"post-partum","title":"Postpartum","updated_at":"2026-11-14T20:08:00+08:00","body_html":"\u003cp\u003eShop your postpartum and hospital bag essentials below. Looking for something we don't currently stock? Please reach out and let us know.\u003cbr\u003e\u003c\/p\u003e\n\u003cp\u003e\u003cspan\u003eYou can even buy now and pay later with Afterpay!\u003c\/span\u003e\u003c\/p\u003e","published_at":"2021-03-10T12:33:47+08:00","sort_order":"best-selling","template_suffix":"postpartum-collection","disjunctive":false,"rules":[],"published_scope":"global","image":{"created_at":"2024-05-06T12:00:36+08:00","alt":"Postpartum - The Birth Store","width":611,"height":702,"src":"\/\/www.thebirthstore.com.au\/cdn\/shop\/collections\/postpartum-150119.jpg?v=1714968037"}},{"id":310045933757,"handle":"shop-all-sale","title":"Shop All Sale","updated_at":"2026-11-14T20:08:00+08:00","body_html":"","published_at":"2024-11-12T13:22:43+08:00","sort_order":"best-selling","template_suffix":"","disjunctive":true,"rules":[],"published_scope":"global","image":{"created_at":"2024-11-13T10:58:16+08:00","alt":"Shop All Sale - The Birth Store","width":2048,"height":1365,"src":"\/\/www.thebirthstore.com.au\/cdn\/shop\/collections\/shop-all-sale-297361.jpg?v=1731466697"}},{"id":281712197821,"handle":"vaginal-birth-recovery","title":"Vaginal Birth Recovery","updated_at":"2026-11-12T20:07:50+08:00","body_html":"","published_at":"2021-12-20T14:18:23+08:00","sort_order":"best-selling","template_suffix":"swaddles-collection","disjunctive":true,"rules":[],"published_scope":"global","image":{"created_at":"2024-05-06T12:01:03+08:00","alt":"Vaginal Birth Recovery - The Birth Store","width":2048,"height":2048,"src":"\/\/www.thebirthstore.com.au\/cdn\/shop\/collections\/vaginal-birth-recovery-449034.jpg?v=1714968063"}}]}