×
Skip to content
When You Support a Small Business You're Supporting Someone's Dream
So, from the bottom of our hearts, thank you for supporting our dream ❤️
10
{"item":{"id":7439743680701,"title":"SRC Recovery Shorts - Mini","handle":"src-recovery-short-mini","description":"\u003cmeta charset=\"utf-8\"\u003e\u003cspan data-mce-fragment=\"1\"\u003eThis product is stocked at a 3\u003c\/span\u003e\u003csup data-mce-fragment=\"1\"\u003erd\u003c\/sup\u003e\u003cspan data-mce-fragment=\"1\"\u003e party warehouse, if ordering with other products you’ll receive two packages. This product will have a turn around time of 10 days if pickup is selected on checkout. Any questions, please contact us \u003ca href=\"https:\/\/www.thebirthstore.com.au\/pages\/contact-us\" title=\"Contact Us\" data-mce-fragment=\"1\" target=\"_blank\" data-mce-href=\"https:\/\/www.thebirthstore.com.au\/pages\/contact-us\"\u003ehere\u003c\/a\u003e.\u003c\/span\u003e\u003cbr\u003e","published_at":"2023-03-13T14:07:20+08:00","created_at":"2023-02-13T22:36:31+08:00","vendor":"SRC Health","type":"Recovery Shorts","tags":["Hospital Bag","Mum","Pelvic Floor","Post-Partum","Support Clothing"],"price":18900,"price_min":18900,"price_max":18900,"available":true,"price_varies":false,"compare_at_price":18900,"compare_at_price_min":18900,"compare_at_price_max":18900,"compare_at_price_varies":false,"variants":[{"id":42658960048317,"title":"XXS \/ Champagne","option1":"XXS","option2":"Champagne","option3":null,"sku":"","requires_shipping":true,"taxable":false,"featured_image":{"id":34641032413373,"product_id":7439743680701,"position":4,"created_at":"2024-05-06T12:00:54+08:00","updated_at":"2024-05-06T12:00:54+08:00","alt":"SRC Recovery Shorts - Mini - The Birth Store-SRC Health","width":1080,"height":1080,"src":"\/\/www.thebirthstore.com.au\/cdn\/shop\/files\/src-recovery-shorts-mini-153344.jpg?v=1714968054","variant_ids":[42658960048317,42658960113853,42658960179389,42658960244925,42658960310461,42658960375997,42658960441533]},"available":true,"name":"SRC Recovery Shorts - Mini - XXS \/ Champagne","public_title":"XXS \/ Champagne","options":["XXS","Champagne"],"price":18900,"weight":0,"compare_at_price":18900,"inventory_management":null,"barcode":"60048317","featured_media":{"alt":"SRC Recovery Shorts - Mini - The Birth Store-SRC Health","id":27007601443005,"position":4,"preview_image":{"aspect_ratio":1.0,"height":1080,"width":1080,"src":"\/\/www.thebirthstore.com.au\/cdn\/shop\/files\/src-recovery-shorts-mini-153344.jpg?v=1714968054"}},"requires_selling_plan":false,"selling_plan_allocations":[],"quantity_rule":{"min":1,"max":null,"increment":1}},{"id":42658960081085,"title":"XXS \/ Black","option1":"XXS","option2":"Black","option3":null,"sku":"","requires_shipping":true,"taxable":false,"featured_image":{"id":34641032315069,"product_id":7439743680701,"position":1,"created_at":"2024-05-06T12:00:54+08:00","updated_at":"2024-05-06T12:00:54+08:00","alt":"SRC Recovery Shorts - Mini - The Birth Store-SRC Health","width":1080,"height":1080,"src":"\/\/www.thebirthstore.com.au\/cdn\/shop\/files\/src-recovery-shorts-mini-371255.jpg?v=1714968054","variant_ids":[42658960081085,42658960146621,42658960212157,42658960277693,42658960343229,42658960408765,42658960474301]},"available":true,"name":"SRC Recovery Shorts - Mini - XXS \/ Black","public_title":"XXS \/ Black","options":["XXS","Black"],"price":18900,"weight":0,"compare_at_price":18900,"inventory_management":null,"barcode":"60081085","featured_media":{"alt":"SRC Recovery Shorts - Mini - The Birth Store-SRC Health","id":27007601344701,"position":1,"preview_image":{"aspect_ratio":1.0,"height":1080,"width":1080,"src":"\/\/www.thebirthstore.com.au\/cdn\/shop\/files\/src-recovery-shorts-mini-371255.jpg?v=1714968054"}},"requires_selling_plan":false,"selling_plan_allocations":[],"quantity_rule":{"min":1,"max":null,"increment":1}},{"id":42658960113853,"title":"XS \/ Champagne","option1":"XS","option2":"Champagne","option3":null,"sku":"","requires_shipping":true,"taxable":false,"featured_image":{"id":34641032413373,"product_id":7439743680701,"position":4,"created_at":"2024-05-06T12:00:54+08:00","updated_at":"2024-05-06T12:00:54+08:00","alt":"SRC Recovery Shorts - Mini - The Birth Store-SRC Health","width":1080,"height":1080,"src":"\/\/www.thebirthstore.com.au\/cdn\/shop\/files\/src-recovery-shorts-mini-153344.jpg?v=1714968054","variant_ids":[42658960048317,42658960113853,42658960179389,42658960244925,42658960310461,42658960375997,42658960441533]},"available":true,"name":"SRC Recovery Shorts - Mini - XS \/ Champagne","public_title":"XS \/ Champagne","options":["XS","Champagne"],"price":18900,"weight":0,"compare_at_price":18900,"inventory_management":null,"barcode":"60113853","featured_media":{"alt":"SRC Recovery Shorts - Mini - The Birth Store-SRC Health","id":27007601443005,"position":4,"preview_image":{"aspect_ratio":1.0,"height":1080,"width":1080,"src":"\/\/www.thebirthstore.com.au\/cdn\/shop\/files\/src-recovery-shorts-mini-153344.jpg?v=1714968054"}},"requires_selling_plan":false,"selling_plan_allocations":[],"quantity_rule":{"min":1,"max":null,"increment":1}},{"id":42658960146621,"title":"XS \/ Black","option1":"XS","option2":"Black","option3":null,"sku":"","requires_shipping":true,"taxable":false,"featured_image":{"id":34641032315069,"product_id":7439743680701,"position":1,"created_at":"2024-05-06T12:00:54+08:00","updated_at":"2024-05-06T12:00:54+08:00","alt":"SRC Recovery Shorts - Mini - The Birth Store-SRC Health","width":1080,"height":1080,"src":"\/\/www.thebirthstore.com.au\/cdn\/shop\/files\/src-recovery-shorts-mini-371255.jpg?v=1714968054","variant_ids":[42658960081085,42658960146621,42658960212157,42658960277693,42658960343229,42658960408765,42658960474301]},"available":true,"name":"SRC Recovery Shorts - Mini - XS \/ Black","public_title":"XS \/ Black","options":["XS","Black"],"price":18900,"weight":0,"compare_at_price":18900,"inventory_management":null,"barcode":"60146621","featured_media":{"alt":"SRC Recovery Shorts - Mini - The Birth Store-SRC Health","id":27007601344701,"position":1,"preview_image":{"aspect_ratio":1.0,"height":1080,"width":1080,"src":"\/\/www.thebirthstore.com.au\/cdn\/shop\/files\/src-recovery-shorts-mini-371255.jpg?v=1714968054"}},"requires_selling_plan":false,"selling_plan_allocations":[],"quantity_rule":{"min":1,"max":null,"increment":1}},{"id":42658960179389,"title":"S \/ Champagne","option1":"S","option2":"Champagne","option3":null,"sku":"","requires_shipping":true,"taxable":false,"featured_image":{"id":34641032413373,"product_id":7439743680701,"position":4,"created_at":"2024-05-06T12:00:54+08:00","updated_at":"2024-05-06T12:00:54+08:00","alt":"SRC Recovery Shorts - Mini - The Birth Store-SRC Health","width":1080,"height":1080,"src":"\/\/www.thebirthstore.com.au\/cdn\/shop\/files\/src-recovery-shorts-mini-153344.jpg?v=1714968054","variant_ids":[42658960048317,42658960113853,42658960179389,42658960244925,42658960310461,42658960375997,42658960441533]},"available":true,"name":"SRC Recovery Shorts - Mini - S \/ Champagne","public_title":"S \/ Champagne","options":["S","Champagne"],"price":18900,"weight":0,"compare_at_price":18900,"inventory_management":null,"barcode":"60179389","featured_media":{"alt":"SRC Recovery Shorts - Mini - The Birth Store-SRC Health","id":27007601443005,"position":4,"preview_image":{"aspect_ratio":1.0,"height":1080,"width":1080,"src":"\/\/www.thebirthstore.com.au\/cdn\/shop\/files\/src-recovery-shorts-mini-153344.jpg?v=1714968054"}},"requires_selling_plan":false,"selling_plan_allocations":[],"quantity_rule":{"min":1,"max":null,"increment":1}},{"id":42658960212157,"title":"S \/ Black","option1":"S","option2":"Black","option3":null,"sku":"","requires_shipping":true,"taxable":false,"featured_image":{"id":34641032315069,"product_id":7439743680701,"position":1,"created_at":"2024-05-06T12:00:54+08:00","updated_at":"2024-05-06T12:00:54+08:00","alt":"SRC Recovery Shorts - Mini - The Birth Store-SRC Health","width":1080,"height":1080,"src":"\/\/www.thebirthstore.com.au\/cdn\/shop\/files\/src-recovery-shorts-mini-371255.jpg?v=1714968054","variant_ids":[42658960081085,42658960146621,42658960212157,42658960277693,42658960343229,42658960408765,42658960474301]},"available":true,"name":"SRC Recovery Shorts - Mini - S \/ Black","public_title":"S \/ Black","options":["S","Black"],"price":18900,"weight":0,"compare_at_price":18900,"inventory_management":null,"barcode":"60212157","featured_media":{"alt":"SRC Recovery Shorts - Mini - The Birth Store-SRC Health","id":27007601344701,"position":1,"preview_image":{"aspect_ratio":1.0,"height":1080,"width":1080,"src":"\/\/www.thebirthstore.com.au\/cdn\/shop\/files\/src-recovery-shorts-mini-371255.jpg?v=1714968054"}},"requires_selling_plan":false,"selling_plan_allocations":[],"quantity_rule":{"min":1,"max":null,"increment":1}},{"id":42658960244925,"title":"M \/ Champagne","option1":"M","option2":"Champagne","option3":null,"sku":"","requires_shipping":true,"taxable":false,"featured_image":{"id":34641032413373,"product_id":7439743680701,"position":4,"created_at":"2024-05-06T12:00:54+08:00","updated_at":"2024-05-06T12:00:54+08:00","alt":"SRC Recovery Shorts - Mini - The Birth Store-SRC Health","width":1080,"height":1080,"src":"\/\/www.thebirthstore.com.au\/cdn\/shop\/files\/src-recovery-shorts-mini-153344.jpg?v=1714968054","variant_ids":[42658960048317,42658960113853,42658960179389,42658960244925,42658960310461,42658960375997,42658960441533]},"available":true,"name":"SRC Recovery Shorts - Mini - M \/ Champagne","public_title":"M \/ Champagne","options":["M","Champagne"],"price":18900,"weight":0,"compare_at_price":18900,"inventory_management":null,"barcode":"60244925","featured_media":{"alt":"SRC Recovery Shorts - Mini - The Birth Store-SRC Health","id":27007601443005,"position":4,"preview_image":{"aspect_ratio":1.0,"height":1080,"width":1080,"src":"\/\/www.thebirthstore.com.au\/cdn\/shop\/files\/src-recovery-shorts-mini-153344.jpg?v=1714968054"}},"requires_selling_plan":false,"selling_plan_allocations":[],"quantity_rule":{"min":1,"max":null,"increment":1}},{"id":42658960277693,"title":"M \/ Black","option1":"M","option2":"Black","option3":null,"sku":"","requires_shipping":true,"taxable":false,"featured_image":{"id":34641032315069,"product_id":7439743680701,"position":1,"created_at":"2024-05-06T12:00:54+08:00","updated_at":"2024-05-06T12:00:54+08:00","alt":"SRC Recovery Shorts - Mini - The Birth Store-SRC Health","width":1080,"height":1080,"src":"\/\/www.thebirthstore.com.au\/cdn\/shop\/files\/src-recovery-shorts-mini-371255.jpg?v=1714968054","variant_ids":[42658960081085,42658960146621,42658960212157,42658960277693,42658960343229,42658960408765,42658960474301]},"available":true,"name":"SRC Recovery Shorts - Mini - M \/ Black","public_title":"M \/ Black","options":["M","Black"],"price":18900,"weight":0,"compare_at_price":18900,"inventory_management":null,"barcode":"60277693","featured_media":{"alt":"SRC Recovery Shorts - Mini - The Birth Store-SRC Health","id":27007601344701,"position":1,"preview_image":{"aspect_ratio":1.0,"height":1080,"width":1080,"src":"\/\/www.thebirthstore.com.au\/cdn\/shop\/files\/src-recovery-shorts-mini-371255.jpg?v=1714968054"}},"requires_selling_plan":false,"selling_plan_allocations":[],"quantity_rule":{"min":1,"max":null,"increment":1}},{"id":42658960310461,"title":"L \/ Champagne","option1":"L","option2":"Champagne","option3":null,"sku":"","requires_shipping":true,"taxable":false,"featured_image":{"id":34641032413373,"product_id":7439743680701,"position":4,"created_at":"2024-05-06T12:00:54+08:00","updated_at":"2024-05-06T12:00:54+08:00","alt":"SRC Recovery Shorts - Mini - The Birth Store-SRC Health","width":1080,"height":1080,"src":"\/\/www.thebirthstore.com.au\/cdn\/shop\/files\/src-recovery-shorts-mini-153344.jpg?v=1714968054","variant_ids":[42658960048317,42658960113853,42658960179389,42658960244925,42658960310461,42658960375997,42658960441533]},"available":true,"name":"SRC Recovery Shorts - Mini - L \/ Champagne","public_title":"L \/ Champagne","options":["L","Champagne"],"price":18900,"weight":0,"compare_at_price":18900,"inventory_management":null,"barcode":"60310461","featured_media":{"alt":"SRC Recovery Shorts - Mini - The Birth Store-SRC Health","id":27007601443005,"position":4,"preview_image":{"aspect_ratio":1.0,"height":1080,"width":1080,"src":"\/\/www.thebirthstore.com.au\/cdn\/shop\/files\/src-recovery-shorts-mini-153344.jpg?v=1714968054"}},"requires_selling_plan":false,"selling_plan_allocations":[],"quantity_rule":{"min":1,"max":null,"increment":1}},{"id":42658960343229,"title":"L \/ Black","option1":"L","option2":"Black","option3":null,"sku":"","requires_shipping":true,"taxable":false,"featured_image":{"id":34641032315069,"product_id":7439743680701,"position":1,"created_at":"2024-05-06T12:00:54+08:00","updated_at":"2024-05-06T12:00:54+08:00","alt":"SRC Recovery Shorts - Mini - The Birth Store-SRC Health","width":1080,"height":1080,"src":"\/\/www.thebirthstore.com.au\/cdn\/shop\/files\/src-recovery-shorts-mini-371255.jpg?v=1714968054","variant_ids":[42658960081085,42658960146621,42658960212157,42658960277693,42658960343229,42658960408765,42658960474301]},"available":true,"name":"SRC Recovery Shorts - Mini - L \/ Black","public_title":"L \/ Black","options":["L","Black"],"price":18900,"weight":0,"compare_at_price":18900,"inventory_management":null,"barcode":"60343229","featured_media":{"alt":"SRC Recovery Shorts - Mini - The Birth Store-SRC Health","id":27007601344701,"position":1,"preview_image":{"aspect_ratio":1.0,"height":1080,"width":1080,"src":"\/\/www.thebirthstore.com.au\/cdn\/shop\/files\/src-recovery-shorts-mini-371255.jpg?v=1714968054"}},"requires_selling_plan":false,"selling_plan_allocations":[],"quantity_rule":{"min":1,"max":null,"increment":1}},{"id":42658960375997,"title":"XL \/ Champagne","option1":"XL","option2":"Champagne","option3":null,"sku":"","requires_shipping":true,"taxable":false,"featured_image":{"id":34641032413373,"product_id":7439743680701,"position":4,"created_at":"2024-05-06T12:00:54+08:00","updated_at":"2024-05-06T12:00:54+08:00","alt":"SRC Recovery Shorts - Mini - The Birth Store-SRC Health","width":1080,"height":1080,"src":"\/\/www.thebirthstore.com.au\/cdn\/shop\/files\/src-recovery-shorts-mini-153344.jpg?v=1714968054","variant_ids":[42658960048317,42658960113853,42658960179389,42658960244925,42658960310461,42658960375997,42658960441533]},"available":true,"name":"SRC Recovery Shorts - Mini - XL \/ Champagne","public_title":"XL \/ Champagne","options":["XL","Champagne"],"price":18900,"weight":0,"compare_at_price":18900,"inventory_management":null,"barcode":"60375997","featured_media":{"alt":"SRC Recovery Shorts - Mini - The Birth Store-SRC Health","id":27007601443005,"position":4,"preview_image":{"aspect_ratio":1.0,"height":1080,"width":1080,"src":"\/\/www.thebirthstore.com.au\/cdn\/shop\/files\/src-recovery-shorts-mini-153344.jpg?v=1714968054"}},"requires_selling_plan":false,"selling_plan_allocations":[],"quantity_rule":{"min":1,"max":null,"increment":1}},{"id":42658960408765,"title":"XL \/ Black","option1":"XL","option2":"Black","option3":null,"sku":"","requires_shipping":true,"taxable":false,"featured_image":{"id":34641032315069,"product_id":7439743680701,"position":1,"created_at":"2024-05-06T12:00:54+08:00","updated_at":"2024-05-06T12:00:54+08:00","alt":"SRC Recovery Shorts - Mini - The Birth Store-SRC Health","width":1080,"height":1080,"src":"\/\/www.thebirthstore.com.au\/cdn\/shop\/files\/src-recovery-shorts-mini-371255.jpg?v=1714968054","variant_ids":[42658960081085,42658960146621,42658960212157,42658960277693,42658960343229,42658960408765,42658960474301]},"available":true,"name":"SRC Recovery Shorts - Mini - XL \/ Black","public_title":"XL \/ Black","options":["XL","Black"],"price":18900,"weight":0,"compare_at_price":18900,"inventory_management":null,"barcode":"60408765","featured_media":{"alt":"SRC Recovery Shorts - Mini - The Birth Store-SRC Health","id":27007601344701,"position":1,"preview_image":{"aspect_ratio":1.0,"height":1080,"width":1080,"src":"\/\/www.thebirthstore.com.au\/cdn\/shop\/files\/src-recovery-shorts-mini-371255.jpg?v=1714968054"}},"requires_selling_plan":false,"selling_plan_allocations":[],"quantity_rule":{"min":1,"max":null,"increment":1}},{"id":42658960441533,"title":"XXL \/ Champagne","option1":"XXL","option2":"Champagne","option3":null,"sku":"","requires_shipping":true,"taxable":false,"featured_image":{"id":34641032413373,"product_id":7439743680701,"position":4,"created_at":"2024-05-06T12:00:54+08:00","updated_at":"2024-05-06T12:00:54+08:00","alt":"SRC Recovery Shorts - Mini - The Birth Store-SRC Health","width":1080,"height":1080,"src":"\/\/www.thebirthstore.com.au\/cdn\/shop\/files\/src-recovery-shorts-mini-153344.jpg?v=1714968054","variant_ids":[42658960048317,42658960113853,42658960179389,42658960244925,42658960310461,42658960375997,42658960441533]},"available":true,"name":"SRC Recovery Shorts - Mini - XXL \/ Champagne","public_title":"XXL \/ Champagne","options":["XXL","Champagne"],"price":18900,"weight":0,"compare_at_price":18900,"inventory_management":null,"barcode":"60441533","featured_media":{"alt":"SRC Recovery Shorts - Mini - The Birth Store-SRC Health","id":27007601443005,"position":4,"preview_image":{"aspect_ratio":1.0,"height":1080,"width":1080,"src":"\/\/www.thebirthstore.com.au\/cdn\/shop\/files\/src-recovery-shorts-mini-153344.jpg?v=1714968054"}},"requires_selling_plan":false,"selling_plan_allocations":[],"quantity_rule":{"min":1,"max":null,"increment":1}},{"id":42658960474301,"title":"XXL \/ Black","option1":"XXL","option2":"Black","option3":null,"sku":"","requires_shipping":true,"taxable":false,"featured_image":{"id":34641032315069,"product_id":7439743680701,"position":1,"created_at":"2024-05-06T12:00:54+08:00","updated_at":"2024-05-06T12:00:54+08:00","alt":"SRC Recovery Shorts - Mini - The Birth Store-SRC Health","width":1080,"height":1080,"src":"\/\/www.thebirthstore.com.au\/cdn\/shop\/files\/src-recovery-shorts-mini-371255.jpg?v=1714968054","variant_ids":[42658960081085,42658960146621,42658960212157,42658960277693,42658960343229,42658960408765,42658960474301]},"available":true,"name":"SRC Recovery Shorts - Mini - XXL \/ Black","public_title":"XXL \/ Black","options":["XXL","Black"],"price":18900,"weight":0,"compare_at_price":18900,"inventory_management":null,"barcode":"60474301","featured_media":{"alt":"SRC Recovery Shorts - Mini - The Birth Store-SRC Health","id":27007601344701,"position":1,"preview_image":{"aspect_ratio":1.0,"height":1080,"width":1080,"src":"\/\/www.thebirthstore.com.au\/cdn\/shop\/files\/src-recovery-shorts-mini-371255.jpg?v=1714968054"}},"requires_selling_plan":false,"selling_plan_allocations":[],"quantity_rule":{"min":1,"max":null,"increment":1}}],"images":["\/\/www.thebirthstore.com.au\/cdn\/shop\/files\/src-recovery-shorts-mini-371255.jpg?v=1714968054","\/\/www.thebirthstore.com.au\/cdn\/shop\/files\/src-recovery-shorts-mini-241254.jpg?v=1714968054","\/\/www.thebirthstore.com.au\/cdn\/shop\/files\/src-recovery-shorts-mini-764674.jpg?v=1714968054","\/\/www.thebirthstore.com.au\/cdn\/shop\/files\/src-recovery-shorts-mini-153344.jpg?v=1714968054","\/\/www.thebirthstore.com.au\/cdn\/shop\/files\/src-recovery-shorts-mini-847837.jpg?v=1714968054","\/\/www.thebirthstore.com.au\/cdn\/shop\/files\/src-recovery-shorts-mini-144195.jpg?v=1714968054","\/\/www.thebirthstore.com.au\/cdn\/shop\/files\/src-recovery-shorts-mini-653179.jpg?v=1714968054"],"featured_image":"\/\/www.thebirthstore.com.au\/cdn\/shop\/files\/src-recovery-shorts-mini-371255.jpg?v=1714968054","options":["Size","Colour"],"media":[{"alt":"SRC Recovery Shorts - Mini - The Birth Store-SRC Health","id":27007601344701,"position":1,"preview_image":{"aspect_ratio":1.0,"height":1080,"width":1080,"src":"\/\/www.thebirthstore.com.au\/cdn\/shop\/files\/src-recovery-shorts-mini-371255.jpg?v=1714968054"},"aspect_ratio":1.0,"height":1080,"media_type":"image","src":"\/\/www.thebirthstore.com.au\/cdn\/shop\/files\/src-recovery-shorts-mini-371255.jpg?v=1714968054","width":1080},{"alt":"SRC Recovery Shorts - Mini - The Birth Store-SRC Health","id":27007601377469,"position":2,"preview_image":{"aspect_ratio":1.0,"height":1080,"width":1080,"src":"\/\/www.thebirthstore.com.au\/cdn\/shop\/files\/src-recovery-shorts-mini-241254.jpg?v=1714968054"},"aspect_ratio":1.0,"height":1080,"media_type":"image","src":"\/\/www.thebirthstore.com.au\/cdn\/shop\/files\/src-recovery-shorts-mini-241254.jpg?v=1714968054","width":1080},{"alt":"SRC Recovery Shorts - Mini - The Birth Store-SRC Health","id":27007601410237,"position":3,"preview_image":{"aspect_ratio":1.0,"height":1080,"width":1080,"src":"\/\/www.thebirthstore.com.au\/cdn\/shop\/files\/src-recovery-shorts-mini-764674.jpg?v=1714968054"},"aspect_ratio":1.0,"height":1080,"media_type":"image","src":"\/\/www.thebirthstore.com.au\/cdn\/shop\/files\/src-recovery-shorts-mini-764674.jpg?v=1714968054","width":1080},{"alt":"SRC Recovery Shorts - Mini - The Birth Store-SRC Health","id":27007601443005,"position":4,"preview_image":{"aspect_ratio":1.0,"height":1080,"width":1080,"src":"\/\/www.thebirthstore.com.au\/cdn\/shop\/files\/src-recovery-shorts-mini-153344.jpg?v=1714968054"},"aspect_ratio":1.0,"height":1080,"media_type":"image","src":"\/\/www.thebirthstore.com.au\/cdn\/shop\/files\/src-recovery-shorts-mini-153344.jpg?v=1714968054","width":1080},{"alt":"SRC Recovery Shorts - Mini - The Birth Store-SRC Health","id":27007601508541,"position":5,"preview_image":{"aspect_ratio":1.0,"height":1080,"width":1080,"src":"\/\/www.thebirthstore.com.au\/cdn\/shop\/files\/src-recovery-shorts-mini-847837.jpg?v=1714968054"},"aspect_ratio":1.0,"height":1080,"media_type":"image","src":"\/\/www.thebirthstore.com.au\/cdn\/shop\/files\/src-recovery-shorts-mini-847837.jpg?v=1714968054","width":1080},{"alt":"SRC Recovery Shorts - Mini - The Birth Store-SRC Health","id":27007601541309,"position":6,"preview_image":{"aspect_ratio":1.0,"height":1080,"width":1080,"src":"\/\/www.thebirthstore.com.au\/cdn\/shop\/files\/src-recovery-shorts-mini-144195.jpg?v=1714968054"},"aspect_ratio":1.0,"height":1080,"media_type":"image","src":"\/\/www.thebirthstore.com.au\/cdn\/shop\/files\/src-recovery-shorts-mini-144195.jpg?v=1714968054","width":1080},{"alt":"SRC Recovery Shorts - Mini - The Birth Store-SRC Health","id":27007601574077,"position":7,"preview_image":{"aspect_ratio":1.582,"height":948,"width":1500,"src":"\/\/www.thebirthstore.com.au\/cdn\/shop\/files\/src-recovery-shorts-mini-653179.jpg?v=1714968054"},"aspect_ratio":1.582,"height":948,"media_type":"image","src":"\/\/www.thebirthstore.com.au\/cdn\/shop\/files\/src-recovery-shorts-mini-653179.jpg?v=1714968054","width":1500}],"requires_selling_plan":false,"selling_plan_groups":[],"content":"\u003cmeta charset=\"utf-8\"\u003e\u003cspan data-mce-fragment=\"1\"\u003eThis product is stocked at a 3\u003c\/span\u003e\u003csup data-mce-fragment=\"1\"\u003erd\u003c\/sup\u003e\u003cspan data-mce-fragment=\"1\"\u003e party warehouse, if ordering with other products you’ll receive two packages. This product will have a turn around time of 10 days if pickup is selected on checkout. Any questions, please contact us \u003ca href=\"https:\/\/www.thebirthstore.com.au\/pages\/contact-us\" title=\"Contact Us\" data-mce-fragment=\"1\" target=\"_blank\" data-mce-href=\"https:\/\/www.thebirthstore.com.au\/pages\/contact-us\"\u003ehere\u003c\/a\u003e.\u003c\/span\u003e\u003cbr\u003e"},"options":[{"name":"Size","position":1,"values":["XXS","XS","S","M","L","XL","XXL"]},{"name":"Colour","position":2,"values":["Champagne","Black"]}],"custom_metafields":{},"metafields":{"badge":"\u003cdiv style='display:none' class='jdgm-prev-badge' data-average-rating='0.00' data-number-of-reviews='0' data-number-of-questions='0'\u003e \u003cspan class='jdgm-prev-badge__stars' data-score='0.00' tabindex='0' aria-label='0.00 stars' role='button'\u003e \u003cspan class='jdgm-star jdgm--off'\u003e\u003c\/span\u003e\u003cspan class='jdgm-star jdgm--off'\u003e\u003c\/span\u003e\u003cspan class='jdgm-star jdgm--off'\u003e\u003c\/span\u003e\u003cspan class='jdgm-star jdgm--off'\u003e\u003c\/span\u003e\u003cspan class='jdgm-star jdgm--off'\u003e\u003c\/span\u003e \u003c\/span\u003e \u003cspan class='jdgm-prev-badge__text'\u003e No reviews \u003c\/span\u003e \u003c\/div\u003e","widget":"\u003cdiv class='jdgm-rev-widg' data-updated-at='2025-06-13T16:12:10Z' data-average-rating='0.00' data-number-of-reviews='0' data-number-of-questions='0'\u003e \u003cstyle class='jdgm-temp-hiding-style'\u003e.jdgm-rev-widg{ display: none }\u003c\/style\u003e \u003cdiv class='jdgm-rev-widg__header'\u003e \u003ch2 class='jdgm-rev-widg__title'\u003eCustomer Reviews\u003c\/h2\u003e \u003cdiv class='jdgm-rev-widg__summary'\u003e \u003cdiv class='jdgm-rev-widg__summary-stars' aria-label='Average rating is 0.00 stars' role='img'\u003e \u003cspan class='jdgm-star jdgm--off'\u003e\u003c\/span\u003e\u003cspan class='jdgm-star jdgm--off'\u003e\u003c\/span\u003e\u003cspan class='jdgm-star jdgm--off'\u003e\u003c\/span\u003e\u003cspan class='jdgm-star jdgm--off'\u003e\u003c\/span\u003e\u003cspan class='jdgm-star jdgm--off'\u003e\u003c\/span\u003e \u003c\/div\u003e \u003cdiv class='jdgm-rev-widg__summary-text'\u003eBe the first to write a review\u003c\/div\u003e \u003c\/div\u003e \u003ca style='display: none' href='#' class='jdgm-write-rev-link' role='button'\u003eWrite a review\u003c\/a\u003e \u003cdiv class='jdgm-histogram jdgm-temp-hidden'\u003e \u003cdiv class='jdgm-histogram__row' data-rating='5' data-frequency='0' data-percentage='0'\u003e \u003cdiv class='jdgm-histogram__star' role='button' aria-label=\"0% (0) reviews with 5 star rating\" tabindex='0' \u003e\u003cspan class='jdgm-star jdgm--on'\u003e\u003c\/span\u003e\u003cspan class='jdgm-star jdgm--on'\u003e\u003c\/span\u003e\u003cspan class='jdgm-star jdgm--on'\u003e\u003c\/span\u003e\u003cspan class='jdgm-star jdgm--on'\u003e\u003c\/span\u003e\u003cspan class='jdgm-star jdgm--on'\u003e\u003c\/span\u003e\u003c\/div\u003e \u003cdiv class='jdgm-histogram__bar'\u003e \u003cdiv class='jdgm-histogram__bar-content' style='width: 0%;'\u003e \u003c\/div\u003e \u003c\/div\u003e \u003cdiv class='jdgm-histogram__percentage'\u003e0%\u003c\/div\u003e \u003cdiv class='jdgm-histogram__frequency'\u003e(0)\u003c\/div\u003e \u003c\/div\u003e \u003cdiv class='jdgm-histogram__row' data-rating='4' data-frequency='0' data-percentage='0'\u003e \u003cdiv class='jdgm-histogram__star' role='button' aria-label=\"0% (0) reviews with 4 star rating\" tabindex='0' \u003e\u003cspan class='jdgm-star jdgm--on'\u003e\u003c\/span\u003e\u003cspan class='jdgm-star jdgm--on'\u003e\u003c\/span\u003e\u003cspan class='jdgm-star jdgm--on'\u003e\u003c\/span\u003e\u003cspan class='jdgm-star jdgm--on'\u003e\u003c\/span\u003e\u003cspan class='jdgm-star jdgm--off'\u003e\u003c\/span\u003e\u003c\/div\u003e \u003cdiv class='jdgm-histogram__bar'\u003e \u003cdiv class='jdgm-histogram__bar-content' style='width: 0%;'\u003e \u003c\/div\u003e \u003c\/div\u003e \u003cdiv class='jdgm-histogram__percentage'\u003e0%\u003c\/div\u003e \u003cdiv class='jdgm-histogram__frequency'\u003e(0)\u003c\/div\u003e \u003c\/div\u003e \u003cdiv class='jdgm-histogram__row' data-rating='3' data-frequency='0' data-percentage='0'\u003e \u003cdiv class='jdgm-histogram__star' role='button' aria-label=\"0% (0) reviews with 3 star rating\" tabindex='0' \u003e\u003cspan class='jdgm-star jdgm--on'\u003e\u003c\/span\u003e\u003cspan class='jdgm-star jdgm--on'\u003e\u003c\/span\u003e\u003cspan class='jdgm-star jdgm--on'\u003e\u003c\/span\u003e\u003cspan class='jdgm-star jdgm--off'\u003e\u003c\/span\u003e\u003cspan class='jdgm-star jdgm--off'\u003e\u003c\/span\u003e\u003c\/div\u003e \u003cdiv class='jdgm-histogram__bar'\u003e \u003cdiv class='jdgm-histogram__bar-content' style='width: 0%;'\u003e \u003c\/div\u003e \u003c\/div\u003e \u003cdiv class='jdgm-histogram__percentage'\u003e0%\u003c\/div\u003e \u003cdiv class='jdgm-histogram__frequency'\u003e(0)\u003c\/div\u003e \u003c\/div\u003e \u003cdiv class='jdgm-histogram__row' data-rating='2' data-frequency='0' data-percentage='0'\u003e \u003cdiv class='jdgm-histogram__star' role='button' aria-label=\"0% (0) reviews with 2 star rating\" tabindex='0' \u003e\u003cspan class='jdgm-star jdgm--on'\u003e\u003c\/span\u003e\u003cspan class='jdgm-star jdgm--on'\u003e\u003c\/span\u003e\u003cspan class='jdgm-star jdgm--off'\u003e\u003c\/span\u003e\u003cspan class='jdgm-star jdgm--off'\u003e\u003c\/span\u003e\u003cspan class='jdgm-star jdgm--off'\u003e\u003c\/span\u003e\u003c\/div\u003e \u003cdiv class='jdgm-histogram__bar'\u003e \u003cdiv class='jdgm-histogram__bar-content' style='width: 0%;'\u003e \u003c\/div\u003e \u003c\/div\u003e \u003cdiv class='jdgm-histogram__percentage'\u003e0%\u003c\/div\u003e \u003cdiv class='jdgm-histogram__frequency'\u003e(0)\u003c\/div\u003e \u003c\/div\u003e \u003cdiv class='jdgm-histogram__row' data-rating='1' data-frequency='0' data-percentage='0'\u003e \u003cdiv class='jdgm-histogram__star' role='button' aria-label=\"0% (0) reviews with 1 star rating\" tabindex='0' \u003e\u003cspan class='jdgm-star jdgm--on'\u003e\u003c\/span\u003e\u003cspan class='jdgm-star jdgm--off'\u003e\u003c\/span\u003e\u003cspan class='jdgm-star jdgm--off'\u003e\u003c\/span\u003e\u003cspan class='jdgm-star jdgm--off'\u003e\u003c\/span\u003e\u003cspan class='jdgm-star jdgm--off'\u003e\u003c\/span\u003e\u003c\/div\u003e \u003cdiv class='jdgm-histogram__bar'\u003e \u003cdiv class='jdgm-histogram__bar-content' style='width: 0%;'\u003e \u003c\/div\u003e \u003c\/div\u003e \u003cdiv class='jdgm-histogram__percentage'\u003e0%\u003c\/div\u003e \u003cdiv class='jdgm-histogram__frequency'\u003e(0)\u003c\/div\u003e \u003c\/div\u003e \u003cdiv class='jdgm-histogram__row jdgm-histogram__clear-filter' data-rating=null tabindex='0'\u003e\u003c\/div\u003e \u003c\/div\u003e \u003cdiv class='jdgm-rev-widg__sort-wrapper'\u003e\u003c\/div\u003e \u003c\/div\u003e \u003cdiv class='jdgm-rev-widg__body'\u003e \u003cdiv class='jdgm-rev-widg__reviews'\u003e\u003c\/div\u003e \u003cdiv class='jdgm-paginate' data-per-page='10' data-url='https:\/\/api.judge.me\/reviews\/reviews_for_widget' style=\"display: none;\"\u003e\u003c\/div\u003e \u003c\/div\u003e \u003cdiv class='jdgm-rev-widg__paginate-spinner-wrapper'\u003e \u003cdiv class='jdgm-spinner'\u003e\u003c\/div\u003e \u003c\/div\u003e \u003c\/div\u003e"},"default_reviews_metafields":{},"collections":[{"id":261657460925,"handle":"buy","title":"Buy","updated_at":"2026-07-30T19:07:59+08:00","body_html":"\u003cp\u003eBrowse all of our pregnancy, labour \u0026amp; birth, postpartum and baby essentials here.\u003cbr\u003e\u003c\/p\u003e\n\u003cp\u003e\u003cspan\u003eYou can even buy now and pay later with Afterpay!\u003c\/span\u003e\u003c\/p\u003e","published_at":"2021-03-10T12:05:31+08:00","sort_order":"best-selling","template_suffix":"shop-all-collection","disjunctive":false,"rules":[{"column":"title","relation":"not_contains","condition":"Hire"}],"published_scope":"global","image":{"created_at":"2024-05-06T11:59:42+08:00","alt":"Buy - The Birth Store","width":2048,"height":2048,"src":"\/\/www.thebirthstore.com.au\/cdn\/shop\/collections\/buy-964856.jpg?v=1714967982"}},{"id":293309022397,"handle":"clothing","title":"Clothing","updated_at":"2026-07-30T19:07:59+08:00","body_html":"","published_at":"2023-05-03T11:41:12+08:00","sort_order":"best-selling","template_suffix":"swaddles-collection","disjunctive":true,"rules":[{"column":"tag","relation":"equals","condition":"Breastfeeding Clothing"},{"column":"tag","relation":"equals","condition":"Support Clothing"}],"published_scope":"global","image":{"created_at":"2024-05-06T11:59:52+08:00","alt":"Clothing - The Birth Store","width":676,"height":581,"src":"\/\/www.thebirthstore.com.au\/cdn\/shop\/collections\/clothing-483293.jpg?v=1714967992"}},{"id":337429201085,"handle":"hospital-bag","title":"Hospital Bag","updated_at":"2026-07-30T19:07:59+08:00","body_html":"","published_at":"2026-06-03T11:36:29+08:00","sort_order":"most-relevant","template_suffix":"","disjunctive":false,"rules":[{"column":"tag","relation":"equals","condition":"Hospital Bag"}],"published_scope":"global"},{"id":281712689341,"handle":"pelvic-floor-health","title":"Pelvic Floor Health","updated_at":"2026-07-30T19:07:59+08:00","body_html":"","published_at":"2021-12-20T14:23:41+08:00","sort_order":"best-selling","template_suffix":"swaddles-collection","disjunctive":false,"rules":[{"column":"tag","relation":"equals","condition":"Pelvic Floor"}],"published_scope":"global","image":{"created_at":"2024-05-06T12:00:29+08:00","alt":"Pelvic Floor Health - The Birth Store","width":536,"height":589,"src":"\/\/www.thebirthstore.com.au\/cdn\/shop\/collections\/pelvic-floor-health-890736.jpg?v=1714968030"}},{"id":261658083517,"handle":"post-partum","title":"Postpartum","updated_at":"2026-07-30T19:07:59+08:00","body_html":"\u003cp\u003eShop your postpartum and hospital bag essentials below. Looking for something we don't currently stock? Please reach out and let us know.\u003cbr\u003e\u003c\/p\u003e\n\u003cp\u003e\u003cspan\u003eYou can even buy now and pay later with Afterpay!\u003c\/span\u003e\u003c\/p\u003e","published_at":"2021-03-10T12:33:47+08:00","sort_order":"best-selling","template_suffix":"postpartum-collection","disjunctive":false,"rules":[{"column":"tag","relation":"equals","condition":"Post-Partum"}],"published_scope":"global","image":{"created_at":"2024-05-06T12:00:36+08:00","alt":"Postpartum - The Birth Store","width":611,"height":702,"src":"\/\/www.thebirthstore.com.au\/cdn\/shop\/collections\/postpartum-150119.jpg?v=1714968037"}},{"id":291456483517,"handle":"shop-all","title":"Shop All - Mum","updated_at":"2026-07-30T19:07:59+08:00","body_html":"","published_at":"2022-12-23T22:04:39+08:00","sort_order":"best-selling","template_suffix":"shop-all-collection","disjunctive":false,"rules":[{"column":"variant_price","relation":"greater_than","condition":"1"},{"column":"title","relation":"not_contains","condition":"Batteries"},{"column":"tag","relation":"equals","condition":"Mum"}],"published_scope":"global","image":{"created_at":"2024-05-06T12:00:54+08:00","alt":"Shop All - The Birth Store","width":1365,"height":2048,"src":"\/\/www.thebirthstore.com.au\/cdn\/shop\/collections\/shop-all-693176.jpg?v=1714968055"}},{"id":292595433661,"handle":"support-clothing","title":"Support Clothing","updated_at":"2026-07-30T19:07:59+08:00","body_html":"Maternity, breastfeeding, supportive, postpartum clothing and more - we've got it all, or we will have soon! Keep an eye out for new arrivals and grab yourself some incredible must-have staple items.","published_at":"2023-02-20T12:49:47+08:00","sort_order":"best-selling","template_suffix":"swaddles-collection","disjunctive":false,"rules":[{"column":"tag","relation":"equals","condition":"Support Clothing"}],"published_scope":"global","image":{"created_at":"2024-05-06T12:00:59+08:00","alt":"Support Clothing - The Birth Store","width":586,"height":879,"src":"\/\/www.thebirthstore.com.au\/cdn\/shop\/collections\/support-clothing-743676.jpg?v=1714968059"}}]}
{"item":{"id":7439748038845,"title":"SRC Restore Support Mini Shorts - Uterine Prolapse \u0026 Continence Treatment","handle":"src-restore-support-shorts-uterine-prolapse-continence-treatment","description":"\u003cmeta charset=\"utf-8\"\u003e\u003cspan data-mce-fragment=\"1\"\u003eThis product is stocked at a 3\u003c\/span\u003e\u003csup data-mce-fragment=\"1\"\u003erd\u003c\/sup\u003e\u003cspan data-mce-fragment=\"1\"\u003e party warehouse, if ordering with other products you’ll receive two packages. This product will have a turn around time of 10 days if pickup is selected on checkout. Any questions, please contact us \u003ca href=\"https:\/\/www.thebirthstore.com.au\/pages\/contact-us\" title=\"Contact Us\" data-mce-fragment=\"1\" target=\"_blank\" data-mce-href=\"https:\/\/www.thebirthstore.com.au\/pages\/contact-us\"\u003ehere\u003c\/a\u003e.\u003c\/span\u003e\u003cbr\u003e","published_at":"2023-03-13T14:09:02+08:00","created_at":"2023-02-13T22:49:59+08:00","vendor":"SRC Health","type":"Support Shorts","tags":["Mum","Pain Relief","Pelvic Floor","Post-Partum","Support Clothing"],"price":9999,"price_min":9999,"price_max":9999,"available":true,"price_varies":false,"compare_at_price":9999,"compare_at_price_min":9999,"compare_at_price_max":9999,"compare_at_price_varies":false,"variants":[{"id":42658993209533,"title":"XXS \/ Champagne","option1":"XXS","option2":"Champagne","option3":null,"sku":"","requires_shipping":true,"taxable":false,"featured_image":{"id":34641032970429,"product_id":7439748038845,"position":5,"created_at":"2024-05-06T12:00:57+08:00","updated_at":"2024-05-06T12:00:57+08:00","alt":"SRC Restore Support Mini Shorts - Uterine Prolapse \u0026 Continence Treatment - The Birth Store-SRC Health","width":1080,"height":1080,"src":"\/\/www.thebirthstore.com.au\/cdn\/shop\/files\/src-restore-support-mini-shorts-uterine-prolapse-continence-treatment-558477.jpg?v=1714968057","variant_ids":[42658993209533,42658993242301,42658993275069,42658993307837]},"available":true,"name":"SRC Restore Support Mini Shorts - Uterine Prolapse \u0026 Continence Treatment - XXS \/ Champagne","public_title":"XXS \/ Champagne","options":["XXS","Champagne"],"price":9999,"weight":0,"compare_at_price":9999,"inventory_management":null,"barcode":"93209533","featured_media":{"alt":"SRC Restore Support Mini Shorts - Uterine Prolapse \u0026 Continence Treatment - The Birth Store-SRC Health","id":27007602000061,"position":5,"preview_image":{"aspect_ratio":1.0,"height":1080,"width":1080,"src":"\/\/www.thebirthstore.com.au\/cdn\/shop\/files\/src-restore-support-mini-shorts-uterine-prolapse-continence-treatment-558477.jpg?v=1714968057"}},"requires_selling_plan":false,"selling_plan_allocations":[],"quantity_rule":{"min":1,"max":null,"increment":1}},{"id":42658991177917,"title":"XXS \/ Black","option1":"XXS","option2":"Black","option3":null,"sku":"","requires_shipping":true,"taxable":false,"featured_image":{"id":34641032773821,"product_id":7439748038845,"position":1,"created_at":"2024-05-06T12:00:56+08:00","updated_at":"2024-05-06T12:00:56+08:00","alt":"SRC Restore Support Mini Shorts - Uterine Prolapse \u0026 Continence Treatment - The Birth Store-SRC Health","width":1080,"height":1080,"src":"\/\/www.thebirthstore.com.au\/cdn\/shop\/files\/src-restore-support-mini-shorts-uterine-prolapse-continence-treatment-120633.jpg?v=1714968056","variant_ids":[42658991177917,42658991243453,42658991308989,42658991374525]},"available":true,"name":"SRC Restore Support Mini Shorts - Uterine Prolapse \u0026 Continence Treatment - XXS \/ Black","public_title":"XXS \/ Black","options":["XXS","Black"],"price":9999,"weight":0,"compare_at_price":9999,"inventory_management":null,"barcode":"91177917","featured_media":{"alt":"SRC Restore Support Mini Shorts - Uterine Prolapse \u0026 Continence Treatment - The Birth Store-SRC Health","id":27007601803453,"position":1,"preview_image":{"aspect_ratio":1.0,"height":1080,"width":1080,"src":"\/\/www.thebirthstore.com.au\/cdn\/shop\/files\/src-restore-support-mini-shorts-uterine-prolapse-continence-treatment-120633.jpg?v=1714968056"}},"requires_selling_plan":false,"selling_plan_allocations":[],"quantity_rule":{"min":1,"max":null,"increment":1}},{"id":42658993242301,"title":"XS \/ Champagne","option1":"XS","option2":"Champagne","option3":null,"sku":"","requires_shipping":true,"taxable":false,"featured_image":{"id":34641032970429,"product_id":7439748038845,"position":5,"created_at":"2024-05-06T12:00:57+08:00","updated_at":"2024-05-06T12:00:57+08:00","alt":"SRC Restore Support Mini Shorts - Uterine Prolapse \u0026 Continence Treatment - The Birth Store-SRC Health","width":1080,"height":1080,"src":"\/\/www.thebirthstore.com.au\/cdn\/shop\/files\/src-restore-support-mini-shorts-uterine-prolapse-continence-treatment-558477.jpg?v=1714968057","variant_ids":[42658993209533,42658993242301,42658993275069,42658993307837]},"available":true,"name":"SRC Restore Support Mini Shorts - Uterine Prolapse \u0026 Continence Treatment - XS \/ Champagne","public_title":"XS \/ Champagne","options":["XS","Champagne"],"price":9999,"weight":0,"compare_at_price":9999,"inventory_management":null,"barcode":"93242301","featured_media":{"alt":"SRC Restore Support Mini Shorts - Uterine Prolapse \u0026 Continence Treatment - The Birth Store-SRC Health","id":27007602000061,"position":5,"preview_image":{"aspect_ratio":1.0,"height":1080,"width":1080,"src":"\/\/www.thebirthstore.com.au\/cdn\/shop\/files\/src-restore-support-mini-shorts-uterine-prolapse-continence-treatment-558477.jpg?v=1714968057"}},"requires_selling_plan":false,"selling_plan_allocations":[],"quantity_rule":{"min":1,"max":null,"increment":1}},{"id":42658991243453,"title":"XS \/ Black","option1":"XS","option2":"Black","option3":null,"sku":"","requires_shipping":true,"taxable":false,"featured_image":{"id":34641032773821,"product_id":7439748038845,"position":1,"created_at":"2024-05-06T12:00:56+08:00","updated_at":"2024-05-06T12:00:56+08:00","alt":"SRC Restore Support Mini Shorts - Uterine Prolapse \u0026 Continence Treatment - The Birth Store-SRC Health","width":1080,"height":1080,"src":"\/\/www.thebirthstore.com.au\/cdn\/shop\/files\/src-restore-support-mini-shorts-uterine-prolapse-continence-treatment-120633.jpg?v=1714968056","variant_ids":[42658991177917,42658991243453,42658991308989,42658991374525]},"available":true,"name":"SRC Restore Support Mini Shorts - Uterine Prolapse \u0026 Continence Treatment - XS \/ Black","public_title":"XS \/ Black","options":["XS","Black"],"price":9999,"weight":0,"compare_at_price":9999,"inventory_management":null,"barcode":"91243453","featured_media":{"alt":"SRC Restore Support Mini Shorts - Uterine Prolapse \u0026 Continence Treatment - The Birth Store-SRC Health","id":27007601803453,"position":1,"preview_image":{"aspect_ratio":1.0,"height":1080,"width":1080,"src":"\/\/www.thebirthstore.com.au\/cdn\/shop\/files\/src-restore-support-mini-shorts-uterine-prolapse-continence-treatment-120633.jpg?v=1714968056"}},"requires_selling_plan":false,"selling_plan_allocations":[],"quantity_rule":{"min":1,"max":null,"increment":1}},{"id":42658993275069,"title":"S \/ Champagne","option1":"S","option2":"Champagne","option3":null,"sku":"","requires_shipping":true,"taxable":false,"featured_image":{"id":34641032970429,"product_id":7439748038845,"position":5,"created_at":"2024-05-06T12:00:57+08:00","updated_at":"2024-05-06T12:00:57+08:00","alt":"SRC Restore Support Mini Shorts - Uterine Prolapse \u0026 Continence Treatment - The Birth Store-SRC Health","width":1080,"height":1080,"src":"\/\/www.thebirthstore.com.au\/cdn\/shop\/files\/src-restore-support-mini-shorts-uterine-prolapse-continence-treatment-558477.jpg?v=1714968057","variant_ids":[42658993209533,42658993242301,42658993275069,42658993307837]},"available":true,"name":"SRC Restore Support Mini Shorts - Uterine Prolapse \u0026 Continence Treatment - S \/ Champagne","public_title":"S \/ Champagne","options":["S","Champagne"],"price":9999,"weight":0,"compare_at_price":9999,"inventory_management":null,"barcode":"93275069","featured_media":{"alt":"SRC Restore Support Mini Shorts - Uterine Prolapse \u0026 Continence Treatment - The Birth Store-SRC Health","id":27007602000061,"position":5,"preview_image":{"aspect_ratio":1.0,"height":1080,"width":1080,"src":"\/\/www.thebirthstore.com.au\/cdn\/shop\/files\/src-restore-support-mini-shorts-uterine-prolapse-continence-treatment-558477.jpg?v=1714968057"}},"requires_selling_plan":false,"selling_plan_allocations":[],"quantity_rule":{"min":1,"max":null,"increment":1}},{"id":42658991308989,"title":"S \/ Black","option1":"S","option2":"Black","option3":null,"sku":"","requires_shipping":true,"taxable":false,"featured_image":{"id":34641032773821,"product_id":7439748038845,"position":1,"created_at":"2024-05-06T12:00:56+08:00","updated_at":"2024-05-06T12:00:56+08:00","alt":"SRC Restore Support Mini Shorts - Uterine Prolapse \u0026 Continence Treatment - The Birth Store-SRC Health","width":1080,"height":1080,"src":"\/\/www.thebirthstore.com.au\/cdn\/shop\/files\/src-restore-support-mini-shorts-uterine-prolapse-continence-treatment-120633.jpg?v=1714968056","variant_ids":[42658991177917,42658991243453,42658991308989,42658991374525]},"available":true,"name":"SRC Restore Support Mini Shorts - Uterine Prolapse \u0026 Continence Treatment - S \/ Black","public_title":"S \/ Black","options":["S","Black"],"price":9999,"weight":0,"compare_at_price":9999,"inventory_management":null,"barcode":"91308989","featured_media":{"alt":"SRC Restore Support Mini Shorts - Uterine Prolapse \u0026 Continence Treatment - The Birth Store-SRC Health","id":27007601803453,"position":1,"preview_image":{"aspect_ratio":1.0,"height":1080,"width":1080,"src":"\/\/www.thebirthstore.com.au\/cdn\/shop\/files\/src-restore-support-mini-shorts-uterine-prolapse-continence-treatment-120633.jpg?v=1714968056"}},"requires_selling_plan":false,"selling_plan_allocations":[],"quantity_rule":{"min":1,"max":null,"increment":1}},{"id":42658993307837,"title":"M \/ Champagne","option1":"M","option2":"Champagne","option3":null,"sku":"","requires_shipping":true,"taxable":false,"featured_image":{"id":34641032970429,"product_id":7439748038845,"position":5,"created_at":"2024-05-06T12:00:57+08:00","updated_at":"2024-05-06T12:00:57+08:00","alt":"SRC Restore Support Mini Shorts - Uterine Prolapse \u0026 Continence Treatment - The Birth Store-SRC Health","width":1080,"height":1080,"src":"\/\/www.thebirthstore.com.au\/cdn\/shop\/files\/src-restore-support-mini-shorts-uterine-prolapse-continence-treatment-558477.jpg?v=1714968057","variant_ids":[42658993209533,42658993242301,42658993275069,42658993307837]},"available":true,"name":"SRC Restore Support Mini Shorts - Uterine Prolapse \u0026 Continence Treatment - M \/ Champagne","public_title":"M \/ Champagne","options":["M","Champagne"],"price":9999,"weight":0,"compare_at_price":9999,"inventory_management":null,"barcode":"93307837","featured_media":{"alt":"SRC Restore Support Mini Shorts - Uterine Prolapse \u0026 Continence Treatment - The Birth Store-SRC Health","id":27007602000061,"position":5,"preview_image":{"aspect_ratio":1.0,"height":1080,"width":1080,"src":"\/\/www.thebirthstore.com.au\/cdn\/shop\/files\/src-restore-support-mini-shorts-uterine-prolapse-continence-treatment-558477.jpg?v=1714968057"}},"requires_selling_plan":false,"selling_plan_allocations":[],"quantity_rule":{"min":1,"max":null,"increment":1}},{"id":42658991374525,"title":"M \/ Black","option1":"M","option2":"Black","option3":null,"sku":"","requires_shipping":true,"taxable":false,"featured_image":{"id":34641032773821,"product_id":7439748038845,"position":1,"created_at":"2024-05-06T12:00:56+08:00","updated_at":"2024-05-06T12:00:56+08:00","alt":"SRC Restore Support Mini Shorts - Uterine Prolapse \u0026 Continence Treatment - The Birth Store-SRC Health","width":1080,"height":1080,"src":"\/\/www.thebirthstore.com.au\/cdn\/shop\/files\/src-restore-support-mini-shorts-uterine-prolapse-continence-treatment-120633.jpg?v=1714968056","variant_ids":[42658991177917,42658991243453,42658991308989,42658991374525]},"available":true,"name":"SRC Restore Support Mini Shorts - Uterine Prolapse \u0026 Continence Treatment - M \/ Black","public_title":"M \/ Black","options":["M","Black"],"price":9999,"weight":0,"compare_at_price":9999,"inventory_management":null,"barcode":"91374525","featured_media":{"alt":"SRC Restore Support Mini Shorts - Uterine Prolapse \u0026 Continence Treatment - The Birth Store-SRC Health","id":27007601803453,"position":1,"preview_image":{"aspect_ratio":1.0,"height":1080,"width":1080,"src":"\/\/www.thebirthstore.com.au\/cdn\/shop\/files\/src-restore-support-mini-shorts-uterine-prolapse-continence-treatment-120633.jpg?v=1714968056"}},"requires_selling_plan":false,"selling_plan_allocations":[],"quantity_rule":{"min":1,"max":null,"increment":1}},{"id":42658993340605,"title":"L \/ Champagne","option1":"L","option2":"Champagne","option3":null,"sku":"","requires_shipping":true,"taxable":false,"featured_image":{"id":34641033068733,"product_id":7439748038845,"position":7,"created_at":"2024-05-06T12:00:57+08:00","updated_at":"2024-05-06T12:00:57+08:00","alt":"SRC Restore Support Mini Shorts - Uterine Prolapse \u0026 Continence Treatment - The Birth Store-SRC Health","width":1080,"height":1080,"src":"\/\/www.thebirthstore.com.au\/cdn\/shop\/files\/src-restore-support-mini-shorts-uterine-prolapse-continence-treatment-713141.jpg?v=1714968057","variant_ids":[42658993340605,42658993373373,42658993406141]},"available":true,"name":"SRC Restore Support Mini Shorts - Uterine Prolapse \u0026 Continence Treatment - L \/ Champagne","public_title":"L \/ Champagne","options":["L","Champagne"],"price":9999,"weight":0,"compare_at_price":9999,"inventory_management":null,"barcode":"93340605","featured_media":{"alt":"SRC Restore Support Mini Shorts - Uterine Prolapse \u0026 Continence Treatment - The Birth Store-SRC Health","id":27007602131133,"position":7,"preview_image":{"aspect_ratio":1.0,"height":1080,"width":1080,"src":"\/\/www.thebirthstore.com.au\/cdn\/shop\/files\/src-restore-support-mini-shorts-uterine-prolapse-continence-treatment-713141.jpg?v=1714968057"}},"requires_selling_plan":false,"selling_plan_allocations":[],"quantity_rule":{"min":1,"max":null,"increment":1}},{"id":42658991440061,"title":"L \/ Black","option1":"L","option2":"Black","option3":null,"sku":"","requires_shipping":true,"taxable":false,"featured_image":{"id":34641032904893,"product_id":7439748038845,"position":4,"created_at":"2024-05-06T12:00:56+08:00","updated_at":"2024-05-06T12:00:57+08:00","alt":"SRC Restore Support Mini Shorts - Uterine Prolapse \u0026 Continence Treatment - The Birth Store-SRC Health","width":1080,"height":1080,"src":"\/\/www.thebirthstore.com.au\/cdn\/shop\/files\/src-restore-support-mini-shorts-uterine-prolapse-continence-treatment-815204.jpg?v=1714968057","variant_ids":[42658991440061,42658991505597,42658991571133]},"available":true,"name":"SRC Restore Support Mini Shorts - Uterine Prolapse \u0026 Continence Treatment - L \/ Black","public_title":"L \/ Black","options":["L","Black"],"price":9999,"weight":0,"compare_at_price":9999,"inventory_management":null,"barcode":"91440061","featured_media":{"alt":"SRC Restore Support Mini Shorts - Uterine Prolapse \u0026 Continence Treatment - The Birth Store-SRC Health","id":27007601934525,"position":4,"preview_image":{"aspect_ratio":1.0,"height":1080,"width":1080,"src":"\/\/www.thebirthstore.com.au\/cdn\/shop\/files\/src-restore-support-mini-shorts-uterine-prolapse-continence-treatment-815204.jpg?v=1714968057"}},"requires_selling_plan":false,"selling_plan_allocations":[],"quantity_rule":{"min":1,"max":null,"increment":1}},{"id":42658993373373,"title":"XL \/ Champagne","option1":"XL","option2":"Champagne","option3":null,"sku":"","requires_shipping":true,"taxable":false,"featured_image":{"id":34641033068733,"product_id":7439748038845,"position":7,"created_at":"2024-05-06T12:00:57+08:00","updated_at":"2024-05-06T12:00:57+08:00","alt":"SRC Restore Support Mini Shorts - Uterine Prolapse \u0026 Continence Treatment - The Birth Store-SRC Health","width":1080,"height":1080,"src":"\/\/www.thebirthstore.com.au\/cdn\/shop\/files\/src-restore-support-mini-shorts-uterine-prolapse-continence-treatment-713141.jpg?v=1714968057","variant_ids":[42658993340605,42658993373373,42658993406141]},"available":true,"name":"SRC Restore Support Mini Shorts - Uterine Prolapse \u0026 Continence Treatment - XL \/ Champagne","public_title":"XL \/ Champagne","options":["XL","Champagne"],"price":9999,"weight":0,"compare_at_price":9999,"inventory_management":null,"barcode":"93373373","featured_media":{"alt":"SRC Restore Support Mini Shorts - Uterine Prolapse \u0026 Continence Treatment - The Birth Store-SRC Health","id":27007602131133,"position":7,"preview_image":{"aspect_ratio":1.0,"height":1080,"width":1080,"src":"\/\/www.thebirthstore.com.au\/cdn\/shop\/files\/src-restore-support-mini-shorts-uterine-prolapse-continence-treatment-713141.jpg?v=1714968057"}},"requires_selling_plan":false,"selling_plan_allocations":[],"quantity_rule":{"min":1,"max":null,"increment":1}},{"id":42658991505597,"title":"XL \/ Black","option1":"XL","option2":"Black","option3":null,"sku":"","requires_shipping":true,"taxable":false,"featured_image":{"id":34641032904893,"product_id":7439748038845,"position":4,"created_at":"2024-05-06T12:00:56+08:00","updated_at":"2024-05-06T12:00:57+08:00","alt":"SRC Restore Support Mini Shorts - Uterine Prolapse \u0026 Continence Treatment - The Birth Store-SRC Health","width":1080,"height":1080,"src":"\/\/www.thebirthstore.com.au\/cdn\/shop\/files\/src-restore-support-mini-shorts-uterine-prolapse-continence-treatment-815204.jpg?v=1714968057","variant_ids":[42658991440061,42658991505597,42658991571133]},"available":true,"name":"SRC Restore Support Mini Shorts - Uterine Prolapse \u0026 Continence Treatment - XL \/ Black","public_title":"XL \/ Black","options":["XL","Black"],"price":9999,"weight":0,"compare_at_price":9999,"inventory_management":null,"barcode":"91505597","featured_media":{"alt":"SRC Restore Support Mini Shorts - Uterine Prolapse \u0026 Continence Treatment - The Birth Store-SRC Health","id":27007601934525,"position":4,"preview_image":{"aspect_ratio":1.0,"height":1080,"width":1080,"src":"\/\/www.thebirthstore.com.au\/cdn\/shop\/files\/src-restore-support-mini-shorts-uterine-prolapse-continence-treatment-815204.jpg?v=1714968057"}},"requires_selling_plan":false,"selling_plan_allocations":[],"quantity_rule":{"min":1,"max":null,"increment":1}},{"id":42658993406141,"title":"XXL \/ Champagne","option1":"XXL","option2":"Champagne","option3":null,"sku":"","requires_shipping":true,"taxable":false,"featured_image":{"id":34641033068733,"product_id":7439748038845,"position":7,"created_at":"2024-05-06T12:00:57+08:00","updated_at":"2024-05-06T12:00:57+08:00","alt":"SRC Restore Support Mini Shorts - Uterine Prolapse \u0026 Continence Treatment - The Birth Store-SRC Health","width":1080,"height":1080,"src":"\/\/www.thebirthstore.com.au\/cdn\/shop\/files\/src-restore-support-mini-shorts-uterine-prolapse-continence-treatment-713141.jpg?v=1714968057","variant_ids":[42658993340605,42658993373373,42658993406141]},"available":true,"name":"SRC Restore Support Mini Shorts - Uterine Prolapse \u0026 Continence Treatment - XXL \/ Champagne","public_title":"XXL \/ Champagne","options":["XXL","Champagne"],"price":9999,"weight":0,"compare_at_price":9999,"inventory_management":null,"barcode":"93406141","featured_media":{"alt":"SRC Restore Support Mini Shorts - Uterine Prolapse \u0026 Continence Treatment - The Birth Store-SRC Health","id":27007602131133,"position":7,"preview_image":{"aspect_ratio":1.0,"height":1080,"width":1080,"src":"\/\/www.thebirthstore.com.au\/cdn\/shop\/files\/src-restore-support-mini-shorts-uterine-prolapse-continence-treatment-713141.jpg?v=1714968057"}},"requires_selling_plan":false,"selling_plan_allocations":[],"quantity_rule":{"min":1,"max":null,"increment":1}},{"id":42658991571133,"title":"XXL \/ Black","option1":"XXL","option2":"Black","option3":null,"sku":"","requires_shipping":true,"taxable":false,"featured_image":{"id":34641032904893,"product_id":7439748038845,"position":4,"created_at":"2024-05-06T12:00:56+08:00","updated_at":"2024-05-06T12:00:57+08:00","alt":"SRC Restore Support Mini Shorts - Uterine Prolapse \u0026 Continence Treatment - The Birth Store-SRC Health","width":1080,"height":1080,"src":"\/\/www.thebirthstore.com.au\/cdn\/shop\/files\/src-restore-support-mini-shorts-uterine-prolapse-continence-treatment-815204.jpg?v=1714968057","variant_ids":[42658991440061,42658991505597,42658991571133]},"available":true,"name":"SRC Restore Support Mini Shorts - Uterine Prolapse \u0026 Continence Treatment - XXL \/ Black","public_title":"XXL \/ Black","options":["XXL","Black"],"price":9999,"weight":0,"compare_at_price":9999,"inventory_management":null,"barcode":"91571133","featured_media":{"alt":"SRC Restore Support Mini Shorts - Uterine Prolapse \u0026 Continence Treatment - The Birth Store-SRC Health","id":27007601934525,"position":4,"preview_image":{"aspect_ratio":1.0,"height":1080,"width":1080,"src":"\/\/www.thebirthstore.com.au\/cdn\/shop\/files\/src-restore-support-mini-shorts-uterine-prolapse-continence-treatment-815204.jpg?v=1714968057"}},"requires_selling_plan":false,"selling_plan_allocations":[],"quantity_rule":{"min":1,"max":null,"increment":1}},{"id":45872452305085,"title":"XXXL \/ Black","option1":"XXXL","option2":"Black","option3":null,"sku":null,"requires_shipping":true,"taxable":false,"featured_image":null,"available":true,"name":"SRC Restore Support Mini Shorts - Uterine Prolapse \u0026 Continence Treatment - XXXL \/ Black","public_title":"XXXL \/ Black","options":["XXXL","Black"],"price":9999,"weight":0,"compare_at_price":9999,"inventory_management":null,"barcode":"52305085","requires_selling_plan":false,"selling_plan_allocations":[],"quantity_rule":{"min":1,"max":null,"increment":1}}],"images":["\/\/www.thebirthstore.com.au\/cdn\/shop\/files\/src-restore-support-mini-shorts-uterine-prolapse-continence-treatment-120633.jpg?v=1714968056","\/\/www.thebirthstore.com.au\/cdn\/shop\/files\/src-restore-support-mini-shorts-uterine-prolapse-continence-treatment-863948.jpg?v=1714968056","\/\/www.thebirthstore.com.au\/cdn\/shop\/files\/src-restore-support-mini-shorts-uterine-prolapse-continence-treatment-109130.jpg?v=1714968056","\/\/www.thebirthstore.com.au\/cdn\/shop\/files\/src-restore-support-mini-shorts-uterine-prolapse-continence-treatment-815204.jpg?v=1714968057","\/\/www.thebirthstore.com.au\/cdn\/shop\/files\/src-restore-support-mini-shorts-uterine-prolapse-continence-treatment-558477.jpg?v=1714968057","\/\/www.thebirthstore.com.au\/cdn\/shop\/files\/src-restore-support-mini-shorts-uterine-prolapse-continence-treatment-627077.jpg?v=1714968057","\/\/www.thebirthstore.com.au\/cdn\/shop\/files\/src-restore-support-mini-shorts-uterine-prolapse-continence-treatment-713141.jpg?v=1714968057","\/\/www.thebirthstore.com.au\/cdn\/shop\/files\/src-restore-support-mini-shorts-uterine-prolapse-continence-treatment-915244.jpg?v=1714968057","\/\/www.thebirthstore.com.au\/cdn\/shop\/files\/src-restore-support-mini-shorts-uterine-prolapse-continence-treatment-237129.png?v=1714968057"],"featured_image":"\/\/www.thebirthstore.com.au\/cdn\/shop\/files\/src-restore-support-mini-shorts-uterine-prolapse-continence-treatment-120633.jpg?v=1714968056","options":["Size","Colour"],"media":[{"alt":"SRC Restore Support Mini Shorts - Uterine Prolapse \u0026 Continence Treatment - The Birth Store-SRC Health","id":27007601803453,"position":1,"preview_image":{"aspect_ratio":1.0,"height":1080,"width":1080,"src":"\/\/www.thebirthstore.com.au\/cdn\/shop\/files\/src-restore-support-mini-shorts-uterine-prolapse-continence-treatment-120633.jpg?v=1714968056"},"aspect_ratio":1.0,"height":1080,"media_type":"image","src":"\/\/www.thebirthstore.com.au\/cdn\/shop\/files\/src-restore-support-mini-shorts-uterine-prolapse-continence-treatment-120633.jpg?v=1714968056","width":1080},{"alt":"SRC Restore Support Mini Shorts - Uterine Prolapse \u0026 Continence Treatment - The Birth Store-SRC Health","id":27007601868989,"position":2,"preview_image":{"aspect_ratio":1.0,"height":1080,"width":1080,"src":"\/\/www.thebirthstore.com.au\/cdn\/shop\/files\/src-restore-support-mini-shorts-uterine-prolapse-continence-treatment-863948.jpg?v=1714968056"},"aspect_ratio":1.0,"height":1080,"media_type":"image","src":"\/\/www.thebirthstore.com.au\/cdn\/shop\/files\/src-restore-support-mini-shorts-uterine-prolapse-continence-treatment-863948.jpg?v=1714968056","width":1080},{"alt":"SRC Restore Support Mini Shorts - Uterine Prolapse \u0026 Continence Treatment - The Birth Store-SRC Health","id":27007601901757,"position":3,"preview_image":{"aspect_ratio":1.0,"height":1080,"width":1080,"src":"\/\/www.thebirthstore.com.au\/cdn\/shop\/files\/src-restore-support-mini-shorts-uterine-prolapse-continence-treatment-109130.jpg?v=1714968056"},"aspect_ratio":1.0,"height":1080,"media_type":"image","src":"\/\/www.thebirthstore.com.au\/cdn\/shop\/files\/src-restore-support-mini-shorts-uterine-prolapse-continence-treatment-109130.jpg?v=1714968056","width":1080},{"alt":"SRC Restore Support Mini Shorts - Uterine Prolapse \u0026 Continence Treatment - The Birth Store-SRC Health","id":27007601934525,"position":4,"preview_image":{"aspect_ratio":1.0,"height":1080,"width":1080,"src":"\/\/www.thebirthstore.com.au\/cdn\/shop\/files\/src-restore-support-mini-shorts-uterine-prolapse-continence-treatment-815204.jpg?v=1714968057"},"aspect_ratio":1.0,"height":1080,"media_type":"image","src":"\/\/www.thebirthstore.com.au\/cdn\/shop\/files\/src-restore-support-mini-shorts-uterine-prolapse-continence-treatment-815204.jpg?v=1714968057","width":1080},{"alt":"SRC Restore Support Mini Shorts - Uterine Prolapse \u0026 Continence Treatment - The Birth Store-SRC Health","id":27007602000061,"position":5,"preview_image":{"aspect_ratio":1.0,"height":1080,"width":1080,"src":"\/\/www.thebirthstore.com.au\/cdn\/shop\/files\/src-restore-support-mini-shorts-uterine-prolapse-continence-treatment-558477.jpg?v=1714968057"},"aspect_ratio":1.0,"height":1080,"media_type":"image","src":"\/\/www.thebirthstore.com.au\/cdn\/shop\/files\/src-restore-support-mini-shorts-uterine-prolapse-continence-treatment-558477.jpg?v=1714968057","width":1080},{"alt":"SRC Restore Support Mini Shorts - Uterine Prolapse \u0026 Continence Treatment - The Birth Store-SRC Health","id":27007602065597,"position":6,"preview_image":{"aspect_ratio":1.0,"height":1080,"width":1080,"src":"\/\/www.thebirthstore.com.au\/cdn\/shop\/files\/src-restore-support-mini-shorts-uterine-prolapse-continence-treatment-627077.jpg?v=1714968057"},"aspect_ratio":1.0,"height":1080,"media_type":"image","src":"\/\/www.thebirthstore.com.au\/cdn\/shop\/files\/src-restore-support-mini-shorts-uterine-prolapse-continence-treatment-627077.jpg?v=1714968057","width":1080},{"alt":"SRC Restore Support Mini Shorts - Uterine Prolapse \u0026 Continence Treatment - The Birth Store-SRC Health","id":27007602131133,"position":7,"preview_image":{"aspect_ratio":1.0,"height":1080,"width":1080,"src":"\/\/www.thebirthstore.com.au\/cdn\/shop\/files\/src-restore-support-mini-shorts-uterine-prolapse-continence-treatment-713141.jpg?v=1714968057"},"aspect_ratio":1.0,"height":1080,"media_type":"image","src":"\/\/www.thebirthstore.com.au\/cdn\/shop\/files\/src-restore-support-mini-shorts-uterine-prolapse-continence-treatment-713141.jpg?v=1714968057","width":1080},{"alt":"SRC Restore Support Mini Shorts - Uterine Prolapse \u0026 Continence Treatment - The Birth Store-SRC Health","id":27007602196669,"position":8,"preview_image":{"aspect_ratio":1.0,"height":1080,"width":1080,"src":"\/\/www.thebirthstore.com.au\/cdn\/shop\/files\/src-restore-support-mini-shorts-uterine-prolapse-continence-treatment-915244.jpg?v=1714968057"},"aspect_ratio":1.0,"height":1080,"media_type":"image","src":"\/\/www.thebirthstore.com.au\/cdn\/shop\/files\/src-restore-support-mini-shorts-uterine-prolapse-continence-treatment-915244.jpg?v=1714968057","width":1080},{"alt":"SRC Restore Support Mini Shorts - Uterine Prolapse \u0026 Continence Treatment - The Birth Store-SRC Health","id":27007602262205,"position":9,"preview_image":{"aspect_ratio":1.881,"height":797,"width":1499,"src":"\/\/www.thebirthstore.com.au\/cdn\/shop\/files\/src-restore-support-mini-shorts-uterine-prolapse-continence-treatment-237129.png?v=1714968057"},"aspect_ratio":1.881,"height":797,"media_type":"image","src":"\/\/www.thebirthstore.com.au\/cdn\/shop\/files\/src-restore-support-mini-shorts-uterine-prolapse-continence-treatment-237129.png?v=1714968057","width":1499}],"requires_selling_plan":false,"selling_plan_groups":[],"content":"\u003cmeta charset=\"utf-8\"\u003e\u003cspan data-mce-fragment=\"1\"\u003eThis product is stocked at a 3\u003c\/span\u003e\u003csup data-mce-fragment=\"1\"\u003erd\u003c\/sup\u003e\u003cspan data-mce-fragment=\"1\"\u003e party warehouse, if ordering with other products you’ll receive two packages. This product will have a turn around time of 10 days if pickup is selected on checkout. Any questions, please contact us \u003ca href=\"https:\/\/www.thebirthstore.com.au\/pages\/contact-us\" title=\"Contact Us\" data-mce-fragment=\"1\" target=\"_blank\" data-mce-href=\"https:\/\/www.thebirthstore.com.au\/pages\/contact-us\"\u003ehere\u003c\/a\u003e.\u003c\/span\u003e\u003cbr\u003e"},"options":[{"name":"Size","position":1,"values":["XXS","XS","S","M","L","XL","XXL","XXXL"]},{"name":"Colour","position":2,"values":["Champagne","Black"]}],"custom_metafields":{},"metafields":{"badge":"\u003cdiv style='display:none' class='jdgm-prev-badge' data-average-rating='5.00' data-number-of-reviews='2' data-number-of-questions='0'\u003e \u003cspan class='jdgm-prev-badge__stars' data-score='5.00' tabindex='0' aria-label='5.00 stars' role='button'\u003e \u003cspan class='jdgm-star jdgm--on'\u003e\u003c\/span\u003e\u003cspan class='jdgm-star jdgm--on'\u003e\u003c\/span\u003e\u003cspan class='jdgm-star jdgm--on'\u003e\u003c\/span\u003e\u003cspan class='jdgm-star jdgm--on'\u003e\u003c\/span\u003e\u003cspan class='jdgm-star jdgm--on'\u003e\u003c\/span\u003e \u003c\/span\u003e \u003cspan class='jdgm-prev-badge__text'\u003e 2 reviews \u003c\/span\u003e \u003c\/div\u003e","widget":"\u003cdiv class='jdgm-rev-widg' data-updated-at='2026-03-29T08:35:36Z' data-average-rating='5.00' data-number-of-reviews='2' data-number-of-questions='0' data-image-url='https:\/\/cdn.shopify.com\/s\/files\/1\/0527\/3393\/5805\/files\/src-restore-support-mini-shorts-uterine-prolapse-continence-treatment-120633.jpg?v=1714968056'\u003e \u003cstyle class='jdgm-temp-hiding-style'\u003e.jdgm-rev-widg{ display: none }\u003c\/style\u003e \u003cdiv class='jdgm-rev-widg__header'\u003e \u003ch2 class='jdgm-rev-widg__title'\u003eCustomer Reviews\u003c\/h2\u003e \u003cdiv class='jdgm-rev-widg__summary'\u003e \u003cdiv class='jdgm-rev-widg__summary-stars' aria-label='Average rating is 5.00 stars' role='img'\u003e \u003cspan class='jdgm-star jdgm--on'\u003e\u003c\/span\u003e\u003cspan class='jdgm-star jdgm--on'\u003e\u003c\/span\u003e\u003cspan class='jdgm-star jdgm--on'\u003e\u003c\/span\u003e\u003cspan class='jdgm-star jdgm--on'\u003e\u003c\/span\u003e\u003cspan class='jdgm-star jdgm--on'\u003e\u003c\/span\u003e \u003c\/div\u003e \u003cdiv class='jdgm-rev-widg__summary-text'\u003eBased on 2 reviews\u003c\/div\u003e \u003c\/div\u003e \u003ca style='display: none' href='#' class='jdgm-write-rev-link' role='button'\u003eWrite a review\u003c\/a\u003e \u003cdiv class='jdgm-histogram jdgm-temp-hidden'\u003e \u003cdiv class='jdgm-histogram__row' data-rating='5' data-frequency='2' data-percentage='100'\u003e \u003cdiv class='jdgm-histogram__star' role='button' aria-label=\"100% (2) reviews with 5 star rating\" tabindex='0' \u003e\u003cspan class='jdgm-star jdgm--on'\u003e\u003c\/span\u003e\u003cspan class='jdgm-star jdgm--on'\u003e\u003c\/span\u003e\u003cspan class='jdgm-star jdgm--on'\u003e\u003c\/span\u003e\u003cspan class='jdgm-star jdgm--on'\u003e\u003c\/span\u003e\u003cspan class='jdgm-star jdgm--on'\u003e\u003c\/span\u003e\u003c\/div\u003e \u003cdiv class='jdgm-histogram__bar'\u003e \u003cdiv class='jdgm-histogram__bar-content' style='width: 100%;'\u003e \u003c\/div\u003e \u003c\/div\u003e \u003cdiv class='jdgm-histogram__percentage'\u003e100%\u003c\/div\u003e \u003cdiv class='jdgm-histogram__frequency'\u003e(2)\u003c\/div\u003e \u003c\/div\u003e \u003cdiv class='jdgm-histogram__row' data-rating='4' data-frequency='0' data-percentage='0'\u003e \u003cdiv class='jdgm-histogram__star' role='button' aria-label=\"0% (0) reviews with 4 star rating\" tabindex='0' \u003e\u003cspan class='jdgm-star jdgm--on'\u003e\u003c\/span\u003e\u003cspan class='jdgm-star jdgm--on'\u003e\u003c\/span\u003e\u003cspan class='jdgm-star jdgm--on'\u003e\u003c\/span\u003e\u003cspan class='jdgm-star jdgm--on'\u003e\u003c\/span\u003e\u003cspan class='jdgm-star jdgm--off'\u003e\u003c\/span\u003e\u003c\/div\u003e \u003cdiv class='jdgm-histogram__bar'\u003e \u003cdiv class='jdgm-histogram__bar-content' style='width: 0%;'\u003e \u003c\/div\u003e \u003c\/div\u003e \u003cdiv class='jdgm-histogram__percentage'\u003e0%\u003c\/div\u003e \u003cdiv class='jdgm-histogram__frequency'\u003e(0)\u003c\/div\u003e \u003c\/div\u003e \u003cdiv class='jdgm-histogram__row' data-rating='3' data-frequency='0' data-percentage='0'\u003e \u003cdiv class='jdgm-histogram__star' role='button' aria-label=\"0% (0) reviews with 3 star rating\" tabindex='0' \u003e\u003cspan class='jdgm-star jdgm--on'\u003e\u003c\/span\u003e\u003cspan class='jdgm-star jdgm--on'\u003e\u003c\/span\u003e\u003cspan class='jdgm-star jdgm--on'\u003e\u003c\/span\u003e\u003cspan class='jdgm-star jdgm--off'\u003e\u003c\/span\u003e\u003cspan class='jdgm-star jdgm--off'\u003e\u003c\/span\u003e\u003c\/div\u003e \u003cdiv class='jdgm-histogram__bar'\u003e \u003cdiv class='jdgm-histogram__bar-content' style='width: 0%;'\u003e \u003c\/div\u003e \u003c\/div\u003e \u003cdiv class='jdgm-histogram__percentage'\u003e0%\u003c\/div\u003e \u003cdiv class='jdgm-histogram__frequency'\u003e(0)\u003c\/div\u003e \u003c\/div\u003e \u003cdiv class='jdgm-histogram__row' data-rating='2' data-frequency='0' data-percentage='0'\u003e \u003cdiv class='jdgm-histogram__star' role='button' aria-label=\"0% (0) reviews with 2 star rating\" tabindex='0' \u003e\u003cspan class='jdgm-star jdgm--on'\u003e\u003c\/span\u003e\u003cspan class='jdgm-star jdgm--on'\u003e\u003c\/span\u003e\u003cspan class='jdgm-star jdgm--off'\u003e\u003c\/span\u003e\u003cspan class='jdgm-star jdgm--off'\u003e\u003c\/span\u003e\u003cspan class='jdgm-star jdgm--off'\u003e\u003c\/span\u003e\u003c\/div\u003e \u003cdiv class='jdgm-histogram__bar'\u003e \u003cdiv class='jdgm-histogram__bar-content' style='width: 0%;'\u003e \u003c\/div\u003e \u003c\/div\u003e \u003cdiv class='jdgm-histogram__percentage'\u003e0%\u003c\/div\u003e \u003cdiv class='jdgm-histogram__frequency'\u003e(0)\u003c\/div\u003e \u003c\/div\u003e \u003cdiv class='jdgm-histogram__row' data-rating='1' data-frequency='0' data-percentage='0'\u003e \u003cdiv class='jdgm-histogram__star' role='button' aria-label=\"0% (0) reviews with 1 star rating\" tabindex='0' \u003e\u003cspan class='jdgm-star jdgm--on'\u003e\u003c\/span\u003e\u003cspan class='jdgm-star jdgm--off'\u003e\u003c\/span\u003e\u003cspan class='jdgm-star jdgm--off'\u003e\u003c\/span\u003e\u003cspan class='jdgm-star jdgm--off'\u003e\u003c\/span\u003e\u003cspan class='jdgm-star jdgm--off'\u003e\u003c\/span\u003e\u003c\/div\u003e \u003cdiv class='jdgm-histogram__bar'\u003e \u003cdiv class='jdgm-histogram__bar-content' style='width: 0%;'\u003e \u003c\/div\u003e \u003c\/div\u003e \u003cdiv class='jdgm-histogram__percentage'\u003e0%\u003c\/div\u003e \u003cdiv class='jdgm-histogram__frequency'\u003e(0)\u003c\/div\u003e \u003c\/div\u003e \u003cdiv class='jdgm-histogram__row jdgm-histogram__clear-filter' data-rating=null tabindex='0'\u003e\u003c\/div\u003e \u003c\/div\u003e \u003cdiv class='jdgm-rev-widg__sort-wrapper'\u003e\u003c\/div\u003e \u003c\/div\u003e \u003cdiv class='jdgm-rev-widg__body'\u003e \u003cdiv class='jdgm-rev-widg__reviews'\u003e\u003cdiv class='jdgm-rev jdgm-divider-top' data-verified-buyer='true' data-review-id='8c135989-ee8e-45b6-83e0-78a085d4002c' data-review-language='' data-product-title='SRC Restore Support Mini Shorts - Uterine Prolapse \u0026amp; Continence Treatment' data-product-url='\/products\/src-restore-support-shorts-uterine-prolapse-continence-treatment' data-thumb-up-count='0' data-thumb-down-count='0'\u003e \u003cdiv class='jdgm-rev__header'\u003e \u003cdiv class='jdgm-rev__icon' \u003e C \u003c\/div\u003e \u003cspan class='jdgm-rev__rating' data-score='5' tabindex='0' aria-label='5 star review' role='img'\u003e \u003cspan class='jdgm-star jdgm--on'\u003e\u003c\/span\u003e\u003cspan class='jdgm-star jdgm--on'\u003e\u003c\/span\u003e\u003cspan class='jdgm-star jdgm--on'\u003e\u003c\/span\u003e\u003cspan class='jdgm-star jdgm--on'\u003e\u003c\/span\u003e\u003cspan class='jdgm-star jdgm--on'\u003e\u003c\/span\u003e \u003c\/span\u003e \u003cspan class='jdgm-rev__timestamp jdgm-spinner' data-content='2026-01-21 01:44:16 UTC'\u003e\u003c\/span\u003e \u003cdiv class='jdgm-rev__br'\u003e\u003c\/div\u003e \u003cspan class='jdgm-rev__buyer-badge-wrapper'\u003e \u003cspan class='jdgm-rev__buyer-badge'\u003e\u003c\/span\u003e \u003c\/span\u003e \u003cspan class='jdgm-rev__author-wrapper'\u003e \u003cspan class='jdgm-rev__author'\u003eCarolyn Allen\u003c\/span\u003e \u003cspan class='jdgm-rev__location' \u003e \u003c\/span\u003e \u003c\/span\u003e \u003c\/div\u003e \u003cdiv class='jdgm-rev__content'\u003e \u003cdiv class='jdgm-rev__custom-form'\u003e \u003c\/div\u003e \u003cb class='jdgm-rev__title'\u003eCompfy\u003c\/b\u003e \u003cdiv class='jdgm-rev__body'\u003e\u003cp\u003eMini shorts, support you and are comfortable to wear.\u003c\/p\u003e\u003c\/div\u003e \u003cdiv class='jdgm-rev__pics'\u003e \u003c\/div\u003e \u003cdiv class='jdgm-rev__vids'\u003e \u003c\/div\u003e \u003cdiv class='jdgm-rev__transparency-badge-wrapper'\u003e \u003cdiv class='jdgm-rev__transparency-badge' data-badge-type=review_collected_via_store_invitation\u003e\u003c\/div\u003e \u003c\/div\u003e \u003c\/div\u003e \u003cdiv class='jdgm-rev__actions'\u003e \u003cdiv class='jdgm-rev__social'\u003e\u003c\/div\u003e \u003cdiv class='jdgm-rev__votes'\u003e\u003c\/div\u003e \u003c\/div\u003e \u003cdiv class='jdgm-rev__reply'\u003e \u003cdiv class='jdgm-rev__replier-wrapper'\u003e \u003cb class='jdgm-rev__replier'\u003e\u003c\/b\u003e \u003c\/div\u003e \u003cdiv class='jdgm-rev__reply-content'\u003e\u003cp\u003eThank you for sharing, Carolyn. We're so glad you found the mini shorts supportive and comfortable to wear. 🙏\u003c\/p\u003e\u003c\/div\u003e \u003c\/div\u003e \u003c\/div\u003e\u003cdiv class='jdgm-rev jdgm-divider-top' data-verified-buyer='true' data-review-id='37cc0fe9-7a48-41c6-a273-6f1f1a522fc8' data-review-language='' data-product-title='SRC Restore Support Mini Shorts - Uterine Prolapse \u0026amp; Continence Treatment' data-product-url='\/products\/src-restore-support-shorts-uterine-prolapse-continence-treatment' data-thumb-up-count='0' data-thumb-down-count='0'\u003e \u003cdiv class='jdgm-rev__header'\u003e \u003cdiv class='jdgm-rev__icon' \u003e S \u003c\/div\u003e \u003cspan class='jdgm-rev__rating' data-score='5' tabindex='0' aria-label='5 star review' role='img'\u003e \u003cspan class='jdgm-star jdgm--on'\u003e\u003c\/span\u003e\u003cspan class='jdgm-star jdgm--on'\u003e\u003c\/span\u003e\u003cspan class='jdgm-star jdgm--on'\u003e\u003c\/span\u003e\u003cspan class='jdgm-star jdgm--on'\u003e\u003c\/span\u003e\u003cspan class='jdgm-star jdgm--on'\u003e\u003c\/span\u003e \u003c\/span\u003e \u003cspan class='jdgm-rev__timestamp jdgm-spinner' data-content='2025-04-11 08:32:37 UTC'\u003e\u003c\/span\u003e \u003cdiv class='jdgm-rev__br'\u003e\u003c\/div\u003e \u003cspan class='jdgm-rev__buyer-badge-wrapper'\u003e \u003cspan class='jdgm-rev__buyer-badge'\u003e\u003c\/span\u003e \u003c\/span\u003e \u003cspan class='jdgm-rev__author-wrapper'\u003e \u003cspan class='jdgm-rev__author'\u003eSally R\u003c\/span\u003e \u003cspan class='jdgm-rev__location' \u003e \u003c\/span\u003e \u003c\/span\u003e \u003c\/div\u003e \u003cdiv class='jdgm-rev__content'\u003e \u003cdiv class='jdgm-rev__custom-form'\u003e \u003c\/div\u003e \u003cb class='jdgm-rev__title'\u003eSupport Mini Shorts\u003c\/b\u003e \u003cdiv class='jdgm-rev__body'\u003e\u003cp\u003eAwesome ~ heading to the website to purchase another pair\u003c\/p\u003e\u003c\/div\u003e \u003cdiv class='jdgm-rev__pics'\u003e \u003c\/div\u003e \u003cdiv class='jdgm-rev__vids'\u003e \u003c\/div\u003e \u003cdiv class='jdgm-rev__transparency-badge-wrapper'\u003e \u003cdiv class='jdgm-rev__transparency-badge' data-badge-type=review_collected_via_store_invitation\u003e\u003c\/div\u003e \u003c\/div\u003e \u003c\/div\u003e \u003cdiv class='jdgm-rev__actions'\u003e \u003cdiv class='jdgm-rev__social'\u003e\u003c\/div\u003e \u003cdiv class='jdgm-rev__votes'\u003e\u003c\/div\u003e \u003c\/div\u003e \u003cdiv class='jdgm-rev__reply'\u003e \u003cdiv class='jdgm-rev__replier-wrapper'\u003e \u003cb class='jdgm-rev__replier'\u003e\u003c\/b\u003e \u003c\/div\u003e \u003cdiv class='jdgm-rev__reply-content'\u003e\u003cp\u003eThank you so much for your lovely feedback, Sally. We’re so glad you’re loving the Support Mini Shorts and that you’re coming back for another pair. We really appreciate your support ❤️\u003c\/p\u003e\u003c\/div\u003e \u003c\/div\u003e \u003c\/div\u003e\u003c\/div\u003e \u003cdiv class='jdgm-paginate' data-per-page='10' data-url='https:\/\/api.judge.me\/reviews\/reviews_for_widget' style=\"display: none;\"\u003e\u003c\/div\u003e \u003c\/div\u003e \u003cdiv class='jdgm-rev-widg__paginate-spinner-wrapper'\u003e \u003cdiv class='jdgm-spinner'\u003e\u003c\/div\u003e \u003c\/div\u003e \u003c\/div\u003e"},"default_reviews_metafields":{"rating":{"scale_min":"1.0","scale_max":"5.0","value":"5.0"},"rating_count":2},"collections":[{"id":261657460925,"handle":"buy","title":"Buy","updated_at":"2026-07-30T19:07:59+08:00","body_html":"\u003cp\u003eBrowse all of our pregnancy, labour \u0026amp; birth, postpartum and baby essentials here.\u003cbr\u003e\u003c\/p\u003e\n\u003cp\u003e\u003cspan\u003eYou can even buy now and pay later with Afterpay!\u003c\/span\u003e\u003c\/p\u003e","published_at":"2021-03-10T12:05:31+08:00","sort_order":"best-selling","template_suffix":"shop-all-collection","disjunctive":false,"rules":[{"column":"title","relation":"not_contains","condition":"Hire"}],"published_scope":"global","image":{"created_at":"2024-05-06T11:59:42+08:00","alt":"Buy - The Birth Store","width":2048,"height":2048,"src":"\/\/www.thebirthstore.com.au\/cdn\/shop\/collections\/buy-964856.jpg?v=1714967982"}},{"id":293309022397,"handle":"clothing","title":"Clothing","updated_at":"2026-07-30T19:07:59+08:00","body_html":"","published_at":"2023-05-03T11:41:12+08:00","sort_order":"best-selling","template_suffix":"swaddles-collection","disjunctive":true,"rules":[{"column":"tag","relation":"equals","condition":"Breastfeeding Clothing"},{"column":"tag","relation":"equals","condition":"Support Clothing"}],"published_scope":"global","image":{"created_at":"2024-05-06T11:59:52+08:00","alt":"Clothing - The Birth Store","width":676,"height":581,"src":"\/\/www.thebirthstore.com.au\/cdn\/shop\/collections\/clothing-483293.jpg?v=1714967992"}},{"id":281712591037,"handle":"pain-relief","title":"Pain Relief","updated_at":"2026-07-30T19:07:59+08:00","body_html":"","published_at":"2021-12-20T14:22:45+08:00","sort_order":"best-selling","template_suffix":"pain-relief-collection","disjunctive":false,"rules":[{"column":"tag","relation":"equals","condition":"Pain Relief"}],"published_scope":"global","image":{"created_at":"2024-05-06T12:00:27+08:00","alt":"Pain Relief - The Birth Store","width":1365,"height":2048,"src":"\/\/www.thebirthstore.com.au\/cdn\/shop\/collections\/pain-relief-878865.jpg?v=1714968027"}},{"id":281712689341,"handle":"pelvic-floor-health","title":"Pelvic Floor Health","updated_at":"2026-07-30T19:07:59+08:00","body_html":"","published_at":"2021-12-20T14:23:41+08:00","sort_order":"best-selling","template_suffix":"swaddles-collection","disjunctive":false,"rules":[{"column":"tag","relation":"equals","condition":"Pelvic Floor"}],"published_scope":"global","image":{"created_at":"2024-05-06T12:00:29+08:00","alt":"Pelvic Floor Health - The Birth Store","width":536,"height":589,"src":"\/\/www.thebirthstore.com.au\/cdn\/shop\/collections\/pelvic-floor-health-890736.jpg?v=1714968030"}},{"id":261658083517,"handle":"post-partum","title":"Postpartum","updated_at":"2026-07-30T19:07:59+08:00","body_html":"\u003cp\u003eShop your postpartum and hospital bag essentials below. Looking for something we don't currently stock? Please reach out and let us know.\u003cbr\u003e\u003c\/p\u003e\n\u003cp\u003e\u003cspan\u003eYou can even buy now and pay later with Afterpay!\u003c\/span\u003e\u003c\/p\u003e","published_at":"2021-03-10T12:33:47+08:00","sort_order":"best-selling","template_suffix":"postpartum-collection","disjunctive":false,"rules":[{"column":"tag","relation":"equals","condition":"Post-Partum"}],"published_scope":"global","image":{"created_at":"2024-05-06T12:00:36+08:00","alt":"Postpartum - The Birth Store","width":611,"height":702,"src":"\/\/www.thebirthstore.com.au\/cdn\/shop\/collections\/postpartum-150119.jpg?v=1714968037"}},{"id":291456483517,"handle":"shop-all","title":"Shop All - Mum","updated_at":"2026-07-30T19:07:59+08:00","body_html":"","published_at":"2022-12-23T22:04:39+08:00","sort_order":"best-selling","template_suffix":"shop-all-collection","disjunctive":false,"rules":[{"column":"variant_price","relation":"greater_than","condition":"1"},{"column":"title","relation":"not_contains","condition":"Batteries"},{"column":"tag","relation":"equals","condition":"Mum"}],"published_scope":"global","image":{"created_at":"2024-05-06T12:00:54+08:00","alt":"Shop All - The Birth Store","width":1365,"height":2048,"src":"\/\/www.thebirthstore.com.au\/cdn\/shop\/collections\/shop-all-693176.jpg?v=1714968055"}},{"id":292595433661,"handle":"support-clothing","title":"Support Clothing","updated_at":"2026-07-30T19:07:59+08:00","body_html":"Maternity, breastfeeding, supportive, postpartum clothing and more - we've got it all, or we will have soon! Keep an eye out for new arrivals and grab yourself some incredible must-have staple items.","published_at":"2023-02-20T12:49:47+08:00","sort_order":"best-selling","template_suffix":"swaddles-collection","disjunctive":false,"rules":[{"column":"tag","relation":"equals","condition":"Support Clothing"}],"published_scope":"global","image":{"created_at":"2024-05-06T12:00:59+08:00","alt":"Support Clothing - The Birth Store","width":586,"height":879,"src":"\/\/www.thebirthstore.com.au\/cdn\/shop\/collections\/support-clothing-743676.jpg?v=1714968059"}}]}
{"item":{"id":7439747088573,"title":"SRC Pregnancy Shorts - Mini Over the Bump","handle":"src-pregnancy-short-mini-over-the-bump","description":"\u003cmeta charset=\"utf-8\"\u003e\u003cspan data-mce-fragment=\"1\"\u003eThis product is stocked at a 3\u003c\/span\u003e\u003csup data-mce-fragment=\"1\"\u003erd\u003c\/sup\u003e\u003cspan data-mce-fragment=\"1\"\u003e party warehouse, if ordering with other products you’ll receive two packages. This product will have a turn around time of 10 days if pickup is selected on checkout. Any questions, please contact us \u003ca href=\"https:\/\/www.thebirthstore.com.au\/pages\/contact-us\" title=\"Contact Us\" data-mce-fragment=\"1\" target=\"_blank\" data-mce-href=\"https:\/\/www.thebirthstore.com.au\/pages\/contact-us\"\u003ehere\u003c\/a\u003e.\u003c\/span\u003e\u003cbr\u003e","published_at":"2023-03-13T14:11:23+08:00","created_at":"2023-02-13T22:46:50+08:00","vendor":"SRC Health","type":"Pregnancy Shorts","tags":["Maternity Clothing","Mum","Pain Relief","Pelvic Floor","Pregnancy","Support Clothing"],"price":18900,"price_min":18900,"price_max":18900,"available":true,"price_varies":false,"compare_at_price":18900,"compare_at_price_min":18900,"compare_at_price_max":18900,"compare_at_price_varies":false,"variants":[{"id":42658981576893,"title":"XXS \/ Champagne","option1":"XXS","option2":"Champagne","option3":null,"sku":"","requires_shipping":true,"taxable":false,"featured_image":{"id":34641031102653,"product_id":7439747088573,"position":2,"created_at":"2024-05-06T12:00:45+08:00","updated_at":"2024-05-06T12:00:45+08:00","alt":"SRC Pregnancy Shorts - Mini Over the Bump - The Birth Store-SRC Health","width":1080,"height":1080,"src":"\/\/www.thebirthstore.com.au\/cdn\/shop\/files\/src-pregnancy-shorts-mini-over-the-bump-684263.jpg?v=1714968045","variant_ids":[42658981576893,42658981642429,42658981707965,42658981773501,42658981839037,42658981904573,42658981970109]},"available":true,"name":"SRC Pregnancy Shorts - Mini Over the Bump - XXS \/ Champagne","public_title":"XXS \/ Champagne","options":["XXS","Champagne"],"price":18900,"weight":0,"compare_at_price":18900,"inventory_management":null,"barcode":"81576893","featured_media":{"alt":"SRC Pregnancy Shorts - Mini Over the Bump - The Birth Store-SRC Health","id":27007600132285,"position":2,"preview_image":{"aspect_ratio":1.0,"height":1080,"width":1080,"src":"\/\/www.thebirthstore.com.au\/cdn\/shop\/files\/src-pregnancy-shorts-mini-over-the-bump-684263.jpg?v=1714968045"}},"requires_selling_plan":false,"selling_plan_allocations":[],"quantity_rule":{"min":1,"max":null,"increment":1}},{"id":42658981609661,"title":"XXS \/ Black","option1":"XXS","option2":"Black","option3":null,"sku":"","requires_shipping":true,"taxable":false,"featured_image":{"id":34641031168189,"product_id":7439747088573,"position":3,"created_at":"2024-05-06T12:00:45+08:00","updated_at":"2024-05-06T12:00:45+08:00","alt":"SRC Pregnancy Shorts - Mini Over the Bump - The Birth Store-SRC Health","width":1080,"height":1080,"src":"\/\/www.thebirthstore.com.au\/cdn\/shop\/files\/src-pregnancy-shorts-mini-over-the-bump-667876.jpg?v=1714968045","variant_ids":[42658981609661,42658981675197,42658981740733,42658981806269,42658981871805,42658981937341,42658982002877]},"available":true,"name":"SRC Pregnancy Shorts - Mini Over the Bump - XXS \/ Black","public_title":"XXS \/ Black","options":["XXS","Black"],"price":18900,"weight":0,"compare_at_price":18900,"inventory_management":null,"barcode":"81609661","featured_media":{"alt":"SRC Pregnancy Shorts - Mini Over the Bump - The Birth Store-SRC Health","id":27007600197821,"position":3,"preview_image":{"aspect_ratio":1.0,"height":1080,"width":1080,"src":"\/\/www.thebirthstore.com.au\/cdn\/shop\/files\/src-pregnancy-shorts-mini-over-the-bump-667876.jpg?v=1714968045"}},"requires_selling_plan":false,"selling_plan_allocations":[],"quantity_rule":{"min":1,"max":null,"increment":1}},{"id":42658981642429,"title":"XS \/ Champagne","option1":"XS","option2":"Champagne","option3":null,"sku":"","requires_shipping":true,"taxable":false,"featured_image":{"id":34641031102653,"product_id":7439747088573,"position":2,"created_at":"2024-05-06T12:00:45+08:00","updated_at":"2024-05-06T12:00:45+08:00","alt":"SRC Pregnancy Shorts - Mini Over the Bump - The Birth Store-SRC Health","width":1080,"height":1080,"src":"\/\/www.thebirthstore.com.au\/cdn\/shop\/files\/src-pregnancy-shorts-mini-over-the-bump-684263.jpg?v=1714968045","variant_ids":[42658981576893,42658981642429,42658981707965,42658981773501,42658981839037,42658981904573,42658981970109]},"available":true,"name":"SRC Pregnancy Shorts - Mini Over the Bump - XS \/ Champagne","public_title":"XS \/ Champagne","options":["XS","Champagne"],"price":18900,"weight":0,"compare_at_price":18900,"inventory_management":null,"barcode":"81642429","featured_media":{"alt":"SRC Pregnancy Shorts - Mini Over the Bump - The Birth Store-SRC Health","id":27007600132285,"position":2,"preview_image":{"aspect_ratio":1.0,"height":1080,"width":1080,"src":"\/\/www.thebirthstore.com.au\/cdn\/shop\/files\/src-pregnancy-shorts-mini-over-the-bump-684263.jpg?v=1714968045"}},"requires_selling_plan":false,"selling_plan_allocations":[],"quantity_rule":{"min":1,"max":null,"increment":1}},{"id":42658981675197,"title":"XS \/ Black","option1":"XS","option2":"Black","option3":null,"sku":"","requires_shipping":true,"taxable":false,"featured_image":{"id":34641031168189,"product_id":7439747088573,"position":3,"created_at":"2024-05-06T12:00:45+08:00","updated_at":"2024-05-06T12:00:45+08:00","alt":"SRC Pregnancy Shorts - Mini Over the Bump - The Birth Store-SRC Health","width":1080,"height":1080,"src":"\/\/www.thebirthstore.com.au\/cdn\/shop\/files\/src-pregnancy-shorts-mini-over-the-bump-667876.jpg?v=1714968045","variant_ids":[42658981609661,42658981675197,42658981740733,42658981806269,42658981871805,42658981937341,42658982002877]},"available":true,"name":"SRC Pregnancy Shorts - Mini Over the Bump - XS \/ Black","public_title":"XS \/ Black","options":["XS","Black"],"price":18900,"weight":0,"compare_at_price":18900,"inventory_management":null,"barcode":"81675197","featured_media":{"alt":"SRC Pregnancy Shorts - Mini Over the Bump - The Birth Store-SRC Health","id":27007600197821,"position":3,"preview_image":{"aspect_ratio":1.0,"height":1080,"width":1080,"src":"\/\/www.thebirthstore.com.au\/cdn\/shop\/files\/src-pregnancy-shorts-mini-over-the-bump-667876.jpg?v=1714968045"}},"requires_selling_plan":false,"selling_plan_allocations":[],"quantity_rule":{"min":1,"max":null,"increment":1}},{"id":42658981707965,"title":"S \/ Champagne","option1":"S","option2":"Champagne","option3":null,"sku":"","requires_shipping":true,"taxable":false,"featured_image":{"id":34641031102653,"product_id":7439747088573,"position":2,"created_at":"2024-05-06T12:00:45+08:00","updated_at":"2024-05-06T12:00:45+08:00","alt":"SRC Pregnancy Shorts - Mini Over the Bump - The Birth Store-SRC Health","width":1080,"height":1080,"src":"\/\/www.thebirthstore.com.au\/cdn\/shop\/files\/src-pregnancy-shorts-mini-over-the-bump-684263.jpg?v=1714968045","variant_ids":[42658981576893,42658981642429,42658981707965,42658981773501,42658981839037,42658981904573,42658981970109]},"available":true,"name":"SRC Pregnancy Shorts - Mini Over the Bump - S \/ Champagne","public_title":"S \/ Champagne","options":["S","Champagne"],"price":18900,"weight":0,"compare_at_price":18900,"inventory_management":null,"barcode":"81707965","featured_media":{"alt":"SRC Pregnancy Shorts - Mini Over the Bump - The Birth Store-SRC Health","id":27007600132285,"position":2,"preview_image":{"aspect_ratio":1.0,"height":1080,"width":1080,"src":"\/\/www.thebirthstore.com.au\/cdn\/shop\/files\/src-pregnancy-shorts-mini-over-the-bump-684263.jpg?v=1714968045"}},"requires_selling_plan":false,"selling_plan_allocations":[],"quantity_rule":{"min":1,"max":null,"increment":1}},{"id":42658981740733,"title":"S \/ Black","option1":"S","option2":"Black","option3":null,"sku":"","requires_shipping":true,"taxable":false,"featured_image":{"id":34641031168189,"product_id":7439747088573,"position":3,"created_at":"2024-05-06T12:00:45+08:00","updated_at":"2024-05-06T12:00:45+08:00","alt":"SRC Pregnancy Shorts - Mini Over the Bump - The Birth Store-SRC Health","width":1080,"height":1080,"src":"\/\/www.thebirthstore.com.au\/cdn\/shop\/files\/src-pregnancy-shorts-mini-over-the-bump-667876.jpg?v=1714968045","variant_ids":[42658981609661,42658981675197,42658981740733,42658981806269,42658981871805,42658981937341,42658982002877]},"available":true,"name":"SRC Pregnancy Shorts - Mini Over the Bump - S \/ Black","public_title":"S \/ Black","options":["S","Black"],"price":18900,"weight":0,"compare_at_price":18900,"inventory_management":null,"barcode":"81740733","featured_media":{"alt":"SRC Pregnancy Shorts - Mini Over the Bump - The Birth Store-SRC Health","id":27007600197821,"position":3,"preview_image":{"aspect_ratio":1.0,"height":1080,"width":1080,"src":"\/\/www.thebirthstore.com.au\/cdn\/shop\/files\/src-pregnancy-shorts-mini-over-the-bump-667876.jpg?v=1714968045"}},"requires_selling_plan":false,"selling_plan_allocations":[],"quantity_rule":{"min":1,"max":null,"increment":1}},{"id":42658981773501,"title":"M \/ Champagne","option1":"M","option2":"Champagne","option3":null,"sku":"","requires_shipping":true,"taxable":false,"featured_image":{"id":34641031102653,"product_id":7439747088573,"position":2,"created_at":"2024-05-06T12:00:45+08:00","updated_at":"2024-05-06T12:00:45+08:00","alt":"SRC Pregnancy Shorts - Mini Over the Bump - The Birth Store-SRC Health","width":1080,"height":1080,"src":"\/\/www.thebirthstore.com.au\/cdn\/shop\/files\/src-pregnancy-shorts-mini-over-the-bump-684263.jpg?v=1714968045","variant_ids":[42658981576893,42658981642429,42658981707965,42658981773501,42658981839037,42658981904573,42658981970109]},"available":true,"name":"SRC Pregnancy Shorts - Mini Over the Bump - M \/ Champagne","public_title":"M \/ Champagne","options":["M","Champagne"],"price":18900,"weight":0,"compare_at_price":18900,"inventory_management":null,"barcode":"81773501","featured_media":{"alt":"SRC Pregnancy Shorts - Mini Over the Bump - The Birth Store-SRC Health","id":27007600132285,"position":2,"preview_image":{"aspect_ratio":1.0,"height":1080,"width":1080,"src":"\/\/www.thebirthstore.com.au\/cdn\/shop\/files\/src-pregnancy-shorts-mini-over-the-bump-684263.jpg?v=1714968045"}},"requires_selling_plan":false,"selling_plan_allocations":[],"quantity_rule":{"min":1,"max":null,"increment":1}},{"id":42658981806269,"title":"M \/ Black","option1":"M","option2":"Black","option3":null,"sku":"","requires_shipping":true,"taxable":false,"featured_image":{"id":34641031168189,"product_id":7439747088573,"position":3,"created_at":"2024-05-06T12:00:45+08:00","updated_at":"2024-05-06T12:00:45+08:00","alt":"SRC Pregnancy Shorts - Mini Over the Bump - The Birth Store-SRC Health","width":1080,"height":1080,"src":"\/\/www.thebirthstore.com.au\/cdn\/shop\/files\/src-pregnancy-shorts-mini-over-the-bump-667876.jpg?v=1714968045","variant_ids":[42658981609661,42658981675197,42658981740733,42658981806269,42658981871805,42658981937341,42658982002877]},"available":true,"name":"SRC Pregnancy Shorts - Mini Over the Bump - M \/ Black","public_title":"M \/ Black","options":["M","Black"],"price":18900,"weight":0,"compare_at_price":18900,"inventory_management":null,"barcode":"81806269","featured_media":{"alt":"SRC Pregnancy Shorts - Mini Over the Bump - The Birth Store-SRC Health","id":27007600197821,"position":3,"preview_image":{"aspect_ratio":1.0,"height":1080,"width":1080,"src":"\/\/www.thebirthstore.com.au\/cdn\/shop\/files\/src-pregnancy-shorts-mini-over-the-bump-667876.jpg?v=1714968045"}},"requires_selling_plan":false,"selling_plan_allocations":[],"quantity_rule":{"min":1,"max":null,"increment":1}},{"id":42658981839037,"title":"L \/ Champagne","option1":"L","option2":"Champagne","option3":null,"sku":"","requires_shipping":true,"taxable":false,"featured_image":{"id":34641031102653,"product_id":7439747088573,"position":2,"created_at":"2024-05-06T12:00:45+08:00","updated_at":"2024-05-06T12:00:45+08:00","alt":"SRC Pregnancy Shorts - Mini Over the Bump - The Birth Store-SRC Health","width":1080,"height":1080,"src":"\/\/www.thebirthstore.com.au\/cdn\/shop\/files\/src-pregnancy-shorts-mini-over-the-bump-684263.jpg?v=1714968045","variant_ids":[42658981576893,42658981642429,42658981707965,42658981773501,42658981839037,42658981904573,42658981970109]},"available":true,"name":"SRC Pregnancy Shorts - Mini Over the Bump - L \/ Champagne","public_title":"L \/ Champagne","options":["L","Champagne"],"price":18900,"weight":0,"compare_at_price":18900,"inventory_management":null,"barcode":"81839037","featured_media":{"alt":"SRC Pregnancy Shorts - Mini Over the Bump - The Birth Store-SRC Health","id":27007600132285,"position":2,"preview_image":{"aspect_ratio":1.0,"height":1080,"width":1080,"src":"\/\/www.thebirthstore.com.au\/cdn\/shop\/files\/src-pregnancy-shorts-mini-over-the-bump-684263.jpg?v=1714968045"}},"requires_selling_plan":false,"selling_plan_allocations":[],"quantity_rule":{"min":1,"max":null,"increment":1}},{"id":42658981871805,"title":"L \/ Black","option1":"L","option2":"Black","option3":null,"sku":"","requires_shipping":true,"taxable":false,"featured_image":{"id":34641031168189,"product_id":7439747088573,"position":3,"created_at":"2024-05-06T12:00:45+08:00","updated_at":"2024-05-06T12:00:45+08:00","alt":"SRC Pregnancy Shorts - Mini Over the Bump - The Birth Store-SRC Health","width":1080,"height":1080,"src":"\/\/www.thebirthstore.com.au\/cdn\/shop\/files\/src-pregnancy-shorts-mini-over-the-bump-667876.jpg?v=1714968045","variant_ids":[42658981609661,42658981675197,42658981740733,42658981806269,42658981871805,42658981937341,42658982002877]},"available":true,"name":"SRC Pregnancy Shorts - Mini Over the Bump - L \/ Black","public_title":"L \/ Black","options":["L","Black"],"price":18900,"weight":0,"compare_at_price":18900,"inventory_management":null,"barcode":"81871805","featured_media":{"alt":"SRC Pregnancy Shorts - Mini Over the Bump - The Birth Store-SRC Health","id":27007600197821,"position":3,"preview_image":{"aspect_ratio":1.0,"height":1080,"width":1080,"src":"\/\/www.thebirthstore.com.au\/cdn\/shop\/files\/src-pregnancy-shorts-mini-over-the-bump-667876.jpg?v=1714968045"}},"requires_selling_plan":false,"selling_plan_allocations":[],"quantity_rule":{"min":1,"max":null,"increment":1}},{"id":42658981904573,"title":"XL \/ Champagne","option1":"XL","option2":"Champagne","option3":null,"sku":"","requires_shipping":true,"taxable":false,"featured_image":{"id":34641031102653,"product_id":7439747088573,"position":2,"created_at":"2024-05-06T12:00:45+08:00","updated_at":"2024-05-06T12:00:45+08:00","alt":"SRC Pregnancy Shorts - Mini Over the Bump - The Birth Store-SRC Health","width":1080,"height":1080,"src":"\/\/www.thebirthstore.com.au\/cdn\/shop\/files\/src-pregnancy-shorts-mini-over-the-bump-684263.jpg?v=1714968045","variant_ids":[42658981576893,42658981642429,42658981707965,42658981773501,42658981839037,42658981904573,42658981970109]},"available":true,"name":"SRC Pregnancy Shorts - Mini Over the Bump - XL \/ Champagne","public_title":"XL \/ Champagne","options":["XL","Champagne"],"price":18900,"weight":0,"compare_at_price":18900,"inventory_management":null,"barcode":"81904573","featured_media":{"alt":"SRC Pregnancy Shorts - Mini Over the Bump - The Birth Store-SRC Health","id":27007600132285,"position":2,"preview_image":{"aspect_ratio":1.0,"height":1080,"width":1080,"src":"\/\/www.thebirthstore.com.au\/cdn\/shop\/files\/src-pregnancy-shorts-mini-over-the-bump-684263.jpg?v=1714968045"}},"requires_selling_plan":false,"selling_plan_allocations":[],"quantity_rule":{"min":1,"max":null,"increment":1}},{"id":42658981937341,"title":"XL \/ Black","option1":"XL","option2":"Black","option3":null,"sku":"","requires_shipping":true,"taxable":false,"featured_image":{"id":34641031168189,"product_id":7439747088573,"position":3,"created_at":"2024-05-06T12:00:45+08:00","updated_at":"2024-05-06T12:00:45+08:00","alt":"SRC Pregnancy Shorts - Mini Over the Bump - The Birth Store-SRC Health","width":1080,"height":1080,"src":"\/\/www.thebirthstore.com.au\/cdn\/shop\/files\/src-pregnancy-shorts-mini-over-the-bump-667876.jpg?v=1714968045","variant_ids":[42658981609661,42658981675197,42658981740733,42658981806269,42658981871805,42658981937341,42658982002877]},"available":true,"name":"SRC Pregnancy Shorts - Mini Over the Bump - XL \/ Black","public_title":"XL \/ Black","options":["XL","Black"],"price":18900,"weight":0,"compare_at_price":18900,"inventory_management":null,"barcode":"81937341","featured_media":{"alt":"SRC Pregnancy Shorts - Mini Over the Bump - The Birth Store-SRC Health","id":27007600197821,"position":3,"preview_image":{"aspect_ratio":1.0,"height":1080,"width":1080,"src":"\/\/www.thebirthstore.com.au\/cdn\/shop\/files\/src-pregnancy-shorts-mini-over-the-bump-667876.jpg?v=1714968045"}},"requires_selling_plan":false,"selling_plan_allocations":[],"quantity_rule":{"min":1,"max":null,"increment":1}},{"id":42658981970109,"title":"XXL \/ Champagne","option1":"XXL","option2":"Champagne","option3":null,"sku":"","requires_shipping":true,"taxable":false,"featured_image":{"id":34641031102653,"product_id":7439747088573,"position":2,"created_at":"2024-05-06T12:00:45+08:00","updated_at":"2024-05-06T12:00:45+08:00","alt":"SRC Pregnancy Shorts - Mini Over the Bump - The Birth Store-SRC Health","width":1080,"height":1080,"src":"\/\/www.thebirthstore.com.au\/cdn\/shop\/files\/src-pregnancy-shorts-mini-over-the-bump-684263.jpg?v=1714968045","variant_ids":[42658981576893,42658981642429,42658981707965,42658981773501,42658981839037,42658981904573,42658981970109]},"available":true,"name":"SRC Pregnancy Shorts - Mini Over the Bump - XXL \/ Champagne","public_title":"XXL \/ Champagne","options":["XXL","Champagne"],"price":18900,"weight":0,"compare_at_price":18900,"inventory_management":null,"barcode":"81970109","featured_media":{"alt":"SRC Pregnancy Shorts - Mini Over the Bump - The Birth Store-SRC Health","id":27007600132285,"position":2,"preview_image":{"aspect_ratio":1.0,"height":1080,"width":1080,"src":"\/\/www.thebirthstore.com.au\/cdn\/shop\/files\/src-pregnancy-shorts-mini-over-the-bump-684263.jpg?v=1714968045"}},"requires_selling_plan":false,"selling_plan_allocations":[],"quantity_rule":{"min":1,"max":null,"increment":1}},{"id":42658982002877,"title":"XXL \/ Black","option1":"XXL","option2":"Black","option3":null,"sku":"","requires_shipping":true,"taxable":false,"featured_image":{"id":34641031168189,"product_id":7439747088573,"position":3,"created_at":"2024-05-06T12:00:45+08:00","updated_at":"2024-05-06T12:00:45+08:00","alt":"SRC Pregnancy Shorts - Mini Over the Bump - The Birth Store-SRC Health","width":1080,"height":1080,"src":"\/\/www.thebirthstore.com.au\/cdn\/shop\/files\/src-pregnancy-shorts-mini-over-the-bump-667876.jpg?v=1714968045","variant_ids":[42658981609661,42658981675197,42658981740733,42658981806269,42658981871805,42658981937341,42658982002877]},"available":true,"name":"SRC Pregnancy Shorts - Mini Over the Bump - XXL \/ Black","public_title":"XXL \/ Black","options":["XXL","Black"],"price":18900,"weight":0,"compare_at_price":18900,"inventory_management":null,"barcode":"82002877","featured_media":{"alt":"SRC Pregnancy Shorts - Mini Over the Bump - The Birth Store-SRC Health","id":27007600197821,"position":3,"preview_image":{"aspect_ratio":1.0,"height":1080,"width":1080,"src":"\/\/www.thebirthstore.com.au\/cdn\/shop\/files\/src-pregnancy-shorts-mini-over-the-bump-667876.jpg?v=1714968045"}},"requires_selling_plan":false,"selling_plan_allocations":[],"quantity_rule":{"min":1,"max":null,"increment":1}}],"images":["\/\/www.thebirthstore.com.au\/cdn\/shop\/files\/src-pregnancy-shorts-mini-over-the-bump-853155.jpg?v=1714968045","\/\/www.thebirthstore.com.au\/cdn\/shop\/files\/src-pregnancy-shorts-mini-over-the-bump-684263.jpg?v=1714968045","\/\/www.thebirthstore.com.au\/cdn\/shop\/files\/src-pregnancy-shorts-mini-over-the-bump-667876.jpg?v=1714968045","\/\/www.thebirthstore.com.au\/cdn\/shop\/files\/src-pregnancy-shorts-mini-over-the-bump-240451.jpg?v=1714968046","\/\/www.thebirthstore.com.au\/cdn\/shop\/files\/src-pregnancy-shorts-mini-over-the-bump-570673.png?v=1714968046"],"featured_image":"\/\/www.thebirthstore.com.au\/cdn\/shop\/files\/src-pregnancy-shorts-mini-over-the-bump-853155.jpg?v=1714968045","options":["Size","Colour"],"media":[{"alt":"SRC Pregnancy Shorts - Mini Over the Bump - The Birth Store-SRC Health","id":27007600001213,"position":1,"preview_image":{"aspect_ratio":1.0,"height":1080,"width":1080,"src":"\/\/www.thebirthstore.com.au\/cdn\/shop\/files\/src-pregnancy-shorts-mini-over-the-bump-853155.jpg?v=1714968045"},"aspect_ratio":1.0,"height":1080,"media_type":"image","src":"\/\/www.thebirthstore.com.au\/cdn\/shop\/files\/src-pregnancy-shorts-mini-over-the-bump-853155.jpg?v=1714968045","width":1080},{"alt":"SRC Pregnancy Shorts - Mini Over the Bump - The Birth Store-SRC Health","id":27007600132285,"position":2,"preview_image":{"aspect_ratio":1.0,"height":1080,"width":1080,"src":"\/\/www.thebirthstore.com.au\/cdn\/shop\/files\/src-pregnancy-shorts-mini-over-the-bump-684263.jpg?v=1714968045"},"aspect_ratio":1.0,"height":1080,"media_type":"image","src":"\/\/www.thebirthstore.com.au\/cdn\/shop\/files\/src-pregnancy-shorts-mini-over-the-bump-684263.jpg?v=1714968045","width":1080},{"alt":"SRC Pregnancy Shorts - Mini Over the Bump - The Birth Store-SRC Health","id":27007600197821,"position":3,"preview_image":{"aspect_ratio":1.0,"height":1080,"width":1080,"src":"\/\/www.thebirthstore.com.au\/cdn\/shop\/files\/src-pregnancy-shorts-mini-over-the-bump-667876.jpg?v=1714968045"},"aspect_ratio":1.0,"height":1080,"media_type":"image","src":"\/\/www.thebirthstore.com.au\/cdn\/shop\/files\/src-pregnancy-shorts-mini-over-the-bump-667876.jpg?v=1714968045","width":1080},{"alt":"SRC Pregnancy Shorts - Mini Over the Bump - The Birth Store-SRC Health","id":27007600230589,"position":4,"preview_image":{"aspect_ratio":1.0,"height":1080,"width":1080,"src":"\/\/www.thebirthstore.com.au\/cdn\/shop\/files\/src-pregnancy-shorts-mini-over-the-bump-240451.jpg?v=1714968046"},"aspect_ratio":1.0,"height":1080,"media_type":"image","src":"\/\/www.thebirthstore.com.au\/cdn\/shop\/files\/src-pregnancy-shorts-mini-over-the-bump-240451.jpg?v=1714968046","width":1080},{"alt":"SRC Pregnancy Shorts - Mini Over the Bump - The Birth Store-SRC Health","id":27007600263357,"position":5,"preview_image":{"aspect_ratio":1.582,"height":948,"width":1500,"src":"\/\/www.thebirthstore.com.au\/cdn\/shop\/files\/src-pregnancy-shorts-mini-over-the-bump-570673.png?v=1714968046"},"aspect_ratio":1.582,"height":948,"media_type":"image","src":"\/\/www.thebirthstore.com.au\/cdn\/shop\/files\/src-pregnancy-shorts-mini-over-the-bump-570673.png?v=1714968046","width":1500}],"requires_selling_plan":false,"selling_plan_groups":[],"content":"\u003cmeta charset=\"utf-8\"\u003e\u003cspan data-mce-fragment=\"1\"\u003eThis product is stocked at a 3\u003c\/span\u003e\u003csup data-mce-fragment=\"1\"\u003erd\u003c\/sup\u003e\u003cspan data-mce-fragment=\"1\"\u003e party warehouse, if ordering with other products you’ll receive two packages. This product will have a turn around time of 10 days if pickup is selected on checkout. Any questions, please contact us \u003ca href=\"https:\/\/www.thebirthstore.com.au\/pages\/contact-us\" title=\"Contact Us\" data-mce-fragment=\"1\" target=\"_blank\" data-mce-href=\"https:\/\/www.thebirthstore.com.au\/pages\/contact-us\"\u003ehere\u003c\/a\u003e.\u003c\/span\u003e\u003cbr\u003e"},"options":[{"name":"Size","position":1,"values":["XXS","XS","S","M","L","XL","XXL"]},{"name":"Colour","position":2,"values":["Champagne","Black"]}],"custom_metafields":{},"metafields":{"badge":"\u003cdiv style='display:none' class='jdgm-prev-badge' data-average-rating='0.00' data-number-of-reviews='0' data-number-of-questions='0'\u003e \u003cspan class='jdgm-prev-badge__stars' data-score='0.00' tabindex='0' aria-label='0.00 stars' role='button'\u003e \u003cspan class='jdgm-star jdgm--off'\u003e\u003c\/span\u003e\u003cspan class='jdgm-star jdgm--off'\u003e\u003c\/span\u003e\u003cspan class='jdgm-star jdgm--off'\u003e\u003c\/span\u003e\u003cspan class='jdgm-star jdgm--off'\u003e\u003c\/span\u003e\u003cspan class='jdgm-star jdgm--off'\u003e\u003c\/span\u003e \u003c\/span\u003e \u003cspan class='jdgm-prev-badge__text'\u003e No reviews \u003c\/span\u003e \u003c\/div\u003e","widget":"\u003cdiv class='jdgm-rev-widg' data-updated-at='2025-06-13T16:12:10Z' data-average-rating='0.00' data-number-of-reviews='0' data-number-of-questions='0'\u003e \u003cstyle class='jdgm-temp-hiding-style'\u003e.jdgm-rev-widg{ display: none }\u003c\/style\u003e \u003cdiv class='jdgm-rev-widg__header'\u003e \u003ch2 class='jdgm-rev-widg__title'\u003eCustomer Reviews\u003c\/h2\u003e \u003cdiv class='jdgm-rev-widg__summary'\u003e \u003cdiv class='jdgm-rev-widg__summary-stars' aria-label='Average rating is 0.00 stars' role='img'\u003e \u003cspan class='jdgm-star jdgm--off'\u003e\u003c\/span\u003e\u003cspan class='jdgm-star jdgm--off'\u003e\u003c\/span\u003e\u003cspan class='jdgm-star jdgm--off'\u003e\u003c\/span\u003e\u003cspan class='jdgm-star jdgm--off'\u003e\u003c\/span\u003e\u003cspan class='jdgm-star jdgm--off'\u003e\u003c\/span\u003e \u003c\/div\u003e \u003cdiv class='jdgm-rev-widg__summary-text'\u003eBe the first to write a review\u003c\/div\u003e \u003c\/div\u003e \u003ca style='display: none' href='#' class='jdgm-write-rev-link' role='button'\u003eWrite a review\u003c\/a\u003e \u003cdiv class='jdgm-histogram jdgm-temp-hidden'\u003e \u003cdiv class='jdgm-histogram__row' data-rating='5' data-frequency='0' data-percentage='0'\u003e \u003cdiv class='jdgm-histogram__star' role='button' aria-label=\"0% (0) reviews with 5 star rating\" tabindex='0' \u003e\u003cspan class='jdgm-star jdgm--on'\u003e\u003c\/span\u003e\u003cspan class='jdgm-star jdgm--on'\u003e\u003c\/span\u003e\u003cspan class='jdgm-star jdgm--on'\u003e\u003c\/span\u003e\u003cspan class='jdgm-star jdgm--on'\u003e\u003c\/span\u003e\u003cspan class='jdgm-star jdgm--on'\u003e\u003c\/span\u003e\u003c\/div\u003e \u003cdiv class='jdgm-histogram__bar'\u003e \u003cdiv class='jdgm-histogram__bar-content' style='width: 0%;'\u003e \u003c\/div\u003e \u003c\/div\u003e \u003cdiv class='jdgm-histogram__percentage'\u003e0%\u003c\/div\u003e \u003cdiv class='jdgm-histogram__frequency'\u003e(0)\u003c\/div\u003e \u003c\/div\u003e \u003cdiv class='jdgm-histogram__row' data-rating='4' data-frequency='0' data-percentage='0'\u003e \u003cdiv class='jdgm-histogram__star' role='button' aria-label=\"0% (0) reviews with 4 star rating\" tabindex='0' \u003e\u003cspan class='jdgm-star jdgm--on'\u003e\u003c\/span\u003e\u003cspan class='jdgm-star jdgm--on'\u003e\u003c\/span\u003e\u003cspan class='jdgm-star jdgm--on'\u003e\u003c\/span\u003e\u003cspan class='jdgm-star jdgm--on'\u003e\u003c\/span\u003e\u003cspan class='jdgm-star jdgm--off'\u003e\u003c\/span\u003e\u003c\/div\u003e \u003cdiv class='jdgm-histogram__bar'\u003e \u003cdiv class='jdgm-histogram__bar-content' style='width: 0%;'\u003e \u003c\/div\u003e \u003c\/div\u003e \u003cdiv class='jdgm-histogram__percentage'\u003e0%\u003c\/div\u003e \u003cdiv class='jdgm-histogram__frequency'\u003e(0)\u003c\/div\u003e \u003c\/div\u003e \u003cdiv class='jdgm-histogram__row' data-rating='3' data-frequency='0' data-percentage='0'\u003e \u003cdiv class='jdgm-histogram__star' role='button' aria-label=\"0% (0) reviews with 3 star rating\" tabindex='0' \u003e\u003cspan class='jdgm-star jdgm--on'\u003e\u003c\/span\u003e\u003cspan class='jdgm-star jdgm--on'\u003e\u003c\/span\u003e\u003cspan class='jdgm-star jdgm--on'\u003e\u003c\/span\u003e\u003cspan class='jdgm-star jdgm--off'\u003e\u003c\/span\u003e\u003cspan class='jdgm-star jdgm--off'\u003e\u003c\/span\u003e\u003c\/div\u003e \u003cdiv class='jdgm-histogram__bar'\u003e \u003cdiv class='jdgm-histogram__bar-content' style='width: 0%;'\u003e \u003c\/div\u003e \u003c\/div\u003e \u003cdiv class='jdgm-histogram__percentage'\u003e0%\u003c\/div\u003e \u003cdiv class='jdgm-histogram__frequency'\u003e(0)\u003c\/div\u003e \u003c\/div\u003e \u003cdiv class='jdgm-histogram__row' data-rating='2' data-frequency='0' data-percentage='0'\u003e \u003cdiv class='jdgm-histogram__star' role='button' aria-label=\"0% (0) reviews with 2 star rating\" tabindex='0' \u003e\u003cspan class='jdgm-star jdgm--on'\u003e\u003c\/span\u003e\u003cspan class='jdgm-star jdgm--on'\u003e\u003c\/span\u003e\u003cspan class='jdgm-star jdgm--off'\u003e\u003c\/span\u003e\u003cspan class='jdgm-star jdgm--off'\u003e\u003c\/span\u003e\u003cspan class='jdgm-star jdgm--off'\u003e\u003c\/span\u003e\u003c\/div\u003e \u003cdiv class='jdgm-histogram__bar'\u003e \u003cdiv class='jdgm-histogram__bar-content' style='width: 0%;'\u003e \u003c\/div\u003e \u003c\/div\u003e \u003cdiv class='jdgm-histogram__percentage'\u003e0%\u003c\/div\u003e \u003cdiv class='jdgm-histogram__frequency'\u003e(0)\u003c\/div\u003e \u003c\/div\u003e \u003cdiv class='jdgm-histogram__row' data-rating='1' data-frequency='0' data-percentage='0'\u003e \u003cdiv class='jdgm-histogram__star' role='button' aria-label=\"0% (0) reviews with 1 star rating\" tabindex='0' \u003e\u003cspan class='jdgm-star jdgm--on'\u003e\u003c\/span\u003e\u003cspan class='jdgm-star jdgm--off'\u003e\u003c\/span\u003e\u003cspan class='jdgm-star jdgm--off'\u003e\u003c\/span\u003e\u003cspan class='jdgm-star jdgm--off'\u003e\u003c\/span\u003e\u003cspan class='jdgm-star jdgm--off'\u003e\u003c\/span\u003e\u003c\/div\u003e \u003cdiv class='jdgm-histogram__bar'\u003e \u003cdiv class='jdgm-histogram__bar-content' style='width: 0%;'\u003e \u003c\/div\u003e \u003c\/div\u003e \u003cdiv class='jdgm-histogram__percentage'\u003e0%\u003c\/div\u003e \u003cdiv class='jdgm-histogram__frequency'\u003e(0)\u003c\/div\u003e \u003c\/div\u003e \u003cdiv class='jdgm-histogram__row jdgm-histogram__clear-filter' data-rating=null tabindex='0'\u003e\u003c\/div\u003e \u003c\/div\u003e \u003cdiv class='jdgm-rev-widg__sort-wrapper'\u003e\u003c\/div\u003e \u003c\/div\u003e \u003cdiv class='jdgm-rev-widg__body'\u003e \u003cdiv class='jdgm-rev-widg__reviews'\u003e\u003c\/div\u003e \u003cdiv class='jdgm-paginate' data-per-page='10' data-url='https:\/\/api.judge.me\/reviews\/reviews_for_widget' style=\"display: none;\"\u003e\u003c\/div\u003e \u003c\/div\u003e \u003cdiv class='jdgm-rev-widg__paginate-spinner-wrapper'\u003e \u003cdiv class='jdgm-spinner'\u003e\u003c\/div\u003e \u003c\/div\u003e \u003c\/div\u003e"},"default_reviews_metafields":{},"collections":[{"id":261657460925,"handle":"buy","title":"Buy","updated_at":"2026-07-30T19:07:59+08:00","body_html":"\u003cp\u003eBrowse all of our pregnancy, labour \u0026amp; birth, postpartum and baby essentials here.\u003cbr\u003e\u003c\/p\u003e\n\u003cp\u003e\u003cspan\u003eYou can even buy now and pay later with Afterpay!\u003c\/span\u003e\u003c\/p\u003e","published_at":"2021-03-10T12:05:31+08:00","sort_order":"best-selling","template_suffix":"shop-all-collection","disjunctive":false,"rules":[{"column":"title","relation":"not_contains","condition":"Hire"}],"published_scope":"global","image":{"created_at":"2024-05-06T11:59:42+08:00","alt":"Buy - The Birth Store","width":2048,"height":2048,"src":"\/\/www.thebirthstore.com.au\/cdn\/shop\/collections\/buy-964856.jpg?v=1714967982"}},{"id":293309022397,"handle":"clothing","title":"Clothing","updated_at":"2026-07-30T19:07:59+08:00","body_html":"","published_at":"2023-05-03T11:41:12+08:00","sort_order":"best-selling","template_suffix":"swaddles-collection","disjunctive":true,"rules":[{"column":"tag","relation":"equals","condition":"Breastfeeding Clothing"},{"column":"tag","relation":"equals","condition":"Support Clothing"}],"published_scope":"global","image":{"created_at":"2024-05-06T11:59:52+08:00","alt":"Clothing - The Birth Store","width":676,"height":581,"src":"\/\/www.thebirthstore.com.au\/cdn\/shop\/collections\/clothing-483293.jpg?v=1714967992"}},{"id":326572048573,"handle":"maternity-clothing","title":"Maternity Clothing","updated_at":"2026-07-30T19:07:59+08:00","body_html":"","published_at":"2025-10-31T12:50:20+08:00","sort_order":"best-selling","template_suffix":"","disjunctive":false,"rules":[{"column":"tag","relation":"equals","condition":"Maternity Clothing"}],"published_scope":"global","image":{"created_at":"2025-11-20T21:34:30+08:00","alt":"Maternity Clothing - The Birth Store","width":1920,"height":1281,"src":"\/\/www.thebirthstore.com.au\/cdn\/shop\/collections\/maternity-clothing-6954274.webp?v=1763645670"}},{"id":281712591037,"handle":"pain-relief","title":"Pain Relief","updated_at":"2026-07-30T19:07:59+08:00","body_html":"","published_at":"2021-12-20T14:22:45+08:00","sort_order":"best-selling","template_suffix":"pain-relief-collection","disjunctive":false,"rules":[{"column":"tag","relation":"equals","condition":"Pain Relief"}],"published_scope":"global","image":{"created_at":"2024-05-06T12:00:27+08:00","alt":"Pain Relief - The Birth Store","width":1365,"height":2048,"src":"\/\/www.thebirthstore.com.au\/cdn\/shop\/collections\/pain-relief-878865.jpg?v=1714968027"}},{"id":281712689341,"handle":"pelvic-floor-health","title":"Pelvic Floor Health","updated_at":"2026-07-30T19:07:59+08:00","body_html":"","published_at":"2021-12-20T14:23:41+08:00","sort_order":"best-selling","template_suffix":"swaddles-collection","disjunctive":false,"rules":[{"column":"tag","relation":"equals","condition":"Pelvic Floor"}],"published_scope":"global","image":{"created_at":"2024-05-06T12:00:29+08:00","alt":"Pelvic Floor Health - The Birth Store","width":536,"height":589,"src":"\/\/www.thebirthstore.com.au\/cdn\/shop\/collections\/pelvic-floor-health-890736.jpg?v=1714968030"}},{"id":261658149053,"handle":"pregnancy-and-maternity-products","title":"Pregnancy","updated_at":"2026-07-30T19:07:59+08:00","body_html":"\u003cp\u003eShop your pregnancy essentials below. Looking for something we don't currently stock? Please reach out and let us know.\u003cbr\u003e\u003c\/p\u003e\n\u003cp\u003e\u003cspan\u003eYou can even buy now and pay later with Afterpay!\u003c\/span\u003e\u003c\/p\u003e","published_at":"2021-03-10T12:34:22+08:00","sort_order":"best-selling","template_suffix":"pregnancy-collection","disjunctive":false,"rules":[{"column":"tag","relation":"equals","condition":"Pregnancy"}],"published_scope":"global","image":{"created_at":"2024-05-06T12:00:40+08:00","alt":"Pregnancy - The Birth Store","width":1024,"height":1536,"src":"\/\/www.thebirthstore.com.au\/cdn\/shop\/collections\/pregnancy-899677.jpg?v=1714968040"}},{"id":291456483517,"handle":"shop-all","title":"Shop All - Mum","updated_at":"2026-07-30T19:07:59+08:00","body_html":"","published_at":"2022-12-23T22:04:39+08:00","sort_order":"best-selling","template_suffix":"shop-all-collection","disjunctive":false,"rules":[{"column":"variant_price","relation":"greater_than","condition":"1"},{"column":"title","relation":"not_contains","condition":"Batteries"},{"column":"tag","relation":"equals","condition":"Mum"}],"published_scope":"global","image":{"created_at":"2024-05-06T12:00:54+08:00","alt":"Shop All - The Birth Store","width":1365,"height":2048,"src":"\/\/www.thebirthstore.com.au\/cdn\/shop\/collections\/shop-all-693176.jpg?v=1714968055"}},{"id":292595433661,"handle":"support-clothing","title":"Support Clothing","updated_at":"2026-07-30T19:07:59+08:00","body_html":"Maternity, breastfeeding, supportive, postpartum clothing and more - we've got it all, or we will have soon! Keep an eye out for new arrivals and grab yourself some incredible must-have staple items.","published_at":"2023-02-20T12:49:47+08:00","sort_order":"best-selling","template_suffix":"swaddles-collection","disjunctive":false,"rules":[{"column":"tag","relation":"equals","condition":"Support Clothing"}],"published_scope":"global","image":{"created_at":"2024-05-06T12:00:59+08:00","alt":"Support Clothing - The Birth Store","width":586,"height":879,"src":"\/\/www.thebirthstore.com.au\/cdn\/shop\/collections\/support-clothing-743676.jpg?v=1714968059"}}]}
{"item":{"id":6929114890429,"title":"SensaTONE Elite Vaginal Probe - Incontinence and Pelvic Floor","handle":"sensatone-elite-vaginal-probe-incontinence-and-pelvic-floor","description":"\u003cp data-mce-fragment=\"1\"\u003eThis is an additional attachment compatible with the Elle TENS Plus and SensaTONE TENS. You must have a machine to use this item, this attachment is for anyone looking to have a spare probe or if you've purchased the machine second hand and need a new attachment.\u003c\/p\u003e\n\u003cp data-mce-fragment=\"1\"\u003eThis attachment is an ultra simple, light, but powerful pelvic floor stimulator. \u003cspan data-mce-fragment=\"1\"\u003eSensaTone Pelvic Floor Stimulator exercises and strengthens pelvic floor muscles, helping to prevent or treat incontinence, whilst also helping to increase sexual sensitivity. \u003c\/span\u003e\u003c\/p\u003e\n\u003cp data-mce-fragment=\"1\"\u003e\u003cspan data-mce-fragment=\"1\"\u003ePelvic floor muscles can become weak as a result of childbirth are just the same as all other muscles in your body. The more you exercise them, the stronger they become. SensaTone Pelvic Floor Stimulator performs pelvic floor exercises for you and effortlessly works out your pelvic floor muscles for optimum strength.\u003c\/span\u003e\u003c\/p\u003e\n\u003cp data-mce-fragment=\"1\"\u003e\u003cspan data-mce-fragment=\"1\"\u003eWomen with strong pelvic floor have greater control over their bladder as well as increased vaginal tone and greater sensation during sexual activity.\u003c\/span\u003e\u003c\/p\u003e\n\u003cp data-mce-fragment=\"1\"\u003e\u003cspan data-mce-fragment=\"1\"\u003eIf you are planning to use this with any other machine, please check with the manufacturer of the machine. Both the SensaTONE and Elle TENS Plus have a specific setting designed for your pelvic floor, general TENS Machines may not be suitable.\u003c\/span\u003e\u003c\/p\u003e\n\u003cp data-mce-fragment=\"1\"\u003e\u003cstrong\u003eYou can even buy now and pay later with Afterpay!\u003c\/strong\u003e\u003c\/p\u003e","published_at":"2021-09-06T08:26:54+08:00","created_at":"2021-08-27T00:29:03+08:00","vendor":"Babycare TENS","type":"","tags":["GST FREE","Mum","Pelvic Floor","Post-Partum"],"price":2500,"price_min":2500,"price_max":2500,"available":true,"price_varies":false,"compare_at_price":4000,"compare_at_price_min":4000,"compare_at_price_max":4000,"compare_at_price_varies":false,"variants":[{"id":40544714621117,"title":"Default Title","option1":"Default Title","option2":null,"option3":null,"sku":"","requires_shipping":true,"taxable":false,"featured_image":null,"available":true,"name":"SensaTONE Elite Vaginal Probe - Incontinence and Pelvic Floor","public_title":null,"options":["Default Title"],"price":2500,"weight":31,"compare_at_price":4000,"inventory_management":"shopify","barcode":"14621117","requires_selling_plan":false,"selling_plan_allocations":[],"quantity_rule":{"min":1,"max":null,"increment":1}}],"images":["\/\/www.thebirthstore.com.au\/cdn\/shop\/files\/sensatone-elite-vaginal-probe-incontinence-and-pelvic-floor-127942.jpg?v=1714968016"],"featured_image":"\/\/www.thebirthstore.com.au\/cdn\/shop\/files\/sensatone-elite-vaginal-probe-incontinence-and-pelvic-floor-127942.jpg?v=1714968016","options":["Title"],"media":[{"alt":"SensaTONE Elite Vaginal Probe - Incontinence and Pelvic Floor - The Birth Store-Babycare TENS","id":27007597674685,"position":1,"preview_image":{"aspect_ratio":1.0,"height":861,"width":861,"src":"\/\/www.thebirthstore.com.au\/cdn\/shop\/files\/sensatone-elite-vaginal-probe-incontinence-and-pelvic-floor-127942.jpg?v=1714968016"},"aspect_ratio":1.0,"height":861,"media_type":"image","src":"\/\/www.thebirthstore.com.au\/cdn\/shop\/files\/sensatone-elite-vaginal-probe-incontinence-and-pelvic-floor-127942.jpg?v=1714968016","width":861}],"requires_selling_plan":false,"selling_plan_groups":[],"content":"\u003cp data-mce-fragment=\"1\"\u003eThis is an additional attachment compatible with the Elle TENS Plus and SensaTONE TENS. You must have a machine to use this item, this attachment is for anyone looking to have a spare probe or if you've purchased the machine second hand and need a new attachment.\u003c\/p\u003e\n\u003cp data-mce-fragment=\"1\"\u003eThis attachment is an ultra simple, light, but powerful pelvic floor stimulator. \u003cspan data-mce-fragment=\"1\"\u003eSensaTone Pelvic Floor Stimulator exercises and strengthens pelvic floor muscles, helping to prevent or treat incontinence, whilst also helping to increase sexual sensitivity. \u003c\/span\u003e\u003c\/p\u003e\n\u003cp data-mce-fragment=\"1\"\u003e\u003cspan data-mce-fragment=\"1\"\u003ePelvic floor muscles can become weak as a result of childbirth are just the same as all other muscles in your body. The more you exercise them, the stronger they become. SensaTone Pelvic Floor Stimulator performs pelvic floor exercises for you and effortlessly works out your pelvic floor muscles for optimum strength.\u003c\/span\u003e\u003c\/p\u003e\n\u003cp data-mce-fragment=\"1\"\u003e\u003cspan data-mce-fragment=\"1\"\u003eWomen with strong pelvic floor have greater control over their bladder as well as increased vaginal tone and greater sensation during sexual activity.\u003c\/span\u003e\u003c\/p\u003e\n\u003cp data-mce-fragment=\"1\"\u003e\u003cspan data-mce-fragment=\"1\"\u003eIf you are planning to use this with any other machine, please check with the manufacturer of the machine. Both the SensaTONE and Elle TENS Plus have a specific setting designed for your pelvic floor, general TENS Machines may not be suitable.\u003c\/span\u003e\u003c\/p\u003e\n\u003cp data-mce-fragment=\"1\"\u003e\u003cstrong\u003eYou can even buy now and pay later with Afterpay!\u003c\/strong\u003e\u003c\/p\u003e"},"options":[{"name":"Title","position":1,"values":["Default Title"]}],"custom_metafields":{},"metafields":{"badge":"\u003cdiv style='display:none' class='jdgm-prev-badge' data-average-rating='0.00' data-number-of-reviews='0' data-number-of-questions='0'\u003e \u003cspan class='jdgm-prev-badge__stars' data-score='0.00' tabindex='0' aria-label='0.00 stars' role='button'\u003e \u003cspan class='jdgm-star jdgm--off'\u003e\u003c\/span\u003e\u003cspan class='jdgm-star jdgm--off'\u003e\u003c\/span\u003e\u003cspan class='jdgm-star jdgm--off'\u003e\u003c\/span\u003e\u003cspan class='jdgm-star jdgm--off'\u003e\u003c\/span\u003e\u003cspan class='jdgm-star jdgm--off'\u003e\u003c\/span\u003e \u003c\/span\u003e \u003cspan class='jdgm-prev-badge__text'\u003e No reviews \u003c\/span\u003e \u003c\/div\u003e","widget":"\u003cdiv class='jdgm-rev-widg' data-updated-at='2025-06-13T16:12:10Z' data-average-rating='0.00' data-number-of-reviews='0' data-number-of-questions='0'\u003e \u003cstyle class='jdgm-temp-hiding-style'\u003e.jdgm-rev-widg{ display: none }\u003c\/style\u003e \u003cdiv class='jdgm-rev-widg__header'\u003e \u003ch2 class='jdgm-rev-widg__title'\u003eCustomer Reviews\u003c\/h2\u003e \u003cdiv class='jdgm-rev-widg__summary'\u003e \u003cdiv class='jdgm-rev-widg__summary-stars' aria-label='Average rating is 0.00 stars' role='img'\u003e \u003cspan class='jdgm-star jdgm--off'\u003e\u003c\/span\u003e\u003cspan class='jdgm-star jdgm--off'\u003e\u003c\/span\u003e\u003cspan class='jdgm-star jdgm--off'\u003e\u003c\/span\u003e\u003cspan class='jdgm-star jdgm--off'\u003e\u003c\/span\u003e\u003cspan class='jdgm-star jdgm--off'\u003e\u003c\/span\u003e \u003c\/div\u003e \u003cdiv class='jdgm-rev-widg__summary-text'\u003eBe the first to write a review\u003c\/div\u003e \u003c\/div\u003e \u003ca style='display: none' href='#' class='jdgm-write-rev-link' role='button'\u003eWrite a review\u003c\/a\u003e \u003cdiv class='jdgm-histogram jdgm-temp-hidden'\u003e \u003cdiv class='jdgm-histogram__row' data-rating='5' data-frequency='0' data-percentage='0'\u003e \u003cdiv class='jdgm-histogram__star' role='button' aria-label=\"0% (0) reviews with 5 star rating\" tabindex='0' \u003e\u003cspan class='jdgm-star jdgm--on'\u003e\u003c\/span\u003e\u003cspan class='jdgm-star jdgm--on'\u003e\u003c\/span\u003e\u003cspan class='jdgm-star jdgm--on'\u003e\u003c\/span\u003e\u003cspan class='jdgm-star jdgm--on'\u003e\u003c\/span\u003e\u003cspan class='jdgm-star jdgm--on'\u003e\u003c\/span\u003e\u003c\/div\u003e \u003cdiv class='jdgm-histogram__bar'\u003e \u003cdiv class='jdgm-histogram__bar-content' style='width: 0%;'\u003e \u003c\/div\u003e \u003c\/div\u003e \u003cdiv class='jdgm-histogram__percentage'\u003e0%\u003c\/div\u003e \u003cdiv class='jdgm-histogram__frequency'\u003e(0)\u003c\/div\u003e \u003c\/div\u003e \u003cdiv class='jdgm-histogram__row' data-rating='4' data-frequency='0' data-percentage='0'\u003e \u003cdiv class='jdgm-histogram__star' role='button' aria-label=\"0% (0) reviews with 4 star rating\" tabindex='0' \u003e\u003cspan class='jdgm-star jdgm--on'\u003e\u003c\/span\u003e\u003cspan class='jdgm-star jdgm--on'\u003e\u003c\/span\u003e\u003cspan class='jdgm-star jdgm--on'\u003e\u003c\/span\u003e\u003cspan class='jdgm-star jdgm--on'\u003e\u003c\/span\u003e\u003cspan class='jdgm-star jdgm--off'\u003e\u003c\/span\u003e\u003c\/div\u003e \u003cdiv class='jdgm-histogram__bar'\u003e \u003cdiv class='jdgm-histogram__bar-content' style='width: 0%;'\u003e \u003c\/div\u003e \u003c\/div\u003e \u003cdiv class='jdgm-histogram__percentage'\u003e0%\u003c\/div\u003e \u003cdiv class='jdgm-histogram__frequency'\u003e(0)\u003c\/div\u003e \u003c\/div\u003e \u003cdiv class='jdgm-histogram__row' data-rating='3' data-frequency='0' data-percentage='0'\u003e \u003cdiv class='jdgm-histogram__star' role='button' aria-label=\"0% (0) reviews with 3 star rating\" tabindex='0' \u003e\u003cspan class='jdgm-star jdgm--on'\u003e\u003c\/span\u003e\u003cspan class='jdgm-star jdgm--on'\u003e\u003c\/span\u003e\u003cspan class='jdgm-star jdgm--on'\u003e\u003c\/span\u003e\u003cspan class='jdgm-star jdgm--off'\u003e\u003c\/span\u003e\u003cspan class='jdgm-star jdgm--off'\u003e\u003c\/span\u003e\u003c\/div\u003e \u003cdiv class='jdgm-histogram__bar'\u003e \u003cdiv class='jdgm-histogram__bar-content' style='width: 0%;'\u003e \u003c\/div\u003e \u003c\/div\u003e \u003cdiv class='jdgm-histogram__percentage'\u003e0%\u003c\/div\u003e \u003cdiv class='jdgm-histogram__frequency'\u003e(0)\u003c\/div\u003e \u003c\/div\u003e \u003cdiv class='jdgm-histogram__row' data-rating='2' data-frequency='0' data-percentage='0'\u003e \u003cdiv class='jdgm-histogram__star' role='button' aria-label=\"0% (0) reviews with 2 star rating\" tabindex='0' \u003e\u003cspan class='jdgm-star jdgm--on'\u003e\u003c\/span\u003e\u003cspan class='jdgm-star jdgm--on'\u003e\u003c\/span\u003e\u003cspan class='jdgm-star jdgm--off'\u003e\u003c\/span\u003e\u003cspan class='jdgm-star jdgm--off'\u003e\u003c\/span\u003e\u003cspan class='jdgm-star jdgm--off'\u003e\u003c\/span\u003e\u003c\/div\u003e \u003cdiv class='jdgm-histogram__bar'\u003e \u003cdiv class='jdgm-histogram__bar-content' style='width: 0%;'\u003e \u003c\/div\u003e \u003c\/div\u003e \u003cdiv class='jdgm-histogram__percentage'\u003e0%\u003c\/div\u003e \u003cdiv class='jdgm-histogram__frequency'\u003e(0)\u003c\/div\u003e \u003c\/div\u003e \u003cdiv class='jdgm-histogram__row' data-rating='1' data-frequency='0' data-percentage='0'\u003e \u003cdiv class='jdgm-histogram__star' role='button' aria-label=\"0% (0) reviews with 1 star rating\" tabindex='0' \u003e\u003cspan class='jdgm-star jdgm--on'\u003e\u003c\/span\u003e\u003cspan class='jdgm-star jdgm--off'\u003e\u003c\/span\u003e\u003cspan class='jdgm-star jdgm--off'\u003e\u003c\/span\u003e\u003cspan class='jdgm-star jdgm--off'\u003e\u003c\/span\u003e\u003cspan class='jdgm-star jdgm--off'\u003e\u003c\/span\u003e\u003c\/div\u003e \u003cdiv class='jdgm-histogram__bar'\u003e \u003cdiv class='jdgm-histogram__bar-content' style='width: 0%;'\u003e \u003c\/div\u003e \u003c\/div\u003e \u003cdiv class='jdgm-histogram__percentage'\u003e0%\u003c\/div\u003e \u003cdiv class='jdgm-histogram__frequency'\u003e(0)\u003c\/div\u003e \u003c\/div\u003e \u003cdiv class='jdgm-histogram__row jdgm-histogram__clear-filter' data-rating=null tabindex='0'\u003e\u003c\/div\u003e \u003c\/div\u003e \u003cdiv class='jdgm-rev-widg__sort-wrapper'\u003e\u003c\/div\u003e \u003c\/div\u003e \u003cdiv class='jdgm-rev-widg__body'\u003e \u003cdiv class='jdgm-rev-widg__reviews'\u003e\u003c\/div\u003e \u003cdiv class='jdgm-paginate' data-per-page='10' data-url='https:\/\/api.judge.me\/reviews\/reviews_for_widget' style=\"display: none;\"\u003e\u003c\/div\u003e \u003c\/div\u003e \u003cdiv class='jdgm-rev-widg__paginate-spinner-wrapper'\u003e \u003cdiv class='jdgm-spinner'\u003e\u003c\/div\u003e \u003c\/div\u003e \u003c\/div\u003e"},"default_reviews_metafields":{},"collections":[{"id":261657460925,"handle":"buy","title":"Buy","updated_at":"2026-07-30T19:07:59+08:00","body_html":"\u003cp\u003eBrowse all of our pregnancy, labour \u0026amp; birth, postpartum and baby essentials here.\u003cbr\u003e\u003c\/p\u003e\n\u003cp\u003e\u003cspan\u003eYou can even buy now and pay later with Afterpay!\u003c\/span\u003e\u003c\/p\u003e","published_at":"2021-03-10T12:05:31+08:00","sort_order":"best-selling","template_suffix":"shop-all-collection","disjunctive":false,"rules":[{"column":"title","relation":"not_contains","condition":"Hire"}],"published_scope":"global","image":{"created_at":"2024-05-06T11:59:42+08:00","alt":"Buy - The Birth Store","width":2048,"height":2048,"src":"\/\/www.thebirthstore.com.au\/cdn\/shop\/collections\/buy-964856.jpg?v=1714967982"}},{"id":281712689341,"handle":"pelvic-floor-health","title":"Pelvic Floor Health","updated_at":"2026-07-30T19:07:59+08:00","body_html":"","published_at":"2021-12-20T14:23:41+08:00","sort_order":"best-selling","template_suffix":"swaddles-collection","disjunctive":false,"rules":[{"column":"tag","relation":"equals","condition":"Pelvic Floor"}],"published_scope":"global","image":{"created_at":"2024-05-06T12:00:29+08:00","alt":"Pelvic Floor Health - The Birth Store","width":536,"height":589,"src":"\/\/www.thebirthstore.com.au\/cdn\/shop\/collections\/pelvic-floor-health-890736.jpg?v=1714968030"}},{"id":261658083517,"handle":"post-partum","title":"Postpartum","updated_at":"2026-07-30T19:07:59+08:00","body_html":"\u003cp\u003eShop your postpartum and hospital bag essentials below. Looking for something we don't currently stock? Please reach out and let us know.\u003cbr\u003e\u003c\/p\u003e\n\u003cp\u003e\u003cspan\u003eYou can even buy now and pay later with Afterpay!\u003c\/span\u003e\u003c\/p\u003e","published_at":"2021-03-10T12:33:47+08:00","sort_order":"best-selling","template_suffix":"postpartum-collection","disjunctive":false,"rules":[{"column":"tag","relation":"equals","condition":"Post-Partum"}],"published_scope":"global","image":{"created_at":"2024-05-06T12:00:36+08:00","alt":"Postpartum - The Birth Store","width":611,"height":702,"src":"\/\/www.thebirthstore.com.au\/cdn\/shop\/collections\/postpartum-150119.jpg?v=1714968037"}},{"id":291456483517,"handle":"shop-all","title":"Shop All - Mum","updated_at":"2026-07-30T19:07:59+08:00","body_html":"","published_at":"2022-12-23T22:04:39+08:00","sort_order":"best-selling","template_suffix":"shop-all-collection","disjunctive":false,"rules":[{"column":"variant_price","relation":"greater_than","condition":"1"},{"column":"title","relation":"not_contains","condition":"Batteries"},{"column":"tag","relation":"equals","condition":"Mum"}],"published_scope":"global","image":{"created_at":"2024-05-06T12:00:54+08:00","alt":"Shop All - The Birth Store","width":1365,"height":2048,"src":"\/\/www.thebirthstore.com.au\/cdn\/shop\/collections\/shop-all-693176.jpg?v=1714968055"}}]}
{"item":{"id":7439743746237,"title":"SRC Recovery Shorts","handle":"src-recovery-shorts","description":"\u003cmeta charset=\"utf-8\"\u003e\u003cspan data-mce-fragment=\"1\"\u003eThis product is stocked at a 3\u003c\/span\u003e\u003csup data-mce-fragment=\"1\"\u003erd\u003c\/sup\u003e\u003cspan data-mce-fragment=\"1\"\u003e party warehouse, if ordering with other products you’ll receive two packages. This product will have a turn around time of 10 days if pickup is selected on checkout. Any questions, please contact us \u003ca href=\"https:\/\/www.thebirthstore.com.au\/pages\/contact-us\" title=\"Contact Us\" data-mce-fragment=\"1\" target=\"_blank\" data-mce-href=\"https:\/\/www.thebirthstore.com.au\/pages\/contact-us\"\u003ehere\u003c\/a\u003e.\u003c\/span\u003e\u003cbr\u003e","published_at":"2023-03-13T14:12:40+08:00","created_at":"2023-02-13T22:37:10+08:00","vendor":"SRC Health","type":"Recovery Shorts","tags":["Hospital Bag","Mum","Pain Relief","Pelvic Floor","Post-Partum","Support Clothing"],"price":18900,"price_min":18900,"price_max":18900,"available":true,"price_varies":false,"compare_at_price":18900,"compare_at_price_min":18900,"compare_at_price_max":18900,"compare_at_price_varies":false,"variants":[{"id":42658960867517,"title":"XXS \/ Champagne","option1":"XXS","option2":"Champagne","option3":null,"sku":null,"requires_shipping":true,"taxable":false,"featured_image":{"id":34641031921853,"product_id":7439743746237,"position":2,"created_at":"2024-05-06T12:00:50+08:00","updated_at":"2024-05-06T12:00:50+08:00","alt":"SRC Recovery Shorts - The Birth Store-SRC Health","width":1080,"height":1080,"src":"\/\/www.thebirthstore.com.au\/cdn\/shop\/files\/src-recovery-shorts-677358.jpg?v=1714968050","variant_ids":[42658960867517,42658960933053,42658960998589,42658961064125,42658961129661,42658961195197,42658961260733]},"available":true,"name":"SRC Recovery Shorts - XXS \/ Champagne","public_title":"XXS \/ Champagne","options":["XXS","Champagne"],"price":18900,"weight":0,"compare_at_price":18900,"inventory_management":null,"barcode":"60867517","featured_media":{"alt":"SRC Recovery Shorts - The Birth Store-SRC Health","id":27007600951485,"position":2,"preview_image":{"aspect_ratio":1.0,"height":1080,"width":1080,"src":"\/\/www.thebirthstore.com.au\/cdn\/shop\/files\/src-recovery-shorts-677358.jpg?v=1714968050"}},"requires_selling_plan":false,"selling_plan_allocations":[],"quantity_rule":{"min":1,"max":null,"increment":1}},{"id":42658960900285,"title":"XXS \/ Black","option1":"XXS","option2":"Black","option3":null,"sku":null,"requires_shipping":true,"taxable":false,"featured_image":{"id":34641031889085,"product_id":7439743746237,"position":1,"created_at":"2024-05-06T12:00:50+08:00","updated_at":"2024-05-06T12:00:50+08:00","alt":"SRC Recovery Shorts - The Birth Store-SRC Health","width":1080,"height":1080,"src":"\/\/www.thebirthstore.com.au\/cdn\/shop\/files\/src-recovery-shorts-666702.jpg?v=1714968050","variant_ids":[42658960900285,42658960965821,42658961031357,42658961096893,42658961162429,42658961227965,42658961293501]},"available":true,"name":"SRC Recovery Shorts - XXS \/ Black","public_title":"XXS \/ Black","options":["XXS","Black"],"price":18900,"weight":0,"compare_at_price":18900,"inventory_management":null,"barcode":"60900285","featured_media":{"alt":"SRC Recovery Shorts - The Birth Store-SRC Health","id":27007600918717,"position":1,"preview_image":{"aspect_ratio":1.0,"height":1080,"width":1080,"src":"\/\/www.thebirthstore.com.au\/cdn\/shop\/files\/src-recovery-shorts-666702.jpg?v=1714968050"}},"requires_selling_plan":false,"selling_plan_allocations":[],"quantity_rule":{"min":1,"max":null,"increment":1}},{"id":42658960933053,"title":"XS \/ Champagne","option1":"XS","option2":"Champagne","option3":null,"sku":null,"requires_shipping":true,"taxable":false,"featured_image":{"id":34641031921853,"product_id":7439743746237,"position":2,"created_at":"2024-05-06T12:00:50+08:00","updated_at":"2024-05-06T12:00:50+08:00","alt":"SRC Recovery Shorts - The Birth Store-SRC Health","width":1080,"height":1080,"src":"\/\/www.thebirthstore.com.au\/cdn\/shop\/files\/src-recovery-shorts-677358.jpg?v=1714968050","variant_ids":[42658960867517,42658960933053,42658960998589,42658961064125,42658961129661,42658961195197,42658961260733]},"available":true,"name":"SRC Recovery Shorts - XS \/ Champagne","public_title":"XS \/ Champagne","options":["XS","Champagne"],"price":18900,"weight":0,"compare_at_price":18900,"inventory_management":null,"barcode":"60933053","featured_media":{"alt":"SRC Recovery Shorts - The Birth Store-SRC Health","id":27007600951485,"position":2,"preview_image":{"aspect_ratio":1.0,"height":1080,"width":1080,"src":"\/\/www.thebirthstore.com.au\/cdn\/shop\/files\/src-recovery-shorts-677358.jpg?v=1714968050"}},"requires_selling_plan":false,"selling_plan_allocations":[],"quantity_rule":{"min":1,"max":null,"increment":1}},{"id":42658960965821,"title":"XS \/ Black","option1":"XS","option2":"Black","option3":null,"sku":null,"requires_shipping":true,"taxable":false,"featured_image":{"id":34641031889085,"product_id":7439743746237,"position":1,"created_at":"2024-05-06T12:00:50+08:00","updated_at":"2024-05-06T12:00:50+08:00","alt":"SRC Recovery Shorts - The Birth Store-SRC Health","width":1080,"height":1080,"src":"\/\/www.thebirthstore.com.au\/cdn\/shop\/files\/src-recovery-shorts-666702.jpg?v=1714968050","variant_ids":[42658960900285,42658960965821,42658961031357,42658961096893,42658961162429,42658961227965,42658961293501]},"available":true,"name":"SRC Recovery Shorts - XS \/ Black","public_title":"XS \/ Black","options":["XS","Black"],"price":18900,"weight":0,"compare_at_price":18900,"inventory_management":null,"barcode":"60965821","featured_media":{"alt":"SRC Recovery Shorts - The Birth Store-SRC Health","id":27007600918717,"position":1,"preview_image":{"aspect_ratio":1.0,"height":1080,"width":1080,"src":"\/\/www.thebirthstore.com.au\/cdn\/shop\/files\/src-recovery-shorts-666702.jpg?v=1714968050"}},"requires_selling_plan":false,"selling_plan_allocations":[],"quantity_rule":{"min":1,"max":null,"increment":1}},{"id":42658960998589,"title":"S \/ Champagne","option1":"S","option2":"Champagne","option3":null,"sku":null,"requires_shipping":true,"taxable":false,"featured_image":{"id":34641031921853,"product_id":7439743746237,"position":2,"created_at":"2024-05-06T12:00:50+08:00","updated_at":"2024-05-06T12:00:50+08:00","alt":"SRC Recovery Shorts - The Birth Store-SRC Health","width":1080,"height":1080,"src":"\/\/www.thebirthstore.com.au\/cdn\/shop\/files\/src-recovery-shorts-677358.jpg?v=1714968050","variant_ids":[42658960867517,42658960933053,42658960998589,42658961064125,42658961129661,42658961195197,42658961260733]},"available":true,"name":"SRC Recovery Shorts - S \/ Champagne","public_title":"S \/ Champagne","options":["S","Champagne"],"price":18900,"weight":0,"compare_at_price":18900,"inventory_management":null,"barcode":"60998589","featured_media":{"alt":"SRC Recovery Shorts - The Birth Store-SRC Health","id":27007600951485,"position":2,"preview_image":{"aspect_ratio":1.0,"height":1080,"width":1080,"src":"\/\/www.thebirthstore.com.au\/cdn\/shop\/files\/src-recovery-shorts-677358.jpg?v=1714968050"}},"requires_selling_plan":false,"selling_plan_allocations":[],"quantity_rule":{"min":1,"max":null,"increment":1}},{"id":42658961031357,"title":"S \/ Black","option1":"S","option2":"Black","option3":null,"sku":null,"requires_shipping":true,"taxable":false,"featured_image":{"id":34641031889085,"product_id":7439743746237,"position":1,"created_at":"2024-05-06T12:00:50+08:00","updated_at":"2024-05-06T12:00:50+08:00","alt":"SRC Recovery Shorts - The Birth Store-SRC Health","width":1080,"height":1080,"src":"\/\/www.thebirthstore.com.au\/cdn\/shop\/files\/src-recovery-shorts-666702.jpg?v=1714968050","variant_ids":[42658960900285,42658960965821,42658961031357,42658961096893,42658961162429,42658961227965,42658961293501]},"available":true,"name":"SRC Recovery Shorts - S \/ Black","public_title":"S \/ Black","options":["S","Black"],"price":18900,"weight":0,"compare_at_price":18900,"inventory_management":null,"barcode":"61031357","featured_media":{"alt":"SRC Recovery Shorts - The Birth Store-SRC Health","id":27007600918717,"position":1,"preview_image":{"aspect_ratio":1.0,"height":1080,"width":1080,"src":"\/\/www.thebirthstore.com.au\/cdn\/shop\/files\/src-recovery-shorts-666702.jpg?v=1714968050"}},"requires_selling_plan":false,"selling_plan_allocations":[],"quantity_rule":{"min":1,"max":null,"increment":1}},{"id":42658961064125,"title":"M \/ Champagne","option1":"M","option2":"Champagne","option3":null,"sku":null,"requires_shipping":true,"taxable":false,"featured_image":{"id":34641031921853,"product_id":7439743746237,"position":2,"created_at":"2024-05-06T12:00:50+08:00","updated_at":"2024-05-06T12:00:50+08:00","alt":"SRC Recovery Shorts - The Birth Store-SRC Health","width":1080,"height":1080,"src":"\/\/www.thebirthstore.com.au\/cdn\/shop\/files\/src-recovery-shorts-677358.jpg?v=1714968050","variant_ids":[42658960867517,42658960933053,42658960998589,42658961064125,42658961129661,42658961195197,42658961260733]},"available":true,"name":"SRC Recovery Shorts - M \/ Champagne","public_title":"M \/ Champagne","options":["M","Champagne"],"price":18900,"weight":0,"compare_at_price":18900,"inventory_management":null,"barcode":"61064125","featured_media":{"alt":"SRC Recovery Shorts - The Birth Store-SRC Health","id":27007600951485,"position":2,"preview_image":{"aspect_ratio":1.0,"height":1080,"width":1080,"src":"\/\/www.thebirthstore.com.au\/cdn\/shop\/files\/src-recovery-shorts-677358.jpg?v=1714968050"}},"requires_selling_plan":false,"selling_plan_allocations":[],"quantity_rule":{"min":1,"max":null,"increment":1}},{"id":42658961096893,"title":"M \/ Black","option1":"M","option2":"Black","option3":null,"sku":null,"requires_shipping":true,"taxable":false,"featured_image":{"id":34641031889085,"product_id":7439743746237,"position":1,"created_at":"2024-05-06T12:00:50+08:00","updated_at":"2024-05-06T12:00:50+08:00","alt":"SRC Recovery Shorts - The Birth Store-SRC Health","width":1080,"height":1080,"src":"\/\/www.thebirthstore.com.au\/cdn\/shop\/files\/src-recovery-shorts-666702.jpg?v=1714968050","variant_ids":[42658960900285,42658960965821,42658961031357,42658961096893,42658961162429,42658961227965,42658961293501]},"available":true,"name":"SRC Recovery Shorts - M \/ Black","public_title":"M \/ Black","options":["M","Black"],"price":18900,"weight":0,"compare_at_price":18900,"inventory_management":null,"barcode":"61096893","featured_media":{"alt":"SRC Recovery Shorts - The Birth Store-SRC Health","id":27007600918717,"position":1,"preview_image":{"aspect_ratio":1.0,"height":1080,"width":1080,"src":"\/\/www.thebirthstore.com.au\/cdn\/shop\/files\/src-recovery-shorts-666702.jpg?v=1714968050"}},"requires_selling_plan":false,"selling_plan_allocations":[],"quantity_rule":{"min":1,"max":null,"increment":1}},{"id":42658961129661,"title":"L \/ Champagne","option1":"L","option2":"Champagne","option3":null,"sku":null,"requires_shipping":true,"taxable":false,"featured_image":{"id":34641031921853,"product_id":7439743746237,"position":2,"created_at":"2024-05-06T12:00:50+08:00","updated_at":"2024-05-06T12:00:50+08:00","alt":"SRC Recovery Shorts - The Birth Store-SRC Health","width":1080,"height":1080,"src":"\/\/www.thebirthstore.com.au\/cdn\/shop\/files\/src-recovery-shorts-677358.jpg?v=1714968050","variant_ids":[42658960867517,42658960933053,42658960998589,42658961064125,42658961129661,42658961195197,42658961260733]},"available":true,"name":"SRC Recovery Shorts - L \/ Champagne","public_title":"L \/ Champagne","options":["L","Champagne"],"price":18900,"weight":0,"compare_at_price":18900,"inventory_management":null,"barcode":"61129661","featured_media":{"alt":"SRC Recovery Shorts - The Birth Store-SRC Health","id":27007600951485,"position":2,"preview_image":{"aspect_ratio":1.0,"height":1080,"width":1080,"src":"\/\/www.thebirthstore.com.au\/cdn\/shop\/files\/src-recovery-shorts-677358.jpg?v=1714968050"}},"requires_selling_plan":false,"selling_plan_allocations":[],"quantity_rule":{"min":1,"max":null,"increment":1}},{"id":42658961162429,"title":"L \/ Black","option1":"L","option2":"Black","option3":null,"sku":null,"requires_shipping":true,"taxable":false,"featured_image":{"id":34641031889085,"product_id":7439743746237,"position":1,"created_at":"2024-05-06T12:00:50+08:00","updated_at":"2024-05-06T12:00:50+08:00","alt":"SRC Recovery Shorts - The Birth Store-SRC Health","width":1080,"height":1080,"src":"\/\/www.thebirthstore.com.au\/cdn\/shop\/files\/src-recovery-shorts-666702.jpg?v=1714968050","variant_ids":[42658960900285,42658960965821,42658961031357,42658961096893,42658961162429,42658961227965,42658961293501]},"available":true,"name":"SRC Recovery Shorts - L \/ Black","public_title":"L \/ Black","options":["L","Black"],"price":18900,"weight":0,"compare_at_price":18900,"inventory_management":null,"barcode":"61162429","featured_media":{"alt":"SRC Recovery Shorts - The Birth Store-SRC Health","id":27007600918717,"position":1,"preview_image":{"aspect_ratio":1.0,"height":1080,"width":1080,"src":"\/\/www.thebirthstore.com.au\/cdn\/shop\/files\/src-recovery-shorts-666702.jpg?v=1714968050"}},"requires_selling_plan":false,"selling_plan_allocations":[],"quantity_rule":{"min":1,"max":null,"increment":1}},{"id":42658961195197,"title":"XL \/ Champagne","option1":"XL","option2":"Champagne","option3":null,"sku":null,"requires_shipping":true,"taxable":false,"featured_image":{"id":34641031921853,"product_id":7439743746237,"position":2,"created_at":"2024-05-06T12:00:50+08:00","updated_at":"2024-05-06T12:00:50+08:00","alt":"SRC Recovery Shorts - The Birth Store-SRC Health","width":1080,"height":1080,"src":"\/\/www.thebirthstore.com.au\/cdn\/shop\/files\/src-recovery-shorts-677358.jpg?v=1714968050","variant_ids":[42658960867517,42658960933053,42658960998589,42658961064125,42658961129661,42658961195197,42658961260733]},"available":true,"name":"SRC Recovery Shorts - XL \/ Champagne","public_title":"XL \/ Champagne","options":["XL","Champagne"],"price":18900,"weight":0,"compare_at_price":18900,"inventory_management":null,"barcode":"61195197","featured_media":{"alt":"SRC Recovery Shorts - The Birth Store-SRC Health","id":27007600951485,"position":2,"preview_image":{"aspect_ratio":1.0,"height":1080,"width":1080,"src":"\/\/www.thebirthstore.com.au\/cdn\/shop\/files\/src-recovery-shorts-677358.jpg?v=1714968050"}},"requires_selling_plan":false,"selling_plan_allocations":[],"quantity_rule":{"min":1,"max":null,"increment":1}},{"id":42658961227965,"title":"XL \/ Black","option1":"XL","option2":"Black","option3":null,"sku":null,"requires_shipping":true,"taxable":false,"featured_image":{"id":34641031889085,"product_id":7439743746237,"position":1,"created_at":"2024-05-06T12:00:50+08:00","updated_at":"2024-05-06T12:00:50+08:00","alt":"SRC Recovery Shorts - The Birth Store-SRC Health","width":1080,"height":1080,"src":"\/\/www.thebirthstore.com.au\/cdn\/shop\/files\/src-recovery-shorts-666702.jpg?v=1714968050","variant_ids":[42658960900285,42658960965821,42658961031357,42658961096893,42658961162429,42658961227965,42658961293501]},"available":true,"name":"SRC Recovery Shorts - XL \/ Black","public_title":"XL \/ Black","options":["XL","Black"],"price":18900,"weight":0,"compare_at_price":18900,"inventory_management":null,"barcode":"61227965","featured_media":{"alt":"SRC Recovery Shorts - The Birth Store-SRC Health","id":27007600918717,"position":1,"preview_image":{"aspect_ratio":1.0,"height":1080,"width":1080,"src":"\/\/www.thebirthstore.com.au\/cdn\/shop\/files\/src-recovery-shorts-666702.jpg?v=1714968050"}},"requires_selling_plan":false,"selling_plan_allocations":[],"quantity_rule":{"min":1,"max":null,"increment":1}},{"id":42658961260733,"title":"XXL \/ Champagne","option1":"XXL","option2":"Champagne","option3":null,"sku":null,"requires_shipping":true,"taxable":false,"featured_image":{"id":34641031921853,"product_id":7439743746237,"position":2,"created_at":"2024-05-06T12:00:50+08:00","updated_at":"2024-05-06T12:00:50+08:00","alt":"SRC Recovery Shorts - The Birth Store-SRC Health","width":1080,"height":1080,"src":"\/\/www.thebirthstore.com.au\/cdn\/shop\/files\/src-recovery-shorts-677358.jpg?v=1714968050","variant_ids":[42658960867517,42658960933053,42658960998589,42658961064125,42658961129661,42658961195197,42658961260733]},"available":true,"name":"SRC Recovery Shorts - XXL \/ Champagne","public_title":"XXL \/ Champagne","options":["XXL","Champagne"],"price":18900,"weight":0,"compare_at_price":18900,"inventory_management":null,"barcode":"61260733","featured_media":{"alt":"SRC Recovery Shorts - The Birth Store-SRC Health","id":27007600951485,"position":2,"preview_image":{"aspect_ratio":1.0,"height":1080,"width":1080,"src":"\/\/www.thebirthstore.com.au\/cdn\/shop\/files\/src-recovery-shorts-677358.jpg?v=1714968050"}},"requires_selling_plan":false,"selling_plan_allocations":[],"quantity_rule":{"min":1,"max":null,"increment":1}},{"id":42658961293501,"title":"XXL \/ Black","option1":"XXL","option2":"Black","option3":null,"sku":null,"requires_shipping":true,"taxable":false,"featured_image":{"id":34641031889085,"product_id":7439743746237,"position":1,"created_at":"2024-05-06T12:00:50+08:00","updated_at":"2024-05-06T12:00:50+08:00","alt":"SRC Recovery Shorts - The Birth Store-SRC Health","width":1080,"height":1080,"src":"\/\/www.thebirthstore.com.au\/cdn\/shop\/files\/src-recovery-shorts-666702.jpg?v=1714968050","variant_ids":[42658960900285,42658960965821,42658961031357,42658961096893,42658961162429,42658961227965,42658961293501]},"available":true,"name":"SRC Recovery Shorts - XXL \/ Black","public_title":"XXL \/ Black","options":["XXL","Black"],"price":18900,"weight":0,"compare_at_price":18900,"inventory_management":null,"barcode":"61293501","featured_media":{"alt":"SRC Recovery Shorts - The Birth Store-SRC Health","id":27007600918717,"position":1,"preview_image":{"aspect_ratio":1.0,"height":1080,"width":1080,"src":"\/\/www.thebirthstore.com.au\/cdn\/shop\/files\/src-recovery-shorts-666702.jpg?v=1714968050"}},"requires_selling_plan":false,"selling_plan_allocations":[],"quantity_rule":{"min":1,"max":null,"increment":1}},{"id":45872450994365,"title":"XXXL \/ Black","option1":"XXXL","option2":"Black","option3":null,"sku":null,"requires_shipping":true,"taxable":false,"featured_image":null,"available":true,"name":"SRC Recovery Shorts - XXXL \/ Black","public_title":"XXXL \/ Black","options":["XXXL","Black"],"price":18900,"weight":0,"compare_at_price":18900,"inventory_management":null,"barcode":"50994365","requires_selling_plan":false,"selling_plan_allocations":[],"quantity_rule":{"min":1,"max":null,"increment":1}}],"images":["\/\/www.thebirthstore.com.au\/cdn\/shop\/files\/src-recovery-shorts-666702.jpg?v=1714968050","\/\/www.thebirthstore.com.au\/cdn\/shop\/files\/src-recovery-shorts-677358.jpg?v=1714968050","\/\/www.thebirthstore.com.au\/cdn\/shop\/files\/src-recovery-shorts-808759.jpg?v=1714968050","\/\/www.thebirthstore.com.au\/cdn\/shop\/files\/src-recovery-shorts-592840.jpg?v=1714968050","\/\/www.thebirthstore.com.au\/cdn\/shop\/files\/src-recovery-shorts-496819.jpg?v=1714968050"],"featured_image":"\/\/www.thebirthstore.com.au\/cdn\/shop\/files\/src-recovery-shorts-666702.jpg?v=1714968050","options":["Size","Colour"],"media":[{"alt":"SRC Recovery Shorts - The Birth Store-SRC Health","id":27007600918717,"position":1,"preview_image":{"aspect_ratio":1.0,"height":1080,"width":1080,"src":"\/\/www.thebirthstore.com.au\/cdn\/shop\/files\/src-recovery-shorts-666702.jpg?v=1714968050"},"aspect_ratio":1.0,"height":1080,"media_type":"image","src":"\/\/www.thebirthstore.com.au\/cdn\/shop\/files\/src-recovery-shorts-666702.jpg?v=1714968050","width":1080},{"alt":"SRC Recovery Shorts - The Birth Store-SRC Health","id":27007600951485,"position":2,"preview_image":{"aspect_ratio":1.0,"height":1080,"width":1080,"src":"\/\/www.thebirthstore.com.au\/cdn\/shop\/files\/src-recovery-shorts-677358.jpg?v=1714968050"},"aspect_ratio":1.0,"height":1080,"media_type":"image","src":"\/\/www.thebirthstore.com.au\/cdn\/shop\/files\/src-recovery-shorts-677358.jpg?v=1714968050","width":1080},{"alt":"SRC Recovery Shorts - The Birth Store-SRC Health","id":27007600984253,"position":3,"preview_image":{"aspect_ratio":1.0,"height":1080,"width":1080,"src":"\/\/www.thebirthstore.com.au\/cdn\/shop\/files\/src-recovery-shorts-808759.jpg?v=1714968050"},"aspect_ratio":1.0,"height":1080,"media_type":"image","src":"\/\/www.thebirthstore.com.au\/cdn\/shop\/files\/src-recovery-shorts-808759.jpg?v=1714968050","width":1080},{"alt":"SRC Recovery Shorts - The Birth Store-SRC Health","id":27007601017021,"position":4,"preview_image":{"aspect_ratio":1.0,"height":1080,"width":1080,"src":"\/\/www.thebirthstore.com.au\/cdn\/shop\/files\/src-recovery-shorts-592840.jpg?v=1714968050"},"aspect_ratio":1.0,"height":1080,"media_type":"image","src":"\/\/www.thebirthstore.com.au\/cdn\/shop\/files\/src-recovery-shorts-592840.jpg?v=1714968050","width":1080},{"alt":"SRC Recovery Shorts - The Birth Store-SRC Health","id":27007601049789,"position":5,"preview_image":{"aspect_ratio":1.582,"height":948,"width":1500,"src":"\/\/www.thebirthstore.com.au\/cdn\/shop\/files\/src-recovery-shorts-496819.jpg?v=1714968050"},"aspect_ratio":1.582,"height":948,"media_type":"image","src":"\/\/www.thebirthstore.com.au\/cdn\/shop\/files\/src-recovery-shorts-496819.jpg?v=1714968050","width":1500}],"requires_selling_plan":false,"selling_plan_groups":[],"content":"\u003cmeta charset=\"utf-8\"\u003e\u003cspan data-mce-fragment=\"1\"\u003eThis product is stocked at a 3\u003c\/span\u003e\u003csup data-mce-fragment=\"1\"\u003erd\u003c\/sup\u003e\u003cspan data-mce-fragment=\"1\"\u003e party warehouse, if ordering with other products you’ll receive two packages. This product will have a turn around time of 10 days if pickup is selected on checkout. Any questions, please contact us \u003ca href=\"https:\/\/www.thebirthstore.com.au\/pages\/contact-us\" title=\"Contact Us\" data-mce-fragment=\"1\" target=\"_blank\" data-mce-href=\"https:\/\/www.thebirthstore.com.au\/pages\/contact-us\"\u003ehere\u003c\/a\u003e.\u003c\/span\u003e\u003cbr\u003e"},"options":[{"name":"Size","position":1,"values":["XXS","XS","S","M","L","XL","XXL","XXXL"]},{"name":"Colour","position":2,"values":["Champagne","Black"]}],"custom_metafields":{},"metafields":{"badge":"\u003cdiv style='display:none' class='jdgm-prev-badge' data-average-rating='0.00' data-number-of-reviews='0' data-number-of-questions='0'\u003e \u003cspan class='jdgm-prev-badge__stars' data-score='0.00' tabindex='0' aria-label='0.00 stars' role='button'\u003e \u003cspan class='jdgm-star jdgm--off'\u003e\u003c\/span\u003e\u003cspan class='jdgm-star jdgm--off'\u003e\u003c\/span\u003e\u003cspan class='jdgm-star jdgm--off'\u003e\u003c\/span\u003e\u003cspan class='jdgm-star jdgm--off'\u003e\u003c\/span\u003e\u003cspan class='jdgm-star jdgm--off'\u003e\u003c\/span\u003e \u003c\/span\u003e \u003cspan class='jdgm-prev-badge__text'\u003e No reviews \u003c\/span\u003e \u003c\/div\u003e","widget":"\u003cdiv class='jdgm-rev-widg' data-updated-at='2025-06-13T16:12:10Z' data-average-rating='0.00' data-number-of-reviews='0' data-number-of-questions='0'\u003e \u003cstyle class='jdgm-temp-hiding-style'\u003e.jdgm-rev-widg{ display: none }\u003c\/style\u003e \u003cdiv class='jdgm-rev-widg__header'\u003e \u003ch2 class='jdgm-rev-widg__title'\u003eCustomer Reviews\u003c\/h2\u003e \u003cdiv class='jdgm-rev-widg__summary'\u003e \u003cdiv class='jdgm-rev-widg__summary-stars' aria-label='Average rating is 0.00 stars' role='img'\u003e \u003cspan class='jdgm-star jdgm--off'\u003e\u003c\/span\u003e\u003cspan class='jdgm-star jdgm--off'\u003e\u003c\/span\u003e\u003cspan class='jdgm-star jdgm--off'\u003e\u003c\/span\u003e\u003cspan class='jdgm-star jdgm--off'\u003e\u003c\/span\u003e\u003cspan class='jdgm-star jdgm--off'\u003e\u003c\/span\u003e \u003c\/div\u003e \u003cdiv class='jdgm-rev-widg__summary-text'\u003eBe the first to write a review\u003c\/div\u003e \u003c\/div\u003e \u003ca style='display: none' href='#' class='jdgm-write-rev-link' role='button'\u003eWrite a review\u003c\/a\u003e \u003cdiv class='jdgm-histogram jdgm-temp-hidden'\u003e \u003cdiv class='jdgm-histogram__row' data-rating='5' data-frequency='0' data-percentage='0'\u003e \u003cdiv class='jdgm-histogram__star' role='button' aria-label=\"0% (0) reviews with 5 star rating\" tabindex='0' \u003e\u003cspan class='jdgm-star jdgm--on'\u003e\u003c\/span\u003e\u003cspan class='jdgm-star jdgm--on'\u003e\u003c\/span\u003e\u003cspan class='jdgm-star jdgm--on'\u003e\u003c\/span\u003e\u003cspan class='jdgm-star jdgm--on'\u003e\u003c\/span\u003e\u003cspan class='jdgm-star jdgm--on'\u003e\u003c\/span\u003e\u003c\/div\u003e \u003cdiv class='jdgm-histogram__bar'\u003e \u003cdiv class='jdgm-histogram__bar-content' style='width: 0%;'\u003e \u003c\/div\u003e \u003c\/div\u003e \u003cdiv class='jdgm-histogram__percentage'\u003e0%\u003c\/div\u003e \u003cdiv class='jdgm-histogram__frequency'\u003e(0)\u003c\/div\u003e \u003c\/div\u003e \u003cdiv class='jdgm-histogram__row' data-rating='4' data-frequency='0' data-percentage='0'\u003e \u003cdiv class='jdgm-histogram__star' role='button' aria-label=\"0% (0) reviews with 4 star rating\" tabindex='0' \u003e\u003cspan class='jdgm-star jdgm--on'\u003e\u003c\/span\u003e\u003cspan class='jdgm-star jdgm--on'\u003e\u003c\/span\u003e\u003cspan class='jdgm-star jdgm--on'\u003e\u003c\/span\u003e\u003cspan class='jdgm-star jdgm--on'\u003e\u003c\/span\u003e\u003cspan class='jdgm-star jdgm--off'\u003e\u003c\/span\u003e\u003c\/div\u003e \u003cdiv class='jdgm-histogram__bar'\u003e \u003cdiv class='jdgm-histogram__bar-content' style='width: 0%;'\u003e \u003c\/div\u003e \u003c\/div\u003e \u003cdiv class='jdgm-histogram__percentage'\u003e0%\u003c\/div\u003e \u003cdiv class='jdgm-histogram__frequency'\u003e(0)\u003c\/div\u003e \u003c\/div\u003e \u003cdiv class='jdgm-histogram__row' data-rating='3' data-frequency='0' data-percentage='0'\u003e \u003cdiv class='jdgm-histogram__star' role='button' aria-label=\"0% (0) reviews with 3 star rating\" tabindex='0' \u003e\u003cspan class='jdgm-star jdgm--on'\u003e\u003c\/span\u003e\u003cspan class='jdgm-star jdgm--on'\u003e\u003c\/span\u003e\u003cspan class='jdgm-star jdgm--on'\u003e\u003c\/span\u003e\u003cspan class='jdgm-star jdgm--off'\u003e\u003c\/span\u003e\u003cspan class='jdgm-star jdgm--off'\u003e\u003c\/span\u003e\u003c\/div\u003e \u003cdiv class='jdgm-histogram__bar'\u003e \u003cdiv class='jdgm-histogram__bar-content' style='width: 0%;'\u003e \u003c\/div\u003e \u003c\/div\u003e \u003cdiv class='jdgm-histogram__percentage'\u003e0%\u003c\/div\u003e \u003cdiv class='jdgm-histogram__frequency'\u003e(0)\u003c\/div\u003e \u003c\/div\u003e \u003cdiv class='jdgm-histogram__row' data-rating='2' data-frequency='0' data-percentage='0'\u003e \u003cdiv class='jdgm-histogram__star' role='button' aria-label=\"0% (0) reviews with 2 star rating\" tabindex='0' \u003e\u003cspan class='jdgm-star jdgm--on'\u003e\u003c\/span\u003e\u003cspan class='jdgm-star jdgm--on'\u003e\u003c\/span\u003e\u003cspan class='jdgm-star jdgm--off'\u003e\u003c\/span\u003e\u003cspan class='jdgm-star jdgm--off'\u003e\u003c\/span\u003e\u003cspan class='jdgm-star jdgm--off'\u003e\u003c\/span\u003e\u003c\/div\u003e \u003cdiv class='jdgm-histogram__bar'\u003e \u003cdiv class='jdgm-histogram__bar-content' style='width: 0%;'\u003e \u003c\/div\u003e \u003c\/div\u003e \u003cdiv class='jdgm-histogram__percentage'\u003e0%\u003c\/div\u003e \u003cdiv class='jdgm-histogram__frequency'\u003e(0)\u003c\/div\u003e \u003c\/div\u003e \u003cdiv class='jdgm-histogram__row' data-rating='1' data-frequency='0' data-percentage='0'\u003e \u003cdiv class='jdgm-histogram__star' role='button' aria-label=\"0% (0) reviews with 1 star rating\" tabindex='0' \u003e\u003cspan class='jdgm-star jdgm--on'\u003e\u003c\/span\u003e\u003cspan class='jdgm-star jdgm--off'\u003e\u003c\/span\u003e\u003cspan class='jdgm-star jdgm--off'\u003e\u003c\/span\u003e\u003cspan class='jdgm-star jdgm--off'\u003e\u003c\/span\u003e\u003cspan class='jdgm-star jdgm--off'\u003e\u003c\/span\u003e\u003c\/div\u003e \u003cdiv class='jdgm-histogram__bar'\u003e \u003cdiv class='jdgm-histogram__bar-content' style='width: 0%;'\u003e \u003c\/div\u003e \u003c\/div\u003e \u003cdiv class='jdgm-histogram__percentage'\u003e0%\u003c\/div\u003e \u003cdiv class='jdgm-histogram__frequency'\u003e(0)\u003c\/div\u003e \u003c\/div\u003e \u003cdiv class='jdgm-histogram__row jdgm-histogram__clear-filter' data-rating=null tabindex='0'\u003e\u003c\/div\u003e \u003c\/div\u003e \u003cdiv class='jdgm-rev-widg__sort-wrapper'\u003e\u003c\/div\u003e \u003c\/div\u003e \u003cdiv class='jdgm-rev-widg__body'\u003e \u003cdiv class='jdgm-rev-widg__reviews'\u003e\u003c\/div\u003e \u003cdiv class='jdgm-paginate' data-per-page='10' data-url='https:\/\/api.judge.me\/reviews\/reviews_for_widget' style=\"display: none;\"\u003e\u003c\/div\u003e \u003c\/div\u003e \u003cdiv class='jdgm-rev-widg__paginate-spinner-wrapper'\u003e \u003cdiv class='jdgm-spinner'\u003e\u003c\/div\u003e \u003c\/div\u003e \u003c\/div\u003e"},"default_reviews_metafields":{},"collections":[{"id":261657460925,"handle":"buy","title":"Buy","updated_at":"2026-07-30T19:07:59+08:00","body_html":"\u003cp\u003eBrowse all of our pregnancy, labour \u0026amp; birth, postpartum and baby essentials here.\u003cbr\u003e\u003c\/p\u003e\n\u003cp\u003e\u003cspan\u003eYou can even buy now and pay later with Afterpay!\u003c\/span\u003e\u003c\/p\u003e","published_at":"2021-03-10T12:05:31+08:00","sort_order":"best-selling","template_suffix":"shop-all-collection","disjunctive":false,"rules":[{"column":"title","relation":"not_contains","condition":"Hire"}],"published_scope":"global","image":{"created_at":"2024-05-06T11:59:42+08:00","alt":"Buy - The Birth Store","width":2048,"height":2048,"src":"\/\/www.thebirthstore.com.au\/cdn\/shop\/collections\/buy-964856.jpg?v=1714967982"}},{"id":293309022397,"handle":"clothing","title":"Clothing","updated_at":"2026-07-30T19:07:59+08:00","body_html":"","published_at":"2023-05-03T11:41:12+08:00","sort_order":"best-selling","template_suffix":"swaddles-collection","disjunctive":true,"rules":[{"column":"tag","relation":"equals","condition":"Breastfeeding Clothing"},{"column":"tag","relation":"equals","condition":"Support Clothing"}],"published_scope":"global","image":{"created_at":"2024-05-06T11:59:52+08:00","alt":"Clothing - The Birth Store","width":676,"height":581,"src":"\/\/www.thebirthstore.com.au\/cdn\/shop\/collections\/clothing-483293.jpg?v=1714967992"}},{"id":337429201085,"handle":"hospital-bag","title":"Hospital Bag","updated_at":"2026-07-30T19:07:59+08:00","body_html":"","published_at":"2026-06-03T11:36:29+08:00","sort_order":"most-relevant","template_suffix":"","disjunctive":false,"rules":[{"column":"tag","relation":"equals","condition":"Hospital Bag"}],"published_scope":"global"},{"id":281712591037,"handle":"pain-relief","title":"Pain Relief","updated_at":"2026-07-30T19:07:59+08:00","body_html":"","published_at":"2021-12-20T14:22:45+08:00","sort_order":"best-selling","template_suffix":"pain-relief-collection","disjunctive":false,"rules":[{"column":"tag","relation":"equals","condition":"Pain Relief"}],"published_scope":"global","image":{"created_at":"2024-05-06T12:00:27+08:00","alt":"Pain Relief - The Birth Store","width":1365,"height":2048,"src":"\/\/www.thebirthstore.com.au\/cdn\/shop\/collections\/pain-relief-878865.jpg?v=1714968027"}},{"id":281712689341,"handle":"pelvic-floor-health","title":"Pelvic Floor Health","updated_at":"2026-07-30T19:07:59+08:00","body_html":"","published_at":"2021-12-20T14:23:41+08:00","sort_order":"best-selling","template_suffix":"swaddles-collection","disjunctive":false,"rules":[{"column":"tag","relation":"equals","condition":"Pelvic Floor"}],"published_scope":"global","image":{"created_at":"2024-05-06T12:00:29+08:00","alt":"Pelvic Floor Health - The Birth Store","width":536,"height":589,"src":"\/\/www.thebirthstore.com.au\/cdn\/shop\/collections\/pelvic-floor-health-890736.jpg?v=1714968030"}},{"id":261658083517,"handle":"post-partum","title":"Postpartum","updated_at":"2026-07-30T19:07:59+08:00","body_html":"\u003cp\u003eShop your postpartum and hospital bag essentials below. Looking for something we don't currently stock? Please reach out and let us know.\u003cbr\u003e\u003c\/p\u003e\n\u003cp\u003e\u003cspan\u003eYou can even buy now and pay later with Afterpay!\u003c\/span\u003e\u003c\/p\u003e","published_at":"2021-03-10T12:33:47+08:00","sort_order":"best-selling","template_suffix":"postpartum-collection","disjunctive":false,"rules":[{"column":"tag","relation":"equals","condition":"Post-Partum"}],"published_scope":"global","image":{"created_at":"2024-05-06T12:00:36+08:00","alt":"Postpartum - The Birth Store","width":611,"height":702,"src":"\/\/www.thebirthstore.com.au\/cdn\/shop\/collections\/postpartum-150119.jpg?v=1714968037"}},{"id":291456483517,"handle":"shop-all","title":"Shop All - Mum","updated_at":"2026-07-30T19:07:59+08:00","body_html":"","published_at":"2022-12-23T22:04:39+08:00","sort_order":"best-selling","template_suffix":"shop-all-collection","disjunctive":false,"rules":[{"column":"variant_price","relation":"greater_than","condition":"1"},{"column":"title","relation":"not_contains","condition":"Batteries"},{"column":"tag","relation":"equals","condition":"Mum"}],"published_scope":"global","image":{"created_at":"2024-05-06T12:00:54+08:00","alt":"Shop All - The Birth Store","width":1365,"height":2048,"src":"\/\/www.thebirthstore.com.au\/cdn\/shop\/collections\/shop-all-693176.jpg?v=1714968055"}},{"id":292595433661,"handle":"support-clothing","title":"Support Clothing","updated_at":"2026-07-30T19:07:59+08:00","body_html":"Maternity, breastfeeding, supportive, postpartum clothing and more - we've got it all, or we will have soon! Keep an eye out for new arrivals and grab yourself some incredible must-have staple items.","published_at":"2023-02-20T12:49:47+08:00","sort_order":"best-selling","template_suffix":"swaddles-collection","disjunctive":false,"rules":[{"column":"tag","relation":"equals","condition":"Support Clothing"}],"published_scope":"global","image":{"created_at":"2024-05-06T12:00:59+08:00","alt":"Support Clothing - The Birth Store","width":586,"height":879,"src":"\/\/www.thebirthstore.com.au\/cdn\/shop\/collections\/support-clothing-743676.jpg?v=1714968059"}}]}
{"item":{"id":7439745974461,"title":"SRC Pregnancy Leggings - Over the Bump","handle":"src-pregnancy-shorts-mini-over-the-bump","description":"\u003cmeta charset=\"utf-8\"\u003e\n\u003cp data-mce-fragment=\"1\"\u003e\u003cspan data-mce-fragment=\"1\"\u003eThis product is stocked at a 3\u003c\/span\u003e\u003csup data-mce-fragment=\"1\"\u003erd\u003c\/sup\u003e\u003cspan data-mce-fragment=\"1\"\u003e party warehouse, if ordering with other products you’ll receive two packages. This product will have a turn around time of 10 days if pickup is selected on checkout. Any questions, please contact us \u003ca title=\"Contact Us\" href=\"https:\/\/www.thebirthstore.com.au\/pages\/contact-us\" data-mce-href=\"https:\/\/www.thebirthstore.com.au\/pages\/contact-us\" target=\"_blank\" data-mce-fragment=\"1\"\u003ehere\u003c\/a\u003e.\u003c\/span\u003e\u003c\/p\u003e","published_at":"2023-03-13T14:10:59+08:00","created_at":"2023-02-13T22:44:27+08:00","vendor":"SRC Health","type":"Pregnancy Leggings","tags":["Maternity Clothing","Mum","Pain Relief","Pelvic Floor","Pregnancy","Support Clothing"],"price":19900,"price_min":19900,"price_max":19900,"available":true,"price_varies":false,"compare_at_price":19900,"compare_at_price_min":19900,"compare_at_price_max":19900,"compare_at_price_varies":false,"variants":[{"id":42658978201789,"title":"XXS","option1":"XXS","option2":null,"option3":null,"sku":"","requires_shipping":true,"taxable":false,"featured_image":null,"available":true,"name":"SRC Pregnancy Leggings - Over the Bump - XXS","public_title":"XXS","options":["XXS"],"price":19900,"weight":0,"compare_at_price":19900,"inventory_management":null,"barcode":"78201789","requires_selling_plan":false,"selling_plan_allocations":[],"quantity_rule":{"min":1,"max":null,"increment":1}},{"id":42658978234557,"title":"XS","option1":"XS","option2":null,"option3":null,"sku":"","requires_shipping":true,"taxable":false,"featured_image":null,"available":true,"name":"SRC Pregnancy Leggings - Over the Bump - XS","public_title":"XS","options":["XS"],"price":19900,"weight":0,"compare_at_price":19900,"inventory_management":null,"barcode":"78234557","requires_selling_plan":false,"selling_plan_allocations":[],"quantity_rule":{"min":1,"max":null,"increment":1}},{"id":42658978267325,"title":"S","option1":"S","option2":null,"option3":null,"sku":"","requires_shipping":true,"taxable":false,"featured_image":null,"available":true,"name":"SRC Pregnancy Leggings - Over the Bump - S","public_title":"S","options":["S"],"price":19900,"weight":0,"compare_at_price":19900,"inventory_management":null,"barcode":"78267325","requires_selling_plan":false,"selling_plan_allocations":[],"quantity_rule":{"min":1,"max":null,"increment":1}},{"id":42658978300093,"title":"M","option1":"M","option2":null,"option3":null,"sku":"","requires_shipping":true,"taxable":false,"featured_image":null,"available":true,"name":"SRC Pregnancy Leggings - Over the Bump - M","public_title":"M","options":["M"],"price":19900,"weight":0,"compare_at_price":19900,"inventory_management":null,"barcode":"78300093","requires_selling_plan":false,"selling_plan_allocations":[],"quantity_rule":{"min":1,"max":null,"increment":1}},{"id":42658978332861,"title":"L","option1":"L","option2":null,"option3":null,"sku":"","requires_shipping":true,"taxable":false,"featured_image":null,"available":true,"name":"SRC Pregnancy Leggings - Over the Bump - L","public_title":"L","options":["L"],"price":19900,"weight":0,"compare_at_price":19900,"inventory_management":null,"barcode":"78332861","requires_selling_plan":false,"selling_plan_allocations":[],"quantity_rule":{"min":1,"max":null,"increment":1}},{"id":42658978365629,"title":"XL","option1":"XL","option2":null,"option3":null,"sku":"","requires_shipping":true,"taxable":false,"featured_image":null,"available":true,"name":"SRC Pregnancy Leggings - Over the Bump - XL","public_title":"XL","options":["XL"],"price":19900,"weight":0,"compare_at_price":19900,"inventory_management":null,"barcode":"78365629","requires_selling_plan":false,"selling_plan_allocations":[],"quantity_rule":{"min":1,"max":null,"increment":1}},{"id":42658978398397,"title":"XXL","option1":"XXL","option2":null,"option3":null,"sku":"","requires_shipping":true,"taxable":false,"featured_image":null,"available":true,"name":"SRC Pregnancy Leggings - Over the Bump - XXL","public_title":"XXL","options":["XXL"],"price":19900,"weight":0,"compare_at_price":19900,"inventory_management":null,"barcode":"78398397","requires_selling_plan":false,"selling_plan_allocations":[],"quantity_rule":{"min":1,"max":null,"increment":1}}],"images":["\/\/www.thebirthstore.com.au\/cdn\/shop\/files\/src-pregnancy-leggings-over-the-bump-283276.jpg?v=1714968045","\/\/www.thebirthstore.com.au\/cdn\/shop\/files\/src-pregnancy-leggings-over-the-bump-353136.jpg?v=1714968045","\/\/www.thebirthstore.com.au\/cdn\/shop\/files\/src-pregnancy-leggings-over-the-bump-890532.jpg?v=1714968045","\/\/www.thebirthstore.com.au\/cdn\/shop\/files\/src-pregnancy-leggings-over-the-bump-258003.jpg?v=1714968045","\/\/www.thebirthstore.com.au\/cdn\/shop\/files\/src-pregnancy-leggings-over-the-bump-328001.png?v=1714968045"],"featured_image":"\/\/www.thebirthstore.com.au\/cdn\/shop\/files\/src-pregnancy-leggings-over-the-bump-283276.jpg?v=1714968045","options":["Size"],"media":[{"alt":"SRC Pregnancy Leggings - Over the Bump - The Birth Store-SRC Health","id":27007599968445,"position":1,"preview_image":{"aspect_ratio":1.0,"height":1080,"width":1080,"src":"\/\/www.thebirthstore.com.au\/cdn\/shop\/files\/src-pregnancy-leggings-over-the-bump-283276.jpg?v=1714968045"},"aspect_ratio":1.0,"height":1080,"media_type":"image","src":"\/\/www.thebirthstore.com.au\/cdn\/shop\/files\/src-pregnancy-leggings-over-the-bump-283276.jpg?v=1714968045","width":1080},{"alt":"SRC Pregnancy Leggings - Over the Bump - The Birth Store-SRC Health","id":27007600033981,"position":2,"preview_image":{"aspect_ratio":1.0,"height":1080,"width":1080,"src":"\/\/www.thebirthstore.com.au\/cdn\/shop\/files\/src-pregnancy-leggings-over-the-bump-353136.jpg?v=1714968045"},"aspect_ratio":1.0,"height":1080,"media_type":"image","src":"\/\/www.thebirthstore.com.au\/cdn\/shop\/files\/src-pregnancy-leggings-over-the-bump-353136.jpg?v=1714968045","width":1080},{"alt":"SRC Pregnancy Leggings - Over the Bump - The Birth Store-SRC Health","id":27007600066749,"position":3,"preview_image":{"aspect_ratio":1.0,"height":1080,"width":1080,"src":"\/\/www.thebirthstore.com.au\/cdn\/shop\/files\/src-pregnancy-leggings-over-the-bump-890532.jpg?v=1714968045"},"aspect_ratio":1.0,"height":1080,"media_type":"image","src":"\/\/www.thebirthstore.com.au\/cdn\/shop\/files\/src-pregnancy-leggings-over-the-bump-890532.jpg?v=1714968045","width":1080},{"alt":"SRC Pregnancy Leggings - Over the Bump - The Birth Store-SRC Health","id":27007600099517,"position":4,"preview_image":{"aspect_ratio":1.0,"height":1080,"width":1080,"src":"\/\/www.thebirthstore.com.au\/cdn\/shop\/files\/src-pregnancy-leggings-over-the-bump-258003.jpg?v=1714968045"},"aspect_ratio":1.0,"height":1080,"media_type":"image","src":"\/\/www.thebirthstore.com.au\/cdn\/shop\/files\/src-pregnancy-leggings-over-the-bump-258003.jpg?v=1714968045","width":1080},{"alt":"SRC Pregnancy Leggings - Over the Bump - The Birth Store-SRC Health","id":27007600165053,"position":5,"preview_image":{"aspect_ratio":1.582,"height":948,"width":1500,"src":"\/\/www.thebirthstore.com.au\/cdn\/shop\/files\/src-pregnancy-leggings-over-the-bump-328001.png?v=1714968045"},"aspect_ratio":1.582,"height":948,"media_type":"image","src":"\/\/www.thebirthstore.com.au\/cdn\/shop\/files\/src-pregnancy-leggings-over-the-bump-328001.png?v=1714968045","width":1500}],"requires_selling_plan":false,"selling_plan_groups":[],"content":"\u003cmeta charset=\"utf-8\"\u003e\n\u003cp data-mce-fragment=\"1\"\u003e\u003cspan data-mce-fragment=\"1\"\u003eThis product is stocked at a 3\u003c\/span\u003e\u003csup data-mce-fragment=\"1\"\u003erd\u003c\/sup\u003e\u003cspan data-mce-fragment=\"1\"\u003e party warehouse, if ordering with other products you’ll receive two packages. This product will have a turn around time of 10 days if pickup is selected on checkout. Any questions, please contact us \u003ca title=\"Contact Us\" href=\"https:\/\/www.thebirthstore.com.au\/pages\/contact-us\" data-mce-href=\"https:\/\/www.thebirthstore.com.au\/pages\/contact-us\" target=\"_blank\" data-mce-fragment=\"1\"\u003ehere\u003c\/a\u003e.\u003c\/span\u003e\u003c\/p\u003e"},"options":[{"name":"Size","position":1,"values":["XXS","XS","S","M","L","XL","XXL"]}],"custom_metafields":{},"metafields":{"badge":"\u003cdiv style='display:none' class='jdgm-prev-badge' data-average-rating='0.00' data-number-of-reviews='0' data-number-of-questions='0'\u003e \u003cspan class='jdgm-prev-badge__stars' data-score='0.00' tabindex='0' aria-label='0.00 stars' role='button'\u003e \u003cspan class='jdgm-star jdgm--off'\u003e\u003c\/span\u003e\u003cspan class='jdgm-star jdgm--off'\u003e\u003c\/span\u003e\u003cspan class='jdgm-star jdgm--off'\u003e\u003c\/span\u003e\u003cspan class='jdgm-star jdgm--off'\u003e\u003c\/span\u003e\u003cspan class='jdgm-star jdgm--off'\u003e\u003c\/span\u003e \u003c\/span\u003e \u003cspan class='jdgm-prev-badge__text'\u003e No reviews \u003c\/span\u003e \u003c\/div\u003e","widget":"\u003cdiv class='jdgm-rev-widg' data-updated-at='2025-06-13T16:12:10Z' data-average-rating='0.00' data-number-of-reviews='0' data-number-of-questions='0'\u003e \u003cstyle class='jdgm-temp-hiding-style'\u003e.jdgm-rev-widg{ display: none }\u003c\/style\u003e \u003cdiv class='jdgm-rev-widg__header'\u003e \u003ch2 class='jdgm-rev-widg__title'\u003eCustomer Reviews\u003c\/h2\u003e \u003cdiv class='jdgm-rev-widg__summary'\u003e \u003cdiv class='jdgm-rev-widg__summary-stars' aria-label='Average rating is 0.00 stars' role='img'\u003e \u003cspan class='jdgm-star jdgm--off'\u003e\u003c\/span\u003e\u003cspan class='jdgm-star jdgm--off'\u003e\u003c\/span\u003e\u003cspan class='jdgm-star jdgm--off'\u003e\u003c\/span\u003e\u003cspan class='jdgm-star jdgm--off'\u003e\u003c\/span\u003e\u003cspan class='jdgm-star jdgm--off'\u003e\u003c\/span\u003e \u003c\/div\u003e \u003cdiv class='jdgm-rev-widg__summary-text'\u003eBe the first to write a review\u003c\/div\u003e \u003c\/div\u003e \u003ca style='display: none' href='#' class='jdgm-write-rev-link' role='button'\u003eWrite a review\u003c\/a\u003e \u003cdiv class='jdgm-histogram jdgm-temp-hidden'\u003e \u003cdiv class='jdgm-histogram__row' data-rating='5' data-frequency='0' data-percentage='0'\u003e \u003cdiv class='jdgm-histogram__star' role='button' aria-label=\"0% (0) reviews with 5 star rating\" tabindex='0' \u003e\u003cspan class='jdgm-star jdgm--on'\u003e\u003c\/span\u003e\u003cspan class='jdgm-star jdgm--on'\u003e\u003c\/span\u003e\u003cspan class='jdgm-star jdgm--on'\u003e\u003c\/span\u003e\u003cspan class='jdgm-star jdgm--on'\u003e\u003c\/span\u003e\u003cspan class='jdgm-star jdgm--on'\u003e\u003c\/span\u003e\u003c\/div\u003e \u003cdiv class='jdgm-histogram__bar'\u003e \u003cdiv class='jdgm-histogram__bar-content' style='width: 0%;'\u003e \u003c\/div\u003e \u003c\/div\u003e \u003cdiv class='jdgm-histogram__percentage'\u003e0%\u003c\/div\u003e \u003cdiv class='jdgm-histogram__frequency'\u003e(0)\u003c\/div\u003e \u003c\/div\u003e \u003cdiv class='jdgm-histogram__row' data-rating='4' data-frequency='0' data-percentage='0'\u003e \u003cdiv class='jdgm-histogram__star' role='button' aria-label=\"0% (0) reviews with 4 star rating\" tabindex='0' \u003e\u003cspan class='jdgm-star jdgm--on'\u003e\u003c\/span\u003e\u003cspan class='jdgm-star jdgm--on'\u003e\u003c\/span\u003e\u003cspan class='jdgm-star jdgm--on'\u003e\u003c\/span\u003e\u003cspan class='jdgm-star jdgm--on'\u003e\u003c\/span\u003e\u003cspan class='jdgm-star jdgm--off'\u003e\u003c\/span\u003e\u003c\/div\u003e \u003cdiv class='jdgm-histogram__bar'\u003e \u003cdiv class='jdgm-histogram__bar-content' style='width: 0%;'\u003e \u003c\/div\u003e \u003c\/div\u003e \u003cdiv class='jdgm-histogram__percentage'\u003e0%\u003c\/div\u003e \u003cdiv class='jdgm-histogram__frequency'\u003e(0)\u003c\/div\u003e \u003c\/div\u003e \u003cdiv class='jdgm-histogram__row' data-rating='3' data-frequency='0' data-percentage='0'\u003e \u003cdiv class='jdgm-histogram__star' role='button' aria-label=\"0% (0) reviews with 3 star rating\" tabindex='0' \u003e\u003cspan class='jdgm-star jdgm--on'\u003e\u003c\/span\u003e\u003cspan class='jdgm-star jdgm--on'\u003e\u003c\/span\u003e\u003cspan class='jdgm-star jdgm--on'\u003e\u003c\/span\u003e\u003cspan class='jdgm-star jdgm--off'\u003e\u003c\/span\u003e\u003cspan class='jdgm-star jdgm--off'\u003e\u003c\/span\u003e\u003c\/div\u003e \u003cdiv class='jdgm-histogram__bar'\u003e \u003cdiv class='jdgm-histogram__bar-content' style='width: 0%;'\u003e \u003c\/div\u003e \u003c\/div\u003e \u003cdiv class='jdgm-histogram__percentage'\u003e0%\u003c\/div\u003e \u003cdiv class='jdgm-histogram__frequency'\u003e(0)\u003c\/div\u003e \u003c\/div\u003e \u003cdiv class='jdgm-histogram__row' data-rating='2' data-frequency='0' data-percentage='0'\u003e \u003cdiv class='jdgm-histogram__star' role='button' aria-label=\"0% (0) reviews with 2 star rating\" tabindex='0' \u003e\u003cspan class='jdgm-star jdgm--on'\u003e\u003c\/span\u003e\u003cspan class='jdgm-star jdgm--on'\u003e\u003c\/span\u003e\u003cspan class='jdgm-star jdgm--off'\u003e\u003c\/span\u003e\u003cspan class='jdgm-star jdgm--off'\u003e\u003c\/span\u003e\u003cspan class='jdgm-star jdgm--off'\u003e\u003c\/span\u003e\u003c\/div\u003e \u003cdiv class='jdgm-histogram__bar'\u003e \u003cdiv class='jdgm-histogram__bar-content' style='width: 0%;'\u003e \u003c\/div\u003e \u003c\/div\u003e \u003cdiv class='jdgm-histogram__percentage'\u003e0%\u003c\/div\u003e \u003cdiv class='jdgm-histogram__frequency'\u003e(0)\u003c\/div\u003e \u003c\/div\u003e \u003cdiv class='jdgm-histogram__row' data-rating='1' data-frequency='0' data-percentage='0'\u003e \u003cdiv class='jdgm-histogram__star' role='button' aria-label=\"0% (0) reviews with 1 star rating\" tabindex='0' \u003e\u003cspan class='jdgm-star jdgm--on'\u003e\u003c\/span\u003e\u003cspan class='jdgm-star jdgm--off'\u003e\u003c\/span\u003e\u003cspan class='jdgm-star jdgm--off'\u003e\u003c\/span\u003e\u003cspan class='jdgm-star jdgm--off'\u003e\u003c\/span\u003e\u003cspan class='jdgm-star jdgm--off'\u003e\u003c\/span\u003e\u003c\/div\u003e \u003cdiv class='jdgm-histogram__bar'\u003e \u003cdiv class='jdgm-histogram__bar-content' style='width: 0%;'\u003e \u003c\/div\u003e \u003c\/div\u003e \u003cdiv class='jdgm-histogram__percentage'\u003e0%\u003c\/div\u003e \u003cdiv class='jdgm-histogram__frequency'\u003e(0)\u003c\/div\u003e \u003c\/div\u003e \u003cdiv class='jdgm-histogram__row jdgm-histogram__clear-filter' data-rating=null tabindex='0'\u003e\u003c\/div\u003e \u003c\/div\u003e \u003cdiv class='jdgm-rev-widg__sort-wrapper'\u003e\u003c\/div\u003e \u003c\/div\u003e \u003cdiv class='jdgm-rev-widg__body'\u003e \u003cdiv class='jdgm-rev-widg__reviews'\u003e\u003c\/div\u003e \u003cdiv class='jdgm-paginate' data-per-page='10' data-url='https:\/\/api.judge.me\/reviews\/reviews_for_widget' style=\"display: none;\"\u003e\u003c\/div\u003e \u003c\/div\u003e \u003cdiv class='jdgm-rev-widg__paginate-spinner-wrapper'\u003e \u003cdiv class='jdgm-spinner'\u003e\u003c\/div\u003e \u003c\/div\u003e \u003c\/div\u003e"},"default_reviews_metafields":{},"collections":[{"id":261657460925,"handle":"buy","title":"Buy","updated_at":"2026-07-30T19:07:59+08:00","body_html":"\u003cp\u003eBrowse all of our pregnancy, labour \u0026amp; birth, postpartum and baby essentials here.\u003cbr\u003e\u003c\/p\u003e\n\u003cp\u003e\u003cspan\u003eYou can even buy now and pay later with Afterpay!\u003c\/span\u003e\u003c\/p\u003e","published_at":"2021-03-10T12:05:31+08:00","sort_order":"best-selling","template_suffix":"shop-all-collection","disjunctive":false,"rules":[{"column":"title","relation":"not_contains","condition":"Hire"}],"published_scope":"global","image":{"created_at":"2024-05-06T11:59:42+08:00","alt":"Buy - The Birth Store","width":2048,"height":2048,"src":"\/\/www.thebirthstore.com.au\/cdn\/shop\/collections\/buy-964856.jpg?v=1714967982"}},{"id":293309022397,"handle":"clothing","title":"Clothing","updated_at":"2026-07-30T19:07:59+08:00","body_html":"","published_at":"2023-05-03T11:41:12+08:00","sort_order":"best-selling","template_suffix":"swaddles-collection","disjunctive":true,"rules":[{"column":"tag","relation":"equals","condition":"Breastfeeding Clothing"},{"column":"tag","relation":"equals","condition":"Support Clothing"}],"published_scope":"global","image":{"created_at":"2024-05-06T11:59:52+08:00","alt":"Clothing - The Birth Store","width":676,"height":581,"src":"\/\/www.thebirthstore.com.au\/cdn\/shop\/collections\/clothing-483293.jpg?v=1714967992"}},{"id":326572048573,"handle":"maternity-clothing","title":"Maternity Clothing","updated_at":"2026-07-30T19:07:59+08:00","body_html":"","published_at":"2025-10-31T12:50:20+08:00","sort_order":"best-selling","template_suffix":"","disjunctive":false,"rules":[{"column":"tag","relation":"equals","condition":"Maternity Clothing"}],"published_scope":"global","image":{"created_at":"2025-11-20T21:34:30+08:00","alt":"Maternity Clothing - The Birth Store","width":1920,"height":1281,"src":"\/\/www.thebirthstore.com.au\/cdn\/shop\/collections\/maternity-clothing-6954274.webp?v=1763645670"}},{"id":281712591037,"handle":"pain-relief","title":"Pain Relief","updated_at":"2026-07-30T19:07:59+08:00","body_html":"","published_at":"2021-12-20T14:22:45+08:00","sort_order":"best-selling","template_suffix":"pain-relief-collection","disjunctive":false,"rules":[{"column":"tag","relation":"equals","condition":"Pain Relief"}],"published_scope":"global","image":{"created_at":"2024-05-06T12:00:27+08:00","alt":"Pain Relief - The Birth Store","width":1365,"height":2048,"src":"\/\/www.thebirthstore.com.au\/cdn\/shop\/collections\/pain-relief-878865.jpg?v=1714968027"}},{"id":281712689341,"handle":"pelvic-floor-health","title":"Pelvic Floor Health","updated_at":"2026-07-30T19:07:59+08:00","body_html":"","published_at":"2021-12-20T14:23:41+08:00","sort_order":"best-selling","template_suffix":"swaddles-collection","disjunctive":false,"rules":[{"column":"tag","relation":"equals","condition":"Pelvic Floor"}],"published_scope":"global","image":{"created_at":"2024-05-06T12:00:29+08:00","alt":"Pelvic Floor Health - The Birth Store","width":536,"height":589,"src":"\/\/www.thebirthstore.com.au\/cdn\/shop\/collections\/pelvic-floor-health-890736.jpg?v=1714968030"}},{"id":261658149053,"handle":"pregnancy-and-maternity-products","title":"Pregnancy","updated_at":"2026-07-30T19:07:59+08:00","body_html":"\u003cp\u003eShop your pregnancy essentials below. Looking for something we don't currently stock? Please reach out and let us know.\u003cbr\u003e\u003c\/p\u003e\n\u003cp\u003e\u003cspan\u003eYou can even buy now and pay later with Afterpay!\u003c\/span\u003e\u003c\/p\u003e","published_at":"2021-03-10T12:34:22+08:00","sort_order":"best-selling","template_suffix":"pregnancy-collection","disjunctive":false,"rules":[{"column":"tag","relation":"equals","condition":"Pregnancy"}],"published_scope":"global","image":{"created_at":"2024-05-06T12:00:40+08:00","alt":"Pregnancy - The Birth Store","width":1024,"height":1536,"src":"\/\/www.thebirthstore.com.au\/cdn\/shop\/collections\/pregnancy-899677.jpg?v=1714968040"}},{"id":291456483517,"handle":"shop-all","title":"Shop All - Mum","updated_at":"2026-07-30T19:07:59+08:00","body_html":"","published_at":"2022-12-23T22:04:39+08:00","sort_order":"best-selling","template_suffix":"shop-all-collection","disjunctive":false,"rules":[{"column":"variant_price","relation":"greater_than","condition":"1"},{"column":"title","relation":"not_contains","condition":"Batteries"},{"column":"tag","relation":"equals","condition":"Mum"}],"published_scope":"global","image":{"created_at":"2024-05-06T12:00:54+08:00","alt":"Shop All - The Birth Store","width":1365,"height":2048,"src":"\/\/www.thebirthstore.com.au\/cdn\/shop\/collections\/shop-all-693176.jpg?v=1714968055"}},{"id":292595433661,"handle":"support-clothing","title":"Support Clothing","updated_at":"2026-07-30T19:07:59+08:00","body_html":"Maternity, breastfeeding, supportive, postpartum clothing and more - we've got it all, or we will have soon! Keep an eye out for new arrivals and grab yourself some incredible must-have staple items.","published_at":"2023-02-20T12:49:47+08:00","sort_order":"best-selling","template_suffix":"swaddles-collection","disjunctive":false,"rules":[{"column":"tag","relation":"equals","condition":"Support Clothing"}],"published_scope":"global","image":{"created_at":"2024-05-06T12:00:59+08:00","alt":"Support Clothing - The Birth Store","width":586,"height":879,"src":"\/\/www.thebirthstore.com.au\/cdn\/shop\/collections\/support-clothing-743676.jpg?v=1714968059"}}]}
{"item":{"id":7439744139453,"title":"SRC Recovery Leggings","handle":"src-recovery-leggings","description":"\u003cmeta charset=\"utf-8\"\u003e\u003cspan data-mce-fragment=\"1\"\u003eThis product is stocked at a 3\u003c\/span\u003e\u003csup data-mce-fragment=\"1\"\u003erd\u003c\/sup\u003e\u003cspan data-mce-fragment=\"1\"\u003e party warehouse, if ordering with other products you’ll receive two packages. This product will have a turn around time of 10 days if pickup is selected on checkout. Any questions, please contact us \u003ca href=\"https:\/\/www.thebirthstore.com.au\/pages\/contact-us\" title=\"Contact Us\" data-mce-fragment=\"1\" target=\"_blank\" data-mce-href=\"https:\/\/www.thebirthstore.com.au\/pages\/contact-us\"\u003ehere\u003c\/a\u003e.\u003c\/span\u003e\u003cbr\u003e","published_at":"2023-03-13T14:12:28+08:00","created_at":"2023-02-13T22:38:21+08:00","vendor":"SRC Health","type":"Recovery Leggings","tags":["Hospital Bag","Mum","Pain Relief","Pelvic Floor","Post-Partum","Support Clothing"],"price":19900,"price_min":19900,"price_max":19900,"available":true,"price_varies":false,"compare_at_price":19900,"compare_at_price_min":19900,"compare_at_price_max":19900,"compare_at_price_varies":false,"variants":[{"id":42658962145469,"title":"XXS","option1":"XXS","option2":null,"option3":null,"sku":"","requires_shipping":true,"taxable":false,"featured_image":null,"available":true,"name":"SRC Recovery Leggings - XXS","public_title":"XXS","options":["XXS"],"price":19900,"weight":0,"compare_at_price":19900,"inventory_management":null,"barcode":"62145469","requires_selling_plan":false,"selling_plan_allocations":[],"quantity_rule":{"min":1,"max":null,"increment":1}},{"id":42658962211005,"title":"XS","option1":"XS","option2":null,"option3":null,"sku":"","requires_shipping":true,"taxable":false,"featured_image":null,"available":true,"name":"SRC Recovery Leggings - XS","public_title":"XS","options":["XS"],"price":19900,"weight":0,"compare_at_price":19900,"inventory_management":null,"barcode":"62211005","requires_selling_plan":false,"selling_plan_allocations":[],"quantity_rule":{"min":1,"max":null,"increment":1}},{"id":42658962276541,"title":"S","option1":"S","option2":null,"option3":null,"sku":"","requires_shipping":true,"taxable":false,"featured_image":null,"available":true,"name":"SRC Recovery Leggings - S","public_title":"S","options":["S"],"price":19900,"weight":0,"compare_at_price":19900,"inventory_management":null,"barcode":"62276541","requires_selling_plan":false,"selling_plan_allocations":[],"quantity_rule":{"min":1,"max":null,"increment":1}},{"id":42658962342077,"title":"M","option1":"M","option2":null,"option3":null,"sku":"","requires_shipping":true,"taxable":false,"featured_image":null,"available":true,"name":"SRC Recovery Leggings - M","public_title":"M","options":["M"],"price":19900,"weight":0,"compare_at_price":19900,"inventory_management":null,"barcode":"62342077","requires_selling_plan":false,"selling_plan_allocations":[],"quantity_rule":{"min":1,"max":null,"increment":1}},{"id":42658962407613,"title":"L","option1":"L","option2":null,"option3":null,"sku":"","requires_shipping":true,"taxable":false,"featured_image":null,"available":true,"name":"SRC Recovery Leggings - L","public_title":"L","options":["L"],"price":19900,"weight":0,"compare_at_price":19900,"inventory_management":null,"barcode":"62407613","requires_selling_plan":false,"selling_plan_allocations":[],"quantity_rule":{"min":1,"max":null,"increment":1}},{"id":42658962473149,"title":"XL","option1":"XL","option2":null,"option3":null,"sku":"","requires_shipping":true,"taxable":false,"featured_image":null,"available":true,"name":"SRC Recovery Leggings - XL","public_title":"XL","options":["XL"],"price":19900,"weight":0,"compare_at_price":19900,"inventory_management":null,"barcode":"62473149","requires_selling_plan":false,"selling_plan_allocations":[],"quantity_rule":{"min":1,"max":null,"increment":1}},{"id":42658962538685,"title":"XXL","option1":"XXL","option2":null,"option3":null,"sku":"","requires_shipping":true,"taxable":false,"featured_image":null,"available":true,"name":"SRC Recovery Leggings - XXL","public_title":"XXL","options":["XXL"],"price":19900,"weight":0,"compare_at_price":19900,"inventory_management":null,"barcode":"62538685","requires_selling_plan":false,"selling_plan_allocations":[],"quantity_rule":{"min":1,"max":null,"increment":1}}],"images":["\/\/www.thebirthstore.com.au\/cdn\/shop\/files\/src-recovery-leggings-235489.jpg?v=1714968048","\/\/www.thebirthstore.com.au\/cdn\/shop\/files\/src-recovery-leggings-256825.jpg?v=1714968049","\/\/www.thebirthstore.com.au\/cdn\/shop\/files\/src-recovery-leggings-753273.jpg?v=1714968049","\/\/www.thebirthstore.com.au\/cdn\/shop\/files\/src-recovery-leggings-491436.jpg?v=1714968049"],"featured_image":"\/\/www.thebirthstore.com.au\/cdn\/shop\/files\/src-recovery-leggings-235489.jpg?v=1714968048","options":["Size"],"media":[{"alt":"SRC Recovery Leggings - The Birth Store-SRC Health","id":27007600787645,"position":1,"preview_image":{"aspect_ratio":1.0,"height":1080,"width":1080,"src":"\/\/www.thebirthstore.com.au\/cdn\/shop\/files\/src-recovery-leggings-235489.jpg?v=1714968048"},"aspect_ratio":1.0,"height":1080,"media_type":"image","src":"\/\/www.thebirthstore.com.au\/cdn\/shop\/files\/src-recovery-leggings-235489.jpg?v=1714968048","width":1080},{"alt":"SRC Recovery Leggings - The Birth Store-SRC Health","id":27007600820413,"position":2,"preview_image":{"aspect_ratio":1.0,"height":1080,"width":1080,"src":"\/\/www.thebirthstore.com.au\/cdn\/shop\/files\/src-recovery-leggings-256825.jpg?v=1714968049"},"aspect_ratio":1.0,"height":1080,"media_type":"image","src":"\/\/www.thebirthstore.com.au\/cdn\/shop\/files\/src-recovery-leggings-256825.jpg?v=1714968049","width":1080},{"alt":"SRC Recovery Leggings - The Birth Store-SRC Health","id":27007600853181,"position":3,"preview_image":{"aspect_ratio":1.0,"height":1080,"width":1080,"src":"\/\/www.thebirthstore.com.au\/cdn\/shop\/files\/src-recovery-leggings-753273.jpg?v=1714968049"},"aspect_ratio":1.0,"height":1080,"media_type":"image","src":"\/\/www.thebirthstore.com.au\/cdn\/shop\/files\/src-recovery-leggings-753273.jpg?v=1714968049","width":1080},{"alt":"SRC Recovery Leggings - The Birth Store-SRC Health","id":27007600885949,"position":4,"preview_image":{"aspect_ratio":1.582,"height":948,"width":1500,"src":"\/\/www.thebirthstore.com.au\/cdn\/shop\/files\/src-recovery-leggings-491436.jpg?v=1714968049"},"aspect_ratio":1.582,"height":948,"media_type":"image","src":"\/\/www.thebirthstore.com.au\/cdn\/shop\/files\/src-recovery-leggings-491436.jpg?v=1714968049","width":1500}],"requires_selling_plan":false,"selling_plan_groups":[],"content":"\u003cmeta charset=\"utf-8\"\u003e\u003cspan data-mce-fragment=\"1\"\u003eThis product is stocked at a 3\u003c\/span\u003e\u003csup data-mce-fragment=\"1\"\u003erd\u003c\/sup\u003e\u003cspan data-mce-fragment=\"1\"\u003e party warehouse, if ordering with other products you’ll receive two packages. This product will have a turn around time of 10 days if pickup is selected on checkout. Any questions, please contact us \u003ca href=\"https:\/\/www.thebirthstore.com.au\/pages\/contact-us\" title=\"Contact Us\" data-mce-fragment=\"1\" target=\"_blank\" data-mce-href=\"https:\/\/www.thebirthstore.com.au\/pages\/contact-us\"\u003ehere\u003c\/a\u003e.\u003c\/span\u003e\u003cbr\u003e"},"options":[{"name":"Size","position":1,"values":["XXS","XS","S","M","L","XL","XXL"]}],"custom_metafields":{},"metafields":{"badge":"\u003cdiv style='display:none' class='jdgm-prev-badge' data-average-rating='0.00' data-number-of-reviews='0' data-number-of-questions='0'\u003e \u003cspan class='jdgm-prev-badge__stars' data-score='0.00' tabindex='0' aria-label='0.00 stars' role='button'\u003e \u003cspan class='jdgm-star jdgm--off'\u003e\u003c\/span\u003e\u003cspan class='jdgm-star jdgm--off'\u003e\u003c\/span\u003e\u003cspan class='jdgm-star jdgm--off'\u003e\u003c\/span\u003e\u003cspan class='jdgm-star jdgm--off'\u003e\u003c\/span\u003e\u003cspan class='jdgm-star jdgm--off'\u003e\u003c\/span\u003e \u003c\/span\u003e \u003cspan class='jdgm-prev-badge__text'\u003e No reviews \u003c\/span\u003e \u003c\/div\u003e","widget":"\u003cdiv class='jdgm-rev-widg' data-updated-at='2025-06-13T16:12:10Z' data-average-rating='0.00' data-number-of-reviews='0' data-number-of-questions='0'\u003e \u003cstyle class='jdgm-temp-hiding-style'\u003e.jdgm-rev-widg{ display: none }\u003c\/style\u003e \u003cdiv class='jdgm-rev-widg__header'\u003e \u003ch2 class='jdgm-rev-widg__title'\u003eCustomer Reviews\u003c\/h2\u003e \u003cdiv class='jdgm-rev-widg__summary'\u003e \u003cdiv class='jdgm-rev-widg__summary-stars' aria-label='Average rating is 0.00 stars' role='img'\u003e \u003cspan class='jdgm-star jdgm--off'\u003e\u003c\/span\u003e\u003cspan class='jdgm-star jdgm--off'\u003e\u003c\/span\u003e\u003cspan class='jdgm-star jdgm--off'\u003e\u003c\/span\u003e\u003cspan class='jdgm-star jdgm--off'\u003e\u003c\/span\u003e\u003cspan class='jdgm-star jdgm--off'\u003e\u003c\/span\u003e \u003c\/div\u003e \u003cdiv class='jdgm-rev-widg__summary-text'\u003eBe the first to write a review\u003c\/div\u003e \u003c\/div\u003e \u003ca style='display: none' href='#' class='jdgm-write-rev-link' role='button'\u003eWrite a review\u003c\/a\u003e \u003cdiv class='jdgm-histogram jdgm-temp-hidden'\u003e \u003cdiv class='jdgm-histogram__row' data-rating='5' data-frequency='0' data-percentage='0'\u003e \u003cdiv class='jdgm-histogram__star' role='button' aria-label=\"0% (0) reviews with 5 star rating\" tabindex='0' \u003e\u003cspan class='jdgm-star jdgm--on'\u003e\u003c\/span\u003e\u003cspan class='jdgm-star jdgm--on'\u003e\u003c\/span\u003e\u003cspan class='jdgm-star jdgm--on'\u003e\u003c\/span\u003e\u003cspan class='jdgm-star jdgm--on'\u003e\u003c\/span\u003e\u003cspan class='jdgm-star jdgm--on'\u003e\u003c\/span\u003e\u003c\/div\u003e \u003cdiv class='jdgm-histogram__bar'\u003e \u003cdiv class='jdgm-histogram__bar-content' style='width: 0%;'\u003e \u003c\/div\u003e \u003c\/div\u003e \u003cdiv class='jdgm-histogram__percentage'\u003e0%\u003c\/div\u003e \u003cdiv class='jdgm-histogram__frequency'\u003e(0)\u003c\/div\u003e \u003c\/div\u003e \u003cdiv class='jdgm-histogram__row' data-rating='4' data-frequency='0' data-percentage='0'\u003e \u003cdiv class='jdgm-histogram__star' role='button' aria-label=\"0% (0) reviews with 4 star rating\" tabindex='0' \u003e\u003cspan class='jdgm-star jdgm--on'\u003e\u003c\/span\u003e\u003cspan class='jdgm-star jdgm--on'\u003e\u003c\/span\u003e\u003cspan class='jdgm-star jdgm--on'\u003e\u003c\/span\u003e\u003cspan class='jdgm-star jdgm--on'\u003e\u003c\/span\u003e\u003cspan class='jdgm-star jdgm--off'\u003e\u003c\/span\u003e\u003c\/div\u003e \u003cdiv class='jdgm-histogram__bar'\u003e \u003cdiv class='jdgm-histogram__bar-content' style='width: 0%;'\u003e \u003c\/div\u003e \u003c\/div\u003e \u003cdiv class='jdgm-histogram__percentage'\u003e0%\u003c\/div\u003e \u003cdiv class='jdgm-histogram__frequency'\u003e(0)\u003c\/div\u003e \u003c\/div\u003e \u003cdiv class='jdgm-histogram__row' data-rating='3' data-frequency='0' data-percentage='0'\u003e \u003cdiv class='jdgm-histogram__star' role='button' aria-label=\"0% (0) reviews with 3 star rating\" tabindex='0' \u003e\u003cspan class='jdgm-star jdgm--on'\u003e\u003c\/span\u003e\u003cspan class='jdgm-star jdgm--on'\u003e\u003c\/span\u003e\u003cspan class='jdgm-star jdgm--on'\u003e\u003c\/span\u003e\u003cspan class='jdgm-star jdgm--off'\u003e\u003c\/span\u003e\u003cspan class='jdgm-star jdgm--off'\u003e\u003c\/span\u003e\u003c\/div\u003e \u003cdiv class='jdgm-histogram__bar'\u003e \u003cdiv class='jdgm-histogram__bar-content' style='width: 0%;'\u003e \u003c\/div\u003e \u003c\/div\u003e \u003cdiv class='jdgm-histogram__percentage'\u003e0%\u003c\/div\u003e \u003cdiv class='jdgm-histogram__frequency'\u003e(0)\u003c\/div\u003e \u003c\/div\u003e \u003cdiv class='jdgm-histogram__row' data-rating='2' data-frequency='0' data-percentage='0'\u003e \u003cdiv class='jdgm-histogram__star' role='button' aria-label=\"0% (0) reviews with 2 star rating\" tabindex='0' \u003e\u003cspan class='jdgm-star jdgm--on'\u003e\u003c\/span\u003e\u003cspan class='jdgm-star jdgm--on'\u003e\u003c\/span\u003e\u003cspan class='jdgm-star jdgm--off'\u003e\u003c\/span\u003e\u003cspan class='jdgm-star jdgm--off'\u003e\u003c\/span\u003e\u003cspan class='jdgm-star jdgm--off'\u003e\u003c\/span\u003e\u003c\/div\u003e \u003cdiv class='jdgm-histogram__bar'\u003e \u003cdiv class='jdgm-histogram__bar-content' style='width: 0%;'\u003e \u003c\/div\u003e \u003c\/div\u003e \u003cdiv class='jdgm-histogram__percentage'\u003e0%\u003c\/div\u003e \u003cdiv class='jdgm-histogram__frequency'\u003e(0)\u003c\/div\u003e \u003c\/div\u003e \u003cdiv class='jdgm-histogram__row' data-rating='1' data-frequency='0' data-percentage='0'\u003e \u003cdiv class='jdgm-histogram__star' role='button' aria-label=\"0% (0) reviews with 1 star rating\" tabindex='0' \u003e\u003cspan class='jdgm-star jdgm--on'\u003e\u003c\/span\u003e\u003cspan class='jdgm-star jdgm--off'\u003e\u003c\/span\u003e\u003cspan class='jdgm-star jdgm--off'\u003e\u003c\/span\u003e\u003cspan class='jdgm-star jdgm--off'\u003e\u003c\/span\u003e\u003cspan class='jdgm-star jdgm--off'\u003e\u003c\/span\u003e\u003c\/div\u003e \u003cdiv class='jdgm-histogram__bar'\u003e \u003cdiv class='jdgm-histogram__bar-content' style='width: 0%;'\u003e \u003c\/div\u003e \u003c\/div\u003e \u003cdiv class='jdgm-histogram__percentage'\u003e0%\u003c\/div\u003e \u003cdiv class='jdgm-histogram__frequency'\u003e(0)\u003c\/div\u003e \u003c\/div\u003e \u003cdiv class='jdgm-histogram__row jdgm-histogram__clear-filter' data-rating=null tabindex='0'\u003e\u003c\/div\u003e \u003c\/div\u003e \u003cdiv class='jdgm-rev-widg__sort-wrapper'\u003e\u003c\/div\u003e \u003c\/div\u003e \u003cdiv class='jdgm-rev-widg__body'\u003e \u003cdiv class='jdgm-rev-widg__reviews'\u003e\u003c\/div\u003e \u003cdiv class='jdgm-paginate' data-per-page='10' data-url='https:\/\/api.judge.me\/reviews\/reviews_for_widget' style=\"display: none;\"\u003e\u003c\/div\u003e \u003c\/div\u003e \u003cdiv class='jdgm-rev-widg__paginate-spinner-wrapper'\u003e \u003cdiv class='jdgm-spinner'\u003e\u003c\/div\u003e \u003c\/div\u003e \u003c\/div\u003e"},"default_reviews_metafields":{},"collections":[{"id":261657460925,"handle":"buy","title":"Buy","updated_at":"2026-07-30T19:07:59+08:00","body_html":"\u003cp\u003eBrowse all of our pregnancy, labour \u0026amp; birth, postpartum and baby essentials here.\u003cbr\u003e\u003c\/p\u003e\n\u003cp\u003e\u003cspan\u003eYou can even buy now and pay later with Afterpay!\u003c\/span\u003e\u003c\/p\u003e","published_at":"2021-03-10T12:05:31+08:00","sort_order":"best-selling","template_suffix":"shop-all-collection","disjunctive":false,"rules":[{"column":"title","relation":"not_contains","condition":"Hire"}],"published_scope":"global","image":{"created_at":"2024-05-06T11:59:42+08:00","alt":"Buy - The Birth Store","width":2048,"height":2048,"src":"\/\/www.thebirthstore.com.au\/cdn\/shop\/collections\/buy-964856.jpg?v=1714967982"}},{"id":293309022397,"handle":"clothing","title":"Clothing","updated_at":"2026-07-30T19:07:59+08:00","body_html":"","published_at":"2023-05-03T11:41:12+08:00","sort_order":"best-selling","template_suffix":"swaddles-collection","disjunctive":true,"rules":[{"column":"tag","relation":"equals","condition":"Breastfeeding Clothing"},{"column":"tag","relation":"equals","condition":"Support Clothing"}],"published_scope":"global","image":{"created_at":"2024-05-06T11:59:52+08:00","alt":"Clothing - The Birth Store","width":676,"height":581,"src":"\/\/www.thebirthstore.com.au\/cdn\/shop\/collections\/clothing-483293.jpg?v=1714967992"}},{"id":337429201085,"handle":"hospital-bag","title":"Hospital Bag","updated_at":"2026-07-30T19:07:59+08:00","body_html":"","published_at":"2026-06-03T11:36:29+08:00","sort_order":"most-relevant","template_suffix":"","disjunctive":false,"rules":[{"column":"tag","relation":"equals","condition":"Hospital Bag"}],"published_scope":"global"},{"id":281712591037,"handle":"pain-relief","title":"Pain Relief","updated_at":"2026-07-30T19:07:59+08:00","body_html":"","published_at":"2021-12-20T14:22:45+08:00","sort_order":"best-selling","template_suffix":"pain-relief-collection","disjunctive":false,"rules":[{"column":"tag","relation":"equals","condition":"Pain Relief"}],"published_scope":"global","image":{"created_at":"2024-05-06T12:00:27+08:00","alt":"Pain Relief - The Birth Store","width":1365,"height":2048,"src":"\/\/www.thebirthstore.com.au\/cdn\/shop\/collections\/pain-relief-878865.jpg?v=1714968027"}},{"id":281712689341,"handle":"pelvic-floor-health","title":"Pelvic Floor Health","updated_at":"2026-07-30T19:07:59+08:00","body_html":"","published_at":"2021-12-20T14:23:41+08:00","sort_order":"best-selling","template_suffix":"swaddles-collection","disjunctive":false,"rules":[{"column":"tag","relation":"equals","condition":"Pelvic Floor"}],"published_scope":"global","image":{"created_at":"2024-05-06T12:00:29+08:00","alt":"Pelvic Floor Health - The Birth Store","width":536,"height":589,"src":"\/\/www.thebirthstore.com.au\/cdn\/shop\/collections\/pelvic-floor-health-890736.jpg?v=1714968030"}},{"id":261658083517,"handle":"post-partum","title":"Postpartum","updated_at":"2026-07-30T19:07:59+08:00","body_html":"\u003cp\u003eShop your postpartum and hospital bag essentials below. Looking for something we don't currently stock? Please reach out and let us know.\u003cbr\u003e\u003c\/p\u003e\n\u003cp\u003e\u003cspan\u003eYou can even buy now and pay later with Afterpay!\u003c\/span\u003e\u003c\/p\u003e","published_at":"2021-03-10T12:33:47+08:00","sort_order":"best-selling","template_suffix":"postpartum-collection","disjunctive":false,"rules":[{"column":"tag","relation":"equals","condition":"Post-Partum"}],"published_scope":"global","image":{"created_at":"2024-05-06T12:00:36+08:00","alt":"Postpartum - The Birth Store","width":611,"height":702,"src":"\/\/www.thebirthstore.com.au\/cdn\/shop\/collections\/postpartum-150119.jpg?v=1714968037"}},{"id":291456483517,"handle":"shop-all","title":"Shop All - Mum","updated_at":"2026-07-30T19:07:59+08:00","body_html":"","published_at":"2022-12-23T22:04:39+08:00","sort_order":"best-selling","template_suffix":"shop-all-collection","disjunctive":false,"rules":[{"column":"variant_price","relation":"greater_than","condition":"1"},{"column":"title","relation":"not_contains","condition":"Batteries"},{"column":"tag","relation":"equals","condition":"Mum"}],"published_scope":"global","image":{"created_at":"2024-05-06T12:00:54+08:00","alt":"Shop All - The Birth Store","width":1365,"height":2048,"src":"\/\/www.thebirthstore.com.au\/cdn\/shop\/collections\/shop-all-693176.jpg?v=1714968055"}},{"id":292595433661,"handle":"support-clothing","title":"Support Clothing","updated_at":"2026-07-30T19:07:59+08:00","body_html":"Maternity, breastfeeding, supportive, postpartum clothing and more - we've got it all, or we will have soon! Keep an eye out for new arrivals and grab yourself some incredible must-have staple items.","published_at":"2023-02-20T12:49:47+08:00","sort_order":"best-selling","template_suffix":"swaddles-collection","disjunctive":false,"rules":[{"column":"tag","relation":"equals","condition":"Support Clothing"}],"published_scope":"global","image":{"created_at":"2024-05-06T12:00:59+08:00","alt":"Support Clothing - The Birth Store","width":586,"height":879,"src":"\/\/www.thebirthstore.com.au\/cdn\/shop\/collections\/support-clothing-743676.jpg?v=1714968059"}}]}
{"item":{"id":7439748694205,"title":"SRC Pregnancy Shorts - Over the Bump","handle":"src-pregnancy-shorts-over-the-bump","description":"\u003cp\u003e\u003cspan\u003eThis product is stocked at a 3\u003c\/span\u003e\u003csup\u003erd\u003c\/sup\u003e\u003cspan\u003e party warehouse, if ordering with other products you’ll receive two packages. This product will have a turn around time of 10 days if pickup is selected on checkout. Any questions, please contact us \u003ca title=\"Contact Us\" href=\"https:\/\/www.thebirthstore.com.au\/pages\/contact-us\" target=\"_blank\"\u003ehere\u003c\/a\u003e.\u003c\/span\u003e\u003cbr\u003e\u003c\/p\u003e\n\u003cp\u003e\u003cspan\u003e\u003cem\u003e\u003cstrong\u003eINSTORE AVAILABILITY - \u003c\/strong\u003e\u003c\/em\u003eWe have limited instore availability for these products, please call us on \u003cspan aria-label=\"Call phone number 0458 556 512\"\u003e0458 556 512\u003c\/span\u003e before heading to the store to buy in-store.\u003c\/span\u003e\u003c\/p\u003e","published_at":"2023-03-13T14:11:45+08:00","created_at":"2023-02-13T22:54:07+08:00","vendor":"SRC Health","type":"Pregnancy Shorts","tags":["Maternity Clothing","Mum","Pain Relief","Pelvic Floor","Support Clothing"],"price":18900,"price_min":18900,"price_max":18900,"available":true,"price_varies":false,"compare_at_price":18900,"compare_at_price_min":18900,"compare_at_price_max":18900,"compare_at_price_varies":false,"variants":[{"id":42658993832125,"title":"XXS","option1":"XXS","option2":null,"option3":null,"sku":null,"requires_shipping":true,"taxable":false,"featured_image":null,"available":true,"name":"SRC Pregnancy Shorts - Over the Bump - XXS","public_title":"XXS","options":["XXS"],"price":18900,"weight":0,"compare_at_price":18900,"inventory_management":null,"barcode":"93832125","requires_selling_plan":false,"selling_plan_allocations":[],"quantity_rule":{"min":1,"max":null,"increment":1}},{"id":42658993897661,"title":"XS","option1":"XS","option2":null,"option3":null,"sku":null,"requires_shipping":true,"taxable":false,"featured_image":null,"available":true,"name":"SRC Pregnancy Shorts - Over the Bump - XS","public_title":"XS","options":["XS"],"price":18900,"weight":0,"compare_at_price":18900,"inventory_management":null,"barcode":"93897661","requires_selling_plan":false,"selling_plan_allocations":[],"quantity_rule":{"min":1,"max":null,"increment":1}},{"id":42658993963197,"title":"S","option1":"S","option2":null,"option3":null,"sku":null,"requires_shipping":true,"taxable":false,"featured_image":null,"available":true,"name":"SRC Pregnancy Shorts - Over the Bump - S","public_title":"S","options":["S"],"price":18900,"weight":0,"compare_at_price":18900,"inventory_management":null,"barcode":"93963197","requires_selling_plan":false,"selling_plan_allocations":[],"quantity_rule":{"min":1,"max":null,"increment":1}},{"id":42658994028733,"title":"M","option1":"M","option2":null,"option3":null,"sku":null,"requires_shipping":true,"taxable":false,"featured_image":null,"available":true,"name":"SRC Pregnancy Shorts - Over the Bump - M","public_title":"M","options":["M"],"price":18900,"weight":0,"compare_at_price":18900,"inventory_management":null,"barcode":"94028733","requires_selling_plan":false,"selling_plan_allocations":[],"quantity_rule":{"min":1,"max":null,"increment":1}},{"id":42658994094269,"title":"L","option1":"L","option2":null,"option3":null,"sku":null,"requires_shipping":true,"taxable":false,"featured_image":null,"available":true,"name":"SRC Pregnancy Shorts - Over the Bump - L","public_title":"L","options":["L"],"price":18900,"weight":0,"compare_at_price":18900,"inventory_management":null,"barcode":"94094269","requires_selling_plan":false,"selling_plan_allocations":[],"quantity_rule":{"min":1,"max":null,"increment":1}},{"id":42658994159805,"title":"XL","option1":"XL","option2":null,"option3":null,"sku":null,"requires_shipping":true,"taxable":false,"featured_image":null,"available":true,"name":"SRC Pregnancy Shorts - Over the Bump - XL","public_title":"XL","options":["XL"],"price":18900,"weight":0,"compare_at_price":18900,"inventory_management":null,"barcode":"94159805","requires_selling_plan":false,"selling_plan_allocations":[],"quantity_rule":{"min":1,"max":null,"increment":1}},{"id":42658994225341,"title":"XXL","option1":"XXL","option2":null,"option3":null,"sku":null,"requires_shipping":true,"taxable":false,"featured_image":null,"available":true,"name":"SRC Pregnancy Shorts - Over the Bump - XXL","public_title":"XXL","options":["XXL"],"price":18900,"weight":0,"compare_at_price":18900,"inventory_management":null,"barcode":"94225341","requires_selling_plan":false,"selling_plan_allocations":[],"quantity_rule":{"min":1,"max":null,"increment":1}},{"id":45872449519805,"title":"XXXL","option1":"XXXL","option2":null,"option3":null,"sku":null,"requires_shipping":true,"taxable":false,"featured_image":null,"available":true,"name":"SRC Pregnancy Shorts - Over the Bump - XXXL","public_title":"XXXL","options":["XXXL"],"price":18900,"weight":0,"compare_at_price":18900,"inventory_management":null,"barcode":"49519805","requires_selling_plan":false,"selling_plan_allocations":[],"quantity_rule":{"min":1,"max":null,"increment":1}}],"images":["\/\/www.thebirthstore.com.au\/cdn\/shop\/files\/src-pregnancy-shorts-over-the-bump-491123.jpg?v=1714968045","\/\/www.thebirthstore.com.au\/cdn\/shop\/files\/src-pregnancy-shorts-over-the-bump-465754.jpg?v=1714968045","\/\/www.thebirthstore.com.au\/cdn\/shop\/files\/src-pregnancy-shorts-over-the-bump-751292.png?v=1714968045"],"featured_image":"\/\/www.thebirthstore.com.au\/cdn\/shop\/files\/src-pregnancy-shorts-over-the-bump-491123.jpg?v=1714968045","options":["Size"],"media":[{"alt":"SRC Pregnancy Shorts - Over the Bump - The Birth Store-SRC Health","id":27007599870141,"position":1,"preview_image":{"aspect_ratio":1.0,"height":1080,"width":1080,"src":"\/\/www.thebirthstore.com.au\/cdn\/shop\/files\/src-pregnancy-shorts-over-the-bump-491123.jpg?v=1714968045"},"aspect_ratio":1.0,"height":1080,"media_type":"image","src":"\/\/www.thebirthstore.com.au\/cdn\/shop\/files\/src-pregnancy-shorts-over-the-bump-491123.jpg?v=1714968045","width":1080},{"alt":"SRC Pregnancy Shorts - Over the Bump - The Birth Store-SRC Health","id":27007599902909,"position":2,"preview_image":{"aspect_ratio":1.0,"height":1080,"width":1080,"src":"\/\/www.thebirthstore.com.au\/cdn\/shop\/files\/src-pregnancy-shorts-over-the-bump-465754.jpg?v=1714968045"},"aspect_ratio":1.0,"height":1080,"media_type":"image","src":"\/\/www.thebirthstore.com.au\/cdn\/shop\/files\/src-pregnancy-shorts-over-the-bump-465754.jpg?v=1714968045","width":1080},{"alt":"SRC Pregnancy Shorts - Over the Bump - The Birth Store-SRC Health","id":27007599935677,"position":3,"preview_image":{"aspect_ratio":1.582,"height":948,"width":1500,"src":"\/\/www.thebirthstore.com.au\/cdn\/shop\/files\/src-pregnancy-shorts-over-the-bump-751292.png?v=1714968045"},"aspect_ratio":1.582,"height":948,"media_type":"image","src":"\/\/www.thebirthstore.com.au\/cdn\/shop\/files\/src-pregnancy-shorts-over-the-bump-751292.png?v=1714968045","width":1500}],"requires_selling_plan":false,"selling_plan_groups":[],"content":"\u003cp\u003e\u003cspan\u003eThis product is stocked at a 3\u003c\/span\u003e\u003csup\u003erd\u003c\/sup\u003e\u003cspan\u003e party warehouse, if ordering with other products you’ll receive two packages. This product will have a turn around time of 10 days if pickup is selected on checkout. Any questions, please contact us \u003ca title=\"Contact Us\" href=\"https:\/\/www.thebirthstore.com.au\/pages\/contact-us\" target=\"_blank\"\u003ehere\u003c\/a\u003e.\u003c\/span\u003e\u003cbr\u003e\u003c\/p\u003e\n\u003cp\u003e\u003cspan\u003e\u003cem\u003e\u003cstrong\u003eINSTORE AVAILABILITY - \u003c\/strong\u003e\u003c\/em\u003eWe have limited instore availability for these products, please call us on \u003cspan aria-label=\"Call phone number 0458 556 512\"\u003e0458 556 512\u003c\/span\u003e before heading to the store to buy in-store.\u003c\/span\u003e\u003c\/p\u003e"},"options":[{"name":"Size","position":1,"values":["XXS","XS","S","M","L","XL","XXL","XXXL"]}],"custom_metafields":{},"metafields":{"badge":"\u003cdiv style='display:none' class='jdgm-prev-badge' data-average-rating='0.00' data-number-of-reviews='0' data-number-of-questions='0'\u003e \u003cspan class='jdgm-prev-badge__stars' data-score='0.00' tabindex='0' aria-label='0.00 stars' role='button'\u003e \u003cspan class='jdgm-star jdgm--off'\u003e\u003c\/span\u003e\u003cspan class='jdgm-star jdgm--off'\u003e\u003c\/span\u003e\u003cspan class='jdgm-star jdgm--off'\u003e\u003c\/span\u003e\u003cspan class='jdgm-star jdgm--off'\u003e\u003c\/span\u003e\u003cspan class='jdgm-star jdgm--off'\u003e\u003c\/span\u003e \u003c\/span\u003e \u003cspan class='jdgm-prev-badge__text'\u003e No reviews \u003c\/span\u003e \u003c\/div\u003e","widget":"\u003cdiv class='jdgm-rev-widg' data-updated-at='2025-06-13T16:12:10Z' data-average-rating='0.00' data-number-of-reviews='0' data-number-of-questions='0'\u003e \u003cstyle class='jdgm-temp-hiding-style'\u003e.jdgm-rev-widg{ display: none }\u003c\/style\u003e \u003cdiv class='jdgm-rev-widg__header'\u003e \u003ch2 class='jdgm-rev-widg__title'\u003eCustomer Reviews\u003c\/h2\u003e \u003cdiv class='jdgm-rev-widg__summary'\u003e \u003cdiv class='jdgm-rev-widg__summary-stars' aria-label='Average rating is 0.00 stars' role='img'\u003e \u003cspan class='jdgm-star jdgm--off'\u003e\u003c\/span\u003e\u003cspan class='jdgm-star jdgm--off'\u003e\u003c\/span\u003e\u003cspan class='jdgm-star jdgm--off'\u003e\u003c\/span\u003e\u003cspan class='jdgm-star jdgm--off'\u003e\u003c\/span\u003e\u003cspan class='jdgm-star jdgm--off'\u003e\u003c\/span\u003e \u003c\/div\u003e \u003cdiv class='jdgm-rev-widg__summary-text'\u003eBe the first to write a review\u003c\/div\u003e \u003c\/div\u003e \u003ca style='display: none' href='#' class='jdgm-write-rev-link' role='button'\u003eWrite a review\u003c\/a\u003e \u003cdiv class='jdgm-histogram jdgm-temp-hidden'\u003e \u003cdiv class='jdgm-histogram__row' data-rating='5' data-frequency='0' data-percentage='0'\u003e \u003cdiv class='jdgm-histogram__star' role='button' aria-label=\"0% (0) reviews with 5 star rating\" tabindex='0' \u003e\u003cspan class='jdgm-star jdgm--on'\u003e\u003c\/span\u003e\u003cspan class='jdgm-star jdgm--on'\u003e\u003c\/span\u003e\u003cspan class='jdgm-star jdgm--on'\u003e\u003c\/span\u003e\u003cspan class='jdgm-star jdgm--on'\u003e\u003c\/span\u003e\u003cspan class='jdgm-star jdgm--on'\u003e\u003c\/span\u003e\u003c\/div\u003e \u003cdiv class='jdgm-histogram__bar'\u003e \u003cdiv class='jdgm-histogram__bar-content' style='width: 0%;'\u003e \u003c\/div\u003e \u003c\/div\u003e \u003cdiv class='jdgm-histogram__percentage'\u003e0%\u003c\/div\u003e \u003cdiv class='jdgm-histogram__frequency'\u003e(0)\u003c\/div\u003e \u003c\/div\u003e \u003cdiv class='jdgm-histogram__row' data-rating='4' data-frequency='0' data-percentage='0'\u003e \u003cdiv class='jdgm-histogram__star' role='button' aria-label=\"0% (0) reviews with 4 star rating\" tabindex='0' \u003e\u003cspan class='jdgm-star jdgm--on'\u003e\u003c\/span\u003e\u003cspan class='jdgm-star jdgm--on'\u003e\u003c\/span\u003e\u003cspan class='jdgm-star jdgm--on'\u003e\u003c\/span\u003e\u003cspan class='jdgm-star jdgm--on'\u003e\u003c\/span\u003e\u003cspan class='jdgm-star jdgm--off'\u003e\u003c\/span\u003e\u003c\/div\u003e \u003cdiv class='jdgm-histogram__bar'\u003e \u003cdiv class='jdgm-histogram__bar-content' style='width: 0%;'\u003e \u003c\/div\u003e \u003c\/div\u003e \u003cdiv class='jdgm-histogram__percentage'\u003e0%\u003c\/div\u003e \u003cdiv class='jdgm-histogram__frequency'\u003e(0)\u003c\/div\u003e \u003c\/div\u003e \u003cdiv class='jdgm-histogram__row' data-rating='3' data-frequency='0' data-percentage='0'\u003e \u003cdiv class='jdgm-histogram__star' role='button' aria-label=\"0% (0) reviews with 3 star rating\" tabindex='0' \u003e\u003cspan class='jdgm-star jdgm--on'\u003e\u003c\/span\u003e\u003cspan class='jdgm-star jdgm--on'\u003e\u003c\/span\u003e\u003cspan class='jdgm-star jdgm--on'\u003e\u003c\/span\u003e\u003cspan class='jdgm-star jdgm--off'\u003e\u003c\/span\u003e\u003cspan class='jdgm-star jdgm--off'\u003e\u003c\/span\u003e\u003c\/div\u003e \u003cdiv class='jdgm-histogram__bar'\u003e \u003cdiv class='jdgm-histogram__bar-content' style='width: 0%;'\u003e \u003c\/div\u003e \u003c\/div\u003e \u003cdiv class='jdgm-histogram__percentage'\u003e0%\u003c\/div\u003e \u003cdiv class='jdgm-histogram__frequency'\u003e(0)\u003c\/div\u003e \u003c\/div\u003e \u003cdiv class='jdgm-histogram__row' data-rating='2' data-frequency='0' data-percentage='0'\u003e \u003cdiv class='jdgm-histogram__star' role='button' aria-label=\"0% (0) reviews with 2 star rating\" tabindex='0' \u003e\u003cspan class='jdgm-star jdgm--on'\u003e\u003c\/span\u003e\u003cspan class='jdgm-star jdgm--on'\u003e\u003c\/span\u003e\u003cspan class='jdgm-star jdgm--off'\u003e\u003c\/span\u003e\u003cspan class='jdgm-star jdgm--off'\u003e\u003c\/span\u003e\u003cspan class='jdgm-star jdgm--off'\u003e\u003c\/span\u003e\u003c\/div\u003e \u003cdiv class='jdgm-histogram__bar'\u003e \u003cdiv class='jdgm-histogram__bar-content' style='width: 0%;'\u003e \u003c\/div\u003e \u003c\/div\u003e \u003cdiv class='jdgm-histogram__percentage'\u003e0%\u003c\/div\u003e \u003cdiv class='jdgm-histogram__frequency'\u003e(0)\u003c\/div\u003e \u003c\/div\u003e \u003cdiv class='jdgm-histogram__row' data-rating='1' data-frequency='0' data-percentage='0'\u003e \u003cdiv class='jdgm-histogram__star' role='button' aria-label=\"0% (0) reviews with 1 star rating\" tabindex='0' \u003e\u003cspan class='jdgm-star jdgm--on'\u003e\u003c\/span\u003e\u003cspan class='jdgm-star jdgm--off'\u003e\u003c\/span\u003e\u003cspan class='jdgm-star jdgm--off'\u003e\u003c\/span\u003e\u003cspan class='jdgm-star jdgm--off'\u003e\u003c\/span\u003e\u003cspan class='jdgm-star jdgm--off'\u003e\u003c\/span\u003e\u003c\/div\u003e \u003cdiv class='jdgm-histogram__bar'\u003e \u003cdiv class='jdgm-histogram__bar-content' style='width: 0%;'\u003e \u003c\/div\u003e \u003c\/div\u003e \u003cdiv class='jdgm-histogram__percentage'\u003e0%\u003c\/div\u003e \u003cdiv class='jdgm-histogram__frequency'\u003e(0)\u003c\/div\u003e \u003c\/div\u003e \u003cdiv class='jdgm-histogram__row jdgm-histogram__clear-filter' data-rating=null tabindex='0'\u003e\u003c\/div\u003e \u003c\/div\u003e \u003cdiv class='jdgm-rev-widg__sort-wrapper'\u003e\u003c\/div\u003e \u003c\/div\u003e \u003cdiv class='jdgm-rev-widg__body'\u003e \u003cdiv class='jdgm-rev-widg__reviews'\u003e\u003c\/div\u003e \u003cdiv class='jdgm-paginate' data-per-page='10' data-url='https:\/\/api.judge.me\/reviews\/reviews_for_widget' style=\"display: none;\"\u003e\u003c\/div\u003e \u003c\/div\u003e \u003cdiv class='jdgm-rev-widg__paginate-spinner-wrapper'\u003e \u003cdiv class='jdgm-spinner'\u003e\u003c\/div\u003e \u003c\/div\u003e \u003c\/div\u003e"},"default_reviews_metafields":{},"collections":[{"id":261657460925,"handle":"buy","title":"Buy","updated_at":"2026-07-30T19:07:59+08:00","body_html":"\u003cp\u003eBrowse all of our pregnancy, labour \u0026amp; birth, postpartum and baby essentials here.\u003cbr\u003e\u003c\/p\u003e\n\u003cp\u003e\u003cspan\u003eYou can even buy now and pay later with Afterpay!\u003c\/span\u003e\u003c\/p\u003e","published_at":"2021-03-10T12:05:31+08:00","sort_order":"best-selling","template_suffix":"shop-all-collection","disjunctive":false,"rules":[{"column":"title","relation":"not_contains","condition":"Hire"}],"published_scope":"global","image":{"created_at":"2024-05-06T11:59:42+08:00","alt":"Buy - The Birth Store","width":2048,"height":2048,"src":"\/\/www.thebirthstore.com.au\/cdn\/shop\/collections\/buy-964856.jpg?v=1714967982"}},{"id":293309022397,"handle":"clothing","title":"Clothing","updated_at":"2026-07-30T19:07:59+08:00","body_html":"","published_at":"2023-05-03T11:41:12+08:00","sort_order":"best-selling","template_suffix":"swaddles-collection","disjunctive":true,"rules":[{"column":"tag","relation":"equals","condition":"Breastfeeding Clothing"},{"column":"tag","relation":"equals","condition":"Support Clothing"}],"published_scope":"global","image":{"created_at":"2024-05-06T11:59:52+08:00","alt":"Clothing - The Birth Store","width":676,"height":581,"src":"\/\/www.thebirthstore.com.au\/cdn\/shop\/collections\/clothing-483293.jpg?v=1714967992"}},{"id":326572048573,"handle":"maternity-clothing","title":"Maternity Clothing","updated_at":"2026-07-30T19:07:59+08:00","body_html":"","published_at":"2025-10-31T12:50:20+08:00","sort_order":"best-selling","template_suffix":"","disjunctive":false,"rules":[{"column":"tag","relation":"equals","condition":"Maternity Clothing"}],"published_scope":"global","image":{"created_at":"2025-11-20T21:34:30+08:00","alt":"Maternity Clothing - The Birth Store","width":1920,"height":1281,"src":"\/\/www.thebirthstore.com.au\/cdn\/shop\/collections\/maternity-clothing-6954274.webp?v=1763645670"}},{"id":281712591037,"handle":"pain-relief","title":"Pain Relief","updated_at":"2026-07-30T19:07:59+08:00","body_html":"","published_at":"2021-12-20T14:22:45+08:00","sort_order":"best-selling","template_suffix":"pain-relief-collection","disjunctive":false,"rules":[{"column":"tag","relation":"equals","condition":"Pain Relief"}],"published_scope":"global","image":{"created_at":"2024-05-06T12:00:27+08:00","alt":"Pain Relief - The Birth Store","width":1365,"height":2048,"src":"\/\/www.thebirthstore.com.au\/cdn\/shop\/collections\/pain-relief-878865.jpg?v=1714968027"}},{"id":281712689341,"handle":"pelvic-floor-health","title":"Pelvic Floor Health","updated_at":"2026-07-30T19:07:59+08:00","body_html":"","published_at":"2021-12-20T14:23:41+08:00","sort_order":"best-selling","template_suffix":"swaddles-collection","disjunctive":false,"rules":[{"column":"tag","relation":"equals","condition":"Pelvic Floor"}],"published_scope":"global","image":{"created_at":"2024-05-06T12:00:29+08:00","alt":"Pelvic Floor Health - The Birth Store","width":536,"height":589,"src":"\/\/www.thebirthstore.com.au\/cdn\/shop\/collections\/pelvic-floor-health-890736.jpg?v=1714968030"}},{"id":291456483517,"handle":"shop-all","title":"Shop All - Mum","updated_at":"2026-07-30T19:07:59+08:00","body_html":"","published_at":"2022-12-23T22:04:39+08:00","sort_order":"best-selling","template_suffix":"shop-all-collection","disjunctive":false,"rules":[{"column":"variant_price","relation":"greater_than","condition":"1"},{"column":"title","relation":"not_contains","condition":"Batteries"},{"column":"tag","relation":"equals","condition":"Mum"}],"published_scope":"global","image":{"created_at":"2024-05-06T12:00:54+08:00","alt":"Shop All - The Birth Store","width":1365,"height":2048,"src":"\/\/www.thebirthstore.com.au\/cdn\/shop\/collections\/shop-all-693176.jpg?v=1714968055"}},{"id":292595433661,"handle":"support-clothing","title":"Support Clothing","updated_at":"2026-07-30T19:07:59+08:00","body_html":"Maternity, breastfeeding, supportive, postpartum clothing and more - we've got it all, or we will have soon! Keep an eye out for new arrivals and grab yourself some incredible must-have staple items.","published_at":"2023-02-20T12:49:47+08:00","sort_order":"best-selling","template_suffix":"swaddles-collection","disjunctive":false,"rules":[{"column":"tag","relation":"equals","condition":"Support Clothing"}],"published_scope":"global","image":{"created_at":"2024-05-06T12:00:59+08:00","alt":"Support Clothing - The Birth Store","width":586,"height":879,"src":"\/\/www.thebirthstore.com.au\/cdn\/shop\/collections\/support-clothing-743676.jpg?v=1714968059"}}]}
{"item":{"id":8115744145597,"title":"SRC C-Section Recovery Shorts - Mini","handle":"src-c-section-recovery-shorts-mini","description":"\u003cmeta charset=\"utf-8\"\u003e\u003cspan data-mce-fragment=\"1\"\u003eThis product is stocked at a 3\u003c\/span\u003e\u003csup data-mce-fragment=\"1\"\u003erd\u003c\/sup\u003e\u003cspan data-mce-fragment=\"1\"\u003e party warehouse, if ordering with other products you’ll receive two packages. This product will have a turn around time of 10 days if pickup is selected on checkout. Any questions, please contact us \u003ca href=\"https:\/\/www.thebirthstore.com.au\/pages\/contact-us\" title=\"Contact Us\" data-mce-fragment=\"1\" target=\"_blank\" data-mce-href=\"https:\/\/www.thebirthstore.com.au\/pages\/contact-us\"\u003ehere\u003c\/a\u003e.\u003c\/span\u003e\u003cbr\u003e","published_at":"2025-10-25T13:47:34+08:00","created_at":"2025-10-25T13:47:34+08:00","vendor":"SRC Health","type":"Recovery Shorts","tags":["C-Section Birth Recovery","Hospital Bag","Mum","Pelvic Floor","Post-Partum","Support Clothing","Vaginal Birth Recovery"],"price":19500,"price_min":19500,"price_max":19500,"available":true,"price_varies":false,"compare_at_price":null,"compare_at_price_min":0,"compare_at_price_max":0,"compare_at_price_varies":false,"variants":[{"id":45841364779197,"title":"XXS \/ Black","option1":"XXS","option2":"Black","option3":null,"sku":null,"requires_shipping":true,"taxable":false,"featured_image":null,"available":true,"name":"SRC C-Section Recovery Shorts - Mini - XXS \/ Black","public_title":"XXS \/ Black","options":["XXS","Black"],"price":19500,"weight":0,"compare_at_price":null,"inventory_management":null,"barcode":"64779197","requires_selling_plan":false,"selling_plan_allocations":[],"quantity_rule":{"min":1,"max":null,"increment":1}},{"id":45841364844733,"title":"XS \/ Black","option1":"XS","option2":"Black","option3":null,"sku":null,"requires_shipping":true,"taxable":false,"featured_image":null,"available":true,"name":"SRC C-Section Recovery Shorts - Mini - XS \/ Black","public_title":"XS \/ Black","options":["XS","Black"],"price":19500,"weight":0,"compare_at_price":null,"inventory_management":null,"barcode":"64844733","requires_selling_plan":false,"selling_plan_allocations":[],"quantity_rule":{"min":1,"max":null,"increment":1}},{"id":45841364910269,"title":"S \/ Black","option1":"S","option2":"Black","option3":null,"sku":null,"requires_shipping":true,"taxable":false,"featured_image":null,"available":true,"name":"SRC C-Section Recovery Shorts - Mini - S \/ Black","public_title":"S \/ Black","options":["S","Black"],"price":19500,"weight":0,"compare_at_price":null,"inventory_management":null,"barcode":"64910269","requires_selling_plan":false,"selling_plan_allocations":[],"quantity_rule":{"min":1,"max":null,"increment":1}},{"id":45841364975805,"title":"M \/ Black","option1":"M","option2":"Black","option3":null,"sku":null,"requires_shipping":true,"taxable":false,"featured_image":null,"available":true,"name":"SRC C-Section Recovery Shorts - Mini - M \/ Black","public_title":"M \/ Black","options":["M","Black"],"price":19500,"weight":0,"compare_at_price":null,"inventory_management":null,"barcode":"64975805","requires_selling_plan":false,"selling_plan_allocations":[],"quantity_rule":{"min":1,"max":null,"increment":1}},{"id":45841365041341,"title":"L \/ Black","option1":"L","option2":"Black","option3":null,"sku":null,"requires_shipping":true,"taxable":false,"featured_image":null,"available":true,"name":"SRC C-Section Recovery Shorts - Mini - L \/ Black","public_title":"L \/ Black","options":["L","Black"],"price":19500,"weight":0,"compare_at_price":null,"inventory_management":null,"barcode":"65041341","requires_selling_plan":false,"selling_plan_allocations":[],"quantity_rule":{"min":1,"max":null,"increment":1}},{"id":45841365106877,"title":"XL \/ Black","option1":"XL","option2":"Black","option3":null,"sku":null,"requires_shipping":true,"taxable":false,"featured_image":null,"available":true,"name":"SRC C-Section Recovery Shorts - Mini - XL \/ Black","public_title":"XL \/ Black","options":["XL","Black"],"price":19500,"weight":0,"compare_at_price":null,"inventory_management":null,"barcode":"65106877","requires_selling_plan":false,"selling_plan_allocations":[],"quantity_rule":{"min":1,"max":null,"increment":1}},{"id":45841365172413,"title":"XXL \/ Black","option1":"XXL","option2":"Black","option3":null,"sku":null,"requires_shipping":true,"taxable":false,"featured_image":null,"available":true,"name":"SRC C-Section Recovery Shorts - Mini - XXL \/ Black","public_title":"XXL \/ Black","options":["XXL","Black"],"price":19500,"weight":0,"compare_at_price":null,"inventory_management":null,"barcode":"65172413","requires_selling_plan":false,"selling_plan_allocations":[],"quantity_rule":{"min":1,"max":null,"increment":1}}],"images":["\/\/www.thebirthstore.com.au\/cdn\/shop\/files\/src-c-section-recovery-shorts-mini-3383851.png?v=1764307139","\/\/www.thebirthstore.com.au\/cdn\/shop\/files\/src-c-section-recovery-shorts-mini-3774997.jpg?v=1762438527","\/\/www.thebirthstore.com.au\/cdn\/shop\/files\/src-c-section-recovery-shorts-mini-6185634.jpg?v=1761398052"],"featured_image":"\/\/www.thebirthstore.com.au\/cdn\/shop\/files\/src-c-section-recovery-shorts-mini-3383851.png?v=1764307139","options":["Size","Colour"],"media":[{"alt":"SRC C - Section Recovery Shorts - Mini - The Birth Store - SRC Health","id":29906962284733,"position":1,"preview_image":{"aspect_ratio":1.0,"height":800,"width":800,"src":"\/\/www.thebirthstore.com.au\/cdn\/shop\/files\/src-c-section-recovery-shorts-mini-3383851.png?v=1764307139"},"aspect_ratio":1.0,"height":800,"media_type":"image","src":"\/\/www.thebirthstore.com.au\/cdn\/shop\/files\/src-c-section-recovery-shorts-mini-3383851.png?v=1764307139","width":800},{"alt":"SRC C - Section Recovery Shorts - Mini - The Birth Store - SRC Health","id":29906962776253,"position":2,"preview_image":{"aspect_ratio":1.0,"height":1080,"width":1080,"src":"\/\/www.thebirthstore.com.au\/cdn\/shop\/files\/src-c-section-recovery-shorts-mini-3774997.jpg?v=1762438527"},"aspect_ratio":1.0,"height":1080,"media_type":"image","src":"\/\/www.thebirthstore.com.au\/cdn\/shop\/files\/src-c-section-recovery-shorts-mini-3774997.jpg?v=1762438527","width":1080},{"alt":"SRC C - Section Recovery Shorts - Mini - The Birth Store - SRC Health","id":29906965332157,"position":3,"preview_image":{"aspect_ratio":0.667,"height":1200,"width":800,"src":"\/\/www.thebirthstore.com.au\/cdn\/shop\/files\/src-c-section-recovery-shorts-mini-6185634.jpg?v=1761398052"},"aspect_ratio":0.667,"height":1200,"media_type":"image","src":"\/\/www.thebirthstore.com.au\/cdn\/shop\/files\/src-c-section-recovery-shorts-mini-6185634.jpg?v=1761398052","width":800}],"requires_selling_plan":false,"selling_plan_groups":[],"content":"\u003cmeta charset=\"utf-8\"\u003e\u003cspan data-mce-fragment=\"1\"\u003eThis product is stocked at a 3\u003c\/span\u003e\u003csup data-mce-fragment=\"1\"\u003erd\u003c\/sup\u003e\u003cspan data-mce-fragment=\"1\"\u003e party warehouse, if ordering with other products you’ll receive two packages. This product will have a turn around time of 10 days if pickup is selected on checkout. Any questions, please contact us \u003ca href=\"https:\/\/www.thebirthstore.com.au\/pages\/contact-us\" title=\"Contact Us\" data-mce-fragment=\"1\" target=\"_blank\" data-mce-href=\"https:\/\/www.thebirthstore.com.au\/pages\/contact-us\"\u003ehere\u003c\/a\u003e.\u003c\/span\u003e\u003cbr\u003e"},"options":[{"name":"Size","position":1,"values":["XXS","XS","S","M","L","XL","XXL"]},{"name":"Colour","position":2,"values":["Black"]}],"custom_metafields":{},"metafields":{"badge":"\u003cdiv style='display:none' class='jdgm-prev-badge' data-average-rating='0.00' data-number-of-reviews='0' data-number-of-questions='0'\u003e \u003cspan class='jdgm-prev-badge__stars' data-score='0.00' tabindex='0' aria-label='0.00 stars' role='button'\u003e \u003cspan class='jdgm-star jdgm--off'\u003e\u003c\/span\u003e\u003cspan class='jdgm-star jdgm--off'\u003e\u003c\/span\u003e\u003cspan class='jdgm-star jdgm--off'\u003e\u003c\/span\u003e\u003cspan class='jdgm-star jdgm--off'\u003e\u003c\/span\u003e\u003cspan class='jdgm-star jdgm--off'\u003e\u003c\/span\u003e \u003c\/span\u003e \u003cspan class='jdgm-prev-badge__text'\u003e No reviews \u003c\/span\u003e \u003c\/div\u003e","widget":"\u003cdiv class='jdgm-rev-widg' data-updated-at='2025-10-25T05:47:37Z' data-average-rating='0.00' data-number-of-reviews='0' data-number-of-questions='0' data-image-url=''\u003e \u003cstyle class='jdgm-temp-hiding-style'\u003e.jdgm-rev-widg{ display: none }\u003c\/style\u003e \u003cdiv class='jdgm-rev-widg__header'\u003e \u003ch2 class='jdgm-rev-widg__title'\u003eCustomer Reviews\u003c\/h2\u003e \u003cdiv class='jdgm-rev-widg__summary'\u003e \u003cdiv class='jdgm-rev-widg__summary-stars' aria-label='Average rating is 0.00 stars' role='img'\u003e \u003cspan class='jdgm-star jdgm--off'\u003e\u003c\/span\u003e\u003cspan class='jdgm-star jdgm--off'\u003e\u003c\/span\u003e\u003cspan class='jdgm-star jdgm--off'\u003e\u003c\/span\u003e\u003cspan class='jdgm-star jdgm--off'\u003e\u003c\/span\u003e\u003cspan class='jdgm-star jdgm--off'\u003e\u003c\/span\u003e \u003c\/div\u003e \u003cdiv class='jdgm-rev-widg__summary-text'\u003eBe the first to write a review\u003c\/div\u003e \u003c\/div\u003e \u003ca style='display: none' href='#' class='jdgm-write-rev-link' role='button'\u003eWrite a review\u003c\/a\u003e \u003cdiv class='jdgm-histogram jdgm-temp-hidden'\u003e \u003cdiv class='jdgm-histogram__row' data-rating='5' data-frequency='0' data-percentage='0'\u003e \u003cdiv class='jdgm-histogram__star' role='button' aria-label=\"0% (0) reviews with 5 star rating\" tabindex='0' \u003e\u003cspan class='jdgm-star jdgm--on'\u003e\u003c\/span\u003e\u003cspan class='jdgm-star jdgm--on'\u003e\u003c\/span\u003e\u003cspan class='jdgm-star jdgm--on'\u003e\u003c\/span\u003e\u003cspan class='jdgm-star jdgm--on'\u003e\u003c\/span\u003e\u003cspan class='jdgm-star jdgm--on'\u003e\u003c\/span\u003e\u003c\/div\u003e \u003cdiv class='jdgm-histogram__bar'\u003e \u003cdiv class='jdgm-histogram__bar-content' style='width: 0%;'\u003e \u003c\/div\u003e \u003c\/div\u003e \u003cdiv class='jdgm-histogram__percentage'\u003e0%\u003c\/div\u003e \u003cdiv class='jdgm-histogram__frequency'\u003e(0)\u003c\/div\u003e \u003c\/div\u003e \u003cdiv class='jdgm-histogram__row' data-rating='4' data-frequency='0' data-percentage='0'\u003e \u003cdiv class='jdgm-histogram__star' role='button' aria-label=\"0% (0) reviews with 4 star rating\" tabindex='0' \u003e\u003cspan class='jdgm-star jdgm--on'\u003e\u003c\/span\u003e\u003cspan class='jdgm-star jdgm--on'\u003e\u003c\/span\u003e\u003cspan class='jdgm-star jdgm--on'\u003e\u003c\/span\u003e\u003cspan class='jdgm-star jdgm--on'\u003e\u003c\/span\u003e\u003cspan class='jdgm-star jdgm--off'\u003e\u003c\/span\u003e\u003c\/div\u003e \u003cdiv class='jdgm-histogram__bar'\u003e \u003cdiv class='jdgm-histogram__bar-content' style='width: 0%;'\u003e \u003c\/div\u003e \u003c\/div\u003e \u003cdiv class='jdgm-histogram__percentage'\u003e0%\u003c\/div\u003e \u003cdiv class='jdgm-histogram__frequency'\u003e(0)\u003c\/div\u003e \u003c\/div\u003e \u003cdiv class='jdgm-histogram__row' data-rating='3' data-frequency='0' data-percentage='0'\u003e \u003cdiv class='jdgm-histogram__star' role='button' aria-label=\"0% (0) reviews with 3 star rating\" tabindex='0' \u003e\u003cspan class='jdgm-star jdgm--on'\u003e\u003c\/span\u003e\u003cspan class='jdgm-star jdgm--on'\u003e\u003c\/span\u003e\u003cspan class='jdgm-star jdgm--on'\u003e\u003c\/span\u003e\u003cspan class='jdgm-star jdgm--off'\u003e\u003c\/span\u003e\u003cspan class='jdgm-star jdgm--off'\u003e\u003c\/span\u003e\u003c\/div\u003e \u003cdiv class='jdgm-histogram__bar'\u003e \u003cdiv class='jdgm-histogram__bar-content' style='width: 0%;'\u003e \u003c\/div\u003e \u003c\/div\u003e \u003cdiv class='jdgm-histogram__percentage'\u003e0%\u003c\/div\u003e \u003cdiv class='jdgm-histogram__frequency'\u003e(0)\u003c\/div\u003e \u003c\/div\u003e \u003cdiv class='jdgm-histogram__row' data-rating='2' data-frequency='0' data-percentage='0'\u003e \u003cdiv class='jdgm-histogram__star' role='button' aria-label=\"0% (0) reviews with 2 star rating\" tabindex='0' \u003e\u003cspan class='jdgm-star jdgm--on'\u003e\u003c\/span\u003e\u003cspan class='jdgm-star jdgm--on'\u003e\u003c\/span\u003e\u003cspan class='jdgm-star jdgm--off'\u003e\u003c\/span\u003e\u003cspan class='jdgm-star jdgm--off'\u003e\u003c\/span\u003e\u003cspan class='jdgm-star jdgm--off'\u003e\u003c\/span\u003e\u003c\/div\u003e \u003cdiv class='jdgm-histogram__bar'\u003e \u003cdiv class='jdgm-histogram__bar-content' style='width: 0%;'\u003e \u003c\/div\u003e \u003c\/div\u003e \u003cdiv class='jdgm-histogram__percentage'\u003e0%\u003c\/div\u003e \u003cdiv class='jdgm-histogram__frequency'\u003e(0)\u003c\/div\u003e \u003c\/div\u003e \u003cdiv class='jdgm-histogram__row' data-rating='1' data-frequency='0' data-percentage='0'\u003e \u003cdiv class='jdgm-histogram__star' role='button' aria-label=\"0% (0) reviews with 1 star rating\" tabindex='0' \u003e\u003cspan class='jdgm-star jdgm--on'\u003e\u003c\/span\u003e\u003cspan class='jdgm-star jdgm--off'\u003e\u003c\/span\u003e\u003cspan class='jdgm-star jdgm--off'\u003e\u003c\/span\u003e\u003cspan class='jdgm-star jdgm--off'\u003e\u003c\/span\u003e\u003cspan class='jdgm-star jdgm--off'\u003e\u003c\/span\u003e\u003c\/div\u003e \u003cdiv class='jdgm-histogram__bar'\u003e \u003cdiv class='jdgm-histogram__bar-content' style='width: 0%;'\u003e \u003c\/div\u003e \u003c\/div\u003e \u003cdiv class='jdgm-histogram__percentage'\u003e0%\u003c\/div\u003e \u003cdiv class='jdgm-histogram__frequency'\u003e(0)\u003c\/div\u003e \u003c\/div\u003e \u003cdiv class='jdgm-histogram__row jdgm-histogram__clear-filter' data-rating=null tabindex='0'\u003e\u003c\/div\u003e \u003c\/div\u003e \u003cdiv class='jdgm-rev-widg__sort-wrapper'\u003e\u003c\/div\u003e \u003c\/div\u003e \u003cdiv class='jdgm-rev-widg__body'\u003e \u003cdiv class='jdgm-rev-widg__reviews'\u003e\u003c\/div\u003e \u003cdiv class='jdgm-paginate' data-per-page='10' data-url='https:\/\/api.judge.me\/reviews\/reviews_for_widget' style=\"display: none;\"\u003e\u003c\/div\u003e \u003c\/div\u003e \u003cdiv class='jdgm-rev-widg__paginate-spinner-wrapper'\u003e \u003cdiv class='jdgm-spinner'\u003e\u003c\/div\u003e \u003c\/div\u003e \u003c\/div\u003e"},"default_reviews_metafields":{},"collections":[{"id":261657460925,"handle":"buy","title":"Buy","updated_at":"2026-07-30T19:07:59+08:00","body_html":"\u003cp\u003eBrowse all of our pregnancy, labour \u0026amp; birth, postpartum and baby essentials here.\u003cbr\u003e\u003c\/p\u003e\n\u003cp\u003e\u003cspan\u003eYou can even buy now and pay later with Afterpay!\u003c\/span\u003e\u003c\/p\u003e","published_at":"2021-03-10T12:05:31+08:00","sort_order":"best-selling","template_suffix":"shop-all-collection","disjunctive":false,"rules":[{"column":"title","relation":"not_contains","condition":"Hire"}],"published_scope":"global","image":{"created_at":"2024-05-06T11:59:42+08:00","alt":"Buy - The Birth Store","width":2048,"height":2048,"src":"\/\/www.thebirthstore.com.au\/cdn\/shop\/collections\/buy-964856.jpg?v=1714967982"}},{"id":281712361661,"handle":"c-section-birth-recovery","title":"C-Section Birth Recovery","updated_at":"2026-07-29T19:08:26+08:00","body_html":"","published_at":"2021-12-20T14:19:01+08:00","sort_order":"best-selling","template_suffix":"swaddles-collection","disjunctive":false,"rules":[{"column":"tag","relation":"equals","condition":"C-Section Birth Recovery"}],"published_scope":"global","image":{"created_at":"2024-05-06T11:59:49+08:00","alt":"C-Section Birth Recovery - The Birth Store","width":1366,"height":2048,"src":"\/\/www.thebirthstore.com.au\/cdn\/shop\/collections\/c-section-birth-recovery-359249.jpg?v=1714967990"}},{"id":293309022397,"handle":"clothing","title":"Clothing","updated_at":"2026-07-30T19:07:59+08:00","body_html":"","published_at":"2023-05-03T11:41:12+08:00","sort_order":"best-selling","template_suffix":"swaddles-collection","disjunctive":true,"rules":[{"column":"tag","relation":"equals","condition":"Breastfeeding Clothing"},{"column":"tag","relation":"equals","condition":"Support Clothing"}],"published_scope":"global","image":{"created_at":"2024-05-06T11:59:52+08:00","alt":"Clothing - The Birth Store","width":676,"height":581,"src":"\/\/www.thebirthstore.com.au\/cdn\/shop\/collections\/clothing-483293.jpg?v=1714967992"}},{"id":337429201085,"handle":"hospital-bag","title":"Hospital Bag","updated_at":"2026-07-30T19:07:59+08:00","body_html":"","published_at":"2026-06-03T11:36:29+08:00","sort_order":"most-relevant","template_suffix":"","disjunctive":false,"rules":[{"column":"tag","relation":"equals","condition":"Hospital Bag"}],"published_scope":"global"},{"id":281712689341,"handle":"pelvic-floor-health","title":"Pelvic Floor Health","updated_at":"2026-07-30T19:07:59+08:00","body_html":"","published_at":"2021-12-20T14:23:41+08:00","sort_order":"best-selling","template_suffix":"swaddles-collection","disjunctive":false,"rules":[{"column":"tag","relation":"equals","condition":"Pelvic Floor"}],"published_scope":"global","image":{"created_at":"2024-05-06T12:00:29+08:00","alt":"Pelvic Floor Health - The Birth Store","width":536,"height":589,"src":"\/\/www.thebirthstore.com.au\/cdn\/shop\/collections\/pelvic-floor-health-890736.jpg?v=1714968030"}},{"id":261658083517,"handle":"post-partum","title":"Postpartum","updated_at":"2026-07-30T19:07:59+08:00","body_html":"\u003cp\u003eShop your postpartum and hospital bag essentials below. Looking for something we don't currently stock? Please reach out and let us know.\u003cbr\u003e\u003c\/p\u003e\n\u003cp\u003e\u003cspan\u003eYou can even buy now and pay later with Afterpay!\u003c\/span\u003e\u003c\/p\u003e","published_at":"2021-03-10T12:33:47+08:00","sort_order":"best-selling","template_suffix":"postpartum-collection","disjunctive":false,"rules":[{"column":"tag","relation":"equals","condition":"Post-Partum"}],"published_scope":"global","image":{"created_at":"2024-05-06T12:00:36+08:00","alt":"Postpartum - The Birth Store","width":611,"height":702,"src":"\/\/www.thebirthstore.com.au\/cdn\/shop\/collections\/postpartum-150119.jpg?v=1714968037"}},{"id":291456483517,"handle":"shop-all","title":"Shop All - Mum","updated_at":"2026-07-30T19:07:59+08:00","body_html":"","published_at":"2022-12-23T22:04:39+08:00","sort_order":"best-selling","template_suffix":"shop-all-collection","disjunctive":false,"rules":[{"column":"variant_price","relation":"greater_than","condition":"1"},{"column":"title","relation":"not_contains","condition":"Batteries"},{"column":"tag","relation":"equals","condition":"Mum"}],"published_scope":"global","image":{"created_at":"2024-05-06T12:00:54+08:00","alt":"Shop All - The Birth Store","width":1365,"height":2048,"src":"\/\/www.thebirthstore.com.au\/cdn\/shop\/collections\/shop-all-693176.jpg?v=1714968055"}},{"id":292595433661,"handle":"support-clothing","title":"Support Clothing","updated_at":"2026-07-30T19:07:59+08:00","body_html":"Maternity, breastfeeding, supportive, postpartum clothing and more - we've got it all, or we will have soon! Keep an eye out for new arrivals and grab yourself some incredible must-have staple items.","published_at":"2023-02-20T12:49:47+08:00","sort_order":"best-selling","template_suffix":"swaddles-collection","disjunctive":false,"rules":[{"column":"tag","relation":"equals","condition":"Support Clothing"}],"published_scope":"global","image":{"created_at":"2024-05-06T12:00:59+08:00","alt":"Support Clothing - The Birth Store","width":586,"height":879,"src":"\/\/www.thebirthstore.com.au\/cdn\/shop\/collections\/support-clothing-743676.jpg?v=1714968059"}},{"id":281712197821,"handle":"vaginal-birth-recovery","title":"Vaginal Birth Recovery","updated_at":"2026-07-30T19:07:59+08:00","body_html":"","published_at":"2021-12-20T14:18:23+08:00","sort_order":"best-selling","template_suffix":"swaddles-collection","disjunctive":true,"rules":[{"column":"tag","relation":"equals","condition":"Vaginal Birth Recovery"},{"column":"tag","relation":"equals","condition":"Vaginal Birth Recover"}],"published_scope":"global","image":{"created_at":"2024-05-06T12:01:03+08:00","alt":"Vaginal Birth Recovery - The Birth Store","width":2048,"height":2048,"src":"\/\/www.thebirthstore.com.au\/cdn\/shop\/collections\/vaginal-birth-recovery-449034.jpg?v=1714968063"}}]}
{"item":{"id":7460439720125,"title":"Perifit - Kegal Exerciser","handle":"perifit-kegal-exerciser","description":"\u003cp\u003e\u003cspan\u003ePerifit is the revolutionary solution for pelvic healing and strength training. Part app, part exerciser, Perifit gives your Kegel exercises a modern upgrade using exciting gamified technology.\u003c\/span\u003e\u003c\/p\u003e\n\u003cp class=\"p2\"\u003eDeveloped with top pelvic floor experts for people at every stage of life, \u003cb\u003efun video games work together with six unique kegel exercise programs\u003c\/b\u003e to successfully strengthen and heal your pelvic floor. Visualize your contractions in action, challenge yourself to level up, and stay motivated with an interactive app to track and monitor your progress.\u003cb\u003e \u003c\/b\u003e\u003c\/p\u003e\n\u003cp class=\"p2\"\u003e\u003cb\u003eYou don’t have to live with the painful effects of incontinence, prolapse and weak pelvic function anymore. \u003c\/b\u003eWith Perifit, experience the physical healing, emotional wellness, and sexual pleasure you deserve.\u003c\/p\u003e\n\u003cp class=\"p2\"\u003eTake back your body and life with Kegel exercises and strength training that work!\u003c\/p\u003e\n\u003cul class=\"ul1\"\u003e\n\u003cli class=\"li2\"\u003e\n\u003cspan class=\"s1\"\u003e\u003c\/span\u003eDeveloped with top pelvic floor doctors\u003c\/li\u003e\n\u003cli class=\"li2\"\u003e\n\u003cspan class=\"s1\"\u003e\u003c\/span\u003eClinically proven biofeedback technology\u003c\/li\u003e\n\u003cli class=\"li2\"\u003e\n\u003cspan class=\"s1\"\u003e\u003c\/span\u003eInnovative patented solution\u003cbr\u003e\n\u003c\/li\u003e\n\u003cli class=\"li2\"\u003e\n\u003cspan class=\"s1\"\u003e\u003c\/span\u003eSleek 100% waterproof design\u003c\/li\u003e\n\u003cli class=\"li2\"\u003e\n\u003cspan class=\"s1\"\u003e\u003c\/span\u003eRecommended by female Health Professionals\u003c\/li\u003e\n\u003c\/ul\u003e","published_at":"2023-04-04T10:21:32+08:00","created_at":"2023-04-04T10:21:32+08:00","vendor":"Perifit","type":"","tags":["Mum","Pelvic Floor","Post-Partum"],"price":20000,"price_min":20000,"price_max":20000,"available":false,"price_varies":false,"compare_at_price":22900,"compare_at_price_min":22900,"compare_at_price_max":22900,"compare_at_price_varies":false,"variants":[{"id":42760962932925,"title":"Default Title","option1":"Default Title","option2":null,"option3":null,"sku":"","requires_shipping":true,"taxable":false,"featured_image":null,"available":false,"name":"Perifit - Kegal Exerciser","public_title":null,"options":["Default Title"],"price":20000,"weight":161,"compare_at_price":22900,"inventory_management":"shopify","barcode":"62932925","requires_selling_plan":false,"selling_plan_allocations":[],"quantity_rule":{"min":1,"max":null,"increment":1}}],"images":["\/\/www.thebirthstore.com.au\/cdn\/shop\/files\/perifit-kegal-exerciser-177795.jpg?v=1714968012","\/\/www.thebirthstore.com.au\/cdn\/shop\/files\/perifit-kegal-exerciser-810132.jpg?v=1714968012","\/\/www.thebirthstore.com.au\/cdn\/shop\/files\/perifit-kegal-exerciser-488883.png?v=1714968012","\/\/www.thebirthstore.com.au\/cdn\/shop\/files\/perifit-kegal-exerciser-191238.jpg?v=1714968012","\/\/www.thebirthstore.com.au\/cdn\/shop\/files\/perifit-kegal-exerciser-744653.jpg?v=1714968012","\/\/www.thebirthstore.com.au\/cdn\/shop\/files\/perifit-kegal-exerciser-360866.png?v=1714968012","\/\/www.thebirthstore.com.au\/cdn\/shop\/files\/perifit-kegal-exerciser-818445.jpg?v=1714968012","\/\/www.thebirthstore.com.au\/cdn\/shop\/files\/perifit-kegal-exerciser-488150.png?v=1714968012","\/\/www.thebirthstore.com.au\/cdn\/shop\/files\/perifit-kegal-exerciser-861525.png?v=1714968012"],"featured_image":"\/\/www.thebirthstore.com.au\/cdn\/shop\/files\/perifit-kegal-exerciser-177795.jpg?v=1714968012","options":["Title"],"media":[{"alt":"Perifit - Kegal Exerciser - The Birth Store-Perifit","id":27007596822717,"position":1,"preview_image":{"aspect_ratio":1.0,"height":1080,"width":1080,"src":"\/\/www.thebirthstore.com.au\/cdn\/shop\/files\/perifit-kegal-exerciser-177795.jpg?v=1714968012"},"aspect_ratio":1.0,"height":1080,"media_type":"image","src":"\/\/www.thebirthstore.com.au\/cdn\/shop\/files\/perifit-kegal-exerciser-177795.jpg?v=1714968012","width":1080},{"alt":"Perifit - Kegal Exerciser - The Birth Store-Perifit","id":27007596888253,"position":2,"preview_image":{"aspect_ratio":1.792,"height":558,"width":1000,"src":"\/\/www.thebirthstore.com.au\/cdn\/shop\/files\/perifit-kegal-exerciser-810132.jpg?v=1714968012"},"aspect_ratio":1.792,"height":558,"media_type":"image","src":"\/\/www.thebirthstore.com.au\/cdn\/shop\/files\/perifit-kegal-exerciser-810132.jpg?v=1714968012","width":1000},{"alt":"Perifit - Kegal Exerciser - The Birth Store-Perifit","id":27007596953789,"position":3,"preview_image":{"aspect_ratio":1.0,"height":700,"width":700,"src":"\/\/www.thebirthstore.com.au\/cdn\/shop\/files\/perifit-kegal-exerciser-488883.png?v=1714968012"},"aspect_ratio":1.0,"height":700,"media_type":"image","src":"\/\/www.thebirthstore.com.au\/cdn\/shop\/files\/perifit-kegal-exerciser-488883.png?v=1714968012","width":700},{"alt":"Perifit - Kegal Exerciser - The Birth Store-Perifit","id":27007596986557,"position":4,"preview_image":{"aspect_ratio":1.0,"height":700,"width":700,"src":"\/\/www.thebirthstore.com.au\/cdn\/shop\/files\/perifit-kegal-exerciser-191238.jpg?v=1714968012"},"aspect_ratio":1.0,"height":700,"media_type":"image","src":"\/\/www.thebirthstore.com.au\/cdn\/shop\/files\/perifit-kegal-exerciser-191238.jpg?v=1714968012","width":700},{"alt":"Perifit - Kegal Exerciser - The Birth Store-Perifit","id":27007597019325,"position":5,"preview_image":{"aspect_ratio":1.0,"height":700,"width":700,"src":"\/\/www.thebirthstore.com.au\/cdn\/shop\/files\/perifit-kegal-exerciser-744653.jpg?v=1714968012"},"aspect_ratio":1.0,"height":700,"media_type":"image","src":"\/\/www.thebirthstore.com.au\/cdn\/shop\/files\/perifit-kegal-exerciser-744653.jpg?v=1714968012","width":700},{"alt":"Perifit - Kegal Exerciser - The Birth Store-Perifit","id":27007597052093,"position":6,"preview_image":{"aspect_ratio":1.0,"height":700,"width":700,"src":"\/\/www.thebirthstore.com.au\/cdn\/shop\/files\/perifit-kegal-exerciser-360866.png?v=1714968012"},"aspect_ratio":1.0,"height":700,"media_type":"image","src":"\/\/www.thebirthstore.com.au\/cdn\/shop\/files\/perifit-kegal-exerciser-360866.png?v=1714968012","width":700},{"alt":"Perifit - Kegal Exerciser - The Birth Store-Perifit","id":27007597084861,"position":7,"preview_image":{"aspect_ratio":1.0,"height":700,"width":700,"src":"\/\/www.thebirthstore.com.au\/cdn\/shop\/files\/perifit-kegal-exerciser-818445.jpg?v=1714968012"},"aspect_ratio":1.0,"height":700,"media_type":"image","src":"\/\/www.thebirthstore.com.au\/cdn\/shop\/files\/perifit-kegal-exerciser-818445.jpg?v=1714968012","width":700},{"alt":"Perifit - Kegal Exerciser - The Birth Store-Perifit","id":27007597117629,"position":8,"preview_image":{"aspect_ratio":1.0,"height":700,"width":700,"src":"\/\/www.thebirthstore.com.au\/cdn\/shop\/files\/perifit-kegal-exerciser-488150.png?v=1714968012"},"aspect_ratio":1.0,"height":700,"media_type":"image","src":"\/\/www.thebirthstore.com.au\/cdn\/shop\/files\/perifit-kegal-exerciser-488150.png?v=1714968012","width":700},{"alt":"Perifit - Kegal Exerciser - The Birth Store-Perifit","id":27007597150397,"position":9,"preview_image":{"aspect_ratio":1.0,"height":700,"width":700,"src":"\/\/www.thebirthstore.com.au\/cdn\/shop\/files\/perifit-kegal-exerciser-861525.png?v=1714968012"},"aspect_ratio":1.0,"height":700,"media_type":"image","src":"\/\/www.thebirthstore.com.au\/cdn\/shop\/files\/perifit-kegal-exerciser-861525.png?v=1714968012","width":700}],"requires_selling_plan":false,"selling_plan_groups":[],"content":"\u003cp\u003e\u003cspan\u003ePerifit is the revolutionary solution for pelvic healing and strength training. Part app, part exerciser, Perifit gives your Kegel exercises a modern upgrade using exciting gamified technology.\u003c\/span\u003e\u003c\/p\u003e\n\u003cp class=\"p2\"\u003eDeveloped with top pelvic floor experts for people at every stage of life, \u003cb\u003efun video games work together with six unique kegel exercise programs\u003c\/b\u003e to successfully strengthen and heal your pelvic floor. Visualize your contractions in action, challenge yourself to level up, and stay motivated with an interactive app to track and monitor your progress.\u003cb\u003e \u003c\/b\u003e\u003c\/p\u003e\n\u003cp class=\"p2\"\u003e\u003cb\u003eYou don’t have to live with the painful effects of incontinence, prolapse and weak pelvic function anymore. \u003c\/b\u003eWith Perifit, experience the physical healing, emotional wellness, and sexual pleasure you deserve.\u003c\/p\u003e\n\u003cp class=\"p2\"\u003eTake back your body and life with Kegel exercises and strength training that work!\u003c\/p\u003e\n\u003cul class=\"ul1\"\u003e\n\u003cli class=\"li2\"\u003e\n\u003cspan class=\"s1\"\u003e\u003c\/span\u003eDeveloped with top pelvic floor doctors\u003c\/li\u003e\n\u003cli class=\"li2\"\u003e\n\u003cspan class=\"s1\"\u003e\u003c\/span\u003eClinically proven biofeedback technology\u003c\/li\u003e\n\u003cli class=\"li2\"\u003e\n\u003cspan class=\"s1\"\u003e\u003c\/span\u003eInnovative patented solution\u003cbr\u003e\n\u003c\/li\u003e\n\u003cli class=\"li2\"\u003e\n\u003cspan class=\"s1\"\u003e\u003c\/span\u003eSleek 100% waterproof design\u003c\/li\u003e\n\u003cli class=\"li2\"\u003e\n\u003cspan class=\"s1\"\u003e\u003c\/span\u003eRecommended by female Health Professionals\u003c\/li\u003e\n\u003c\/ul\u003e"},"options":[{"name":"Title","position":1,"values":["Default Title"]}],"custom_metafields":{},"metafields":{"badge":"\u003cdiv style='display:none' class='jdgm-prev-badge' data-average-rating='0.00' data-number-of-reviews='0' data-number-of-questions='0'\u003e \u003cspan class='jdgm-prev-badge__stars' data-score='0.00' tabindex='0' aria-label='0.00 stars' role='button'\u003e \u003cspan class='jdgm-star jdgm--off'\u003e\u003c\/span\u003e\u003cspan class='jdgm-star jdgm--off'\u003e\u003c\/span\u003e\u003cspan class='jdgm-star jdgm--off'\u003e\u003c\/span\u003e\u003cspan class='jdgm-star jdgm--off'\u003e\u003c\/span\u003e\u003cspan class='jdgm-star jdgm--off'\u003e\u003c\/span\u003e \u003c\/span\u003e \u003cspan class='jdgm-prev-badge__text'\u003e No reviews \u003c\/span\u003e \u003c\/div\u003e","widget":"\u003cdiv class='jdgm-rev-widg' data-updated-at='2025-06-13T16:12:53Z' data-average-rating='0.00' data-number-of-reviews='0' data-number-of-questions='0'\u003e \u003cstyle class='jdgm-temp-hiding-style'\u003e.jdgm-rev-widg{ display: none }\u003c\/style\u003e \u003cdiv class='jdgm-rev-widg__header'\u003e \u003ch2 class='jdgm-rev-widg__title'\u003eCustomer Reviews\u003c\/h2\u003e \u003cdiv class='jdgm-rev-widg__summary'\u003e \u003cdiv class='jdgm-rev-widg__summary-stars' aria-label='Average rating is 0.00 stars' role='img'\u003e \u003cspan class='jdgm-star jdgm--off'\u003e\u003c\/span\u003e\u003cspan class='jdgm-star jdgm--off'\u003e\u003c\/span\u003e\u003cspan class='jdgm-star jdgm--off'\u003e\u003c\/span\u003e\u003cspan class='jdgm-star jdgm--off'\u003e\u003c\/span\u003e\u003cspan class='jdgm-star jdgm--off'\u003e\u003c\/span\u003e \u003c\/div\u003e \u003cdiv class='jdgm-rev-widg__summary-text'\u003eBe the first to write a review\u003c\/div\u003e \u003c\/div\u003e \u003ca style='display: none' href='#' class='jdgm-write-rev-link' role='button'\u003eWrite a review\u003c\/a\u003e \u003cdiv class='jdgm-histogram jdgm-temp-hidden'\u003e \u003cdiv class='jdgm-histogram__row' data-rating='5' data-frequency='0' data-percentage='0'\u003e \u003cdiv class='jdgm-histogram__star' role='button' aria-label=\"0% (0) reviews with 5 star rating\" tabindex='0' \u003e\u003cspan class='jdgm-star jdgm--on'\u003e\u003c\/span\u003e\u003cspan class='jdgm-star jdgm--on'\u003e\u003c\/span\u003e\u003cspan class='jdgm-star jdgm--on'\u003e\u003c\/span\u003e\u003cspan class='jdgm-star jdgm--on'\u003e\u003c\/span\u003e\u003cspan class='jdgm-star jdgm--on'\u003e\u003c\/span\u003e\u003c\/div\u003e \u003cdiv class='jdgm-histogram__bar'\u003e \u003cdiv class='jdgm-histogram__bar-content' style='width: 0%;'\u003e \u003c\/div\u003e \u003c\/div\u003e \u003cdiv class='jdgm-histogram__percentage'\u003e0%\u003c\/div\u003e \u003cdiv class='jdgm-histogram__frequency'\u003e(0)\u003c\/div\u003e \u003c\/div\u003e \u003cdiv class='jdgm-histogram__row' data-rating='4' data-frequency='0' data-percentage='0'\u003e \u003cdiv class='jdgm-histogram__star' role='button' aria-label=\"0% (0) reviews with 4 star rating\" tabindex='0' \u003e\u003cspan class='jdgm-star jdgm--on'\u003e\u003c\/span\u003e\u003cspan class='jdgm-star jdgm--on'\u003e\u003c\/span\u003e\u003cspan class='jdgm-star jdgm--on'\u003e\u003c\/span\u003e\u003cspan class='jdgm-star jdgm--on'\u003e\u003c\/span\u003e\u003cspan class='jdgm-star jdgm--off'\u003e\u003c\/span\u003e\u003c\/div\u003e \u003cdiv class='jdgm-histogram__bar'\u003e \u003cdiv class='jdgm-histogram__bar-content' style='width: 0%;'\u003e \u003c\/div\u003e \u003c\/div\u003e \u003cdiv class='jdgm-histogram__percentage'\u003e0%\u003c\/div\u003e \u003cdiv class='jdgm-histogram__frequency'\u003e(0)\u003c\/div\u003e \u003c\/div\u003e \u003cdiv class='jdgm-histogram__row' data-rating='3' data-frequency='0' data-percentage='0'\u003e \u003cdiv class='jdgm-histogram__star' role='button' aria-label=\"0% (0) reviews with 3 star rating\" tabindex='0' \u003e\u003cspan class='jdgm-star jdgm--on'\u003e\u003c\/span\u003e\u003cspan class='jdgm-star jdgm--on'\u003e\u003c\/span\u003e\u003cspan class='jdgm-star jdgm--on'\u003e\u003c\/span\u003e\u003cspan class='jdgm-star jdgm--off'\u003e\u003c\/span\u003e\u003cspan class='jdgm-star jdgm--off'\u003e\u003c\/span\u003e\u003c\/div\u003e \u003cdiv class='jdgm-histogram__bar'\u003e \u003cdiv class='jdgm-histogram__bar-content' style='width: 0%;'\u003e \u003c\/div\u003e \u003c\/div\u003e \u003cdiv class='jdgm-histogram__percentage'\u003e0%\u003c\/div\u003e \u003cdiv class='jdgm-histogram__frequency'\u003e(0)\u003c\/div\u003e \u003c\/div\u003e \u003cdiv class='jdgm-histogram__row' data-rating='2' data-frequency='0' data-percentage='0'\u003e \u003cdiv class='jdgm-histogram__star' role='button' aria-label=\"0% (0) reviews with 2 star rating\" tabindex='0' \u003e\u003cspan class='jdgm-star jdgm--on'\u003e\u003c\/span\u003e\u003cspan class='jdgm-star jdgm--on'\u003e\u003c\/span\u003e\u003cspan class='jdgm-star jdgm--off'\u003e\u003c\/span\u003e\u003cspan class='jdgm-star jdgm--off'\u003e\u003c\/span\u003e\u003cspan class='jdgm-star jdgm--off'\u003e\u003c\/span\u003e\u003c\/div\u003e \u003cdiv class='jdgm-histogram__bar'\u003e \u003cdiv class='jdgm-histogram__bar-content' style='width: 0%;'\u003e \u003c\/div\u003e \u003c\/div\u003e \u003cdiv class='jdgm-histogram__percentage'\u003e0%\u003c\/div\u003e \u003cdiv class='jdgm-histogram__frequency'\u003e(0)\u003c\/div\u003e \u003c\/div\u003e \u003cdiv class='jdgm-histogram__row' data-rating='1' data-frequency='0' data-percentage='0'\u003e \u003cdiv class='jdgm-histogram__star' role='button' aria-label=\"0% (0) reviews with 1 star rating\" tabindex='0' \u003e\u003cspan class='jdgm-star jdgm--on'\u003e\u003c\/span\u003e\u003cspan class='jdgm-star jdgm--off'\u003e\u003c\/span\u003e\u003cspan class='jdgm-star jdgm--off'\u003e\u003c\/span\u003e\u003cspan class='jdgm-star jdgm--off'\u003e\u003c\/span\u003e\u003cspan class='jdgm-star jdgm--off'\u003e\u003c\/span\u003e\u003c\/div\u003e \u003cdiv class='jdgm-histogram__bar'\u003e \u003cdiv class='jdgm-histogram__bar-content' style='width: 0%;'\u003e \u003c\/div\u003e \u003c\/div\u003e \u003cdiv class='jdgm-histogram__percentage'\u003e0%\u003c\/div\u003e \u003cdiv class='jdgm-histogram__frequency'\u003e(0)\u003c\/div\u003e \u003c\/div\u003e \u003cdiv class='jdgm-histogram__row jdgm-histogram__clear-filter' data-rating=null tabindex='0'\u003e\u003c\/div\u003e \u003c\/div\u003e \u003cdiv class='jdgm-rev-widg__sort-wrapper'\u003e\u003c\/div\u003e \u003c\/div\u003e \u003cdiv class='jdgm-rev-widg__body'\u003e \u003cdiv class='jdgm-rev-widg__reviews'\u003e\u003c\/div\u003e \u003cdiv class='jdgm-paginate' data-per-page='10' data-url='https:\/\/api.judge.me\/reviews\/reviews_for_widget' style=\"display: none;\"\u003e\u003c\/div\u003e \u003c\/div\u003e \u003cdiv class='jdgm-rev-widg__paginate-spinner-wrapper'\u003e \u003cdiv class='jdgm-spinner'\u003e\u003c\/div\u003e \u003c\/div\u003e \u003c\/div\u003e"},"default_reviews_metafields":{},"collections":[{"id":261657460925,"handle":"buy","title":"Buy","updated_at":"2026-07-30T19:07:59+08:00","body_html":"\u003cp\u003eBrowse all of our pregnancy, labour \u0026amp; birth, postpartum and baby essentials here.\u003cbr\u003e\u003c\/p\u003e\n\u003cp\u003e\u003cspan\u003eYou can even buy now and pay later with Afterpay!\u003c\/span\u003e\u003c\/p\u003e","published_at":"2021-03-10T12:05:31+08:00","sort_order":"best-selling","template_suffix":"shop-all-collection","disjunctive":false,"rules":[{"column":"title","relation":"not_contains","condition":"Hire"}],"published_scope":"global","image":{"created_at":"2024-05-06T11:59:42+08:00","alt":"Buy - The Birth Store","width":2048,"height":2048,"src":"\/\/www.thebirthstore.com.au\/cdn\/shop\/collections\/buy-964856.jpg?v=1714967982"}},{"id":281712689341,"handle":"pelvic-floor-health","title":"Pelvic Floor Health","updated_at":"2026-07-30T19:07:59+08:00","body_html":"","published_at":"2021-12-20T14:23:41+08:00","sort_order":"best-selling","template_suffix":"swaddles-collection","disjunctive":false,"rules":[{"column":"tag","relation":"equals","condition":"Pelvic Floor"}],"published_scope":"global","image":{"created_at":"2024-05-06T12:00:29+08:00","alt":"Pelvic Floor Health - The Birth Store","width":536,"height":589,"src":"\/\/www.thebirthstore.com.au\/cdn\/shop\/collections\/pelvic-floor-health-890736.jpg?v=1714968030"}},{"id":261658083517,"handle":"post-partum","title":"Postpartum","updated_at":"2026-07-30T19:07:59+08:00","body_html":"\u003cp\u003eShop your postpartum and hospital bag essentials below. Looking for something we don't currently stock? Please reach out and let us know.\u003cbr\u003e\u003c\/p\u003e\n\u003cp\u003e\u003cspan\u003eYou can even buy now and pay later with Afterpay!\u003c\/span\u003e\u003c\/p\u003e","published_at":"2021-03-10T12:33:47+08:00","sort_order":"best-selling","template_suffix":"postpartum-collection","disjunctive":false,"rules":[{"column":"tag","relation":"equals","condition":"Post-Partum"}],"published_scope":"global","image":{"created_at":"2024-05-06T12:00:36+08:00","alt":"Postpartum - The Birth Store","width":611,"height":702,"src":"\/\/www.thebirthstore.com.au\/cdn\/shop\/collections\/postpartum-150119.jpg?v=1714968037"}},{"id":291456483517,"handle":"shop-all","title":"Shop All - Mum","updated_at":"2026-07-30T19:07:59+08:00","body_html":"","published_at":"2022-12-23T22:04:39+08:00","sort_order":"best-selling","template_suffix":"shop-all-collection","disjunctive":false,"rules":[{"column":"variant_price","relation":"greater_than","condition":"1"},{"column":"title","relation":"not_contains","condition":"Batteries"},{"column":"tag","relation":"equals","condition":"Mum"}],"published_scope":"global","image":{"created_at":"2024-05-06T12:00:54+08:00","alt":"Shop All - The Birth Store","width":1365,"height":2048,"src":"\/\/www.thebirthstore.com.au\/cdn\/shop\/collections\/shop-all-693176.jpg?v=1714968055"}}]}


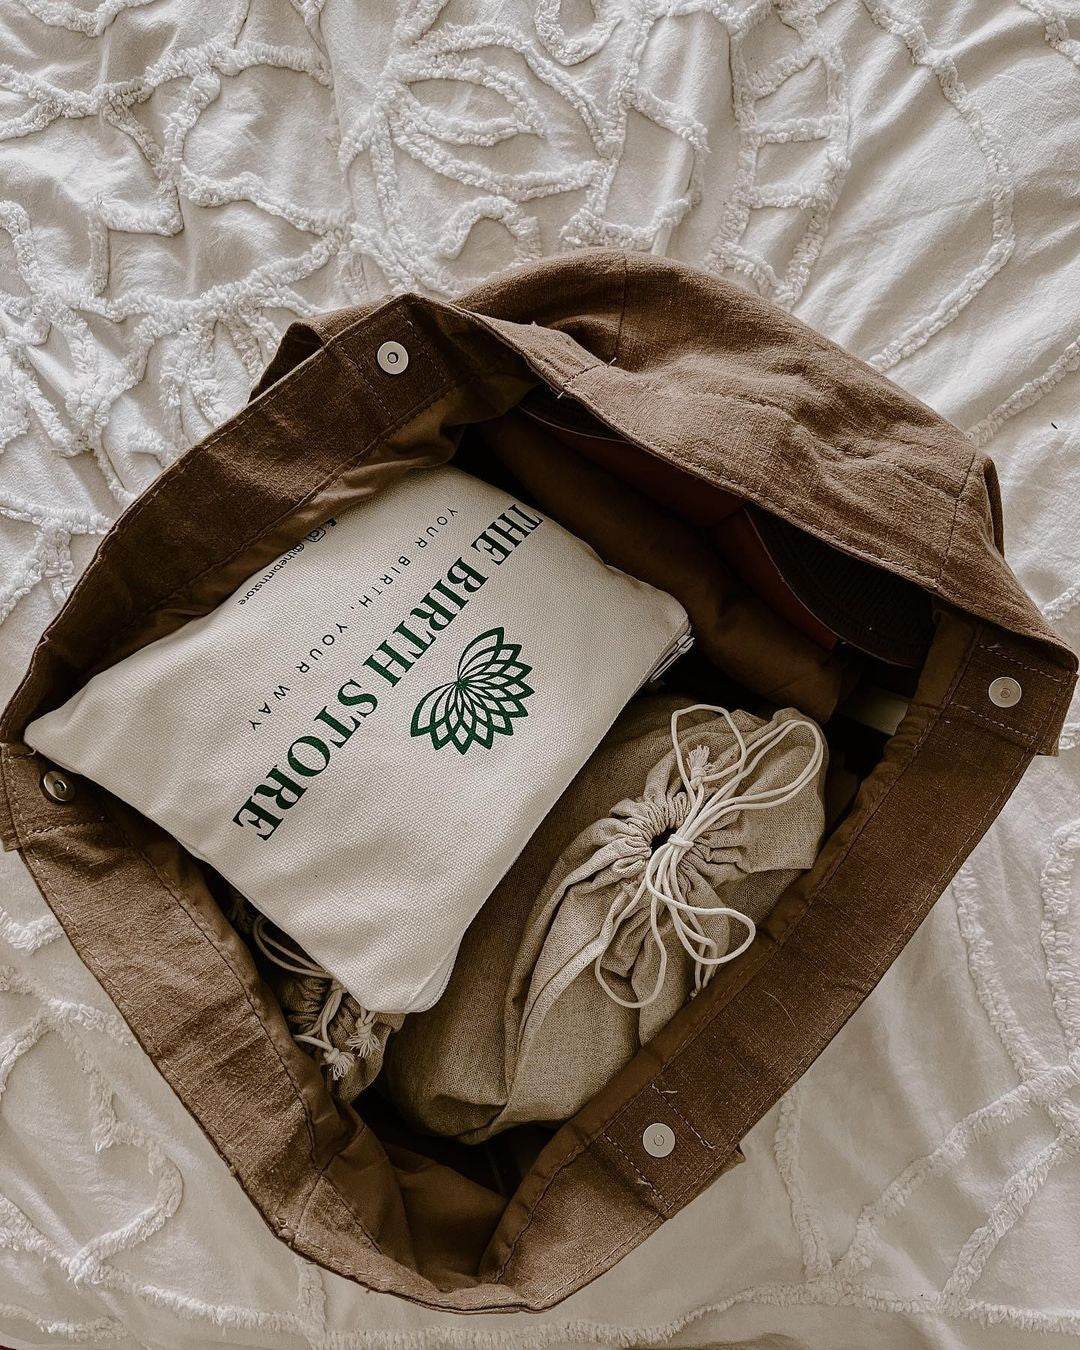

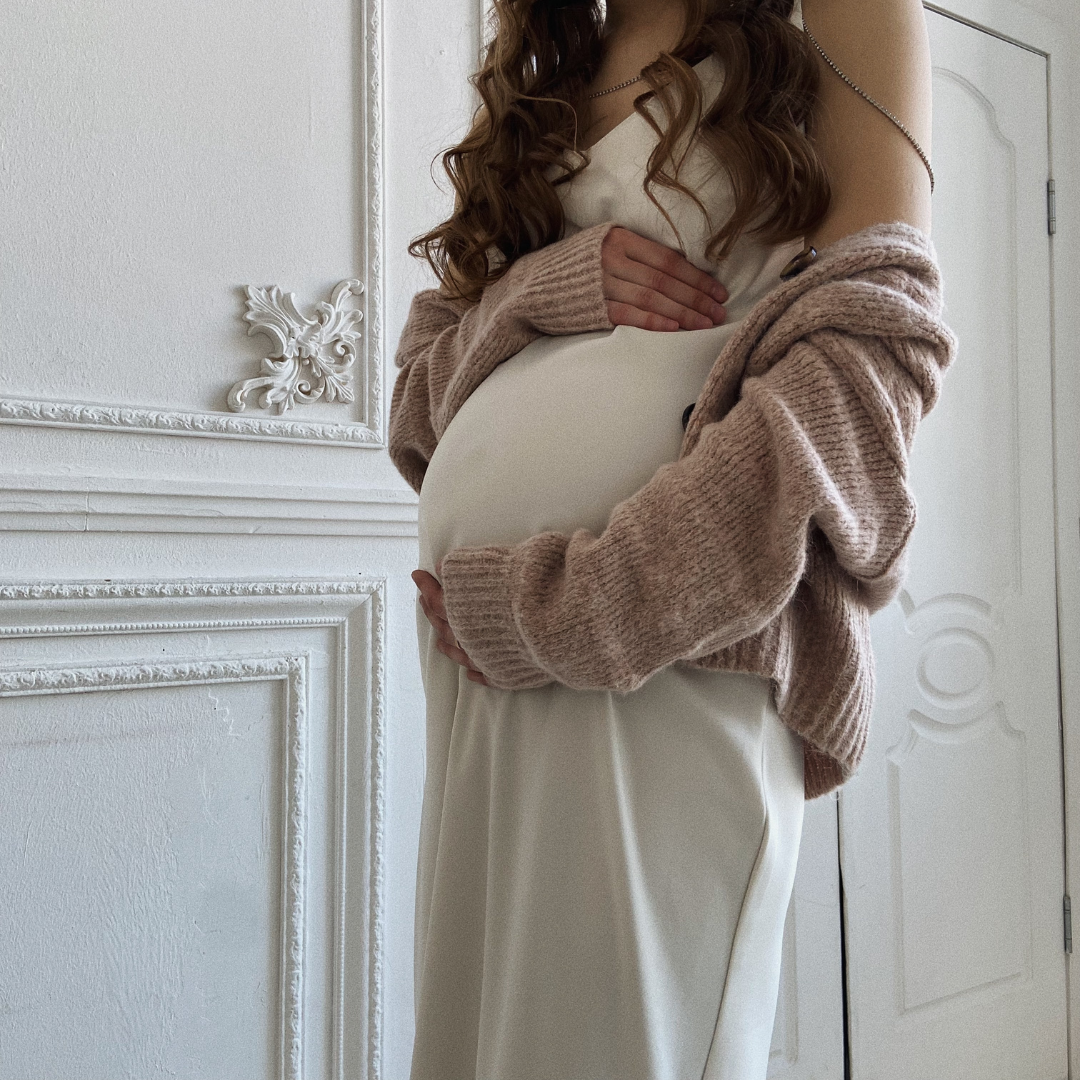
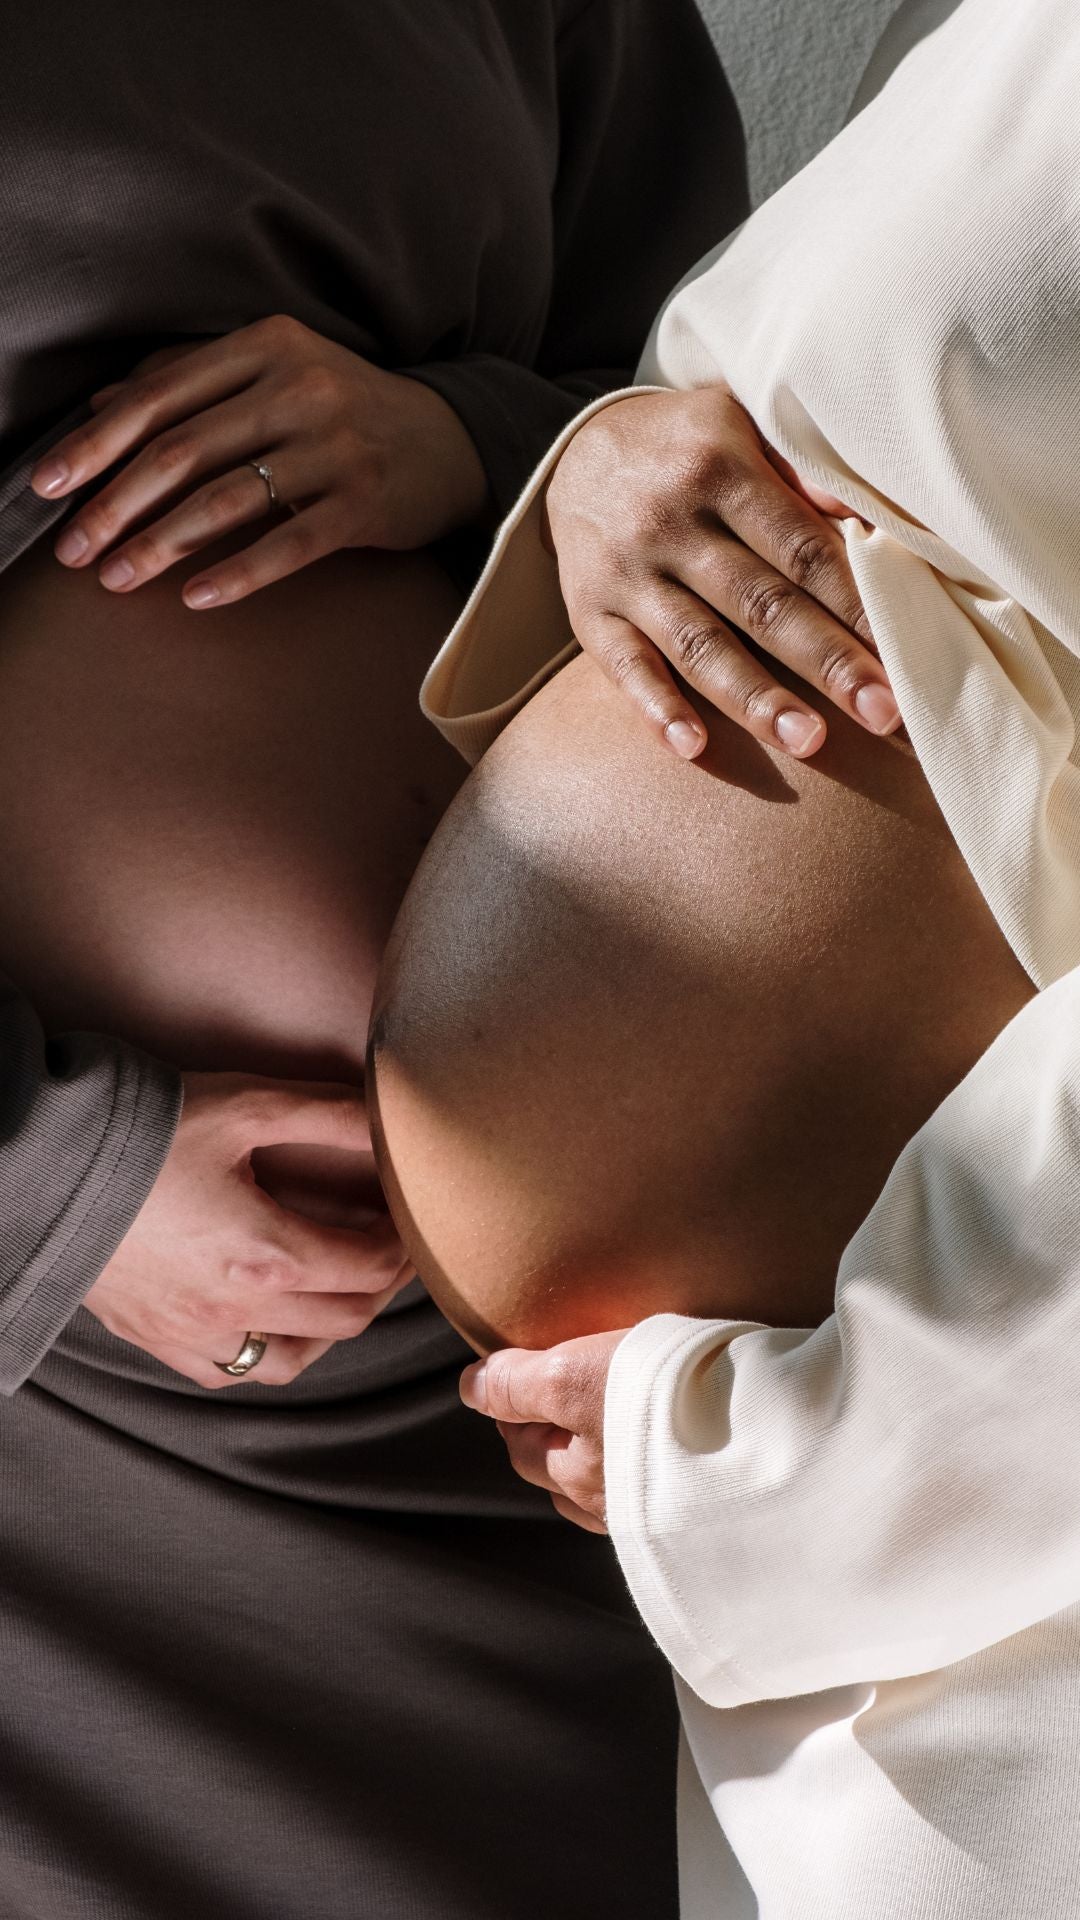
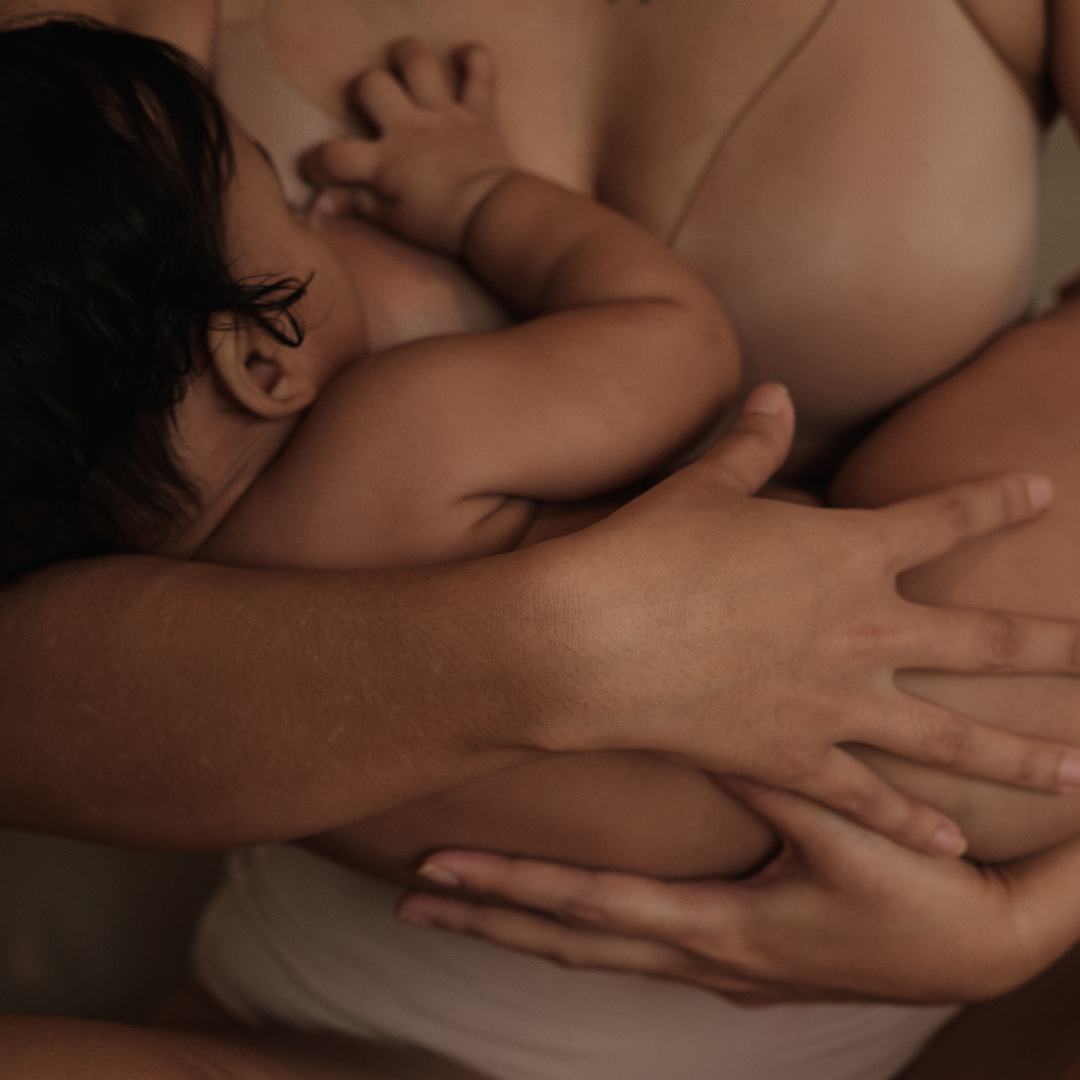


