×
Skip to content
Supporting your breastfeeding journey with this delicious organic nursing tea
When You Support a Small Business You're Supporting Someone's Dream
So, from the bottom of our hearts, thank you for supporting our dream ❤️
{"item":{"id":7455628984509,"title":"Antenatal Colostrum Expressing Kit","handle":"antenatal-colostrum-expressing-kit","description":"\u003cp\u003e\u003cmeta charset=\"utf-8\"\u003e\u003cspan\u003eThe Milky Goodness Antenatal Colostrum Expressing Kit is a comprehensive yet convenient kit designed to help you prepare \u0026amp; store your expressed colostrum. This kit is perfect for a new mum or those experienced in this wonderful journey of motherhood.\u003c\/span\u003e\u003c\/p\u003e","published_at":"2023-03-22T14:05:32+08:00","created_at":"2023-03-22T14:05:32+08:00","vendor":"Milky Goodness","type":"","tags":["Breastfeeding","Hospital Bag","Labour Preparation","Labour Progression","Lactation Products","Mum","Pregnancy"],"price":3295,"price_min":3295,"price_max":3295,"available":false,"price_varies":false,"compare_at_price":null,"compare_at_price_min":0,"compare_at_price_max":0,"compare_at_price_varies":false,"variants":[{"id":42740024148157,"title":"Default Title","option1":"Default Title","option2":null,"option3":null,"sku":"","requires_shipping":true,"taxable":false,"featured_image":null,"available":false,"name":"Antenatal Colostrum Expressing Kit","public_title":null,"options":["Default Title"],"price":3295,"weight":104,"compare_at_price":null,"inventory_management":"shopify","barcode":"24148157","requires_selling_plan":false,"selling_plan_allocations":[]}],"images":["\/\/www.thebirthstore.com.au\/cdn\/shop\/files\/antenatal-colostrum-expressing-kit-299493.jpg?v=1714967953","\/\/www.thebirthstore.com.au\/cdn\/shop\/files\/antenatal-colostrum-expressing-kit-582565.jpg?v=1714967953","\/\/www.thebirthstore.com.au\/cdn\/shop\/files\/antenatal-colostrum-expressing-kit-536934.jpg?v=1714967953","\/\/www.thebirthstore.com.au\/cdn\/shop\/files\/antenatal-colostrum-expressing-kit-835314.jpg?v=1714967953","\/\/www.thebirthstore.com.au\/cdn\/shop\/files\/antenatal-colostrum-expressing-kit-315192.jpg?v=1714967953","\/\/www.thebirthstore.com.au\/cdn\/shop\/files\/antenatal-colostrum-expressing-kit-917437.jpg?v=1714967953"],"featured_image":"\/\/www.thebirthstore.com.au\/cdn\/shop\/files\/antenatal-colostrum-expressing-kit-299493.jpg?v=1714967953","options":["Title"],"media":[{"alt":"Antenatal Colostrum Expressing Kit - The Birth Store-Milky Goodness","id":27007581388989,"position":1,"preview_image":{"aspect_ratio":1.0,"height":2048,"width":2048,"src":"\/\/www.thebirthstore.com.au\/cdn\/shop\/files\/antenatal-colostrum-expressing-kit-299493.jpg?v=1714967953"},"aspect_ratio":1.0,"height":2048,"media_type":"image","src":"\/\/www.thebirthstore.com.au\/cdn\/shop\/files\/antenatal-colostrum-expressing-kit-299493.jpg?v=1714967953","width":2048},{"alt":"Antenatal Colostrum Expressing Kit - The Birth Store-Milky Goodness","id":27007581421757,"position":2,"preview_image":{"aspect_ratio":0.75,"height":2048,"width":1536,"src":"\/\/www.thebirthstore.com.au\/cdn\/shop\/files\/antenatal-colostrum-expressing-kit-582565.jpg?v=1714967953"},"aspect_ratio":0.75,"height":2048,"media_type":"image","src":"\/\/www.thebirthstore.com.au\/cdn\/shop\/files\/antenatal-colostrum-expressing-kit-582565.jpg?v=1714967953","width":1536},{"alt":"Antenatal Colostrum Expressing Kit - The Birth Store-Milky Goodness","id":27007581454525,"position":3,"preview_image":{"aspect_ratio":1.0,"height":800,"width":800,"src":"\/\/www.thebirthstore.com.au\/cdn\/shop\/files\/antenatal-colostrum-expressing-kit-536934.jpg?v=1714967953"},"aspect_ratio":1.0,"height":800,"media_type":"image","src":"\/\/www.thebirthstore.com.au\/cdn\/shop\/files\/antenatal-colostrum-expressing-kit-536934.jpg?v=1714967953","width":800},{"alt":"Antenatal Colostrum Expressing Kit - The Birth Store-Milky Goodness","id":27007581487293,"position":4,"preview_image":{"aspect_ratio":1.0,"height":300,"width":300,"src":"\/\/www.thebirthstore.com.au\/cdn\/shop\/files\/antenatal-colostrum-expressing-kit-835314.jpg?v=1714967953"},"aspect_ratio":1.0,"height":300,"media_type":"image","src":"\/\/www.thebirthstore.com.au\/cdn\/shop\/files\/antenatal-colostrum-expressing-kit-835314.jpg?v=1714967953","width":300},{"alt":"Antenatal Colostrum Expressing Kit - The Birth Store-Milky Goodness","id":27007581520061,"position":5,"preview_image":{"aspect_ratio":0.75,"height":2048,"width":1536,"src":"\/\/www.thebirthstore.com.au\/cdn\/shop\/files\/antenatal-colostrum-expressing-kit-315192.jpg?v=1714967953"},"aspect_ratio":0.75,"height":2048,"media_type":"image","src":"\/\/www.thebirthstore.com.au\/cdn\/shop\/files\/antenatal-colostrum-expressing-kit-315192.jpg?v=1714967953","width":1536},{"alt":"Antenatal Colostrum Expressing Kit - The Birth Store-Milky Goodness","id":27007581552829,"position":6,"preview_image":{"aspect_ratio":0.75,"height":2048,"width":1536,"src":"\/\/www.thebirthstore.com.au\/cdn\/shop\/files\/antenatal-colostrum-expressing-kit-917437.jpg?v=1714967953"},"aspect_ratio":0.75,"height":2048,"media_type":"image","src":"\/\/www.thebirthstore.com.au\/cdn\/shop\/files\/antenatal-colostrum-expressing-kit-917437.jpg?v=1714967953","width":1536}],"requires_selling_plan":false,"selling_plan_groups":[],"content":"\u003cp\u003e\u003cmeta charset=\"utf-8\"\u003e\u003cspan\u003eThe Milky Goodness Antenatal Colostrum Expressing Kit is a comprehensive yet convenient kit designed to help you prepare \u0026amp; store your expressed colostrum. This kit is perfect for a new mum or those experienced in this wonderful journey of motherhood.\u003c\/span\u003e\u003c\/p\u003e"},"options":[{"name":"Title","position":1,"values":["Default Title"]}],"custom_metafields":{},"metafields":{"badge":"\u003cdiv style='display:none' class='jdgm-prev-badge' data-average-rating='0.00' data-number-of-reviews='0' data-number-of-questions='0'\u003e \u003cspan class='jdgm-prev-badge__stars' data-score='0.00' tabindex='0' aria-label='0.00 stars' role='button'\u003e \u003cspan class='jdgm-star jdgm--off'\u003e\u003c\/span\u003e\u003cspan class='jdgm-star jdgm--off'\u003e\u003c\/span\u003e\u003cspan class='jdgm-star jdgm--off'\u003e\u003c\/span\u003e\u003cspan class='jdgm-star jdgm--off'\u003e\u003c\/span\u003e\u003cspan class='jdgm-star jdgm--off'\u003e\u003c\/span\u003e \u003c\/span\u003e \u003cspan class='jdgm-prev-badge__text'\u003e No reviews \u003c\/span\u003e \u003c\/div\u003e","widget":"\u003cdiv class='jdgm-rev-widg' data-updated-at='2025-06-13T16:12:53Z' data-average-rating='0.00' data-number-of-reviews='0' data-number-of-questions='0'\u003e \u003cstyle class='jdgm-temp-hiding-style'\u003e.jdgm-rev-widg{ display: none }\u003c\/style\u003e \u003cdiv class='jdgm-rev-widg__header'\u003e \u003ch2 class='jdgm-rev-widg__title'\u003eCustomer Reviews\u003c\/h2\u003e \u003cdiv class='jdgm-rev-widg__summary'\u003e \u003cdiv class='jdgm-rev-widg__summary-stars' aria-label='Average rating is 0.00 stars' role='img'\u003e \u003cspan class='jdgm-star jdgm--off'\u003e\u003c\/span\u003e\u003cspan class='jdgm-star jdgm--off'\u003e\u003c\/span\u003e\u003cspan class='jdgm-star jdgm--off'\u003e\u003c\/span\u003e\u003cspan class='jdgm-star jdgm--off'\u003e\u003c\/span\u003e\u003cspan class='jdgm-star jdgm--off'\u003e\u003c\/span\u003e \u003c\/div\u003e \u003cdiv class='jdgm-rev-widg__summary-text'\u003eBe the first to write a review\u003c\/div\u003e \u003c\/div\u003e \u003ca style='display: none' href='#' class='jdgm-write-rev-link' role='button'\u003eWrite a review\u003c\/a\u003e \u003cdiv class='jdgm-histogram jdgm-temp-hidden'\u003e \u003cdiv class='jdgm-histogram__row' data-rating='5' data-frequency='0' data-percentage='0'\u003e \u003cdiv class='jdgm-histogram__star' role='button' aria-label=\"0% (0) reviews with 5 star rating\" tabindex='0' \u003e\u003cspan class='jdgm-star jdgm--on'\u003e\u003c\/span\u003e\u003cspan class='jdgm-star jdgm--on'\u003e\u003c\/span\u003e\u003cspan class='jdgm-star jdgm--on'\u003e\u003c\/span\u003e\u003cspan class='jdgm-star jdgm--on'\u003e\u003c\/span\u003e\u003cspan class='jdgm-star jdgm--on'\u003e\u003c\/span\u003e\u003c\/div\u003e \u003cdiv class='jdgm-histogram__bar'\u003e \u003cdiv class='jdgm-histogram__bar-content' style='width: 0%;'\u003e \u003c\/div\u003e \u003c\/div\u003e \u003cdiv class='jdgm-histogram__percentage'\u003e0%\u003c\/div\u003e \u003cdiv class='jdgm-histogram__frequency'\u003e(0)\u003c\/div\u003e \u003c\/div\u003e \u003cdiv class='jdgm-histogram__row' data-rating='4' data-frequency='0' data-percentage='0'\u003e \u003cdiv class='jdgm-histogram__star' role='button' aria-label=\"0% (0) reviews with 4 star rating\" tabindex='0' \u003e\u003cspan class='jdgm-star jdgm--on'\u003e\u003c\/span\u003e\u003cspan class='jdgm-star jdgm--on'\u003e\u003c\/span\u003e\u003cspan class='jdgm-star jdgm--on'\u003e\u003c\/span\u003e\u003cspan class='jdgm-star jdgm--on'\u003e\u003c\/span\u003e\u003cspan class='jdgm-star jdgm--off'\u003e\u003c\/span\u003e\u003c\/div\u003e \u003cdiv class='jdgm-histogram__bar'\u003e \u003cdiv class='jdgm-histogram__bar-content' style='width: 0%;'\u003e \u003c\/div\u003e \u003c\/div\u003e \u003cdiv class='jdgm-histogram__percentage'\u003e0%\u003c\/div\u003e \u003cdiv class='jdgm-histogram__frequency'\u003e(0)\u003c\/div\u003e \u003c\/div\u003e \u003cdiv class='jdgm-histogram__row' data-rating='3' data-frequency='0' data-percentage='0'\u003e \u003cdiv class='jdgm-histogram__star' role='button' aria-label=\"0% (0) reviews with 3 star rating\" tabindex='0' \u003e\u003cspan class='jdgm-star jdgm--on'\u003e\u003c\/span\u003e\u003cspan class='jdgm-star jdgm--on'\u003e\u003c\/span\u003e\u003cspan class='jdgm-star jdgm--on'\u003e\u003c\/span\u003e\u003cspan class='jdgm-star jdgm--off'\u003e\u003c\/span\u003e\u003cspan class='jdgm-star jdgm--off'\u003e\u003c\/span\u003e\u003c\/div\u003e \u003cdiv class='jdgm-histogram__bar'\u003e \u003cdiv class='jdgm-histogram__bar-content' style='width: 0%;'\u003e \u003c\/div\u003e \u003c\/div\u003e \u003cdiv class='jdgm-histogram__percentage'\u003e0%\u003c\/div\u003e \u003cdiv class='jdgm-histogram__frequency'\u003e(0)\u003c\/div\u003e \u003c\/div\u003e \u003cdiv class='jdgm-histogram__row' data-rating='2' data-frequency='0' data-percentage='0'\u003e \u003cdiv class='jdgm-histogram__star' role='button' aria-label=\"0% (0) reviews with 2 star rating\" tabindex='0' \u003e\u003cspan class='jdgm-star jdgm--on'\u003e\u003c\/span\u003e\u003cspan class='jdgm-star jdgm--on'\u003e\u003c\/span\u003e\u003cspan class='jdgm-star jdgm--off'\u003e\u003c\/span\u003e\u003cspan class='jdgm-star jdgm--off'\u003e\u003c\/span\u003e\u003cspan class='jdgm-star jdgm--off'\u003e\u003c\/span\u003e\u003c\/div\u003e \u003cdiv class='jdgm-histogram__bar'\u003e \u003cdiv class='jdgm-histogram__bar-content' style='width: 0%;'\u003e \u003c\/div\u003e \u003c\/div\u003e \u003cdiv class='jdgm-histogram__percentage'\u003e0%\u003c\/div\u003e \u003cdiv class='jdgm-histogram__frequency'\u003e(0)\u003c\/div\u003e \u003c\/div\u003e \u003cdiv class='jdgm-histogram__row' data-rating='1' data-frequency='0' data-percentage='0'\u003e \u003cdiv class='jdgm-histogram__star' role='button' aria-label=\"0% (0) reviews with 1 star rating\" tabindex='0' \u003e\u003cspan class='jdgm-star jdgm--on'\u003e\u003c\/span\u003e\u003cspan class='jdgm-star jdgm--off'\u003e\u003c\/span\u003e\u003cspan class='jdgm-star jdgm--off'\u003e\u003c\/span\u003e\u003cspan class='jdgm-star jdgm--off'\u003e\u003c\/span\u003e\u003cspan class='jdgm-star jdgm--off'\u003e\u003c\/span\u003e\u003c\/div\u003e \u003cdiv class='jdgm-histogram__bar'\u003e \u003cdiv class='jdgm-histogram__bar-content' style='width: 0%;'\u003e \u003c\/div\u003e \u003c\/div\u003e \u003cdiv class='jdgm-histogram__percentage'\u003e0%\u003c\/div\u003e \u003cdiv class='jdgm-histogram__frequency'\u003e(0)\u003c\/div\u003e \u003c\/div\u003e \u003cdiv class='jdgm-histogram__row jdgm-histogram__clear-filter' data-rating=null tabindex='0'\u003e\u003c\/div\u003e \u003c\/div\u003e \u003cdiv class='jdgm-rev-widg__sort-wrapper'\u003e\u003c\/div\u003e \u003c\/div\u003e \u003cdiv class='jdgm-rev-widg__body'\u003e \u003cdiv class='jdgm-rev-widg__reviews'\u003e\u003c\/div\u003e \u003cdiv class='jdgm-paginate' data-per-page='10' data-url='https:\/\/api.judge.me\/reviews\/reviews_for_widget' style=\"display: none;\"\u003e\u003c\/div\u003e \u003c\/div\u003e \u003cdiv class='jdgm-rev-widg__paginate-spinner-wrapper'\u003e \u003cdiv class='jdgm-spinner'\u003e\u003c\/div\u003e \u003c\/div\u003e \u003c\/div\u003e"},"collections":[{"id":281712427197,"handle":"breastfeeding","title":"Breastfeeding","updated_at":"2025-12-28T20:10:01+08:00","body_html":"","published_at":"2021-12-20T14:19:33+08:00","sort_order":"best-selling","template_suffix":"breastfeeding-collection","disjunctive":false,"rules":[{"column":"tag","relation":"equals","condition":"Breastfeeding"}],"published_scope":"global","image":{"created_at":"2024-05-06T11:59:34+08:00","alt":"Breastfeeding - The Birth Store","width":620,"height":635,"src":"\/\/www.thebirthstore.com.au\/cdn\/shop\/collections\/breastfeeding-793872.jpg?v=1714967974"}},{"id":261657460925,"handle":"buy","title":"Buy","updated_at":"2025-12-28T20:10:01+08:00","body_html":"\u003cp\u003eBrowse all of our pregnancy, labour \u0026amp; birth, postpartum and baby essentials here.\u003cbr\u003e\u003c\/p\u003e\n\u003cp\u003e\u003cspan\u003eYou can even buy now and pay later with Afterpay!\u003c\/span\u003e\u003c\/p\u003e","published_at":"2021-03-10T12:05:31+08:00","sort_order":"best-selling","template_suffix":"shop-all-collection","disjunctive":false,"rules":[{"column":"title","relation":"not_contains","condition":"Hire"}],"published_scope":"global","image":{"created_at":"2024-05-06T11:59:42+08:00","alt":"Buy - The Birth Store","width":2048,"height":2048,"src":"\/\/www.thebirthstore.com.au\/cdn\/shop\/collections\/buy-964856.jpg?v=1714967982"}},{"id":281712558269,"handle":"labour-aids","title":"Labour Aids","updated_at":"2025-12-28T20:10:01+08:00","body_html":"","published_at":"2021-12-20T14:22:16+08:00","sort_order":"best-selling","template_suffix":"labour-aids-collection","disjunctive":false,"rules":[{"column":"tag","relation":"equals","condition":"Labour Progression"}],"published_scope":"global","image":{"created_at":"2024-05-06T12:00:11+08:00","alt":"Labour Aids - The Birth Store","width":1365,"height":2048,"src":"\/\/www.thebirthstore.com.au\/cdn\/shop\/collections\/labour-aids-211824.jpg?v=1714968012"}},{"id":281712525501,"handle":"labour-preparation","title":"Labour Preparation","updated_at":"2025-12-28T20:10:01+08:00","body_html":"","published_at":"2021-12-20T14:20:12+08:00","sort_order":"best-selling","template_suffix":"labour-preparation-collec","disjunctive":false,"rules":[{"column":"tag","relation":"equals","condition":"Labour Preparation"}],"published_scope":"global","image":{"created_at":"2024-05-06T12:00:13+08:00","alt":"Labour Preparation - The Birth Store","width":1024,"height":1536,"src":"\/\/www.thebirthstore.com.au\/cdn\/shop\/collections\/labour-preparation-271961.jpg?v=1714968013"}},{"id":292919476413,"handle":"lactation-products","title":"Lactation Products","updated_at":"2025-12-28T20:10:01+08:00","body_html":"","published_at":"2023-03-22T12:22:41+08:00","sort_order":"best-selling","template_suffix":"lactation-products-collec","disjunctive":false,"rules":[{"column":"tag","relation":"equals","condition":"Lactation Products"}],"published_scope":"global","image":{"created_at":"2024-05-06T12:00:19+08:00","alt":"Lactation Products - The Birth Store","width":1034,"height":922,"src":"\/\/www.thebirthstore.com.au\/cdn\/shop\/collections\/lactation-products-752907.jpg?v=1714968019"}},{"id":261658149053,"handle":"pregnancy-and-maternity-products","title":"Pregnancy","updated_at":"2025-12-28T20:10:01+08:00","body_html":"\u003cp\u003eShop your pregnancy essentials below. Looking for something we don't currently stock? Please reach out and let us know.\u003cbr\u003e\u003c\/p\u003e\n\u003cp\u003e\u003cspan\u003eYou can even buy now and pay later with Afterpay!\u003c\/span\u003e\u003c\/p\u003e","published_at":"2021-03-10T12:34:22+08:00","sort_order":"best-selling","template_suffix":"pregnancy-collection","disjunctive":false,"rules":[{"column":"tag","relation":"equals","condition":"Pregnancy"}],"published_scope":"global","image":{"created_at":"2024-05-06T12:00:40+08:00","alt":"Pregnancy - The Birth Store","width":1024,"height":1536,"src":"\/\/www.thebirthstore.com.au\/cdn\/shop\/collections\/pregnancy-899677.jpg?v=1714968040"}},{"id":291456483517,"handle":"shop-all","title":"Shop All - Mum","updated_at":"2025-12-28T20:10:01+08:00","body_html":"","published_at":"2022-12-23T22:04:39+08:00","sort_order":"best-selling","template_suffix":"shop-all-collection","disjunctive":false,"rules":[{"column":"variant_price","relation":"greater_than","condition":"1"},{"column":"title","relation":"not_contains","condition":"Batteries"},{"column":"tag","relation":"equals","condition":"Mum"}],"published_scope":"global","image":{"created_at":"2024-05-06T12:00:54+08:00","alt":"Shop All - The Birth Store","width":1365,"height":2048,"src":"\/\/www.thebirthstore.com.au\/cdn\/shop\/collections\/shop-all-693176.jpg?v=1714968055"}},{"id":310045933757,"handle":"shop-all-sale","title":"Shop All Sale","updated_at":"2025-12-28T20:10:01+08:00","body_html":"","published_at":"2024-11-12T13:22:43+08:00","sort_order":"alpha-asc","template_suffix":"","disjunctive":true,"rules":[{"column":"tag","relation":"equals","condition":"Bundles"},{"column":"vendor","relation":"equals","condition":"Franjos Kitchen"},{"column":"vendor","relation":"equals","condition":"Adored Illustrations"},{"column":"vendor","relation":"equals","condition":"Amazing Oils"},{"column":"vendor","relation":"equals","condition":"Ice Ice Booby"},{"column":"vendor","relation":"equals","condition":"Made to Milk"},{"column":"vendor","relation":"equals","condition":"Milky Goodness"},{"column":"vendor","relation":"equals","condition":"Seasons of Mama"},{"column":"vendor","relation":"equals","condition":"Silverette"},{"column":"vendor","relation":"equals","condition":"Snuggle Hunny"},{"column":"vendor","relation":"equals","condition":"Yung Bod"},{"column":"vendor","relation":"equals","condition":"Bare Love"},{"column":"vendor","relation":"equals","condition":"Haakaa"},{"column":"vendor","relation":"equals","condition":"Mere Botanicals"},{"column":"vendor","relation":"equals","condition":"The Birth Store Hire"},{"column":"vendor","relation":"equals","condition":"The Birth Store"}],"published_scope":"global","image":{"created_at":"2024-11-13T10:58:16+08:00","alt":"Shop All Sale - The Birth Store","width":2048,"height":1365,"src":"\/\/www.thebirthstore.com.au\/cdn\/shop\/collections\/shop-all-sale-297361.jpg?v=1731466697"}}]}
[{"alt":"Antenatal Colostrum Expressing Kit - The Birth Store-Milky Goodness","id":27007581388989,"position":1,"preview_image":{"aspect_ratio":1.0,"height":2048,"width":2048,"src":"\/\/www.thebirthstore.com.au\/cdn\/shop\/files\/antenatal-colostrum-expressing-kit-299493.jpg?v=1714967953"},"aspect_ratio":1.0,"height":2048,"media_type":"image","src":"\/\/www.thebirthstore.com.au\/cdn\/shop\/files\/antenatal-colostrum-expressing-kit-299493.jpg?v=1714967953","width":2048},{"alt":"Antenatal Colostrum Expressing Kit - The Birth Store-Milky Goodness","id":27007581421757,"position":2,"preview_image":{"aspect_ratio":0.75,"height":2048,"width":1536,"src":"\/\/www.thebirthstore.com.au\/cdn\/shop\/files\/antenatal-colostrum-expressing-kit-582565.jpg?v=1714967953"},"aspect_ratio":0.75,"height":2048,"media_type":"image","src":"\/\/www.thebirthstore.com.au\/cdn\/shop\/files\/antenatal-colostrum-expressing-kit-582565.jpg?v=1714967953","width":1536},{"alt":"Antenatal Colostrum Expressing Kit - The Birth Store-Milky Goodness","id":27007581454525,"position":3,"preview_image":{"aspect_ratio":1.0,"height":800,"width":800,"src":"\/\/www.thebirthstore.com.au\/cdn\/shop\/files\/antenatal-colostrum-expressing-kit-536934.jpg?v=1714967953"},"aspect_ratio":1.0,"height":800,"media_type":"image","src":"\/\/www.thebirthstore.com.au\/cdn\/shop\/files\/antenatal-colostrum-expressing-kit-536934.jpg?v=1714967953","width":800},{"alt":"Antenatal Colostrum Expressing Kit - The Birth Store-Milky Goodness","id":27007581487293,"position":4,"preview_image":{"aspect_ratio":1.0,"height":300,"width":300,"src":"\/\/www.thebirthstore.com.au\/cdn\/shop\/files\/antenatal-colostrum-expressing-kit-835314.jpg?v=1714967953"},"aspect_ratio":1.0,"height":300,"media_type":"image","src":"\/\/www.thebirthstore.com.au\/cdn\/shop\/files\/antenatal-colostrum-expressing-kit-835314.jpg?v=1714967953","width":300},{"alt":"Antenatal Colostrum Expressing Kit - The Birth Store-Milky Goodness","id":27007581520061,"position":5,"preview_image":{"aspect_ratio":0.75,"height":2048,"width":1536,"src":"\/\/www.thebirthstore.com.au\/cdn\/shop\/files\/antenatal-colostrum-expressing-kit-315192.jpg?v=1714967953"},"aspect_ratio":0.75,"height":2048,"media_type":"image","src":"\/\/www.thebirthstore.com.au\/cdn\/shop\/files\/antenatal-colostrum-expressing-kit-315192.jpg?v=1714967953","width":1536},{"alt":"Antenatal Colostrum Expressing Kit - The Birth Store-Milky Goodness","id":27007581552829,"position":6,"preview_image":{"aspect_ratio":0.75,"height":2048,"width":1536,"src":"\/\/www.thebirthstore.com.au\/cdn\/shop\/files\/antenatal-colostrum-expressing-kit-917437.jpg?v=1714967953"},"aspect_ratio":0.75,"height":2048,"media_type":"image","src":"\/\/www.thebirthstore.com.au\/cdn\/shop\/files\/antenatal-colostrum-expressing-kit-917437.jpg?v=1714967953","width":1536}]
{"item":{"id":7455714214077,"title":"Antenatal Colostrum Expressing Kit - Made to Milk","handle":"antenatal-colostrum-expressing-kit-made-to-milk","description":"\u003cp\u003e\u003cmeta charset=\"utf-8\"\u003e\u003cspan\u003eThe Milky Goodness Antenatal Colostrum Expressing Kit is a comprehensive yet convenient kit designed to help you prepare \u0026amp; store your expressed colostrum. This kit is perfect for a new mum or those experienced in this wonderful journey of motherhood.\u003c\/span\u003e\u003c\/p\u003e","published_at":"2023-03-22T21:49:12+08:00","created_at":"2023-03-22T21:49:12+08:00","vendor":"Made to Milk","type":"","tags":["Breastfeeding","Hospital Bag","Labour Preparation","Labour Progression","Lactation Products","Mum","Pregnancy"],"price":3995,"price_min":3995,"price_max":3995,"available":true,"price_varies":false,"compare_at_price":null,"compare_at_price_min":0,"compare_at_price_max":0,"compare_at_price_varies":false,"variants":[{"id":42740426866877,"title":"Default Title","option1":"Default Title","option2":null,"option3":null,"sku":"","requires_shipping":true,"taxable":false,"featured_image":null,"available":true,"name":"Antenatal Colostrum Expressing Kit - Made to Milk","public_title":null,"options":["Default Title"],"price":3995,"weight":335,"compare_at_price":null,"inventory_management":"shopify","barcode":"26866877","requires_selling_plan":false,"selling_plan_allocations":[]}],"images":["\/\/www.thebirthstore.com.au\/cdn\/shop\/files\/antenatal-colostrum-expressing-kit-made-to-milk-382319.jpg?v=1714967948","\/\/www.thebirthstore.com.au\/cdn\/shop\/files\/antenatal-colostrum-expressing-kit-made-to-milk-700625.jpg?v=1714967948"],"featured_image":"\/\/www.thebirthstore.com.au\/cdn\/shop\/files\/antenatal-colostrum-expressing-kit-made-to-milk-382319.jpg?v=1714967948","options":["Title"],"media":[{"alt":"Antenatal Colostrum Expressing Kit - Made to Milk - The Birth Store-Made to Milk","id":27007579685053,"position":1,"preview_image":{"aspect_ratio":1.0,"height":2048,"width":2048,"src":"\/\/www.thebirthstore.com.au\/cdn\/shop\/files\/antenatal-colostrum-expressing-kit-made-to-milk-382319.jpg?v=1714967948"},"aspect_ratio":1.0,"height":2048,"media_type":"image","src":"\/\/www.thebirthstore.com.au\/cdn\/shop\/files\/antenatal-colostrum-expressing-kit-made-to-milk-382319.jpg?v=1714967948","width":2048},{"alt":"Antenatal Colostrum Expressing Kit - Made to Milk - The Birth Store-Made to Milk","id":27007579750589,"position":2,"preview_image":{"aspect_ratio":0.667,"height":810,"width":540,"src":"\/\/www.thebirthstore.com.au\/cdn\/shop\/files\/antenatal-colostrum-expressing-kit-made-to-milk-700625.jpg?v=1714967948"},"aspect_ratio":0.667,"height":810,"media_type":"image","src":"\/\/www.thebirthstore.com.au\/cdn\/shop\/files\/antenatal-colostrum-expressing-kit-made-to-milk-700625.jpg?v=1714967948","width":540}],"requires_selling_plan":false,"selling_plan_groups":[],"content":"\u003cp\u003e\u003cmeta charset=\"utf-8\"\u003e\u003cspan\u003eThe Milky Goodness Antenatal Colostrum Expressing Kit is a comprehensive yet convenient kit designed to help you prepare \u0026amp; store your expressed colostrum. This kit is perfect for a new mum or those experienced in this wonderful journey of motherhood.\u003c\/span\u003e\u003c\/p\u003e"},"options":[{"name":"Title","position":1,"values":["Default Title"]}],"custom_metafields":{},"metafields":{"badge":"\u003cdiv style='display:none' class='jdgm-prev-badge' data-average-rating='5.00' data-number-of-reviews='1' data-number-of-questions='0'\u003e \u003cspan class='jdgm-prev-badge__stars' data-score='5.00' tabindex='0' aria-label='5.00 stars' role='button'\u003e \u003cspan class='jdgm-star jdgm--on'\u003e\u003c\/span\u003e\u003cspan class='jdgm-star jdgm--on'\u003e\u003c\/span\u003e\u003cspan class='jdgm-star jdgm--on'\u003e\u003c\/span\u003e\u003cspan class='jdgm-star jdgm--on'\u003e\u003c\/span\u003e\u003cspan class='jdgm-star jdgm--on'\u003e\u003c\/span\u003e \u003c\/span\u003e \u003cspan class='jdgm-prev-badge__text'\u003e 1 review \u003c\/span\u003e \u003c\/div\u003e","review_snippet_widget":"\u003cdiv class='jdgm-widget jdgm-review-snippet-widget'\u003e \u003cstyle\u003e\n .jdgm-review-snippet-widget{position:relative}.jdgm-review-snippet-widget:hover{cursor:pointer}@media only screen and (max-width: 767px){.jdgm-review-snippet-widget .jdgm-rev-snippet-widget__cards-container{left:unset;right:unset}}.jdgm-review-snippet-widget .jdgm-rev-snippet-card{background:#fff}.jdgm-review-snippet-widget .jdgm-star{color:#399}.jdgm-review-snippet-widget .jdgm-rev-snippet-card{border-radius:8px;background:#fff}.jdgm-review-snippet-widget .jdgm-rev-snippet-card__rev-prod-wrapper{border-radius:8px}.jdgm-review-snippet-widget .jdgm-rev-snippet-card__rev-content-wrapper{max-width:360px}.jdgm-review-snippet-widget .jdgm-rev-snippet-widget__prev-btn,.jdgm-review-snippet-widget .jdgm-rev-snippet-widget__next-btn{border-radius:50%;background:#fff}.jdgm-review-snippet-widget .jdgm-rev-snippet-widget__prev-btn\u003esvg,.jdgm-review-snippet-widget .jdgm-rev-snippet-widget__next-btn\u003esvg{fill:#000}.jdgm-review-snippet-widget .jdgm-rev-snippet-widget__prev-btn{left:0;top:40%}.jdgm-review-snippet-widget .jdgm-rev-snippet-widget__next-btn{right:0;top:40%}.jdgm-full-rev-modal.review-snippet-widget .jm-mfp-content{border-radius:8px}.jdgm-full-rev-modal.review-snippet-widget .jdgm-full-rev__icon{border-radius:8px}.jdgm-full-rev-modal.review-snippet-widget .jdgm-full-rev[data-verified-buyer=\"true\"] .jdgm-full-rev__icon::after{border-radius:8px}.jdgm-full-rev-modal.review-snippet-widget .jdgm-rev__buyer-badge{border-radius:calc( 8px \/ 2 )}.jdgm-full-rev-modal.review-snippet-widget .jdgm-full-rev__pic-img{border-radius:8px}.jdgm-full-rev-modal.review-snippet-widget .jdgm-full-rev__reply{border-radius:8px}.jdgm-full-rev-modal.review-snippet-widget .jdgm-full-rev__replier::before{content:'thebirthstore.com.au'}.jdgm-full-rev-modal.review-snippet-widget .jdgm-full-rev__product-button{border-radius:calc( 8px * 6 )}\n\n \u003c\/style\u003e \u003ci class=\"jdgm-rev-snippet-widget__prev-btn\" style='display: none;'\u003e \u003csvg xmlns=\"http:\/\/www.w3.org\/2000\/svg\" height=\"12\" viewBox=\"0 0 8 12\" width=\"8\" fill=\"#000\"\u003e\u003cpath d=\"M3.09961 6.00005L6.99961 9.90005C7.18294 10.0834 7.27461 10.3167 7.27461 10.6C7.27461 10.8834 7.18294 11.1167 6.99961 11.3C6.81628 11.4834 6.58294 11.575 6.29961 11.575C6.01628 11.575 5.78294 11.4834 5.59961 11.3L0.999609 6.70005C0.899609 6.60005 0.828776 6.49172 0.787109 6.37505C0.745443 6.25838 0.724609 6.13338 0.724609 6.00005C0.724609 5.86672 0.745443 5.74172 0.787109 5.62505C0.828776 5.50838 0.899609 5.40005 0.999609 5.30005L5.59961 0.700049C5.78294 0.516715 6.01628 0.425049 6.29961 0.425049C6.58294 0.425049 6.81628 0.516715 6.99961 0.700049C7.18294 0.883382 7.27461 1.11672 7.27461 1.40005C7.27461 1.68338 7.18294 1.91672 6.99961 2.10005L3.09961 6.00005Z\"\/\u003e\u003c\/svg\u003e \u003c\/i\u003e \u003ci class=\"jdgm-rev-snippet-widget__next-btn\" style='display: none;'\u003e \u003csvg xmlns=\"http:\/\/www.w3.org\/2000\/svg\" height=\"12\" viewBox=\"0 0 8 12\" width=\"8\" fill=\"#000\"\u003e\u003cpath d=\"M4.89961 6.00005L0.999609 2.10005C0.816276 1.91672 0.724609 1.68338 0.724609 1.40005C0.724609 1.11672 0.816276 0.883382 0.999609 0.700049C1.18294 0.516715 1.41628 0.425049 1.69961 0.425049C1.98294 0.425049 2.21628 0.516715 2.39961 0.700049L6.99961 5.30005C7.09961 5.40005 7.17044 5.50838 7.21211 5.62505C7.25378 5.74172 7.27461 5.86672 7.27461 6.00005C7.27461 6.13338 7.25378 6.25838 7.21211 6.37505C7.17044 6.49172 7.09961 6.60005 6.99961 6.70005L2.39961 11.3C2.21628 11.4834 1.98294 11.575 1.69961 11.575C1.41628 11.575 1.18294 11.4834 0.999609 11.3C0.816276 11.1167 0.724609 10.8834 0.724609 10.6C0.724609 10.3167 0.816276 10.0834 0.999609 9.90005L4.89961 6.00005Z\"\/\u003e\u003c\/svg\u003e \u003c\/i\u003e \u003cdiv style=\"overflow: hidden;\"\u003e \u003cdiv class='jdgm-rev-snippet-widget__cards-container'\u003e \u003cdiv class='jdgm-rev-snippet-card' data-review-id='143bdb7d-9f59-53e8-ab31-3931e347f6c3' style='display: none;'\u003e \u003cdiv class=\"jdgm-rev-snippet-card__rev-prod-wrapper\"\u003e \u003ca class='jdgm-rev-snippet-card__rev-content-wrapper jdgm-rev-snippet-card__full-review-link' style='text-decoration: none; color: inherit;padding: 0 34px;' role='button' data-review-id='143bdb7d-9f59-53e8-ab31-3931e347f6c3'\u003e \u003cdiv class='jdgm-rev-snippet-card__rev-header'\u003e \u003cdiv class='jdgm-rev-snippet-card__rev-rating' aria-label='5 stars' role='img'\u003e \u003cspan class='jdgm-star jdgm--on'\u003e\u003c\/span\u003e\u003cspan class='jdgm-star jdgm--on'\u003e\u003c\/span\u003e\u003cspan class='jdgm-star jdgm--on'\u003e\u003c\/span\u003e\u003cspan class='jdgm-star jdgm--on'\u003e\u003c\/span\u003e\u003cspan class='jdgm-star jdgm--on'\u003e\u003c\/span\u003e \u003c\/div\u003e \u003cdiv class='jdgm-rev-snippet-card__reviewer'\u003e Linda \u003c\/div\u003e \u003c\/div\u003e \u003cdiv class='jdgm-rev-snippet-card__rev-content'\u003e \u003cspan class='jdgm-rev-snippet-card__rev-body'\u003e \u003cp\u003eLove this kit!\u003c\/p\u003e \u003c\/span\u003e \u003c\/div\u003e \u003c\/a\u003e \u003c\/div\u003e \u003c\/div\u003e \u003c\/div\u003e \u003c\/div\u003e \u003c\/div\u003e","widget":"\u003cdiv class='jdgm-rev-widg' data-updated-at='2025-09-24T04:10:28Z' data-average-rating='5.00' data-number-of-reviews='1' data-number-of-questions='0' data-image-url='https:\/\/cdn.shopify.com\/s\/files\/1\/0527\/3393\/5805\/files\/antenatal-colostrum-expressing-kit-made-to-milk-382319.jpg?v=1714967948'\u003e \u003cstyle class='jdgm-temp-hiding-style'\u003e.jdgm-rev-widg{ display: none }\u003c\/style\u003e \u003cdiv class='jdgm-rev-widg__header'\u003e \u003ch2 class='jdgm-rev-widg__title'\u003eCustomer Reviews\u003c\/h2\u003e \u003cdiv class='jdgm-rev-widg__summary'\u003e \u003cdiv class='jdgm-rev-widg__summary-stars' aria-label='Average rating is 5.00 stars' role='img'\u003e \u003cspan class='jdgm-star jdgm--on'\u003e\u003c\/span\u003e\u003cspan class='jdgm-star jdgm--on'\u003e\u003c\/span\u003e\u003cspan class='jdgm-star jdgm--on'\u003e\u003c\/span\u003e\u003cspan class='jdgm-star jdgm--on'\u003e\u003c\/span\u003e\u003cspan class='jdgm-star jdgm--on'\u003e\u003c\/span\u003e \u003c\/div\u003e \u003cdiv class='jdgm-rev-widg__summary-text'\u003eBased on 1 review\u003c\/div\u003e \u003c\/div\u003e \u003ca style='display: none' href='#' class='jdgm-write-rev-link' role='button'\u003eWrite a review\u003c\/a\u003e \u003cdiv class='jdgm-histogram jdgm-temp-hidden'\u003e \u003cdiv class='jdgm-histogram__row' data-rating='5' data-frequency='1' data-percentage='100'\u003e \u003cdiv class='jdgm-histogram__star' role='button' aria-label=\"100% (1) reviews with 5 star rating\" tabindex='0' \u003e\u003cspan class='jdgm-star jdgm--on'\u003e\u003c\/span\u003e\u003cspan class='jdgm-star jdgm--on'\u003e\u003c\/span\u003e\u003cspan class='jdgm-star jdgm--on'\u003e\u003c\/span\u003e\u003cspan class='jdgm-star jdgm--on'\u003e\u003c\/span\u003e\u003cspan class='jdgm-star jdgm--on'\u003e\u003c\/span\u003e\u003c\/div\u003e \u003cdiv class='jdgm-histogram__bar'\u003e \u003cdiv class='jdgm-histogram__bar-content' style='width: 100%;'\u003e \u003c\/div\u003e \u003c\/div\u003e \u003cdiv class='jdgm-histogram__percentage'\u003e100%\u003c\/div\u003e \u003cdiv class='jdgm-histogram__frequency'\u003e(1)\u003c\/div\u003e \u003c\/div\u003e \u003cdiv class='jdgm-histogram__row' data-rating='4' data-frequency='0' data-percentage='0'\u003e \u003cdiv class='jdgm-histogram__star' role='button' aria-label=\"0% (0) reviews with 4 star rating\" tabindex='0' \u003e\u003cspan class='jdgm-star jdgm--on'\u003e\u003c\/span\u003e\u003cspan class='jdgm-star jdgm--on'\u003e\u003c\/span\u003e\u003cspan class='jdgm-star jdgm--on'\u003e\u003c\/span\u003e\u003cspan class='jdgm-star jdgm--on'\u003e\u003c\/span\u003e\u003cspan class='jdgm-star jdgm--off'\u003e\u003c\/span\u003e\u003c\/div\u003e \u003cdiv class='jdgm-histogram__bar'\u003e \u003cdiv class='jdgm-histogram__bar-content' style='width: 0%;'\u003e \u003c\/div\u003e \u003c\/div\u003e \u003cdiv class='jdgm-histogram__percentage'\u003e0%\u003c\/div\u003e \u003cdiv class='jdgm-histogram__frequency'\u003e(0)\u003c\/div\u003e \u003c\/div\u003e \u003cdiv class='jdgm-histogram__row' data-rating='3' data-frequency='0' data-percentage='0'\u003e \u003cdiv class='jdgm-histogram__star' role='button' aria-label=\"0% (0) reviews with 3 star rating\" tabindex='0' \u003e\u003cspan class='jdgm-star jdgm--on'\u003e\u003c\/span\u003e\u003cspan class='jdgm-star jdgm--on'\u003e\u003c\/span\u003e\u003cspan class='jdgm-star jdgm--on'\u003e\u003c\/span\u003e\u003cspan class='jdgm-star jdgm--off'\u003e\u003c\/span\u003e\u003cspan class='jdgm-star jdgm--off'\u003e\u003c\/span\u003e\u003c\/div\u003e \u003cdiv class='jdgm-histogram__bar'\u003e \u003cdiv class='jdgm-histogram__bar-content' style='width: 0%;'\u003e \u003c\/div\u003e \u003c\/div\u003e \u003cdiv class='jdgm-histogram__percentage'\u003e0%\u003c\/div\u003e \u003cdiv class='jdgm-histogram__frequency'\u003e(0)\u003c\/div\u003e \u003c\/div\u003e \u003cdiv class='jdgm-histogram__row' data-rating='2' data-frequency='0' data-percentage='0'\u003e \u003cdiv class='jdgm-histogram__star' role='button' aria-label=\"0% (0) reviews with 2 star rating\" tabindex='0' \u003e\u003cspan class='jdgm-star jdgm--on'\u003e\u003c\/span\u003e\u003cspan class='jdgm-star jdgm--on'\u003e\u003c\/span\u003e\u003cspan class='jdgm-star jdgm--off'\u003e\u003c\/span\u003e\u003cspan class='jdgm-star jdgm--off'\u003e\u003c\/span\u003e\u003cspan class='jdgm-star jdgm--off'\u003e\u003c\/span\u003e\u003c\/div\u003e \u003cdiv class='jdgm-histogram__bar'\u003e \u003cdiv class='jdgm-histogram__bar-content' style='width: 0%;'\u003e \u003c\/div\u003e \u003c\/div\u003e \u003cdiv class='jdgm-histogram__percentage'\u003e0%\u003c\/div\u003e \u003cdiv class='jdgm-histogram__frequency'\u003e(0)\u003c\/div\u003e \u003c\/div\u003e \u003cdiv class='jdgm-histogram__row' data-rating='1' data-frequency='0' data-percentage='0'\u003e \u003cdiv class='jdgm-histogram__star' role='button' aria-label=\"0% (0) reviews with 1 star rating\" tabindex='0' \u003e\u003cspan class='jdgm-star jdgm--on'\u003e\u003c\/span\u003e\u003cspan class='jdgm-star jdgm--off'\u003e\u003c\/span\u003e\u003cspan class='jdgm-star jdgm--off'\u003e\u003c\/span\u003e\u003cspan class='jdgm-star jdgm--off'\u003e\u003c\/span\u003e\u003cspan class='jdgm-star jdgm--off'\u003e\u003c\/span\u003e\u003c\/div\u003e \u003cdiv class='jdgm-histogram__bar'\u003e \u003cdiv class='jdgm-histogram__bar-content' style='width: 0%;'\u003e \u003c\/div\u003e \u003c\/div\u003e \u003cdiv class='jdgm-histogram__percentage'\u003e0%\u003c\/div\u003e \u003cdiv class='jdgm-histogram__frequency'\u003e(0)\u003c\/div\u003e \u003c\/div\u003e \u003cdiv class='jdgm-histogram__row jdgm-histogram__clear-filter' data-rating=null tabindex='0'\u003e\u003c\/div\u003e \u003c\/div\u003e \u003cdiv class='jdgm-rev-widg__sort-wrapper'\u003e\u003c\/div\u003e \u003c\/div\u003e \u003cdiv class='jdgm-rev-widg__body'\u003e \u003cdiv class='jdgm-rev-widg__reviews'\u003e\u003cdiv class='jdgm-rev jdgm-divider-top' data-verified-buyer='true' data-review-id='143bdb7d-9f59-53e8-ab31-3931e347f6c3' data-review-language='' data-product-title='Antenatal Colostrum Expressing Kit - Made to Milk' data-product-url='\/products\/antenatal-colostrum-expressing-kit-made-to-milk' data-thumb-up-count='1' data-thumb-down-count='0'\u003e \u003cdiv class='jdgm-rev__header'\u003e \u003cdiv class='jdgm-rev__icon' \u003e E \u003c\/div\u003e \u003cspan class='jdgm-rev__rating' data-score='5' tabindex='0' aria-label='5 star review' role='img'\u003e \u003cspan class='jdgm-star jdgm--on'\u003e\u003c\/span\u003e\u003cspan class='jdgm-star jdgm--on'\u003e\u003c\/span\u003e\u003cspan class='jdgm-star jdgm--on'\u003e\u003c\/span\u003e\u003cspan class='jdgm-star jdgm--on'\u003e\u003c\/span\u003e\u003cspan class='jdgm-star jdgm--on'\u003e\u003c\/span\u003e \u003c\/span\u003e \u003cspan class='jdgm-rev__timestamp jdgm-spinner' data-content='2024-08-18 02:18:34 UTC'\u003e\u003c\/span\u003e \u003cdiv class='jdgm-rev__br'\u003e\u003c\/div\u003e \u003cspan class='jdgm-rev__buyer-badge-wrapper'\u003e \u003cspan class='jdgm-rev__buyer-badge'\u003e\u003c\/span\u003e \u003c\/span\u003e \u003cspan class='jdgm-rev__author-wrapper'\u003e \u003cspan class='jdgm-rev__author'\u003eEmma\u003c\/span\u003e \u003cspan class='jdgm-rev__location' \u003e \u003c\/span\u003e \u003cspan class='jdgm-rev__source' data-source=\"shop-app\"\u003e\u003c\/span\u003e \u003c\/span\u003e \u003c\/div\u003e \u003cdiv class='jdgm-rev__content'\u003e \u003cdiv class='jdgm-rev__custom-form'\u003e \u003c\/div\u003e \u003cb class='jdgm-rev__title'\u003e\u003c\/b\u003e \u003cdiv class='jdgm-rev__body'\u003e\u003cp\u003eLove this kit!\u003c\/p\u003e\u003c\/div\u003e \u003cdiv class='jdgm-rev__pics'\u003e \u003c\/div\u003e \u003cdiv class='jdgm-rev__vids'\u003e \u003c\/div\u003e \u003cdiv class='jdgm-rev__transparency-badge-wrapper'\u003e \u003c\/div\u003e \u003c\/div\u003e \u003cdiv class='jdgm-rev__actions'\u003e \u003cdiv class='jdgm-rev__social'\u003e\u003c\/div\u003e \u003cdiv class='jdgm-rev__votes'\u003e\u003c\/div\u003e \u003c\/div\u003e \u003cdiv class='jdgm-rev__reply'\u003e \u003c\/div\u003e \u003c\/div\u003e\u003c\/div\u003e \u003cdiv class='jdgm-paginate' data-per-page='10' data-url='https:\/\/api.judge.me\/reviews\/reviews_for_widget' style=\"display: none;\"\u003e\u003c\/div\u003e \u003c\/div\u003e \u003cdiv class='jdgm-rev-widg__paginate-spinner-wrapper'\u003e \u003cdiv class='jdgm-spinner'\u003e\u003c\/div\u003e \u003c\/div\u003e \u003c\/div\u003e"},"collections":[{"id":281712427197,"handle":"breastfeeding","title":"Breastfeeding","updated_at":"2025-12-28T20:10:01+08:00","body_html":"","published_at":"2021-12-20T14:19:33+08:00","sort_order":"best-selling","template_suffix":"breastfeeding-collection","disjunctive":false,"rules":[{"column":"tag","relation":"equals","condition":"Breastfeeding"}],"published_scope":"global","image":{"created_at":"2024-05-06T11:59:34+08:00","alt":"Breastfeeding - The Birth Store","width":620,"height":635,"src":"\/\/www.thebirthstore.com.au\/cdn\/shop\/collections\/breastfeeding-793872.jpg?v=1714967974"}},{"id":261657460925,"handle":"buy","title":"Buy","updated_at":"2025-12-28T20:10:01+08:00","body_html":"\u003cp\u003eBrowse all of our pregnancy, labour \u0026amp; birth, postpartum and baby essentials here.\u003cbr\u003e\u003c\/p\u003e\n\u003cp\u003e\u003cspan\u003eYou can even buy now and pay later with Afterpay!\u003c\/span\u003e\u003c\/p\u003e","published_at":"2021-03-10T12:05:31+08:00","sort_order":"best-selling","template_suffix":"shop-all-collection","disjunctive":false,"rules":[{"column":"title","relation":"not_contains","condition":"Hire"}],"published_scope":"global","image":{"created_at":"2024-05-06T11:59:42+08:00","alt":"Buy - The Birth Store","width":2048,"height":2048,"src":"\/\/www.thebirthstore.com.au\/cdn\/shop\/collections\/buy-964856.jpg?v=1714967982"}},{"id":281712558269,"handle":"labour-aids","title":"Labour Aids","updated_at":"2025-12-28T20:10:01+08:00","body_html":"","published_at":"2021-12-20T14:22:16+08:00","sort_order":"best-selling","template_suffix":"labour-aids-collection","disjunctive":false,"rules":[{"column":"tag","relation":"equals","condition":"Labour Progression"}],"published_scope":"global","image":{"created_at":"2024-05-06T12:00:11+08:00","alt":"Labour Aids - The Birth Store","width":1365,"height":2048,"src":"\/\/www.thebirthstore.com.au\/cdn\/shop\/collections\/labour-aids-211824.jpg?v=1714968012"}},{"id":281712525501,"handle":"labour-preparation","title":"Labour Preparation","updated_at":"2025-12-28T20:10:01+08:00","body_html":"","published_at":"2021-12-20T14:20:12+08:00","sort_order":"best-selling","template_suffix":"labour-preparation-collec","disjunctive":false,"rules":[{"column":"tag","relation":"equals","condition":"Labour Preparation"}],"published_scope":"global","image":{"created_at":"2024-05-06T12:00:13+08:00","alt":"Labour Preparation - The Birth Store","width":1024,"height":1536,"src":"\/\/www.thebirthstore.com.au\/cdn\/shop\/collections\/labour-preparation-271961.jpg?v=1714968013"}},{"id":292919476413,"handle":"lactation-products","title":"Lactation Products","updated_at":"2025-12-28T20:10:01+08:00","body_html":"","published_at":"2023-03-22T12:22:41+08:00","sort_order":"best-selling","template_suffix":"lactation-products-collec","disjunctive":false,"rules":[{"column":"tag","relation":"equals","condition":"Lactation Products"}],"published_scope":"global","image":{"created_at":"2024-05-06T12:00:19+08:00","alt":"Lactation Products - The Birth Store","width":1034,"height":922,"src":"\/\/www.thebirthstore.com.au\/cdn\/shop\/collections\/lactation-products-752907.jpg?v=1714968019"}},{"id":261658149053,"handle":"pregnancy-and-maternity-products","title":"Pregnancy","updated_at":"2025-12-28T20:10:01+08:00","body_html":"\u003cp\u003eShop your pregnancy essentials below. Looking for something we don't currently stock? Please reach out and let us know.\u003cbr\u003e\u003c\/p\u003e\n\u003cp\u003e\u003cspan\u003eYou can even buy now and pay later with Afterpay!\u003c\/span\u003e\u003c\/p\u003e","published_at":"2021-03-10T12:34:22+08:00","sort_order":"best-selling","template_suffix":"pregnancy-collection","disjunctive":false,"rules":[{"column":"tag","relation":"equals","condition":"Pregnancy"}],"published_scope":"global","image":{"created_at":"2024-05-06T12:00:40+08:00","alt":"Pregnancy - The Birth Store","width":1024,"height":1536,"src":"\/\/www.thebirthstore.com.au\/cdn\/shop\/collections\/pregnancy-899677.jpg?v=1714968040"}},{"id":291456483517,"handle":"shop-all","title":"Shop All - Mum","updated_at":"2025-12-28T20:10:01+08:00","body_html":"","published_at":"2022-12-23T22:04:39+08:00","sort_order":"best-selling","template_suffix":"shop-all-collection","disjunctive":false,"rules":[{"column":"variant_price","relation":"greater_than","condition":"1"},{"column":"title","relation":"not_contains","condition":"Batteries"},{"column":"tag","relation":"equals","condition":"Mum"}],"published_scope":"global","image":{"created_at":"2024-05-06T12:00:54+08:00","alt":"Shop All - The Birth Store","width":1365,"height":2048,"src":"\/\/www.thebirthstore.com.au\/cdn\/shop\/collections\/shop-all-693176.jpg?v=1714968055"}},{"id":310045933757,"handle":"shop-all-sale","title":"Shop All Sale","updated_at":"2025-12-28T20:10:01+08:00","body_html":"","published_at":"2024-11-12T13:22:43+08:00","sort_order":"alpha-asc","template_suffix":"","disjunctive":true,"rules":[{"column":"tag","relation":"equals","condition":"Bundles"},{"column":"vendor","relation":"equals","condition":"Franjos Kitchen"},{"column":"vendor","relation":"equals","condition":"Adored Illustrations"},{"column":"vendor","relation":"equals","condition":"Amazing Oils"},{"column":"vendor","relation":"equals","condition":"Ice Ice Booby"},{"column":"vendor","relation":"equals","condition":"Made to Milk"},{"column":"vendor","relation":"equals","condition":"Milky Goodness"},{"column":"vendor","relation":"equals","condition":"Seasons of Mama"},{"column":"vendor","relation":"equals","condition":"Silverette"},{"column":"vendor","relation":"equals","condition":"Snuggle Hunny"},{"column":"vendor","relation":"equals","condition":"Yung Bod"},{"column":"vendor","relation":"equals","condition":"Bare Love"},{"column":"vendor","relation":"equals","condition":"Haakaa"},{"column":"vendor","relation":"equals","condition":"Mere Botanicals"},{"column":"vendor","relation":"equals","condition":"The Birth Store Hire"},{"column":"vendor","relation":"equals","condition":"The Birth Store"}],"published_scope":"global","image":{"created_at":"2024-11-13T10:58:16+08:00","alt":"Shop All Sale - The Birth Store","width":2048,"height":1365,"src":"\/\/www.thebirthstore.com.au\/cdn\/shop\/collections\/shop-all-sale-297361.jpg?v=1731466697"}}]}
[{"alt":"Antenatal Colostrum Expressing Kit - Made to Milk - The Birth Store-Made to Milk","id":27007579685053,"position":1,"preview_image":{"aspect_ratio":1.0,"height":2048,"width":2048,"src":"\/\/www.thebirthstore.com.au\/cdn\/shop\/files\/antenatal-colostrum-expressing-kit-made-to-milk-382319.jpg?v=1714967948"},"aspect_ratio":1.0,"height":2048,"media_type":"image","src":"\/\/www.thebirthstore.com.au\/cdn\/shop\/files\/antenatal-colostrum-expressing-kit-made-to-milk-382319.jpg?v=1714967948","width":2048},{"alt":"Antenatal Colostrum Expressing Kit - Made to Milk - The Birth Store-Made to Milk","id":27007579750589,"position":2,"preview_image":{"aspect_ratio":0.667,"height":810,"width":540,"src":"\/\/www.thebirthstore.com.au\/cdn\/shop\/files\/antenatal-colostrum-expressing-kit-made-to-milk-700625.jpg?v=1714967948"},"aspect_ratio":0.667,"height":810,"media_type":"image","src":"\/\/www.thebirthstore.com.au\/cdn\/shop\/files\/antenatal-colostrum-expressing-kit-made-to-milk-700625.jpg?v=1714967948","width":540}]
{"item":{"id":7483976712381,"title":"Baby Journal","handle":"baby-journal","description":"\u003cp data-mce-fragment=\"1\"\u003e\u003cspan data-mce-fragment=\"1\"\u003eA unique and beautiful baby journal to detail all of those precious moments in your child's first five years. The Darling Baby Journal has space to document all the special moments of each month of your little ones first year as well as dedicated special occasion pages such as first birthday and first Christmas.\u003c\/span\u003e\u003c\/p\u003e\n\u003cp data-mce-fragment=\"1\"\u003e\u003cspan data-mce-fragment=\"1\"\u003eEach journal comes packaged in a beautiful linen bag so that you can keep the journal in pristine condition or add extra photos or mementos to the bag as a special keepsake. The journal itself is covered in a stunning linen fabric with gold foil embossing on the front and back. The inside of the journal features a simple and classic design that won’t date in years to come, with a beautiful floral design and gold foil on the endpapers.\u003c\/span\u003e\u003c\/p\u003e\n\u003cp data-mce-fragment=\"1\"\u003e\u003cspan data-mce-fragment=\"1\"\u003eThe darling baby journal has the following features:\u003c\/span\u003e\u003c\/p\u003e\n\u003cul data-mce-fragment=\"1\"\u003e\n\u003cli data-mce-fragment=\"1\"\u003e\n\u003cspan data-mce-fragment=\"1\"\u003e\u003c\/span\u003e\u003cspan data-mce-fragment=\"1\"\u003e104 pages printed on 120GSM high quality paper\u003c\/span\u003e\n\u003c\/li\u003e\n\u003cli data-mce-fragment=\"1\"\u003e\u003cspan data-mce-fragment=\"1\"\u003e4 pages to record monthly milestones and photographs\u003c\/span\u003e\u003c\/li\u003e\n\u003cli data-mce-fragment=\"1\"\u003e\u003cspan data-mce-fragment=\"1\"\u003eAn additional 2 page spread for years 1-5\u003c\/span\u003e\u003c\/li\u003e\n\u003cli data-mce-fragment=\"1\"\u003e\u003cspan data-mce-fragment=\"1\"\u003eLuxurious linen cover with linen keepsake bag\u003c\/span\u003e\u003c\/li\u003e\n\u003cli data-mce-fragment=\"1\"\u003e\n\u003cspan data-mce-fragment=\"1\"\u003e\u003c\/span\u003e\u003cspan data-mce-fragment=\"1\"\u003eGold embossing on the front and back of the journal\u003c\/span\u003e\n\u003c\/li\u003e\n\u003cli data-mce-fragment=\"1\"\u003e\u003cspan data-mce-fragment=\"1\"\u003eSize of journal is 230mm x 200mm\u003c\/span\u003e\u003c\/li\u003e\n\u003cli data-mce-fragment=\"1\"\u003e\n\u003cspan data-mce-fragment=\"1\"\u003e\u003c\/span\u003e\u003cspan data-mce-fragment=\"1\"\u003eDesigned and illustrated in Australia\u003c\/span\u003e\n\u003c\/li\u003e\n\u003cli data-mce-fragment=\"1\"\u003e\n\u003cspan data-mce-fragment=\"1\"\u003e\u003c\/span\u003e\u003cspan data-mce-fragment=\"1\"\u003eClassic, timeless internal design\u003c\/span\u003e\n\u003c\/li\u003e\n\u003cli data-mce-fragment=\"1\"\u003e\n\u003cspan data-mce-fragment=\"1\"\u003e\u003c\/span\u003e\u003cspan data-mce-fragment=\"1\"\u003eFeature illustration on the endpapers with gold foil detailing\u003c\/span\u003e\n\u003c\/li\u003e\n\u003cli data-mce-fragment=\"1\"\u003e\n\u003cspan data-mce-fragment=\"1\"\u003e\u003c\/span\u003e\u003cspan data-mce-fragment=\"1\"\u003eSuitable for all family types - mums, dads, same sex couples and single parents\u003c\/span\u003e\n\u003c\/li\u003e\n\u003cli data-mce-fragment=\"1\"\u003e\n\u003cspan data-mce-fragment=\"1\"\u003e\u003c\/span\u003e\u003cspan data-mce-fragment=\"1\"\u003eGender neutral design suitable for either gender\u003c\/span\u003e\n\u003c\/li\u003e\n\u003c\/ul\u003e","published_at":"2023-06-08T22:27:48+08:00","created_at":"2023-06-08T22:27:48+08:00","vendor":"Adored Illustrations","type":"","tags":["Baby","Baby Shower Gifts - Baby","Books","Keepsakes","Memory Books","Pregnancy"],"price":5900,"price_min":5900,"price_max":5900,"available":true,"price_varies":false,"compare_at_price":null,"compare_at_price_min":0,"compare_at_price_max":0,"compare_at_price_varies":false,"variants":[{"id":42869002469565,"title":"Default Title","option1":"Default Title","option2":null,"option3":null,"sku":"","requires_shipping":true,"taxable":false,"featured_image":null,"available":true,"name":"Baby Journal","public_title":null,"options":["Default Title"],"price":5900,"weight":506,"compare_at_price":null,"inventory_management":"shopify","barcode":"02469565","requires_selling_plan":false,"selling_plan_allocations":[]}],"images":["\/\/www.thebirthstore.com.au\/cdn\/shop\/files\/baby-journal-700249.jpg?v=1762519429","\/\/www.thebirthstore.com.au\/cdn\/shop\/files\/baby-journal-701988.jpg?v=1762519429","\/\/www.thebirthstore.com.au\/cdn\/shop\/files\/baby-journal-461044.jpg?v=1762519429","\/\/www.thebirthstore.com.au\/cdn\/shop\/files\/baby-journal-512408.jpg?v=1762519429","\/\/www.thebirthstore.com.au\/cdn\/shop\/files\/baby-journal-511248.jpg?v=1762519429","\/\/www.thebirthstore.com.au\/cdn\/shop\/files\/baby-journal-331884.jpg?v=1762519429","\/\/www.thebirthstore.com.au\/cdn\/shop\/files\/baby-journal-414425.jpg?v=1762519429"],"featured_image":"\/\/www.thebirthstore.com.au\/cdn\/shop\/files\/baby-journal-700249.jpg?v=1762519429","options":["Title"],"media":[{"alt":"Baby Journal - The Birth Store-Adored Illustrations","id":27007582273725,"position":1,"preview_image":{"aspect_ratio":1.0,"height":1080,"width":1080,"src":"\/\/www.thebirthstore.com.au\/cdn\/shop\/files\/baby-journal-700249.jpg?v=1762519429"},"aspect_ratio":1.0,"height":1080,"media_type":"image","src":"\/\/www.thebirthstore.com.au\/cdn\/shop\/files\/baby-journal-700249.jpg?v=1762519429","width":1080},{"alt":"Baby Journal - The Birth Store-Adored Illustrations","id":27007582077117,"position":2,"preview_image":{"aspect_ratio":1.0,"height":2048,"width":2048,"src":"\/\/www.thebirthstore.com.au\/cdn\/shop\/files\/baby-journal-701988.jpg?v=1762519429"},"aspect_ratio":1.0,"height":2048,"media_type":"image","src":"\/\/www.thebirthstore.com.au\/cdn\/shop\/files\/baby-journal-701988.jpg?v=1762519429","width":2048},{"alt":"Baby Journal - The Birth Store-Adored Illustrations","id":27007582109885,"position":3,"preview_image":{"aspect_ratio":1.0,"height":1080,"width":1080,"src":"\/\/www.thebirthstore.com.au\/cdn\/shop\/files\/baby-journal-461044.jpg?v=1762519429"},"aspect_ratio":1.0,"height":1080,"media_type":"image","src":"\/\/www.thebirthstore.com.au\/cdn\/shop\/files\/baby-journal-461044.jpg?v=1762519429","width":1080},{"alt":"Baby Journal - The Birth Store-Adored Illustrations","id":27007582142653,"position":4,"preview_image":{"aspect_ratio":1.0,"height":1080,"width":1080,"src":"\/\/www.thebirthstore.com.au\/cdn\/shop\/files\/baby-journal-512408.jpg?v=1762519429"},"aspect_ratio":1.0,"height":1080,"media_type":"image","src":"\/\/www.thebirthstore.com.au\/cdn\/shop\/files\/baby-journal-512408.jpg?v=1762519429","width":1080},{"alt":"Baby Journal - The Birth Store-Adored Illustrations","id":27007582175421,"position":5,"preview_image":{"aspect_ratio":1.0,"height":1080,"width":1080,"src":"\/\/www.thebirthstore.com.au\/cdn\/shop\/files\/baby-journal-511248.jpg?v=1762519429"},"aspect_ratio":1.0,"height":1080,"media_type":"image","src":"\/\/www.thebirthstore.com.au\/cdn\/shop\/files\/baby-journal-511248.jpg?v=1762519429","width":1080},{"alt":"Baby Journal - The Birth Store-Adored Illustrations","id":27007582208189,"position":6,"preview_image":{"aspect_ratio":1.0,"height":1080,"width":1080,"src":"\/\/www.thebirthstore.com.au\/cdn\/shop\/files\/baby-journal-331884.jpg?v=1762519429"},"aspect_ratio":1.0,"height":1080,"media_type":"image","src":"\/\/www.thebirthstore.com.au\/cdn\/shop\/files\/baby-journal-331884.jpg?v=1762519429","width":1080},{"alt":"Baby Journal - The Birth Store-Adored Illustrations","id":27007582240957,"position":7,"preview_image":{"aspect_ratio":1.0,"height":1080,"width":1080,"src":"\/\/www.thebirthstore.com.au\/cdn\/shop\/files\/baby-journal-414425.jpg?v=1762519429"},"aspect_ratio":1.0,"height":1080,"media_type":"image","src":"\/\/www.thebirthstore.com.au\/cdn\/shop\/files\/baby-journal-414425.jpg?v=1762519429","width":1080}],"requires_selling_plan":false,"selling_plan_groups":[],"content":"\u003cp data-mce-fragment=\"1\"\u003e\u003cspan data-mce-fragment=\"1\"\u003eA unique and beautiful baby journal to detail all of those precious moments in your child's first five years. The Darling Baby Journal has space to document all the special moments of each month of your little ones first year as well as dedicated special occasion pages such as first birthday and first Christmas.\u003c\/span\u003e\u003c\/p\u003e\n\u003cp data-mce-fragment=\"1\"\u003e\u003cspan data-mce-fragment=\"1\"\u003eEach journal comes packaged in a beautiful linen bag so that you can keep the journal in pristine condition or add extra photos or mementos to the bag as a special keepsake. The journal itself is covered in a stunning linen fabric with gold foil embossing on the front and back. The inside of the journal features a simple and classic design that won’t date in years to come, with a beautiful floral design and gold foil on the endpapers.\u003c\/span\u003e\u003c\/p\u003e\n\u003cp data-mce-fragment=\"1\"\u003e\u003cspan data-mce-fragment=\"1\"\u003eThe darling baby journal has the following features:\u003c\/span\u003e\u003c\/p\u003e\n\u003cul data-mce-fragment=\"1\"\u003e\n\u003cli data-mce-fragment=\"1\"\u003e\n\u003cspan data-mce-fragment=\"1\"\u003e\u003c\/span\u003e\u003cspan data-mce-fragment=\"1\"\u003e104 pages printed on 120GSM high quality paper\u003c\/span\u003e\n\u003c\/li\u003e\n\u003cli data-mce-fragment=\"1\"\u003e\u003cspan data-mce-fragment=\"1\"\u003e4 pages to record monthly milestones and photographs\u003c\/span\u003e\u003c\/li\u003e\n\u003cli data-mce-fragment=\"1\"\u003e\u003cspan data-mce-fragment=\"1\"\u003eAn additional 2 page spread for years 1-5\u003c\/span\u003e\u003c\/li\u003e\n\u003cli data-mce-fragment=\"1\"\u003e\u003cspan data-mce-fragment=\"1\"\u003eLuxurious linen cover with linen keepsake bag\u003c\/span\u003e\u003c\/li\u003e\n\u003cli data-mce-fragment=\"1\"\u003e\n\u003cspan data-mce-fragment=\"1\"\u003e\u003c\/span\u003e\u003cspan data-mce-fragment=\"1\"\u003eGold embossing on the front and back of the journal\u003c\/span\u003e\n\u003c\/li\u003e\n\u003cli data-mce-fragment=\"1\"\u003e\u003cspan data-mce-fragment=\"1\"\u003eSize of journal is 230mm x 200mm\u003c\/span\u003e\u003c\/li\u003e\n\u003cli data-mce-fragment=\"1\"\u003e\n\u003cspan data-mce-fragment=\"1\"\u003e\u003c\/span\u003e\u003cspan data-mce-fragment=\"1\"\u003eDesigned and illustrated in Australia\u003c\/span\u003e\n\u003c\/li\u003e\n\u003cli data-mce-fragment=\"1\"\u003e\n\u003cspan data-mce-fragment=\"1\"\u003e\u003c\/span\u003e\u003cspan data-mce-fragment=\"1\"\u003eClassic, timeless internal design\u003c\/span\u003e\n\u003c\/li\u003e\n\u003cli data-mce-fragment=\"1\"\u003e\n\u003cspan data-mce-fragment=\"1\"\u003e\u003c\/span\u003e\u003cspan data-mce-fragment=\"1\"\u003eFeature illustration on the endpapers with gold foil detailing\u003c\/span\u003e\n\u003c\/li\u003e\n\u003cli data-mce-fragment=\"1\"\u003e\n\u003cspan data-mce-fragment=\"1\"\u003e\u003c\/span\u003e\u003cspan data-mce-fragment=\"1\"\u003eSuitable for all family types - mums, dads, same sex couples and single parents\u003c\/span\u003e\n\u003c\/li\u003e\n\u003cli data-mce-fragment=\"1\"\u003e\n\u003cspan data-mce-fragment=\"1\"\u003e\u003c\/span\u003e\u003cspan data-mce-fragment=\"1\"\u003eGender neutral design suitable for either gender\u003c\/span\u003e\n\u003c\/li\u003e\n\u003c\/ul\u003e"},"options":[{"name":"Title","position":1,"values":["Default Title"]}],"custom_metafields":{},"metafields":{"badge":"\u003cdiv style='display:none' class='jdgm-prev-badge' data-average-rating='0.00' data-number-of-reviews='0' data-number-of-questions='0'\u003e \u003cspan class='jdgm-prev-badge__stars' data-score='0.00' tabindex='0' aria-label='0.00 stars' role='button'\u003e \u003cspan class='jdgm-star jdgm--off'\u003e\u003c\/span\u003e\u003cspan class='jdgm-star jdgm--off'\u003e\u003c\/span\u003e\u003cspan class='jdgm-star jdgm--off'\u003e\u003c\/span\u003e\u003cspan class='jdgm-star jdgm--off'\u003e\u003c\/span\u003e\u003cspan class='jdgm-star jdgm--off'\u003e\u003c\/span\u003e \u003c\/span\u003e \u003cspan class='jdgm-prev-badge__text'\u003e No reviews \u003c\/span\u003e \u003c\/div\u003e","widget":"\u003cdiv class='jdgm-rev-widg' data-updated-at='2025-06-13T16:12:53Z' data-average-rating='0.00' data-number-of-reviews='0' data-number-of-questions='0'\u003e \u003cstyle class='jdgm-temp-hiding-style'\u003e.jdgm-rev-widg{ display: none }\u003c\/style\u003e \u003cdiv class='jdgm-rev-widg__header'\u003e \u003ch2 class='jdgm-rev-widg__title'\u003eCustomer Reviews\u003c\/h2\u003e \u003cdiv class='jdgm-rev-widg__summary'\u003e \u003cdiv class='jdgm-rev-widg__summary-stars' aria-label='Average rating is 0.00 stars' role='img'\u003e \u003cspan class='jdgm-star jdgm--off'\u003e\u003c\/span\u003e\u003cspan class='jdgm-star jdgm--off'\u003e\u003c\/span\u003e\u003cspan class='jdgm-star jdgm--off'\u003e\u003c\/span\u003e\u003cspan class='jdgm-star jdgm--off'\u003e\u003c\/span\u003e\u003cspan class='jdgm-star jdgm--off'\u003e\u003c\/span\u003e \u003c\/div\u003e \u003cdiv class='jdgm-rev-widg__summary-text'\u003eBe the first to write a review\u003c\/div\u003e \u003c\/div\u003e \u003ca style='display: none' href='#' class='jdgm-write-rev-link' role='button'\u003eWrite a review\u003c\/a\u003e \u003cdiv class='jdgm-histogram jdgm-temp-hidden'\u003e \u003cdiv class='jdgm-histogram__row' data-rating='5' data-frequency='0' data-percentage='0'\u003e \u003cdiv class='jdgm-histogram__star' role='button' aria-label=\"0% (0) reviews with 5 star rating\" tabindex='0' \u003e\u003cspan class='jdgm-star jdgm--on'\u003e\u003c\/span\u003e\u003cspan class='jdgm-star jdgm--on'\u003e\u003c\/span\u003e\u003cspan class='jdgm-star jdgm--on'\u003e\u003c\/span\u003e\u003cspan class='jdgm-star jdgm--on'\u003e\u003c\/span\u003e\u003cspan class='jdgm-star jdgm--on'\u003e\u003c\/span\u003e\u003c\/div\u003e \u003cdiv class='jdgm-histogram__bar'\u003e \u003cdiv class='jdgm-histogram__bar-content' style='width: 0%;'\u003e \u003c\/div\u003e \u003c\/div\u003e \u003cdiv class='jdgm-histogram__percentage'\u003e0%\u003c\/div\u003e \u003cdiv class='jdgm-histogram__frequency'\u003e(0)\u003c\/div\u003e \u003c\/div\u003e \u003cdiv class='jdgm-histogram__row' data-rating='4' data-frequency='0' data-percentage='0'\u003e \u003cdiv class='jdgm-histogram__star' role='button' aria-label=\"0% (0) reviews with 4 star rating\" tabindex='0' \u003e\u003cspan class='jdgm-star jdgm--on'\u003e\u003c\/span\u003e\u003cspan class='jdgm-star jdgm--on'\u003e\u003c\/span\u003e\u003cspan class='jdgm-star jdgm--on'\u003e\u003c\/span\u003e\u003cspan class='jdgm-star jdgm--on'\u003e\u003c\/span\u003e\u003cspan class='jdgm-star jdgm--off'\u003e\u003c\/span\u003e\u003c\/div\u003e \u003cdiv class='jdgm-histogram__bar'\u003e \u003cdiv class='jdgm-histogram__bar-content' style='width: 0%;'\u003e \u003c\/div\u003e \u003c\/div\u003e \u003cdiv class='jdgm-histogram__percentage'\u003e0%\u003c\/div\u003e \u003cdiv class='jdgm-histogram__frequency'\u003e(0)\u003c\/div\u003e \u003c\/div\u003e \u003cdiv class='jdgm-histogram__row' data-rating='3' data-frequency='0' data-percentage='0'\u003e \u003cdiv class='jdgm-histogram__star' role='button' aria-label=\"0% (0) reviews with 3 star rating\" tabindex='0' \u003e\u003cspan class='jdgm-star jdgm--on'\u003e\u003c\/span\u003e\u003cspan class='jdgm-star jdgm--on'\u003e\u003c\/span\u003e\u003cspan class='jdgm-star jdgm--on'\u003e\u003c\/span\u003e\u003cspan class='jdgm-star jdgm--off'\u003e\u003c\/span\u003e\u003cspan class='jdgm-star jdgm--off'\u003e\u003c\/span\u003e\u003c\/div\u003e \u003cdiv class='jdgm-histogram__bar'\u003e \u003cdiv class='jdgm-histogram__bar-content' style='width: 0%;'\u003e \u003c\/div\u003e \u003c\/div\u003e \u003cdiv class='jdgm-histogram__percentage'\u003e0%\u003c\/div\u003e \u003cdiv class='jdgm-histogram__frequency'\u003e(0)\u003c\/div\u003e \u003c\/div\u003e \u003cdiv class='jdgm-histogram__row' data-rating='2' data-frequency='0' data-percentage='0'\u003e \u003cdiv class='jdgm-histogram__star' role='button' aria-label=\"0% (0) reviews with 2 star rating\" tabindex='0' \u003e\u003cspan class='jdgm-star jdgm--on'\u003e\u003c\/span\u003e\u003cspan class='jdgm-star jdgm--on'\u003e\u003c\/span\u003e\u003cspan class='jdgm-star jdgm--off'\u003e\u003c\/span\u003e\u003cspan class='jdgm-star jdgm--off'\u003e\u003c\/span\u003e\u003cspan class='jdgm-star jdgm--off'\u003e\u003c\/span\u003e\u003c\/div\u003e \u003cdiv class='jdgm-histogram__bar'\u003e \u003cdiv class='jdgm-histogram__bar-content' style='width: 0%;'\u003e \u003c\/div\u003e \u003c\/div\u003e \u003cdiv class='jdgm-histogram__percentage'\u003e0%\u003c\/div\u003e \u003cdiv class='jdgm-histogram__frequency'\u003e(0)\u003c\/div\u003e \u003c\/div\u003e \u003cdiv class='jdgm-histogram__row' data-rating='1' data-frequency='0' data-percentage='0'\u003e \u003cdiv class='jdgm-histogram__star' role='button' aria-label=\"0% (0) reviews with 1 star rating\" tabindex='0' \u003e\u003cspan class='jdgm-star jdgm--on'\u003e\u003c\/span\u003e\u003cspan class='jdgm-star jdgm--off'\u003e\u003c\/span\u003e\u003cspan class='jdgm-star jdgm--off'\u003e\u003c\/span\u003e\u003cspan class='jdgm-star jdgm--off'\u003e\u003c\/span\u003e\u003cspan class='jdgm-star jdgm--off'\u003e\u003c\/span\u003e\u003c\/div\u003e \u003cdiv class='jdgm-histogram__bar'\u003e \u003cdiv class='jdgm-histogram__bar-content' style='width: 0%;'\u003e \u003c\/div\u003e \u003c\/div\u003e \u003cdiv class='jdgm-histogram__percentage'\u003e0%\u003c\/div\u003e \u003cdiv class='jdgm-histogram__frequency'\u003e(0)\u003c\/div\u003e \u003c\/div\u003e \u003cdiv class='jdgm-histogram__row jdgm-histogram__clear-filter' data-rating=null tabindex='0'\u003e\u003c\/div\u003e \u003c\/div\u003e \u003cdiv class='jdgm-rev-widg__sort-wrapper'\u003e\u003c\/div\u003e \u003c\/div\u003e \u003cdiv class='jdgm-rev-widg__body'\u003e \u003cdiv class='jdgm-rev-widg__reviews'\u003e\u003c\/div\u003e \u003cdiv class='jdgm-paginate' data-per-page='10' data-url='https:\/\/api.judge.me\/reviews\/reviews_for_widget' style=\"display: none;\"\u003e\u003c\/div\u003e \u003c\/div\u003e \u003cdiv class='jdgm-rev-widg__paginate-spinner-wrapper'\u003e \u003cdiv class='jdgm-spinner'\u003e\u003c\/div\u003e \u003c\/div\u003e \u003c\/div\u003e"},"collections":[{"id":325528486077,"handle":"baby-shower-gifts-baby","title":"Baby Shower Gifts - Baby","updated_at":"2025-12-28T20:10:01+08:00","body_html":"","published_at":"2025-10-11T10:27:03+08:00","sort_order":"best-selling","template_suffix":"baby-collection","disjunctive":true,"rules":[{"column":"tag","relation":"equals","condition":"Baby Shower Gifts - Baby"},{"column":"tag","relation":"equals","condition":"Gift Card"}],"published_scope":"global","image":{"created_at":"2025-10-30T16:16:58+08:00","alt":"Baby Shower Gifts - Baby - The Birth Store","width":1638,"height":2048,"src":"\/\/www.thebirthstore.com.au\/cdn\/shop\/collections\/baby-shower-gifts-baby-5416143.jpg?v=1761812219"}},{"id":264450998461,"handle":"baby-collection","title":"Baby-Collection","updated_at":"2025-12-28T20:10:01+08:00","body_html":"\u003cp\u003eShop your baby announcement and milestone essentials below. Looking for something we don't currently stock? Please reach out and let us know.\u003cbr\u003e\u003c\/p\u003e\n\u003cp\u003e\u003cspan\u003eYou can even buy now and pay later with Afterpay!\u003c\/span\u003e\u003c\/p\u003e","published_at":"2021-04-07T22:29:35+08:00","sort_order":"best-selling","template_suffix":"baby-collection","disjunctive":false,"rules":[{"column":"tag","relation":"equals","condition":"Baby"}],"published_scope":"global","image":{"created_at":"2024-05-06T11:59:24+08:00","alt":"Baby - The Birth Store","width":1280,"height":1600,"src":"\/\/www.thebirthstore.com.au\/cdn\/shop\/collections\/baby-398774.jpg?v=1714967964"}},{"id":293669077181,"handle":"books","title":"Books","updated_at":"2025-12-24T20:09:23+08:00","body_html":"","published_at":"2023-06-08T21:27:34+08:00","sort_order":"best-selling","template_suffix":"swaddles-collection","disjunctive":false,"rules":[{"column":"tag","relation":"equals","condition":"Books"}],"published_scope":"global","image":{"created_at":"2024-05-06T11:59:31+08:00","alt":"Books - The Birth Store","width":1476,"height":2048,"src":"\/\/www.thebirthstore.com.au\/cdn\/shop\/collections\/books-814717.jpg?v=1714967972"}},{"id":261657460925,"handle":"buy","title":"Buy","updated_at":"2025-12-28T20:10:01+08:00","body_html":"\u003cp\u003eBrowse all of our pregnancy, labour \u0026amp; birth, postpartum and baby essentials here.\u003cbr\u003e\u003c\/p\u003e\n\u003cp\u003e\u003cspan\u003eYou can even buy now and pay later with Afterpay!\u003c\/span\u003e\u003c\/p\u003e","published_at":"2021-03-10T12:05:31+08:00","sort_order":"best-selling","template_suffix":"shop-all-collection","disjunctive":false,"rules":[{"column":"title","relation":"not_contains","condition":"Hire"}],"published_scope":"global","image":{"created_at":"2024-05-06T11:59:42+08:00","alt":"Buy - The Birth Store","width":2048,"height":2048,"src":"\/\/www.thebirthstore.com.au\/cdn\/shop\/collections\/buy-964856.jpg?v=1714967982"}},{"id":295225327805,"handle":"keepsakes","title":"Keepsakes","updated_at":"2025-12-28T20:10:01+08:00","body_html":"","published_at":"2023-11-10T20:56:20+08:00","sort_order":"best-selling","template_suffix":"baby-collection","disjunctive":false,"rules":[{"column":"tag","relation":"equals","condition":"Keepsakes"}],"published_scope":"global","image":{"created_at":"2024-05-06T12:00:06+08:00","alt":"Keepsakes - The Birth Store","width":1080,"height":1080,"src":"\/\/www.thebirthstore.com.au\/cdn\/shop\/collections\/keepsakes-128077.jpg?v=1714968006"}},{"id":324679958717,"handle":"keepsakes-1","title":"Keepsakes","updated_at":"2025-12-28T20:10:01+08:00","body_html":"","published_at":"2025-09-23T22:02:39+08:00","sort_order":"best-selling","template_suffix":"baby-collection","disjunctive":false,"rules":[{"column":"tag","relation":"equals","condition":"Keepsakes"}],"published_scope":"global","image":{"created_at":"2025-09-29T00:43:46+08:00","alt":"Keepsakes - The Birth Store","width":1638,"height":2048,"src":"\/\/www.thebirthstore.com.au\/cdn\/shop\/collections\/keepsakes-9229046.jpg?v=1759077826"}},{"id":324680122557,"handle":"memory-books","title":"Memory Books","updated_at":"2025-12-24T20:09:23+08:00","body_html":"","published_at":"2025-09-23T22:03:05+08:00","sort_order":"best-selling","template_suffix":"baby-collection","disjunctive":false,"rules":[{"column":"tag","relation":"equals","condition":"Memory Books"}],"published_scope":"global","image":{"created_at":"2025-11-20T21:34:31+08:00","alt":"Memory Books - The Birth Store","width":1638,"height":1638,"src":"\/\/www.thebirthstore.com.au\/cdn\/shop\/collections\/memory-books-2307078.jpg?v=1763645672"}},{"id":261658149053,"handle":"pregnancy-and-maternity-products","title":"Pregnancy","updated_at":"2025-12-28T20:10:01+08:00","body_html":"\u003cp\u003eShop your pregnancy essentials below. Looking for something we don't currently stock? Please reach out and let us know.\u003cbr\u003e\u003c\/p\u003e\n\u003cp\u003e\u003cspan\u003eYou can even buy now and pay later with Afterpay!\u003c\/span\u003e\u003c\/p\u003e","published_at":"2021-03-10T12:34:22+08:00","sort_order":"best-selling","template_suffix":"pregnancy-collection","disjunctive":false,"rules":[{"column":"tag","relation":"equals","condition":"Pregnancy"}],"published_scope":"global","image":{"created_at":"2024-05-06T12:00:40+08:00","alt":"Pregnancy - The Birth Store","width":1024,"height":1536,"src":"\/\/www.thebirthstore.com.au\/cdn\/shop\/collections\/pregnancy-899677.jpg?v=1714968040"}},{"id":326135316669,"handle":"shop-all-baby","title":"Shop All - Baby","updated_at":"2025-12-28T20:10:01+08:00","body_html":"","published_at":"2025-10-22T11:00:50+08:00","sort_order":"best-selling","template_suffix":"baby-collection","disjunctive":false,"rules":[{"column":"variant_price","relation":"greater_than","condition":"1"},{"column":"title","relation":"not_contains","condition":"Batteries"},{"column":"tag","relation":"equals","condition":"Baby"}],"published_scope":"global","image":{"created_at":"2025-10-30T16:17:07+08:00","alt":"Shop All - Baby - The Birth Store","width":1075,"height":1613,"src":"\/\/www.thebirthstore.com.au\/cdn\/shop\/collections\/shop-all-baby-1449113.jpg?v=1761812227"}},{"id":310045933757,"handle":"shop-all-sale","title":"Shop All Sale","updated_at":"2025-12-28T20:10:01+08:00","body_html":"","published_at":"2024-11-12T13:22:43+08:00","sort_order":"alpha-asc","template_suffix":"","disjunctive":true,"rules":[{"column":"tag","relation":"equals","condition":"Bundles"},{"column":"vendor","relation":"equals","condition":"Franjos Kitchen"},{"column":"vendor","relation":"equals","condition":"Adored Illustrations"},{"column":"vendor","relation":"equals","condition":"Amazing Oils"},{"column":"vendor","relation":"equals","condition":"Ice Ice Booby"},{"column":"vendor","relation":"equals","condition":"Made to Milk"},{"column":"vendor","relation":"equals","condition":"Milky Goodness"},{"column":"vendor","relation":"equals","condition":"Seasons of Mama"},{"column":"vendor","relation":"equals","condition":"Silverette"},{"column":"vendor","relation":"equals","condition":"Snuggle Hunny"},{"column":"vendor","relation":"equals","condition":"Yung Bod"},{"column":"vendor","relation":"equals","condition":"Bare Love"},{"column":"vendor","relation":"equals","condition":"Haakaa"},{"column":"vendor","relation":"equals","condition":"Mere Botanicals"},{"column":"vendor","relation":"equals","condition":"The Birth Store Hire"},{"column":"vendor","relation":"equals","condition":"The Birth Store"}],"published_scope":"global","image":{"created_at":"2024-11-13T10:58:16+08:00","alt":"Shop All Sale - The Birth Store","width":2048,"height":1365,"src":"\/\/www.thebirthstore.com.au\/cdn\/shop\/collections\/shop-all-sale-297361.jpg?v=1731466697"}}]}
[{"alt":"Baby Journal - The Birth Store-Adored Illustrations","id":27007582273725,"position":1,"preview_image":{"aspect_ratio":1.0,"height":1080,"width":1080,"src":"\/\/www.thebirthstore.com.au\/cdn\/shop\/files\/baby-journal-700249.jpg?v=1762519429"},"aspect_ratio":1.0,"height":1080,"media_type":"image","src":"\/\/www.thebirthstore.com.au\/cdn\/shop\/files\/baby-journal-700249.jpg?v=1762519429","width":1080},{"alt":"Baby Journal - The Birth Store-Adored Illustrations","id":27007582077117,"position":2,"preview_image":{"aspect_ratio":1.0,"height":2048,"width":2048,"src":"\/\/www.thebirthstore.com.au\/cdn\/shop\/files\/baby-journal-701988.jpg?v=1762519429"},"aspect_ratio":1.0,"height":2048,"media_type":"image","src":"\/\/www.thebirthstore.com.au\/cdn\/shop\/files\/baby-journal-701988.jpg?v=1762519429","width":2048},{"alt":"Baby Journal - The Birth Store-Adored Illustrations","id":27007582109885,"position":3,"preview_image":{"aspect_ratio":1.0,"height":1080,"width":1080,"src":"\/\/www.thebirthstore.com.au\/cdn\/shop\/files\/baby-journal-461044.jpg?v=1762519429"},"aspect_ratio":1.0,"height":1080,"media_type":"image","src":"\/\/www.thebirthstore.com.au\/cdn\/shop\/files\/baby-journal-461044.jpg?v=1762519429","width":1080},{"alt":"Baby Journal - The Birth Store-Adored Illustrations","id":27007582142653,"position":4,"preview_image":{"aspect_ratio":1.0,"height":1080,"width":1080,"src":"\/\/www.thebirthstore.com.au\/cdn\/shop\/files\/baby-journal-512408.jpg?v=1762519429"},"aspect_ratio":1.0,"height":1080,"media_type":"image","src":"\/\/www.thebirthstore.com.au\/cdn\/shop\/files\/baby-journal-512408.jpg?v=1762519429","width":1080},{"alt":"Baby Journal - The Birth Store-Adored Illustrations","id":27007582175421,"position":5,"preview_image":{"aspect_ratio":1.0,"height":1080,"width":1080,"src":"\/\/www.thebirthstore.com.au\/cdn\/shop\/files\/baby-journal-511248.jpg?v=1762519429"},"aspect_ratio":1.0,"height":1080,"media_type":"image","src":"\/\/www.thebirthstore.com.au\/cdn\/shop\/files\/baby-journal-511248.jpg?v=1762519429","width":1080},{"alt":"Baby Journal - The Birth Store-Adored Illustrations","id":27007582208189,"position":6,"preview_image":{"aspect_ratio":1.0,"height":1080,"width":1080,"src":"\/\/www.thebirthstore.com.au\/cdn\/shop\/files\/baby-journal-331884.jpg?v=1762519429"},"aspect_ratio":1.0,"height":1080,"media_type":"image","src":"\/\/www.thebirthstore.com.au\/cdn\/shop\/files\/baby-journal-331884.jpg?v=1762519429","width":1080},{"alt":"Baby Journal - The Birth Store-Adored Illustrations","id":27007582240957,"position":7,"preview_image":{"aspect_ratio":1.0,"height":1080,"width":1080,"src":"\/\/www.thebirthstore.com.au\/cdn\/shop\/files\/baby-journal-414425.jpg?v=1762519429"},"aspect_ratio":1.0,"height":1080,"media_type":"image","src":"\/\/www.thebirthstore.com.au\/cdn\/shop\/files\/baby-journal-414425.jpg?v=1762519429","width":1080}]
{"item":{"id":7483975663805,"title":"Baby Milestone Cards","handle":"baby-milestone-cards","description":"\u003cp data-mce-fragment=\"1\"\u003e\u003cspan data-mce-fragment=\"1\"\u003eDon't miss a moment of your little ones first year with our sweet set of baby milestone cards.\u003c\/span\u003e\u003c\/p\u003e\n\u003cp data-mce-fragment=\"1\"\u003e\u003cspan data-mce-fragment=\"1\"\u003eThe set features a range of important milestones from when they are first born up until they are one and many in between such as ‘the first time I smiled’ and ‘the first time I slept through the night.’ The darling baby milestone cards pair perfectly with our darling baby journal featuring the same beautiful floral illustration in both the journal and on the back of the milestone cards.\u003c\/span\u003e\u003c\/p\u003e\n\u003cp data-mce-fragment=\"1\"\u003e\u003cspan data-mce-fragment=\"1\"\u003eFeatures of the darling baby milestone cards:\u003c\/span\u003e\u003c\/p\u003e\n\u003cul data-mce-fragment=\"1\"\u003e\n\u003cli data-mce-fragment=\"1\"\u003e30 round cards (10cm in diameter)\u003c\/li\u003e\n\u003cli data-mce-fragment=\"1\"\u003eClassic, timeless design\u003c\/li\u003e\n\u003cli data-mce-fragment=\"1\"\u003e\n\u003cspan data-mce-fragment=\"1\"\u003e\u003c\/span\u003e\u003cspan data-mce-fragment=\"1\"\u003eFeature floral illustration on the back of each card with gold foil detailing\u003c\/span\u003e\n\u003c\/li\u003e\n\u003cli data-mce-fragment=\"1\"\u003e\n\u003cspan data-mce-fragment=\"1\"\u003e\u003c\/span\u003e\u003cspan data-mce-fragment=\"1\"\u003eSuitable for either sex in a gender neutral colours\u003c\/span\u003e\n\u003c\/li\u003e\n\u003cli data-mce-fragment=\"1\"\u003e\n\u003cspan data-mce-fragment=\"1\"\u003e\u003c\/span\u003e\u003cspan data-mce-fragment=\"1\"\u003ePackaged in a keepsake drawer box\u003c\/span\u003e\n\u003c\/li\u003e\n\u003c\/ul\u003e\n\u003cp data-mce-fragment=\"1\"\u003eThese milestone cards make a beautiful gift for any expecting mum that will be treasured for years to come.\u003c\/p\u003e\n\u003cp data-mce-fragment=\"1\"\u003e\u003cspan data-mce-fragment=\"1\"\u003eThe set contains the following:\u003c\/span\u003e\u003c\/p\u003e\n\u003cul data-mce-fragment=\"1\"\u003e\n\u003cli data-mce-fragment=\"1\"\u003e1 week\u003c\/li\u003e\n\u003cli data-mce-fragment=\"1\"\u003e2 weeks\u003c\/li\u003e\n\u003cli data-mce-fragment=\"1\"\u003e3 weeks\u003c\/li\u003e\n\u003cli data-mce-fragment=\"1\"\u003e1 month\u003c\/li\u003e\n\u003cli data-mce-fragment=\"1\"\u003e6 weeks\u003c\/li\u003e\n\u003cli data-mce-fragment=\"1\"\u003e2 months\u003c\/li\u003e\n\u003cli data-mce-fragment=\"1\"\u003e3 months\u003c\/li\u003e\n\u003cli data-mce-fragment=\"1\"\u003e4 months\u003c\/li\u003e\n\u003cli data-mce-fragment=\"1\"\u003e5 months\u003c\/li\u003e\n\u003cli data-mce-fragment=\"1\"\u003e6 months\u003c\/li\u003e\n\u003cli data-mce-fragment=\"1\"\u003e7 months\u003c\/li\u003e\n\u003cli data-mce-fragment=\"1\"\u003e8 months\u003c\/li\u003e\n\u003cli data-mce-fragment=\"1\"\u003e9 months\u003c\/li\u003e\n\u003cli data-mce-fragment=\"1\"\u003e10 months\u003c\/li\u003e\n\u003cli data-mce-fragment=\"1\"\u003e11 months\u003c\/li\u003e\n\u003cli data-mce-fragment=\"1\"\u003e1 year\u003c\/li\u003e\n\u003cli data-mce-fragment=\"1\"\u003eHello world\u003c\/li\u003e\n\u003cli data-mce-fragment=\"1\"\u003eToday I had my first bath\u003c\/li\u003e\n\u003cli data-mce-fragment=\"1\"\u003eToday I rolled over\u003c\/li\u003e\n\u003cli data-mce-fragment=\"1\"\u003eToday I stood up for the first time\u003c\/li\u003e\n\u003cli data-mce-fragment=\"1\"\u003eI slept through the night\u003c\/li\u003e\n\u003cli data-mce-fragment=\"1\"\u003eToday I said my first word\u003c\/li\u003e\n\u003cli data-mce-fragment=\"1\"\u003eToday I laughed for the first time\u003c\/li\u003e\n\u003cli data-mce-fragment=\"1\"\u003eToday I sat up for the first time\u003c\/li\u003e\n\u003cli data-mce-fragment=\"1\"\u003eToday I crawled for the first time\u003c\/li\u003e\n\u003cli data-mce-fragment=\"1\"\u003eToday I ate solids for the first time\u003c\/li\u003e\n\u003cli data-mce-fragment=\"1\"\u003eI got my first tooth!\u003c\/li\u003e\n\u003cli data-mce-fragment=\"1\"\u003eToday I smiled for the first time\u003c\/li\u003e\n\u003cli data-mce-fragment=\"1\"\u003eToday I drove my parents crazy\u003c\/li\u003e\n\u003cli data-mce-fragment=\"1\"\u003eOh how I adore you\u003c\/li\u003e\n\u003c\/ul\u003e\n\u003cul data-mce-fragment=\"1\"\u003e\u003c\/ul\u003e\n\u003cul data-mce-fragment=\"1\"\u003e\u003c\/ul\u003e","published_at":"2023-06-08T22:19:26+08:00","created_at":"2023-06-08T22:19:26+08:00","vendor":"Adored Illustrations","type":"","tags":["Baby","Baby Shower Gifts - Baby","Keepsakes","Milestone Cards"],"price":3600,"price_min":3600,"price_max":3600,"available":false,"price_varies":false,"compare_at_price":null,"compare_at_price_min":0,"compare_at_price_max":0,"compare_at_price_varies":false,"variants":[{"id":42868991426749,"title":"Default Title","option1":"Default Title","option2":null,"option3":null,"sku":"","requires_shipping":true,"taxable":false,"featured_image":null,"available":false,"name":"Baby Milestone Cards","public_title":null,"options":["Default Title"],"price":3600,"weight":157,"compare_at_price":null,"inventory_management":"shopify","barcode":"91426749","requires_selling_plan":false,"selling_plan_allocations":[]}],"images":["\/\/www.thebirthstore.com.au\/cdn\/shop\/files\/baby-milestone-cards-783318.jpg?v=1762519858","\/\/www.thebirthstore.com.au\/cdn\/shop\/files\/baby-milestone-cards-118224.jpg?v=1762519858","\/\/www.thebirthstore.com.au\/cdn\/shop\/files\/baby-milestone-cards-852004.jpg?v=1762519858","\/\/www.thebirthstore.com.au\/cdn\/shop\/files\/baby-milestone-cards-311291.jpg?v=1762519858","\/\/www.thebirthstore.com.au\/cdn\/shop\/files\/baby-milestone-cards-975962.jpg?v=1762519858","\/\/www.thebirthstore.com.au\/cdn\/shop\/files\/baby-milestone-cards-146694.jpg?v=1762519858"],"featured_image":"\/\/www.thebirthstore.com.au\/cdn\/shop\/files\/baby-milestone-cards-783318.jpg?v=1762519858","options":["Title"],"media":[{"alt":"Baby Milestone Cards - The Birth Store-Adored Illustrations","id":27007581356221,"position":1,"preview_image":{"aspect_ratio":1.0,"height":1080,"width":1080,"src":"\/\/www.thebirthstore.com.au\/cdn\/shop\/files\/baby-milestone-cards-783318.jpg?v=1762519858"},"aspect_ratio":1.0,"height":1080,"media_type":"image","src":"\/\/www.thebirthstore.com.au\/cdn\/shop\/files\/baby-milestone-cards-783318.jpg?v=1762519858","width":1080},{"alt":"Baby Milestone Cards - The Birth Store-Adored Illustrations","id":27007581094077,"position":2,"preview_image":{"aspect_ratio":1.0,"height":2048,"width":2048,"src":"\/\/www.thebirthstore.com.au\/cdn\/shop\/files\/baby-milestone-cards-118224.jpg?v=1762519858"},"aspect_ratio":1.0,"height":2048,"media_type":"image","src":"\/\/www.thebirthstore.com.au\/cdn\/shop\/files\/baby-milestone-cards-118224.jpg?v=1762519858","width":2048},{"alt":"Baby Milestone Cards - The Birth Store-Adored Illustrations","id":27007581192381,"position":3,"preview_image":{"aspect_ratio":1.0,"height":1080,"width":1080,"src":"\/\/www.thebirthstore.com.au\/cdn\/shop\/files\/baby-milestone-cards-852004.jpg?v=1762519858"},"aspect_ratio":1.0,"height":1080,"media_type":"image","src":"\/\/www.thebirthstore.com.au\/cdn\/shop\/files\/baby-milestone-cards-852004.jpg?v=1762519858","width":1080},{"alt":"Baby Milestone Cards - The Birth Store-Adored Illustrations","id":27007581257917,"position":4,"preview_image":{"aspect_ratio":1.0,"height":1080,"width":1080,"src":"\/\/www.thebirthstore.com.au\/cdn\/shop\/files\/baby-milestone-cards-311291.jpg?v=1762519858"},"aspect_ratio":1.0,"height":1080,"media_type":"image","src":"\/\/www.thebirthstore.com.au\/cdn\/shop\/files\/baby-milestone-cards-311291.jpg?v=1762519858","width":1080},{"alt":"Baby Milestone Cards - The Birth Store-Adored Illustrations","id":27007581290685,"position":5,"preview_image":{"aspect_ratio":1.0,"height":1080,"width":1080,"src":"\/\/www.thebirthstore.com.au\/cdn\/shop\/files\/baby-milestone-cards-975962.jpg?v=1762519858"},"aspect_ratio":1.0,"height":1080,"media_type":"image","src":"\/\/www.thebirthstore.com.au\/cdn\/shop\/files\/baby-milestone-cards-975962.jpg?v=1762519858","width":1080},{"alt":"Baby Milestone Cards - The Birth Store-Adored Illustrations","id":27007581323453,"position":6,"preview_image":{"aspect_ratio":1.0,"height":1080,"width":1080,"src":"\/\/www.thebirthstore.com.au\/cdn\/shop\/files\/baby-milestone-cards-146694.jpg?v=1762519858"},"aspect_ratio":1.0,"height":1080,"media_type":"image","src":"\/\/www.thebirthstore.com.au\/cdn\/shop\/files\/baby-milestone-cards-146694.jpg?v=1762519858","width":1080}],"requires_selling_plan":false,"selling_plan_groups":[],"content":"\u003cp data-mce-fragment=\"1\"\u003e\u003cspan data-mce-fragment=\"1\"\u003eDon't miss a moment of your little ones first year with our sweet set of baby milestone cards.\u003c\/span\u003e\u003c\/p\u003e\n\u003cp data-mce-fragment=\"1\"\u003e\u003cspan data-mce-fragment=\"1\"\u003eThe set features a range of important milestones from when they are first born up until they are one and many in between such as ‘the first time I smiled’ and ‘the first time I slept through the night.’ The darling baby milestone cards pair perfectly with our darling baby journal featuring the same beautiful floral illustration in both the journal and on the back of the milestone cards.\u003c\/span\u003e\u003c\/p\u003e\n\u003cp data-mce-fragment=\"1\"\u003e\u003cspan data-mce-fragment=\"1\"\u003eFeatures of the darling baby milestone cards:\u003c\/span\u003e\u003c\/p\u003e\n\u003cul data-mce-fragment=\"1\"\u003e\n\u003cli data-mce-fragment=\"1\"\u003e30 round cards (10cm in diameter)\u003c\/li\u003e\n\u003cli data-mce-fragment=\"1\"\u003eClassic, timeless design\u003c\/li\u003e\n\u003cli data-mce-fragment=\"1\"\u003e\n\u003cspan data-mce-fragment=\"1\"\u003e\u003c\/span\u003e\u003cspan data-mce-fragment=\"1\"\u003eFeature floral illustration on the back of each card with gold foil detailing\u003c\/span\u003e\n\u003c\/li\u003e\n\u003cli data-mce-fragment=\"1\"\u003e\n\u003cspan data-mce-fragment=\"1\"\u003e\u003c\/span\u003e\u003cspan data-mce-fragment=\"1\"\u003eSuitable for either sex in a gender neutral colours\u003c\/span\u003e\n\u003c\/li\u003e\n\u003cli data-mce-fragment=\"1\"\u003e\n\u003cspan data-mce-fragment=\"1\"\u003e\u003c\/span\u003e\u003cspan data-mce-fragment=\"1\"\u003ePackaged in a keepsake drawer box\u003c\/span\u003e\n\u003c\/li\u003e\n\u003c\/ul\u003e\n\u003cp data-mce-fragment=\"1\"\u003eThese milestone cards make a beautiful gift for any expecting mum that will be treasured for years to come.\u003c\/p\u003e\n\u003cp data-mce-fragment=\"1\"\u003e\u003cspan data-mce-fragment=\"1\"\u003eThe set contains the following:\u003c\/span\u003e\u003c\/p\u003e\n\u003cul data-mce-fragment=\"1\"\u003e\n\u003cli data-mce-fragment=\"1\"\u003e1 week\u003c\/li\u003e\n\u003cli data-mce-fragment=\"1\"\u003e2 weeks\u003c\/li\u003e\n\u003cli data-mce-fragment=\"1\"\u003e3 weeks\u003c\/li\u003e\n\u003cli data-mce-fragment=\"1\"\u003e1 month\u003c\/li\u003e\n\u003cli data-mce-fragment=\"1\"\u003e6 weeks\u003c\/li\u003e\n\u003cli data-mce-fragment=\"1\"\u003e2 months\u003c\/li\u003e\n\u003cli data-mce-fragment=\"1\"\u003e3 months\u003c\/li\u003e\n\u003cli data-mce-fragment=\"1\"\u003e4 months\u003c\/li\u003e\n\u003cli data-mce-fragment=\"1\"\u003e5 months\u003c\/li\u003e\n\u003cli data-mce-fragment=\"1\"\u003e6 months\u003c\/li\u003e\n\u003cli data-mce-fragment=\"1\"\u003e7 months\u003c\/li\u003e\n\u003cli data-mce-fragment=\"1\"\u003e8 months\u003c\/li\u003e\n\u003cli data-mce-fragment=\"1\"\u003e9 months\u003c\/li\u003e\n\u003cli data-mce-fragment=\"1\"\u003e10 months\u003c\/li\u003e\n\u003cli data-mce-fragment=\"1\"\u003e11 months\u003c\/li\u003e\n\u003cli data-mce-fragment=\"1\"\u003e1 year\u003c\/li\u003e\n\u003cli data-mce-fragment=\"1\"\u003eHello world\u003c\/li\u003e\n\u003cli data-mce-fragment=\"1\"\u003eToday I had my first bath\u003c\/li\u003e\n\u003cli data-mce-fragment=\"1\"\u003eToday I rolled over\u003c\/li\u003e\n\u003cli data-mce-fragment=\"1\"\u003eToday I stood up for the first time\u003c\/li\u003e\n\u003cli data-mce-fragment=\"1\"\u003eI slept through the night\u003c\/li\u003e\n\u003cli data-mce-fragment=\"1\"\u003eToday I said my first word\u003c\/li\u003e\n\u003cli data-mce-fragment=\"1\"\u003eToday I laughed for the first time\u003c\/li\u003e\n\u003cli data-mce-fragment=\"1\"\u003eToday I sat up for the first time\u003c\/li\u003e\n\u003cli data-mce-fragment=\"1\"\u003eToday I crawled for the first time\u003c\/li\u003e\n\u003cli data-mce-fragment=\"1\"\u003eToday I ate solids for the first time\u003c\/li\u003e\n\u003cli data-mce-fragment=\"1\"\u003eI got my first tooth!\u003c\/li\u003e\n\u003cli data-mce-fragment=\"1\"\u003eToday I smiled for the first time\u003c\/li\u003e\n\u003cli data-mce-fragment=\"1\"\u003eToday I drove my parents crazy\u003c\/li\u003e\n\u003cli data-mce-fragment=\"1\"\u003eOh how I adore you\u003c\/li\u003e\n\u003c\/ul\u003e\n\u003cul data-mce-fragment=\"1\"\u003e\u003c\/ul\u003e\n\u003cul data-mce-fragment=\"1\"\u003e\u003c\/ul\u003e"},"options":[{"name":"Title","position":1,"values":["Default Title"]}],"custom_metafields":{},"metafields":{"badge":"\u003cdiv style='display:none' class='jdgm-prev-badge' data-average-rating='0.00' data-number-of-reviews='0' data-number-of-questions='0'\u003e \u003cspan class='jdgm-prev-badge__stars' data-score='0.00' tabindex='0' aria-label='0.00 stars' role='button'\u003e \u003cspan class='jdgm-star jdgm--off'\u003e\u003c\/span\u003e\u003cspan class='jdgm-star jdgm--off'\u003e\u003c\/span\u003e\u003cspan class='jdgm-star jdgm--off'\u003e\u003c\/span\u003e\u003cspan class='jdgm-star jdgm--off'\u003e\u003c\/span\u003e\u003cspan class='jdgm-star jdgm--off'\u003e\u003c\/span\u003e \u003c\/span\u003e \u003cspan class='jdgm-prev-badge__text'\u003e No reviews \u003c\/span\u003e \u003c\/div\u003e","widget":"\u003cdiv class='jdgm-rev-widg' data-updated-at='2025-06-13T16:12:53Z' data-average-rating='0.00' data-number-of-reviews='0' data-number-of-questions='0'\u003e \u003cstyle class='jdgm-temp-hiding-style'\u003e.jdgm-rev-widg{ display: none }\u003c\/style\u003e \u003cdiv class='jdgm-rev-widg__header'\u003e \u003ch2 class='jdgm-rev-widg__title'\u003eCustomer Reviews\u003c\/h2\u003e \u003cdiv class='jdgm-rev-widg__summary'\u003e \u003cdiv class='jdgm-rev-widg__summary-stars' aria-label='Average rating is 0.00 stars' role='img'\u003e \u003cspan class='jdgm-star jdgm--off'\u003e\u003c\/span\u003e\u003cspan class='jdgm-star jdgm--off'\u003e\u003c\/span\u003e\u003cspan class='jdgm-star jdgm--off'\u003e\u003c\/span\u003e\u003cspan class='jdgm-star jdgm--off'\u003e\u003c\/span\u003e\u003cspan class='jdgm-star jdgm--off'\u003e\u003c\/span\u003e \u003c\/div\u003e \u003cdiv class='jdgm-rev-widg__summary-text'\u003eBe the first to write a review\u003c\/div\u003e \u003c\/div\u003e \u003ca style='display: none' href='#' class='jdgm-write-rev-link' role='button'\u003eWrite a review\u003c\/a\u003e \u003cdiv class='jdgm-histogram jdgm-temp-hidden'\u003e \u003cdiv class='jdgm-histogram__row' data-rating='5' data-frequency='0' data-percentage='0'\u003e \u003cdiv class='jdgm-histogram__star' role='button' aria-label=\"0% (0) reviews with 5 star rating\" tabindex='0' \u003e\u003cspan class='jdgm-star jdgm--on'\u003e\u003c\/span\u003e\u003cspan class='jdgm-star jdgm--on'\u003e\u003c\/span\u003e\u003cspan class='jdgm-star jdgm--on'\u003e\u003c\/span\u003e\u003cspan class='jdgm-star jdgm--on'\u003e\u003c\/span\u003e\u003cspan class='jdgm-star jdgm--on'\u003e\u003c\/span\u003e\u003c\/div\u003e \u003cdiv class='jdgm-histogram__bar'\u003e \u003cdiv class='jdgm-histogram__bar-content' style='width: 0%;'\u003e \u003c\/div\u003e \u003c\/div\u003e \u003cdiv class='jdgm-histogram__percentage'\u003e0%\u003c\/div\u003e \u003cdiv class='jdgm-histogram__frequency'\u003e(0)\u003c\/div\u003e \u003c\/div\u003e \u003cdiv class='jdgm-histogram__row' data-rating='4' data-frequency='0' data-percentage='0'\u003e \u003cdiv class='jdgm-histogram__star' role='button' aria-label=\"0% (0) reviews with 4 star rating\" tabindex='0' \u003e\u003cspan class='jdgm-star jdgm--on'\u003e\u003c\/span\u003e\u003cspan class='jdgm-star jdgm--on'\u003e\u003c\/span\u003e\u003cspan class='jdgm-star jdgm--on'\u003e\u003c\/span\u003e\u003cspan class='jdgm-star jdgm--on'\u003e\u003c\/span\u003e\u003cspan class='jdgm-star jdgm--off'\u003e\u003c\/span\u003e\u003c\/div\u003e \u003cdiv class='jdgm-histogram__bar'\u003e \u003cdiv class='jdgm-histogram__bar-content' style='width: 0%;'\u003e \u003c\/div\u003e \u003c\/div\u003e \u003cdiv class='jdgm-histogram__percentage'\u003e0%\u003c\/div\u003e \u003cdiv class='jdgm-histogram__frequency'\u003e(0)\u003c\/div\u003e \u003c\/div\u003e \u003cdiv class='jdgm-histogram__row' data-rating='3' data-frequency='0' data-percentage='0'\u003e \u003cdiv class='jdgm-histogram__star' role='button' aria-label=\"0% (0) reviews with 3 star rating\" tabindex='0' \u003e\u003cspan class='jdgm-star jdgm--on'\u003e\u003c\/span\u003e\u003cspan class='jdgm-star jdgm--on'\u003e\u003c\/span\u003e\u003cspan class='jdgm-star jdgm--on'\u003e\u003c\/span\u003e\u003cspan class='jdgm-star jdgm--off'\u003e\u003c\/span\u003e\u003cspan class='jdgm-star jdgm--off'\u003e\u003c\/span\u003e\u003c\/div\u003e \u003cdiv class='jdgm-histogram__bar'\u003e \u003cdiv class='jdgm-histogram__bar-content' style='width: 0%;'\u003e \u003c\/div\u003e \u003c\/div\u003e \u003cdiv class='jdgm-histogram__percentage'\u003e0%\u003c\/div\u003e \u003cdiv class='jdgm-histogram__frequency'\u003e(0)\u003c\/div\u003e \u003c\/div\u003e \u003cdiv class='jdgm-histogram__row' data-rating='2' data-frequency='0' data-percentage='0'\u003e \u003cdiv class='jdgm-histogram__star' role='button' aria-label=\"0% (0) reviews with 2 star rating\" tabindex='0' \u003e\u003cspan class='jdgm-star jdgm--on'\u003e\u003c\/span\u003e\u003cspan class='jdgm-star jdgm--on'\u003e\u003c\/span\u003e\u003cspan class='jdgm-star jdgm--off'\u003e\u003c\/span\u003e\u003cspan class='jdgm-star jdgm--off'\u003e\u003c\/span\u003e\u003cspan class='jdgm-star jdgm--off'\u003e\u003c\/span\u003e\u003c\/div\u003e \u003cdiv class='jdgm-histogram__bar'\u003e \u003cdiv class='jdgm-histogram__bar-content' style='width: 0%;'\u003e \u003c\/div\u003e \u003c\/div\u003e \u003cdiv class='jdgm-histogram__percentage'\u003e0%\u003c\/div\u003e \u003cdiv class='jdgm-histogram__frequency'\u003e(0)\u003c\/div\u003e \u003c\/div\u003e \u003cdiv class='jdgm-histogram__row' data-rating='1' data-frequency='0' data-percentage='0'\u003e \u003cdiv class='jdgm-histogram__star' role='button' aria-label=\"0% (0) reviews with 1 star rating\" tabindex='0' \u003e\u003cspan class='jdgm-star jdgm--on'\u003e\u003c\/span\u003e\u003cspan class='jdgm-star jdgm--off'\u003e\u003c\/span\u003e\u003cspan class='jdgm-star jdgm--off'\u003e\u003c\/span\u003e\u003cspan class='jdgm-star jdgm--off'\u003e\u003c\/span\u003e\u003cspan class='jdgm-star jdgm--off'\u003e\u003c\/span\u003e\u003c\/div\u003e \u003cdiv class='jdgm-histogram__bar'\u003e \u003cdiv class='jdgm-histogram__bar-content' style='width: 0%;'\u003e \u003c\/div\u003e \u003c\/div\u003e \u003cdiv class='jdgm-histogram__percentage'\u003e0%\u003c\/div\u003e \u003cdiv class='jdgm-histogram__frequency'\u003e(0)\u003c\/div\u003e \u003c\/div\u003e \u003cdiv class='jdgm-histogram__row jdgm-histogram__clear-filter' data-rating=null tabindex='0'\u003e\u003c\/div\u003e \u003c\/div\u003e \u003cdiv class='jdgm-rev-widg__sort-wrapper'\u003e\u003c\/div\u003e \u003c\/div\u003e \u003cdiv class='jdgm-rev-widg__body'\u003e \u003cdiv class='jdgm-rev-widg__reviews'\u003e\u003c\/div\u003e \u003cdiv class='jdgm-paginate' data-per-page='10' data-url='https:\/\/api.judge.me\/reviews\/reviews_for_widget' style=\"display: none;\"\u003e\u003c\/div\u003e \u003c\/div\u003e \u003cdiv class='jdgm-rev-widg__paginate-spinner-wrapper'\u003e \u003cdiv class='jdgm-spinner'\u003e\u003c\/div\u003e \u003c\/div\u003e \u003c\/div\u003e"},"collections":[{"id":325528486077,"handle":"baby-shower-gifts-baby","title":"Baby Shower Gifts - Baby","updated_at":"2025-12-28T20:10:01+08:00","body_html":"","published_at":"2025-10-11T10:27:03+08:00","sort_order":"best-selling","template_suffix":"baby-collection","disjunctive":true,"rules":[{"column":"tag","relation":"equals","condition":"Baby Shower Gifts - Baby"},{"column":"tag","relation":"equals","condition":"Gift Card"}],"published_scope":"global","image":{"created_at":"2025-10-30T16:16:58+08:00","alt":"Baby Shower Gifts - Baby - The Birth Store","width":1638,"height":2048,"src":"\/\/www.thebirthstore.com.au\/cdn\/shop\/collections\/baby-shower-gifts-baby-5416143.jpg?v=1761812219"}},{"id":264450998461,"handle":"baby-collection","title":"Baby-Collection","updated_at":"2025-12-28T20:10:01+08:00","body_html":"\u003cp\u003eShop your baby announcement and milestone essentials below. Looking for something we don't currently stock? Please reach out and let us know.\u003cbr\u003e\u003c\/p\u003e\n\u003cp\u003e\u003cspan\u003eYou can even buy now and pay later with Afterpay!\u003c\/span\u003e\u003c\/p\u003e","published_at":"2021-04-07T22:29:35+08:00","sort_order":"best-selling","template_suffix":"baby-collection","disjunctive":false,"rules":[{"column":"tag","relation":"equals","condition":"Baby"}],"published_scope":"global","image":{"created_at":"2024-05-06T11:59:24+08:00","alt":"Baby - The Birth Store","width":1280,"height":1600,"src":"\/\/www.thebirthstore.com.au\/cdn\/shop\/collections\/baby-398774.jpg?v=1714967964"}},{"id":261657460925,"handle":"buy","title":"Buy","updated_at":"2025-12-28T20:10:01+08:00","body_html":"\u003cp\u003eBrowse all of our pregnancy, labour \u0026amp; birth, postpartum and baby essentials here.\u003cbr\u003e\u003c\/p\u003e\n\u003cp\u003e\u003cspan\u003eYou can even buy now and pay later with Afterpay!\u003c\/span\u003e\u003c\/p\u003e","published_at":"2021-03-10T12:05:31+08:00","sort_order":"best-selling","template_suffix":"shop-all-collection","disjunctive":false,"rules":[{"column":"title","relation":"not_contains","condition":"Hire"}],"published_scope":"global","image":{"created_at":"2024-05-06T11:59:42+08:00","alt":"Buy - The Birth Store","width":2048,"height":2048,"src":"\/\/www.thebirthstore.com.au\/cdn\/shop\/collections\/buy-964856.jpg?v=1714967982"}},{"id":295225327805,"handle":"keepsakes","title":"Keepsakes","updated_at":"2025-12-28T20:10:01+08:00","body_html":"","published_at":"2023-11-10T20:56:20+08:00","sort_order":"best-selling","template_suffix":"baby-collection","disjunctive":false,"rules":[{"column":"tag","relation":"equals","condition":"Keepsakes"}],"published_scope":"global","image":{"created_at":"2024-05-06T12:00:06+08:00","alt":"Keepsakes - The Birth Store","width":1080,"height":1080,"src":"\/\/www.thebirthstore.com.au\/cdn\/shop\/collections\/keepsakes-128077.jpg?v=1714968006"}},{"id":324679958717,"handle":"keepsakes-1","title":"Keepsakes","updated_at":"2025-12-28T20:10:01+08:00","body_html":"","published_at":"2025-09-23T22:02:39+08:00","sort_order":"best-selling","template_suffix":"baby-collection","disjunctive":false,"rules":[{"column":"tag","relation":"equals","condition":"Keepsakes"}],"published_scope":"global","image":{"created_at":"2025-09-29T00:43:46+08:00","alt":"Keepsakes - The Birth Store","width":1638,"height":2048,"src":"\/\/www.thebirthstore.com.au\/cdn\/shop\/collections\/keepsakes-9229046.jpg?v=1759077826"}},{"id":293669535933,"handle":"milestone-cards","title":"Milestone Cards","updated_at":"2025-12-28T20:10:01+08:00","body_html":"","published_at":"2023-06-08T22:36:28+08:00","sort_order":"best-selling","template_suffix":"baby-collection","disjunctive":false,"rules":[{"column":"tag","relation":"equals","condition":"Milestone Cards"}],"published_scope":"global","image":{"created_at":"2024-05-06T12:00:22+08:00","alt":"Milestone Cards - The Birth Store","width":854,"height":854,"src":"\/\/www.thebirthstore.com.au\/cdn\/shop\/collections\/milestone-cards-854521.jpg?v=1714968023"}},{"id":324680089789,"handle":"milestone-cards-1","title":"Milestone Cards","updated_at":"2025-12-28T20:10:01+08:00","body_html":"","published_at":"2025-09-23T22:02:53+08:00","sort_order":"best-selling","template_suffix":"baby-collection","disjunctive":false,"rules":[{"column":"tag","relation":"equals","condition":"Milestone Cards"}],"published_scope":"global","image":{"created_at":"2025-09-29T00:43:49+08:00","alt":"Milestone Cards - The Birth Store","width":1080,"height":1080,"src":"\/\/www.thebirthstore.com.au\/cdn\/shop\/collections\/milestone-cards-8050562.png?v=1759077829"}},{"id":326135316669,"handle":"shop-all-baby","title":"Shop All - Baby","updated_at":"2025-12-28T20:10:01+08:00","body_html":"","published_at":"2025-10-22T11:00:50+08:00","sort_order":"best-selling","template_suffix":"baby-collection","disjunctive":false,"rules":[{"column":"variant_price","relation":"greater_than","condition":"1"},{"column":"title","relation":"not_contains","condition":"Batteries"},{"column":"tag","relation":"equals","condition":"Baby"}],"published_scope":"global","image":{"created_at":"2025-10-30T16:17:07+08:00","alt":"Shop All - Baby - The Birth Store","width":1075,"height":1613,"src":"\/\/www.thebirthstore.com.au\/cdn\/shop\/collections\/shop-all-baby-1449113.jpg?v=1761812227"}},{"id":310045933757,"handle":"shop-all-sale","title":"Shop All Sale","updated_at":"2025-12-28T20:10:01+08:00","body_html":"","published_at":"2024-11-12T13:22:43+08:00","sort_order":"alpha-asc","template_suffix":"","disjunctive":true,"rules":[{"column":"tag","relation":"equals","condition":"Bundles"},{"column":"vendor","relation":"equals","condition":"Franjos Kitchen"},{"column":"vendor","relation":"equals","condition":"Adored Illustrations"},{"column":"vendor","relation":"equals","condition":"Amazing Oils"},{"column":"vendor","relation":"equals","condition":"Ice Ice Booby"},{"column":"vendor","relation":"equals","condition":"Made to Milk"},{"column":"vendor","relation":"equals","condition":"Milky Goodness"},{"column":"vendor","relation":"equals","condition":"Seasons of Mama"},{"column":"vendor","relation":"equals","condition":"Silverette"},{"column":"vendor","relation":"equals","condition":"Snuggle Hunny"},{"column":"vendor","relation":"equals","condition":"Yung Bod"},{"column":"vendor","relation":"equals","condition":"Bare Love"},{"column":"vendor","relation":"equals","condition":"Haakaa"},{"column":"vendor","relation":"equals","condition":"Mere Botanicals"},{"column":"vendor","relation":"equals","condition":"The Birth Store Hire"},{"column":"vendor","relation":"equals","condition":"The Birth Store"}],"published_scope":"global","image":{"created_at":"2024-11-13T10:58:16+08:00","alt":"Shop All Sale - The Birth Store","width":2048,"height":1365,"src":"\/\/www.thebirthstore.com.au\/cdn\/shop\/collections\/shop-all-sale-297361.jpg?v=1731466697"}}]}
[{"alt":"Baby Milestone Cards - The Birth Store-Adored Illustrations","id":27007581356221,"position":1,"preview_image":{"aspect_ratio":1.0,"height":1080,"width":1080,"src":"\/\/www.thebirthstore.com.au\/cdn\/shop\/files\/baby-milestone-cards-783318.jpg?v=1762519858"},"aspect_ratio":1.0,"height":1080,"media_type":"image","src":"\/\/www.thebirthstore.com.au\/cdn\/shop\/files\/baby-milestone-cards-783318.jpg?v=1762519858","width":1080},{"alt":"Baby Milestone Cards - The Birth Store-Adored Illustrations","id":27007581094077,"position":2,"preview_image":{"aspect_ratio":1.0,"height":2048,"width":2048,"src":"\/\/www.thebirthstore.com.au\/cdn\/shop\/files\/baby-milestone-cards-118224.jpg?v=1762519858"},"aspect_ratio":1.0,"height":2048,"media_type":"image","src":"\/\/www.thebirthstore.com.au\/cdn\/shop\/files\/baby-milestone-cards-118224.jpg?v=1762519858","width":2048},{"alt":"Baby Milestone Cards - The Birth Store-Adored Illustrations","id":27007581192381,"position":3,"preview_image":{"aspect_ratio":1.0,"height":1080,"width":1080,"src":"\/\/www.thebirthstore.com.au\/cdn\/shop\/files\/baby-milestone-cards-852004.jpg?v=1762519858"},"aspect_ratio":1.0,"height":1080,"media_type":"image","src":"\/\/www.thebirthstore.com.au\/cdn\/shop\/files\/baby-milestone-cards-852004.jpg?v=1762519858","width":1080},{"alt":"Baby Milestone Cards - The Birth Store-Adored Illustrations","id":27007581257917,"position":4,"preview_image":{"aspect_ratio":1.0,"height":1080,"width":1080,"src":"\/\/www.thebirthstore.com.au\/cdn\/shop\/files\/baby-milestone-cards-311291.jpg?v=1762519858"},"aspect_ratio":1.0,"height":1080,"media_type":"image","src":"\/\/www.thebirthstore.com.au\/cdn\/shop\/files\/baby-milestone-cards-311291.jpg?v=1762519858","width":1080},{"alt":"Baby Milestone Cards - The Birth Store-Adored Illustrations","id":27007581290685,"position":5,"preview_image":{"aspect_ratio":1.0,"height":1080,"width":1080,"src":"\/\/www.thebirthstore.com.au\/cdn\/shop\/files\/baby-milestone-cards-975962.jpg?v=1762519858"},"aspect_ratio":1.0,"height":1080,"media_type":"image","src":"\/\/www.thebirthstore.com.au\/cdn\/shop\/files\/baby-milestone-cards-975962.jpg?v=1762519858","width":1080},{"alt":"Baby Milestone Cards - The Birth Store-Adored Illustrations","id":27007581323453,"position":6,"preview_image":{"aspect_ratio":1.0,"height":1080,"width":1080,"src":"\/\/www.thebirthstore.com.au\/cdn\/shop\/files\/baby-milestone-cards-146694.jpg?v=1762519858"},"aspect_ratio":1.0,"height":1080,"media_type":"image","src":"\/\/www.thebirthstore.com.au\/cdn\/shop\/files\/baby-milestone-cards-146694.jpg?v=1762519858","width":1080}]
{"item":{"id":7455714115773,"title":"Boobie Busters","handle":"boobie-busters","description":"\u003cp\u003eMade to Milk's Boobie Buster are all packed full of natural galactagogues including Brewers Yeast to boost \u0026amp; support your milk supply while breastfeeding.\u003c\/p\u003e\n\u003cp\u003eThese little gold nuggets contain the most concentrated and highest performing galactagogues out there - brewer's yeast \u0026amp; flaxseed!\u003c\/p\u003e","published_at":"2023-03-22T21:48:36+08:00","created_at":"2023-03-22T21:48:36+08:00","vendor":"Made to Milk","type":"","tags":["Breastfeeding","Lactation Products","Mum"],"price":2995,"price_min":2995,"price_max":2995,"available":false,"price_varies":false,"compare_at_price":null,"compare_at_price_min":0,"compare_at_price_max":0,"compare_at_price_varies":false,"variants":[{"id":42740426473661,"title":"Default Title","option1":"Default Title","option2":null,"option3":null,"sku":"","requires_shipping":true,"taxable":false,"featured_image":null,"available":false,"name":"Boobie Busters","public_title":null,"options":["Default Title"],"price":2995,"weight":85,"compare_at_price":null,"inventory_management":"shopify","barcode":"26473661","requires_selling_plan":false,"selling_plan_allocations":[]}],"images":["\/\/www.thebirthstore.com.au\/cdn\/shop\/files\/boobie-busters-246183.jpg?v=1714967948","\/\/www.thebirthstore.com.au\/cdn\/shop\/files\/boobie-busters-370614.jpg?v=1714967948"],"featured_image":"\/\/www.thebirthstore.com.au\/cdn\/shop\/files\/boobie-busters-246183.jpg?v=1714967948","options":["Title"],"media":[{"alt":"Boobie Busters - The Birth Store-Made to Milk","id":27007579619517,"position":1,"preview_image":{"aspect_ratio":1.0,"height":2048,"width":2048,"src":"\/\/www.thebirthstore.com.au\/cdn\/shop\/files\/boobie-busters-246183.jpg?v=1714967948"},"aspect_ratio":1.0,"height":2048,"media_type":"image","src":"\/\/www.thebirthstore.com.au\/cdn\/shop\/files\/boobie-busters-246183.jpg?v=1714967948","width":2048},{"alt":"Boobie Busters - The Birth Store-Made to Milk","id":27007579652285,"position":2,"preview_image":{"aspect_ratio":0.667,"height":810,"width":540,"src":"\/\/www.thebirthstore.com.au\/cdn\/shop\/files\/boobie-busters-370614.jpg?v=1714967948"},"aspect_ratio":0.667,"height":810,"media_type":"image","src":"\/\/www.thebirthstore.com.au\/cdn\/shop\/files\/boobie-busters-370614.jpg?v=1714967948","width":540}],"requires_selling_plan":false,"selling_plan_groups":[],"content":"\u003cp\u003eMade to Milk's Boobie Buster are all packed full of natural galactagogues including Brewers Yeast to boost \u0026amp; support your milk supply while breastfeeding.\u003c\/p\u003e\n\u003cp\u003eThese little gold nuggets contain the most concentrated and highest performing galactagogues out there - brewer's yeast \u0026amp; flaxseed!\u003c\/p\u003e"},"options":[{"name":"Title","position":1,"values":["Default Title"]}],"custom_metafields":{},"metafields":{"badge":"\u003cdiv style='display:none' class='jdgm-prev-badge' data-average-rating='5.00' data-number-of-reviews='1' data-number-of-questions='0'\u003e \u003cspan class='jdgm-prev-badge__stars' data-score='5.00' tabindex='0' aria-label='5.00 stars' role='button'\u003e \u003cspan class='jdgm-star jdgm--on'\u003e\u003c\/span\u003e\u003cspan class='jdgm-star jdgm--on'\u003e\u003c\/span\u003e\u003cspan class='jdgm-star jdgm--on'\u003e\u003c\/span\u003e\u003cspan class='jdgm-star jdgm--on'\u003e\u003c\/span\u003e\u003cspan class='jdgm-star jdgm--on'\u003e\u003c\/span\u003e \u003c\/span\u003e \u003cspan class='jdgm-prev-badge__text'\u003e 1 review \u003c\/span\u003e \u003c\/div\u003e","widget":"\u003cdiv class='jdgm-rev-widg' data-updated-at='2025-10-05T02:11:16Z' data-average-rating='5.00' data-number-of-reviews='1' data-number-of-questions='0' data-image-url='https:\/\/cdn.shopify.com\/s\/files\/1\/0527\/3393\/5805\/files\/boobie-busters-246183.jpg?v=1714967948'\u003e \u003cstyle class='jdgm-temp-hiding-style'\u003e.jdgm-rev-widg{ display: none }\u003c\/style\u003e \u003cdiv class='jdgm-rev-widg__header'\u003e \u003ch2 class='jdgm-rev-widg__title'\u003eCustomer Reviews\u003c\/h2\u003e \u003cdiv class='jdgm-rev-widg__summary'\u003e \u003cdiv class='jdgm-rev-widg__summary-stars' aria-label='Average rating is 5.00 stars' role='img'\u003e \u003cspan class='jdgm-star jdgm--on'\u003e\u003c\/span\u003e\u003cspan class='jdgm-star jdgm--on'\u003e\u003c\/span\u003e\u003cspan class='jdgm-star jdgm--on'\u003e\u003c\/span\u003e\u003cspan class='jdgm-star jdgm--on'\u003e\u003c\/span\u003e\u003cspan class='jdgm-star jdgm--on'\u003e\u003c\/span\u003e \u003c\/div\u003e \u003cdiv class='jdgm-rev-widg__summary-text'\u003eBased on 1 review\u003c\/div\u003e \u003c\/div\u003e \u003ca style='display: none' href='#' class='jdgm-write-rev-link' role='button'\u003eWrite a review\u003c\/a\u003e \u003cdiv class='jdgm-histogram jdgm-temp-hidden'\u003e \u003cdiv class='jdgm-histogram__row' data-rating='5' data-frequency='1' data-percentage='100'\u003e \u003cdiv class='jdgm-histogram__star' role='button' aria-label=\"100% (1) reviews with 5 star rating\" tabindex='0' \u003e\u003cspan class='jdgm-star jdgm--on'\u003e\u003c\/span\u003e\u003cspan class='jdgm-star jdgm--on'\u003e\u003c\/span\u003e\u003cspan class='jdgm-star jdgm--on'\u003e\u003c\/span\u003e\u003cspan class='jdgm-star jdgm--on'\u003e\u003c\/span\u003e\u003cspan class='jdgm-star jdgm--on'\u003e\u003c\/span\u003e\u003c\/div\u003e \u003cdiv class='jdgm-histogram__bar'\u003e \u003cdiv class='jdgm-histogram__bar-content' style='width: 100%;'\u003e \u003c\/div\u003e \u003c\/div\u003e \u003cdiv class='jdgm-histogram__percentage'\u003e100%\u003c\/div\u003e \u003cdiv class='jdgm-histogram__frequency'\u003e(1)\u003c\/div\u003e \u003c\/div\u003e \u003cdiv class='jdgm-histogram__row' data-rating='4' data-frequency='0' data-percentage='0'\u003e \u003cdiv class='jdgm-histogram__star' role='button' aria-label=\"0% (0) reviews with 4 star rating\" tabindex='0' \u003e\u003cspan class='jdgm-star jdgm--on'\u003e\u003c\/span\u003e\u003cspan class='jdgm-star jdgm--on'\u003e\u003c\/span\u003e\u003cspan class='jdgm-star jdgm--on'\u003e\u003c\/span\u003e\u003cspan class='jdgm-star jdgm--on'\u003e\u003c\/span\u003e\u003cspan class='jdgm-star jdgm--off'\u003e\u003c\/span\u003e\u003c\/div\u003e \u003cdiv class='jdgm-histogram__bar'\u003e \u003cdiv class='jdgm-histogram__bar-content' style='width: 0%;'\u003e \u003c\/div\u003e \u003c\/div\u003e \u003cdiv class='jdgm-histogram__percentage'\u003e0%\u003c\/div\u003e \u003cdiv class='jdgm-histogram__frequency'\u003e(0)\u003c\/div\u003e \u003c\/div\u003e \u003cdiv class='jdgm-histogram__row' data-rating='3' data-frequency='0' data-percentage='0'\u003e \u003cdiv class='jdgm-histogram__star' role='button' aria-label=\"0% (0) reviews with 3 star rating\" tabindex='0' \u003e\u003cspan class='jdgm-star jdgm--on'\u003e\u003c\/span\u003e\u003cspan class='jdgm-star jdgm--on'\u003e\u003c\/span\u003e\u003cspan class='jdgm-star jdgm--on'\u003e\u003c\/span\u003e\u003cspan class='jdgm-star jdgm--off'\u003e\u003c\/span\u003e\u003cspan class='jdgm-star jdgm--off'\u003e\u003c\/span\u003e\u003c\/div\u003e \u003cdiv class='jdgm-histogram__bar'\u003e \u003cdiv class='jdgm-histogram__bar-content' style='width: 0%;'\u003e \u003c\/div\u003e \u003c\/div\u003e \u003cdiv class='jdgm-histogram__percentage'\u003e0%\u003c\/div\u003e \u003cdiv class='jdgm-histogram__frequency'\u003e(0)\u003c\/div\u003e \u003c\/div\u003e \u003cdiv class='jdgm-histogram__row' data-rating='2' data-frequency='0' data-percentage='0'\u003e \u003cdiv class='jdgm-histogram__star' role='button' aria-label=\"0% (0) reviews with 2 star rating\" tabindex='0' \u003e\u003cspan class='jdgm-star jdgm--on'\u003e\u003c\/span\u003e\u003cspan class='jdgm-star jdgm--on'\u003e\u003c\/span\u003e\u003cspan class='jdgm-star jdgm--off'\u003e\u003c\/span\u003e\u003cspan class='jdgm-star jdgm--off'\u003e\u003c\/span\u003e\u003cspan class='jdgm-star jdgm--off'\u003e\u003c\/span\u003e\u003c\/div\u003e \u003cdiv class='jdgm-histogram__bar'\u003e \u003cdiv class='jdgm-histogram__bar-content' style='width: 0%;'\u003e \u003c\/div\u003e \u003c\/div\u003e \u003cdiv class='jdgm-histogram__percentage'\u003e0%\u003c\/div\u003e \u003cdiv class='jdgm-histogram__frequency'\u003e(0)\u003c\/div\u003e \u003c\/div\u003e \u003cdiv class='jdgm-histogram__row' data-rating='1' data-frequency='0' data-percentage='0'\u003e \u003cdiv class='jdgm-histogram__star' role='button' aria-label=\"0% (0) reviews with 1 star rating\" tabindex='0' \u003e\u003cspan class='jdgm-star jdgm--on'\u003e\u003c\/span\u003e\u003cspan class='jdgm-star jdgm--off'\u003e\u003c\/span\u003e\u003cspan class='jdgm-star jdgm--off'\u003e\u003c\/span\u003e\u003cspan class='jdgm-star jdgm--off'\u003e\u003c\/span\u003e\u003cspan class='jdgm-star jdgm--off'\u003e\u003c\/span\u003e\u003c\/div\u003e \u003cdiv class='jdgm-histogram__bar'\u003e \u003cdiv class='jdgm-histogram__bar-content' style='width: 0%;'\u003e \u003c\/div\u003e \u003c\/div\u003e \u003cdiv class='jdgm-histogram__percentage'\u003e0%\u003c\/div\u003e \u003cdiv class='jdgm-histogram__frequency'\u003e(0)\u003c\/div\u003e \u003c\/div\u003e \u003cdiv class='jdgm-histogram__row jdgm-histogram__clear-filter' data-rating=null tabindex='0'\u003e\u003c\/div\u003e \u003c\/div\u003e \u003cdiv class='jdgm-rev-widg__sort-wrapper'\u003e\u003c\/div\u003e \u003c\/div\u003e \u003cdiv class='jdgm-rev-widg__body'\u003e \u003cdiv class='jdgm-rev-widg__reviews'\u003e\u003cdiv class='jdgm-rev jdgm-divider-top' data-verified-buyer='true' data-review-id='b38e9b24-4985-4a7b-a015-d44db210cbed' data-review-language='' data-product-title='Boobie Busters' data-product-url='\/products\/boobie-busters' data-thumb-up-count='0' data-thumb-down-count='0'\u003e \u003cdiv class='jdgm-rev__header'\u003e \u003cdiv class='jdgm-rev__icon' \u003e J \u003c\/div\u003e \u003cspan class='jdgm-rev__rating' data-score='5' tabindex='0' aria-label='5 star review' role='img'\u003e \u003cspan class='jdgm-star jdgm--on'\u003e\u003c\/span\u003e\u003cspan class='jdgm-star jdgm--on'\u003e\u003c\/span\u003e\u003cspan class='jdgm-star jdgm--on'\u003e\u003c\/span\u003e\u003cspan class='jdgm-star jdgm--on'\u003e\u003c\/span\u003e\u003cspan class='jdgm-star jdgm--on'\u003e\u003c\/span\u003e \u003c\/span\u003e \u003cspan class='jdgm-rev__timestamp jdgm-spinner' data-content='2025-10-05 02:06:10 UTC'\u003e\u003c\/span\u003e \u003cdiv class='jdgm-rev__br'\u003e\u003c\/div\u003e \u003cspan class='jdgm-rev__buyer-badge-wrapper'\u003e \u003cspan class='jdgm-rev__buyer-badge'\u003e\u003c\/span\u003e \u003c\/span\u003e \u003cspan class='jdgm-rev__author-wrapper'\u003e \u003cspan class='jdgm-rev__author'\u003eJacqueline Lee\u003c\/span\u003e \u003cspan class='jdgm-rev__location' \u003e \u003c\/span\u003e \u003c\/span\u003e \u003c\/div\u003e \u003cdiv class='jdgm-rev__content'\u003e \u003cdiv class='jdgm-rev__custom-form'\u003e \u003c\/div\u003e \u003cb class='jdgm-rev__title'\u003eAMAZING!\u003c\/b\u003e \u003cdiv class='jdgm-rev__body'\u003e\u003cp\u003eLove the Boobie Busters. They have increased my milk supply greatly. Let downs are more frequent, my boobs feel so much fuller, my baby is so content and I’m not worrying about my supply being low like I was with my other children. Highly recommend this amazing product!\u003c\/p\u003e\u003c\/div\u003e \u003cdiv class='jdgm-rev__pics'\u003e \u003c\/div\u003e \u003cdiv class='jdgm-rev__vids'\u003e \u003c\/div\u003e \u003cdiv class='jdgm-rev__transparency-badge-wrapper'\u003e \u003c\/div\u003e \u003c\/div\u003e \u003cdiv class='jdgm-rev__actions'\u003e \u003cdiv class='jdgm-rev__social'\u003e\u003c\/div\u003e \u003cdiv class='jdgm-rev__votes'\u003e\u003c\/div\u003e \u003c\/div\u003e \u003cdiv class='jdgm-rev__reply'\u003e \u003c\/div\u003e \u003c\/div\u003e\u003c\/div\u003e \u003cdiv class='jdgm-paginate' data-per-page='10' data-url='https:\/\/api.judge.me\/reviews\/reviews_for_widget' style=\"display: none;\"\u003e\u003c\/div\u003e \u003c\/div\u003e \u003cdiv class='jdgm-rev-widg__paginate-spinner-wrapper'\u003e \u003cdiv class='jdgm-spinner'\u003e\u003c\/div\u003e \u003c\/div\u003e \u003c\/div\u003e"},"collections":[{"id":281712427197,"handle":"breastfeeding","title":"Breastfeeding","updated_at":"2025-12-28T20:10:01+08:00","body_html":"","published_at":"2021-12-20T14:19:33+08:00","sort_order":"best-selling","template_suffix":"breastfeeding-collection","disjunctive":false,"rules":[{"column":"tag","relation":"equals","condition":"Breastfeeding"}],"published_scope":"global","image":{"created_at":"2024-05-06T11:59:34+08:00","alt":"Breastfeeding - The Birth Store","width":620,"height":635,"src":"\/\/www.thebirthstore.com.au\/cdn\/shop\/collections\/breastfeeding-793872.jpg?v=1714967974"}},{"id":261657460925,"handle":"buy","title":"Buy","updated_at":"2025-12-28T20:10:01+08:00","body_html":"\u003cp\u003eBrowse all of our pregnancy, labour \u0026amp; birth, postpartum and baby essentials here.\u003cbr\u003e\u003c\/p\u003e\n\u003cp\u003e\u003cspan\u003eYou can even buy now and pay later with Afterpay!\u003c\/span\u003e\u003c\/p\u003e","published_at":"2021-03-10T12:05:31+08:00","sort_order":"best-selling","template_suffix":"shop-all-collection","disjunctive":false,"rules":[{"column":"title","relation":"not_contains","condition":"Hire"}],"published_scope":"global","image":{"created_at":"2024-05-06T11:59:42+08:00","alt":"Buy - The Birth Store","width":2048,"height":2048,"src":"\/\/www.thebirthstore.com.au\/cdn\/shop\/collections\/buy-964856.jpg?v=1714967982"}},{"id":292919476413,"handle":"lactation-products","title":"Lactation Products","updated_at":"2025-12-28T20:10:01+08:00","body_html":"","published_at":"2023-03-22T12:22:41+08:00","sort_order":"best-selling","template_suffix":"lactation-products-collec","disjunctive":false,"rules":[{"column":"tag","relation":"equals","condition":"Lactation Products"}],"published_scope":"global","image":{"created_at":"2024-05-06T12:00:19+08:00","alt":"Lactation Products - The Birth Store","width":1034,"height":922,"src":"\/\/www.thebirthstore.com.au\/cdn\/shop\/collections\/lactation-products-752907.jpg?v=1714968019"}},{"id":291456483517,"handle":"shop-all","title":"Shop All - Mum","updated_at":"2025-12-28T20:10:01+08:00","body_html":"","published_at":"2022-12-23T22:04:39+08:00","sort_order":"best-selling","template_suffix":"shop-all-collection","disjunctive":false,"rules":[{"column":"variant_price","relation":"greater_than","condition":"1"},{"column":"title","relation":"not_contains","condition":"Batteries"},{"column":"tag","relation":"equals","condition":"Mum"}],"published_scope":"global","image":{"created_at":"2024-05-06T12:00:54+08:00","alt":"Shop All - The Birth Store","width":1365,"height":2048,"src":"\/\/www.thebirthstore.com.au\/cdn\/shop\/collections\/shop-all-693176.jpg?v=1714968055"}},{"id":310045933757,"handle":"shop-all-sale","title":"Shop All Sale","updated_at":"2025-12-28T20:10:01+08:00","body_html":"","published_at":"2024-11-12T13:22:43+08:00","sort_order":"alpha-asc","template_suffix":"","disjunctive":true,"rules":[{"column":"tag","relation":"equals","condition":"Bundles"},{"column":"vendor","relation":"equals","condition":"Franjos Kitchen"},{"column":"vendor","relation":"equals","condition":"Adored Illustrations"},{"column":"vendor","relation":"equals","condition":"Amazing Oils"},{"column":"vendor","relation":"equals","condition":"Ice Ice Booby"},{"column":"vendor","relation":"equals","condition":"Made to Milk"},{"column":"vendor","relation":"equals","condition":"Milky Goodness"},{"column":"vendor","relation":"equals","condition":"Seasons of Mama"},{"column":"vendor","relation":"equals","condition":"Silverette"},{"column":"vendor","relation":"equals","condition":"Snuggle Hunny"},{"column":"vendor","relation":"equals","condition":"Yung Bod"},{"column":"vendor","relation":"equals","condition":"Bare Love"},{"column":"vendor","relation":"equals","condition":"Haakaa"},{"column":"vendor","relation":"equals","condition":"Mere Botanicals"},{"column":"vendor","relation":"equals","condition":"The Birth Store Hire"},{"column":"vendor","relation":"equals","condition":"The Birth Store"}],"published_scope":"global","image":{"created_at":"2024-11-13T10:58:16+08:00","alt":"Shop All Sale - The Birth Store","width":2048,"height":1365,"src":"\/\/www.thebirthstore.com.au\/cdn\/shop\/collections\/shop-all-sale-297361.jpg?v=1731466697"}}]}
[{"alt":"Boobie Busters - The Birth Store-Made to Milk","id":27007579619517,"position":1,"preview_image":{"aspect_ratio":1.0,"height":2048,"width":2048,"src":"\/\/www.thebirthstore.com.au\/cdn\/shop\/files\/boobie-busters-246183.jpg?v=1714967948"},"aspect_ratio":1.0,"height":2048,"media_type":"image","src":"\/\/www.thebirthstore.com.au\/cdn\/shop\/files\/boobie-busters-246183.jpg?v=1714967948","width":2048},{"alt":"Boobie Busters - The Birth Store-Made to Milk","id":27007579652285,"position":2,"preview_image":{"aspect_ratio":0.667,"height":810,"width":540,"src":"\/\/www.thebirthstore.com.au\/cdn\/shop\/files\/boobie-busters-370614.jpg?v=1714967948"},"aspect_ratio":0.667,"height":810,"media_type":"image","src":"\/\/www.thebirthstore.com.au\/cdn\/shop\/files\/boobie-busters-370614.jpg?v=1714967948","width":540}]
{"item":{"id":7973359091901,"title":"Breast \u0026 Perineal Recovery Ice \u0026 Heat Packs","handle":"breast-perineal-recovery-ice-heat-packs","description":"\u003cp data-pm-slice=\"1 1 []\"\u003e\u003cspan\u003eWhen your body is healing after birth, every little bit of comfort counts. Our Breast \u0026amp; Perineal Recovery Ice \u0026amp; Heat Pack Set is the ultimate postpartum care duo — designed to provide relief from top to bottom.\u003c\/span\u003e\u003c\/p\u003e\n\u003cp\u003e\u003cspan\u003e\u003cstrong\u003eTo Help With:\u003c\/strong\u003e\u003c\/span\u003e\u003c\/p\u003e\n\u003cul data-spread=\"false\"\u003e\n\u003cli\u003e\n\u003cp\u003e\u003cspan\u003eEngorgement, mastitis, and blocked ducts\u003c\/span\u003e\u003c\/p\u003e\n\u003c\/li\u003e\n\u003cli\u003e\n\u003cp\u003e\u003cspan\u003ePerineal swelling and discomfort\u003c\/span\u003e\u003c\/p\u003e\n\u003c\/li\u003e\n\u003cli\u003e\n\u003cp\u003e\u003cspan\u003ePostpartum stitches and tearing\u003c\/span\u003e\u003c\/p\u003e\n\u003c\/li\u003e\n\u003cli\u003e\n\u003cp\u003e\u003cspan\u003eGeneral breast and perineal tenderness\u003c\/span\u003e\u003c\/p\u003e\n\u003c\/li\u003e\n\u003c\/ul\u003e\n\u003cp\u003e\u003cspan\u003e\u003cstrong\u003eFeatures:\u003c\/strong\u003e\u003c\/span\u003e\u003c\/p\u003e\n\u003cul data-spread=\"false\"\u003e\n\u003cli\u003e\n\u003cp\u003e\u003cspan\u003eBreast packs: Dual-sided with direct ice\/heat contact on one side and plush, soft backing on the other — no extra covers needed.\u003c\/span\u003e\u003c\/p\u003e\n\u003c\/li\u003e\n\u003cli\u003e\n\u003cp\u003e\u003cspan\u003ePerineal packs: Comes with two packs so you can always have one ready to go.\u003c\/span\u003e\u003c\/p\u003e\n\u003c\/li\u003e\n\u003cli\u003e\n\u003cp\u003e\u003cspan\u003eFlexible design: Contours comfortably to your body.\u003c\/span\u003e\u003c\/p\u003e\n\u003c\/li\u003e\n\u003cli\u003e\n\u003cp\u003e\u003cspan\u003ePerineal covers sold separately, so you can choose to keep things simple or invest in reusable covers.\u003c\/span\u003e\u003c\/p\u003e\n\u003c\/li\u003e\n\u003c\/ul\u003e\n\u003cp\u003e\u003cspan\u003e\u003cstrong\u003eHow to Use:\u003c\/strong\u003e\u003c\/span\u003e\u003c\/p\u003e\n\u003cul data-spread=\"false\"\u003e\n\u003cli\u003e\n\u003cp\u003e\u003cspan\u003eFor cold therapy: Place in the freezer without covers for at least 2 hours before use or submerge in ice water until the desired temperature is achieved.\u003c\/span\u003e\u003c\/p\u003e\n\u003c\/li\u003e\n\u003cli\u003e\n\u003cspan\u003eFor heat therapy: Microwave without covers for 10-20 seconds depending on the microwave (wattage table on product instructions), checking the temperature before applying.\u003c\/span\u003e\u003cspan\u003e\u003c\/span\u003e\n\u003c\/li\u003e\n\u003cli\u003e\n\u003cp\u003e\u003cspan\u003eApply to the affected area for up to 20 minutes, as needed.\u003c\/span\u003e\u003c\/p\u003e\n\u003c\/li\u003e\n\u003c\/ul\u003e\n\u003cp\u003e\u003cspan\u003e\u003cstrong\u003eSafety Information:\u003c\/strong\u003e\u003c\/span\u003e\u003c\/p\u003e\n\u003cul\u003e\n\u003cli\u003e\u003cspan\u003eAlways test the temperature before applying to avoid burns or frostbite.\u003c\/span\u003e\u003c\/li\u003e\n\u003cli\u003e\u003cspan\u003eConsult with a healthcare professional if symptoms persist.\u003c\/span\u003e\u003c\/li\u003e\n\u003cli\u003e\u003cspan\u003e\u003cspan class=\"OYPEnA font-feature-liga-off font-feature-clig-off font-feature-calt-off text-decoration-none text-strikethrough-none\"\u003eThis product is not recommended f\u003c\/span\u003e\u003cspan class=\"OYPEnA font-feature-liga-off font-feature-clig-off font-feature-calt-off text-decoration-none text-strikethrough-none\"\u003eor people with reduced awareness of temperature or feeling in their skin.\u003c\/span\u003e\u003c\/span\u003e\u003c\/li\u003e\n\u003c\/ul\u003e","published_at":"2025-03-18T17:40:07+08:00","created_at":"2025-03-09T13:09:38+08:00","vendor":"The Birth Store","type":"Ice Packs","tags":["Breastfeeding","Hemorrhoids","Mastitis","Mum","Pain Relief","Peri Care","Post-Partum","Pregnancy","The Birth Store","Vaginal Birth Recovery"],"price":4200,"price_min":4200,"price_max":4200,"available":true,"price_varies":false,"compare_at_price":null,"compare_at_price_min":0,"compare_at_price_max":0,"compare_at_price_varies":false,"variants":[{"id":44896065028285,"title":"Default Title","option1":"Default Title","option2":null,"option3":null,"sku":null,"requires_shipping":true,"taxable":false,"featured_image":null,"available":true,"name":"Breast \u0026 Perineal Recovery Ice \u0026 Heat Packs","public_title":null,"options":["Default Title"],"price":4200,"weight":514,"compare_at_price":null,"inventory_management":"shopify","barcode":"65028285","requires_selling_plan":false,"selling_plan_allocations":[]}],"images":["\/\/www.thebirthstore.com.au\/cdn\/shop\/files\/breast-perineal-recovery-ice-heat-packs-299362.jpg?v=1750253241","\/\/www.thebirthstore.com.au\/cdn\/shop\/files\/breast-perineal-recovery-ice-heat-packs-165433.png?v=1750219344","\/\/www.thebirthstore.com.au\/cdn\/shop\/files\/breast-perineal-recovery-ice-heat-packs-574145.jpg?v=1750219380","\/\/www.thebirthstore.com.au\/cdn\/shop\/files\/perineal-ice-pack-sleeves-664034.jpg?v=1750219344","\/\/www.thebirthstore.com.au\/cdn\/shop\/files\/perineal-ice-pack-sleeves-220916.jpg?v=1750219380","\/\/www.thebirthstore.com.au\/cdn\/shop\/files\/breast-perineal-recovery-ice-heat-packs-652289.jpg?v=1750219380","\/\/www.thebirthstore.com.au\/cdn\/shop\/files\/perineal-ice-pack-sleeves-411950.jpg?v=1750219344","\/\/www.thebirthstore.com.au\/cdn\/shop\/files\/breast-perineal-recovery-ice-heat-packs-763864.jpg?v=1750219344","\/\/www.thebirthstore.com.au\/cdn\/shop\/files\/breast-perineal-recovery-ice-heat-packs-607493.jpg?v=1750219344","\/\/www.thebirthstore.com.au\/cdn\/shop\/files\/instant-peri-ice-packs-137615.jpg?v=1750219380","\/\/www.thebirthstore.com.au\/cdn\/shop\/files\/breast-perineal-recovery-ice-heat-packs-202703.jpg?v=1750219380","\/\/www.thebirthstore.com.au\/cdn\/shop\/files\/breast-perineal-recovery-ice-heat-packs-149616.jpg?v=1750219344","\/\/www.thebirthstore.com.au\/cdn\/shop\/files\/breast-perineal-recovery-ice-heat-packs-275768.jpg?v=1750219344","\/\/www.thebirthstore.com.au\/cdn\/shop\/files\/breast-perineal-recovery-ice-heat-packs-606688.jpg?v=1750219344"],"featured_image":"\/\/www.thebirthstore.com.au\/cdn\/shop\/files\/breast-perineal-recovery-ice-heat-packs-299362.jpg?v=1750253241","options":["Title"],"media":[{"alt":"Breast \u0026 Perineal Recovery Ice \u0026 Heat Packs - The Birth Store - The Birth Store","id":28995619848381,"position":1,"preview_image":{"aspect_ratio":1.0,"height":1080,"width":1080,"src":"\/\/www.thebirthstore.com.au\/cdn\/shop\/files\/breast-perineal-recovery-ice-heat-packs-299362.jpg?v=1750253241"},"aspect_ratio":1.0,"height":1080,"media_type":"image","src":"\/\/www.thebirthstore.com.au\/cdn\/shop\/files\/breast-perineal-recovery-ice-heat-packs-299362.jpg?v=1750253241","width":1080},{"alt":"Breast \u0026 Perineal Recovery Ice \u0026 Heat Packs - The Birth Store - The Birth Store","id":28435577143485,"position":2,"preview_image":{"aspect_ratio":1.0,"height":1080,"width":1080,"src":"\/\/www.thebirthstore.com.au\/cdn\/shop\/files\/breast-perineal-recovery-ice-heat-packs-165433.png?v=1750219344"},"aspect_ratio":1.0,"height":1080,"media_type":"image","src":"\/\/www.thebirthstore.com.au\/cdn\/shop\/files\/breast-perineal-recovery-ice-heat-packs-165433.png?v=1750219344","width":1080},{"alt":"Breast \u0026 Perineal Recovery Ice \u0026 Heat Packs - The Birth Store - The Birth Store","id":28436124958909,"position":3,"preview_image":{"aspect_ratio":0.668,"height":1440,"width":962,"src":"\/\/www.thebirthstore.com.au\/cdn\/shop\/files\/breast-perineal-recovery-ice-heat-packs-574145.jpg?v=1750219380"},"aspect_ratio":0.668,"height":1440,"media_type":"image","src":"\/\/www.thebirthstore.com.au\/cdn\/shop\/files\/breast-perineal-recovery-ice-heat-packs-574145.jpg?v=1750219380","width":962},{"alt":"Perineal Ice Pack Sleeves - The Birth Store - The Birth Store","id":28436124663997,"position":4,"preview_image":{"aspect_ratio":1.497,"height":684,"width":1024,"src":"\/\/www.thebirthstore.com.au\/cdn\/shop\/files\/perineal-ice-pack-sleeves-664034.jpg?v=1750219344"},"aspect_ratio":1.497,"height":684,"media_type":"image","src":"\/\/www.thebirthstore.com.au\/cdn\/shop\/files\/perineal-ice-pack-sleeves-664034.jpg?v=1750219344","width":1024},{"alt":"Perineal Ice Pack Sleeves - The Birth Store - The Birth Store","id":28436124926141,"position":5,"preview_image":{"aspect_ratio":1.497,"height":684,"width":1024,"src":"\/\/www.thebirthstore.com.au\/cdn\/shop\/files\/perineal-ice-pack-sleeves-220916.jpg?v=1750219380"},"aspect_ratio":1.497,"height":684,"media_type":"image","src":"\/\/www.thebirthstore.com.au\/cdn\/shop\/files\/perineal-ice-pack-sleeves-220916.jpg?v=1750219380","width":1024},{"alt":"Breast \u0026 Perineal Recovery Ice \u0026 Heat Packs - The Birth Store - The Birth Store","id":28410309935293,"position":6,"preview_image":{"aspect_ratio":0.667,"height":1536,"width":1024,"src":"\/\/www.thebirthstore.com.au\/cdn\/shop\/files\/breast-perineal-recovery-ice-heat-packs-652289.jpg?v=1750219380"},"aspect_ratio":0.667,"height":1536,"media_type":"image","src":"\/\/www.thebirthstore.com.au\/cdn\/shop\/files\/breast-perineal-recovery-ice-heat-packs-652289.jpg?v=1750219380","width":1024},{"alt":"Perineal Ice Pack Sleeves - The Birth Store - The Birth Store","id":28436124893373,"position":7,"preview_image":{"aspect_ratio":1.775,"height":502,"width":891,"src":"\/\/www.thebirthstore.com.au\/cdn\/shop\/files\/perineal-ice-pack-sleeves-411950.jpg?v=1750219344"},"aspect_ratio":1.775,"height":502,"media_type":"image","src":"\/\/www.thebirthstore.com.au\/cdn\/shop\/files\/perineal-ice-pack-sleeves-411950.jpg?v=1750219344","width":891},{"alt":"Breast \u0026 Perineal Recovery Ice \u0026 Heat Packs - The Birth Store - The Birth Store","id":28410319372477,"position":8,"preview_image":{"aspect_ratio":0.667,"height":1536,"width":1024,"src":"\/\/www.thebirthstore.com.au\/cdn\/shop\/files\/breast-perineal-recovery-ice-heat-packs-763864.jpg?v=1750219344"},"aspect_ratio":0.667,"height":1536,"media_type":"image","src":"\/\/www.thebirthstore.com.au\/cdn\/shop\/files\/breast-perineal-recovery-ice-heat-packs-763864.jpg?v=1750219344","width":1024},{"alt":"Breast \u0026 Perineal Recovery Ice \u0026 Heat Packs - The Birth Store - The Birth Store","id":28410319438013,"position":9,"preview_image":{"aspect_ratio":0.667,"height":1536,"width":1024,"src":"\/\/www.thebirthstore.com.au\/cdn\/shop\/files\/breast-perineal-recovery-ice-heat-packs-607493.jpg?v=1750219344"},"aspect_ratio":0.667,"height":1536,"media_type":"image","src":"\/\/www.thebirthstore.com.au\/cdn\/shop\/files\/breast-perineal-recovery-ice-heat-packs-607493.jpg?v=1750219344","width":1024},{"alt":"Instant Peri Ice Packs - The Birth Store - The Birth Store","id":28436124860605,"position":10,"preview_image":{"aspect_ratio":1.497,"height":684,"width":1024,"src":"\/\/www.thebirthstore.com.au\/cdn\/shop\/files\/instant-peri-ice-packs-137615.jpg?v=1750219380"},"aspect_ratio":1.497,"height":684,"media_type":"image","src":"\/\/www.thebirthstore.com.au\/cdn\/shop\/files\/instant-peri-ice-packs-137615.jpg?v=1750219380","width":1024},{"alt":"Breast \u0026 Perineal Recovery Ice \u0026 Heat Packs - The Birth Store - The Birth Store","id":28436124729533,"position":11,"preview_image":{"aspect_ratio":1.497,"height":684,"width":1024,"src":"\/\/www.thebirthstore.com.au\/cdn\/shop\/files\/breast-perineal-recovery-ice-heat-packs-202703.jpg?v=1750219380"},"aspect_ratio":1.497,"height":684,"media_type":"image","src":"\/\/www.thebirthstore.com.au\/cdn\/shop\/files\/breast-perineal-recovery-ice-heat-packs-202703.jpg?v=1750219380","width":1024},{"alt":"Breast \u0026 Perineal Recovery Ice \u0026 Heat Packs - The Birth Store - The Birth Store","id":28410310033597,"position":12,"preview_image":{"aspect_ratio":0.667,"height":1536,"width":1024,"src":"\/\/www.thebirthstore.com.au\/cdn\/shop\/files\/breast-perineal-recovery-ice-heat-packs-149616.jpg?v=1750219344"},"aspect_ratio":0.667,"height":1536,"media_type":"image","src":"\/\/www.thebirthstore.com.au\/cdn\/shop\/files\/breast-perineal-recovery-ice-heat-packs-149616.jpg?v=1750219344","width":1024},{"alt":"Breast \u0026 Perineal Recovery Ice \u0026 Heat Packs - The Birth Store - The Birth Store","id":28436124696765,"position":13,"preview_image":{"aspect_ratio":1.497,"height":684,"width":1024,"src":"\/\/www.thebirthstore.com.au\/cdn\/shop\/files\/breast-perineal-recovery-ice-heat-packs-275768.jpg?v=1750219344"},"aspect_ratio":1.497,"height":684,"media_type":"image","src":"\/\/www.thebirthstore.com.au\/cdn\/shop\/files\/breast-perineal-recovery-ice-heat-packs-275768.jpg?v=1750219344","width":1024},{"alt":"Breast \u0026 Perineal Recovery Ice \u0026 Heat Packs - The Birth Store - The Birth Store","id":28410310099133,"position":14,"preview_image":{"aspect_ratio":0.667,"height":1536,"width":1024,"src":"\/\/www.thebirthstore.com.au\/cdn\/shop\/files\/breast-perineal-recovery-ice-heat-packs-606688.jpg?v=1750219344"},"aspect_ratio":0.667,"height":1536,"media_type":"image","src":"\/\/www.thebirthstore.com.au\/cdn\/shop\/files\/breast-perineal-recovery-ice-heat-packs-606688.jpg?v=1750219344","width":1024}],"requires_selling_plan":false,"selling_plan_groups":[],"content":"\u003cp data-pm-slice=\"1 1 []\"\u003e\u003cspan\u003eWhen your body is healing after birth, every little bit of comfort counts. Our Breast \u0026amp; Perineal Recovery Ice \u0026amp; Heat Pack Set is the ultimate postpartum care duo — designed to provide relief from top to bottom.\u003c\/span\u003e\u003c\/p\u003e\n\u003cp\u003e\u003cspan\u003e\u003cstrong\u003eTo Help With:\u003c\/strong\u003e\u003c\/span\u003e\u003c\/p\u003e\n\u003cul data-spread=\"false\"\u003e\n\u003cli\u003e\n\u003cp\u003e\u003cspan\u003eEngorgement, mastitis, and blocked ducts\u003c\/span\u003e\u003c\/p\u003e\n\u003c\/li\u003e\n\u003cli\u003e\n\u003cp\u003e\u003cspan\u003ePerineal swelling and discomfort\u003c\/span\u003e\u003c\/p\u003e\n\u003c\/li\u003e\n\u003cli\u003e\n\u003cp\u003e\u003cspan\u003ePostpartum stitches and tearing\u003c\/span\u003e\u003c\/p\u003e\n\u003c\/li\u003e\n\u003cli\u003e\n\u003cp\u003e\u003cspan\u003eGeneral breast and perineal tenderness\u003c\/span\u003e\u003c\/p\u003e\n\u003c\/li\u003e\n\u003c\/ul\u003e\n\u003cp\u003e\u003cspan\u003e\u003cstrong\u003eFeatures:\u003c\/strong\u003e\u003c\/span\u003e\u003c\/p\u003e\n\u003cul data-spread=\"false\"\u003e\n\u003cli\u003e\n\u003cp\u003e\u003cspan\u003eBreast packs: Dual-sided with direct ice\/heat contact on one side and plush, soft backing on the other — no extra covers needed.\u003c\/span\u003e\u003c\/p\u003e\n\u003c\/li\u003e\n\u003cli\u003e\n\u003cp\u003e\u003cspan\u003ePerineal packs: Comes with two packs so you can always have one ready to go.\u003c\/span\u003e\u003c\/p\u003e\n\u003c\/li\u003e\n\u003cli\u003e\n\u003cp\u003e\u003cspan\u003eFlexible design: Contours comfortably to your body.\u003c\/span\u003e\u003c\/p\u003e\n\u003c\/li\u003e\n\u003cli\u003e\n\u003cp\u003e\u003cspan\u003ePerineal covers sold separately, so you can choose to keep things simple or invest in reusable covers.\u003c\/span\u003e\u003c\/p\u003e\n\u003c\/li\u003e\n\u003c\/ul\u003e\n\u003cp\u003e\u003cspan\u003e\u003cstrong\u003eHow to Use:\u003c\/strong\u003e\u003c\/span\u003e\u003c\/p\u003e\n\u003cul data-spread=\"false\"\u003e\n\u003cli\u003e\n\u003cp\u003e\u003cspan\u003eFor cold therapy: Place in the freezer without covers for at least 2 hours before use or submerge in ice water until the desired temperature is achieved.\u003c\/span\u003e\u003c\/p\u003e\n\u003c\/li\u003e\n\u003cli\u003e\n\u003cspan\u003eFor heat therapy: Microwave without covers for 10-20 seconds depending on the microwave (wattage table on product instructions), checking the temperature before applying.\u003c\/span\u003e\u003cspan\u003e\u003c\/span\u003e\n\u003c\/li\u003e\n\u003cli\u003e\n\u003cp\u003e\u003cspan\u003eApply to the affected area for up to 20 minutes, as needed.\u003c\/span\u003e\u003c\/p\u003e\n\u003c\/li\u003e\n\u003c\/ul\u003e\n\u003cp\u003e\u003cspan\u003e\u003cstrong\u003eSafety Information:\u003c\/strong\u003e\u003c\/span\u003e\u003c\/p\u003e\n\u003cul\u003e\n\u003cli\u003e\u003cspan\u003eAlways test the temperature before applying to avoid burns or frostbite.\u003c\/span\u003e\u003c\/li\u003e\n\u003cli\u003e\u003cspan\u003eConsult with a healthcare professional if symptoms persist.\u003c\/span\u003e\u003c\/li\u003e\n\u003cli\u003e\u003cspan\u003e\u003cspan class=\"OYPEnA font-feature-liga-off font-feature-clig-off font-feature-calt-off text-decoration-none text-strikethrough-none\"\u003eThis product is not recommended f\u003c\/span\u003e\u003cspan class=\"OYPEnA font-feature-liga-off font-feature-clig-off font-feature-calt-off text-decoration-none text-strikethrough-none\"\u003eor people with reduced awareness of temperature or feeling in their skin.\u003c\/span\u003e\u003c\/span\u003e\u003c\/li\u003e\n\u003c\/ul\u003e"},"options":[{"name":"Title","position":1,"values":["Default Title"]}],"custom_metafields":{},"metafields":{"badge":"\u003cdiv style='display:none' class='jdgm-prev-badge' data-average-rating='0.00' data-number-of-reviews='0' data-number-of-questions='0'\u003e \u003cspan class='jdgm-prev-badge__stars' data-score='0.00' tabindex='0' aria-label='0.00 stars' role='button'\u003e \u003cspan class='jdgm-star jdgm--off'\u003e\u003c\/span\u003e\u003cspan class='jdgm-star jdgm--off'\u003e\u003c\/span\u003e\u003cspan class='jdgm-star jdgm--off'\u003e\u003c\/span\u003e\u003cspan class='jdgm-star jdgm--off'\u003e\u003c\/span\u003e\u003cspan class='jdgm-star jdgm--off'\u003e\u003c\/span\u003e \u003c\/span\u003e \u003cspan class='jdgm-prev-badge__text'\u003e No reviews \u003c\/span\u003e \u003c\/div\u003e","widget":"\u003cdiv class='jdgm-rev-widg' data-updated-at='2025-06-13T16:13:40Z' data-average-rating='0.00' data-number-of-reviews='0' data-number-of-questions='0'\u003e \u003cstyle class='jdgm-temp-hiding-style'\u003e.jdgm-rev-widg{ display: none }\u003c\/style\u003e \u003cdiv class='jdgm-rev-widg__header'\u003e \u003ch2 class='jdgm-rev-widg__title'\u003eCustomer Reviews\u003c\/h2\u003e \u003cdiv class='jdgm-rev-widg__summary'\u003e \u003cdiv class='jdgm-rev-widg__summary-stars' aria-label='Average rating is 0.00 stars' role='img'\u003e \u003cspan class='jdgm-star jdgm--off'\u003e\u003c\/span\u003e\u003cspan class='jdgm-star jdgm--off'\u003e\u003c\/span\u003e\u003cspan class='jdgm-star jdgm--off'\u003e\u003c\/span\u003e\u003cspan class='jdgm-star jdgm--off'\u003e\u003c\/span\u003e\u003cspan class='jdgm-star jdgm--off'\u003e\u003c\/span\u003e \u003c\/div\u003e \u003cdiv class='jdgm-rev-widg__summary-text'\u003eBe the first to write a review\u003c\/div\u003e \u003c\/div\u003e \u003ca style='display: none' href='#' class='jdgm-write-rev-link' role='button'\u003eWrite a review\u003c\/a\u003e \u003cdiv class='jdgm-histogram jdgm-temp-hidden'\u003e \u003cdiv class='jdgm-histogram__row' data-rating='5' data-frequency='0' data-percentage='0'\u003e \u003cdiv class='jdgm-histogram__star' role='button' aria-label=\"0% (0) reviews with 5 star rating\" tabindex='0' \u003e\u003cspan class='jdgm-star jdgm--on'\u003e\u003c\/span\u003e\u003cspan class='jdgm-star jdgm--on'\u003e\u003c\/span\u003e\u003cspan class='jdgm-star jdgm--on'\u003e\u003c\/span\u003e\u003cspan class='jdgm-star jdgm--on'\u003e\u003c\/span\u003e\u003cspan class='jdgm-star jdgm--on'\u003e\u003c\/span\u003e\u003c\/div\u003e \u003cdiv class='jdgm-histogram__bar'\u003e \u003cdiv class='jdgm-histogram__bar-content' style='width: 0%;'\u003e \u003c\/div\u003e \u003c\/div\u003e \u003cdiv class='jdgm-histogram__percentage'\u003e0%\u003c\/div\u003e \u003cdiv class='jdgm-histogram__frequency'\u003e(0)\u003c\/div\u003e \u003c\/div\u003e \u003cdiv class='jdgm-histogram__row' data-rating='4' data-frequency='0' data-percentage='0'\u003e \u003cdiv class='jdgm-histogram__star' role='button' aria-label=\"0% (0) reviews with 4 star rating\" tabindex='0' \u003e\u003cspan class='jdgm-star jdgm--on'\u003e\u003c\/span\u003e\u003cspan class='jdgm-star jdgm--on'\u003e\u003c\/span\u003e\u003cspan class='jdgm-star jdgm--on'\u003e\u003c\/span\u003e\u003cspan class='jdgm-star jdgm--on'\u003e\u003c\/span\u003e\u003cspan class='jdgm-star jdgm--off'\u003e\u003c\/span\u003e\u003c\/div\u003e \u003cdiv class='jdgm-histogram__bar'\u003e \u003cdiv class='jdgm-histogram__bar-content' style='width: 0%;'\u003e \u003c\/div\u003e \u003c\/div\u003e \u003cdiv class='jdgm-histogram__percentage'\u003e0%\u003c\/div\u003e \u003cdiv class='jdgm-histogram__frequency'\u003e(0)\u003c\/div\u003e \u003c\/div\u003e \u003cdiv class='jdgm-histogram__row' data-rating='3' data-frequency='0' data-percentage='0'\u003e \u003cdiv class='jdgm-histogram__star' role='button' aria-label=\"0% (0) reviews with 3 star rating\" tabindex='0' \u003e\u003cspan class='jdgm-star jdgm--on'\u003e\u003c\/span\u003e\u003cspan class='jdgm-star jdgm--on'\u003e\u003c\/span\u003e\u003cspan class='jdgm-star jdgm--on'\u003e\u003c\/span\u003e\u003cspan class='jdgm-star jdgm--off'\u003e\u003c\/span\u003e\u003cspan class='jdgm-star jdgm--off'\u003e\u003c\/span\u003e\u003c\/div\u003e \u003cdiv class='jdgm-histogram__bar'\u003e \u003cdiv class='jdgm-histogram__bar-content' style='width: 0%;'\u003e \u003c\/div\u003e \u003c\/div\u003e \u003cdiv class='jdgm-histogram__percentage'\u003e0%\u003c\/div\u003e \u003cdiv class='jdgm-histogram__frequency'\u003e(0)\u003c\/div\u003e \u003c\/div\u003e \u003cdiv class='jdgm-histogram__row' data-rating='2' data-frequency='0' data-percentage='0'\u003e \u003cdiv class='jdgm-histogram__star' role='button' aria-label=\"0% (0) reviews with 2 star rating\" tabindex='0' \u003e\u003cspan class='jdgm-star jdgm--on'\u003e\u003c\/span\u003e\u003cspan class='jdgm-star jdgm--on'\u003e\u003c\/span\u003e\u003cspan class='jdgm-star jdgm--off'\u003e\u003c\/span\u003e\u003cspan class='jdgm-star jdgm--off'\u003e\u003c\/span\u003e\u003cspan class='jdgm-star jdgm--off'\u003e\u003c\/span\u003e\u003c\/div\u003e \u003cdiv class='jdgm-histogram__bar'\u003e \u003cdiv class='jdgm-histogram__bar-content' style='width: 0%;'\u003e \u003c\/div\u003e \u003c\/div\u003e \u003cdiv class='jdgm-histogram__percentage'\u003e0%\u003c\/div\u003e \u003cdiv class='jdgm-histogram__frequency'\u003e(0)\u003c\/div\u003e \u003c\/div\u003e \u003cdiv class='jdgm-histogram__row' data-rating='1' data-frequency='0' data-percentage='0'\u003e \u003cdiv class='jdgm-histogram__star' role='button' aria-label=\"0% (0) reviews with 1 star rating\" tabindex='0' \u003e\u003cspan class='jdgm-star jdgm--on'\u003e\u003c\/span\u003e\u003cspan class='jdgm-star jdgm--off'\u003e\u003c\/span\u003e\u003cspan class='jdgm-star jdgm--off'\u003e\u003c\/span\u003e\u003cspan class='jdgm-star jdgm--off'\u003e\u003c\/span\u003e\u003cspan class='jdgm-star jdgm--off'\u003e\u003c\/span\u003e\u003c\/div\u003e \u003cdiv class='jdgm-histogram__bar'\u003e \u003cdiv class='jdgm-histogram__bar-content' style='width: 0%;'\u003e \u003c\/div\u003e \u003c\/div\u003e \u003cdiv class='jdgm-histogram__percentage'\u003e0%\u003c\/div\u003e \u003cdiv class='jdgm-histogram__frequency'\u003e(0)\u003c\/div\u003e \u003c\/div\u003e \u003cdiv class='jdgm-histogram__row jdgm-histogram__clear-filter' data-rating=null tabindex='0'\u003e\u003c\/div\u003e \u003c\/div\u003e \u003cdiv class='jdgm-rev-widg__sort-wrapper'\u003e\u003c\/div\u003e \u003c\/div\u003e \u003cdiv class='jdgm-rev-widg__body'\u003e \u003cdiv class='jdgm-rev-widg__reviews'\u003e\u003c\/div\u003e \u003cdiv class='jdgm-paginate' data-per-page='10' data-url='https:\/\/api.judge.me\/reviews\/reviews_for_widget' style=\"display: none;\"\u003e\u003c\/div\u003e \u003c\/div\u003e \u003cdiv class='jdgm-rev-widg__paginate-spinner-wrapper'\u003e \u003cdiv class='jdgm-spinner'\u003e\u003c\/div\u003e \u003c\/div\u003e \u003c\/div\u003e"},"collections":[{"id":309505622205,"handle":"the-birth-store-range","title":"'The Birth Store' Range","updated_at":"2025-12-28T20:10:01+08:00","body_html":"","published_at":"2024-10-28T13:24:26+08:00","sort_order":"alpha-asc","template_suffix":"","disjunctive":false,"rules":[{"column":"tag","relation":"equals","condition":"The Birth Store"}],"published_scope":"global","image":{"created_at":"2025-10-30T16:16:56+08:00","alt":"'The Birth Store' Range - The Birth Store","width":1365,"height":2048,"src":"\/\/www.thebirthstore.com.au\/cdn\/shop\/collections\/the-birth-store-range-5183880.jpg?v=1761812217"}},{"id":281712427197,"handle":"breastfeeding","title":"Breastfeeding","updated_at":"2025-12-28T20:10:01+08:00","body_html":"","published_at":"2021-12-20T14:19:33+08:00","sort_order":"best-selling","template_suffix":"breastfeeding-collection","disjunctive":false,"rules":[{"column":"tag","relation":"equals","condition":"Breastfeeding"}],"published_scope":"global","image":{"created_at":"2024-05-06T11:59:34+08:00","alt":"Breastfeeding - The Birth Store","width":620,"height":635,"src":"\/\/www.thebirthstore.com.au\/cdn\/shop\/collections\/breastfeeding-793872.jpg?v=1714967974"}},{"id":261657460925,"handle":"buy","title":"Buy","updated_at":"2025-12-28T20:10:01+08:00","body_html":"\u003cp\u003eBrowse all of our pregnancy, labour \u0026amp; birth, postpartum and baby essentials here.\u003cbr\u003e\u003c\/p\u003e\n\u003cp\u003e\u003cspan\u003eYou can even buy now and pay later with Afterpay!\u003c\/span\u003e\u003c\/p\u003e","published_at":"2021-03-10T12:05:31+08:00","sort_order":"best-selling","template_suffix":"shop-all-collection","disjunctive":false,"rules":[{"column":"title","relation":"not_contains","condition":"Hire"}],"published_scope":"global","image":{"created_at":"2024-05-06T11:59:42+08:00","alt":"Buy - The Birth Store","width":2048,"height":2048,"src":"\/\/www.thebirthstore.com.au\/cdn\/shop\/collections\/buy-964856.jpg?v=1714967982"}},{"id":281712066749,"handle":"hemorrhoid-care","title":"Haemorrhoid Care","updated_at":"2025-12-28T20:10:01+08:00","body_html":"","published_at":"2021-12-20T14:16:30+08:00","sort_order":"best-selling","template_suffix":"swaddles-collection","disjunctive":false,"rules":[{"column":"tag","relation":"equals","condition":"Hemorrhoids"}],"published_scope":"global","image":{"created_at":"2024-05-06T12:00:00+08:00","alt":"Haemorrhoid Care - The Birth Store","width":763,"height":556,"src":"\/\/www.thebirthstore.com.au\/cdn\/shop\/collections\/haemorrhoid-care-562138.jpg?v=1714968001"}},{"id":319580635325,"handle":"ice-heat-packs","updated_at":"2025-12-28T20:10:01+08:00","published_at":"2025-06-08T20:45:57+08:00","sort_order":"best-selling","template_suffix":"","published_scope":"global","title":"Ice \u0026 Heat Packs","body_html":"","image":{"created_at":"2025-10-30T16:16:45+08:00","alt":"Ice \u0026 Heat Packs - The Birth Store","width":1024,"height":684,"src":"\/\/www.thebirthstore.com.au\/cdn\/shop\/collections\/ice-heat-packs-1501133.jpg?v=1761812205"}},{"id":290869313725,"handle":"mastitis-blocked-ducts","title":"Mastitis \u0026 Blocked Ducts","updated_at":"2025-12-27T20:11:40+08:00","body_html":"","published_at":"2022-11-17T10:50:01+08:00","sort_order":"best-selling","template_suffix":"swaddles-collection","disjunctive":false,"rules":[{"column":"tag","relation":"equals","condition":"Mastitis"}],"published_scope":"global","image":{"created_at":"2024-05-06T12:00:21+08:00","alt":"Mastitis \u0026 Blocked Ducts - The Birth Store","width":494,"height":487,"src":"\/\/www.thebirthstore.com.au\/cdn\/shop\/collections\/mastitis-blocked-ducts-488726.jpg?v=1714968021"}},{"id":281712591037,"handle":"pain-relief","title":"Pain Relief","updated_at":"2025-12-28T20:10:01+08:00","body_html":"","published_at":"2021-12-20T14:22:45+08:00","sort_order":"best-selling","template_suffix":"pain-relief-collection","disjunctive":false,"rules":[{"column":"tag","relation":"equals","condition":"Pain Relief"}],"published_scope":"global","image":{"created_at":"2024-05-06T12:00:27+08:00","alt":"Pain Relief - The Birth Store","width":1365,"height":2048,"src":"\/\/www.thebirthstore.com.au\/cdn\/shop\/collections\/pain-relief-878865.jpg?v=1714968027"}},{"id":295224705213,"handle":"perineal-care","title":"Perineal Care","updated_at":"2025-12-28T20:10:01+08:00","body_html":"","published_at":"2023-11-10T20:43:30+08:00","sort_order":"best-selling","template_suffix":"perineal-care-collection","disjunctive":false,"rules":[{"column":"tag","relation":"equals","condition":"Peri Care"}],"published_scope":"global","image":{"created_at":"2024-05-06T12:00:33+08:00","alt":"Perineal Care - The Birth Store","width":1024,"height":1536,"src":"\/\/www.thebirthstore.com.au\/cdn\/shop\/collections\/perineal-care-657628.jpg?v=1714968034"}},{"id":261658083517,"handle":"post-partum","title":"Postpartum","updated_at":"2025-12-28T20:10:01+08:00","body_html":"\u003cp\u003eShop your postpartum and hospital bag essentials below. Looking for something we don't currently stock? Please reach out and let us know.\u003cbr\u003e\u003c\/p\u003e\n\u003cp\u003e\u003cspan\u003eYou can even buy now and pay later with Afterpay!\u003c\/span\u003e\u003c\/p\u003e","published_at":"2021-03-10T12:33:47+08:00","sort_order":"best-selling","template_suffix":"postpartum-collection","disjunctive":false,"rules":[{"column":"tag","relation":"equals","condition":"Post-Partum"}],"published_scope":"global","image":{"created_at":"2024-05-06T12:00:36+08:00","alt":"Postpartum - The Birth Store","width":611,"height":702,"src":"\/\/www.thebirthstore.com.au\/cdn\/shop\/collections\/postpartum-150119.jpg?v=1714968037"}},{"id":261658149053,"handle":"pregnancy-and-maternity-products","title":"Pregnancy","updated_at":"2025-12-28T20:10:01+08:00","body_html":"\u003cp\u003eShop your pregnancy essentials below. Looking for something we don't currently stock? Please reach out and let us know.\u003cbr\u003e\u003c\/p\u003e\n\u003cp\u003e\u003cspan\u003eYou can even buy now and pay later with Afterpay!\u003c\/span\u003e\u003c\/p\u003e","published_at":"2021-03-10T12:34:22+08:00","sort_order":"best-selling","template_suffix":"pregnancy-collection","disjunctive":false,"rules":[{"column":"tag","relation":"equals","condition":"Pregnancy"}],"published_scope":"global","image":{"created_at":"2024-05-06T12:00:40+08:00","alt":"Pregnancy - The Birth Store","width":1024,"height":1536,"src":"\/\/www.thebirthstore.com.au\/cdn\/shop\/collections\/pregnancy-899677.jpg?v=1714968040"}},{"id":315407761597,"handle":"the-birth-store-2025-product-launch","updated_at":"2025-12-28T20:10:01+08:00","published_at":"2025-03-15T21:46:34+08:00","sort_order":"created-desc","template_suffix":"ice-pack-launch","published_scope":"global","title":"Recovery Ice \u0026 Heat Packs","body_html":"","image":{"created_at":"2025-10-30T16:16:46+08:00","alt":"Recovery Ice \u0026 Heat Packs - The Birth Store","width":1024,"height":684,"src":"\/\/www.thebirthstore.com.au\/cdn\/shop\/collections\/recovery-ice-heat-packs-9023381.jpg?v=1761812207"}},{"id":291456483517,"handle":"shop-all","title":"Shop All - Mum","updated_at":"2025-12-28T20:10:01+08:00","body_html":"","published_at":"2022-12-23T22:04:39+08:00","sort_order":"best-selling","template_suffix":"shop-all-collection","disjunctive":false,"rules":[{"column":"variant_price","relation":"greater_than","condition":"1"},{"column":"title","relation":"not_contains","condition":"Batteries"},{"column":"tag","relation":"equals","condition":"Mum"}],"published_scope":"global","image":{"created_at":"2024-05-06T12:00:54+08:00","alt":"Shop All - The Birth Store","width":1365,"height":2048,"src":"\/\/www.thebirthstore.com.au\/cdn\/shop\/collections\/shop-all-693176.jpg?v=1714968055"}},{"id":310045933757,"handle":"shop-all-sale","title":"Shop All Sale","updated_at":"2025-12-28T20:10:01+08:00","body_html":"","published_at":"2024-11-12T13:22:43+08:00","sort_order":"alpha-asc","template_suffix":"","disjunctive":true,"rules":[{"column":"tag","relation":"equals","condition":"Bundles"},{"column":"vendor","relation":"equals","condition":"Franjos Kitchen"},{"column":"vendor","relation":"equals","condition":"Adored Illustrations"},{"column":"vendor","relation":"equals","condition":"Amazing Oils"},{"column":"vendor","relation":"equals","condition":"Ice Ice Booby"},{"column":"vendor","relation":"equals","condition":"Made to Milk"},{"column":"vendor","relation":"equals","condition":"Milky Goodness"},{"column":"vendor","relation":"equals","condition":"Seasons of Mama"},{"column":"vendor","relation":"equals","condition":"Silverette"},{"column":"vendor","relation":"equals","condition":"Snuggle Hunny"},{"column":"vendor","relation":"equals","condition":"Yung Bod"},{"column":"vendor","relation":"equals","condition":"Bare Love"},{"column":"vendor","relation":"equals","condition":"Haakaa"},{"column":"vendor","relation":"equals","condition":"Mere Botanicals"},{"column":"vendor","relation":"equals","condition":"The Birth Store Hire"},{"column":"vendor","relation":"equals","condition":"The Birth Store"}],"published_scope":"global","image":{"created_at":"2024-11-13T10:58:16+08:00","alt":"Shop All Sale - The Birth Store","width":2048,"height":1365,"src":"\/\/www.thebirthstore.com.au\/cdn\/shop\/collections\/shop-all-sale-297361.jpg?v=1731466697"}},{"id":281712197821,"handle":"vaginal-birth-recovery","title":"Vaginal Birth Recovery","updated_at":"2025-12-28T20:10:01+08:00","body_html":"","published_at":"2021-12-20T14:18:23+08:00","sort_order":"best-selling","template_suffix":"swaddles-collection","disjunctive":true,"rules":[{"column":"tag","relation":"equals","condition":"Vaginal Birth Recovery"},{"column":"tag","relation":"equals","condition":"Vaginal Birth Recover"}],"published_scope":"global","image":{"created_at":"2024-05-06T12:01:03+08:00","alt":"Vaginal Birth Recovery - The Birth Store","width":2048,"height":2048,"src":"\/\/www.thebirthstore.com.au\/cdn\/shop\/collections\/vaginal-birth-recovery-449034.jpg?v=1714968063"}},{"id":316942287037,"handle":"wholesale-products","updated_at":"2025-12-28T20:10:01+08:00","published_at":"2025-04-19T15:30:53+08:00","sort_order":"best-selling","template_suffix":"","published_scope":"global","title":"Wholesale Products","body_html":"","image":{"created_at":"2025-11-20T21:33:57+08:00","alt":"Wholesale Products - The Birth Store","width":1024,"height":684,"src":"\/\/www.thebirthstore.com.au\/cdn\/shop\/collections\/wholesale-products-3833919.jpg?v=1763645638"}}]}
[{"alt":"Breast \u0026 Perineal Recovery Ice \u0026 Heat Packs - The Birth Store - The Birth Store","id":28995619848381,"position":1,"preview_image":{"aspect_ratio":1.0,"height":1080,"width":1080,"src":"\/\/www.thebirthstore.com.au\/cdn\/shop\/files\/breast-perineal-recovery-ice-heat-packs-299362.jpg?v=1750253241"},"aspect_ratio":1.0,"height":1080,"media_type":"image","src":"\/\/www.thebirthstore.com.au\/cdn\/shop\/files\/breast-perineal-recovery-ice-heat-packs-299362.jpg?v=1750253241","width":1080},{"alt":"Breast \u0026 Perineal Recovery Ice \u0026 Heat Packs - The Birth Store - The Birth Store","id":28435577143485,"position":2,"preview_image":{"aspect_ratio":1.0,"height":1080,"width":1080,"src":"\/\/www.thebirthstore.com.au\/cdn\/shop\/files\/breast-perineal-recovery-ice-heat-packs-165433.png?v=1750219344"},"aspect_ratio":1.0,"height":1080,"media_type":"image","src":"\/\/www.thebirthstore.com.au\/cdn\/shop\/files\/breast-perineal-recovery-ice-heat-packs-165433.png?v=1750219344","width":1080},{"alt":"Breast \u0026 Perineal Recovery Ice \u0026 Heat Packs - The Birth Store - The Birth Store","id":28436124958909,"position":3,"preview_image":{"aspect_ratio":0.668,"height":1440,"width":962,"src":"\/\/www.thebirthstore.com.au\/cdn\/shop\/files\/breast-perineal-recovery-ice-heat-packs-574145.jpg?v=1750219380"},"aspect_ratio":0.668,"height":1440,"media_type":"image","src":"\/\/www.thebirthstore.com.au\/cdn\/shop\/files\/breast-perineal-recovery-ice-heat-packs-574145.jpg?v=1750219380","width":962},{"alt":"Perineal Ice Pack Sleeves - The Birth Store - The Birth Store","id":28436124663997,"position":4,"preview_image":{"aspect_ratio":1.497,"height":684,"width":1024,"src":"\/\/www.thebirthstore.com.au\/cdn\/shop\/files\/perineal-ice-pack-sleeves-664034.jpg?v=1750219344"},"aspect_ratio":1.497,"height":684,"media_type":"image","src":"\/\/www.thebirthstore.com.au\/cdn\/shop\/files\/perineal-ice-pack-sleeves-664034.jpg?v=1750219344","width":1024},{"alt":"Perineal Ice Pack Sleeves - The Birth Store - The Birth Store","id":28436124926141,"position":5,"preview_image":{"aspect_ratio":1.497,"height":684,"width":1024,"src":"\/\/www.thebirthstore.com.au\/cdn\/shop\/files\/perineal-ice-pack-sleeves-220916.jpg?v=1750219380"},"aspect_ratio":1.497,"height":684,"media_type":"image","src":"\/\/www.thebirthstore.com.au\/cdn\/shop\/files\/perineal-ice-pack-sleeves-220916.jpg?v=1750219380","width":1024},{"alt":"Breast \u0026 Perineal Recovery Ice \u0026 Heat Packs - The Birth Store - The Birth Store","id":28410309935293,"position":6,"preview_image":{"aspect_ratio":0.667,"height":1536,"width":1024,"src":"\/\/www.thebirthstore.com.au\/cdn\/shop\/files\/breast-perineal-recovery-ice-heat-packs-652289.jpg?v=1750219380"},"aspect_ratio":0.667,"height":1536,"media_type":"image","src":"\/\/www.thebirthstore.com.au\/cdn\/shop\/files\/breast-perineal-recovery-ice-heat-packs-652289.jpg?v=1750219380","width":1024},{"alt":"Perineal Ice Pack Sleeves - The Birth Store - The Birth Store","id":28436124893373,"position":7,"preview_image":{"aspect_ratio":1.775,"height":502,"width":891,"src":"\/\/www.thebirthstore.com.au\/cdn\/shop\/files\/perineal-ice-pack-sleeves-411950.jpg?v=1750219344"},"aspect_ratio":1.775,"height":502,"media_type":"image","src":"\/\/www.thebirthstore.com.au\/cdn\/shop\/files\/perineal-ice-pack-sleeves-411950.jpg?v=1750219344","width":891},{"alt":"Breast \u0026 Perineal Recovery Ice \u0026 Heat Packs - The Birth Store - The Birth Store","id":28410319372477,"position":8,"preview_image":{"aspect_ratio":0.667,"height":1536,"width":1024,"src":"\/\/www.thebirthstore.com.au\/cdn\/shop\/files\/breast-perineal-recovery-ice-heat-packs-763864.jpg?v=1750219344"},"aspect_ratio":0.667,"height":1536,"media_type":"image","src":"\/\/www.thebirthstore.com.au\/cdn\/shop\/files\/breast-perineal-recovery-ice-heat-packs-763864.jpg?v=1750219344","width":1024},{"alt":"Breast \u0026 Perineal Recovery Ice \u0026 Heat Packs - The Birth Store - The Birth Store","id":28410319438013,"position":9,"preview_image":{"aspect_ratio":0.667,"height":1536,"width":1024,"src":"\/\/www.thebirthstore.com.au\/cdn\/shop\/files\/breast-perineal-recovery-ice-heat-packs-607493.jpg?v=1750219344"},"aspect_ratio":0.667,"height":1536,"media_type":"image","src":"\/\/www.thebirthstore.com.au\/cdn\/shop\/files\/breast-perineal-recovery-ice-heat-packs-607493.jpg?v=1750219344","width":1024},{"alt":"Instant Peri Ice Packs - The Birth Store - The Birth Store","id":28436124860605,"position":10,"preview_image":{"aspect_ratio":1.497,"height":684,"width":1024,"src":"\/\/www.thebirthstore.com.au\/cdn\/shop\/files\/instant-peri-ice-packs-137615.jpg?v=1750219380"},"aspect_ratio":1.497,"height":684,"media_type":"image","src":"\/\/www.thebirthstore.com.au\/cdn\/shop\/files\/instant-peri-ice-packs-137615.jpg?v=1750219380","width":1024},{"alt":"Breast \u0026 Perineal Recovery Ice \u0026 Heat Packs - The Birth Store - The Birth Store","id":28436124729533,"position":11,"preview_image":{"aspect_ratio":1.497,"height":684,"width":1024,"src":"\/\/www.thebirthstore.com.au\/cdn\/shop\/files\/breast-perineal-recovery-ice-heat-packs-202703.jpg?v=1750219380"},"aspect_ratio":1.497,"height":684,"media_type":"image","src":"\/\/www.thebirthstore.com.au\/cdn\/shop\/files\/breast-perineal-recovery-ice-heat-packs-202703.jpg?v=1750219380","width":1024},{"alt":"Breast \u0026 Perineal Recovery Ice \u0026 Heat Packs - The Birth Store - The Birth Store","id":28410310033597,"position":12,"preview_image":{"aspect_ratio":0.667,"height":1536,"width":1024,"src":"\/\/www.thebirthstore.com.au\/cdn\/shop\/files\/breast-perineal-recovery-ice-heat-packs-149616.jpg?v=1750219344"},"aspect_ratio":0.667,"height":1536,"media_type":"image","src":"\/\/www.thebirthstore.com.au\/cdn\/shop\/files\/breast-perineal-recovery-ice-heat-packs-149616.jpg?v=1750219344","width":1024},{"alt":"Breast \u0026 Perineal Recovery Ice \u0026 Heat Packs - The Birth Store - The Birth Store","id":28436124696765,"position":13,"preview_image":{"aspect_ratio":1.497,"height":684,"width":1024,"src":"\/\/www.thebirthstore.com.au\/cdn\/shop\/files\/breast-perineal-recovery-ice-heat-packs-275768.jpg?v=1750219344"},"aspect_ratio":1.497,"height":684,"media_type":"image","src":"\/\/www.thebirthstore.com.au\/cdn\/shop\/files\/breast-perineal-recovery-ice-heat-packs-275768.jpg?v=1750219344","width":1024},{"alt":"Breast \u0026 Perineal Recovery Ice \u0026 Heat Packs - The Birth Store - The Birth Store","id":28410310099133,"position":14,"preview_image":{"aspect_ratio":0.667,"height":1536,"width":1024,"src":"\/\/www.thebirthstore.com.au\/cdn\/shop\/files\/breast-perineal-recovery-ice-heat-packs-606688.jpg?v=1750219344"},"aspect_ratio":0.667,"height":1536,"media_type":"image","src":"\/\/www.thebirthstore.com.au\/cdn\/shop\/files\/breast-perineal-recovery-ice-heat-packs-606688.jpg?v=1750219344","width":1024}]
{"item":{"id":7455628427453,"title":"Breast Milk Storage Bags","handle":"breast-milk-storage-bags","description":"\u003cp\u003eMilky Goodness Breast Milk Storage Bags allows you to safely refrigerate or freeze your breast milk. These storage bags are pre-sterilized and are ready to use. With a dual zip preventing any milk leakage. Made with a durable material that allows for freezing, heating, thawing \u0026amp; transportation. A designated area for making note of expressed date, expiration date \u0026amp; volume. Each bag is designed with the capability of self standing or laying flat to optimize freezer space. Made free from BPA\u003c\/p\u003e\n\u003cp\u003eEach box contains 25 breast milk storage bags with a 180ml capacity.\u003c\/p\u003e","published_at":"2023-03-22T14:02:53+08:00","created_at":"2023-03-22T14:02:53+08:00","vendor":"Milky Goodness","type":"","tags":["Breastfeeding","Lactation Products","Mum"],"price":1995,"price_min":1995,"price_max":1995,"available":true,"price_varies":false,"compare_at_price":null,"compare_at_price_min":0,"compare_at_price_max":0,"compare_at_price_varies":false,"variants":[{"id":42740020773053,"title":"Default Title","option1":"Default Title","option2":null,"option3":null,"sku":"","requires_shipping":true,"taxable":false,"featured_image":null,"available":true,"name":"Breast Milk Storage Bags","public_title":null,"options":["Default Title"],"price":1995,"weight":132,"compare_at_price":null,"inventory_management":"shopify","barcode":"20773053","requires_selling_plan":false,"selling_plan_allocations":[]}],"images":["\/\/www.thebirthstore.com.au\/cdn\/shop\/files\/breast-milk-storage-bags-980456.jpg?v=1714967949","\/\/www.thebirthstore.com.au\/cdn\/shop\/files\/breast-milk-storage-bags-839704.jpg?v=1714967949","\/\/www.thebirthstore.com.au\/cdn\/shop\/files\/breast-milk-storage-bags-365203.jpg?v=1714967949"],"featured_image":"\/\/www.thebirthstore.com.au\/cdn\/shop\/files\/breast-milk-storage-bags-980456.jpg?v=1714967949","options":["Title"],"media":[{"alt":"Breast Milk Storage Bags - The Birth Store-Milky Goodness","id":27007579947197,"position":1,"preview_image":{"aspect_ratio":1.0,"height":2048,"width":2048,"src":"\/\/www.thebirthstore.com.au\/cdn\/shop\/files\/breast-milk-storage-bags-980456.jpg?v=1714967949"},"aspect_ratio":1.0,"height":2048,"media_type":"image","src":"\/\/www.thebirthstore.com.au\/cdn\/shop\/files\/breast-milk-storage-bags-980456.jpg?v=1714967949","width":2048},{"alt":"Breast Milk Storage Bags - The Birth Store-Milky Goodness","id":27007579979965,"position":2,"preview_image":{"aspect_ratio":1.0,"height":900,"width":900,"src":"\/\/www.thebirthstore.com.au\/cdn\/shop\/files\/breast-milk-storage-bags-839704.jpg?v=1714967949"},"aspect_ratio":1.0,"height":900,"media_type":"image","src":"\/\/www.thebirthstore.com.au\/cdn\/shop\/files\/breast-milk-storage-bags-839704.jpg?v=1714967949","width":900},{"alt":"Breast Milk Storage Bags - The Birth Store-Milky Goodness","id":27007580012733,"position":3,"preview_image":{"aspect_ratio":1.0,"height":750,"width":750,"src":"\/\/www.thebirthstore.com.au\/cdn\/shop\/files\/breast-milk-storage-bags-365203.jpg?v=1714967949"},"aspect_ratio":1.0,"height":750,"media_type":"image","src":"\/\/www.thebirthstore.com.au\/cdn\/shop\/files\/breast-milk-storage-bags-365203.jpg?v=1714967949","width":750}],"requires_selling_plan":false,"selling_plan_groups":[],"content":"\u003cp\u003eMilky Goodness Breast Milk Storage Bags allows you to safely refrigerate or freeze your breast milk. These storage bags are pre-sterilized and are ready to use. With a dual zip preventing any milk leakage. Made with a durable material that allows for freezing, heating, thawing \u0026amp; transportation. A designated area for making note of expressed date, expiration date \u0026amp; volume. Each bag is designed with the capability of self standing or laying flat to optimize freezer space. Made free from BPA\u003c\/p\u003e\n\u003cp\u003eEach box contains 25 breast milk storage bags with a 180ml capacity.\u003c\/p\u003e"},"options":[{"name":"Title","position":1,"values":["Default Title"]}],"custom_metafields":{},"metafields":{"badge":"\u003cdiv style='display:none' class='jdgm-prev-badge' data-average-rating='0.00' data-number-of-reviews='0' data-number-of-questions='0'\u003e \u003cspan class='jdgm-prev-badge__stars' data-score='0.00' tabindex='0' aria-label='0.00 stars' role='button'\u003e \u003cspan class='jdgm-star jdgm--off'\u003e\u003c\/span\u003e\u003cspan class='jdgm-star jdgm--off'\u003e\u003c\/span\u003e\u003cspan class='jdgm-star jdgm--off'\u003e\u003c\/span\u003e\u003cspan class='jdgm-star jdgm--off'\u003e\u003c\/span\u003e\u003cspan class='jdgm-star jdgm--off'\u003e\u003c\/span\u003e \u003c\/span\u003e \u003cspan class='jdgm-prev-badge__text'\u003e No reviews \u003c\/span\u003e \u003c\/div\u003e","widget":"\u003cdiv class='jdgm-rev-widg' data-updated-at='2025-06-13T16:12:53Z' data-average-rating='0.00' data-number-of-reviews='0' data-number-of-questions='0'\u003e \u003cstyle class='jdgm-temp-hiding-style'\u003e.jdgm-rev-widg{ display: none }\u003c\/style\u003e \u003cdiv class='jdgm-rev-widg__header'\u003e \u003ch2 class='jdgm-rev-widg__title'\u003eCustomer Reviews\u003c\/h2\u003e \u003cdiv class='jdgm-rev-widg__summary'\u003e \u003cdiv class='jdgm-rev-widg__summary-stars' aria-label='Average rating is 0.00 stars' role='img'\u003e \u003cspan class='jdgm-star jdgm--off'\u003e\u003c\/span\u003e\u003cspan class='jdgm-star jdgm--off'\u003e\u003c\/span\u003e\u003cspan class='jdgm-star jdgm--off'\u003e\u003c\/span\u003e\u003cspan class='jdgm-star jdgm--off'\u003e\u003c\/span\u003e\u003cspan class='jdgm-star jdgm--off'\u003e\u003c\/span\u003e \u003c\/div\u003e \u003cdiv class='jdgm-rev-widg__summary-text'\u003eBe the first to write a review\u003c\/div\u003e \u003c\/div\u003e \u003ca style='display: none' href='#' class='jdgm-write-rev-link' role='button'\u003eWrite a review\u003c\/a\u003e \u003cdiv class='jdgm-histogram jdgm-temp-hidden'\u003e \u003cdiv class='jdgm-histogram__row' data-rating='5' data-frequency='0' data-percentage='0'\u003e \u003cdiv class='jdgm-histogram__star' role='button' aria-label=\"0% (0) reviews with 5 star rating\" tabindex='0' \u003e\u003cspan class='jdgm-star jdgm--on'\u003e\u003c\/span\u003e\u003cspan class='jdgm-star jdgm--on'\u003e\u003c\/span\u003e\u003cspan class='jdgm-star jdgm--on'\u003e\u003c\/span\u003e\u003cspan class='jdgm-star jdgm--on'\u003e\u003c\/span\u003e\u003cspan class='jdgm-star jdgm--on'\u003e\u003c\/span\u003e\u003c\/div\u003e \u003cdiv class='jdgm-histogram__bar'\u003e \u003cdiv class='jdgm-histogram__bar-content' style='width: 0%;'\u003e \u003c\/div\u003e \u003c\/div\u003e \u003cdiv class='jdgm-histogram__percentage'\u003e0%\u003c\/div\u003e \u003cdiv class='jdgm-histogram__frequency'\u003e(0)\u003c\/div\u003e \u003c\/div\u003e \u003cdiv class='jdgm-histogram__row' data-rating='4' data-frequency='0' data-percentage='0'\u003e \u003cdiv class='jdgm-histogram__star' role='button' aria-label=\"0% (0) reviews with 4 star rating\" tabindex='0' \u003e\u003cspan class='jdgm-star jdgm--on'\u003e\u003c\/span\u003e\u003cspan class='jdgm-star jdgm--on'\u003e\u003c\/span\u003e\u003cspan class='jdgm-star jdgm--on'\u003e\u003c\/span\u003e\u003cspan class='jdgm-star jdgm--on'\u003e\u003c\/span\u003e\u003cspan class='jdgm-star jdgm--off'\u003e\u003c\/span\u003e\u003c\/div\u003e \u003cdiv class='jdgm-histogram__bar'\u003e \u003cdiv class='jdgm-histogram__bar-content' style='width: 0%;'\u003e \u003c\/div\u003e \u003c\/div\u003e \u003cdiv class='jdgm-histogram__percentage'\u003e0%\u003c\/div\u003e \u003cdiv class='jdgm-histogram__frequency'\u003e(0)\u003c\/div\u003e \u003c\/div\u003e \u003cdiv class='jdgm-histogram__row' data-rating='3' data-frequency='0' data-percentage='0'\u003e \u003cdiv class='jdgm-histogram__star' role='button' aria-label=\"0% (0) reviews with 3 star rating\" tabindex='0' \u003e\u003cspan class='jdgm-star jdgm--on'\u003e\u003c\/span\u003e\u003cspan class='jdgm-star jdgm--on'\u003e\u003c\/span\u003e\u003cspan class='jdgm-star jdgm--on'\u003e\u003c\/span\u003e\u003cspan class='jdgm-star jdgm--off'\u003e\u003c\/span\u003e\u003cspan class='jdgm-star jdgm--off'\u003e\u003c\/span\u003e\u003c\/div\u003e \u003cdiv class='jdgm-histogram__bar'\u003e \u003cdiv class='jdgm-histogram__bar-content' style='width: 0%;'\u003e \u003c\/div\u003e \u003c\/div\u003e \u003cdiv class='jdgm-histogram__percentage'\u003e0%\u003c\/div\u003e \u003cdiv class='jdgm-histogram__frequency'\u003e(0)\u003c\/div\u003e \u003c\/div\u003e \u003cdiv class='jdgm-histogram__row' data-rating='2' data-frequency='0' data-percentage='0'\u003e \u003cdiv class='jdgm-histogram__star' role='button' aria-label=\"0% (0) reviews with 2 star rating\" tabindex='0' \u003e\u003cspan class='jdgm-star jdgm--on'\u003e\u003c\/span\u003e\u003cspan class='jdgm-star jdgm--on'\u003e\u003c\/span\u003e\u003cspan class='jdgm-star jdgm--off'\u003e\u003c\/span\u003e\u003cspan class='jdgm-star jdgm--off'\u003e\u003c\/span\u003e\u003cspan class='jdgm-star jdgm--off'\u003e\u003c\/span\u003e\u003c\/div\u003e \u003cdiv class='jdgm-histogram__bar'\u003e \u003cdiv class='jdgm-histogram__bar-content' style='width: 0%;'\u003e \u003c\/div\u003e \u003c\/div\u003e \u003cdiv class='jdgm-histogram__percentage'\u003e0%\u003c\/div\u003e \u003cdiv class='jdgm-histogram__frequency'\u003e(0)\u003c\/div\u003e \u003c\/div\u003e \u003cdiv class='jdgm-histogram__row' data-rating='1' data-frequency='0' data-percentage='0'\u003e \u003cdiv class='jdgm-histogram__star' role='button' aria-label=\"0% (0) reviews with 1 star rating\" tabindex='0' \u003e\u003cspan class='jdgm-star jdgm--on'\u003e\u003c\/span\u003e\u003cspan class='jdgm-star jdgm--off'\u003e\u003c\/span\u003e\u003cspan class='jdgm-star jdgm--off'\u003e\u003c\/span\u003e\u003cspan class='jdgm-star jdgm--off'\u003e\u003c\/span\u003e\u003cspan class='jdgm-star jdgm--off'\u003e\u003c\/span\u003e\u003c\/div\u003e \u003cdiv class='jdgm-histogram__bar'\u003e \u003cdiv class='jdgm-histogram__bar-content' style='width: 0%;'\u003e \u003c\/div\u003e \u003c\/div\u003e \u003cdiv class='jdgm-histogram__percentage'\u003e0%\u003c\/div\u003e \u003cdiv class='jdgm-histogram__frequency'\u003e(0)\u003c\/div\u003e \u003c\/div\u003e \u003cdiv class='jdgm-histogram__row jdgm-histogram__clear-filter' data-rating=null tabindex='0'\u003e\u003c\/div\u003e \u003c\/div\u003e \u003cdiv class='jdgm-rev-widg__sort-wrapper'\u003e\u003c\/div\u003e \u003c\/div\u003e \u003cdiv class='jdgm-rev-widg__body'\u003e \u003cdiv class='jdgm-rev-widg__reviews'\u003e\u003c\/div\u003e \u003cdiv class='jdgm-paginate' data-per-page='10' data-url='https:\/\/api.judge.me\/reviews\/reviews_for_widget' style=\"display: none;\"\u003e\u003c\/div\u003e \u003c\/div\u003e \u003cdiv class='jdgm-rev-widg__paginate-spinner-wrapper'\u003e \u003cdiv class='jdgm-spinner'\u003e\u003c\/div\u003e \u003c\/div\u003e \u003c\/div\u003e"},"collections":[{"id":281712427197,"handle":"breastfeeding","title":"Breastfeeding","updated_at":"2025-12-28T20:10:01+08:00","body_html":"","published_at":"2021-12-20T14:19:33+08:00","sort_order":"best-selling","template_suffix":"breastfeeding-collection","disjunctive":false,"rules":[{"column":"tag","relation":"equals","condition":"Breastfeeding"}],"published_scope":"global","image":{"created_at":"2024-05-06T11:59:34+08:00","alt":"Breastfeeding - The Birth Store","width":620,"height":635,"src":"\/\/www.thebirthstore.com.au\/cdn\/shop\/collections\/breastfeeding-793872.jpg?v=1714967974"}},{"id":261657460925,"handle":"buy","title":"Buy","updated_at":"2025-12-28T20:10:01+08:00","body_html":"\u003cp\u003eBrowse all of our pregnancy, labour \u0026amp; birth, postpartum and baby essentials here.\u003cbr\u003e\u003c\/p\u003e\n\u003cp\u003e\u003cspan\u003eYou can even buy now and pay later with Afterpay!\u003c\/span\u003e\u003c\/p\u003e","published_at":"2021-03-10T12:05:31+08:00","sort_order":"best-selling","template_suffix":"shop-all-collection","disjunctive":false,"rules":[{"column":"title","relation":"not_contains","condition":"Hire"}],"published_scope":"global","image":{"created_at":"2024-05-06T11:59:42+08:00","alt":"Buy - The Birth Store","width":2048,"height":2048,"src":"\/\/www.thebirthstore.com.au\/cdn\/shop\/collections\/buy-964856.jpg?v=1714967982"}},{"id":292919476413,"handle":"lactation-products","title":"Lactation Products","updated_at":"2025-12-28T20:10:01+08:00","body_html":"","published_at":"2023-03-22T12:22:41+08:00","sort_order":"best-selling","template_suffix":"lactation-products-collec","disjunctive":false,"rules":[{"column":"tag","relation":"equals","condition":"Lactation Products"}],"published_scope":"global","image":{"created_at":"2024-05-06T12:00:19+08:00","alt":"Lactation Products - The Birth Store","width":1034,"height":922,"src":"\/\/www.thebirthstore.com.au\/cdn\/shop\/collections\/lactation-products-752907.jpg?v=1714968019"}},{"id":291456483517,"handle":"shop-all","title":"Shop All - Mum","updated_at":"2025-12-28T20:10:01+08:00","body_html":"","published_at":"2022-12-23T22:04:39+08:00","sort_order":"best-selling","template_suffix":"shop-all-collection","disjunctive":false,"rules":[{"column":"variant_price","relation":"greater_than","condition":"1"},{"column":"title","relation":"not_contains","condition":"Batteries"},{"column":"tag","relation":"equals","condition":"Mum"}],"published_scope":"global","image":{"created_at":"2024-05-06T12:00:54+08:00","alt":"Shop All - The Birth Store","width":1365,"height":2048,"src":"\/\/www.thebirthstore.com.au\/cdn\/shop\/collections\/shop-all-693176.jpg?v=1714968055"}},{"id":310045933757,"handle":"shop-all-sale","title":"Shop All Sale","updated_at":"2025-12-28T20:10:01+08:00","body_html":"","published_at":"2024-11-12T13:22:43+08:00","sort_order":"alpha-asc","template_suffix":"","disjunctive":true,"rules":[{"column":"tag","relation":"equals","condition":"Bundles"},{"column":"vendor","relation":"equals","condition":"Franjos Kitchen"},{"column":"vendor","relation":"equals","condition":"Adored Illustrations"},{"column":"vendor","relation":"equals","condition":"Amazing Oils"},{"column":"vendor","relation":"equals","condition":"Ice Ice Booby"},{"column":"vendor","relation":"equals","condition":"Made to Milk"},{"column":"vendor","relation":"equals","condition":"Milky Goodness"},{"column":"vendor","relation":"equals","condition":"Seasons of Mama"},{"column":"vendor","relation":"equals","condition":"Silverette"},{"column":"vendor","relation":"equals","condition":"Snuggle Hunny"},{"column":"vendor","relation":"equals","condition":"Yung Bod"},{"column":"vendor","relation":"equals","condition":"Bare Love"},{"column":"vendor","relation":"equals","condition":"Haakaa"},{"column":"vendor","relation":"equals","condition":"Mere Botanicals"},{"column":"vendor","relation":"equals","condition":"The Birth Store Hire"},{"column":"vendor","relation":"equals","condition":"The Birth Store"}],"published_scope":"global","image":{"created_at":"2024-11-13T10:58:16+08:00","alt":"Shop All Sale - The Birth Store","width":2048,"height":1365,"src":"\/\/www.thebirthstore.com.au\/cdn\/shop\/collections\/shop-all-sale-297361.jpg?v=1731466697"}}]}
[{"alt":"Breast Milk Storage Bags - The Birth Store-Milky Goodness","id":27007579947197,"position":1,"preview_image":{"aspect_ratio":1.0,"height":2048,"width":2048,"src":"\/\/www.thebirthstore.com.au\/cdn\/shop\/files\/breast-milk-storage-bags-980456.jpg?v=1714967949"},"aspect_ratio":1.0,"height":2048,"media_type":"image","src":"\/\/www.thebirthstore.com.au\/cdn\/shop\/files\/breast-milk-storage-bags-980456.jpg?v=1714967949","width":2048},{"alt":"Breast Milk Storage Bags - The Birth Store-Milky Goodness","id":27007579979965,"position":2,"preview_image":{"aspect_ratio":1.0,"height":900,"width":900,"src":"\/\/www.thebirthstore.com.au\/cdn\/shop\/files\/breast-milk-storage-bags-839704.jpg?v=1714967949"},"aspect_ratio":1.0,"height":900,"media_type":"image","src":"\/\/www.thebirthstore.com.au\/cdn\/shop\/files\/breast-milk-storage-bags-839704.jpg?v=1714967949","width":900},{"alt":"Breast Milk Storage Bags - The Birth Store-Milky Goodness","id":27007580012733,"position":3,"preview_image":{"aspect_ratio":1.0,"height":750,"width":750,"src":"\/\/www.thebirthstore.com.au\/cdn\/shop\/files\/breast-milk-storage-bags-365203.jpg?v=1714967949"},"aspect_ratio":1.0,"height":750,"media_type":"image","src":"\/\/www.thebirthstore.com.au\/cdn\/shop\/files\/breast-milk-storage-bags-365203.jpg?v=1714967949","width":750}]
{"item":{"id":7455574130877,"title":"Breast Milk Storage Magnet","handle":"breast-milk-storage-magnet","description":"\u003cp\u003eKeep this baby on your fridge!\u003cbr\u003eYou will never have to wonder again...\u003c\/p\u003e\n\u003cp\u003eHaving the correct temps \u0026amp; time frames available for breast milk storage is key to ensuring you never waste a precious drop of your breast milk.\u003c\/p\u003e\n\u003cp\u003eThis is the perfect addition to a baby shower gift, take a look at the rest of our breastfeeding range to find many other great products to go along with this.\u003c\/p\u003e","published_at":"2023-03-22T12:21:10+08:00","created_at":"2023-03-22T12:21:10+08:00","vendor":"Milky Goodness","type":"","tags":["Breastfeeding","Mum"],"price":300,"price_min":300,"price_max":300,"available":true,"price_varies":false,"compare_at_price":null,"compare_at_price_min":0,"compare_at_price_max":0,"compare_at_price_varies":false,"variants":[{"id":42739908739261,"title":"Default Title","option1":"Default Title","option2":null,"option3":null,"sku":"","requires_shipping":true,"taxable":false,"featured_image":null,"available":true,"name":"Breast Milk Storage Magnet","public_title":null,"options":["Default Title"],"price":300,"weight":21,"compare_at_price":null,"inventory_management":"shopify","barcode":"08739261","requires_selling_plan":false,"selling_plan_allocations":[]}],"images":["\/\/www.thebirthstore.com.au\/cdn\/shop\/files\/breast-milk-storage-magnet-799280.jpg?v=1714967948","\/\/www.thebirthstore.com.au\/cdn\/shop\/files\/breast-milk-storage-magnet-543956.jpg?v=1714967948"],"featured_image":"\/\/www.thebirthstore.com.au\/cdn\/shop\/files\/breast-milk-storage-magnet-799280.jpg?v=1714967948","options":["Title"],"media":[{"alt":"Breast Milk Storage Magnet - The Birth Store-Milky Goodness","id":27007579717821,"position":1,"preview_image":{"aspect_ratio":1.0,"height":2048,"width":2048,"src":"\/\/www.thebirthstore.com.au\/cdn\/shop\/files\/breast-milk-storage-magnet-799280.jpg?v=1714967948"},"aspect_ratio":1.0,"height":2048,"media_type":"image","src":"\/\/www.thebirthstore.com.au\/cdn\/shop\/files\/breast-milk-storage-magnet-799280.jpg?v=1714967948","width":2048},{"alt":"Breast Milk Storage Magnet - The Birth Store-Milky Goodness","id":27007579783357,"position":2,"preview_image":{"aspect_ratio":1.125,"height":513,"width":577,"src":"\/\/www.thebirthstore.com.au\/cdn\/shop\/files\/breast-milk-storage-magnet-543956.jpg?v=1714967948"},"aspect_ratio":1.125,"height":513,"media_type":"image","src":"\/\/www.thebirthstore.com.au\/cdn\/shop\/files\/breast-milk-storage-magnet-543956.jpg?v=1714967948","width":577}],"requires_selling_plan":false,"selling_plan_groups":[],"content":"\u003cp\u003eKeep this baby on your fridge!\u003cbr\u003eYou will never have to wonder again...\u003c\/p\u003e\n\u003cp\u003eHaving the correct temps \u0026amp; time frames available for breast milk storage is key to ensuring you never waste a precious drop of your breast milk.\u003c\/p\u003e\n\u003cp\u003eThis is the perfect addition to a baby shower gift, take a look at the rest of our breastfeeding range to find many other great products to go along with this.\u003c\/p\u003e"},"options":[{"name":"Title","position":1,"values":["Default Title"]}],"custom_metafields":{},"metafields":{"badge":"\u003cdiv style='display:none' class='jdgm-prev-badge' data-average-rating='5.00' data-number-of-reviews='1' data-number-of-questions='0'\u003e \u003cspan class='jdgm-prev-badge__stars' data-score='5.00' tabindex='0' aria-label='5.00 stars' role='button'\u003e \u003cspan class='jdgm-star jdgm--on'\u003e\u003c\/span\u003e\u003cspan class='jdgm-star jdgm--on'\u003e\u003c\/span\u003e\u003cspan class='jdgm-star jdgm--on'\u003e\u003c\/span\u003e\u003cspan class='jdgm-star jdgm--on'\u003e\u003c\/span\u003e\u003cspan class='jdgm-star jdgm--on'\u003e\u003c\/span\u003e \u003c\/span\u003e \u003cspan class='jdgm-prev-badge__text'\u003e 1 review \u003c\/span\u003e \u003c\/div\u003e","review_snippet_widget":"\u003cdiv class='jdgm-widget jdgm-review-snippet-widget'\u003e \u003cstyle\u003e\n .jdgm-review-snippet-widget{position:relative}.jdgm-review-snippet-widget:hover{cursor:pointer}@media only screen and (max-width: 767px){.jdgm-review-snippet-widget .jdgm-rev-snippet-widget__cards-container{left:unset;right:unset}}.jdgm-review-snippet-widget .jdgm-rev-snippet-card{background:#fff}.jdgm-review-snippet-widget .jdgm-star{color:#399}.jdgm-review-snippet-widget .jdgm-rev-snippet-card{border-radius:8px;background:#fff}.jdgm-review-snippet-widget .jdgm-rev-snippet-card__rev-prod-wrapper{border-radius:8px}.jdgm-review-snippet-widget .jdgm-rev-snippet-card__rev-content-wrapper{max-width:360px}.jdgm-review-snippet-widget .jdgm-rev-snippet-widget__prev-btn,.jdgm-review-snippet-widget .jdgm-rev-snippet-widget__next-btn{border-radius:50%;background:#fff}.jdgm-review-snippet-widget .jdgm-rev-snippet-widget__prev-btn\u003esvg,.jdgm-review-snippet-widget .jdgm-rev-snippet-widget__next-btn\u003esvg{fill:#000}.jdgm-review-snippet-widget .jdgm-rev-snippet-widget__prev-btn{left:0;top:40%}.jdgm-review-snippet-widget .jdgm-rev-snippet-widget__next-btn{right:0;top:40%}.jdgm-full-rev-modal.review-snippet-widget .jm-mfp-content{border-radius:8px}.jdgm-full-rev-modal.review-snippet-widget .jdgm-full-rev__icon{border-radius:8px}.jdgm-full-rev-modal.review-snippet-widget .jdgm-full-rev[data-verified-buyer=\"true\"] .jdgm-full-rev__icon::after{border-radius:8px}.jdgm-full-rev-modal.review-snippet-widget .jdgm-rev__buyer-badge{border-radius:calc( 8px \/ 2 )}.jdgm-full-rev-modal.review-snippet-widget .jdgm-full-rev__pic-img{border-radius:8px}.jdgm-full-rev-modal.review-snippet-widget .jdgm-full-rev__reply{border-radius:8px}.jdgm-full-rev-modal.review-snippet-widget .jdgm-full-rev__replier::before{content:'thebirthstore.com.au'}.jdgm-full-rev-modal.review-snippet-widget .jdgm-full-rev__product-button{border-radius:calc( 8px * 6 )}\n\n \u003c\/style\u003e \u003ci class=\"jdgm-rev-snippet-widget__prev-btn\" style='display: none;'\u003e \u003csvg xmlns=\"http:\/\/www.w3.org\/2000\/svg\" height=\"12\" viewBox=\"0 0 8 12\" width=\"8\" fill=\"#000\"\u003e\u003cpath d=\"M3.09961 6.00005L6.99961 9.90005C7.18294 10.0834 7.27461 10.3167 7.27461 10.6C7.27461 10.8834 7.18294 11.1167 6.99961 11.3C6.81628 11.4834 6.58294 11.575 6.29961 11.575C6.01628 11.575 5.78294 11.4834 5.59961 11.3L0.999609 6.70005C0.899609 6.60005 0.828776 6.49172 0.787109 6.37505C0.745443 6.25838 0.724609 6.13338 0.724609 6.00005C0.724609 5.86672 0.745443 5.74172 0.787109 5.62505C0.828776 5.50838 0.899609 5.40005 0.999609 5.30005L5.59961 0.700049C5.78294 0.516715 6.01628 0.425049 6.29961 0.425049C6.58294 0.425049 6.81628 0.516715 6.99961 0.700049C7.18294 0.883382 7.27461 1.11672 7.27461 1.40005C7.27461 1.68338 7.18294 1.91672 6.99961 2.10005L3.09961 6.00005Z\"\/\u003e\u003c\/svg\u003e \u003c\/i\u003e \u003ci class=\"jdgm-rev-snippet-widget__next-btn\" style='display: none;'\u003e \u003csvg xmlns=\"http:\/\/www.w3.org\/2000\/svg\" height=\"12\" viewBox=\"0 0 8 12\" width=\"8\" fill=\"#000\"\u003e\u003cpath d=\"M4.89961 6.00005L0.999609 2.10005C0.816276 1.91672 0.724609 1.68338 0.724609 1.40005C0.724609 1.11672 0.816276 0.883382 0.999609 0.700049C1.18294 0.516715 1.41628 0.425049 1.69961 0.425049C1.98294 0.425049 2.21628 0.516715 2.39961 0.700049L6.99961 5.30005C7.09961 5.40005 7.17044 5.50838 7.21211 5.62505C7.25378 5.74172 7.27461 5.86672 7.27461 6.00005C7.27461 6.13338 7.25378 6.25838 7.21211 6.37505C7.17044 6.49172 7.09961 6.60005 6.99961 6.70005L2.39961 11.3C2.21628 11.4834 1.98294 11.575 1.69961 11.575C1.41628 11.575 1.18294 11.4834 0.999609 11.3C0.816276 11.1167 0.724609 10.8834 0.724609 10.6C0.724609 10.3167 0.816276 10.0834 0.999609 9.90005L4.89961 6.00005Z\"\/\u003e\u003c\/svg\u003e \u003c\/i\u003e \u003cdiv style=\"overflow: hidden;\"\u003e \u003cdiv class='jdgm-rev-snippet-widget__cards-container'\u003e \u003cdiv class='jdgm-rev-snippet-card' data-review-id='3151ff80-356d-5a6a-a5f0-bbbd8d4f84f4' style='display: none;'\u003e \u003cdiv class=\"jdgm-rev-snippet-card__rev-prod-wrapper\"\u003e \u003ca class='jdgm-rev-snippet-card__rev-content-wrapper jdgm-rev-snippet-card__full-review-link' style='text-decoration: none; color: inherit;padding: 0 34px;' role='button' data-review-id='3151ff80-356d-5a6a-a5f0-bbbd8d4f84f4'\u003e \u003cdiv class='jdgm-rev-snippet-card__rev-header'\u003e \u003cdiv class='jdgm-rev-snippet-card__rev-rating' aria-label='5 stars' role='img'\u003e \u003cspan class='jdgm-star jdgm--on'\u003e\u003c\/span\u003e\u003cspan class='jdgm-star jdgm--on'\u003e\u003c\/span\u003e\u003cspan class='jdgm-star jdgm--on'\u003e\u003c\/span\u003e\u003cspan class='jdgm-star jdgm--on'\u003e\u003c\/span\u003e\u003cspan class='jdgm-star jdgm--on'\u003e\u003c\/span\u003e \u003c\/div\u003e \u003cdiv class='jdgm-rev-snippet-card__reviewer'\u003e Linda \u003c\/div\u003e \u003c\/div\u003e \u003cdiv class='jdgm-rev-snippet-card__rev-content'\u003e \u003cspan class='jdgm-rev-snippet-card__rev-body'\u003e \u003cp\u003eHandy guide to have\u003c\/p\u003e \u003c\/span\u003e \u003c\/div\u003e \u003c\/a\u003e \u003c\/div\u003e \u003c\/div\u003e \u003c\/div\u003e \u003c\/div\u003e \u003c\/div\u003e","widget":"\u003cdiv class='jdgm-rev-widg' data-updated-at='2025-06-13T16:12:53Z' data-average-rating='5.00' data-number-of-reviews='1' data-number-of-questions='0'\u003e \u003cstyle class='jdgm-temp-hiding-style'\u003e.jdgm-rev-widg{ display: none }\u003c\/style\u003e \u003cdiv class='jdgm-rev-widg__header'\u003e \u003ch2 class='jdgm-rev-widg__title'\u003eCustomer Reviews\u003c\/h2\u003e \u003cdiv class='jdgm-rev-widg__summary'\u003e \u003cdiv class='jdgm-rev-widg__summary-stars' aria-label='Average rating is 5.00 stars' role='img'\u003e \u003cspan class='jdgm-star jdgm--on'\u003e\u003c\/span\u003e\u003cspan class='jdgm-star jdgm--on'\u003e\u003c\/span\u003e\u003cspan class='jdgm-star jdgm--on'\u003e\u003c\/span\u003e\u003cspan class='jdgm-star jdgm--on'\u003e\u003c\/span\u003e\u003cspan class='jdgm-star jdgm--on'\u003e\u003c\/span\u003e \u003c\/div\u003e \u003cdiv class='jdgm-rev-widg__summary-text'\u003eBased on 1 review\u003c\/div\u003e \u003c\/div\u003e \u003ca style='display: none' href='#' class='jdgm-write-rev-link' role='button'\u003eWrite a review\u003c\/a\u003e \u003cdiv class='jdgm-histogram jdgm-temp-hidden'\u003e \u003cdiv class='jdgm-histogram__row' data-rating='5' data-frequency='1' data-percentage='100'\u003e \u003cdiv class='jdgm-histogram__star' role='button' aria-label=\"100% (1) reviews with 5 star rating\" tabindex='0' \u003e\u003cspan class='jdgm-star jdgm--on'\u003e\u003c\/span\u003e\u003cspan class='jdgm-star jdgm--on'\u003e\u003c\/span\u003e\u003cspan class='jdgm-star jdgm--on'\u003e\u003c\/span\u003e\u003cspan class='jdgm-star jdgm--on'\u003e\u003c\/span\u003e\u003cspan class='jdgm-star jdgm--on'\u003e\u003c\/span\u003e\u003c\/div\u003e \u003cdiv class='jdgm-histogram__bar'\u003e \u003cdiv class='jdgm-histogram__bar-content' style='width: 100%;'\u003e \u003c\/div\u003e \u003c\/div\u003e \u003cdiv class='jdgm-histogram__percentage'\u003e100%\u003c\/div\u003e \u003cdiv class='jdgm-histogram__frequency'\u003e(1)\u003c\/div\u003e \u003c\/div\u003e \u003cdiv class='jdgm-histogram__row' data-rating='4' data-frequency='0' data-percentage='0'\u003e \u003cdiv class='jdgm-histogram__star' role='button' aria-label=\"0% (0) reviews with 4 star rating\" tabindex='0' \u003e\u003cspan class='jdgm-star jdgm--on'\u003e\u003c\/span\u003e\u003cspan class='jdgm-star jdgm--on'\u003e\u003c\/span\u003e\u003cspan class='jdgm-star jdgm--on'\u003e\u003c\/span\u003e\u003cspan class='jdgm-star jdgm--on'\u003e\u003c\/span\u003e\u003cspan class='jdgm-star jdgm--off'\u003e\u003c\/span\u003e\u003c\/div\u003e \u003cdiv class='jdgm-histogram__bar'\u003e \u003cdiv class='jdgm-histogram__bar-content' style='width: 0%;'\u003e \u003c\/div\u003e \u003c\/div\u003e \u003cdiv class='jdgm-histogram__percentage'\u003e0%\u003c\/div\u003e \u003cdiv class='jdgm-histogram__frequency'\u003e(0)\u003c\/div\u003e \u003c\/div\u003e \u003cdiv class='jdgm-histogram__row' data-rating='3' data-frequency='0' data-percentage='0'\u003e \u003cdiv class='jdgm-histogram__star' role='button' aria-label=\"0% (0) reviews with 3 star rating\" tabindex='0' \u003e\u003cspan class='jdgm-star jdgm--on'\u003e\u003c\/span\u003e\u003cspan class='jdgm-star jdgm--on'\u003e\u003c\/span\u003e\u003cspan class='jdgm-star jdgm--on'\u003e\u003c\/span\u003e\u003cspan class='jdgm-star jdgm--off'\u003e\u003c\/span\u003e\u003cspan class='jdgm-star jdgm--off'\u003e\u003c\/span\u003e\u003c\/div\u003e \u003cdiv class='jdgm-histogram__bar'\u003e \u003cdiv class='jdgm-histogram__bar-content' style='width: 0%;'\u003e \u003c\/div\u003e \u003c\/div\u003e \u003cdiv class='jdgm-histogram__percentage'\u003e0%\u003c\/div\u003e \u003cdiv class='jdgm-histogram__frequency'\u003e(0)\u003c\/div\u003e \u003c\/div\u003e \u003cdiv class='jdgm-histogram__row' data-rating='2' data-frequency='0' data-percentage='0'\u003e \u003cdiv class='jdgm-histogram__star' role='button' aria-label=\"0% (0) reviews with 2 star rating\" tabindex='0' \u003e\u003cspan class='jdgm-star jdgm--on'\u003e\u003c\/span\u003e\u003cspan class='jdgm-star jdgm--on'\u003e\u003c\/span\u003e\u003cspan class='jdgm-star jdgm--off'\u003e\u003c\/span\u003e\u003cspan class='jdgm-star jdgm--off'\u003e\u003c\/span\u003e\u003cspan class='jdgm-star jdgm--off'\u003e\u003c\/span\u003e\u003c\/div\u003e \u003cdiv class='jdgm-histogram__bar'\u003e \u003cdiv class='jdgm-histogram__bar-content' style='width: 0%;'\u003e \u003c\/div\u003e \u003c\/div\u003e \u003cdiv class='jdgm-histogram__percentage'\u003e0%\u003c\/div\u003e \u003cdiv class='jdgm-histogram__frequency'\u003e(0)\u003c\/div\u003e \u003c\/div\u003e \u003cdiv class='jdgm-histogram__row' data-rating='1' data-frequency='0' data-percentage='0'\u003e \u003cdiv class='jdgm-histogram__star' role='button' aria-label=\"0% (0) reviews with 1 star rating\" tabindex='0' \u003e\u003cspan class='jdgm-star jdgm--on'\u003e\u003c\/span\u003e\u003cspan class='jdgm-star jdgm--off'\u003e\u003c\/span\u003e\u003cspan class='jdgm-star jdgm--off'\u003e\u003c\/span\u003e\u003cspan class='jdgm-star jdgm--off'\u003e\u003c\/span\u003e\u003cspan class='jdgm-star jdgm--off'\u003e\u003c\/span\u003e\u003c\/div\u003e \u003cdiv class='jdgm-histogram__bar'\u003e \u003cdiv class='jdgm-histogram__bar-content' style='width: 0%;'\u003e \u003c\/div\u003e \u003c\/div\u003e \u003cdiv class='jdgm-histogram__percentage'\u003e0%\u003c\/div\u003e \u003cdiv class='jdgm-histogram__frequency'\u003e(0)\u003c\/div\u003e \u003c\/div\u003e \u003cdiv class='jdgm-histogram__row jdgm-histogram__clear-filter' data-rating=null tabindex='0'\u003e\u003c\/div\u003e \u003c\/div\u003e \u003cdiv class='jdgm-rev-widg__sort-wrapper'\u003e\u003c\/div\u003e \u003c\/div\u003e \u003cdiv class='jdgm-rev-widg__body'\u003e \u003cdiv class='jdgm-rev-widg__reviews'\u003e\u003cdiv class='jdgm-rev jdgm-divider-top' data-verified-buyer='true' data-review-id='3151ff80-356d-5a6a-a5f0-bbbd8d4f84f4' data-review-language='' data-product-title='Breast Milk Storage Magnet' data-product-url='\/products\/breast-milk-storage-magnet' data-thumb-up-count='0' data-thumb-down-count='0'\u003e \u003cdiv class='jdgm-rev__header'\u003e \u003cdiv class='jdgm-rev__icon' \u003e E \u003c\/div\u003e \u003cspan class='jdgm-rev__rating' data-score='5' tabindex='0' aria-label='5 star review' role='img'\u003e \u003cspan class='jdgm-star jdgm--on'\u003e\u003c\/span\u003e\u003cspan class='jdgm-star jdgm--on'\u003e\u003c\/span\u003e\u003cspan class='jdgm-star jdgm--on'\u003e\u003c\/span\u003e\u003cspan class='jdgm-star jdgm--on'\u003e\u003c\/span\u003e\u003cspan class='jdgm-star jdgm--on'\u003e\u003c\/span\u003e \u003c\/span\u003e \u003cspan class='jdgm-rev__timestamp jdgm-spinner' data-content='2024-08-18 02:19:08 UTC'\u003e\u003c\/span\u003e \u003cdiv class='jdgm-rev__br'\u003e\u003c\/div\u003e \u003cspan class='jdgm-rev__buyer-badge-wrapper'\u003e \u003cspan class='jdgm-rev__buyer-badge'\u003e\u003c\/span\u003e \u003c\/span\u003e \u003cspan class='jdgm-rev__author-wrapper'\u003e \u003cspan class='jdgm-rev__author'\u003eEmma\u003c\/span\u003e \u003cspan class='jdgm-rev__location' \u003e \u003c\/span\u003e \u003cspan class='jdgm-rev__source' data-source=\"shop-app\"\u003e\u003c\/span\u003e \u003c\/span\u003e \u003c\/div\u003e \u003cdiv class='jdgm-rev__content'\u003e \u003cdiv class='jdgm-rev__custom-form'\u003e \u003c\/div\u003e \u003cb class='jdgm-rev__title'\u003e\u003c\/b\u003e \u003cdiv class='jdgm-rev__body'\u003e\u003cp\u003eHandy guide to have\u003c\/p\u003e\u003c\/div\u003e \u003cdiv class='jdgm-rev__pics'\u003e \u003c\/div\u003e \u003cdiv class='jdgm-rev__vids'\u003e \u003c\/div\u003e \u003cdiv class='jdgm-rev__transparency-badge-wrapper'\u003e \u003c\/div\u003e \u003c\/div\u003e \u003cdiv class='jdgm-rev__actions'\u003e \u003cdiv class='jdgm-rev__social'\u003e\u003c\/div\u003e \u003cdiv class='jdgm-rev__votes'\u003e\u003c\/div\u003e \u003c\/div\u003e \u003cdiv class='jdgm-rev__reply'\u003e \u003c\/div\u003e \u003c\/div\u003e\u003c\/div\u003e \u003cdiv class='jdgm-paginate' data-per-page='10' data-url='https:\/\/api.judge.me\/reviews\/reviews_for_widget' style=\"display: none;\"\u003e\u003c\/div\u003e \u003c\/div\u003e \u003cdiv class='jdgm-rev-widg__paginate-spinner-wrapper'\u003e \u003cdiv class='jdgm-spinner'\u003e\u003c\/div\u003e \u003c\/div\u003e \u003c\/div\u003e"},"collections":[{"id":281712427197,"handle":"breastfeeding","title":"Breastfeeding","updated_at":"2025-12-28T20:10:01+08:00","body_html":"","published_at":"2021-12-20T14:19:33+08:00","sort_order":"best-selling","template_suffix":"breastfeeding-collection","disjunctive":false,"rules":[{"column":"tag","relation":"equals","condition":"Breastfeeding"}],"published_scope":"global","image":{"created_at":"2024-05-06T11:59:34+08:00","alt":"Breastfeeding - The Birth Store","width":620,"height":635,"src":"\/\/www.thebirthstore.com.au\/cdn\/shop\/collections\/breastfeeding-793872.jpg?v=1714967974"}},{"id":261657460925,"handle":"buy","title":"Buy","updated_at":"2025-12-28T20:10:01+08:00","body_html":"\u003cp\u003eBrowse all of our pregnancy, labour \u0026amp; birth, postpartum and baby essentials here.\u003cbr\u003e\u003c\/p\u003e\n\u003cp\u003e\u003cspan\u003eYou can even buy now and pay later with Afterpay!\u003c\/span\u003e\u003c\/p\u003e","published_at":"2021-03-10T12:05:31+08:00","sort_order":"best-selling","template_suffix":"shop-all-collection","disjunctive":false,"rules":[{"column":"title","relation":"not_contains","condition":"Hire"}],"published_scope":"global","image":{"created_at":"2024-05-06T11:59:42+08:00","alt":"Buy - The Birth Store","width":2048,"height":2048,"src":"\/\/www.thebirthstore.com.au\/cdn\/shop\/collections\/buy-964856.jpg?v=1714967982"}},{"id":291456483517,"handle":"shop-all","title":"Shop All - Mum","updated_at":"2025-12-28T20:10:01+08:00","body_html":"","published_at":"2022-12-23T22:04:39+08:00","sort_order":"best-selling","template_suffix":"shop-all-collection","disjunctive":false,"rules":[{"column":"variant_price","relation":"greater_than","condition":"1"},{"column":"title","relation":"not_contains","condition":"Batteries"},{"column":"tag","relation":"equals","condition":"Mum"}],"published_scope":"global","image":{"created_at":"2024-05-06T12:00:54+08:00","alt":"Shop All - The Birth Store","width":1365,"height":2048,"src":"\/\/www.thebirthstore.com.au\/cdn\/shop\/collections\/shop-all-693176.jpg?v=1714968055"}},{"id":310045933757,"handle":"shop-all-sale","title":"Shop All Sale","updated_at":"2025-12-28T20:10:01+08:00","body_html":"","published_at":"2024-11-12T13:22:43+08:00","sort_order":"alpha-asc","template_suffix":"","disjunctive":true,"rules":[{"column":"tag","relation":"equals","condition":"Bundles"},{"column":"vendor","relation":"equals","condition":"Franjos Kitchen"},{"column":"vendor","relation":"equals","condition":"Adored Illustrations"},{"column":"vendor","relation":"equals","condition":"Amazing Oils"},{"column":"vendor","relation":"equals","condition":"Ice Ice Booby"},{"column":"vendor","relation":"equals","condition":"Made to Milk"},{"column":"vendor","relation":"equals","condition":"Milky Goodness"},{"column":"vendor","relation":"equals","condition":"Seasons of Mama"},{"column":"vendor","relation":"equals","condition":"Silverette"},{"column":"vendor","relation":"equals","condition":"Snuggle Hunny"},{"column":"vendor","relation":"equals","condition":"Yung Bod"},{"column":"vendor","relation":"equals","condition":"Bare Love"},{"column":"vendor","relation":"equals","condition":"Haakaa"},{"column":"vendor","relation":"equals","condition":"Mere Botanicals"},{"column":"vendor","relation":"equals","condition":"The Birth Store Hire"},{"column":"vendor","relation":"equals","condition":"The Birth Store"}],"published_scope":"global","image":{"created_at":"2024-11-13T10:58:16+08:00","alt":"Shop All Sale - The Birth Store","width":2048,"height":1365,"src":"\/\/www.thebirthstore.com.au\/cdn\/shop\/collections\/shop-all-sale-297361.jpg?v=1731466697"}}]}
[{"alt":"Breast Milk Storage Magnet - The Birth Store-Milky Goodness","id":27007579717821,"position":1,"preview_image":{"aspect_ratio":1.0,"height":2048,"width":2048,"src":"\/\/www.thebirthstore.com.au\/cdn\/shop\/files\/breast-milk-storage-magnet-799280.jpg?v=1714967948"},"aspect_ratio":1.0,"height":2048,"media_type":"image","src":"\/\/www.thebirthstore.com.au\/cdn\/shop\/files\/breast-milk-storage-magnet-799280.jpg?v=1714967948","width":2048},{"alt":"Breast Milk Storage Magnet - The Birth Store-Milky Goodness","id":27007579783357,"position":2,"preview_image":{"aspect_ratio":1.125,"height":513,"width":577,"src":"\/\/www.thebirthstore.com.au\/cdn\/shop\/files\/breast-milk-storage-magnet-543956.jpg?v=1714967948"},"aspect_ratio":1.125,"height":513,"media_type":"image","src":"\/\/www.thebirthstore.com.au\/cdn\/shop\/files\/breast-milk-storage-magnet-543956.jpg?v=1714967948","width":577}]
{"item":{"id":7973358829757,"title":"Breast Recovery Ice \u0026 Heat Packs","handle":"breast-recovery-ice-heat-packs","description":"\u003cp data-pm-slice=\"1 3 []\"\u003e\u003cspan\u003eBreastfeeding is beautiful, but let’s be honest - the early days can be tough. Whether you’re navigating the early days of engorgement, managing mastitis, or just looking for a little extra comfort, our Breast Recovery Ice \u0026amp; Heat Packs are here to help you feel supported every step of the way, and with our unique plush backing, it's never been more comfortable.\u003c\/span\u003e\u003c\/p\u003e\n\u003cp\u003e\u003cspan\u003e\u003cstrong\u003eTo Help With:\u003c\/strong\u003e\u003c\/span\u003e\u003c\/p\u003e\n\u003cul data-spread=\"false\"\u003e\n\u003cli\u003e\n\u003cp\u003e\u003cspan\u003eEngorgement relief\u003c\/span\u003e\u003c\/p\u003e\n\u003c\/li\u003e\n\u003cli\u003e\n\u003cp\u003e\u003cspan\u003eMastitis and blocked ducts\u003c\/span\u003e\u003c\/p\u003e\n\u003c\/li\u003e\n\u003cli\u003e\n\u003cp\u003e\u003cspan\u003eSoothing tenderness during pumping\u003c\/span\u003e\u003c\/p\u003e\n\u003c\/li\u003e\n\u003cli\u003e\n\u003cp\u003e\u003cspan\u003eGeneral breast discomfort\u003c\/span\u003e\u003c\/p\u003e\n\u003c\/li\u003e\n\u003c\/ul\u003e\n\u003cp\u003e\u003cspan\u003e\u003cstrong\u003eFeatures:\u003c\/strong\u003e\u003c\/span\u003e\u003c\/p\u003e\n\u003cul data-spread=\"false\"\u003e\n\u003cli\u003e\n\u003cp\u003e\u003cspan\u003eDual-sided design: one side provides direct contact with ice or heat once it's cooled down, while the other has a plush backing for soft, gentle comfort when you first start using it.\u003c\/span\u003e\u003c\/p\u003e\n\u003c\/li\u003e\n\u003cli\u003e\n\u003cp\u003e\u003cspan\u003eNo need for fiddly covers — perfect when you’re doing everything one-handed.\u003c\/span\u003e\u003c\/p\u003e\n\u003c\/li\u003e\n\u003cli\u003e\n\u003cp\u003e\u003cspan\u003eFlexible and contoured to comfortably fit around your breast.\u003c\/span\u003e\u003c\/p\u003e\n\u003c\/li\u003e\n\u003c\/ul\u003e\n\u003cp\u003e\u003cspan\u003e\u003cstrong\u003eHow to Use:\u003c\/strong\u003e\u003c\/span\u003e\u003c\/p\u003e\n\u003cul data-spread=\"false\"\u003e\n\u003cli\u003e\n\u003cp\u003e\u003cspan\u003eFor cold therapy: Place in the freezer for at least 2 hours before use or submerge in ice water until the desired temperature is achieved.\u003c\/span\u003e\u003c\/p\u003e\n\u003c\/li\u003e\n\u003cli\u003e\n\u003cp\u003e\u003cspan\u003eFor heat therapy: Microwave for 10-20 seconds depending on the microwave (wattage table on product instructions), checking the temperature before applying.\u003c\/span\u003e\u003c\/p\u003e\n\u003c\/li\u003e\n\u003cli\u003e\n\u003cp\u003e\u003cspan\u003eApply to the affected area for up to 20 minutes, as needed.\u003c\/span\u003e\u003c\/p\u003e\n\u003c\/li\u003e\n\u003c\/ul\u003e\n\u003cp\u003e\u003cspan\u003e\u003cstrong\u003eSafety Information:\u003c\/strong\u003e\u003c\/span\u003e\u003c\/p\u003e\n\u003cul data-spread=\"false\"\u003e\n\u003cli\u003e\n\u003cp\u003e\u003cspan\u003eAlways test the temperature before applying to avoid burns or frostbite.\u003c\/span\u003e\u003c\/p\u003e\n\u003c\/li\u003e\n\u003cli\u003e\u003cspan\u003eConsult with a healthcare professional if symptoms persist.\u003c\/span\u003e\u003c\/li\u003e\n\u003cli\u003e\u003cspan\u003e\u003cspan class=\"OYPEnA font-feature-liga-off font-feature-clig-off font-feature-calt-off text-decoration-none text-strikethrough-none\"\u003eThis product is not recommended f\u003c\/span\u003e\u003cspan class=\"OYPEnA font-feature-liga-off font-feature-clig-off font-feature-calt-off text-decoration-none text-strikethrough-none\"\u003eor people with reduced awareness of temperature or feeling in their skin.\u003c\/span\u003e\u003c\/span\u003e\u003c\/li\u003e\n\u003c\/ul\u003e","published_at":"2025-03-18T17:40:22+08:00","created_at":"2025-03-09T13:07:38+08:00","vendor":"The Birth Store","type":"Ice Packs","tags":["Breastfeeding","Hospital Bag","Mastitis","Mum","Pain Relief","The Birth Store"],"price":3000,"price_min":3000,"price_max":3000,"available":true,"price_varies":false,"compare_at_price":null,"compare_at_price_min":0,"compare_at_price_max":0,"compare_at_price_varies":false,"variants":[{"id":44896064503997,"title":"Default Title","option1":"Default Title","option2":null,"option3":null,"sku":"","requires_shipping":true,"taxable":false,"featured_image":null,"available":true,"name":"Breast Recovery Ice \u0026 Heat Packs","public_title":null,"options":["Default Title"],"price":3000,"weight":319,"compare_at_price":null,"inventory_management":"shopify","barcode":"64503997","requires_selling_plan":false,"selling_plan_allocations":[]}],"images":["\/\/www.thebirthstore.com.au\/cdn\/shop\/files\/breast-recovery-ice-heat-packs-755802.jpg?v=1750253241","\/\/www.thebirthstore.com.au\/cdn\/shop\/files\/breast-recovery-ice-heat-packs-623437.png?v=1750219380","\/\/www.thebirthstore.com.au\/cdn\/shop\/files\/breast-perineal-recovery-ice-heat-packs-202703.jpg?v=1750219380","\/\/www.thebirthstore.com.au\/cdn\/shop\/files\/breast-perineal-recovery-ice-heat-packs-574145.jpg?v=1750219380","\/\/www.thebirthstore.com.au\/cdn\/shop\/files\/breast-perineal-recovery-ice-heat-packs-652289.jpg?v=1750219380","\/\/www.thebirthstore.com.au\/cdn\/shop\/files\/instant-peri-ice-packs-137615.jpg?v=1750219380","\/\/www.thebirthstore.com.au\/cdn\/shop\/files\/breast-recovery-ice-heat-packs-505635.jpg?v=1750219380","\/\/www.thebirthstore.com.au\/cdn\/shop\/files\/perineal-ice-pack-sleeves-220916.jpg?v=1750219380"],"featured_image":"\/\/www.thebirthstore.com.au\/cdn\/shop\/files\/breast-recovery-ice-heat-packs-755802.jpg?v=1750253241","options":["Title"],"media":[{"alt":"Breast Recovery Ice \u0026 Heat Packs - The Birth Store - The Birth Store","id":28995619815613,"position":1,"preview_image":{"aspect_ratio":1.0,"height":1080,"width":1080,"src":"\/\/www.thebirthstore.com.au\/cdn\/shop\/files\/breast-recovery-ice-heat-packs-755802.jpg?v=1750253241"},"aspect_ratio":1.0,"height":1080,"media_type":"image","src":"\/\/www.thebirthstore.com.au\/cdn\/shop\/files\/breast-recovery-ice-heat-packs-755802.jpg?v=1750253241","width":1080},{"alt":"Breast Recovery Ice \u0026 Heat Packs - The Birth Store - The Birth Store","id":28435577110717,"position":2,"preview_image":{"aspect_ratio":1.0,"height":1080,"width":1080,"src":"\/\/www.thebirthstore.com.au\/cdn\/shop\/files\/breast-recovery-ice-heat-packs-623437.png?v=1750219380"},"aspect_ratio":1.0,"height":1080,"media_type":"image","src":"\/\/www.thebirthstore.com.au\/cdn\/shop\/files\/breast-recovery-ice-heat-packs-623437.png?v=1750219380","width":1080},{"alt":"Breast \u0026 Perineal Recovery Ice \u0026 Heat Packs - The Birth Store - The Birth Store","id":28436124729533,"position":3,"preview_image":{"aspect_ratio":1.497,"height":684,"width":1024,"src":"\/\/www.thebirthstore.com.au\/cdn\/shop\/files\/breast-perineal-recovery-ice-heat-packs-202703.jpg?v=1750219380"},"aspect_ratio":1.497,"height":684,"media_type":"image","src":"\/\/www.thebirthstore.com.au\/cdn\/shop\/files\/breast-perineal-recovery-ice-heat-packs-202703.jpg?v=1750219380","width":1024},{"alt":"Breast \u0026 Perineal Recovery Ice \u0026 Heat Packs - The Birth Store - The Birth Store","id":28436124958909,"position":4,"preview_image":{"aspect_ratio":0.668,"height":1440,"width":962,"src":"\/\/www.thebirthstore.com.au\/cdn\/shop\/files\/breast-perineal-recovery-ice-heat-packs-574145.jpg?v=1750219380"},"aspect_ratio":0.668,"height":1440,"media_type":"image","src":"\/\/www.thebirthstore.com.au\/cdn\/shop\/files\/breast-perineal-recovery-ice-heat-packs-574145.jpg?v=1750219380","width":962},{"alt":"Breast \u0026 Perineal Recovery Ice \u0026 Heat Packs - The Birth Store - The Birth Store","id":28410309935293,"position":5,"preview_image":{"aspect_ratio":0.667,"height":1536,"width":1024,"src":"\/\/www.thebirthstore.com.au\/cdn\/shop\/files\/breast-perineal-recovery-ice-heat-packs-652289.jpg?v=1750219380"},"aspect_ratio":0.667,"height":1536,"media_type":"image","src":"\/\/www.thebirthstore.com.au\/cdn\/shop\/files\/breast-perineal-recovery-ice-heat-packs-652289.jpg?v=1750219380","width":1024},{"alt":"Instant Peri Ice Packs - The Birth Store - The Birth Store","id":28436124860605,"position":6,"preview_image":{"aspect_ratio":1.497,"height":684,"width":1024,"src":"\/\/www.thebirthstore.com.au\/cdn\/shop\/files\/instant-peri-ice-packs-137615.jpg?v=1750219380"},"aspect_ratio":1.497,"height":684,"media_type":"image","src":"\/\/www.thebirthstore.com.au\/cdn\/shop\/files\/instant-peri-ice-packs-137615.jpg?v=1750219380","width":1024},{"alt":"Breast Recovery Ice \u0026 Heat Packs - The Birth Store - The Birth Store","id":28436124795069,"position":7,"preview_image":{"aspect_ratio":0.668,"height":1369,"width":915,"src":"\/\/www.thebirthstore.com.au\/cdn\/shop\/files\/breast-recovery-ice-heat-packs-505635.jpg?v=1750219380"},"aspect_ratio":0.668,"height":1369,"media_type":"image","src":"\/\/www.thebirthstore.com.au\/cdn\/shop\/files\/breast-recovery-ice-heat-packs-505635.jpg?v=1750219380","width":915},{"alt":"Perineal Ice Pack Sleeves - The Birth Store - The Birth Store","id":28436124926141,"position":8,"preview_image":{"aspect_ratio":1.497,"height":684,"width":1024,"src":"\/\/www.thebirthstore.com.au\/cdn\/shop\/files\/perineal-ice-pack-sleeves-220916.jpg?v=1750219380"},"aspect_ratio":1.497,"height":684,"media_type":"image","src":"\/\/www.thebirthstore.com.au\/cdn\/shop\/files\/perineal-ice-pack-sleeves-220916.jpg?v=1750219380","width":1024}],"requires_selling_plan":false,"selling_plan_groups":[],"content":"\u003cp data-pm-slice=\"1 3 []\"\u003e\u003cspan\u003eBreastfeeding is beautiful, but let’s be honest - the early days can be tough. Whether you’re navigating the early days of engorgement, managing mastitis, or just looking for a little extra comfort, our Breast Recovery Ice \u0026amp; Heat Packs are here to help you feel supported every step of the way, and with our unique plush backing, it's never been more comfortable.\u003c\/span\u003e\u003c\/p\u003e\n\u003cp\u003e\u003cspan\u003e\u003cstrong\u003eTo Help With:\u003c\/strong\u003e\u003c\/span\u003e\u003c\/p\u003e\n\u003cul data-spread=\"false\"\u003e\n\u003cli\u003e\n\u003cp\u003e\u003cspan\u003eEngorgement relief\u003c\/span\u003e\u003c\/p\u003e\n\u003c\/li\u003e\n\u003cli\u003e\n\u003cp\u003e\u003cspan\u003eMastitis and blocked ducts\u003c\/span\u003e\u003c\/p\u003e\n\u003c\/li\u003e\n\u003cli\u003e\n\u003cp\u003e\u003cspan\u003eSoothing tenderness during pumping\u003c\/span\u003e\u003c\/p\u003e\n\u003c\/li\u003e\n\u003cli\u003e\n\u003cp\u003e\u003cspan\u003eGeneral breast discomfort\u003c\/span\u003e\u003c\/p\u003e\n\u003c\/li\u003e\n\u003c\/ul\u003e\n\u003cp\u003e\u003cspan\u003e\u003cstrong\u003eFeatures:\u003c\/strong\u003e\u003c\/span\u003e\u003c\/p\u003e\n\u003cul data-spread=\"false\"\u003e\n\u003cli\u003e\n\u003cp\u003e\u003cspan\u003eDual-sided design: one side provides direct contact with ice or heat once it's cooled down, while the other has a plush backing for soft, gentle comfort when you first start using it.\u003c\/span\u003e\u003c\/p\u003e\n\u003c\/li\u003e\n\u003cli\u003e\n\u003cp\u003e\u003cspan\u003eNo need for fiddly covers — perfect when you’re doing everything one-handed.\u003c\/span\u003e\u003c\/p\u003e\n\u003c\/li\u003e\n\u003cli\u003e\n\u003cp\u003e\u003cspan\u003eFlexible and contoured to comfortably fit around your breast.\u003c\/span\u003e\u003c\/p\u003e\n\u003c\/li\u003e\n\u003c\/ul\u003e\n\u003cp\u003e\u003cspan\u003e\u003cstrong\u003eHow to Use:\u003c\/strong\u003e\u003c\/span\u003e\u003c\/p\u003e\n\u003cul data-spread=\"false\"\u003e\n\u003cli\u003e\n\u003cp\u003e\u003cspan\u003eFor cold therapy: Place in the freezer for at least 2 hours before use or submerge in ice water until the desired temperature is achieved.\u003c\/span\u003e\u003c\/p\u003e\n\u003c\/li\u003e\n\u003cli\u003e\n\u003cp\u003e\u003cspan\u003eFor heat therapy: Microwave for 10-20 seconds depending on the microwave (wattage table on product instructions), checking the temperature before applying.\u003c\/span\u003e\u003c\/p\u003e\n\u003c\/li\u003e\n\u003cli\u003e\n\u003cp\u003e\u003cspan\u003eApply to the affected area for up to 20 minutes, as needed.\u003c\/span\u003e\u003c\/p\u003e\n\u003c\/li\u003e\n\u003c\/ul\u003e\n\u003cp\u003e\u003cspan\u003e\u003cstrong\u003eSafety Information:\u003c\/strong\u003e\u003c\/span\u003e\u003c\/p\u003e\n\u003cul data-spread=\"false\"\u003e\n\u003cli\u003e\n\u003cp\u003e\u003cspan\u003eAlways test the temperature before applying to avoid burns or frostbite.\u003c\/span\u003e\u003c\/p\u003e\n\u003c\/li\u003e\n\u003cli\u003e\u003cspan\u003eConsult with a healthcare professional if symptoms persist.\u003c\/span\u003e\u003c\/li\u003e\n\u003cli\u003e\u003cspan\u003e\u003cspan class=\"OYPEnA font-feature-liga-off font-feature-clig-off font-feature-calt-off text-decoration-none text-strikethrough-none\"\u003eThis product is not recommended f\u003c\/span\u003e\u003cspan class=\"OYPEnA font-feature-liga-off font-feature-clig-off font-feature-calt-off text-decoration-none text-strikethrough-none\"\u003eor people with reduced awareness of temperature or feeling in their skin.\u003c\/span\u003e\u003c\/span\u003e\u003c\/li\u003e\n\u003c\/ul\u003e"},"options":[{"name":"Title","position":1,"values":["Default Title"]}],"custom_metafields":{},"metafields":{"badge":"\u003cdiv style='display:none' class='jdgm-prev-badge' data-average-rating='0.00' data-number-of-reviews='0' data-number-of-questions='0'\u003e \u003cspan class='jdgm-prev-badge__stars' data-score='0.00' tabindex='0' aria-label='0.00 stars' role='button'\u003e \u003cspan class='jdgm-star jdgm--off'\u003e\u003c\/span\u003e\u003cspan class='jdgm-star jdgm--off'\u003e\u003c\/span\u003e\u003cspan class='jdgm-star jdgm--off'\u003e\u003c\/span\u003e\u003cspan class='jdgm-star jdgm--off'\u003e\u003c\/span\u003e\u003cspan class='jdgm-star jdgm--off'\u003e\u003c\/span\u003e \u003c\/span\u003e \u003cspan class='jdgm-prev-badge__text'\u003e No reviews \u003c\/span\u003e \u003c\/div\u003e","widget":"\u003cdiv class='jdgm-rev-widg' data-updated-at='2025-06-13T16:13:40Z' data-average-rating='0.00' data-number-of-reviews='0' data-number-of-questions='0'\u003e \u003cstyle class='jdgm-temp-hiding-style'\u003e.jdgm-rev-widg{ display: none }\u003c\/style\u003e \u003cdiv class='jdgm-rev-widg__header'\u003e \u003ch2 class='jdgm-rev-widg__title'\u003eCustomer Reviews\u003c\/h2\u003e \u003cdiv class='jdgm-rev-widg__summary'\u003e \u003cdiv class='jdgm-rev-widg__summary-stars' aria-label='Average rating is 0.00 stars' role='img'\u003e \u003cspan class='jdgm-star jdgm--off'\u003e\u003c\/span\u003e\u003cspan class='jdgm-star jdgm--off'\u003e\u003c\/span\u003e\u003cspan class='jdgm-star jdgm--off'\u003e\u003c\/span\u003e\u003cspan class='jdgm-star jdgm--off'\u003e\u003c\/span\u003e\u003cspan class='jdgm-star jdgm--off'\u003e\u003c\/span\u003e \u003c\/div\u003e \u003cdiv class='jdgm-rev-widg__summary-text'\u003eBe the first to write a review\u003c\/div\u003e \u003c\/div\u003e \u003ca style='display: none' href='#' class='jdgm-write-rev-link' role='button'\u003eWrite a review\u003c\/a\u003e \u003cdiv class='jdgm-histogram jdgm-temp-hidden'\u003e \u003cdiv class='jdgm-histogram__row' data-rating='5' data-frequency='0' data-percentage='0'\u003e \u003cdiv class='jdgm-histogram__star' role='button' aria-label=\"0% (0) reviews with 5 star rating\" tabindex='0' \u003e\u003cspan class='jdgm-star jdgm--on'\u003e\u003c\/span\u003e\u003cspan class='jdgm-star jdgm--on'\u003e\u003c\/span\u003e\u003cspan class='jdgm-star jdgm--on'\u003e\u003c\/span\u003e\u003cspan class='jdgm-star jdgm--on'\u003e\u003c\/span\u003e\u003cspan class='jdgm-star jdgm--on'\u003e\u003c\/span\u003e\u003c\/div\u003e \u003cdiv class='jdgm-histogram__bar'\u003e \u003cdiv class='jdgm-histogram__bar-content' style='width: 0%;'\u003e \u003c\/div\u003e \u003c\/div\u003e \u003cdiv class='jdgm-histogram__percentage'\u003e0%\u003c\/div\u003e \u003cdiv class='jdgm-histogram__frequency'\u003e(0)\u003c\/div\u003e \u003c\/div\u003e \u003cdiv class='jdgm-histogram__row' data-rating='4' data-frequency='0' data-percentage='0'\u003e \u003cdiv class='jdgm-histogram__star' role='button' aria-label=\"0% (0) reviews with 4 star rating\" tabindex='0' \u003e\u003cspan class='jdgm-star jdgm--on'\u003e\u003c\/span\u003e\u003cspan class='jdgm-star jdgm--on'\u003e\u003c\/span\u003e\u003cspan class='jdgm-star jdgm--on'\u003e\u003c\/span\u003e\u003cspan class='jdgm-star jdgm--on'\u003e\u003c\/span\u003e\u003cspan class='jdgm-star jdgm--off'\u003e\u003c\/span\u003e\u003c\/div\u003e \u003cdiv class='jdgm-histogram__bar'\u003e \u003cdiv class='jdgm-histogram__bar-content' style='width: 0%;'\u003e \u003c\/div\u003e \u003c\/div\u003e \u003cdiv class='jdgm-histogram__percentage'\u003e0%\u003c\/div\u003e \u003cdiv class='jdgm-histogram__frequency'\u003e(0)\u003c\/div\u003e \u003c\/div\u003e \u003cdiv class='jdgm-histogram__row' data-rating='3' data-frequency='0' data-percentage='0'\u003e \u003cdiv class='jdgm-histogram__star' role='button' aria-label=\"0% (0) reviews with 3 star rating\" tabindex='0' \u003e\u003cspan class='jdgm-star jdgm--on'\u003e\u003c\/span\u003e\u003cspan class='jdgm-star jdgm--on'\u003e\u003c\/span\u003e\u003cspan class='jdgm-star jdgm--on'\u003e\u003c\/span\u003e\u003cspan class='jdgm-star jdgm--off'\u003e\u003c\/span\u003e\u003cspan class='jdgm-star jdgm--off'\u003e\u003c\/span\u003e\u003c\/div\u003e \u003cdiv class='jdgm-histogram__bar'\u003e \u003cdiv class='jdgm-histogram__bar-content' style='width: 0%;'\u003e \u003c\/div\u003e \u003c\/div\u003e \u003cdiv class='jdgm-histogram__percentage'\u003e0%\u003c\/div\u003e \u003cdiv class='jdgm-histogram__frequency'\u003e(0)\u003c\/div\u003e \u003c\/div\u003e \u003cdiv class='jdgm-histogram__row' data-rating='2' data-frequency='0' data-percentage='0'\u003e \u003cdiv class='jdgm-histogram__star' role='button' aria-label=\"0% (0) reviews with 2 star rating\" tabindex='0' \u003e\u003cspan class='jdgm-star jdgm--on'\u003e\u003c\/span\u003e\u003cspan class='jdgm-star jdgm--on'\u003e\u003c\/span\u003e\u003cspan class='jdgm-star jdgm--off'\u003e\u003c\/span\u003e\u003cspan class='jdgm-star jdgm--off'\u003e\u003c\/span\u003e\u003cspan class='jdgm-star jdgm--off'\u003e\u003c\/span\u003e\u003c\/div\u003e \u003cdiv class='jdgm-histogram__bar'\u003e \u003cdiv class='jdgm-histogram__bar-content' style='width: 0%;'\u003e \u003c\/div\u003e \u003c\/div\u003e \u003cdiv class='jdgm-histogram__percentage'\u003e0%\u003c\/div\u003e \u003cdiv class='jdgm-histogram__frequency'\u003e(0)\u003c\/div\u003e \u003c\/div\u003e \u003cdiv class='jdgm-histogram__row' data-rating='1' data-frequency='0' data-percentage='0'\u003e \u003cdiv class='jdgm-histogram__star' role='button' aria-label=\"0% (0) reviews with 1 star rating\" tabindex='0' \u003e\u003cspan class='jdgm-star jdgm--on'\u003e\u003c\/span\u003e\u003cspan class='jdgm-star jdgm--off'\u003e\u003c\/span\u003e\u003cspan class='jdgm-star jdgm--off'\u003e\u003c\/span\u003e\u003cspan class='jdgm-star jdgm--off'\u003e\u003c\/span\u003e\u003cspan class='jdgm-star jdgm--off'\u003e\u003c\/span\u003e\u003c\/div\u003e \u003cdiv class='jdgm-histogram__bar'\u003e \u003cdiv class='jdgm-histogram__bar-content' style='width: 0%;'\u003e \u003c\/div\u003e \u003c\/div\u003e \u003cdiv class='jdgm-histogram__percentage'\u003e0%\u003c\/div\u003e \u003cdiv class='jdgm-histogram__frequency'\u003e(0)\u003c\/div\u003e \u003c\/div\u003e \u003cdiv class='jdgm-histogram__row jdgm-histogram__clear-filter' data-rating=null tabindex='0'\u003e\u003c\/div\u003e \u003c\/div\u003e \u003cdiv class='jdgm-rev-widg__sort-wrapper'\u003e\u003c\/div\u003e \u003c\/div\u003e \u003cdiv class='jdgm-rev-widg__body'\u003e \u003cdiv class='jdgm-rev-widg__reviews'\u003e\u003c\/div\u003e \u003cdiv class='jdgm-paginate' data-per-page='10' data-url='https:\/\/api.judge.me\/reviews\/reviews_for_widget' style=\"display: none;\"\u003e\u003c\/div\u003e \u003c\/div\u003e \u003cdiv class='jdgm-rev-widg__paginate-spinner-wrapper'\u003e \u003cdiv class='jdgm-spinner'\u003e\u003c\/div\u003e \u003c\/div\u003e \u003c\/div\u003e"},"collections":[{"id":309505622205,"handle":"the-birth-store-range","title":"'The Birth Store' Range","updated_at":"2025-12-28T20:10:01+08:00","body_html":"","published_at":"2024-10-28T13:24:26+08:00","sort_order":"alpha-asc","template_suffix":"","disjunctive":false,"rules":[{"column":"tag","relation":"equals","condition":"The Birth Store"}],"published_scope":"global","image":{"created_at":"2025-10-30T16:16:56+08:00","alt":"'The Birth Store' Range - The Birth Store","width":1365,"height":2048,"src":"\/\/www.thebirthstore.com.au\/cdn\/shop\/collections\/the-birth-store-range-5183880.jpg?v=1761812217"}},{"id":281712427197,"handle":"breastfeeding","title":"Breastfeeding","updated_at":"2025-12-28T20:10:01+08:00","body_html":"","published_at":"2021-12-20T14:19:33+08:00","sort_order":"best-selling","template_suffix":"breastfeeding-collection","disjunctive":false,"rules":[{"column":"tag","relation":"equals","condition":"Breastfeeding"}],"published_scope":"global","image":{"created_at":"2024-05-06T11:59:34+08:00","alt":"Breastfeeding - The Birth Store","width":620,"height":635,"src":"\/\/www.thebirthstore.com.au\/cdn\/shop\/collections\/breastfeeding-793872.jpg?v=1714967974"}},{"id":261657460925,"handle":"buy","title":"Buy","updated_at":"2025-12-28T20:10:01+08:00","body_html":"\u003cp\u003eBrowse all of our pregnancy, labour \u0026amp; birth, postpartum and baby essentials here.\u003cbr\u003e\u003c\/p\u003e\n\u003cp\u003e\u003cspan\u003eYou can even buy now and pay later with Afterpay!\u003c\/span\u003e\u003c\/p\u003e","published_at":"2021-03-10T12:05:31+08:00","sort_order":"best-selling","template_suffix":"shop-all-collection","disjunctive":false,"rules":[{"column":"title","relation":"not_contains","condition":"Hire"}],"published_scope":"global","image":{"created_at":"2024-05-06T11:59:42+08:00","alt":"Buy - The Birth Store","width":2048,"height":2048,"src":"\/\/www.thebirthstore.com.au\/cdn\/shop\/collections\/buy-964856.jpg?v=1714967982"}},{"id":319580635325,"handle":"ice-heat-packs","updated_at":"2025-12-28T20:10:01+08:00","published_at":"2025-06-08T20:45:57+08:00","sort_order":"best-selling","template_suffix":"","published_scope":"global","title":"Ice \u0026 Heat Packs","body_html":"","image":{"created_at":"2025-10-30T16:16:45+08:00","alt":"Ice \u0026 Heat Packs - The Birth Store","width":1024,"height":684,"src":"\/\/www.thebirthstore.com.au\/cdn\/shop\/collections\/ice-heat-packs-1501133.jpg?v=1761812205"}},{"id":290869313725,"handle":"mastitis-blocked-ducts","title":"Mastitis \u0026 Blocked Ducts","updated_at":"2025-12-27T20:11:40+08:00","body_html":"","published_at":"2022-11-17T10:50:01+08:00","sort_order":"best-selling","template_suffix":"swaddles-collection","disjunctive":false,"rules":[{"column":"tag","relation":"equals","condition":"Mastitis"}],"published_scope":"global","image":{"created_at":"2024-05-06T12:00:21+08:00","alt":"Mastitis \u0026 Blocked Ducts - The Birth Store","width":494,"height":487,"src":"\/\/www.thebirthstore.com.au\/cdn\/shop\/collections\/mastitis-blocked-ducts-488726.jpg?v=1714968021"}},{"id":281712591037,"handle":"pain-relief","title":"Pain Relief","updated_at":"2025-12-28T20:10:01+08:00","body_html":"","published_at":"2021-12-20T14:22:45+08:00","sort_order":"best-selling","template_suffix":"pain-relief-collection","disjunctive":false,"rules":[{"column":"tag","relation":"equals","condition":"Pain Relief"}],"published_scope":"global","image":{"created_at":"2024-05-06T12:00:27+08:00","alt":"Pain Relief - The Birth Store","width":1365,"height":2048,"src":"\/\/www.thebirthstore.com.au\/cdn\/shop\/collections\/pain-relief-878865.jpg?v=1714968027"}},{"id":315407761597,"handle":"the-birth-store-2025-product-launch","updated_at":"2025-12-28T20:10:01+08:00","published_at":"2025-03-15T21:46:34+08:00","sort_order":"created-desc","template_suffix":"ice-pack-launch","published_scope":"global","title":"Recovery Ice \u0026 Heat Packs","body_html":"","image":{"created_at":"2025-10-30T16:16:46+08:00","alt":"Recovery Ice \u0026 Heat Packs - The Birth Store","width":1024,"height":684,"src":"\/\/www.thebirthstore.com.au\/cdn\/shop\/collections\/recovery-ice-heat-packs-9023381.jpg?v=1761812207"}},{"id":291456483517,"handle":"shop-all","title":"Shop All - Mum","updated_at":"2025-12-28T20:10:01+08:00","body_html":"","published_at":"2022-12-23T22:04:39+08:00","sort_order":"best-selling","template_suffix":"shop-all-collection","disjunctive":false,"rules":[{"column":"variant_price","relation":"greater_than","condition":"1"},{"column":"title","relation":"not_contains","condition":"Batteries"},{"column":"tag","relation":"equals","condition":"Mum"}],"published_scope":"global","image":{"created_at":"2024-05-06T12:00:54+08:00","alt":"Shop All - The Birth Store","width":1365,"height":2048,"src":"\/\/www.thebirthstore.com.au\/cdn\/shop\/collections\/shop-all-693176.jpg?v=1714968055"}},{"id":310045933757,"handle":"shop-all-sale","title":"Shop All Sale","updated_at":"2025-12-28T20:10:01+08:00","body_html":"","published_at":"2024-11-12T13:22:43+08:00","sort_order":"alpha-asc","template_suffix":"","disjunctive":true,"rules":[{"column":"tag","relation":"equals","condition":"Bundles"},{"column":"vendor","relation":"equals","condition":"Franjos Kitchen"},{"column":"vendor","relation":"equals","condition":"Adored Illustrations"},{"column":"vendor","relation":"equals","condition":"Amazing Oils"},{"column":"vendor","relation":"equals","condition":"Ice Ice Booby"},{"column":"vendor","relation":"equals","condition":"Made to Milk"},{"column":"vendor","relation":"equals","condition":"Milky Goodness"},{"column":"vendor","relation":"equals","condition":"Seasons of Mama"},{"column":"vendor","relation":"equals","condition":"Silverette"},{"column":"vendor","relation":"equals","condition":"Snuggle Hunny"},{"column":"vendor","relation":"equals","condition":"Yung Bod"},{"column":"vendor","relation":"equals","condition":"Bare Love"},{"column":"vendor","relation":"equals","condition":"Haakaa"},{"column":"vendor","relation":"equals","condition":"Mere Botanicals"},{"column":"vendor","relation":"equals","condition":"The Birth Store Hire"},{"column":"vendor","relation":"equals","condition":"The Birth Store"}],"published_scope":"global","image":{"created_at":"2024-11-13T10:58:16+08:00","alt":"Shop All Sale - The Birth Store","width":2048,"height":1365,"src":"\/\/www.thebirthstore.com.au\/cdn\/shop\/collections\/shop-all-sale-297361.jpg?v=1731466697"}},{"id":316942287037,"handle":"wholesale-products","updated_at":"2025-12-28T20:10:01+08:00","published_at":"2025-04-19T15:30:53+08:00","sort_order":"best-selling","template_suffix":"","published_scope":"global","title":"Wholesale Products","body_html":"","image":{"created_at":"2025-11-20T21:33:57+08:00","alt":"Wholesale Products - The Birth Store","width":1024,"height":684,"src":"\/\/www.thebirthstore.com.au\/cdn\/shop\/collections\/wholesale-products-3833919.jpg?v=1763645638"}}]}
[{"alt":"Breast Recovery Ice \u0026 Heat Packs - The Birth Store - The Birth Store","id":28995619815613,"position":1,"preview_image":{"aspect_ratio":1.0,"height":1080,"width":1080,"src":"\/\/www.thebirthstore.com.au\/cdn\/shop\/files\/breast-recovery-ice-heat-packs-755802.jpg?v=1750253241"},"aspect_ratio":1.0,"height":1080,"media_type":"image","src":"\/\/www.thebirthstore.com.au\/cdn\/shop\/files\/breast-recovery-ice-heat-packs-755802.jpg?v=1750253241","width":1080},{"alt":"Breast Recovery Ice \u0026 Heat Packs - The Birth Store - The Birth Store","id":28435577110717,"position":2,"preview_image":{"aspect_ratio":1.0,"height":1080,"width":1080,"src":"\/\/www.thebirthstore.com.au\/cdn\/shop\/files\/breast-recovery-ice-heat-packs-623437.png?v=1750219380"},"aspect_ratio":1.0,"height":1080,"media_type":"image","src":"\/\/www.thebirthstore.com.au\/cdn\/shop\/files\/breast-recovery-ice-heat-packs-623437.png?v=1750219380","width":1080},{"alt":"Breast \u0026 Perineal Recovery Ice \u0026 Heat Packs - The Birth Store - The Birth Store","id":28436124729533,"position":3,"preview_image":{"aspect_ratio":1.497,"height":684,"width":1024,"src":"\/\/www.thebirthstore.com.au\/cdn\/shop\/files\/breast-perineal-recovery-ice-heat-packs-202703.jpg?v=1750219380"},"aspect_ratio":1.497,"height":684,"media_type":"image","src":"\/\/www.thebirthstore.com.au\/cdn\/shop\/files\/breast-perineal-recovery-ice-heat-packs-202703.jpg?v=1750219380","width":1024},{"alt":"Breast \u0026 Perineal Recovery Ice \u0026 Heat Packs - The Birth Store - The Birth Store","id":28436124958909,"position":4,"preview_image":{"aspect_ratio":0.668,"height":1440,"width":962,"src":"\/\/www.thebirthstore.com.au\/cdn\/shop\/files\/breast-perineal-recovery-ice-heat-packs-574145.jpg?v=1750219380"},"aspect_ratio":0.668,"height":1440,"media_type":"image","src":"\/\/www.thebirthstore.com.au\/cdn\/shop\/files\/breast-perineal-recovery-ice-heat-packs-574145.jpg?v=1750219380","width":962},{"alt":"Breast \u0026 Perineal Recovery Ice \u0026 Heat Packs - The Birth Store - The Birth Store","id":28410309935293,"position":5,"preview_image":{"aspect_ratio":0.667,"height":1536,"width":1024,"src":"\/\/www.thebirthstore.com.au\/cdn\/shop\/files\/breast-perineal-recovery-ice-heat-packs-652289.jpg?v=1750219380"},"aspect_ratio":0.667,"height":1536,"media_type":"image","src":"\/\/www.thebirthstore.com.au\/cdn\/shop\/files\/breast-perineal-recovery-ice-heat-packs-652289.jpg?v=1750219380","width":1024},{"alt":"Instant Peri Ice Packs - The Birth Store - The Birth Store","id":28436124860605,"position":6,"preview_image":{"aspect_ratio":1.497,"height":684,"width":1024,"src":"\/\/www.thebirthstore.com.au\/cdn\/shop\/files\/instant-peri-ice-packs-137615.jpg?v=1750219380"},"aspect_ratio":1.497,"height":684,"media_type":"image","src":"\/\/www.thebirthstore.com.au\/cdn\/shop\/files\/instant-peri-ice-packs-137615.jpg?v=1750219380","width":1024},{"alt":"Breast Recovery Ice \u0026 Heat Packs - The Birth Store - The Birth Store","id":28436124795069,"position":7,"preview_image":{"aspect_ratio":0.668,"height":1369,"width":915,"src":"\/\/www.thebirthstore.com.au\/cdn\/shop\/files\/breast-recovery-ice-heat-packs-505635.jpg?v=1750219380"},"aspect_ratio":0.668,"height":1369,"media_type":"image","src":"\/\/www.thebirthstore.com.au\/cdn\/shop\/files\/breast-recovery-ice-heat-packs-505635.jpg?v=1750219380","width":915},{"alt":"Perineal Ice Pack Sleeves - The Birth Store - The Birth Store","id":28436124926141,"position":8,"preview_image":{"aspect_ratio":1.497,"height":684,"width":1024,"src":"\/\/www.thebirthstore.com.au\/cdn\/shop\/files\/perineal-ice-pack-sleeves-220916.jpg?v=1750219380"},"aspect_ratio":1.497,"height":684,"media_type":"image","src":"\/\/www.thebirthstore.com.au\/cdn\/shop\/files\/perineal-ice-pack-sleeves-220916.jpg?v=1750219380","width":1024}]
{"item":{"id":7483877261501,"title":"Breastfeeding Nipple Shield - 1pc","handle":"haakaa-breastfeeding-nipple-shield-1pc","description":"\u003cdiv id=\"s-ce7ccc34-31d3-4b20-94eb-80f5e4d4bb3d\" class=\"shg-c shg-align-center\" data-mce-fragment=\"1\"\u003e\n\u003cdiv class=\"shogun-heading-component\" data-mce-fragment=\"1\"\u003e\n\u003ch2 data-mce-fragment=\"1\"\u003eThe Haakaa Breastfeeding Nipple Shield! A world 1st design made of 100% soft silicone. An extended teat puts space between your nipple \u0026amp; baby's mouth.\u003c\/h2\u003e\n\u003c\/div\u003e\n\u003c\/div\u003e\n\u003cdiv id=\"s-2d13688d-9f80-44db-ba59-35f9921b1be0\" class=\"shg-c\" data-mce-fragment=\"1\"\u003e\n\u003cdiv class=\"shg-rich-text shg-theme-text-content\" data-mce-fragment=\"1\"\u003e\n\u003cp data-mce-fragment=\"1\"\u003eIf your little one bites down, pulls away, or if you have inverted or cracked nipples, you will still be able to breastfeed with ease and comfort. Our Nipple Shields suction onto your breast, giving you a hands-free breastfeeding experience.\u003c\/p\u003e\n\u003cp data-mce-fragment=\"1\"\u003eAvailable with a round or triangle base, the Haakaa Breastfeeding Nipple Shield allows all mums to experience the beauty of breastfeeding without the worry of discomfort and pain! The round base is larger and suctions on more easily, making it more suited for those who are new to using nipple shields. The triangle base is smaller, but allows for more skin-to-skin contact, making it more suited for those who are more experienced with using nipple shields.\u003c\/p\u003e\n\u003cp data-mce-fragment=\"1\"\u003eWe offer two teat shapes: the orthodontic teat and the nipple teat. The orthodontic teat is thumb-shaped to replicate the shape of a mother's nipple during breastfeeding, making it more readily accepted by your baby. The nipple teat replicates the silicone teat of a baby bottle and is better suited to help your baby transition from breast to bottle.\u003c\/p\u003e\n\u003cp data-mce-fragment=\"1\"\u003eThe Orthodontic Breastfeeding Nipple Shields have an opening that's 28mm in diameter and the Bottle Breastfeeding Nipple Shields have an opening that's 23mm in diameter for your nipple.\u003c\/p\u003e\n\u003cp data-mce-fragment=\"1\"\u003eThis product is designed for mothers who are physically unable to breastfeed due to sore, cracked nipples and should only be used in the interim before returning to natural breastfeeding once your nipple has healed. If you are able to breastfeed successfully and experience slight discomfort, we suggest using the Haakaa traditional nipple shields as a protective alternative if your nipples become raw and sore.\u003c\/p\u003e\n\u003cp data-mce-fragment=\"1\"\u003eIncludes one shield and a protective case for storage.\u003c\/p\u003e\n\u003cul data-mce-fragment=\"1\"\u003e\n\u003cli data-mce-fragment=\"1\"\u003e\u003cspan data-mce-fragment=\"1\"\u003ePatented one-piece design with no joints, cracks or edges.\u003c\/span\u003e\u003c\/li\u003e\n\u003cli data-mce-fragment=\"1\"\u003e\u003cspan data-mce-fragment=\"1\"\u003eNipple design allows babies to mimic a natural sucking rhythm, making it easier for babies that have difficulty latching.\u003c\/span\u003e\u003c\/li\u003e\n\u003cli data-mce-fragment=\"1\"\u003e\u003cspan data-mce-fragment=\"1\"\u003eSuctions on to all breast shapes, making it easier for new mums to use and enjoy a hands-free breastfeeding experience.\u003c\/span\u003e\u003c\/li\u003e\n\u003cli data-mce-fragment=\"1\"\u003e\u003cspan data-mce-fragment=\"1\"\u003eThe anti-slip ridged outer edge make the nipple shield easier to hold while the baby is feeding.\u003c\/span\u003e\u003c\/li\u003e\n\u003cli data-mce-fragment=\"1\"\u003e\u003cspan data-mce-fragment=\"1\"\u003eAnti-colic and variable flow nipple allows baby to drink continuously without gasping for air or drinking bubbles and prevents them from choking if milk flows too fast.\u003c\/span\u003e\u003c\/li\u003e\n\u003cli data-mce-fragment=\"1\"\u003e\u003cspan data-mce-fragment=\"1\"\u003eSpace between mum’s nipple and the nipple shield head prevents baby from biting the nipple.\u003c\/span\u003e\u003c\/li\u003e\n\u003cli data-mce-fragment=\"1\"\u003e\u003cspan data-mce-fragment=\"1\"\u003eBPA, PVC and phthalate-free.\u003c\/span\u003e\u003c\/li\u003e\n\u003c\/ul\u003e\n\u003c\/div\u003e\n\u003c\/div\u003e","published_at":"2023-06-08T15:44:20+08:00","created_at":"2023-06-08T15:44:20+08:00","vendor":"Haakaa","type":"","tags":["Breastfeeding","Cracked Nipples","Hospital Bag","Mum","Post-Partum"],"price":2600,"price_min":2600,"price_max":2600,"available":true,"price_varies":false,"compare_at_price":null,"compare_at_price_min":0,"compare_at_price_max":0,"compare_at_price_varies":false,"variants":[{"id":42868442529981,"title":"Round","option1":"Round","option2":null,"option3":null,"sku":"","requires_shipping":true,"taxable":false,"featured_image":{"id":34641011212477,"product_id":7483877261501,"position":1,"created_at":"2024-05-06T11:59:10+08:00","updated_at":"2024-05-06T11:59:10+08:00","alt":"Breastfeeding Nipple Shield - 1pc - The Birth Store-Haakaa","width":1080,"height":1080,"src":"\/\/www.thebirthstore.com.au\/cdn\/shop\/files\/breastfeeding-nipple-shield-1pc-429407.jpg?v=1714967950","variant_ids":[42868442529981]},"available":true,"name":"Breastfeeding Nipple Shield - 1pc - Round","public_title":"Round","options":["Round"],"price":2600,"weight":87,"compare_at_price":null,"inventory_management":"shopify","barcode":"42529981","featured_media":{"alt":"Breastfeeding Nipple Shield - 1pc - The Birth Store-Haakaa","id":27007580176573,"position":1,"preview_image":{"aspect_ratio":1.0,"height":1080,"width":1080,"src":"\/\/www.thebirthstore.com.au\/cdn\/shop\/files\/breastfeeding-nipple-shield-1pc-429407.jpg?v=1714967950"}},"requires_selling_plan":false,"selling_plan_allocations":[]},{"id":42868442562749,"title":"Orthodontic Triangle","option1":"Orthodontic Triangle","option2":null,"option3":null,"sku":"","requires_shipping":true,"taxable":false,"featured_image":{"id":34641011278013,"product_id":7483877261501,"position":3,"created_at":"2024-05-06T11:59:10+08:00","updated_at":"2024-05-06T11:59:11+08:00","alt":"Breastfeeding Nipple Shield - 1pc - The Birth Store-Haakaa","width":1080,"height":1080,"src":"\/\/www.thebirthstore.com.au\/cdn\/shop\/files\/breastfeeding-nipple-shield-1pc-148677.jpg?v=1714967951","variant_ids":[42868442562749]},"available":true,"name":"Breastfeeding Nipple Shield - 1pc - Orthodontic Triangle","public_title":"Orthodontic Triangle","options":["Orthodontic Triangle"],"price":2600,"weight":87,"compare_at_price":null,"inventory_management":"shopify","barcode":"42562749","featured_media":{"alt":"Breastfeeding Nipple Shield - 1pc - The Birth Store-Haakaa","id":27007580242109,"position":3,"preview_image":{"aspect_ratio":1.0,"height":1080,"width":1080,"src":"\/\/www.thebirthstore.com.au\/cdn\/shop\/files\/breastfeeding-nipple-shield-1pc-148677.jpg?v=1714967951"}},"requires_selling_plan":false,"selling_plan_allocations":[]},{"id":42868442595517,"title":"Orthodontic Round","option1":"Orthodontic Round","option2":null,"option3":null,"sku":"","requires_shipping":true,"taxable":false,"featured_image":{"id":34641011310781,"product_id":7483877261501,"position":4,"created_at":"2024-05-06T11:59:11+08:00","updated_at":"2024-05-06T11:59:11+08:00","alt":"Breastfeeding Nipple Shield - 1pc - The Birth Store-Haakaa","width":1080,"height":1080,"src":"\/\/www.thebirthstore.com.au\/cdn\/shop\/files\/breastfeeding-nipple-shield-1pc-178483.jpg?v=1714967951","variant_ids":[42868442595517]},"available":true,"name":"Breastfeeding Nipple Shield - 1pc - Orthodontic Round","public_title":"Orthodontic Round","options":["Orthodontic Round"],"price":2600,"weight":87,"compare_at_price":null,"inventory_management":"shopify","barcode":"42595517","featured_media":{"alt":"Breastfeeding Nipple Shield - 1pc - The Birth Store-Haakaa","id":27007580274877,"position":4,"preview_image":{"aspect_ratio":1.0,"height":1080,"width":1080,"src":"\/\/www.thebirthstore.com.au\/cdn\/shop\/files\/breastfeeding-nipple-shield-1pc-178483.jpg?v=1714967951"}},"requires_selling_plan":false,"selling_plan_allocations":[]}],"images":["\/\/www.thebirthstore.com.au\/cdn\/shop\/files\/breastfeeding-nipple-shield-1pc-429407.jpg?v=1714967950","\/\/www.thebirthstore.com.au\/cdn\/shop\/files\/breastfeeding-nipple-shield-1pc-135216.jpg?v=1714967950","\/\/www.thebirthstore.com.au\/cdn\/shop\/files\/breastfeeding-nipple-shield-1pc-148677.jpg?v=1714967951","\/\/www.thebirthstore.com.au\/cdn\/shop\/files\/breastfeeding-nipple-shield-1pc-178483.jpg?v=1714967951"],"featured_image":"\/\/www.thebirthstore.com.au\/cdn\/shop\/files\/breastfeeding-nipple-shield-1pc-429407.jpg?v=1714967950","options":["Shape"],"media":[{"alt":"Breastfeeding Nipple Shield - 1pc - The Birth Store-Haakaa","id":27007580176573,"position":1,"preview_image":{"aspect_ratio":1.0,"height":1080,"width":1080,"src":"\/\/www.thebirthstore.com.au\/cdn\/shop\/files\/breastfeeding-nipple-shield-1pc-429407.jpg?v=1714967950"},"aspect_ratio":1.0,"height":1080,"media_type":"image","src":"\/\/www.thebirthstore.com.au\/cdn\/shop\/files\/breastfeeding-nipple-shield-1pc-429407.jpg?v=1714967950","width":1080},{"alt":"Breastfeeding Nipple Shield - 1pc - The Birth Store-Haakaa","id":27007580209341,"position":2,"preview_image":{"aspect_ratio":1.0,"height":1000,"width":1000,"src":"\/\/www.thebirthstore.com.au\/cdn\/shop\/files\/breastfeeding-nipple-shield-1pc-135216.jpg?v=1714967950"},"aspect_ratio":1.0,"height":1000,"media_type":"image","src":"\/\/www.thebirthstore.com.au\/cdn\/shop\/files\/breastfeeding-nipple-shield-1pc-135216.jpg?v=1714967950","width":1000},{"alt":"Breastfeeding Nipple Shield - 1pc - The Birth Store-Haakaa","id":27007580242109,"position":3,"preview_image":{"aspect_ratio":1.0,"height":1080,"width":1080,"src":"\/\/www.thebirthstore.com.au\/cdn\/shop\/files\/breastfeeding-nipple-shield-1pc-148677.jpg?v=1714967951"},"aspect_ratio":1.0,"height":1080,"media_type":"image","src":"\/\/www.thebirthstore.com.au\/cdn\/shop\/files\/breastfeeding-nipple-shield-1pc-148677.jpg?v=1714967951","width":1080},{"alt":"Breastfeeding Nipple Shield - 1pc - The Birth Store-Haakaa","id":27007580274877,"position":4,"preview_image":{"aspect_ratio":1.0,"height":1080,"width":1080,"src":"\/\/www.thebirthstore.com.au\/cdn\/shop\/files\/breastfeeding-nipple-shield-1pc-178483.jpg?v=1714967951"},"aspect_ratio":1.0,"height":1080,"media_type":"image","src":"\/\/www.thebirthstore.com.au\/cdn\/shop\/files\/breastfeeding-nipple-shield-1pc-178483.jpg?v=1714967951","width":1080}],"requires_selling_plan":false,"selling_plan_groups":[],"content":"\u003cdiv id=\"s-ce7ccc34-31d3-4b20-94eb-80f5e4d4bb3d\" class=\"shg-c shg-align-center\" data-mce-fragment=\"1\"\u003e\n\u003cdiv class=\"shogun-heading-component\" data-mce-fragment=\"1\"\u003e\n\u003ch2 data-mce-fragment=\"1\"\u003eThe Haakaa Breastfeeding Nipple Shield! A world 1st design made of 100% soft silicone. An extended teat puts space between your nipple \u0026amp; baby's mouth.\u003c\/h2\u003e\n\u003c\/div\u003e\n\u003c\/div\u003e\n\u003cdiv id=\"s-2d13688d-9f80-44db-ba59-35f9921b1be0\" class=\"shg-c\" data-mce-fragment=\"1\"\u003e\n\u003cdiv class=\"shg-rich-text shg-theme-text-content\" data-mce-fragment=\"1\"\u003e\n\u003cp data-mce-fragment=\"1\"\u003eIf your little one bites down, pulls away, or if you have inverted or cracked nipples, you will still be able to breastfeed with ease and comfort. Our Nipple Shields suction onto your breast, giving you a hands-free breastfeeding experience.\u003c\/p\u003e\n\u003cp data-mce-fragment=\"1\"\u003eAvailable with a round or triangle base, the Haakaa Breastfeeding Nipple Shield allows all mums to experience the beauty of breastfeeding without the worry of discomfort and pain! The round base is larger and suctions on more easily, making it more suited for those who are new to using nipple shields. The triangle base is smaller, but allows for more skin-to-skin contact, making it more suited for those who are more experienced with using nipple shields.\u003c\/p\u003e\n\u003cp data-mce-fragment=\"1\"\u003eWe offer two teat shapes: the orthodontic teat and the nipple teat. The orthodontic teat is thumb-shaped to replicate the shape of a mother's nipple during breastfeeding, making it more readily accepted by your baby. The nipple teat replicates the silicone teat of a baby bottle and is better suited to help your baby transition from breast to bottle.\u003c\/p\u003e\n\u003cp data-mce-fragment=\"1\"\u003eThe Orthodontic Breastfeeding Nipple Shields have an opening that's 28mm in diameter and the Bottle Breastfeeding Nipple Shields have an opening that's 23mm in diameter for your nipple.\u003c\/p\u003e\n\u003cp data-mce-fragment=\"1\"\u003eThis product is designed for mothers who are physically unable to breastfeed due to sore, cracked nipples and should only be used in the interim before returning to natural breastfeeding once your nipple has healed. If you are able to breastfeed successfully and experience slight discomfort, we suggest using the Haakaa traditional nipple shields as a protective alternative if your nipples become raw and sore.\u003c\/p\u003e\n\u003cp data-mce-fragment=\"1\"\u003eIncludes one shield and a protective case for storage.\u003c\/p\u003e\n\u003cul data-mce-fragment=\"1\"\u003e\n\u003cli data-mce-fragment=\"1\"\u003e\u003cspan data-mce-fragment=\"1\"\u003ePatented one-piece design with no joints, cracks or edges.\u003c\/span\u003e\u003c\/li\u003e\n\u003cli data-mce-fragment=\"1\"\u003e\u003cspan data-mce-fragment=\"1\"\u003eNipple design allows babies to mimic a natural sucking rhythm, making it easier for babies that have difficulty latching.\u003c\/span\u003e\u003c\/li\u003e\n\u003cli data-mce-fragment=\"1\"\u003e\u003cspan data-mce-fragment=\"1\"\u003eSuctions on to all breast shapes, making it easier for new mums to use and enjoy a hands-free breastfeeding experience.\u003c\/span\u003e\u003c\/li\u003e\n\u003cli data-mce-fragment=\"1\"\u003e\u003cspan data-mce-fragment=\"1\"\u003eThe anti-slip ridged outer edge make the nipple shield easier to hold while the baby is feeding.\u003c\/span\u003e\u003c\/li\u003e\n\u003cli data-mce-fragment=\"1\"\u003e\u003cspan data-mce-fragment=\"1\"\u003eAnti-colic and variable flow nipple allows baby to drink continuously without gasping for air or drinking bubbles and prevents them from choking if milk flows too fast.\u003c\/span\u003e\u003c\/li\u003e\n\u003cli data-mce-fragment=\"1\"\u003e\u003cspan data-mce-fragment=\"1\"\u003eSpace between mum’s nipple and the nipple shield head prevents baby from biting the nipple.\u003c\/span\u003e\u003c\/li\u003e\n\u003cli data-mce-fragment=\"1\"\u003e\u003cspan data-mce-fragment=\"1\"\u003eBPA, PVC and phthalate-free.\u003c\/span\u003e\u003c\/li\u003e\n\u003c\/ul\u003e\n\u003c\/div\u003e\n\u003c\/div\u003e"},"options":[{"name":"Shape","position":1,"values":["Round","Orthodontic Triangle","Orthodontic Round"]}],"custom_metafields":{},"metafields":{"badge":"\u003cdiv style='display:none' class='jdgm-prev-badge' data-average-rating='0.00' data-number-of-reviews='0' data-number-of-questions='0'\u003e \u003cspan class='jdgm-prev-badge__stars' data-score='0.00' tabindex='0' aria-label='0.00 stars' role='button'\u003e \u003cspan class='jdgm-star jdgm--off'\u003e\u003c\/span\u003e\u003cspan class='jdgm-star jdgm--off'\u003e\u003c\/span\u003e\u003cspan class='jdgm-star jdgm--off'\u003e\u003c\/span\u003e\u003cspan class='jdgm-star jdgm--off'\u003e\u003c\/span\u003e\u003cspan class='jdgm-star jdgm--off'\u003e\u003c\/span\u003e \u003c\/span\u003e \u003cspan class='jdgm-prev-badge__text'\u003e No reviews \u003c\/span\u003e \u003c\/div\u003e","widget":"\u003cdiv class='jdgm-rev-widg' data-updated-at='2025-06-13T16:12:53Z' data-average-rating='0.00' data-number-of-reviews='0' data-number-of-questions='0'\u003e \u003cstyle class='jdgm-temp-hiding-style'\u003e.jdgm-rev-widg{ display: none }\u003c\/style\u003e \u003cdiv class='jdgm-rev-widg__header'\u003e \u003ch2 class='jdgm-rev-widg__title'\u003eCustomer Reviews\u003c\/h2\u003e \u003cdiv class='jdgm-rev-widg__summary'\u003e \u003cdiv class='jdgm-rev-widg__summary-stars' aria-label='Average rating is 0.00 stars' role='img'\u003e \u003cspan class='jdgm-star jdgm--off'\u003e\u003c\/span\u003e\u003cspan class='jdgm-star jdgm--off'\u003e\u003c\/span\u003e\u003cspan class='jdgm-star jdgm--off'\u003e\u003c\/span\u003e\u003cspan class='jdgm-star jdgm--off'\u003e\u003c\/span\u003e\u003cspan class='jdgm-star jdgm--off'\u003e\u003c\/span\u003e \u003c\/div\u003e \u003cdiv class='jdgm-rev-widg__summary-text'\u003eBe the first to write a review\u003c\/div\u003e \u003c\/div\u003e \u003ca style='display: none' href='#' class='jdgm-write-rev-link' role='button'\u003eWrite a review\u003c\/a\u003e \u003cdiv class='jdgm-histogram jdgm-temp-hidden'\u003e \u003cdiv class='jdgm-histogram__row' data-rating='5' data-frequency='0' data-percentage='0'\u003e \u003cdiv class='jdgm-histogram__star' role='button' aria-label=\"0% (0) reviews with 5 star rating\" tabindex='0' \u003e\u003cspan class='jdgm-star jdgm--on'\u003e\u003c\/span\u003e\u003cspan class='jdgm-star jdgm--on'\u003e\u003c\/span\u003e\u003cspan class='jdgm-star jdgm--on'\u003e\u003c\/span\u003e\u003cspan class='jdgm-star jdgm--on'\u003e\u003c\/span\u003e\u003cspan class='jdgm-star jdgm--on'\u003e\u003c\/span\u003e\u003c\/div\u003e \u003cdiv class='jdgm-histogram__bar'\u003e \u003cdiv class='jdgm-histogram__bar-content' style='width: 0%;'\u003e \u003c\/div\u003e \u003c\/div\u003e \u003cdiv class='jdgm-histogram__percentage'\u003e0%\u003c\/div\u003e \u003cdiv class='jdgm-histogram__frequency'\u003e(0)\u003c\/div\u003e \u003c\/div\u003e \u003cdiv class='jdgm-histogram__row' data-rating='4' data-frequency='0' data-percentage='0'\u003e \u003cdiv class='jdgm-histogram__star' role='button' aria-label=\"0% (0) reviews with 4 star rating\" tabindex='0' \u003e\u003cspan class='jdgm-star jdgm--on'\u003e\u003c\/span\u003e\u003cspan class='jdgm-star jdgm--on'\u003e\u003c\/span\u003e\u003cspan class='jdgm-star jdgm--on'\u003e\u003c\/span\u003e\u003cspan class='jdgm-star jdgm--on'\u003e\u003c\/span\u003e\u003cspan class='jdgm-star jdgm--off'\u003e\u003c\/span\u003e\u003c\/div\u003e \u003cdiv class='jdgm-histogram__bar'\u003e \u003cdiv class='jdgm-histogram__bar-content' style='width: 0%;'\u003e \u003c\/div\u003e \u003c\/div\u003e \u003cdiv class='jdgm-histogram__percentage'\u003e0%\u003c\/div\u003e \u003cdiv class='jdgm-histogram__frequency'\u003e(0)\u003c\/div\u003e \u003c\/div\u003e \u003cdiv class='jdgm-histogram__row' data-rating='3' data-frequency='0' data-percentage='0'\u003e \u003cdiv class='jdgm-histogram__star' role='button' aria-label=\"0% (0) reviews with 3 star rating\" tabindex='0' \u003e\u003cspan class='jdgm-star jdgm--on'\u003e\u003c\/span\u003e\u003cspan class='jdgm-star jdgm--on'\u003e\u003c\/span\u003e\u003cspan class='jdgm-star jdgm--on'\u003e\u003c\/span\u003e\u003cspan class='jdgm-star jdgm--off'\u003e\u003c\/span\u003e\u003cspan class='jdgm-star jdgm--off'\u003e\u003c\/span\u003e\u003c\/div\u003e \u003cdiv class='jdgm-histogram__bar'\u003e \u003cdiv class='jdgm-histogram__bar-content' style='width: 0%;'\u003e \u003c\/div\u003e \u003c\/div\u003e \u003cdiv class='jdgm-histogram__percentage'\u003e0%\u003c\/div\u003e \u003cdiv class='jdgm-histogram__frequency'\u003e(0)\u003c\/div\u003e \u003c\/div\u003e \u003cdiv class='jdgm-histogram__row' data-rating='2' data-frequency='0' data-percentage='0'\u003e \u003cdiv class='jdgm-histogram__star' role='button' aria-label=\"0% (0) reviews with 2 star rating\" tabindex='0' \u003e\u003cspan class='jdgm-star jdgm--on'\u003e\u003c\/span\u003e\u003cspan class='jdgm-star jdgm--on'\u003e\u003c\/span\u003e\u003cspan class='jdgm-star jdgm--off'\u003e\u003c\/span\u003e\u003cspan class='jdgm-star jdgm--off'\u003e\u003c\/span\u003e\u003cspan class='jdgm-star jdgm--off'\u003e\u003c\/span\u003e\u003c\/div\u003e \u003cdiv class='jdgm-histogram__bar'\u003e \u003cdiv class='jdgm-histogram__bar-content' style='width: 0%;'\u003e \u003c\/div\u003e \u003c\/div\u003e \u003cdiv class='jdgm-histogram__percentage'\u003e0%\u003c\/div\u003e \u003cdiv class='jdgm-histogram__frequency'\u003e(0)\u003c\/div\u003e \u003c\/div\u003e \u003cdiv class='jdgm-histogram__row' data-rating='1' data-frequency='0' data-percentage='0'\u003e \u003cdiv class='jdgm-histogram__star' role='button' aria-label=\"0% (0) reviews with 1 star rating\" tabindex='0' \u003e\u003cspan class='jdgm-star jdgm--on'\u003e\u003c\/span\u003e\u003cspan class='jdgm-star jdgm--off'\u003e\u003c\/span\u003e\u003cspan class='jdgm-star jdgm--off'\u003e\u003c\/span\u003e\u003cspan class='jdgm-star jdgm--off'\u003e\u003c\/span\u003e\u003cspan class='jdgm-star jdgm--off'\u003e\u003c\/span\u003e\u003c\/div\u003e \u003cdiv class='jdgm-histogram__bar'\u003e \u003cdiv class='jdgm-histogram__bar-content' style='width: 0%;'\u003e \u003c\/div\u003e \u003c\/div\u003e \u003cdiv class='jdgm-histogram__percentage'\u003e0%\u003c\/div\u003e \u003cdiv class='jdgm-histogram__frequency'\u003e(0)\u003c\/div\u003e \u003c\/div\u003e \u003cdiv class='jdgm-histogram__row jdgm-histogram__clear-filter' data-rating=null tabindex='0'\u003e\u003c\/div\u003e \u003c\/div\u003e \u003cdiv class='jdgm-rev-widg__sort-wrapper'\u003e\u003c\/div\u003e \u003c\/div\u003e \u003cdiv class='jdgm-rev-widg__body'\u003e \u003cdiv class='jdgm-rev-widg__reviews'\u003e\u003c\/div\u003e \u003cdiv class='jdgm-paginate' data-per-page='10' data-url='https:\/\/api.judge.me\/reviews\/reviews_for_widget' style=\"display: none;\"\u003e\u003c\/div\u003e \u003c\/div\u003e \u003cdiv class='jdgm-rev-widg__paginate-spinner-wrapper'\u003e \u003cdiv class='jdgm-spinner'\u003e\u003c\/div\u003e \u003c\/div\u003e \u003c\/div\u003e"},"collections":[{"id":281712427197,"handle":"breastfeeding","title":"Breastfeeding","updated_at":"2025-12-28T20:10:01+08:00","body_html":"","published_at":"2021-12-20T14:19:33+08:00","sort_order":"best-selling","template_suffix":"breastfeeding-collection","disjunctive":false,"rules":[{"column":"tag","relation":"equals","condition":"Breastfeeding"}],"published_scope":"global","image":{"created_at":"2024-05-06T11:59:34+08:00","alt":"Breastfeeding - The Birth Store","width":620,"height":635,"src":"\/\/www.thebirthstore.com.au\/cdn\/shop\/collections\/breastfeeding-793872.jpg?v=1714967974"}},{"id":261657460925,"handle":"buy","title":"Buy","updated_at":"2025-12-28T20:10:01+08:00","body_html":"\u003cp\u003eBrowse all of our pregnancy, labour \u0026amp; birth, postpartum and baby essentials here.\u003cbr\u003e\u003c\/p\u003e\n\u003cp\u003e\u003cspan\u003eYou can even buy now and pay later with Afterpay!\u003c\/span\u003e\u003c\/p\u003e","published_at":"2021-03-10T12:05:31+08:00","sort_order":"best-selling","template_suffix":"shop-all-collection","disjunctive":false,"rules":[{"column":"title","relation":"not_contains","condition":"Hire"}],"published_scope":"global","image":{"created_at":"2024-05-06T11:59:42+08:00","alt":"Buy - The Birth Store","width":2048,"height":2048,"src":"\/\/www.thebirthstore.com.au\/cdn\/shop\/collections\/buy-964856.jpg?v=1714967982"}},{"id":294349865149,"handle":"cracked-nipples","title":"Cracked Nipples","updated_at":"2025-12-26T20:08:47+08:00","body_html":"","published_at":"2023-09-21T14:03:02+08:00","sort_order":"best-selling","template_suffix":"swaddles-collection","disjunctive":false,"rules":[{"column":"tag","relation":"equals","condition":"Cracked Nipples"}],"published_scope":"global","image":{"created_at":"2024-05-06T11:59:53+08:00","alt":"Cracked Nipples - The Birth Store","width":1050,"height":1050,"src":"\/\/www.thebirthstore.com.au\/cdn\/shop\/collections\/cracked-nipples-166971.jpg?v=1714967994"}},{"id":261658083517,"handle":"post-partum","title":"Postpartum","updated_at":"2025-12-28T20:10:01+08:00","body_html":"\u003cp\u003eShop your postpartum and hospital bag essentials below. Looking for something we don't currently stock? Please reach out and let us know.\u003cbr\u003e\u003c\/p\u003e\n\u003cp\u003e\u003cspan\u003eYou can even buy now and pay later with Afterpay!\u003c\/span\u003e\u003c\/p\u003e","published_at":"2021-03-10T12:33:47+08:00","sort_order":"best-selling","template_suffix":"postpartum-collection","disjunctive":false,"rules":[{"column":"tag","relation":"equals","condition":"Post-Partum"}],"published_scope":"global","image":{"created_at":"2024-05-06T12:00:36+08:00","alt":"Postpartum - The Birth Store","width":611,"height":702,"src":"\/\/www.thebirthstore.com.au\/cdn\/shop\/collections\/postpartum-150119.jpg?v=1714968037"}},{"id":291456483517,"handle":"shop-all","title":"Shop All - Mum","updated_at":"2025-12-28T20:10:01+08:00","body_html":"","published_at":"2022-12-23T22:04:39+08:00","sort_order":"best-selling","template_suffix":"shop-all-collection","disjunctive":false,"rules":[{"column":"variant_price","relation":"greater_than","condition":"1"},{"column":"title","relation":"not_contains","condition":"Batteries"},{"column":"tag","relation":"equals","condition":"Mum"}],"published_scope":"global","image":{"created_at":"2024-05-06T12:00:54+08:00","alt":"Shop All - The Birth Store","width":1365,"height":2048,"src":"\/\/www.thebirthstore.com.au\/cdn\/shop\/collections\/shop-all-693176.jpg?v=1714968055"}},{"id":310045933757,"handle":"shop-all-sale","title":"Shop All Sale","updated_at":"2025-12-28T20:10:01+08:00","body_html":"","published_at":"2024-11-12T13:22:43+08:00","sort_order":"alpha-asc","template_suffix":"","disjunctive":true,"rules":[{"column":"tag","relation":"equals","condition":"Bundles"},{"column":"vendor","relation":"equals","condition":"Franjos Kitchen"},{"column":"vendor","relation":"equals","condition":"Adored Illustrations"},{"column":"vendor","relation":"equals","condition":"Amazing Oils"},{"column":"vendor","relation":"equals","condition":"Ice Ice Booby"},{"column":"vendor","relation":"equals","condition":"Made to Milk"},{"column":"vendor","relation":"equals","condition":"Milky Goodness"},{"column":"vendor","relation":"equals","condition":"Seasons of Mama"},{"column":"vendor","relation":"equals","condition":"Silverette"},{"column":"vendor","relation":"equals","condition":"Snuggle Hunny"},{"column":"vendor","relation":"equals","condition":"Yung Bod"},{"column":"vendor","relation":"equals","condition":"Bare Love"},{"column":"vendor","relation":"equals","condition":"Haakaa"},{"column":"vendor","relation":"equals","condition":"Mere Botanicals"},{"column":"vendor","relation":"equals","condition":"The Birth Store Hire"},{"column":"vendor","relation":"equals","condition":"The Birth Store"}],"published_scope":"global","image":{"created_at":"2024-11-13T10:58:16+08:00","alt":"Shop All Sale - The Birth Store","width":2048,"height":1365,"src":"\/\/www.thebirthstore.com.au\/cdn\/shop\/collections\/shop-all-sale-297361.jpg?v=1731466697"}}]}
[{"alt":"Breastfeeding Nipple Shield - 1pc - The Birth Store-Haakaa","id":27007580176573,"position":1,"preview_image":{"aspect_ratio":1.0,"height":1080,"width":1080,"src":"\/\/www.thebirthstore.com.au\/cdn\/shop\/files\/breastfeeding-nipple-shield-1pc-429407.jpg?v=1714967950"},"aspect_ratio":1.0,"height":1080,"media_type":"image","src":"\/\/www.thebirthstore.com.au\/cdn\/shop\/files\/breastfeeding-nipple-shield-1pc-429407.jpg?v=1714967950","width":1080},{"alt":"Breastfeeding Nipple Shield - 1pc - The Birth Store-Haakaa","id":27007580209341,"position":2,"preview_image":{"aspect_ratio":1.0,"height":1000,"width":1000,"src":"\/\/www.thebirthstore.com.au\/cdn\/shop\/files\/breastfeeding-nipple-shield-1pc-135216.jpg?v=1714967950"},"aspect_ratio":1.0,"height":1000,"media_type":"image","src":"\/\/www.thebirthstore.com.au\/cdn\/shop\/files\/breastfeeding-nipple-shield-1pc-135216.jpg?v=1714967950","width":1000},{"alt":"Breastfeeding Nipple Shield - 1pc - The Birth Store-Haakaa","id":27007580242109,"position":3,"preview_image":{"aspect_ratio":1.0,"height":1080,"width":1080,"src":"\/\/www.thebirthstore.com.au\/cdn\/shop\/files\/breastfeeding-nipple-shield-1pc-148677.jpg?v=1714967951"},"aspect_ratio":1.0,"height":1080,"media_type":"image","src":"\/\/www.thebirthstore.com.au\/cdn\/shop\/files\/breastfeeding-nipple-shield-1pc-148677.jpg?v=1714967951","width":1080},{"alt":"Breastfeeding Nipple Shield - 1pc - The Birth Store-Haakaa","id":27007580274877,"position":4,"preview_image":{"aspect_ratio":1.0,"height":1080,"width":1080,"src":"\/\/www.thebirthstore.com.au\/cdn\/shop\/files\/breastfeeding-nipple-shield-1pc-178483.jpg?v=1714967951"},"aspect_ratio":1.0,"height":1080,"media_type":"image","src":"\/\/www.thebirthstore.com.au\/cdn\/shop\/files\/breastfeeding-nipple-shield-1pc-178483.jpg?v=1714967951","width":1080}]
{"item":{"id":7856835297469,"title":"Bump \u0026 Beyond Belly Mask","handle":"bump-beyond-belly-mask","description":"\u003cp class=\"\"\u003eThe YUNG BOD Bump \u0026amp; Beyond Belly Mask nourishes your pregnant and post-birth belly skin, offering a replenishing feeling to the area. This sheet mask is specifically designed for your growing bump or recovering belly, and it’s infused with restorative ingredients to give your delicate skin some much-needed comfort.\u003c\/p\u003e\n\u003cp class=\"\"\u003eThe skin on your belly stretches during pregnancy as your baby bump grows. Even after you’ve given birth, the skin in this area can feel uncomfortable and sensitive. By increasing your skin’s hydration and moisture content, you can help this area feel soft, supple, and re-strengthened.\u003c\/p\u003e\n\u003cp class=\"\"\u003eThis sheet mask is pregnancy and breastfeeding-safe. It’s formulated with a mix of clinically studied ingredients and natural plant extracts\u003c\/p\u003e","published_at":"2024-08-06T14:18:49+08:00","created_at":"2024-08-06T14:02:35+08:00","vendor":"Yung Bod","type":"","tags":["Baby Shower Gifts - Mum","Mum","Post-Partum","Pregnancy","Skin Care"],"price":1199,"price_min":1199,"price_max":1199,"available":false,"price_varies":false,"compare_at_price":null,"compare_at_price_min":0,"compare_at_price_max":0,"compare_at_price_varies":false,"variants":[{"id":44422748012733,"title":"Default Title","option1":"Default Title","option2":null,"option3":null,"sku":null,"requires_shipping":true,"taxable":false,"featured_image":null,"available":false,"name":"Bump \u0026 Beyond Belly Mask","public_title":null,"options":["Default Title"],"price":1199,"weight":42,"compare_at_price":null,"inventory_management":"shopify","barcode":"48012733","requires_selling_plan":false,"selling_plan_allocations":[]}],"images":["\/\/www.thebirthstore.com.au\/cdn\/shop\/files\/bump-beyond-belly-mask-545409.jpg?v=1723678022"],"featured_image":"\/\/www.thebirthstore.com.au\/cdn\/shop\/files\/bump-beyond-belly-mask-545409.jpg?v=1723678022","options":["Title"],"media":[{"alt":"Bump \u0026 Beyond Belly Mask - The Birth Store - Yung Bod","id":27548635529405,"position":1,"preview_image":{"aspect_ratio":1.0,"height":1080,"width":1080,"src":"\/\/www.thebirthstore.com.au\/cdn\/shop\/files\/bump-beyond-belly-mask-545409.jpg?v=1723678022"},"aspect_ratio":1.0,"height":1080,"media_type":"image","src":"\/\/www.thebirthstore.com.au\/cdn\/shop\/files\/bump-beyond-belly-mask-545409.jpg?v=1723678022","width":1080}],"requires_selling_plan":false,"selling_plan_groups":[],"content":"\u003cp class=\"\"\u003eThe YUNG BOD Bump \u0026amp; Beyond Belly Mask nourishes your pregnant and post-birth belly skin, offering a replenishing feeling to the area. This sheet mask is specifically designed for your growing bump or recovering belly, and it’s infused with restorative ingredients to give your delicate skin some much-needed comfort.\u003c\/p\u003e\n\u003cp class=\"\"\u003eThe skin on your belly stretches during pregnancy as your baby bump grows. Even after you’ve given birth, the skin in this area can feel uncomfortable and sensitive. By increasing your skin’s hydration and moisture content, you can help this area feel soft, supple, and re-strengthened.\u003c\/p\u003e\n\u003cp class=\"\"\u003eThis sheet mask is pregnancy and breastfeeding-safe. It’s formulated with a mix of clinically studied ingredients and natural plant extracts\u003c\/p\u003e"},"options":[{"name":"Title","position":1,"values":["Default Title"]}],"custom_metafields":{},"metafields":{"badge":"\u003cdiv style='display:none' class='jdgm-prev-badge' data-average-rating='0.00' data-number-of-reviews='0' data-number-of-questions='0'\u003e \u003cspan class='jdgm-prev-badge__stars' data-score='0.00' tabindex='0' aria-label='0.00 stars' role='button'\u003e \u003cspan class='jdgm-star jdgm--off'\u003e\u003c\/span\u003e\u003cspan class='jdgm-star jdgm--off'\u003e\u003c\/span\u003e\u003cspan class='jdgm-star jdgm--off'\u003e\u003c\/span\u003e\u003cspan class='jdgm-star jdgm--off'\u003e\u003c\/span\u003e\u003cspan class='jdgm-star jdgm--off'\u003e\u003c\/span\u003e \u003c\/span\u003e \u003cspan class='jdgm-prev-badge__text'\u003e No reviews \u003c\/span\u003e \u003c\/div\u003e","widget":"\u003cdiv class='jdgm-rev-widg' data-updated-at='2025-06-13T16:13:40Z' data-average-rating='0.00' data-number-of-reviews='0' data-number-of-questions='0'\u003e \u003cstyle class='jdgm-temp-hiding-style'\u003e.jdgm-rev-widg{ display: none }\u003c\/style\u003e \u003cdiv class='jdgm-rev-widg__header'\u003e \u003ch2 class='jdgm-rev-widg__title'\u003eCustomer Reviews\u003c\/h2\u003e \u003cdiv class='jdgm-rev-widg__summary'\u003e \u003cdiv class='jdgm-rev-widg__summary-stars' aria-label='Average rating is 0.00 stars' role='img'\u003e \u003cspan class='jdgm-star jdgm--off'\u003e\u003c\/span\u003e\u003cspan class='jdgm-star jdgm--off'\u003e\u003c\/span\u003e\u003cspan class='jdgm-star jdgm--off'\u003e\u003c\/span\u003e\u003cspan class='jdgm-star jdgm--off'\u003e\u003c\/span\u003e\u003cspan class='jdgm-star jdgm--off'\u003e\u003c\/span\u003e \u003c\/div\u003e \u003cdiv class='jdgm-rev-widg__summary-text'\u003eBe the first to write a review\u003c\/div\u003e \u003c\/div\u003e \u003ca style='display: none' href='#' class='jdgm-write-rev-link' role='button'\u003eWrite a review\u003c\/a\u003e \u003cdiv class='jdgm-histogram jdgm-temp-hidden'\u003e \u003cdiv class='jdgm-histogram__row' data-rating='5' data-frequency='0' data-percentage='0'\u003e \u003cdiv class='jdgm-histogram__star' role='button' aria-label=\"0% (0) reviews with 5 star rating\" tabindex='0' \u003e\u003cspan class='jdgm-star jdgm--on'\u003e\u003c\/span\u003e\u003cspan class='jdgm-star jdgm--on'\u003e\u003c\/span\u003e\u003cspan class='jdgm-star jdgm--on'\u003e\u003c\/span\u003e\u003cspan class='jdgm-star jdgm--on'\u003e\u003c\/span\u003e\u003cspan class='jdgm-star jdgm--on'\u003e\u003c\/span\u003e\u003c\/div\u003e \u003cdiv class='jdgm-histogram__bar'\u003e \u003cdiv class='jdgm-histogram__bar-content' style='width: 0%;'\u003e \u003c\/div\u003e \u003c\/div\u003e \u003cdiv class='jdgm-histogram__percentage'\u003e0%\u003c\/div\u003e \u003cdiv class='jdgm-histogram__frequency'\u003e(0)\u003c\/div\u003e \u003c\/div\u003e \u003cdiv class='jdgm-histogram__row' data-rating='4' data-frequency='0' data-percentage='0'\u003e \u003cdiv class='jdgm-histogram__star' role='button' aria-label=\"0% (0) reviews with 4 star rating\" tabindex='0' \u003e\u003cspan class='jdgm-star jdgm--on'\u003e\u003c\/span\u003e\u003cspan class='jdgm-star jdgm--on'\u003e\u003c\/span\u003e\u003cspan class='jdgm-star jdgm--on'\u003e\u003c\/span\u003e\u003cspan class='jdgm-star jdgm--on'\u003e\u003c\/span\u003e\u003cspan class='jdgm-star jdgm--off'\u003e\u003c\/span\u003e\u003c\/div\u003e \u003cdiv class='jdgm-histogram__bar'\u003e \u003cdiv class='jdgm-histogram__bar-content' style='width: 0%;'\u003e \u003c\/div\u003e \u003c\/div\u003e \u003cdiv class='jdgm-histogram__percentage'\u003e0%\u003c\/div\u003e \u003cdiv class='jdgm-histogram__frequency'\u003e(0)\u003c\/div\u003e \u003c\/div\u003e \u003cdiv class='jdgm-histogram__row' data-rating='3' data-frequency='0' data-percentage='0'\u003e \u003cdiv class='jdgm-histogram__star' role='button' aria-label=\"0% (0) reviews with 3 star rating\" tabindex='0' \u003e\u003cspan class='jdgm-star jdgm--on'\u003e\u003c\/span\u003e\u003cspan class='jdgm-star jdgm--on'\u003e\u003c\/span\u003e\u003cspan class='jdgm-star jdgm--on'\u003e\u003c\/span\u003e\u003cspan class='jdgm-star jdgm--off'\u003e\u003c\/span\u003e\u003cspan class='jdgm-star jdgm--off'\u003e\u003c\/span\u003e\u003c\/div\u003e \u003cdiv class='jdgm-histogram__bar'\u003e \u003cdiv class='jdgm-histogram__bar-content' style='width: 0%;'\u003e \u003c\/div\u003e \u003c\/div\u003e \u003cdiv class='jdgm-histogram__percentage'\u003e0%\u003c\/div\u003e \u003cdiv class='jdgm-histogram__frequency'\u003e(0)\u003c\/div\u003e \u003c\/div\u003e \u003cdiv class='jdgm-histogram__row' data-rating='2' data-frequency='0' data-percentage='0'\u003e \u003cdiv class='jdgm-histogram__star' role='button' aria-label=\"0% (0) reviews with 2 star rating\" tabindex='0' \u003e\u003cspan class='jdgm-star jdgm--on'\u003e\u003c\/span\u003e\u003cspan class='jdgm-star jdgm--on'\u003e\u003c\/span\u003e\u003cspan class='jdgm-star jdgm--off'\u003e\u003c\/span\u003e\u003cspan class='jdgm-star jdgm--off'\u003e\u003c\/span\u003e\u003cspan class='jdgm-star jdgm--off'\u003e\u003c\/span\u003e\u003c\/div\u003e \u003cdiv class='jdgm-histogram__bar'\u003e \u003cdiv class='jdgm-histogram__bar-content' style='width: 0%;'\u003e \u003c\/div\u003e \u003c\/div\u003e \u003cdiv class='jdgm-histogram__percentage'\u003e0%\u003c\/div\u003e \u003cdiv class='jdgm-histogram__frequency'\u003e(0)\u003c\/div\u003e \u003c\/div\u003e \u003cdiv class='jdgm-histogram__row' data-rating='1' data-frequency='0' data-percentage='0'\u003e \u003cdiv class='jdgm-histogram__star' role='button' aria-label=\"0% (0) reviews with 1 star rating\" tabindex='0' \u003e\u003cspan class='jdgm-star jdgm--on'\u003e\u003c\/span\u003e\u003cspan class='jdgm-star jdgm--off'\u003e\u003c\/span\u003e\u003cspan class='jdgm-star jdgm--off'\u003e\u003c\/span\u003e\u003cspan class='jdgm-star jdgm--off'\u003e\u003c\/span\u003e\u003cspan class='jdgm-star jdgm--off'\u003e\u003c\/span\u003e\u003c\/div\u003e \u003cdiv class='jdgm-histogram__bar'\u003e \u003cdiv class='jdgm-histogram__bar-content' style='width: 0%;'\u003e \u003c\/div\u003e \u003c\/div\u003e \u003cdiv class='jdgm-histogram__percentage'\u003e0%\u003c\/div\u003e \u003cdiv class='jdgm-histogram__frequency'\u003e(0)\u003c\/div\u003e \u003c\/div\u003e \u003cdiv class='jdgm-histogram__row jdgm-histogram__clear-filter' data-rating=null tabindex='0'\u003e\u003c\/div\u003e \u003c\/div\u003e \u003cdiv class='jdgm-rev-widg__sort-wrapper'\u003e\u003c\/div\u003e \u003c\/div\u003e \u003cdiv class='jdgm-rev-widg__body'\u003e \u003cdiv class='jdgm-rev-widg__reviews'\u003e\u003c\/div\u003e \u003cdiv class='jdgm-paginate' data-per-page='10' data-url='https:\/\/api.judge.me\/reviews\/reviews_for_widget' style=\"display: none;\"\u003e\u003c\/div\u003e \u003c\/div\u003e \u003cdiv class='jdgm-rev-widg__paginate-spinner-wrapper'\u003e \u003cdiv class='jdgm-spinner'\u003e\u003c\/div\u003e \u003c\/div\u003e \u003c\/div\u003e"},"collections":[{"id":281356533949,"handle":"baby-shower-gifts","title":"Baby Shower Gifts - Mum","updated_at":"2025-12-28T20:10:01+08:00","body_html":"\u003cp\u003eLooking for a unique baby shower gift? Or an all-in-one bundle pack to suit all your needs? We've got just the thing!\u003c\/p\u003e","published_at":"2021-12-06T13:43:56+08:00","sort_order":"best-selling","template_suffix":"baby-shower-gifts","disjunctive":true,"rules":[{"column":"tag","relation":"equals","condition":"Baby Shower Gifts - Mum"},{"column":"tag","relation":"equals","condition":"Gift Card"}],"published_scope":"global","image":{"created_at":"2024-05-06T11:59:28+08:00","alt":"Baby Shower Gifts - The Birth Store","width":1200,"height":1800,"src":"\/\/www.thebirthstore.com.au\/cdn\/shop\/collections\/baby-shower-gifts-401770.jpg?v=1761791272"}},{"id":261657460925,"handle":"buy","title":"Buy","updated_at":"2025-12-28T20:10:01+08:00","body_html":"\u003cp\u003eBrowse all of our pregnancy, labour \u0026amp; birth, postpartum and baby essentials here.\u003cbr\u003e\u003c\/p\u003e\n\u003cp\u003e\u003cspan\u003eYou can even buy now and pay later with Afterpay!\u003c\/span\u003e\u003c\/p\u003e","published_at":"2021-03-10T12:05:31+08:00","sort_order":"best-selling","template_suffix":"shop-all-collection","disjunctive":false,"rules":[{"column":"title","relation":"not_contains","condition":"Hire"}],"published_scope":"global","image":{"created_at":"2024-05-06T11:59:42+08:00","alt":"Buy - The Birth Store","width":2048,"height":2048,"src":"\/\/www.thebirthstore.com.au\/cdn\/shop\/collections\/buy-964856.jpg?v=1714967982"}},{"id":261658083517,"handle":"post-partum","title":"Postpartum","updated_at":"2025-12-28T20:10:01+08:00","body_html":"\u003cp\u003eShop your postpartum and hospital bag essentials below. Looking for something we don't currently stock? Please reach out and let us know.\u003cbr\u003e\u003c\/p\u003e\n\u003cp\u003e\u003cspan\u003eYou can even buy now and pay later with Afterpay!\u003c\/span\u003e\u003c\/p\u003e","published_at":"2021-03-10T12:33:47+08:00","sort_order":"best-selling","template_suffix":"postpartum-collection","disjunctive":false,"rules":[{"column":"tag","relation":"equals","condition":"Post-Partum"}],"published_scope":"global","image":{"created_at":"2024-05-06T12:00:36+08:00","alt":"Postpartum - The Birth Store","width":611,"height":702,"src":"\/\/www.thebirthstore.com.au\/cdn\/shop\/collections\/postpartum-150119.jpg?v=1714968037"}},{"id":261658149053,"handle":"pregnancy-and-maternity-products","title":"Pregnancy","updated_at":"2025-12-28T20:10:01+08:00","body_html":"\u003cp\u003eShop your pregnancy essentials below. Looking for something we don't currently stock? Please reach out and let us know.\u003cbr\u003e\u003c\/p\u003e\n\u003cp\u003e\u003cspan\u003eYou can even buy now and pay later with Afterpay!\u003c\/span\u003e\u003c\/p\u003e","published_at":"2021-03-10T12:34:22+08:00","sort_order":"best-selling","template_suffix":"pregnancy-collection","disjunctive":false,"rules":[{"column":"tag","relation":"equals","condition":"Pregnancy"}],"published_scope":"global","image":{"created_at":"2024-05-06T12:00:40+08:00","alt":"Pregnancy - The Birth Store","width":1024,"height":1536,"src":"\/\/www.thebirthstore.com.au\/cdn\/shop\/collections\/pregnancy-899677.jpg?v=1714968040"}},{"id":291456483517,"handle":"shop-all","title":"Shop All - Mum","updated_at":"2025-12-28T20:10:01+08:00","body_html":"","published_at":"2022-12-23T22:04:39+08:00","sort_order":"best-selling","template_suffix":"shop-all-collection","disjunctive":false,"rules":[{"column":"variant_price","relation":"greater_than","condition":"1"},{"column":"title","relation":"not_contains","condition":"Batteries"},{"column":"tag","relation":"equals","condition":"Mum"}],"published_scope":"global","image":{"created_at":"2024-05-06T12:00:54+08:00","alt":"Shop All - The Birth Store","width":1365,"height":2048,"src":"\/\/www.thebirthstore.com.au\/cdn\/shop\/collections\/shop-all-693176.jpg?v=1714968055"}},{"id":310045933757,"handle":"shop-all-sale","title":"Shop All Sale","updated_at":"2025-12-28T20:10:01+08:00","body_html":"","published_at":"2024-11-12T13:22:43+08:00","sort_order":"alpha-asc","template_suffix":"","disjunctive":true,"rules":[{"column":"tag","relation":"equals","condition":"Bundles"},{"column":"vendor","relation":"equals","condition":"Franjos Kitchen"},{"column":"vendor","relation":"equals","condition":"Adored Illustrations"},{"column":"vendor","relation":"equals","condition":"Amazing Oils"},{"column":"vendor","relation":"equals","condition":"Ice Ice Booby"},{"column":"vendor","relation":"equals","condition":"Made to Milk"},{"column":"vendor","relation":"equals","condition":"Milky Goodness"},{"column":"vendor","relation":"equals","condition":"Seasons of Mama"},{"column":"vendor","relation":"equals","condition":"Silverette"},{"column":"vendor","relation":"equals","condition":"Snuggle Hunny"},{"column":"vendor","relation":"equals","condition":"Yung Bod"},{"column":"vendor","relation":"equals","condition":"Bare Love"},{"column":"vendor","relation":"equals","condition":"Haakaa"},{"column":"vendor","relation":"equals","condition":"Mere Botanicals"},{"column":"vendor","relation":"equals","condition":"The Birth Store Hire"},{"column":"vendor","relation":"equals","condition":"The Birth Store"}],"published_scope":"global","image":{"created_at":"2024-11-13T10:58:16+08:00","alt":"Shop All Sale - The Birth Store","width":2048,"height":1365,"src":"\/\/www.thebirthstore.com.au\/cdn\/shop\/collections\/shop-all-sale-297361.jpg?v=1731466697"}},{"id":324680483005,"handle":"skin-care","title":"Skin Care","updated_at":"2025-12-28T20:10:01+08:00","body_html":"","published_at":"2025-09-23T22:14:11+08:00","sort_order":"best-selling","template_suffix":"","disjunctive":false,"rules":[{"column":"tag","relation":"equals","condition":"Skin Care"}],"published_scope":"global","image":{"created_at":"2025-10-30T16:17:08+08:00","alt":"Skin Care - The Birth Store","width":800,"height":800,"src":"\/\/www.thebirthstore.com.au\/cdn\/shop\/collections\/skin-care-6874549.jpg?v=1761812228"}}]}
[{"alt":"Bump \u0026 Beyond Belly Mask - The Birth Store - Yung Bod","id":27548635529405,"position":1,"preview_image":{"aspect_ratio":1.0,"height":1080,"width":1080,"src":"\/\/www.thebirthstore.com.au\/cdn\/shop\/files\/bump-beyond-belly-mask-545409.jpg?v=1723678022"},"aspect_ratio":1.0,"height":1080,"media_type":"image","src":"\/\/www.thebirthstore.com.au\/cdn\/shop\/files\/bump-beyond-belly-mask-545409.jpg?v=1723678022","width":1080}]
{"item":{"id":7513281331389,"title":"C-Section Birth Recovery Kit - Cream \u0026 Roller","handle":"c-section-birth-recovery-kit-cream-roller","description":"\u003cp\u003e\u003cmeta charset=\"utf-8\"\u003e\u003cspan\u003eThere are so many beautiful products on the market now to help with healing and comfort after your birth. We have created a kit with a couple of our favourite products from small Australian businesses to aid you in you the recovery journey you deserve - the one kit to fill all your recovery needs!\u003c\/span\u003e\u003c\/p\u003e","published_at":"2023-10-03T14:34:50+08:00","created_at":"2023-10-03T13:34:40+08:00","vendor":"Bundles","type":"","tags":["Baby Shower Gifts","Bundles","C-Section Birth Recovery","Hemorrhoids","Hospital Bag","Post-Partum"],"price":13975,"price_min":13975,"price_max":13975,"available":true,"price_varies":false,"compare_at_price":15685,"compare_at_price_min":15685,"compare_at_price_max":15685,"compare_at_price_varies":false,"variants":[{"id":43056991731901,"title":"Medium","option1":"Medium","option2":null,"option3":null,"sku":"","requires_shipping":true,"taxable":false,"featured_image":null,"available":true,"name":"C-Section Birth Recovery Kit - Cream \u0026 Roller - Medium","public_title":"Medium","options":["Medium"],"price":13975,"weight":1160,"compare_at_price":15685,"inventory_management":"shopify","barcode":"91731901","requires_selling_plan":false,"selling_plan_allocations":[]},{"id":43056991764669,"title":"Large","option1":"Large","option2":null,"option3":null,"sku":"","requires_shipping":true,"taxable":false,"featured_image":null,"available":false,"name":"C-Section Birth Recovery Kit - Cream \u0026 Roller - Large","public_title":"Large","options":["Large"],"price":13975,"weight":1270,"compare_at_price":15685,"inventory_management":"shopify","barcode":"91764669","requires_selling_plan":false,"selling_plan_allocations":[]}],"images":["\/\/www.thebirthstore.com.au\/cdn\/shop\/files\/c-section-birth-recovery-kit-cream-roller-738399.jpg?v=1714967949","\/\/www.thebirthstore.com.au\/cdn\/shop\/files\/c-section-birth-recovery-kit-cream-roller-753872.jpg?v=1714967949","\/\/www.thebirthstore.com.au\/cdn\/shop\/files\/c-section-birth-recovery-kit-cream-roller-652326.jpg?v=1714967949"],"featured_image":"\/\/www.thebirthstore.com.au\/cdn\/shop\/files\/c-section-birth-recovery-kit-cream-roller-738399.jpg?v=1714967949","options":["Disposable Maternity \u0026 Postpartum Underwear (Size)"],"media":[{"alt":"C-Section Birth Recovery Kit - Cream \u0026 Roller - The Birth Store-The Birth Store","id":27007579848893,"position":1,"preview_image":{"aspect_ratio":1.0,"height":1080,"width":1080,"src":"\/\/www.thebirthstore.com.au\/cdn\/shop\/files\/c-section-birth-recovery-kit-cream-roller-738399.jpg?v=1714967949"},"aspect_ratio":1.0,"height":1080,"media_type":"image","src":"\/\/www.thebirthstore.com.au\/cdn\/shop\/files\/c-section-birth-recovery-kit-cream-roller-738399.jpg?v=1714967949","width":1080},{"alt":"C-Section Birth Recovery Kit - Cream \u0026 Roller - The Birth Store-The Birth Store","id":27007579881661,"position":2,"preview_image":{"aspect_ratio":0.662,"height":976,"width":646,"src":"\/\/www.thebirthstore.com.au\/cdn\/shop\/files\/c-section-birth-recovery-kit-cream-roller-753872.jpg?v=1714967949"},"aspect_ratio":0.662,"height":976,"media_type":"image","src":"\/\/www.thebirthstore.com.au\/cdn\/shop\/files\/c-section-birth-recovery-kit-cream-roller-753872.jpg?v=1714967949","width":646},{"alt":"C-Section Birth Recovery Kit - Cream \u0026 Roller - The Birth Store-The Birth Store","id":27007579914429,"position":3,"preview_image":{"aspect_ratio":0.671,"height":957,"width":642,"src":"\/\/www.thebirthstore.com.au\/cdn\/shop\/files\/c-section-birth-recovery-kit-cream-roller-652326.jpg?v=1714967949"},"aspect_ratio":0.671,"height":957,"media_type":"image","src":"\/\/www.thebirthstore.com.au\/cdn\/shop\/files\/c-section-birth-recovery-kit-cream-roller-652326.jpg?v=1714967949","width":642}],"requires_selling_plan":false,"selling_plan_groups":[],"content":"\u003cp\u003e\u003cmeta charset=\"utf-8\"\u003e\u003cspan\u003eThere are so many beautiful products on the market now to help with healing and comfort after your birth. We have created a kit with a couple of our favourite products from small Australian businesses to aid you in you the recovery journey you deserve - the one kit to fill all your recovery needs!\u003c\/span\u003e\u003c\/p\u003e"},"options":[{"name":"Disposable Maternity \u0026 Postpartum Underwear (Size)","position":1,"values":["Medium","Large"]}],"custom_metafields":{},"metafields":{"badge":"\u003cdiv style='display:none' class='jdgm-prev-badge' data-average-rating='0.00' data-number-of-reviews='0' data-number-of-questions='0'\u003e \u003cspan class='jdgm-prev-badge__stars' data-score='0.00' tabindex='0' aria-label='0.00 stars' role='button'\u003e \u003cspan class='jdgm-star jdgm--off'\u003e\u003c\/span\u003e\u003cspan class='jdgm-star jdgm--off'\u003e\u003c\/span\u003e\u003cspan class='jdgm-star jdgm--off'\u003e\u003c\/span\u003e\u003cspan class='jdgm-star jdgm--off'\u003e\u003c\/span\u003e\u003cspan class='jdgm-star jdgm--off'\u003e\u003c\/span\u003e \u003c\/span\u003e \u003cspan class='jdgm-prev-badge__text'\u003e No reviews \u003c\/span\u003e \u003c\/div\u003e","widget":"\u003cdiv class='jdgm-rev-widg' data-updated-at='2025-06-13T16:13:40Z' data-average-rating='0.00' data-number-of-reviews='0' data-number-of-questions='0'\u003e \u003cstyle class='jdgm-temp-hiding-style'\u003e.jdgm-rev-widg{ display: none }\u003c\/style\u003e \u003cdiv class='jdgm-rev-widg__header'\u003e \u003ch2 class='jdgm-rev-widg__title'\u003eCustomer Reviews\u003c\/h2\u003e \u003cdiv class='jdgm-rev-widg__summary'\u003e \u003cdiv class='jdgm-rev-widg__summary-stars' aria-label='Average rating is 0.00 stars' role='img'\u003e \u003cspan class='jdgm-star jdgm--off'\u003e\u003c\/span\u003e\u003cspan class='jdgm-star jdgm--off'\u003e\u003c\/span\u003e\u003cspan class='jdgm-star jdgm--off'\u003e\u003c\/span\u003e\u003cspan class='jdgm-star jdgm--off'\u003e\u003c\/span\u003e\u003cspan class='jdgm-star jdgm--off'\u003e\u003c\/span\u003e \u003c\/div\u003e \u003cdiv class='jdgm-rev-widg__summary-text'\u003eBe the first to write a review\u003c\/div\u003e \u003c\/div\u003e \u003ca style='display: none' href='#' class='jdgm-write-rev-link' role='button'\u003eWrite a review\u003c\/a\u003e \u003cdiv class='jdgm-histogram jdgm-temp-hidden'\u003e \u003cdiv class='jdgm-histogram__row' data-rating='5' data-frequency='0' data-percentage='0'\u003e \u003cdiv class='jdgm-histogram__star' role='button' aria-label=\"0% (0) reviews with 5 star rating\" tabindex='0' \u003e\u003cspan class='jdgm-star jdgm--on'\u003e\u003c\/span\u003e\u003cspan class='jdgm-star jdgm--on'\u003e\u003c\/span\u003e\u003cspan class='jdgm-star jdgm--on'\u003e\u003c\/span\u003e\u003cspan class='jdgm-star jdgm--on'\u003e\u003c\/span\u003e\u003cspan class='jdgm-star jdgm--on'\u003e\u003c\/span\u003e\u003c\/div\u003e \u003cdiv class='jdgm-histogram__bar'\u003e \u003cdiv class='jdgm-histogram__bar-content' style='width: 0%;'\u003e \u003c\/div\u003e \u003c\/div\u003e \u003cdiv class='jdgm-histogram__percentage'\u003e0%\u003c\/div\u003e \u003cdiv class='jdgm-histogram__frequency'\u003e(0)\u003c\/div\u003e \u003c\/div\u003e \u003cdiv class='jdgm-histogram__row' data-rating='4' data-frequency='0' data-percentage='0'\u003e \u003cdiv class='jdgm-histogram__star' role='button' aria-label=\"0% (0) reviews with 4 star rating\" tabindex='0' \u003e\u003cspan class='jdgm-star jdgm--on'\u003e\u003c\/span\u003e\u003cspan class='jdgm-star jdgm--on'\u003e\u003c\/span\u003e\u003cspan class='jdgm-star jdgm--on'\u003e\u003c\/span\u003e\u003cspan class='jdgm-star jdgm--on'\u003e\u003c\/span\u003e\u003cspan class='jdgm-star jdgm--off'\u003e\u003c\/span\u003e\u003c\/div\u003e \u003cdiv class='jdgm-histogram__bar'\u003e \u003cdiv class='jdgm-histogram__bar-content' style='width: 0%;'\u003e \u003c\/div\u003e \u003c\/div\u003e \u003cdiv class='jdgm-histogram__percentage'\u003e0%\u003c\/div\u003e \u003cdiv class='jdgm-histogram__frequency'\u003e(0)\u003c\/div\u003e \u003c\/div\u003e \u003cdiv class='jdgm-histogram__row' data-rating='3' data-frequency='0' data-percentage='0'\u003e \u003cdiv class='jdgm-histogram__star' role='button' aria-label=\"0% (0) reviews with 3 star rating\" tabindex='0' \u003e\u003cspan class='jdgm-star jdgm--on'\u003e\u003c\/span\u003e\u003cspan class='jdgm-star jdgm--on'\u003e\u003c\/span\u003e\u003cspan class='jdgm-star jdgm--on'\u003e\u003c\/span\u003e\u003cspan class='jdgm-star jdgm--off'\u003e\u003c\/span\u003e\u003cspan class='jdgm-star jdgm--off'\u003e\u003c\/span\u003e\u003c\/div\u003e \u003cdiv class='jdgm-histogram__bar'\u003e \u003cdiv class='jdgm-histogram__bar-content' style='width: 0%;'\u003e \u003c\/div\u003e \u003c\/div\u003e \u003cdiv class='jdgm-histogram__percentage'\u003e0%\u003c\/div\u003e \u003cdiv class='jdgm-histogram__frequency'\u003e(0)\u003c\/div\u003e \u003c\/div\u003e \u003cdiv class='jdgm-histogram__row' data-rating='2' data-frequency='0' data-percentage='0'\u003e \u003cdiv class='jdgm-histogram__star' role='button' aria-label=\"0% (0) reviews with 2 star rating\" tabindex='0' \u003e\u003cspan class='jdgm-star jdgm--on'\u003e\u003c\/span\u003e\u003cspan class='jdgm-star jdgm--on'\u003e\u003c\/span\u003e\u003cspan class='jdgm-star jdgm--off'\u003e\u003c\/span\u003e\u003cspan class='jdgm-star jdgm--off'\u003e\u003c\/span\u003e\u003cspan class='jdgm-star jdgm--off'\u003e\u003c\/span\u003e\u003c\/div\u003e \u003cdiv class='jdgm-histogram__bar'\u003e \u003cdiv class='jdgm-histogram__bar-content' style='width: 0%;'\u003e \u003c\/div\u003e \u003c\/div\u003e \u003cdiv class='jdgm-histogram__percentage'\u003e0%\u003c\/div\u003e \u003cdiv class='jdgm-histogram__frequency'\u003e(0)\u003c\/div\u003e \u003c\/div\u003e \u003cdiv class='jdgm-histogram__row' data-rating='1' data-frequency='0' data-percentage='0'\u003e \u003cdiv class='jdgm-histogram__star' role='button' aria-label=\"0% (0) reviews with 1 star rating\" tabindex='0' \u003e\u003cspan class='jdgm-star jdgm--on'\u003e\u003c\/span\u003e\u003cspan class='jdgm-star jdgm--off'\u003e\u003c\/span\u003e\u003cspan class='jdgm-star jdgm--off'\u003e\u003c\/span\u003e\u003cspan class='jdgm-star jdgm--off'\u003e\u003c\/span\u003e\u003cspan class='jdgm-star jdgm--off'\u003e\u003c\/span\u003e\u003c\/div\u003e \u003cdiv class='jdgm-histogram__bar'\u003e \u003cdiv class='jdgm-histogram__bar-content' style='width: 0%;'\u003e \u003c\/div\u003e \u003c\/div\u003e \u003cdiv class='jdgm-histogram__percentage'\u003e0%\u003c\/div\u003e \u003cdiv class='jdgm-histogram__frequency'\u003e(0)\u003c\/div\u003e \u003c\/div\u003e \u003cdiv class='jdgm-histogram__row jdgm-histogram__clear-filter' data-rating=null tabindex='0'\u003e\u003c\/div\u003e \u003c\/div\u003e \u003cdiv class='jdgm-rev-widg__sort-wrapper'\u003e\u003c\/div\u003e \u003c\/div\u003e \u003cdiv class='jdgm-rev-widg__body'\u003e \u003cdiv class='jdgm-rev-widg__reviews'\u003e\u003c\/div\u003e \u003cdiv class='jdgm-paginate' data-per-page='10' data-url='https:\/\/api.judge.me\/reviews\/reviews_for_widget' style=\"display: none;\"\u003e\u003c\/div\u003e \u003c\/div\u003e \u003cdiv class='jdgm-rev-widg__paginate-spinner-wrapper'\u003e \u003cdiv class='jdgm-spinner'\u003e\u003c\/div\u003e \u003c\/div\u003e \u003c\/div\u003e"},"collections":[{"id":283018526909,"handle":"bundles","title":"Bundles","updated_at":"2025-11-18T20:29:11+08:00","body_html":"\u003cp\u003eMake shopping for your bump, birth and beyond easier with our bundle packs. With a pack available for every stage, you can get everything you need with no fuss and with our bundle packs, you even save money.\u003c\/p\u003e","published_at":"2022-02-01T22:33:09+08:00","sort_order":"best-selling","template_suffix":"swaddles-collection","disjunctive":false,"rules":[{"column":"tag","relation":"equals","condition":"Bundles"}],"published_scope":"global","image":{"created_at":"2024-05-06T11:59:39+08:00","alt":"Bundles - The Birth Store","width":2048,"height":1365,"src":"\/\/www.thebirthstore.com.au\/cdn\/shop\/collections\/bundles-299009.jpg?v=1714967980"}},{"id":261657460925,"handle":"buy","title":"Buy","updated_at":"2025-12-28T20:10:01+08:00","body_html":"\u003cp\u003eBrowse all of our pregnancy, labour \u0026amp; birth, postpartum and baby essentials here.\u003cbr\u003e\u003c\/p\u003e\n\u003cp\u003e\u003cspan\u003eYou can even buy now and pay later with Afterpay!\u003c\/span\u003e\u003c\/p\u003e","published_at":"2021-03-10T12:05:31+08:00","sort_order":"best-selling","template_suffix":"shop-all-collection","disjunctive":false,"rules":[{"column":"title","relation":"not_contains","condition":"Hire"}],"published_scope":"global","image":{"created_at":"2024-05-06T11:59:42+08:00","alt":"Buy - The Birth Store","width":2048,"height":2048,"src":"\/\/www.thebirthstore.com.au\/cdn\/shop\/collections\/buy-964856.jpg?v=1714967982"}},{"id":281712361661,"handle":"c-section-birth-recovery","title":"C-Section Birth Recovery","updated_at":"2025-12-27T20:11:39+08:00","body_html":"","published_at":"2021-12-20T14:19:01+08:00","sort_order":"best-selling","template_suffix":"swaddles-collection","disjunctive":false,"rules":[{"column":"tag","relation":"equals","condition":"C-Section Birth Recovery"}],"published_scope":"global","image":{"created_at":"2024-05-06T11:59:49+08:00","alt":"C-Section Birth Recovery - The Birth Store","width":1366,"height":2048,"src":"\/\/www.thebirthstore.com.au\/cdn\/shop\/collections\/c-section-birth-recovery-359249.jpg?v=1714967990"}},{"id":281712066749,"handle":"hemorrhoid-care","title":"Haemorrhoid Care","updated_at":"2025-12-28T20:10:01+08:00","body_html":"","published_at":"2021-12-20T14:16:30+08:00","sort_order":"best-selling","template_suffix":"swaddles-collection","disjunctive":false,"rules":[{"column":"tag","relation":"equals","condition":"Hemorrhoids"}],"published_scope":"global","image":{"created_at":"2024-05-06T12:00:00+08:00","alt":"Haemorrhoid Care - The Birth Store","width":763,"height":556,"src":"\/\/www.thebirthstore.com.au\/cdn\/shop\/collections\/haemorrhoid-care-562138.jpg?v=1714968001"}},{"id":261658083517,"handle":"post-partum","title":"Postpartum","updated_at":"2025-12-28T20:10:01+08:00","body_html":"\u003cp\u003eShop your postpartum and hospital bag essentials below. Looking for something we don't currently stock? Please reach out and let us know.\u003cbr\u003e\u003c\/p\u003e\n\u003cp\u003e\u003cspan\u003eYou can even buy now and pay later with Afterpay!\u003c\/span\u003e\u003c\/p\u003e","published_at":"2021-03-10T12:33:47+08:00","sort_order":"best-selling","template_suffix":"postpartum-collection","disjunctive":false,"rules":[{"column":"tag","relation":"equals","condition":"Post-Partum"}],"published_scope":"global","image":{"created_at":"2024-05-06T12:00:36+08:00","alt":"Postpartum - The Birth Store","width":611,"height":702,"src":"\/\/www.thebirthstore.com.au\/cdn\/shop\/collections\/postpartum-150119.jpg?v=1714968037"}},{"id":310045933757,"handle":"shop-all-sale","title":"Shop All Sale","updated_at":"2025-12-28T20:10:01+08:00","body_html":"","published_at":"2024-11-12T13:22:43+08:00","sort_order":"alpha-asc","template_suffix":"","disjunctive":true,"rules":[{"column":"tag","relation":"equals","condition":"Bundles"},{"column":"vendor","relation":"equals","condition":"Franjos Kitchen"},{"column":"vendor","relation":"equals","condition":"Adored Illustrations"},{"column":"vendor","relation":"equals","condition":"Amazing Oils"},{"column":"vendor","relation":"equals","condition":"Ice Ice Booby"},{"column":"vendor","relation":"equals","condition":"Made to Milk"},{"column":"vendor","relation":"equals","condition":"Milky Goodness"},{"column":"vendor","relation":"equals","condition":"Seasons of Mama"},{"column":"vendor","relation":"equals","condition":"Silverette"},{"column":"vendor","relation":"equals","condition":"Snuggle Hunny"},{"column":"vendor","relation":"equals","condition":"Yung Bod"},{"column":"vendor","relation":"equals","condition":"Bare Love"},{"column":"vendor","relation":"equals","condition":"Haakaa"},{"column":"vendor","relation":"equals","condition":"Mere Botanicals"},{"column":"vendor","relation":"equals","condition":"The Birth Store Hire"},{"column":"vendor","relation":"equals","condition":"The Birth Store"}],"published_scope":"global","image":{"created_at":"2024-11-13T10:58:16+08:00","alt":"Shop All Sale - The Birth Store","width":2048,"height":1365,"src":"\/\/www.thebirthstore.com.au\/cdn\/shop\/collections\/shop-all-sale-297361.jpg?v=1731466697"}}]}
[{"alt":"C-Section Birth Recovery Kit - Cream \u0026 Roller - The Birth Store-The Birth Store","id":27007579848893,"position":1,"preview_image":{"aspect_ratio":1.0,"height":1080,"width":1080,"src":"\/\/www.thebirthstore.com.au\/cdn\/shop\/files\/c-section-birth-recovery-kit-cream-roller-738399.jpg?v=1714967949"},"aspect_ratio":1.0,"height":1080,"media_type":"image","src":"\/\/www.thebirthstore.com.au\/cdn\/shop\/files\/c-section-birth-recovery-kit-cream-roller-738399.jpg?v=1714967949","width":1080},{"alt":"C-Section Birth Recovery Kit - Cream \u0026 Roller - The Birth Store-The Birth Store","id":27007579881661,"position":2,"preview_image":{"aspect_ratio":0.662,"height":976,"width":646,"src":"\/\/www.thebirthstore.com.au\/cdn\/shop\/files\/c-section-birth-recovery-kit-cream-roller-753872.jpg?v=1714967949"},"aspect_ratio":0.662,"height":976,"media_type":"image","src":"\/\/www.thebirthstore.com.au\/cdn\/shop\/files\/c-section-birth-recovery-kit-cream-roller-753872.jpg?v=1714967949","width":646},{"alt":"C-Section Birth Recovery Kit - Cream \u0026 Roller - The Birth Store-The Birth Store","id":27007579914429,"position":3,"preview_image":{"aspect_ratio":0.671,"height":957,"width":642,"src":"\/\/www.thebirthstore.com.au\/cdn\/shop\/files\/c-section-birth-recovery-kit-cream-roller-652326.jpg?v=1714967949"},"aspect_ratio":0.671,"height":957,"media_type":"image","src":"\/\/www.thebirthstore.com.au\/cdn\/shop\/files\/c-section-birth-recovery-kit-cream-roller-652326.jpg?v=1714967949","width":642}]
{"item":{"id":7513281200317,"title":"C-Section Birth Recovery Kit - Silicone Strips","handle":"c-section-birth-recovery-kit-silicone-strips","description":"\u003cp\u003e\u003cmeta charset=\"utf-8\"\u003e\u003cspan\u003eThere are so many beautiful products on the market now to help with healing and comfort after your birth. We have created a kit with a couple of our favourite products from small Australian businesses to aid you in you the recovery journey you deserve - the one kit to fill all your recovery needs!\u003c\/span\u003e\u003c\/p\u003e","published_at":"2023-10-03T14:26:20+08:00","created_at":"2023-10-03T13:33:54+08:00","vendor":"Bundles","type":"","tags":["Baby Shower Gifts","Bundles","C-Section Birth Recovery","Hemorrhoids","Hospital Bag","Post-Partum"],"price":10385,"price_min":10385,"price_max":10385,"available":true,"price_varies":false,"compare_at_price":10185,"compare_at_price_min":10185,"compare_at_price_max":10185,"compare_at_price_varies":false,"variants":[{"id":43056990847165,"title":"Medium","option1":"Medium","option2":null,"option3":null,"sku":"","requires_shipping":true,"taxable":false,"featured_image":null,"available":true,"name":"C-Section Birth Recovery Kit - Silicone Strips - Medium","public_title":"Medium","options":["Medium"],"price":10385,"weight":906,"compare_at_price":10185,"inventory_management":"shopify","barcode":"90847165","requires_selling_plan":false,"selling_plan_allocations":[]},{"id":43056990879933,"title":"Large","option1":"Large","option2":null,"option3":null,"sku":"","requires_shipping":true,"taxable":false,"featured_image":null,"available":false,"name":"C-Section Birth Recovery Kit - Silicone Strips - Large","public_title":"Large","options":["Large"],"price":10385,"weight":1020,"compare_at_price":10185,"inventory_management":"shopify","barcode":"90879933","requires_selling_plan":false,"selling_plan_allocations":[]}],"images":["\/\/www.thebirthstore.com.au\/cdn\/shop\/files\/c-section-birth-recovery-kit-silicone-strips-465947.jpg?v=1714967950","\/\/www.thebirthstore.com.au\/cdn\/shop\/files\/c-section-birth-recovery-kit-silicone-strips-178982.jpg?v=1714967950","\/\/www.thebirthstore.com.au\/cdn\/shop\/files\/c-section-birth-recovery-kit-silicone-strips-963539.jpg?v=1714967950","\/\/www.thebirthstore.com.au\/cdn\/shop\/files\/c-section-birth-recovery-kit-silicone-strips-308719.jpg?v=1714967950"],"featured_image":"\/\/www.thebirthstore.com.au\/cdn\/shop\/files\/c-section-birth-recovery-kit-silicone-strips-465947.jpg?v=1714967950","options":["Disposable Maternity \u0026 Postpartum Underwear (Size)"],"media":[{"alt":"C-Section Birth Recovery Kit - Silicone Strips - The Birth Store-The Birth Store","id":27007580045501,"position":1,"preview_image":{"aspect_ratio":1.0,"height":1080,"width":1080,"src":"\/\/www.thebirthstore.com.au\/cdn\/shop\/files\/c-section-birth-recovery-kit-silicone-strips-465947.jpg?v=1714967950"},"aspect_ratio":1.0,"height":1080,"media_type":"image","src":"\/\/www.thebirthstore.com.au\/cdn\/shop\/files\/c-section-birth-recovery-kit-silicone-strips-465947.jpg?v=1714967950","width":1080},{"alt":"C-Section Birth Recovery Kit - Silicone Strips - The Birth Store-The Birth Store","id":27007580078269,"position":2,"preview_image":{"aspect_ratio":0.667,"height":1536,"width":1024,"src":"\/\/www.thebirthstore.com.au\/cdn\/shop\/files\/c-section-birth-recovery-kit-silicone-strips-178982.jpg?v=1714967950"},"aspect_ratio":0.667,"height":1536,"media_type":"image","src":"\/\/www.thebirthstore.com.au\/cdn\/shop\/files\/c-section-birth-recovery-kit-silicone-strips-178982.jpg?v=1714967950","width":1024},{"alt":"C-Section Birth Recovery Kit - Silicone Strips - The Birth Store-The Birth Store","id":27007580111037,"position":3,"preview_image":{"aspect_ratio":0.667,"height":915,"width":610,"src":"\/\/www.thebirthstore.com.au\/cdn\/shop\/files\/c-section-birth-recovery-kit-silicone-strips-963539.jpg?v=1714967950"},"aspect_ratio":0.667,"height":915,"media_type":"image","src":"\/\/www.thebirthstore.com.au\/cdn\/shop\/files\/c-section-birth-recovery-kit-silicone-strips-963539.jpg?v=1714967950","width":610},{"alt":"C-Section Birth Recovery Kit - Silicone Strips - The Birth Store-The Birth Store","id":27007580143805,"position":4,"preview_image":{"aspect_ratio":0.667,"height":2048,"width":1365,"src":"\/\/www.thebirthstore.com.au\/cdn\/shop\/files\/c-section-birth-recovery-kit-silicone-strips-308719.jpg?v=1714967950"},"aspect_ratio":0.667,"height":2048,"media_type":"image","src":"\/\/www.thebirthstore.com.au\/cdn\/shop\/files\/c-section-birth-recovery-kit-silicone-strips-308719.jpg?v=1714967950","width":1365}],"requires_selling_plan":false,"selling_plan_groups":[],"content":"\u003cp\u003e\u003cmeta charset=\"utf-8\"\u003e\u003cspan\u003eThere are so many beautiful products on the market now to help with healing and comfort after your birth. We have created a kit with a couple of our favourite products from small Australian businesses to aid you in you the recovery journey you deserve - the one kit to fill all your recovery needs!\u003c\/span\u003e\u003c\/p\u003e"},"options":[{"name":"Disposable Maternity \u0026 Postpartum Underwear (Size)","position":1,"values":["Medium","Large"]}],"custom_metafields":{},"metafields":{"badge":"\u003cdiv style='display:none' class='jdgm-prev-badge' data-average-rating='0.00' data-number-of-reviews='0' data-number-of-questions='0'\u003e \u003cspan class='jdgm-prev-badge__stars' data-score='0.00' tabindex='0' aria-label='0.00 stars' role='button'\u003e \u003cspan class='jdgm-star jdgm--off'\u003e\u003c\/span\u003e\u003cspan class='jdgm-star jdgm--off'\u003e\u003c\/span\u003e\u003cspan class='jdgm-star jdgm--off'\u003e\u003c\/span\u003e\u003cspan class='jdgm-star jdgm--off'\u003e\u003c\/span\u003e\u003cspan class='jdgm-star jdgm--off'\u003e\u003c\/span\u003e \u003c\/span\u003e \u003cspan class='jdgm-prev-badge__text'\u003e No reviews \u003c\/span\u003e \u003c\/div\u003e","widget":"\u003cdiv class='jdgm-rev-widg' data-updated-at='2025-06-13T16:13:40Z' data-average-rating='0.00' data-number-of-reviews='0' data-number-of-questions='0'\u003e \u003cstyle class='jdgm-temp-hiding-style'\u003e.jdgm-rev-widg{ display: none }\u003c\/style\u003e \u003cdiv class='jdgm-rev-widg__header'\u003e \u003ch2 class='jdgm-rev-widg__title'\u003eCustomer Reviews\u003c\/h2\u003e \u003cdiv class='jdgm-rev-widg__summary'\u003e \u003cdiv class='jdgm-rev-widg__summary-stars' aria-label='Average rating is 0.00 stars' role='img'\u003e \u003cspan class='jdgm-star jdgm--off'\u003e\u003c\/span\u003e\u003cspan class='jdgm-star jdgm--off'\u003e\u003c\/span\u003e\u003cspan class='jdgm-star jdgm--off'\u003e\u003c\/span\u003e\u003cspan class='jdgm-star jdgm--off'\u003e\u003c\/span\u003e\u003cspan class='jdgm-star jdgm--off'\u003e\u003c\/span\u003e \u003c\/div\u003e \u003cdiv class='jdgm-rev-widg__summary-text'\u003eBe the first to write a review\u003c\/div\u003e \u003c\/div\u003e \u003ca style='display: none' href='#' class='jdgm-write-rev-link' role='button'\u003eWrite a review\u003c\/a\u003e \u003cdiv class='jdgm-histogram jdgm-temp-hidden'\u003e \u003cdiv class='jdgm-histogram__row' data-rating='5' data-frequency='0' data-percentage='0'\u003e \u003cdiv class='jdgm-histogram__star' role='button' aria-label=\"0% (0) reviews with 5 star rating\" tabindex='0' \u003e\u003cspan class='jdgm-star jdgm--on'\u003e\u003c\/span\u003e\u003cspan class='jdgm-star jdgm--on'\u003e\u003c\/span\u003e\u003cspan class='jdgm-star jdgm--on'\u003e\u003c\/span\u003e\u003cspan class='jdgm-star jdgm--on'\u003e\u003c\/span\u003e\u003cspan class='jdgm-star jdgm--on'\u003e\u003c\/span\u003e\u003c\/div\u003e \u003cdiv class='jdgm-histogram__bar'\u003e \u003cdiv class='jdgm-histogram__bar-content' style='width: 0%;'\u003e \u003c\/div\u003e \u003c\/div\u003e \u003cdiv class='jdgm-histogram__percentage'\u003e0%\u003c\/div\u003e \u003cdiv class='jdgm-histogram__frequency'\u003e(0)\u003c\/div\u003e \u003c\/div\u003e \u003cdiv class='jdgm-histogram__row' data-rating='4' data-frequency='0' data-percentage='0'\u003e \u003cdiv class='jdgm-histogram__star' role='button' aria-label=\"0% (0) reviews with 4 star rating\" tabindex='0' \u003e\u003cspan class='jdgm-star jdgm--on'\u003e\u003c\/span\u003e\u003cspan class='jdgm-star jdgm--on'\u003e\u003c\/span\u003e\u003cspan class='jdgm-star jdgm--on'\u003e\u003c\/span\u003e\u003cspan class='jdgm-star jdgm--on'\u003e\u003c\/span\u003e\u003cspan class='jdgm-star jdgm--off'\u003e\u003c\/span\u003e\u003c\/div\u003e \u003cdiv class='jdgm-histogram__bar'\u003e \u003cdiv class='jdgm-histogram__bar-content' style='width: 0%;'\u003e \u003c\/div\u003e \u003c\/div\u003e \u003cdiv class='jdgm-histogram__percentage'\u003e0%\u003c\/div\u003e \u003cdiv class='jdgm-histogram__frequency'\u003e(0)\u003c\/div\u003e \u003c\/div\u003e \u003cdiv class='jdgm-histogram__row' data-rating='3' data-frequency='0' data-percentage='0'\u003e \u003cdiv class='jdgm-histogram__star' role='button' aria-label=\"0% (0) reviews with 3 star rating\" tabindex='0' \u003e\u003cspan class='jdgm-star jdgm--on'\u003e\u003c\/span\u003e\u003cspan class='jdgm-star jdgm--on'\u003e\u003c\/span\u003e\u003cspan class='jdgm-star jdgm--on'\u003e\u003c\/span\u003e\u003cspan class='jdgm-star jdgm--off'\u003e\u003c\/span\u003e\u003cspan class='jdgm-star jdgm--off'\u003e\u003c\/span\u003e\u003c\/div\u003e \u003cdiv class='jdgm-histogram__bar'\u003e \u003cdiv class='jdgm-histogram__bar-content' style='width: 0%;'\u003e \u003c\/div\u003e \u003c\/div\u003e \u003cdiv class='jdgm-histogram__percentage'\u003e0%\u003c\/div\u003e \u003cdiv class='jdgm-histogram__frequency'\u003e(0)\u003c\/div\u003e \u003c\/div\u003e \u003cdiv class='jdgm-histogram__row' data-rating='2' data-frequency='0' data-percentage='0'\u003e \u003cdiv class='jdgm-histogram__star' role='button' aria-label=\"0% (0) reviews with 2 star rating\" tabindex='0' \u003e\u003cspan class='jdgm-star jdgm--on'\u003e\u003c\/span\u003e\u003cspan class='jdgm-star jdgm--on'\u003e\u003c\/span\u003e\u003cspan class='jdgm-star jdgm--off'\u003e\u003c\/span\u003e\u003cspan class='jdgm-star jdgm--off'\u003e\u003c\/span\u003e\u003cspan class='jdgm-star jdgm--off'\u003e\u003c\/span\u003e\u003c\/div\u003e \u003cdiv class='jdgm-histogram__bar'\u003e \u003cdiv class='jdgm-histogram__bar-content' style='width: 0%;'\u003e \u003c\/div\u003e \u003c\/div\u003e \u003cdiv class='jdgm-histogram__percentage'\u003e0%\u003c\/div\u003e \u003cdiv class='jdgm-histogram__frequency'\u003e(0)\u003c\/div\u003e \u003c\/div\u003e \u003cdiv class='jdgm-histogram__row' data-rating='1' data-frequency='0' data-percentage='0'\u003e \u003cdiv class='jdgm-histogram__star' role='button' aria-label=\"0% (0) reviews with 1 star rating\" tabindex='0' \u003e\u003cspan class='jdgm-star jdgm--on'\u003e\u003c\/span\u003e\u003cspan class='jdgm-star jdgm--off'\u003e\u003c\/span\u003e\u003cspan class='jdgm-star jdgm--off'\u003e\u003c\/span\u003e\u003cspan class='jdgm-star jdgm--off'\u003e\u003c\/span\u003e\u003cspan class='jdgm-star jdgm--off'\u003e\u003c\/span\u003e\u003c\/div\u003e \u003cdiv class='jdgm-histogram__bar'\u003e \u003cdiv class='jdgm-histogram__bar-content' style='width: 0%;'\u003e \u003c\/div\u003e \u003c\/div\u003e \u003cdiv class='jdgm-histogram__percentage'\u003e0%\u003c\/div\u003e \u003cdiv class='jdgm-histogram__frequency'\u003e(0)\u003c\/div\u003e \u003c\/div\u003e \u003cdiv class='jdgm-histogram__row jdgm-histogram__clear-filter' data-rating=null tabindex='0'\u003e\u003c\/div\u003e \u003c\/div\u003e \u003cdiv class='jdgm-rev-widg__sort-wrapper'\u003e\u003c\/div\u003e \u003c\/div\u003e \u003cdiv class='jdgm-rev-widg__body'\u003e \u003cdiv class='jdgm-rev-widg__reviews'\u003e\u003c\/div\u003e \u003cdiv class='jdgm-paginate' data-per-page='10' data-url='https:\/\/api.judge.me\/reviews\/reviews_for_widget' style=\"display: none;\"\u003e\u003c\/div\u003e \u003c\/div\u003e \u003cdiv class='jdgm-rev-widg__paginate-spinner-wrapper'\u003e \u003cdiv class='jdgm-spinner'\u003e\u003c\/div\u003e \u003c\/div\u003e \u003c\/div\u003e"},"collections":[{"id":283018526909,"handle":"bundles","title":"Bundles","updated_at":"2025-11-18T20:29:11+08:00","body_html":"\u003cp\u003eMake shopping for your bump, birth and beyond easier with our bundle packs. With a pack available for every stage, you can get everything you need with no fuss and with our bundle packs, you even save money.\u003c\/p\u003e","published_at":"2022-02-01T22:33:09+08:00","sort_order":"best-selling","template_suffix":"swaddles-collection","disjunctive":false,"rules":[{"column":"tag","relation":"equals","condition":"Bundles"}],"published_scope":"global","image":{"created_at":"2024-05-06T11:59:39+08:00","alt":"Bundles - The Birth Store","width":2048,"height":1365,"src":"\/\/www.thebirthstore.com.au\/cdn\/shop\/collections\/bundles-299009.jpg?v=1714967980"}},{"id":261657460925,"handle":"buy","title":"Buy","updated_at":"2025-12-28T20:10:01+08:00","body_html":"\u003cp\u003eBrowse all of our pregnancy, labour \u0026amp; birth, postpartum and baby essentials here.\u003cbr\u003e\u003c\/p\u003e\n\u003cp\u003e\u003cspan\u003eYou can even buy now and pay later with Afterpay!\u003c\/span\u003e\u003c\/p\u003e","published_at":"2021-03-10T12:05:31+08:00","sort_order":"best-selling","template_suffix":"shop-all-collection","disjunctive":false,"rules":[{"column":"title","relation":"not_contains","condition":"Hire"}],"published_scope":"global","image":{"created_at":"2024-05-06T11:59:42+08:00","alt":"Buy - The Birth Store","width":2048,"height":2048,"src":"\/\/www.thebirthstore.com.au\/cdn\/shop\/collections\/buy-964856.jpg?v=1714967982"}},{"id":281712361661,"handle":"c-section-birth-recovery","title":"C-Section Birth Recovery","updated_at":"2025-12-27T20:11:39+08:00","body_html":"","published_at":"2021-12-20T14:19:01+08:00","sort_order":"best-selling","template_suffix":"swaddles-collection","disjunctive":false,"rules":[{"column":"tag","relation":"equals","condition":"C-Section Birth Recovery"}],"published_scope":"global","image":{"created_at":"2024-05-06T11:59:49+08:00","alt":"C-Section Birth Recovery - The Birth Store","width":1366,"height":2048,"src":"\/\/www.thebirthstore.com.au\/cdn\/shop\/collections\/c-section-birth-recovery-359249.jpg?v=1714967990"}},{"id":281712066749,"handle":"hemorrhoid-care","title":"Haemorrhoid Care","updated_at":"2025-12-28T20:10:01+08:00","body_html":"","published_at":"2021-12-20T14:16:30+08:00","sort_order":"best-selling","template_suffix":"swaddles-collection","disjunctive":false,"rules":[{"column":"tag","relation":"equals","condition":"Hemorrhoids"}],"published_scope":"global","image":{"created_at":"2024-05-06T12:00:00+08:00","alt":"Haemorrhoid Care - The Birth Store","width":763,"height":556,"src":"\/\/www.thebirthstore.com.au\/cdn\/shop\/collections\/haemorrhoid-care-562138.jpg?v=1714968001"}},{"id":261658083517,"handle":"post-partum","title":"Postpartum","updated_at":"2025-12-28T20:10:01+08:00","body_html":"\u003cp\u003eShop your postpartum and hospital bag essentials below. Looking for something we don't currently stock? Please reach out and let us know.\u003cbr\u003e\u003c\/p\u003e\n\u003cp\u003e\u003cspan\u003eYou can even buy now and pay later with Afterpay!\u003c\/span\u003e\u003c\/p\u003e","published_at":"2021-03-10T12:33:47+08:00","sort_order":"best-selling","template_suffix":"postpartum-collection","disjunctive":false,"rules":[{"column":"tag","relation":"equals","condition":"Post-Partum"}],"published_scope":"global","image":{"created_at":"2024-05-06T12:00:36+08:00","alt":"Postpartum - The Birth Store","width":611,"height":702,"src":"\/\/www.thebirthstore.com.au\/cdn\/shop\/collections\/postpartum-150119.jpg?v=1714968037"}},{"id":310045933757,"handle":"shop-all-sale","title":"Shop All Sale","updated_at":"2025-12-28T20:10:01+08:00","body_html":"","published_at":"2024-11-12T13:22:43+08:00","sort_order":"alpha-asc","template_suffix":"","disjunctive":true,"rules":[{"column":"tag","relation":"equals","condition":"Bundles"},{"column":"vendor","relation":"equals","condition":"Franjos Kitchen"},{"column":"vendor","relation":"equals","condition":"Adored Illustrations"},{"column":"vendor","relation":"equals","condition":"Amazing Oils"},{"column":"vendor","relation":"equals","condition":"Ice Ice Booby"},{"column":"vendor","relation":"equals","condition":"Made to Milk"},{"column":"vendor","relation":"equals","condition":"Milky Goodness"},{"column":"vendor","relation":"equals","condition":"Seasons of Mama"},{"column":"vendor","relation":"equals","condition":"Silverette"},{"column":"vendor","relation":"equals","condition":"Snuggle Hunny"},{"column":"vendor","relation":"equals","condition":"Yung Bod"},{"column":"vendor","relation":"equals","condition":"Bare Love"},{"column":"vendor","relation":"equals","condition":"Haakaa"},{"column":"vendor","relation":"equals","condition":"Mere Botanicals"},{"column":"vendor","relation":"equals","condition":"The Birth Store Hire"},{"column":"vendor","relation":"equals","condition":"The Birth Store"}],"published_scope":"global","image":{"created_at":"2024-11-13T10:58:16+08:00","alt":"Shop All Sale - The Birth Store","width":2048,"height":1365,"src":"\/\/www.thebirthstore.com.au\/cdn\/shop\/collections\/shop-all-sale-297361.jpg?v=1731466697"}}]}
[{"alt":"C-Section Birth Recovery Kit - Silicone Strips - The Birth Store-The Birth Store","id":27007580045501,"position":1,"preview_image":{"aspect_ratio":1.0,"height":1080,"width":1080,"src":"\/\/www.thebirthstore.com.au\/cdn\/shop\/files\/c-section-birth-recovery-kit-silicone-strips-465947.jpg?v=1714967950"},"aspect_ratio":1.0,"height":1080,"media_type":"image","src":"\/\/www.thebirthstore.com.au\/cdn\/shop\/files\/c-section-birth-recovery-kit-silicone-strips-465947.jpg?v=1714967950","width":1080},{"alt":"C-Section Birth Recovery Kit - Silicone Strips - The Birth Store-The Birth Store","id":27007580078269,"position":2,"preview_image":{"aspect_ratio":0.667,"height":1536,"width":1024,"src":"\/\/www.thebirthstore.com.au\/cdn\/shop\/files\/c-section-birth-recovery-kit-silicone-strips-178982.jpg?v=1714967950"},"aspect_ratio":0.667,"height":1536,"media_type":"image","src":"\/\/www.thebirthstore.com.au\/cdn\/shop\/files\/c-section-birth-recovery-kit-silicone-strips-178982.jpg?v=1714967950","width":1024},{"alt":"C-Section Birth Recovery Kit - Silicone Strips - The Birth Store-The Birth Store","id":27007580111037,"position":3,"preview_image":{"aspect_ratio":0.667,"height":915,"width":610,"src":"\/\/www.thebirthstore.com.au\/cdn\/shop\/files\/c-section-birth-recovery-kit-silicone-strips-963539.jpg?v=1714967950"},"aspect_ratio":0.667,"height":915,"media_type":"image","src":"\/\/www.thebirthstore.com.au\/cdn\/shop\/files\/c-section-birth-recovery-kit-silicone-strips-963539.jpg?v=1714967950","width":610},{"alt":"C-Section Birth Recovery Kit - Silicone Strips - The Birth Store-The Birth Store","id":27007580143805,"position":4,"preview_image":{"aspect_ratio":0.667,"height":2048,"width":1365,"src":"\/\/www.thebirthstore.com.au\/cdn\/shop\/files\/c-section-birth-recovery-kit-silicone-strips-308719.jpg?v=1714967950"},"aspect_ratio":0.667,"height":2048,"media_type":"image","src":"\/\/www.thebirthstore.com.au\/cdn\/shop\/files\/c-section-birth-recovery-kit-silicone-strips-308719.jpg?v=1714967950","width":1365}]
{"item":{"id":7369232351421,"title":"C-Section Cream","handle":"c-section-cream","description":"\u003ch2 class=\"h1\" data-mce-fragment=\"1\"\u003eDesigned specifically for your post-delivery skin\u003c\/h2\u003e\n\u003cdiv class=\"rich-text__text rte\" data-mce-fragment=\"1\"\u003e\n\u003cp data-mce-fragment=\"1\"\u003eThe YUNG BOD C-SECTION MAMA CREAM is a skincare product created specifically for your post-delivery skin and scar area. It contains a blend of evidence-backed ingredients to comfort your c-section skin and improve the appearance of this sensitive area.\u003c\/p\u003e\n\u003ch2 class=\"image-with-text__heading h1\"\u003eIngredients\u003c\/h2\u003e\n\u003cdiv class=\"image-with-text__text rte\"\u003e\n\u003cp\u003e\u003cstrong\u003eOnion extract \u003c\/strong\u003e– we’ll be the first to admit that it doesn’t sound like the sexiest ingredient, but it is exceptional for promoting a soft, smooth feeling to your scarred skin.\u003c\/p\u003e\n\u003cp\u003e(It gives the formula a slightly odd smell, but trust us - it’s nothing compared to what your bundle of joy produces.)\u003c\/p\u003e\n\u003cp\u003e\u003cstrong\u003eAllantoin\u003c\/strong\u003e - has an exfoliating effect on your skin to help speed up the process, and to improve the overall appearance of your scar. Works well with the onion extract. Being similar to retinol (vitamin A) but of course safe for pregnancy and breastfeeding.\u003c\/p\u003e\n\u003cp\u003e\u003cstrong\u003eImmortelle flower extract\u003c\/strong\u003e – this rare extract naturally boasts anti-inflammatory, anti-microbial, and anti-allergenic properties. This combination is a powerhouse.\u003c\/p\u003e\n\u003cp\u003e\u003cstrong\u003eThe ‘Bs’ \u003c\/strong\u003e– \u003cstrong\u003eniacinamide\u003c\/strong\u003e encourages an even, brighter look to your skin tone, while \u003cstrong\u003epanthenol\u003c\/strong\u003e assists with hydration to support a healthy skin barrier.\u003c\/p\u003e\n\u003cp\u003e\u003cstrong\u003ePurple passionflower seed oil\u003c\/strong\u003e - This seed is loaded with antioxidants, vitamin A, and vitamin C, which contribute to smooth-looking skin.\u003c\/p\u003e\n\u003cp\u003eWe’ve also included moisturising and nourishing \u003cstrong\u003evitamin E, cocoa butter, jojoba seed oil, \u003c\/strong\u003eand\u003cstrong\u003e rosehip seed oil, \u003c\/strong\u003eplus\u003cstrong\u003e biotin\u003c\/strong\u003e to support healthy-looking skin\u003c\/p\u003e\n\u003cp\u003e\u003cem\u003e(FYI: Not everyone’s skin agrees with artificial fragrances or colours, so we haven’t included any of those).\u003c\/em\u003e\u003c\/p\u003e\n\u003c\/div\u003e\n\u003c\/div\u003e","published_at":"2022-10-16T15:39:20+08:00","created_at":"2022-10-07T15:28:15+08:00","vendor":"Yung Bod","type":"","tags":["C-Section Birth Recovery","Mum","Post-Partum","Skin Care"],"price":4400,"price_min":4400,"price_max":4400,"available":true,"price_varies":false,"compare_at_price":null,"compare_at_price_min":0,"compare_at_price_max":0,"compare_at_price_varies":false,"variants":[{"id":42392020484285,"title":"Default Title","option1":"Default Title","option2":null,"option3":null,"sku":"","requires_shipping":true,"taxable":false,"featured_image":null,"available":true,"name":"C-Section Cream","public_title":null,"options":["Default Title"],"price":4400,"weight":66,"compare_at_price":null,"inventory_management":"shopify","barcode":"20484285","requires_selling_plan":false,"selling_plan_allocations":[]}],"images":["\/\/www.thebirthstore.com.au\/cdn\/shop\/files\/c-section-cream-535608.jpg?v=1714967954","\/\/www.thebirthstore.com.au\/cdn\/shop\/files\/c-section-cream-650372.jpg?v=1714967954","\/\/www.thebirthstore.com.au\/cdn\/shop\/files\/c-section-cream-312803.jpg?v=1714967954","\/\/www.thebirthstore.com.au\/cdn\/shop\/files\/c-section-cream-481781.jpg?v=1714967954","\/\/www.thebirthstore.com.au\/cdn\/shop\/files\/c-section-cream-205419.jpg?v=1714967954"],"featured_image":"\/\/www.thebirthstore.com.au\/cdn\/shop\/files\/c-section-cream-535608.jpg?v=1714967954","options":["Title"],"media":[{"alt":"C-Section Cream - The Birth Store-Yung Bod","id":27007581651133,"position":1,"preview_image":{"aspect_ratio":1.0,"height":802,"width":802,"src":"\/\/www.thebirthstore.com.au\/cdn\/shop\/files\/c-section-cream-535608.jpg?v=1714967954"},"aspect_ratio":1.0,"height":802,"media_type":"image","src":"\/\/www.thebirthstore.com.au\/cdn\/shop\/files\/c-section-cream-535608.jpg?v=1714967954","width":802},{"alt":"C-Section Cream - The Birth Store-Yung Bod","id":27007581814973,"position":2,"preview_image":{"aspect_ratio":1.25,"height":819,"width":1024,"src":"\/\/www.thebirthstore.com.au\/cdn\/shop\/files\/c-section-cream-650372.jpg?v=1714967954"},"aspect_ratio":1.25,"height":819,"media_type":"image","src":"\/\/www.thebirthstore.com.au\/cdn\/shop\/files\/c-section-cream-650372.jpg?v=1714967954","width":1024},{"alt":"C-Section Cream - The Birth Store-Yung Bod","id":27007581847741,"position":3,"preview_image":{"aspect_ratio":0.8,"height":1280,"width":1024,"src":"\/\/www.thebirthstore.com.au\/cdn\/shop\/files\/c-section-cream-312803.jpg?v=1714967954"},"aspect_ratio":0.8,"height":1280,"media_type":"image","src":"\/\/www.thebirthstore.com.au\/cdn\/shop\/files\/c-section-cream-312803.jpg?v=1714967954","width":1024},{"alt":"C-Section Cream - The Birth Store-Yung Bod","id":27007581946045,"position":4,"preview_image":{"aspect_ratio":1.499,"height":1366,"width":2048,"src":"\/\/www.thebirthstore.com.au\/cdn\/shop\/files\/c-section-cream-481781.jpg?v=1714967954"},"aspect_ratio":1.499,"height":1366,"media_type":"image","src":"\/\/www.thebirthstore.com.au\/cdn\/shop\/files\/c-section-cream-481781.jpg?v=1714967954","width":2048},{"alt":"C-Section Cream - The Birth Store-Yung Bod","id":27007582044349,"position":5,"preview_image":{"aspect_ratio":1.25,"height":819,"width":1024,"src":"\/\/www.thebirthstore.com.au\/cdn\/shop\/files\/c-section-cream-205419.jpg?v=1714967954"},"aspect_ratio":1.25,"height":819,"media_type":"image","src":"\/\/www.thebirthstore.com.au\/cdn\/shop\/files\/c-section-cream-205419.jpg?v=1714967954","width":1024}],"requires_selling_plan":false,"selling_plan_groups":[],"content":"\u003ch2 class=\"h1\" data-mce-fragment=\"1\"\u003eDesigned specifically for your post-delivery skin\u003c\/h2\u003e\n\u003cdiv class=\"rich-text__text rte\" data-mce-fragment=\"1\"\u003e\n\u003cp data-mce-fragment=\"1\"\u003eThe YUNG BOD C-SECTION MAMA CREAM is a skincare product created specifically for your post-delivery skin and scar area. It contains a blend of evidence-backed ingredients to comfort your c-section skin and improve the appearance of this sensitive area.\u003c\/p\u003e\n\u003ch2 class=\"image-with-text__heading h1\"\u003eIngredients\u003c\/h2\u003e\n\u003cdiv class=\"image-with-text__text rte\"\u003e\n\u003cp\u003e\u003cstrong\u003eOnion extract \u003c\/strong\u003e– we’ll be the first to admit that it doesn’t sound like the sexiest ingredient, but it is exceptional for promoting a soft, smooth feeling to your scarred skin.\u003c\/p\u003e\n\u003cp\u003e(It gives the formula a slightly odd smell, but trust us - it’s nothing compared to what your bundle of joy produces.)\u003c\/p\u003e\n\u003cp\u003e\u003cstrong\u003eAllantoin\u003c\/strong\u003e - has an exfoliating effect on your skin to help speed up the process, and to improve the overall appearance of your scar. Works well with the onion extract. Being similar to retinol (vitamin A) but of course safe for pregnancy and breastfeeding.\u003c\/p\u003e\n\u003cp\u003e\u003cstrong\u003eImmortelle flower extract\u003c\/strong\u003e – this rare extract naturally boasts anti-inflammatory, anti-microbial, and anti-allergenic properties. This combination is a powerhouse.\u003c\/p\u003e\n\u003cp\u003e\u003cstrong\u003eThe ‘Bs’ \u003c\/strong\u003e– \u003cstrong\u003eniacinamide\u003c\/strong\u003e encourages an even, brighter look to your skin tone, while \u003cstrong\u003epanthenol\u003c\/strong\u003e assists with hydration to support a healthy skin barrier.\u003c\/p\u003e\n\u003cp\u003e\u003cstrong\u003ePurple passionflower seed oil\u003c\/strong\u003e - This seed is loaded with antioxidants, vitamin A, and vitamin C, which contribute to smooth-looking skin.\u003c\/p\u003e\n\u003cp\u003eWe’ve also included moisturising and nourishing \u003cstrong\u003evitamin E, cocoa butter, jojoba seed oil, \u003c\/strong\u003eand\u003cstrong\u003e rosehip seed oil, \u003c\/strong\u003eplus\u003cstrong\u003e biotin\u003c\/strong\u003e to support healthy-looking skin\u003c\/p\u003e\n\u003cp\u003e\u003cem\u003e(FYI: Not everyone’s skin agrees with artificial fragrances or colours, so we haven’t included any of those).\u003c\/em\u003e\u003c\/p\u003e\n\u003c\/div\u003e\n\u003c\/div\u003e"},"options":[{"name":"Title","position":1,"values":["Default Title"]}],"custom_metafields":{},"metafields":{"badge":"\u003cdiv style='display:none' class='jdgm-prev-badge' data-average-rating='0.00' data-number-of-reviews='0' data-number-of-questions='0'\u003e \u003cspan class='jdgm-prev-badge__stars' data-score='0.00' tabindex='0' aria-label='0.00 stars' role='button'\u003e \u003cspan class='jdgm-star jdgm--off'\u003e\u003c\/span\u003e\u003cspan class='jdgm-star jdgm--off'\u003e\u003c\/span\u003e\u003cspan class='jdgm-star jdgm--off'\u003e\u003c\/span\u003e\u003cspan class='jdgm-star jdgm--off'\u003e\u003c\/span\u003e\u003cspan class='jdgm-star jdgm--off'\u003e\u003c\/span\u003e \u003c\/span\u003e \u003cspan class='jdgm-prev-badge__text'\u003e No reviews \u003c\/span\u003e \u003c\/div\u003e","widget":"\u003cdiv class='jdgm-rev-widg' data-updated-at='2025-06-13T16:12:10Z' data-average-rating='0.00' data-number-of-reviews='0' data-number-of-questions='0'\u003e \u003cstyle class='jdgm-temp-hiding-style'\u003e.jdgm-rev-widg{ display: none }\u003c\/style\u003e \u003cdiv class='jdgm-rev-widg__header'\u003e \u003ch2 class='jdgm-rev-widg__title'\u003eCustomer Reviews\u003c\/h2\u003e \u003cdiv class='jdgm-rev-widg__summary'\u003e \u003cdiv class='jdgm-rev-widg__summary-stars' aria-label='Average rating is 0.00 stars' role='img'\u003e \u003cspan class='jdgm-star jdgm--off'\u003e\u003c\/span\u003e\u003cspan class='jdgm-star jdgm--off'\u003e\u003c\/span\u003e\u003cspan class='jdgm-star jdgm--off'\u003e\u003c\/span\u003e\u003cspan class='jdgm-star jdgm--off'\u003e\u003c\/span\u003e\u003cspan class='jdgm-star jdgm--off'\u003e\u003c\/span\u003e \u003c\/div\u003e \u003cdiv class='jdgm-rev-widg__summary-text'\u003eBe the first to write a review\u003c\/div\u003e \u003c\/div\u003e \u003ca style='display: none' href='#' class='jdgm-write-rev-link' role='button'\u003eWrite a review\u003c\/a\u003e \u003cdiv class='jdgm-histogram jdgm-temp-hidden'\u003e \u003cdiv class='jdgm-histogram__row' data-rating='5' data-frequency='0' data-percentage='0'\u003e \u003cdiv class='jdgm-histogram__star' role='button' aria-label=\"0% (0) reviews with 5 star rating\" tabindex='0' \u003e\u003cspan class='jdgm-star jdgm--on'\u003e\u003c\/span\u003e\u003cspan class='jdgm-star jdgm--on'\u003e\u003c\/span\u003e\u003cspan class='jdgm-star jdgm--on'\u003e\u003c\/span\u003e\u003cspan class='jdgm-star jdgm--on'\u003e\u003c\/span\u003e\u003cspan class='jdgm-star jdgm--on'\u003e\u003c\/span\u003e\u003c\/div\u003e \u003cdiv class='jdgm-histogram__bar'\u003e \u003cdiv class='jdgm-histogram__bar-content' style='width: 0%;'\u003e \u003c\/div\u003e \u003c\/div\u003e \u003cdiv class='jdgm-histogram__percentage'\u003e0%\u003c\/div\u003e \u003cdiv class='jdgm-histogram__frequency'\u003e(0)\u003c\/div\u003e \u003c\/div\u003e \u003cdiv class='jdgm-histogram__row' data-rating='4' data-frequency='0' data-percentage='0'\u003e \u003cdiv class='jdgm-histogram__star' role='button' aria-label=\"0% (0) reviews with 4 star rating\" tabindex='0' \u003e\u003cspan class='jdgm-star jdgm--on'\u003e\u003c\/span\u003e\u003cspan class='jdgm-star jdgm--on'\u003e\u003c\/span\u003e\u003cspan class='jdgm-star jdgm--on'\u003e\u003c\/span\u003e\u003cspan class='jdgm-star jdgm--on'\u003e\u003c\/span\u003e\u003cspan class='jdgm-star jdgm--off'\u003e\u003c\/span\u003e\u003c\/div\u003e \u003cdiv class='jdgm-histogram__bar'\u003e \u003cdiv class='jdgm-histogram__bar-content' style='width: 0%;'\u003e \u003c\/div\u003e \u003c\/div\u003e \u003cdiv class='jdgm-histogram__percentage'\u003e0%\u003c\/div\u003e \u003cdiv class='jdgm-histogram__frequency'\u003e(0)\u003c\/div\u003e \u003c\/div\u003e \u003cdiv class='jdgm-histogram__row' data-rating='3' data-frequency='0' data-percentage='0'\u003e \u003cdiv class='jdgm-histogram__star' role='button' aria-label=\"0% (0) reviews with 3 star rating\" tabindex='0' \u003e\u003cspan class='jdgm-star jdgm--on'\u003e\u003c\/span\u003e\u003cspan class='jdgm-star jdgm--on'\u003e\u003c\/span\u003e\u003cspan class='jdgm-star jdgm--on'\u003e\u003c\/span\u003e\u003cspan class='jdgm-star jdgm--off'\u003e\u003c\/span\u003e\u003cspan class='jdgm-star jdgm--off'\u003e\u003c\/span\u003e\u003c\/div\u003e \u003cdiv class='jdgm-histogram__bar'\u003e \u003cdiv class='jdgm-histogram__bar-content' style='width: 0%;'\u003e \u003c\/div\u003e \u003c\/div\u003e \u003cdiv class='jdgm-histogram__percentage'\u003e0%\u003c\/div\u003e \u003cdiv class='jdgm-histogram__frequency'\u003e(0)\u003c\/div\u003e \u003c\/div\u003e \u003cdiv class='jdgm-histogram__row' data-rating='2' data-frequency='0' data-percentage='0'\u003e \u003cdiv class='jdgm-histogram__star' role='button' aria-label=\"0% (0) reviews with 2 star rating\" tabindex='0' \u003e\u003cspan class='jdgm-star jdgm--on'\u003e\u003c\/span\u003e\u003cspan class='jdgm-star jdgm--on'\u003e\u003c\/span\u003e\u003cspan class='jdgm-star jdgm--off'\u003e\u003c\/span\u003e\u003cspan class='jdgm-star jdgm--off'\u003e\u003c\/span\u003e\u003cspan class='jdgm-star jdgm--off'\u003e\u003c\/span\u003e\u003c\/div\u003e \u003cdiv class='jdgm-histogram__bar'\u003e \u003cdiv class='jdgm-histogram__bar-content' style='width: 0%;'\u003e \u003c\/div\u003e \u003c\/div\u003e \u003cdiv class='jdgm-histogram__percentage'\u003e0%\u003c\/div\u003e \u003cdiv class='jdgm-histogram__frequency'\u003e(0)\u003c\/div\u003e \u003c\/div\u003e \u003cdiv class='jdgm-histogram__row' data-rating='1' data-frequency='0' data-percentage='0'\u003e \u003cdiv class='jdgm-histogram__star' role='button' aria-label=\"0% (0) reviews with 1 star rating\" tabindex='0' \u003e\u003cspan class='jdgm-star jdgm--on'\u003e\u003c\/span\u003e\u003cspan class='jdgm-star jdgm--off'\u003e\u003c\/span\u003e\u003cspan class='jdgm-star jdgm--off'\u003e\u003c\/span\u003e\u003cspan class='jdgm-star jdgm--off'\u003e\u003c\/span\u003e\u003cspan class='jdgm-star jdgm--off'\u003e\u003c\/span\u003e\u003c\/div\u003e \u003cdiv class='jdgm-histogram__bar'\u003e \u003cdiv class='jdgm-histogram__bar-content' style='width: 0%;'\u003e \u003c\/div\u003e \u003c\/div\u003e \u003cdiv class='jdgm-histogram__percentage'\u003e0%\u003c\/div\u003e \u003cdiv class='jdgm-histogram__frequency'\u003e(0)\u003c\/div\u003e \u003c\/div\u003e \u003cdiv class='jdgm-histogram__row jdgm-histogram__clear-filter' data-rating=null tabindex='0'\u003e\u003c\/div\u003e \u003c\/div\u003e \u003cdiv class='jdgm-rev-widg__sort-wrapper'\u003e\u003c\/div\u003e \u003c\/div\u003e \u003cdiv class='jdgm-rev-widg__body'\u003e \u003cdiv class='jdgm-rev-widg__reviews'\u003e\u003c\/div\u003e \u003cdiv class='jdgm-paginate' data-per-page='10' data-url='https:\/\/api.judge.me\/reviews\/reviews_for_widget' style=\"display: none;\"\u003e\u003c\/div\u003e \u003c\/div\u003e \u003cdiv class='jdgm-rev-widg__paginate-spinner-wrapper'\u003e \u003cdiv class='jdgm-spinner'\u003e\u003c\/div\u003e \u003c\/div\u003e \u003c\/div\u003e"},"collections":[{"id":261657460925,"handle":"buy","title":"Buy","updated_at":"2025-12-28T20:10:01+08:00","body_html":"\u003cp\u003eBrowse all of our pregnancy, labour \u0026amp; birth, postpartum and baby essentials here.\u003cbr\u003e\u003c\/p\u003e\n\u003cp\u003e\u003cspan\u003eYou can even buy now and pay later with Afterpay!\u003c\/span\u003e\u003c\/p\u003e","published_at":"2021-03-10T12:05:31+08:00","sort_order":"best-selling","template_suffix":"shop-all-collection","disjunctive":false,"rules":[{"column":"title","relation":"not_contains","condition":"Hire"}],"published_scope":"global","image":{"created_at":"2024-05-06T11:59:42+08:00","alt":"Buy - The Birth Store","width":2048,"height":2048,"src":"\/\/www.thebirthstore.com.au\/cdn\/shop\/collections\/buy-964856.jpg?v=1714967982"}},{"id":281712361661,"handle":"c-section-birth-recovery","title":"C-Section Birth Recovery","updated_at":"2025-12-27T20:11:39+08:00","body_html":"","published_at":"2021-12-20T14:19:01+08:00","sort_order":"best-selling","template_suffix":"swaddles-collection","disjunctive":false,"rules":[{"column":"tag","relation":"equals","condition":"C-Section Birth Recovery"}],"published_scope":"global","image":{"created_at":"2024-05-06T11:59:49+08:00","alt":"C-Section Birth Recovery - The Birth Store","width":1366,"height":2048,"src":"\/\/www.thebirthstore.com.au\/cdn\/shop\/collections\/c-section-birth-recovery-359249.jpg?v=1714967990"}},{"id":261658083517,"handle":"post-partum","title":"Postpartum","updated_at":"2025-12-28T20:10:01+08:00","body_html":"\u003cp\u003eShop your postpartum and hospital bag essentials below. Looking for something we don't currently stock? Please reach out and let us know.\u003cbr\u003e\u003c\/p\u003e\n\u003cp\u003e\u003cspan\u003eYou can even buy now and pay later with Afterpay!\u003c\/span\u003e\u003c\/p\u003e","published_at":"2021-03-10T12:33:47+08:00","sort_order":"best-selling","template_suffix":"postpartum-collection","disjunctive":false,"rules":[{"column":"tag","relation":"equals","condition":"Post-Partum"}],"published_scope":"global","image":{"created_at":"2024-05-06T12:00:36+08:00","alt":"Postpartum - The Birth Store","width":611,"height":702,"src":"\/\/www.thebirthstore.com.au\/cdn\/shop\/collections\/postpartum-150119.jpg?v=1714968037"}},{"id":291456483517,"handle":"shop-all","title":"Shop All - Mum","updated_at":"2025-12-28T20:10:01+08:00","body_html":"","published_at":"2022-12-23T22:04:39+08:00","sort_order":"best-selling","template_suffix":"shop-all-collection","disjunctive":false,"rules":[{"column":"variant_price","relation":"greater_than","condition":"1"},{"column":"title","relation":"not_contains","condition":"Batteries"},{"column":"tag","relation":"equals","condition":"Mum"}],"published_scope":"global","image":{"created_at":"2024-05-06T12:00:54+08:00","alt":"Shop All - The Birth Store","width":1365,"height":2048,"src":"\/\/www.thebirthstore.com.au\/cdn\/shop\/collections\/shop-all-693176.jpg?v=1714968055"}},{"id":310045933757,"handle":"shop-all-sale","title":"Shop All Sale","updated_at":"2025-12-28T20:10:01+08:00","body_html":"","published_at":"2024-11-12T13:22:43+08:00","sort_order":"alpha-asc","template_suffix":"","disjunctive":true,"rules":[{"column":"tag","relation":"equals","condition":"Bundles"},{"column":"vendor","relation":"equals","condition":"Franjos Kitchen"},{"column":"vendor","relation":"equals","condition":"Adored Illustrations"},{"column":"vendor","relation":"equals","condition":"Amazing Oils"},{"column":"vendor","relation":"equals","condition":"Ice Ice Booby"},{"column":"vendor","relation":"equals","condition":"Made to Milk"},{"column":"vendor","relation":"equals","condition":"Milky Goodness"},{"column":"vendor","relation":"equals","condition":"Seasons of Mama"},{"column":"vendor","relation":"equals","condition":"Silverette"},{"column":"vendor","relation":"equals","condition":"Snuggle Hunny"},{"column":"vendor","relation":"equals","condition":"Yung Bod"},{"column":"vendor","relation":"equals","condition":"Bare Love"},{"column":"vendor","relation":"equals","condition":"Haakaa"},{"column":"vendor","relation":"equals","condition":"Mere Botanicals"},{"column":"vendor","relation":"equals","condition":"The Birth Store Hire"},{"column":"vendor","relation":"equals","condition":"The Birth Store"}],"published_scope":"global","image":{"created_at":"2024-11-13T10:58:16+08:00","alt":"Shop All Sale - The Birth Store","width":2048,"height":1365,"src":"\/\/www.thebirthstore.com.au\/cdn\/shop\/collections\/shop-all-sale-297361.jpg?v=1731466697"}},{"id":324680483005,"handle":"skin-care","title":"Skin Care","updated_at":"2025-12-28T20:10:01+08:00","body_html":"","published_at":"2025-09-23T22:14:11+08:00","sort_order":"best-selling","template_suffix":"","disjunctive":false,"rules":[{"column":"tag","relation":"equals","condition":"Skin Care"}],"published_scope":"global","image":{"created_at":"2025-10-30T16:17:08+08:00","alt":"Skin Care - The Birth Store","width":800,"height":800,"src":"\/\/www.thebirthstore.com.au\/cdn\/shop\/collections\/skin-care-6874549.jpg?v=1761812228"}}]}
[{"alt":"C-Section Cream - The Birth Store-Yung Bod","id":27007581651133,"position":1,"preview_image":{"aspect_ratio":1.0,"height":802,"width":802,"src":"\/\/www.thebirthstore.com.au\/cdn\/shop\/files\/c-section-cream-535608.jpg?v=1714967954"},"aspect_ratio":1.0,"height":802,"media_type":"image","src":"\/\/www.thebirthstore.com.au\/cdn\/shop\/files\/c-section-cream-535608.jpg?v=1714967954","width":802},{"alt":"C-Section Cream - The Birth Store-Yung Bod","id":27007581814973,"position":2,"preview_image":{"aspect_ratio":1.25,"height":819,"width":1024,"src":"\/\/www.thebirthstore.com.au\/cdn\/shop\/files\/c-section-cream-650372.jpg?v=1714967954"},"aspect_ratio":1.25,"height":819,"media_type":"image","src":"\/\/www.thebirthstore.com.au\/cdn\/shop\/files\/c-section-cream-650372.jpg?v=1714967954","width":1024},{"alt":"C-Section Cream - The Birth Store-Yung Bod","id":27007581847741,"position":3,"preview_image":{"aspect_ratio":0.8,"height":1280,"width":1024,"src":"\/\/www.thebirthstore.com.au\/cdn\/shop\/files\/c-section-cream-312803.jpg?v=1714967954"},"aspect_ratio":0.8,"height":1280,"media_type":"image","src":"\/\/www.thebirthstore.com.au\/cdn\/shop\/files\/c-section-cream-312803.jpg?v=1714967954","width":1024},{"alt":"C-Section Cream - The Birth Store-Yung Bod","id":27007581946045,"position":4,"preview_image":{"aspect_ratio":1.499,"height":1366,"width":2048,"src":"\/\/www.thebirthstore.com.au\/cdn\/shop\/files\/c-section-cream-481781.jpg?v=1714967954"},"aspect_ratio":1.499,"height":1366,"media_type":"image","src":"\/\/www.thebirthstore.com.au\/cdn\/shop\/files\/c-section-cream-481781.jpg?v=1714967954","width":2048},{"alt":"C-Section Cream - The Birth Store-Yung Bod","id":27007582044349,"position":5,"preview_image":{"aspect_ratio":1.25,"height":819,"width":1024,"src":"\/\/www.thebirthstore.com.au\/cdn\/shop\/files\/c-section-cream-205419.jpg?v=1714967954"},"aspect_ratio":1.25,"height":819,"media_type":"image","src":"\/\/www.thebirthstore.com.au\/cdn\/shop\/files\/c-section-cream-205419.jpg?v=1714967954","width":1024}]
{"item":{"id":7369232679101,"title":"C-Section Rock 'n' Roller","handle":"c-section-rock-n-roller","description":"\u003ch2 class=\"h1\" data-mce-fragment=\"1\"\u003eThe first ever C-section scar roller\u003c\/h2\u003e\n\u003cdiv class=\"rich-text__text rte\" data-mce-fragment=\"1\"\u003e\n\u003cp data-mce-fragment=\"1\"\u003eIf you want to rock your C-section scar as is, we love that for you so much. If you're someone who wants to minimise the look or feel of your scar, then this is for you\u003c\/p\u003e\n\u003cp data-mce-fragment=\"1\"\u003eThe first of its kind the YUNG BOD C-SECTION ROCK ‘n’ ROLLER is a multipurpose massaging beauty tool that improves the appearance of post-delivery skin and boosts the absorption of topical skincare products.\u003c\/p\u003e\n\u003cp data-mce-fragment=\"1\"\u003eSince the skin around your c-section is likely to become raised, thick, and firm as it recovers, manual massages may help your skin look flatter, smoother, and more even. This can help break down built-up collagen (which is what makes scars appear and feel lumpy and bumpy) and give your c-section skin the best chance of healing with a faint scar appearance.\u003c\/p\u003e\n\u003cp data-mce-fragment=\"1\"\u003eOur massaging roller features two multi-purpose heads: a small amethyst stone head and a large ridged stainless steel acupressure head.\u003c\/p\u003e\n\u003ch2 class=\"image-with-text__heading h1\"\u003eAmethyst stone head\u003c\/h2\u003e\n\u003cdiv class=\"image-with-text__text rte\"\u003e\n\u003cp\u003eThe \u003cstrong\u003eamethyst stone head\u003c\/strong\u003e, the purple stone is known for its relaxing energy and product absorption, it has a more soothing and smoothing effect on your skin by gently massaging the area.\u003c\/p\u003e\n\u003ch2 class=\"image-with-text__heading h1\"\u003eRidged stainless steel head\u003c\/h2\u003e\n\u003cdiv class=\"image-with-text__text rte\"\u003e\n\u003cp\u003eThe\u003cspan\u003e \u003c\/span\u003e\u003cstrong\u003eridged stainless steel \u003c\/strong\u003ehead delivers a more acupressure-like feeling to your skin, which may help improve its elasticity, thickness, and flexibility over time.\u003c\/p\u003e\n\u003cp\u003e\u003cspan\u003eThese roller heads ensure your c-section skin feels supported during the recovery process, plus they enhance skincare product absorption. Once you’ve applied a topical product to your skin (such as YUNG BOD C-SECTION MAMA), the roller gently presses the formula into your skin for quicker, more effective absorption.\u003c\/span\u003e\u003c\/p\u003e\n\u003ch2 class=\"h1\"\u003eHow to Use\u003c\/h2\u003e\n\u003cdiv class=\"rich-text__text rte\"\u003e\n\u003cp\u003eAfter showering, apply YUNG BOD C-SECTION MAMA CREAM to dry skin. Depending on your scar’s age, we recommend the using following massage techniques to rejuvenate your skin.\u003c\/p\u003e\n\u003cp\u003e\u003cstrong\u003eNew scars\u003c\/strong\u003e\u003c\/p\u003e\n\u003cp\u003e\u003cem\u003eAge: Approximately 12 weeks to 24 months\u003c\/em\u003e\u003c\/p\u003e\n\u003cp\u003eGently move the smaller, amethyst end of the roller around your c-section site. Carefully move in up and down, back and forth directions, so you’ve covered the area in a cross-hatch.\u003c\/p\u003e\n\u003cp\u003eWhen your wound is three months old, you can use the larger, ridged end of the roller on the site. Use your thumb and forefinger to stretch the skin in your c-section area, moving the roller in up and down, back and forth directions, so you’ve covered the area in a cross-hatch.\u003c\/p\u003e\n\u003cp\u003eYou can build up pressure over time and up to five minutes of massage per day.\u003c\/p\u003e\n\u003cp\u003e\u003cstrong\u003eOld scars\u003c\/strong\u003e\u003c\/p\u003e\n\u003cp\u003e\u003cem\u003eAge: Approximately 2 years onwards\u003c\/em\u003e\u003c\/p\u003e\n\u003cp\u003eThis area can be sore and delicate, even if the scar is years old. However, you can massage the site straight away.\u003c\/p\u003e\n\u003cp\u003eGently move the smaller, amethyst end of the roller around your c-section site. Carefully move in up and down, back and forth directions, so you’ve covered the area in a cross-hatch.\u003c\/p\u003e\n\u003cp\u003eUse your thumb and forefinger to stretch the skin in your c-section area, moving the larger, ridged end of the roller in up and down, back and forth directions, so you’ve covered the area in a cross-hatch.\u003c\/p\u003e\n\u003cp\u003eYou can massage for 10 to 15 minutes at a time, two to three times per week.\u003c\/p\u003e\n\u003ch2 class=\"image-with-text__heading h1\"\u003eWarnings\u003c\/h2\u003e\n\u003cdiv class=\"image-with-text__text rte\"\u003e\n\u003cp\u003e- Intended for adult use only.\u003c\/p\u003e\n\u003cp\u003e- Keep out of reach of children.\u003c\/p\u003e\n\u003cp\u003e- For external use only.\u003c\/p\u003e\n\u003cp\u003e- Wash hands before using.\u003c\/p\u003e\n\u003cp\u003e- Do not use it on open wounds, broken skin, or infected skin.\u003c\/p\u003e\n\u003cp\u003e- To clean, wipe both ends with a damp cloth. Never fully wet this tool.\u003c\/p\u003e\n\u003cp\u003e- Discontinue use and discard if the stone becomes broken, chipped, or has sharp edges.\u003c\/p\u003e\n\u003cp\u003e- If you have metal allergies (especially nickel), please consult a medical practitioner before using this roller.\u003c\/p\u003e\n\u003cp\u003e- Any injury resulting from misuse and not following instructions is not the responsibility of YUNG BOD. Should an adverse reaction occur, discontinue use immediately.\u003c\/p\u003e\n\u003cp\u003eThis item is not intended to diagnose, treat, cure, or prevent any condition.\u003c\/p\u003e\n\u003c\/div\u003e\n\u003c\/div\u003e\n\u003c\/div\u003e\n\u003c\/div\u003e\n\u003c\/div\u003e","published_at":"2022-10-16T15:39:30+08:00","created_at":"2022-10-07T15:29:02+08:00","vendor":"Yung Bod","type":"","tags":["C-Section Birth Recovery","Mum","Post-Partum","Skin Care"],"price":5500,"price_min":5500,"price_max":5500,"available":true,"price_varies":false,"compare_at_price":null,"compare_at_price_min":0,"compare_at_price_max":0,"compare_at_price_varies":false,"variants":[{"id":42392021041341,"title":"Default Title","option1":"Default Title","option2":null,"option3":null,"sku":"","requires_shipping":true,"taxable":false,"featured_image":null,"available":true,"name":"C-Section Rock 'n' Roller","public_title":null,"options":["Default Title"],"price":5500,"weight":229,"compare_at_price":null,"inventory_management":"shopify","barcode":"21041341","requires_selling_plan":false,"selling_plan_allocations":[]}],"images":["\/\/www.thebirthstore.com.au\/cdn\/shop\/files\/c-section-rock-n-roller-523262.jpg?v=1714967954","\/\/www.thebirthstore.com.au\/cdn\/shop\/files\/c-section-rock-n-roller-967121.jpg?v=1714967954","\/\/www.thebirthstore.com.au\/cdn\/shop\/files\/c-section-rock-n-roller-986451.jpg?v=1714967954","\/\/www.thebirthstore.com.au\/cdn\/shop\/files\/c-section-rock-n-roller-792092.jpg?v=1714967954","\/\/www.thebirthstore.com.au\/cdn\/shop\/files\/c-section-rock-n-roller-940595.jpg?v=1714967954"],"featured_image":"\/\/www.thebirthstore.com.au\/cdn\/shop\/files\/c-section-rock-n-roller-523262.jpg?v=1714967954","options":["Title"],"media":[{"alt":"C-Section Rock 'n' Roller - The Birth Store-Yung Bod","id":27007581618365,"position":1,"preview_image":{"aspect_ratio":1.0,"height":671,"width":671,"src":"\/\/www.thebirthstore.com.au\/cdn\/shop\/files\/c-section-rock-n-roller-523262.jpg?v=1714967954"},"aspect_ratio":1.0,"height":671,"media_type":"image","src":"\/\/www.thebirthstore.com.au\/cdn\/shop\/files\/c-section-rock-n-roller-523262.jpg?v=1714967954","width":671},{"alt":"C-Section Rock 'n' Roller - The Birth Store-Yung Bod","id":27007581716669,"position":2,"preview_image":{"aspect_ratio":1.25,"height":819,"width":1024,"src":"\/\/www.thebirthstore.com.au\/cdn\/shop\/files\/c-section-rock-n-roller-967121.jpg?v=1714967954"},"aspect_ratio":1.25,"height":819,"media_type":"image","src":"\/\/www.thebirthstore.com.au\/cdn\/shop\/files\/c-section-rock-n-roller-967121.jpg?v=1714967954","width":1024},{"alt":"C-Section Rock 'n' Roller - The Birth Store-Yung Bod","id":27007581782205,"position":3,"preview_image":{"aspect_ratio":1.25,"height":819,"width":1024,"src":"\/\/www.thebirthstore.com.au\/cdn\/shop\/files\/c-section-rock-n-roller-986451.jpg?v=1714967954"},"aspect_ratio":1.25,"height":819,"media_type":"image","src":"\/\/www.thebirthstore.com.au\/cdn\/shop\/files\/c-section-rock-n-roller-986451.jpg?v=1714967954","width":1024},{"alt":"C-Section Rock 'n' Roller - The Birth Store-Yung Bod","id":27007581880509,"position":4,"preview_image":{"aspect_ratio":1.25,"height":819,"width":1024,"src":"\/\/www.thebirthstore.com.au\/cdn\/shop\/files\/c-section-rock-n-roller-792092.jpg?v=1714967954"},"aspect_ratio":1.25,"height":819,"media_type":"image","src":"\/\/www.thebirthstore.com.au\/cdn\/shop\/files\/c-section-rock-n-roller-792092.jpg?v=1714967954","width":1024},{"alt":"C-Section Rock 'n' Roller - The Birth Store-Yung Bod","id":27007581978813,"position":5,"preview_image":{"aspect_ratio":0.8,"height":1280,"width":1024,"src":"\/\/www.thebirthstore.com.au\/cdn\/shop\/files\/c-section-rock-n-roller-940595.jpg?v=1714967954"},"aspect_ratio":0.8,"height":1280,"media_type":"image","src":"\/\/www.thebirthstore.com.au\/cdn\/shop\/files\/c-section-rock-n-roller-940595.jpg?v=1714967954","width":1024}],"requires_selling_plan":false,"selling_plan_groups":[],"content":"\u003ch2 class=\"h1\" data-mce-fragment=\"1\"\u003eThe first ever C-section scar roller\u003c\/h2\u003e\n\u003cdiv class=\"rich-text__text rte\" data-mce-fragment=\"1\"\u003e\n\u003cp data-mce-fragment=\"1\"\u003eIf you want to rock your C-section scar as is, we love that for you so much. If you're someone who wants to minimise the look or feel of your scar, then this is for you\u003c\/p\u003e\n\u003cp data-mce-fragment=\"1\"\u003eThe first of its kind the YUNG BOD C-SECTION ROCK ‘n’ ROLLER is a multipurpose massaging beauty tool that improves the appearance of post-delivery skin and boosts the absorption of topical skincare products.\u003c\/p\u003e\n\u003cp data-mce-fragment=\"1\"\u003eSince the skin around your c-section is likely to become raised, thick, and firm as it recovers, manual massages may help your skin look flatter, smoother, and more even. This can help break down built-up collagen (which is what makes scars appear and feel lumpy and bumpy) and give your c-section skin the best chance of healing with a faint scar appearance.\u003c\/p\u003e\n\u003cp data-mce-fragment=\"1\"\u003eOur massaging roller features two multi-purpose heads: a small amethyst stone head and a large ridged stainless steel acupressure head.\u003c\/p\u003e\n\u003ch2 class=\"image-with-text__heading h1\"\u003eAmethyst stone head\u003c\/h2\u003e\n\u003cdiv class=\"image-with-text__text rte\"\u003e\n\u003cp\u003eThe \u003cstrong\u003eamethyst stone head\u003c\/strong\u003e, the purple stone is known for its relaxing energy and product absorption, it has a more soothing and smoothing effect on your skin by gently massaging the area.\u003c\/p\u003e\n\u003ch2 class=\"image-with-text__heading h1\"\u003eRidged stainless steel head\u003c\/h2\u003e\n\u003cdiv class=\"image-with-text__text rte\"\u003e\n\u003cp\u003eThe\u003cspan\u003e \u003c\/span\u003e\u003cstrong\u003eridged stainless steel \u003c\/strong\u003ehead delivers a more acupressure-like feeling to your skin, which may help improve its elasticity, thickness, and flexibility over time.\u003c\/p\u003e\n\u003cp\u003e\u003cspan\u003eThese roller heads ensure your c-section skin feels supported during the recovery process, plus they enhance skincare product absorption. Once you’ve applied a topical product to your skin (such as YUNG BOD C-SECTION MAMA), the roller gently presses the formula into your skin for quicker, more effective absorption.\u003c\/span\u003e\u003c\/p\u003e\n\u003ch2 class=\"h1\"\u003eHow to Use\u003c\/h2\u003e\n\u003cdiv class=\"rich-text__text rte\"\u003e\n\u003cp\u003eAfter showering, apply YUNG BOD C-SECTION MAMA CREAM to dry skin. Depending on your scar’s age, we recommend the using following massage techniques to rejuvenate your skin.\u003c\/p\u003e\n\u003cp\u003e\u003cstrong\u003eNew scars\u003c\/strong\u003e\u003c\/p\u003e\n\u003cp\u003e\u003cem\u003eAge: Approximately 12 weeks to 24 months\u003c\/em\u003e\u003c\/p\u003e\n\u003cp\u003eGently move the smaller, amethyst end of the roller around your c-section site. Carefully move in up and down, back and forth directions, so you’ve covered the area in a cross-hatch.\u003c\/p\u003e\n\u003cp\u003eWhen your wound is three months old, you can use the larger, ridged end of the roller on the site. Use your thumb and forefinger to stretch the skin in your c-section area, moving the roller in up and down, back and forth directions, so you’ve covered the area in a cross-hatch.\u003c\/p\u003e\n\u003cp\u003eYou can build up pressure over time and up to five minutes of massage per day.\u003c\/p\u003e\n\u003cp\u003e\u003cstrong\u003eOld scars\u003c\/strong\u003e\u003c\/p\u003e\n\u003cp\u003e\u003cem\u003eAge: Approximately 2 years onwards\u003c\/em\u003e\u003c\/p\u003e\n\u003cp\u003eThis area can be sore and delicate, even if the scar is years old. However, you can massage the site straight away.\u003c\/p\u003e\n\u003cp\u003eGently move the smaller, amethyst end of the roller around your c-section site. Carefully move in up and down, back and forth directions, so you’ve covered the area in a cross-hatch.\u003c\/p\u003e\n\u003cp\u003eUse your thumb and forefinger to stretch the skin in your c-section area, moving the larger, ridged end of the roller in up and down, back and forth directions, so you’ve covered the area in a cross-hatch.\u003c\/p\u003e\n\u003cp\u003eYou can massage for 10 to 15 minutes at a time, two to three times per week.\u003c\/p\u003e\n\u003ch2 class=\"image-with-text__heading h1\"\u003eWarnings\u003c\/h2\u003e\n\u003cdiv class=\"image-with-text__text rte\"\u003e\n\u003cp\u003e- Intended for adult use only.\u003c\/p\u003e\n\u003cp\u003e- Keep out of reach of children.\u003c\/p\u003e\n\u003cp\u003e- For external use only.\u003c\/p\u003e\n\u003cp\u003e- Wash hands before using.\u003c\/p\u003e\n\u003cp\u003e- Do not use it on open wounds, broken skin, or infected skin.\u003c\/p\u003e\n\u003cp\u003e- To clean, wipe both ends with a damp cloth. Never fully wet this tool.\u003c\/p\u003e\n\u003cp\u003e- Discontinue use and discard if the stone becomes broken, chipped, or has sharp edges.\u003c\/p\u003e\n\u003cp\u003e- If you have metal allergies (especially nickel), please consult a medical practitioner before using this roller.\u003c\/p\u003e\n\u003cp\u003e- Any injury resulting from misuse and not following instructions is not the responsibility of YUNG BOD. Should an adverse reaction occur, discontinue use immediately.\u003c\/p\u003e\n\u003cp\u003eThis item is not intended to diagnose, treat, cure, or prevent any condition.\u003c\/p\u003e\n\u003c\/div\u003e\n\u003c\/div\u003e\n\u003c\/div\u003e\n\u003c\/div\u003e\n\u003c\/div\u003e"},"options":[{"name":"Title","position":1,"values":["Default Title"]}],"custom_metafields":{},"metafields":{"badge":"\u003cdiv style='display:none' class='jdgm-prev-badge' data-average-rating='0.00' data-number-of-reviews='0' data-number-of-questions='0'\u003e \u003cspan class='jdgm-prev-badge__stars' data-score='0.00' tabindex='0' aria-label='0.00 stars' role='button'\u003e \u003cspan class='jdgm-star jdgm--off'\u003e\u003c\/span\u003e\u003cspan class='jdgm-star jdgm--off'\u003e\u003c\/span\u003e\u003cspan class='jdgm-star jdgm--off'\u003e\u003c\/span\u003e\u003cspan class='jdgm-star jdgm--off'\u003e\u003c\/span\u003e\u003cspan class='jdgm-star jdgm--off'\u003e\u003c\/span\u003e \u003c\/span\u003e \u003cspan class='jdgm-prev-badge__text'\u003e No reviews \u003c\/span\u003e \u003c\/div\u003e","widget":"\u003cdiv class='jdgm-rev-widg' data-updated-at='2025-06-13T16:12:10Z' data-average-rating='0.00' data-number-of-reviews='0' data-number-of-questions='0'\u003e \u003cstyle class='jdgm-temp-hiding-style'\u003e.jdgm-rev-widg{ display: none }\u003c\/style\u003e \u003cdiv class='jdgm-rev-widg__header'\u003e \u003ch2 class='jdgm-rev-widg__title'\u003eCustomer Reviews\u003c\/h2\u003e \u003cdiv class='jdgm-rev-widg__summary'\u003e \u003cdiv class='jdgm-rev-widg__summary-stars' aria-label='Average rating is 0.00 stars' role='img'\u003e \u003cspan class='jdgm-star jdgm--off'\u003e\u003c\/span\u003e\u003cspan class='jdgm-star jdgm--off'\u003e\u003c\/span\u003e\u003cspan class='jdgm-star jdgm--off'\u003e\u003c\/span\u003e\u003cspan class='jdgm-star jdgm--off'\u003e\u003c\/span\u003e\u003cspan class='jdgm-star jdgm--off'\u003e\u003c\/span\u003e \u003c\/div\u003e \u003cdiv class='jdgm-rev-widg__summary-text'\u003eBe the first to write a review\u003c\/div\u003e \u003c\/div\u003e \u003ca style='display: none' href='#' class='jdgm-write-rev-link' role='button'\u003eWrite a review\u003c\/a\u003e \u003cdiv class='jdgm-histogram jdgm-temp-hidden'\u003e \u003cdiv class='jdgm-histogram__row' data-rating='5' data-frequency='0' data-percentage='0'\u003e \u003cdiv class='jdgm-histogram__star' role='button' aria-label=\"0% (0) reviews with 5 star rating\" tabindex='0' \u003e\u003cspan class='jdgm-star jdgm--on'\u003e\u003c\/span\u003e\u003cspan class='jdgm-star jdgm--on'\u003e\u003c\/span\u003e\u003cspan class='jdgm-star jdgm--on'\u003e\u003c\/span\u003e\u003cspan class='jdgm-star jdgm--on'\u003e\u003c\/span\u003e\u003cspan class='jdgm-star jdgm--on'\u003e\u003c\/span\u003e\u003c\/div\u003e \u003cdiv class='jdgm-histogram__bar'\u003e \u003cdiv class='jdgm-histogram__bar-content' style='width: 0%;'\u003e \u003c\/div\u003e \u003c\/div\u003e \u003cdiv class='jdgm-histogram__percentage'\u003e0%\u003c\/div\u003e \u003cdiv class='jdgm-histogram__frequency'\u003e(0)\u003c\/div\u003e \u003c\/div\u003e \u003cdiv class='jdgm-histogram__row' data-rating='4' data-frequency='0' data-percentage='0'\u003e \u003cdiv class='jdgm-histogram__star' role='button' aria-label=\"0% (0) reviews with 4 star rating\" tabindex='0' \u003e\u003cspan class='jdgm-star jdgm--on'\u003e\u003c\/span\u003e\u003cspan class='jdgm-star jdgm--on'\u003e\u003c\/span\u003e\u003cspan class='jdgm-star jdgm--on'\u003e\u003c\/span\u003e\u003cspan class='jdgm-star jdgm--on'\u003e\u003c\/span\u003e\u003cspan class='jdgm-star jdgm--off'\u003e\u003c\/span\u003e\u003c\/div\u003e \u003cdiv class='jdgm-histogram__bar'\u003e \u003cdiv class='jdgm-histogram__bar-content' style='width: 0%;'\u003e \u003c\/div\u003e \u003c\/div\u003e \u003cdiv class='jdgm-histogram__percentage'\u003e0%\u003c\/div\u003e \u003cdiv class='jdgm-histogram__frequency'\u003e(0)\u003c\/div\u003e \u003c\/div\u003e \u003cdiv class='jdgm-histogram__row' data-rating='3' data-frequency='0' data-percentage='0'\u003e \u003cdiv class='jdgm-histogram__star' role='button' aria-label=\"0% (0) reviews with 3 star rating\" tabindex='0' \u003e\u003cspan class='jdgm-star jdgm--on'\u003e\u003c\/span\u003e\u003cspan class='jdgm-star jdgm--on'\u003e\u003c\/span\u003e\u003cspan class='jdgm-star jdgm--on'\u003e\u003c\/span\u003e\u003cspan class='jdgm-star jdgm--off'\u003e\u003c\/span\u003e\u003cspan class='jdgm-star jdgm--off'\u003e\u003c\/span\u003e\u003c\/div\u003e \u003cdiv class='jdgm-histogram__bar'\u003e \u003cdiv class='jdgm-histogram__bar-content' style='width: 0%;'\u003e \u003c\/div\u003e \u003c\/div\u003e \u003cdiv class='jdgm-histogram__percentage'\u003e0%\u003c\/div\u003e \u003cdiv class='jdgm-histogram__frequency'\u003e(0)\u003c\/div\u003e \u003c\/div\u003e \u003cdiv class='jdgm-histogram__row' data-rating='2' data-frequency='0' data-percentage='0'\u003e \u003cdiv class='jdgm-histogram__star' role='button' aria-label=\"0% (0) reviews with 2 star rating\" tabindex='0' \u003e\u003cspan class='jdgm-star jdgm--on'\u003e\u003c\/span\u003e\u003cspan class='jdgm-star jdgm--on'\u003e\u003c\/span\u003e\u003cspan class='jdgm-star jdgm--off'\u003e\u003c\/span\u003e\u003cspan class='jdgm-star jdgm--off'\u003e\u003c\/span\u003e\u003cspan class='jdgm-star jdgm--off'\u003e\u003c\/span\u003e\u003c\/div\u003e \u003cdiv class='jdgm-histogram__bar'\u003e \u003cdiv class='jdgm-histogram__bar-content' style='width: 0%;'\u003e \u003c\/div\u003e \u003c\/div\u003e \u003cdiv class='jdgm-histogram__percentage'\u003e0%\u003c\/div\u003e \u003cdiv class='jdgm-histogram__frequency'\u003e(0)\u003c\/div\u003e \u003c\/div\u003e \u003cdiv class='jdgm-histogram__row' data-rating='1' data-frequency='0' data-percentage='0'\u003e \u003cdiv class='jdgm-histogram__star' role='button' aria-label=\"0% (0) reviews with 1 star rating\" tabindex='0' \u003e\u003cspan class='jdgm-star jdgm--on'\u003e\u003c\/span\u003e\u003cspan class='jdgm-star jdgm--off'\u003e\u003c\/span\u003e\u003cspan class='jdgm-star jdgm--off'\u003e\u003c\/span\u003e\u003cspan class='jdgm-star jdgm--off'\u003e\u003c\/span\u003e\u003cspan class='jdgm-star jdgm--off'\u003e\u003c\/span\u003e\u003c\/div\u003e \u003cdiv class='jdgm-histogram__bar'\u003e \u003cdiv class='jdgm-histogram__bar-content' style='width: 0%;'\u003e \u003c\/div\u003e \u003c\/div\u003e \u003cdiv class='jdgm-histogram__percentage'\u003e0%\u003c\/div\u003e \u003cdiv class='jdgm-histogram__frequency'\u003e(0)\u003c\/div\u003e \u003c\/div\u003e \u003cdiv class='jdgm-histogram__row jdgm-histogram__clear-filter' data-rating=null tabindex='0'\u003e\u003c\/div\u003e \u003c\/div\u003e \u003cdiv class='jdgm-rev-widg__sort-wrapper'\u003e\u003c\/div\u003e \u003c\/div\u003e \u003cdiv class='jdgm-rev-widg__body'\u003e \u003cdiv class='jdgm-rev-widg__reviews'\u003e\u003c\/div\u003e \u003cdiv class='jdgm-paginate' data-per-page='10' data-url='https:\/\/api.judge.me\/reviews\/reviews_for_widget' style=\"display: none;\"\u003e\u003c\/div\u003e \u003c\/div\u003e \u003cdiv class='jdgm-rev-widg__paginate-spinner-wrapper'\u003e \u003cdiv class='jdgm-spinner'\u003e\u003c\/div\u003e \u003c\/div\u003e \u003c\/div\u003e"},"collections":[{"id":261657460925,"handle":"buy","title":"Buy","updated_at":"2025-12-28T20:10:01+08:00","body_html":"\u003cp\u003eBrowse all of our pregnancy, labour \u0026amp; birth, postpartum and baby essentials here.\u003cbr\u003e\u003c\/p\u003e\n\u003cp\u003e\u003cspan\u003eYou can even buy now and pay later with Afterpay!\u003c\/span\u003e\u003c\/p\u003e","published_at":"2021-03-10T12:05:31+08:00","sort_order":"best-selling","template_suffix":"shop-all-collection","disjunctive":false,"rules":[{"column":"title","relation":"not_contains","condition":"Hire"}],"published_scope":"global","image":{"created_at":"2024-05-06T11:59:42+08:00","alt":"Buy - The Birth Store","width":2048,"height":2048,"src":"\/\/www.thebirthstore.com.au\/cdn\/shop\/collections\/buy-964856.jpg?v=1714967982"}},{"id":281712361661,"handle":"c-section-birth-recovery","title":"C-Section Birth Recovery","updated_at":"2025-12-27T20:11:39+08:00","body_html":"","published_at":"2021-12-20T14:19:01+08:00","sort_order":"best-selling","template_suffix":"swaddles-collection","disjunctive":false,"rules":[{"column":"tag","relation":"equals","condition":"C-Section Birth Recovery"}],"published_scope":"global","image":{"created_at":"2024-05-06T11:59:49+08:00","alt":"C-Section Birth Recovery - The Birth Store","width":1366,"height":2048,"src":"\/\/www.thebirthstore.com.au\/cdn\/shop\/collections\/c-section-birth-recovery-359249.jpg?v=1714967990"}},{"id":261658083517,"handle":"post-partum","title":"Postpartum","updated_at":"2025-12-28T20:10:01+08:00","body_html":"\u003cp\u003eShop your postpartum and hospital bag essentials below. Looking for something we don't currently stock? Please reach out and let us know.\u003cbr\u003e\u003c\/p\u003e\n\u003cp\u003e\u003cspan\u003eYou can even buy now and pay later with Afterpay!\u003c\/span\u003e\u003c\/p\u003e","published_at":"2021-03-10T12:33:47+08:00","sort_order":"best-selling","template_suffix":"postpartum-collection","disjunctive":false,"rules":[{"column":"tag","relation":"equals","condition":"Post-Partum"}],"published_scope":"global","image":{"created_at":"2024-05-06T12:00:36+08:00","alt":"Postpartum - The Birth Store","width":611,"height":702,"src":"\/\/www.thebirthstore.com.au\/cdn\/shop\/collections\/postpartum-150119.jpg?v=1714968037"}},{"id":291456483517,"handle":"shop-all","title":"Shop All - Mum","updated_at":"2025-12-28T20:10:01+08:00","body_html":"","published_at":"2022-12-23T22:04:39+08:00","sort_order":"best-selling","template_suffix":"shop-all-collection","disjunctive":false,"rules":[{"column":"variant_price","relation":"greater_than","condition":"1"},{"column":"title","relation":"not_contains","condition":"Batteries"},{"column":"tag","relation":"equals","condition":"Mum"}],"published_scope":"global","image":{"created_at":"2024-05-06T12:00:54+08:00","alt":"Shop All - The Birth Store","width":1365,"height":2048,"src":"\/\/www.thebirthstore.com.au\/cdn\/shop\/collections\/shop-all-693176.jpg?v=1714968055"}},{"id":310045933757,"handle":"shop-all-sale","title":"Shop All Sale","updated_at":"2025-12-28T20:10:01+08:00","body_html":"","published_at":"2024-11-12T13:22:43+08:00","sort_order":"alpha-asc","template_suffix":"","disjunctive":true,"rules":[{"column":"tag","relation":"equals","condition":"Bundles"},{"column":"vendor","relation":"equals","condition":"Franjos Kitchen"},{"column":"vendor","relation":"equals","condition":"Adored Illustrations"},{"column":"vendor","relation":"equals","condition":"Amazing Oils"},{"column":"vendor","relation":"equals","condition":"Ice Ice Booby"},{"column":"vendor","relation":"equals","condition":"Made to Milk"},{"column":"vendor","relation":"equals","condition":"Milky Goodness"},{"column":"vendor","relation":"equals","condition":"Seasons of Mama"},{"column":"vendor","relation":"equals","condition":"Silverette"},{"column":"vendor","relation":"equals","condition":"Snuggle Hunny"},{"column":"vendor","relation":"equals","condition":"Yung Bod"},{"column":"vendor","relation":"equals","condition":"Bare Love"},{"column":"vendor","relation":"equals","condition":"Haakaa"},{"column":"vendor","relation":"equals","condition":"Mere Botanicals"},{"column":"vendor","relation":"equals","condition":"The Birth Store Hire"},{"column":"vendor","relation":"equals","condition":"The Birth Store"}],"published_scope":"global","image":{"created_at":"2024-11-13T10:58:16+08:00","alt":"Shop All Sale - The Birth Store","width":2048,"height":1365,"src":"\/\/www.thebirthstore.com.au\/cdn\/shop\/collections\/shop-all-sale-297361.jpg?v=1731466697"}},{"id":324680483005,"handle":"skin-care","title":"Skin Care","updated_at":"2025-12-28T20:10:01+08:00","body_html":"","published_at":"2025-09-23T22:14:11+08:00","sort_order":"best-selling","template_suffix":"","disjunctive":false,"rules":[{"column":"tag","relation":"equals","condition":"Skin Care"}],"published_scope":"global","image":{"created_at":"2025-10-30T16:17:08+08:00","alt":"Skin Care - The Birth Store","width":800,"height":800,"src":"\/\/www.thebirthstore.com.au\/cdn\/shop\/collections\/skin-care-6874549.jpg?v=1761812228"}}]}
[{"alt":"C-Section Rock 'n' Roller - The Birth Store-Yung Bod","id":27007581618365,"position":1,"preview_image":{"aspect_ratio":1.0,"height":671,"width":671,"src":"\/\/www.thebirthstore.com.au\/cdn\/shop\/files\/c-section-rock-n-roller-523262.jpg?v=1714967954"},"aspect_ratio":1.0,"height":671,"media_type":"image","src":"\/\/www.thebirthstore.com.au\/cdn\/shop\/files\/c-section-rock-n-roller-523262.jpg?v=1714967954","width":671},{"alt":"C-Section Rock 'n' Roller - The Birth Store-Yung Bod","id":27007581716669,"position":2,"preview_image":{"aspect_ratio":1.25,"height":819,"width":1024,"src":"\/\/www.thebirthstore.com.au\/cdn\/shop\/files\/c-section-rock-n-roller-967121.jpg?v=1714967954"},"aspect_ratio":1.25,"height":819,"media_type":"image","src":"\/\/www.thebirthstore.com.au\/cdn\/shop\/files\/c-section-rock-n-roller-967121.jpg?v=1714967954","width":1024},{"alt":"C-Section Rock 'n' Roller - The Birth Store-Yung Bod","id":27007581782205,"position":3,"preview_image":{"aspect_ratio":1.25,"height":819,"width":1024,"src":"\/\/www.thebirthstore.com.au\/cdn\/shop\/files\/c-section-rock-n-roller-986451.jpg?v=1714967954"},"aspect_ratio":1.25,"height":819,"media_type":"image","src":"\/\/www.thebirthstore.com.au\/cdn\/shop\/files\/c-section-rock-n-roller-986451.jpg?v=1714967954","width":1024},{"alt":"C-Section Rock 'n' Roller - The Birth Store-Yung Bod","id":27007581880509,"position":4,"preview_image":{"aspect_ratio":1.25,"height":819,"width":1024,"src":"\/\/www.thebirthstore.com.au\/cdn\/shop\/files\/c-section-rock-n-roller-792092.jpg?v=1714967954"},"aspect_ratio":1.25,"height":819,"media_type":"image","src":"\/\/www.thebirthstore.com.au\/cdn\/shop\/files\/c-section-rock-n-roller-792092.jpg?v=1714967954","width":1024},{"alt":"C-Section Rock 'n' Roller - The Birth Store-Yung Bod","id":27007581978813,"position":5,"preview_image":{"aspect_ratio":0.8,"height":1280,"width":1024,"src":"\/\/www.thebirthstore.com.au\/cdn\/shop\/files\/c-section-rock-n-roller-940595.jpg?v=1714967954"},"aspect_ratio":0.8,"height":1280,"media_type":"image","src":"\/\/www.thebirthstore.com.au\/cdn\/shop\/files\/c-section-rock-n-roller-940595.jpg?v=1714967954","width":1024}]
{"item":{"id":7491780935869,"title":"C-Section Scar Silicone Strips","handle":"silicone-strips","description":"\u003cp class=\"preFade fadeIn\" data-mce-fragment=\"1\"\u003eSilicone can be used for improving the appearance and textures of scars, and is often recommended by healthcare professionals. and labelled as the ‘gold standard’ of scar treatment. You can use these silicone strips once your practitioner gives you the okay to apply topical products to your c-section skin - this is usually at your six-week check up.\u003c\/p\u003e","published_at":"2023-07-25T13:06:29+08:00","created_at":"2023-07-12T11:06:30+08:00","vendor":"Yung Bod","type":"","tags":["C-Section Birth Recovery","Mum","Post-Partum","Skin Care"],"price":4400,"price_min":4400,"price_max":4400,"available":true,"price_varies":false,"compare_at_price":null,"compare_at_price_min":0,"compare_at_price_max":0,"compare_at_price_varies":false,"variants":[{"id":42916427169981,"title":"Default Title","option1":"Default Title","option2":null,"option3":null,"sku":"","requires_shipping":true,"taxable":false,"featured_image":null,"available":true,"name":"C-Section Scar Silicone Strips","public_title":null,"options":["Default Title"],"price":4400,"weight":42,"compare_at_price":null,"inventory_management":"shopify","barcode":"27169981","requires_selling_plan":false,"selling_plan_allocations":[]}],"images":["\/\/www.thebirthstore.com.au\/cdn\/shop\/files\/c-section-scar-silicone-strips-481809.jpg?v=1714967958","\/\/www.thebirthstore.com.au\/cdn\/shop\/files\/c-section-scar-silicone-strips-777646.jpg?v=1714967958","\/\/www.thebirthstore.com.au\/cdn\/shop\/files\/c-section-scar-silicone-strips-366490.jpg?v=1714967958","\/\/www.thebirthstore.com.au\/cdn\/shop\/files\/c-section-scar-silicone-strips-577749.jpg?v=1714967958","\/\/www.thebirthstore.com.au\/cdn\/shop\/files\/c-section-scar-silicone-strips-323860.jpg?v=1714967958","\/\/www.thebirthstore.com.au\/cdn\/shop\/files\/c-section-scar-silicone-strips-533705.jpg?v=1714967958","\/\/www.thebirthstore.com.au\/cdn\/shop\/files\/c-section-scar-silicone-strips-944478.jpg?v=1714967958","\/\/www.thebirthstore.com.au\/cdn\/shop\/files\/c-section-scar-silicone-strips-604719.jpg?v=1714967958"],"featured_image":"\/\/www.thebirthstore.com.au\/cdn\/shop\/files\/c-section-scar-silicone-strips-481809.jpg?v=1714967958","options":["Title"],"media":[{"alt":"C-Section Scar Silicone Strips - The Birth Store-Yung Bod","id":27007582535869,"position":1,"preview_image":{"aspect_ratio":1.0,"height":1080,"width":1080,"src":"\/\/www.thebirthstore.com.au\/cdn\/shop\/files\/c-section-scar-silicone-strips-481809.jpg?v=1714967958"},"aspect_ratio":1.0,"height":1080,"media_type":"image","src":"\/\/www.thebirthstore.com.au\/cdn\/shop\/files\/c-section-scar-silicone-strips-481809.jpg?v=1714967958","width":1080},{"alt":"C-Section Scar Silicone Strips - The Birth Store-Yung Bod","id":27007582568637,"position":2,"preview_image":{"aspect_ratio":0.667,"height":2048,"width":1365,"src":"\/\/www.thebirthstore.com.au\/cdn\/shop\/files\/c-section-scar-silicone-strips-777646.jpg?v=1714967958"},"aspect_ratio":0.667,"height":2048,"media_type":"image","src":"\/\/www.thebirthstore.com.au\/cdn\/shop\/files\/c-section-scar-silicone-strips-777646.jpg?v=1714967958","width":1365},{"alt":"C-Section Scar Silicone Strips - The Birth Store-Yung Bod","id":27007582601405,"position":3,"preview_image":{"aspect_ratio":1.5,"height":1365,"width":2048,"src":"\/\/www.thebirthstore.com.au\/cdn\/shop\/files\/c-section-scar-silicone-strips-366490.jpg?v=1714967958"},"aspect_ratio":1.5,"height":1365,"media_type":"image","src":"\/\/www.thebirthstore.com.au\/cdn\/shop\/files\/c-section-scar-silicone-strips-366490.jpg?v=1714967958","width":2048},{"alt":"C-Section Scar Silicone Strips - The Birth Store-Yung Bod","id":27007582634173,"position":4,"preview_image":{"aspect_ratio":1.5,"height":1365,"width":2048,"src":"\/\/www.thebirthstore.com.au\/cdn\/shop\/files\/c-section-scar-silicone-strips-577749.jpg?v=1714967958"},"aspect_ratio":1.5,"height":1365,"media_type":"image","src":"\/\/www.thebirthstore.com.au\/cdn\/shop\/files\/c-section-scar-silicone-strips-577749.jpg?v=1714967958","width":2048},{"alt":"C-Section Scar Silicone Strips - The Birth Store-Yung Bod","id":27007582666941,"position":5,"preview_image":{"aspect_ratio":0.667,"height":2048,"width":1365,"src":"\/\/www.thebirthstore.com.au\/cdn\/shop\/files\/c-section-scar-silicone-strips-323860.jpg?v=1714967958"},"aspect_ratio":0.667,"height":2048,"media_type":"image","src":"\/\/www.thebirthstore.com.au\/cdn\/shop\/files\/c-section-scar-silicone-strips-323860.jpg?v=1714967958","width":1365},{"alt":"C-Section Scar Silicone Strips - The Birth Store-Yung Bod","id":27007582699709,"position":6,"preview_image":{"aspect_ratio":0.667,"height":2048,"width":1365,"src":"\/\/www.thebirthstore.com.au\/cdn\/shop\/files\/c-section-scar-silicone-strips-533705.jpg?v=1714967958"},"aspect_ratio":0.667,"height":2048,"media_type":"image","src":"\/\/www.thebirthstore.com.au\/cdn\/shop\/files\/c-section-scar-silicone-strips-533705.jpg?v=1714967958","width":1365},{"alt":"C-Section Scar Silicone Strips - The Birth Store-Yung Bod","id":27007582732477,"position":7,"preview_image":{"aspect_ratio":1.5,"height":1365,"width":2048,"src":"\/\/www.thebirthstore.com.au\/cdn\/shop\/files\/c-section-scar-silicone-strips-944478.jpg?v=1714967958"},"aspect_ratio":1.5,"height":1365,"media_type":"image","src":"\/\/www.thebirthstore.com.au\/cdn\/shop\/files\/c-section-scar-silicone-strips-944478.jpg?v=1714967958","width":2048},{"alt":"C-Section Scar Silicone Strips - The Birth Store-Yung Bod","id":27007582765245,"position":8,"preview_image":{"aspect_ratio":0.667,"height":2048,"width":1365,"src":"\/\/www.thebirthstore.com.au\/cdn\/shop\/files\/c-section-scar-silicone-strips-604719.jpg?v=1714967958"},"aspect_ratio":0.667,"height":2048,"media_type":"image","src":"\/\/www.thebirthstore.com.au\/cdn\/shop\/files\/c-section-scar-silicone-strips-604719.jpg?v=1714967958","width":1365}],"requires_selling_plan":false,"selling_plan_groups":[],"content":"\u003cp class=\"preFade fadeIn\" data-mce-fragment=\"1\"\u003eSilicone can be used for improving the appearance and textures of scars, and is often recommended by healthcare professionals. and labelled as the ‘gold standard’ of scar treatment. You can use these silicone strips once your practitioner gives you the okay to apply topical products to your c-section skin - this is usually at your six-week check up.\u003c\/p\u003e"},"options":[{"name":"Title","position":1,"values":["Default Title"]}],"custom_metafields":{},"metafields":{"badge":"\u003cdiv style='display:none' class='jdgm-prev-badge' data-average-rating='5.00' data-number-of-reviews='1' data-number-of-questions='0'\u003e \u003cspan class='jdgm-prev-badge__stars' data-score='5.00' tabindex='0' aria-label='5.00 stars' role='button'\u003e \u003cspan class='jdgm-star jdgm--on'\u003e\u003c\/span\u003e\u003cspan class='jdgm-star jdgm--on'\u003e\u003c\/span\u003e\u003cspan class='jdgm-star jdgm--on'\u003e\u003c\/span\u003e\u003cspan class='jdgm-star jdgm--on'\u003e\u003c\/span\u003e\u003cspan class='jdgm-star jdgm--on'\u003e\u003c\/span\u003e \u003c\/span\u003e \u003cspan class='jdgm-prev-badge__text'\u003e 1 review \u003c\/span\u003e \u003c\/div\u003e","widget":"\u003cdiv class='jdgm-rev-widg' data-updated-at='2025-06-13T16:12:53Z' data-average-rating='5.00' data-number-of-reviews='1' data-number-of-questions='0'\u003e \u003cstyle class='jdgm-temp-hiding-style'\u003e.jdgm-rev-widg{ display: none }\u003c\/style\u003e \u003cdiv class='jdgm-rev-widg__header'\u003e \u003ch2 class='jdgm-rev-widg__title'\u003eCustomer Reviews\u003c\/h2\u003e \u003cdiv class='jdgm-rev-widg__summary'\u003e \u003cdiv class='jdgm-rev-widg__summary-stars' aria-label='Average rating is 5.00 stars' role='img'\u003e \u003cspan class='jdgm-star jdgm--on'\u003e\u003c\/span\u003e\u003cspan class='jdgm-star jdgm--on'\u003e\u003c\/span\u003e\u003cspan class='jdgm-star jdgm--on'\u003e\u003c\/span\u003e\u003cspan class='jdgm-star jdgm--on'\u003e\u003c\/span\u003e\u003cspan class='jdgm-star jdgm--on'\u003e\u003c\/span\u003e \u003c\/div\u003e \u003cdiv class='jdgm-rev-widg__summary-text'\u003eBased on 1 review\u003c\/div\u003e \u003c\/div\u003e \u003ca style='display: none' href='#' class='jdgm-write-rev-link' role='button'\u003eWrite a review\u003c\/a\u003e \u003cdiv class='jdgm-histogram jdgm-temp-hidden'\u003e \u003cdiv class='jdgm-histogram__row' data-rating='5' data-frequency='1' data-percentage='100'\u003e \u003cdiv class='jdgm-histogram__star' role='button' aria-label=\"100% (1) reviews with 5 star rating\" tabindex='0' \u003e\u003cspan class='jdgm-star jdgm--on'\u003e\u003c\/span\u003e\u003cspan class='jdgm-star jdgm--on'\u003e\u003c\/span\u003e\u003cspan class='jdgm-star jdgm--on'\u003e\u003c\/span\u003e\u003cspan class='jdgm-star jdgm--on'\u003e\u003c\/span\u003e\u003cspan class='jdgm-star jdgm--on'\u003e\u003c\/span\u003e\u003c\/div\u003e \u003cdiv class='jdgm-histogram__bar'\u003e \u003cdiv class='jdgm-histogram__bar-content' style='width: 100%;'\u003e \u003c\/div\u003e \u003c\/div\u003e \u003cdiv class='jdgm-histogram__percentage'\u003e100%\u003c\/div\u003e \u003cdiv class='jdgm-histogram__frequency'\u003e(1)\u003c\/div\u003e \u003c\/div\u003e \u003cdiv class='jdgm-histogram__row' data-rating='4' data-frequency='0' data-percentage='0'\u003e \u003cdiv class='jdgm-histogram__star' role='button' aria-label=\"0% (0) reviews with 4 star rating\" tabindex='0' \u003e\u003cspan class='jdgm-star jdgm--on'\u003e\u003c\/span\u003e\u003cspan class='jdgm-star jdgm--on'\u003e\u003c\/span\u003e\u003cspan class='jdgm-star jdgm--on'\u003e\u003c\/span\u003e\u003cspan class='jdgm-star jdgm--on'\u003e\u003c\/span\u003e\u003cspan class='jdgm-star jdgm--off'\u003e\u003c\/span\u003e\u003c\/div\u003e \u003cdiv class='jdgm-histogram__bar'\u003e \u003cdiv class='jdgm-histogram__bar-content' style='width: 0%;'\u003e \u003c\/div\u003e \u003c\/div\u003e \u003cdiv class='jdgm-histogram__percentage'\u003e0%\u003c\/div\u003e \u003cdiv class='jdgm-histogram__frequency'\u003e(0)\u003c\/div\u003e \u003c\/div\u003e \u003cdiv class='jdgm-histogram__row' data-rating='3' data-frequency='0' data-percentage='0'\u003e \u003cdiv class='jdgm-histogram__star' role='button' aria-label=\"0% (0) reviews with 3 star rating\" tabindex='0' \u003e\u003cspan class='jdgm-star jdgm--on'\u003e\u003c\/span\u003e\u003cspan class='jdgm-star jdgm--on'\u003e\u003c\/span\u003e\u003cspan class='jdgm-star jdgm--on'\u003e\u003c\/span\u003e\u003cspan class='jdgm-star jdgm--off'\u003e\u003c\/span\u003e\u003cspan class='jdgm-star jdgm--off'\u003e\u003c\/span\u003e\u003c\/div\u003e \u003cdiv class='jdgm-histogram__bar'\u003e \u003cdiv class='jdgm-histogram__bar-content' style='width: 0%;'\u003e \u003c\/div\u003e \u003c\/div\u003e \u003cdiv class='jdgm-histogram__percentage'\u003e0%\u003c\/div\u003e \u003cdiv class='jdgm-histogram__frequency'\u003e(0)\u003c\/div\u003e \u003c\/div\u003e \u003cdiv class='jdgm-histogram__row' data-rating='2' data-frequency='0' data-percentage='0'\u003e \u003cdiv class='jdgm-histogram__star' role='button' aria-label=\"0% (0) reviews with 2 star rating\" tabindex='0' \u003e\u003cspan class='jdgm-star jdgm--on'\u003e\u003c\/span\u003e\u003cspan class='jdgm-star jdgm--on'\u003e\u003c\/span\u003e\u003cspan class='jdgm-star jdgm--off'\u003e\u003c\/span\u003e\u003cspan class='jdgm-star jdgm--off'\u003e\u003c\/span\u003e\u003cspan class='jdgm-star jdgm--off'\u003e\u003c\/span\u003e\u003c\/div\u003e \u003cdiv class='jdgm-histogram__bar'\u003e \u003cdiv class='jdgm-histogram__bar-content' style='width: 0%;'\u003e \u003c\/div\u003e \u003c\/div\u003e \u003cdiv class='jdgm-histogram__percentage'\u003e0%\u003c\/div\u003e \u003cdiv class='jdgm-histogram__frequency'\u003e(0)\u003c\/div\u003e \u003c\/div\u003e \u003cdiv class='jdgm-histogram__row' data-rating='1' data-frequency='0' data-percentage='0'\u003e \u003cdiv class='jdgm-histogram__star' role='button' aria-label=\"0% (0) reviews with 1 star rating\" tabindex='0' \u003e\u003cspan class='jdgm-star jdgm--on'\u003e\u003c\/span\u003e\u003cspan class='jdgm-star jdgm--off'\u003e\u003c\/span\u003e\u003cspan class='jdgm-star jdgm--off'\u003e\u003c\/span\u003e\u003cspan class='jdgm-star jdgm--off'\u003e\u003c\/span\u003e\u003cspan class='jdgm-star jdgm--off'\u003e\u003c\/span\u003e\u003c\/div\u003e \u003cdiv class='jdgm-histogram__bar'\u003e \u003cdiv class='jdgm-histogram__bar-content' style='width: 0%;'\u003e \u003c\/div\u003e \u003c\/div\u003e \u003cdiv class='jdgm-histogram__percentage'\u003e0%\u003c\/div\u003e \u003cdiv class='jdgm-histogram__frequency'\u003e(0)\u003c\/div\u003e \u003c\/div\u003e \u003cdiv class='jdgm-histogram__row jdgm-histogram__clear-filter' data-rating=null tabindex='0'\u003e\u003c\/div\u003e \u003c\/div\u003e \u003cdiv class='jdgm-rev-widg__sort-wrapper'\u003e\u003c\/div\u003e \u003c\/div\u003e \u003cdiv class='jdgm-rev-widg__body'\u003e \u003cdiv class='jdgm-rev-widg__reviews'\u003e\u003cdiv class='jdgm-rev jdgm-divider-top' data-verified-buyer='true' data-review-id='a7409e7d-9629-4c33-81d9-340d12eaf603' data-review-language='' data-product-title='C-Section Scar Silicone Strips' data-product-url='\/products\/silicone-strips' data-thumb-up-count='0' data-thumb-down-count='0'\u003e \u003cdiv class='jdgm-rev__header'\u003e \u003cdiv class='jdgm-rev__icon' \u003e B \u003c\/div\u003e \u003cspan class='jdgm-rev__rating' data-score='5' tabindex='0' aria-label='5 star review' role='img'\u003e \u003cspan class='jdgm-star jdgm--on'\u003e\u003c\/span\u003e\u003cspan class='jdgm-star jdgm--on'\u003e\u003c\/span\u003e\u003cspan class='jdgm-star jdgm--on'\u003e\u003c\/span\u003e\u003cspan class='jdgm-star jdgm--on'\u003e\u003c\/span\u003e\u003cspan class='jdgm-star jdgm--on'\u003e\u003c\/span\u003e \u003c\/span\u003e \u003cspan class='jdgm-rev__timestamp jdgm-spinner' data-content='2024-10-08 03:32:54 UTC'\u003e\u003c\/span\u003e \u003cdiv class='jdgm-rev__br'\u003e\u003c\/div\u003e \u003cspan class='jdgm-rev__buyer-badge-wrapper'\u003e \u003cspan class='jdgm-rev__buyer-badge'\u003e\u003c\/span\u003e \u003c\/span\u003e \u003cspan class='jdgm-rev__author-wrapper'\u003e \u003cspan class='jdgm-rev__author'\u003eBernadette Obery\u003c\/span\u003e \u003cspan class='jdgm-rev__location' \u003e \u003c\/span\u003e \u003c\/span\u003e \u003c\/div\u003e \u003cdiv class='jdgm-rev__content'\u003e \u003cdiv class='jdgm-rev__custom-form'\u003e \u003c\/div\u003e \u003cb class='jdgm-rev__title'\u003ePostpartum recovery essential\u003c\/b\u003e \u003cdiv class='jdgm-rev__body'\u003e\u003cp\u003eI'm so glad I got the c section silicone strips - super comfortable, perfect size and really helping in my recovery. Wish I had these for my first pregnancy.\u003c\/p\u003e\u003c\/div\u003e \u003cdiv class='jdgm-rev__pics'\u003e \u003c\/div\u003e \u003cdiv class='jdgm-rev__vids'\u003e \u003c\/div\u003e \u003cdiv class='jdgm-rev__transparency-badge-wrapper'\u003e \u003c\/div\u003e \u003c\/div\u003e \u003cdiv class='jdgm-rev__actions'\u003e \u003cdiv class='jdgm-rev__social'\u003e\u003c\/div\u003e \u003cdiv class='jdgm-rev__votes'\u003e\u003c\/div\u003e \u003c\/div\u003e \u003cdiv class='jdgm-rev__reply'\u003e \u003c\/div\u003e \u003c\/div\u003e\u003c\/div\u003e \u003cdiv class='jdgm-paginate' data-per-page='10' data-url='https:\/\/api.judge.me\/reviews\/reviews_for_widget' style=\"display: none;\"\u003e\u003c\/div\u003e \u003c\/div\u003e \u003cdiv class='jdgm-rev-widg__paginate-spinner-wrapper'\u003e \u003cdiv class='jdgm-spinner'\u003e\u003c\/div\u003e \u003c\/div\u003e \u003c\/div\u003e"},"collections":[{"id":261657460925,"handle":"buy","title":"Buy","updated_at":"2025-12-28T20:10:01+08:00","body_html":"\u003cp\u003eBrowse all of our pregnancy, labour \u0026amp; birth, postpartum and baby essentials here.\u003cbr\u003e\u003c\/p\u003e\n\u003cp\u003e\u003cspan\u003eYou can even buy now and pay later with Afterpay!\u003c\/span\u003e\u003c\/p\u003e","published_at":"2021-03-10T12:05:31+08:00","sort_order":"best-selling","template_suffix":"shop-all-collection","disjunctive":false,"rules":[{"column":"title","relation":"not_contains","condition":"Hire"}],"published_scope":"global","image":{"created_at":"2024-05-06T11:59:42+08:00","alt":"Buy - The Birth Store","width":2048,"height":2048,"src":"\/\/www.thebirthstore.com.au\/cdn\/shop\/collections\/buy-964856.jpg?v=1714967982"}},{"id":281712361661,"handle":"c-section-birth-recovery","title":"C-Section Birth Recovery","updated_at":"2025-12-27T20:11:39+08:00","body_html":"","published_at":"2021-12-20T14:19:01+08:00","sort_order":"best-selling","template_suffix":"swaddles-collection","disjunctive":false,"rules":[{"column":"tag","relation":"equals","condition":"C-Section Birth Recovery"}],"published_scope":"global","image":{"created_at":"2024-05-06T11:59:49+08:00","alt":"C-Section Birth Recovery - The Birth Store","width":1366,"height":2048,"src":"\/\/www.thebirthstore.com.au\/cdn\/shop\/collections\/c-section-birth-recovery-359249.jpg?v=1714967990"}},{"id":261658083517,"handle":"post-partum","title":"Postpartum","updated_at":"2025-12-28T20:10:01+08:00","body_html":"\u003cp\u003eShop your postpartum and hospital bag essentials below. Looking for something we don't currently stock? Please reach out and let us know.\u003cbr\u003e\u003c\/p\u003e\n\u003cp\u003e\u003cspan\u003eYou can even buy now and pay later with Afterpay!\u003c\/span\u003e\u003c\/p\u003e","published_at":"2021-03-10T12:33:47+08:00","sort_order":"best-selling","template_suffix":"postpartum-collection","disjunctive":false,"rules":[{"column":"tag","relation":"equals","condition":"Post-Partum"}],"published_scope":"global","image":{"created_at":"2024-05-06T12:00:36+08:00","alt":"Postpartum - The Birth Store","width":611,"height":702,"src":"\/\/www.thebirthstore.com.au\/cdn\/shop\/collections\/postpartum-150119.jpg?v=1714968037"}},{"id":291456483517,"handle":"shop-all","title":"Shop All - Mum","updated_at":"2025-12-28T20:10:01+08:00","body_html":"","published_at":"2022-12-23T22:04:39+08:00","sort_order":"best-selling","template_suffix":"shop-all-collection","disjunctive":false,"rules":[{"column":"variant_price","relation":"greater_than","condition":"1"},{"column":"title","relation":"not_contains","condition":"Batteries"},{"column":"tag","relation":"equals","condition":"Mum"}],"published_scope":"global","image":{"created_at":"2024-05-06T12:00:54+08:00","alt":"Shop All - The Birth Store","width":1365,"height":2048,"src":"\/\/www.thebirthstore.com.au\/cdn\/shop\/collections\/shop-all-693176.jpg?v=1714968055"}},{"id":310045933757,"handle":"shop-all-sale","title":"Shop All Sale","updated_at":"2025-12-28T20:10:01+08:00","body_html":"","published_at":"2024-11-12T13:22:43+08:00","sort_order":"alpha-asc","template_suffix":"","disjunctive":true,"rules":[{"column":"tag","relation":"equals","condition":"Bundles"},{"column":"vendor","relation":"equals","condition":"Franjos Kitchen"},{"column":"vendor","relation":"equals","condition":"Adored Illustrations"},{"column":"vendor","relation":"equals","condition":"Amazing Oils"},{"column":"vendor","relation":"equals","condition":"Ice Ice Booby"},{"column":"vendor","relation":"equals","condition":"Made to Milk"},{"column":"vendor","relation":"equals","condition":"Milky Goodness"},{"column":"vendor","relation":"equals","condition":"Seasons of Mama"},{"column":"vendor","relation":"equals","condition":"Silverette"},{"column":"vendor","relation":"equals","condition":"Snuggle Hunny"},{"column":"vendor","relation":"equals","condition":"Yung Bod"},{"column":"vendor","relation":"equals","condition":"Bare Love"},{"column":"vendor","relation":"equals","condition":"Haakaa"},{"column":"vendor","relation":"equals","condition":"Mere Botanicals"},{"column":"vendor","relation":"equals","condition":"The Birth Store Hire"},{"column":"vendor","relation":"equals","condition":"The Birth Store"}],"published_scope":"global","image":{"created_at":"2024-11-13T10:58:16+08:00","alt":"Shop All Sale - The Birth Store","width":2048,"height":1365,"src":"\/\/www.thebirthstore.com.au\/cdn\/shop\/collections\/shop-all-sale-297361.jpg?v=1731466697"}},{"id":324680483005,"handle":"skin-care","title":"Skin Care","updated_at":"2025-12-28T20:10:01+08:00","body_html":"","published_at":"2025-09-23T22:14:11+08:00","sort_order":"best-selling","template_suffix":"","disjunctive":false,"rules":[{"column":"tag","relation":"equals","condition":"Skin Care"}],"published_scope":"global","image":{"created_at":"2025-10-30T16:17:08+08:00","alt":"Skin Care - The Birth Store","width":800,"height":800,"src":"\/\/www.thebirthstore.com.au\/cdn\/shop\/collections\/skin-care-6874549.jpg?v=1761812228"}}]}
[{"alt":"C-Section Scar Silicone Strips - The Birth Store-Yung Bod","id":27007582535869,"position":1,"preview_image":{"aspect_ratio":1.0,"height":1080,"width":1080,"src":"\/\/www.thebirthstore.com.au\/cdn\/shop\/files\/c-section-scar-silicone-strips-481809.jpg?v=1714967958"},"aspect_ratio":1.0,"height":1080,"media_type":"image","src":"\/\/www.thebirthstore.com.au\/cdn\/shop\/files\/c-section-scar-silicone-strips-481809.jpg?v=1714967958","width":1080},{"alt":"C-Section Scar Silicone Strips - The Birth Store-Yung Bod","id":27007582568637,"position":2,"preview_image":{"aspect_ratio":0.667,"height":2048,"width":1365,"src":"\/\/www.thebirthstore.com.au\/cdn\/shop\/files\/c-section-scar-silicone-strips-777646.jpg?v=1714967958"},"aspect_ratio":0.667,"height":2048,"media_type":"image","src":"\/\/www.thebirthstore.com.au\/cdn\/shop\/files\/c-section-scar-silicone-strips-777646.jpg?v=1714967958","width":1365},{"alt":"C-Section Scar Silicone Strips - The Birth Store-Yung Bod","id":27007582601405,"position":3,"preview_image":{"aspect_ratio":1.5,"height":1365,"width":2048,"src":"\/\/www.thebirthstore.com.au\/cdn\/shop\/files\/c-section-scar-silicone-strips-366490.jpg?v=1714967958"},"aspect_ratio":1.5,"height":1365,"media_type":"image","src":"\/\/www.thebirthstore.com.au\/cdn\/shop\/files\/c-section-scar-silicone-strips-366490.jpg?v=1714967958","width":2048},{"alt":"C-Section Scar Silicone Strips - The Birth Store-Yung Bod","id":27007582634173,"position":4,"preview_image":{"aspect_ratio":1.5,"height":1365,"width":2048,"src":"\/\/www.thebirthstore.com.au\/cdn\/shop\/files\/c-section-scar-silicone-strips-577749.jpg?v=1714967958"},"aspect_ratio":1.5,"height":1365,"media_type":"image","src":"\/\/www.thebirthstore.com.au\/cdn\/shop\/files\/c-section-scar-silicone-strips-577749.jpg?v=1714967958","width":2048},{"alt":"C-Section Scar Silicone Strips - The Birth Store-Yung Bod","id":27007582666941,"position":5,"preview_image":{"aspect_ratio":0.667,"height":2048,"width":1365,"src":"\/\/www.thebirthstore.com.au\/cdn\/shop\/files\/c-section-scar-silicone-strips-323860.jpg?v=1714967958"},"aspect_ratio":0.667,"height":2048,"media_type":"image","src":"\/\/www.thebirthstore.com.au\/cdn\/shop\/files\/c-section-scar-silicone-strips-323860.jpg?v=1714967958","width":1365},{"alt":"C-Section Scar Silicone Strips - The Birth Store-Yung Bod","id":27007582699709,"position":6,"preview_image":{"aspect_ratio":0.667,"height":2048,"width":1365,"src":"\/\/www.thebirthstore.com.au\/cdn\/shop\/files\/c-section-scar-silicone-strips-533705.jpg?v=1714967958"},"aspect_ratio":0.667,"height":2048,"media_type":"image","src":"\/\/www.thebirthstore.com.au\/cdn\/shop\/files\/c-section-scar-silicone-strips-533705.jpg?v=1714967958","width":1365},{"alt":"C-Section Scar Silicone Strips - The Birth Store-Yung Bod","id":27007582732477,"position":7,"preview_image":{"aspect_ratio":1.5,"height":1365,"width":2048,"src":"\/\/www.thebirthstore.com.au\/cdn\/shop\/files\/c-section-scar-silicone-strips-944478.jpg?v=1714967958"},"aspect_ratio":1.5,"height":1365,"media_type":"image","src":"\/\/www.thebirthstore.com.au\/cdn\/shop\/files\/c-section-scar-silicone-strips-944478.jpg?v=1714967958","width":2048},{"alt":"C-Section Scar Silicone Strips - The Birth Store-Yung Bod","id":27007582765245,"position":8,"preview_image":{"aspect_ratio":0.667,"height":2048,"width":1365,"src":"\/\/www.thebirthstore.com.au\/cdn\/shop\/files\/c-section-scar-silicone-strips-604719.jpg?v=1714967958"},"aspect_ratio":0.667,"height":2048,"media_type":"image","src":"\/\/www.thebirthstore.com.au\/cdn\/shop\/files\/c-section-scar-silicone-strips-604719.jpg?v=1714967958","width":1365}]
{"item":{"id":6631294009533,"title":"Clary Sage Oil - 10ml","handle":"clary-sage-oil-labour-for-labour","description":"\u003cp data-mce-fragment=\"1\"\u003e\u003cspan data-mce-fragment=\"1\"\u003eClary Sage has been used for centuries predominantly to ease menstrual pains, aid in sleep and relaxation, hormone balancing and more. One popular use is to support the progression of labour when it is safe to do so. \u003c\/span\u003e\u003c\/p\u003e\n\u003cp data-mce-fragment=\"1\"\u003e\u003cstrong data-mce-fragment=\"1\"\u003eCAUTION:\u003c\/strong\u003e Clary Sage should only be used after discussing with your medical team as they are able to consider your individual medical situation. Under no circumstances should Clary Sage be used before 37 weeks gestation. Please use caution when handling if ordering before 37 weeks.\u003c\/p\u003e\n\u003cp data-mce-fragment=\"1\"\u003e\u003cstrong data-mce-fragment=\"1\"\u003eWhat does Clary Sage do?\u003c\/strong\u003e\u003c\/p\u003e\n\u003cp data-mce-fragment=\"1\"\u003eThere is only a limited amount of medical information available for essential oils and their benefits, but Clary Sage has been shown in some cases to:\u003c\/p\u003e\n\u003cul data-mce-fragment=\"1\"\u003e\n\u003cli data-mce-fragment=\"1\"\u003eReduce the pain of menstrual and contraction pains\u003c\/li\u003e\n\u003cli data-mce-fragment=\"1\"\u003eAid in sleep allowing you to be more relaxed\u003c\/li\u003e\n\u003cli data-mce-fragment=\"1\"\u003eHave a stimulating effect on the uterus – which is why it is an absolute no-go before 37 weeks and is preferred to use when already in labour with medical approval\u003c\/li\u003e\n\u003cli data-mce-fragment=\"1\"\u003eBoost oxytocin which causes contractions – this helps to speed up labour if it is slowing down\u003c\/li\u003e\n\u003cli data-mce-fragment=\"1\"\u003eReduce anxiety and aid relaxation whilst in labour\u003c\/li\u003e\n\u003c\/ul\u003e\n\u003cp data-mce-fragment=\"1\"\u003e\u003cstrong data-mce-fragment=\"1\"\u003eHow do I use Clary Sage?\u003c\/strong\u003e\u003c\/p\u003e\n\u003cp data-mce-fragment=\"1\"\u003eClary Sage can be used in several ways:\u003c\/p\u003e\n\u003cul data-mce-fragment=\"1\"\u003e\n\u003cli data-mce-fragment=\"1\"\u003eYou can put a few drops in your bath\u003c\/li\u003e\n\u003cli data-mce-fragment=\"1\"\u003ePut a few drops on a flannel, tissue or similar and inhale it\u003c\/li\u003e\n\u003cli data-mce-fragment=\"1\"\u003eMix a few drops into a carrier oil and rub it onto your body\n\u003cul data-mce-fragment=\"1\"\u003e\n\u003cli data-mce-fragment=\"1\"\u003eOur oil is 100% pure and strong so when applying to the skin a carrier oil is a must – a few examples of carrier oils are coconut oil, almond oil, olive oil and sunflower oil (1 drop of Clary Sage to 5mls of carrier oil is recommended)\u003c\/li\u003e\n\u003c\/ul\u003e\n\u003c\/li\u003e\n\u003cli data-mce-fragment=\"1\"\u003eAdding a few drops in your diffuser or oil burner\n\u003cul data-mce-fragment=\"1\"\u003e\n\u003cli data-mce-fragment=\"1\"\u003eThis is a great thing to do when you are at home, full term and already in labour – if you can diffuse in your birthing suite, we recommend that too. It is best to double check the policies of where you will be though, some hospitals have banned Clary Sage in maternity wards due to the effect it can have on other patients or health professionals who are not full term in their pregnancy\u003c\/li\u003e\n\u003c\/ul\u003e\n\u003c\/li\u003e\n\u003c\/ul\u003e\n\u003cp\u003e\u003cstrong\u003e\u003cspan\u003eYou can even buy now and pay later with Afterpay!\u003c\/span\u003e\u003c\/strong\u003e\u003c\/p\u003e\n\u003cp data-mce-fragment=\"1\"\u003e\u003cspan style=\"color: #ff1818;\"\u003e\u003cstrong data-mce-fragment=\"1\"\u003eSafety Reminder:\u003c\/strong\u003e\u003c\/span\u003e\u003c\/p\u003e\n\u003cp data-mce-fragment=\"1\"\u003eKeep out of reach of children. \u003cspan data-mce-fragment=\"1\"\u003eIf pregnant or under a doctor's care consult your physician. Avoid contact with eyes, inner ears and sensitive areas. For external use only. Always patch test for allergies and seek medical attention if irritation occurs. This is a flammable liquid please handle with care and keep out of the sun.\u003c\/span\u003e\u003c\/p\u003e","published_at":"2021-04-06T15:05:31+08:00","created_at":"2021-04-06T15:05:30+08:00","vendor":"The Birth Store","type":"Essential Oil","tags":["Birth","Labour Preparation","Labour Progression","Mum","Pregnancy","The Birth Store"],"price":2400,"price_min":2400,"price_max":2400,"available":true,"price_varies":false,"compare_at_price":null,"compare_at_price_min":0,"compare_at_price_max":0,"compare_at_price_varies":false,"variants":[{"id":39524497850557,"title":"Default Title","option1":"Default Title","option2":null,"option3":null,"sku":"","requires_shipping":true,"taxable":false,"featured_image":null,"available":true,"name":"Clary Sage Oil - 10ml","public_title":null,"options":["Default Title"],"price":2400,"weight":43,"compare_at_price":null,"inventory_management":"shopify","barcode":"97850557","requires_selling_plan":false,"selling_plan_allocations":[]}],"images":["\/\/www.thebirthstore.com.au\/cdn\/shop\/files\/clary-sage-oil-10ml-745960.jpg?v=1750253316","\/\/www.thebirthstore.com.au\/cdn\/shop\/files\/clary-sage-oil-10ml-126481.jpg?v=1750217972","\/\/www.thebirthstore.com.au\/cdn\/shop\/files\/clary-sage-oil-10ml-814641.jpg?v=1750217972"],"featured_image":"\/\/www.thebirthstore.com.au\/cdn\/shop\/files\/clary-sage-oil-10ml-745960.jpg?v=1750253316","options":["Title"],"media":[{"alt":"Clary Sage Oil - 10ml - The Birth Store - The Birth Store","id":28995606020285,"position":1,"preview_image":{"aspect_ratio":1.0,"height":1080,"width":1080,"src":"\/\/www.thebirthstore.com.au\/cdn\/shop\/files\/clary-sage-oil-10ml-745960.jpg?v=1750253316"},"aspect_ratio":1.0,"height":1080,"media_type":"image","src":"\/\/www.thebirthstore.com.au\/cdn\/shop\/files\/clary-sage-oil-10ml-745960.jpg?v=1750253316","width":1080},{"alt":"Clary Sage Oil - 10ml - The Birth Store-The Birth Store","id":27007581159613,"position":2,"preview_image":{"aspect_ratio":0.667,"height":2048,"width":1365,"src":"\/\/www.thebirthstore.com.au\/cdn\/shop\/files\/clary-sage-oil-10ml-126481.jpg?v=1750217972"},"aspect_ratio":0.667,"height":2048,"media_type":"image","src":"\/\/www.thebirthstore.com.au\/cdn\/shop\/files\/clary-sage-oil-10ml-126481.jpg?v=1750217972","width":1365},{"alt":"Clary Sage Oil - 10ml - The Birth Store-The Birth Store","id":27007581225149,"position":3,"preview_image":{"aspect_ratio":0.667,"height":2048,"width":1365,"src":"\/\/www.thebirthstore.com.au\/cdn\/shop\/files\/clary-sage-oil-10ml-814641.jpg?v=1750217972"},"aspect_ratio":0.667,"height":2048,"media_type":"image","src":"\/\/www.thebirthstore.com.au\/cdn\/shop\/files\/clary-sage-oil-10ml-814641.jpg?v=1750217972","width":1365}],"requires_selling_plan":false,"selling_plan_groups":[],"content":"\u003cp data-mce-fragment=\"1\"\u003e\u003cspan data-mce-fragment=\"1\"\u003eClary Sage has been used for centuries predominantly to ease menstrual pains, aid in sleep and relaxation, hormone balancing and more. One popular use is to support the progression of labour when it is safe to do so. \u003c\/span\u003e\u003c\/p\u003e\n\u003cp data-mce-fragment=\"1\"\u003e\u003cstrong data-mce-fragment=\"1\"\u003eCAUTION:\u003c\/strong\u003e Clary Sage should only be used after discussing with your medical team as they are able to consider your individual medical situation. Under no circumstances should Clary Sage be used before 37 weeks gestation. Please use caution when handling if ordering before 37 weeks.\u003c\/p\u003e\n\u003cp data-mce-fragment=\"1\"\u003e\u003cstrong data-mce-fragment=\"1\"\u003eWhat does Clary Sage do?\u003c\/strong\u003e\u003c\/p\u003e\n\u003cp data-mce-fragment=\"1\"\u003eThere is only a limited amount of medical information available for essential oils and their benefits, but Clary Sage has been shown in some cases to:\u003c\/p\u003e\n\u003cul data-mce-fragment=\"1\"\u003e\n\u003cli data-mce-fragment=\"1\"\u003eReduce the pain of menstrual and contraction pains\u003c\/li\u003e\n\u003cli data-mce-fragment=\"1\"\u003eAid in sleep allowing you to be more relaxed\u003c\/li\u003e\n\u003cli data-mce-fragment=\"1\"\u003eHave a stimulating effect on the uterus – which is why it is an absolute no-go before 37 weeks and is preferred to use when already in labour with medical approval\u003c\/li\u003e\n\u003cli data-mce-fragment=\"1\"\u003eBoost oxytocin which causes contractions – this helps to speed up labour if it is slowing down\u003c\/li\u003e\n\u003cli data-mce-fragment=\"1\"\u003eReduce anxiety and aid relaxation whilst in labour\u003c\/li\u003e\n\u003c\/ul\u003e\n\u003cp data-mce-fragment=\"1\"\u003e\u003cstrong data-mce-fragment=\"1\"\u003eHow do I use Clary Sage?\u003c\/strong\u003e\u003c\/p\u003e\n\u003cp data-mce-fragment=\"1\"\u003eClary Sage can be used in several ways:\u003c\/p\u003e\n\u003cul data-mce-fragment=\"1\"\u003e\n\u003cli data-mce-fragment=\"1\"\u003eYou can put a few drops in your bath\u003c\/li\u003e\n\u003cli data-mce-fragment=\"1\"\u003ePut a few drops on a flannel, tissue or similar and inhale it\u003c\/li\u003e\n\u003cli data-mce-fragment=\"1\"\u003eMix a few drops into a carrier oil and rub it onto your body\n\u003cul data-mce-fragment=\"1\"\u003e\n\u003cli data-mce-fragment=\"1\"\u003eOur oil is 100% pure and strong so when applying to the skin a carrier oil is a must – a few examples of carrier oils are coconut oil, almond oil, olive oil and sunflower oil (1 drop of Clary Sage to 5mls of carrier oil is recommended)\u003c\/li\u003e\n\u003c\/ul\u003e\n\u003c\/li\u003e\n\u003cli data-mce-fragment=\"1\"\u003eAdding a few drops in your diffuser or oil burner\n\u003cul data-mce-fragment=\"1\"\u003e\n\u003cli data-mce-fragment=\"1\"\u003eThis is a great thing to do when you are at home, full term and already in labour – if you can diffuse in your birthing suite, we recommend that too. It is best to double check the policies of where you will be though, some hospitals have banned Clary Sage in maternity wards due to the effect it can have on other patients or health professionals who are not full term in their pregnancy\u003c\/li\u003e\n\u003c\/ul\u003e\n\u003c\/li\u003e\n\u003c\/ul\u003e\n\u003cp\u003e\u003cstrong\u003e\u003cspan\u003eYou can even buy now and pay later with Afterpay!\u003c\/span\u003e\u003c\/strong\u003e\u003c\/p\u003e\n\u003cp data-mce-fragment=\"1\"\u003e\u003cspan style=\"color: #ff1818;\"\u003e\u003cstrong data-mce-fragment=\"1\"\u003eSafety Reminder:\u003c\/strong\u003e\u003c\/span\u003e\u003c\/p\u003e\n\u003cp data-mce-fragment=\"1\"\u003eKeep out of reach of children. \u003cspan data-mce-fragment=\"1\"\u003eIf pregnant or under a doctor's care consult your physician. Avoid contact with eyes, inner ears and sensitive areas. For external use only. Always patch test for allergies and seek medical attention if irritation occurs. This is a flammable liquid please handle with care and keep out of the sun.\u003c\/span\u003e\u003c\/p\u003e"},"options":[{"name":"Title","position":1,"values":["Default Title"]}],"custom_metafields":{},"metafields":{"badge":"\u003cdiv style='display:none' class='jdgm-prev-badge' data-average-rating='0.00' data-number-of-reviews='0' data-number-of-questions='0'\u003e \u003cspan class='jdgm-prev-badge__stars' data-score='0.00' tabindex='0' aria-label='0.00 stars' role='button'\u003e \u003cspan class='jdgm-star jdgm--off'\u003e\u003c\/span\u003e\u003cspan class='jdgm-star jdgm--off'\u003e\u003c\/span\u003e\u003cspan class='jdgm-star jdgm--off'\u003e\u003c\/span\u003e\u003cspan class='jdgm-star jdgm--off'\u003e\u003c\/span\u003e\u003cspan class='jdgm-star jdgm--off'\u003e\u003c\/span\u003e \u003c\/span\u003e \u003cspan class='jdgm-prev-badge__text'\u003e No reviews \u003c\/span\u003e \u003c\/div\u003e","widget":"\u003cdiv class='jdgm-rev-widg' data-updated-at='2025-06-13T16:12:10Z' data-average-rating='0.00' data-number-of-reviews='0' data-number-of-questions='0'\u003e \u003cstyle class='jdgm-temp-hiding-style'\u003e.jdgm-rev-widg{ display: none }\u003c\/style\u003e \u003cdiv class='jdgm-rev-widg__header'\u003e \u003ch2 class='jdgm-rev-widg__title'\u003eCustomer Reviews\u003c\/h2\u003e \u003cdiv class='jdgm-rev-widg__summary'\u003e \u003cdiv class='jdgm-rev-widg__summary-stars' aria-label='Average rating is 0.00 stars' role='img'\u003e \u003cspan class='jdgm-star jdgm--off'\u003e\u003c\/span\u003e\u003cspan class='jdgm-star jdgm--off'\u003e\u003c\/span\u003e\u003cspan class='jdgm-star jdgm--off'\u003e\u003c\/span\u003e\u003cspan class='jdgm-star jdgm--off'\u003e\u003c\/span\u003e\u003cspan class='jdgm-star jdgm--off'\u003e\u003c\/span\u003e \u003c\/div\u003e \u003cdiv class='jdgm-rev-widg__summary-text'\u003eBe the first to write a review\u003c\/div\u003e \u003c\/div\u003e \u003ca style='display: none' href='#' class='jdgm-write-rev-link' role='button'\u003eWrite a review\u003c\/a\u003e \u003cdiv class='jdgm-histogram jdgm-temp-hidden'\u003e \u003cdiv class='jdgm-histogram__row' data-rating='5' data-frequency='0' data-percentage='0'\u003e \u003cdiv class='jdgm-histogram__star' role='button' aria-label=\"0% (0) reviews with 5 star rating\" tabindex='0' \u003e\u003cspan class='jdgm-star jdgm--on'\u003e\u003c\/span\u003e\u003cspan class='jdgm-star jdgm--on'\u003e\u003c\/span\u003e\u003cspan class='jdgm-star jdgm--on'\u003e\u003c\/span\u003e\u003cspan class='jdgm-star jdgm--on'\u003e\u003c\/span\u003e\u003cspan class='jdgm-star jdgm--on'\u003e\u003c\/span\u003e\u003c\/div\u003e \u003cdiv class='jdgm-histogram__bar'\u003e \u003cdiv class='jdgm-histogram__bar-content' style='width: 0%;'\u003e \u003c\/div\u003e \u003c\/div\u003e \u003cdiv class='jdgm-histogram__percentage'\u003e0%\u003c\/div\u003e \u003cdiv class='jdgm-histogram__frequency'\u003e(0)\u003c\/div\u003e \u003c\/div\u003e \u003cdiv class='jdgm-histogram__row' data-rating='4' data-frequency='0' data-percentage='0'\u003e \u003cdiv class='jdgm-histogram__star' role='button' aria-label=\"0% (0) reviews with 4 star rating\" tabindex='0' \u003e\u003cspan class='jdgm-star jdgm--on'\u003e\u003c\/span\u003e\u003cspan class='jdgm-star jdgm--on'\u003e\u003c\/span\u003e\u003cspan class='jdgm-star jdgm--on'\u003e\u003c\/span\u003e\u003cspan class='jdgm-star jdgm--on'\u003e\u003c\/span\u003e\u003cspan class='jdgm-star jdgm--off'\u003e\u003c\/span\u003e\u003c\/div\u003e \u003cdiv class='jdgm-histogram__bar'\u003e \u003cdiv class='jdgm-histogram__bar-content' style='width: 0%;'\u003e \u003c\/div\u003e \u003c\/div\u003e \u003cdiv class='jdgm-histogram__percentage'\u003e0%\u003c\/div\u003e \u003cdiv class='jdgm-histogram__frequency'\u003e(0)\u003c\/div\u003e \u003c\/div\u003e \u003cdiv class='jdgm-histogram__row' data-rating='3' data-frequency='0' data-percentage='0'\u003e \u003cdiv class='jdgm-histogram__star' role='button' aria-label=\"0% (0) reviews with 3 star rating\" tabindex='0' \u003e\u003cspan class='jdgm-star jdgm--on'\u003e\u003c\/span\u003e\u003cspan class='jdgm-star jdgm--on'\u003e\u003c\/span\u003e\u003cspan class='jdgm-star jdgm--on'\u003e\u003c\/span\u003e\u003cspan class='jdgm-star jdgm--off'\u003e\u003c\/span\u003e\u003cspan class='jdgm-star jdgm--off'\u003e\u003c\/span\u003e\u003c\/div\u003e \u003cdiv class='jdgm-histogram__bar'\u003e \u003cdiv class='jdgm-histogram__bar-content' style='width: 0%;'\u003e \u003c\/div\u003e \u003c\/div\u003e \u003cdiv class='jdgm-histogram__percentage'\u003e0%\u003c\/div\u003e \u003cdiv class='jdgm-histogram__frequency'\u003e(0)\u003c\/div\u003e \u003c\/div\u003e \u003cdiv class='jdgm-histogram__row' data-rating='2' data-frequency='0' data-percentage='0'\u003e \u003cdiv class='jdgm-histogram__star' role='button' aria-label=\"0% (0) reviews with 2 star rating\" tabindex='0' \u003e\u003cspan class='jdgm-star jdgm--on'\u003e\u003c\/span\u003e\u003cspan class='jdgm-star jdgm--on'\u003e\u003c\/span\u003e\u003cspan class='jdgm-star jdgm--off'\u003e\u003c\/span\u003e\u003cspan class='jdgm-star jdgm--off'\u003e\u003c\/span\u003e\u003cspan class='jdgm-star jdgm--off'\u003e\u003c\/span\u003e\u003c\/div\u003e \u003cdiv class='jdgm-histogram__bar'\u003e \u003cdiv class='jdgm-histogram__bar-content' style='width: 0%;'\u003e \u003c\/div\u003e \u003c\/div\u003e \u003cdiv class='jdgm-histogram__percentage'\u003e0%\u003c\/div\u003e \u003cdiv class='jdgm-histogram__frequency'\u003e(0)\u003c\/div\u003e \u003c\/div\u003e \u003cdiv class='jdgm-histogram__row' data-rating='1' data-frequency='0' data-percentage='0'\u003e \u003cdiv class='jdgm-histogram__star' role='button' aria-label=\"0% (0) reviews with 1 star rating\" tabindex='0' \u003e\u003cspan class='jdgm-star jdgm--on'\u003e\u003c\/span\u003e\u003cspan class='jdgm-star jdgm--off'\u003e\u003c\/span\u003e\u003cspan class='jdgm-star jdgm--off'\u003e\u003c\/span\u003e\u003cspan class='jdgm-star jdgm--off'\u003e\u003c\/span\u003e\u003cspan class='jdgm-star jdgm--off'\u003e\u003c\/span\u003e\u003c\/div\u003e \u003cdiv class='jdgm-histogram__bar'\u003e \u003cdiv class='jdgm-histogram__bar-content' style='width: 0%;'\u003e \u003c\/div\u003e \u003c\/div\u003e \u003cdiv class='jdgm-histogram__percentage'\u003e0%\u003c\/div\u003e \u003cdiv class='jdgm-histogram__frequency'\u003e(0)\u003c\/div\u003e \u003c\/div\u003e \u003cdiv class='jdgm-histogram__row jdgm-histogram__clear-filter' data-rating=null tabindex='0'\u003e\u003c\/div\u003e \u003c\/div\u003e \u003cdiv class='jdgm-rev-widg__sort-wrapper'\u003e\u003c\/div\u003e \u003c\/div\u003e \u003cdiv class='jdgm-rev-widg__body'\u003e \u003cdiv class='jdgm-rev-widg__reviews'\u003e\u003c\/div\u003e \u003cdiv class='jdgm-paginate' data-per-page='10' data-url='https:\/\/api.judge.me\/reviews\/reviews_for_widget' style=\"display: none;\"\u003e\u003c\/div\u003e \u003c\/div\u003e \u003cdiv class='jdgm-rev-widg__paginate-spinner-wrapper'\u003e \u003cdiv class='jdgm-spinner'\u003e\u003c\/div\u003e \u003c\/div\u003e \u003c\/div\u003e"},"collections":[{"id":309505622205,"handle":"the-birth-store-range","title":"'The Birth Store' Range","updated_at":"2025-12-28T20:10:01+08:00","body_html":"","published_at":"2024-10-28T13:24:26+08:00","sort_order":"alpha-asc","template_suffix":"","disjunctive":false,"rules":[{"column":"tag","relation":"equals","condition":"The Birth Store"}],"published_scope":"global","image":{"created_at":"2025-10-30T16:16:56+08:00","alt":"'The Birth Store' Range - The Birth Store","width":1365,"height":2048,"src":"\/\/www.thebirthstore.com.au\/cdn\/shop\/collections\/the-birth-store-range-5183880.jpg?v=1761812217"}},{"id":261657460925,"handle":"buy","title":"Buy","updated_at":"2025-12-28T20:10:01+08:00","body_html":"\u003cp\u003eBrowse all of our pregnancy, labour \u0026amp; birth, postpartum and baby essentials here.\u003cbr\u003e\u003c\/p\u003e\n\u003cp\u003e\u003cspan\u003eYou can even buy now and pay later with Afterpay!\u003c\/span\u003e\u003c\/p\u003e","published_at":"2021-03-10T12:05:31+08:00","sort_order":"best-selling","template_suffix":"shop-all-collection","disjunctive":false,"rules":[{"column":"title","relation":"not_contains","condition":"Hire"}],"published_scope":"global","image":{"created_at":"2024-05-06T11:59:42+08:00","alt":"Buy - The Birth Store","width":2048,"height":2048,"src":"\/\/www.thebirthstore.com.au\/cdn\/shop\/collections\/buy-964856.jpg?v=1714967982"}},{"id":261658214589,"handle":"labour-and-birth-buy","title":"Labour \u0026 Birth","updated_at":"2025-12-28T20:10:01+08:00","body_html":"\u003cp\u003eWe stock a large range of Elle TENS machines for you to buy for your labour and birth. We stock the Elle TENS, Elle TENS 2 and Elle TENS Plus, we also hire these out if that suits you better, please head over to our TENS machine hire page for more information. We ship Australia wide or have options for local delivery\/pick-up in Perth if you are due ASAP. We also stock other items for your labour and birth. \u003c\/p\u003e\n\u003cp\u003eLooking for something we don't currently stock? Please reach out and let us know.\u003c\/p\u003e\n\u003cp\u003e\u003cspan\u003eYou can even buy now and pay later with Afterpay!\u003c\/span\u003e\u003c\/p\u003e","published_at":"2021-03-10T12:34:43+08:00","sort_order":"best-selling","template_suffix":"labour-birth-collection","disjunctive":false,"rules":[{"column":"tag","relation":"equals","condition":"Birth"}],"published_scope":"global","image":{"created_at":"2024-05-06T12:00:09+08:00","alt":"Labour \u0026 Birth - The Birth Store","width":1080,"height":981,"src":"\/\/www.thebirthstore.com.au\/cdn\/shop\/collections\/labour-birth-342038.jpg?v=1714968009"}},{"id":281712558269,"handle":"labour-aids","title":"Labour Aids","updated_at":"2025-12-28T20:10:01+08:00","body_html":"","published_at":"2021-12-20T14:22:16+08:00","sort_order":"best-selling","template_suffix":"labour-aids-collection","disjunctive":false,"rules":[{"column":"tag","relation":"equals","condition":"Labour Progression"}],"published_scope":"global","image":{"created_at":"2024-05-06T12:00:11+08:00","alt":"Labour Aids - The Birth Store","width":1365,"height":2048,"src":"\/\/www.thebirthstore.com.au\/cdn\/shop\/collections\/labour-aids-211824.jpg?v=1714968012"}},{"id":281712525501,"handle":"labour-preparation","title":"Labour Preparation","updated_at":"2025-12-28T20:10:01+08:00","body_html":"","published_at":"2021-12-20T14:20:12+08:00","sort_order":"best-selling","template_suffix":"labour-preparation-collec","disjunctive":false,"rules":[{"column":"tag","relation":"equals","condition":"Labour Preparation"}],"published_scope":"global","image":{"created_at":"2024-05-06T12:00:13+08:00","alt":"Labour Preparation - The Birth Store","width":1024,"height":1536,"src":"\/\/www.thebirthstore.com.au\/cdn\/shop\/collections\/labour-preparation-271961.jpg?v=1714968013"}},{"id":261658149053,"handle":"pregnancy-and-maternity-products","title":"Pregnancy","updated_at":"2025-12-28T20:10:01+08:00","body_html":"\u003cp\u003eShop your pregnancy essentials below. Looking for something we don't currently stock? Please reach out and let us know.\u003cbr\u003e\u003c\/p\u003e\n\u003cp\u003e\u003cspan\u003eYou can even buy now and pay later with Afterpay!\u003c\/span\u003e\u003c\/p\u003e","published_at":"2021-03-10T12:34:22+08:00","sort_order":"best-selling","template_suffix":"pregnancy-collection","disjunctive":false,"rules":[{"column":"tag","relation":"equals","condition":"Pregnancy"}],"published_scope":"global","image":{"created_at":"2024-05-06T12:00:40+08:00","alt":"Pregnancy - The Birth Store","width":1024,"height":1536,"src":"\/\/www.thebirthstore.com.au\/cdn\/shop\/collections\/pregnancy-899677.jpg?v=1714968040"}},{"id":291456483517,"handle":"shop-all","title":"Shop All - Mum","updated_at":"2025-12-28T20:10:01+08:00","body_html":"","published_at":"2022-12-23T22:04:39+08:00","sort_order":"best-selling","template_suffix":"shop-all-collection","disjunctive":false,"rules":[{"column":"variant_price","relation":"greater_than","condition":"1"},{"column":"title","relation":"not_contains","condition":"Batteries"},{"column":"tag","relation":"equals","condition":"Mum"}],"published_scope":"global","image":{"created_at":"2024-05-06T12:00:54+08:00","alt":"Shop All - The Birth Store","width":1365,"height":2048,"src":"\/\/www.thebirthstore.com.au\/cdn\/shop\/collections\/shop-all-693176.jpg?v=1714968055"}},{"id":310045933757,"handle":"shop-all-sale","title":"Shop All Sale","updated_at":"2025-12-28T20:10:01+08:00","body_html":"","published_at":"2024-11-12T13:22:43+08:00","sort_order":"alpha-asc","template_suffix":"","disjunctive":true,"rules":[{"column":"tag","relation":"equals","condition":"Bundles"},{"column":"vendor","relation":"equals","condition":"Franjos Kitchen"},{"column":"vendor","relation":"equals","condition":"Adored Illustrations"},{"column":"vendor","relation":"equals","condition":"Amazing Oils"},{"column":"vendor","relation":"equals","condition":"Ice Ice Booby"},{"column":"vendor","relation":"equals","condition":"Made to Milk"},{"column":"vendor","relation":"equals","condition":"Milky Goodness"},{"column":"vendor","relation":"equals","condition":"Seasons of Mama"},{"column":"vendor","relation":"equals","condition":"Silverette"},{"column":"vendor","relation":"equals","condition":"Snuggle Hunny"},{"column":"vendor","relation":"equals","condition":"Yung Bod"},{"column":"vendor","relation":"equals","condition":"Bare Love"},{"column":"vendor","relation":"equals","condition":"Haakaa"},{"column":"vendor","relation":"equals","condition":"Mere Botanicals"},{"column":"vendor","relation":"equals","condition":"The Birth Store Hire"},{"column":"vendor","relation":"equals","condition":"The Birth Store"}],"published_scope":"global","image":{"created_at":"2024-11-13T10:58:16+08:00","alt":"Shop All Sale - The Birth Store","width":2048,"height":1365,"src":"\/\/www.thebirthstore.com.au\/cdn\/shop\/collections\/shop-all-sale-297361.jpg?v=1731466697"}},{"id":316942287037,"handle":"wholesale-products","updated_at":"2025-12-28T20:10:01+08:00","published_at":"2025-04-19T15:30:53+08:00","sort_order":"best-selling","template_suffix":"","published_scope":"global","title":"Wholesale Products","body_html":"","image":{"created_at":"2025-11-20T21:33:57+08:00","alt":"Wholesale Products - The Birth Store","width":1024,"height":684,"src":"\/\/www.thebirthstore.com.au\/cdn\/shop\/collections\/wholesale-products-3833919.jpg?v=1763645638"}}]}
[{"alt":"Clary Sage Oil - 10ml - The Birth Store - The Birth Store","id":28995606020285,"position":1,"preview_image":{"aspect_ratio":1.0,"height":1080,"width":1080,"src":"\/\/www.thebirthstore.com.au\/cdn\/shop\/files\/clary-sage-oil-10ml-745960.jpg?v=1750253316"},"aspect_ratio":1.0,"height":1080,"media_type":"image","src":"\/\/www.thebirthstore.com.au\/cdn\/shop\/files\/clary-sage-oil-10ml-745960.jpg?v=1750253316","width":1080},{"alt":"Clary Sage Oil - 10ml - The Birth Store-The Birth Store","id":27007581159613,"position":2,"preview_image":{"aspect_ratio":0.667,"height":2048,"width":1365,"src":"\/\/www.thebirthstore.com.au\/cdn\/shop\/files\/clary-sage-oil-10ml-126481.jpg?v=1750217972"},"aspect_ratio":0.667,"height":2048,"media_type":"image","src":"\/\/www.thebirthstore.com.au\/cdn\/shop\/files\/clary-sage-oil-10ml-126481.jpg?v=1750217972","width":1365},{"alt":"Clary Sage Oil - 10ml - The Birth Store-The Birth Store","id":27007581225149,"position":3,"preview_image":{"aspect_ratio":0.667,"height":2048,"width":1365,"src":"\/\/www.thebirthstore.com.au\/cdn\/shop\/files\/clary-sage-oil-10ml-814641.jpg?v=1750217972"},"aspect_ratio":0.667,"height":2048,"media_type":"image","src":"\/\/www.thebirthstore.com.au\/cdn\/shop\/files\/clary-sage-oil-10ml-814641.jpg?v=1750217972","width":1365}]
{"item":{"id":8109243072701,"title":"Convertible Romper with Frill","handle":"sleepsuit-frill-zip-footie-snuggle-hunny-copy-1","description":"\u003cp\u003eOur Organic Snugglesuits are convertible rompers - zipped onesies with foldover feet. Soft and stretchy, our convertible rompers are an easy-care, fuss-free option with a modern, fitted style. The rompers are made in our SnuggleSoft™ fabric which is buttery soft and one of the many reason our community loves us.\u003c\/p\u003e\n\u003cp\u003eSuitable for loungewear, daywear, birth announcement photos and they make great baby gifts. All Snuggle Hunny clothing is made with GOTS Certified Organic Cotton\u003cspan\u003e \u003c\/span\u003e\u003cspan\u003eCU 1182228\u003c\/span\u003e.\u003c\/p\u003e\n\u003cp\u003e\u003cstrong\u003eOur Snugglesuit Design\u003c\/strong\u003e\u003c\/p\u003e\n\u003cp\u003eThis design includes a two way zip, making it easy to get bub in and out for naptime and nappy change. Foldable hand mittens are included for newborn to 6 months and help stop little nails from scratching and also keep hands warm when the weather is cool. Bub can wear the mittens open or closed. For sizes from 6 months upwards, the mittens are replaced with a stylish cuff. Foot mittens are also an important feature and these are included on all sizes. Who doesn’t love to tuck in those little feet for bedtime to keep warm?\u003c\/p\u003e\n\u003cp\u003e\u003cstrong\u003eFeatures Include:\u003c\/strong\u003e\u003c\/p\u003e\n\u003cul\u003e\n\u003cli\u003eSizing: Newborn to Size 2\u003c\/li\u003e\n\u003cli\u003eFoldable hand mittens (newborn to 6 months)\u003c\/li\u003e\n\u003cli\u003eFoldable foot mittens (all sizes)\u003c\/li\u003e\n\u003cli\u003eFull length two-way zipper\u003cbr\u003e\n\u003c\/li\u003e\n\u003cli\u003eProtective zip cover\u003c\/li\u003e\n\u003cli\u003eSoft and stretchy\u003c\/li\u003e\n\u003cli\u003eFitted style\u003c\/li\u003e\n\u003cli\u003eEasy to wear\u003c\/li\u003e\n\u003cli\u003eLightweight and breathable\u003c\/li\u003e\n\u003cli\u003eGOTS Certified Organic\u003cspan\u003e \u003c\/span\u003e\u003cspan\u003eCU 1182228\u003c\/span\u003e\n\u003c\/li\u003e\n\u003cli\u003e95% Organic Cotton \/ 5% Elastane\u003c\/li\u003e\n\u003c\/ul\u003e\n\u003cp\u003eDesigned in Australia. Made in India.\u003c\/p\u003e\n\u003cp\u003eNote: headwear and accessories not included but can be bought separately.\u003c\/p\u003e\n\u003cp\u003e\u003cspan\u003eDue to the nature of our print style your romper may feature the design in different positions compared to the image. \u003c\/span\u003e\u003c\/p\u003e\n\u003cp\u003eRemove headwear when putting baby to sleep.\u003c\/p\u003e","published_at":"2025-11-06T22:17:00+08:00","created_at":"2025-10-16T13:12:19+08:00","vendor":"Snuggle Hunny","type":"","tags":["Baby","Baby Clothing","Baby Shower Gifts - Baby","Growsuits","new"],"price":3995,"price_min":3995,"price_max":3995,"available":true,"price_varies":false,"compare_at_price":null,"compare_at_price_min":0,"compare_at_price_max":0,"compare_at_price_varies":false,"variants":[{"id":45792804503741,"title":"Isla \/ 0000","option1":"Isla","option2":"0000","option3":null,"sku":null,"requires_shipping":true,"taxable":false,"featured_image":{"id":38808619417789,"product_id":8109243072701,"position":7,"created_at":"2025-11-07T22:07:25+08:00","updated_at":"2025-11-19T21:48:27+08:00","alt":"Convertible Romper with Frill - The Birth Store - Snuggle Hunny","width":1000,"height":1000,"src":"\/\/www.thebirthstore.com.au\/cdn\/shop\/files\/convertible-romper-with-frill-3982696.jpg?v=1763560107","variant_ids":[45792804503741,45792804536509,45792804569277,45792804602045,45792804634813,45792804667581]},"available":true,"name":"Convertible Romper with Frill - Isla \/ 0000","public_title":"Isla \/ 0000","options":["Isla","0000"],"price":3995,"weight":200,"compare_at_price":null,"inventory_management":"shopify","barcode":"04503741","featured_media":{"alt":"Convertible Romper with Frill - The Birth Store - Snuggle Hunny","id":30051622256829,"position":7,"preview_image":{"aspect_ratio":1.0,"height":1000,"width":1000,"src":"\/\/www.thebirthstore.com.au\/cdn\/shop\/files\/convertible-romper-with-frill-3982696.jpg?v=1763560107"}},"requires_selling_plan":false,"selling_plan_allocations":[]},{"id":45792804536509,"title":"Isla \/ 000","option1":"Isla","option2":"000","option3":null,"sku":null,"requires_shipping":true,"taxable":false,"featured_image":{"id":38808619417789,"product_id":8109243072701,"position":7,"created_at":"2025-11-07T22:07:25+08:00","updated_at":"2025-11-19T21:48:27+08:00","alt":"Convertible Romper with Frill - The Birth Store - Snuggle Hunny","width":1000,"height":1000,"src":"\/\/www.thebirthstore.com.au\/cdn\/shop\/files\/convertible-romper-with-frill-3982696.jpg?v=1763560107","variant_ids":[45792804503741,45792804536509,45792804569277,45792804602045,45792804634813,45792804667581]},"available":true,"name":"Convertible Romper with Frill - Isla \/ 000","public_title":"Isla \/ 000","options":["Isla","000"],"price":3995,"weight":200,"compare_at_price":null,"inventory_management":"shopify","barcode":"04536509","featured_media":{"alt":"Convertible Romper with Frill - The Birth Store - Snuggle Hunny","id":30051622256829,"position":7,"preview_image":{"aspect_ratio":1.0,"height":1000,"width":1000,"src":"\/\/www.thebirthstore.com.au\/cdn\/shop\/files\/convertible-romper-with-frill-3982696.jpg?v=1763560107"}},"requires_selling_plan":false,"selling_plan_allocations":[]},{"id":45792804569277,"title":"Isla \/ 00","option1":"Isla","option2":"00","option3":null,"sku":null,"requires_shipping":true,"taxable":false,"featured_image":{"id":38808619417789,"product_id":8109243072701,"position":7,"created_at":"2025-11-07T22:07:25+08:00","updated_at":"2025-11-19T21:48:27+08:00","alt":"Convertible Romper with Frill - The Birth Store - Snuggle Hunny","width":1000,"height":1000,"src":"\/\/www.thebirthstore.com.au\/cdn\/shop\/files\/convertible-romper-with-frill-3982696.jpg?v=1763560107","variant_ids":[45792804503741,45792804536509,45792804569277,45792804602045,45792804634813,45792804667581]},"available":true,"name":"Convertible Romper with Frill - Isla \/ 00","public_title":"Isla \/ 00","options":["Isla","00"],"price":3995,"weight":200,"compare_at_price":null,"inventory_management":"shopify","barcode":"04569277","featured_media":{"alt":"Convertible Romper with Frill - The Birth Store - Snuggle Hunny","id":30051622256829,"position":7,"preview_image":{"aspect_ratio":1.0,"height":1000,"width":1000,"src":"\/\/www.thebirthstore.com.au\/cdn\/shop\/files\/convertible-romper-with-frill-3982696.jpg?v=1763560107"}},"requires_selling_plan":false,"selling_plan_allocations":[]},{"id":45792804602045,"title":"Isla \/ 0","option1":"Isla","option2":"0","option3":null,"sku":null,"requires_shipping":true,"taxable":false,"featured_image":{"id":38808619417789,"product_id":8109243072701,"position":7,"created_at":"2025-11-07T22:07:25+08:00","updated_at":"2025-11-19T21:48:27+08:00","alt":"Convertible Romper with Frill - The Birth Store - Snuggle Hunny","width":1000,"height":1000,"src":"\/\/www.thebirthstore.com.au\/cdn\/shop\/files\/convertible-romper-with-frill-3982696.jpg?v=1763560107","variant_ids":[45792804503741,45792804536509,45792804569277,45792804602045,45792804634813,45792804667581]},"available":true,"name":"Convertible Romper with Frill - Isla \/ 0","public_title":"Isla \/ 0","options":["Isla","0"],"price":3995,"weight":200,"compare_at_price":null,"inventory_management":"shopify","barcode":"04602045","featured_media":{"alt":"Convertible Romper with Frill - The Birth Store - Snuggle Hunny","id":30051622256829,"position":7,"preview_image":{"aspect_ratio":1.0,"height":1000,"width":1000,"src":"\/\/www.thebirthstore.com.au\/cdn\/shop\/files\/convertible-romper-with-frill-3982696.jpg?v=1763560107"}},"requires_selling_plan":false,"selling_plan_allocations":[]},{"id":45792804634813,"title":"Isla \/ 1","option1":"Isla","option2":"1","option3":null,"sku":null,"requires_shipping":true,"taxable":false,"featured_image":{"id":38808619417789,"product_id":8109243072701,"position":7,"created_at":"2025-11-07T22:07:25+08:00","updated_at":"2025-11-19T21:48:27+08:00","alt":"Convertible Romper with Frill - The Birth Store - Snuggle Hunny","width":1000,"height":1000,"src":"\/\/www.thebirthstore.com.au\/cdn\/shop\/files\/convertible-romper-with-frill-3982696.jpg?v=1763560107","variant_ids":[45792804503741,45792804536509,45792804569277,45792804602045,45792804634813,45792804667581]},"available":true,"name":"Convertible Romper with Frill - Isla \/ 1","public_title":"Isla \/ 1","options":["Isla","1"],"price":3995,"weight":200,"compare_at_price":null,"inventory_management":"shopify","barcode":"04634813","featured_media":{"alt":"Convertible Romper with Frill - The Birth Store - Snuggle Hunny","id":30051622256829,"position":7,"preview_image":{"aspect_ratio":1.0,"height":1000,"width":1000,"src":"\/\/www.thebirthstore.com.au\/cdn\/shop\/files\/convertible-romper-with-frill-3982696.jpg?v=1763560107"}},"requires_selling_plan":false,"selling_plan_allocations":[]},{"id":45792804667581,"title":"Isla \/ 2","option1":"Isla","option2":"2","option3":null,"sku":null,"requires_shipping":true,"taxable":false,"featured_image":{"id":38808619417789,"product_id":8109243072701,"position":7,"created_at":"2025-11-07T22:07:25+08:00","updated_at":"2025-11-19T21:48:27+08:00","alt":"Convertible Romper with Frill - The Birth Store - Snuggle Hunny","width":1000,"height":1000,"src":"\/\/www.thebirthstore.com.au\/cdn\/shop\/files\/convertible-romper-with-frill-3982696.jpg?v=1763560107","variant_ids":[45792804503741,45792804536509,45792804569277,45792804602045,45792804634813,45792804667581]},"available":true,"name":"Convertible Romper with Frill - Isla \/ 2","public_title":"Isla \/ 2","options":["Isla","2"],"price":3995,"weight":200,"compare_at_price":null,"inventory_management":"shopify","barcode":"04667581","featured_media":{"alt":"Convertible Romper with Frill - The Birth Store - Snuggle Hunny","id":30051622256829,"position":7,"preview_image":{"aspect_ratio":1.0,"height":1000,"width":1000,"src":"\/\/www.thebirthstore.com.au\/cdn\/shop\/files\/convertible-romper-with-frill-3982696.jpg?v=1763560107"}},"requires_selling_plan":false,"selling_plan_allocations":[]},{"id":45792811450557,"title":"Cherry Blossom \/ 0000","option1":"Cherry Blossom","option2":"0000","option3":null,"sku":null,"requires_shipping":true,"taxable":false,"featured_image":{"id":38795540005053,"product_id":8109243072701,"position":11,"created_at":"2025-11-07T12:11:29+08:00","updated_at":"2025-11-19T21:48:27+08:00","alt":"Convertible Romper with Frill - The Birth Store - Snuggle Hunny","width":1000,"height":1000,"src":"\/\/www.thebirthstore.com.au\/cdn\/shop\/files\/convertible-romper-with-frill-9382375.jpg?v=1763560107","variant_ids":[45792811450557,45792811483325,45792811516093,45792811548861,45792811581629,45792811614397]},"available":true,"name":"Convertible Romper with Frill - Cherry Blossom \/ 0000","public_title":"Cherry Blossom \/ 0000","options":["Cherry Blossom","0000"],"price":3995,"weight":200,"compare_at_price":null,"inventory_management":"shopify","barcode":"11450557","featured_media":{"alt":"Convertible Romper with Frill - The Birth Store - Snuggle Hunny","id":30039782523069,"position":11,"preview_image":{"aspect_ratio":1.0,"height":1000,"width":1000,"src":"\/\/www.thebirthstore.com.au\/cdn\/shop\/files\/convertible-romper-with-frill-9382375.jpg?v=1763560107"}},"requires_selling_plan":false,"selling_plan_allocations":[]},{"id":45792811483325,"title":"Cherry Blossom \/ 000","option1":"Cherry Blossom","option2":"000","option3":null,"sku":null,"requires_shipping":true,"taxable":false,"featured_image":{"id":38795540005053,"product_id":8109243072701,"position":11,"created_at":"2025-11-07T12:11:29+08:00","updated_at":"2025-11-19T21:48:27+08:00","alt":"Convertible Romper with Frill - The Birth Store - Snuggle Hunny","width":1000,"height":1000,"src":"\/\/www.thebirthstore.com.au\/cdn\/shop\/files\/convertible-romper-with-frill-9382375.jpg?v=1763560107","variant_ids":[45792811450557,45792811483325,45792811516093,45792811548861,45792811581629,45792811614397]},"available":true,"name":"Convertible Romper with Frill - Cherry Blossom \/ 000","public_title":"Cherry Blossom \/ 000","options":["Cherry Blossom","000"],"price":3995,"weight":200,"compare_at_price":null,"inventory_management":"shopify","barcode":"11483325","featured_media":{"alt":"Convertible Romper with Frill - The Birth Store - Snuggle Hunny","id":30039782523069,"position":11,"preview_image":{"aspect_ratio":1.0,"height":1000,"width":1000,"src":"\/\/www.thebirthstore.com.au\/cdn\/shop\/files\/convertible-romper-with-frill-9382375.jpg?v=1763560107"}},"requires_selling_plan":false,"selling_plan_allocations":[]},{"id":45792811516093,"title":"Cherry Blossom \/ 00","option1":"Cherry Blossom","option2":"00","option3":null,"sku":null,"requires_shipping":true,"taxable":false,"featured_image":{"id":38795540005053,"product_id":8109243072701,"position":11,"created_at":"2025-11-07T12:11:29+08:00","updated_at":"2025-11-19T21:48:27+08:00","alt":"Convertible Romper with Frill - The Birth Store - Snuggle Hunny","width":1000,"height":1000,"src":"\/\/www.thebirthstore.com.au\/cdn\/shop\/files\/convertible-romper-with-frill-9382375.jpg?v=1763560107","variant_ids":[45792811450557,45792811483325,45792811516093,45792811548861,45792811581629,45792811614397]},"available":true,"name":"Convertible Romper with Frill - Cherry Blossom \/ 00","public_title":"Cherry Blossom \/ 00","options":["Cherry Blossom","00"],"price":3995,"weight":200,"compare_at_price":null,"inventory_management":"shopify","barcode":"11516093","featured_media":{"alt":"Convertible Romper with Frill - The Birth Store - Snuggle Hunny","id":30039782523069,"position":11,"preview_image":{"aspect_ratio":1.0,"height":1000,"width":1000,"src":"\/\/www.thebirthstore.com.au\/cdn\/shop\/files\/convertible-romper-with-frill-9382375.jpg?v=1763560107"}},"requires_selling_plan":false,"selling_plan_allocations":[]},{"id":45792811548861,"title":"Cherry Blossom \/ 0","option1":"Cherry Blossom","option2":"0","option3":null,"sku":null,"requires_shipping":true,"taxable":false,"featured_image":{"id":38795540005053,"product_id":8109243072701,"position":11,"created_at":"2025-11-07T12:11:29+08:00","updated_at":"2025-11-19T21:48:27+08:00","alt":"Convertible Romper with Frill - The Birth Store - Snuggle Hunny","width":1000,"height":1000,"src":"\/\/www.thebirthstore.com.au\/cdn\/shop\/files\/convertible-romper-with-frill-9382375.jpg?v=1763560107","variant_ids":[45792811450557,45792811483325,45792811516093,45792811548861,45792811581629,45792811614397]},"available":true,"name":"Convertible Romper with Frill - Cherry Blossom \/ 0","public_title":"Cherry Blossom \/ 0","options":["Cherry Blossom","0"],"price":3995,"weight":200,"compare_at_price":null,"inventory_management":"shopify","barcode":"11548861","featured_media":{"alt":"Convertible Romper with Frill - The Birth Store - Snuggle Hunny","id":30039782523069,"position":11,"preview_image":{"aspect_ratio":1.0,"height":1000,"width":1000,"src":"\/\/www.thebirthstore.com.au\/cdn\/shop\/files\/convertible-romper-with-frill-9382375.jpg?v=1763560107"}},"requires_selling_plan":false,"selling_plan_allocations":[]},{"id":45792811581629,"title":"Cherry Blossom \/ 1","option1":"Cherry Blossom","option2":"1","option3":null,"sku":null,"requires_shipping":true,"taxable":false,"featured_image":{"id":38795540005053,"product_id":8109243072701,"position":11,"created_at":"2025-11-07T12:11:29+08:00","updated_at":"2025-11-19T21:48:27+08:00","alt":"Convertible Romper with Frill - The Birth Store - Snuggle Hunny","width":1000,"height":1000,"src":"\/\/www.thebirthstore.com.au\/cdn\/shop\/files\/convertible-romper-with-frill-9382375.jpg?v=1763560107","variant_ids":[45792811450557,45792811483325,45792811516093,45792811548861,45792811581629,45792811614397]},"available":true,"name":"Convertible Romper with Frill - Cherry Blossom \/ 1","public_title":"Cherry Blossom \/ 1","options":["Cherry Blossom","1"],"price":3995,"weight":200,"compare_at_price":null,"inventory_management":"shopify","barcode":"11581629","featured_media":{"alt":"Convertible Romper with Frill - The Birth Store - Snuggle Hunny","id":30039782523069,"position":11,"preview_image":{"aspect_ratio":1.0,"height":1000,"width":1000,"src":"\/\/www.thebirthstore.com.au\/cdn\/shop\/files\/convertible-romper-with-frill-9382375.jpg?v=1763560107"}},"requires_selling_plan":false,"selling_plan_allocations":[]},{"id":45792811614397,"title":"Cherry Blossom \/ 2","option1":"Cherry Blossom","option2":"2","option3":null,"sku":null,"requires_shipping":true,"taxable":false,"featured_image":{"id":38795540005053,"product_id":8109243072701,"position":11,"created_at":"2025-11-07T12:11:29+08:00","updated_at":"2025-11-19T21:48:27+08:00","alt":"Convertible Romper with Frill - The Birth Store - Snuggle Hunny","width":1000,"height":1000,"src":"\/\/www.thebirthstore.com.au\/cdn\/shop\/files\/convertible-romper-with-frill-9382375.jpg?v=1763560107","variant_ids":[45792811450557,45792811483325,45792811516093,45792811548861,45792811581629,45792811614397]},"available":true,"name":"Convertible Romper with Frill - Cherry Blossom \/ 2","public_title":"Cherry Blossom \/ 2","options":["Cherry Blossom","2"],"price":3995,"weight":200,"compare_at_price":null,"inventory_management":"shopify","barcode":"11614397","featured_media":{"alt":"Convertible Romper with Frill - The Birth Store - Snuggle Hunny","id":30039782523069,"position":11,"preview_image":{"aspect_ratio":1.0,"height":1000,"width":1000,"src":"\/\/www.thebirthstore.com.au\/cdn\/shop\/files\/convertible-romper-with-frill-9382375.jpg?v=1763560107"}},"requires_selling_plan":false,"selling_plan_allocations":[]},{"id":45792832159933,"title":"Coral \/ 0000","option1":"Coral","option2":"0000","option3":null,"sku":null,"requires_shipping":true,"taxable":false,"featured_image":{"id":38583190159549,"product_id":8109243072701,"position":8,"created_at":"2025-10-16T13:22:49+08:00","updated_at":"2025-11-19T21:48:27+08:00","alt":"Convertible Romper with Frill | Snuggle Hunny - The Birth Store - Snuggle Hunny","width":1000,"height":1000,"src":"\/\/www.thebirthstore.com.au\/cdn\/shop\/files\/convertible-romper-with-frill-snuggle-hunny-4824830.webp?v=1763560107","variant_ids":[45792832159933,45792832192701,45792832225469,45792832258237,45792832291005,45792832323773]},"available":true,"name":"Convertible Romper with Frill - Coral \/ 0000","public_title":"Coral \/ 0000","options":["Coral","0000"],"price":3995,"weight":200,"compare_at_price":null,"inventory_management":"shopify","barcode":"32159933","featured_media":{"alt":"Convertible Romper with Frill | Snuggle Hunny - The Birth Store - Snuggle Hunny","id":29842549604541,"position":8,"preview_image":{"aspect_ratio":1.0,"height":1000,"width":1000,"src":"\/\/www.thebirthstore.com.au\/cdn\/shop\/files\/convertible-romper-with-frill-snuggle-hunny-4824830.webp?v=1763560107"}},"requires_selling_plan":false,"selling_plan_allocations":[]},{"id":45792832192701,"title":"Coral \/ 000","option1":"Coral","option2":"000","option3":null,"sku":null,"requires_shipping":true,"taxable":false,"featured_image":{"id":38583190159549,"product_id":8109243072701,"position":8,"created_at":"2025-10-16T13:22:49+08:00","updated_at":"2025-11-19T21:48:27+08:00","alt":"Convertible Romper with Frill | Snuggle Hunny - The Birth Store - Snuggle Hunny","width":1000,"height":1000,"src":"\/\/www.thebirthstore.com.au\/cdn\/shop\/files\/convertible-romper-with-frill-snuggle-hunny-4824830.webp?v=1763560107","variant_ids":[45792832159933,45792832192701,45792832225469,45792832258237,45792832291005,45792832323773]},"available":true,"name":"Convertible Romper with Frill - Coral \/ 000","public_title":"Coral \/ 000","options":["Coral","000"],"price":3995,"weight":200,"compare_at_price":null,"inventory_management":"shopify","barcode":"32192701","featured_media":{"alt":"Convertible Romper with Frill | Snuggle Hunny - The Birth Store - Snuggle Hunny","id":29842549604541,"position":8,"preview_image":{"aspect_ratio":1.0,"height":1000,"width":1000,"src":"\/\/www.thebirthstore.com.au\/cdn\/shop\/files\/convertible-romper-with-frill-snuggle-hunny-4824830.webp?v=1763560107"}},"requires_selling_plan":false,"selling_plan_allocations":[]},{"id":45792832225469,"title":"Coral \/ 00","option1":"Coral","option2":"00","option3":null,"sku":null,"requires_shipping":true,"taxable":false,"featured_image":{"id":38583190159549,"product_id":8109243072701,"position":8,"created_at":"2025-10-16T13:22:49+08:00","updated_at":"2025-11-19T21:48:27+08:00","alt":"Convertible Romper with Frill | Snuggle Hunny - The Birth Store - Snuggle Hunny","width":1000,"height":1000,"src":"\/\/www.thebirthstore.com.au\/cdn\/shop\/files\/convertible-romper-with-frill-snuggle-hunny-4824830.webp?v=1763560107","variant_ids":[45792832159933,45792832192701,45792832225469,45792832258237,45792832291005,45792832323773]},"available":false,"name":"Convertible Romper with Frill - Coral \/ 00","public_title":"Coral \/ 00","options":["Coral","00"],"price":3995,"weight":200,"compare_at_price":null,"inventory_management":"shopify","barcode":"32225469","featured_media":{"alt":"Convertible Romper with Frill | Snuggle Hunny - The Birth Store - Snuggle Hunny","id":29842549604541,"position":8,"preview_image":{"aspect_ratio":1.0,"height":1000,"width":1000,"src":"\/\/www.thebirthstore.com.au\/cdn\/shop\/files\/convertible-romper-with-frill-snuggle-hunny-4824830.webp?v=1763560107"}},"requires_selling_plan":false,"selling_plan_allocations":[]},{"id":45792832258237,"title":"Coral \/ 0","option1":"Coral","option2":"0","option3":null,"sku":null,"requires_shipping":true,"taxable":false,"featured_image":{"id":38583190159549,"product_id":8109243072701,"position":8,"created_at":"2025-10-16T13:22:49+08:00","updated_at":"2025-11-19T21:48:27+08:00","alt":"Convertible Romper with Frill | Snuggle Hunny - The Birth Store - Snuggle Hunny","width":1000,"height":1000,"src":"\/\/www.thebirthstore.com.au\/cdn\/shop\/files\/convertible-romper-with-frill-snuggle-hunny-4824830.webp?v=1763560107","variant_ids":[45792832159933,45792832192701,45792832225469,45792832258237,45792832291005,45792832323773]},"available":true,"name":"Convertible Romper with Frill - Coral \/ 0","public_title":"Coral \/ 0","options":["Coral","0"],"price":3995,"weight":200,"compare_at_price":null,"inventory_management":"shopify","barcode":"32258237","featured_media":{"alt":"Convertible Romper with Frill | Snuggle Hunny - The Birth Store - Snuggle Hunny","id":29842549604541,"position":8,"preview_image":{"aspect_ratio":1.0,"height":1000,"width":1000,"src":"\/\/www.thebirthstore.com.au\/cdn\/shop\/files\/convertible-romper-with-frill-snuggle-hunny-4824830.webp?v=1763560107"}},"requires_selling_plan":false,"selling_plan_allocations":[]},{"id":45792832291005,"title":"Coral \/ 1","option1":"Coral","option2":"1","option3":null,"sku":null,"requires_shipping":true,"taxable":false,"featured_image":{"id":38583190159549,"product_id":8109243072701,"position":8,"created_at":"2025-10-16T13:22:49+08:00","updated_at":"2025-11-19T21:48:27+08:00","alt":"Convertible Romper with Frill | Snuggle Hunny - The Birth Store - Snuggle Hunny","width":1000,"height":1000,"src":"\/\/www.thebirthstore.com.au\/cdn\/shop\/files\/convertible-romper-with-frill-snuggle-hunny-4824830.webp?v=1763560107","variant_ids":[45792832159933,45792832192701,45792832225469,45792832258237,45792832291005,45792832323773]},"available":true,"name":"Convertible Romper with Frill - Coral \/ 1","public_title":"Coral \/ 1","options":["Coral","1"],"price":3995,"weight":200,"compare_at_price":null,"inventory_management":"shopify","barcode":"32291005","featured_media":{"alt":"Convertible Romper with Frill | Snuggle Hunny - The Birth Store - Snuggle Hunny","id":29842549604541,"position":8,"preview_image":{"aspect_ratio":1.0,"height":1000,"width":1000,"src":"\/\/www.thebirthstore.com.au\/cdn\/shop\/files\/convertible-romper-with-frill-snuggle-hunny-4824830.webp?v=1763560107"}},"requires_selling_plan":false,"selling_plan_allocations":[]},{"id":45792832323773,"title":"Coral \/ 2","option1":"Coral","option2":"2","option3":null,"sku":null,"requires_shipping":true,"taxable":false,"featured_image":{"id":38583190159549,"product_id":8109243072701,"position":8,"created_at":"2025-10-16T13:22:49+08:00","updated_at":"2025-11-19T21:48:27+08:00","alt":"Convertible Romper with Frill | Snuggle Hunny - The Birth Store - Snuggle Hunny","width":1000,"height":1000,"src":"\/\/www.thebirthstore.com.au\/cdn\/shop\/files\/convertible-romper-with-frill-snuggle-hunny-4824830.webp?v=1763560107","variant_ids":[45792832159933,45792832192701,45792832225469,45792832258237,45792832291005,45792832323773]},"available":true,"name":"Convertible Romper with Frill - Coral \/ 2","public_title":"Coral \/ 2","options":["Coral","2"],"price":3995,"weight":200,"compare_at_price":null,"inventory_management":"shopify","barcode":"32323773","featured_media":{"alt":"Convertible Romper with Frill | Snuggle Hunny - The Birth Store - Snuggle Hunny","id":29842549604541,"position":8,"preview_image":{"aspect_ratio":1.0,"height":1000,"width":1000,"src":"\/\/www.thebirthstore.com.au\/cdn\/shop\/files\/convertible-romper-with-frill-snuggle-hunny-4824830.webp?v=1763560107"}},"requires_selling_plan":false,"selling_plan_allocations":[]},{"id":45792839663805,"title":"Spring Floral \/ 0000","option1":"Spring Floral","option2":"0000","option3":null,"sku":null,"requires_shipping":true,"taxable":false,"featured_image":{"id":38808599756989,"product_id":8109243072701,"position":6,"created_at":"2025-11-07T21:55:31+08:00","updated_at":"2025-11-19T21:48:27+08:00","alt":"Convertible Romper with Frill - The Birth Store - Snuggle Hunny","width":2048,"height":2048,"src":"\/\/www.thebirthstore.com.au\/cdn\/shop\/files\/convertible-romper-with-frill-1426750.jpg?v=1763560107","variant_ids":[45792839663805,45792839696573,45792839729341,45792839762109,45792839794877,45792839827645]},"available":true,"name":"Convertible Romper with Frill - Spring Floral \/ 0000","public_title":"Spring Floral \/ 0000","options":["Spring Floral","0000"],"price":3995,"weight":200,"compare_at_price":null,"inventory_management":"shopify","barcode":"39663805","featured_media":{"alt":"Convertible Romper with Frill - The Birth Store - Snuggle Hunny","id":30051602923709,"position":6,"preview_image":{"aspect_ratio":1.0,"height":2048,"width":2048,"src":"\/\/www.thebirthstore.com.au\/cdn\/shop\/files\/convertible-romper-with-frill-1426750.jpg?v=1763560107"}},"requires_selling_plan":false,"selling_plan_allocations":[]},{"id":45792839696573,"title":"Spring Floral \/ 000","option1":"Spring Floral","option2":"000","option3":null,"sku":null,"requires_shipping":true,"taxable":false,"featured_image":{"id":38808599756989,"product_id":8109243072701,"position":6,"created_at":"2025-11-07T21:55:31+08:00","updated_at":"2025-11-19T21:48:27+08:00","alt":"Convertible Romper with Frill - The Birth Store - Snuggle Hunny","width":2048,"height":2048,"src":"\/\/www.thebirthstore.com.au\/cdn\/shop\/files\/convertible-romper-with-frill-1426750.jpg?v=1763560107","variant_ids":[45792839663805,45792839696573,45792839729341,45792839762109,45792839794877,45792839827645]},"available":true,"name":"Convertible Romper with Frill - Spring Floral \/ 000","public_title":"Spring Floral \/ 000","options":["Spring Floral","000"],"price":3995,"weight":200,"compare_at_price":null,"inventory_management":"shopify","barcode":"39696573","featured_media":{"alt":"Convertible Romper with Frill - The Birth Store - Snuggle Hunny","id":30051602923709,"position":6,"preview_image":{"aspect_ratio":1.0,"height":2048,"width":2048,"src":"\/\/www.thebirthstore.com.au\/cdn\/shop\/files\/convertible-romper-with-frill-1426750.jpg?v=1763560107"}},"requires_selling_plan":false,"selling_plan_allocations":[]},{"id":45792839729341,"title":"Spring Floral \/ 00","option1":"Spring Floral","option2":"00","option3":null,"sku":null,"requires_shipping":true,"taxable":false,"featured_image":{"id":38808599756989,"product_id":8109243072701,"position":6,"created_at":"2025-11-07T21:55:31+08:00","updated_at":"2025-11-19T21:48:27+08:00","alt":"Convertible Romper with Frill - The Birth Store - Snuggle Hunny","width":2048,"height":2048,"src":"\/\/www.thebirthstore.com.au\/cdn\/shop\/files\/convertible-romper-with-frill-1426750.jpg?v=1763560107","variant_ids":[45792839663805,45792839696573,45792839729341,45792839762109,45792839794877,45792839827645]},"available":true,"name":"Convertible Romper with Frill - Spring Floral \/ 00","public_title":"Spring Floral \/ 00","options":["Spring Floral","00"],"price":3995,"weight":200,"compare_at_price":null,"inventory_management":"shopify","barcode":"39729341","featured_media":{"alt":"Convertible Romper with Frill - The Birth Store - Snuggle Hunny","id":30051602923709,"position":6,"preview_image":{"aspect_ratio":1.0,"height":2048,"width":2048,"src":"\/\/www.thebirthstore.com.au\/cdn\/shop\/files\/convertible-romper-with-frill-1426750.jpg?v=1763560107"}},"requires_selling_plan":false,"selling_plan_allocations":[]},{"id":45792839762109,"title":"Spring Floral \/ 0","option1":"Spring Floral","option2":"0","option3":null,"sku":null,"requires_shipping":true,"taxable":false,"featured_image":{"id":38808599756989,"product_id":8109243072701,"position":6,"created_at":"2025-11-07T21:55:31+08:00","updated_at":"2025-11-19T21:48:27+08:00","alt":"Convertible Romper with Frill - The Birth Store - Snuggle Hunny","width":2048,"height":2048,"src":"\/\/www.thebirthstore.com.au\/cdn\/shop\/files\/convertible-romper-with-frill-1426750.jpg?v=1763560107","variant_ids":[45792839663805,45792839696573,45792839729341,45792839762109,45792839794877,45792839827645]},"available":true,"name":"Convertible Romper with Frill - Spring Floral \/ 0","public_title":"Spring Floral \/ 0","options":["Spring Floral","0"],"price":3995,"weight":200,"compare_at_price":null,"inventory_management":"shopify","barcode":"39762109","featured_media":{"alt":"Convertible Romper with Frill - The Birth Store - Snuggle Hunny","id":30051602923709,"position":6,"preview_image":{"aspect_ratio":1.0,"height":2048,"width":2048,"src":"\/\/www.thebirthstore.com.au\/cdn\/shop\/files\/convertible-romper-with-frill-1426750.jpg?v=1763560107"}},"requires_selling_plan":false,"selling_plan_allocations":[]},{"id":45792839794877,"title":"Spring Floral \/ 1","option1":"Spring Floral","option2":"1","option3":null,"sku":null,"requires_shipping":true,"taxable":false,"featured_image":{"id":38808599756989,"product_id":8109243072701,"position":6,"created_at":"2025-11-07T21:55:31+08:00","updated_at":"2025-11-19T21:48:27+08:00","alt":"Convertible Romper with Frill - The Birth Store - Snuggle Hunny","width":2048,"height":2048,"src":"\/\/www.thebirthstore.com.au\/cdn\/shop\/files\/convertible-romper-with-frill-1426750.jpg?v=1763560107","variant_ids":[45792839663805,45792839696573,45792839729341,45792839762109,45792839794877,45792839827645]},"available":true,"name":"Convertible Romper with Frill - Spring Floral \/ 1","public_title":"Spring Floral \/ 1","options":["Spring Floral","1"],"price":3995,"weight":200,"compare_at_price":null,"inventory_management":"shopify","barcode":"39794877","featured_media":{"alt":"Convertible Romper with Frill - The Birth Store - Snuggle Hunny","id":30051602923709,"position":6,"preview_image":{"aspect_ratio":1.0,"height":2048,"width":2048,"src":"\/\/www.thebirthstore.com.au\/cdn\/shop\/files\/convertible-romper-with-frill-1426750.jpg?v=1763560107"}},"requires_selling_plan":false,"selling_plan_allocations":[]},{"id":45792839827645,"title":"Spring Floral \/ 2","option1":"Spring Floral","option2":"2","option3":null,"sku":null,"requires_shipping":true,"taxable":false,"featured_image":{"id":38808599756989,"product_id":8109243072701,"position":6,"created_at":"2025-11-07T21:55:31+08:00","updated_at":"2025-11-19T21:48:27+08:00","alt":"Convertible Romper with Frill - The Birth Store - Snuggle Hunny","width":2048,"height":2048,"src":"\/\/www.thebirthstore.com.au\/cdn\/shop\/files\/convertible-romper-with-frill-1426750.jpg?v=1763560107","variant_ids":[45792839663805,45792839696573,45792839729341,45792839762109,45792839794877,45792839827645]},"available":true,"name":"Convertible Romper with Frill - Spring Floral \/ 2","public_title":"Spring Floral \/ 2","options":["Spring Floral","2"],"price":3995,"weight":200,"compare_at_price":null,"inventory_management":"shopify","barcode":"39827645","featured_media":{"alt":"Convertible Romper with Frill - The Birth Store - Snuggle Hunny","id":30051602923709,"position":6,"preview_image":{"aspect_ratio":1.0,"height":2048,"width":2048,"src":"\/\/www.thebirthstore.com.au\/cdn\/shop\/files\/convertible-romper-with-frill-1426750.jpg?v=1763560107"}},"requires_selling_plan":false,"selling_plan_allocations":[]},{"id":45792844710077,"title":"Blushing Beauty \/ 0000","option1":"Blushing Beauty","option2":"0000","option3":null,"sku":null,"requires_shipping":true,"taxable":false,"featured_image":{"id":38808727257277,"product_id":8109243072701,"position":1,"created_at":"2025-11-07T22:16:36+08:00","updated_at":"2025-11-19T21:48:27+08:00","alt":"Convertible Romper with Frill - The Birth Store - Snuggle Hunny","width":1000,"height":1000,"src":"\/\/www.thebirthstore.com.au\/cdn\/shop\/files\/convertible-romper-with-frill-4038806.jpg?v=1763560107","variant_ids":[45792844710077,45792844742845,45792844775613,45792844808381,45792844841149,45792844873917]},"available":true,"name":"Convertible Romper with Frill - Blushing Beauty \/ 0000","public_title":"Blushing Beauty \/ 0000","options":["Blushing Beauty","0000"],"price":3995,"weight":200,"compare_at_price":null,"inventory_management":"shopify","barcode":"44710077","featured_media":{"alt":"Convertible Romper with Frill - The Birth Store - Snuggle Hunny","id":30051729637565,"position":1,"preview_image":{"aspect_ratio":1.0,"height":1000,"width":1000,"src":"\/\/www.thebirthstore.com.au\/cdn\/shop\/files\/convertible-romper-with-frill-4038806.jpg?v=1763560107"}},"requires_selling_plan":false,"selling_plan_allocations":[]},{"id":45792844742845,"title":"Blushing Beauty \/ 000","option1":"Blushing Beauty","option2":"000","option3":null,"sku":null,"requires_shipping":true,"taxable":false,"featured_image":{"id":38808727257277,"product_id":8109243072701,"position":1,"created_at":"2025-11-07T22:16:36+08:00","updated_at":"2025-11-19T21:48:27+08:00","alt":"Convertible Romper with Frill - The Birth Store - Snuggle Hunny","width":1000,"height":1000,"src":"\/\/www.thebirthstore.com.au\/cdn\/shop\/files\/convertible-romper-with-frill-4038806.jpg?v=1763560107","variant_ids":[45792844710077,45792844742845,45792844775613,45792844808381,45792844841149,45792844873917]},"available":true,"name":"Convertible Romper with Frill - Blushing Beauty \/ 000","public_title":"Blushing Beauty \/ 000","options":["Blushing Beauty","000"],"price":3995,"weight":200,"compare_at_price":null,"inventory_management":"shopify","barcode":"44742845","featured_media":{"alt":"Convertible Romper with Frill - The Birth Store - Snuggle Hunny","id":30051729637565,"position":1,"preview_image":{"aspect_ratio":1.0,"height":1000,"width":1000,"src":"\/\/www.thebirthstore.com.au\/cdn\/shop\/files\/convertible-romper-with-frill-4038806.jpg?v=1763560107"}},"requires_selling_plan":false,"selling_plan_allocations":[]},{"id":45792844775613,"title":"Blushing Beauty \/ 00","option1":"Blushing Beauty","option2":"00","option3":null,"sku":null,"requires_shipping":true,"taxable":false,"featured_image":{"id":38808727257277,"product_id":8109243072701,"position":1,"created_at":"2025-11-07T22:16:36+08:00","updated_at":"2025-11-19T21:48:27+08:00","alt":"Convertible Romper with Frill - The Birth Store - Snuggle Hunny","width":1000,"height":1000,"src":"\/\/www.thebirthstore.com.au\/cdn\/shop\/files\/convertible-romper-with-frill-4038806.jpg?v=1763560107","variant_ids":[45792844710077,45792844742845,45792844775613,45792844808381,45792844841149,45792844873917]},"available":true,"name":"Convertible Romper with Frill - Blushing Beauty \/ 00","public_title":"Blushing Beauty \/ 00","options":["Blushing Beauty","00"],"price":3995,"weight":200,"compare_at_price":null,"inventory_management":"shopify","barcode":"44775613","featured_media":{"alt":"Convertible Romper with Frill - The Birth Store - Snuggle Hunny","id":30051729637565,"position":1,"preview_image":{"aspect_ratio":1.0,"height":1000,"width":1000,"src":"\/\/www.thebirthstore.com.au\/cdn\/shop\/files\/convertible-romper-with-frill-4038806.jpg?v=1763560107"}},"requires_selling_plan":false,"selling_plan_allocations":[]},{"id":45792844808381,"title":"Blushing Beauty \/ 0","option1":"Blushing Beauty","option2":"0","option3":null,"sku":null,"requires_shipping":true,"taxable":false,"featured_image":{"id":38808727257277,"product_id":8109243072701,"position":1,"created_at":"2025-11-07T22:16:36+08:00","updated_at":"2025-11-19T21:48:27+08:00","alt":"Convertible Romper with Frill - The Birth Store - Snuggle Hunny","width":1000,"height":1000,"src":"\/\/www.thebirthstore.com.au\/cdn\/shop\/files\/convertible-romper-with-frill-4038806.jpg?v=1763560107","variant_ids":[45792844710077,45792844742845,45792844775613,45792844808381,45792844841149,45792844873917]},"available":true,"name":"Convertible Romper with Frill - Blushing Beauty \/ 0","public_title":"Blushing Beauty \/ 0","options":["Blushing Beauty","0"],"price":3995,"weight":200,"compare_at_price":null,"inventory_management":"shopify","barcode":"44808381","featured_media":{"alt":"Convertible Romper with Frill - The Birth Store - Snuggle Hunny","id":30051729637565,"position":1,"preview_image":{"aspect_ratio":1.0,"height":1000,"width":1000,"src":"\/\/www.thebirthstore.com.au\/cdn\/shop\/files\/convertible-romper-with-frill-4038806.jpg?v=1763560107"}},"requires_selling_plan":false,"selling_plan_allocations":[]},{"id":45792844841149,"title":"Blushing Beauty \/ 1","option1":"Blushing Beauty","option2":"1","option3":null,"sku":null,"requires_shipping":true,"taxable":false,"featured_image":{"id":38808727257277,"product_id":8109243072701,"position":1,"created_at":"2025-11-07T22:16:36+08:00","updated_at":"2025-11-19T21:48:27+08:00","alt":"Convertible Romper with Frill - The Birth Store - Snuggle Hunny","width":1000,"height":1000,"src":"\/\/www.thebirthstore.com.au\/cdn\/shop\/files\/convertible-romper-with-frill-4038806.jpg?v=1763560107","variant_ids":[45792844710077,45792844742845,45792844775613,45792844808381,45792844841149,45792844873917]},"available":true,"name":"Convertible Romper with Frill - Blushing Beauty \/ 1","public_title":"Blushing Beauty \/ 1","options":["Blushing Beauty","1"],"price":3995,"weight":200,"compare_at_price":null,"inventory_management":"shopify","barcode":"44841149","featured_media":{"alt":"Convertible Romper with Frill - The Birth Store - Snuggle Hunny","id":30051729637565,"position":1,"preview_image":{"aspect_ratio":1.0,"height":1000,"width":1000,"src":"\/\/www.thebirthstore.com.au\/cdn\/shop\/files\/convertible-romper-with-frill-4038806.jpg?v=1763560107"}},"requires_selling_plan":false,"selling_plan_allocations":[]},{"id":45792844873917,"title":"Blushing Beauty \/ 2","option1":"Blushing Beauty","option2":"2","option3":null,"sku":null,"requires_shipping":true,"taxable":false,"featured_image":{"id":38808727257277,"product_id":8109243072701,"position":1,"created_at":"2025-11-07T22:16:36+08:00","updated_at":"2025-11-19T21:48:27+08:00","alt":"Convertible Romper with Frill - The Birth Store - Snuggle Hunny","width":1000,"height":1000,"src":"\/\/www.thebirthstore.com.au\/cdn\/shop\/files\/convertible-romper-with-frill-4038806.jpg?v=1763560107","variant_ids":[45792844710077,45792844742845,45792844775613,45792844808381,45792844841149,45792844873917]},"available":false,"name":"Convertible Romper with Frill - Blushing Beauty \/ 2","public_title":"Blushing Beauty \/ 2","options":["Blushing Beauty","2"],"price":3995,"weight":200,"compare_at_price":null,"inventory_management":"shopify","barcode":"44873917","featured_media":{"alt":"Convertible Romper with Frill - The Birth Store - Snuggle Hunny","id":30051729637565,"position":1,"preview_image":{"aspect_ratio":1.0,"height":1000,"width":1000,"src":"\/\/www.thebirthstore.com.au\/cdn\/shop\/files\/convertible-romper-with-frill-4038806.jpg?v=1763560107"}},"requires_selling_plan":false,"selling_plan_allocations":[]},{"id":45792866795709,"title":"Camille \/ 0000","option1":"Camille","option2":"0000","option3":null,"sku":null,"requires_shipping":true,"taxable":false,"featured_image":{"id":38808599003325,"product_id":8109243072701,"position":5,"created_at":"2025-11-07T21:54:52+08:00","updated_at":"2025-11-19T21:48:27+08:00","alt":"Convertible Romper with Frill - The Birth Store - Snuggle Hunny","width":2048,"height":2048,"src":"\/\/www.thebirthstore.com.au\/cdn\/shop\/files\/convertible-romper-with-frill-1184529.jpg?v=1763560107","variant_ids":[45792866795709,45792866828477,45792866861245,45792866894013,45792866926781,45792866959549]},"available":true,"name":"Convertible Romper with Frill - Camille \/ 0000","public_title":"Camille \/ 0000","options":["Camille","0000"],"price":3995,"weight":200,"compare_at_price":null,"inventory_management":"shopify","barcode":"66795709","featured_media":{"alt":"Convertible Romper with Frill - The Birth Store - Snuggle Hunny","id":30051602202813,"position":5,"preview_image":{"aspect_ratio":1.0,"height":2048,"width":2048,"src":"\/\/www.thebirthstore.com.au\/cdn\/shop\/files\/convertible-romper-with-frill-1184529.jpg?v=1763560107"}},"requires_selling_plan":false,"selling_plan_allocations":[]},{"id":45792866828477,"title":"Camille \/ 000","option1":"Camille","option2":"000","option3":null,"sku":null,"requires_shipping":true,"taxable":false,"featured_image":{"id":38808599003325,"product_id":8109243072701,"position":5,"created_at":"2025-11-07T21:54:52+08:00","updated_at":"2025-11-19T21:48:27+08:00","alt":"Convertible Romper with Frill - The Birth Store - Snuggle Hunny","width":2048,"height":2048,"src":"\/\/www.thebirthstore.com.au\/cdn\/shop\/files\/convertible-romper-with-frill-1184529.jpg?v=1763560107","variant_ids":[45792866795709,45792866828477,45792866861245,45792866894013,45792866926781,45792866959549]},"available":true,"name":"Convertible Romper with Frill - Camille \/ 000","public_title":"Camille \/ 000","options":["Camille","000"],"price":3995,"weight":200,"compare_at_price":null,"inventory_management":"shopify","barcode":"66828477","featured_media":{"alt":"Convertible Romper with Frill - The Birth Store - Snuggle Hunny","id":30051602202813,"position":5,"preview_image":{"aspect_ratio":1.0,"height":2048,"width":2048,"src":"\/\/www.thebirthstore.com.au\/cdn\/shop\/files\/convertible-romper-with-frill-1184529.jpg?v=1763560107"}},"requires_selling_plan":false,"selling_plan_allocations":[]},{"id":45792866861245,"title":"Camille \/ 00","option1":"Camille","option2":"00","option3":null,"sku":null,"requires_shipping":true,"taxable":false,"featured_image":{"id":38808599003325,"product_id":8109243072701,"position":5,"created_at":"2025-11-07T21:54:52+08:00","updated_at":"2025-11-19T21:48:27+08:00","alt":"Convertible Romper with Frill - The Birth Store - Snuggle Hunny","width":2048,"height":2048,"src":"\/\/www.thebirthstore.com.au\/cdn\/shop\/files\/convertible-romper-with-frill-1184529.jpg?v=1763560107","variant_ids":[45792866795709,45792866828477,45792866861245,45792866894013,45792866926781,45792866959549]},"available":true,"name":"Convertible Romper with Frill - Camille \/ 00","public_title":"Camille \/ 00","options":["Camille","00"],"price":3995,"weight":200,"compare_at_price":null,"inventory_management":"shopify","barcode":"66861245","featured_media":{"alt":"Convertible Romper with Frill - The Birth Store - Snuggle Hunny","id":30051602202813,"position":5,"preview_image":{"aspect_ratio":1.0,"height":2048,"width":2048,"src":"\/\/www.thebirthstore.com.au\/cdn\/shop\/files\/convertible-romper-with-frill-1184529.jpg?v=1763560107"}},"requires_selling_plan":false,"selling_plan_allocations":[]},{"id":45792866894013,"title":"Camille \/ 0","option1":"Camille","option2":"0","option3":null,"sku":null,"requires_shipping":true,"taxable":false,"featured_image":{"id":38808599003325,"product_id":8109243072701,"position":5,"created_at":"2025-11-07T21:54:52+08:00","updated_at":"2025-11-19T21:48:27+08:00","alt":"Convertible Romper with Frill - The Birth Store - Snuggle Hunny","width":2048,"height":2048,"src":"\/\/www.thebirthstore.com.au\/cdn\/shop\/files\/convertible-romper-with-frill-1184529.jpg?v=1763560107","variant_ids":[45792866795709,45792866828477,45792866861245,45792866894013,45792866926781,45792866959549]},"available":true,"name":"Convertible Romper with Frill - Camille \/ 0","public_title":"Camille \/ 0","options":["Camille","0"],"price":3995,"weight":200,"compare_at_price":null,"inventory_management":"shopify","barcode":"66894013","featured_media":{"alt":"Convertible Romper with Frill - The Birth Store - Snuggle Hunny","id":30051602202813,"position":5,"preview_image":{"aspect_ratio":1.0,"height":2048,"width":2048,"src":"\/\/www.thebirthstore.com.au\/cdn\/shop\/files\/convertible-romper-with-frill-1184529.jpg?v=1763560107"}},"requires_selling_plan":false,"selling_plan_allocations":[]},{"id":45792866926781,"title":"Camille \/ 1","option1":"Camille","option2":"1","option3":null,"sku":null,"requires_shipping":true,"taxable":false,"featured_image":{"id":38808599003325,"product_id":8109243072701,"position":5,"created_at":"2025-11-07T21:54:52+08:00","updated_at":"2025-11-19T21:48:27+08:00","alt":"Convertible Romper with Frill - The Birth Store - Snuggle Hunny","width":2048,"height":2048,"src":"\/\/www.thebirthstore.com.au\/cdn\/shop\/files\/convertible-romper-with-frill-1184529.jpg?v=1763560107","variant_ids":[45792866795709,45792866828477,45792866861245,45792866894013,45792866926781,45792866959549]},"available":true,"name":"Convertible Romper with Frill - Camille \/ 1","public_title":"Camille \/ 1","options":["Camille","1"],"price":3995,"weight":200,"compare_at_price":null,"inventory_management":"shopify","barcode":"66926781","featured_media":{"alt":"Convertible Romper with Frill - The Birth Store - Snuggle Hunny","id":30051602202813,"position":5,"preview_image":{"aspect_ratio":1.0,"height":2048,"width":2048,"src":"\/\/www.thebirthstore.com.au\/cdn\/shop\/files\/convertible-romper-with-frill-1184529.jpg?v=1763560107"}},"requires_selling_plan":false,"selling_plan_allocations":[]},{"id":45792866959549,"title":"Camille \/ 2","option1":"Camille","option2":"2","option3":null,"sku":null,"requires_shipping":true,"taxable":false,"featured_image":{"id":38808599003325,"product_id":8109243072701,"position":5,"created_at":"2025-11-07T21:54:52+08:00","updated_at":"2025-11-19T21:48:27+08:00","alt":"Convertible Romper with Frill - The Birth Store - Snuggle Hunny","width":2048,"height":2048,"src":"\/\/www.thebirthstore.com.au\/cdn\/shop\/files\/convertible-romper-with-frill-1184529.jpg?v=1763560107","variant_ids":[45792866795709,45792866828477,45792866861245,45792866894013,45792866926781,45792866959549]},"available":false,"name":"Convertible Romper with Frill - Camille \/ 2","public_title":"Camille \/ 2","options":["Camille","2"],"price":3995,"weight":200,"compare_at_price":null,"inventory_management":"shopify","barcode":"66959549","featured_media":{"alt":"Convertible Romper with Frill - The Birth Store - Snuggle Hunny","id":30051602202813,"position":5,"preview_image":{"aspect_ratio":1.0,"height":2048,"width":2048,"src":"\/\/www.thebirthstore.com.au\/cdn\/shop\/files\/convertible-romper-with-frill-1184529.jpg?v=1763560107"}},"requires_selling_plan":false,"selling_plan_allocations":[]},{"id":45871912976573,"title":"Midnight Swan \/ 0000","option1":"Midnight Swan","option2":"0000","option3":null,"sku":null,"requires_shipping":true,"taxable":false,"featured_image":{"id":38808718639293,"product_id":8109243072701,"position":9,"created_at":"2025-11-07T22:15:36+08:00","updated_at":"2025-11-19T21:48:27+08:00","alt":"Convertible Romper with Frill - The Birth Store - Snuggle Hunny","width":1000,"height":1000,"src":"\/\/www.thebirthstore.com.au\/cdn\/shop\/files\/convertible-romper-with-frill-6410603.jpg?v=1763560107","variant_ids":[45871912976573,45871913009341,45871913042109,45871913074877,45871913107645,45871913140413]},"available":true,"name":"Convertible Romper with Frill - Midnight Swan \/ 0000","public_title":"Midnight Swan \/ 0000","options":["Midnight Swan","0000"],"price":3995,"weight":200,"compare_at_price":null,"inventory_management":"shopify","barcode":"12976573","featured_media":{"alt":"Convertible Romper with Frill - The Birth Store - Snuggle Hunny","id":30051721478333,"position":9,"preview_image":{"aspect_ratio":1.0,"height":1000,"width":1000,"src":"\/\/www.thebirthstore.com.au\/cdn\/shop\/files\/convertible-romper-with-frill-6410603.jpg?v=1763560107"}},"requires_selling_plan":false,"selling_plan_allocations":[]},{"id":45871913009341,"title":"Midnight Swan \/ 000","option1":"Midnight Swan","option2":"000","option3":null,"sku":null,"requires_shipping":true,"taxable":false,"featured_image":{"id":38808718639293,"product_id":8109243072701,"position":9,"created_at":"2025-11-07T22:15:36+08:00","updated_at":"2025-11-19T21:48:27+08:00","alt":"Convertible Romper with Frill - The Birth Store - Snuggle Hunny","width":1000,"height":1000,"src":"\/\/www.thebirthstore.com.au\/cdn\/shop\/files\/convertible-romper-with-frill-6410603.jpg?v=1763560107","variant_ids":[45871912976573,45871913009341,45871913042109,45871913074877,45871913107645,45871913140413]},"available":true,"name":"Convertible Romper with Frill - Midnight Swan \/ 000","public_title":"Midnight Swan \/ 000","options":["Midnight Swan","000"],"price":3995,"weight":200,"compare_at_price":null,"inventory_management":"shopify","barcode":"13009341","featured_media":{"alt":"Convertible Romper with Frill - The Birth Store - Snuggle Hunny","id":30051721478333,"position":9,"preview_image":{"aspect_ratio":1.0,"height":1000,"width":1000,"src":"\/\/www.thebirthstore.com.au\/cdn\/shop\/files\/convertible-romper-with-frill-6410603.jpg?v=1763560107"}},"requires_selling_plan":false,"selling_plan_allocations":[]},{"id":45871913042109,"title":"Midnight Swan \/ 00","option1":"Midnight Swan","option2":"00","option3":null,"sku":null,"requires_shipping":true,"taxable":false,"featured_image":{"id":38808718639293,"product_id":8109243072701,"position":9,"created_at":"2025-11-07T22:15:36+08:00","updated_at":"2025-11-19T21:48:27+08:00","alt":"Convertible Romper with Frill - The Birth Store - Snuggle Hunny","width":1000,"height":1000,"src":"\/\/www.thebirthstore.com.au\/cdn\/shop\/files\/convertible-romper-with-frill-6410603.jpg?v=1763560107","variant_ids":[45871912976573,45871913009341,45871913042109,45871913074877,45871913107645,45871913140413]},"available":true,"name":"Convertible Romper with Frill - Midnight Swan \/ 00","public_title":"Midnight Swan \/ 00","options":["Midnight Swan","00"],"price":3995,"weight":200,"compare_at_price":null,"inventory_management":"shopify","barcode":"13042109","featured_media":{"alt":"Convertible Romper with Frill - The Birth Store - Snuggle Hunny","id":30051721478333,"position":9,"preview_image":{"aspect_ratio":1.0,"height":1000,"width":1000,"src":"\/\/www.thebirthstore.com.au\/cdn\/shop\/files\/convertible-romper-with-frill-6410603.jpg?v=1763560107"}},"requires_selling_plan":false,"selling_plan_allocations":[]},{"id":45871913074877,"title":"Midnight Swan \/ 0","option1":"Midnight Swan","option2":"0","option3":null,"sku":null,"requires_shipping":true,"taxable":false,"featured_image":{"id":38808718639293,"product_id":8109243072701,"position":9,"created_at":"2025-11-07T22:15:36+08:00","updated_at":"2025-11-19T21:48:27+08:00","alt":"Convertible Romper with Frill - The Birth Store - Snuggle Hunny","width":1000,"height":1000,"src":"\/\/www.thebirthstore.com.au\/cdn\/shop\/files\/convertible-romper-with-frill-6410603.jpg?v=1763560107","variant_ids":[45871912976573,45871913009341,45871913042109,45871913074877,45871913107645,45871913140413]},"available":true,"name":"Convertible Romper with Frill - Midnight Swan \/ 0","public_title":"Midnight Swan \/ 0","options":["Midnight Swan","0"],"price":3995,"weight":200,"compare_at_price":null,"inventory_management":"shopify","barcode":"13074877","featured_media":{"alt":"Convertible Romper with Frill - The Birth Store - Snuggle Hunny","id":30051721478333,"position":9,"preview_image":{"aspect_ratio":1.0,"height":1000,"width":1000,"src":"\/\/www.thebirthstore.com.au\/cdn\/shop\/files\/convertible-romper-with-frill-6410603.jpg?v=1763560107"}},"requires_selling_plan":false,"selling_plan_allocations":[]},{"id":45871913107645,"title":"Midnight Swan \/ 1","option1":"Midnight Swan","option2":"1","option3":null,"sku":null,"requires_shipping":true,"taxable":false,"featured_image":{"id":38808718639293,"product_id":8109243072701,"position":9,"created_at":"2025-11-07T22:15:36+08:00","updated_at":"2025-11-19T21:48:27+08:00","alt":"Convertible Romper with Frill - The Birth Store - Snuggle Hunny","width":1000,"height":1000,"src":"\/\/www.thebirthstore.com.au\/cdn\/shop\/files\/convertible-romper-with-frill-6410603.jpg?v=1763560107","variant_ids":[45871912976573,45871913009341,45871913042109,45871913074877,45871913107645,45871913140413]},"available":true,"name":"Convertible Romper with Frill - Midnight Swan \/ 1","public_title":"Midnight Swan \/ 1","options":["Midnight Swan","1"],"price":3995,"weight":200,"compare_at_price":null,"inventory_management":"shopify","barcode":"13107645","featured_media":{"alt":"Convertible Romper with Frill - The Birth Store - Snuggle Hunny","id":30051721478333,"position":9,"preview_image":{"aspect_ratio":1.0,"height":1000,"width":1000,"src":"\/\/www.thebirthstore.com.au\/cdn\/shop\/files\/convertible-romper-with-frill-6410603.jpg?v=1763560107"}},"requires_selling_plan":false,"selling_plan_allocations":[]},{"id":45871913140413,"title":"Midnight Swan \/ 2","option1":"Midnight Swan","option2":"2","option3":null,"sku":null,"requires_shipping":true,"taxable":false,"featured_image":{"id":38808718639293,"product_id":8109243072701,"position":9,"created_at":"2025-11-07T22:15:36+08:00","updated_at":"2025-11-19T21:48:27+08:00","alt":"Convertible Romper with Frill - The Birth Store - Snuggle Hunny","width":1000,"height":1000,"src":"\/\/www.thebirthstore.com.au\/cdn\/shop\/files\/convertible-romper-with-frill-6410603.jpg?v=1763560107","variant_ids":[45871912976573,45871913009341,45871913042109,45871913074877,45871913107645,45871913140413]},"available":false,"name":"Convertible Romper with Frill - Midnight Swan \/ 2","public_title":"Midnight Swan \/ 2","options":["Midnight Swan","2"],"price":3995,"weight":200,"compare_at_price":null,"inventory_management":"shopify","barcode":"13140413","featured_media":{"alt":"Convertible Romper with Frill - The Birth Store - Snuggle Hunny","id":30051721478333,"position":9,"preview_image":{"aspect_ratio":1.0,"height":1000,"width":1000,"src":"\/\/www.thebirthstore.com.au\/cdn\/shop\/files\/convertible-romper-with-frill-6410603.jpg?v=1763560107"}},"requires_selling_plan":false,"selling_plan_allocations":[]},{"id":45871917269181,"title":"Strawberry \/ 0000","option1":"Strawberry","option2":"0000","option3":null,"sku":null,"requires_shipping":true,"taxable":false,"featured_image":{"id":38808708808893,"product_id":8109243072701,"position":4,"created_at":"2025-11-07T22:14:31+08:00","updated_at":"2025-11-19T21:48:27+08:00","alt":"Convertible Romper with Frill - The Birth Store - Snuggle Hunny","width":1000,"height":1000,"src":"\/\/www.thebirthstore.com.au\/cdn\/shop\/files\/convertible-romper-with-frill-8224224.jpg?v=1763560107","variant_ids":[45871917269181,45871917301949,45871917334717,45871917367485,45871917400253,45871917433021]},"available":false,"name":"Convertible Romper with Frill - Strawberry \/ 0000","public_title":"Strawberry \/ 0000","options":["Strawberry","0000"],"price":3995,"weight":200,"compare_at_price":null,"inventory_management":"shopify","barcode":"17269181","featured_media":{"alt":"Convertible Romper with Frill - The Birth Store - Snuggle Hunny","id":30051711647933,"position":4,"preview_image":{"aspect_ratio":1.0,"height":1000,"width":1000,"src":"\/\/www.thebirthstore.com.au\/cdn\/shop\/files\/convertible-romper-with-frill-8224224.jpg?v=1763560107"}},"requires_selling_plan":false,"selling_plan_allocations":[]},{"id":45871917301949,"title":"Strawberry \/ 000","option1":"Strawberry","option2":"000","option3":null,"sku":null,"requires_shipping":true,"taxable":false,"featured_image":{"id":38808708808893,"product_id":8109243072701,"position":4,"created_at":"2025-11-07T22:14:31+08:00","updated_at":"2025-11-19T21:48:27+08:00","alt":"Convertible Romper with Frill - The Birth Store - Snuggle Hunny","width":1000,"height":1000,"src":"\/\/www.thebirthstore.com.au\/cdn\/shop\/files\/convertible-romper-with-frill-8224224.jpg?v=1763560107","variant_ids":[45871917269181,45871917301949,45871917334717,45871917367485,45871917400253,45871917433021]},"available":false,"name":"Convertible Romper with Frill - Strawberry \/ 000","public_title":"Strawberry \/ 000","options":["Strawberry","000"],"price":3995,"weight":200,"compare_at_price":null,"inventory_management":"shopify","barcode":"17301949","featured_media":{"alt":"Convertible Romper with Frill - The Birth Store - Snuggle Hunny","id":30051711647933,"position":4,"preview_image":{"aspect_ratio":1.0,"height":1000,"width":1000,"src":"\/\/www.thebirthstore.com.au\/cdn\/shop\/files\/convertible-romper-with-frill-8224224.jpg?v=1763560107"}},"requires_selling_plan":false,"selling_plan_allocations":[]},{"id":45871917334717,"title":"Strawberry \/ 00","option1":"Strawberry","option2":"00","option3":null,"sku":null,"requires_shipping":true,"taxable":false,"featured_image":{"id":38808708808893,"product_id":8109243072701,"position":4,"created_at":"2025-11-07T22:14:31+08:00","updated_at":"2025-11-19T21:48:27+08:00","alt":"Convertible Romper with Frill - The Birth Store - Snuggle Hunny","width":1000,"height":1000,"src":"\/\/www.thebirthstore.com.au\/cdn\/shop\/files\/convertible-romper-with-frill-8224224.jpg?v=1763560107","variant_ids":[45871917269181,45871917301949,45871917334717,45871917367485,45871917400253,45871917433021]},"available":false,"name":"Convertible Romper with Frill - Strawberry \/ 00","public_title":"Strawberry \/ 00","options":["Strawberry","00"],"price":3995,"weight":200,"compare_at_price":null,"inventory_management":"shopify","barcode":"17334717","featured_media":{"alt":"Convertible Romper with Frill - The Birth Store - Snuggle Hunny","id":30051711647933,"position":4,"preview_image":{"aspect_ratio":1.0,"height":1000,"width":1000,"src":"\/\/www.thebirthstore.com.au\/cdn\/shop\/files\/convertible-romper-with-frill-8224224.jpg?v=1763560107"}},"requires_selling_plan":false,"selling_plan_allocations":[]},{"id":45871917367485,"title":"Strawberry \/ 0","option1":"Strawberry","option2":"0","option3":null,"sku":null,"requires_shipping":true,"taxable":false,"featured_image":{"id":38808708808893,"product_id":8109243072701,"position":4,"created_at":"2025-11-07T22:14:31+08:00","updated_at":"2025-11-19T21:48:27+08:00","alt":"Convertible Romper with Frill - The Birth Store - Snuggle Hunny","width":1000,"height":1000,"src":"\/\/www.thebirthstore.com.au\/cdn\/shop\/files\/convertible-romper-with-frill-8224224.jpg?v=1763560107","variant_ids":[45871917269181,45871917301949,45871917334717,45871917367485,45871917400253,45871917433021]},"available":false,"name":"Convertible Romper with Frill - Strawberry \/ 0","public_title":"Strawberry \/ 0","options":["Strawberry","0"],"price":3995,"weight":200,"compare_at_price":null,"inventory_management":"shopify","barcode":"17367485","featured_media":{"alt":"Convertible Romper with Frill - The Birth Store - Snuggle Hunny","id":30051711647933,"position":4,"preview_image":{"aspect_ratio":1.0,"height":1000,"width":1000,"src":"\/\/www.thebirthstore.com.au\/cdn\/shop\/files\/convertible-romper-with-frill-8224224.jpg?v=1763560107"}},"requires_selling_plan":false,"selling_plan_allocations":[]},{"id":45871917400253,"title":"Strawberry \/ 1","option1":"Strawberry","option2":"1","option3":null,"sku":null,"requires_shipping":true,"taxable":false,"featured_image":{"id":38808708808893,"product_id":8109243072701,"position":4,"created_at":"2025-11-07T22:14:31+08:00","updated_at":"2025-11-19T21:48:27+08:00","alt":"Convertible Romper with Frill - The Birth Store - Snuggle Hunny","width":1000,"height":1000,"src":"\/\/www.thebirthstore.com.au\/cdn\/shop\/files\/convertible-romper-with-frill-8224224.jpg?v=1763560107","variant_ids":[45871917269181,45871917301949,45871917334717,45871917367485,45871917400253,45871917433021]},"available":true,"name":"Convertible Romper with Frill - Strawberry \/ 1","public_title":"Strawberry \/ 1","options":["Strawberry","1"],"price":3995,"weight":200,"compare_at_price":null,"inventory_management":"shopify","barcode":"17400253","featured_media":{"alt":"Convertible Romper with Frill - The Birth Store - Snuggle Hunny","id":30051711647933,"position":4,"preview_image":{"aspect_ratio":1.0,"height":1000,"width":1000,"src":"\/\/www.thebirthstore.com.au\/cdn\/shop\/files\/convertible-romper-with-frill-8224224.jpg?v=1763560107"}},"requires_selling_plan":false,"selling_plan_allocations":[]},{"id":45871917433021,"title":"Strawberry \/ 2","option1":"Strawberry","option2":"2","option3":null,"sku":null,"requires_shipping":true,"taxable":false,"featured_image":{"id":38808708808893,"product_id":8109243072701,"position":4,"created_at":"2025-11-07T22:14:31+08:00","updated_at":"2025-11-19T21:48:27+08:00","alt":"Convertible Romper with Frill - The Birth Store - Snuggle Hunny","width":1000,"height":1000,"src":"\/\/www.thebirthstore.com.au\/cdn\/shop\/files\/convertible-romper-with-frill-8224224.jpg?v=1763560107","variant_ids":[45871917269181,45871917301949,45871917334717,45871917367485,45871917400253,45871917433021]},"available":false,"name":"Convertible Romper with Frill - Strawberry \/ 2","public_title":"Strawberry \/ 2","options":["Strawberry","2"],"price":3995,"weight":200,"compare_at_price":null,"inventory_management":"shopify","barcode":"17433021","featured_media":{"alt":"Convertible Romper with Frill - The Birth Store - Snuggle Hunny","id":30051711647933,"position":4,"preview_image":{"aspect_ratio":1.0,"height":1000,"width":1000,"src":"\/\/www.thebirthstore.com.au\/cdn\/shop\/files\/convertible-romper-with-frill-8224224.jpg?v=1763560107"}},"requires_selling_plan":false,"selling_plan_allocations":[]},{"id":45871918645437,"title":"Butterfly \/ 0000","option1":"Butterfly","option2":"0000","option3":null,"sku":null,"requires_shipping":true,"taxable":false,"featured_image":{"id":38795536138429,"product_id":8109243072701,"position":12,"created_at":"2025-11-07T12:05:41+08:00","updated_at":"2025-11-19T21:48:27+08:00","alt":"Convertible Romper with Frill - The Birth Store - Snuggle Hunny","width":1000,"height":1000,"src":"\/\/www.thebirthstore.com.au\/cdn\/shop\/files\/convertible-romper-with-frill-8599558.jpg?v=1763560107","variant_ids":[45871918645437,45871918678205,45871918710973,45871918743741,45871918776509,45871918809277]},"available":false,"name":"Convertible Romper with Frill - Butterfly \/ 0000","public_title":"Butterfly \/ 0000","options":["Butterfly","0000"],"price":3995,"weight":200,"compare_at_price":null,"inventory_management":"shopify","barcode":"18645437","featured_media":{"alt":"Convertible Romper with Frill - The Birth Store - Snuggle Hunny","id":30039778656445,"position":12,"preview_image":{"aspect_ratio":1.0,"height":1000,"width":1000,"src":"\/\/www.thebirthstore.com.au\/cdn\/shop\/files\/convertible-romper-with-frill-8599558.jpg?v=1763560107"}},"requires_selling_plan":false,"selling_plan_allocations":[]},{"id":45871918678205,"title":"Butterfly \/ 000","option1":"Butterfly","option2":"000","option3":null,"sku":null,"requires_shipping":true,"taxable":false,"featured_image":{"id":38795536138429,"product_id":8109243072701,"position":12,"created_at":"2025-11-07T12:05:41+08:00","updated_at":"2025-11-19T21:48:27+08:00","alt":"Convertible Romper with Frill - The Birth Store - Snuggle Hunny","width":1000,"height":1000,"src":"\/\/www.thebirthstore.com.au\/cdn\/shop\/files\/convertible-romper-with-frill-8599558.jpg?v=1763560107","variant_ids":[45871918645437,45871918678205,45871918710973,45871918743741,45871918776509,45871918809277]},"available":false,"name":"Convertible Romper with Frill - Butterfly \/ 000","public_title":"Butterfly \/ 000","options":["Butterfly","000"],"price":3995,"weight":200,"compare_at_price":null,"inventory_management":"shopify","barcode":"18678205","featured_media":{"alt":"Convertible Romper with Frill - The Birth Store - Snuggle Hunny","id":30039778656445,"position":12,"preview_image":{"aspect_ratio":1.0,"height":1000,"width":1000,"src":"\/\/www.thebirthstore.com.au\/cdn\/shop\/files\/convertible-romper-with-frill-8599558.jpg?v=1763560107"}},"requires_selling_plan":false,"selling_plan_allocations":[]},{"id":45871918710973,"title":"Butterfly \/ 00","option1":"Butterfly","option2":"00","option3":null,"sku":null,"requires_shipping":true,"taxable":false,"featured_image":{"id":38795536138429,"product_id":8109243072701,"position":12,"created_at":"2025-11-07T12:05:41+08:00","updated_at":"2025-11-19T21:48:27+08:00","alt":"Convertible Romper with Frill - The Birth Store - Snuggle Hunny","width":1000,"height":1000,"src":"\/\/www.thebirthstore.com.au\/cdn\/shop\/files\/convertible-romper-with-frill-8599558.jpg?v=1763560107","variant_ids":[45871918645437,45871918678205,45871918710973,45871918743741,45871918776509,45871918809277]},"available":false,"name":"Convertible Romper with Frill - Butterfly \/ 00","public_title":"Butterfly \/ 00","options":["Butterfly","00"],"price":3995,"weight":200,"compare_at_price":null,"inventory_management":"shopify","barcode":"18710973","featured_media":{"alt":"Convertible Romper with Frill - The Birth Store - Snuggle Hunny","id":30039778656445,"position":12,"preview_image":{"aspect_ratio":1.0,"height":1000,"width":1000,"src":"\/\/www.thebirthstore.com.au\/cdn\/shop\/files\/convertible-romper-with-frill-8599558.jpg?v=1763560107"}},"requires_selling_plan":false,"selling_plan_allocations":[]},{"id":45871918743741,"title":"Butterfly \/ 0","option1":"Butterfly","option2":"0","option3":null,"sku":null,"requires_shipping":true,"taxable":false,"featured_image":{"id":38795536138429,"product_id":8109243072701,"position":12,"created_at":"2025-11-07T12:05:41+08:00","updated_at":"2025-11-19T21:48:27+08:00","alt":"Convertible Romper with Frill - The Birth Store - Snuggle Hunny","width":1000,"height":1000,"src":"\/\/www.thebirthstore.com.au\/cdn\/shop\/files\/convertible-romper-with-frill-8599558.jpg?v=1763560107","variant_ids":[45871918645437,45871918678205,45871918710973,45871918743741,45871918776509,45871918809277]},"available":true,"name":"Convertible Romper with Frill - Butterfly \/ 0","public_title":"Butterfly \/ 0","options":["Butterfly","0"],"price":3995,"weight":200,"compare_at_price":null,"inventory_management":"shopify","barcode":"18743741","featured_media":{"alt":"Convertible Romper with Frill - The Birth Store - Snuggle Hunny","id":30039778656445,"position":12,"preview_image":{"aspect_ratio":1.0,"height":1000,"width":1000,"src":"\/\/www.thebirthstore.com.au\/cdn\/shop\/files\/convertible-romper-with-frill-8599558.jpg?v=1763560107"}},"requires_selling_plan":false,"selling_plan_allocations":[]},{"id":45871918776509,"title":"Butterfly \/ 1","option1":"Butterfly","option2":"1","option3":null,"sku":null,"requires_shipping":true,"taxable":false,"featured_image":{"id":38795536138429,"product_id":8109243072701,"position":12,"created_at":"2025-11-07T12:05:41+08:00","updated_at":"2025-11-19T21:48:27+08:00","alt":"Convertible Romper with Frill - The Birth Store - Snuggle Hunny","width":1000,"height":1000,"src":"\/\/www.thebirthstore.com.au\/cdn\/shop\/files\/convertible-romper-with-frill-8599558.jpg?v=1763560107","variant_ids":[45871918645437,45871918678205,45871918710973,45871918743741,45871918776509,45871918809277]},"available":true,"name":"Convertible Romper with Frill - Butterfly \/ 1","public_title":"Butterfly \/ 1","options":["Butterfly","1"],"price":3995,"weight":200,"compare_at_price":null,"inventory_management":"shopify","barcode":"18776509","featured_media":{"alt":"Convertible Romper with Frill - The Birth Store - Snuggle Hunny","id":30039778656445,"position":12,"preview_image":{"aspect_ratio":1.0,"height":1000,"width":1000,"src":"\/\/www.thebirthstore.com.au\/cdn\/shop\/files\/convertible-romper-with-frill-8599558.jpg?v=1763560107"}},"requires_selling_plan":false,"selling_plan_allocations":[]},{"id":45871918809277,"title":"Butterfly \/ 2","option1":"Butterfly","option2":"2","option3":null,"sku":null,"requires_shipping":true,"taxable":false,"featured_image":{"id":38795536138429,"product_id":8109243072701,"position":12,"created_at":"2025-11-07T12:05:41+08:00","updated_at":"2025-11-19T21:48:27+08:00","alt":"Convertible Romper with Frill - The Birth Store - Snuggle Hunny","width":1000,"height":1000,"src":"\/\/www.thebirthstore.com.au\/cdn\/shop\/files\/convertible-romper-with-frill-8599558.jpg?v=1763560107","variant_ids":[45871918645437,45871918678205,45871918710973,45871918743741,45871918776509,45871918809277]},"available":false,"name":"Convertible Romper with Frill - Butterfly \/ 2","public_title":"Butterfly \/ 2","options":["Butterfly","2"],"price":3995,"weight":200,"compare_at_price":null,"inventory_management":"shopify","barcode":"18809277","featured_media":{"alt":"Convertible Romper with Frill - The Birth Store - Snuggle Hunny","id":30039778656445,"position":12,"preview_image":{"aspect_ratio":1.0,"height":1000,"width":1000,"src":"\/\/www.thebirthstore.com.au\/cdn\/shop\/files\/convertible-romper-with-frill-8599558.jpg?v=1763560107"}},"requires_selling_plan":false,"selling_plan_allocations":[]},{"id":45871918940349,"title":"Sienna \/ 0000","option1":"Sienna","option2":"0000","option3":null,"sku":null,"requires_shipping":true,"taxable":false,"featured_image":{"id":38808623481021,"product_id":8109243072701,"position":2,"created_at":"2025-11-07T22:08:19+08:00","updated_at":"2025-11-19T21:48:27+08:00","alt":"Convertible Romper with Frill - The Birth Store - Snuggle Hunny","width":1000,"height":1000,"src":"\/\/www.thebirthstore.com.au\/cdn\/shop\/files\/convertible-romper-with-frill-2953758.jpg?v=1763560107","variant_ids":[45871918940349,45871918973117,45871919005885,45871919038653,45871919071421,45871919104189]},"available":true,"name":"Convertible Romper with Frill - Sienna \/ 0000","public_title":"Sienna \/ 0000","options":["Sienna","0000"],"price":3995,"weight":200,"compare_at_price":null,"inventory_management":"shopify","barcode":"18940349","featured_media":{"alt":"Convertible Romper with Frill - The Birth Store - Snuggle Hunny","id":30051626320061,"position":2,"preview_image":{"aspect_ratio":1.0,"height":1000,"width":1000,"src":"\/\/www.thebirthstore.com.au\/cdn\/shop\/files\/convertible-romper-with-frill-2953758.jpg?v=1763560107"}},"requires_selling_plan":false,"selling_plan_allocations":[]},{"id":45871918973117,"title":"Sienna \/ 000","option1":"Sienna","option2":"000","option3":null,"sku":null,"requires_shipping":true,"taxable":false,"featured_image":{"id":38808623481021,"product_id":8109243072701,"position":2,"created_at":"2025-11-07T22:08:19+08:00","updated_at":"2025-11-19T21:48:27+08:00","alt":"Convertible Romper with Frill - The Birth Store - Snuggle Hunny","width":1000,"height":1000,"src":"\/\/www.thebirthstore.com.au\/cdn\/shop\/files\/convertible-romper-with-frill-2953758.jpg?v=1763560107","variant_ids":[45871918940349,45871918973117,45871919005885,45871919038653,45871919071421,45871919104189]},"available":true,"name":"Convertible Romper with Frill - Sienna \/ 000","public_title":"Sienna \/ 000","options":["Sienna","000"],"price":3995,"weight":200,"compare_at_price":null,"inventory_management":"shopify","barcode":"18973117","featured_media":{"alt":"Convertible Romper with Frill - The Birth Store - Snuggle Hunny","id":30051626320061,"position":2,"preview_image":{"aspect_ratio":1.0,"height":1000,"width":1000,"src":"\/\/www.thebirthstore.com.au\/cdn\/shop\/files\/convertible-romper-with-frill-2953758.jpg?v=1763560107"}},"requires_selling_plan":false,"selling_plan_allocations":[]},{"id":45871919005885,"title":"Sienna \/ 00","option1":"Sienna","option2":"00","option3":null,"sku":null,"requires_shipping":true,"taxable":false,"featured_image":{"id":38808623481021,"product_id":8109243072701,"position":2,"created_at":"2025-11-07T22:08:19+08:00","updated_at":"2025-11-19T21:48:27+08:00","alt":"Convertible Romper with Frill - The Birth Store - Snuggle Hunny","width":1000,"height":1000,"src":"\/\/www.thebirthstore.com.au\/cdn\/shop\/files\/convertible-romper-with-frill-2953758.jpg?v=1763560107","variant_ids":[45871918940349,45871918973117,45871919005885,45871919038653,45871919071421,45871919104189]},"available":true,"name":"Convertible Romper with Frill - Sienna \/ 00","public_title":"Sienna \/ 00","options":["Sienna","00"],"price":3995,"weight":200,"compare_at_price":null,"inventory_management":"shopify","barcode":"19005885","featured_media":{"alt":"Convertible Romper with Frill - The Birth Store - Snuggle Hunny","id":30051626320061,"position":2,"preview_image":{"aspect_ratio":1.0,"height":1000,"width":1000,"src":"\/\/www.thebirthstore.com.au\/cdn\/shop\/files\/convertible-romper-with-frill-2953758.jpg?v=1763560107"}},"requires_selling_plan":false,"selling_plan_allocations":[]},{"id":45871919038653,"title":"Sienna \/ 0","option1":"Sienna","option2":"0","option3":null,"sku":null,"requires_shipping":true,"taxable":false,"featured_image":{"id":38808623481021,"product_id":8109243072701,"position":2,"created_at":"2025-11-07T22:08:19+08:00","updated_at":"2025-11-19T21:48:27+08:00","alt":"Convertible Romper with Frill - The Birth Store - Snuggle Hunny","width":1000,"height":1000,"src":"\/\/www.thebirthstore.com.au\/cdn\/shop\/files\/convertible-romper-with-frill-2953758.jpg?v=1763560107","variant_ids":[45871918940349,45871918973117,45871919005885,45871919038653,45871919071421,45871919104189]},"available":true,"name":"Convertible Romper with Frill - Sienna \/ 0","public_title":"Sienna \/ 0","options":["Sienna","0"],"price":3995,"weight":200,"compare_at_price":null,"inventory_management":"shopify","barcode":"19038653","featured_media":{"alt":"Convertible Romper with Frill - The Birth Store - Snuggle Hunny","id":30051626320061,"position":2,"preview_image":{"aspect_ratio":1.0,"height":1000,"width":1000,"src":"\/\/www.thebirthstore.com.au\/cdn\/shop\/files\/convertible-romper-with-frill-2953758.jpg?v=1763560107"}},"requires_selling_plan":false,"selling_plan_allocations":[]},{"id":45871919071421,"title":"Sienna \/ 1","option1":"Sienna","option2":"1","option3":null,"sku":null,"requires_shipping":true,"taxable":false,"featured_image":{"id":38808623481021,"product_id":8109243072701,"position":2,"created_at":"2025-11-07T22:08:19+08:00","updated_at":"2025-11-19T21:48:27+08:00","alt":"Convertible Romper with Frill - The Birth Store - Snuggle Hunny","width":1000,"height":1000,"src":"\/\/www.thebirthstore.com.au\/cdn\/shop\/files\/convertible-romper-with-frill-2953758.jpg?v=1763560107","variant_ids":[45871918940349,45871918973117,45871919005885,45871919038653,45871919071421,45871919104189]},"available":false,"name":"Convertible Romper with Frill - Sienna \/ 1","public_title":"Sienna \/ 1","options":["Sienna","1"],"price":3995,"weight":200,"compare_at_price":null,"inventory_management":"shopify","barcode":"19071421","featured_media":{"alt":"Convertible Romper with Frill - The Birth Store - Snuggle Hunny","id":30051626320061,"position":2,"preview_image":{"aspect_ratio":1.0,"height":1000,"width":1000,"src":"\/\/www.thebirthstore.com.au\/cdn\/shop\/files\/convertible-romper-with-frill-2953758.jpg?v=1763560107"}},"requires_selling_plan":false,"selling_plan_allocations":[]},{"id":45871919104189,"title":"Sienna \/ 2","option1":"Sienna","option2":"2","option3":null,"sku":null,"requires_shipping":true,"taxable":false,"featured_image":{"id":38808623481021,"product_id":8109243072701,"position":2,"created_at":"2025-11-07T22:08:19+08:00","updated_at":"2025-11-19T21:48:27+08:00","alt":"Convertible Romper with Frill - The Birth Store - Snuggle Hunny","width":1000,"height":1000,"src":"\/\/www.thebirthstore.com.au\/cdn\/shop\/files\/convertible-romper-with-frill-2953758.jpg?v=1763560107","variant_ids":[45871918940349,45871918973117,45871919005885,45871919038653,45871919071421,45871919104189]},"available":false,"name":"Convertible Romper with Frill - Sienna \/ 2","public_title":"Sienna \/ 2","options":["Sienna","2"],"price":3995,"weight":200,"compare_at_price":null,"inventory_management":"shopify","barcode":"19104189","featured_media":{"alt":"Convertible Romper with Frill - The Birth Store - Snuggle Hunny","id":30051626320061,"position":2,"preview_image":{"aspect_ratio":1.0,"height":1000,"width":1000,"src":"\/\/www.thebirthstore.com.au\/cdn\/shop\/files\/convertible-romper-with-frill-2953758.jpg?v=1763560107"}},"requires_selling_plan":false,"selling_plan_allocations":[]},{"id":45871919890621,"title":"Pink Wattle \/ 0000","option1":"Pink Wattle","option2":"0000","option3":null,"sku":null,"requires_shipping":true,"taxable":false,"featured_image":{"id":38750772723901,"product_id":8109243072701,"position":3,"created_at":"2025-11-04T12:05:43+08:00","updated_at":"2025-11-19T21:48:27+08:00","alt":"Convertible Romper with Frill | Snuggle Hunny - The Birth Store - Snuggle Hunny","width":1000,"height":1000,"src":"\/\/www.thebirthstore.com.au\/cdn\/shop\/files\/convertible-romper-with-frill-snuggle-hunny-3806089.webp?v=1763560107","variant_ids":[45871919890621,45871919923389,45871919956157,45871919988925,45871920021693,45871920054461]},"available":true,"name":"Convertible Romper with Frill - Pink Wattle \/ 0000","public_title":"Pink Wattle \/ 0000","options":["Pink Wattle","0000"],"price":3995,"weight":200,"compare_at_price":null,"inventory_management":"shopify","barcode":"19890621","featured_media":{"alt":"Convertible Romper with Frill | Snuggle Hunny - The Birth Store - Snuggle Hunny","id":29998852145341,"position":3,"preview_image":{"aspect_ratio":1.0,"height":1000,"width":1000,"src":"\/\/www.thebirthstore.com.au\/cdn\/shop\/files\/convertible-romper-with-frill-snuggle-hunny-3806089.webp?v=1763560107"}},"requires_selling_plan":false,"selling_plan_allocations":[]},{"id":45871919923389,"title":"Pink Wattle \/ 000","option1":"Pink Wattle","option2":"000","option3":null,"sku":null,"requires_shipping":true,"taxable":false,"featured_image":{"id":38750772723901,"product_id":8109243072701,"position":3,"created_at":"2025-11-04T12:05:43+08:00","updated_at":"2025-11-19T21:48:27+08:00","alt":"Convertible Romper with Frill | Snuggle Hunny - The Birth Store - Snuggle Hunny","width":1000,"height":1000,"src":"\/\/www.thebirthstore.com.au\/cdn\/shop\/files\/convertible-romper-with-frill-snuggle-hunny-3806089.webp?v=1763560107","variant_ids":[45871919890621,45871919923389,45871919956157,45871919988925,45871920021693,45871920054461]},"available":true,"name":"Convertible Romper with Frill - Pink Wattle \/ 000","public_title":"Pink Wattle \/ 000","options":["Pink Wattle","000"],"price":3995,"weight":200,"compare_at_price":null,"inventory_management":"shopify","barcode":"19923389","featured_media":{"alt":"Convertible Romper with Frill | Snuggle Hunny - The Birth Store - Snuggle Hunny","id":29998852145341,"position":3,"preview_image":{"aspect_ratio":1.0,"height":1000,"width":1000,"src":"\/\/www.thebirthstore.com.au\/cdn\/shop\/files\/convertible-romper-with-frill-snuggle-hunny-3806089.webp?v=1763560107"}},"requires_selling_plan":false,"selling_plan_allocations":[]},{"id":45871919956157,"title":"Pink Wattle \/ 00","option1":"Pink Wattle","option2":"00","option3":null,"sku":null,"requires_shipping":true,"taxable":false,"featured_image":{"id":38750772723901,"product_id":8109243072701,"position":3,"created_at":"2025-11-04T12:05:43+08:00","updated_at":"2025-11-19T21:48:27+08:00","alt":"Convertible Romper with Frill | Snuggle Hunny - The Birth Store - Snuggle Hunny","width":1000,"height":1000,"src":"\/\/www.thebirthstore.com.au\/cdn\/shop\/files\/convertible-romper-with-frill-snuggle-hunny-3806089.webp?v=1763560107","variant_ids":[45871919890621,45871919923389,45871919956157,45871919988925,45871920021693,45871920054461]},"available":true,"name":"Convertible Romper with Frill - Pink Wattle \/ 00","public_title":"Pink Wattle \/ 00","options":["Pink Wattle","00"],"price":3995,"weight":200,"compare_at_price":null,"inventory_management":"shopify","barcode":"19956157","featured_media":{"alt":"Convertible Romper with Frill | Snuggle Hunny - The Birth Store - Snuggle Hunny","id":29998852145341,"position":3,"preview_image":{"aspect_ratio":1.0,"height":1000,"width":1000,"src":"\/\/www.thebirthstore.com.au\/cdn\/shop\/files\/convertible-romper-with-frill-snuggle-hunny-3806089.webp?v=1763560107"}},"requires_selling_plan":false,"selling_plan_allocations":[]},{"id":45871919988925,"title":"Pink Wattle \/ 0","option1":"Pink Wattle","option2":"0","option3":null,"sku":null,"requires_shipping":true,"taxable":false,"featured_image":{"id":38750772723901,"product_id":8109243072701,"position":3,"created_at":"2025-11-04T12:05:43+08:00","updated_at":"2025-11-19T21:48:27+08:00","alt":"Convertible Romper with Frill | Snuggle Hunny - The Birth Store - Snuggle Hunny","width":1000,"height":1000,"src":"\/\/www.thebirthstore.com.au\/cdn\/shop\/files\/convertible-romper-with-frill-snuggle-hunny-3806089.webp?v=1763560107","variant_ids":[45871919890621,45871919923389,45871919956157,45871919988925,45871920021693,45871920054461]},"available":true,"name":"Convertible Romper with Frill - Pink Wattle \/ 0","public_title":"Pink Wattle \/ 0","options":["Pink Wattle","0"],"price":3995,"weight":200,"compare_at_price":null,"inventory_management":"shopify","barcode":"19988925","featured_media":{"alt":"Convertible Romper with Frill | Snuggle Hunny - The Birth Store - Snuggle Hunny","id":29998852145341,"position":3,"preview_image":{"aspect_ratio":1.0,"height":1000,"width":1000,"src":"\/\/www.thebirthstore.com.au\/cdn\/shop\/files\/convertible-romper-with-frill-snuggle-hunny-3806089.webp?v=1763560107"}},"requires_selling_plan":false,"selling_plan_allocations":[]},{"id":45871920021693,"title":"Pink Wattle \/ 1","option1":"Pink Wattle","option2":"1","option3":null,"sku":null,"requires_shipping":true,"taxable":false,"featured_image":{"id":38750772723901,"product_id":8109243072701,"position":3,"created_at":"2025-11-04T12:05:43+08:00","updated_at":"2025-11-19T21:48:27+08:00","alt":"Convertible Romper with Frill | Snuggle Hunny - The Birth Store - Snuggle Hunny","width":1000,"height":1000,"src":"\/\/www.thebirthstore.com.au\/cdn\/shop\/files\/convertible-romper-with-frill-snuggle-hunny-3806089.webp?v=1763560107","variant_ids":[45871919890621,45871919923389,45871919956157,45871919988925,45871920021693,45871920054461]},"available":true,"name":"Convertible Romper with Frill - Pink Wattle \/ 1","public_title":"Pink Wattle \/ 1","options":["Pink Wattle","1"],"price":3995,"weight":200,"compare_at_price":null,"inventory_management":"shopify","barcode":"20021693","featured_media":{"alt":"Convertible Romper with Frill | Snuggle Hunny - The Birth Store - Snuggle Hunny","id":29998852145341,"position":3,"preview_image":{"aspect_ratio":1.0,"height":1000,"width":1000,"src":"\/\/www.thebirthstore.com.au\/cdn\/shop\/files\/convertible-romper-with-frill-snuggle-hunny-3806089.webp?v=1763560107"}},"requires_selling_plan":false,"selling_plan_allocations":[]},{"id":45871920054461,"title":"Pink Wattle \/ 2","option1":"Pink Wattle","option2":"2","option3":null,"sku":null,"requires_shipping":true,"taxable":false,"featured_image":{"id":38750772723901,"product_id":8109243072701,"position":3,"created_at":"2025-11-04T12:05:43+08:00","updated_at":"2025-11-19T21:48:27+08:00","alt":"Convertible Romper with Frill | Snuggle Hunny - The Birth Store - Snuggle Hunny","width":1000,"height":1000,"src":"\/\/www.thebirthstore.com.au\/cdn\/shop\/files\/convertible-romper-with-frill-snuggle-hunny-3806089.webp?v=1763560107","variant_ids":[45871919890621,45871919923389,45871919956157,45871919988925,45871920021693,45871920054461]},"available":false,"name":"Convertible Romper with Frill - Pink Wattle \/ 2","public_title":"Pink Wattle \/ 2","options":["Pink Wattle","2"],"price":3995,"weight":200,"compare_at_price":null,"inventory_management":"shopify","barcode":"20054461","featured_media":{"alt":"Convertible Romper with Frill | Snuggle Hunny - The Birth Store - Snuggle Hunny","id":29998852145341,"position":3,"preview_image":{"aspect_ratio":1.0,"height":1000,"width":1000,"src":"\/\/www.thebirthstore.com.au\/cdn\/shop\/files\/convertible-romper-with-frill-snuggle-hunny-3806089.webp?v=1763560107"}},"requires_selling_plan":false,"selling_plan_allocations":[]},{"id":45871921889469,"title":"Vintage Blossom \/ 0000","option1":"Vintage Blossom","option2":"0000","option3":null,"sku":null,"requires_shipping":true,"taxable":false,"featured_image":{"id":38750788288701,"product_id":8109243072701,"position":10,"created_at":"2025-11-04T12:08:48+08:00","updated_at":"2025-11-19T21:48:27+08:00","alt":"Convertible Romper with Frill | Snuggle Hunny - The Birth Store - Snuggle Hunny","width":1000,"height":1000,"src":"\/\/www.thebirthstore.com.au\/cdn\/shop\/files\/convertible-romper-with-frill-snuggle-hunny-5388430.webp?v=1763560107","variant_ids":[45871921889469,45871921922237,45871921955005,45871921987773,45871922020541,45871922053309]},"available":true,"name":"Convertible Romper with Frill - Vintage Blossom \/ 0000","public_title":"Vintage Blossom \/ 0000","options":["Vintage Blossom","0000"],"price":3995,"weight":200,"compare_at_price":null,"inventory_management":"shopify","barcode":"21889469","featured_media":{"alt":"Convertible Romper with Frill | Snuggle Hunny - The Birth Store - Snuggle Hunny","id":29998867447997,"position":10,"preview_image":{"aspect_ratio":1.0,"height":1000,"width":1000,"src":"\/\/www.thebirthstore.com.au\/cdn\/shop\/files\/convertible-romper-with-frill-snuggle-hunny-5388430.webp?v=1763560107"}},"requires_selling_plan":false,"selling_plan_allocations":[]},{"id":45871921922237,"title":"Vintage Blossom \/ 000","option1":"Vintage Blossom","option2":"000","option3":null,"sku":null,"requires_shipping":true,"taxable":false,"featured_image":{"id":38750788288701,"product_id":8109243072701,"position":10,"created_at":"2025-11-04T12:08:48+08:00","updated_at":"2025-11-19T21:48:27+08:00","alt":"Convertible Romper with Frill | Snuggle Hunny - The Birth Store - Snuggle Hunny","width":1000,"height":1000,"src":"\/\/www.thebirthstore.com.au\/cdn\/shop\/files\/convertible-romper-with-frill-snuggle-hunny-5388430.webp?v=1763560107","variant_ids":[45871921889469,45871921922237,45871921955005,45871921987773,45871922020541,45871922053309]},"available":true,"name":"Convertible Romper with Frill - Vintage Blossom \/ 000","public_title":"Vintage Blossom \/ 000","options":["Vintage Blossom","000"],"price":3995,"weight":200,"compare_at_price":null,"inventory_management":"shopify","barcode":"21922237","featured_media":{"alt":"Convertible Romper with Frill | Snuggle Hunny - The Birth Store - Snuggle Hunny","id":29998867447997,"position":10,"preview_image":{"aspect_ratio":1.0,"height":1000,"width":1000,"src":"\/\/www.thebirthstore.com.au\/cdn\/shop\/files\/convertible-romper-with-frill-snuggle-hunny-5388430.webp?v=1763560107"}},"requires_selling_plan":false,"selling_plan_allocations":[]},{"id":45871921955005,"title":"Vintage Blossom \/ 00","option1":"Vintage Blossom","option2":"00","option3":null,"sku":null,"requires_shipping":true,"taxable":false,"featured_image":{"id":38750788288701,"product_id":8109243072701,"position":10,"created_at":"2025-11-04T12:08:48+08:00","updated_at":"2025-11-19T21:48:27+08:00","alt":"Convertible Romper with Frill | Snuggle Hunny - The Birth Store - Snuggle Hunny","width":1000,"height":1000,"src":"\/\/www.thebirthstore.com.au\/cdn\/shop\/files\/convertible-romper-with-frill-snuggle-hunny-5388430.webp?v=1763560107","variant_ids":[45871921889469,45871921922237,45871921955005,45871921987773,45871922020541,45871922053309]},"available":true,"name":"Convertible Romper with Frill - Vintage Blossom \/ 00","public_title":"Vintage Blossom \/ 00","options":["Vintage Blossom","00"],"price":3995,"weight":200,"compare_at_price":null,"inventory_management":"shopify","barcode":"21955005","featured_media":{"alt":"Convertible Romper with Frill | Snuggle Hunny - The Birth Store - Snuggle Hunny","id":29998867447997,"position":10,"preview_image":{"aspect_ratio":1.0,"height":1000,"width":1000,"src":"\/\/www.thebirthstore.com.au\/cdn\/shop\/files\/convertible-romper-with-frill-snuggle-hunny-5388430.webp?v=1763560107"}},"requires_selling_plan":false,"selling_plan_allocations":[]},{"id":45871921987773,"title":"Vintage Blossom \/ 0","option1":"Vintage Blossom","option2":"0","option3":null,"sku":null,"requires_shipping":true,"taxable":false,"featured_image":{"id":38750788288701,"product_id":8109243072701,"position":10,"created_at":"2025-11-04T12:08:48+08:00","updated_at":"2025-11-19T21:48:27+08:00","alt":"Convertible Romper with Frill | Snuggle Hunny - The Birth Store - Snuggle Hunny","width":1000,"height":1000,"src":"\/\/www.thebirthstore.com.au\/cdn\/shop\/files\/convertible-romper-with-frill-snuggle-hunny-5388430.webp?v=1763560107","variant_ids":[45871921889469,45871921922237,45871921955005,45871921987773,45871922020541,45871922053309]},"available":true,"name":"Convertible Romper with Frill - Vintage Blossom \/ 0","public_title":"Vintage Blossom \/ 0","options":["Vintage Blossom","0"],"price":3995,"weight":200,"compare_at_price":null,"inventory_management":"shopify","barcode":"21987773","featured_media":{"alt":"Convertible Romper with Frill | Snuggle Hunny - The Birth Store - Snuggle Hunny","id":29998867447997,"position":10,"preview_image":{"aspect_ratio":1.0,"height":1000,"width":1000,"src":"\/\/www.thebirthstore.com.au\/cdn\/shop\/files\/convertible-romper-with-frill-snuggle-hunny-5388430.webp?v=1763560107"}},"requires_selling_plan":false,"selling_plan_allocations":[]},{"id":45871922020541,"title":"Vintage Blossom \/ 1","option1":"Vintage Blossom","option2":"1","option3":null,"sku":null,"requires_shipping":true,"taxable":false,"featured_image":{"id":38750788288701,"product_id":8109243072701,"position":10,"created_at":"2025-11-04T12:08:48+08:00","updated_at":"2025-11-19T21:48:27+08:00","alt":"Convertible Romper with Frill | Snuggle Hunny - The Birth Store - Snuggle Hunny","width":1000,"height":1000,"src":"\/\/www.thebirthstore.com.au\/cdn\/shop\/files\/convertible-romper-with-frill-snuggle-hunny-5388430.webp?v=1763560107","variant_ids":[45871921889469,45871921922237,45871921955005,45871921987773,45871922020541,45871922053309]},"available":true,"name":"Convertible Romper with Frill - Vintage Blossom \/ 1","public_title":"Vintage Blossom \/ 1","options":["Vintage Blossom","1"],"price":3995,"weight":200,"compare_at_price":null,"inventory_management":"shopify","barcode":"22020541","featured_media":{"alt":"Convertible Romper with Frill | Snuggle Hunny - The Birth Store - Snuggle Hunny","id":29998867447997,"position":10,"preview_image":{"aspect_ratio":1.0,"height":1000,"width":1000,"src":"\/\/www.thebirthstore.com.au\/cdn\/shop\/files\/convertible-romper-with-frill-snuggle-hunny-5388430.webp?v=1763560107"}},"requires_selling_plan":false,"selling_plan_allocations":[]},{"id":45871922053309,"title":"Vintage Blossom \/ 2","option1":"Vintage Blossom","option2":"2","option3":null,"sku":null,"requires_shipping":true,"taxable":false,"featured_image":{"id":38750788288701,"product_id":8109243072701,"position":10,"created_at":"2025-11-04T12:08:48+08:00","updated_at":"2025-11-19T21:48:27+08:00","alt":"Convertible Romper with Frill | Snuggle Hunny - The Birth Store - Snuggle Hunny","width":1000,"height":1000,"src":"\/\/www.thebirthstore.com.au\/cdn\/shop\/files\/convertible-romper-with-frill-snuggle-hunny-5388430.webp?v=1763560107","variant_ids":[45871921889469,45871921922237,45871921955005,45871921987773,45871922020541,45871922053309]},"available":false,"name":"Convertible Romper with Frill - Vintage Blossom \/ 2","public_title":"Vintage Blossom \/ 2","options":["Vintage Blossom","2"],"price":3995,"weight":200,"compare_at_price":null,"inventory_management":"shopify","barcode":"22053309","featured_media":{"alt":"Convertible Romper with Frill | Snuggle Hunny - The Birth Store - Snuggle Hunny","id":29998867447997,"position":10,"preview_image":{"aspect_ratio":1.0,"height":1000,"width":1000,"src":"\/\/www.thebirthstore.com.au\/cdn\/shop\/files\/convertible-romper-with-frill-snuggle-hunny-5388430.webp?v=1763560107"}},"requires_selling_plan":false,"selling_plan_allocations":[]}],"images":["\/\/www.thebirthstore.com.au\/cdn\/shop\/files\/convertible-romper-with-frill-4038806.jpg?v=1763560107","\/\/www.thebirthstore.com.au\/cdn\/shop\/files\/convertible-romper-with-frill-2953758.jpg?v=1763560107","\/\/www.thebirthstore.com.au\/cdn\/shop\/files\/convertible-romper-with-frill-snuggle-hunny-3806089.webp?v=1763560107","\/\/www.thebirthstore.com.au\/cdn\/shop\/files\/convertible-romper-with-frill-8224224.jpg?v=1763560107","\/\/www.thebirthstore.com.au\/cdn\/shop\/files\/convertible-romper-with-frill-1184529.jpg?v=1763560107","\/\/www.thebirthstore.com.au\/cdn\/shop\/files\/convertible-romper-with-frill-1426750.jpg?v=1763560107","\/\/www.thebirthstore.com.au\/cdn\/shop\/files\/convertible-romper-with-frill-3982696.jpg?v=1763560107","\/\/www.thebirthstore.com.au\/cdn\/shop\/files\/convertible-romper-with-frill-snuggle-hunny-4824830.webp?v=1763560107","\/\/www.thebirthstore.com.au\/cdn\/shop\/files\/convertible-romper-with-frill-6410603.jpg?v=1763560107","\/\/www.thebirthstore.com.au\/cdn\/shop\/files\/convertible-romper-with-frill-snuggle-hunny-5388430.webp?v=1763560107","\/\/www.thebirthstore.com.au\/cdn\/shop\/files\/convertible-romper-with-frill-9382375.jpg?v=1763560107","\/\/www.thebirthstore.com.au\/cdn\/shop\/files\/convertible-romper-with-frill-8599558.jpg?v=1763560107","\/\/www.thebirthstore.com.au\/cdn\/shop\/files\/convertible-romper-with-frill-snuggle-hunny-5671701.webp?v=1763560107","\/\/www.thebirthstore.com.au\/cdn\/shop\/files\/convertible-romper-with-frill-snuggle-hunny-2268822.webp?v=1763560107","\/\/www.thebirthstore.com.au\/cdn\/shop\/files\/convertible-romper-with-frill-snuggle-hunny-7104413.webp?v=1763560107","\/\/www.thebirthstore.com.au\/cdn\/shop\/files\/convertible-romper-with-frill-snuggle-hunny-1620669.webp?v=1763560107","\/\/www.thebirthstore.com.au\/cdn\/shop\/files\/convertible-romper-with-frill-snuggle-hunny-2573567.webp?v=1763560107","\/\/www.thebirthstore.com.au\/cdn\/shop\/files\/convertible-romper-with-frill-snuggle-hunny-1008289.webp?v=1763560107","\/\/www.thebirthstore.com.au\/cdn\/shop\/files\/convertible-romper-with-frill-snuggle-hunny-1912785.webp?v=1763560107","\/\/www.thebirthstore.com.au\/cdn\/shop\/files\/convertible-romper-with-frill-snuggle-hunny-7395412.webp?v=1763560107","\/\/www.thebirthstore.com.au\/cdn\/shop\/files\/convertible-romper-with-frill-snuggle-hunny-7332308.webp?v=1763560107"],"featured_image":"\/\/www.thebirthstore.com.au\/cdn\/shop\/files\/convertible-romper-with-frill-4038806.jpg?v=1763560107","options":["Colour","Size"],"media":[{"alt":"Convertible Romper with Frill - The Birth Store - Snuggle Hunny","id":30051729637565,"position":1,"preview_image":{"aspect_ratio":1.0,"height":1000,"width":1000,"src":"\/\/www.thebirthstore.com.au\/cdn\/shop\/files\/convertible-romper-with-frill-4038806.jpg?v=1763560107"},"aspect_ratio":1.0,"height":1000,"media_type":"image","src":"\/\/www.thebirthstore.com.au\/cdn\/shop\/files\/convertible-romper-with-frill-4038806.jpg?v=1763560107","width":1000},{"alt":"Convertible Romper with Frill - The Birth Store - Snuggle Hunny","id":30051626320061,"position":2,"preview_image":{"aspect_ratio":1.0,"height":1000,"width":1000,"src":"\/\/www.thebirthstore.com.au\/cdn\/shop\/files\/convertible-romper-with-frill-2953758.jpg?v=1763560107"},"aspect_ratio":1.0,"height":1000,"media_type":"image","src":"\/\/www.thebirthstore.com.au\/cdn\/shop\/files\/convertible-romper-with-frill-2953758.jpg?v=1763560107","width":1000},{"alt":"Convertible Romper with Frill | Snuggle Hunny - The Birth Store - Snuggle Hunny","id":29998852145341,"position":3,"preview_image":{"aspect_ratio":1.0,"height":1000,"width":1000,"src":"\/\/www.thebirthstore.com.au\/cdn\/shop\/files\/convertible-romper-with-frill-snuggle-hunny-3806089.webp?v=1763560107"},"aspect_ratio":1.0,"height":1000,"media_type":"image","src":"\/\/www.thebirthstore.com.au\/cdn\/shop\/files\/convertible-romper-with-frill-snuggle-hunny-3806089.webp?v=1763560107","width":1000},{"alt":"Convertible Romper with Frill - The Birth Store - Snuggle Hunny","id":30051711647933,"position":4,"preview_image":{"aspect_ratio":1.0,"height":1000,"width":1000,"src":"\/\/www.thebirthstore.com.au\/cdn\/shop\/files\/convertible-romper-with-frill-8224224.jpg?v=1763560107"},"aspect_ratio":1.0,"height":1000,"media_type":"image","src":"\/\/www.thebirthstore.com.au\/cdn\/shop\/files\/convertible-romper-with-frill-8224224.jpg?v=1763560107","width":1000},{"alt":"Convertible Romper with Frill - The Birth Store - Snuggle Hunny","id":30051602202813,"position":5,"preview_image":{"aspect_ratio":1.0,"height":2048,"width":2048,"src":"\/\/www.thebirthstore.com.au\/cdn\/shop\/files\/convertible-romper-with-frill-1184529.jpg?v=1763560107"},"aspect_ratio":1.0,"height":2048,"media_type":"image","src":"\/\/www.thebirthstore.com.au\/cdn\/shop\/files\/convertible-romper-with-frill-1184529.jpg?v=1763560107","width":2048},{"alt":"Convertible Romper with Frill - The Birth Store - Snuggle Hunny","id":30051602923709,"position":6,"preview_image":{"aspect_ratio":1.0,"height":2048,"width":2048,"src":"\/\/www.thebirthstore.com.au\/cdn\/shop\/files\/convertible-romper-with-frill-1426750.jpg?v=1763560107"},"aspect_ratio":1.0,"height":2048,"media_type":"image","src":"\/\/www.thebirthstore.com.au\/cdn\/shop\/files\/convertible-romper-with-frill-1426750.jpg?v=1763560107","width":2048},{"alt":"Convertible Romper with Frill - The Birth Store - Snuggle Hunny","id":30051622256829,"position":7,"preview_image":{"aspect_ratio":1.0,"height":1000,"width":1000,"src":"\/\/www.thebirthstore.com.au\/cdn\/shop\/files\/convertible-romper-with-frill-3982696.jpg?v=1763560107"},"aspect_ratio":1.0,"height":1000,"media_type":"image","src":"\/\/www.thebirthstore.com.au\/cdn\/shop\/files\/convertible-romper-with-frill-3982696.jpg?v=1763560107","width":1000},{"alt":"Convertible Romper with Frill | Snuggle Hunny - The Birth Store - Snuggle Hunny","id":29842549604541,"position":8,"preview_image":{"aspect_ratio":1.0,"height":1000,"width":1000,"src":"\/\/www.thebirthstore.com.au\/cdn\/shop\/files\/convertible-romper-with-frill-snuggle-hunny-4824830.webp?v=1763560107"},"aspect_ratio":1.0,"height":1000,"media_type":"image","src":"\/\/www.thebirthstore.com.au\/cdn\/shop\/files\/convertible-romper-with-frill-snuggle-hunny-4824830.webp?v=1763560107","width":1000},{"alt":"Convertible Romper with Frill - The Birth Store - Snuggle Hunny","id":30051721478333,"position":9,"preview_image":{"aspect_ratio":1.0,"height":1000,"width":1000,"src":"\/\/www.thebirthstore.com.au\/cdn\/shop\/files\/convertible-romper-with-frill-6410603.jpg?v=1763560107"},"aspect_ratio":1.0,"height":1000,"media_type":"image","src":"\/\/www.thebirthstore.com.au\/cdn\/shop\/files\/convertible-romper-with-frill-6410603.jpg?v=1763560107","width":1000},{"alt":"Convertible Romper with Frill | Snuggle Hunny - The Birth Store - Snuggle Hunny","id":29998867447997,"position":10,"preview_image":{"aspect_ratio":1.0,"height":1000,"width":1000,"src":"\/\/www.thebirthstore.com.au\/cdn\/shop\/files\/convertible-romper-with-frill-snuggle-hunny-5388430.webp?v=1763560107"},"aspect_ratio":1.0,"height":1000,"media_type":"image","src":"\/\/www.thebirthstore.com.au\/cdn\/shop\/files\/convertible-romper-with-frill-snuggle-hunny-5388430.webp?v=1763560107","width":1000},{"alt":"Convertible Romper with Frill - The Birth Store - Snuggle Hunny","id":30039782523069,"position":11,"preview_image":{"aspect_ratio":1.0,"height":1000,"width":1000,"src":"\/\/www.thebirthstore.com.au\/cdn\/shop\/files\/convertible-romper-with-frill-9382375.jpg?v=1763560107"},"aspect_ratio":1.0,"height":1000,"media_type":"image","src":"\/\/www.thebirthstore.com.au\/cdn\/shop\/files\/convertible-romper-with-frill-9382375.jpg?v=1763560107","width":1000},{"alt":"Convertible Romper with Frill - The Birth Store - Snuggle Hunny","id":30039778656445,"position":12,"preview_image":{"aspect_ratio":1.0,"height":1000,"width":1000,"src":"\/\/www.thebirthstore.com.au\/cdn\/shop\/files\/convertible-romper-with-frill-8599558.jpg?v=1763560107"},"aspect_ratio":1.0,"height":1000,"media_type":"image","src":"\/\/www.thebirthstore.com.au\/cdn\/shop\/files\/convertible-romper-with-frill-8599558.jpg?v=1763560107","width":1000},{"alt":"Convertible Romper with Frill | Snuggle Hunny - The Birth Store - Snuggle Hunny","id":29842428428477,"position":13,"preview_image":{"aspect_ratio":1.0,"height":1000,"width":1000,"src":"\/\/www.thebirthstore.com.au\/cdn\/shop\/files\/convertible-romper-with-frill-snuggle-hunny-5671701.webp?v=1763560107"},"aspect_ratio":1.0,"height":1000,"media_type":"image","src":"\/\/www.thebirthstore.com.au\/cdn\/shop\/files\/convertible-romper-with-frill-snuggle-hunny-5671701.webp?v=1763560107","width":1000},{"alt":"Convertible Romper with Frill | Snuggle Hunny - The Birth Store - Snuggle Hunny","id":29842456379581,"position":14,"preview_image":{"aspect_ratio":1.0,"height":1000,"width":1000,"src":"\/\/www.thebirthstore.com.au\/cdn\/shop\/files\/convertible-romper-with-frill-snuggle-hunny-2268822.webp?v=1763560107"},"aspect_ratio":1.0,"height":1000,"media_type":"image","src":"\/\/www.thebirthstore.com.au\/cdn\/shop\/files\/convertible-romper-with-frill-snuggle-hunny-2268822.webp?v=1763560107","width":1000},{"alt":"Convertible Romper with Frill | Snuggle Hunny - The Birth Store - Snuggle Hunny","id":29842578145469,"position":15,"preview_image":{"aspect_ratio":1.0,"height":1000,"width":1000,"src":"\/\/www.thebirthstore.com.au\/cdn\/shop\/files\/convertible-romper-with-frill-snuggle-hunny-7104413.webp?v=1763560107"},"aspect_ratio":1.0,"height":1000,"media_type":"image","src":"\/\/www.thebirthstore.com.au\/cdn\/shop\/files\/convertible-romper-with-frill-snuggle-hunny-7104413.webp?v=1763560107","width":1000},{"alt":"Convertible Romper with Frill | Snuggle Hunny - The Birth Store - Snuggle Hunny","id":29842589581501,"position":16,"preview_image":{"aspect_ratio":1.0,"height":1000,"width":1000,"src":"\/\/www.thebirthstore.com.au\/cdn\/shop\/files\/convertible-romper-with-frill-snuggle-hunny-1620669.webp?v=1763560107"},"aspect_ratio":1.0,"height":1000,"media_type":"image","src":"\/\/www.thebirthstore.com.au\/cdn\/shop\/files\/convertible-romper-with-frill-snuggle-hunny-1620669.webp?v=1763560107","width":1000},{"alt":"Convertible Romper with Frill | Snuggle Hunny - The Birth Store - Snuggle Hunny","id":29842618777789,"position":17,"preview_image":{"aspect_ratio":1.0,"height":1000,"width":1000,"src":"\/\/www.thebirthstore.com.au\/cdn\/shop\/files\/convertible-romper-with-frill-snuggle-hunny-2573567.webp?v=1763560107"},"aspect_ratio":1.0,"height":1000,"media_type":"image","src":"\/\/www.thebirthstore.com.au\/cdn\/shop\/files\/convertible-romper-with-frill-snuggle-hunny-2573567.webp?v=1763560107","width":1000},{"alt":"Convertible Romper with Frill | Snuggle Hunny - The Birth Store - Snuggle Hunny","id":29998798962877,"position":18,"preview_image":{"aspect_ratio":1.0,"height":1000,"width":1000,"src":"\/\/www.thebirthstore.com.au\/cdn\/shop\/files\/convertible-romper-with-frill-snuggle-hunny-1008289.webp?v=1763560107"},"aspect_ratio":1.0,"height":1000,"media_type":"image","src":"\/\/www.thebirthstore.com.au\/cdn\/shop\/files\/convertible-romper-with-frill-snuggle-hunny-1008289.webp?v=1763560107","width":1000},{"alt":"Convertible Romper with Frill | Snuggle Hunny - The Birth Store - Snuggle Hunny","id":29998816690365,"position":19,"preview_image":{"aspect_ratio":1.0,"height":1000,"width":1000,"src":"\/\/www.thebirthstore.com.au\/cdn\/shop\/files\/convertible-romper-with-frill-snuggle-hunny-1912785.webp?v=1763560107"},"aspect_ratio":1.0,"height":1000,"media_type":"image","src":"\/\/www.thebirthstore.com.au\/cdn\/shop\/files\/convertible-romper-with-frill-snuggle-hunny-1912785.webp?v=1763560107","width":1000},{"alt":"Convertible Romper with Frill | Snuggle Hunny - The Birth Store - Snuggle Hunny","id":29998834122941,"position":20,"preview_image":{"aspect_ratio":1.0,"height":1000,"width":1000,"src":"\/\/www.thebirthstore.com.au\/cdn\/shop\/files\/convertible-romper-with-frill-snuggle-hunny-7395412.webp?v=1763560107"},"aspect_ratio":1.0,"height":1000,"media_type":"image","src":"\/\/www.thebirthstore.com.au\/cdn\/shop\/files\/convertible-romper-with-frill-snuggle-hunny-7395412.webp?v=1763560107","width":1000},{"alt":"Convertible Romper with Frill | Snuggle Hunny - The Birth Store - Snuggle Hunny","id":29998841299133,"position":21,"preview_image":{"aspect_ratio":1.0,"height":1000,"width":1000,"src":"\/\/www.thebirthstore.com.au\/cdn\/shop\/files\/convertible-romper-with-frill-snuggle-hunny-7332308.webp?v=1763560107"},"aspect_ratio":1.0,"height":1000,"media_type":"image","src":"\/\/www.thebirthstore.com.au\/cdn\/shop\/files\/convertible-romper-with-frill-snuggle-hunny-7332308.webp?v=1763560107","width":1000}],"requires_selling_plan":false,"selling_plan_groups":[],"content":"\u003cp\u003eOur Organic Snugglesuits are convertible rompers - zipped onesies with foldover feet. Soft and stretchy, our convertible rompers are an easy-care, fuss-free option with a modern, fitted style. The rompers are made in our SnuggleSoft™ fabric which is buttery soft and one of the many reason our community loves us.\u003c\/p\u003e\n\u003cp\u003eSuitable for loungewear, daywear, birth announcement photos and they make great baby gifts. All Snuggle Hunny clothing is made with GOTS Certified Organic Cotton\u003cspan\u003e \u003c\/span\u003e\u003cspan\u003eCU 1182228\u003c\/span\u003e.\u003c\/p\u003e\n\u003cp\u003e\u003cstrong\u003eOur Snugglesuit Design\u003c\/strong\u003e\u003c\/p\u003e\n\u003cp\u003eThis design includes a two way zip, making it easy to get bub in and out for naptime and nappy change. Foldable hand mittens are included for newborn to 6 months and help stop little nails from scratching and also keep hands warm when the weather is cool. Bub can wear the mittens open or closed. For sizes from 6 months upwards, the mittens are replaced with a stylish cuff. Foot mittens are also an important feature and these are included on all sizes. Who doesn’t love to tuck in those little feet for bedtime to keep warm?\u003c\/p\u003e\n\u003cp\u003e\u003cstrong\u003eFeatures Include:\u003c\/strong\u003e\u003c\/p\u003e\n\u003cul\u003e\n\u003cli\u003eSizing: Newborn to Size 2\u003c\/li\u003e\n\u003cli\u003eFoldable hand mittens (newborn to 6 months)\u003c\/li\u003e\n\u003cli\u003eFoldable foot mittens (all sizes)\u003c\/li\u003e\n\u003cli\u003eFull length two-way zipper\u003cbr\u003e\n\u003c\/li\u003e\n\u003cli\u003eProtective zip cover\u003c\/li\u003e\n\u003cli\u003eSoft and stretchy\u003c\/li\u003e\n\u003cli\u003eFitted style\u003c\/li\u003e\n\u003cli\u003eEasy to wear\u003c\/li\u003e\n\u003cli\u003eLightweight and breathable\u003c\/li\u003e\n\u003cli\u003eGOTS Certified Organic\u003cspan\u003e \u003c\/span\u003e\u003cspan\u003eCU 1182228\u003c\/span\u003e\n\u003c\/li\u003e\n\u003cli\u003e95% Organic Cotton \/ 5% Elastane\u003c\/li\u003e\n\u003c\/ul\u003e\n\u003cp\u003eDesigned in Australia. Made in India.\u003c\/p\u003e\n\u003cp\u003eNote: headwear and accessories not included but can be bought separately.\u003c\/p\u003e\n\u003cp\u003e\u003cspan\u003eDue to the nature of our print style your romper may feature the design in different positions compared to the image. \u003c\/span\u003e\u003c\/p\u003e\n\u003cp\u003eRemove headwear when putting baby to sleep.\u003c\/p\u003e"},"options":[{"name":"Colour","position":1,"values":["Isla","Cherry Blossom","Coral","Spring Floral","Blushing Beauty","Camille","Midnight Swan","Strawberry","Butterfly","Sienna","Pink Wattle","Vintage Blossom"]},{"name":"Size","position":2,"values":["0000","000","00","0","1","2"]}],"custom_metafields":{},"metafields":{"badge":"\u003cdiv style='display:none' class='jdgm-prev-badge' data-average-rating='0.00' data-number-of-reviews='0' data-number-of-questions='0'\u003e \u003cspan class='jdgm-prev-badge__stars' data-score='0.00' tabindex='0' aria-label='0.00 stars' role='button'\u003e \u003cspan class='jdgm-star jdgm--off'\u003e\u003c\/span\u003e\u003cspan class='jdgm-star jdgm--off'\u003e\u003c\/span\u003e\u003cspan class='jdgm-star jdgm--off'\u003e\u003c\/span\u003e\u003cspan class='jdgm-star jdgm--off'\u003e\u003c\/span\u003e\u003cspan class='jdgm-star jdgm--off'\u003e\u003c\/span\u003e \u003c\/span\u003e \u003cspan class='jdgm-prev-badge__text'\u003e No reviews \u003c\/span\u003e \u003c\/div\u003e","widget":"\u003cdiv class='jdgm-rev-widg' data-updated-at='2025-11-06T14:17:03Z' data-average-rating='0.00' data-number-of-reviews='0' data-number-of-questions='0' data-image-url='https:\/\/cdn.shopify.com\/s\/files\/1\/0527\/3393\/5805\/files\/convertible_romper_isla_1_1000x_2x_fe8ec9a2-9ba8-42df-863a-997f99acbf8b.webp?v=1760591704'\u003e \u003cstyle class='jdgm-temp-hiding-style'\u003e.jdgm-rev-widg{ display: none }\u003c\/style\u003e \u003cdiv class='jdgm-rev-widg__header'\u003e \u003ch2 class='jdgm-rev-widg__title'\u003eCustomer Reviews\u003c\/h2\u003e \u003cdiv class='jdgm-rev-widg__summary'\u003e \u003cdiv class='jdgm-rev-widg__summary-stars' aria-label='Average rating is 0.00 stars' role='img'\u003e \u003cspan class='jdgm-star jdgm--off'\u003e\u003c\/span\u003e\u003cspan class='jdgm-star jdgm--off'\u003e\u003c\/span\u003e\u003cspan class='jdgm-star jdgm--off'\u003e\u003c\/span\u003e\u003cspan class='jdgm-star jdgm--off'\u003e\u003c\/span\u003e\u003cspan class='jdgm-star jdgm--off'\u003e\u003c\/span\u003e \u003c\/div\u003e \u003cdiv class='jdgm-rev-widg__summary-text'\u003eBe the first to write a review\u003c\/div\u003e \u003c\/div\u003e \u003ca style='display: none' href='#' class='jdgm-write-rev-link' role='button'\u003eWrite a review\u003c\/a\u003e \u003cdiv class='jdgm-histogram jdgm-temp-hidden'\u003e \u003cdiv class='jdgm-histogram__row' data-rating='5' data-frequency='0' data-percentage='0'\u003e \u003cdiv class='jdgm-histogram__star' role='button' aria-label=\"0% (0) reviews with 5 star rating\" tabindex='0' \u003e\u003cspan class='jdgm-star jdgm--on'\u003e\u003c\/span\u003e\u003cspan class='jdgm-star jdgm--on'\u003e\u003c\/span\u003e\u003cspan class='jdgm-star jdgm--on'\u003e\u003c\/span\u003e\u003cspan class='jdgm-star jdgm--on'\u003e\u003c\/span\u003e\u003cspan class='jdgm-star jdgm--on'\u003e\u003c\/span\u003e\u003c\/div\u003e \u003cdiv class='jdgm-histogram__bar'\u003e \u003cdiv class='jdgm-histogram__bar-content' style='width: 0%;'\u003e \u003c\/div\u003e \u003c\/div\u003e \u003cdiv class='jdgm-histogram__percentage'\u003e0%\u003c\/div\u003e \u003cdiv class='jdgm-histogram__frequency'\u003e(0)\u003c\/div\u003e \u003c\/div\u003e \u003cdiv class='jdgm-histogram__row' data-rating='4' data-frequency='0' data-percentage='0'\u003e \u003cdiv class='jdgm-histogram__star' role='button' aria-label=\"0% (0) reviews with 4 star rating\" tabindex='0' \u003e\u003cspan class='jdgm-star jdgm--on'\u003e\u003c\/span\u003e\u003cspan class='jdgm-star jdgm--on'\u003e\u003c\/span\u003e\u003cspan class='jdgm-star jdgm--on'\u003e\u003c\/span\u003e\u003cspan class='jdgm-star jdgm--on'\u003e\u003c\/span\u003e\u003cspan class='jdgm-star jdgm--off'\u003e\u003c\/span\u003e\u003c\/div\u003e \u003cdiv class='jdgm-histogram__bar'\u003e \u003cdiv class='jdgm-histogram__bar-content' style='width: 0%;'\u003e \u003c\/div\u003e \u003c\/div\u003e \u003cdiv class='jdgm-histogram__percentage'\u003e0%\u003c\/div\u003e \u003cdiv class='jdgm-histogram__frequency'\u003e(0)\u003c\/div\u003e \u003c\/div\u003e \u003cdiv class='jdgm-histogram__row' data-rating='3' data-frequency='0' data-percentage='0'\u003e \u003cdiv class='jdgm-histogram__star' role='button' aria-label=\"0% (0) reviews with 3 star rating\" tabindex='0' \u003e\u003cspan class='jdgm-star jdgm--on'\u003e\u003c\/span\u003e\u003cspan class='jdgm-star jdgm--on'\u003e\u003c\/span\u003e\u003cspan class='jdgm-star jdgm--on'\u003e\u003c\/span\u003e\u003cspan class='jdgm-star jdgm--off'\u003e\u003c\/span\u003e\u003cspan class='jdgm-star jdgm--off'\u003e\u003c\/span\u003e\u003c\/div\u003e \u003cdiv class='jdgm-histogram__bar'\u003e \u003cdiv class='jdgm-histogram__bar-content' style='width: 0%;'\u003e \u003c\/div\u003e \u003c\/div\u003e \u003cdiv class='jdgm-histogram__percentage'\u003e0%\u003c\/div\u003e \u003cdiv class='jdgm-histogram__frequency'\u003e(0)\u003c\/div\u003e \u003c\/div\u003e \u003cdiv class='jdgm-histogram__row' data-rating='2' data-frequency='0' data-percentage='0'\u003e \u003cdiv class='jdgm-histogram__star' role='button' aria-label=\"0% (0) reviews with 2 star rating\" tabindex='0' \u003e\u003cspan class='jdgm-star jdgm--on'\u003e\u003c\/span\u003e\u003cspan class='jdgm-star jdgm--on'\u003e\u003c\/span\u003e\u003cspan class='jdgm-star jdgm--off'\u003e\u003c\/span\u003e\u003cspan class='jdgm-star jdgm--off'\u003e\u003c\/span\u003e\u003cspan class='jdgm-star jdgm--off'\u003e\u003c\/span\u003e\u003c\/div\u003e \u003cdiv class='jdgm-histogram__bar'\u003e \u003cdiv class='jdgm-histogram__bar-content' style='width: 0%;'\u003e \u003c\/div\u003e \u003c\/div\u003e \u003cdiv class='jdgm-histogram__percentage'\u003e0%\u003c\/div\u003e \u003cdiv class='jdgm-histogram__frequency'\u003e(0)\u003c\/div\u003e \u003c\/div\u003e \u003cdiv class='jdgm-histogram__row' data-rating='1' data-frequency='0' data-percentage='0'\u003e \u003cdiv class='jdgm-histogram__star' role='button' aria-label=\"0% (0) reviews with 1 star rating\" tabindex='0' \u003e\u003cspan class='jdgm-star jdgm--on'\u003e\u003c\/span\u003e\u003cspan class='jdgm-star jdgm--off'\u003e\u003c\/span\u003e\u003cspan class='jdgm-star jdgm--off'\u003e\u003c\/span\u003e\u003cspan class='jdgm-star jdgm--off'\u003e\u003c\/span\u003e\u003cspan class='jdgm-star jdgm--off'\u003e\u003c\/span\u003e\u003c\/div\u003e \u003cdiv class='jdgm-histogram__bar'\u003e \u003cdiv class='jdgm-histogram__bar-content' style='width: 0%;'\u003e \u003c\/div\u003e \u003c\/div\u003e \u003cdiv class='jdgm-histogram__percentage'\u003e0%\u003c\/div\u003e \u003cdiv class='jdgm-histogram__frequency'\u003e(0)\u003c\/div\u003e \u003c\/div\u003e \u003cdiv class='jdgm-histogram__row jdgm-histogram__clear-filter' data-rating=null tabindex='0'\u003e\u003c\/div\u003e \u003c\/div\u003e \u003cdiv class='jdgm-rev-widg__sort-wrapper'\u003e\u003c\/div\u003e \u003c\/div\u003e \u003cdiv class='jdgm-rev-widg__body'\u003e \u003cdiv class='jdgm-rev-widg__reviews'\u003e\u003c\/div\u003e \u003cdiv class='jdgm-paginate' data-per-page='10' data-url='https:\/\/api.judge.me\/reviews\/reviews_for_widget' style=\"display: none;\"\u003e\u003c\/div\u003e \u003c\/div\u003e \u003cdiv class='jdgm-rev-widg__paginate-spinner-wrapper'\u003e \u003cdiv class='jdgm-spinner'\u003e\u003c\/div\u003e \u003c\/div\u003e \u003c\/div\u003e"},"collections":[{"id":324679172285,"handle":"baby-clothing","title":"Baby Clothing","updated_at":"2025-12-27T20:11:40+08:00","body_html":"","published_at":"2025-09-23T21:58:24+08:00","sort_order":"best-selling","template_suffix":"baby-collection","disjunctive":false,"rules":[{"column":"tag","relation":"equals","condition":"Baby Clothing"}],"published_scope":"global","image":{"created_at":"2025-11-20T21:34:15+08:00","alt":"Baby Clothing - The Birth Store","width":1000,"height":1000,"src":"\/\/www.thebirthstore.com.au\/cdn\/shop\/collections\/baby-clothing-9243933.jpg?v=1763645655"}},{"id":325528486077,"handle":"baby-shower-gifts-baby","title":"Baby Shower Gifts - Baby","updated_at":"2025-12-28T20:10:01+08:00","body_html":"","published_at":"2025-10-11T10:27:03+08:00","sort_order":"best-selling","template_suffix":"baby-collection","disjunctive":true,"rules":[{"column":"tag","relation":"equals","condition":"Baby Shower Gifts - Baby"},{"column":"tag","relation":"equals","condition":"Gift Card"}],"published_scope":"global","image":{"created_at":"2025-10-30T16:16:58+08:00","alt":"Baby Shower Gifts - Baby - The Birth Store","width":1638,"height":2048,"src":"\/\/www.thebirthstore.com.au\/cdn\/shop\/collections\/baby-shower-gifts-baby-5416143.jpg?v=1761812219"}},{"id":264450998461,"handle":"baby-collection","title":"Baby-Collection","updated_at":"2025-12-28T20:10:01+08:00","body_html":"\u003cp\u003eShop your baby announcement and milestone essentials below. Looking for something we don't currently stock? Please reach out and let us know.\u003cbr\u003e\u003c\/p\u003e\n\u003cp\u003e\u003cspan\u003eYou can even buy now and pay later with Afterpay!\u003c\/span\u003e\u003c\/p\u003e","published_at":"2021-04-07T22:29:35+08:00","sort_order":"best-selling","template_suffix":"baby-collection","disjunctive":false,"rules":[{"column":"tag","relation":"equals","condition":"Baby"}],"published_scope":"global","image":{"created_at":"2024-05-06T11:59:24+08:00","alt":"Baby - The Birth Store","width":1280,"height":1600,"src":"\/\/www.thebirthstore.com.au\/cdn\/shop\/collections\/baby-398774.jpg?v=1714967964"}},{"id":261657460925,"handle":"buy","title":"Buy","updated_at":"2025-12-28T20:10:01+08:00","body_html":"\u003cp\u003eBrowse all of our pregnancy, labour \u0026amp; birth, postpartum and baby essentials here.\u003cbr\u003e\u003c\/p\u003e\n\u003cp\u003e\u003cspan\u003eYou can even buy now and pay later with Afterpay!\u003c\/span\u003e\u003c\/p\u003e","published_at":"2021-03-10T12:05:31+08:00","sort_order":"best-selling","template_suffix":"shop-all-collection","disjunctive":false,"rules":[{"column":"title","relation":"not_contains","condition":"Hire"}],"published_scope":"global","image":{"created_at":"2024-05-06T11:59:42+08:00","alt":"Buy - The Birth Store","width":2048,"height":2048,"src":"\/\/www.thebirthstore.com.au\/cdn\/shop\/collections\/buy-964856.jpg?v=1714967982"}},{"id":324679205053,"handle":"growsuits","title":"Growsuits","updated_at":"2025-12-26T20:08:47+08:00","body_html":"","published_at":"2025-09-23T21:58:37+08:00","sort_order":"best-selling","template_suffix":"baby-collection","disjunctive":false,"rules":[{"column":"tag","relation":"equals","condition":"Growsuits"}],"published_scope":"global","image":{"created_at":"2025-11-20T21:34:26+08:00","alt":"Growsuits - The Birth Store","width":1000,"height":1000,"src":"\/\/www.thebirthstore.com.au\/cdn\/shop\/collections\/growsuits-9310144.jpg?v=1763645666"}},{"id":324679139517,"handle":"new-arrivals-baby","title":"New Arrivals - Baby","updated_at":"2025-12-28T20:10:01+08:00","body_html":"","published_at":"2025-09-23T21:58:03+08:00","sort_order":"best-selling","template_suffix":"baby-collection","disjunctive":false,"rules":[{"column":"tag","relation":"equals","condition":"new"},{"column":"tag","relation":"equals","condition":"Baby"}],"published_scope":"global","image":{"created_at":"2025-09-29T00:43:52+08:00","alt":"New Arrivals - Baby - The Birth Store","width":1080,"height":1080,"src":"\/\/www.thebirthstore.com.au\/cdn\/shop\/collections\/new-arrivals-baby-4242728.png?v=1759077833"}},{"id":326135316669,"handle":"shop-all-baby","title":"Shop All - Baby","updated_at":"2025-12-28T20:10:01+08:00","body_html":"","published_at":"2025-10-22T11:00:50+08:00","sort_order":"best-selling","template_suffix":"baby-collection","disjunctive":false,"rules":[{"column":"variant_price","relation":"greater_than","condition":"1"},{"column":"title","relation":"not_contains","condition":"Batteries"},{"column":"tag","relation":"equals","condition":"Baby"}],"published_scope":"global","image":{"created_at":"2025-10-30T16:17:07+08:00","alt":"Shop All - Baby - The Birth Store","width":1075,"height":1613,"src":"\/\/www.thebirthstore.com.au\/cdn\/shop\/collections\/shop-all-baby-1449113.jpg?v=1761812227"}},{"id":310045933757,"handle":"shop-all-sale","title":"Shop All Sale","updated_at":"2025-12-28T20:10:01+08:00","body_html":"","published_at":"2024-11-12T13:22:43+08:00","sort_order":"alpha-asc","template_suffix":"","disjunctive":true,"rules":[{"column":"tag","relation":"equals","condition":"Bundles"},{"column":"vendor","relation":"equals","condition":"Franjos Kitchen"},{"column":"vendor","relation":"equals","condition":"Adored Illustrations"},{"column":"vendor","relation":"equals","condition":"Amazing Oils"},{"column":"vendor","relation":"equals","condition":"Ice Ice Booby"},{"column":"vendor","relation":"equals","condition":"Made to Milk"},{"column":"vendor","relation":"equals","condition":"Milky Goodness"},{"column":"vendor","relation":"equals","condition":"Seasons of Mama"},{"column":"vendor","relation":"equals","condition":"Silverette"},{"column":"vendor","relation":"equals","condition":"Snuggle Hunny"},{"column":"vendor","relation":"equals","condition":"Yung Bod"},{"column":"vendor","relation":"equals","condition":"Bare Love"},{"column":"vendor","relation":"equals","condition":"Haakaa"},{"column":"vendor","relation":"equals","condition":"Mere Botanicals"},{"column":"vendor","relation":"equals","condition":"The Birth Store Hire"},{"column":"vendor","relation":"equals","condition":"The Birth Store"}],"published_scope":"global","image":{"created_at":"2024-11-13T10:58:16+08:00","alt":"Shop All Sale - The Birth Store","width":2048,"height":1365,"src":"\/\/www.thebirthstore.com.au\/cdn\/shop\/collections\/shop-all-sale-297361.jpg?v=1731466697"}}]}
[{"alt":"Convertible Romper with Frill - The Birth Store - Snuggle Hunny","id":30051729637565,"position":1,"preview_image":{"aspect_ratio":1.0,"height":1000,"width":1000,"src":"\/\/www.thebirthstore.com.au\/cdn\/shop\/files\/convertible-romper-with-frill-4038806.jpg?v=1763560107"},"aspect_ratio":1.0,"height":1000,"media_type":"image","src":"\/\/www.thebirthstore.com.au\/cdn\/shop\/files\/convertible-romper-with-frill-4038806.jpg?v=1763560107","width":1000},{"alt":"Convertible Romper with Frill - The Birth Store - Snuggle Hunny","id":30051626320061,"position":2,"preview_image":{"aspect_ratio":1.0,"height":1000,"width":1000,"src":"\/\/www.thebirthstore.com.au\/cdn\/shop\/files\/convertible-romper-with-frill-2953758.jpg?v=1763560107"},"aspect_ratio":1.0,"height":1000,"media_type":"image","src":"\/\/www.thebirthstore.com.au\/cdn\/shop\/files\/convertible-romper-with-frill-2953758.jpg?v=1763560107","width":1000},{"alt":"Convertible Romper with Frill | Snuggle Hunny - The Birth Store - Snuggle Hunny","id":29998852145341,"position":3,"preview_image":{"aspect_ratio":1.0,"height":1000,"width":1000,"src":"\/\/www.thebirthstore.com.au\/cdn\/shop\/files\/convertible-romper-with-frill-snuggle-hunny-3806089.webp?v=1763560107"},"aspect_ratio":1.0,"height":1000,"media_type":"image","src":"\/\/www.thebirthstore.com.au\/cdn\/shop\/files\/convertible-romper-with-frill-snuggle-hunny-3806089.webp?v=1763560107","width":1000},{"alt":"Convertible Romper with Frill - The Birth Store - Snuggle Hunny","id":30051711647933,"position":4,"preview_image":{"aspect_ratio":1.0,"height":1000,"width":1000,"src":"\/\/www.thebirthstore.com.au\/cdn\/shop\/files\/convertible-romper-with-frill-8224224.jpg?v=1763560107"},"aspect_ratio":1.0,"height":1000,"media_type":"image","src":"\/\/www.thebirthstore.com.au\/cdn\/shop\/files\/convertible-romper-with-frill-8224224.jpg?v=1763560107","width":1000},{"alt":"Convertible Romper with Frill - The Birth Store - Snuggle Hunny","id":30051602202813,"position":5,"preview_image":{"aspect_ratio":1.0,"height":2048,"width":2048,"src":"\/\/www.thebirthstore.com.au\/cdn\/shop\/files\/convertible-romper-with-frill-1184529.jpg?v=1763560107"},"aspect_ratio":1.0,"height":2048,"media_type":"image","src":"\/\/www.thebirthstore.com.au\/cdn\/shop\/files\/convertible-romper-with-frill-1184529.jpg?v=1763560107","width":2048},{"alt":"Convertible Romper with Frill - The Birth Store - Snuggle Hunny","id":30051602923709,"position":6,"preview_image":{"aspect_ratio":1.0,"height":2048,"width":2048,"src":"\/\/www.thebirthstore.com.au\/cdn\/shop\/files\/convertible-romper-with-frill-1426750.jpg?v=1763560107"},"aspect_ratio":1.0,"height":2048,"media_type":"image","src":"\/\/www.thebirthstore.com.au\/cdn\/shop\/files\/convertible-romper-with-frill-1426750.jpg?v=1763560107","width":2048},{"alt":"Convertible Romper with Frill - The Birth Store - Snuggle Hunny","id":30051622256829,"position":7,"preview_image":{"aspect_ratio":1.0,"height":1000,"width":1000,"src":"\/\/www.thebirthstore.com.au\/cdn\/shop\/files\/convertible-romper-with-frill-3982696.jpg?v=1763560107"},"aspect_ratio":1.0,"height":1000,"media_type":"image","src":"\/\/www.thebirthstore.com.au\/cdn\/shop\/files\/convertible-romper-with-frill-3982696.jpg?v=1763560107","width":1000},{"alt":"Convertible Romper with Frill | Snuggle Hunny - The Birth Store - Snuggle Hunny","id":29842549604541,"position":8,"preview_image":{"aspect_ratio":1.0,"height":1000,"width":1000,"src":"\/\/www.thebirthstore.com.au\/cdn\/shop\/files\/convertible-romper-with-frill-snuggle-hunny-4824830.webp?v=1763560107"},"aspect_ratio":1.0,"height":1000,"media_type":"image","src":"\/\/www.thebirthstore.com.au\/cdn\/shop\/files\/convertible-romper-with-frill-snuggle-hunny-4824830.webp?v=1763560107","width":1000},{"alt":"Convertible Romper with Frill - The Birth Store - Snuggle Hunny","id":30051721478333,"position":9,"preview_image":{"aspect_ratio":1.0,"height":1000,"width":1000,"src":"\/\/www.thebirthstore.com.au\/cdn\/shop\/files\/convertible-romper-with-frill-6410603.jpg?v=1763560107"},"aspect_ratio":1.0,"height":1000,"media_type":"image","src":"\/\/www.thebirthstore.com.au\/cdn\/shop\/files\/convertible-romper-with-frill-6410603.jpg?v=1763560107","width":1000},{"alt":"Convertible Romper with Frill | Snuggle Hunny - The Birth Store - Snuggle Hunny","id":29998867447997,"position":10,"preview_image":{"aspect_ratio":1.0,"height":1000,"width":1000,"src":"\/\/www.thebirthstore.com.au\/cdn\/shop\/files\/convertible-romper-with-frill-snuggle-hunny-5388430.webp?v=1763560107"},"aspect_ratio":1.0,"height":1000,"media_type":"image","src":"\/\/www.thebirthstore.com.au\/cdn\/shop\/files\/convertible-romper-with-frill-snuggle-hunny-5388430.webp?v=1763560107","width":1000},{"alt":"Convertible Romper with Frill - The Birth Store - Snuggle Hunny","id":30039782523069,"position":11,"preview_image":{"aspect_ratio":1.0,"height":1000,"width":1000,"src":"\/\/www.thebirthstore.com.au\/cdn\/shop\/files\/convertible-romper-with-frill-9382375.jpg?v=1763560107"},"aspect_ratio":1.0,"height":1000,"media_type":"image","src":"\/\/www.thebirthstore.com.au\/cdn\/shop\/files\/convertible-romper-with-frill-9382375.jpg?v=1763560107","width":1000},{"alt":"Convertible Romper with Frill - The Birth Store - Snuggle Hunny","id":30039778656445,"position":12,"preview_image":{"aspect_ratio":1.0,"height":1000,"width":1000,"src":"\/\/www.thebirthstore.com.au\/cdn\/shop\/files\/convertible-romper-with-frill-8599558.jpg?v=1763560107"},"aspect_ratio":1.0,"height":1000,"media_type":"image","src":"\/\/www.thebirthstore.com.au\/cdn\/shop\/files\/convertible-romper-with-frill-8599558.jpg?v=1763560107","width":1000},{"alt":"Convertible Romper with Frill | Snuggle Hunny - The Birth Store - Snuggle Hunny","id":29842428428477,"position":13,"preview_image":{"aspect_ratio":1.0,"height":1000,"width":1000,"src":"\/\/www.thebirthstore.com.au\/cdn\/shop\/files\/convertible-romper-with-frill-snuggle-hunny-5671701.webp?v=1763560107"},"aspect_ratio":1.0,"height":1000,"media_type":"image","src":"\/\/www.thebirthstore.com.au\/cdn\/shop\/files\/convertible-romper-with-frill-snuggle-hunny-5671701.webp?v=1763560107","width":1000},{"alt":"Convertible Romper with Frill | Snuggle Hunny - The Birth Store - Snuggle Hunny","id":29842456379581,"position":14,"preview_image":{"aspect_ratio":1.0,"height":1000,"width":1000,"src":"\/\/www.thebirthstore.com.au\/cdn\/shop\/files\/convertible-romper-with-frill-snuggle-hunny-2268822.webp?v=1763560107"},"aspect_ratio":1.0,"height":1000,"media_type":"image","src":"\/\/www.thebirthstore.com.au\/cdn\/shop\/files\/convertible-romper-with-frill-snuggle-hunny-2268822.webp?v=1763560107","width":1000},{"alt":"Convertible Romper with Frill | Snuggle Hunny - The Birth Store - Snuggle Hunny","id":29842578145469,"position":15,"preview_image":{"aspect_ratio":1.0,"height":1000,"width":1000,"src":"\/\/www.thebirthstore.com.au\/cdn\/shop\/files\/convertible-romper-with-frill-snuggle-hunny-7104413.webp?v=1763560107"},"aspect_ratio":1.0,"height":1000,"media_type":"image","src":"\/\/www.thebirthstore.com.au\/cdn\/shop\/files\/convertible-romper-with-frill-snuggle-hunny-7104413.webp?v=1763560107","width":1000},{"alt":"Convertible Romper with Frill | Snuggle Hunny - The Birth Store - Snuggle Hunny","id":29842589581501,"position":16,"preview_image":{"aspect_ratio":1.0,"height":1000,"width":1000,"src":"\/\/www.thebirthstore.com.au\/cdn\/shop\/files\/convertible-romper-with-frill-snuggle-hunny-1620669.webp?v=1763560107"},"aspect_ratio":1.0,"height":1000,"media_type":"image","src":"\/\/www.thebirthstore.com.au\/cdn\/shop\/files\/convertible-romper-with-frill-snuggle-hunny-1620669.webp?v=1763560107","width":1000},{"alt":"Convertible Romper with Frill | Snuggle Hunny - The Birth Store - Snuggle Hunny","id":29842618777789,"position":17,"preview_image":{"aspect_ratio":1.0,"height":1000,"width":1000,"src":"\/\/www.thebirthstore.com.au\/cdn\/shop\/files\/convertible-romper-with-frill-snuggle-hunny-2573567.webp?v=1763560107"},"aspect_ratio":1.0,"height":1000,"media_type":"image","src":"\/\/www.thebirthstore.com.au\/cdn\/shop\/files\/convertible-romper-with-frill-snuggle-hunny-2573567.webp?v=1763560107","width":1000},{"alt":"Convertible Romper with Frill | Snuggle Hunny - The Birth Store - Snuggle Hunny","id":29998798962877,"position":18,"preview_image":{"aspect_ratio":1.0,"height":1000,"width":1000,"src":"\/\/www.thebirthstore.com.au\/cdn\/shop\/files\/convertible-romper-with-frill-snuggle-hunny-1008289.webp?v=1763560107"},"aspect_ratio":1.0,"height":1000,"media_type":"image","src":"\/\/www.thebirthstore.com.au\/cdn\/shop\/files\/convertible-romper-with-frill-snuggle-hunny-1008289.webp?v=1763560107","width":1000},{"alt":"Convertible Romper with Frill | Snuggle Hunny - The Birth Store - Snuggle Hunny","id":29998816690365,"position":19,"preview_image":{"aspect_ratio":1.0,"height":1000,"width":1000,"src":"\/\/www.thebirthstore.com.au\/cdn\/shop\/files\/convertible-romper-with-frill-snuggle-hunny-1912785.webp?v=1763560107"},"aspect_ratio":1.0,"height":1000,"media_type":"image","src":"\/\/www.thebirthstore.com.au\/cdn\/shop\/files\/convertible-romper-with-frill-snuggle-hunny-1912785.webp?v=1763560107","width":1000},{"alt":"Convertible Romper with Frill | Snuggle Hunny - The Birth Store - Snuggle Hunny","id":29998834122941,"position":20,"preview_image":{"aspect_ratio":1.0,"height":1000,"width":1000,"src":"\/\/www.thebirthstore.com.au\/cdn\/shop\/files\/convertible-romper-with-frill-snuggle-hunny-7395412.webp?v=1763560107"},"aspect_ratio":1.0,"height":1000,"media_type":"image","src":"\/\/www.thebirthstore.com.au\/cdn\/shop\/files\/convertible-romper-with-frill-snuggle-hunny-7395412.webp?v=1763560107","width":1000},{"alt":"Convertible Romper with Frill | Snuggle Hunny - The Birth Store - Snuggle Hunny","id":29998841299133,"position":21,"preview_image":{"aspect_ratio":1.0,"height":1000,"width":1000,"src":"\/\/www.thebirthstore.com.au\/cdn\/shop\/files\/convertible-romper-with-frill-snuggle-hunny-7332308.webp?v=1763560107"},"aspect_ratio":1.0,"height":1000,"media_type":"image","src":"\/\/www.thebirthstore.com.au\/cdn\/shop\/files\/convertible-romper-with-frill-snuggle-hunny-7332308.webp?v=1763560107","width":1000}]
{"item":{"id":7862826434749,"title":"Deluxe Lactation Mug Cake Mix - Single Serve","handle":"deluxe-lactation-mug-cake-mix-single-serve","description":"\u003cp data-mce-fragment=\"1\"\u003eOur devilishly decadent new mug cake mix is sure to be a crowd favourite! 5 single serve sachets individually packed into a money-saving box, this is the perfect treat for dessert loving mamas to get that milk flowing.\u003c\/p\u003e\n\u003cp data-mce-fragment=\"1\"\u003eSweet, but not too sweet, this mug cake mix ticks allergy boxes being DAIRY FREE and SOY FREE!\u003c\/p\u003e\n\u003cp data-mce-fragment=\"1\"\u003eEach sachet contains a single serve mug cake mix only needing two simple staple pantry\/fridge items - milk (of your choice) and oil (of your choice).\u003c\/p\u003e\n\u003cp data-mce-fragment=\"1\"\u003eThrow this bad boy in the microwave and in 60 SECONDS you have yourself a milk-boosting dessert.\u003c\/p\u003e\n\u003cp data-mce-fragment=\"1\"\u003eIngredients: Wheat flour, Australian cane sugar, Cocoa, Brewers yeast, Baking powder.\u003c\/p\u003e","published_at":"2024-08-17T12:50:21+08:00","created_at":"2024-08-17T12:50:21+08:00","vendor":"Made to Milk","type":"","tags":["Breastfeeding","Lactation Products","Mum","Post-Partum","Pregnancy"],"price":650,"price_min":650,"price_max":650,"available":true,"price_varies":false,"compare_at_price":null,"compare_at_price_min":0,"compare_at_price_max":0,"compare_at_price_varies":false,"variants":[{"id":44598930112701,"title":"Blondie Mug Cake Mix","option1":"Blondie Mug Cake Mix","option2":null,"option3":null,"sku":"","requires_shipping":true,"taxable":false,"featured_image":{"id":38738729730237,"product_id":7862826434749,"position":9,"created_at":"2025-11-02T22:36:56+08:00","updated_at":"2025-11-03T12:22:53+08:00","alt":"Deluxe Lactation Mug Cake Mix - Single Serve - The Birth Store - Made to Milk","width":1080,"height":1080,"src":"\/\/www.thebirthstore.com.au\/cdn\/shop\/files\/deluxe-lactation-mug-cake-mix-single-serve-4257651.png?v=1762143773","variant_ids":[44598930112701]},"available":true,"name":"Deluxe Lactation Mug Cake Mix - Single Serve - Blondie Mug Cake Mix","public_title":"Blondie Mug Cake Mix","options":["Blondie Mug Cake Mix"],"price":650,"weight":56,"compare_at_price":null,"inventory_management":"shopify","barcode":"88160701","featured_media":{"alt":"Deluxe Lactation Mug Cake Mix - Single Serve - The Birth Store - Made to Milk","id":29988439523517,"position":9,"preview_image":{"aspect_ratio":1.0,"height":1080,"width":1080,"src":"\/\/www.thebirthstore.com.au\/cdn\/shop\/files\/deluxe-lactation-mug-cake-mix-single-serve-4257651.png?v=1762143773"}},"requires_selling_plan":false,"selling_plan_allocations":[]},{"id":44598930145469,"title":"Chocolate Mug Cake Mix","option1":"Chocolate Mug Cake Mix","option2":null,"option3":null,"sku":"","requires_shipping":true,"taxable":false,"featured_image":{"id":38404723605693,"product_id":7862826434749,"position":1,"created_at":"2025-09-25T21:07:13+08:00","updated_at":"2025-09-26T03:43:40+08:00","alt":"Deluxe Lactation Mug Cake Mix - Single Serve - The Birth Store - Made to Milk","width":1080,"height":1080,"src":"\/\/www.thebirthstore.com.au\/cdn\/shop\/files\/deluxe-lactation-mug-cake-mix-single-serve-5001791.png?v=1758829420","variant_ids":[44598930145469]},"available":true,"name":"Deluxe Lactation Mug Cake Mix - Single Serve - Chocolate Mug Cake Mix","public_title":"Chocolate Mug Cake Mix","options":["Chocolate Mug Cake Mix"],"price":650,"weight":56,"compare_at_price":null,"inventory_management":"shopify","barcode":"30145469","featured_media":{"alt":"Deluxe Lactation Mug Cake Mix - Single Serve - The Birth Store - Made to Milk","id":29672056225981,"position":1,"preview_image":{"aspect_ratio":1.0,"height":1080,"width":1080,"src":"\/\/www.thebirthstore.com.au\/cdn\/shop\/files\/deluxe-lactation-mug-cake-mix-single-serve-5001791.png?v=1758829420"}},"requires_selling_plan":false,"selling_plan_allocations":[]}],"images":["\/\/www.thebirthstore.com.au\/cdn\/shop\/files\/deluxe-lactation-mug-cake-mix-single-serve-5001791.png?v=1758829420","\/\/www.thebirthstore.com.au\/cdn\/shop\/files\/deluxe-lactation-mug-cake-mix-single-serve-488756.jpg?v=1758805663","\/\/www.thebirthstore.com.au\/cdn\/shop\/files\/deluxe-lactation-mug-cake-mix-single-serve-521372.jpg?v=1758805663","\/\/www.thebirthstore.com.au\/cdn\/shop\/files\/deluxe-lactation-mug-cake-mix-single-serve-509306.jpg?v=1758805663","\/\/www.thebirthstore.com.au\/cdn\/shop\/files\/deluxe-lactation-mug-cake-mix-single-serve-196575.webp?v=1758805663","\/\/www.thebirthstore.com.au\/cdn\/shop\/files\/deluxe-lactation-mug-cake-mix-single-serve-268481.jpg?v=1758805663","\/\/www.thebirthstore.com.au\/cdn\/shop\/files\/deluxe-lactation-mug-cake-mix-single-serve-993017.jpg?v=1758805663","\/\/www.thebirthstore.com.au\/cdn\/shop\/files\/deluxe-lactation-mug-cake-mix-single-serve-546456.jpg?v=1758805663","\/\/www.thebirthstore.com.au\/cdn\/shop\/files\/deluxe-lactation-mug-cake-mix-single-serve-4257651.png?v=1762143773"],"featured_image":"\/\/www.thebirthstore.com.au\/cdn\/shop\/files\/deluxe-lactation-mug-cake-mix-single-serve-5001791.png?v=1758829420","options":["Flavour"],"media":[{"alt":"Deluxe Lactation Mug Cake Mix - Single Serve - The Birth Store - Made to Milk","id":29672056225981,"position":1,"preview_image":{"aspect_ratio":1.0,"height":1080,"width":1080,"src":"\/\/www.thebirthstore.com.au\/cdn\/shop\/files\/deluxe-lactation-mug-cake-mix-single-serve-5001791.png?v=1758829420"},"aspect_ratio":1.0,"height":1080,"media_type":"image","src":"\/\/www.thebirthstore.com.au\/cdn\/shop\/files\/deluxe-lactation-mug-cake-mix-single-serve-5001791.png?v=1758829420","width":1080},{"alt":"Deluxe Lactation Mug Cake Mix - Single Serve - The Birth Store - Made to Milk","id":27561192095933,"position":2,"preview_image":{"aspect_ratio":0.667,"height":1080,"width":720,"src":"\/\/www.thebirthstore.com.au\/cdn\/shop\/files\/deluxe-lactation-mug-cake-mix-single-serve-488756.jpg?v=1758805663"},"aspect_ratio":0.667,"height":1080,"media_type":"image","src":"\/\/www.thebirthstore.com.au\/cdn\/shop\/files\/deluxe-lactation-mug-cake-mix-single-serve-488756.jpg?v=1758805663","width":720},{"alt":"Deluxe Lactation Mug Cake Mix - Single Serve - The Birth Store - Made to Milk","id":27561192128701,"position":3,"preview_image":{"aspect_ratio":0.667,"height":1080,"width":720,"src":"\/\/www.thebirthstore.com.au\/cdn\/shop\/files\/deluxe-lactation-mug-cake-mix-single-serve-521372.jpg?v=1758805663"},"aspect_ratio":0.667,"height":1080,"media_type":"image","src":"\/\/www.thebirthstore.com.au\/cdn\/shop\/files\/deluxe-lactation-mug-cake-mix-single-serve-521372.jpg?v=1758805663","width":720},{"alt":"Deluxe Lactation Mug Cake Mix - Single Serve - The Birth Store - Made to Milk","id":27561192161469,"position":4,"preview_image":{"aspect_ratio":0.667,"height":1080,"width":720,"src":"\/\/www.thebirthstore.com.au\/cdn\/shop\/files\/deluxe-lactation-mug-cake-mix-single-serve-509306.jpg?v=1758805663"},"aspect_ratio":0.667,"height":1080,"media_type":"image","src":"\/\/www.thebirthstore.com.au\/cdn\/shop\/files\/deluxe-lactation-mug-cake-mix-single-serve-509306.jpg?v=1758805663","width":720},{"alt":"Deluxe Lactation Mug Cake Mix - Single Serve - The Birth Store - Made to Milk","id":27561192194237,"position":5,"preview_image":{"aspect_ratio":1.0,"height":1006,"width":1006,"src":"\/\/www.thebirthstore.com.au\/cdn\/shop\/files\/deluxe-lactation-mug-cake-mix-single-serve-196575.webp?v=1758805663"},"aspect_ratio":1.0,"height":1006,"media_type":"image","src":"\/\/www.thebirthstore.com.au\/cdn\/shop\/files\/deluxe-lactation-mug-cake-mix-single-serve-196575.webp?v=1758805663","width":1006},{"alt":"Deluxe Lactation Mug Cake Mix - Single Serve - The Birth Store - Made to Milk","id":27844281794749,"position":6,"preview_image":{"aspect_ratio":1.0,"height":540,"width":540,"src":"\/\/www.thebirthstore.com.au\/cdn\/shop\/files\/deluxe-lactation-mug-cake-mix-single-serve-268481.jpg?v=1758805663"},"aspect_ratio":1.0,"height":540,"media_type":"image","src":"\/\/www.thebirthstore.com.au\/cdn\/shop\/files\/deluxe-lactation-mug-cake-mix-single-serve-268481.jpg?v=1758805663","width":540},{"alt":"Deluxe Lactation Mug Cake Mix - Single Serve - The Birth Store - Made to Milk","id":27844281827517,"position":7,"preview_image":{"aspect_ratio":1.0,"height":540,"width":540,"src":"\/\/www.thebirthstore.com.au\/cdn\/shop\/files\/deluxe-lactation-mug-cake-mix-single-serve-993017.jpg?v=1758805663"},"aspect_ratio":1.0,"height":540,"media_type":"image","src":"\/\/www.thebirthstore.com.au\/cdn\/shop\/files\/deluxe-lactation-mug-cake-mix-single-serve-993017.jpg?v=1758805663","width":540},{"alt":"Deluxe Lactation Mug Cake Mix - Single Serve - The Birth Store - Made to Milk","id":27844281860285,"position":8,"preview_image":{"aspect_ratio":1.0,"height":540,"width":540,"src":"\/\/www.thebirthstore.com.au\/cdn\/shop\/files\/deluxe-lactation-mug-cake-mix-single-serve-546456.jpg?v=1758805663"},"aspect_ratio":1.0,"height":540,"media_type":"image","src":"\/\/www.thebirthstore.com.au\/cdn\/shop\/files\/deluxe-lactation-mug-cake-mix-single-serve-546456.jpg?v=1758805663","width":540},{"alt":"Deluxe Lactation Mug Cake Mix - Single Serve - The Birth Store - Made to Milk","id":29988439523517,"position":9,"preview_image":{"aspect_ratio":1.0,"height":1080,"width":1080,"src":"\/\/www.thebirthstore.com.au\/cdn\/shop\/files\/deluxe-lactation-mug-cake-mix-single-serve-4257651.png?v=1762143773"},"aspect_ratio":1.0,"height":1080,"media_type":"image","src":"\/\/www.thebirthstore.com.au\/cdn\/shop\/files\/deluxe-lactation-mug-cake-mix-single-serve-4257651.png?v=1762143773","width":1080}],"requires_selling_plan":false,"selling_plan_groups":[],"content":"\u003cp data-mce-fragment=\"1\"\u003eOur devilishly decadent new mug cake mix is sure to be a crowd favourite! 5 single serve sachets individually packed into a money-saving box, this is the perfect treat for dessert loving mamas to get that milk flowing.\u003c\/p\u003e\n\u003cp data-mce-fragment=\"1\"\u003eSweet, but not too sweet, this mug cake mix ticks allergy boxes being DAIRY FREE and SOY FREE!\u003c\/p\u003e\n\u003cp data-mce-fragment=\"1\"\u003eEach sachet contains a single serve mug cake mix only needing two simple staple pantry\/fridge items - milk (of your choice) and oil (of your choice).\u003c\/p\u003e\n\u003cp data-mce-fragment=\"1\"\u003eThrow this bad boy in the microwave and in 60 SECONDS you have yourself a milk-boosting dessert.\u003c\/p\u003e\n\u003cp data-mce-fragment=\"1\"\u003eIngredients: Wheat flour, Australian cane sugar, Cocoa, Brewers yeast, Baking powder.\u003c\/p\u003e"},"options":[{"name":"Flavour","position":1,"values":["Blondie Mug Cake Mix","Chocolate Mug Cake Mix"]}],"custom_metafields":{},"metafields":{"badge":"\u003cdiv style='display:none' class='jdgm-prev-badge' data-average-rating='0.00' data-number-of-reviews='0' data-number-of-questions='0'\u003e \u003cspan class='jdgm-prev-badge__stars' data-score='0.00' tabindex='0' aria-label='0.00 stars' role='button'\u003e \u003cspan class='jdgm-star jdgm--off'\u003e\u003c\/span\u003e\u003cspan class='jdgm-star jdgm--off'\u003e\u003c\/span\u003e\u003cspan class='jdgm-star jdgm--off'\u003e\u003c\/span\u003e\u003cspan class='jdgm-star jdgm--off'\u003e\u003c\/span\u003e\u003cspan class='jdgm-star jdgm--off'\u003e\u003c\/span\u003e \u003c\/span\u003e \u003cspan class='jdgm-prev-badge__text'\u003e No reviews \u003c\/span\u003e \u003c\/div\u003e","widget":"\u003cdiv class='jdgm-rev-widg' data-updated-at='2025-06-13T16:13:40Z' data-average-rating='0.00' data-number-of-reviews='0' data-number-of-questions='0'\u003e \u003cstyle class='jdgm-temp-hiding-style'\u003e.jdgm-rev-widg{ display: none }\u003c\/style\u003e \u003cdiv class='jdgm-rev-widg__header'\u003e \u003ch2 class='jdgm-rev-widg__title'\u003eCustomer Reviews\u003c\/h2\u003e \u003cdiv class='jdgm-rev-widg__summary'\u003e \u003cdiv class='jdgm-rev-widg__summary-stars' aria-label='Average rating is 0.00 stars' role='img'\u003e \u003cspan class='jdgm-star jdgm--off'\u003e\u003c\/span\u003e\u003cspan class='jdgm-star jdgm--off'\u003e\u003c\/span\u003e\u003cspan class='jdgm-star jdgm--off'\u003e\u003c\/span\u003e\u003cspan class='jdgm-star jdgm--off'\u003e\u003c\/span\u003e\u003cspan class='jdgm-star jdgm--off'\u003e\u003c\/span\u003e \u003c\/div\u003e \u003cdiv class='jdgm-rev-widg__summary-text'\u003eBe the first to write a review\u003c\/div\u003e \u003c\/div\u003e \u003ca style='display: none' href='#' class='jdgm-write-rev-link' role='button'\u003eWrite a review\u003c\/a\u003e \u003cdiv class='jdgm-histogram jdgm-temp-hidden'\u003e \u003cdiv class='jdgm-histogram__row' data-rating='5' data-frequency='0' data-percentage='0'\u003e \u003cdiv class='jdgm-histogram__star' role='button' aria-label=\"0% (0) reviews with 5 star rating\" tabindex='0' \u003e\u003cspan class='jdgm-star jdgm--on'\u003e\u003c\/span\u003e\u003cspan class='jdgm-star jdgm--on'\u003e\u003c\/span\u003e\u003cspan class='jdgm-star jdgm--on'\u003e\u003c\/span\u003e\u003cspan class='jdgm-star jdgm--on'\u003e\u003c\/span\u003e\u003cspan class='jdgm-star jdgm--on'\u003e\u003c\/span\u003e\u003c\/div\u003e \u003cdiv class='jdgm-histogram__bar'\u003e \u003cdiv class='jdgm-histogram__bar-content' style='width: 0%;'\u003e \u003c\/div\u003e \u003c\/div\u003e \u003cdiv class='jdgm-histogram__percentage'\u003e0%\u003c\/div\u003e \u003cdiv class='jdgm-histogram__frequency'\u003e(0)\u003c\/div\u003e \u003c\/div\u003e \u003cdiv class='jdgm-histogram__row' data-rating='4' data-frequency='0' data-percentage='0'\u003e \u003cdiv class='jdgm-histogram__star' role='button' aria-label=\"0% (0) reviews with 4 star rating\" tabindex='0' \u003e\u003cspan class='jdgm-star jdgm--on'\u003e\u003c\/span\u003e\u003cspan class='jdgm-star jdgm--on'\u003e\u003c\/span\u003e\u003cspan class='jdgm-star jdgm--on'\u003e\u003c\/span\u003e\u003cspan class='jdgm-star jdgm--on'\u003e\u003c\/span\u003e\u003cspan class='jdgm-star jdgm--off'\u003e\u003c\/span\u003e\u003c\/div\u003e \u003cdiv class='jdgm-histogram__bar'\u003e \u003cdiv class='jdgm-histogram__bar-content' style='width: 0%;'\u003e \u003c\/div\u003e \u003c\/div\u003e \u003cdiv class='jdgm-histogram__percentage'\u003e0%\u003c\/div\u003e \u003cdiv class='jdgm-histogram__frequency'\u003e(0)\u003c\/div\u003e \u003c\/div\u003e \u003cdiv class='jdgm-histogram__row' data-rating='3' data-frequency='0' data-percentage='0'\u003e \u003cdiv class='jdgm-histogram__star' role='button' aria-label=\"0% (0) reviews with 3 star rating\" tabindex='0' \u003e\u003cspan class='jdgm-star jdgm--on'\u003e\u003c\/span\u003e\u003cspan class='jdgm-star jdgm--on'\u003e\u003c\/span\u003e\u003cspan class='jdgm-star jdgm--on'\u003e\u003c\/span\u003e\u003cspan class='jdgm-star jdgm--off'\u003e\u003c\/span\u003e\u003cspan class='jdgm-star jdgm--off'\u003e\u003c\/span\u003e\u003c\/div\u003e \u003cdiv class='jdgm-histogram__bar'\u003e \u003cdiv class='jdgm-histogram__bar-content' style='width: 0%;'\u003e \u003c\/div\u003e \u003c\/div\u003e \u003cdiv class='jdgm-histogram__percentage'\u003e0%\u003c\/div\u003e \u003cdiv class='jdgm-histogram__frequency'\u003e(0)\u003c\/div\u003e \u003c\/div\u003e \u003cdiv class='jdgm-histogram__row' data-rating='2' data-frequency='0' data-percentage='0'\u003e \u003cdiv class='jdgm-histogram__star' role='button' aria-label=\"0% (0) reviews with 2 star rating\" tabindex='0' \u003e\u003cspan class='jdgm-star jdgm--on'\u003e\u003c\/span\u003e\u003cspan class='jdgm-star jdgm--on'\u003e\u003c\/span\u003e\u003cspan class='jdgm-star jdgm--off'\u003e\u003c\/span\u003e\u003cspan class='jdgm-star jdgm--off'\u003e\u003c\/span\u003e\u003cspan class='jdgm-star jdgm--off'\u003e\u003c\/span\u003e\u003c\/div\u003e \u003cdiv class='jdgm-histogram__bar'\u003e \u003cdiv class='jdgm-histogram__bar-content' style='width: 0%;'\u003e \u003c\/div\u003e \u003c\/div\u003e \u003cdiv class='jdgm-histogram__percentage'\u003e0%\u003c\/div\u003e \u003cdiv class='jdgm-histogram__frequency'\u003e(0)\u003c\/div\u003e \u003c\/div\u003e \u003cdiv class='jdgm-histogram__row' data-rating='1' data-frequency='0' data-percentage='0'\u003e \u003cdiv class='jdgm-histogram__star' role='button' aria-label=\"0% (0) reviews with 1 star rating\" tabindex='0' \u003e\u003cspan class='jdgm-star jdgm--on'\u003e\u003c\/span\u003e\u003cspan class='jdgm-star jdgm--off'\u003e\u003c\/span\u003e\u003cspan class='jdgm-star jdgm--off'\u003e\u003c\/span\u003e\u003cspan class='jdgm-star jdgm--off'\u003e\u003c\/span\u003e\u003cspan class='jdgm-star jdgm--off'\u003e\u003c\/span\u003e\u003c\/div\u003e \u003cdiv class='jdgm-histogram__bar'\u003e \u003cdiv class='jdgm-histogram__bar-content' style='width: 0%;'\u003e \u003c\/div\u003e \u003c\/div\u003e \u003cdiv class='jdgm-histogram__percentage'\u003e0%\u003c\/div\u003e \u003cdiv class='jdgm-histogram__frequency'\u003e(0)\u003c\/div\u003e \u003c\/div\u003e \u003cdiv class='jdgm-histogram__row jdgm-histogram__clear-filter' data-rating=null tabindex='0'\u003e\u003c\/div\u003e \u003c\/div\u003e \u003cdiv class='jdgm-rev-widg__sort-wrapper'\u003e\u003c\/div\u003e \u003c\/div\u003e \u003cdiv class='jdgm-rev-widg__body'\u003e \u003cdiv class='jdgm-rev-widg__reviews'\u003e\u003c\/div\u003e \u003cdiv class='jdgm-paginate' data-per-page='10' data-url='https:\/\/api.judge.me\/reviews\/reviews_for_widget' style=\"display: none;\"\u003e\u003c\/div\u003e \u003c\/div\u003e \u003cdiv class='jdgm-rev-widg__paginate-spinner-wrapper'\u003e \u003cdiv class='jdgm-spinner'\u003e\u003c\/div\u003e \u003c\/div\u003e \u003c\/div\u003e"},"collections":[{"id":281712427197,"handle":"breastfeeding","title":"Breastfeeding","updated_at":"2025-12-28T20:10:01+08:00","body_html":"","published_at":"2021-12-20T14:19:33+08:00","sort_order":"best-selling","template_suffix":"breastfeeding-collection","disjunctive":false,"rules":[{"column":"tag","relation":"equals","condition":"Breastfeeding"}],"published_scope":"global","image":{"created_at":"2024-05-06T11:59:34+08:00","alt":"Breastfeeding - The Birth Store","width":620,"height":635,"src":"\/\/www.thebirthstore.com.au\/cdn\/shop\/collections\/breastfeeding-793872.jpg?v=1714967974"}},{"id":261657460925,"handle":"buy","title":"Buy","updated_at":"2025-12-28T20:10:01+08:00","body_html":"\u003cp\u003eBrowse all of our pregnancy, labour \u0026amp; birth, postpartum and baby essentials here.\u003cbr\u003e\u003c\/p\u003e\n\u003cp\u003e\u003cspan\u003eYou can even buy now and pay later with Afterpay!\u003c\/span\u003e\u003c\/p\u003e","published_at":"2021-03-10T12:05:31+08:00","sort_order":"best-selling","template_suffix":"shop-all-collection","disjunctive":false,"rules":[{"column":"title","relation":"not_contains","condition":"Hire"}],"published_scope":"global","image":{"created_at":"2024-05-06T11:59:42+08:00","alt":"Buy - The Birth Store","width":2048,"height":2048,"src":"\/\/www.thebirthstore.com.au\/cdn\/shop\/collections\/buy-964856.jpg?v=1714967982"}},{"id":292919476413,"handle":"lactation-products","title":"Lactation Products","updated_at":"2025-12-28T20:10:01+08:00","body_html":"","published_at":"2023-03-22T12:22:41+08:00","sort_order":"best-selling","template_suffix":"lactation-products-collec","disjunctive":false,"rules":[{"column":"tag","relation":"equals","condition":"Lactation Products"}],"published_scope":"global","image":{"created_at":"2024-05-06T12:00:19+08:00","alt":"Lactation Products - The Birth Store","width":1034,"height":922,"src":"\/\/www.thebirthstore.com.au\/cdn\/shop\/collections\/lactation-products-752907.jpg?v=1714968019"}},{"id":261658083517,"handle":"post-partum","title":"Postpartum","updated_at":"2025-12-28T20:10:01+08:00","body_html":"\u003cp\u003eShop your postpartum and hospital bag essentials below. Looking for something we don't currently stock? Please reach out and let us know.\u003cbr\u003e\u003c\/p\u003e\n\u003cp\u003e\u003cspan\u003eYou can even buy now and pay later with Afterpay!\u003c\/span\u003e\u003c\/p\u003e","published_at":"2021-03-10T12:33:47+08:00","sort_order":"best-selling","template_suffix":"postpartum-collection","disjunctive":false,"rules":[{"column":"tag","relation":"equals","condition":"Post-Partum"}],"published_scope":"global","image":{"created_at":"2024-05-06T12:00:36+08:00","alt":"Postpartum - The Birth Store","width":611,"height":702,"src":"\/\/www.thebirthstore.com.au\/cdn\/shop\/collections\/postpartum-150119.jpg?v=1714968037"}},{"id":261658149053,"handle":"pregnancy-and-maternity-products","title":"Pregnancy","updated_at":"2025-12-28T20:10:01+08:00","body_html":"\u003cp\u003eShop your pregnancy essentials below. Looking for something we don't currently stock? Please reach out and let us know.\u003cbr\u003e\u003c\/p\u003e\n\u003cp\u003e\u003cspan\u003eYou can even buy now and pay later with Afterpay!\u003c\/span\u003e\u003c\/p\u003e","published_at":"2021-03-10T12:34:22+08:00","sort_order":"best-selling","template_suffix":"pregnancy-collection","disjunctive":false,"rules":[{"column":"tag","relation":"equals","condition":"Pregnancy"}],"published_scope":"global","image":{"created_at":"2024-05-06T12:00:40+08:00","alt":"Pregnancy - The Birth Store","width":1024,"height":1536,"src":"\/\/www.thebirthstore.com.au\/cdn\/shop\/collections\/pregnancy-899677.jpg?v=1714968040"}},{"id":291456483517,"handle":"shop-all","title":"Shop All - Mum","updated_at":"2025-12-28T20:10:01+08:00","body_html":"","published_at":"2022-12-23T22:04:39+08:00","sort_order":"best-selling","template_suffix":"shop-all-collection","disjunctive":false,"rules":[{"column":"variant_price","relation":"greater_than","condition":"1"},{"column":"title","relation":"not_contains","condition":"Batteries"},{"column":"tag","relation":"equals","condition":"Mum"}],"published_scope":"global","image":{"created_at":"2024-05-06T12:00:54+08:00","alt":"Shop All - The Birth Store","width":1365,"height":2048,"src":"\/\/www.thebirthstore.com.au\/cdn\/shop\/collections\/shop-all-693176.jpg?v=1714968055"}},{"id":310045933757,"handle":"shop-all-sale","title":"Shop All Sale","updated_at":"2025-12-28T20:10:01+08:00","body_html":"","published_at":"2024-11-12T13:22:43+08:00","sort_order":"alpha-asc","template_suffix":"","disjunctive":true,"rules":[{"column":"tag","relation":"equals","condition":"Bundles"},{"column":"vendor","relation":"equals","condition":"Franjos Kitchen"},{"column":"vendor","relation":"equals","condition":"Adored Illustrations"},{"column":"vendor","relation":"equals","condition":"Amazing Oils"},{"column":"vendor","relation":"equals","condition":"Ice Ice Booby"},{"column":"vendor","relation":"equals","condition":"Made to Milk"},{"column":"vendor","relation":"equals","condition":"Milky Goodness"},{"column":"vendor","relation":"equals","condition":"Seasons of Mama"},{"column":"vendor","relation":"equals","condition":"Silverette"},{"column":"vendor","relation":"equals","condition":"Snuggle Hunny"},{"column":"vendor","relation":"equals","condition":"Yung Bod"},{"column":"vendor","relation":"equals","condition":"Bare Love"},{"column":"vendor","relation":"equals","condition":"Haakaa"},{"column":"vendor","relation":"equals","condition":"Mere Botanicals"},{"column":"vendor","relation":"equals","condition":"The Birth Store Hire"},{"column":"vendor","relation":"equals","condition":"The Birth Store"}],"published_scope":"global","image":{"created_at":"2024-11-13T10:58:16+08:00","alt":"Shop All Sale - The Birth Store","width":2048,"height":1365,"src":"\/\/www.thebirthstore.com.au\/cdn\/shop\/collections\/shop-all-sale-297361.jpg?v=1731466697"}}]}
[{"alt":"Deluxe Lactation Mug Cake Mix - Single Serve - The Birth Store - Made to Milk","id":29672056225981,"position":1,"preview_image":{"aspect_ratio":1.0,"height":1080,"width":1080,"src":"\/\/www.thebirthstore.com.au\/cdn\/shop\/files\/deluxe-lactation-mug-cake-mix-single-serve-5001791.png?v=1758829420"},"aspect_ratio":1.0,"height":1080,"media_type":"image","src":"\/\/www.thebirthstore.com.au\/cdn\/shop\/files\/deluxe-lactation-mug-cake-mix-single-serve-5001791.png?v=1758829420","width":1080},{"alt":"Deluxe Lactation Mug Cake Mix - Single Serve - The Birth Store - Made to Milk","id":27561192095933,"position":2,"preview_image":{"aspect_ratio":0.667,"height":1080,"width":720,"src":"\/\/www.thebirthstore.com.au\/cdn\/shop\/files\/deluxe-lactation-mug-cake-mix-single-serve-488756.jpg?v=1758805663"},"aspect_ratio":0.667,"height":1080,"media_type":"image","src":"\/\/www.thebirthstore.com.au\/cdn\/shop\/files\/deluxe-lactation-mug-cake-mix-single-serve-488756.jpg?v=1758805663","width":720},{"alt":"Deluxe Lactation Mug Cake Mix - Single Serve - The Birth Store - Made to Milk","id":27561192128701,"position":3,"preview_image":{"aspect_ratio":0.667,"height":1080,"width":720,"src":"\/\/www.thebirthstore.com.au\/cdn\/shop\/files\/deluxe-lactation-mug-cake-mix-single-serve-521372.jpg?v=1758805663"},"aspect_ratio":0.667,"height":1080,"media_type":"image","src":"\/\/www.thebirthstore.com.au\/cdn\/shop\/files\/deluxe-lactation-mug-cake-mix-single-serve-521372.jpg?v=1758805663","width":720},{"alt":"Deluxe Lactation Mug Cake Mix - Single Serve - The Birth Store - Made to Milk","id":27561192161469,"position":4,"preview_image":{"aspect_ratio":0.667,"height":1080,"width":720,"src":"\/\/www.thebirthstore.com.au\/cdn\/shop\/files\/deluxe-lactation-mug-cake-mix-single-serve-509306.jpg?v=1758805663"},"aspect_ratio":0.667,"height":1080,"media_type":"image","src":"\/\/www.thebirthstore.com.au\/cdn\/shop\/files\/deluxe-lactation-mug-cake-mix-single-serve-509306.jpg?v=1758805663","width":720},{"alt":"Deluxe Lactation Mug Cake Mix - Single Serve - The Birth Store - Made to Milk","id":27561192194237,"position":5,"preview_image":{"aspect_ratio":1.0,"height":1006,"width":1006,"src":"\/\/www.thebirthstore.com.au\/cdn\/shop\/files\/deluxe-lactation-mug-cake-mix-single-serve-196575.webp?v=1758805663"},"aspect_ratio":1.0,"height":1006,"media_type":"image","src":"\/\/www.thebirthstore.com.au\/cdn\/shop\/files\/deluxe-lactation-mug-cake-mix-single-serve-196575.webp?v=1758805663","width":1006},{"alt":"Deluxe Lactation Mug Cake Mix - Single Serve - The Birth Store - Made to Milk","id":27844281794749,"position":6,"preview_image":{"aspect_ratio":1.0,"height":540,"width":540,"src":"\/\/www.thebirthstore.com.au\/cdn\/shop\/files\/deluxe-lactation-mug-cake-mix-single-serve-268481.jpg?v=1758805663"},"aspect_ratio":1.0,"height":540,"media_type":"image","src":"\/\/www.thebirthstore.com.au\/cdn\/shop\/files\/deluxe-lactation-mug-cake-mix-single-serve-268481.jpg?v=1758805663","width":540},{"alt":"Deluxe Lactation Mug Cake Mix - Single Serve - The Birth Store - Made to Milk","id":27844281827517,"position":7,"preview_image":{"aspect_ratio":1.0,"height":540,"width":540,"src":"\/\/www.thebirthstore.com.au\/cdn\/shop\/files\/deluxe-lactation-mug-cake-mix-single-serve-993017.jpg?v=1758805663"},"aspect_ratio":1.0,"height":540,"media_type":"image","src":"\/\/www.thebirthstore.com.au\/cdn\/shop\/files\/deluxe-lactation-mug-cake-mix-single-serve-993017.jpg?v=1758805663","width":540},{"alt":"Deluxe Lactation Mug Cake Mix - Single Serve - The Birth Store - Made to Milk","id":27844281860285,"position":8,"preview_image":{"aspect_ratio":1.0,"height":540,"width":540,"src":"\/\/www.thebirthstore.com.au\/cdn\/shop\/files\/deluxe-lactation-mug-cake-mix-single-serve-546456.jpg?v=1758805663"},"aspect_ratio":1.0,"height":540,"media_type":"image","src":"\/\/www.thebirthstore.com.au\/cdn\/shop\/files\/deluxe-lactation-mug-cake-mix-single-serve-546456.jpg?v=1758805663","width":540},{"alt":"Deluxe Lactation Mug Cake Mix - Single Serve - The Birth Store - Made to Milk","id":29988439523517,"position":9,"preview_image":{"aspect_ratio":1.0,"height":1080,"width":1080,"src":"\/\/www.thebirthstore.com.au\/cdn\/shop\/files\/deluxe-lactation-mug-cake-mix-single-serve-4257651.png?v=1762143773"},"aspect_ratio":1.0,"height":1080,"media_type":"image","src":"\/\/www.thebirthstore.com.au\/cdn\/shop\/files\/deluxe-lactation-mug-cake-mix-single-serve-4257651.png?v=1762143773","width":1080}]
{"item":{"id":7322191462589,"title":"Disposable Nursing Pads","handle":"disposable-nursing-pads","description":"\u003cp data-mce-fragment=\"1\"\u003eIf you're breastfeeding, Haakaa Disposable Nursing Pads will help to keep you and your clothing dry to avoid milk stains during the day!\u003cbr data-mce-fragment=\"1\"\u003e\u003c\/p\u003e\n\u003cp data-mce-fragment=\"1\"\u003eThese Disposable Nursing Pads are designed with a special absorbent polymer and stay-dry lining to draw milk away from the skin and into the pad's core. They're low profile, giving you the confidence to wear them during the day without worrying about lumps and bumps under your clothes. \u003c\/p\u003e\n\u003cul\u003e\n\u003cli\u003eSuper-absorbent polymer material prevents leaks. \u003c\/li\u003e\n\u003cli\u003eSoft, stay-dry lining. \u003c\/li\u003e\n\u003cli\u003eButterfly-shaped for extra coverage. \u003c\/li\u003e\n\u003cli\u003eUltra-slim and lightweight.\u003c\/li\u003e\n\u003cli\u003eWaterproof tissue keeps clothing protected. \u003c\/li\u003e\n\u003cli\u003eTwo adhesive strips keep pad in place.\u003c\/li\u003e\n\u003cli\u003eDraws moisture away from the skin.\u003c\/li\u003e\n\u003cli\u003eMade with 100% natural materials.\u003c\/li\u003e\n\u003cli\u003eLow profile design for discreet and comfortable wear.\u003c\/li\u003e\n\u003cli\u003eContains 36 disposable pads in each pack.\u003c\/li\u003e\n\u003c\/ul\u003e\n\u003cp\u003e\u003cstrong\u003eDirections:\u003c\/strong\u003e\u003c\/p\u003e\n\u003col\u003e\n\u003cli\u003eOpen the individual pack and remove the pad.\u003c\/li\u003e\n\u003cli\u003eRemove backing tape.\u003c\/li\u003e\n\u003cli\u003ePlace pad into bra, with tapes positioned at the top and bottom facing outward (away from your skin).\u003c\/li\u003e\n\u003cli\u003ePress pad onto bra to secure. \u003c\/li\u003e\n\u003c\/ol\u003e\n\u003cp\u003e\u003cstrong\u003eCaution:\u003c\/strong\u003e\u003c\/p\u003e\n\u003cp\u003eReplace if this product shows any signs of damage. This product is not a toy. Do not use this product for anything other than its intended use. Adult use only. Keep out of the reach of children and pets. Do not store near any sharp objects. Store product in a cool, dry place and avoid direct sunlight. \u003cspan\u003e\u003c\/span\u003e\u003cspan\u003e\u003c\/span\u003e\u003cspan\u003e\u003c\/span\u003e\u003cspan\u003e\u003c\/span\u003e\u003c\/p\u003e\n\u003cdiv\u003e\n\u003carticle\u003e\n\u003csection\u003e\n\u003cdiv\u003e\n\u003cdiv\u003e\u003c\/div\u003e\n\u003c\/div\u003e\n\u003c\/section\u003e\n\u003c\/article\u003e\n\u003c\/div\u003e","published_at":"2022-08-16T19:26:19+08:00","created_at":"2022-08-16T19:26:17+08:00","vendor":"Haakaa","type":"","tags":["Breastfeeding","Cracked Nipples","Hospital Bag","Labour Preparation","Mum","Pregnancy"],"price":1490,"price_min":1490,"price_max":1490,"available":false,"price_varies":false,"compare_at_price":1490,"compare_at_price_min":1490,"compare_at_price_max":1490,"compare_at_price_varies":false,"variants":[{"id":42216829878461,"title":"Default Title","option1":"Default Title","option2":null,"option3":null,"sku":"","requires_shipping":true,"taxable":false,"featured_image":null,"available":false,"name":"Disposable Nursing Pads","public_title":null,"options":["Default Title"],"price":1490,"weight":210,"compare_at_price":1490,"inventory_management":"shopify","barcode":"29878461","requires_selling_plan":false,"selling_plan_allocations":[]}],"images":["\/\/www.thebirthstore.com.au\/cdn\/shop\/files\/disposable-nursing-pads-340462.jpg?v=1714967959","\/\/www.thebirthstore.com.au\/cdn\/shop\/files\/disposable-nursing-pads-916130.jpg?v=1714967959"],"featured_image":"\/\/www.thebirthstore.com.au\/cdn\/shop\/files\/disposable-nursing-pads-340462.jpg?v=1714967959","options":["Title"],"media":[{"alt":"Disposable Nursing Pads - The Birth Store-Haakaa","id":27007582798013,"position":1,"preview_image":{"aspect_ratio":1.0,"height":1080,"width":1080,"src":"\/\/www.thebirthstore.com.au\/cdn\/shop\/files\/disposable-nursing-pads-340462.jpg?v=1714967959"},"aspect_ratio":1.0,"height":1080,"media_type":"image","src":"\/\/www.thebirthstore.com.au\/cdn\/shop\/files\/disposable-nursing-pads-340462.jpg?v=1714967959","width":1080},{"alt":"Disposable Nursing Pads - The Birth Store-Haakaa","id":27007582830781,"position":2,"preview_image":{"aspect_ratio":1.0,"height":1000,"width":1000,"src":"\/\/www.thebirthstore.com.au\/cdn\/shop\/files\/disposable-nursing-pads-916130.jpg?v=1714967959"},"aspect_ratio":1.0,"height":1000,"media_type":"image","src":"\/\/www.thebirthstore.com.au\/cdn\/shop\/files\/disposable-nursing-pads-916130.jpg?v=1714967959","width":1000}],"requires_selling_plan":false,"selling_plan_groups":[],"content":"\u003cp data-mce-fragment=\"1\"\u003eIf you're breastfeeding, Haakaa Disposable Nursing Pads will help to keep you and your clothing dry to avoid milk stains during the day!\u003cbr data-mce-fragment=\"1\"\u003e\u003c\/p\u003e\n\u003cp data-mce-fragment=\"1\"\u003eThese Disposable Nursing Pads are designed with a special absorbent polymer and stay-dry lining to draw milk away from the skin and into the pad's core. They're low profile, giving you the confidence to wear them during the day without worrying about lumps and bumps under your clothes. \u003c\/p\u003e\n\u003cul\u003e\n\u003cli\u003eSuper-absorbent polymer material prevents leaks. \u003c\/li\u003e\n\u003cli\u003eSoft, stay-dry lining. \u003c\/li\u003e\n\u003cli\u003eButterfly-shaped for extra coverage. \u003c\/li\u003e\n\u003cli\u003eUltra-slim and lightweight.\u003c\/li\u003e\n\u003cli\u003eWaterproof tissue keeps clothing protected. \u003c\/li\u003e\n\u003cli\u003eTwo adhesive strips keep pad in place.\u003c\/li\u003e\n\u003cli\u003eDraws moisture away from the skin.\u003c\/li\u003e\n\u003cli\u003eMade with 100% natural materials.\u003c\/li\u003e\n\u003cli\u003eLow profile design for discreet and comfortable wear.\u003c\/li\u003e\n\u003cli\u003eContains 36 disposable pads in each pack.\u003c\/li\u003e\n\u003c\/ul\u003e\n\u003cp\u003e\u003cstrong\u003eDirections:\u003c\/strong\u003e\u003c\/p\u003e\n\u003col\u003e\n\u003cli\u003eOpen the individual pack and remove the pad.\u003c\/li\u003e\n\u003cli\u003eRemove backing tape.\u003c\/li\u003e\n\u003cli\u003ePlace pad into bra, with tapes positioned at the top and bottom facing outward (away from your skin).\u003c\/li\u003e\n\u003cli\u003ePress pad onto bra to secure. \u003c\/li\u003e\n\u003c\/ol\u003e\n\u003cp\u003e\u003cstrong\u003eCaution:\u003c\/strong\u003e\u003c\/p\u003e\n\u003cp\u003eReplace if this product shows any signs of damage. This product is not a toy. Do not use this product for anything other than its intended use. Adult use only. Keep out of the reach of children and pets. Do not store near any sharp objects. Store product in a cool, dry place and avoid direct sunlight. \u003cspan\u003e\u003c\/span\u003e\u003cspan\u003e\u003c\/span\u003e\u003cspan\u003e\u003c\/span\u003e\u003cspan\u003e\u003c\/span\u003e\u003c\/p\u003e\n\u003cdiv\u003e\n\u003carticle\u003e\n\u003csection\u003e\n\u003cdiv\u003e\n\u003cdiv\u003e\u003c\/div\u003e\n\u003c\/div\u003e\n\u003c\/section\u003e\n\u003c\/article\u003e\n\u003c\/div\u003e"},"options":[{"name":"Title","position":1,"values":["Default Title"]}],"custom_metafields":{},"metafields":{"badge":"\u003cdiv style='display:none' class='jdgm-prev-badge' data-average-rating='0.00' data-number-of-reviews='0' data-number-of-questions='0'\u003e \u003cspan class='jdgm-prev-badge__stars' data-score='0.00' tabindex='0' aria-label='0.00 stars' role='button'\u003e \u003cspan class='jdgm-star jdgm--off'\u003e\u003c\/span\u003e\u003cspan class='jdgm-star jdgm--off'\u003e\u003c\/span\u003e\u003cspan class='jdgm-star jdgm--off'\u003e\u003c\/span\u003e\u003cspan class='jdgm-star jdgm--off'\u003e\u003c\/span\u003e\u003cspan class='jdgm-star jdgm--off'\u003e\u003c\/span\u003e \u003c\/span\u003e \u003cspan class='jdgm-prev-badge__text'\u003e No reviews \u003c\/span\u003e \u003c\/div\u003e","widget":"\u003cdiv class='jdgm-rev-widg' data-updated-at='2025-06-13T16:12:10Z' data-average-rating='0.00' data-number-of-reviews='0' data-number-of-questions='0'\u003e \u003cstyle class='jdgm-temp-hiding-style'\u003e.jdgm-rev-widg{ display: none }\u003c\/style\u003e \u003cdiv class='jdgm-rev-widg__header'\u003e \u003ch2 class='jdgm-rev-widg__title'\u003eCustomer Reviews\u003c\/h2\u003e \u003cdiv class='jdgm-rev-widg__summary'\u003e \u003cdiv class='jdgm-rev-widg__summary-stars' aria-label='Average rating is 0.00 stars' role='img'\u003e \u003cspan class='jdgm-star jdgm--off'\u003e\u003c\/span\u003e\u003cspan class='jdgm-star jdgm--off'\u003e\u003c\/span\u003e\u003cspan class='jdgm-star jdgm--off'\u003e\u003c\/span\u003e\u003cspan class='jdgm-star jdgm--off'\u003e\u003c\/span\u003e\u003cspan class='jdgm-star jdgm--off'\u003e\u003c\/span\u003e \u003c\/div\u003e \u003cdiv class='jdgm-rev-widg__summary-text'\u003eBe the first to write a review\u003c\/div\u003e \u003c\/div\u003e \u003ca style='display: none' href='#' class='jdgm-write-rev-link' role='button'\u003eWrite a review\u003c\/a\u003e \u003cdiv class='jdgm-histogram jdgm-temp-hidden'\u003e \u003cdiv class='jdgm-histogram__row' data-rating='5' data-frequency='0' data-percentage='0'\u003e \u003cdiv class='jdgm-histogram__star' role='button' aria-label=\"0% (0) reviews with 5 star rating\" tabindex='0' \u003e\u003cspan class='jdgm-star jdgm--on'\u003e\u003c\/span\u003e\u003cspan class='jdgm-star jdgm--on'\u003e\u003c\/span\u003e\u003cspan class='jdgm-star jdgm--on'\u003e\u003c\/span\u003e\u003cspan class='jdgm-star jdgm--on'\u003e\u003c\/span\u003e\u003cspan class='jdgm-star jdgm--on'\u003e\u003c\/span\u003e\u003c\/div\u003e \u003cdiv class='jdgm-histogram__bar'\u003e \u003cdiv class='jdgm-histogram__bar-content' style='width: 0%;'\u003e \u003c\/div\u003e \u003c\/div\u003e \u003cdiv class='jdgm-histogram__percentage'\u003e0%\u003c\/div\u003e \u003cdiv class='jdgm-histogram__frequency'\u003e(0)\u003c\/div\u003e \u003c\/div\u003e \u003cdiv class='jdgm-histogram__row' data-rating='4' data-frequency='0' data-percentage='0'\u003e \u003cdiv class='jdgm-histogram__star' role='button' aria-label=\"0% (0) reviews with 4 star rating\" tabindex='0' \u003e\u003cspan class='jdgm-star jdgm--on'\u003e\u003c\/span\u003e\u003cspan class='jdgm-star jdgm--on'\u003e\u003c\/span\u003e\u003cspan class='jdgm-star jdgm--on'\u003e\u003c\/span\u003e\u003cspan class='jdgm-star jdgm--on'\u003e\u003c\/span\u003e\u003cspan class='jdgm-star jdgm--off'\u003e\u003c\/span\u003e\u003c\/div\u003e \u003cdiv class='jdgm-histogram__bar'\u003e \u003cdiv class='jdgm-histogram__bar-content' style='width: 0%;'\u003e \u003c\/div\u003e \u003c\/div\u003e \u003cdiv class='jdgm-histogram__percentage'\u003e0%\u003c\/div\u003e \u003cdiv class='jdgm-histogram__frequency'\u003e(0)\u003c\/div\u003e \u003c\/div\u003e \u003cdiv class='jdgm-histogram__row' data-rating='3' data-frequency='0' data-percentage='0'\u003e \u003cdiv class='jdgm-histogram__star' role='button' aria-label=\"0% (0) reviews with 3 star rating\" tabindex='0' \u003e\u003cspan class='jdgm-star jdgm--on'\u003e\u003c\/span\u003e\u003cspan class='jdgm-star jdgm--on'\u003e\u003c\/span\u003e\u003cspan class='jdgm-star jdgm--on'\u003e\u003c\/span\u003e\u003cspan class='jdgm-star jdgm--off'\u003e\u003c\/span\u003e\u003cspan class='jdgm-star jdgm--off'\u003e\u003c\/span\u003e\u003c\/div\u003e \u003cdiv class='jdgm-histogram__bar'\u003e \u003cdiv class='jdgm-histogram__bar-content' style='width: 0%;'\u003e \u003c\/div\u003e \u003c\/div\u003e \u003cdiv class='jdgm-histogram__percentage'\u003e0%\u003c\/div\u003e \u003cdiv class='jdgm-histogram__frequency'\u003e(0)\u003c\/div\u003e \u003c\/div\u003e \u003cdiv class='jdgm-histogram__row' data-rating='2' data-frequency='0' data-percentage='0'\u003e \u003cdiv class='jdgm-histogram__star' role='button' aria-label=\"0% (0) reviews with 2 star rating\" tabindex='0' \u003e\u003cspan class='jdgm-star jdgm--on'\u003e\u003c\/span\u003e\u003cspan class='jdgm-star jdgm--on'\u003e\u003c\/span\u003e\u003cspan class='jdgm-star jdgm--off'\u003e\u003c\/span\u003e\u003cspan class='jdgm-star jdgm--off'\u003e\u003c\/span\u003e\u003cspan class='jdgm-star jdgm--off'\u003e\u003c\/span\u003e\u003c\/div\u003e \u003cdiv class='jdgm-histogram__bar'\u003e \u003cdiv class='jdgm-histogram__bar-content' style='width: 0%;'\u003e \u003c\/div\u003e \u003c\/div\u003e \u003cdiv class='jdgm-histogram__percentage'\u003e0%\u003c\/div\u003e \u003cdiv class='jdgm-histogram__frequency'\u003e(0)\u003c\/div\u003e \u003c\/div\u003e \u003cdiv class='jdgm-histogram__row' data-rating='1' data-frequency='0' data-percentage='0'\u003e \u003cdiv class='jdgm-histogram__star' role='button' aria-label=\"0% (0) reviews with 1 star rating\" tabindex='0' \u003e\u003cspan class='jdgm-star jdgm--on'\u003e\u003c\/span\u003e\u003cspan class='jdgm-star jdgm--off'\u003e\u003c\/span\u003e\u003cspan class='jdgm-star jdgm--off'\u003e\u003c\/span\u003e\u003cspan class='jdgm-star jdgm--off'\u003e\u003c\/span\u003e\u003cspan class='jdgm-star jdgm--off'\u003e\u003c\/span\u003e\u003c\/div\u003e \u003cdiv class='jdgm-histogram__bar'\u003e \u003cdiv class='jdgm-histogram__bar-content' style='width: 0%;'\u003e \u003c\/div\u003e \u003c\/div\u003e \u003cdiv class='jdgm-histogram__percentage'\u003e0%\u003c\/div\u003e \u003cdiv class='jdgm-histogram__frequency'\u003e(0)\u003c\/div\u003e \u003c\/div\u003e \u003cdiv class='jdgm-histogram__row jdgm-histogram__clear-filter' data-rating=null tabindex='0'\u003e\u003c\/div\u003e \u003c\/div\u003e \u003cdiv class='jdgm-rev-widg__sort-wrapper'\u003e\u003c\/div\u003e \u003c\/div\u003e \u003cdiv class='jdgm-rev-widg__body'\u003e \u003cdiv class='jdgm-rev-widg__reviews'\u003e\u003c\/div\u003e \u003cdiv class='jdgm-paginate' data-per-page='10' data-url='https:\/\/api.judge.me\/reviews\/reviews_for_widget' style=\"display: none;\"\u003e\u003c\/div\u003e \u003c\/div\u003e \u003cdiv class='jdgm-rev-widg__paginate-spinner-wrapper'\u003e \u003cdiv class='jdgm-spinner'\u003e\u003c\/div\u003e \u003c\/div\u003e \u003c\/div\u003e"},"collections":[{"id":281712427197,"handle":"breastfeeding","title":"Breastfeeding","updated_at":"2025-12-28T20:10:01+08:00","body_html":"","published_at":"2021-12-20T14:19:33+08:00","sort_order":"best-selling","template_suffix":"breastfeeding-collection","disjunctive":false,"rules":[{"column":"tag","relation":"equals","condition":"Breastfeeding"}],"published_scope":"global","image":{"created_at":"2024-05-06T11:59:34+08:00","alt":"Breastfeeding - The Birth Store","width":620,"height":635,"src":"\/\/www.thebirthstore.com.au\/cdn\/shop\/collections\/breastfeeding-793872.jpg?v=1714967974"}},{"id":261657460925,"handle":"buy","title":"Buy","updated_at":"2025-12-28T20:10:01+08:00","body_html":"\u003cp\u003eBrowse all of our pregnancy, labour \u0026amp; birth, postpartum and baby essentials here.\u003cbr\u003e\u003c\/p\u003e\n\u003cp\u003e\u003cspan\u003eYou can even buy now and pay later with Afterpay!\u003c\/span\u003e\u003c\/p\u003e","published_at":"2021-03-10T12:05:31+08:00","sort_order":"best-selling","template_suffix":"shop-all-collection","disjunctive":false,"rules":[{"column":"title","relation":"not_contains","condition":"Hire"}],"published_scope":"global","image":{"created_at":"2024-05-06T11:59:42+08:00","alt":"Buy - The Birth Store","width":2048,"height":2048,"src":"\/\/www.thebirthstore.com.au\/cdn\/shop\/collections\/buy-964856.jpg?v=1714967982"}},{"id":294349865149,"handle":"cracked-nipples","title":"Cracked Nipples","updated_at":"2025-12-26T20:08:47+08:00","body_html":"","published_at":"2023-09-21T14:03:02+08:00","sort_order":"best-selling","template_suffix":"swaddles-collection","disjunctive":false,"rules":[{"column":"tag","relation":"equals","condition":"Cracked Nipples"}],"published_scope":"global","image":{"created_at":"2024-05-06T11:59:53+08:00","alt":"Cracked Nipples - The Birth Store","width":1050,"height":1050,"src":"\/\/www.thebirthstore.com.au\/cdn\/shop\/collections\/cracked-nipples-166971.jpg?v=1714967994"}},{"id":281712525501,"handle":"labour-preparation","title":"Labour Preparation","updated_at":"2025-12-28T20:10:01+08:00","body_html":"","published_at":"2021-12-20T14:20:12+08:00","sort_order":"best-selling","template_suffix":"labour-preparation-collec","disjunctive":false,"rules":[{"column":"tag","relation":"equals","condition":"Labour Preparation"}],"published_scope":"global","image":{"created_at":"2024-05-06T12:00:13+08:00","alt":"Labour Preparation - The Birth Store","width":1024,"height":1536,"src":"\/\/www.thebirthstore.com.au\/cdn\/shop\/collections\/labour-preparation-271961.jpg?v=1714968013"}},{"id":261658149053,"handle":"pregnancy-and-maternity-products","title":"Pregnancy","updated_at":"2025-12-28T20:10:01+08:00","body_html":"\u003cp\u003eShop your pregnancy essentials below. Looking for something we don't currently stock? Please reach out and let us know.\u003cbr\u003e\u003c\/p\u003e\n\u003cp\u003e\u003cspan\u003eYou can even buy now and pay later with Afterpay!\u003c\/span\u003e\u003c\/p\u003e","published_at":"2021-03-10T12:34:22+08:00","sort_order":"best-selling","template_suffix":"pregnancy-collection","disjunctive":false,"rules":[{"column":"tag","relation":"equals","condition":"Pregnancy"}],"published_scope":"global","image":{"created_at":"2024-05-06T12:00:40+08:00","alt":"Pregnancy - The Birth Store","width":1024,"height":1536,"src":"\/\/www.thebirthstore.com.au\/cdn\/shop\/collections\/pregnancy-899677.jpg?v=1714968040"}},{"id":291456483517,"handle":"shop-all","title":"Shop All - Mum","updated_at":"2025-12-28T20:10:01+08:00","body_html":"","published_at":"2022-12-23T22:04:39+08:00","sort_order":"best-selling","template_suffix":"shop-all-collection","disjunctive":false,"rules":[{"column":"variant_price","relation":"greater_than","condition":"1"},{"column":"title","relation":"not_contains","condition":"Batteries"},{"column":"tag","relation":"equals","condition":"Mum"}],"published_scope":"global","image":{"created_at":"2024-05-06T12:00:54+08:00","alt":"Shop All - The Birth Store","width":1365,"height":2048,"src":"\/\/www.thebirthstore.com.au\/cdn\/shop\/collections\/shop-all-693176.jpg?v=1714968055"}},{"id":310045933757,"handle":"shop-all-sale","title":"Shop All Sale","updated_at":"2025-12-28T20:10:01+08:00","body_html":"","published_at":"2024-11-12T13:22:43+08:00","sort_order":"alpha-asc","template_suffix":"","disjunctive":true,"rules":[{"column":"tag","relation":"equals","condition":"Bundles"},{"column":"vendor","relation":"equals","condition":"Franjos Kitchen"},{"column":"vendor","relation":"equals","condition":"Adored Illustrations"},{"column":"vendor","relation":"equals","condition":"Amazing Oils"},{"column":"vendor","relation":"equals","condition":"Ice Ice Booby"},{"column":"vendor","relation":"equals","condition":"Made to Milk"},{"column":"vendor","relation":"equals","condition":"Milky Goodness"},{"column":"vendor","relation":"equals","condition":"Seasons of Mama"},{"column":"vendor","relation":"equals","condition":"Silverette"},{"column":"vendor","relation":"equals","condition":"Snuggle Hunny"},{"column":"vendor","relation":"equals","condition":"Yung Bod"},{"column":"vendor","relation":"equals","condition":"Bare Love"},{"column":"vendor","relation":"equals","condition":"Haakaa"},{"column":"vendor","relation":"equals","condition":"Mere Botanicals"},{"column":"vendor","relation":"equals","condition":"The Birth Store Hire"},{"column":"vendor","relation":"equals","condition":"The Birth Store"}],"published_scope":"global","image":{"created_at":"2024-11-13T10:58:16+08:00","alt":"Shop All Sale - The Birth Store","width":2048,"height":1365,"src":"\/\/www.thebirthstore.com.au\/cdn\/shop\/collections\/shop-all-sale-297361.jpg?v=1731466697"}}]}
[{"alt":"Disposable Nursing Pads - The Birth Store-Haakaa","id":27007582798013,"position":1,"preview_image":{"aspect_ratio":1.0,"height":1080,"width":1080,"src":"\/\/www.thebirthstore.com.au\/cdn\/shop\/files\/disposable-nursing-pads-340462.jpg?v=1714967959"},"aspect_ratio":1.0,"height":1080,"media_type":"image","src":"\/\/www.thebirthstore.com.au\/cdn\/shop\/files\/disposable-nursing-pads-340462.jpg?v=1714967959","width":1080},{"alt":"Disposable Nursing Pads - The Birth Store-Haakaa","id":27007582830781,"position":2,"preview_image":{"aspect_ratio":1.0,"height":1000,"width":1000,"src":"\/\/www.thebirthstore.com.au\/cdn\/shop\/files\/disposable-nursing-pads-916130.jpg?v=1714967959"},"aspect_ratio":1.0,"height":1000,"media_type":"image","src":"\/\/www.thebirthstore.com.au\/cdn\/shop\/files\/disposable-nursing-pads-916130.jpg?v=1714967959","width":1000}]
{"item":{"id":7322273448125,"title":"Haakaa Generation 2 Silicone Breast Pump with Suction Base","handle":"generation-2-100-150ml-silicone-breast-pump-with-suction-base","description":"\u003cp data-mce-fragment=\"1\"\u003e\u003cspan data-mce-fragment=\"1\"\u003eIf you're breastfeeding, the Haakaa Silicone Breast Pump is the perfect little essential to incorporate into your nursing journey.\u003c\/span\u003e\u003c\/p\u003e\n\u003cp data-mce-fragment=\"1\"\u003eWe've updated the famous Haakaa Silicone Breast Pump! Although it works in the same way as the original Haakaa breast pump, our new pump has a few added features to make your life that little bit easier. Available in two larger capacities of 100ml and 150ml, and with a new suction base that sticks to flat surfaces to prevent accidental spills, it is the easiest and most simple way to express breast milk. \u003cbr data-mce-fragment=\"1\"\u003e\u003c\/p\u003e\n\u003cp data-mce-fragment=\"1\"\u003eMade from 100% food-grade silicone, this compact pump is perfect for long-distance trips, planes, car rides, family BBQs, or anywhere you would like to express discreetly, silently and quickly. Simply suction to your breast and let the pump do the work for you as it draws your milk using suction. It's 100% eco-friendly and safe for mum, baby and our environment.\u003c\/p\u003e\n\u003cul\u003e\n\u003cli\u003eExpress breast milk using the power of natural suction!\u003c\/li\u003e\n\u003cli\u003eMade from soft 100% food-grade silicone.\u003c\/li\u003e\n\u003cli\u003eCompact size fits perfectly into any handbag or baby bag.\u003c\/li\u003e\n\u003cli\u003eOne-piece design with no joints, cracks or edges for bacteria to harbour.\u003c\/li\u003e\n\u003cli\u003eSuction base stops accidental spills.\u003c\/li\u003e\n\u003cli\u003e100\/150ml capacity.\u003c\/li\u003e\n\u003cli\u003eNo cords, batteries or assembly required.\u003c\/li\u003e\n\u003cli\u003eEasy to use and clean.\u003c\/li\u003e\n\u003cli\u003eBPA, PVC and phthalate-free. \u003c\/li\u003e\n\u003cli\u003eMicrowave steriliser and dishwasher safe.\u003c\/li\u003e\n\u003c\/ul\u003e\n\u003cp\u003e\u003cstrong\u003eHow to Use Your Haakaa Breast Pump:\u003c\/strong\u003e\u003c\/p\u003e\n\u003col\u003e\n\u003cli\u003eSterilise your pump by boiling in water for 2-3 minutes.\u003c\/li\u003e\n\u003cli\u003ePlace the pump flange over your nipple – make sure your nipple is centred comfortably in the neck of the pump.\u003c\/li\u003e\n\u003cli\u003eApply suction – you may need to adjust the position of your pump a couple of times. Once the pump is secure and comfortable, apply suction by squeezing the base of the pump to start the flow of milk.\u003c\/li\u003e\n\u003cli\u003eOnce milk begins to flow, simply leave the pump alone to do its thing!\u003c\/li\u003e\n\u003cli\u003eWhen the pump is full, empty into a safe storage container and reposition.\u003c\/li\u003e\n\u003cli\u003eIf the flow of milk slows or you've expressed your desired amount, simply stick the suction base to a flat surface while you finish your feeding or redress.\u003c\/li\u003e\n\u003c\/ol\u003e\n\u003cp\u003eTips: Encourage let-down by placing a warm flannel on top of your breast and massaging gently. While your child is feeding, attach your Haakaa pump to the other breast to catch precious milk that would otherwise be lost in a nursing pad.\u003c\/p\u003e\n\u003cp\u003e\u003cstrong\u003eCleaning \u0026amp; Care:\u003c\/strong\u003e\u003c\/p\u003e\n\u003cp\u003e\u003cspan\u003eClean after each use. We strongly recommend cleaning and sterilising your Haakaa Breast Pump with any steam sterilising system or by boiling in water for 2-3 minutes. Do not use any bleach-based agents or sterilising tablets to clean this product. \u003c\/span\u003e\u003cspan\u003eDo not use UV sterilisers to clean this product as it may impact the lifespan of your pump.\u003c\/span\u003e\u003c\/p\u003e\n\u003cp\u003e\u003cstrong\u003eCaution:\u003c\/strong\u003e\u003c\/p\u003e\n\u003cp\u003eCheck product condition regularly. Replace if this product shows any signs of damage. Do not store near any sharp objects. Only soft bristle brushes or soft sponges should be used to clean this product as hard scourers may scratch the surface. Exposure to detergent may make the silicone in this product appear cloudy. This product is not a toy. Do not use this product for anything other than its intended use. Store product in a cool, dry place and avoid direct sunlight. Adult supervision is required. \u003c\/p\u003e\n\u003cp\u003e\u003cem\u003ePlease note: Always consult with a medical professional regarding dietary requirements if you or your child is ill or on medication. Results may vary as each woman and her milk supply are unique.\u003c\/em\u003e\u003c\/p\u003e\n\u003cp\u003eThe guidelines of health organisations should be followed at all times with regards to catching let-down\/expressing and storing milk safely.\u003c\/p\u003e","published_at":"2022-08-16T20:24:39+08:00","created_at":"2022-08-16T20:24:37+08:00","vendor":"Haakaa","type":"","tags":["Baby Shower Gifts - Mum","Breastfeeding","Hospital Bag","Mum","Post-Partum"],"price":2795,"price_min":2795,"price_max":2995,"available":true,"price_varies":true,"compare_at_price":null,"compare_at_price_min":0,"compare_at_price_max":0,"compare_at_price_varies":false,"variants":[{"id":42217014132925,"title":"100mls","option1":"100mls","option2":null,"option3":null,"sku":"","requires_shipping":true,"taxable":false,"featured_image":null,"available":true,"name":"Haakaa Generation 2 Silicone Breast Pump with Suction Base - 100mls","public_title":"100mls","options":["100mls"],"price":2795,"weight":176,"compare_at_price":null,"inventory_management":"shopify","barcode":"14132925","requires_selling_plan":false,"selling_plan_allocations":[]},{"id":42217014165693,"title":"150mls","option1":"150mls","option2":null,"option3":null,"sku":"","requires_shipping":true,"taxable":false,"featured_image":null,"available":true,"name":"Haakaa Generation 2 Silicone Breast Pump with Suction Base - 150mls","public_title":"150mls","options":["150mls"],"price":2995,"weight":203,"compare_at_price":null,"inventory_management":"shopify","barcode":"14165693","requires_selling_plan":false,"selling_plan_allocations":[]}],"images":["\/\/www.thebirthstore.com.au\/cdn\/shop\/files\/haakaa-generation-2-silicone-breast-pump-with-suction-base-238344.jpg?v=1714967970","\/\/www.thebirthstore.com.au\/cdn\/shop\/files\/haakaa-generation-2-silicone-breast-pump-with-suction-base-596943.jpg?v=1714967970","\/\/www.thebirthstore.com.au\/cdn\/shop\/files\/haakaa-generation-2-silicone-breast-pump-with-suction-base-809663.jpg?v=1714967970","\/\/www.thebirthstore.com.au\/cdn\/shop\/files\/haakaa-generation-2-silicone-breast-pump-with-suction-base-786701.jpg?v=1714967970","\/\/www.thebirthstore.com.au\/cdn\/shop\/files\/haakaa-generation-2-silicone-breast-pump-with-suction-base-973994.jpg?v=1714967970"],"featured_image":"\/\/www.thebirthstore.com.au\/cdn\/shop\/files\/haakaa-generation-2-silicone-breast-pump-with-suction-base-238344.jpg?v=1714967970","options":["Size"],"media":[{"alt":"Haakaa Generation 2 Silicone Breast Pump with Suction Base - The Birth Store-Haakaa","id":27007585943741,"position":1,"preview_image":{"aspect_ratio":1.0,"height":949,"width":949,"src":"\/\/www.thebirthstore.com.au\/cdn\/shop\/files\/haakaa-generation-2-silicone-breast-pump-with-suction-base-238344.jpg?v=1714967970"},"aspect_ratio":1.0,"height":949,"media_type":"image","src":"\/\/www.thebirthstore.com.au\/cdn\/shop\/files\/haakaa-generation-2-silicone-breast-pump-with-suction-base-238344.jpg?v=1714967970","width":949},{"alt":"Haakaa Generation 2 Silicone Breast Pump with Suction Base - The Birth Store-Haakaa","id":27007585976509,"position":2,"preview_image":{"aspect_ratio":1.0,"height":800,"width":800,"src":"\/\/www.thebirthstore.com.au\/cdn\/shop\/files\/haakaa-generation-2-silicone-breast-pump-with-suction-base-596943.jpg?v=1714967970"},"aspect_ratio":1.0,"height":800,"media_type":"image","src":"\/\/www.thebirthstore.com.au\/cdn\/shop\/files\/haakaa-generation-2-silicone-breast-pump-with-suction-base-596943.jpg?v=1714967970","width":800},{"alt":"Haakaa Generation 2 Silicone Breast Pump with Suction Base - The Birth Store-Haakaa","id":27007586009277,"position":3,"preview_image":{"aspect_ratio":1.0,"height":800,"width":800,"src":"\/\/www.thebirthstore.com.au\/cdn\/shop\/files\/haakaa-generation-2-silicone-breast-pump-with-suction-base-809663.jpg?v=1714967970"},"aspect_ratio":1.0,"height":800,"media_type":"image","src":"\/\/www.thebirthstore.com.au\/cdn\/shop\/files\/haakaa-generation-2-silicone-breast-pump-with-suction-base-809663.jpg?v=1714967970","width":800},{"alt":"Haakaa Generation 2 Silicone Breast Pump with Suction Base - The Birth Store-Haakaa","id":27007586042045,"position":4,"preview_image":{"aspect_ratio":1.367,"height":447,"width":611,"src":"\/\/www.thebirthstore.com.au\/cdn\/shop\/files\/haakaa-generation-2-silicone-breast-pump-with-suction-base-786701.jpg?v=1714967970"},"aspect_ratio":1.367,"height":447,"media_type":"image","src":"\/\/www.thebirthstore.com.au\/cdn\/shop\/files\/haakaa-generation-2-silicone-breast-pump-with-suction-base-786701.jpg?v=1714967970","width":611},{"alt":"Haakaa Generation 2 Silicone Breast Pump with Suction Base - The Birth Store-Haakaa","id":27007586074813,"position":5,"preview_image":{"aspect_ratio":1.086,"height":594,"width":645,"src":"\/\/www.thebirthstore.com.au\/cdn\/shop\/files\/haakaa-generation-2-silicone-breast-pump-with-suction-base-973994.jpg?v=1714967970"},"aspect_ratio":1.086,"height":594,"media_type":"image","src":"\/\/www.thebirthstore.com.au\/cdn\/shop\/files\/haakaa-generation-2-silicone-breast-pump-with-suction-base-973994.jpg?v=1714967970","width":645}],"requires_selling_plan":false,"selling_plan_groups":[],"content":"\u003cp data-mce-fragment=\"1\"\u003e\u003cspan data-mce-fragment=\"1\"\u003eIf you're breastfeeding, the Haakaa Silicone Breast Pump is the perfect little essential to incorporate into your nursing journey.\u003c\/span\u003e\u003c\/p\u003e\n\u003cp data-mce-fragment=\"1\"\u003eWe've updated the famous Haakaa Silicone Breast Pump! Although it works in the same way as the original Haakaa breast pump, our new pump has a few added features to make your life that little bit easier. Available in two larger capacities of 100ml and 150ml, and with a new suction base that sticks to flat surfaces to prevent accidental spills, it is the easiest and most simple way to express breast milk. \u003cbr data-mce-fragment=\"1\"\u003e\u003c\/p\u003e\n\u003cp data-mce-fragment=\"1\"\u003eMade from 100% food-grade silicone, this compact pump is perfect for long-distance trips, planes, car rides, family BBQs, or anywhere you would like to express discreetly, silently and quickly. Simply suction to your breast and let the pump do the work for you as it draws your milk using suction. It's 100% eco-friendly and safe for mum, baby and our environment.\u003c\/p\u003e\n\u003cul\u003e\n\u003cli\u003eExpress breast milk using the power of natural suction!\u003c\/li\u003e\n\u003cli\u003eMade from soft 100% food-grade silicone.\u003c\/li\u003e\n\u003cli\u003eCompact size fits perfectly into any handbag or baby bag.\u003c\/li\u003e\n\u003cli\u003eOne-piece design with no joints, cracks or edges for bacteria to harbour.\u003c\/li\u003e\n\u003cli\u003eSuction base stops accidental spills.\u003c\/li\u003e\n\u003cli\u003e100\/150ml capacity.\u003c\/li\u003e\n\u003cli\u003eNo cords, batteries or assembly required.\u003c\/li\u003e\n\u003cli\u003eEasy to use and clean.\u003c\/li\u003e\n\u003cli\u003eBPA, PVC and phthalate-free. \u003c\/li\u003e\n\u003cli\u003eMicrowave steriliser and dishwasher safe.\u003c\/li\u003e\n\u003c\/ul\u003e\n\u003cp\u003e\u003cstrong\u003eHow to Use Your Haakaa Breast Pump:\u003c\/strong\u003e\u003c\/p\u003e\n\u003col\u003e\n\u003cli\u003eSterilise your pump by boiling in water for 2-3 minutes.\u003c\/li\u003e\n\u003cli\u003ePlace the pump flange over your nipple – make sure your nipple is centred comfortably in the neck of the pump.\u003c\/li\u003e\n\u003cli\u003eApply suction – you may need to adjust the position of your pump a couple of times. Once the pump is secure and comfortable, apply suction by squeezing the base of the pump to start the flow of milk.\u003c\/li\u003e\n\u003cli\u003eOnce milk begins to flow, simply leave the pump alone to do its thing!\u003c\/li\u003e\n\u003cli\u003eWhen the pump is full, empty into a safe storage container and reposition.\u003c\/li\u003e\n\u003cli\u003eIf the flow of milk slows or you've expressed your desired amount, simply stick the suction base to a flat surface while you finish your feeding or redress.\u003c\/li\u003e\n\u003c\/ol\u003e\n\u003cp\u003eTips: Encourage let-down by placing a warm flannel on top of your breast and massaging gently. While your child is feeding, attach your Haakaa pump to the other breast to catch precious milk that would otherwise be lost in a nursing pad.\u003c\/p\u003e\n\u003cp\u003e\u003cstrong\u003eCleaning \u0026amp; Care:\u003c\/strong\u003e\u003c\/p\u003e\n\u003cp\u003e\u003cspan\u003eClean after each use. We strongly recommend cleaning and sterilising your Haakaa Breast Pump with any steam sterilising system or by boiling in water for 2-3 minutes. Do not use any bleach-based agents or sterilising tablets to clean this product. \u003c\/span\u003e\u003cspan\u003eDo not use UV sterilisers to clean this product as it may impact the lifespan of your pump.\u003c\/span\u003e\u003c\/p\u003e\n\u003cp\u003e\u003cstrong\u003eCaution:\u003c\/strong\u003e\u003c\/p\u003e\n\u003cp\u003eCheck product condition regularly. Replace if this product shows any signs of damage. Do not store near any sharp objects. Only soft bristle brushes or soft sponges should be used to clean this product as hard scourers may scratch the surface. Exposure to detergent may make the silicone in this product appear cloudy. This product is not a toy. Do not use this product for anything other than its intended use. Store product in a cool, dry place and avoid direct sunlight. Adult supervision is required. \u003c\/p\u003e\n\u003cp\u003e\u003cem\u003ePlease note: Always consult with a medical professional regarding dietary requirements if you or your child is ill or on medication. Results may vary as each woman and her milk supply are unique.\u003c\/em\u003e\u003c\/p\u003e\n\u003cp\u003eThe guidelines of health organisations should be followed at all times with regards to catching let-down\/expressing and storing milk safely.\u003c\/p\u003e"},"options":[{"name":"Size","position":1,"values":["100mls","150mls"]}],"custom_metafields":{},"metafields":{"badge":"\u003cdiv style='display:none' class='jdgm-prev-badge' data-average-rating='0.00' data-number-of-reviews='0' data-number-of-questions='0'\u003e \u003cspan class='jdgm-prev-badge__stars' data-score='0.00' tabindex='0' aria-label='0.00 stars' role='button'\u003e \u003cspan class='jdgm-star jdgm--off'\u003e\u003c\/span\u003e\u003cspan class='jdgm-star jdgm--off'\u003e\u003c\/span\u003e\u003cspan class='jdgm-star jdgm--off'\u003e\u003c\/span\u003e\u003cspan class='jdgm-star jdgm--off'\u003e\u003c\/span\u003e\u003cspan class='jdgm-star jdgm--off'\u003e\u003c\/span\u003e \u003c\/span\u003e \u003cspan class='jdgm-prev-badge__text'\u003e No reviews \u003c\/span\u003e \u003c\/div\u003e","widget":"\u003cdiv class='jdgm-rev-widg' data-updated-at='2025-06-13T16:12:10Z' data-average-rating='0.00' data-number-of-reviews='0' data-number-of-questions='0'\u003e \u003cstyle class='jdgm-temp-hiding-style'\u003e.jdgm-rev-widg{ display: none }\u003c\/style\u003e \u003cdiv class='jdgm-rev-widg__header'\u003e \u003ch2 class='jdgm-rev-widg__title'\u003eCustomer Reviews\u003c\/h2\u003e \u003cdiv class='jdgm-rev-widg__summary'\u003e \u003cdiv class='jdgm-rev-widg__summary-stars' aria-label='Average rating is 0.00 stars' role='img'\u003e \u003cspan class='jdgm-star jdgm--off'\u003e\u003c\/span\u003e\u003cspan class='jdgm-star jdgm--off'\u003e\u003c\/span\u003e\u003cspan class='jdgm-star jdgm--off'\u003e\u003c\/span\u003e\u003cspan class='jdgm-star jdgm--off'\u003e\u003c\/span\u003e\u003cspan class='jdgm-star jdgm--off'\u003e\u003c\/span\u003e \u003c\/div\u003e \u003cdiv class='jdgm-rev-widg__summary-text'\u003eBe the first to write a review\u003c\/div\u003e \u003c\/div\u003e \u003ca style='display: none' href='#' class='jdgm-write-rev-link' role='button'\u003eWrite a review\u003c\/a\u003e \u003cdiv class='jdgm-histogram jdgm-temp-hidden'\u003e \u003cdiv class='jdgm-histogram__row' data-rating='5' data-frequency='0' data-percentage='0'\u003e \u003cdiv class='jdgm-histogram__star' role='button' aria-label=\"0% (0) reviews with 5 star rating\" tabindex='0' \u003e\u003cspan class='jdgm-star jdgm--on'\u003e\u003c\/span\u003e\u003cspan class='jdgm-star jdgm--on'\u003e\u003c\/span\u003e\u003cspan class='jdgm-star jdgm--on'\u003e\u003c\/span\u003e\u003cspan class='jdgm-star jdgm--on'\u003e\u003c\/span\u003e\u003cspan class='jdgm-star jdgm--on'\u003e\u003c\/span\u003e\u003c\/div\u003e \u003cdiv class='jdgm-histogram__bar'\u003e \u003cdiv class='jdgm-histogram__bar-content' style='width: 0%;'\u003e \u003c\/div\u003e \u003c\/div\u003e \u003cdiv class='jdgm-histogram__percentage'\u003e0%\u003c\/div\u003e \u003cdiv class='jdgm-histogram__frequency'\u003e(0)\u003c\/div\u003e \u003c\/div\u003e \u003cdiv class='jdgm-histogram__row' data-rating='4' data-frequency='0' data-percentage='0'\u003e \u003cdiv class='jdgm-histogram__star' role='button' aria-label=\"0% (0) reviews with 4 star rating\" tabindex='0' \u003e\u003cspan class='jdgm-star jdgm--on'\u003e\u003c\/span\u003e\u003cspan class='jdgm-star jdgm--on'\u003e\u003c\/span\u003e\u003cspan class='jdgm-star jdgm--on'\u003e\u003c\/span\u003e\u003cspan class='jdgm-star jdgm--on'\u003e\u003c\/span\u003e\u003cspan class='jdgm-star jdgm--off'\u003e\u003c\/span\u003e\u003c\/div\u003e \u003cdiv class='jdgm-histogram__bar'\u003e \u003cdiv class='jdgm-histogram__bar-content' style='width: 0%;'\u003e \u003c\/div\u003e \u003c\/div\u003e \u003cdiv class='jdgm-histogram__percentage'\u003e0%\u003c\/div\u003e \u003cdiv class='jdgm-histogram__frequency'\u003e(0)\u003c\/div\u003e \u003c\/div\u003e \u003cdiv class='jdgm-histogram__row' data-rating='3' data-frequency='0' data-percentage='0'\u003e \u003cdiv class='jdgm-histogram__star' role='button' aria-label=\"0% (0) reviews with 3 star rating\" tabindex='0' \u003e\u003cspan class='jdgm-star jdgm--on'\u003e\u003c\/span\u003e\u003cspan class='jdgm-star jdgm--on'\u003e\u003c\/span\u003e\u003cspan class='jdgm-star jdgm--on'\u003e\u003c\/span\u003e\u003cspan class='jdgm-star jdgm--off'\u003e\u003c\/span\u003e\u003cspan class='jdgm-star jdgm--off'\u003e\u003c\/span\u003e\u003c\/div\u003e \u003cdiv class='jdgm-histogram__bar'\u003e \u003cdiv class='jdgm-histogram__bar-content' style='width: 0%;'\u003e \u003c\/div\u003e \u003c\/div\u003e \u003cdiv class='jdgm-histogram__percentage'\u003e0%\u003c\/div\u003e \u003cdiv class='jdgm-histogram__frequency'\u003e(0)\u003c\/div\u003e \u003c\/div\u003e \u003cdiv class='jdgm-histogram__row' data-rating='2' data-frequency='0' data-percentage='0'\u003e \u003cdiv class='jdgm-histogram__star' role='button' aria-label=\"0% (0) reviews with 2 star rating\" tabindex='0' \u003e\u003cspan class='jdgm-star jdgm--on'\u003e\u003c\/span\u003e\u003cspan class='jdgm-star jdgm--on'\u003e\u003c\/span\u003e\u003cspan class='jdgm-star jdgm--off'\u003e\u003c\/span\u003e\u003cspan class='jdgm-star jdgm--off'\u003e\u003c\/span\u003e\u003cspan class='jdgm-star jdgm--off'\u003e\u003c\/span\u003e\u003c\/div\u003e \u003cdiv class='jdgm-histogram__bar'\u003e \u003cdiv class='jdgm-histogram__bar-content' style='width: 0%;'\u003e \u003c\/div\u003e \u003c\/div\u003e \u003cdiv class='jdgm-histogram__percentage'\u003e0%\u003c\/div\u003e \u003cdiv class='jdgm-histogram__frequency'\u003e(0)\u003c\/div\u003e \u003c\/div\u003e \u003cdiv class='jdgm-histogram__row' data-rating='1' data-frequency='0' data-percentage='0'\u003e \u003cdiv class='jdgm-histogram__star' role='button' aria-label=\"0% (0) reviews with 1 star rating\" tabindex='0' \u003e\u003cspan class='jdgm-star jdgm--on'\u003e\u003c\/span\u003e\u003cspan class='jdgm-star jdgm--off'\u003e\u003c\/span\u003e\u003cspan class='jdgm-star jdgm--off'\u003e\u003c\/span\u003e\u003cspan class='jdgm-star jdgm--off'\u003e\u003c\/span\u003e\u003cspan class='jdgm-star jdgm--off'\u003e\u003c\/span\u003e\u003c\/div\u003e \u003cdiv class='jdgm-histogram__bar'\u003e \u003cdiv class='jdgm-histogram__bar-content' style='width: 0%;'\u003e \u003c\/div\u003e \u003c\/div\u003e \u003cdiv class='jdgm-histogram__percentage'\u003e0%\u003c\/div\u003e \u003cdiv class='jdgm-histogram__frequency'\u003e(0)\u003c\/div\u003e \u003c\/div\u003e \u003cdiv class='jdgm-histogram__row jdgm-histogram__clear-filter' data-rating=null tabindex='0'\u003e\u003c\/div\u003e \u003c\/div\u003e \u003cdiv class='jdgm-rev-widg__sort-wrapper'\u003e\u003c\/div\u003e \u003c\/div\u003e \u003cdiv class='jdgm-rev-widg__body'\u003e \u003cdiv class='jdgm-rev-widg__reviews'\u003e\u003c\/div\u003e \u003cdiv class='jdgm-paginate' data-per-page='10' data-url='https:\/\/api.judge.me\/reviews\/reviews_for_widget' style=\"display: none;\"\u003e\u003c\/div\u003e \u003c\/div\u003e \u003cdiv class='jdgm-rev-widg__paginate-spinner-wrapper'\u003e \u003cdiv class='jdgm-spinner'\u003e\u003c\/div\u003e \u003c\/div\u003e \u003c\/div\u003e"},"collections":[{"id":281356533949,"handle":"baby-shower-gifts","title":"Baby Shower Gifts - Mum","updated_at":"2025-12-28T20:10:01+08:00","body_html":"\u003cp\u003eLooking for a unique baby shower gift? Or an all-in-one bundle pack to suit all your needs? We've got just the thing!\u003c\/p\u003e","published_at":"2021-12-06T13:43:56+08:00","sort_order":"best-selling","template_suffix":"baby-shower-gifts","disjunctive":true,"rules":[{"column":"tag","relation":"equals","condition":"Baby Shower Gifts - Mum"},{"column":"tag","relation":"equals","condition":"Gift Card"}],"published_scope":"global","image":{"created_at":"2024-05-06T11:59:28+08:00","alt":"Baby Shower Gifts - The Birth Store","width":1200,"height":1800,"src":"\/\/www.thebirthstore.com.au\/cdn\/shop\/collections\/baby-shower-gifts-401770.jpg?v=1761791272"}},{"id":281712427197,"handle":"breastfeeding","title":"Breastfeeding","updated_at":"2025-12-28T20:10:01+08:00","body_html":"","published_at":"2021-12-20T14:19:33+08:00","sort_order":"best-selling","template_suffix":"breastfeeding-collection","disjunctive":false,"rules":[{"column":"tag","relation":"equals","condition":"Breastfeeding"}],"published_scope":"global","image":{"created_at":"2024-05-06T11:59:34+08:00","alt":"Breastfeeding - The Birth Store","width":620,"height":635,"src":"\/\/www.thebirthstore.com.au\/cdn\/shop\/collections\/breastfeeding-793872.jpg?v=1714967974"}},{"id":261657460925,"handle":"buy","title":"Buy","updated_at":"2025-12-28T20:10:01+08:00","body_html":"\u003cp\u003eBrowse all of our pregnancy, labour \u0026amp; birth, postpartum and baby essentials here.\u003cbr\u003e\u003c\/p\u003e\n\u003cp\u003e\u003cspan\u003eYou can even buy now and pay later with Afterpay!\u003c\/span\u003e\u003c\/p\u003e","published_at":"2021-03-10T12:05:31+08:00","sort_order":"best-selling","template_suffix":"shop-all-collection","disjunctive":false,"rules":[{"column":"title","relation":"not_contains","condition":"Hire"}],"published_scope":"global","image":{"created_at":"2024-05-06T11:59:42+08:00","alt":"Buy - The Birth Store","width":2048,"height":2048,"src":"\/\/www.thebirthstore.com.au\/cdn\/shop\/collections\/buy-964856.jpg?v=1714967982"}},{"id":261658083517,"handle":"post-partum","title":"Postpartum","updated_at":"2025-12-28T20:10:01+08:00","body_html":"\u003cp\u003eShop your postpartum and hospital bag essentials below. Looking for something we don't currently stock? Please reach out and let us know.\u003cbr\u003e\u003c\/p\u003e\n\u003cp\u003e\u003cspan\u003eYou can even buy now and pay later with Afterpay!\u003c\/span\u003e\u003c\/p\u003e","published_at":"2021-03-10T12:33:47+08:00","sort_order":"best-selling","template_suffix":"postpartum-collection","disjunctive":false,"rules":[{"column":"tag","relation":"equals","condition":"Post-Partum"}],"published_scope":"global","image":{"created_at":"2024-05-06T12:00:36+08:00","alt":"Postpartum - The Birth Store","width":611,"height":702,"src":"\/\/www.thebirthstore.com.au\/cdn\/shop\/collections\/postpartum-150119.jpg?v=1714968037"}},{"id":291456483517,"handle":"shop-all","title":"Shop All - Mum","updated_at":"2025-12-28T20:10:01+08:00","body_html":"","published_at":"2022-12-23T22:04:39+08:00","sort_order":"best-selling","template_suffix":"shop-all-collection","disjunctive":false,"rules":[{"column":"variant_price","relation":"greater_than","condition":"1"},{"column":"title","relation":"not_contains","condition":"Batteries"},{"column":"tag","relation":"equals","condition":"Mum"}],"published_scope":"global","image":{"created_at":"2024-05-06T12:00:54+08:00","alt":"Shop All - The Birth Store","width":1365,"height":2048,"src":"\/\/www.thebirthstore.com.au\/cdn\/shop\/collections\/shop-all-693176.jpg?v=1714968055"}},{"id":310045933757,"handle":"shop-all-sale","title":"Shop All Sale","updated_at":"2025-12-28T20:10:01+08:00","body_html":"","published_at":"2024-11-12T13:22:43+08:00","sort_order":"alpha-asc","template_suffix":"","disjunctive":true,"rules":[{"column":"tag","relation":"equals","condition":"Bundles"},{"column":"vendor","relation":"equals","condition":"Franjos Kitchen"},{"column":"vendor","relation":"equals","condition":"Adored Illustrations"},{"column":"vendor","relation":"equals","condition":"Amazing Oils"},{"column":"vendor","relation":"equals","condition":"Ice Ice Booby"},{"column":"vendor","relation":"equals","condition":"Made to Milk"},{"column":"vendor","relation":"equals","condition":"Milky Goodness"},{"column":"vendor","relation":"equals","condition":"Seasons of Mama"},{"column":"vendor","relation":"equals","condition":"Silverette"},{"column":"vendor","relation":"equals","condition":"Snuggle Hunny"},{"column":"vendor","relation":"equals","condition":"Yung Bod"},{"column":"vendor","relation":"equals","condition":"Bare Love"},{"column":"vendor","relation":"equals","condition":"Haakaa"},{"column":"vendor","relation":"equals","condition":"Mere Botanicals"},{"column":"vendor","relation":"equals","condition":"The Birth Store Hire"},{"column":"vendor","relation":"equals","condition":"The Birth Store"}],"published_scope":"global","image":{"created_at":"2024-11-13T10:58:16+08:00","alt":"Shop All Sale - The Birth Store","width":2048,"height":1365,"src":"\/\/www.thebirthstore.com.au\/cdn\/shop\/collections\/shop-all-sale-297361.jpg?v=1731466697"}}]}
[{"alt":"Haakaa Generation 2 Silicone Breast Pump with Suction Base - The Birth Store-Haakaa","id":27007585943741,"position":1,"preview_image":{"aspect_ratio":1.0,"height":949,"width":949,"src":"\/\/www.thebirthstore.com.au\/cdn\/shop\/files\/haakaa-generation-2-silicone-breast-pump-with-suction-base-238344.jpg?v=1714967970"},"aspect_ratio":1.0,"height":949,"media_type":"image","src":"\/\/www.thebirthstore.com.au\/cdn\/shop\/files\/haakaa-generation-2-silicone-breast-pump-with-suction-base-238344.jpg?v=1714967970","width":949},{"alt":"Haakaa Generation 2 Silicone Breast Pump with Suction Base - The Birth Store-Haakaa","id":27007585976509,"position":2,"preview_image":{"aspect_ratio":1.0,"height":800,"width":800,"src":"\/\/www.thebirthstore.com.au\/cdn\/shop\/files\/haakaa-generation-2-silicone-breast-pump-with-suction-base-596943.jpg?v=1714967970"},"aspect_ratio":1.0,"height":800,"media_type":"image","src":"\/\/www.thebirthstore.com.au\/cdn\/shop\/files\/haakaa-generation-2-silicone-breast-pump-with-suction-base-596943.jpg?v=1714967970","width":800},{"alt":"Haakaa Generation 2 Silicone Breast Pump with Suction Base - The Birth Store-Haakaa","id":27007586009277,"position":3,"preview_image":{"aspect_ratio":1.0,"height":800,"width":800,"src":"\/\/www.thebirthstore.com.au\/cdn\/shop\/files\/haakaa-generation-2-silicone-breast-pump-with-suction-base-809663.jpg?v=1714967970"},"aspect_ratio":1.0,"height":800,"media_type":"image","src":"\/\/www.thebirthstore.com.au\/cdn\/shop\/files\/haakaa-generation-2-silicone-breast-pump-with-suction-base-809663.jpg?v=1714967970","width":800},{"alt":"Haakaa Generation 2 Silicone Breast Pump with Suction Base - The Birth Store-Haakaa","id":27007586042045,"position":4,"preview_image":{"aspect_ratio":1.367,"height":447,"width":611,"src":"\/\/www.thebirthstore.com.au\/cdn\/shop\/files\/haakaa-generation-2-silicone-breast-pump-with-suction-base-786701.jpg?v=1714967970"},"aspect_ratio":1.367,"height":447,"media_type":"image","src":"\/\/www.thebirthstore.com.au\/cdn\/shop\/files\/haakaa-generation-2-silicone-breast-pump-with-suction-base-786701.jpg?v=1714967970","width":611},{"alt":"Haakaa Generation 2 Silicone Breast Pump with Suction Base - The Birth Store-Haakaa","id":27007586074813,"position":5,"preview_image":{"aspect_ratio":1.086,"height":594,"width":645,"src":"\/\/www.thebirthstore.com.au\/cdn\/shop\/files\/haakaa-generation-2-silicone-breast-pump-with-suction-base-973994.jpg?v=1714967970"},"aspect_ratio":1.086,"height":594,"media_type":"image","src":"\/\/www.thebirthstore.com.au\/cdn\/shop\/files\/haakaa-generation-2-silicone-breast-pump-with-suction-base-973994.jpg?v=1714967970","width":645}]
{"item":{"id":7054922711229,"title":"Healing Peri Spray 30ml","handle":"healing-peri-spray-30ml","description":"\u003cspan data-mce-fragment=\"1\"\u003eHealing Peri Spray has been designed by a Naturopath to help gently ease and sooth personal discomfort after the birth. Our Peri spray in a nourishing solution formulated to keep your perineum clean, toned, refreshed and comfortable post birth.\u003c\/span\u003e\u003cbr data-mce-fragment=\"1\"\u003e\u003cbr data-mce-fragment=\"1\"\u003e\u003cspan data-mce-fragment=\"1\"\u003e\u003cstrong\u003eIngredients:\u003c\/strong\u003e Hamamelis virginiana\u003c\/span\u003e\u003cstrong data-mce-fragment=\"1\"\u003e\u003cspan data-mce-fragment=\"1\"\u003e \u003c\/span\u003e(Witch hazel)\u003c\/strong\u003e\u003cspan data-mce-fragment=\"1\"\u003e, Aloe barbadensis \u003c\/span\u003e\u003cstrong data-mce-fragment=\"1\"\u003e(Aloe Vera)\u003c\/strong\u003e\u003cspan data-mce-fragment=\"1\"\u003e leaf juice, Equisetum arvense \u003c\/span\u003e\u003cstrong data-mce-fragment=\"1\"\u003e(Horse tail)\u003c\/strong\u003e\u003cspan data-mce-fragment=\"1\"\u003e extract, Natural Vitamin E (Mixed Tocopherols 70%), Grapefruit seed extract\u003c\/span\u003e\u003cbr data-mce-fragment=\"1\"\u003e\u003cbr data-mce-fragment=\"1\"\u003e\u003cspan data-mce-fragment=\"1\"\u003e\u003cstrong\u003eDirections:\u003c\/strong\u003e Spray onto the perineum post birth multiple times per day. Can be used on a caesarean section wound. Store in the fridge for added benefit. Do not ingest. Always perform a patch test before use. If reaction occurs, seek medical attention.\u003c\/span\u003e\u003cbr data-mce-fragment=\"1\"\u003e\u003cbr data-mce-fragment=\"1\"\u003e\u003cspan data-mce-fragment=\"1\"\u003eFree from silicones, parabens, PEGs, sulfates (SLS\/SLES), GMOs, mineral oils, petrolatum, synthetic colours and fragrances, or animal testing.\u003c\/span\u003e","published_at":"2021-11-18T14:34:37+08:00","created_at":"2021-11-02T12:57:31+08:00","vendor":"Mere Botanicals","type":"","tags":["Hemorrhoids","Hospital Bag","Mum","Peri Care","Post-Partum","Skin Care","Vaginal Birth Recovery"],"price":2295,"price_min":2295,"price_max":2295,"available":true,"price_varies":false,"compare_at_price":null,"compare_at_price_min":0,"compare_at_price_max":0,"compare_at_price_varies":false,"variants":[{"id":40977720082621,"title":"Default Title","option1":"Default Title","option2":null,"option3":null,"sku":"","requires_shipping":true,"taxable":false,"featured_image":null,"available":true,"name":"Healing Peri Spray 30ml","public_title":null,"options":["Default Title"],"price":2295,"weight":95,"compare_at_price":null,"inventory_management":"shopify","barcode":"20082621","requires_selling_plan":false,"selling_plan_allocations":[]}],"images":["\/\/www.thebirthstore.com.au\/cdn\/shop\/files\/healing-peri-spray-30ml-711171.jpg?v=1714967969","\/\/www.thebirthstore.com.au\/cdn\/shop\/files\/healing-peri-spray-30ml-769794.jpg?v=1714967969","\/\/www.thebirthstore.com.au\/cdn\/shop\/files\/healing-peri-spray-30ml-412478.jpg?v=1714967969","\/\/www.thebirthstore.com.au\/cdn\/shop\/files\/healing-peri-spray-30ml-325764.jpg?v=1714967969"],"featured_image":"\/\/www.thebirthstore.com.au\/cdn\/shop\/files\/healing-peri-spray-30ml-711171.jpg?v=1714967969","options":["Title"],"media":[{"alt":"Healing Peri Spray 30ml - The Birth Store-Mere Botanicals","id":27007585681597,"position":1,"preview_image":{"aspect_ratio":1.0,"height":882,"width":882,"src":"\/\/www.thebirthstore.com.au\/cdn\/shop\/files\/healing-peri-spray-30ml-711171.jpg?v=1714967969"},"aspect_ratio":1.0,"height":882,"media_type":"image","src":"\/\/www.thebirthstore.com.au\/cdn\/shop\/files\/healing-peri-spray-30ml-711171.jpg?v=1714967969","width":882},{"alt":"Healing Peri Spray 30ml - The Birth Store-Mere Botanicals","id":27007585714365,"position":2,"preview_image":{"aspect_ratio":0.667,"height":1350,"width":900,"src":"\/\/www.thebirthstore.com.au\/cdn\/shop\/files\/healing-peri-spray-30ml-769794.jpg?v=1714967969"},"aspect_ratio":0.667,"height":1350,"media_type":"image","src":"\/\/www.thebirthstore.com.au\/cdn\/shop\/files\/healing-peri-spray-30ml-769794.jpg?v=1714967969","width":900},{"alt":"Healing Peri Spray 30ml - The Birth Store-Mere Botanicals","id":27007585747133,"position":3,"preview_image":{"aspect_ratio":1.5,"height":600,"width":900,"src":"\/\/www.thebirthstore.com.au\/cdn\/shop\/files\/healing-peri-spray-30ml-412478.jpg?v=1714967969"},"aspect_ratio":1.5,"height":600,"media_type":"image","src":"\/\/www.thebirthstore.com.au\/cdn\/shop\/files\/healing-peri-spray-30ml-412478.jpg?v=1714967969","width":900},{"alt":"Healing Peri Spray 30ml - The Birth Store-Mere Botanicals","id":27007585779901,"position":4,"preview_image":{"aspect_ratio":1.0,"height":70,"width":70,"src":"\/\/www.thebirthstore.com.au\/cdn\/shop\/files\/healing-peri-spray-30ml-325764.jpg?v=1714967969"},"aspect_ratio":1.0,"height":70,"media_type":"image","src":"\/\/www.thebirthstore.com.au\/cdn\/shop\/files\/healing-peri-spray-30ml-325764.jpg?v=1714967969","width":70}],"requires_selling_plan":false,"selling_plan_groups":[],"content":"\u003cspan data-mce-fragment=\"1\"\u003eHealing Peri Spray has been designed by a Naturopath to help gently ease and sooth personal discomfort after the birth. Our Peri spray in a nourishing solution formulated to keep your perineum clean, toned, refreshed and comfortable post birth.\u003c\/span\u003e\u003cbr data-mce-fragment=\"1\"\u003e\u003cbr data-mce-fragment=\"1\"\u003e\u003cspan data-mce-fragment=\"1\"\u003e\u003cstrong\u003eIngredients:\u003c\/strong\u003e Hamamelis virginiana\u003c\/span\u003e\u003cstrong data-mce-fragment=\"1\"\u003e\u003cspan data-mce-fragment=\"1\"\u003e \u003c\/span\u003e(Witch hazel)\u003c\/strong\u003e\u003cspan data-mce-fragment=\"1\"\u003e, Aloe barbadensis \u003c\/span\u003e\u003cstrong data-mce-fragment=\"1\"\u003e(Aloe Vera)\u003c\/strong\u003e\u003cspan data-mce-fragment=\"1\"\u003e leaf juice, Equisetum arvense \u003c\/span\u003e\u003cstrong data-mce-fragment=\"1\"\u003e(Horse tail)\u003c\/strong\u003e\u003cspan data-mce-fragment=\"1\"\u003e extract, Natural Vitamin E (Mixed Tocopherols 70%), Grapefruit seed extract\u003c\/span\u003e\u003cbr data-mce-fragment=\"1\"\u003e\u003cbr data-mce-fragment=\"1\"\u003e\u003cspan data-mce-fragment=\"1\"\u003e\u003cstrong\u003eDirections:\u003c\/strong\u003e Spray onto the perineum post birth multiple times per day. Can be used on a caesarean section wound. Store in the fridge for added benefit. Do not ingest. Always perform a patch test before use. If reaction occurs, seek medical attention.\u003c\/span\u003e\u003cbr data-mce-fragment=\"1\"\u003e\u003cbr data-mce-fragment=\"1\"\u003e\u003cspan data-mce-fragment=\"1\"\u003eFree from silicones, parabens, PEGs, sulfates (SLS\/SLES), GMOs, mineral oils, petrolatum, synthetic colours and fragrances, or animal testing.\u003c\/span\u003e"},"options":[{"name":"Title","position":1,"values":["Default Title"]}],"custom_metafields":{},"metafields":{"badge":"\u003cdiv style='display:none' class='jdgm-prev-badge' data-average-rating='5.00' data-number-of-reviews='2' data-number-of-questions='0'\u003e \u003cspan class='jdgm-prev-badge__stars' data-score='5.00' tabindex='0' aria-label='5.00 stars' role='button'\u003e \u003cspan class='jdgm-star jdgm--on'\u003e\u003c\/span\u003e\u003cspan class='jdgm-star jdgm--on'\u003e\u003c\/span\u003e\u003cspan class='jdgm-star jdgm--on'\u003e\u003c\/span\u003e\u003cspan class='jdgm-star jdgm--on'\u003e\u003c\/span\u003e\u003cspan class='jdgm-star jdgm--on'\u003e\u003c\/span\u003e \u003c\/span\u003e \u003cspan class='jdgm-prev-badge__text'\u003e 2 reviews \u003c\/span\u003e \u003c\/div\u003e","review_snippet_widget":"\u003cdiv class='jdgm-widget jdgm-review-snippet-widget'\u003e \u003cstyle\u003e\n .jdgm-review-snippet-widget{position:relative}.jdgm-review-snippet-widget:hover{cursor:pointer}@media only screen and (max-width: 767px){.jdgm-review-snippet-widget .jdgm-rev-snippet-widget__cards-container{left:unset;right:unset}}.jdgm-review-snippet-widget .jdgm-rev-snippet-card{background:#fff}.jdgm-review-snippet-widget .jdgm-star{color:#399}.jdgm-review-snippet-widget .jdgm-rev-snippet-card{border-radius:8px;background:#fff}.jdgm-review-snippet-widget .jdgm-rev-snippet-card__rev-prod-wrapper{border-radius:8px}.jdgm-review-snippet-widget .jdgm-rev-snippet-card__rev-content-wrapper{max-width:360px}.jdgm-review-snippet-widget .jdgm-rev-snippet-widget__prev-btn,.jdgm-review-snippet-widget .jdgm-rev-snippet-widget__next-btn{border-radius:50%;background:#fff}.jdgm-review-snippet-widget .jdgm-rev-snippet-widget__prev-btn\u003esvg,.jdgm-review-snippet-widget .jdgm-rev-snippet-widget__next-btn\u003esvg{fill:#000}.jdgm-review-snippet-widget .jdgm-rev-snippet-widget__prev-btn{left:0;top:40%}.jdgm-review-snippet-widget .jdgm-rev-snippet-widget__next-btn{right:0;top:40%}.jdgm-full-rev-modal.review-snippet-widget .jm-mfp-content{border-radius:8px}.jdgm-full-rev-modal.review-snippet-widget .jdgm-full-rev__icon{border-radius:8px}.jdgm-full-rev-modal.review-snippet-widget .jdgm-full-rev[data-verified-buyer=\"true\"] .jdgm-full-rev__icon::after{border-radius:8px}.jdgm-full-rev-modal.review-snippet-widget .jdgm-rev__buyer-badge{border-radius:calc( 8px \/ 2 )}.jdgm-full-rev-modal.review-snippet-widget .jdgm-full-rev__pic-img{border-radius:8px}.jdgm-full-rev-modal.review-snippet-widget .jdgm-full-rev__reply{border-radius:8px}.jdgm-full-rev-modal.review-snippet-widget .jdgm-full-rev__replier::before{content:'thebirthstore.com.au'}.jdgm-full-rev-modal.review-snippet-widget .jdgm-full-rev__product-button{border-radius:calc( 8px * 6 )}\n\n \u003c\/style\u003e \u003ci class=\"jdgm-rev-snippet-widget__prev-btn\" style='display: none;'\u003e \u003csvg xmlns=\"http:\/\/www.w3.org\/2000\/svg\" height=\"12\" viewBox=\"0 0 8 12\" width=\"8\" fill=\"#000\"\u003e\u003cpath d=\"M3.09961 6.00005L6.99961 9.90005C7.18294 10.0834 7.27461 10.3167 7.27461 10.6C7.27461 10.8834 7.18294 11.1167 6.99961 11.3C6.81628 11.4834 6.58294 11.575 6.29961 11.575C6.01628 11.575 5.78294 11.4834 5.59961 11.3L0.999609 6.70005C0.899609 6.60005 0.828776 6.49172 0.787109 6.37505C0.745443 6.25838 0.724609 6.13338 0.724609 6.00005C0.724609 5.86672 0.745443 5.74172 0.787109 5.62505C0.828776 5.50838 0.899609 5.40005 0.999609 5.30005L5.59961 0.700049C5.78294 0.516715 6.01628 0.425049 6.29961 0.425049C6.58294 0.425049 6.81628 0.516715 6.99961 0.700049C7.18294 0.883382 7.27461 1.11672 7.27461 1.40005C7.27461 1.68338 7.18294 1.91672 6.99961 2.10005L3.09961 6.00005Z\"\/\u003e\u003c\/svg\u003e \u003c\/i\u003e \u003ci class=\"jdgm-rev-snippet-widget__next-btn\" style='display: none;'\u003e \u003csvg xmlns=\"http:\/\/www.w3.org\/2000\/svg\" height=\"12\" viewBox=\"0 0 8 12\" width=\"8\" fill=\"#000\"\u003e\u003cpath d=\"M4.89961 6.00005L0.999609 2.10005C0.816276 1.91672 0.724609 1.68338 0.724609 1.40005C0.724609 1.11672 0.816276 0.883382 0.999609 0.700049C1.18294 0.516715 1.41628 0.425049 1.69961 0.425049C1.98294 0.425049 2.21628 0.516715 2.39961 0.700049L6.99961 5.30005C7.09961 5.40005 7.17044 5.50838 7.21211 5.62505C7.25378 5.74172 7.27461 5.86672 7.27461 6.00005C7.27461 6.13338 7.25378 6.25838 7.21211 6.37505C7.17044 6.49172 7.09961 6.60005 6.99961 6.70005L2.39961 11.3C2.21628 11.4834 1.98294 11.575 1.69961 11.575C1.41628 11.575 1.18294 11.4834 0.999609 11.3C0.816276 11.1167 0.724609 10.8834 0.724609 10.6C0.724609 10.3167 0.816276 10.0834 0.999609 9.90005L4.89961 6.00005Z\"\/\u003e\u003c\/svg\u003e \u003c\/i\u003e \u003cdiv style=\"overflow: hidden;\"\u003e \u003cdiv class='jdgm-rev-snippet-widget__cards-container'\u003e \u003cdiv class='jdgm-rev-snippet-card' data-review-id='8c42b294-0db7-48d9-95b8-eab958d5e4fc' style='display: none;'\u003e \u003cdiv class=\"jdgm-rev-snippet-card__rev-prod-wrapper\"\u003e \u003ca class='jdgm-rev-snippet-card__rev-content-wrapper jdgm-rev-snippet-card__full-review-link' style='text-decoration: none; color: inherit;padding: 0 34px;' role='button' data-review-id='8c42b294-0db7-48d9-95b8-eab958d5e4fc'\u003e \u003cdiv class='jdgm-rev-snippet-card__rev-header'\u003e \u003cdiv class='jdgm-rev-snippet-card__rev-rating' aria-label='5 stars' role='img'\u003e \u003cspan class='jdgm-star jdgm--on'\u003e\u003c\/span\u003e\u003cspan class='jdgm-star jdgm--on'\u003e\u003c\/span\u003e\u003cspan class='jdgm-star jdgm--on'\u003e\u003c\/span\u003e\u003cspan class='jdgm-star jdgm--on'\u003e\u003c\/span\u003e\u003cspan class='jdgm-star jdgm--on'\u003e\u003c\/span\u003e \u003c\/div\u003e \u003cdiv class='jdgm-rev-snippet-card__reviewer'\u003e Roxy \u003c\/div\u003e \u003c\/div\u003e \u003cdiv class='jdgm-rev-snippet-card__rev-content'\u003e \u003cspan class='jdgm-rev-snippet-card__rev-body'\u003e \u003cp\u003ethis is a must for postpartum recovery.\u003c\/p\u003e \u003c\/span\u003e \u003c\/div\u003e \u003c\/a\u003e \u003c\/div\u003e \u003c\/div\u003e\u003cdiv class='jdgm-rev-snippet-card' data-review-id='29f6b21d-91a2-4ff9-97bc-88d4d9d96cd8' style='display: none;'\u003e \u003cdiv class=\"jdgm-rev-snippet-card__rev-prod-wrapper\"\u003e \u003ca class='jdgm-rev-snippet-card__rev-content-wrapper jdgm-rev-snippet-card__full-review-link' style='text-decoration: none; color: inherit;padding: 0 34px;' role='button' data-review-id='29f6b21d-91a2-4ff9-97bc-88d4d9d96cd8'\u003e \u003cdiv class='jdgm-rev-snippet-card__rev-header'\u003e \u003cdiv class='jdgm-rev-snippet-card__rev-rating' aria-label='5 stars' role='img'\u003e \u003cspan class='jdgm-star jdgm--on'\u003e\u003c\/span\u003e\u003cspan class='jdgm-star jdgm--on'\u003e\u003c\/span\u003e\u003cspan class='jdgm-star jdgm--on'\u003e\u003c\/span\u003e\u003cspan class='jdgm-star jdgm--on'\u003e\u003c\/span\u003e\u003cspan class='jdgm-star jdgm--on'\u003e\u003c\/span\u003e \u003c\/div\u003e \u003cdiv class='jdgm-rev-snippet-card__reviewer'\u003e Marissa Robertson \u003c\/div\u003e \u003c\/div\u003e \u003cdiv class='jdgm-rev-snippet-card__rev-content'\u003e \u003cspan class='jdgm-rev-snippet-card__rev-body'\u003e \u003cp\u003eNow everything will be swollen and sore and this is an easy spray to put on don't have to touch anything sensitive at all. (Espsecially if you end uo with stiches like i did) And doesn't burn! I'm glad my baby brain added this into the cart.\u003c\/p\u003e \u003c\/span\u003e \u003c\/div\u003e \u003c\/a\u003e \u003c\/div\u003e \u003c\/div\u003e \u003c\/div\u003e \u003c\/div\u003e \u003c\/div\u003e","widget":"\u003cdiv class='jdgm-rev-widg' data-updated-at='2025-06-13T16:12:10Z' data-average-rating='5.00' data-number-of-reviews='2' data-number-of-questions='0'\u003e \u003cstyle class='jdgm-temp-hiding-style'\u003e.jdgm-rev-widg{ display: none }\u003c\/style\u003e \u003cdiv class='jdgm-rev-widg__header'\u003e \u003ch2 class='jdgm-rev-widg__title'\u003eCustomer Reviews\u003c\/h2\u003e \u003cdiv class='jdgm-rev-widg__summary'\u003e \u003cdiv class='jdgm-rev-widg__summary-stars' aria-label='Average rating is 5.00 stars' role='img'\u003e \u003cspan class='jdgm-star jdgm--on'\u003e\u003c\/span\u003e\u003cspan class='jdgm-star jdgm--on'\u003e\u003c\/span\u003e\u003cspan class='jdgm-star jdgm--on'\u003e\u003c\/span\u003e\u003cspan class='jdgm-star jdgm--on'\u003e\u003c\/span\u003e\u003cspan class='jdgm-star jdgm--on'\u003e\u003c\/span\u003e \u003c\/div\u003e \u003cdiv class='jdgm-rev-widg__summary-text'\u003eBased on 2 reviews\u003c\/div\u003e \u003c\/div\u003e \u003ca style='display: none' href='#' class='jdgm-write-rev-link' role='button'\u003eWrite a review\u003c\/a\u003e \u003cdiv class='jdgm-histogram jdgm-temp-hidden'\u003e \u003cdiv class='jdgm-histogram__row' data-rating='5' data-frequency='2' data-percentage='100'\u003e \u003cdiv class='jdgm-histogram__star' role='button' aria-label=\"100% (2) reviews with 5 star rating\" tabindex='0' \u003e\u003cspan class='jdgm-star jdgm--on'\u003e\u003c\/span\u003e\u003cspan class='jdgm-star jdgm--on'\u003e\u003c\/span\u003e\u003cspan class='jdgm-star jdgm--on'\u003e\u003c\/span\u003e\u003cspan class='jdgm-star jdgm--on'\u003e\u003c\/span\u003e\u003cspan class='jdgm-star jdgm--on'\u003e\u003c\/span\u003e\u003c\/div\u003e \u003cdiv class='jdgm-histogram__bar'\u003e \u003cdiv class='jdgm-histogram__bar-content' style='width: 100%;'\u003e \u003c\/div\u003e \u003c\/div\u003e \u003cdiv class='jdgm-histogram__percentage'\u003e100%\u003c\/div\u003e \u003cdiv class='jdgm-histogram__frequency'\u003e(2)\u003c\/div\u003e \u003c\/div\u003e \u003cdiv class='jdgm-histogram__row' data-rating='4' data-frequency='0' data-percentage='0'\u003e \u003cdiv class='jdgm-histogram__star' role='button' aria-label=\"0% (0) reviews with 4 star rating\" tabindex='0' \u003e\u003cspan class='jdgm-star jdgm--on'\u003e\u003c\/span\u003e\u003cspan class='jdgm-star jdgm--on'\u003e\u003c\/span\u003e\u003cspan class='jdgm-star jdgm--on'\u003e\u003c\/span\u003e\u003cspan class='jdgm-star jdgm--on'\u003e\u003c\/span\u003e\u003cspan class='jdgm-star jdgm--off'\u003e\u003c\/span\u003e\u003c\/div\u003e \u003cdiv class='jdgm-histogram__bar'\u003e \u003cdiv class='jdgm-histogram__bar-content' style='width: 0%;'\u003e \u003c\/div\u003e \u003c\/div\u003e \u003cdiv class='jdgm-histogram__percentage'\u003e0%\u003c\/div\u003e \u003cdiv class='jdgm-histogram__frequency'\u003e(0)\u003c\/div\u003e \u003c\/div\u003e \u003cdiv class='jdgm-histogram__row' data-rating='3' data-frequency='0' data-percentage='0'\u003e \u003cdiv class='jdgm-histogram__star' role='button' aria-label=\"0% (0) reviews with 3 star rating\" tabindex='0' \u003e\u003cspan class='jdgm-star jdgm--on'\u003e\u003c\/span\u003e\u003cspan class='jdgm-star jdgm--on'\u003e\u003c\/span\u003e\u003cspan class='jdgm-star jdgm--on'\u003e\u003c\/span\u003e\u003cspan class='jdgm-star jdgm--off'\u003e\u003c\/span\u003e\u003cspan class='jdgm-star jdgm--off'\u003e\u003c\/span\u003e\u003c\/div\u003e \u003cdiv class='jdgm-histogram__bar'\u003e \u003cdiv class='jdgm-histogram__bar-content' style='width: 0%;'\u003e \u003c\/div\u003e \u003c\/div\u003e \u003cdiv class='jdgm-histogram__percentage'\u003e0%\u003c\/div\u003e \u003cdiv class='jdgm-histogram__frequency'\u003e(0)\u003c\/div\u003e \u003c\/div\u003e \u003cdiv class='jdgm-histogram__row' data-rating='2' data-frequency='0' data-percentage='0'\u003e \u003cdiv class='jdgm-histogram__star' role='button' aria-label=\"0% (0) reviews with 2 star rating\" tabindex='0' \u003e\u003cspan class='jdgm-star jdgm--on'\u003e\u003c\/span\u003e\u003cspan class='jdgm-star jdgm--on'\u003e\u003c\/span\u003e\u003cspan class='jdgm-star jdgm--off'\u003e\u003c\/span\u003e\u003cspan class='jdgm-star jdgm--off'\u003e\u003c\/span\u003e\u003cspan class='jdgm-star jdgm--off'\u003e\u003c\/span\u003e\u003c\/div\u003e \u003cdiv class='jdgm-histogram__bar'\u003e \u003cdiv class='jdgm-histogram__bar-content' style='width: 0%;'\u003e \u003c\/div\u003e \u003c\/div\u003e \u003cdiv class='jdgm-histogram__percentage'\u003e0%\u003c\/div\u003e \u003cdiv class='jdgm-histogram__frequency'\u003e(0)\u003c\/div\u003e \u003c\/div\u003e \u003cdiv class='jdgm-histogram__row' data-rating='1' data-frequency='0' data-percentage='0'\u003e \u003cdiv class='jdgm-histogram__star' role='button' aria-label=\"0% (0) reviews with 1 star rating\" tabindex='0' \u003e\u003cspan class='jdgm-star jdgm--on'\u003e\u003c\/span\u003e\u003cspan class='jdgm-star jdgm--off'\u003e\u003c\/span\u003e\u003cspan class='jdgm-star jdgm--off'\u003e\u003c\/span\u003e\u003cspan class='jdgm-star jdgm--off'\u003e\u003c\/span\u003e\u003cspan class='jdgm-star jdgm--off'\u003e\u003c\/span\u003e\u003c\/div\u003e \u003cdiv class='jdgm-histogram__bar'\u003e \u003cdiv class='jdgm-histogram__bar-content' style='width: 0%;'\u003e \u003c\/div\u003e \u003c\/div\u003e \u003cdiv class='jdgm-histogram__percentage'\u003e0%\u003c\/div\u003e \u003cdiv class='jdgm-histogram__frequency'\u003e(0)\u003c\/div\u003e \u003c\/div\u003e \u003cdiv class='jdgm-histogram__row jdgm-histogram__clear-filter' data-rating=null tabindex='0'\u003e\u003c\/div\u003e \u003c\/div\u003e \u003cdiv class='jdgm-rev-widg__sort-wrapper'\u003e\u003c\/div\u003e \u003c\/div\u003e \u003cdiv class='jdgm-rev-widg__body'\u003e \u003cdiv class='jdgm-rev-widg__reviews'\u003e\u003cdiv class='jdgm-rev jdgm-divider-top' data-verified-buyer='true' data-review-id='8c42b294-0db7-48d9-95b8-eab958d5e4fc' data-review-language='' data-product-title='Healing Peri Spray 30ml' data-product-url='\/products\/healing-peri-spray-30ml' data-thumb-up-count='0' data-thumb-down-count='0'\u003e \u003cdiv class='jdgm-rev__header'\u003e \u003cdiv class='jdgm-rev__icon' \u003e R \u003c\/div\u003e \u003cspan class='jdgm-rev__rating' data-score='5' tabindex='0' aria-label='5 star review' role='img'\u003e \u003cspan class='jdgm-star jdgm--on'\u003e\u003c\/span\u003e\u003cspan class='jdgm-star jdgm--on'\u003e\u003c\/span\u003e\u003cspan class='jdgm-star jdgm--on'\u003e\u003c\/span\u003e\u003cspan class='jdgm-star jdgm--on'\u003e\u003c\/span\u003e\u003cspan class='jdgm-star jdgm--on'\u003e\u003c\/span\u003e \u003c\/span\u003e \u003cspan class='jdgm-rev__timestamp jdgm-spinner' data-content='2024-06-29 04:10:58 UTC'\u003e\u003c\/span\u003e \u003cdiv class='jdgm-rev__br'\u003e\u003c\/div\u003e \u003cspan class='jdgm-rev__buyer-badge-wrapper'\u003e \u003cspan class='jdgm-rev__buyer-badge'\u003e\u003c\/span\u003e \u003c\/span\u003e \u003cspan class='jdgm-rev__author-wrapper'\u003e \u003cspan class='jdgm-rev__author'\u003eRoxanne Van rensburg\u003c\/span\u003e \u003cspan class='jdgm-rev__location' \u003e \u003c\/span\u003e \u003c\/span\u003e \u003c\/div\u003e \u003cdiv class='jdgm-rev__content'\u003e \u003cdiv class='jdgm-rev__custom-form'\u003e \u003c\/div\u003e \u003cb class='jdgm-rev__title'\u003eGreat product\u003c\/b\u003e \u003cdiv class='jdgm-rev__body'\u003e\u003cp\u003ethis is a must for postpartum recovery.\u003c\/p\u003e\u003c\/div\u003e \u003cdiv class='jdgm-rev__pics'\u003e \u003c\/div\u003e \u003cdiv class='jdgm-rev__vids'\u003e \u003c\/div\u003e \u003cdiv class='jdgm-rev__transparency-badge-wrapper'\u003e \u003c\/div\u003e \u003c\/div\u003e \u003cdiv class='jdgm-rev__actions'\u003e \u003cdiv class='jdgm-rev__social'\u003e\u003c\/div\u003e \u003cdiv class='jdgm-rev__votes'\u003e\u003c\/div\u003e \u003c\/div\u003e \u003cdiv class='jdgm-rev__reply'\u003e \u003c\/div\u003e \u003c\/div\u003e\u003cdiv class='jdgm-rev jdgm-divider-top' data-verified-buyer='false' data-review-id='29f6b21d-91a2-4ff9-97bc-88d4d9d96cd8' data-review-language='' data-product-title='Healing Peri Spray 30ml' data-product-url='\/products\/healing-peri-spray-30ml' data-thumb-up-count='0' data-thumb-down-count='0'\u003e \u003cdiv class='jdgm-rev__header'\u003e \u003cdiv class='jdgm-rev__icon' \u003e M \u003c\/div\u003e \u003cspan class='jdgm-rev__rating' data-score='5' tabindex='0' aria-label='5 star review' role='img'\u003e \u003cspan class='jdgm-star jdgm--on'\u003e\u003c\/span\u003e\u003cspan class='jdgm-star jdgm--on'\u003e\u003c\/span\u003e\u003cspan class='jdgm-star jdgm--on'\u003e\u003c\/span\u003e\u003cspan class='jdgm-star jdgm--on'\u003e\u003c\/span\u003e\u003cspan class='jdgm-star jdgm--on'\u003e\u003c\/span\u003e \u003c\/span\u003e \u003cspan class='jdgm-rev__timestamp jdgm-spinner' data-content='2023-04-20 03:34:20 UTC'\u003e\u003c\/span\u003e \u003cdiv class='jdgm-rev__br'\u003e\u003c\/div\u003e \u003cspan class='jdgm-rev__buyer-badge-wrapper'\u003e \u003c\/span\u003e \u003cspan class='jdgm-rev__author-wrapper'\u003e \u003cspan class='jdgm-rev__author'\u003eMarissa Robertson\u003c\/span\u003e \u003cspan class='jdgm-rev__location' \u003e \u003c\/span\u003e \u003c\/span\u003e \u003c\/div\u003e \u003cdiv class='jdgm-rev__content'\u003e \u003cdiv class='jdgm-rev__custom-form'\u003e \u003c\/div\u003e \u003cb class='jdgm-rev__title'\u003eYou\u0026#39;ll appreciate this!\u003c\/b\u003e \u003cdiv class='jdgm-rev__body'\u003e\u003cp\u003eNow everything will be swollen and sore and this is an easy spray to put on don't have to touch anything sensitive at all. (Espsecially if you end uo with stiches like i did) And doesn't burn! I'm glad my baby brain added this into the cart.\u003c\/p\u003e\u003c\/div\u003e \u003cdiv class='jdgm-rev__pics'\u003e \u003c\/div\u003e \u003cdiv class='jdgm-rev__vids'\u003e \u003c\/div\u003e \u003cdiv class='jdgm-rev__transparency-badge-wrapper'\u003e \u003c\/div\u003e \u003c\/div\u003e \u003cdiv class='jdgm-rev__actions'\u003e \u003cdiv class='jdgm-rev__social'\u003e\u003c\/div\u003e \u003cdiv class='jdgm-rev__votes'\u003e\u003c\/div\u003e \u003c\/div\u003e \u003cdiv class='jdgm-rev__reply'\u003e \u003c\/div\u003e \u003c\/div\u003e\u003c\/div\u003e \u003cdiv class='jdgm-paginate' data-per-page='10' data-url='https:\/\/api.judge.me\/reviews\/reviews_for_widget' style=\"display: none;\"\u003e\u003c\/div\u003e \u003c\/div\u003e \u003cdiv class='jdgm-rev-widg__paginate-spinner-wrapper'\u003e \u003cdiv class='jdgm-spinner'\u003e\u003c\/div\u003e \u003c\/div\u003e \u003c\/div\u003e"},"collections":[{"id":261657460925,"handle":"buy","title":"Buy","updated_at":"2025-12-28T20:10:01+08:00","body_html":"\u003cp\u003eBrowse all of our pregnancy, labour \u0026amp; birth, postpartum and baby essentials here.\u003cbr\u003e\u003c\/p\u003e\n\u003cp\u003e\u003cspan\u003eYou can even buy now and pay later with Afterpay!\u003c\/span\u003e\u003c\/p\u003e","published_at":"2021-03-10T12:05:31+08:00","sort_order":"best-selling","template_suffix":"shop-all-collection","disjunctive":false,"rules":[{"column":"title","relation":"not_contains","condition":"Hire"}],"published_scope":"global","image":{"created_at":"2024-05-06T11:59:42+08:00","alt":"Buy - The Birth Store","width":2048,"height":2048,"src":"\/\/www.thebirthstore.com.au\/cdn\/shop\/collections\/buy-964856.jpg?v=1714967982"}},{"id":281712066749,"handle":"hemorrhoid-care","title":"Haemorrhoid Care","updated_at":"2025-12-28T20:10:01+08:00","body_html":"","published_at":"2021-12-20T14:16:30+08:00","sort_order":"best-selling","template_suffix":"swaddles-collection","disjunctive":false,"rules":[{"column":"tag","relation":"equals","condition":"Hemorrhoids"}],"published_scope":"global","image":{"created_at":"2024-05-06T12:00:00+08:00","alt":"Haemorrhoid Care - The Birth Store","width":763,"height":556,"src":"\/\/www.thebirthstore.com.au\/cdn\/shop\/collections\/haemorrhoid-care-562138.jpg?v=1714968001"}},{"id":295224705213,"handle":"perineal-care","title":"Perineal Care","updated_at":"2025-12-28T20:10:01+08:00","body_html":"","published_at":"2023-11-10T20:43:30+08:00","sort_order":"best-selling","template_suffix":"perineal-care-collection","disjunctive":false,"rules":[{"column":"tag","relation":"equals","condition":"Peri Care"}],"published_scope":"global","image":{"created_at":"2024-05-06T12:00:33+08:00","alt":"Perineal Care - The Birth Store","width":1024,"height":1536,"src":"\/\/www.thebirthstore.com.au\/cdn\/shop\/collections\/perineal-care-657628.jpg?v=1714968034"}},{"id":261658083517,"handle":"post-partum","title":"Postpartum","updated_at":"2025-12-28T20:10:01+08:00","body_html":"\u003cp\u003eShop your postpartum and hospital bag essentials below. Looking for something we don't currently stock? Please reach out and let us know.\u003cbr\u003e\u003c\/p\u003e\n\u003cp\u003e\u003cspan\u003eYou can even buy now and pay later with Afterpay!\u003c\/span\u003e\u003c\/p\u003e","published_at":"2021-03-10T12:33:47+08:00","sort_order":"best-selling","template_suffix":"postpartum-collection","disjunctive":false,"rules":[{"column":"tag","relation":"equals","condition":"Post-Partum"}],"published_scope":"global","image":{"created_at":"2024-05-06T12:00:36+08:00","alt":"Postpartum - The Birth Store","width":611,"height":702,"src":"\/\/www.thebirthstore.com.au\/cdn\/shop\/collections\/postpartum-150119.jpg?v=1714968037"}},{"id":291456483517,"handle":"shop-all","title":"Shop All - Mum","updated_at":"2025-12-28T20:10:01+08:00","body_html":"","published_at":"2022-12-23T22:04:39+08:00","sort_order":"best-selling","template_suffix":"shop-all-collection","disjunctive":false,"rules":[{"column":"variant_price","relation":"greater_than","condition":"1"},{"column":"title","relation":"not_contains","condition":"Batteries"},{"column":"tag","relation":"equals","condition":"Mum"}],"published_scope":"global","image":{"created_at":"2024-05-06T12:00:54+08:00","alt":"Shop All - The Birth Store","width":1365,"height":2048,"src":"\/\/www.thebirthstore.com.au\/cdn\/shop\/collections\/shop-all-693176.jpg?v=1714968055"}},{"id":310045933757,"handle":"shop-all-sale","title":"Shop All Sale","updated_at":"2025-12-28T20:10:01+08:00","body_html":"","published_at":"2024-11-12T13:22:43+08:00","sort_order":"alpha-asc","template_suffix":"","disjunctive":true,"rules":[{"column":"tag","relation":"equals","condition":"Bundles"},{"column":"vendor","relation":"equals","condition":"Franjos Kitchen"},{"column":"vendor","relation":"equals","condition":"Adored Illustrations"},{"column":"vendor","relation":"equals","condition":"Amazing Oils"},{"column":"vendor","relation":"equals","condition":"Ice Ice Booby"},{"column":"vendor","relation":"equals","condition":"Made to Milk"},{"column":"vendor","relation":"equals","condition":"Milky Goodness"},{"column":"vendor","relation":"equals","condition":"Seasons of Mama"},{"column":"vendor","relation":"equals","condition":"Silverette"},{"column":"vendor","relation":"equals","condition":"Snuggle Hunny"},{"column":"vendor","relation":"equals","condition":"Yung Bod"},{"column":"vendor","relation":"equals","condition":"Bare Love"},{"column":"vendor","relation":"equals","condition":"Haakaa"},{"column":"vendor","relation":"equals","condition":"Mere Botanicals"},{"column":"vendor","relation":"equals","condition":"The Birth Store Hire"},{"column":"vendor","relation":"equals","condition":"The Birth Store"}],"published_scope":"global","image":{"created_at":"2024-11-13T10:58:16+08:00","alt":"Shop All Sale - The Birth Store","width":2048,"height":1365,"src":"\/\/www.thebirthstore.com.au\/cdn\/shop\/collections\/shop-all-sale-297361.jpg?v=1731466697"}},{"id":324680483005,"handle":"skin-care","title":"Skin Care","updated_at":"2025-12-28T20:10:01+08:00","body_html":"","published_at":"2025-09-23T22:14:11+08:00","sort_order":"best-selling","template_suffix":"","disjunctive":false,"rules":[{"column":"tag","relation":"equals","condition":"Skin Care"}],"published_scope":"global","image":{"created_at":"2025-10-30T16:17:08+08:00","alt":"Skin Care - The Birth Store","width":800,"height":800,"src":"\/\/www.thebirthstore.com.au\/cdn\/shop\/collections\/skin-care-6874549.jpg?v=1761812228"}},{"id":281712197821,"handle":"vaginal-birth-recovery","title":"Vaginal Birth Recovery","updated_at":"2025-12-28T20:10:01+08:00","body_html":"","published_at":"2021-12-20T14:18:23+08:00","sort_order":"best-selling","template_suffix":"swaddles-collection","disjunctive":true,"rules":[{"column":"tag","relation":"equals","condition":"Vaginal Birth Recovery"},{"column":"tag","relation":"equals","condition":"Vaginal Birth Recover"}],"published_scope":"global","image":{"created_at":"2024-05-06T12:01:03+08:00","alt":"Vaginal Birth Recovery - The Birth Store","width":2048,"height":2048,"src":"\/\/www.thebirthstore.com.au\/cdn\/shop\/collections\/vaginal-birth-recovery-449034.jpg?v=1714968063"}}]}
[{"alt":"Healing Peri Spray 30ml - The Birth Store-Mere Botanicals","id":27007585681597,"position":1,"preview_image":{"aspect_ratio":1.0,"height":882,"width":882,"src":"\/\/www.thebirthstore.com.au\/cdn\/shop\/files\/healing-peri-spray-30ml-711171.jpg?v=1714967969"},"aspect_ratio":1.0,"height":882,"media_type":"image","src":"\/\/www.thebirthstore.com.au\/cdn\/shop\/files\/healing-peri-spray-30ml-711171.jpg?v=1714967969","width":882},{"alt":"Healing Peri Spray 30ml - The Birth Store-Mere Botanicals","id":27007585714365,"position":2,"preview_image":{"aspect_ratio":0.667,"height":1350,"width":900,"src":"\/\/www.thebirthstore.com.au\/cdn\/shop\/files\/healing-peri-spray-30ml-769794.jpg?v=1714967969"},"aspect_ratio":0.667,"height":1350,"media_type":"image","src":"\/\/www.thebirthstore.com.au\/cdn\/shop\/files\/healing-peri-spray-30ml-769794.jpg?v=1714967969","width":900},{"alt":"Healing Peri Spray 30ml - The Birth Store-Mere Botanicals","id":27007585747133,"position":3,"preview_image":{"aspect_ratio":1.5,"height":600,"width":900,"src":"\/\/www.thebirthstore.com.au\/cdn\/shop\/files\/healing-peri-spray-30ml-412478.jpg?v=1714967969"},"aspect_ratio":1.5,"height":600,"media_type":"image","src":"\/\/www.thebirthstore.com.au\/cdn\/shop\/files\/healing-peri-spray-30ml-412478.jpg?v=1714967969","width":900},{"alt":"Healing Peri Spray 30ml - The Birth Store-Mere Botanicals","id":27007585779901,"position":4,"preview_image":{"aspect_ratio":1.0,"height":70,"width":70,"src":"\/\/www.thebirthstore.com.au\/cdn\/shop\/files\/healing-peri-spray-30ml-325764.jpg?v=1714967969"},"aspect_ratio":1.0,"height":70,"media_type":"image","src":"\/\/www.thebirthstore.com.au\/cdn\/shop\/files\/healing-peri-spray-30ml-325764.jpg?v=1714967969","width":70}]
{"item":{"id":7499247845565,"title":"Hyperemesis Gravidarum (HG) Encouragement Cards","handle":"hg-encouragement-cards","description":"\u003cp\u003eWith our hearts full of delight, we welcome our newest set of collab cards and this time with a special focus on our little HG hero's! We know how our HG warrior mamas can feel as they try to explain their HG pregnancy to their small child\/children. In our attempt to support these special families, we have created a set of cards to instill confidence, positivity and oodles of reassurance for these resilient little kiddies. \u003c\/p\u003e\n\u003cp\u003eThis set of 22 cards comes in a plain calico bag and are a slightly smaller size than our originals to suit small hands. They are fun, playful and engaging with age-appropriate language. \u003c\/p\u003e\n\u003cp\u003e\u003cspan\u003eA note to our little HG Hero's\u003c\/span\u003e\u003cspan\u003e \u003c\/span\u003e(which can be found as the cover letter within this set)\u003c\/p\u003e\n\u003cp\u003e\u003cem\u003eDear Little Hero,\u003c\/em\u003e\u003cbr\u003e\u003cem\u003eIf you are reading this, then someone who loves you is having a baby - and growing that baby is making them feel a bit sick.\u003c\/em\u003e\u003cbr\u003e\u003cem\u003eHaving a baby to look forward to is a great, big, wonderful thing but like most things that are great and big and wonderful, it might also feel a bit scary. And seeing someone you love feeling sick, tired and sad can be pretty scary too.\u003c\/em\u003e\u003cbr\u003e\u003cem\u003eThese cards are full of words to help you feel brave or when you need a little reminder that you are loved. It can be hard to remember these things when the world feels like it has been turned upside down, so keep these cards close and use them as much as you need.\u003c\/em\u003e\u003cbr\u003e\u003cem\u003eOne day soon things will feel bright and shiny again - and you will have a new little buddy to make memories with. Even though I don't know you, I want you to know that you are my hero - and I bet the person who has given you these cards thinks you are their hero too.\u003c\/em\u003e\u003cbr\u003e\u003cem\u003eHang in there xx\u003c\/em\u003e\u003c\/p\u003e","published_at":"2023-08-14T22:23:58+08:00","created_at":"2023-08-08T09:47:06+08:00","vendor":"Seasons of Mama","type":"","tags":["Affirmations","Baby Shower Gifts - Mum","Mum","Nausea","Pregnancy"],"price":4995,"price_min":4995,"price_max":4995,"available":true,"price_varies":false,"compare_at_price":null,"compare_at_price_min":0,"compare_at_price_max":0,"compare_at_price_varies":false,"variants":[{"id":42959907750077,"title":"Default Title","option1":"Default Title","option2":null,"option3":null,"sku":null,"requires_shipping":true,"taxable":false,"featured_image":null,"available":true,"name":"Hyperemesis Gravidarum (HG) Encouragement Cards","public_title":null,"options":["Default Title"],"price":4995,"weight":285,"compare_at_price":null,"inventory_management":"shopify","barcode":"07750077","requires_selling_plan":false,"selling_plan_allocations":[]}],"images":["\/\/www.thebirthstore.com.au\/cdn\/shop\/files\/hyperemesis-gravidarum-hg-encouragement-cards-676251.jpg?v=1714967974","\/\/www.thebirthstore.com.au\/cdn\/shop\/files\/hyperemesis-gravidarum-hg-encouragement-cards-363449.jpg?v=1714967974","\/\/www.thebirthstore.com.au\/cdn\/shop\/files\/hyperemesis-gravidarum-hg-encouragement-cards-941179.jpg?v=1714967974","\/\/www.thebirthstore.com.au\/cdn\/shop\/files\/hyperemesis-gravidarum-hg-encouragement-cards-552395.jpg?v=1714967974","\/\/www.thebirthstore.com.au\/cdn\/shop\/files\/hyperemesis-gravidarum-hg-encouragement-cards-822113.jpg?v=1714967974","\/\/www.thebirthstore.com.au\/cdn\/shop\/files\/hyperemesis-gravidarum-hg-encouragement-cards-419378.jpg?v=1714967974","\/\/www.thebirthstore.com.au\/cdn\/shop\/files\/hyperemesis-gravidarum-hg-encouragement-cards-316898.jpg?v=1714967974"],"featured_image":"\/\/www.thebirthstore.com.au\/cdn\/shop\/files\/hyperemesis-gravidarum-hg-encouragement-cards-676251.jpg?v=1714967974","options":["Title"],"media":[{"alt":"Hyperemesis Gravidarum (HG) Encouragement Cards - The Birth Store-Seasons of Mama","id":27007587287229,"position":1,"preview_image":{"aspect_ratio":1.0,"height":2048,"width":2048,"src":"\/\/www.thebirthstore.com.au\/cdn\/shop\/files\/hyperemesis-gravidarum-hg-encouragement-cards-676251.jpg?v=1714967974"},"aspect_ratio":1.0,"height":2048,"media_type":"image","src":"\/\/www.thebirthstore.com.au\/cdn\/shop\/files\/hyperemesis-gravidarum-hg-encouragement-cards-676251.jpg?v=1714967974","width":2048},{"alt":"Hyperemesis Gravidarum (HG) Encouragement Cards - The Birth Store-Seasons of Mama","id":27007587319997,"position":2,"preview_image":{"aspect_ratio":0.674,"height":1228,"width":828,"src":"\/\/www.thebirthstore.com.au\/cdn\/shop\/files\/hyperemesis-gravidarum-hg-encouragement-cards-363449.jpg?v=1714967974"},"aspect_ratio":0.674,"height":1228,"media_type":"image","src":"\/\/www.thebirthstore.com.au\/cdn\/shop\/files\/hyperemesis-gravidarum-hg-encouragement-cards-363449.jpg?v=1714967974","width":828},{"alt":"Hyperemesis Gravidarum (HG) Encouragement Cards - The Birth Store-Seasons of Mama","id":27007587352765,"position":3,"preview_image":{"aspect_ratio":0.667,"height":1200,"width":800,"src":"\/\/www.thebirthstore.com.au\/cdn\/shop\/files\/hyperemesis-gravidarum-hg-encouragement-cards-941179.jpg?v=1714967974"},"aspect_ratio":0.667,"height":1200,"media_type":"image","src":"\/\/www.thebirthstore.com.au\/cdn\/shop\/files\/hyperemesis-gravidarum-hg-encouragement-cards-941179.jpg?v=1714967974","width":800},{"alt":"Hyperemesis Gravidarum (HG) Encouragement Cards - The Birth Store-Seasons of Mama","id":27007587385533,"position":4,"preview_image":{"aspect_ratio":0.67,"height":1236,"width":828,"src":"\/\/www.thebirthstore.com.au\/cdn\/shop\/files\/hyperemesis-gravidarum-hg-encouragement-cards-552395.jpg?v=1714967974"},"aspect_ratio":0.67,"height":1236,"media_type":"image","src":"\/\/www.thebirthstore.com.au\/cdn\/shop\/files\/hyperemesis-gravidarum-hg-encouragement-cards-552395.jpg?v=1714967974","width":828},{"alt":"Hyperemesis Gravidarum (HG) Encouragement Cards - The Birth Store-Seasons of Mama","id":27007587418301,"position":5,"preview_image":{"aspect_ratio":0.688,"height":1204,"width":828,"src":"\/\/www.thebirthstore.com.au\/cdn\/shop\/files\/hyperemesis-gravidarum-hg-encouragement-cards-822113.jpg?v=1714967974"},"aspect_ratio":0.688,"height":1204,"media_type":"image","src":"\/\/www.thebirthstore.com.au\/cdn\/shop\/files\/hyperemesis-gravidarum-hg-encouragement-cards-822113.jpg?v=1714967974","width":828},{"alt":"Hyperemesis Gravidarum (HG) Encouragement Cards - The Birth Store-Seasons of Mama","id":27007587483837,"position":6,"preview_image":{"aspect_ratio":1.525,"height":543,"width":828,"src":"\/\/www.thebirthstore.com.au\/cdn\/shop\/files\/hyperemesis-gravidarum-hg-encouragement-cards-419378.jpg?v=1714967974"},"aspect_ratio":1.525,"height":543,"media_type":"image","src":"\/\/www.thebirthstore.com.au\/cdn\/shop\/files\/hyperemesis-gravidarum-hg-encouragement-cards-419378.jpg?v=1714967974","width":828},{"alt":"Hyperemesis Gravidarum (HG) Encouragement Cards - The Birth Store-Seasons of Mama","id":27007587516605,"position":7,"preview_image":{"aspect_ratio":1.0,"height":1080,"width":1080,"src":"\/\/www.thebirthstore.com.au\/cdn\/shop\/files\/hyperemesis-gravidarum-hg-encouragement-cards-316898.jpg?v=1714967974"},"aspect_ratio":1.0,"height":1080,"media_type":"image","src":"\/\/www.thebirthstore.com.au\/cdn\/shop\/files\/hyperemesis-gravidarum-hg-encouragement-cards-316898.jpg?v=1714967974","width":1080}],"requires_selling_plan":false,"selling_plan_groups":[],"content":"\u003cp\u003eWith our hearts full of delight, we welcome our newest set of collab cards and this time with a special focus on our little HG hero's! We know how our HG warrior mamas can feel as they try to explain their HG pregnancy to their small child\/children. In our attempt to support these special families, we have created a set of cards to instill confidence, positivity and oodles of reassurance for these resilient little kiddies. \u003c\/p\u003e\n\u003cp\u003eThis set of 22 cards comes in a plain calico bag and are a slightly smaller size than our originals to suit small hands. They are fun, playful and engaging with age-appropriate language. \u003c\/p\u003e\n\u003cp\u003e\u003cspan\u003eA note to our little HG Hero's\u003c\/span\u003e\u003cspan\u003e \u003c\/span\u003e(which can be found as the cover letter within this set)\u003c\/p\u003e\n\u003cp\u003e\u003cem\u003eDear Little Hero,\u003c\/em\u003e\u003cbr\u003e\u003cem\u003eIf you are reading this, then someone who loves you is having a baby - and growing that baby is making them feel a bit sick.\u003c\/em\u003e\u003cbr\u003e\u003cem\u003eHaving a baby to look forward to is a great, big, wonderful thing but like most things that are great and big and wonderful, it might also feel a bit scary. And seeing someone you love feeling sick, tired and sad can be pretty scary too.\u003c\/em\u003e\u003cbr\u003e\u003cem\u003eThese cards are full of words to help you feel brave or when you need a little reminder that you are loved. It can be hard to remember these things when the world feels like it has been turned upside down, so keep these cards close and use them as much as you need.\u003c\/em\u003e\u003cbr\u003e\u003cem\u003eOne day soon things will feel bright and shiny again - and you will have a new little buddy to make memories with. Even though I don't know you, I want you to know that you are my hero - and I bet the person who has given you these cards thinks you are their hero too.\u003c\/em\u003e\u003cbr\u003e\u003cem\u003eHang in there xx\u003c\/em\u003e\u003c\/p\u003e"},"options":[{"name":"Title","position":1,"values":["Default Title"]}],"custom_metafields":{},"metafields":{"badge":"\u003cdiv style='display:none' class='jdgm-prev-badge' data-average-rating='0.00' data-number-of-reviews='0' data-number-of-questions='0'\u003e \u003cspan class='jdgm-prev-badge__stars' data-score='0.00' tabindex='0' aria-label='0.00 stars' role='button'\u003e \u003cspan class='jdgm-star jdgm--off'\u003e\u003c\/span\u003e\u003cspan class='jdgm-star jdgm--off'\u003e\u003c\/span\u003e\u003cspan class='jdgm-star jdgm--off'\u003e\u003c\/span\u003e\u003cspan class='jdgm-star jdgm--off'\u003e\u003c\/span\u003e\u003cspan class='jdgm-star jdgm--off'\u003e\u003c\/span\u003e \u003c\/span\u003e \u003cspan class='jdgm-prev-badge__text'\u003e No reviews \u003c\/span\u003e \u003c\/div\u003e","widget":"\u003cdiv class='jdgm-rev-widg' data-updated-at='2025-06-13T16:12:53Z' data-average-rating='0.00' data-number-of-reviews='0' data-number-of-questions='0'\u003e \u003cstyle class='jdgm-temp-hiding-style'\u003e.jdgm-rev-widg{ display: none }\u003c\/style\u003e \u003cdiv class='jdgm-rev-widg__header'\u003e \u003ch2 class='jdgm-rev-widg__title'\u003eCustomer Reviews\u003c\/h2\u003e \u003cdiv class='jdgm-rev-widg__summary'\u003e \u003cdiv class='jdgm-rev-widg__summary-stars' aria-label='Average rating is 0.00 stars' role='img'\u003e \u003cspan class='jdgm-star jdgm--off'\u003e\u003c\/span\u003e\u003cspan class='jdgm-star jdgm--off'\u003e\u003c\/span\u003e\u003cspan class='jdgm-star jdgm--off'\u003e\u003c\/span\u003e\u003cspan class='jdgm-star jdgm--off'\u003e\u003c\/span\u003e\u003cspan class='jdgm-star jdgm--off'\u003e\u003c\/span\u003e \u003c\/div\u003e \u003cdiv class='jdgm-rev-widg__summary-text'\u003eBe the first to write a review\u003c\/div\u003e \u003c\/div\u003e \u003ca style='display: none' href='#' class='jdgm-write-rev-link' role='button'\u003eWrite a review\u003c\/a\u003e \u003cdiv class='jdgm-histogram jdgm-temp-hidden'\u003e \u003cdiv class='jdgm-histogram__row' data-rating='5' data-frequency='0' data-percentage='0'\u003e \u003cdiv class='jdgm-histogram__star' role='button' aria-label=\"0% (0) reviews with 5 star rating\" tabindex='0' \u003e\u003cspan class='jdgm-star jdgm--on'\u003e\u003c\/span\u003e\u003cspan class='jdgm-star jdgm--on'\u003e\u003c\/span\u003e\u003cspan class='jdgm-star jdgm--on'\u003e\u003c\/span\u003e\u003cspan class='jdgm-star jdgm--on'\u003e\u003c\/span\u003e\u003cspan class='jdgm-star jdgm--on'\u003e\u003c\/span\u003e\u003c\/div\u003e \u003cdiv class='jdgm-histogram__bar'\u003e \u003cdiv class='jdgm-histogram__bar-content' style='width: 0%;'\u003e \u003c\/div\u003e \u003c\/div\u003e \u003cdiv class='jdgm-histogram__percentage'\u003e0%\u003c\/div\u003e \u003cdiv class='jdgm-histogram__frequency'\u003e(0)\u003c\/div\u003e \u003c\/div\u003e \u003cdiv class='jdgm-histogram__row' data-rating='4' data-frequency='0' data-percentage='0'\u003e \u003cdiv class='jdgm-histogram__star' role='button' aria-label=\"0% (0) reviews with 4 star rating\" tabindex='0' \u003e\u003cspan class='jdgm-star jdgm--on'\u003e\u003c\/span\u003e\u003cspan class='jdgm-star jdgm--on'\u003e\u003c\/span\u003e\u003cspan class='jdgm-star jdgm--on'\u003e\u003c\/span\u003e\u003cspan class='jdgm-star jdgm--on'\u003e\u003c\/span\u003e\u003cspan class='jdgm-star jdgm--off'\u003e\u003c\/span\u003e\u003c\/div\u003e \u003cdiv class='jdgm-histogram__bar'\u003e \u003cdiv class='jdgm-histogram__bar-content' style='width: 0%;'\u003e \u003c\/div\u003e \u003c\/div\u003e \u003cdiv class='jdgm-histogram__percentage'\u003e0%\u003c\/div\u003e \u003cdiv class='jdgm-histogram__frequency'\u003e(0)\u003c\/div\u003e \u003c\/div\u003e \u003cdiv class='jdgm-histogram__row' data-rating='3' data-frequency='0' data-percentage='0'\u003e \u003cdiv class='jdgm-histogram__star' role='button' aria-label=\"0% (0) reviews with 3 star rating\" tabindex='0' \u003e\u003cspan class='jdgm-star jdgm--on'\u003e\u003c\/span\u003e\u003cspan class='jdgm-star jdgm--on'\u003e\u003c\/span\u003e\u003cspan class='jdgm-star jdgm--on'\u003e\u003c\/span\u003e\u003cspan class='jdgm-star jdgm--off'\u003e\u003c\/span\u003e\u003cspan class='jdgm-star jdgm--off'\u003e\u003c\/span\u003e\u003c\/div\u003e \u003cdiv class='jdgm-histogram__bar'\u003e \u003cdiv class='jdgm-histogram__bar-content' style='width: 0%;'\u003e \u003c\/div\u003e \u003c\/div\u003e \u003cdiv class='jdgm-histogram__percentage'\u003e0%\u003c\/div\u003e \u003cdiv class='jdgm-histogram__frequency'\u003e(0)\u003c\/div\u003e \u003c\/div\u003e \u003cdiv class='jdgm-histogram__row' data-rating='2' data-frequency='0' data-percentage='0'\u003e \u003cdiv class='jdgm-histogram__star' role='button' aria-label=\"0% (0) reviews with 2 star rating\" tabindex='0' \u003e\u003cspan class='jdgm-star jdgm--on'\u003e\u003c\/span\u003e\u003cspan class='jdgm-star jdgm--on'\u003e\u003c\/span\u003e\u003cspan class='jdgm-star jdgm--off'\u003e\u003c\/span\u003e\u003cspan class='jdgm-star jdgm--off'\u003e\u003c\/span\u003e\u003cspan class='jdgm-star jdgm--off'\u003e\u003c\/span\u003e\u003c\/div\u003e \u003cdiv class='jdgm-histogram__bar'\u003e \u003cdiv class='jdgm-histogram__bar-content' style='width: 0%;'\u003e \u003c\/div\u003e \u003c\/div\u003e \u003cdiv class='jdgm-histogram__percentage'\u003e0%\u003c\/div\u003e \u003cdiv class='jdgm-histogram__frequency'\u003e(0)\u003c\/div\u003e \u003c\/div\u003e \u003cdiv class='jdgm-histogram__row' data-rating='1' data-frequency='0' data-percentage='0'\u003e \u003cdiv class='jdgm-histogram__star' role='button' aria-label=\"0% (0) reviews with 1 star rating\" tabindex='0' \u003e\u003cspan class='jdgm-star jdgm--on'\u003e\u003c\/span\u003e\u003cspan class='jdgm-star jdgm--off'\u003e\u003c\/span\u003e\u003cspan class='jdgm-star jdgm--off'\u003e\u003c\/span\u003e\u003cspan class='jdgm-star jdgm--off'\u003e\u003c\/span\u003e\u003cspan class='jdgm-star jdgm--off'\u003e\u003c\/span\u003e\u003c\/div\u003e \u003cdiv class='jdgm-histogram__bar'\u003e \u003cdiv class='jdgm-histogram__bar-content' style='width: 0%;'\u003e \u003c\/div\u003e \u003c\/div\u003e \u003cdiv class='jdgm-histogram__percentage'\u003e0%\u003c\/div\u003e \u003cdiv class='jdgm-histogram__frequency'\u003e(0)\u003c\/div\u003e \u003c\/div\u003e \u003cdiv class='jdgm-histogram__row jdgm-histogram__clear-filter' data-rating=null tabindex='0'\u003e\u003c\/div\u003e \u003c\/div\u003e \u003cdiv class='jdgm-rev-widg__sort-wrapper'\u003e\u003c\/div\u003e \u003c\/div\u003e \u003cdiv class='jdgm-rev-widg__body'\u003e \u003cdiv class='jdgm-rev-widg__reviews'\u003e\u003c\/div\u003e \u003cdiv class='jdgm-paginate' data-per-page='10' data-url='https:\/\/api.judge.me\/reviews\/reviews_for_widget' style=\"display: none;\"\u003e\u003c\/div\u003e \u003c\/div\u003e \u003cdiv class='jdgm-rev-widg__paginate-spinner-wrapper'\u003e \u003cdiv class='jdgm-spinner'\u003e\u003c\/div\u003e \u003c\/div\u003e \u003c\/div\u003e"},"collections":[{"id":295224541373,"handle":"affirmations","title":"Affirmations","updated_at":"2025-12-28T20:10:01+08:00","body_html":"","published_at":"2023-11-10T20:37:58+08:00","sort_order":"best-selling","template_suffix":"swaddles-collection","disjunctive":false,"rules":[{"column":"tag","relation":"equals","condition":"Affirmations"}],"published_scope":"global","image":{"created_at":"2024-05-06T11:59:20+08:00","alt":"Affirmations - The Birth Store","width":1000,"height":1250,"src":"\/\/www.thebirthstore.com.au\/cdn\/shop\/collections\/affirmations-495130.jpg?v=1714967960"}},{"id":281356533949,"handle":"baby-shower-gifts","title":"Baby Shower Gifts - Mum","updated_at":"2025-12-28T20:10:01+08:00","body_html":"\u003cp\u003eLooking for a unique baby shower gift? Or an all-in-one bundle pack to suit all your needs? We've got just the thing!\u003c\/p\u003e","published_at":"2021-12-06T13:43:56+08:00","sort_order":"best-selling","template_suffix":"baby-shower-gifts","disjunctive":true,"rules":[{"column":"tag","relation":"equals","condition":"Baby Shower Gifts - Mum"},{"column":"tag","relation":"equals","condition":"Gift Card"}],"published_scope":"global","image":{"created_at":"2024-05-06T11:59:28+08:00","alt":"Baby Shower Gifts - The Birth Store","width":1200,"height":1800,"src":"\/\/www.thebirthstore.com.au\/cdn\/shop\/collections\/baby-shower-gifts-401770.jpg?v=1761791272"}},{"id":261657460925,"handle":"buy","title":"Buy","updated_at":"2025-12-28T20:10:01+08:00","body_html":"\u003cp\u003eBrowse all of our pregnancy, labour \u0026amp; birth, postpartum and baby essentials here.\u003cbr\u003e\u003c\/p\u003e\n\u003cp\u003e\u003cspan\u003eYou can even buy now and pay later with Afterpay!\u003c\/span\u003e\u003c\/p\u003e","published_at":"2021-03-10T12:05:31+08:00","sort_order":"best-selling","template_suffix":"shop-all-collection","disjunctive":false,"rules":[{"column":"title","relation":"not_contains","condition":"Hire"}],"published_scope":"global","image":{"created_at":"2024-05-06T11:59:42+08:00","alt":"Buy - The Birth Store","width":2048,"height":2048,"src":"\/\/www.thebirthstore.com.au\/cdn\/shop\/collections\/buy-964856.jpg?v=1714967982"}},{"id":295224836285,"handle":"nausea","title":"Nausea","updated_at":"2025-12-28T20:10:01+08:00","body_html":"","published_at":"2023-11-10T20:47:34+08:00","sort_order":"best-selling","template_suffix":"nausea-collection","disjunctive":false,"rules":[{"column":"tag","relation":"equals","condition":"Nausea"}],"published_scope":"global","image":{"created_at":"2024-05-06T12:00:24+08:00","alt":"Nausea - The Birth Store","width":610,"height":915,"src":"\/\/www.thebirthstore.com.au\/cdn\/shop\/collections\/nausea-404101.jpg?v=1714968024"}},{"id":261658149053,"handle":"pregnancy-and-maternity-products","title":"Pregnancy","updated_at":"2025-12-28T20:10:01+08:00","body_html":"\u003cp\u003eShop your pregnancy essentials below. Looking for something we don't currently stock? Please reach out and let us know.\u003cbr\u003e\u003c\/p\u003e\n\u003cp\u003e\u003cspan\u003eYou can even buy now and pay later with Afterpay!\u003c\/span\u003e\u003c\/p\u003e","published_at":"2021-03-10T12:34:22+08:00","sort_order":"best-selling","template_suffix":"pregnancy-collection","disjunctive":false,"rules":[{"column":"tag","relation":"equals","condition":"Pregnancy"}],"published_scope":"global","image":{"created_at":"2024-05-06T12:00:40+08:00","alt":"Pregnancy - The Birth Store","width":1024,"height":1536,"src":"\/\/www.thebirthstore.com.au\/cdn\/shop\/collections\/pregnancy-899677.jpg?v=1714968040"}},{"id":291456483517,"handle":"shop-all","title":"Shop All - Mum","updated_at":"2025-12-28T20:10:01+08:00","body_html":"","published_at":"2022-12-23T22:04:39+08:00","sort_order":"best-selling","template_suffix":"shop-all-collection","disjunctive":false,"rules":[{"column":"variant_price","relation":"greater_than","condition":"1"},{"column":"title","relation":"not_contains","condition":"Batteries"},{"column":"tag","relation":"equals","condition":"Mum"}],"published_scope":"global","image":{"created_at":"2024-05-06T12:00:54+08:00","alt":"Shop All - The Birth Store","width":1365,"height":2048,"src":"\/\/www.thebirthstore.com.au\/cdn\/shop\/collections\/shop-all-693176.jpg?v=1714968055"}},{"id":310045933757,"handle":"shop-all-sale","title":"Shop All Sale","updated_at":"2025-12-28T20:10:01+08:00","body_html":"","published_at":"2024-11-12T13:22:43+08:00","sort_order":"alpha-asc","template_suffix":"","disjunctive":true,"rules":[{"column":"tag","relation":"equals","condition":"Bundles"},{"column":"vendor","relation":"equals","condition":"Franjos Kitchen"},{"column":"vendor","relation":"equals","condition":"Adored Illustrations"},{"column":"vendor","relation":"equals","condition":"Amazing Oils"},{"column":"vendor","relation":"equals","condition":"Ice Ice Booby"},{"column":"vendor","relation":"equals","condition":"Made to Milk"},{"column":"vendor","relation":"equals","condition":"Milky Goodness"},{"column":"vendor","relation":"equals","condition":"Seasons of Mama"},{"column":"vendor","relation":"equals","condition":"Silverette"},{"column":"vendor","relation":"equals","condition":"Snuggle Hunny"},{"column":"vendor","relation":"equals","condition":"Yung Bod"},{"column":"vendor","relation":"equals","condition":"Bare Love"},{"column":"vendor","relation":"equals","condition":"Haakaa"},{"column":"vendor","relation":"equals","condition":"Mere Botanicals"},{"column":"vendor","relation":"equals","condition":"The Birth Store Hire"},{"column":"vendor","relation":"equals","condition":"The Birth Store"}],"published_scope":"global","image":{"created_at":"2024-11-13T10:58:16+08:00","alt":"Shop All Sale - The Birth Store","width":2048,"height":1365,"src":"\/\/www.thebirthstore.com.au\/cdn\/shop\/collections\/shop-all-sale-297361.jpg?v=1731466697"}}]}
[{"alt":"Hyperemesis Gravidarum (HG) Encouragement Cards - The Birth Store-Seasons of Mama","id":27007587287229,"position":1,"preview_image":{"aspect_ratio":1.0,"height":2048,"width":2048,"src":"\/\/www.thebirthstore.com.au\/cdn\/shop\/files\/hyperemesis-gravidarum-hg-encouragement-cards-676251.jpg?v=1714967974"},"aspect_ratio":1.0,"height":2048,"media_type":"image","src":"\/\/www.thebirthstore.com.au\/cdn\/shop\/files\/hyperemesis-gravidarum-hg-encouragement-cards-676251.jpg?v=1714967974","width":2048},{"alt":"Hyperemesis Gravidarum (HG) Encouragement Cards - The Birth Store-Seasons of Mama","id":27007587319997,"position":2,"preview_image":{"aspect_ratio":0.674,"height":1228,"width":828,"src":"\/\/www.thebirthstore.com.au\/cdn\/shop\/files\/hyperemesis-gravidarum-hg-encouragement-cards-363449.jpg?v=1714967974"},"aspect_ratio":0.674,"height":1228,"media_type":"image","src":"\/\/www.thebirthstore.com.au\/cdn\/shop\/files\/hyperemesis-gravidarum-hg-encouragement-cards-363449.jpg?v=1714967974","width":828},{"alt":"Hyperemesis Gravidarum (HG) Encouragement Cards - The Birth Store-Seasons of Mama","id":27007587352765,"position":3,"preview_image":{"aspect_ratio":0.667,"height":1200,"width":800,"src":"\/\/www.thebirthstore.com.au\/cdn\/shop\/files\/hyperemesis-gravidarum-hg-encouragement-cards-941179.jpg?v=1714967974"},"aspect_ratio":0.667,"height":1200,"media_type":"image","src":"\/\/www.thebirthstore.com.au\/cdn\/shop\/files\/hyperemesis-gravidarum-hg-encouragement-cards-941179.jpg?v=1714967974","width":800},{"alt":"Hyperemesis Gravidarum (HG) Encouragement Cards - The Birth Store-Seasons of Mama","id":27007587385533,"position":4,"preview_image":{"aspect_ratio":0.67,"height":1236,"width":828,"src":"\/\/www.thebirthstore.com.au\/cdn\/shop\/files\/hyperemesis-gravidarum-hg-encouragement-cards-552395.jpg?v=1714967974"},"aspect_ratio":0.67,"height":1236,"media_type":"image","src":"\/\/www.thebirthstore.com.au\/cdn\/shop\/files\/hyperemesis-gravidarum-hg-encouragement-cards-552395.jpg?v=1714967974","width":828},{"alt":"Hyperemesis Gravidarum (HG) Encouragement Cards - The Birth Store-Seasons of Mama","id":27007587418301,"position":5,"preview_image":{"aspect_ratio":0.688,"height":1204,"width":828,"src":"\/\/www.thebirthstore.com.au\/cdn\/shop\/files\/hyperemesis-gravidarum-hg-encouragement-cards-822113.jpg?v=1714967974"},"aspect_ratio":0.688,"height":1204,"media_type":"image","src":"\/\/www.thebirthstore.com.au\/cdn\/shop\/files\/hyperemesis-gravidarum-hg-encouragement-cards-822113.jpg?v=1714967974","width":828},{"alt":"Hyperemesis Gravidarum (HG) Encouragement Cards - The Birth Store-Seasons of Mama","id":27007587483837,"position":6,"preview_image":{"aspect_ratio":1.525,"height":543,"width":828,"src":"\/\/www.thebirthstore.com.au\/cdn\/shop\/files\/hyperemesis-gravidarum-hg-encouragement-cards-419378.jpg?v=1714967974"},"aspect_ratio":1.525,"height":543,"media_type":"image","src":"\/\/www.thebirthstore.com.au\/cdn\/shop\/files\/hyperemesis-gravidarum-hg-encouragement-cards-419378.jpg?v=1714967974","width":828},{"alt":"Hyperemesis Gravidarum (HG) Encouragement Cards - The Birth Store-Seasons of Mama","id":27007587516605,"position":7,"preview_image":{"aspect_ratio":1.0,"height":1080,"width":1080,"src":"\/\/www.thebirthstore.com.au\/cdn\/shop\/files\/hyperemesis-gravidarum-hg-encouragement-cards-316898.jpg?v=1714967974"},"aspect_ratio":1.0,"height":1080,"media_type":"image","src":"\/\/www.thebirthstore.com.au\/cdn\/shop\/files\/hyperemesis-gravidarum-hg-encouragement-cards-316898.jpg?v=1714967974","width":1080}]
{"item":{"id":7973362172093,"title":"Instant Peri Ice Packs","handle":"perineal-ice-pack-sleeves-copy","description":"\u003cp data-pm-slice=\"1 1 []\"\u003e\u003cspan\u003ePostpartum recovery can be unpredictable, but relief should always be within reach. Our Instant Peri Ice Packs are designed for fast, cooling comfort when you need it most. No freezing required—just crack, shake, and experience soothing relief - it's like sitting on a cool water bed for your peri!\u003c\/span\u003e\u003c\/p\u003e\n\u003cp data-pm-slice=\"1 1 []\"\u003e\u003cspan\u003eBecause postpartum recovery deserves instant, effortless relief.\u003c\/span\u003e\u003c\/p\u003e\n\u003cp\u003e\u003cspan\u003e\u003cstrong\u003eTo Help With:\u003c\/strong\u003e\u003c\/span\u003e\u003c\/p\u003e\n\u003cul data-spread=\"false\"\u003e\n\u003cli\u003e\n\u003cp\u003e\u003cspan\u003ePerineal swelling and discomfort\u003c\/span\u003e\u003c\/p\u003e\n\u003c\/li\u003e\n\u003cli\u003e\n\u003cp\u003e\u003cspan\u003ePostpartum stitches and tearing\u003c\/span\u003e\u003c\/p\u003e\n\u003c\/li\u003e\n\u003cli\u003e\n\u003cp\u003e\u003cspan\u003eHaemorrhoid relief\u003c\/span\u003e\u003c\/p\u003e\n\u003c\/li\u003e\n\u003cli\u003e\n\u003cp\u003e\u003cspan\u003eGeneral postpartum discomfort\u003c\/span\u003e\u003c\/p\u003e\n\u003c\/li\u003e\n\u003c\/ul\u003e\n\u003cp\u003e\u003cspan\u003e\u003cstrong\u003eFeatures:\u003c\/strong\u003e\u003c\/span\u003e\u003c\/p\u003e\n\u003cul data-spread=\"false\"\u003e\n\u003cli\u003e\n\u003cp\u003e\u003cspan\u003eInstant activation: no freezing necessary\u003c\/span\u003e\u003c\/p\u003e\n\u003c\/li\u003e\n\u003cli\u003e\n\u003cp\u003e\u003cspan\u003eSoft and cushioned for ultimate comfort\u003c\/span\u003e\u003c\/p\u003e\n\u003c\/li\u003e\n\u003cli\u003e\n\u003cp\u003e\u003cspan\u003eSingle-use for convenience and hygiene\u003c\/span\u003e\u003c\/p\u003e\n\u003c\/li\u003e\n\u003cli\u003e\n\u003cp\u003e\u003cspan\u003eAdhesive backing to secure in place\u003c\/span\u003e\u003c\/p\u003e\n\u003c\/li\u003e\n\u003c\/ul\u003e\n\u003cp\u003e\u003cspan\u003e\u003cstrong\u003eHow to Use:\u003c\/strong\u003e\u003c\/span\u003e\u003c\/p\u003e\n\u003col data-spread=\"false\" start=\"1\"\u003e\n\u003cli\u003e\n\u003cp\u003e\u003cspan\u003eSqueeze the centre of the pad to break the inner water bag.\u003c\/span\u003e\u003c\/p\u003e\n\u003c\/li\u003e\n\u003cli\u003e\n\u003cp\u003e\u003cspan\u003eShake for 5 - 10 seconds to mix the inner liquid.\u003c\/span\u003e\u003c\/p\u003e\n\u003c\/li\u003e\n\u003cli\u003e\n\u003cp\u003e\u003cspan\u003eRemove the pad from the plastic pouch.\u003c\/span\u003e\u003c\/p\u003e\n\u003c\/li\u003e\n\u003cli\u003e\n\u003cp\u003e\u003cspan\u003ePeel the paper strip to reveal the sticky side.\u003c\/span\u003e\u003c\/p\u003e\n\u003c\/li\u003e\n\u003cli\u003e\n\u003cp\u003e\u003cspan\u003ePlace inside underwear with the sticky side facing down.\u003c\/span\u003e\u003c\/p\u003e\n\u003c\/li\u003e\n\u003cli\u003e\n\u003cp\u003e\u003cspan\u003eOnce finished, dispose of the pad in the bin.\u003c\/span\u003e\u003c\/p\u003e\n\u003c\/li\u003e\n\u003c\/ol\u003e\n\u003cp\u003e\u003cspan\u003e\u003cstrong\u003eSafety Information:\u003c\/strong\u003e\u003c\/span\u003e\u003c\/p\u003e\n\u003cul data-spread=\"false\"\u003e\n\u003cli\u003e\n\u003cp\u003e\u003cspan\u003eNot recommended for people with reduced awareness of temperature or skin sensitivity.\u003c\/span\u003e\u003c\/p\u003e\n\u003c\/li\u003e\n\u003cli\u003e\n\u003cp\u003e\u003cspan\u003eAlways test the temperature before use and remove immediately if uncomfortable.\u003c\/span\u003e\u003c\/p\u003e\n\u003c\/li\u003e\n\u003cli\u003e\n\u003cp\u003e\u003cspan\u003eNot to be used on infants.\u003c\/span\u003e\u003c\/p\u003e\n\u003c\/li\u003e\n\u003cli\u003e\n\u003cp\u003e\u003cspan\u003eFor prolonged or unexplained pain, contact a medical professional.\u003c\/span\u003e\u003c\/p\u003e\n\u003c\/li\u003e\n\u003c\/ul\u003e","published_at":"2025-03-18T17:38:20+08:00","created_at":"2025-03-09T13:26:39+08:00","vendor":"The Birth Store","type":"Ice Packs","tags":["Hemorrhoids","Hospital Bag","Mum","Pain Relief","Peri Care","Post-Partum","Pregnancy","The Birth Store","Vaginal Birth Recovery"],"price":3200,"price_min":3200,"price_max":3200,"available":true,"price_varies":false,"compare_at_price":null,"compare_at_price_min":0,"compare_at_price_max":0,"compare_at_price_varies":false,"variants":[{"id":44896078102717,"title":"Default Title","option1":"Default Title","option2":null,"option3":null,"sku":null,"requires_shipping":true,"taxable":false,"featured_image":null,"available":true,"name":"Instant Peri Ice Packs","public_title":null,"options":["Default Title"],"price":3200,"weight":1500,"compare_at_price":null,"inventory_management":"shopify","barcode":"78102717","requires_selling_plan":false,"selling_plan_allocations":[]}],"images":["\/\/www.thebirthstore.com.au\/cdn\/shop\/files\/instant-peri-ice-packs-661599.jpg?v=1750253235","\/\/www.thebirthstore.com.au\/cdn\/shop\/files\/instant-peri-ice-packs-518639.jpg?v=1750218152","\/\/www.thebirthstore.com.au\/cdn\/shop\/files\/instant-peri-ice-packs-996450.jpg?v=1750219194","\/\/www.thebirthstore.com.au\/cdn\/shop\/files\/instant-peri-ice-packs-303059.jpg?v=1750218152","\/\/www.thebirthstore.com.au\/cdn\/shop\/files\/instant-peri-ice-packs-124122.jpg?v=1750218152","\/\/www.thebirthstore.com.au\/cdn\/shop\/files\/instant-peri-ice-packs-137615.jpg?v=1750219380"],"featured_image":"\/\/www.thebirthstore.com.au\/cdn\/shop\/files\/instant-peri-ice-packs-661599.jpg?v=1750253235","options":["Title"],"media":[{"alt":"Instant Peri Ice Packs - The Birth Store - The Birth Store","id":28995608510653,"position":1,"preview_image":{"aspect_ratio":1.0,"height":1080,"width":1080,"src":"\/\/www.thebirthstore.com.au\/cdn\/shop\/files\/instant-peri-ice-packs-661599.jpg?v=1750253235"},"aspect_ratio":1.0,"height":1080,"media_type":"image","src":"\/\/www.thebirthstore.com.au\/cdn\/shop\/files\/instant-peri-ice-packs-661599.jpg?v=1750253235","width":1080},{"alt":"Instant Peri Ice Packs - The Birth Store - The Birth Store","id":28416620003517,"position":2,"preview_image":{"aspect_ratio":0.667,"height":1536,"width":1024,"src":"\/\/www.thebirthstore.com.au\/cdn\/shop\/files\/instant-peri-ice-packs-518639.jpg?v=1750218152"},"aspect_ratio":0.667,"height":1536,"media_type":"image","src":"\/\/www.thebirthstore.com.au\/cdn\/shop\/files\/instant-peri-ice-packs-518639.jpg?v=1750218152","width":1024},{"alt":"Instant Peri Ice Packs - The Birth Store - The Birth Store","id":28410354303165,"position":3,"preview_image":{"aspect_ratio":0.667,"height":1536,"width":1024,"src":"\/\/www.thebirthstore.com.au\/cdn\/shop\/files\/instant-peri-ice-packs-996450.jpg?v=1750219194"},"aspect_ratio":0.667,"height":1536,"media_type":"image","src":"\/\/www.thebirthstore.com.au\/cdn\/shop\/files\/instant-peri-ice-packs-996450.jpg?v=1750219194","width":1024},{"alt":"Instant Peri Ice Packs - The Birth Store - The Birth Store","id":28436124631229,"position":4,"preview_image":{"aspect_ratio":1.497,"height":684,"width":1024,"src":"\/\/www.thebirthstore.com.au\/cdn\/shop\/files\/instant-peri-ice-packs-303059.jpg?v=1750218152"},"aspect_ratio":1.497,"height":684,"media_type":"image","src":"\/\/www.thebirthstore.com.au\/cdn\/shop\/files\/instant-peri-ice-packs-303059.jpg?v=1750218152","width":1024},{"alt":"Instant Peri Ice Packs - The Birth Store - The Birth Store","id":28436124598461,"position":5,"preview_image":{"aspect_ratio":1.497,"height":684,"width":1024,"src":"\/\/www.thebirthstore.com.au\/cdn\/shop\/files\/instant-peri-ice-packs-124122.jpg?v=1750218152"},"aspect_ratio":1.497,"height":684,"media_type":"image","src":"\/\/www.thebirthstore.com.au\/cdn\/shop\/files\/instant-peri-ice-packs-124122.jpg?v=1750218152","width":1024},{"alt":"Instant Peri Ice Packs - The Birth Store - The Birth Store","id":28436124860605,"position":6,"preview_image":{"aspect_ratio":1.497,"height":684,"width":1024,"src":"\/\/www.thebirthstore.com.au\/cdn\/shop\/files\/instant-peri-ice-packs-137615.jpg?v=1750219380"},"aspect_ratio":1.497,"height":684,"media_type":"image","src":"\/\/www.thebirthstore.com.au\/cdn\/shop\/files\/instant-peri-ice-packs-137615.jpg?v=1750219380","width":1024}],"requires_selling_plan":false,"selling_plan_groups":[],"content":"\u003cp data-pm-slice=\"1 1 []\"\u003e\u003cspan\u003ePostpartum recovery can be unpredictable, but relief should always be within reach. Our Instant Peri Ice Packs are designed for fast, cooling comfort when you need it most. No freezing required—just crack, shake, and experience soothing relief - it's like sitting on a cool water bed for your peri!\u003c\/span\u003e\u003c\/p\u003e\n\u003cp data-pm-slice=\"1 1 []\"\u003e\u003cspan\u003eBecause postpartum recovery deserves instant, effortless relief.\u003c\/span\u003e\u003c\/p\u003e\n\u003cp\u003e\u003cspan\u003e\u003cstrong\u003eTo Help With:\u003c\/strong\u003e\u003c\/span\u003e\u003c\/p\u003e\n\u003cul data-spread=\"false\"\u003e\n\u003cli\u003e\n\u003cp\u003e\u003cspan\u003ePerineal swelling and discomfort\u003c\/span\u003e\u003c\/p\u003e\n\u003c\/li\u003e\n\u003cli\u003e\n\u003cp\u003e\u003cspan\u003ePostpartum stitches and tearing\u003c\/span\u003e\u003c\/p\u003e\n\u003c\/li\u003e\n\u003cli\u003e\n\u003cp\u003e\u003cspan\u003eHaemorrhoid relief\u003c\/span\u003e\u003c\/p\u003e\n\u003c\/li\u003e\n\u003cli\u003e\n\u003cp\u003e\u003cspan\u003eGeneral postpartum discomfort\u003c\/span\u003e\u003c\/p\u003e\n\u003c\/li\u003e\n\u003c\/ul\u003e\n\u003cp\u003e\u003cspan\u003e\u003cstrong\u003eFeatures:\u003c\/strong\u003e\u003c\/span\u003e\u003c\/p\u003e\n\u003cul data-spread=\"false\"\u003e\n\u003cli\u003e\n\u003cp\u003e\u003cspan\u003eInstant activation: no freezing necessary\u003c\/span\u003e\u003c\/p\u003e\n\u003c\/li\u003e\n\u003cli\u003e\n\u003cp\u003e\u003cspan\u003eSoft and cushioned for ultimate comfort\u003c\/span\u003e\u003c\/p\u003e\n\u003c\/li\u003e\n\u003cli\u003e\n\u003cp\u003e\u003cspan\u003eSingle-use for convenience and hygiene\u003c\/span\u003e\u003c\/p\u003e\n\u003c\/li\u003e\n\u003cli\u003e\n\u003cp\u003e\u003cspan\u003eAdhesive backing to secure in place\u003c\/span\u003e\u003c\/p\u003e\n\u003c\/li\u003e\n\u003c\/ul\u003e\n\u003cp\u003e\u003cspan\u003e\u003cstrong\u003eHow to Use:\u003c\/strong\u003e\u003c\/span\u003e\u003c\/p\u003e\n\u003col data-spread=\"false\" start=\"1\"\u003e\n\u003cli\u003e\n\u003cp\u003e\u003cspan\u003eSqueeze the centre of the pad to break the inner water bag.\u003c\/span\u003e\u003c\/p\u003e\n\u003c\/li\u003e\n\u003cli\u003e\n\u003cp\u003e\u003cspan\u003eShake for 5 - 10 seconds to mix the inner liquid.\u003c\/span\u003e\u003c\/p\u003e\n\u003c\/li\u003e\n\u003cli\u003e\n\u003cp\u003e\u003cspan\u003eRemove the pad from the plastic pouch.\u003c\/span\u003e\u003c\/p\u003e\n\u003c\/li\u003e\n\u003cli\u003e\n\u003cp\u003e\u003cspan\u003ePeel the paper strip to reveal the sticky side.\u003c\/span\u003e\u003c\/p\u003e\n\u003c\/li\u003e\n\u003cli\u003e\n\u003cp\u003e\u003cspan\u003ePlace inside underwear with the sticky side facing down.\u003c\/span\u003e\u003c\/p\u003e\n\u003c\/li\u003e\n\u003cli\u003e\n\u003cp\u003e\u003cspan\u003eOnce finished, dispose of the pad in the bin.\u003c\/span\u003e\u003c\/p\u003e\n\u003c\/li\u003e\n\u003c\/ol\u003e\n\u003cp\u003e\u003cspan\u003e\u003cstrong\u003eSafety Information:\u003c\/strong\u003e\u003c\/span\u003e\u003c\/p\u003e\n\u003cul data-spread=\"false\"\u003e\n\u003cli\u003e\n\u003cp\u003e\u003cspan\u003eNot recommended for people with reduced awareness of temperature or skin sensitivity.\u003c\/span\u003e\u003c\/p\u003e\n\u003c\/li\u003e\n\u003cli\u003e\n\u003cp\u003e\u003cspan\u003eAlways test the temperature before use and remove immediately if uncomfortable.\u003c\/span\u003e\u003c\/p\u003e\n\u003c\/li\u003e\n\u003cli\u003e\n\u003cp\u003e\u003cspan\u003eNot to be used on infants.\u003c\/span\u003e\u003c\/p\u003e\n\u003c\/li\u003e\n\u003cli\u003e\n\u003cp\u003e\u003cspan\u003eFor prolonged or unexplained pain, contact a medical professional.\u003c\/span\u003e\u003c\/p\u003e\n\u003c\/li\u003e\n\u003c\/ul\u003e"},"options":[{"name":"Title","position":1,"values":["Default Title"]}],"custom_metafields":{},"metafields":{"badge":"\u003cdiv style='display:none' class='jdgm-prev-badge' data-average-rating='5.00' data-number-of-reviews='2' data-number-of-questions='0'\u003e \u003cspan class='jdgm-prev-badge__stars' data-score='5.00' tabindex='0' aria-label='5.00 stars' role='button'\u003e \u003cspan class='jdgm-star jdgm--on'\u003e\u003c\/span\u003e\u003cspan class='jdgm-star jdgm--on'\u003e\u003c\/span\u003e\u003cspan class='jdgm-star jdgm--on'\u003e\u003c\/span\u003e\u003cspan class='jdgm-star jdgm--on'\u003e\u003c\/span\u003e\u003cspan class='jdgm-star jdgm--on'\u003e\u003c\/span\u003e \u003c\/span\u003e \u003cspan class='jdgm-prev-badge__text'\u003e 2 reviews \u003c\/span\u003e \u003c\/div\u003e","widget":"\u003cdiv class='jdgm-rev-widg' data-updated-at='2025-11-12T23:10:01Z' data-average-rating='5.00' data-number-of-reviews='2' data-number-of-questions='0' data-image-url='https:\/\/cdn.shopify.com\/s\/files\/1\/0527\/3393\/5805\/files\/instant-peri-ice-packs-661599.jpg?v=1750253235'\u003e \u003cstyle class='jdgm-temp-hiding-style'\u003e.jdgm-rev-widg{ display: none }\u003c\/style\u003e \u003cdiv class='jdgm-rev-widg__header'\u003e \u003ch2 class='jdgm-rev-widg__title'\u003eCustomer Reviews\u003c\/h2\u003e \u003cdiv class='jdgm-rev-widg__summary'\u003e \u003cdiv class='jdgm-rev-widg__summary-stars' aria-label='Average rating is 5.00 stars' role='img'\u003e \u003cspan class='jdgm-star jdgm--on'\u003e\u003c\/span\u003e\u003cspan class='jdgm-star jdgm--on'\u003e\u003c\/span\u003e\u003cspan class='jdgm-star jdgm--on'\u003e\u003c\/span\u003e\u003cspan class='jdgm-star jdgm--on'\u003e\u003c\/span\u003e\u003cspan class='jdgm-star jdgm--on'\u003e\u003c\/span\u003e \u003c\/div\u003e \u003cdiv class='jdgm-rev-widg__summary-text'\u003eBased on 2 reviews\u003c\/div\u003e \u003c\/div\u003e \u003ca style='display: none' href='#' class='jdgm-write-rev-link' role='button'\u003eWrite a review\u003c\/a\u003e \u003cdiv class='jdgm-histogram jdgm-temp-hidden'\u003e \u003cdiv class='jdgm-histogram__row' data-rating='5' data-frequency='2' data-percentage='100'\u003e \u003cdiv class='jdgm-histogram__star' role='button' aria-label=\"100% (2) reviews with 5 star rating\" tabindex='0' \u003e\u003cspan class='jdgm-star jdgm--on'\u003e\u003c\/span\u003e\u003cspan class='jdgm-star jdgm--on'\u003e\u003c\/span\u003e\u003cspan class='jdgm-star jdgm--on'\u003e\u003c\/span\u003e\u003cspan class='jdgm-star jdgm--on'\u003e\u003c\/span\u003e\u003cspan class='jdgm-star jdgm--on'\u003e\u003c\/span\u003e\u003c\/div\u003e \u003cdiv class='jdgm-histogram__bar'\u003e \u003cdiv class='jdgm-histogram__bar-content' style='width: 100%;'\u003e \u003c\/div\u003e \u003c\/div\u003e \u003cdiv class='jdgm-histogram__percentage'\u003e100%\u003c\/div\u003e \u003cdiv class='jdgm-histogram__frequency'\u003e(2)\u003c\/div\u003e \u003c\/div\u003e \u003cdiv class='jdgm-histogram__row' data-rating='4' data-frequency='0' data-percentage='0'\u003e \u003cdiv class='jdgm-histogram__star' role='button' aria-label=\"0% (0) reviews with 4 star rating\" tabindex='0' \u003e\u003cspan class='jdgm-star jdgm--on'\u003e\u003c\/span\u003e\u003cspan class='jdgm-star jdgm--on'\u003e\u003c\/span\u003e\u003cspan class='jdgm-star jdgm--on'\u003e\u003c\/span\u003e\u003cspan class='jdgm-star jdgm--on'\u003e\u003c\/span\u003e\u003cspan class='jdgm-star jdgm--off'\u003e\u003c\/span\u003e\u003c\/div\u003e \u003cdiv class='jdgm-histogram__bar'\u003e \u003cdiv class='jdgm-histogram__bar-content' style='width: 0%;'\u003e \u003c\/div\u003e \u003c\/div\u003e \u003cdiv class='jdgm-histogram__percentage'\u003e0%\u003c\/div\u003e \u003cdiv class='jdgm-histogram__frequency'\u003e(0)\u003c\/div\u003e \u003c\/div\u003e \u003cdiv class='jdgm-histogram__row' data-rating='3' data-frequency='0' data-percentage='0'\u003e \u003cdiv class='jdgm-histogram__star' role='button' aria-label=\"0% (0) reviews with 3 star rating\" tabindex='0' \u003e\u003cspan class='jdgm-star jdgm--on'\u003e\u003c\/span\u003e\u003cspan class='jdgm-star jdgm--on'\u003e\u003c\/span\u003e\u003cspan class='jdgm-star jdgm--on'\u003e\u003c\/span\u003e\u003cspan class='jdgm-star jdgm--off'\u003e\u003c\/span\u003e\u003cspan class='jdgm-star jdgm--off'\u003e\u003c\/span\u003e\u003c\/div\u003e \u003cdiv class='jdgm-histogram__bar'\u003e \u003cdiv class='jdgm-histogram__bar-content' style='width: 0%;'\u003e \u003c\/div\u003e \u003c\/div\u003e \u003cdiv class='jdgm-histogram__percentage'\u003e0%\u003c\/div\u003e \u003cdiv class='jdgm-histogram__frequency'\u003e(0)\u003c\/div\u003e \u003c\/div\u003e \u003cdiv class='jdgm-histogram__row' data-rating='2' data-frequency='0' data-percentage='0'\u003e \u003cdiv class='jdgm-histogram__star' role='button' aria-label=\"0% (0) reviews with 2 star rating\" tabindex='0' \u003e\u003cspan class='jdgm-star jdgm--on'\u003e\u003c\/span\u003e\u003cspan class='jdgm-star jdgm--on'\u003e\u003c\/span\u003e\u003cspan class='jdgm-star jdgm--off'\u003e\u003c\/span\u003e\u003cspan class='jdgm-star jdgm--off'\u003e\u003c\/span\u003e\u003cspan class='jdgm-star jdgm--off'\u003e\u003c\/span\u003e\u003c\/div\u003e \u003cdiv class='jdgm-histogram__bar'\u003e \u003cdiv class='jdgm-histogram__bar-content' style='width: 0%;'\u003e \u003c\/div\u003e \u003c\/div\u003e \u003cdiv class='jdgm-histogram__percentage'\u003e0%\u003c\/div\u003e \u003cdiv class='jdgm-histogram__frequency'\u003e(0)\u003c\/div\u003e \u003c\/div\u003e \u003cdiv class='jdgm-histogram__row' data-rating='1' data-frequency='0' data-percentage='0'\u003e \u003cdiv class='jdgm-histogram__star' role='button' aria-label=\"0% (0) reviews with 1 star rating\" tabindex='0' \u003e\u003cspan class='jdgm-star jdgm--on'\u003e\u003c\/span\u003e\u003cspan class='jdgm-star jdgm--off'\u003e\u003c\/span\u003e\u003cspan class='jdgm-star jdgm--off'\u003e\u003c\/span\u003e\u003cspan class='jdgm-star jdgm--off'\u003e\u003c\/span\u003e\u003cspan class='jdgm-star jdgm--off'\u003e\u003c\/span\u003e\u003c\/div\u003e \u003cdiv class='jdgm-histogram__bar'\u003e \u003cdiv class='jdgm-histogram__bar-content' style='width: 0%;'\u003e \u003c\/div\u003e \u003c\/div\u003e \u003cdiv class='jdgm-histogram__percentage'\u003e0%\u003c\/div\u003e \u003cdiv class='jdgm-histogram__frequency'\u003e(0)\u003c\/div\u003e \u003c\/div\u003e \u003cdiv class='jdgm-histogram__row jdgm-histogram__clear-filter' data-rating=null tabindex='0'\u003e\u003c\/div\u003e \u003c\/div\u003e \u003cdiv class='jdgm-rev-widg__sort-wrapper'\u003e\u003c\/div\u003e \u003c\/div\u003e \u003cdiv class='jdgm-rev-widg__body'\u003e \u003cdiv class='jdgm-rev-widg__reviews'\u003e\u003cdiv class='jdgm-rev jdgm-divider-top' data-verified-buyer='true' data-review-id='b5cb21fc-251c-43e3-8205-1e64568cb2f2' data-review-language='' data-product-title='Instant Peri Ice Packs' data-product-url='\/products\/perineal-ice-pack-sleeves-copy' data-thumb-up-count='0' data-thumb-down-count='0'\u003e \u003cdiv class='jdgm-rev__header'\u003e \u003cdiv class='jdgm-rev__icon' \u003e J \u003c\/div\u003e \u003cspan class='jdgm-rev__rating' data-score='5' tabindex='0' aria-label='5 star review' role='img'\u003e \u003cspan class='jdgm-star jdgm--on'\u003e\u003c\/span\u003e\u003cspan class='jdgm-star jdgm--on'\u003e\u003c\/span\u003e\u003cspan class='jdgm-star jdgm--on'\u003e\u003c\/span\u003e\u003cspan class='jdgm-star jdgm--on'\u003e\u003c\/span\u003e\u003cspan class='jdgm-star jdgm--on'\u003e\u003c\/span\u003e \u003c\/span\u003e \u003cspan class='jdgm-rev__timestamp jdgm-spinner' data-content='2025-11-12 23:08:34 UTC'\u003e\u003c\/span\u003e \u003cdiv class='jdgm-rev__br'\u003e\u003c\/div\u003e \u003cspan class='jdgm-rev__buyer-badge-wrapper'\u003e \u003cspan class='jdgm-rev__buyer-badge'\u003e\u003c\/span\u003e \u003c\/span\u003e \u003cspan class='jdgm-rev__author-wrapper'\u003e \u003cspan class='jdgm-rev__author'\u003eJennifer Collins\u003c\/span\u003e \u003cspan class='jdgm-rev__location' \u003e \u003c\/span\u003e \u003c\/span\u003e \u003c\/div\u003e \u003cdiv class='jdgm-rev__content'\u003e \u003cdiv class='jdgm-rev__custom-form'\u003e \u003c\/div\u003e \u003cb class='jdgm-rev__title'\u003eTens machine\u003c\/b\u003e \u003cdiv class='jdgm-rev__body'\u003e\u003cp\u003eWould highly recommend the tens machine for labour. It was really fantastic\u003c\/p\u003e\u003c\/div\u003e \u003cdiv class='jdgm-rev__pics'\u003e \u003c\/div\u003e \u003cdiv class='jdgm-rev__vids'\u003e \u003c\/div\u003e \u003cdiv class='jdgm-rev__transparency-badge-wrapper'\u003e \u003c\/div\u003e \u003c\/div\u003e \u003cdiv class='jdgm-rev__actions'\u003e \u003cdiv class='jdgm-rev__social'\u003e\u003c\/div\u003e \u003cdiv class='jdgm-rev__votes'\u003e\u003c\/div\u003e \u003c\/div\u003e \u003cdiv class='jdgm-rev__reply'\u003e \u003c\/div\u003e \u003c\/div\u003e\u003cdiv class='jdgm-rev jdgm-divider-top' data-verified-buyer='true' data-review-id='09acec6a-e9a2-489b-920f-eb407e09d690' data-review-language='' data-product-title='Instant Peri Ice Packs' data-product-url='\/products\/perineal-ice-pack-sleeves-copy' data-thumb-up-count='0' data-thumb-down-count='0'\u003e \u003cdiv class='jdgm-rev__header'\u003e \u003cdiv class='jdgm-rev__icon' \u003e E \u003c\/div\u003e \u003cspan class='jdgm-rev__rating' data-score='5' tabindex='0' aria-label='5 star review' role='img'\u003e \u003cspan class='jdgm-star jdgm--on'\u003e\u003c\/span\u003e\u003cspan class='jdgm-star jdgm--on'\u003e\u003c\/span\u003e\u003cspan class='jdgm-star jdgm--on'\u003e\u003c\/span\u003e\u003cspan class='jdgm-star jdgm--on'\u003e\u003c\/span\u003e\u003cspan class='jdgm-star jdgm--on'\u003e\u003c\/span\u003e \u003c\/span\u003e \u003cspan class='jdgm-rev__timestamp jdgm-spinner' data-content='2025-08-20 05:41:30 UTC'\u003e\u003c\/span\u003e \u003cdiv class='jdgm-rev__br'\u003e\u003c\/div\u003e \u003cspan class='jdgm-rev__buyer-badge-wrapper'\u003e \u003cspan class='jdgm-rev__buyer-badge'\u003e\u003c\/span\u003e \u003c\/span\u003e \u003cspan class='jdgm-rev__author-wrapper'\u003e \u003cspan class='jdgm-rev__author'\u003eEmma\u003c\/span\u003e \u003cspan class='jdgm-rev__location' \u003e \u003c\/span\u003e \u003c\/span\u003e \u003c\/div\u003e \u003cdiv class='jdgm-rev__content'\u003e \u003cdiv class='jdgm-rev__custom-form'\u003e \u003c\/div\u003e \u003cb class='jdgm-rev__title'\u003eInstant Ice packs\u003c\/b\u003e \u003cdiv class='jdgm-rev__body'\u003e\u003cp\u003eThese were great post birth! Would buy again!\u003c\/p\u003e\u003c\/div\u003e \u003cdiv class='jdgm-rev__pics'\u003e \u003c\/div\u003e \u003cdiv class='jdgm-rev__vids'\u003e \u003c\/div\u003e \u003cdiv class='jdgm-rev__transparency-badge-wrapper'\u003e \u003c\/div\u003e \u003c\/div\u003e \u003cdiv class='jdgm-rev__actions'\u003e \u003cdiv class='jdgm-rev__social'\u003e\u003c\/div\u003e \u003cdiv class='jdgm-rev__votes'\u003e\u003c\/div\u003e \u003c\/div\u003e \u003cdiv class='jdgm-rev__reply'\u003e \u003c\/div\u003e \u003c\/div\u003e\u003c\/div\u003e \u003cdiv class='jdgm-paginate' data-per-page='10' data-url='https:\/\/api.judge.me\/reviews\/reviews_for_widget' style=\"display: none;\"\u003e\u003c\/div\u003e \u003c\/div\u003e \u003cdiv class='jdgm-rev-widg__paginate-spinner-wrapper'\u003e \u003cdiv class='jdgm-spinner'\u003e\u003c\/div\u003e \u003c\/div\u003e \u003c\/div\u003e"},"collections":[{"id":309505622205,"handle":"the-birth-store-range","title":"'The Birth Store' Range","updated_at":"2025-12-28T20:10:01+08:00","body_html":"","published_at":"2024-10-28T13:24:26+08:00","sort_order":"alpha-asc","template_suffix":"","disjunctive":false,"rules":[{"column":"tag","relation":"equals","condition":"The Birth Store"}],"published_scope":"global","image":{"created_at":"2025-10-30T16:16:56+08:00","alt":"'The Birth Store' Range - The Birth Store","width":1365,"height":2048,"src":"\/\/www.thebirthstore.com.au\/cdn\/shop\/collections\/the-birth-store-range-5183880.jpg?v=1761812217"}},{"id":261657460925,"handle":"buy","title":"Buy","updated_at":"2025-12-28T20:10:01+08:00","body_html":"\u003cp\u003eBrowse all of our pregnancy, labour \u0026amp; birth, postpartum and baby essentials here.\u003cbr\u003e\u003c\/p\u003e\n\u003cp\u003e\u003cspan\u003eYou can even buy now and pay later with Afterpay!\u003c\/span\u003e\u003c\/p\u003e","published_at":"2021-03-10T12:05:31+08:00","sort_order":"best-selling","template_suffix":"shop-all-collection","disjunctive":false,"rules":[{"column":"title","relation":"not_contains","condition":"Hire"}],"published_scope":"global","image":{"created_at":"2024-05-06T11:59:42+08:00","alt":"Buy - The Birth Store","width":2048,"height":2048,"src":"\/\/www.thebirthstore.com.au\/cdn\/shop\/collections\/buy-964856.jpg?v=1714967982"}},{"id":281712066749,"handle":"hemorrhoid-care","title":"Haemorrhoid Care","updated_at":"2025-12-28T20:10:01+08:00","body_html":"","published_at":"2021-12-20T14:16:30+08:00","sort_order":"best-selling","template_suffix":"swaddles-collection","disjunctive":false,"rules":[{"column":"tag","relation":"equals","condition":"Hemorrhoids"}],"published_scope":"global","image":{"created_at":"2024-05-06T12:00:00+08:00","alt":"Haemorrhoid Care - The Birth Store","width":763,"height":556,"src":"\/\/www.thebirthstore.com.au\/cdn\/shop\/collections\/haemorrhoid-care-562138.jpg?v=1714968001"}},{"id":319580635325,"handle":"ice-heat-packs","updated_at":"2025-12-28T20:10:01+08:00","published_at":"2025-06-08T20:45:57+08:00","sort_order":"best-selling","template_suffix":"","published_scope":"global","title":"Ice \u0026 Heat Packs","body_html":"","image":{"created_at":"2025-10-30T16:16:45+08:00","alt":"Ice \u0026 Heat Packs - The Birth Store","width":1024,"height":684,"src":"\/\/www.thebirthstore.com.au\/cdn\/shop\/collections\/ice-heat-packs-1501133.jpg?v=1761812205"}},{"id":281712591037,"handle":"pain-relief","title":"Pain Relief","updated_at":"2025-12-28T20:10:01+08:00","body_html":"","published_at":"2021-12-20T14:22:45+08:00","sort_order":"best-selling","template_suffix":"pain-relief-collection","disjunctive":false,"rules":[{"column":"tag","relation":"equals","condition":"Pain Relief"}],"published_scope":"global","image":{"created_at":"2024-05-06T12:00:27+08:00","alt":"Pain Relief - The Birth Store","width":1365,"height":2048,"src":"\/\/www.thebirthstore.com.au\/cdn\/shop\/collections\/pain-relief-878865.jpg?v=1714968027"}},{"id":295224705213,"handle":"perineal-care","title":"Perineal Care","updated_at":"2025-12-28T20:10:01+08:00","body_html":"","published_at":"2023-11-10T20:43:30+08:00","sort_order":"best-selling","template_suffix":"perineal-care-collection","disjunctive":false,"rules":[{"column":"tag","relation":"equals","condition":"Peri Care"}],"published_scope":"global","image":{"created_at":"2024-05-06T12:00:33+08:00","alt":"Perineal Care - The Birth Store","width":1024,"height":1536,"src":"\/\/www.thebirthstore.com.au\/cdn\/shop\/collections\/perineal-care-657628.jpg?v=1714968034"}},{"id":261658083517,"handle":"post-partum","title":"Postpartum","updated_at":"2025-12-28T20:10:01+08:00","body_html":"\u003cp\u003eShop your postpartum and hospital bag essentials below. Looking for something we don't currently stock? Please reach out and let us know.\u003cbr\u003e\u003c\/p\u003e\n\u003cp\u003e\u003cspan\u003eYou can even buy now and pay later with Afterpay!\u003c\/span\u003e\u003c\/p\u003e","published_at":"2021-03-10T12:33:47+08:00","sort_order":"best-selling","template_suffix":"postpartum-collection","disjunctive":false,"rules":[{"column":"tag","relation":"equals","condition":"Post-Partum"}],"published_scope":"global","image":{"created_at":"2024-05-06T12:00:36+08:00","alt":"Postpartum - The Birth Store","width":611,"height":702,"src":"\/\/www.thebirthstore.com.au\/cdn\/shop\/collections\/postpartum-150119.jpg?v=1714968037"}},{"id":261658149053,"handle":"pregnancy-and-maternity-products","title":"Pregnancy","updated_at":"2025-12-28T20:10:01+08:00","body_html":"\u003cp\u003eShop your pregnancy essentials below. Looking for something we don't currently stock? Please reach out and let us know.\u003cbr\u003e\u003c\/p\u003e\n\u003cp\u003e\u003cspan\u003eYou can even buy now and pay later with Afterpay!\u003c\/span\u003e\u003c\/p\u003e","published_at":"2021-03-10T12:34:22+08:00","sort_order":"best-selling","template_suffix":"pregnancy-collection","disjunctive":false,"rules":[{"column":"tag","relation":"equals","condition":"Pregnancy"}],"published_scope":"global","image":{"created_at":"2024-05-06T12:00:40+08:00","alt":"Pregnancy - The Birth Store","width":1024,"height":1536,"src":"\/\/www.thebirthstore.com.au\/cdn\/shop\/collections\/pregnancy-899677.jpg?v=1714968040"}},{"id":315407761597,"handle":"the-birth-store-2025-product-launch","updated_at":"2025-12-28T20:10:01+08:00","published_at":"2025-03-15T21:46:34+08:00","sort_order":"created-desc","template_suffix":"ice-pack-launch","published_scope":"global","title":"Recovery Ice \u0026 Heat Packs","body_html":"","image":{"created_at":"2025-10-30T16:16:46+08:00","alt":"Recovery Ice \u0026 Heat Packs - The Birth Store","width":1024,"height":684,"src":"\/\/www.thebirthstore.com.au\/cdn\/shop\/collections\/recovery-ice-heat-packs-9023381.jpg?v=1761812207"}},{"id":291456483517,"handle":"shop-all","title":"Shop All - Mum","updated_at":"2025-12-28T20:10:01+08:00","body_html":"","published_at":"2022-12-23T22:04:39+08:00","sort_order":"best-selling","template_suffix":"shop-all-collection","disjunctive":false,"rules":[{"column":"variant_price","relation":"greater_than","condition":"1"},{"column":"title","relation":"not_contains","condition":"Batteries"},{"column":"tag","relation":"equals","condition":"Mum"}],"published_scope":"global","image":{"created_at":"2024-05-06T12:00:54+08:00","alt":"Shop All - The Birth Store","width":1365,"height":2048,"src":"\/\/www.thebirthstore.com.au\/cdn\/shop\/collections\/shop-all-693176.jpg?v=1714968055"}},{"id":310045933757,"handle":"shop-all-sale","title":"Shop All Sale","updated_at":"2025-12-28T20:10:01+08:00","body_html":"","published_at":"2024-11-12T13:22:43+08:00","sort_order":"alpha-asc","template_suffix":"","disjunctive":true,"rules":[{"column":"tag","relation":"equals","condition":"Bundles"},{"column":"vendor","relation":"equals","condition":"Franjos Kitchen"},{"column":"vendor","relation":"equals","condition":"Adored Illustrations"},{"column":"vendor","relation":"equals","condition":"Amazing Oils"},{"column":"vendor","relation":"equals","condition":"Ice Ice Booby"},{"column":"vendor","relation":"equals","condition":"Made to Milk"},{"column":"vendor","relation":"equals","condition":"Milky Goodness"},{"column":"vendor","relation":"equals","condition":"Seasons of Mama"},{"column":"vendor","relation":"equals","condition":"Silverette"},{"column":"vendor","relation":"equals","condition":"Snuggle Hunny"},{"column":"vendor","relation":"equals","condition":"Yung Bod"},{"column":"vendor","relation":"equals","condition":"Bare Love"},{"column":"vendor","relation":"equals","condition":"Haakaa"},{"column":"vendor","relation":"equals","condition":"Mere Botanicals"},{"column":"vendor","relation":"equals","condition":"The Birth Store Hire"},{"column":"vendor","relation":"equals","condition":"The Birth Store"}],"published_scope":"global","image":{"created_at":"2024-11-13T10:58:16+08:00","alt":"Shop All Sale - The Birth Store","width":2048,"height":1365,"src":"\/\/www.thebirthstore.com.au\/cdn\/shop\/collections\/shop-all-sale-297361.jpg?v=1731466697"}},{"id":281712197821,"handle":"vaginal-birth-recovery","title":"Vaginal Birth Recovery","updated_at":"2025-12-28T20:10:01+08:00","body_html":"","published_at":"2021-12-20T14:18:23+08:00","sort_order":"best-selling","template_suffix":"swaddles-collection","disjunctive":true,"rules":[{"column":"tag","relation":"equals","condition":"Vaginal Birth Recovery"},{"column":"tag","relation":"equals","condition":"Vaginal Birth Recover"}],"published_scope":"global","image":{"created_at":"2024-05-06T12:01:03+08:00","alt":"Vaginal Birth Recovery - The Birth Store","width":2048,"height":2048,"src":"\/\/www.thebirthstore.com.au\/cdn\/shop\/collections\/vaginal-birth-recovery-449034.jpg?v=1714968063"}},{"id":316942287037,"handle":"wholesale-products","updated_at":"2025-12-28T20:10:01+08:00","published_at":"2025-04-19T15:30:53+08:00","sort_order":"best-selling","template_suffix":"","published_scope":"global","title":"Wholesale Products","body_html":"","image":{"created_at":"2025-11-20T21:33:57+08:00","alt":"Wholesale Products - The Birth Store","width":1024,"height":684,"src":"\/\/www.thebirthstore.com.au\/cdn\/shop\/collections\/wholesale-products-3833919.jpg?v=1763645638"}}]}
[{"alt":"Instant Peri Ice Packs - The Birth Store - The Birth Store","id":28995608510653,"position":1,"preview_image":{"aspect_ratio":1.0,"height":1080,"width":1080,"src":"\/\/www.thebirthstore.com.au\/cdn\/shop\/files\/instant-peri-ice-packs-661599.jpg?v=1750253235"},"aspect_ratio":1.0,"height":1080,"media_type":"image","src":"\/\/www.thebirthstore.com.au\/cdn\/shop\/files\/instant-peri-ice-packs-661599.jpg?v=1750253235","width":1080},{"alt":"Instant Peri Ice Packs - The Birth Store - The Birth Store","id":28416620003517,"position":2,"preview_image":{"aspect_ratio":0.667,"height":1536,"width":1024,"src":"\/\/www.thebirthstore.com.au\/cdn\/shop\/files\/instant-peri-ice-packs-518639.jpg?v=1750218152"},"aspect_ratio":0.667,"height":1536,"media_type":"image","src":"\/\/www.thebirthstore.com.au\/cdn\/shop\/files\/instant-peri-ice-packs-518639.jpg?v=1750218152","width":1024},{"alt":"Instant Peri Ice Packs - The Birth Store - The Birth Store","id":28410354303165,"position":3,"preview_image":{"aspect_ratio":0.667,"height":1536,"width":1024,"src":"\/\/www.thebirthstore.com.au\/cdn\/shop\/files\/instant-peri-ice-packs-996450.jpg?v=1750219194"},"aspect_ratio":0.667,"height":1536,"media_type":"image","src":"\/\/www.thebirthstore.com.au\/cdn\/shop\/files\/instant-peri-ice-packs-996450.jpg?v=1750219194","width":1024},{"alt":"Instant Peri Ice Packs - The Birth Store - The Birth Store","id":28436124631229,"position":4,"preview_image":{"aspect_ratio":1.497,"height":684,"width":1024,"src":"\/\/www.thebirthstore.com.au\/cdn\/shop\/files\/instant-peri-ice-packs-303059.jpg?v=1750218152"},"aspect_ratio":1.497,"height":684,"media_type":"image","src":"\/\/www.thebirthstore.com.au\/cdn\/shop\/files\/instant-peri-ice-packs-303059.jpg?v=1750218152","width":1024},{"alt":"Instant Peri Ice Packs - The Birth Store - The Birth Store","id":28436124598461,"position":5,"preview_image":{"aspect_ratio":1.497,"height":684,"width":1024,"src":"\/\/www.thebirthstore.com.au\/cdn\/shop\/files\/instant-peri-ice-packs-124122.jpg?v=1750218152"},"aspect_ratio":1.497,"height":684,"media_type":"image","src":"\/\/www.thebirthstore.com.au\/cdn\/shop\/files\/instant-peri-ice-packs-124122.jpg?v=1750218152","width":1024},{"alt":"Instant Peri Ice Packs - The Birth Store - The Birth Store","id":28436124860605,"position":6,"preview_image":{"aspect_ratio":1.497,"height":684,"width":1024,"src":"\/\/www.thebirthstore.com.au\/cdn\/shop\/files\/instant-peri-ice-packs-137615.jpg?v=1750219380"},"aspect_ratio":1.497,"height":684,"media_type":"image","src":"\/\/www.thebirthstore.com.au\/cdn\/shop\/files\/instant-peri-ice-packs-137615.jpg?v=1750219380","width":1024}]
{"item":{"id":7483974516925,"title":"IVF Milestone Cards","handle":"ivf-milestone-cards","description":"\u003cp data-mce-fragment=\"1\"\u003e\u003cspan data-mce-fragment=\"1\"\u003eOur IVF milestone cards are the perfect way to track your IVF journey.\u003c\/span\u003e\u003cspan data-mce-fragment=\"1\"\u003e \u003c\/span\u003e\u003cspan data-mce-fragment=\"1\"\u003eAs well as including all of the important milestones of IVF there are also a range of inspirational quotes to help you through the rollercoaster ride that is IVF. Created by a mama who has been through it three times over herself, these cards will help you keep track of one of the most important journeys of your life.\u003c\/span\u003e\u003cbr data-mce-fragment=\"1\"\u003e\u003c\/p\u003e\n\u003cp data-mce-fragment=\"1\"\u003e\u003cspan data-mce-fragment=\"1\"\u003eFeatures of the darling IVF milestone cards:\u003c\/span\u003e\u003c\/p\u003e\n\u003cul data-mce-fragment=\"1\"\u003e\n\u003cli data-mce-fragment=\"1\"\u003e30 round cards (10cm in diameter)\u003c\/li\u003e\n\u003cli data-mce-fragment=\"1\"\u003eClassic, timeless design\u003c\/li\u003e\n\u003cli data-mce-fragment=\"1\"\u003e\n\u003cspan data-mce-fragment=\"1\"\u003e\u003c\/span\u003e\u003cspan data-mce-fragment=\"1\"\u003eFeature floral illustration on the back of each card with gold foil detailing\u003c\/span\u003e\n\u003c\/li\u003e\n\u003cli data-mce-fragment=\"1\"\u003e\n\u003cspan data-mce-fragment=\"1\"\u003e\u003c\/span\u003e\u003cspan data-mce-fragment=\"1\"\u003eQuote cards as well as cards detailing the IVF experience\u003c\/span\u003e\n\u003c\/li\u003e\n\u003cli data-mce-fragment=\"1\"\u003e\n\u003cspan data-mce-fragment=\"1\"\u003e\u003c\/span\u003e\u003cspan data-mce-fragment=\"1\"\u003ePackaged in a keepsake drawer box\u003c\/span\u003e\n\u003c\/li\u003e\n\u003c\/ul\u003e\n\u003cp data-mce-fragment=\"1\"\u003e\u003cspan data-mce-fragment=\"1\"\u003eThe set contains the following:\u003c\/span\u003e\u003c\/p\u003e\n\u003cul data-mce-fragment=\"1\"\u003e\n\u003cli data-mce-fragment=\"1\"\u003e\n\u003cspan data-mce-fragment=\"1\"\u003e\u003c\/span\u003e\u003cspan data-mce-fragment=\"1\"\u003eToday our journey begins\u003c\/span\u003e\n\u003c\/li\u003e\n\u003cli data-mce-fragment=\"1\"\u003e\n\u003cspan data-mce-fragment=\"1\"\u003e\u003c\/span\u003e\u003cspan data-mce-fragment=\"1\"\u003eMedication collected\u003c\/span\u003e\n\u003c\/li\u003e\n\u003cli data-mce-fragment=\"1\"\u003e\n\u003cspan data-mce-fragment=\"1\"\u003e\u003c\/span\u003e\u003cspan data-mce-fragment=\"1\"\u003eDay one\u003c\/span\u003e\n\u003c\/li\u003e\n\u003cli data-mce-fragment=\"1\"\u003e\n\u003cspan data-mce-fragment=\"1\"\u003e\u003c\/span\u003e\u003cspan data-mce-fragment=\"1\"\u003eInjection day\u003c\/span\u003e\n\u003c\/li\u003e\n\u003cli data-mce-fragment=\"1\"\u003e\n\u003cspan data-mce-fragment=\"1\"\u003e\u003c\/span\u003e\u003cspan data-mce-fragment=\"1\"\u003eBlood test today\u003c\/span\u003e\n\u003c\/li\u003e\n\u003cli data-mce-fragment=\"1\"\u003e\n\u003cspan data-mce-fragment=\"1\"\u003e\u003c\/span\u003e\u003cspan data-mce-fragment=\"1\"\u003eScan day\u003c\/span\u003e\n\u003c\/li\u003e\n\u003cli data-mce-fragment=\"1\"\u003e\n\u003cspan data-mce-fragment=\"1\"\u003e\u003c\/span\u003e\u003cspan data-mce-fragment=\"1\"\u003eTwo week wait starts today\u003c\/span\u003e\n\u003c\/li\u003e\n\u003cli data-mce-fragment=\"1\"\u003e\n\u003cspan data-mce-fragment=\"1\"\u003e\u003c\/span\u003e\u003cspan data-mce-fragment=\"1\"\u003eWaiting….\u003c\/span\u003e\n\u003c\/li\u003e\n\u003cli data-mce-fragment=\"1\"\u003e\n\u003cspan data-mce-fragment=\"1\"\u003e\u003c\/span\u003e\u003cspan data-mce-fragment=\"1\"\u003eEmbryo transfer day\u003c\/span\u003e\n\u003c\/li\u003e\n\u003cli data-mce-fragment=\"1\"\u003e\n\u003cspan data-mce-fragment=\"1\"\u003e\u003c\/span\u003e\u003cspan data-mce-fragment=\"1\"\u003eOur embryos\u003c\/span\u003e\n\u003c\/li\u003e\n\u003cli data-mce-fragment=\"1\"\u003e\n\u003cspan data-mce-fragment=\"1\"\u003e\u003c\/span\u003e\u003cspan data-mce-fragment=\"1\"\u003eOur embryos are growing\u003c\/span\u003e\n\u003c\/li\u003e\n\u003cli data-mce-fragment=\"1\"\u003e\n\u003cspan data-mce-fragment=\"1\"\u003e\u003c\/span\u003e\u003cspan data-mce-fragment=\"1\"\u003eTime to pee on a stick\u003c\/span\u003e\n\u003c\/li\u003e\n\u003cli data-mce-fragment=\"1\"\u003e\n\u003cspan data-mce-fragment=\"1\"\u003e\u003c\/span\u003e\u003cspan data-mce-fragment=\"1\"\u003eIt’s negative\u003c\/span\u003e\n\u003c\/li\u003e\n\u003cli data-mce-fragment=\"1\"\u003e\n\u003cspan data-mce-fragment=\"1\"\u003e\u003c\/span\u003e\u003cspan data-mce-fragment=\"1\"\u003eIt’s positive\u003c\/span\u003e\n\u003c\/li\u003e\n\u003cli data-mce-fragment=\"1\"\u003e\n\u003cspan data-mce-fragment=\"1\"\u003e\u003c\/span\u003e\u003cspan data-mce-fragment=\"1\"\u003eEgg retrieval day\u003c\/span\u003e\n\u003c\/li\u003e\n\u003cli data-mce-fragment=\"1\"\u003e\n\u003cspan data-mce-fragment=\"1\"\u003e\u003c\/span\u003e\u003cspan data-mce-fragment=\"1\"\u003eIt’s your choice to spend your days living with hope or living with pain\u003c\/span\u003e\n\u003c\/li\u003e\n\u003cli data-mce-fragment=\"1\"\u003e\n\u003cspan data-mce-fragment=\"1\"\u003e\u003c\/span\u003e\u003cspan data-mce-fragment=\"1\"\u003eOnly in the darkness can you see the stars\u003c\/span\u003e\n\u003c\/li\u003e\n\u003cli data-mce-fragment=\"1\"\u003e\n\u003cspan data-mce-fragment=\"1\"\u003e\u003c\/span\u003e\u003cspan data-mce-fragment=\"1\"\u003eThe best is yet to come\u003c\/span\u003e\n\u003c\/li\u003e\n\u003cli data-mce-fragment=\"1\"\u003e\n\u003cspan data-mce-fragment=\"1\"\u003e\u003c\/span\u003e\u003cspan data-mce-fragment=\"1\"\u003eDon’t. Give. Up\u003c\/span\u003e\n\u003c\/li\u003e\n\u003cli data-mce-fragment=\"1\"\u003e\n\u003cspan data-mce-fragment=\"1\"\u003e\u003c\/span\u003e\u003cspan data-mce-fragment=\"1\"\u003eThe best things in life are not always free\u003c\/span\u003e\n\u003c\/li\u003e\n\u003cli data-mce-fragment=\"1\"\u003e\n\u003cspan data-mce-fragment=\"1\"\u003e\u003c\/span\u003e\u003cspan data-mce-fragment=\"1\"\u003eYou are stronger than you think\u003c\/span\u003e\n\u003c\/li\u003e\n\u003cli data-mce-fragment=\"1\"\u003e\n\u003cspan data-mce-fragment=\"1\"\u003e\u003c\/span\u003e\u003cspan data-mce-fragment=\"1\"\u003eTomorrow is a new day\u003c\/span\u003e\n\u003c\/li\u003e\n\u003cli data-mce-fragment=\"1\"\u003e\n\u003cspan data-mce-fragment=\"1\"\u003e\u003c\/span\u003e\u003cspan data-mce-fragment=\"1\"\u003eThe best things come to those who wait\u003c\/span\u003e\n\u003c\/li\u003e\n\u003cli data-mce-fragment=\"1\"\u003e\n\u003cspan data-mce-fragment=\"1\"\u003e\u003c\/span\u003e\u003cspan data-mce-fragment=\"1\"\u003eThe struggle is only part of your story\u003c\/span\u003e\n\u003c\/li\u003e\n\u003cli data-mce-fragment=\"1\"\u003e\n\u003cspan data-mce-fragment=\"1\"\u003e\u003c\/span\u003e\u003cspan data-mce-fragment=\"1\"\u003eForget all the reasons it won’t work, believe that it will work\u003c\/span\u003e\n\u003c\/li\u003e\n\u003cli data-mce-fragment=\"1\"\u003e\n\u003cspan data-mce-fragment=\"1\"\u003e\u003c\/span\u003e\u003cspan data-mce-fragment=\"1\"\u003eThe strongest women become the strongest mothers\u003c\/span\u003e\n\u003c\/li\u003e\n\u003cli data-mce-fragment=\"1\"\u003e\n\u003cspan data-mce-fragment=\"1\"\u003e\u003c\/span\u003e\u003cspan data-mce-fragment=\"1\"\u003eAgainst all odds, against all logic, there is always hope\u003c\/span\u003e\n\u003c\/li\u003e\n\u003cli data-mce-fragment=\"1\"\u003e\n\u003cspan data-mce-fragment=\"1\"\u003e\u003c\/span\u003e\u003cspan data-mce-fragment=\"1\"\u003eDon’t give up one day you will hold the world in your arms\u003c\/span\u003e\n\u003c\/li\u003e\n\u003cli data-mce-fragment=\"1\"\u003e\n\u003cspan data-mce-fragment=\"1\"\u003e\u003c\/span\u003e\u003cspan data-mce-fragment=\"1\"\u003eAlways believe something wonderful is about to happen\u003c\/span\u003e\n\u003c\/li\u003e\n\u003cli data-mce-fragment=\"1\"\u003e\n\u003cspan data-mce-fragment=\"1\"\u003e\u003c\/span\u003e\u003cspan data-mce-fragment=\"1\"\u003eI will be ok\u003c\/span\u003e\n\u003c\/li\u003e\n\u003c\/ul\u003e","published_at":"2023-06-08T22:09:19+08:00","created_at":"2023-06-08T22:09:19+08:00","vendor":"Adored Illustrations","type":"","tags":["Affirmations","Mum","Pre-Conception","Pregnancy"],"price":3600,"price_min":3600,"price_max":3600,"available":true,"price_varies":false,"compare_at_price":null,"compare_at_price_min":0,"compare_at_price_max":0,"compare_at_price_varies":false,"variants":[{"id":42868976124093,"title":"Default Title","option1":"Default Title","option2":null,"option3":null,"sku":"","requires_shipping":true,"taxable":false,"featured_image":null,"available":true,"name":"IVF Milestone Cards","public_title":null,"options":["Default Title"],"price":3600,"weight":158,"compare_at_price":null,"inventory_management":"shopify","barcode":"76124093","requires_selling_plan":false,"selling_plan_allocations":[]}],"images":["\/\/www.thebirthstore.com.au\/cdn\/shop\/files\/ivf-milestone-cards-398530.jpg?v=1714967987","\/\/www.thebirthstore.com.au\/cdn\/shop\/files\/ivf-milestone-cards-712735.jpg?v=1714967987","\/\/www.thebirthstore.com.au\/cdn\/shop\/files\/ivf-milestone-cards-379869.jpg?v=1714967987","\/\/www.thebirthstore.com.au\/cdn\/shop\/files\/ivf-milestone-cards-200778.jpg?v=1714967987","\/\/www.thebirthstore.com.au\/cdn\/shop\/files\/ivf-milestone-cards-829342.jpg?v=1714967987"],"featured_image":"\/\/www.thebirthstore.com.au\/cdn\/shop\/files\/ivf-milestone-cards-398530.jpg?v=1714967987","options":["Title"],"media":[{"alt":"IVF Milestone Cards - The Birth Store-Adored Illustrations","id":27007588401341,"position":1,"preview_image":{"aspect_ratio":1.0,"height":2048,"width":2048,"src":"\/\/www.thebirthstore.com.au\/cdn\/shop\/files\/ivf-milestone-cards-398530.jpg?v=1714967987"},"aspect_ratio":1.0,"height":2048,"media_type":"image","src":"\/\/www.thebirthstore.com.au\/cdn\/shop\/files\/ivf-milestone-cards-398530.jpg?v=1714967987","width":2048},{"alt":"IVF Milestone Cards - The Birth Store-Adored Illustrations","id":27007588565181,"position":2,"preview_image":{"aspect_ratio":1.0,"height":1080,"width":1080,"src":"\/\/www.thebirthstore.com.au\/cdn\/shop\/files\/ivf-milestone-cards-712735.jpg?v=1714967987"},"aspect_ratio":1.0,"height":1080,"media_type":"image","src":"\/\/www.thebirthstore.com.au\/cdn\/shop\/files\/ivf-milestone-cards-712735.jpg?v=1714967987","width":1080},{"alt":"IVF Milestone Cards - The Birth Store-Adored Illustrations","id":27007588597949,"position":3,"preview_image":{"aspect_ratio":1.0,"height":1080,"width":1080,"src":"\/\/www.thebirthstore.com.au\/cdn\/shop\/files\/ivf-milestone-cards-379869.jpg?v=1714967987"},"aspect_ratio":1.0,"height":1080,"media_type":"image","src":"\/\/www.thebirthstore.com.au\/cdn\/shop\/files\/ivf-milestone-cards-379869.jpg?v=1714967987","width":1080},{"alt":"IVF Milestone Cards - The Birth Store-Adored Illustrations","id":27007588729021,"position":4,"preview_image":{"aspect_ratio":1.0,"height":1080,"width":1080,"src":"\/\/www.thebirthstore.com.au\/cdn\/shop\/files\/ivf-milestone-cards-200778.jpg?v=1714967987"},"aspect_ratio":1.0,"height":1080,"media_type":"image","src":"\/\/www.thebirthstore.com.au\/cdn\/shop\/files\/ivf-milestone-cards-200778.jpg?v=1714967987","width":1080},{"alt":"IVF Milestone Cards - The Birth Store-Adored Illustrations","id":27007588761789,"position":5,"preview_image":{"aspect_ratio":1.0,"height":1080,"width":1080,"src":"\/\/www.thebirthstore.com.au\/cdn\/shop\/files\/ivf-milestone-cards-829342.jpg?v=1714967987"},"aspect_ratio":1.0,"height":1080,"media_type":"image","src":"\/\/www.thebirthstore.com.au\/cdn\/shop\/files\/ivf-milestone-cards-829342.jpg?v=1714967987","width":1080}],"requires_selling_plan":false,"selling_plan_groups":[],"content":"\u003cp data-mce-fragment=\"1\"\u003e\u003cspan data-mce-fragment=\"1\"\u003eOur IVF milestone cards are the perfect way to track your IVF journey.\u003c\/span\u003e\u003cspan data-mce-fragment=\"1\"\u003e \u003c\/span\u003e\u003cspan data-mce-fragment=\"1\"\u003eAs well as including all of the important milestones of IVF there are also a range of inspirational quotes to help you through the rollercoaster ride that is IVF. Created by a mama who has been through it three times over herself, these cards will help you keep track of one of the most important journeys of your life.\u003c\/span\u003e\u003cbr data-mce-fragment=\"1\"\u003e\u003c\/p\u003e\n\u003cp data-mce-fragment=\"1\"\u003e\u003cspan data-mce-fragment=\"1\"\u003eFeatures of the darling IVF milestone cards:\u003c\/span\u003e\u003c\/p\u003e\n\u003cul data-mce-fragment=\"1\"\u003e\n\u003cli data-mce-fragment=\"1\"\u003e30 round cards (10cm in diameter)\u003c\/li\u003e\n\u003cli data-mce-fragment=\"1\"\u003eClassic, timeless design\u003c\/li\u003e\n\u003cli data-mce-fragment=\"1\"\u003e\n\u003cspan data-mce-fragment=\"1\"\u003e\u003c\/span\u003e\u003cspan data-mce-fragment=\"1\"\u003eFeature floral illustration on the back of each card with gold foil detailing\u003c\/span\u003e\n\u003c\/li\u003e\n\u003cli data-mce-fragment=\"1\"\u003e\n\u003cspan data-mce-fragment=\"1\"\u003e\u003c\/span\u003e\u003cspan data-mce-fragment=\"1\"\u003eQuote cards as well as cards detailing the IVF experience\u003c\/span\u003e\n\u003c\/li\u003e\n\u003cli data-mce-fragment=\"1\"\u003e\n\u003cspan data-mce-fragment=\"1\"\u003e\u003c\/span\u003e\u003cspan data-mce-fragment=\"1\"\u003ePackaged in a keepsake drawer box\u003c\/span\u003e\n\u003c\/li\u003e\n\u003c\/ul\u003e\n\u003cp data-mce-fragment=\"1\"\u003e\u003cspan data-mce-fragment=\"1\"\u003eThe set contains the following:\u003c\/span\u003e\u003c\/p\u003e\n\u003cul data-mce-fragment=\"1\"\u003e\n\u003cli data-mce-fragment=\"1\"\u003e\n\u003cspan data-mce-fragment=\"1\"\u003e\u003c\/span\u003e\u003cspan data-mce-fragment=\"1\"\u003eToday our journey begins\u003c\/span\u003e\n\u003c\/li\u003e\n\u003cli data-mce-fragment=\"1\"\u003e\n\u003cspan data-mce-fragment=\"1\"\u003e\u003c\/span\u003e\u003cspan data-mce-fragment=\"1\"\u003eMedication collected\u003c\/span\u003e\n\u003c\/li\u003e\n\u003cli data-mce-fragment=\"1\"\u003e\n\u003cspan data-mce-fragment=\"1\"\u003e\u003c\/span\u003e\u003cspan data-mce-fragment=\"1\"\u003eDay one\u003c\/span\u003e\n\u003c\/li\u003e\n\u003cli data-mce-fragment=\"1\"\u003e\n\u003cspan data-mce-fragment=\"1\"\u003e\u003c\/span\u003e\u003cspan data-mce-fragment=\"1\"\u003eInjection day\u003c\/span\u003e\n\u003c\/li\u003e\n\u003cli data-mce-fragment=\"1\"\u003e\n\u003cspan data-mce-fragment=\"1\"\u003e\u003c\/span\u003e\u003cspan data-mce-fragment=\"1\"\u003eBlood test today\u003c\/span\u003e\n\u003c\/li\u003e\n\u003cli data-mce-fragment=\"1\"\u003e\n\u003cspan data-mce-fragment=\"1\"\u003e\u003c\/span\u003e\u003cspan data-mce-fragment=\"1\"\u003eScan day\u003c\/span\u003e\n\u003c\/li\u003e\n\u003cli data-mce-fragment=\"1\"\u003e\n\u003cspan data-mce-fragment=\"1\"\u003e\u003c\/span\u003e\u003cspan data-mce-fragment=\"1\"\u003eTwo week wait starts today\u003c\/span\u003e\n\u003c\/li\u003e\n\u003cli data-mce-fragment=\"1\"\u003e\n\u003cspan data-mce-fragment=\"1\"\u003e\u003c\/span\u003e\u003cspan data-mce-fragment=\"1\"\u003eWaiting….\u003c\/span\u003e\n\u003c\/li\u003e\n\u003cli data-mce-fragment=\"1\"\u003e\n\u003cspan data-mce-fragment=\"1\"\u003e\u003c\/span\u003e\u003cspan data-mce-fragment=\"1\"\u003eEmbryo transfer day\u003c\/span\u003e\n\u003c\/li\u003e\n\u003cli data-mce-fragment=\"1\"\u003e\n\u003cspan data-mce-fragment=\"1\"\u003e\u003c\/span\u003e\u003cspan data-mce-fragment=\"1\"\u003eOur embryos\u003c\/span\u003e\n\u003c\/li\u003e\n\u003cli data-mce-fragment=\"1\"\u003e\n\u003cspan data-mce-fragment=\"1\"\u003e\u003c\/span\u003e\u003cspan data-mce-fragment=\"1\"\u003eOur embryos are growing\u003c\/span\u003e\n\u003c\/li\u003e\n\u003cli data-mce-fragment=\"1\"\u003e\n\u003cspan data-mce-fragment=\"1\"\u003e\u003c\/span\u003e\u003cspan data-mce-fragment=\"1\"\u003eTime to pee on a stick\u003c\/span\u003e\n\u003c\/li\u003e\n\u003cli data-mce-fragment=\"1\"\u003e\n\u003cspan data-mce-fragment=\"1\"\u003e\u003c\/span\u003e\u003cspan data-mce-fragment=\"1\"\u003eIt’s negative\u003c\/span\u003e\n\u003c\/li\u003e\n\u003cli data-mce-fragment=\"1\"\u003e\n\u003cspan data-mce-fragment=\"1\"\u003e\u003c\/span\u003e\u003cspan data-mce-fragment=\"1\"\u003eIt’s positive\u003c\/span\u003e\n\u003c\/li\u003e\n\u003cli data-mce-fragment=\"1\"\u003e\n\u003cspan data-mce-fragment=\"1\"\u003e\u003c\/span\u003e\u003cspan data-mce-fragment=\"1\"\u003eEgg retrieval day\u003c\/span\u003e\n\u003c\/li\u003e\n\u003cli data-mce-fragment=\"1\"\u003e\n\u003cspan data-mce-fragment=\"1\"\u003e\u003c\/span\u003e\u003cspan data-mce-fragment=\"1\"\u003eIt’s your choice to spend your days living with hope or living with pain\u003c\/span\u003e\n\u003c\/li\u003e\n\u003cli data-mce-fragment=\"1\"\u003e\n\u003cspan data-mce-fragment=\"1\"\u003e\u003c\/span\u003e\u003cspan data-mce-fragment=\"1\"\u003eOnly in the darkness can you see the stars\u003c\/span\u003e\n\u003c\/li\u003e\n\u003cli data-mce-fragment=\"1\"\u003e\n\u003cspan data-mce-fragment=\"1\"\u003e\u003c\/span\u003e\u003cspan data-mce-fragment=\"1\"\u003eThe best is yet to come\u003c\/span\u003e\n\u003c\/li\u003e\n\u003cli data-mce-fragment=\"1\"\u003e\n\u003cspan data-mce-fragment=\"1\"\u003e\u003c\/span\u003e\u003cspan data-mce-fragment=\"1\"\u003eDon’t. Give. Up\u003c\/span\u003e\n\u003c\/li\u003e\n\u003cli data-mce-fragment=\"1\"\u003e\n\u003cspan data-mce-fragment=\"1\"\u003e\u003c\/span\u003e\u003cspan data-mce-fragment=\"1\"\u003eThe best things in life are not always free\u003c\/span\u003e\n\u003c\/li\u003e\n\u003cli data-mce-fragment=\"1\"\u003e\n\u003cspan data-mce-fragment=\"1\"\u003e\u003c\/span\u003e\u003cspan data-mce-fragment=\"1\"\u003eYou are stronger than you think\u003c\/span\u003e\n\u003c\/li\u003e\n\u003cli data-mce-fragment=\"1\"\u003e\n\u003cspan data-mce-fragment=\"1\"\u003e\u003c\/span\u003e\u003cspan data-mce-fragment=\"1\"\u003eTomorrow is a new day\u003c\/span\u003e\n\u003c\/li\u003e\n\u003cli data-mce-fragment=\"1\"\u003e\n\u003cspan data-mce-fragment=\"1\"\u003e\u003c\/span\u003e\u003cspan data-mce-fragment=\"1\"\u003eThe best things come to those who wait\u003c\/span\u003e\n\u003c\/li\u003e\n\u003cli data-mce-fragment=\"1\"\u003e\n\u003cspan data-mce-fragment=\"1\"\u003e\u003c\/span\u003e\u003cspan data-mce-fragment=\"1\"\u003eThe struggle is only part of your story\u003c\/span\u003e\n\u003c\/li\u003e\n\u003cli data-mce-fragment=\"1\"\u003e\n\u003cspan data-mce-fragment=\"1\"\u003e\u003c\/span\u003e\u003cspan data-mce-fragment=\"1\"\u003eForget all the reasons it won’t work, believe that it will work\u003c\/span\u003e\n\u003c\/li\u003e\n\u003cli data-mce-fragment=\"1\"\u003e\n\u003cspan data-mce-fragment=\"1\"\u003e\u003c\/span\u003e\u003cspan data-mce-fragment=\"1\"\u003eThe strongest women become the strongest mothers\u003c\/span\u003e\n\u003c\/li\u003e\n\u003cli data-mce-fragment=\"1\"\u003e\n\u003cspan data-mce-fragment=\"1\"\u003e\u003c\/span\u003e\u003cspan data-mce-fragment=\"1\"\u003eAgainst all odds, against all logic, there is always hope\u003c\/span\u003e\n\u003c\/li\u003e\n\u003cli data-mce-fragment=\"1\"\u003e\n\u003cspan data-mce-fragment=\"1\"\u003e\u003c\/span\u003e\u003cspan data-mce-fragment=\"1\"\u003eDon’t give up one day you will hold the world in your arms\u003c\/span\u003e\n\u003c\/li\u003e\n\u003cli data-mce-fragment=\"1\"\u003e\n\u003cspan data-mce-fragment=\"1\"\u003e\u003c\/span\u003e\u003cspan data-mce-fragment=\"1\"\u003eAlways believe something wonderful is about to happen\u003c\/span\u003e\n\u003c\/li\u003e\n\u003cli data-mce-fragment=\"1\"\u003e\n\u003cspan data-mce-fragment=\"1\"\u003e\u003c\/span\u003e\u003cspan data-mce-fragment=\"1\"\u003eI will be ok\u003c\/span\u003e\n\u003c\/li\u003e\n\u003c\/ul\u003e"},"options":[{"name":"Title","position":1,"values":["Default Title"]}],"custom_metafields":{},"metafields":{"badge":"\u003cdiv style='display:none' class='jdgm-prev-badge' data-average-rating='0.00' data-number-of-reviews='0' data-number-of-questions='0'\u003e \u003cspan class='jdgm-prev-badge__stars' data-score='0.00' tabindex='0' aria-label='0.00 stars' role='button'\u003e \u003cspan class='jdgm-star jdgm--off'\u003e\u003c\/span\u003e\u003cspan class='jdgm-star jdgm--off'\u003e\u003c\/span\u003e\u003cspan class='jdgm-star jdgm--off'\u003e\u003c\/span\u003e\u003cspan class='jdgm-star jdgm--off'\u003e\u003c\/span\u003e\u003cspan class='jdgm-star jdgm--off'\u003e\u003c\/span\u003e \u003c\/span\u003e \u003cspan class='jdgm-prev-badge__text'\u003e No reviews \u003c\/span\u003e \u003c\/div\u003e","widget":"\u003cdiv class='jdgm-rev-widg' data-updated-at='2025-06-13T16:12:53Z' data-average-rating='0.00' data-number-of-reviews='0' data-number-of-questions='0'\u003e \u003cstyle class='jdgm-temp-hiding-style'\u003e.jdgm-rev-widg{ display: none }\u003c\/style\u003e \u003cdiv class='jdgm-rev-widg__header'\u003e \u003ch2 class='jdgm-rev-widg__title'\u003eCustomer Reviews\u003c\/h2\u003e \u003cdiv class='jdgm-rev-widg__summary'\u003e \u003cdiv class='jdgm-rev-widg__summary-stars' aria-label='Average rating is 0.00 stars' role='img'\u003e \u003cspan class='jdgm-star jdgm--off'\u003e\u003c\/span\u003e\u003cspan class='jdgm-star jdgm--off'\u003e\u003c\/span\u003e\u003cspan class='jdgm-star jdgm--off'\u003e\u003c\/span\u003e\u003cspan class='jdgm-star jdgm--off'\u003e\u003c\/span\u003e\u003cspan class='jdgm-star jdgm--off'\u003e\u003c\/span\u003e \u003c\/div\u003e \u003cdiv class='jdgm-rev-widg__summary-text'\u003eBe the first to write a review\u003c\/div\u003e \u003c\/div\u003e \u003ca style='display: none' href='#' class='jdgm-write-rev-link' role='button'\u003eWrite a review\u003c\/a\u003e \u003cdiv class='jdgm-histogram jdgm-temp-hidden'\u003e \u003cdiv class='jdgm-histogram__row' data-rating='5' data-frequency='0' data-percentage='0'\u003e \u003cdiv class='jdgm-histogram__star' role='button' aria-label=\"0% (0) reviews with 5 star rating\" tabindex='0' \u003e\u003cspan class='jdgm-star jdgm--on'\u003e\u003c\/span\u003e\u003cspan class='jdgm-star jdgm--on'\u003e\u003c\/span\u003e\u003cspan class='jdgm-star jdgm--on'\u003e\u003c\/span\u003e\u003cspan class='jdgm-star jdgm--on'\u003e\u003c\/span\u003e\u003cspan class='jdgm-star jdgm--on'\u003e\u003c\/span\u003e\u003c\/div\u003e \u003cdiv class='jdgm-histogram__bar'\u003e \u003cdiv class='jdgm-histogram__bar-content' style='width: 0%;'\u003e \u003c\/div\u003e \u003c\/div\u003e \u003cdiv class='jdgm-histogram__percentage'\u003e0%\u003c\/div\u003e \u003cdiv class='jdgm-histogram__frequency'\u003e(0)\u003c\/div\u003e \u003c\/div\u003e \u003cdiv class='jdgm-histogram__row' data-rating='4' data-frequency='0' data-percentage='0'\u003e \u003cdiv class='jdgm-histogram__star' role='button' aria-label=\"0% (0) reviews with 4 star rating\" tabindex='0' \u003e\u003cspan class='jdgm-star jdgm--on'\u003e\u003c\/span\u003e\u003cspan class='jdgm-star jdgm--on'\u003e\u003c\/span\u003e\u003cspan class='jdgm-star jdgm--on'\u003e\u003c\/span\u003e\u003cspan class='jdgm-star jdgm--on'\u003e\u003c\/span\u003e\u003cspan class='jdgm-star jdgm--off'\u003e\u003c\/span\u003e\u003c\/div\u003e \u003cdiv class='jdgm-histogram__bar'\u003e \u003cdiv class='jdgm-histogram__bar-content' style='width: 0%;'\u003e \u003c\/div\u003e \u003c\/div\u003e \u003cdiv class='jdgm-histogram__percentage'\u003e0%\u003c\/div\u003e \u003cdiv class='jdgm-histogram__frequency'\u003e(0)\u003c\/div\u003e \u003c\/div\u003e \u003cdiv class='jdgm-histogram__row' data-rating='3' data-frequency='0' data-percentage='0'\u003e \u003cdiv class='jdgm-histogram__star' role='button' aria-label=\"0% (0) reviews with 3 star rating\" tabindex='0' \u003e\u003cspan class='jdgm-star jdgm--on'\u003e\u003c\/span\u003e\u003cspan class='jdgm-star jdgm--on'\u003e\u003c\/span\u003e\u003cspan class='jdgm-star jdgm--on'\u003e\u003c\/span\u003e\u003cspan class='jdgm-star jdgm--off'\u003e\u003c\/span\u003e\u003cspan class='jdgm-star jdgm--off'\u003e\u003c\/span\u003e\u003c\/div\u003e \u003cdiv class='jdgm-histogram__bar'\u003e \u003cdiv class='jdgm-histogram__bar-content' style='width: 0%;'\u003e \u003c\/div\u003e \u003c\/div\u003e \u003cdiv class='jdgm-histogram__percentage'\u003e0%\u003c\/div\u003e \u003cdiv class='jdgm-histogram__frequency'\u003e(0)\u003c\/div\u003e \u003c\/div\u003e \u003cdiv class='jdgm-histogram__row' data-rating='2' data-frequency='0' data-percentage='0'\u003e \u003cdiv class='jdgm-histogram__star' role='button' aria-label=\"0% (0) reviews with 2 star rating\" tabindex='0' \u003e\u003cspan class='jdgm-star jdgm--on'\u003e\u003c\/span\u003e\u003cspan class='jdgm-star jdgm--on'\u003e\u003c\/span\u003e\u003cspan class='jdgm-star jdgm--off'\u003e\u003c\/span\u003e\u003cspan class='jdgm-star jdgm--off'\u003e\u003c\/span\u003e\u003cspan class='jdgm-star jdgm--off'\u003e\u003c\/span\u003e\u003c\/div\u003e \u003cdiv class='jdgm-histogram__bar'\u003e \u003cdiv class='jdgm-histogram__bar-content' style='width: 0%;'\u003e \u003c\/div\u003e \u003c\/div\u003e \u003cdiv class='jdgm-histogram__percentage'\u003e0%\u003c\/div\u003e \u003cdiv class='jdgm-histogram__frequency'\u003e(0)\u003c\/div\u003e \u003c\/div\u003e \u003cdiv class='jdgm-histogram__row' data-rating='1' data-frequency='0' data-percentage='0'\u003e \u003cdiv class='jdgm-histogram__star' role='button' aria-label=\"0% (0) reviews with 1 star rating\" tabindex='0' \u003e\u003cspan class='jdgm-star jdgm--on'\u003e\u003c\/span\u003e\u003cspan class='jdgm-star jdgm--off'\u003e\u003c\/span\u003e\u003cspan class='jdgm-star jdgm--off'\u003e\u003c\/span\u003e\u003cspan class='jdgm-star jdgm--off'\u003e\u003c\/span\u003e\u003cspan class='jdgm-star jdgm--off'\u003e\u003c\/span\u003e\u003c\/div\u003e \u003cdiv class='jdgm-histogram__bar'\u003e \u003cdiv class='jdgm-histogram__bar-content' style='width: 0%;'\u003e \u003c\/div\u003e \u003c\/div\u003e \u003cdiv class='jdgm-histogram__percentage'\u003e0%\u003c\/div\u003e \u003cdiv class='jdgm-histogram__frequency'\u003e(0)\u003c\/div\u003e \u003c\/div\u003e \u003cdiv class='jdgm-histogram__row jdgm-histogram__clear-filter' data-rating=null tabindex='0'\u003e\u003c\/div\u003e \u003c\/div\u003e \u003cdiv class='jdgm-rev-widg__sort-wrapper'\u003e\u003c\/div\u003e \u003c\/div\u003e \u003cdiv class='jdgm-rev-widg__body'\u003e \u003cdiv class='jdgm-rev-widg__reviews'\u003e\u003c\/div\u003e \u003cdiv class='jdgm-paginate' data-per-page='10' data-url='https:\/\/api.judge.me\/reviews\/reviews_for_widget' style=\"display: none;\"\u003e\u003c\/div\u003e \u003c\/div\u003e \u003cdiv class='jdgm-rev-widg__paginate-spinner-wrapper'\u003e \u003cdiv class='jdgm-spinner'\u003e\u003c\/div\u003e \u003c\/div\u003e \u003c\/div\u003e"},"collections":[{"id":295224541373,"handle":"affirmations","title":"Affirmations","updated_at":"2025-12-28T20:10:01+08:00","body_html":"","published_at":"2023-11-10T20:37:58+08:00","sort_order":"best-selling","template_suffix":"swaddles-collection","disjunctive":false,"rules":[{"column":"tag","relation":"equals","condition":"Affirmations"}],"published_scope":"global","image":{"created_at":"2024-05-06T11:59:20+08:00","alt":"Affirmations - The Birth Store","width":1000,"height":1250,"src":"\/\/www.thebirthstore.com.au\/cdn\/shop\/collections\/affirmations-495130.jpg?v=1714967960"}},{"id":261657460925,"handle":"buy","title":"Buy","updated_at":"2025-12-28T20:10:01+08:00","body_html":"\u003cp\u003eBrowse all of our pregnancy, labour \u0026amp; birth, postpartum and baby essentials here.\u003cbr\u003e\u003c\/p\u003e\n\u003cp\u003e\u003cspan\u003eYou can even buy now and pay later with Afterpay!\u003c\/span\u003e\u003c\/p\u003e","published_at":"2021-03-10T12:05:31+08:00","sort_order":"best-selling","template_suffix":"shop-all-collection","disjunctive":false,"rules":[{"column":"title","relation":"not_contains","condition":"Hire"}],"published_scope":"global","image":{"created_at":"2024-05-06T11:59:42+08:00","alt":"Buy - The Birth Store","width":2048,"height":2048,"src":"\/\/www.thebirthstore.com.au\/cdn\/shop\/collections\/buy-964856.jpg?v=1714967982"}},{"id":261658149053,"handle":"pregnancy-and-maternity-products","title":"Pregnancy","updated_at":"2025-12-28T20:10:01+08:00","body_html":"\u003cp\u003eShop your pregnancy essentials below. Looking for something we don't currently stock? Please reach out and let us know.\u003cbr\u003e\u003c\/p\u003e\n\u003cp\u003e\u003cspan\u003eYou can even buy now and pay later with Afterpay!\u003c\/span\u003e\u003c\/p\u003e","published_at":"2021-03-10T12:34:22+08:00","sort_order":"best-selling","template_suffix":"pregnancy-collection","disjunctive":false,"rules":[{"column":"tag","relation":"equals","condition":"Pregnancy"}],"published_scope":"global","image":{"created_at":"2024-05-06T12:00:40+08:00","alt":"Pregnancy - The Birth Store","width":1024,"height":1536,"src":"\/\/www.thebirthstore.com.au\/cdn\/shop\/collections\/pregnancy-899677.jpg?v=1714968040"}},{"id":291456483517,"handle":"shop-all","title":"Shop All - Mum","updated_at":"2025-12-28T20:10:01+08:00","body_html":"","published_at":"2022-12-23T22:04:39+08:00","sort_order":"best-selling","template_suffix":"shop-all-collection","disjunctive":false,"rules":[{"column":"variant_price","relation":"greater_than","condition":"1"},{"column":"title","relation":"not_contains","condition":"Batteries"},{"column":"tag","relation":"equals","condition":"Mum"}],"published_scope":"global","image":{"created_at":"2024-05-06T12:00:54+08:00","alt":"Shop All - The Birth Store","width":1365,"height":2048,"src":"\/\/www.thebirthstore.com.au\/cdn\/shop\/collections\/shop-all-693176.jpg?v=1714968055"}},{"id":310045933757,"handle":"shop-all-sale","title":"Shop All Sale","updated_at":"2025-12-28T20:10:01+08:00","body_html":"","published_at":"2024-11-12T13:22:43+08:00","sort_order":"alpha-asc","template_suffix":"","disjunctive":true,"rules":[{"column":"tag","relation":"equals","condition":"Bundles"},{"column":"vendor","relation":"equals","condition":"Franjos Kitchen"},{"column":"vendor","relation":"equals","condition":"Adored Illustrations"},{"column":"vendor","relation":"equals","condition":"Amazing Oils"},{"column":"vendor","relation":"equals","condition":"Ice Ice Booby"},{"column":"vendor","relation":"equals","condition":"Made to Milk"},{"column":"vendor","relation":"equals","condition":"Milky Goodness"},{"column":"vendor","relation":"equals","condition":"Seasons of Mama"},{"column":"vendor","relation":"equals","condition":"Silverette"},{"column":"vendor","relation":"equals","condition":"Snuggle Hunny"},{"column":"vendor","relation":"equals","condition":"Yung Bod"},{"column":"vendor","relation":"equals","condition":"Bare Love"},{"column":"vendor","relation":"equals","condition":"Haakaa"},{"column":"vendor","relation":"equals","condition":"Mere Botanicals"},{"column":"vendor","relation":"equals","condition":"The Birth Store Hire"},{"column":"vendor","relation":"equals","condition":"The Birth Store"}],"published_scope":"global","image":{"created_at":"2024-11-13T10:58:16+08:00","alt":"Shop All Sale - The Birth Store","width":2048,"height":1365,"src":"\/\/www.thebirthstore.com.au\/cdn\/shop\/collections\/shop-all-sale-297361.jpg?v=1731466697"}}]}
[{"alt":"IVF Milestone Cards - The Birth Store-Adored Illustrations","id":27007588401341,"position":1,"preview_image":{"aspect_ratio":1.0,"height":2048,"width":2048,"src":"\/\/www.thebirthstore.com.au\/cdn\/shop\/files\/ivf-milestone-cards-398530.jpg?v=1714967987"},"aspect_ratio":1.0,"height":2048,"media_type":"image","src":"\/\/www.thebirthstore.com.au\/cdn\/shop\/files\/ivf-milestone-cards-398530.jpg?v=1714967987","width":2048},{"alt":"IVF Milestone Cards - The Birth Store-Adored Illustrations","id":27007588565181,"position":2,"preview_image":{"aspect_ratio":1.0,"height":1080,"width":1080,"src":"\/\/www.thebirthstore.com.au\/cdn\/shop\/files\/ivf-milestone-cards-712735.jpg?v=1714967987"},"aspect_ratio":1.0,"height":1080,"media_type":"image","src":"\/\/www.thebirthstore.com.au\/cdn\/shop\/files\/ivf-milestone-cards-712735.jpg?v=1714967987","width":1080},{"alt":"IVF Milestone Cards - The Birth Store-Adored Illustrations","id":27007588597949,"position":3,"preview_image":{"aspect_ratio":1.0,"height":1080,"width":1080,"src":"\/\/www.thebirthstore.com.au\/cdn\/shop\/files\/ivf-milestone-cards-379869.jpg?v=1714967987"},"aspect_ratio":1.0,"height":1080,"media_type":"image","src":"\/\/www.thebirthstore.com.au\/cdn\/shop\/files\/ivf-milestone-cards-379869.jpg?v=1714967987","width":1080},{"alt":"IVF Milestone Cards - The Birth Store-Adored Illustrations","id":27007588729021,"position":4,"preview_image":{"aspect_ratio":1.0,"height":1080,"width":1080,"src":"\/\/www.thebirthstore.com.au\/cdn\/shop\/files\/ivf-milestone-cards-200778.jpg?v=1714967987"},"aspect_ratio":1.0,"height":1080,"media_type":"image","src":"\/\/www.thebirthstore.com.au\/cdn\/shop\/files\/ivf-milestone-cards-200778.jpg?v=1714967987","width":1080},{"alt":"IVF Milestone Cards - The Birth Store-Adored Illustrations","id":27007588761789,"position":5,"preview_image":{"aspect_ratio":1.0,"height":1080,"width":1080,"src":"\/\/www.thebirthstore.com.au\/cdn\/shop\/files\/ivf-milestone-cards-829342.jpg?v=1714967987"},"aspect_ratio":1.0,"height":1080,"media_type":"image","src":"\/\/www.thebirthstore.com.au\/cdn\/shop\/files\/ivf-milestone-cards-829342.jpg?v=1714967987","width":1080}]
{"item":{"id":7499247190205,"title":"Konjac Sponge","handle":"kojac-sponge","description":"\u003cp class=\"\" data-mce-fragment=\"1\"\u003eThis little beauty is your labour and birth buddy! But how? I hear you ask...\u003c\/p\u003e\n\u003cp class=\"\" data-mce-fragment=\"1\"\u003eWell have you heard these sayings...\u003c\/p\u003e\n\u003cp class=\"\" data-mce-fragment=\"1\"\u003e\u003cem\u003e\"soft face, soft fanny\"\u003c\/em\u003e\u003c\/p\u003e\n\u003cp class=\"\" data-mce-fragment=\"1\"\u003e\u003cem\u003e\"loose lips, loose lips\"\u003c\/em\u003e\u003c\/p\u003e\n\u003cp class=\"\" data-mce-fragment=\"1\"\u003e\u003cem\u003e\"as above, so below\"\u003c\/em\u003e\u003c\/p\u003e\n\u003cp class=\"\" data-mce-fragment=\"1\"\u003eThat's because your jaw is a mirror of your pelvic floor. If you are holding tension in your jaw you are holding tension and creating lift in your pelvic floor but when we bring awareness to this area, we are able to transfer relaxation, allowing our pelvic floor to soften and lengthen, allowing for an easier second stage of birth. \u003c\/p\u003e\n\u003cp class=\"\" data-mce-fragment=\"1\"\u003eThis pink clay konjac sponge can help relax your facial muscles when gently massaged over your face, neck and shoulders between contractions (while your birth support person scores multiple brownie points in the process). As we know for birth, a relaxed jaw is a relaxed pelvic floor and this little eco sponge brings with it heavenly mini facial vibes, to do exactly that.\u003c\/p\u003e\n\u003cp class=\"\" data-mce-fragment=\"1\"\u003eAnd not only that! Perfect for postpartum as a self care ritual too! Just pop it in the compost when it starts to break down. A win for you and the environment!\u003c\/p\u003e\n\u003cp class=\"\" data-mce-fragment=\"1\"\u003eEncourage your support partner to get creative too - beautiful as an all over body massage or when mama is in a warm bath, dip this in cold water and apply for a much needed cooling effect \u003c\/p\u003e\n\u003cdiv class=\"rich-text__text rte\" data-mce-fragment=\"1\"\u003e\n\u003cdiv class=\"image-with-text__text rte\"\u003e\n\u003cdiv class=\"image-with-text__text rte\"\u003e\u003c\/div\u003e\n\u003c\/div\u003e\n\u003c\/div\u003e","published_at":"2023-08-14T22:24:06+08:00","created_at":"2023-08-08T09:38:23+08:00","vendor":"Seasons of Mama","type":"","tags":["Birth","Hospital Bag","Labour Progression","Mum"],"price":1495,"price_min":1495,"price_max":1495,"available":false,"price_varies":false,"compare_at_price":null,"compare_at_price_min":0,"compare_at_price_max":0,"compare_at_price_varies":false,"variants":[{"id":42959903555773,"title":"Default Title","option1":"Default Title","option2":null,"option3":null,"sku":null,"requires_shipping":true,"taxable":false,"featured_image":null,"available":false,"name":"Konjac Sponge","public_title":null,"options":["Default Title"],"price":1495,"weight":18,"compare_at_price":null,"inventory_management":"shopify","barcode":"03555773","requires_selling_plan":false,"selling_plan_allocations":[]}],"images":["\/\/www.thebirthstore.com.au\/cdn\/shop\/files\/konjac-sponge-976339.jpg?v=1714967973","\/\/www.thebirthstore.com.au\/cdn\/shop\/files\/konjac-sponge-987272.jpg?v=1714967973","\/\/www.thebirthstore.com.au\/cdn\/shop\/files\/konjac-sponge-305674.jpg?v=1714967973","\/\/www.thebirthstore.com.au\/cdn\/shop\/files\/konjac-sponge-427554.jpg?v=1714967973","\/\/www.thebirthstore.com.au\/cdn\/shop\/files\/konjac-sponge-490262.jpg?v=1714967973","\/\/www.thebirthstore.com.au\/cdn\/shop\/files\/konjac-sponge-843427.jpg?v=1714967973"],"featured_image":"\/\/www.thebirthstore.com.au\/cdn\/shop\/files\/konjac-sponge-976339.jpg?v=1714967973","options":["Title"],"media":[{"alt":"Konjac Sponge - The Birth Store-Seasons of Mama","id":27007586894013,"position":1,"preview_image":{"aspect_ratio":1.0,"height":1080,"width":1080,"src":"\/\/www.thebirthstore.com.au\/cdn\/shop\/files\/konjac-sponge-976339.jpg?v=1714967973"},"aspect_ratio":1.0,"height":1080,"media_type":"image","src":"\/\/www.thebirthstore.com.au\/cdn\/shop\/files\/konjac-sponge-976339.jpg?v=1714967973","width":1080},{"alt":"Konjac Sponge - The Birth Store-Seasons of Mama","id":27007586926781,"position":2,"preview_image":{"aspect_ratio":0.667,"height":1200,"width":800,"src":"\/\/www.thebirthstore.com.au\/cdn\/shop\/files\/konjac-sponge-987272.jpg?v=1714967973"},"aspect_ratio":0.667,"height":1200,"media_type":"image","src":"\/\/www.thebirthstore.com.au\/cdn\/shop\/files\/konjac-sponge-987272.jpg?v=1714967973","width":800},{"alt":"Konjac Sponge - The Birth Store-Seasons of Mama","id":27007586959549,"position":3,"preview_image":{"aspect_ratio":1.497,"height":553,"width":828,"src":"\/\/www.thebirthstore.com.au\/cdn\/shop\/files\/konjac-sponge-305674.jpg?v=1714967973"},"aspect_ratio":1.497,"height":553,"media_type":"image","src":"\/\/www.thebirthstore.com.au\/cdn\/shop\/files\/konjac-sponge-305674.jpg?v=1714967973","width":828},{"alt":"Konjac Sponge - The Birth Store-Seasons of Mama","id":27007586992317,"position":4,"preview_image":{"aspect_ratio":0.673,"height":1231,"width":828,"src":"\/\/www.thebirthstore.com.au\/cdn\/shop\/files\/konjac-sponge-427554.jpg?v=1714967973"},"aspect_ratio":0.673,"height":1231,"media_type":"image","src":"\/\/www.thebirthstore.com.au\/cdn\/shop\/files\/konjac-sponge-427554.jpg?v=1714967973","width":828},{"alt":"Konjac Sponge - The Birth Store-Seasons of Mama","id":27007587025085,"position":5,"preview_image":{"aspect_ratio":1.526,"height":542,"width":827,"src":"\/\/www.thebirthstore.com.au\/cdn\/shop\/files\/konjac-sponge-490262.jpg?v=1714967973"},"aspect_ratio":1.526,"height":542,"media_type":"image","src":"\/\/www.thebirthstore.com.au\/cdn\/shop\/files\/konjac-sponge-490262.jpg?v=1714967973","width":827},{"alt":"Konjac Sponge - The Birth Store-Seasons of Mama","id":27007587123389,"position":6,"preview_image":{"aspect_ratio":0.667,"height":1200,"width":800,"src":"\/\/www.thebirthstore.com.au\/cdn\/shop\/files\/konjac-sponge-843427.jpg?v=1714967973"},"aspect_ratio":0.667,"height":1200,"media_type":"image","src":"\/\/www.thebirthstore.com.au\/cdn\/shop\/files\/konjac-sponge-843427.jpg?v=1714967973","width":800}],"requires_selling_plan":false,"selling_plan_groups":[],"content":"\u003cp class=\"\" data-mce-fragment=\"1\"\u003eThis little beauty is your labour and birth buddy! But how? I hear you ask...\u003c\/p\u003e\n\u003cp class=\"\" data-mce-fragment=\"1\"\u003eWell have you heard these sayings...\u003c\/p\u003e\n\u003cp class=\"\" data-mce-fragment=\"1\"\u003e\u003cem\u003e\"soft face, soft fanny\"\u003c\/em\u003e\u003c\/p\u003e\n\u003cp class=\"\" data-mce-fragment=\"1\"\u003e\u003cem\u003e\"loose lips, loose lips\"\u003c\/em\u003e\u003c\/p\u003e\n\u003cp class=\"\" data-mce-fragment=\"1\"\u003e\u003cem\u003e\"as above, so below\"\u003c\/em\u003e\u003c\/p\u003e\n\u003cp class=\"\" data-mce-fragment=\"1\"\u003eThat's because your jaw is a mirror of your pelvic floor. If you are holding tension in your jaw you are holding tension and creating lift in your pelvic floor but when we bring awareness to this area, we are able to transfer relaxation, allowing our pelvic floor to soften and lengthen, allowing for an easier second stage of birth. \u003c\/p\u003e\n\u003cp class=\"\" data-mce-fragment=\"1\"\u003eThis pink clay konjac sponge can help relax your facial muscles when gently massaged over your face, neck and shoulders between contractions (while your birth support person scores multiple brownie points in the process). As we know for birth, a relaxed jaw is a relaxed pelvic floor and this little eco sponge brings with it heavenly mini facial vibes, to do exactly that.\u003c\/p\u003e\n\u003cp class=\"\" data-mce-fragment=\"1\"\u003eAnd not only that! Perfect for postpartum as a self care ritual too! Just pop it in the compost when it starts to break down. A win for you and the environment!\u003c\/p\u003e\n\u003cp class=\"\" data-mce-fragment=\"1\"\u003eEncourage your support partner to get creative too - beautiful as an all over body massage or when mama is in a warm bath, dip this in cold water and apply for a much needed cooling effect \u003c\/p\u003e\n\u003cdiv class=\"rich-text__text rte\" data-mce-fragment=\"1\"\u003e\n\u003cdiv class=\"image-with-text__text rte\"\u003e\n\u003cdiv class=\"image-with-text__text rte\"\u003e\u003c\/div\u003e\n\u003c\/div\u003e\n\u003c\/div\u003e"},"options":[{"name":"Title","position":1,"values":["Default Title"]}],"custom_metafields":{},"metafields":{"badge":"\u003cdiv style='display:none' class='jdgm-prev-badge' data-average-rating='0.00' data-number-of-reviews='0' data-number-of-questions='0'\u003e \u003cspan class='jdgm-prev-badge__stars' data-score='0.00' tabindex='0' aria-label='0.00 stars' role='button'\u003e \u003cspan class='jdgm-star jdgm--off'\u003e\u003c\/span\u003e\u003cspan class='jdgm-star jdgm--off'\u003e\u003c\/span\u003e\u003cspan class='jdgm-star jdgm--off'\u003e\u003c\/span\u003e\u003cspan class='jdgm-star jdgm--off'\u003e\u003c\/span\u003e\u003cspan class='jdgm-star jdgm--off'\u003e\u003c\/span\u003e \u003c\/span\u003e \u003cspan class='jdgm-prev-badge__text'\u003e No reviews \u003c\/span\u003e \u003c\/div\u003e","widget":"\u003cdiv class='jdgm-rev-widg' data-updated-at='2025-06-13T16:12:53Z' data-average-rating='0.00' data-number-of-reviews='0' data-number-of-questions='0'\u003e \u003cstyle class='jdgm-temp-hiding-style'\u003e.jdgm-rev-widg{ display: none }\u003c\/style\u003e \u003cdiv class='jdgm-rev-widg__header'\u003e \u003ch2 class='jdgm-rev-widg__title'\u003eCustomer Reviews\u003c\/h2\u003e \u003cdiv class='jdgm-rev-widg__summary'\u003e \u003cdiv class='jdgm-rev-widg__summary-stars' aria-label='Average rating is 0.00 stars' role='img'\u003e \u003cspan class='jdgm-star jdgm--off'\u003e\u003c\/span\u003e\u003cspan class='jdgm-star jdgm--off'\u003e\u003c\/span\u003e\u003cspan class='jdgm-star jdgm--off'\u003e\u003c\/span\u003e\u003cspan class='jdgm-star jdgm--off'\u003e\u003c\/span\u003e\u003cspan class='jdgm-star jdgm--off'\u003e\u003c\/span\u003e \u003c\/div\u003e \u003cdiv class='jdgm-rev-widg__summary-text'\u003eBe the first to write a review\u003c\/div\u003e \u003c\/div\u003e \u003ca style='display: none' href='#' class='jdgm-write-rev-link' role='button'\u003eWrite a review\u003c\/a\u003e \u003cdiv class='jdgm-histogram jdgm-temp-hidden'\u003e \u003cdiv class='jdgm-histogram__row' data-rating='5' data-frequency='0' data-percentage='0'\u003e \u003cdiv class='jdgm-histogram__star' role='button' aria-label=\"0% (0) reviews with 5 star rating\" tabindex='0' \u003e\u003cspan class='jdgm-star jdgm--on'\u003e\u003c\/span\u003e\u003cspan class='jdgm-star jdgm--on'\u003e\u003c\/span\u003e\u003cspan class='jdgm-star jdgm--on'\u003e\u003c\/span\u003e\u003cspan class='jdgm-star jdgm--on'\u003e\u003c\/span\u003e\u003cspan class='jdgm-star jdgm--on'\u003e\u003c\/span\u003e\u003c\/div\u003e \u003cdiv class='jdgm-histogram__bar'\u003e \u003cdiv class='jdgm-histogram__bar-content' style='width: 0%;'\u003e \u003c\/div\u003e \u003c\/div\u003e \u003cdiv class='jdgm-histogram__percentage'\u003e0%\u003c\/div\u003e \u003cdiv class='jdgm-histogram__frequency'\u003e(0)\u003c\/div\u003e \u003c\/div\u003e \u003cdiv class='jdgm-histogram__row' data-rating='4' data-frequency='0' data-percentage='0'\u003e \u003cdiv class='jdgm-histogram__star' role='button' aria-label=\"0% (0) reviews with 4 star rating\" tabindex='0' \u003e\u003cspan class='jdgm-star jdgm--on'\u003e\u003c\/span\u003e\u003cspan class='jdgm-star jdgm--on'\u003e\u003c\/span\u003e\u003cspan class='jdgm-star jdgm--on'\u003e\u003c\/span\u003e\u003cspan class='jdgm-star jdgm--on'\u003e\u003c\/span\u003e\u003cspan class='jdgm-star jdgm--off'\u003e\u003c\/span\u003e\u003c\/div\u003e \u003cdiv class='jdgm-histogram__bar'\u003e \u003cdiv class='jdgm-histogram__bar-content' style='width: 0%;'\u003e \u003c\/div\u003e \u003c\/div\u003e \u003cdiv class='jdgm-histogram__percentage'\u003e0%\u003c\/div\u003e \u003cdiv class='jdgm-histogram__frequency'\u003e(0)\u003c\/div\u003e \u003c\/div\u003e \u003cdiv class='jdgm-histogram__row' data-rating='3' data-frequency='0' data-percentage='0'\u003e \u003cdiv class='jdgm-histogram__star' role='button' aria-label=\"0% (0) reviews with 3 star rating\" tabindex='0' \u003e\u003cspan class='jdgm-star jdgm--on'\u003e\u003c\/span\u003e\u003cspan class='jdgm-star jdgm--on'\u003e\u003c\/span\u003e\u003cspan class='jdgm-star jdgm--on'\u003e\u003c\/span\u003e\u003cspan class='jdgm-star jdgm--off'\u003e\u003c\/span\u003e\u003cspan class='jdgm-star jdgm--off'\u003e\u003c\/span\u003e\u003c\/div\u003e \u003cdiv class='jdgm-histogram__bar'\u003e \u003cdiv class='jdgm-histogram__bar-content' style='width: 0%;'\u003e \u003c\/div\u003e \u003c\/div\u003e \u003cdiv class='jdgm-histogram__percentage'\u003e0%\u003c\/div\u003e \u003cdiv class='jdgm-histogram__frequency'\u003e(0)\u003c\/div\u003e \u003c\/div\u003e \u003cdiv class='jdgm-histogram__row' data-rating='2' data-frequency='0' data-percentage='0'\u003e \u003cdiv class='jdgm-histogram__star' role='button' aria-label=\"0% (0) reviews with 2 star rating\" tabindex='0' \u003e\u003cspan class='jdgm-star jdgm--on'\u003e\u003c\/span\u003e\u003cspan class='jdgm-star jdgm--on'\u003e\u003c\/span\u003e\u003cspan class='jdgm-star jdgm--off'\u003e\u003c\/span\u003e\u003cspan class='jdgm-star jdgm--off'\u003e\u003c\/span\u003e\u003cspan class='jdgm-star jdgm--off'\u003e\u003c\/span\u003e\u003c\/div\u003e \u003cdiv class='jdgm-histogram__bar'\u003e \u003cdiv class='jdgm-histogram__bar-content' style='width: 0%;'\u003e \u003c\/div\u003e \u003c\/div\u003e \u003cdiv class='jdgm-histogram__percentage'\u003e0%\u003c\/div\u003e \u003cdiv class='jdgm-histogram__frequency'\u003e(0)\u003c\/div\u003e \u003c\/div\u003e \u003cdiv class='jdgm-histogram__row' data-rating='1' data-frequency='0' data-percentage='0'\u003e \u003cdiv class='jdgm-histogram__star' role='button' aria-label=\"0% (0) reviews with 1 star rating\" tabindex='0' \u003e\u003cspan class='jdgm-star jdgm--on'\u003e\u003c\/span\u003e\u003cspan class='jdgm-star jdgm--off'\u003e\u003c\/span\u003e\u003cspan class='jdgm-star jdgm--off'\u003e\u003c\/span\u003e\u003cspan class='jdgm-star jdgm--off'\u003e\u003c\/span\u003e\u003cspan class='jdgm-star jdgm--off'\u003e\u003c\/span\u003e\u003c\/div\u003e \u003cdiv class='jdgm-histogram__bar'\u003e \u003cdiv class='jdgm-histogram__bar-content' style='width: 0%;'\u003e \u003c\/div\u003e \u003c\/div\u003e \u003cdiv class='jdgm-histogram__percentage'\u003e0%\u003c\/div\u003e \u003cdiv class='jdgm-histogram__frequency'\u003e(0)\u003c\/div\u003e \u003c\/div\u003e \u003cdiv class='jdgm-histogram__row jdgm-histogram__clear-filter' data-rating=null tabindex='0'\u003e\u003c\/div\u003e \u003c\/div\u003e \u003cdiv class='jdgm-rev-widg__sort-wrapper'\u003e\u003c\/div\u003e \u003c\/div\u003e \u003cdiv class='jdgm-rev-widg__body'\u003e \u003cdiv class='jdgm-rev-widg__reviews'\u003e\u003c\/div\u003e \u003cdiv class='jdgm-paginate' data-per-page='10' data-url='https:\/\/api.judge.me\/reviews\/reviews_for_widget' style=\"display: none;\"\u003e\u003c\/div\u003e \u003c\/div\u003e \u003cdiv class='jdgm-rev-widg__paginate-spinner-wrapper'\u003e \u003cdiv class='jdgm-spinner'\u003e\u003c\/div\u003e \u003c\/div\u003e \u003c\/div\u003e"},"collections":[{"id":261657460925,"handle":"buy","title":"Buy","updated_at":"2025-12-28T20:10:01+08:00","body_html":"\u003cp\u003eBrowse all of our pregnancy, labour \u0026amp; birth, postpartum and baby essentials here.\u003cbr\u003e\u003c\/p\u003e\n\u003cp\u003e\u003cspan\u003eYou can even buy now and pay later with Afterpay!\u003c\/span\u003e\u003c\/p\u003e","published_at":"2021-03-10T12:05:31+08:00","sort_order":"best-selling","template_suffix":"shop-all-collection","disjunctive":false,"rules":[{"column":"title","relation":"not_contains","condition":"Hire"}],"published_scope":"global","image":{"created_at":"2024-05-06T11:59:42+08:00","alt":"Buy - The Birth Store","width":2048,"height":2048,"src":"\/\/www.thebirthstore.com.au\/cdn\/shop\/collections\/buy-964856.jpg?v=1714967982"}},{"id":261658214589,"handle":"labour-and-birth-buy","title":"Labour \u0026 Birth","updated_at":"2025-12-28T20:10:01+08:00","body_html":"\u003cp\u003eWe stock a large range of Elle TENS machines for you to buy for your labour and birth. We stock the Elle TENS, Elle TENS 2 and Elle TENS Plus, we also hire these out if that suits you better, please head over to our TENS machine hire page for more information. We ship Australia wide or have options for local delivery\/pick-up in Perth if you are due ASAP. We also stock other items for your labour and birth. \u003c\/p\u003e\n\u003cp\u003eLooking for something we don't currently stock? Please reach out and let us know.\u003c\/p\u003e\n\u003cp\u003e\u003cspan\u003eYou can even buy now and pay later with Afterpay!\u003c\/span\u003e\u003c\/p\u003e","published_at":"2021-03-10T12:34:43+08:00","sort_order":"best-selling","template_suffix":"labour-birth-collection","disjunctive":false,"rules":[{"column":"tag","relation":"equals","condition":"Birth"}],"published_scope":"global","image":{"created_at":"2024-05-06T12:00:09+08:00","alt":"Labour \u0026 Birth - The Birth Store","width":1080,"height":981,"src":"\/\/www.thebirthstore.com.au\/cdn\/shop\/collections\/labour-birth-342038.jpg?v=1714968009"}},{"id":281712558269,"handle":"labour-aids","title":"Labour Aids","updated_at":"2025-12-28T20:10:01+08:00","body_html":"","published_at":"2021-12-20T14:22:16+08:00","sort_order":"best-selling","template_suffix":"labour-aids-collection","disjunctive":false,"rules":[{"column":"tag","relation":"equals","condition":"Labour Progression"}],"published_scope":"global","image":{"created_at":"2024-05-06T12:00:11+08:00","alt":"Labour Aids - The Birth Store","width":1365,"height":2048,"src":"\/\/www.thebirthstore.com.au\/cdn\/shop\/collections\/labour-aids-211824.jpg?v=1714968012"}},{"id":291456483517,"handle":"shop-all","title":"Shop All - Mum","updated_at":"2025-12-28T20:10:01+08:00","body_html":"","published_at":"2022-12-23T22:04:39+08:00","sort_order":"best-selling","template_suffix":"shop-all-collection","disjunctive":false,"rules":[{"column":"variant_price","relation":"greater_than","condition":"1"},{"column":"title","relation":"not_contains","condition":"Batteries"},{"column":"tag","relation":"equals","condition":"Mum"}],"published_scope":"global","image":{"created_at":"2024-05-06T12:00:54+08:00","alt":"Shop All - The Birth Store","width":1365,"height":2048,"src":"\/\/www.thebirthstore.com.au\/cdn\/shop\/collections\/shop-all-693176.jpg?v=1714968055"}},{"id":310045933757,"handle":"shop-all-sale","title":"Shop All Sale","updated_at":"2025-12-28T20:10:01+08:00","body_html":"","published_at":"2024-11-12T13:22:43+08:00","sort_order":"alpha-asc","template_suffix":"","disjunctive":true,"rules":[{"column":"tag","relation":"equals","condition":"Bundles"},{"column":"vendor","relation":"equals","condition":"Franjos Kitchen"},{"column":"vendor","relation":"equals","condition":"Adored Illustrations"},{"column":"vendor","relation":"equals","condition":"Amazing Oils"},{"column":"vendor","relation":"equals","condition":"Ice Ice Booby"},{"column":"vendor","relation":"equals","condition":"Made to Milk"},{"column":"vendor","relation":"equals","condition":"Milky Goodness"},{"column":"vendor","relation":"equals","condition":"Seasons of Mama"},{"column":"vendor","relation":"equals","condition":"Silverette"},{"column":"vendor","relation":"equals","condition":"Snuggle Hunny"},{"column":"vendor","relation":"equals","condition":"Yung Bod"},{"column":"vendor","relation":"equals","condition":"Bare Love"},{"column":"vendor","relation":"equals","condition":"Haakaa"},{"column":"vendor","relation":"equals","condition":"Mere Botanicals"},{"column":"vendor","relation":"equals","condition":"The Birth Store Hire"},{"column":"vendor","relation":"equals","condition":"The Birth Store"}],"published_scope":"global","image":{"created_at":"2024-11-13T10:58:16+08:00","alt":"Shop All Sale - The Birth Store","width":2048,"height":1365,"src":"\/\/www.thebirthstore.com.au\/cdn\/shop\/collections\/shop-all-sale-297361.jpg?v=1731466697"}}]}
[{"alt":"Konjac Sponge - The Birth Store-Seasons of Mama","id":27007586894013,"position":1,"preview_image":{"aspect_ratio":1.0,"height":1080,"width":1080,"src":"\/\/www.thebirthstore.com.au\/cdn\/shop\/files\/konjac-sponge-976339.jpg?v=1714967973"},"aspect_ratio":1.0,"height":1080,"media_type":"image","src":"\/\/www.thebirthstore.com.au\/cdn\/shop\/files\/konjac-sponge-976339.jpg?v=1714967973","width":1080},{"alt":"Konjac Sponge - The Birth Store-Seasons of Mama","id":27007586926781,"position":2,"preview_image":{"aspect_ratio":0.667,"height":1200,"width":800,"src":"\/\/www.thebirthstore.com.au\/cdn\/shop\/files\/konjac-sponge-987272.jpg?v=1714967973"},"aspect_ratio":0.667,"height":1200,"media_type":"image","src":"\/\/www.thebirthstore.com.au\/cdn\/shop\/files\/konjac-sponge-987272.jpg?v=1714967973","width":800},{"alt":"Konjac Sponge - The Birth Store-Seasons of Mama","id":27007586959549,"position":3,"preview_image":{"aspect_ratio":1.497,"height":553,"width":828,"src":"\/\/www.thebirthstore.com.au\/cdn\/shop\/files\/konjac-sponge-305674.jpg?v=1714967973"},"aspect_ratio":1.497,"height":553,"media_type":"image","src":"\/\/www.thebirthstore.com.au\/cdn\/shop\/files\/konjac-sponge-305674.jpg?v=1714967973","width":828},{"alt":"Konjac Sponge - The Birth Store-Seasons of Mama","id":27007586992317,"position":4,"preview_image":{"aspect_ratio":0.673,"height":1231,"width":828,"src":"\/\/www.thebirthstore.com.au\/cdn\/shop\/files\/konjac-sponge-427554.jpg?v=1714967973"},"aspect_ratio":0.673,"height":1231,"media_type":"image","src":"\/\/www.thebirthstore.com.au\/cdn\/shop\/files\/konjac-sponge-427554.jpg?v=1714967973","width":828},{"alt":"Konjac Sponge - The Birth Store-Seasons of Mama","id":27007587025085,"position":5,"preview_image":{"aspect_ratio":1.526,"height":542,"width":827,"src":"\/\/www.thebirthstore.com.au\/cdn\/shop\/files\/konjac-sponge-490262.jpg?v=1714967973"},"aspect_ratio":1.526,"height":542,"media_type":"image","src":"\/\/www.thebirthstore.com.au\/cdn\/shop\/files\/konjac-sponge-490262.jpg?v=1714967973","width":827},{"alt":"Konjac Sponge - The Birth Store-Seasons of Mama","id":27007587123389,"position":6,"preview_image":{"aspect_ratio":0.667,"height":1200,"width":800,"src":"\/\/www.thebirthstore.com.au\/cdn\/shop\/files\/konjac-sponge-843427.jpg?v=1714967973"},"aspect_ratio":0.667,"height":1200,"media_type":"image","src":"\/\/www.thebirthstore.com.au\/cdn\/shop\/files\/konjac-sponge-843427.jpg?v=1714967973","width":800}]
{"item":{"id":7513280381117,"title":"Labour \u0026 Birth Box - Spiky Ball","handle":"labour-birth-box-spiky-ball","description":"\u003cp\u003e\u003cmeta charset=\"utf-8\"\u003e\u003cspan\u003eThere are so many beautiful products on the market now to help support you in labour \u0026amp; birth. We have created a kit with a couple of our favourite products from our range and other small Australian businesses to support you in labour \u0026amp; birth.\u003c\/span\u003e\u003c\/p\u003e","published_at":"2023-10-03T14:04:09+08:00","created_at":"2023-10-03T13:31:42+08:00","vendor":"Bundles","type":"","tags":["Baby Shower Gifts","Birth","Bundles","Hospital Bag","Labour Preparation","Labour Progression","Nausea","Pain Relief","Pregnancy"],"price":7212,"price_min":7212,"price_max":7212,"available":true,"price_varies":false,"compare_at_price":8195,"compare_at_price_min":8195,"compare_at_price_max":8195,"compare_at_price_varies":false,"variants":[{"id":43056986161341,"title":"Black","option1":"Black","option2":null,"option3":null,"sku":"","requires_shipping":true,"taxable":false,"featured_image":null,"available":true,"name":"Labour \u0026 Birth Box - Spiky Ball - Black","public_title":"Black","options":["Black"],"price":7212,"weight":267,"compare_at_price":8195,"inventory_management":"shopify","barcode":"86161341","requires_selling_plan":false,"selling_plan_allocations":[]},{"id":43056986194109,"title":"Purple","option1":"Purple","option2":null,"option3":null,"sku":"","requires_shipping":true,"taxable":false,"featured_image":null,"available":true,"name":"Labour \u0026 Birth Box - Spiky Ball - Purple","public_title":"Purple","options":["Purple"],"price":7212,"weight":267,"compare_at_price":8195,"inventory_management":"shopify","barcode":"86194109","requires_selling_plan":false,"selling_plan_allocations":[]},{"id":43056986226877,"title":"Pink","option1":"Pink","option2":null,"option3":null,"sku":"","requires_shipping":true,"taxable":false,"featured_image":null,"available":true,"name":"Labour \u0026 Birth Box - Spiky Ball - Pink","public_title":"Pink","options":["Pink"],"price":7212,"weight":267,"compare_at_price":8195,"inventory_management":"shopify","barcode":"86226877","requires_selling_plan":false,"selling_plan_allocations":[]},{"id":43056986259645,"title":"Blue","option1":"Blue","option2":null,"option3":null,"sku":"","requires_shipping":true,"taxable":false,"featured_image":null,"available":true,"name":"Labour \u0026 Birth Box - Spiky Ball - Blue","public_title":"Blue","options":["Blue"],"price":7212,"weight":267,"compare_at_price":8195,"inventory_management":"shopify","barcode":"86259645","requires_selling_plan":false,"selling_plan_allocations":[]}],"images":["\/\/www.thebirthstore.com.au\/cdn\/shop\/files\/labour-birth-box-spiky-ball-2914052.png?v=1758829421","\/\/www.thebirthstore.com.au\/cdn\/shop\/files\/labour-birth-box-spiky-ball-270365.jpg?v=1758807490","\/\/www.thebirthstore.com.au\/cdn\/shop\/files\/labour-birth-box-spiky-ball-404808.jpg?v=1758807490"],"featured_image":"\/\/www.thebirthstore.com.au\/cdn\/shop\/files\/labour-birth-box-spiky-ball-2914052.png?v=1758829421","options":["Spiky Massage Ball (Colour)"],"media":[{"alt":"Labour \u0026 Birth Box - Spiky Ball - The Birth Store - Bundles","id":29672202600637,"position":1,"preview_image":{"aspect_ratio":1.0,"height":1080,"width":1080,"src":"\/\/www.thebirthstore.com.au\/cdn\/shop\/files\/labour-birth-box-spiky-ball-2914052.png?v=1758829421"},"aspect_ratio":1.0,"height":1080,"media_type":"image","src":"\/\/www.thebirthstore.com.au\/cdn\/shop\/files\/labour-birth-box-spiky-ball-2914052.png?v=1758829421","width":1080},{"alt":"Labour \u0026 Birth Box - Spiky Ball - The Birth Store-The Birth Store","id":27007587156157,"position":2,"preview_image":{"aspect_ratio":0.667,"height":2048,"width":1365,"src":"\/\/www.thebirthstore.com.au\/cdn\/shop\/files\/labour-birth-box-spiky-ball-270365.jpg?v=1758807490"},"aspect_ratio":0.667,"height":2048,"media_type":"image","src":"\/\/www.thebirthstore.com.au\/cdn\/shop\/files\/labour-birth-box-spiky-ball-270365.jpg?v=1758807490","width":1365},{"alt":"Labour \u0026 Birth Box - Spiky Ball - The Birth Store-The Birth Store","id":27007587188925,"position":3,"preview_image":{"aspect_ratio":0.786,"height":2048,"width":1609,"src":"\/\/www.thebirthstore.com.au\/cdn\/shop\/files\/labour-birth-box-spiky-ball-404808.jpg?v=1758807490"},"aspect_ratio":0.786,"height":2048,"media_type":"image","src":"\/\/www.thebirthstore.com.au\/cdn\/shop\/files\/labour-birth-box-spiky-ball-404808.jpg?v=1758807490","width":1609}],"requires_selling_plan":false,"selling_plan_groups":[],"content":"\u003cp\u003e\u003cmeta charset=\"utf-8\"\u003e\u003cspan\u003eThere are so many beautiful products on the market now to help support you in labour \u0026amp; birth. We have created a kit with a couple of our favourite products from our range and other small Australian businesses to support you in labour \u0026amp; birth.\u003c\/span\u003e\u003c\/p\u003e"},"options":[{"name":"Spiky Massage Ball (Colour)","position":1,"values":["Black","Purple","Pink","Blue"]}],"custom_metafields":{},"metafields":{"badge":"\u003cdiv style='display:none' class='jdgm-prev-badge' data-average-rating='0.00' data-number-of-reviews='0' data-number-of-questions='0'\u003e \u003cspan class='jdgm-prev-badge__stars' data-score='0.00' tabindex='0' aria-label='0.00 stars' role='button'\u003e \u003cspan class='jdgm-star jdgm--off'\u003e\u003c\/span\u003e\u003cspan class='jdgm-star jdgm--off'\u003e\u003c\/span\u003e\u003cspan class='jdgm-star jdgm--off'\u003e\u003c\/span\u003e\u003cspan class='jdgm-star jdgm--off'\u003e\u003c\/span\u003e\u003cspan class='jdgm-star jdgm--off'\u003e\u003c\/span\u003e \u003c\/span\u003e \u003cspan class='jdgm-prev-badge__text'\u003e No reviews \u003c\/span\u003e \u003c\/div\u003e","widget":"\u003cdiv class='jdgm-rev-widg' data-updated-at='2025-06-13T16:13:40Z' data-average-rating='0.00' data-number-of-reviews='0' data-number-of-questions='0'\u003e \u003cstyle class='jdgm-temp-hiding-style'\u003e.jdgm-rev-widg{ display: none }\u003c\/style\u003e \u003cdiv class='jdgm-rev-widg__header'\u003e \u003ch2 class='jdgm-rev-widg__title'\u003eCustomer Reviews\u003c\/h2\u003e \u003cdiv class='jdgm-rev-widg__summary'\u003e \u003cdiv class='jdgm-rev-widg__summary-stars' aria-label='Average rating is 0.00 stars' role='img'\u003e \u003cspan class='jdgm-star jdgm--off'\u003e\u003c\/span\u003e\u003cspan class='jdgm-star jdgm--off'\u003e\u003c\/span\u003e\u003cspan class='jdgm-star jdgm--off'\u003e\u003c\/span\u003e\u003cspan class='jdgm-star jdgm--off'\u003e\u003c\/span\u003e\u003cspan class='jdgm-star jdgm--off'\u003e\u003c\/span\u003e \u003c\/div\u003e \u003cdiv class='jdgm-rev-widg__summary-text'\u003eBe the first to write a review\u003c\/div\u003e \u003c\/div\u003e \u003ca style='display: none' href='#' class='jdgm-write-rev-link' role='button'\u003eWrite a review\u003c\/a\u003e \u003cdiv class='jdgm-histogram jdgm-temp-hidden'\u003e \u003cdiv class='jdgm-histogram__row' data-rating='5' data-frequency='0' data-percentage='0'\u003e \u003cdiv class='jdgm-histogram__star' role='button' aria-label=\"0% (0) reviews with 5 star rating\" tabindex='0' \u003e\u003cspan class='jdgm-star jdgm--on'\u003e\u003c\/span\u003e\u003cspan class='jdgm-star jdgm--on'\u003e\u003c\/span\u003e\u003cspan class='jdgm-star jdgm--on'\u003e\u003c\/span\u003e\u003cspan class='jdgm-star jdgm--on'\u003e\u003c\/span\u003e\u003cspan class='jdgm-star jdgm--on'\u003e\u003c\/span\u003e\u003c\/div\u003e \u003cdiv class='jdgm-histogram__bar'\u003e \u003cdiv class='jdgm-histogram__bar-content' style='width: 0%;'\u003e \u003c\/div\u003e \u003c\/div\u003e \u003cdiv class='jdgm-histogram__percentage'\u003e0%\u003c\/div\u003e \u003cdiv class='jdgm-histogram__frequency'\u003e(0)\u003c\/div\u003e \u003c\/div\u003e \u003cdiv class='jdgm-histogram__row' data-rating='4' data-frequency='0' data-percentage='0'\u003e \u003cdiv class='jdgm-histogram__star' role='button' aria-label=\"0% (0) reviews with 4 star rating\" tabindex='0' \u003e\u003cspan class='jdgm-star jdgm--on'\u003e\u003c\/span\u003e\u003cspan class='jdgm-star jdgm--on'\u003e\u003c\/span\u003e\u003cspan class='jdgm-star jdgm--on'\u003e\u003c\/span\u003e\u003cspan class='jdgm-star jdgm--on'\u003e\u003c\/span\u003e\u003cspan class='jdgm-star jdgm--off'\u003e\u003c\/span\u003e\u003c\/div\u003e \u003cdiv class='jdgm-histogram__bar'\u003e \u003cdiv class='jdgm-histogram__bar-content' style='width: 0%;'\u003e \u003c\/div\u003e \u003c\/div\u003e \u003cdiv class='jdgm-histogram__percentage'\u003e0%\u003c\/div\u003e \u003cdiv class='jdgm-histogram__frequency'\u003e(0)\u003c\/div\u003e \u003c\/div\u003e \u003cdiv class='jdgm-histogram__row' data-rating='3' data-frequency='0' data-percentage='0'\u003e \u003cdiv class='jdgm-histogram__star' role='button' aria-label=\"0% (0) reviews with 3 star rating\" tabindex='0' \u003e\u003cspan class='jdgm-star jdgm--on'\u003e\u003c\/span\u003e\u003cspan class='jdgm-star jdgm--on'\u003e\u003c\/span\u003e\u003cspan class='jdgm-star jdgm--on'\u003e\u003c\/span\u003e\u003cspan class='jdgm-star jdgm--off'\u003e\u003c\/span\u003e\u003cspan class='jdgm-star jdgm--off'\u003e\u003c\/span\u003e\u003c\/div\u003e \u003cdiv class='jdgm-histogram__bar'\u003e \u003cdiv class='jdgm-histogram__bar-content' style='width: 0%;'\u003e \u003c\/div\u003e \u003c\/div\u003e \u003cdiv class='jdgm-histogram__percentage'\u003e0%\u003c\/div\u003e \u003cdiv class='jdgm-histogram__frequency'\u003e(0)\u003c\/div\u003e \u003c\/div\u003e \u003cdiv class='jdgm-histogram__row' data-rating='2' data-frequency='0' data-percentage='0'\u003e \u003cdiv class='jdgm-histogram__star' role='button' aria-label=\"0% (0) reviews with 2 star rating\" tabindex='0' \u003e\u003cspan class='jdgm-star jdgm--on'\u003e\u003c\/span\u003e\u003cspan class='jdgm-star jdgm--on'\u003e\u003c\/span\u003e\u003cspan class='jdgm-star jdgm--off'\u003e\u003c\/span\u003e\u003cspan class='jdgm-star jdgm--off'\u003e\u003c\/span\u003e\u003cspan class='jdgm-star jdgm--off'\u003e\u003c\/span\u003e\u003c\/div\u003e \u003cdiv class='jdgm-histogram__bar'\u003e \u003cdiv class='jdgm-histogram__bar-content' style='width: 0%;'\u003e \u003c\/div\u003e \u003c\/div\u003e \u003cdiv class='jdgm-histogram__percentage'\u003e0%\u003c\/div\u003e \u003cdiv class='jdgm-histogram__frequency'\u003e(0)\u003c\/div\u003e \u003c\/div\u003e \u003cdiv class='jdgm-histogram__row' data-rating='1' data-frequency='0' data-percentage='0'\u003e \u003cdiv class='jdgm-histogram__star' role='button' aria-label=\"0% (0) reviews with 1 star rating\" tabindex='0' \u003e\u003cspan class='jdgm-star jdgm--on'\u003e\u003c\/span\u003e\u003cspan class='jdgm-star jdgm--off'\u003e\u003c\/span\u003e\u003cspan class='jdgm-star jdgm--off'\u003e\u003c\/span\u003e\u003cspan class='jdgm-star jdgm--off'\u003e\u003c\/span\u003e\u003cspan class='jdgm-star jdgm--off'\u003e\u003c\/span\u003e\u003c\/div\u003e \u003cdiv class='jdgm-histogram__bar'\u003e \u003cdiv class='jdgm-histogram__bar-content' style='width: 0%;'\u003e \u003c\/div\u003e \u003c\/div\u003e \u003cdiv class='jdgm-histogram__percentage'\u003e0%\u003c\/div\u003e \u003cdiv class='jdgm-histogram__frequency'\u003e(0)\u003c\/div\u003e \u003c\/div\u003e \u003cdiv class='jdgm-histogram__row jdgm-histogram__clear-filter' data-rating=null tabindex='0'\u003e\u003c\/div\u003e \u003c\/div\u003e \u003cdiv class='jdgm-rev-widg__sort-wrapper'\u003e\u003c\/div\u003e \u003c\/div\u003e \u003cdiv class='jdgm-rev-widg__body'\u003e \u003cdiv class='jdgm-rev-widg__reviews'\u003e\u003c\/div\u003e \u003cdiv class='jdgm-paginate' data-per-page='10' data-url='https:\/\/api.judge.me\/reviews\/reviews_for_widget' style=\"display: none;\"\u003e\u003c\/div\u003e \u003c\/div\u003e \u003cdiv class='jdgm-rev-widg__paginate-spinner-wrapper'\u003e \u003cdiv class='jdgm-spinner'\u003e\u003c\/div\u003e \u003c\/div\u003e \u003c\/div\u003e"},"collections":[{"id":283018526909,"handle":"bundles","title":"Bundles","updated_at":"2025-11-18T20:29:11+08:00","body_html":"\u003cp\u003eMake shopping for your bump, birth and beyond easier with our bundle packs. With a pack available for every stage, you can get everything you need with no fuss and with our bundle packs, you even save money.\u003c\/p\u003e","published_at":"2022-02-01T22:33:09+08:00","sort_order":"best-selling","template_suffix":"swaddles-collection","disjunctive":false,"rules":[{"column":"tag","relation":"equals","condition":"Bundles"}],"published_scope":"global","image":{"created_at":"2024-05-06T11:59:39+08:00","alt":"Bundles - The Birth Store","width":2048,"height":1365,"src":"\/\/www.thebirthstore.com.au\/cdn\/shop\/collections\/bundles-299009.jpg?v=1714967980"}},{"id":261657460925,"handle":"buy","title":"Buy","updated_at":"2025-12-28T20:10:01+08:00","body_html":"\u003cp\u003eBrowse all of our pregnancy, labour \u0026amp; birth, postpartum and baby essentials here.\u003cbr\u003e\u003c\/p\u003e\n\u003cp\u003e\u003cspan\u003eYou can even buy now and pay later with Afterpay!\u003c\/span\u003e\u003c\/p\u003e","published_at":"2021-03-10T12:05:31+08:00","sort_order":"best-selling","template_suffix":"shop-all-collection","disjunctive":false,"rules":[{"column":"title","relation":"not_contains","condition":"Hire"}],"published_scope":"global","image":{"created_at":"2024-05-06T11:59:42+08:00","alt":"Buy - The Birth Store","width":2048,"height":2048,"src":"\/\/www.thebirthstore.com.au\/cdn\/shop\/collections\/buy-964856.jpg?v=1714967982"}},{"id":261658214589,"handle":"labour-and-birth-buy","title":"Labour \u0026 Birth","updated_at":"2025-12-28T20:10:01+08:00","body_html":"\u003cp\u003eWe stock a large range of Elle TENS machines for you to buy for your labour and birth. We stock the Elle TENS, Elle TENS 2 and Elle TENS Plus, we also hire these out if that suits you better, please head over to our TENS machine hire page for more information. We ship Australia wide or have options for local delivery\/pick-up in Perth if you are due ASAP. We also stock other items for your labour and birth. \u003c\/p\u003e\n\u003cp\u003eLooking for something we don't currently stock? Please reach out and let us know.\u003c\/p\u003e\n\u003cp\u003e\u003cspan\u003eYou can even buy now and pay later with Afterpay!\u003c\/span\u003e\u003c\/p\u003e","published_at":"2021-03-10T12:34:43+08:00","sort_order":"best-selling","template_suffix":"labour-birth-collection","disjunctive":false,"rules":[{"column":"tag","relation":"equals","condition":"Birth"}],"published_scope":"global","image":{"created_at":"2024-05-06T12:00:09+08:00","alt":"Labour \u0026 Birth - The Birth Store","width":1080,"height":981,"src":"\/\/www.thebirthstore.com.au\/cdn\/shop\/collections\/labour-birth-342038.jpg?v=1714968009"}},{"id":281712558269,"handle":"labour-aids","title":"Labour Aids","updated_at":"2025-12-28T20:10:01+08:00","body_html":"","published_at":"2021-12-20T14:22:16+08:00","sort_order":"best-selling","template_suffix":"labour-aids-collection","disjunctive":false,"rules":[{"column":"tag","relation":"equals","condition":"Labour Progression"}],"published_scope":"global","image":{"created_at":"2024-05-06T12:00:11+08:00","alt":"Labour Aids - The Birth Store","width":1365,"height":2048,"src":"\/\/www.thebirthstore.com.au\/cdn\/shop\/collections\/labour-aids-211824.jpg?v=1714968012"}},{"id":281712525501,"handle":"labour-preparation","title":"Labour Preparation","updated_at":"2025-12-28T20:10:01+08:00","body_html":"","published_at":"2021-12-20T14:20:12+08:00","sort_order":"best-selling","template_suffix":"labour-preparation-collec","disjunctive":false,"rules":[{"column":"tag","relation":"equals","condition":"Labour Preparation"}],"published_scope":"global","image":{"created_at":"2024-05-06T12:00:13+08:00","alt":"Labour Preparation - The Birth Store","width":1024,"height":1536,"src":"\/\/www.thebirthstore.com.au\/cdn\/shop\/collections\/labour-preparation-271961.jpg?v=1714968013"}},{"id":295224836285,"handle":"nausea","title":"Nausea","updated_at":"2025-12-28T20:10:01+08:00","body_html":"","published_at":"2023-11-10T20:47:34+08:00","sort_order":"best-selling","template_suffix":"nausea-collection","disjunctive":false,"rules":[{"column":"tag","relation":"equals","condition":"Nausea"}],"published_scope":"global","image":{"created_at":"2024-05-06T12:00:24+08:00","alt":"Nausea - The Birth Store","width":610,"height":915,"src":"\/\/www.thebirthstore.com.au\/cdn\/shop\/collections\/nausea-404101.jpg?v=1714968024"}},{"id":281712591037,"handle":"pain-relief","title":"Pain Relief","updated_at":"2025-12-28T20:10:01+08:00","body_html":"","published_at":"2021-12-20T14:22:45+08:00","sort_order":"best-selling","template_suffix":"pain-relief-collection","disjunctive":false,"rules":[{"column":"tag","relation":"equals","condition":"Pain Relief"}],"published_scope":"global","image":{"created_at":"2024-05-06T12:00:27+08:00","alt":"Pain Relief - The Birth Store","width":1365,"height":2048,"src":"\/\/www.thebirthstore.com.au\/cdn\/shop\/collections\/pain-relief-878865.jpg?v=1714968027"}},{"id":261658149053,"handle":"pregnancy-and-maternity-products","title":"Pregnancy","updated_at":"2025-12-28T20:10:01+08:00","body_html":"\u003cp\u003eShop your pregnancy essentials below. Looking for something we don't currently stock? Please reach out and let us know.\u003cbr\u003e\u003c\/p\u003e\n\u003cp\u003e\u003cspan\u003eYou can even buy now and pay later with Afterpay!\u003c\/span\u003e\u003c\/p\u003e","published_at":"2021-03-10T12:34:22+08:00","sort_order":"best-selling","template_suffix":"pregnancy-collection","disjunctive":false,"rules":[{"column":"tag","relation":"equals","condition":"Pregnancy"}],"published_scope":"global","image":{"created_at":"2024-05-06T12:00:40+08:00","alt":"Pregnancy - The Birth Store","width":1024,"height":1536,"src":"\/\/www.thebirthstore.com.au\/cdn\/shop\/collections\/pregnancy-899677.jpg?v=1714968040"}},{"id":310045933757,"handle":"shop-all-sale","title":"Shop All Sale","updated_at":"2025-12-28T20:10:01+08:00","body_html":"","published_at":"2024-11-12T13:22:43+08:00","sort_order":"alpha-asc","template_suffix":"","disjunctive":true,"rules":[{"column":"tag","relation":"equals","condition":"Bundles"},{"column":"vendor","relation":"equals","condition":"Franjos Kitchen"},{"column":"vendor","relation":"equals","condition":"Adored Illustrations"},{"column":"vendor","relation":"equals","condition":"Amazing Oils"},{"column":"vendor","relation":"equals","condition":"Ice Ice Booby"},{"column":"vendor","relation":"equals","condition":"Made to Milk"},{"column":"vendor","relation":"equals","condition":"Milky Goodness"},{"column":"vendor","relation":"equals","condition":"Seasons of Mama"},{"column":"vendor","relation":"equals","condition":"Silverette"},{"column":"vendor","relation":"equals","condition":"Snuggle Hunny"},{"column":"vendor","relation":"equals","condition":"Yung Bod"},{"column":"vendor","relation":"equals","condition":"Bare Love"},{"column":"vendor","relation":"equals","condition":"Haakaa"},{"column":"vendor","relation":"equals","condition":"Mere Botanicals"},{"column":"vendor","relation":"equals","condition":"The Birth Store Hire"},{"column":"vendor","relation":"equals","condition":"The Birth Store"}],"published_scope":"global","image":{"created_at":"2024-11-13T10:58:16+08:00","alt":"Shop All Sale - The Birth Store","width":2048,"height":1365,"src":"\/\/www.thebirthstore.com.au\/cdn\/shop\/collections\/shop-all-sale-297361.jpg?v=1731466697"}}]}
[{"alt":"Labour \u0026 Birth Box - Spiky Ball - The Birth Store - Bundles","id":29672202600637,"position":1,"preview_image":{"aspect_ratio":1.0,"height":1080,"width":1080,"src":"\/\/www.thebirthstore.com.au\/cdn\/shop\/files\/labour-birth-box-spiky-ball-2914052.png?v=1758829421"},"aspect_ratio":1.0,"height":1080,"media_type":"image","src":"\/\/www.thebirthstore.com.au\/cdn\/shop\/files\/labour-birth-box-spiky-ball-2914052.png?v=1758829421","width":1080},{"alt":"Labour \u0026 Birth Box - Spiky Ball - The Birth Store-The Birth Store","id":27007587156157,"position":2,"preview_image":{"aspect_ratio":0.667,"height":2048,"width":1365,"src":"\/\/www.thebirthstore.com.au\/cdn\/shop\/files\/labour-birth-box-spiky-ball-270365.jpg?v=1758807490"},"aspect_ratio":0.667,"height":2048,"media_type":"image","src":"\/\/www.thebirthstore.com.au\/cdn\/shop\/files\/labour-birth-box-spiky-ball-270365.jpg?v=1758807490","width":1365},{"alt":"Labour \u0026 Birth Box - Spiky Ball - The Birth Store-The Birth Store","id":27007587188925,"position":3,"preview_image":{"aspect_ratio":0.786,"height":2048,"width":1609,"src":"\/\/www.thebirthstore.com.au\/cdn\/shop\/files\/labour-birth-box-spiky-ball-404808.jpg?v=1758807490"},"aspect_ratio":0.786,"height":2048,"media_type":"image","src":"\/\/www.thebirthstore.com.au\/cdn\/shop\/files\/labour-birth-box-spiky-ball-404808.jpg?v=1758807490","width":1609}]
{"item":{"id":7513280315581,"title":"Labour \u0026 Birth Box - Wooden Birth Comb","handle":"labour-birth-box-wooden-birth-comb","description":"\u003cp\u003e\u003cmeta charset=\"utf-8\"\u003e\u003cspan\u003eThere are so many beautiful products on the market now to help support you in labour \u0026amp; birth. We have created a kit with a couple of our favourite products from our range and other small Australian businesses to support you in labour \u0026amp; birth.\u003c\/span\u003e\u003c\/p\u003e","published_at":"2023-10-03T14:00:51+08:00","created_at":"2023-10-03T13:30:48+08:00","vendor":"Bundles","type":"","tags":["Baby Shower Gifts","Birth","Bundles","Hospital Bag","Labour Preparation","Labour Progression","Nausea","Pain Relief","Pregnancy"],"price":8615,"price_min":8615,"price_max":8615,"available":true,"price_varies":false,"compare_at_price":9790,"compare_at_price_min":9790,"compare_at_price_max":9790,"compare_at_price_varies":false,"variants":[{"id":43056985669821,"title":"Default Title","option1":"Default Title","option2":null,"option3":null,"sku":"","requires_shipping":true,"taxable":false,"featured_image":null,"available":true,"name":"Labour \u0026 Birth Box - Wooden Birth Comb","public_title":null,"options":["Default Title"],"price":8615,"weight":265,"compare_at_price":9790,"inventory_management":"shopify","barcode":"04109245","requires_selling_plan":false,"selling_plan_allocations":[]}],"images":["\/\/www.thebirthstore.com.au\/cdn\/shop\/files\/labour-birth-box-wooden-birth-comb-132802.jpg?v=1714967987","\/\/www.thebirthstore.com.au\/cdn\/shop\/files\/labour-birth-box-wooden-birth-comb-403390.jpg?v=1714967987","\/\/www.thebirthstore.com.au\/cdn\/shop\/files\/labour-birth-box-wooden-birth-comb-447199.jpg?v=1714967987","\/\/www.thebirthstore.com.au\/cdn\/shop\/files\/labour-birth-box-wooden-birth-comb-801370.jpg?v=1714967987","\/\/www.thebirthstore.com.au\/cdn\/shop\/files\/labour-birth-box-wooden-birth-comb-860343.jpg?v=1714967987"],"featured_image":"\/\/www.thebirthstore.com.au\/cdn\/shop\/files\/labour-birth-box-wooden-birth-comb-132802.jpg?v=1714967987","options":["Title"],"media":[{"alt":"Labour \u0026 Birth Box - Wooden Birth Comb - The Birth Store-The Birth Store","id":27007588368573,"position":1,"preview_image":{"aspect_ratio":1.008,"height":720,"width":726,"src":"\/\/www.thebirthstore.com.au\/cdn\/shop\/files\/labour-birth-box-wooden-birth-comb-132802.jpg?v=1714967987"},"aspect_ratio":1.008,"height":720,"media_type":"image","src":"\/\/www.thebirthstore.com.au\/cdn\/shop\/files\/labour-birth-box-wooden-birth-comb-132802.jpg?v=1714967987","width":726},{"alt":"Labour \u0026 Birth Box - Wooden Birth Comb - The Birth Store-The Birth Store","id":27007588434109,"position":2,"preview_image":{"aspect_ratio":1.5,"height":1365,"width":2048,"src":"\/\/www.thebirthstore.com.au\/cdn\/shop\/files\/labour-birth-box-wooden-birth-comb-403390.jpg?v=1714967987"},"aspect_ratio":1.5,"height":1365,"media_type":"image","src":"\/\/www.thebirthstore.com.au\/cdn\/shop\/files\/labour-birth-box-wooden-birth-comb-403390.jpg?v=1714967987","width":2048},{"alt":"Labour \u0026 Birth Box - Wooden Birth Comb - The Birth Store-The Birth Store","id":27007588466877,"position":3,"preview_image":{"aspect_ratio":1.0,"height":2048,"width":2048,"src":"\/\/www.thebirthstore.com.au\/cdn\/shop\/files\/labour-birth-box-wooden-birth-comb-447199.jpg?v=1714967987"},"aspect_ratio":1.0,"height":2048,"media_type":"image","src":"\/\/www.thebirthstore.com.au\/cdn\/shop\/files\/labour-birth-box-wooden-birth-comb-447199.jpg?v=1714967987","width":2048},{"alt":"Labour \u0026 Birth Box - Wooden Birth Comb - The Birth Store-The Birth Store","id":27007588499645,"position":4,"preview_image":{"aspect_ratio":0.667,"height":2048,"width":1365,"src":"\/\/www.thebirthstore.com.au\/cdn\/shop\/files\/labour-birth-box-wooden-birth-comb-801370.jpg?v=1714967987"},"aspect_ratio":0.667,"height":2048,"media_type":"image","src":"\/\/www.thebirthstore.com.au\/cdn\/shop\/files\/labour-birth-box-wooden-birth-comb-801370.jpg?v=1714967987","width":1365},{"alt":"Labour \u0026 Birth Box - Wooden Birth Comb - The Birth Store-The Birth Store","id":27007588532413,"position":5,"preview_image":{"aspect_ratio":1.0,"height":600,"width":600,"src":"\/\/www.thebirthstore.com.au\/cdn\/shop\/files\/labour-birth-box-wooden-birth-comb-860343.jpg?v=1714967987"},"aspect_ratio":1.0,"height":600,"media_type":"image","src":"\/\/www.thebirthstore.com.au\/cdn\/shop\/files\/labour-birth-box-wooden-birth-comb-860343.jpg?v=1714967987","width":600}],"requires_selling_plan":false,"selling_plan_groups":[],"content":"\u003cp\u003e\u003cmeta charset=\"utf-8\"\u003e\u003cspan\u003eThere are so many beautiful products on the market now to help support you in labour \u0026amp; birth. We have created a kit with a couple of our favourite products from our range and other small Australian businesses to support you in labour \u0026amp; birth.\u003c\/span\u003e\u003c\/p\u003e"},"options":[{"name":"Title","position":1,"values":["Default Title"]}],"custom_metafields":{},"metafields":{"badge":"\u003cdiv style='display:none' class='jdgm-prev-badge' data-average-rating='0.00' data-number-of-reviews='0' data-number-of-questions='0'\u003e \u003cspan class='jdgm-prev-badge__stars' data-score='0.00' tabindex='0' aria-label='0.00 stars' role='button'\u003e \u003cspan class='jdgm-star jdgm--off'\u003e\u003c\/span\u003e\u003cspan class='jdgm-star jdgm--off'\u003e\u003c\/span\u003e\u003cspan class='jdgm-star jdgm--off'\u003e\u003c\/span\u003e\u003cspan class='jdgm-star jdgm--off'\u003e\u003c\/span\u003e\u003cspan class='jdgm-star jdgm--off'\u003e\u003c\/span\u003e \u003c\/span\u003e \u003cspan class='jdgm-prev-badge__text'\u003e No reviews \u003c\/span\u003e \u003c\/div\u003e","widget":"\u003cdiv class='jdgm-rev-widg' data-updated-at='2025-06-13T16:13:40Z' data-average-rating='0.00' data-number-of-reviews='0' data-number-of-questions='0'\u003e \u003cstyle class='jdgm-temp-hiding-style'\u003e.jdgm-rev-widg{ display: none }\u003c\/style\u003e \u003cdiv class='jdgm-rev-widg__header'\u003e \u003ch2 class='jdgm-rev-widg__title'\u003eCustomer Reviews\u003c\/h2\u003e \u003cdiv class='jdgm-rev-widg__summary'\u003e \u003cdiv class='jdgm-rev-widg__summary-stars' aria-label='Average rating is 0.00 stars' role='img'\u003e \u003cspan class='jdgm-star jdgm--off'\u003e\u003c\/span\u003e\u003cspan class='jdgm-star jdgm--off'\u003e\u003c\/span\u003e\u003cspan class='jdgm-star jdgm--off'\u003e\u003c\/span\u003e\u003cspan class='jdgm-star jdgm--off'\u003e\u003c\/span\u003e\u003cspan class='jdgm-star jdgm--off'\u003e\u003c\/span\u003e \u003c\/div\u003e \u003cdiv class='jdgm-rev-widg__summary-text'\u003eBe the first to write a review\u003c\/div\u003e \u003c\/div\u003e \u003ca style='display: none' href='#' class='jdgm-write-rev-link' role='button'\u003eWrite a review\u003c\/a\u003e \u003cdiv class='jdgm-histogram jdgm-temp-hidden'\u003e \u003cdiv class='jdgm-histogram__row' data-rating='5' data-frequency='0' data-percentage='0'\u003e \u003cdiv class='jdgm-histogram__star' role='button' aria-label=\"0% (0) reviews with 5 star rating\" tabindex='0' \u003e\u003cspan class='jdgm-star jdgm--on'\u003e\u003c\/span\u003e\u003cspan class='jdgm-star jdgm--on'\u003e\u003c\/span\u003e\u003cspan class='jdgm-star jdgm--on'\u003e\u003c\/span\u003e\u003cspan class='jdgm-star jdgm--on'\u003e\u003c\/span\u003e\u003cspan class='jdgm-star jdgm--on'\u003e\u003c\/span\u003e\u003c\/div\u003e \u003cdiv class='jdgm-histogram__bar'\u003e \u003cdiv class='jdgm-histogram__bar-content' style='width: 0%;'\u003e \u003c\/div\u003e \u003c\/div\u003e \u003cdiv class='jdgm-histogram__percentage'\u003e0%\u003c\/div\u003e \u003cdiv class='jdgm-histogram__frequency'\u003e(0)\u003c\/div\u003e \u003c\/div\u003e \u003cdiv class='jdgm-histogram__row' data-rating='4' data-frequency='0' data-percentage='0'\u003e \u003cdiv class='jdgm-histogram__star' role='button' aria-label=\"0% (0) reviews with 4 star rating\" tabindex='0' \u003e\u003cspan class='jdgm-star jdgm--on'\u003e\u003c\/span\u003e\u003cspan class='jdgm-star jdgm--on'\u003e\u003c\/span\u003e\u003cspan class='jdgm-star jdgm--on'\u003e\u003c\/span\u003e\u003cspan class='jdgm-star jdgm--on'\u003e\u003c\/span\u003e\u003cspan class='jdgm-star jdgm--off'\u003e\u003c\/span\u003e\u003c\/div\u003e \u003cdiv class='jdgm-histogram__bar'\u003e \u003cdiv class='jdgm-histogram__bar-content' style='width: 0%;'\u003e \u003c\/div\u003e \u003c\/div\u003e \u003cdiv class='jdgm-histogram__percentage'\u003e0%\u003c\/div\u003e \u003cdiv class='jdgm-histogram__frequency'\u003e(0)\u003c\/div\u003e \u003c\/div\u003e \u003cdiv class='jdgm-histogram__row' data-rating='3' data-frequency='0' data-percentage='0'\u003e \u003cdiv class='jdgm-histogram__star' role='button' aria-label=\"0% (0) reviews with 3 star rating\" tabindex='0' \u003e\u003cspan class='jdgm-star jdgm--on'\u003e\u003c\/span\u003e\u003cspan class='jdgm-star jdgm--on'\u003e\u003c\/span\u003e\u003cspan class='jdgm-star jdgm--on'\u003e\u003c\/span\u003e\u003cspan class='jdgm-star jdgm--off'\u003e\u003c\/span\u003e\u003cspan class='jdgm-star jdgm--off'\u003e\u003c\/span\u003e\u003c\/div\u003e \u003cdiv class='jdgm-histogram__bar'\u003e \u003cdiv class='jdgm-histogram__bar-content' style='width: 0%;'\u003e \u003c\/div\u003e \u003c\/div\u003e \u003cdiv class='jdgm-histogram__percentage'\u003e0%\u003c\/div\u003e \u003cdiv class='jdgm-histogram__frequency'\u003e(0)\u003c\/div\u003e \u003c\/div\u003e \u003cdiv class='jdgm-histogram__row' data-rating='2' data-frequency='0' data-percentage='0'\u003e \u003cdiv class='jdgm-histogram__star' role='button' aria-label=\"0% (0) reviews with 2 star rating\" tabindex='0' \u003e\u003cspan class='jdgm-star jdgm--on'\u003e\u003c\/span\u003e\u003cspan class='jdgm-star jdgm--on'\u003e\u003c\/span\u003e\u003cspan class='jdgm-star jdgm--off'\u003e\u003c\/span\u003e\u003cspan class='jdgm-star jdgm--off'\u003e\u003c\/span\u003e\u003cspan class='jdgm-star jdgm--off'\u003e\u003c\/span\u003e\u003c\/div\u003e \u003cdiv class='jdgm-histogram__bar'\u003e \u003cdiv class='jdgm-histogram__bar-content' style='width: 0%;'\u003e \u003c\/div\u003e \u003c\/div\u003e \u003cdiv class='jdgm-histogram__percentage'\u003e0%\u003c\/div\u003e \u003cdiv class='jdgm-histogram__frequency'\u003e(0)\u003c\/div\u003e \u003c\/div\u003e \u003cdiv class='jdgm-histogram__row' data-rating='1' data-frequency='0' data-percentage='0'\u003e \u003cdiv class='jdgm-histogram__star' role='button' aria-label=\"0% (0) reviews with 1 star rating\" tabindex='0' \u003e\u003cspan class='jdgm-star jdgm--on'\u003e\u003c\/span\u003e\u003cspan class='jdgm-star jdgm--off'\u003e\u003c\/span\u003e\u003cspan class='jdgm-star jdgm--off'\u003e\u003c\/span\u003e\u003cspan class='jdgm-star jdgm--off'\u003e\u003c\/span\u003e\u003cspan class='jdgm-star jdgm--off'\u003e\u003c\/span\u003e\u003c\/div\u003e \u003cdiv class='jdgm-histogram__bar'\u003e \u003cdiv class='jdgm-histogram__bar-content' style='width: 0%;'\u003e \u003c\/div\u003e \u003c\/div\u003e \u003cdiv class='jdgm-histogram__percentage'\u003e0%\u003c\/div\u003e \u003cdiv class='jdgm-histogram__frequency'\u003e(0)\u003c\/div\u003e \u003c\/div\u003e \u003cdiv class='jdgm-histogram__row jdgm-histogram__clear-filter' data-rating=null tabindex='0'\u003e\u003c\/div\u003e \u003c\/div\u003e \u003cdiv class='jdgm-rev-widg__sort-wrapper'\u003e\u003c\/div\u003e \u003c\/div\u003e \u003cdiv class='jdgm-rev-widg__body'\u003e \u003cdiv class='jdgm-rev-widg__reviews'\u003e\u003c\/div\u003e \u003cdiv class='jdgm-paginate' data-per-page='10' data-url='https:\/\/api.judge.me\/reviews\/reviews_for_widget' style=\"display: none;\"\u003e\u003c\/div\u003e \u003c\/div\u003e \u003cdiv class='jdgm-rev-widg__paginate-spinner-wrapper'\u003e \u003cdiv class='jdgm-spinner'\u003e\u003c\/div\u003e \u003c\/div\u003e \u003c\/div\u003e"},"collections":[{"id":283018526909,"handle":"bundles","title":"Bundles","updated_at":"2025-11-18T20:29:11+08:00","body_html":"\u003cp\u003eMake shopping for your bump, birth and beyond easier with our bundle packs. With a pack available for every stage, you can get everything you need with no fuss and with our bundle packs, you even save money.\u003c\/p\u003e","published_at":"2022-02-01T22:33:09+08:00","sort_order":"best-selling","template_suffix":"swaddles-collection","disjunctive":false,"rules":[{"column":"tag","relation":"equals","condition":"Bundles"}],"published_scope":"global","image":{"created_at":"2024-05-06T11:59:39+08:00","alt":"Bundles - The Birth Store","width":2048,"height":1365,"src":"\/\/www.thebirthstore.com.au\/cdn\/shop\/collections\/bundles-299009.jpg?v=1714967980"}},{"id":261657460925,"handle":"buy","title":"Buy","updated_at":"2025-12-28T20:10:01+08:00","body_html":"\u003cp\u003eBrowse all of our pregnancy, labour \u0026amp; birth, postpartum and baby essentials here.\u003cbr\u003e\u003c\/p\u003e\n\u003cp\u003e\u003cspan\u003eYou can even buy now and pay later with Afterpay!\u003c\/span\u003e\u003c\/p\u003e","published_at":"2021-03-10T12:05:31+08:00","sort_order":"best-selling","template_suffix":"shop-all-collection","disjunctive":false,"rules":[{"column":"title","relation":"not_contains","condition":"Hire"}],"published_scope":"global","image":{"created_at":"2024-05-06T11:59:42+08:00","alt":"Buy - The Birth Store","width":2048,"height":2048,"src":"\/\/www.thebirthstore.com.au\/cdn\/shop\/collections\/buy-964856.jpg?v=1714967982"}},{"id":261658214589,"handle":"labour-and-birth-buy","title":"Labour \u0026 Birth","updated_at":"2025-12-28T20:10:01+08:00","body_html":"\u003cp\u003eWe stock a large range of Elle TENS machines for you to buy for your labour and birth. We stock the Elle TENS, Elle TENS 2 and Elle TENS Plus, we also hire these out if that suits you better, please head over to our TENS machine hire page for more information. We ship Australia wide or have options for local delivery\/pick-up in Perth if you are due ASAP. We also stock other items for your labour and birth. \u003c\/p\u003e\n\u003cp\u003eLooking for something we don't currently stock? Please reach out and let us know.\u003c\/p\u003e\n\u003cp\u003e\u003cspan\u003eYou can even buy now and pay later with Afterpay!\u003c\/span\u003e\u003c\/p\u003e","published_at":"2021-03-10T12:34:43+08:00","sort_order":"best-selling","template_suffix":"labour-birth-collection","disjunctive":false,"rules":[{"column":"tag","relation":"equals","condition":"Birth"}],"published_scope":"global","image":{"created_at":"2024-05-06T12:00:09+08:00","alt":"Labour \u0026 Birth - The Birth Store","width":1080,"height":981,"src":"\/\/www.thebirthstore.com.au\/cdn\/shop\/collections\/labour-birth-342038.jpg?v=1714968009"}},{"id":281712558269,"handle":"labour-aids","title":"Labour Aids","updated_at":"2025-12-28T20:10:01+08:00","body_html":"","published_at":"2021-12-20T14:22:16+08:00","sort_order":"best-selling","template_suffix":"labour-aids-collection","disjunctive":false,"rules":[{"column":"tag","relation":"equals","condition":"Labour Progression"}],"published_scope":"global","image":{"created_at":"2024-05-06T12:00:11+08:00","alt":"Labour Aids - The Birth Store","width":1365,"height":2048,"src":"\/\/www.thebirthstore.com.au\/cdn\/shop\/collections\/labour-aids-211824.jpg?v=1714968012"}},{"id":281712525501,"handle":"labour-preparation","title":"Labour Preparation","updated_at":"2025-12-28T20:10:01+08:00","body_html":"","published_at":"2021-12-20T14:20:12+08:00","sort_order":"best-selling","template_suffix":"labour-preparation-collec","disjunctive":false,"rules":[{"column":"tag","relation":"equals","condition":"Labour Preparation"}],"published_scope":"global","image":{"created_at":"2024-05-06T12:00:13+08:00","alt":"Labour Preparation - The Birth Store","width":1024,"height":1536,"src":"\/\/www.thebirthstore.com.au\/cdn\/shop\/collections\/labour-preparation-271961.jpg?v=1714968013"}},{"id":295224836285,"handle":"nausea","title":"Nausea","updated_at":"2025-12-28T20:10:01+08:00","body_html":"","published_at":"2023-11-10T20:47:34+08:00","sort_order":"best-selling","template_suffix":"nausea-collection","disjunctive":false,"rules":[{"column":"tag","relation":"equals","condition":"Nausea"}],"published_scope":"global","image":{"created_at":"2024-05-06T12:00:24+08:00","alt":"Nausea - The Birth Store","width":610,"height":915,"src":"\/\/www.thebirthstore.com.au\/cdn\/shop\/collections\/nausea-404101.jpg?v=1714968024"}},{"id":281712591037,"handle":"pain-relief","title":"Pain Relief","updated_at":"2025-12-28T20:10:01+08:00","body_html":"","published_at":"2021-12-20T14:22:45+08:00","sort_order":"best-selling","template_suffix":"pain-relief-collection","disjunctive":false,"rules":[{"column":"tag","relation":"equals","condition":"Pain Relief"}],"published_scope":"global","image":{"created_at":"2024-05-06T12:00:27+08:00","alt":"Pain Relief - The Birth Store","width":1365,"height":2048,"src":"\/\/www.thebirthstore.com.au\/cdn\/shop\/collections\/pain-relief-878865.jpg?v=1714968027"}},{"id":261658149053,"handle":"pregnancy-and-maternity-products","title":"Pregnancy","updated_at":"2025-12-28T20:10:01+08:00","body_html":"\u003cp\u003eShop your pregnancy essentials below. Looking for something we don't currently stock? Please reach out and let us know.\u003cbr\u003e\u003c\/p\u003e\n\u003cp\u003e\u003cspan\u003eYou can even buy now and pay later with Afterpay!\u003c\/span\u003e\u003c\/p\u003e","published_at":"2021-03-10T12:34:22+08:00","sort_order":"best-selling","template_suffix":"pregnancy-collection","disjunctive":false,"rules":[{"column":"tag","relation":"equals","condition":"Pregnancy"}],"published_scope":"global","image":{"created_at":"2024-05-06T12:00:40+08:00","alt":"Pregnancy - The Birth Store","width":1024,"height":1536,"src":"\/\/www.thebirthstore.com.au\/cdn\/shop\/collections\/pregnancy-899677.jpg?v=1714968040"}},{"id":310045933757,"handle":"shop-all-sale","title":"Shop All Sale","updated_at":"2025-12-28T20:10:01+08:00","body_html":"","published_at":"2024-11-12T13:22:43+08:00","sort_order":"alpha-asc","template_suffix":"","disjunctive":true,"rules":[{"column":"tag","relation":"equals","condition":"Bundles"},{"column":"vendor","relation":"equals","condition":"Franjos Kitchen"},{"column":"vendor","relation":"equals","condition":"Adored Illustrations"},{"column":"vendor","relation":"equals","condition":"Amazing Oils"},{"column":"vendor","relation":"equals","condition":"Ice Ice Booby"},{"column":"vendor","relation":"equals","condition":"Made to Milk"},{"column":"vendor","relation":"equals","condition":"Milky Goodness"},{"column":"vendor","relation":"equals","condition":"Seasons of Mama"},{"column":"vendor","relation":"equals","condition":"Silverette"},{"column":"vendor","relation":"equals","condition":"Snuggle Hunny"},{"column":"vendor","relation":"equals","condition":"Yung Bod"},{"column":"vendor","relation":"equals","condition":"Bare Love"},{"column":"vendor","relation":"equals","condition":"Haakaa"},{"column":"vendor","relation":"equals","condition":"Mere Botanicals"},{"column":"vendor","relation":"equals","condition":"The Birth Store Hire"},{"column":"vendor","relation":"equals","condition":"The Birth Store"}],"published_scope":"global","image":{"created_at":"2024-11-13T10:58:16+08:00","alt":"Shop All Sale - The Birth Store","width":2048,"height":1365,"src":"\/\/www.thebirthstore.com.au\/cdn\/shop\/collections\/shop-all-sale-297361.jpg?v=1731466697"}}]}
[{"alt":"Labour \u0026 Birth Box - Wooden Birth Comb - The Birth Store-The Birth Store","id":27007588368573,"position":1,"preview_image":{"aspect_ratio":1.008,"height":720,"width":726,"src":"\/\/www.thebirthstore.com.au\/cdn\/shop\/files\/labour-birth-box-wooden-birth-comb-132802.jpg?v=1714967987"},"aspect_ratio":1.008,"height":720,"media_type":"image","src":"\/\/www.thebirthstore.com.au\/cdn\/shop\/files\/labour-birth-box-wooden-birth-comb-132802.jpg?v=1714967987","width":726},{"alt":"Labour \u0026 Birth Box - Wooden Birth Comb - The Birth Store-The Birth Store","id":27007588434109,"position":2,"preview_image":{"aspect_ratio":1.5,"height":1365,"width":2048,"src":"\/\/www.thebirthstore.com.au\/cdn\/shop\/files\/labour-birth-box-wooden-birth-comb-403390.jpg?v=1714967987"},"aspect_ratio":1.5,"height":1365,"media_type":"image","src":"\/\/www.thebirthstore.com.au\/cdn\/shop\/files\/labour-birth-box-wooden-birth-comb-403390.jpg?v=1714967987","width":2048},{"alt":"Labour \u0026 Birth Box - Wooden Birth Comb - The Birth Store-The Birth Store","id":27007588466877,"position":3,"preview_image":{"aspect_ratio":1.0,"height":2048,"width":2048,"src":"\/\/www.thebirthstore.com.au\/cdn\/shop\/files\/labour-birth-box-wooden-birth-comb-447199.jpg?v=1714967987"},"aspect_ratio":1.0,"height":2048,"media_type":"image","src":"\/\/www.thebirthstore.com.au\/cdn\/shop\/files\/labour-birth-box-wooden-birth-comb-447199.jpg?v=1714967987","width":2048},{"alt":"Labour \u0026 Birth Box - Wooden Birth Comb - The Birth Store-The Birth Store","id":27007588499645,"position":4,"preview_image":{"aspect_ratio":0.667,"height":2048,"width":1365,"src":"\/\/www.thebirthstore.com.au\/cdn\/shop\/files\/labour-birth-box-wooden-birth-comb-801370.jpg?v=1714967987"},"aspect_ratio":0.667,"height":2048,"media_type":"image","src":"\/\/www.thebirthstore.com.au\/cdn\/shop\/files\/labour-birth-box-wooden-birth-comb-801370.jpg?v=1714967987","width":1365},{"alt":"Labour \u0026 Birth Box - Wooden Birth Comb - The Birth Store-The Birth Store","id":27007588532413,"position":5,"preview_image":{"aspect_ratio":1.0,"height":600,"width":600,"src":"\/\/www.thebirthstore.com.au\/cdn\/shop\/files\/labour-birth-box-wooden-birth-comb-860343.jpg?v=1714967987"},"aspect_ratio":1.0,"height":600,"media_type":"image","src":"\/\/www.thebirthstore.com.au\/cdn\/shop\/files\/labour-birth-box-wooden-birth-comb-860343.jpg?v=1714967987","width":600}]
{"item":{"id":6822808486077,"title":"Labour \u0026 Birth Roller Blends - 10mls","handle":"labour-roller-blends","description":"\u003cp\u003eIf you're looking for a pocket sized assist to your calm birth, then here it is!\u003c\/p\u003e\n\u003cp\u003e \u003c\/p\u003e\n\u003cp\u003eThis item comes with 3 10ml roller blends, each with their own role in your birth - all packaged together in a small draw string back to easily pack in your birthing bag. Plus they smell great!\u003c\/p\u003e\n\u003cp\u003e \u003c\/p\u003e\n\u003cp\u003e\u003cstrong\u003eWhat is each ingredient believed to do?\u003c\/strong\u003e\u003c\/p\u003e\n\u003cp\u003e \u003c\/p\u003e\n\u003cp\u003e\u003cstrong\u003eCalm \u0026amp; Relax:\u003c\/strong\u003e\u003c\/p\u003e\n\u003cp\u003e- Lavender to reduce anxiety and release muscle tension\u003c\/p\u003e\n\u003cp\u003e- Frankincense to help calm emotions\u003c\/p\u003e\n\u003cp\u003e- Rose to reduce stress levels\u003c\/p\u003e\n\u003cp\u003e \u003c\/p\u003e\n\u003cp\u003e\u003cstrong\u003ePain Ease:\u003c\/strong\u003e\u003c\/p\u003e\n\u003cp\u003e- Spearmint to provide natural pain relief (bonus - it may also help with nausea and to boost energy)\u003c\/p\u003e\n\u003cp\u003e- Lavender to reduce sensations of physical pain\u003c\/p\u003e\n\u003cp\u003e \u003c\/p\u003e\n\u003cp\u003e\u003cstrong\u003eOxytocin Boost:\u003c\/strong\u003e\u003c\/p\u003e\n\u003cp\u003e- Clary Sage to boost oxytocin which can encourage effective contractions (bonus - it may also help to relieve anxiety)\u003c\/p\u003e\n\u003cp\u003e- Jasmine to revitalise and energise the mind as well as lift your mood which can boost oxytocin\u003c\/p\u003e\n\u003cp\u003e \u003c\/p\u003e\n\u003cp\u003eEach blend contains coconut oil as it's carrier oil.\u003c\/p\u003e\n\u003cp\u003e \u003c\/p\u003e\n\u003cp\u003e\u003cstrong\u003eDirections for use:\u003c\/strong\u003e\u003c\/p\u003e\n\u003cp\u003e \u003c\/p\u003e\n\u003cp\u003eCalm \u0026amp; Relax - Rub on temples, forehead and back of shoulders\u003c\/p\u003e\n\u003cp\u003ePain Ease - Rub on back during contractions\u003c\/p\u003e\n\u003cp\u003eOxytocin Boost - Rub on inner ankles and\/or lower stomach\u003c\/p\u003e\n\u003cp\u003e \u003c\/p\u003e\n\u003cp\u003e\u003cstrong\u003eSafety Information:\u003c\/strong\u003e\u003c\/p\u003e\n\u003cp\u003e\u003cem\u003ePlease note this information is not intended to diagnose, treat, cure, or prevent any disease. Please consult your health care professional to discuss your personal suitability for the use of these products. Keep out of reach of children and pets. Never use clary sage before 37 weeks in pregnancy. Wash hands after using oils. Consider placement of oils for when baby is born (i.e. avoid neck and chest area to ensure oils don't come in contact with baby during skin to skin). Keep away from open flames. Patch test before use. For external use only. Keep away from sensitive areas eyes, inner ears etc.\u003c\/em\u003e\u003c\/p\u003e","published_at":"2021-09-03T14:59:32+08:00","created_at":"2021-07-08T14:21:08+08:00","vendor":"The Birth Store","type":"","tags":["Birth","Hospital Bag","Labour Progression","Mum","Nausea","Pain Relief","Pregnancy","The Birth Store"],"price":3700,"price_min":3700,"price_max":3700,"available":true,"price_varies":false,"compare_at_price":null,"compare_at_price_min":0,"compare_at_price_max":0,"compare_at_price_varies":false,"variants":[{"id":40176532586685,"title":"Default Title","option1":"Default Title","option2":null,"option3":null,"sku":"","requires_shipping":true,"taxable":false,"featured_image":null,"available":true,"name":"Labour \u0026 Birth Roller Blends - 10mls","public_title":null,"options":["Default Title"],"price":3700,"weight":160,"compare_at_price":null,"inventory_management":"shopify","barcode":"32586685","requires_selling_plan":false,"selling_plan_allocations":[]}],"images":["\/\/www.thebirthstore.com.au\/cdn\/shop\/files\/labour-birth-roller-blends-10mls-840043.jpg?v=1750253316","\/\/www.thebirthstore.com.au\/cdn\/shop\/files\/labour-birth-roller-blends-10mls-160488.jpg?v=1750217900","\/\/www.thebirthstore.com.au\/cdn\/shop\/files\/labour-birth-roller-blends-10mls-861027.jpg?v=1750217900","\/\/www.thebirthstore.com.au\/cdn\/shop\/files\/labour-birth-roller-blends-10mls-470573.jpg?v=1750217900","\/\/www.thebirthstore.com.au\/cdn\/shop\/files\/labour-birth-roller-blends-10mls-426905.jpg?v=1750217900","\/\/www.thebirthstore.com.au\/cdn\/shop\/files\/labour-birth-roller-blends-10mls-135739.jpg?v=1750217900"],"featured_image":"\/\/www.thebirthstore.com.au\/cdn\/shop\/files\/labour-birth-roller-blends-10mls-840043.jpg?v=1750253316","options":["Title"],"media":[{"alt":"Labour \u0026 Birth Roller Blends - 10mls - The Birth Store - The Birth Store","id":28995605987517,"position":1,"preview_image":{"aspect_ratio":1.0,"height":1080,"width":1080,"src":"\/\/www.thebirthstore.com.au\/cdn\/shop\/files\/labour-birth-roller-blends-10mls-840043.jpg?v=1750253316"},"aspect_ratio":1.0,"height":1080,"media_type":"image","src":"\/\/www.thebirthstore.com.au\/cdn\/shop\/files\/labour-birth-roller-blends-10mls-840043.jpg?v=1750253316","width":1080},{"alt":"Labour \u0026 Birth Roller Blends - 10mls - The Birth Store-The Birth Store","id":27007590400189,"position":2,"preview_image":{"aspect_ratio":1.0,"height":2048,"width":2048,"src":"\/\/www.thebirthstore.com.au\/cdn\/shop\/files\/labour-birth-roller-blends-10mls-160488.jpg?v=1750217900"},"aspect_ratio":1.0,"height":2048,"media_type":"image","src":"\/\/www.thebirthstore.com.au\/cdn\/shop\/files\/labour-birth-roller-blends-10mls-160488.jpg?v=1750217900","width":2048},{"alt":"Labour \u0026 Birth Roller Blends - 10mls - The Birth Store-The Birth Store","id":27007590465725,"position":3,"preview_image":{"aspect_ratio":0.667,"height":2048,"width":1365,"src":"\/\/www.thebirthstore.com.au\/cdn\/shop\/files\/labour-birth-roller-blends-10mls-861027.jpg?v=1750217900"},"aspect_ratio":0.667,"height":2048,"media_type":"image","src":"\/\/www.thebirthstore.com.au\/cdn\/shop\/files\/labour-birth-roller-blends-10mls-861027.jpg?v=1750217900","width":1365},{"alt":"Labour \u0026 Birth Roller Blends - 10mls - The Birth Store-The Birth Store","id":27007590531261,"position":4,"preview_image":{"aspect_ratio":0.667,"height":2048,"width":1365,"src":"\/\/www.thebirthstore.com.au\/cdn\/shop\/files\/labour-birth-roller-blends-10mls-470573.jpg?v=1750217900"},"aspect_ratio":0.667,"height":2048,"media_type":"image","src":"\/\/www.thebirthstore.com.au\/cdn\/shop\/files\/labour-birth-roller-blends-10mls-470573.jpg?v=1750217900","width":1365},{"alt":"Labour \u0026 Birth Roller Blends - 10mls - The Birth Store-The Birth Store","id":27007590564029,"position":5,"preview_image":{"aspect_ratio":1.5,"height":1365,"width":2048,"src":"\/\/www.thebirthstore.com.au\/cdn\/shop\/files\/labour-birth-roller-blends-10mls-426905.jpg?v=1750217900"},"aspect_ratio":1.5,"height":1365,"media_type":"image","src":"\/\/www.thebirthstore.com.au\/cdn\/shop\/files\/labour-birth-roller-blends-10mls-426905.jpg?v=1750217900","width":2048},{"alt":"Labour \u0026 Birth Roller Blends - 10mls - The Birth Store-The Birth Store","id":27007590596797,"position":6,"preview_image":{"aspect_ratio":1.0,"height":2048,"width":2048,"src":"\/\/www.thebirthstore.com.au\/cdn\/shop\/files\/labour-birth-roller-blends-10mls-135739.jpg?v=1750217900"},"aspect_ratio":1.0,"height":2048,"media_type":"image","src":"\/\/www.thebirthstore.com.au\/cdn\/shop\/files\/labour-birth-roller-blends-10mls-135739.jpg?v=1750217900","width":2048}],"requires_selling_plan":false,"selling_plan_groups":[],"content":"\u003cp\u003eIf you're looking for a pocket sized assist to your calm birth, then here it is!\u003c\/p\u003e\n\u003cp\u003e \u003c\/p\u003e\n\u003cp\u003eThis item comes with 3 10ml roller blends, each with their own role in your birth - all packaged together in a small draw string back to easily pack in your birthing bag. Plus they smell great!\u003c\/p\u003e\n\u003cp\u003e \u003c\/p\u003e\n\u003cp\u003e\u003cstrong\u003eWhat is each ingredient believed to do?\u003c\/strong\u003e\u003c\/p\u003e\n\u003cp\u003e \u003c\/p\u003e\n\u003cp\u003e\u003cstrong\u003eCalm \u0026amp; Relax:\u003c\/strong\u003e\u003c\/p\u003e\n\u003cp\u003e- Lavender to reduce anxiety and release muscle tension\u003c\/p\u003e\n\u003cp\u003e- Frankincense to help calm emotions\u003c\/p\u003e\n\u003cp\u003e- Rose to reduce stress levels\u003c\/p\u003e\n\u003cp\u003e \u003c\/p\u003e\n\u003cp\u003e\u003cstrong\u003ePain Ease:\u003c\/strong\u003e\u003c\/p\u003e\n\u003cp\u003e- Spearmint to provide natural pain relief (bonus - it may also help with nausea and to boost energy)\u003c\/p\u003e\n\u003cp\u003e- Lavender to reduce sensations of physical pain\u003c\/p\u003e\n\u003cp\u003e \u003c\/p\u003e\n\u003cp\u003e\u003cstrong\u003eOxytocin Boost:\u003c\/strong\u003e\u003c\/p\u003e\n\u003cp\u003e- Clary Sage to boost oxytocin which can encourage effective contractions (bonus - it may also help to relieve anxiety)\u003c\/p\u003e\n\u003cp\u003e- Jasmine to revitalise and energise the mind as well as lift your mood which can boost oxytocin\u003c\/p\u003e\n\u003cp\u003e \u003c\/p\u003e\n\u003cp\u003eEach blend contains coconut oil as it's carrier oil.\u003c\/p\u003e\n\u003cp\u003e \u003c\/p\u003e\n\u003cp\u003e\u003cstrong\u003eDirections for use:\u003c\/strong\u003e\u003c\/p\u003e\n\u003cp\u003e \u003c\/p\u003e\n\u003cp\u003eCalm \u0026amp; Relax - Rub on temples, forehead and back of shoulders\u003c\/p\u003e\n\u003cp\u003ePain Ease - Rub on back during contractions\u003c\/p\u003e\n\u003cp\u003eOxytocin Boost - Rub on inner ankles and\/or lower stomach\u003c\/p\u003e\n\u003cp\u003e \u003c\/p\u003e\n\u003cp\u003e\u003cstrong\u003eSafety Information:\u003c\/strong\u003e\u003c\/p\u003e\n\u003cp\u003e\u003cem\u003ePlease note this information is not intended to diagnose, treat, cure, or prevent any disease. Please consult your health care professional to discuss your personal suitability for the use of these products. Keep out of reach of children and pets. Never use clary sage before 37 weeks in pregnancy. Wash hands after using oils. Consider placement of oils for when baby is born (i.e. avoid neck and chest area to ensure oils don't come in contact with baby during skin to skin). Keep away from open flames. Patch test before use. For external use only. Keep away from sensitive areas eyes, inner ears etc.\u003c\/em\u003e\u003c\/p\u003e"},"options":[{"name":"Title","position":1,"values":["Default Title"]}],"custom_metafields":{},"metafields":{"badge":"\u003cdiv style='display:none' class='jdgm-prev-badge' data-average-rating='5.00' data-number-of-reviews='2' data-number-of-questions='0'\u003e \u003cspan class='jdgm-prev-badge__stars' data-score='5.00' tabindex='0' aria-label='5.00 stars' role='button'\u003e \u003cspan class='jdgm-star jdgm--on'\u003e\u003c\/span\u003e\u003cspan class='jdgm-star jdgm--on'\u003e\u003c\/span\u003e\u003cspan class='jdgm-star jdgm--on'\u003e\u003c\/span\u003e\u003cspan class='jdgm-star jdgm--on'\u003e\u003c\/span\u003e\u003cspan class='jdgm-star jdgm--on'\u003e\u003c\/span\u003e \u003c\/span\u003e \u003cspan class='jdgm-prev-badge__text'\u003e 2 reviews \u003c\/span\u003e \u003c\/div\u003e","review_snippet_widget":"\u003cdiv class='jdgm-widget jdgm-review-snippet-widget'\u003e \u003cstyle\u003e\n .jdgm-review-snippet-widget{position:relative}.jdgm-review-snippet-widget:hover{cursor:pointer}@media only screen and (max-width: 767px){.jdgm-review-snippet-widget .jdgm-rev-snippet-widget__cards-container{left:unset;right:unset}}.jdgm-review-snippet-widget .jdgm-rev-snippet-card{background:#fff}.jdgm-review-snippet-widget .jdgm-star{color:#399}.jdgm-review-snippet-widget .jdgm-rev-snippet-card{border-radius:8px;background:#fff}.jdgm-review-snippet-widget .jdgm-rev-snippet-card__rev-prod-wrapper{border-radius:8px}.jdgm-review-snippet-widget .jdgm-rev-snippet-card__rev-content-wrapper{max-width:360px}.jdgm-review-snippet-widget .jdgm-rev-snippet-widget__prev-btn,.jdgm-review-snippet-widget .jdgm-rev-snippet-widget__next-btn{border-radius:50%;background:#fff}.jdgm-review-snippet-widget .jdgm-rev-snippet-widget__prev-btn\u003esvg,.jdgm-review-snippet-widget .jdgm-rev-snippet-widget__next-btn\u003esvg{fill:#000}.jdgm-review-snippet-widget .jdgm-rev-snippet-widget__prev-btn{left:0;top:40%}.jdgm-review-snippet-widget .jdgm-rev-snippet-widget__next-btn{right:0;top:40%}.jdgm-full-rev-modal.review-snippet-widget .jm-mfp-content{border-radius:8px}.jdgm-full-rev-modal.review-snippet-widget .jdgm-full-rev__icon{border-radius:8px}.jdgm-full-rev-modal.review-snippet-widget .jdgm-full-rev[data-verified-buyer=\"true\"] .jdgm-full-rev__icon::after{border-radius:8px}.jdgm-full-rev-modal.review-snippet-widget .jdgm-rev__buyer-badge{border-radius:calc( 8px \/ 2 )}.jdgm-full-rev-modal.review-snippet-widget .jdgm-full-rev__pic-img{border-radius:8px}.jdgm-full-rev-modal.review-snippet-widget .jdgm-full-rev__reply{border-radius:8px}.jdgm-full-rev-modal.review-snippet-widget .jdgm-full-rev__replier::before{content:'thebirthstore.com.au'}.jdgm-full-rev-modal.review-snippet-widget .jdgm-full-rev__product-button{border-radius:calc( 8px * 6 )}\n\n \u003c\/style\u003e \u003ci class=\"jdgm-rev-snippet-widget__prev-btn\" style='display: none;'\u003e \u003csvg xmlns=\"http:\/\/www.w3.org\/2000\/svg\" height=\"12\" viewBox=\"0 0 8 12\" width=\"8\" fill=\"#000\"\u003e\u003cpath d=\"M3.09961 6.00005L6.99961 9.90005C7.18294 10.0834 7.27461 10.3167 7.27461 10.6C7.27461 10.8834 7.18294 11.1167 6.99961 11.3C6.81628 11.4834 6.58294 11.575 6.29961 11.575C6.01628 11.575 5.78294 11.4834 5.59961 11.3L0.999609 6.70005C0.899609 6.60005 0.828776 6.49172 0.787109 6.37505C0.745443 6.25838 0.724609 6.13338 0.724609 6.00005C0.724609 5.86672 0.745443 5.74172 0.787109 5.62505C0.828776 5.50838 0.899609 5.40005 0.999609 5.30005L5.59961 0.700049C5.78294 0.516715 6.01628 0.425049 6.29961 0.425049C6.58294 0.425049 6.81628 0.516715 6.99961 0.700049C7.18294 0.883382 7.27461 1.11672 7.27461 1.40005C7.27461 1.68338 7.18294 1.91672 6.99961 2.10005L3.09961 6.00005Z\"\/\u003e\u003c\/svg\u003e \u003c\/i\u003e \u003ci class=\"jdgm-rev-snippet-widget__next-btn\" style='display: none;'\u003e \u003csvg xmlns=\"http:\/\/www.w3.org\/2000\/svg\" height=\"12\" viewBox=\"0 0 8 12\" width=\"8\" fill=\"#000\"\u003e\u003cpath d=\"M4.89961 6.00005L0.999609 2.10005C0.816276 1.91672 0.724609 1.68338 0.724609 1.40005C0.724609 1.11672 0.816276 0.883382 0.999609 0.700049C1.18294 0.516715 1.41628 0.425049 1.69961 0.425049C1.98294 0.425049 2.21628 0.516715 2.39961 0.700049L6.99961 5.30005C7.09961 5.40005 7.17044 5.50838 7.21211 5.62505C7.25378 5.74172 7.27461 5.86672 7.27461 6.00005C7.27461 6.13338 7.25378 6.25838 7.21211 6.37505C7.17044 6.49172 7.09961 6.60005 6.99961 6.70005L2.39961 11.3C2.21628 11.4834 1.98294 11.575 1.69961 11.575C1.41628 11.575 1.18294 11.4834 0.999609 11.3C0.816276 11.1167 0.724609 10.8834 0.724609 10.6C0.724609 10.3167 0.816276 10.0834 0.999609 9.90005L4.89961 6.00005Z\"\/\u003e\u003c\/svg\u003e \u003c\/i\u003e \u003cdiv style=\"overflow: hidden;\"\u003e \u003cdiv class='jdgm-rev-snippet-widget__cards-container'\u003e \u003cdiv class='jdgm-rev-snippet-card' data-review-id='fb6edbb5-0c1e-48fe-851a-58b36f3b1313' style='display: none;'\u003e \u003cdiv class=\"jdgm-rev-snippet-card__rev-prod-wrapper\"\u003e \u003ca class='jdgm-rev-snippet-card__rev-content-wrapper jdgm-rev-snippet-card__full-review-link' style='text-decoration: none; color: inherit;padding: 0 34px;' role='button' data-review-id='fb6edbb5-0c1e-48fe-851a-58b36f3b1313'\u003e \u003cdiv class='jdgm-rev-snippet-card__rev-header'\u003e \u003cdiv class='jdgm-rev-snippet-card__rev-rating' aria-label='5 stars' role='img'\u003e \u003cspan class='jdgm-star jdgm--on'\u003e\u003c\/span\u003e\u003cspan class='jdgm-star jdgm--on'\u003e\u003c\/span\u003e\u003cspan class='jdgm-star jdgm--on'\u003e\u003c\/span\u003e\u003cspan class='jdgm-star jdgm--on'\u003e\u003c\/span\u003e\u003cspan class='jdgm-star jdgm--on'\u003e\u003c\/span\u003e \u003c\/div\u003e \u003cdiv class='jdgm-rev-snippet-card__reviewer'\u003e Beth Bronickis \u003c\/div\u003e \u003c\/div\u003e \u003cdiv class='jdgm-rev-snippet-card__rev-content'\u003e \u003cspan class='jdgm-rev-snippet-card__rev-body'\u003e \u003cp\u003eI absolutely loved using the labor and birth roller blends during my delivery. From the moment I applied it, I felt an immediate sense of calm wash over me.\u003c\/p\u003e\n\n\u003cp\u003eWhat I appreciated most was how easy it was to use. The roller design allowed me to quickly apply it to my pulse points whenever I needed a boost of calm or reassurance. The blend of essential oils was perfectly balanced – not too overpowering, yet strong enough to make an impact.\u003c\/p\u003e\n\n\u003cp\u003eDuring the more intense moments, this blend helped me feel in control and more connected to my body. It truly became an essential part of my labor experience. If you’re looking for a natural way to stay calm and centered during birth, I highly recommend trying these roller blends. They were a lifesaver for me!\u003c\/p\u003e \u003c\/span\u003e \u003c\/div\u003e \u003c\/a\u003e \u003c\/div\u003e \u003c\/div\u003e\u003cdiv class='jdgm-rev-snippet-card' data-review-id='7e250ff3-223f-44e0-9ad3-353b10773292' style='display: none;'\u003e \u003cdiv class=\"jdgm-rev-snippet-card__rev-prod-wrapper\"\u003e \u003ca class='jdgm-rev-snippet-card__rev-content-wrapper jdgm-rev-snippet-card__full-review-link' style='text-decoration: none; color: inherit;padding: 0 34px;' role='button' data-review-id='7e250ff3-223f-44e0-9ad3-353b10773292'\u003e \u003cdiv class='jdgm-rev-snippet-card__rev-header'\u003e \u003cdiv class='jdgm-rev-snippet-card__rev-rating' aria-label='5 stars' role='img'\u003e \u003cspan class='jdgm-star jdgm--on'\u003e\u003c\/span\u003e\u003cspan class='jdgm-star jdgm--on'\u003e\u003c\/span\u003e\u003cspan class='jdgm-star jdgm--on'\u003e\u003c\/span\u003e\u003cspan class='jdgm-star jdgm--on'\u003e\u003c\/span\u003e\u003cspan class='jdgm-star jdgm--on'\u003e\u003c\/span\u003e \u003c\/div\u003e \u003cdiv class='jdgm-rev-snippet-card__reviewer'\u003e Soph \u003c\/div\u003e \u003c\/div\u003e \u003cdiv class='jdgm-rev-snippet-card__rev-content'\u003e \u003cspan class='jdgm-rev-snippet-card__rev-body'\u003e \u003cp\u003eI had these bad boys packed in my hospital ready handbag and got to use the pain ease roller once, but I didn’t get much more chance to use it again or to use the other two because my labour came on so hard and fast and had given birth within 3hrs of my contractions starting! I’m sure I’ll find another use for them though!\u003c\/p\u003e \u003c\/span\u003e \u003c\/div\u003e \u003c\/a\u003e \u003c\/div\u003e \u003c\/div\u003e \u003c\/div\u003e \u003c\/div\u003e \u003c\/div\u003e","widget":"\u003cdiv class='jdgm-rev-widg' data-updated-at='2025-06-13T16:12:10Z' data-average-rating='5.00' data-number-of-reviews='2' data-number-of-questions='0'\u003e \u003cstyle class='jdgm-temp-hiding-style'\u003e.jdgm-rev-widg{ display: none }\u003c\/style\u003e \u003cdiv class='jdgm-rev-widg__header'\u003e \u003ch2 class='jdgm-rev-widg__title'\u003eCustomer Reviews\u003c\/h2\u003e \u003cdiv class='jdgm-rev-widg__summary'\u003e \u003cdiv class='jdgm-rev-widg__summary-stars' aria-label='Average rating is 5.00 stars' role='img'\u003e \u003cspan class='jdgm-star jdgm--on'\u003e\u003c\/span\u003e\u003cspan class='jdgm-star jdgm--on'\u003e\u003c\/span\u003e\u003cspan class='jdgm-star jdgm--on'\u003e\u003c\/span\u003e\u003cspan class='jdgm-star jdgm--on'\u003e\u003c\/span\u003e\u003cspan class='jdgm-star jdgm--on'\u003e\u003c\/span\u003e \u003c\/div\u003e \u003cdiv class='jdgm-rev-widg__summary-text'\u003eBased on 2 reviews\u003c\/div\u003e \u003c\/div\u003e \u003ca style='display: none' href='#' class='jdgm-write-rev-link' role='button'\u003eWrite a review\u003c\/a\u003e \u003cdiv class='jdgm-histogram jdgm-temp-hidden'\u003e \u003cdiv class='jdgm-histogram__row' data-rating='5' data-frequency='2' data-percentage='100'\u003e \u003cdiv class='jdgm-histogram__star' role='button' aria-label=\"100% (2) reviews with 5 star rating\" tabindex='0' \u003e\u003cspan class='jdgm-star jdgm--on'\u003e\u003c\/span\u003e\u003cspan class='jdgm-star jdgm--on'\u003e\u003c\/span\u003e\u003cspan class='jdgm-star jdgm--on'\u003e\u003c\/span\u003e\u003cspan class='jdgm-star jdgm--on'\u003e\u003c\/span\u003e\u003cspan class='jdgm-star jdgm--on'\u003e\u003c\/span\u003e\u003c\/div\u003e \u003cdiv class='jdgm-histogram__bar'\u003e \u003cdiv class='jdgm-histogram__bar-content' style='width: 100%;'\u003e \u003c\/div\u003e \u003c\/div\u003e \u003cdiv class='jdgm-histogram__percentage'\u003e100%\u003c\/div\u003e \u003cdiv class='jdgm-histogram__frequency'\u003e(2)\u003c\/div\u003e \u003c\/div\u003e \u003cdiv class='jdgm-histogram__row' data-rating='4' data-frequency='0' data-percentage='0'\u003e \u003cdiv class='jdgm-histogram__star' role='button' aria-label=\"0% (0) reviews with 4 star rating\" tabindex='0' \u003e\u003cspan class='jdgm-star jdgm--on'\u003e\u003c\/span\u003e\u003cspan class='jdgm-star jdgm--on'\u003e\u003c\/span\u003e\u003cspan class='jdgm-star jdgm--on'\u003e\u003c\/span\u003e\u003cspan class='jdgm-star jdgm--on'\u003e\u003c\/span\u003e\u003cspan class='jdgm-star jdgm--off'\u003e\u003c\/span\u003e\u003c\/div\u003e \u003cdiv class='jdgm-histogram__bar'\u003e \u003cdiv class='jdgm-histogram__bar-content' style='width: 0%;'\u003e \u003c\/div\u003e \u003c\/div\u003e \u003cdiv class='jdgm-histogram__percentage'\u003e0%\u003c\/div\u003e \u003cdiv class='jdgm-histogram__frequency'\u003e(0)\u003c\/div\u003e \u003c\/div\u003e \u003cdiv class='jdgm-histogram__row' data-rating='3' data-frequency='0' data-percentage='0'\u003e \u003cdiv class='jdgm-histogram__star' role='button' aria-label=\"0% (0) reviews with 3 star rating\" tabindex='0' \u003e\u003cspan class='jdgm-star jdgm--on'\u003e\u003c\/span\u003e\u003cspan class='jdgm-star jdgm--on'\u003e\u003c\/span\u003e\u003cspan class='jdgm-star jdgm--on'\u003e\u003c\/span\u003e\u003cspan class='jdgm-star jdgm--off'\u003e\u003c\/span\u003e\u003cspan class='jdgm-star jdgm--off'\u003e\u003c\/span\u003e\u003c\/div\u003e \u003cdiv class='jdgm-histogram__bar'\u003e \u003cdiv class='jdgm-histogram__bar-content' style='width: 0%;'\u003e \u003c\/div\u003e \u003c\/div\u003e \u003cdiv class='jdgm-histogram__percentage'\u003e0%\u003c\/div\u003e \u003cdiv class='jdgm-histogram__frequency'\u003e(0)\u003c\/div\u003e \u003c\/div\u003e \u003cdiv class='jdgm-histogram__row' data-rating='2' data-frequency='0' data-percentage='0'\u003e \u003cdiv class='jdgm-histogram__star' role='button' aria-label=\"0% (0) reviews with 2 star rating\" tabindex='0' \u003e\u003cspan class='jdgm-star jdgm--on'\u003e\u003c\/span\u003e\u003cspan class='jdgm-star jdgm--on'\u003e\u003c\/span\u003e\u003cspan class='jdgm-star jdgm--off'\u003e\u003c\/span\u003e\u003cspan class='jdgm-star jdgm--off'\u003e\u003c\/span\u003e\u003cspan class='jdgm-star jdgm--off'\u003e\u003c\/span\u003e\u003c\/div\u003e \u003cdiv class='jdgm-histogram__bar'\u003e \u003cdiv class='jdgm-histogram__bar-content' style='width: 0%;'\u003e \u003c\/div\u003e \u003c\/div\u003e \u003cdiv class='jdgm-histogram__percentage'\u003e0%\u003c\/div\u003e \u003cdiv class='jdgm-histogram__frequency'\u003e(0)\u003c\/div\u003e \u003c\/div\u003e \u003cdiv class='jdgm-histogram__row' data-rating='1' data-frequency='0' data-percentage='0'\u003e \u003cdiv class='jdgm-histogram__star' role='button' aria-label=\"0% (0) reviews with 1 star rating\" tabindex='0' \u003e\u003cspan class='jdgm-star jdgm--on'\u003e\u003c\/span\u003e\u003cspan class='jdgm-star jdgm--off'\u003e\u003c\/span\u003e\u003cspan class='jdgm-star jdgm--off'\u003e\u003c\/span\u003e\u003cspan class='jdgm-star jdgm--off'\u003e\u003c\/span\u003e\u003cspan class='jdgm-star jdgm--off'\u003e\u003c\/span\u003e\u003c\/div\u003e \u003cdiv class='jdgm-histogram__bar'\u003e \u003cdiv class='jdgm-histogram__bar-content' style='width: 0%;'\u003e \u003c\/div\u003e \u003c\/div\u003e \u003cdiv class='jdgm-histogram__percentage'\u003e0%\u003c\/div\u003e \u003cdiv class='jdgm-histogram__frequency'\u003e(0)\u003c\/div\u003e \u003c\/div\u003e \u003cdiv class='jdgm-histogram__row jdgm-histogram__clear-filter' data-rating=null tabindex='0'\u003e\u003c\/div\u003e \u003c\/div\u003e \u003cdiv class='jdgm-rev-widg__sort-wrapper'\u003e\u003c\/div\u003e \u003c\/div\u003e \u003cdiv class='jdgm-rev-widg__body'\u003e \u003cdiv class='jdgm-rev-widg__reviews'\u003e\u003cdiv class='jdgm-rev jdgm-divider-top' data-verified-buyer='true' data-review-id='fb6edbb5-0c1e-48fe-851a-58b36f3b1313' data-review-language='' data-product-title='Labour \u0026amp; Birth Roller Blends - 10mls' data-product-url='\/products\/labour-roller-blends' data-thumb-up-count='0' data-thumb-down-count='0'\u003e \u003cdiv class='jdgm-rev__header'\u003e \u003cdiv class='jdgm-rev__icon' \u003e B \u003c\/div\u003e \u003cspan class='jdgm-rev__rating' data-score='5' tabindex='0' aria-label='5 star review' role='img'\u003e \u003cspan class='jdgm-star jdgm--on'\u003e\u003c\/span\u003e\u003cspan class='jdgm-star jdgm--on'\u003e\u003c\/span\u003e\u003cspan class='jdgm-star jdgm--on'\u003e\u003c\/span\u003e\u003cspan class='jdgm-star jdgm--on'\u003e\u003c\/span\u003e\u003cspan class='jdgm-star jdgm--on'\u003e\u003c\/span\u003e \u003c\/span\u003e \u003cspan class='jdgm-rev__timestamp jdgm-spinner' data-content='2024-08-26 02:33:46 UTC'\u003e\u003c\/span\u003e \u003cdiv class='jdgm-rev__br'\u003e\u003c\/div\u003e \u003cspan class='jdgm-rev__buyer-badge-wrapper'\u003e \u003cspan class='jdgm-rev__buyer-badge'\u003e\u003c\/span\u003e \u003c\/span\u003e \u003cspan class='jdgm-rev__author-wrapper'\u003e \u003cspan class='jdgm-rev__author'\u003eBethany Bronickis\u003c\/span\u003e \u003cspan class='jdgm-rev__location' \u003e \u003c\/span\u003e \u003c\/span\u003e \u003c\/div\u003e \u003cdiv class='jdgm-rev__content'\u003e \u003cdiv class='jdgm-rev__custom-form'\u003e \u003c\/div\u003e \u003cb class='jdgm-rev__title'\u003eIn control and connected to my body!\u003c\/b\u003e \u003cdiv class='jdgm-rev__body'\u003e\u003cp\u003eI absolutely loved using the labor and birth roller blends during my delivery. From the moment I applied it, I felt an immediate sense of calm wash over me.\u003c\/p\u003e\n\n\u003cp\u003eWhat I appreciated most was how easy it was to use. The roller design allowed me to quickly apply it to my pulse points whenever I needed a boost of calm or reassurance. The blend of essential oils was perfectly balanced – not too overpowering, yet strong enough to make an impact.\u003c\/p\u003e\n\n\u003cp\u003eDuring the more intense moments, this blend helped me feel in control and more connected to my body. It truly became an essential part of my labor experience. If you’re looking for a natural way to stay calm and centered during birth, I highly recommend trying these roller blends. They were a lifesaver for me!\u003c\/p\u003e\u003c\/div\u003e \u003cdiv class='jdgm-rev__pics'\u003e \u003c\/div\u003e \u003cdiv class='jdgm-rev__vids'\u003e \u003c\/div\u003e \u003cdiv class='jdgm-rev__transparency-badge-wrapper'\u003e \u003c\/div\u003e \u003c\/div\u003e \u003cdiv class='jdgm-rev__actions'\u003e \u003cdiv class='jdgm-rev__social'\u003e\u003c\/div\u003e \u003cdiv class='jdgm-rev__votes'\u003e\u003c\/div\u003e \u003c\/div\u003e \u003cdiv class='jdgm-rev__reply'\u003e \u003c\/div\u003e \u003c\/div\u003e\u003cdiv class='jdgm-rev jdgm-divider-top' data-verified-buyer='true' data-review-id='7e250ff3-223f-44e0-9ad3-353b10773292' data-review-language='' data-product-title='Labour \u0026amp; Birth Roller Blends - 10mls' data-product-url='\/products\/labour-roller-blends' data-thumb-up-count='0' data-thumb-down-count='3'\u003e \u003cdiv class='jdgm-rev__header'\u003e \u003cdiv class='jdgm-rev__icon' \u003e S \u003c\/div\u003e \u003cspan class='jdgm-rev__rating' data-score='5' tabindex='0' aria-label='5 star review' role='img'\u003e \u003cspan class='jdgm-star jdgm--on'\u003e\u003c\/span\u003e\u003cspan class='jdgm-star jdgm--on'\u003e\u003c\/span\u003e\u003cspan class='jdgm-star jdgm--on'\u003e\u003c\/span\u003e\u003cspan class='jdgm-star jdgm--on'\u003e\u003c\/span\u003e\u003cspan class='jdgm-star jdgm--on'\u003e\u003c\/span\u003e \u003c\/span\u003e \u003cspan class='jdgm-rev__timestamp jdgm-spinner' data-content='2024-05-03 09:54:52 UTC'\u003e\u003c\/span\u003e \u003cdiv class='jdgm-rev__br'\u003e\u003c\/div\u003e \u003cspan class='jdgm-rev__buyer-badge-wrapper'\u003e \u003cspan class='jdgm-rev__buyer-badge'\u003e\u003c\/span\u003e \u003c\/span\u003e \u003cspan class='jdgm-rev__author-wrapper'\u003e \u003cspan class='jdgm-rev__author'\u003eSophie Butler\u003c\/span\u003e \u003cspan class='jdgm-rev__location' \u003e \u003c\/span\u003e \u003c\/span\u003e \u003c\/div\u003e \u003cdiv class='jdgm-rev__content'\u003e \u003cdiv class='jdgm-rev__custom-form'\u003e \u003c\/div\u003e \u003cb class='jdgm-rev__title'\u003eSmell amazing\u003c\/b\u003e \u003cdiv class='jdgm-rev__body'\u003e\u003cp\u003eI had these bad boys packed in my hospital ready handbag and got to use the pain ease roller once, but I didn’t get much more chance to use it again or to use the other two because my labour came on so hard and fast and had given birth within 3hrs of my contractions starting! I’m sure I’ll find another use for them though!\u003c\/p\u003e\u003c\/div\u003e \u003cdiv class='jdgm-rev__pics'\u003e \u003c\/div\u003e \u003cdiv class='jdgm-rev__vids'\u003e \u003c\/div\u003e \u003cdiv class='jdgm-rev__transparency-badge-wrapper'\u003e \u003c\/div\u003e \u003c\/div\u003e \u003cdiv class='jdgm-rev__actions'\u003e \u003cdiv class='jdgm-rev__social'\u003e\u003c\/div\u003e \u003cdiv class='jdgm-rev__votes'\u003e\u003c\/div\u003e \u003c\/div\u003e \u003cdiv class='jdgm-rev__reply'\u003e \u003c\/div\u003e \u003c\/div\u003e\u003c\/div\u003e \u003cdiv class='jdgm-paginate' data-per-page='10' data-url='https:\/\/api.judge.me\/reviews\/reviews_for_widget' style=\"display: none;\"\u003e\u003c\/div\u003e \u003c\/div\u003e \u003cdiv class='jdgm-rev-widg__paginate-spinner-wrapper'\u003e \u003cdiv class='jdgm-spinner'\u003e\u003c\/div\u003e \u003c\/div\u003e \u003c\/div\u003e"},"collections":[{"id":309505622205,"handle":"the-birth-store-range","title":"'The Birth Store' Range","updated_at":"2025-12-28T20:10:01+08:00","body_html":"","published_at":"2024-10-28T13:24:26+08:00","sort_order":"alpha-asc","template_suffix":"","disjunctive":false,"rules":[{"column":"tag","relation":"equals","condition":"The Birth Store"}],"published_scope":"global","image":{"created_at":"2025-10-30T16:16:56+08:00","alt":"'The Birth Store' Range - The Birth Store","width":1365,"height":2048,"src":"\/\/www.thebirthstore.com.au\/cdn\/shop\/collections\/the-birth-store-range-5183880.jpg?v=1761812217"}},{"id":261657460925,"handle":"buy","title":"Buy","updated_at":"2025-12-28T20:10:01+08:00","body_html":"\u003cp\u003eBrowse all of our pregnancy, labour \u0026amp; birth, postpartum and baby essentials here.\u003cbr\u003e\u003c\/p\u003e\n\u003cp\u003e\u003cspan\u003eYou can even buy now and pay later with Afterpay!\u003c\/span\u003e\u003c\/p\u003e","published_at":"2021-03-10T12:05:31+08:00","sort_order":"best-selling","template_suffix":"shop-all-collection","disjunctive":false,"rules":[{"column":"title","relation":"not_contains","condition":"Hire"}],"published_scope":"global","image":{"created_at":"2024-05-06T11:59:42+08:00","alt":"Buy - The Birth Store","width":2048,"height":2048,"src":"\/\/www.thebirthstore.com.au\/cdn\/shop\/collections\/buy-964856.jpg?v=1714967982"}},{"id":261658214589,"handle":"labour-and-birth-buy","title":"Labour \u0026 Birth","updated_at":"2025-12-28T20:10:01+08:00","body_html":"\u003cp\u003eWe stock a large range of Elle TENS machines for you to buy for your labour and birth. We stock the Elle TENS, Elle TENS 2 and Elle TENS Plus, we also hire these out if that suits you better, please head over to our TENS machine hire page for more information. We ship Australia wide or have options for local delivery\/pick-up in Perth if you are due ASAP. We also stock other items for your labour and birth. \u003c\/p\u003e\n\u003cp\u003eLooking for something we don't currently stock? Please reach out and let us know.\u003c\/p\u003e\n\u003cp\u003e\u003cspan\u003eYou can even buy now and pay later with Afterpay!\u003c\/span\u003e\u003c\/p\u003e","published_at":"2021-03-10T12:34:43+08:00","sort_order":"best-selling","template_suffix":"labour-birth-collection","disjunctive":false,"rules":[{"column":"tag","relation":"equals","condition":"Birth"}],"published_scope":"global","image":{"created_at":"2024-05-06T12:00:09+08:00","alt":"Labour \u0026 Birth - The Birth Store","width":1080,"height":981,"src":"\/\/www.thebirthstore.com.au\/cdn\/shop\/collections\/labour-birth-342038.jpg?v=1714968009"}},{"id":281712558269,"handle":"labour-aids","title":"Labour Aids","updated_at":"2025-12-28T20:10:01+08:00","body_html":"","published_at":"2021-12-20T14:22:16+08:00","sort_order":"best-selling","template_suffix":"labour-aids-collection","disjunctive":false,"rules":[{"column":"tag","relation":"equals","condition":"Labour Progression"}],"published_scope":"global","image":{"created_at":"2024-05-06T12:00:11+08:00","alt":"Labour Aids - The Birth Store","width":1365,"height":2048,"src":"\/\/www.thebirthstore.com.au\/cdn\/shop\/collections\/labour-aids-211824.jpg?v=1714968012"}},{"id":295224836285,"handle":"nausea","title":"Nausea","updated_at":"2025-12-28T20:10:01+08:00","body_html":"","published_at":"2023-11-10T20:47:34+08:00","sort_order":"best-selling","template_suffix":"nausea-collection","disjunctive":false,"rules":[{"column":"tag","relation":"equals","condition":"Nausea"}],"published_scope":"global","image":{"created_at":"2024-05-06T12:00:24+08:00","alt":"Nausea - The Birth Store","width":610,"height":915,"src":"\/\/www.thebirthstore.com.au\/cdn\/shop\/collections\/nausea-404101.jpg?v=1714968024"}},{"id":281712591037,"handle":"pain-relief","title":"Pain Relief","updated_at":"2025-12-28T20:10:01+08:00","body_html":"","published_at":"2021-12-20T14:22:45+08:00","sort_order":"best-selling","template_suffix":"pain-relief-collection","disjunctive":false,"rules":[{"column":"tag","relation":"equals","condition":"Pain Relief"}],"published_scope":"global","image":{"created_at":"2024-05-06T12:00:27+08:00","alt":"Pain Relief - The Birth Store","width":1365,"height":2048,"src":"\/\/www.thebirthstore.com.au\/cdn\/shop\/collections\/pain-relief-878865.jpg?v=1714968027"}},{"id":261658149053,"handle":"pregnancy-and-maternity-products","title":"Pregnancy","updated_at":"2025-12-28T20:10:01+08:00","body_html":"\u003cp\u003eShop your pregnancy essentials below. Looking for something we don't currently stock? Please reach out and let us know.\u003cbr\u003e\u003c\/p\u003e\n\u003cp\u003e\u003cspan\u003eYou can even buy now and pay later with Afterpay!\u003c\/span\u003e\u003c\/p\u003e","published_at":"2021-03-10T12:34:22+08:00","sort_order":"best-selling","template_suffix":"pregnancy-collection","disjunctive":false,"rules":[{"column":"tag","relation":"equals","condition":"Pregnancy"}],"published_scope":"global","image":{"created_at":"2024-05-06T12:00:40+08:00","alt":"Pregnancy - The Birth Store","width":1024,"height":1536,"src":"\/\/www.thebirthstore.com.au\/cdn\/shop\/collections\/pregnancy-899677.jpg?v=1714968040"}},{"id":291456483517,"handle":"shop-all","title":"Shop All - Mum","updated_at":"2025-12-28T20:10:01+08:00","body_html":"","published_at":"2022-12-23T22:04:39+08:00","sort_order":"best-selling","template_suffix":"shop-all-collection","disjunctive":false,"rules":[{"column":"variant_price","relation":"greater_than","condition":"1"},{"column":"title","relation":"not_contains","condition":"Batteries"},{"column":"tag","relation":"equals","condition":"Mum"}],"published_scope":"global","image":{"created_at":"2024-05-06T12:00:54+08:00","alt":"Shop All - The Birth Store","width":1365,"height":2048,"src":"\/\/www.thebirthstore.com.au\/cdn\/shop\/collections\/shop-all-693176.jpg?v=1714968055"}},{"id":310045933757,"handle":"shop-all-sale","title":"Shop All Sale","updated_at":"2025-12-28T20:10:01+08:00","body_html":"","published_at":"2024-11-12T13:22:43+08:00","sort_order":"alpha-asc","template_suffix":"","disjunctive":true,"rules":[{"column":"tag","relation":"equals","condition":"Bundles"},{"column":"vendor","relation":"equals","condition":"Franjos Kitchen"},{"column":"vendor","relation":"equals","condition":"Adored Illustrations"},{"column":"vendor","relation":"equals","condition":"Amazing Oils"},{"column":"vendor","relation":"equals","condition":"Ice Ice Booby"},{"column":"vendor","relation":"equals","condition":"Made to Milk"},{"column":"vendor","relation":"equals","condition":"Milky Goodness"},{"column":"vendor","relation":"equals","condition":"Seasons of Mama"},{"column":"vendor","relation":"equals","condition":"Silverette"},{"column":"vendor","relation":"equals","condition":"Snuggle Hunny"},{"column":"vendor","relation":"equals","condition":"Yung Bod"},{"column":"vendor","relation":"equals","condition":"Bare Love"},{"column":"vendor","relation":"equals","condition":"Haakaa"},{"column":"vendor","relation":"equals","condition":"Mere Botanicals"},{"column":"vendor","relation":"equals","condition":"The Birth Store Hire"},{"column":"vendor","relation":"equals","condition":"The Birth Store"}],"published_scope":"global","image":{"created_at":"2024-11-13T10:58:16+08:00","alt":"Shop All Sale - The Birth Store","width":2048,"height":1365,"src":"\/\/www.thebirthstore.com.au\/cdn\/shop\/collections\/shop-all-sale-297361.jpg?v=1731466697"}},{"id":316942287037,"handle":"wholesale-products","updated_at":"2025-12-28T20:10:01+08:00","published_at":"2025-04-19T15:30:53+08:00","sort_order":"best-selling","template_suffix":"","published_scope":"global","title":"Wholesale Products","body_html":"","image":{"created_at":"2025-11-20T21:33:57+08:00","alt":"Wholesale Products - The Birth Store","width":1024,"height":684,"src":"\/\/www.thebirthstore.com.au\/cdn\/shop\/collections\/wholesale-products-3833919.jpg?v=1763645638"}}]}
[{"alt":"Labour \u0026 Birth Roller Blends - 10mls - The Birth Store - The Birth Store","id":28995605987517,"position":1,"preview_image":{"aspect_ratio":1.0,"height":1080,"width":1080,"src":"\/\/www.thebirthstore.com.au\/cdn\/shop\/files\/labour-birth-roller-blends-10mls-840043.jpg?v=1750253316"},"aspect_ratio":1.0,"height":1080,"media_type":"image","src":"\/\/www.thebirthstore.com.au\/cdn\/shop\/files\/labour-birth-roller-blends-10mls-840043.jpg?v=1750253316","width":1080},{"alt":"Labour \u0026 Birth Roller Blends - 10mls - The Birth Store-The Birth Store","id":27007590400189,"position":2,"preview_image":{"aspect_ratio":1.0,"height":2048,"width":2048,"src":"\/\/www.thebirthstore.com.au\/cdn\/shop\/files\/labour-birth-roller-blends-10mls-160488.jpg?v=1750217900"},"aspect_ratio":1.0,"height":2048,"media_type":"image","src":"\/\/www.thebirthstore.com.au\/cdn\/shop\/files\/labour-birth-roller-blends-10mls-160488.jpg?v=1750217900","width":2048},{"alt":"Labour \u0026 Birth Roller Blends - 10mls - The Birth Store-The Birth Store","id":27007590465725,"position":3,"preview_image":{"aspect_ratio":0.667,"height":2048,"width":1365,"src":"\/\/www.thebirthstore.com.au\/cdn\/shop\/files\/labour-birth-roller-blends-10mls-861027.jpg?v=1750217900"},"aspect_ratio":0.667,"height":2048,"media_type":"image","src":"\/\/www.thebirthstore.com.au\/cdn\/shop\/files\/labour-birth-roller-blends-10mls-861027.jpg?v=1750217900","width":1365},{"alt":"Labour \u0026 Birth Roller Blends - 10mls - The Birth Store-The Birth Store","id":27007590531261,"position":4,"preview_image":{"aspect_ratio":0.667,"height":2048,"width":1365,"src":"\/\/www.thebirthstore.com.au\/cdn\/shop\/files\/labour-birth-roller-blends-10mls-470573.jpg?v=1750217900"},"aspect_ratio":0.667,"height":2048,"media_type":"image","src":"\/\/www.thebirthstore.com.au\/cdn\/shop\/files\/labour-birth-roller-blends-10mls-470573.jpg?v=1750217900","width":1365},{"alt":"Labour \u0026 Birth Roller Blends - 10mls - The Birth Store-The Birth Store","id":27007590564029,"position":5,"preview_image":{"aspect_ratio":1.5,"height":1365,"width":2048,"src":"\/\/www.thebirthstore.com.au\/cdn\/shop\/files\/labour-birth-roller-blends-10mls-426905.jpg?v=1750217900"},"aspect_ratio":1.5,"height":1365,"media_type":"image","src":"\/\/www.thebirthstore.com.au\/cdn\/shop\/files\/labour-birth-roller-blends-10mls-426905.jpg?v=1750217900","width":2048},{"alt":"Labour \u0026 Birth Roller Blends - 10mls - The Birth Store-The Birth Store","id":27007590596797,"position":6,"preview_image":{"aspect_ratio":1.0,"height":2048,"width":2048,"src":"\/\/www.thebirthstore.com.au\/cdn\/shop\/files\/labour-birth-roller-blends-10mls-135739.jpg?v=1750217900"},"aspect_ratio":1.0,"height":2048,"media_type":"image","src":"\/\/www.thebirthstore.com.au\/cdn\/shop\/files\/labour-birth-roller-blends-10mls-135739.jpg?v=1750217900","width":2048}]
{"item":{"id":7054942765245,"title":"Labour Aid 40gm","handle":"labour-aid-40gm","description":"\u003cp data-mce-fragment=\"1\"\u003e\u003cspan data-sheets-value='{\"1\":2,\"2\":\"An electrolyte drink to help aid hydration during labour.\"}' data-sheets-userformat='{\"2\":6659,\"3\":{\"1\":0},\"4\":[null,2,16777215],\"12\":0,\"14\":[null,2,0],\"15\":\"\\\"Times New Roman\\\"\"}' data-mce-fragment=\"1\"\u003eAn electrolyte drink to help aid hydration during labour.\u003cbr data-mce-fragment=\"1\"\u003e\u003cbr data-mce-fragment=\"1\"\u003e\u003c\/span\u003eOrange flavour.\u003cbr data-mce-fragment=\"1\"\u003e\u003cbr data-mce-fragment=\"1\"\u003e\u003cspan data-sheets-value='{\"1\":2,\"2\":\"Directions: Mix 2 tsp with 350ml - 600ml of water or juice and take as required. Take up to 4 doses daily. \"}' data-sheets-userformat='{\"2\":6659,\"3\":{\"1\":0},\"4\":[null,2,16777215],\"12\":0,\"14\":[null,2,0],\"15\":\"\\\"Times New Roman\\\"\"}' data-mce-fragment=\"1\"\u003e\u003cstrong\u003eDirections:\u003c\/strong\u003e Mix 3 tsp with 350ml of water or juice and take as required. Take up to 4 doses daily.\u003cbr data-mce-fragment=\"1\"\u003e\u003cbr data-mce-fragment=\"1\"\u003eEach 10gm dose contains:\u003c\/span\u003e\u003c\/p\u003e\n\u003cp data-mce-fragment=\"1\"\u003eCalcium citrate 1.5g\u003cbr data-mce-fragment=\"1\"\u003eEqiv. Elemental CALCIUM 315mg\u003cbr data-mce-fragment=\"1\"\u003eSodium ascorbate 1.5g\u003cbr data-mce-fragment=\"1\"\u003e\u003cspan data-mce-fragment=\"1\"\u003eEqiv. Elemental SODIUM 166.5mg\u003cbr data-mce-fragment=\"1\"\u003eEqiv. Elemental ASCORBATE 1.33mg\u003cbr data-mce-fragment=\"1\"\u003e\u003c\/span\u003ePotassium citrate 1g\u003cbr data-mce-fragment=\"1\"\u003e\u003cspan data-mce-fragment=\"1\"\u003eEqiv. Elemental POTASSIUM 392mg\u003cbr data-mce-fragment=\"1\"\u003e\u003c\/span\u003eMagnesium amino acid chelate 500mg\u003cbr data-mce-fragment=\"1\"\u003e\u003cspan data-mce-fragment=\"1\"\u003eEqiv. Elemental MAGNESIUM 150mg\u003c\/span\u003e\u003cspan data-sheets-value='{\"1\":2,\"2\":\"Directions: Mix 2 tsp with 350ml - 600ml of water or juice and take as required. Take up to 4 doses daily. \"}' data-sheets-userformat='{\"2\":6659,\"3\":{\"1\":0},\"4\":[null,2,16777215],\"12\":0,\"14\":[null,2,0],\"15\":\"\\\"Times New Roman\\\"\"}' data-mce-fragment=\"1\"\u003e\u003cbr data-mce-fragment=\"1\"\u003e\u003cbr data-mce-fragment=\"1\"\u003e\u003cbr data-mce-fragment=\"1\"\u003eExcipients: Malic acid (derived from apples), Organic natural orange flavour, Fructose and Xylitol. Store below 30°c in an air tight container. Made in Australia from local and imported ingredients. This bag is compostable.\u003cbr data-mce-fragment=\"1\"\u003e\u003cbr data-mce-fragment=\"1\"\u003eNo added artificial flavouring or colouring. Free from gluten, wheat, dairy, lactose, eggs, nuts and yeast.\u003c\/span\u003e\u003c\/p\u003e","published_at":"2021-11-18T14:35:21+08:00","created_at":"2021-11-02T13:13:19+08:00","vendor":"Mere Botanicals","type":"","tags":["Birth","Hospital Bag","Mum","Pregnancy"],"price":1595,"price_min":1595,"price_max":1595,"available":true,"price_varies":false,"compare_at_price":1595,"compare_at_price_min":1595,"compare_at_price_max":1595,"compare_at_price_varies":false,"variants":[{"id":40977745248445,"title":"Default Title","option1":"Default Title","option2":null,"option3":null,"sku":"","requires_shipping":true,"taxable":false,"featured_image":null,"available":true,"name":"Labour Aid 40gm","public_title":null,"options":["Default Title"],"price":1595,"weight":49,"compare_at_price":1595,"inventory_management":"shopify","barcode":"45248445","requires_selling_plan":false,"selling_plan_allocations":[]}],"images":["\/\/www.thebirthstore.com.au\/cdn\/shop\/files\/labour-aid-40gm-548936.jpg?v=1714967973","\/\/www.thebirthstore.com.au\/cdn\/shop\/files\/labour-aid-40gm-950584.jpg?v=1714967973","\/\/www.thebirthstore.com.au\/cdn\/shop\/files\/labour-aid-40gm-542973.jpg?v=1714967973"],"featured_image":"\/\/www.thebirthstore.com.au\/cdn\/shop\/files\/labour-aid-40gm-548936.jpg?v=1714967973","options":["Title"],"media":[{"alt":"Labour Aid 40gm - The Birth Store-Mere Botanicals","id":27007587057853,"position":1,"preview_image":{"aspect_ratio":1.0,"height":828,"width":828,"src":"\/\/www.thebirthstore.com.au\/cdn\/shop\/files\/labour-aid-40gm-548936.jpg?v=1714967973"},"aspect_ratio":1.0,"height":828,"media_type":"image","src":"\/\/www.thebirthstore.com.au\/cdn\/shop\/files\/labour-aid-40gm-548936.jpg?v=1714967973","width":828},{"alt":"Labour Aid 40gm - The Birth Store-Mere Botanicals","id":27007587221693,"position":2,"preview_image":{"aspect_ratio":0.667,"height":2048,"width":1365,"src":"\/\/www.thebirthstore.com.au\/cdn\/shop\/files\/labour-aid-40gm-950584.jpg?v=1714967973"},"aspect_ratio":0.667,"height":2048,"media_type":"image","src":"\/\/www.thebirthstore.com.au\/cdn\/shop\/files\/labour-aid-40gm-950584.jpg?v=1714967973","width":1365},{"alt":"Labour Aid 40gm - The Birth Store-Mere Botanicals","id":27007587254461,"position":3,"preview_image":{"aspect_ratio":0.667,"height":1350,"width":900,"src":"\/\/www.thebirthstore.com.au\/cdn\/shop\/files\/labour-aid-40gm-542973.jpg?v=1714967973"},"aspect_ratio":0.667,"height":1350,"media_type":"image","src":"\/\/www.thebirthstore.com.au\/cdn\/shop\/files\/labour-aid-40gm-542973.jpg?v=1714967973","width":900}],"requires_selling_plan":false,"selling_plan_groups":[],"content":"\u003cp data-mce-fragment=\"1\"\u003e\u003cspan data-sheets-value='{\"1\":2,\"2\":\"An electrolyte drink to help aid hydration during labour.\"}' data-sheets-userformat='{\"2\":6659,\"3\":{\"1\":0},\"4\":[null,2,16777215],\"12\":0,\"14\":[null,2,0],\"15\":\"\\\"Times New Roman\\\"\"}' data-mce-fragment=\"1\"\u003eAn electrolyte drink to help aid hydration during labour.\u003cbr data-mce-fragment=\"1\"\u003e\u003cbr data-mce-fragment=\"1\"\u003e\u003c\/span\u003eOrange flavour.\u003cbr data-mce-fragment=\"1\"\u003e\u003cbr data-mce-fragment=\"1\"\u003e\u003cspan data-sheets-value='{\"1\":2,\"2\":\"Directions: Mix 2 tsp with 350ml - 600ml of water or juice and take as required. Take up to 4 doses daily. \"}' data-sheets-userformat='{\"2\":6659,\"3\":{\"1\":0},\"4\":[null,2,16777215],\"12\":0,\"14\":[null,2,0],\"15\":\"\\\"Times New Roman\\\"\"}' data-mce-fragment=\"1\"\u003e\u003cstrong\u003eDirections:\u003c\/strong\u003e Mix 3 tsp with 350ml of water or juice and take as required. Take up to 4 doses daily.\u003cbr data-mce-fragment=\"1\"\u003e\u003cbr data-mce-fragment=\"1\"\u003eEach 10gm dose contains:\u003c\/span\u003e\u003c\/p\u003e\n\u003cp data-mce-fragment=\"1\"\u003eCalcium citrate 1.5g\u003cbr data-mce-fragment=\"1\"\u003eEqiv. Elemental CALCIUM 315mg\u003cbr data-mce-fragment=\"1\"\u003eSodium ascorbate 1.5g\u003cbr data-mce-fragment=\"1\"\u003e\u003cspan data-mce-fragment=\"1\"\u003eEqiv. Elemental SODIUM 166.5mg\u003cbr data-mce-fragment=\"1\"\u003eEqiv. Elemental ASCORBATE 1.33mg\u003cbr data-mce-fragment=\"1\"\u003e\u003c\/span\u003ePotassium citrate 1g\u003cbr data-mce-fragment=\"1\"\u003e\u003cspan data-mce-fragment=\"1\"\u003eEqiv. Elemental POTASSIUM 392mg\u003cbr data-mce-fragment=\"1\"\u003e\u003c\/span\u003eMagnesium amino acid chelate 500mg\u003cbr data-mce-fragment=\"1\"\u003e\u003cspan data-mce-fragment=\"1\"\u003eEqiv. Elemental MAGNESIUM 150mg\u003c\/span\u003e\u003cspan data-sheets-value='{\"1\":2,\"2\":\"Directions: Mix 2 tsp with 350ml - 600ml of water or juice and take as required. Take up to 4 doses daily. \"}' data-sheets-userformat='{\"2\":6659,\"3\":{\"1\":0},\"4\":[null,2,16777215],\"12\":0,\"14\":[null,2,0],\"15\":\"\\\"Times New Roman\\\"\"}' data-mce-fragment=\"1\"\u003e\u003cbr data-mce-fragment=\"1\"\u003e\u003cbr data-mce-fragment=\"1\"\u003e\u003cbr data-mce-fragment=\"1\"\u003eExcipients: Malic acid (derived from apples), Organic natural orange flavour, Fructose and Xylitol. Store below 30°c in an air tight container. Made in Australia from local and imported ingredients. This bag is compostable.\u003cbr data-mce-fragment=\"1\"\u003e\u003cbr data-mce-fragment=\"1\"\u003eNo added artificial flavouring or colouring. Free from gluten, wheat, dairy, lactose, eggs, nuts and yeast.\u003c\/span\u003e\u003c\/p\u003e"},"options":[{"name":"Title","position":1,"values":["Default Title"]}],"custom_metafields":{},"metafields":{"badge":"\u003cdiv style='display:none' class='jdgm-prev-badge' data-average-rating='0.00' data-number-of-reviews='0' data-number-of-questions='0'\u003e \u003cspan class='jdgm-prev-badge__stars' data-score='0.00' tabindex='0' aria-label='0.00 stars' role='button'\u003e \u003cspan class='jdgm-star jdgm--off'\u003e\u003c\/span\u003e\u003cspan class='jdgm-star jdgm--off'\u003e\u003c\/span\u003e\u003cspan class='jdgm-star jdgm--off'\u003e\u003c\/span\u003e\u003cspan class='jdgm-star jdgm--off'\u003e\u003c\/span\u003e\u003cspan class='jdgm-star jdgm--off'\u003e\u003c\/span\u003e \u003c\/span\u003e \u003cspan class='jdgm-prev-badge__text'\u003e No reviews \u003c\/span\u003e \u003c\/div\u003e","widget":"\u003cdiv class='jdgm-rev-widg' data-updated-at='2025-06-13T16:12:10Z' data-average-rating='0.00' data-number-of-reviews='0' data-number-of-questions='0'\u003e \u003cstyle class='jdgm-temp-hiding-style'\u003e.jdgm-rev-widg{ display: none }\u003c\/style\u003e \u003cdiv class='jdgm-rev-widg__header'\u003e \u003ch2 class='jdgm-rev-widg__title'\u003eCustomer Reviews\u003c\/h2\u003e \u003cdiv class='jdgm-rev-widg__summary'\u003e \u003cdiv class='jdgm-rev-widg__summary-stars' aria-label='Average rating is 0.00 stars' role='img'\u003e \u003cspan class='jdgm-star jdgm--off'\u003e\u003c\/span\u003e\u003cspan class='jdgm-star jdgm--off'\u003e\u003c\/span\u003e\u003cspan class='jdgm-star jdgm--off'\u003e\u003c\/span\u003e\u003cspan class='jdgm-star jdgm--off'\u003e\u003c\/span\u003e\u003cspan class='jdgm-star jdgm--off'\u003e\u003c\/span\u003e \u003c\/div\u003e \u003cdiv class='jdgm-rev-widg__summary-text'\u003eBe the first to write a review\u003c\/div\u003e \u003c\/div\u003e \u003ca style='display: none' href='#' class='jdgm-write-rev-link' role='button'\u003eWrite a review\u003c\/a\u003e \u003cdiv class='jdgm-histogram jdgm-temp-hidden'\u003e \u003cdiv class='jdgm-histogram__row' data-rating='5' data-frequency='0' data-percentage='0'\u003e \u003cdiv class='jdgm-histogram__star' role='button' aria-label=\"0% (0) reviews with 5 star rating\" tabindex='0' \u003e\u003cspan class='jdgm-star jdgm--on'\u003e\u003c\/span\u003e\u003cspan class='jdgm-star jdgm--on'\u003e\u003c\/span\u003e\u003cspan class='jdgm-star jdgm--on'\u003e\u003c\/span\u003e\u003cspan class='jdgm-star jdgm--on'\u003e\u003c\/span\u003e\u003cspan class='jdgm-star jdgm--on'\u003e\u003c\/span\u003e\u003c\/div\u003e \u003cdiv class='jdgm-histogram__bar'\u003e \u003cdiv class='jdgm-histogram__bar-content' style='width: 0%;'\u003e \u003c\/div\u003e \u003c\/div\u003e \u003cdiv class='jdgm-histogram__percentage'\u003e0%\u003c\/div\u003e \u003cdiv class='jdgm-histogram__frequency'\u003e(0)\u003c\/div\u003e \u003c\/div\u003e \u003cdiv class='jdgm-histogram__row' data-rating='4' data-frequency='0' data-percentage='0'\u003e \u003cdiv class='jdgm-histogram__star' role='button' aria-label=\"0% (0) reviews with 4 star rating\" tabindex='0' \u003e\u003cspan class='jdgm-star jdgm--on'\u003e\u003c\/span\u003e\u003cspan class='jdgm-star jdgm--on'\u003e\u003c\/span\u003e\u003cspan class='jdgm-star jdgm--on'\u003e\u003c\/span\u003e\u003cspan class='jdgm-star jdgm--on'\u003e\u003c\/span\u003e\u003cspan class='jdgm-star jdgm--off'\u003e\u003c\/span\u003e\u003c\/div\u003e \u003cdiv class='jdgm-histogram__bar'\u003e \u003cdiv class='jdgm-histogram__bar-content' style='width: 0%;'\u003e \u003c\/div\u003e \u003c\/div\u003e \u003cdiv class='jdgm-histogram__percentage'\u003e0%\u003c\/div\u003e \u003cdiv class='jdgm-histogram__frequency'\u003e(0)\u003c\/div\u003e \u003c\/div\u003e \u003cdiv class='jdgm-histogram__row' data-rating='3' data-frequency='0' data-percentage='0'\u003e \u003cdiv class='jdgm-histogram__star' role='button' aria-label=\"0% (0) reviews with 3 star rating\" tabindex='0' \u003e\u003cspan class='jdgm-star jdgm--on'\u003e\u003c\/span\u003e\u003cspan class='jdgm-star jdgm--on'\u003e\u003c\/span\u003e\u003cspan class='jdgm-star jdgm--on'\u003e\u003c\/span\u003e\u003cspan class='jdgm-star jdgm--off'\u003e\u003c\/span\u003e\u003cspan class='jdgm-star jdgm--off'\u003e\u003c\/span\u003e\u003c\/div\u003e \u003cdiv class='jdgm-histogram__bar'\u003e \u003cdiv class='jdgm-histogram__bar-content' style='width: 0%;'\u003e \u003c\/div\u003e \u003c\/div\u003e \u003cdiv class='jdgm-histogram__percentage'\u003e0%\u003c\/div\u003e \u003cdiv class='jdgm-histogram__frequency'\u003e(0)\u003c\/div\u003e \u003c\/div\u003e \u003cdiv class='jdgm-histogram__row' data-rating='2' data-frequency='0' data-percentage='0'\u003e \u003cdiv class='jdgm-histogram__star' role='button' aria-label=\"0% (0) reviews with 2 star rating\" tabindex='0' \u003e\u003cspan class='jdgm-star jdgm--on'\u003e\u003c\/span\u003e\u003cspan class='jdgm-star jdgm--on'\u003e\u003c\/span\u003e\u003cspan class='jdgm-star jdgm--off'\u003e\u003c\/span\u003e\u003cspan class='jdgm-star jdgm--off'\u003e\u003c\/span\u003e\u003cspan class='jdgm-star jdgm--off'\u003e\u003c\/span\u003e\u003c\/div\u003e \u003cdiv class='jdgm-histogram__bar'\u003e \u003cdiv class='jdgm-histogram__bar-content' style='width: 0%;'\u003e \u003c\/div\u003e \u003c\/div\u003e \u003cdiv class='jdgm-histogram__percentage'\u003e0%\u003c\/div\u003e \u003cdiv class='jdgm-histogram__frequency'\u003e(0)\u003c\/div\u003e \u003c\/div\u003e \u003cdiv class='jdgm-histogram__row' data-rating='1' data-frequency='0' data-percentage='0'\u003e \u003cdiv class='jdgm-histogram__star' role='button' aria-label=\"0% (0) reviews with 1 star rating\" tabindex='0' \u003e\u003cspan class='jdgm-star jdgm--on'\u003e\u003c\/span\u003e\u003cspan class='jdgm-star jdgm--off'\u003e\u003c\/span\u003e\u003cspan class='jdgm-star jdgm--off'\u003e\u003c\/span\u003e\u003cspan class='jdgm-star jdgm--off'\u003e\u003c\/span\u003e\u003cspan class='jdgm-star jdgm--off'\u003e\u003c\/span\u003e\u003c\/div\u003e \u003cdiv class='jdgm-histogram__bar'\u003e \u003cdiv class='jdgm-histogram__bar-content' style='width: 0%;'\u003e \u003c\/div\u003e \u003c\/div\u003e \u003cdiv class='jdgm-histogram__percentage'\u003e0%\u003c\/div\u003e \u003cdiv class='jdgm-histogram__frequency'\u003e(0)\u003c\/div\u003e \u003c\/div\u003e \u003cdiv class='jdgm-histogram__row jdgm-histogram__clear-filter' data-rating=null tabindex='0'\u003e\u003c\/div\u003e \u003c\/div\u003e \u003cdiv class='jdgm-rev-widg__sort-wrapper'\u003e\u003c\/div\u003e \u003c\/div\u003e \u003cdiv class='jdgm-rev-widg__body'\u003e \u003cdiv class='jdgm-rev-widg__reviews'\u003e\u003c\/div\u003e \u003cdiv class='jdgm-paginate' data-per-page='10' data-url='https:\/\/api.judge.me\/reviews\/reviews_for_widget' style=\"display: none;\"\u003e\u003c\/div\u003e \u003c\/div\u003e \u003cdiv class='jdgm-rev-widg__paginate-spinner-wrapper'\u003e \u003cdiv class='jdgm-spinner'\u003e\u003c\/div\u003e \u003c\/div\u003e \u003c\/div\u003e"},"collections":[{"id":261657460925,"handle":"buy","title":"Buy","updated_at":"2025-12-28T20:10:01+08:00","body_html":"\u003cp\u003eBrowse all of our pregnancy, labour \u0026amp; birth, postpartum and baby essentials here.\u003cbr\u003e\u003c\/p\u003e\n\u003cp\u003e\u003cspan\u003eYou can even buy now and pay later with Afterpay!\u003c\/span\u003e\u003c\/p\u003e","published_at":"2021-03-10T12:05:31+08:00","sort_order":"best-selling","template_suffix":"shop-all-collection","disjunctive":false,"rules":[{"column":"title","relation":"not_contains","condition":"Hire"}],"published_scope":"global","image":{"created_at":"2024-05-06T11:59:42+08:00","alt":"Buy - The Birth Store","width":2048,"height":2048,"src":"\/\/www.thebirthstore.com.au\/cdn\/shop\/collections\/buy-964856.jpg?v=1714967982"}},{"id":261658214589,"handle":"labour-and-birth-buy","title":"Labour \u0026 Birth","updated_at":"2025-12-28T20:10:01+08:00","body_html":"\u003cp\u003eWe stock a large range of Elle TENS machines for you to buy for your labour and birth. We stock the Elle TENS, Elle TENS 2 and Elle TENS Plus, we also hire these out if that suits you better, please head over to our TENS machine hire page for more information. We ship Australia wide or have options for local delivery\/pick-up in Perth if you are due ASAP. We also stock other items for your labour and birth. \u003c\/p\u003e\n\u003cp\u003eLooking for something we don't currently stock? Please reach out and let us know.\u003c\/p\u003e\n\u003cp\u003e\u003cspan\u003eYou can even buy now and pay later with Afterpay!\u003c\/span\u003e\u003c\/p\u003e","published_at":"2021-03-10T12:34:43+08:00","sort_order":"best-selling","template_suffix":"labour-birth-collection","disjunctive":false,"rules":[{"column":"tag","relation":"equals","condition":"Birth"}],"published_scope":"global","image":{"created_at":"2024-05-06T12:00:09+08:00","alt":"Labour \u0026 Birth - The Birth Store","width":1080,"height":981,"src":"\/\/www.thebirthstore.com.au\/cdn\/shop\/collections\/labour-birth-342038.jpg?v=1714968009"}},{"id":261658149053,"handle":"pregnancy-and-maternity-products","title":"Pregnancy","updated_at":"2025-12-28T20:10:01+08:00","body_html":"\u003cp\u003eShop your pregnancy essentials below. Looking for something we don't currently stock? Please reach out and let us know.\u003cbr\u003e\u003c\/p\u003e\n\u003cp\u003e\u003cspan\u003eYou can even buy now and pay later with Afterpay!\u003c\/span\u003e\u003c\/p\u003e","published_at":"2021-03-10T12:34:22+08:00","sort_order":"best-selling","template_suffix":"pregnancy-collection","disjunctive":false,"rules":[{"column":"tag","relation":"equals","condition":"Pregnancy"}],"published_scope":"global","image":{"created_at":"2024-05-06T12:00:40+08:00","alt":"Pregnancy - The Birth Store","width":1024,"height":1536,"src":"\/\/www.thebirthstore.com.au\/cdn\/shop\/collections\/pregnancy-899677.jpg?v=1714968040"}},{"id":291456483517,"handle":"shop-all","title":"Shop All - Mum","updated_at":"2025-12-28T20:10:01+08:00","body_html":"","published_at":"2022-12-23T22:04:39+08:00","sort_order":"best-selling","template_suffix":"shop-all-collection","disjunctive":false,"rules":[{"column":"variant_price","relation":"greater_than","condition":"1"},{"column":"title","relation":"not_contains","condition":"Batteries"},{"column":"tag","relation":"equals","condition":"Mum"}],"published_scope":"global","image":{"created_at":"2024-05-06T12:00:54+08:00","alt":"Shop All - The Birth Store","width":1365,"height":2048,"src":"\/\/www.thebirthstore.com.au\/cdn\/shop\/collections\/shop-all-693176.jpg?v=1714968055"}},{"id":310045933757,"handle":"shop-all-sale","title":"Shop All Sale","updated_at":"2025-12-28T20:10:01+08:00","body_html":"","published_at":"2024-11-12T13:22:43+08:00","sort_order":"alpha-asc","template_suffix":"","disjunctive":true,"rules":[{"column":"tag","relation":"equals","condition":"Bundles"},{"column":"vendor","relation":"equals","condition":"Franjos Kitchen"},{"column":"vendor","relation":"equals","condition":"Adored Illustrations"},{"column":"vendor","relation":"equals","condition":"Amazing Oils"},{"column":"vendor","relation":"equals","condition":"Ice Ice Booby"},{"column":"vendor","relation":"equals","condition":"Made to Milk"},{"column":"vendor","relation":"equals","condition":"Milky Goodness"},{"column":"vendor","relation":"equals","condition":"Seasons of Mama"},{"column":"vendor","relation":"equals","condition":"Silverette"},{"column":"vendor","relation":"equals","condition":"Snuggle Hunny"},{"column":"vendor","relation":"equals","condition":"Yung Bod"},{"column":"vendor","relation":"equals","condition":"Bare Love"},{"column":"vendor","relation":"equals","condition":"Haakaa"},{"column":"vendor","relation":"equals","condition":"Mere Botanicals"},{"column":"vendor","relation":"equals","condition":"The Birth Store Hire"},{"column":"vendor","relation":"equals","condition":"The Birth Store"}],"published_scope":"global","image":{"created_at":"2024-11-13T10:58:16+08:00","alt":"Shop All Sale - The Birth Store","width":2048,"height":1365,"src":"\/\/www.thebirthstore.com.au\/cdn\/shop\/collections\/shop-all-sale-297361.jpg?v=1731466697"}}]}
[{"alt":"Labour Aid 40gm - The Birth Store-Mere Botanicals","id":27007587057853,"position":1,"preview_image":{"aspect_ratio":1.0,"height":828,"width":828,"src":"\/\/www.thebirthstore.com.au\/cdn\/shop\/files\/labour-aid-40gm-548936.jpg?v=1714967973"},"aspect_ratio":1.0,"height":828,"media_type":"image","src":"\/\/www.thebirthstore.com.au\/cdn\/shop\/files\/labour-aid-40gm-548936.jpg?v=1714967973","width":828},{"alt":"Labour Aid 40gm - The Birth Store-Mere Botanicals","id":27007587221693,"position":2,"preview_image":{"aspect_ratio":0.667,"height":2048,"width":1365,"src":"\/\/www.thebirthstore.com.au\/cdn\/shop\/files\/labour-aid-40gm-950584.jpg?v=1714967973"},"aspect_ratio":0.667,"height":2048,"media_type":"image","src":"\/\/www.thebirthstore.com.au\/cdn\/shop\/files\/labour-aid-40gm-950584.jpg?v=1714967973","width":1365},{"alt":"Labour Aid 40gm - The Birth Store-Mere Botanicals","id":27007587254461,"position":3,"preview_image":{"aspect_ratio":0.667,"height":1350,"width":900,"src":"\/\/www.thebirthstore.com.au\/cdn\/shop\/files\/labour-aid-40gm-542973.jpg?v=1714967973"},"aspect_ratio":0.667,"height":1350,"media_type":"image","src":"\/\/www.thebirthstore.com.au\/cdn\/shop\/files\/labour-aid-40gm-542973.jpg?v=1714967973","width":900}]
{"item":{"id":7513280250045,"title":"Labour Preparation Pack - Capsules","handle":"labour-preparation-pack-capsules","description":"\u003cp\u003e\u003cmeta charset=\"utf-8\"\u003e\u003cspan\u003eThere are so many wonderful products on the market now, to help you prepare for your labour and birth. We have created a pack with a couple of our favourite products from small Australian businesses to aid you in preparing for arguably the most memorable day of your life - the one pack to fill all your labour preparation needs!\u003c\/span\u003e\u003c\/p\u003e","published_at":"2023-10-03T13:58:28+08:00","created_at":"2023-10-03T13:29:54+08:00","vendor":"Bundles","type":"","tags":["Baby Shower Gifts","Bundles","Labour Preparation","Labour Progression","Pregnancy"],"price":4897,"price_min":4897,"price_max":4897,"available":true,"price_varies":false,"compare_at_price":5565,"compare_at_price_min":5565,"compare_at_price_max":5565,"compare_at_price_varies":false,"variants":[{"id":43056985243837,"title":"Default Title","option1":"Default Title","option2":null,"option3":null,"sku":"","requires_shipping":true,"taxable":false,"featured_image":null,"available":true,"name":"Labour Preparation Pack - Capsules","public_title":null,"options":["Default Title"],"price":4897,"weight":250,"compare_at_price":5565,"inventory_management":"shopify","barcode":"05878717","requires_selling_plan":false,"selling_plan_allocations":[]}],"images":["\/\/www.thebirthstore.com.au\/cdn\/shop\/files\/labour-preparation-pack-capsules-709119.jpg?v=1714967975","\/\/www.thebirthstore.com.au\/cdn\/shop\/files\/labour-preparation-pack-capsules-332316.jpg?v=1714967975"],"featured_image":"\/\/www.thebirthstore.com.au\/cdn\/shop\/files\/labour-preparation-pack-capsules-709119.jpg?v=1714967975","options":["Title"],"media":[{"alt":"Labour Preparation Pack - Capsules - The Birth Store-The Birth Store","id":27007587942589,"position":1,"preview_image":{"aspect_ratio":1.0,"height":2048,"width":2048,"src":"\/\/www.thebirthstore.com.au\/cdn\/shop\/files\/labour-preparation-pack-capsules-709119.jpg?v=1714967975"},"aspect_ratio":1.0,"height":2048,"media_type":"image","src":"\/\/www.thebirthstore.com.au\/cdn\/shop\/files\/labour-preparation-pack-capsules-709119.jpg?v=1714967975","width":2048},{"alt":"Labour Preparation Pack - Capsules - The Birth Store-The Birth Store","id":27007587975357,"position":2,"preview_image":{"aspect_ratio":0.667,"height":2048,"width":1365,"src":"\/\/www.thebirthstore.com.au\/cdn\/shop\/files\/labour-preparation-pack-capsules-332316.jpg?v=1714967975"},"aspect_ratio":0.667,"height":2048,"media_type":"image","src":"\/\/www.thebirthstore.com.au\/cdn\/shop\/files\/labour-preparation-pack-capsules-332316.jpg?v=1714967975","width":1365}],"requires_selling_plan":false,"selling_plan_groups":[],"content":"\u003cp\u003e\u003cmeta charset=\"utf-8\"\u003e\u003cspan\u003eThere are so many wonderful products on the market now, to help you prepare for your labour and birth. We have created a pack with a couple of our favourite products from small Australian businesses to aid you in preparing for arguably the most memorable day of your life - the one pack to fill all your labour preparation needs!\u003c\/span\u003e\u003c\/p\u003e"},"options":[{"name":"Title","position":1,"values":["Default Title"]}],"custom_metafields":{},"metafields":{"badge":"\u003cdiv style='display:none' class='jdgm-prev-badge' data-average-rating='0.00' data-number-of-reviews='0' data-number-of-questions='0'\u003e \u003cspan class='jdgm-prev-badge__stars' data-score='0.00' tabindex='0' aria-label='0.00 stars' role='button'\u003e \u003cspan class='jdgm-star jdgm--off'\u003e\u003c\/span\u003e\u003cspan class='jdgm-star jdgm--off'\u003e\u003c\/span\u003e\u003cspan class='jdgm-star jdgm--off'\u003e\u003c\/span\u003e\u003cspan class='jdgm-star jdgm--off'\u003e\u003c\/span\u003e\u003cspan class='jdgm-star jdgm--off'\u003e\u003c\/span\u003e \u003c\/span\u003e \u003cspan class='jdgm-prev-badge__text'\u003e No reviews \u003c\/span\u003e \u003c\/div\u003e","widget":"\u003cdiv class='jdgm-rev-widg' data-updated-at='2025-06-13T16:13:40Z' data-average-rating='0.00' data-number-of-reviews='0' data-number-of-questions='0'\u003e \u003cstyle class='jdgm-temp-hiding-style'\u003e.jdgm-rev-widg{ display: none }\u003c\/style\u003e \u003cdiv class='jdgm-rev-widg__header'\u003e \u003ch2 class='jdgm-rev-widg__title'\u003eCustomer Reviews\u003c\/h2\u003e \u003cdiv class='jdgm-rev-widg__summary'\u003e \u003cdiv class='jdgm-rev-widg__summary-stars' aria-label='Average rating is 0.00 stars' role='img'\u003e \u003cspan class='jdgm-star jdgm--off'\u003e\u003c\/span\u003e\u003cspan class='jdgm-star jdgm--off'\u003e\u003c\/span\u003e\u003cspan class='jdgm-star jdgm--off'\u003e\u003c\/span\u003e\u003cspan class='jdgm-star jdgm--off'\u003e\u003c\/span\u003e\u003cspan class='jdgm-star jdgm--off'\u003e\u003c\/span\u003e \u003c\/div\u003e \u003cdiv class='jdgm-rev-widg__summary-text'\u003eBe the first to write a review\u003c\/div\u003e \u003c\/div\u003e \u003ca style='display: none' href='#' class='jdgm-write-rev-link' role='button'\u003eWrite a review\u003c\/a\u003e \u003cdiv class='jdgm-histogram jdgm-temp-hidden'\u003e \u003cdiv class='jdgm-histogram__row' data-rating='5' data-frequency='0' data-percentage='0'\u003e \u003cdiv class='jdgm-histogram__star' role='button' aria-label=\"0% (0) reviews with 5 star rating\" tabindex='0' \u003e\u003cspan class='jdgm-star jdgm--on'\u003e\u003c\/span\u003e\u003cspan class='jdgm-star jdgm--on'\u003e\u003c\/span\u003e\u003cspan class='jdgm-star jdgm--on'\u003e\u003c\/span\u003e\u003cspan class='jdgm-star jdgm--on'\u003e\u003c\/span\u003e\u003cspan class='jdgm-star jdgm--on'\u003e\u003c\/span\u003e\u003c\/div\u003e \u003cdiv class='jdgm-histogram__bar'\u003e \u003cdiv class='jdgm-histogram__bar-content' style='width: 0%;'\u003e \u003c\/div\u003e \u003c\/div\u003e \u003cdiv class='jdgm-histogram__percentage'\u003e0%\u003c\/div\u003e \u003cdiv class='jdgm-histogram__frequency'\u003e(0)\u003c\/div\u003e \u003c\/div\u003e \u003cdiv class='jdgm-histogram__row' data-rating='4' data-frequency='0' data-percentage='0'\u003e \u003cdiv class='jdgm-histogram__star' role='button' aria-label=\"0% (0) reviews with 4 star rating\" tabindex='0' \u003e\u003cspan class='jdgm-star jdgm--on'\u003e\u003c\/span\u003e\u003cspan class='jdgm-star jdgm--on'\u003e\u003c\/span\u003e\u003cspan class='jdgm-star jdgm--on'\u003e\u003c\/span\u003e\u003cspan class='jdgm-star jdgm--on'\u003e\u003c\/span\u003e\u003cspan class='jdgm-star jdgm--off'\u003e\u003c\/span\u003e\u003c\/div\u003e \u003cdiv class='jdgm-histogram__bar'\u003e \u003cdiv class='jdgm-histogram__bar-content' style='width: 0%;'\u003e \u003c\/div\u003e \u003c\/div\u003e \u003cdiv class='jdgm-histogram__percentage'\u003e0%\u003c\/div\u003e \u003cdiv class='jdgm-histogram__frequency'\u003e(0)\u003c\/div\u003e \u003c\/div\u003e \u003cdiv class='jdgm-histogram__row' data-rating='3' data-frequency='0' data-percentage='0'\u003e \u003cdiv class='jdgm-histogram__star' role='button' aria-label=\"0% (0) reviews with 3 star rating\" tabindex='0' \u003e\u003cspan class='jdgm-star jdgm--on'\u003e\u003c\/span\u003e\u003cspan class='jdgm-star jdgm--on'\u003e\u003c\/span\u003e\u003cspan class='jdgm-star jdgm--on'\u003e\u003c\/span\u003e\u003cspan class='jdgm-star jdgm--off'\u003e\u003c\/span\u003e\u003cspan class='jdgm-star jdgm--off'\u003e\u003c\/span\u003e\u003c\/div\u003e \u003cdiv class='jdgm-histogram__bar'\u003e \u003cdiv class='jdgm-histogram__bar-content' style='width: 0%;'\u003e \u003c\/div\u003e \u003c\/div\u003e \u003cdiv class='jdgm-histogram__percentage'\u003e0%\u003c\/div\u003e \u003cdiv class='jdgm-histogram__frequency'\u003e(0)\u003c\/div\u003e \u003c\/div\u003e \u003cdiv class='jdgm-histogram__row' data-rating='2' data-frequency='0' data-percentage='0'\u003e \u003cdiv class='jdgm-histogram__star' role='button' aria-label=\"0% (0) reviews with 2 star rating\" tabindex='0' \u003e\u003cspan class='jdgm-star jdgm--on'\u003e\u003c\/span\u003e\u003cspan class='jdgm-star jdgm--on'\u003e\u003c\/span\u003e\u003cspan class='jdgm-star jdgm--off'\u003e\u003c\/span\u003e\u003cspan class='jdgm-star jdgm--off'\u003e\u003c\/span\u003e\u003cspan class='jdgm-star jdgm--off'\u003e\u003c\/span\u003e\u003c\/div\u003e \u003cdiv class='jdgm-histogram__bar'\u003e \u003cdiv class='jdgm-histogram__bar-content' style='width: 0%;'\u003e \u003c\/div\u003e \u003c\/div\u003e \u003cdiv class='jdgm-histogram__percentage'\u003e0%\u003c\/div\u003e \u003cdiv class='jdgm-histogram__frequency'\u003e(0)\u003c\/div\u003e \u003c\/div\u003e \u003cdiv class='jdgm-histogram__row' data-rating='1' data-frequency='0' data-percentage='0'\u003e \u003cdiv class='jdgm-histogram__star' role='button' aria-label=\"0% (0) reviews with 1 star rating\" tabindex='0' \u003e\u003cspan class='jdgm-star jdgm--on'\u003e\u003c\/span\u003e\u003cspan class='jdgm-star jdgm--off'\u003e\u003c\/span\u003e\u003cspan class='jdgm-star jdgm--off'\u003e\u003c\/span\u003e\u003cspan class='jdgm-star jdgm--off'\u003e\u003c\/span\u003e\u003cspan class='jdgm-star jdgm--off'\u003e\u003c\/span\u003e\u003c\/div\u003e \u003cdiv class='jdgm-histogram__bar'\u003e \u003cdiv class='jdgm-histogram__bar-content' style='width: 0%;'\u003e \u003c\/div\u003e \u003c\/div\u003e \u003cdiv class='jdgm-histogram__percentage'\u003e0%\u003c\/div\u003e \u003cdiv class='jdgm-histogram__frequency'\u003e(0)\u003c\/div\u003e \u003c\/div\u003e \u003cdiv class='jdgm-histogram__row jdgm-histogram__clear-filter' data-rating=null tabindex='0'\u003e\u003c\/div\u003e \u003c\/div\u003e \u003cdiv class='jdgm-rev-widg__sort-wrapper'\u003e\u003c\/div\u003e \u003c\/div\u003e \u003cdiv class='jdgm-rev-widg__body'\u003e \u003cdiv class='jdgm-rev-widg__reviews'\u003e\u003c\/div\u003e \u003cdiv class='jdgm-paginate' data-per-page='10' data-url='https:\/\/api.judge.me\/reviews\/reviews_for_widget' style=\"display: none;\"\u003e\u003c\/div\u003e \u003c\/div\u003e \u003cdiv class='jdgm-rev-widg__paginate-spinner-wrapper'\u003e \u003cdiv class='jdgm-spinner'\u003e\u003c\/div\u003e \u003c\/div\u003e \u003c\/div\u003e"},"collections":[{"id":283018526909,"handle":"bundles","title":"Bundles","updated_at":"2025-11-18T20:29:11+08:00","body_html":"\u003cp\u003eMake shopping for your bump, birth and beyond easier with our bundle packs. With a pack available for every stage, you can get everything you need with no fuss and with our bundle packs, you even save money.\u003c\/p\u003e","published_at":"2022-02-01T22:33:09+08:00","sort_order":"best-selling","template_suffix":"swaddles-collection","disjunctive":false,"rules":[{"column":"tag","relation":"equals","condition":"Bundles"}],"published_scope":"global","image":{"created_at":"2024-05-06T11:59:39+08:00","alt":"Bundles - The Birth Store","width":2048,"height":1365,"src":"\/\/www.thebirthstore.com.au\/cdn\/shop\/collections\/bundles-299009.jpg?v=1714967980"}},{"id":261657460925,"handle":"buy","title":"Buy","updated_at":"2025-12-28T20:10:01+08:00","body_html":"\u003cp\u003eBrowse all of our pregnancy, labour \u0026amp; birth, postpartum and baby essentials here.\u003cbr\u003e\u003c\/p\u003e\n\u003cp\u003e\u003cspan\u003eYou can even buy now and pay later with Afterpay!\u003c\/span\u003e\u003c\/p\u003e","published_at":"2021-03-10T12:05:31+08:00","sort_order":"best-selling","template_suffix":"shop-all-collection","disjunctive":false,"rules":[{"column":"title","relation":"not_contains","condition":"Hire"}],"published_scope":"global","image":{"created_at":"2024-05-06T11:59:42+08:00","alt":"Buy - The Birth Store","width":2048,"height":2048,"src":"\/\/www.thebirthstore.com.au\/cdn\/shop\/collections\/buy-964856.jpg?v=1714967982"}},{"id":281712558269,"handle":"labour-aids","title":"Labour Aids","updated_at":"2025-12-28T20:10:01+08:00","body_html":"","published_at":"2021-12-20T14:22:16+08:00","sort_order":"best-selling","template_suffix":"labour-aids-collection","disjunctive":false,"rules":[{"column":"tag","relation":"equals","condition":"Labour Progression"}],"published_scope":"global","image":{"created_at":"2024-05-06T12:00:11+08:00","alt":"Labour Aids - The Birth Store","width":1365,"height":2048,"src":"\/\/www.thebirthstore.com.au\/cdn\/shop\/collections\/labour-aids-211824.jpg?v=1714968012"}},{"id":281712525501,"handle":"labour-preparation","title":"Labour Preparation","updated_at":"2025-12-28T20:10:01+08:00","body_html":"","published_at":"2021-12-20T14:20:12+08:00","sort_order":"best-selling","template_suffix":"labour-preparation-collec","disjunctive":false,"rules":[{"column":"tag","relation":"equals","condition":"Labour Preparation"}],"published_scope":"global","image":{"created_at":"2024-05-06T12:00:13+08:00","alt":"Labour Preparation - The Birth Store","width":1024,"height":1536,"src":"\/\/www.thebirthstore.com.au\/cdn\/shop\/collections\/labour-preparation-271961.jpg?v=1714968013"}},{"id":261658149053,"handle":"pregnancy-and-maternity-products","title":"Pregnancy","updated_at":"2025-12-28T20:10:01+08:00","body_html":"\u003cp\u003eShop your pregnancy essentials below. Looking for something we don't currently stock? Please reach out and let us know.\u003cbr\u003e\u003c\/p\u003e\n\u003cp\u003e\u003cspan\u003eYou can even buy now and pay later with Afterpay!\u003c\/span\u003e\u003c\/p\u003e","published_at":"2021-03-10T12:34:22+08:00","sort_order":"best-selling","template_suffix":"pregnancy-collection","disjunctive":false,"rules":[{"column":"tag","relation":"equals","condition":"Pregnancy"}],"published_scope":"global","image":{"created_at":"2024-05-06T12:00:40+08:00","alt":"Pregnancy - The Birth Store","width":1024,"height":1536,"src":"\/\/www.thebirthstore.com.au\/cdn\/shop\/collections\/pregnancy-899677.jpg?v=1714968040"}},{"id":310045933757,"handle":"shop-all-sale","title":"Shop All Sale","updated_at":"2025-12-28T20:10:01+08:00","body_html":"","published_at":"2024-11-12T13:22:43+08:00","sort_order":"alpha-asc","template_suffix":"","disjunctive":true,"rules":[{"column":"tag","relation":"equals","condition":"Bundles"},{"column":"vendor","relation":"equals","condition":"Franjos Kitchen"},{"column":"vendor","relation":"equals","condition":"Adored Illustrations"},{"column":"vendor","relation":"equals","condition":"Amazing Oils"},{"column":"vendor","relation":"equals","condition":"Ice Ice Booby"},{"column":"vendor","relation":"equals","condition":"Made to Milk"},{"column":"vendor","relation":"equals","condition":"Milky Goodness"},{"column":"vendor","relation":"equals","condition":"Seasons of Mama"},{"column":"vendor","relation":"equals","condition":"Silverette"},{"column":"vendor","relation":"equals","condition":"Snuggle Hunny"},{"column":"vendor","relation":"equals","condition":"Yung Bod"},{"column":"vendor","relation":"equals","condition":"Bare Love"},{"column":"vendor","relation":"equals","condition":"Haakaa"},{"column":"vendor","relation":"equals","condition":"Mere Botanicals"},{"column":"vendor","relation":"equals","condition":"The Birth Store Hire"},{"column":"vendor","relation":"equals","condition":"The Birth Store"}],"published_scope":"global","image":{"created_at":"2024-11-13T10:58:16+08:00","alt":"Shop All Sale - The Birth Store","width":2048,"height":1365,"src":"\/\/www.thebirthstore.com.au\/cdn\/shop\/collections\/shop-all-sale-297361.jpg?v=1731466697"}}]}
[{"alt":"Labour Preparation Pack - Capsules - The Birth Store-The Birth Store","id":27007587942589,"position":1,"preview_image":{"aspect_ratio":1.0,"height":2048,"width":2048,"src":"\/\/www.thebirthstore.com.au\/cdn\/shop\/files\/labour-preparation-pack-capsules-709119.jpg?v=1714967975"},"aspect_ratio":1.0,"height":2048,"media_type":"image","src":"\/\/www.thebirthstore.com.au\/cdn\/shop\/files\/labour-preparation-pack-capsules-709119.jpg?v=1714967975","width":2048},{"alt":"Labour Preparation Pack - Capsules - The Birth Store-The Birth Store","id":27007587975357,"position":2,"preview_image":{"aspect_ratio":0.667,"height":2048,"width":1365,"src":"\/\/www.thebirthstore.com.au\/cdn\/shop\/files\/labour-preparation-pack-capsules-332316.jpg?v=1714967975"},"aspect_ratio":0.667,"height":2048,"media_type":"image","src":"\/\/www.thebirthstore.com.au\/cdn\/shop\/files\/labour-preparation-pack-capsules-332316.jpg?v=1714967975","width":1365}]
{"item":{"id":7513280151741,"title":"Labour Preparation Pack - Tea","handle":"labour-preparation-pack-tea","description":"\u003cp\u003e\u003cmeta charset=\"utf-8\"\u003e\u003cspan\u003eThere are so many wonderful products on the market now, to help you prepare for your labour and birth. We have created a pack with a couple of our favourite products from small Australian businesses to aid you in preparing for arguably the most memorable day of your life - the one pack to fill all your labour preparation needs!\u003c\/span\u003e\u003c\/p\u003e","published_at":"2023-10-03T13:54:19+08:00","created_at":"2023-10-03T13:29:12+08:00","vendor":"Bundles","type":"","tags":["Baby Shower Gifts","Bundles","Labour Preparation","Labour Progression","Pregnancy"],"price":5416,"price_min":5416,"price_max":5416,"available":true,"price_varies":false,"compare_at_price":6155,"compare_at_price_min":6155,"compare_at_price_max":6155,"compare_at_price_varies":false,"variants":[{"id":43056984981693,"title":"Default Title","option1":"Default Title","option2":null,"option3":null,"sku":"","requires_shipping":true,"taxable":false,"featured_image":null,"available":true,"name":"Labour Preparation Pack - Tea","public_title":null,"options":["Default Title"],"price":5416,"weight":333,"compare_at_price":6155,"inventory_management":"shopify","barcode":"09384893","requires_selling_plan":false,"selling_plan_allocations":[]}],"images":["\/\/www.thebirthstore.com.au\/cdn\/shop\/files\/labour-preparation-pack-tea-826901.jpg?v=1714967975","\/\/www.thebirthstore.com.au\/cdn\/shop\/files\/0J3A7064-Edit-Edit_b93f3f6f-63da-463e-aa28-c91d68b5aba8.jpg?v=1701351433"],"featured_image":"\/\/www.thebirthstore.com.au\/cdn\/shop\/files\/labour-preparation-pack-tea-826901.jpg?v=1714967975","options":["Title"],"media":[{"alt":"Labour Preparation Pack - Tea - The Birth Store-The Birth Store","id":27007587549373,"position":1,"preview_image":{"aspect_ratio":1.0,"height":2048,"width":2048,"src":"\/\/www.thebirthstore.com.au\/cdn\/shop\/files\/labour-preparation-pack-tea-826901.jpg?v=1714967975"},"aspect_ratio":1.0,"height":2048,"media_type":"image","src":"\/\/www.thebirthstore.com.au\/cdn\/shop\/files\/labour-preparation-pack-tea-826901.jpg?v=1714967975","width":2048},{"alt":null,"id":26241934950589,"position":2,"preview_image":{"aspect_ratio":0.667,"height":3600,"width":2400,"src":"\/\/www.thebirthstore.com.au\/cdn\/shop\/files\/0J3A7064-Edit-Edit_b93f3f6f-63da-463e-aa28-c91d68b5aba8.jpg?v=1701351433"},"aspect_ratio":0.667,"height":3600,"media_type":"image","src":"\/\/www.thebirthstore.com.au\/cdn\/shop\/files\/0J3A7064-Edit-Edit_b93f3f6f-63da-463e-aa28-c91d68b5aba8.jpg?v=1701351433","width":2400}],"requires_selling_plan":false,"selling_plan_groups":[],"content":"\u003cp\u003e\u003cmeta charset=\"utf-8\"\u003e\u003cspan\u003eThere are so many wonderful products on the market now, to help you prepare for your labour and birth. We have created a pack with a couple of our favourite products from small Australian businesses to aid you in preparing for arguably the most memorable day of your life - the one pack to fill all your labour preparation needs!\u003c\/span\u003e\u003c\/p\u003e"},"options":[{"name":"Title","position":1,"values":["Default Title"]}],"custom_metafields":{},"metafields":{"badge":"\u003cdiv style='display:none' class='jdgm-prev-badge' data-average-rating='0.00' data-number-of-reviews='0' data-number-of-questions='0'\u003e \u003cspan class='jdgm-prev-badge__stars' data-score='0.00' tabindex='0' aria-label='0.00 stars' role='button'\u003e \u003cspan class='jdgm-star jdgm--off'\u003e\u003c\/span\u003e\u003cspan class='jdgm-star jdgm--off'\u003e\u003c\/span\u003e\u003cspan class='jdgm-star jdgm--off'\u003e\u003c\/span\u003e\u003cspan class='jdgm-star jdgm--off'\u003e\u003c\/span\u003e\u003cspan class='jdgm-star jdgm--off'\u003e\u003c\/span\u003e \u003c\/span\u003e \u003cspan class='jdgm-prev-badge__text'\u003e No reviews \u003c\/span\u003e \u003c\/div\u003e","widget":"\u003cdiv class='jdgm-rev-widg' data-updated-at='2025-06-13T16:13:40Z' data-average-rating='0.00' data-number-of-reviews='0' data-number-of-questions='0'\u003e \u003cstyle class='jdgm-temp-hiding-style'\u003e.jdgm-rev-widg{ display: none }\u003c\/style\u003e \u003cdiv class='jdgm-rev-widg__header'\u003e \u003ch2 class='jdgm-rev-widg__title'\u003eCustomer Reviews\u003c\/h2\u003e \u003cdiv class='jdgm-rev-widg__summary'\u003e \u003cdiv class='jdgm-rev-widg__summary-stars' aria-label='Average rating is 0.00 stars' role='img'\u003e \u003cspan class='jdgm-star jdgm--off'\u003e\u003c\/span\u003e\u003cspan class='jdgm-star jdgm--off'\u003e\u003c\/span\u003e\u003cspan class='jdgm-star jdgm--off'\u003e\u003c\/span\u003e\u003cspan class='jdgm-star jdgm--off'\u003e\u003c\/span\u003e\u003cspan class='jdgm-star jdgm--off'\u003e\u003c\/span\u003e \u003c\/div\u003e \u003cdiv class='jdgm-rev-widg__summary-text'\u003eBe the first to write a review\u003c\/div\u003e \u003c\/div\u003e \u003ca style='display: none' href='#' class='jdgm-write-rev-link' role='button'\u003eWrite a review\u003c\/a\u003e \u003cdiv class='jdgm-histogram jdgm-temp-hidden'\u003e \u003cdiv class='jdgm-histogram__row' data-rating='5' data-frequency='0' data-percentage='0'\u003e \u003cdiv class='jdgm-histogram__star' role='button' aria-label=\"0% (0) reviews with 5 star rating\" tabindex='0' \u003e\u003cspan class='jdgm-star jdgm--on'\u003e\u003c\/span\u003e\u003cspan class='jdgm-star jdgm--on'\u003e\u003c\/span\u003e\u003cspan class='jdgm-star jdgm--on'\u003e\u003c\/span\u003e\u003cspan class='jdgm-star jdgm--on'\u003e\u003c\/span\u003e\u003cspan class='jdgm-star jdgm--on'\u003e\u003c\/span\u003e\u003c\/div\u003e \u003cdiv class='jdgm-histogram__bar'\u003e \u003cdiv class='jdgm-histogram__bar-content' style='width: 0%;'\u003e \u003c\/div\u003e \u003c\/div\u003e \u003cdiv class='jdgm-histogram__percentage'\u003e0%\u003c\/div\u003e \u003cdiv class='jdgm-histogram__frequency'\u003e(0)\u003c\/div\u003e \u003c\/div\u003e \u003cdiv class='jdgm-histogram__row' data-rating='4' data-frequency='0' data-percentage='0'\u003e \u003cdiv class='jdgm-histogram__star' role='button' aria-label=\"0% (0) reviews with 4 star rating\" tabindex='0' \u003e\u003cspan class='jdgm-star jdgm--on'\u003e\u003c\/span\u003e\u003cspan class='jdgm-star jdgm--on'\u003e\u003c\/span\u003e\u003cspan class='jdgm-star jdgm--on'\u003e\u003c\/span\u003e\u003cspan class='jdgm-star jdgm--on'\u003e\u003c\/span\u003e\u003cspan class='jdgm-star jdgm--off'\u003e\u003c\/span\u003e\u003c\/div\u003e \u003cdiv class='jdgm-histogram__bar'\u003e \u003cdiv class='jdgm-histogram__bar-content' style='width: 0%;'\u003e \u003c\/div\u003e \u003c\/div\u003e \u003cdiv class='jdgm-histogram__percentage'\u003e0%\u003c\/div\u003e \u003cdiv class='jdgm-histogram__frequency'\u003e(0)\u003c\/div\u003e \u003c\/div\u003e \u003cdiv class='jdgm-histogram__row' data-rating='3' data-frequency='0' data-percentage='0'\u003e \u003cdiv class='jdgm-histogram__star' role='button' aria-label=\"0% (0) reviews with 3 star rating\" tabindex='0' \u003e\u003cspan class='jdgm-star jdgm--on'\u003e\u003c\/span\u003e\u003cspan class='jdgm-star jdgm--on'\u003e\u003c\/span\u003e\u003cspan class='jdgm-star jdgm--on'\u003e\u003c\/span\u003e\u003cspan class='jdgm-star jdgm--off'\u003e\u003c\/span\u003e\u003cspan class='jdgm-star jdgm--off'\u003e\u003c\/span\u003e\u003c\/div\u003e \u003cdiv class='jdgm-histogram__bar'\u003e \u003cdiv class='jdgm-histogram__bar-content' style='width: 0%;'\u003e \u003c\/div\u003e \u003c\/div\u003e \u003cdiv class='jdgm-histogram__percentage'\u003e0%\u003c\/div\u003e \u003cdiv class='jdgm-histogram__frequency'\u003e(0)\u003c\/div\u003e \u003c\/div\u003e \u003cdiv class='jdgm-histogram__row' data-rating='2' data-frequency='0' data-percentage='0'\u003e \u003cdiv class='jdgm-histogram__star' role='button' aria-label=\"0% (0) reviews with 2 star rating\" tabindex='0' \u003e\u003cspan class='jdgm-star jdgm--on'\u003e\u003c\/span\u003e\u003cspan class='jdgm-star jdgm--on'\u003e\u003c\/span\u003e\u003cspan class='jdgm-star jdgm--off'\u003e\u003c\/span\u003e\u003cspan class='jdgm-star jdgm--off'\u003e\u003c\/span\u003e\u003cspan class='jdgm-star jdgm--off'\u003e\u003c\/span\u003e\u003c\/div\u003e \u003cdiv class='jdgm-histogram__bar'\u003e \u003cdiv class='jdgm-histogram__bar-content' style='width: 0%;'\u003e \u003c\/div\u003e \u003c\/div\u003e \u003cdiv class='jdgm-histogram__percentage'\u003e0%\u003c\/div\u003e \u003cdiv class='jdgm-histogram__frequency'\u003e(0)\u003c\/div\u003e \u003c\/div\u003e \u003cdiv class='jdgm-histogram__row' data-rating='1' data-frequency='0' data-percentage='0'\u003e \u003cdiv class='jdgm-histogram__star' role='button' aria-label=\"0% (0) reviews with 1 star rating\" tabindex='0' \u003e\u003cspan class='jdgm-star jdgm--on'\u003e\u003c\/span\u003e\u003cspan class='jdgm-star jdgm--off'\u003e\u003c\/span\u003e\u003cspan class='jdgm-star jdgm--off'\u003e\u003c\/span\u003e\u003cspan class='jdgm-star jdgm--off'\u003e\u003c\/span\u003e\u003cspan class='jdgm-star jdgm--off'\u003e\u003c\/span\u003e\u003c\/div\u003e \u003cdiv class='jdgm-histogram__bar'\u003e \u003cdiv class='jdgm-histogram__bar-content' style='width: 0%;'\u003e \u003c\/div\u003e \u003c\/div\u003e \u003cdiv class='jdgm-histogram__percentage'\u003e0%\u003c\/div\u003e \u003cdiv class='jdgm-histogram__frequency'\u003e(0)\u003c\/div\u003e \u003c\/div\u003e \u003cdiv class='jdgm-histogram__row jdgm-histogram__clear-filter' data-rating=null tabindex='0'\u003e\u003c\/div\u003e \u003c\/div\u003e \u003cdiv class='jdgm-rev-widg__sort-wrapper'\u003e\u003c\/div\u003e \u003c\/div\u003e \u003cdiv class='jdgm-rev-widg__body'\u003e \u003cdiv class='jdgm-rev-widg__reviews'\u003e\u003c\/div\u003e \u003cdiv class='jdgm-paginate' data-per-page='10' data-url='https:\/\/api.judge.me\/reviews\/reviews_for_widget' style=\"display: none;\"\u003e\u003c\/div\u003e \u003c\/div\u003e \u003cdiv class='jdgm-rev-widg__paginate-spinner-wrapper'\u003e \u003cdiv class='jdgm-spinner'\u003e\u003c\/div\u003e \u003c\/div\u003e \u003c\/div\u003e"},"collections":[{"id":283018526909,"handle":"bundles","title":"Bundles","updated_at":"2025-11-18T20:29:11+08:00","body_html":"\u003cp\u003eMake shopping for your bump, birth and beyond easier with our bundle packs. With a pack available for every stage, you can get everything you need with no fuss and with our bundle packs, you even save money.\u003c\/p\u003e","published_at":"2022-02-01T22:33:09+08:00","sort_order":"best-selling","template_suffix":"swaddles-collection","disjunctive":false,"rules":[{"column":"tag","relation":"equals","condition":"Bundles"}],"published_scope":"global","image":{"created_at":"2024-05-06T11:59:39+08:00","alt":"Bundles - The Birth Store","width":2048,"height":1365,"src":"\/\/www.thebirthstore.com.au\/cdn\/shop\/collections\/bundles-299009.jpg?v=1714967980"}},{"id":261657460925,"handle":"buy","title":"Buy","updated_at":"2025-12-28T20:10:01+08:00","body_html":"\u003cp\u003eBrowse all of our pregnancy, labour \u0026amp; birth, postpartum and baby essentials here.\u003cbr\u003e\u003c\/p\u003e\n\u003cp\u003e\u003cspan\u003eYou can even buy now and pay later with Afterpay!\u003c\/span\u003e\u003c\/p\u003e","published_at":"2021-03-10T12:05:31+08:00","sort_order":"best-selling","template_suffix":"shop-all-collection","disjunctive":false,"rules":[{"column":"title","relation":"not_contains","condition":"Hire"}],"published_scope":"global","image":{"created_at":"2024-05-06T11:59:42+08:00","alt":"Buy - The Birth Store","width":2048,"height":2048,"src":"\/\/www.thebirthstore.com.au\/cdn\/shop\/collections\/buy-964856.jpg?v=1714967982"}},{"id":281712558269,"handle":"labour-aids","title":"Labour Aids","updated_at":"2025-12-28T20:10:01+08:00","body_html":"","published_at":"2021-12-20T14:22:16+08:00","sort_order":"best-selling","template_suffix":"labour-aids-collection","disjunctive":false,"rules":[{"column":"tag","relation":"equals","condition":"Labour Progression"}],"published_scope":"global","image":{"created_at":"2024-05-06T12:00:11+08:00","alt":"Labour Aids - The Birth Store","width":1365,"height":2048,"src":"\/\/www.thebirthstore.com.au\/cdn\/shop\/collections\/labour-aids-211824.jpg?v=1714968012"}},{"id":281712525501,"handle":"labour-preparation","title":"Labour Preparation","updated_at":"2025-12-28T20:10:01+08:00","body_html":"","published_at":"2021-12-20T14:20:12+08:00","sort_order":"best-selling","template_suffix":"labour-preparation-collec","disjunctive":false,"rules":[{"column":"tag","relation":"equals","condition":"Labour Preparation"}],"published_scope":"global","image":{"created_at":"2024-05-06T12:00:13+08:00","alt":"Labour Preparation - The Birth Store","width":1024,"height":1536,"src":"\/\/www.thebirthstore.com.au\/cdn\/shop\/collections\/labour-preparation-271961.jpg?v=1714968013"}},{"id":261658149053,"handle":"pregnancy-and-maternity-products","title":"Pregnancy","updated_at":"2025-12-28T20:10:01+08:00","body_html":"\u003cp\u003eShop your pregnancy essentials below. Looking for something we don't currently stock? Please reach out and let us know.\u003cbr\u003e\u003c\/p\u003e\n\u003cp\u003e\u003cspan\u003eYou can even buy now and pay later with Afterpay!\u003c\/span\u003e\u003c\/p\u003e","published_at":"2021-03-10T12:34:22+08:00","sort_order":"best-selling","template_suffix":"pregnancy-collection","disjunctive":false,"rules":[{"column":"tag","relation":"equals","condition":"Pregnancy"}],"published_scope":"global","image":{"created_at":"2024-05-06T12:00:40+08:00","alt":"Pregnancy - The Birth Store","width":1024,"height":1536,"src":"\/\/www.thebirthstore.com.au\/cdn\/shop\/collections\/pregnancy-899677.jpg?v=1714968040"}},{"id":310045933757,"handle":"shop-all-sale","title":"Shop All Sale","updated_at":"2025-12-28T20:10:01+08:00","body_html":"","published_at":"2024-11-12T13:22:43+08:00","sort_order":"alpha-asc","template_suffix":"","disjunctive":true,"rules":[{"column":"tag","relation":"equals","condition":"Bundles"},{"column":"vendor","relation":"equals","condition":"Franjos Kitchen"},{"column":"vendor","relation":"equals","condition":"Adored Illustrations"},{"column":"vendor","relation":"equals","condition":"Amazing Oils"},{"column":"vendor","relation":"equals","condition":"Ice Ice Booby"},{"column":"vendor","relation":"equals","condition":"Made to Milk"},{"column":"vendor","relation":"equals","condition":"Milky Goodness"},{"column":"vendor","relation":"equals","condition":"Seasons of Mama"},{"column":"vendor","relation":"equals","condition":"Silverette"},{"column":"vendor","relation":"equals","condition":"Snuggle Hunny"},{"column":"vendor","relation":"equals","condition":"Yung Bod"},{"column":"vendor","relation":"equals","condition":"Bare Love"},{"column":"vendor","relation":"equals","condition":"Haakaa"},{"column":"vendor","relation":"equals","condition":"Mere Botanicals"},{"column":"vendor","relation":"equals","condition":"The Birth Store Hire"},{"column":"vendor","relation":"equals","condition":"The Birth Store"}],"published_scope":"global","image":{"created_at":"2024-11-13T10:58:16+08:00","alt":"Shop All Sale - The Birth Store","width":2048,"height":1365,"src":"\/\/www.thebirthstore.com.au\/cdn\/shop\/collections\/shop-all-sale-297361.jpg?v=1731466697"}}]}
[{"alt":"Labour Preparation Pack - Tea - The Birth Store-The Birth Store","id":27007587549373,"position":1,"preview_image":{"aspect_ratio":1.0,"height":2048,"width":2048,"src":"\/\/www.thebirthstore.com.au\/cdn\/shop\/files\/labour-preparation-pack-tea-826901.jpg?v=1714967975"},"aspect_ratio":1.0,"height":2048,"media_type":"image","src":"\/\/www.thebirthstore.com.au\/cdn\/shop\/files\/labour-preparation-pack-tea-826901.jpg?v=1714967975","width":2048},{"alt":null,"id":26241934950589,"position":2,"preview_image":{"aspect_ratio":0.667,"height":3600,"width":2400,"src":"\/\/www.thebirthstore.com.au\/cdn\/shop\/files\/0J3A7064-Edit-Edit_b93f3f6f-63da-463e-aa28-c91d68b5aba8.jpg?v=1701351433"},"aspect_ratio":0.667,"height":3600,"media_type":"image","src":"\/\/www.thebirthstore.com.au\/cdn\/shop\/files\/0J3A7064-Edit-Edit_b93f3f6f-63da-463e-aa28-c91d68b5aba8.jpg?v=1701351433","width":2400}]
{"item":{"id":8009000714429,"title":"Labour TENS Machine Hire","handle":"labour-birth-tens-machine-hire","description":"","published_at":"2025-05-21T13:50:10+08:00","created_at":"2025-05-21T13:50:10+08:00","vendor":"The Birth Store","type":"","tags":["Birth","Hospital Bag","Mum","Pain Relief","TENS Hire"],"price":4900,"price_min":4900,"price_max":8900,"available":true,"price_varies":true,"compare_at_price":null,"compare_at_price_min":0,"compare_at_price_max":0,"compare_at_price_varies":false,"variants":[{"id":45080046010557,"title":"Elle TENS \/ 4 Weeks","option1":"Elle TENS","option2":"4 Weeks","option3":null,"sku":"","requires_shipping":true,"taxable":false,"featured_image":{"id":38194356781245,"product_id":8009000714429,"position":6,"created_at":"2025-08-29T13:56:08+08:00","updated_at":"2025-08-30T07:57:06+08:00","alt":"Labour TENS Machine Hire - The Birth Store - The Birth Store","width":1080,"height":1080,"src":"\/\/www.thebirthstore.com.au\/cdn\/shop\/files\/labour-tens-machine-hire-6971704.png?v=1756511826","variant_ids":[45080046010557,45080046043325,45080046076093]},"available":true,"name":"Labour TENS Machine Hire - Elle TENS \/ 4 Weeks","public_title":"Elle TENS \/ 4 Weeks","options":["Elle TENS","4 Weeks"],"price":4900,"weight":350,"compare_at_price":null,"inventory_management":"shopify","barcode":"46010557","featured_media":{"alt":"Labour TENS Machine Hire - The Birth Store - The Birth Store","id":29468042821821,"position":8,"preview_image":{"aspect_ratio":1.0,"height":1080,"width":1080,"src":"\/\/www.thebirthstore.com.au\/cdn\/shop\/files\/labour-tens-machine-hire-6971704.png?v=1756511826"}},"requires_selling_plan":false,"selling_plan_allocations":[]},{"id":45080046043325,"title":"Elle TENS \/ 6 Weeks","option1":"Elle TENS","option2":"6 Weeks","option3":null,"sku":"","requires_shipping":true,"taxable":false,"featured_image":{"id":38194356781245,"product_id":8009000714429,"position":6,"created_at":"2025-08-29T13:56:08+08:00","updated_at":"2025-08-30T07:57:06+08:00","alt":"Labour TENS Machine Hire - The Birth Store - The Birth Store","width":1080,"height":1080,"src":"\/\/www.thebirthstore.com.au\/cdn\/shop\/files\/labour-tens-machine-hire-6971704.png?v=1756511826","variant_ids":[45080046010557,45080046043325,45080046076093]},"available":true,"name":"Labour TENS Machine Hire - Elle TENS \/ 6 Weeks","public_title":"Elle TENS \/ 6 Weeks","options":["Elle TENS","6 Weeks"],"price":5900,"weight":350,"compare_at_price":null,"inventory_management":"shopify","barcode":"46043325","featured_media":{"alt":"Labour TENS Machine Hire - The Birth Store - The Birth Store","id":29468042821821,"position":8,"preview_image":{"aspect_ratio":1.0,"height":1080,"width":1080,"src":"\/\/www.thebirthstore.com.au\/cdn\/shop\/files\/labour-tens-machine-hire-6971704.png?v=1756511826"}},"requires_selling_plan":false,"selling_plan_allocations":[]},{"id":45080046076093,"title":"Elle TENS \/ 8 Weeks","option1":"Elle TENS","option2":"8 Weeks","option3":null,"sku":"","requires_shipping":true,"taxable":false,"featured_image":{"id":38194356781245,"product_id":8009000714429,"position":6,"created_at":"2025-08-29T13:56:08+08:00","updated_at":"2025-08-30T07:57:06+08:00","alt":"Labour TENS Machine Hire - The Birth Store - The Birth Store","width":1080,"height":1080,"src":"\/\/www.thebirthstore.com.au\/cdn\/shop\/files\/labour-tens-machine-hire-6971704.png?v=1756511826","variant_ids":[45080046010557,45080046043325,45080046076093]},"available":true,"name":"Labour TENS Machine Hire - Elle TENS \/ 8 Weeks","public_title":"Elle TENS \/ 8 Weeks","options":["Elle TENS","8 Weeks"],"price":6900,"weight":350,"compare_at_price":null,"inventory_management":"shopify","barcode":"46076093","featured_media":{"alt":"Labour TENS Machine Hire - The Birth Store - The Birth Store","id":29468042821821,"position":8,"preview_image":{"aspect_ratio":1.0,"height":1080,"width":1080,"src":"\/\/www.thebirthstore.com.au\/cdn\/shop\/files\/labour-tens-machine-hire-6971704.png?v=1756511826"}},"requires_selling_plan":false,"selling_plan_allocations":[]},{"id":45080046108861,"title":"Elle TENS 2 \/ 4 Weeks","option1":"Elle TENS 2","option2":"4 Weeks","option3":null,"sku":"","requires_shipping":true,"taxable":false,"featured_image":{"id":38194357895357,"product_id":8009000714429,"position":7,"created_at":"2025-08-29T13:56:19+08:00","updated_at":"2025-08-30T07:57:06+08:00","alt":"Labour TENS Machine Hire - The Birth Store - The Birth Store","width":1080,"height":1080,"src":"\/\/www.thebirthstore.com.au\/cdn\/shop\/files\/labour-tens-machine-hire-3380341.png?v=1756511826","variant_ids":[45080046108861,45080046141629,45080046174397]},"available":true,"name":"Labour TENS Machine Hire - Elle TENS 2 \/ 4 Weeks","public_title":"Elle TENS 2 \/ 4 Weeks","options":["Elle TENS 2","4 Weeks"],"price":5900,"weight":350,"compare_at_price":null,"inventory_management":"shopify","barcode":"46108861","featured_media":{"alt":"Labour TENS Machine Hire - The Birth Store - The Birth Store","id":29468043673789,"position":9,"preview_image":{"aspect_ratio":1.0,"height":1080,"width":1080,"src":"\/\/www.thebirthstore.com.au\/cdn\/shop\/files\/labour-tens-machine-hire-3380341.png?v=1756511826"}},"requires_selling_plan":false,"selling_plan_allocations":[]},{"id":45080046141629,"title":"Elle TENS 2 \/ 6 Weeks","option1":"Elle TENS 2","option2":"6 Weeks","option3":null,"sku":"","requires_shipping":true,"taxable":false,"featured_image":{"id":38194357895357,"product_id":8009000714429,"position":7,"created_at":"2025-08-29T13:56:19+08:00","updated_at":"2025-08-30T07:57:06+08:00","alt":"Labour TENS Machine Hire - The Birth Store - The Birth Store","width":1080,"height":1080,"src":"\/\/www.thebirthstore.com.au\/cdn\/shop\/files\/labour-tens-machine-hire-3380341.png?v=1756511826","variant_ids":[45080046108861,45080046141629,45080046174397]},"available":true,"name":"Labour TENS Machine Hire - Elle TENS 2 \/ 6 Weeks","public_title":"Elle TENS 2 \/ 6 Weeks","options":["Elle TENS 2","6 Weeks"],"price":6900,"weight":350,"compare_at_price":null,"inventory_management":"shopify","barcode":"46141629","featured_media":{"alt":"Labour TENS Machine Hire - The Birth Store - The Birth Store","id":29468043673789,"position":9,"preview_image":{"aspect_ratio":1.0,"height":1080,"width":1080,"src":"\/\/www.thebirthstore.com.au\/cdn\/shop\/files\/labour-tens-machine-hire-3380341.png?v=1756511826"}},"requires_selling_plan":false,"selling_plan_allocations":[]},{"id":45080046174397,"title":"Elle TENS 2 \/ 8 Weeks","option1":"Elle TENS 2","option2":"8 Weeks","option3":null,"sku":"","requires_shipping":true,"taxable":false,"featured_image":{"id":38194357895357,"product_id":8009000714429,"position":7,"created_at":"2025-08-29T13:56:19+08:00","updated_at":"2025-08-30T07:57:06+08:00","alt":"Labour TENS Machine Hire - The Birth Store - The Birth Store","width":1080,"height":1080,"src":"\/\/www.thebirthstore.com.au\/cdn\/shop\/files\/labour-tens-machine-hire-3380341.png?v=1756511826","variant_ids":[45080046108861,45080046141629,45080046174397]},"available":true,"name":"Labour TENS Machine Hire - Elle TENS 2 \/ 8 Weeks","public_title":"Elle TENS 2 \/ 8 Weeks","options":["Elle TENS 2","8 Weeks"],"price":7900,"weight":350,"compare_at_price":null,"inventory_management":"shopify","barcode":"46174397","featured_media":{"alt":"Labour TENS Machine Hire - The Birth Store - The Birth Store","id":29468043673789,"position":9,"preview_image":{"aspect_ratio":1.0,"height":1080,"width":1080,"src":"\/\/www.thebirthstore.com.au\/cdn\/shop\/files\/labour-tens-machine-hire-3380341.png?v=1756511826"}},"requires_selling_plan":false,"selling_plan_allocations":[]},{"id":45080046207165,"title":"Elle TENS Plus \/ 4 Weeks","option1":"Elle TENS Plus","option2":"4 Weeks","option3":null,"sku":"","requires_shipping":true,"taxable":false,"featured_image":{"id":38194359697597,"product_id":8009000714429,"position":9,"created_at":"2025-08-29T13:56:42+08:00","updated_at":"2025-08-30T07:57:06+08:00","alt":"Labour TENS Machine Hire - The Birth Store - The Birth Store","width":1080,"height":1080,"src":"\/\/www.thebirthstore.com.au\/cdn\/shop\/files\/labour-tens-machine-hire-4267878.png?v=1756511826","variant_ids":[45080046207165,45080046239933,45080046272701]},"available":true,"name":"Labour TENS Machine Hire - Elle TENS Plus \/ 4 Weeks","public_title":"Elle TENS Plus \/ 4 Weeks","options":["Elle TENS Plus","4 Weeks"],"price":6900,"weight":350,"compare_at_price":null,"inventory_management":"shopify","barcode":"46207165","featured_media":{"alt":"Labour TENS Machine Hire - The Birth Store - The Birth Store","id":29468045639869,"position":11,"preview_image":{"aspect_ratio":1.0,"height":1080,"width":1080,"src":"\/\/www.thebirthstore.com.au\/cdn\/shop\/files\/labour-tens-machine-hire-4267878.png?v=1756511826"}},"requires_selling_plan":false,"selling_plan_allocations":[]},{"id":45080046239933,"title":"Elle TENS Plus \/ 6 Weeks","option1":"Elle TENS Plus","option2":"6 Weeks","option3":null,"sku":"","requires_shipping":true,"taxable":false,"featured_image":{"id":38194359697597,"product_id":8009000714429,"position":9,"created_at":"2025-08-29T13:56:42+08:00","updated_at":"2025-08-30T07:57:06+08:00","alt":"Labour TENS Machine Hire - The Birth Store - The Birth Store","width":1080,"height":1080,"src":"\/\/www.thebirthstore.com.au\/cdn\/shop\/files\/labour-tens-machine-hire-4267878.png?v=1756511826","variant_ids":[45080046207165,45080046239933,45080046272701]},"available":true,"name":"Labour TENS Machine Hire - Elle TENS Plus \/ 6 Weeks","public_title":"Elle TENS Plus \/ 6 Weeks","options":["Elle TENS Plus","6 Weeks"],"price":7900,"weight":350,"compare_at_price":null,"inventory_management":"shopify","barcode":"46239933","featured_media":{"alt":"Labour TENS Machine Hire - The Birth Store - The Birth Store","id":29468045639869,"position":11,"preview_image":{"aspect_ratio":1.0,"height":1080,"width":1080,"src":"\/\/www.thebirthstore.com.au\/cdn\/shop\/files\/labour-tens-machine-hire-4267878.png?v=1756511826"}},"requires_selling_plan":false,"selling_plan_allocations":[]},{"id":45080046272701,"title":"Elle TENS Plus \/ 8 Weeks","option1":"Elle TENS Plus","option2":"8 Weeks","option3":null,"sku":"","requires_shipping":true,"taxable":false,"featured_image":{"id":38194359697597,"product_id":8009000714429,"position":9,"created_at":"2025-08-29T13:56:42+08:00","updated_at":"2025-08-30T07:57:06+08:00","alt":"Labour TENS Machine Hire - The Birth Store - The Birth Store","width":1080,"height":1080,"src":"\/\/www.thebirthstore.com.au\/cdn\/shop\/files\/labour-tens-machine-hire-4267878.png?v=1756511826","variant_ids":[45080046207165,45080046239933,45080046272701]},"available":true,"name":"Labour TENS Machine Hire - Elle TENS Plus \/ 8 Weeks","public_title":"Elle TENS Plus \/ 8 Weeks","options":["Elle TENS Plus","8 Weeks"],"price":8900,"weight":350,"compare_at_price":null,"inventory_management":"shopify","barcode":"46272701","featured_media":{"alt":"Labour TENS Machine Hire - The Birth Store - The Birth Store","id":29468045639869,"position":11,"preview_image":{"aspect_ratio":1.0,"height":1080,"width":1080,"src":"\/\/www.thebirthstore.com.au\/cdn\/shop\/files\/labour-tens-machine-hire-4267878.png?v=1756511826"}},"requires_selling_plan":false,"selling_plan_allocations":[]}],"images":["\/\/www.thebirthstore.com.au\/cdn\/shop\/files\/labour-tens-machine-hire-6853036.png?v=1756511826","\/\/www.thebirthstore.com.au\/cdn\/shop\/files\/labour-tens-machine-hire-414227.jpg?v=1756446767","\/\/www.thebirthstore.com.au\/cdn\/shop\/files\/labour-tens-machine-hire-543609.jpg?v=1756446767","\/\/www.thebirthstore.com.au\/cdn\/shop\/files\/labour-tens-machine-hire-857177.jpg?v=1756446767","\/\/www.thebirthstore.com.au\/cdn\/shop\/files\/labour-tens-machine-hire-430497.jpg?v=1756446767","\/\/www.thebirthstore.com.au\/cdn\/shop\/files\/labour-tens-machine-hire-6971704.png?v=1756511826","\/\/www.thebirthstore.com.au\/cdn\/shop\/files\/labour-tens-machine-hire-3380341.png?v=1756511826","\/\/www.thebirthstore.com.au\/cdn\/shop\/files\/labour-tens-machine-hire-9652507.png?v=1756511826","\/\/www.thebirthstore.com.au\/cdn\/shop\/files\/labour-tens-machine-hire-4267878.png?v=1756511826"],"featured_image":"\/\/www.thebirthstore.com.au\/cdn\/shop\/files\/labour-tens-machine-hire-6853036.png?v=1756511826","options":["Choose Your Machine","Choose Your Hire Length"],"media":[{"alt":"Labour TENS Machine Hire - The Birth Store - The Birth Store","id":29467981873341,"position":1,"preview_image":{"aspect_ratio":1.0,"height":1080,"width":1080,"src":"\/\/www.thebirthstore.com.au\/cdn\/shop\/files\/labour-tens-machine-hire-6853036.png?v=1756511826"},"aspect_ratio":1.0,"height":1080,"media_type":"image","src":"\/\/www.thebirthstore.com.au\/cdn\/shop\/files\/labour-tens-machine-hire-6853036.png?v=1756511826","width":1080},{"alt":"Labour TENS Machine Hire - The Birth Store - The Birth Store","id":28800742883517,"position":2,"preview_image":{"aspect_ratio":0.667,"height":990,"width":660,"src":"\/\/www.thebirthstore.com.au\/cdn\/shop\/files\/labour-tens-machine-hire-414227.jpg?v=1756446767"},"aspect_ratio":0.667,"height":990,"media_type":"image","src":"\/\/www.thebirthstore.com.au\/cdn\/shop\/files\/labour-tens-machine-hire-414227.jpg?v=1756446767","width":660},{"alt":"Labour TENS Machine Hire - The Birth Store - The Birth Store","id":28800734036157,"position":3,"preview_image":{"aspect_ratio":0.8,"height":1800,"width":1440,"src":"\/\/www.thebirthstore.com.au\/cdn\/shop\/files\/labour-tens-machine-hire-543609.jpg?v=1756446767"},"aspect_ratio":0.8,"height":1800,"media_type":"image","src":"\/\/www.thebirthstore.com.au\/cdn\/shop\/files\/labour-tens-machine-hire-543609.jpg?v=1756446767","width":1440},{"alt":"Labour TENS Machine Hire - The Birth Store - The Birth Store","id":28800751796413,"position":4,"preview_image":{"aspect_ratio":0.75,"height":2048,"width":1536,"src":"\/\/www.thebirthstore.com.au\/cdn\/shop\/files\/labour-tens-machine-hire-857177.jpg?v=1756446767"},"aspect_ratio":0.75,"height":2048,"media_type":"image","src":"\/\/www.thebirthstore.com.au\/cdn\/shop\/files\/labour-tens-machine-hire-857177.jpg?v=1756446767","width":1536},{"alt":null,"id":28800734953661,"position":5,"preview_image":{"aspect_ratio":0.563,"height":1920,"width":1080,"src":"\/\/www.thebirthstore.com.au\/cdn\/shop\/files\/preview_images\/4a0cbcc0853c429aa70edc55130dbc6a.thumbnail.0000000000.jpg?v=1747837646"},"aspect_ratio":0.563,"duration":21920,"media_type":"video","sources":[{"format":"mp4","height":480,"mime_type":"video\/mp4","url":"\/\/www.thebirthstore.com.au\/cdn\/shop\/videos\/c\/vp\/4a0cbcc0853c429aa70edc55130dbc6a\/4a0cbcc0853c429aa70edc55130dbc6a.SD-480p-1.5Mbps-47978508.mp4?v=0","width":270},{"format":"mp4","height":1080,"mime_type":"video\/mp4","url":"\/\/www.thebirthstore.com.au\/cdn\/shop\/videos\/c\/vp\/4a0cbcc0853c429aa70edc55130dbc6a\/4a0cbcc0853c429aa70edc55130dbc6a.HD-1080p-7.2Mbps-47978508.mp4?v=0","width":606},{"format":"mp4","height":720,"mime_type":"video\/mp4","url":"\/\/www.thebirthstore.com.au\/cdn\/shop\/videos\/c\/vp\/4a0cbcc0853c429aa70edc55130dbc6a\/4a0cbcc0853c429aa70edc55130dbc6a.HD-720p-4.5Mbps-47978508.mp4?v=0","width":404},{"format":"m3u8","height":1080,"mime_type":"application\/x-mpegURL","url":"\/\/www.thebirthstore.com.au\/cdn\/shop\/videos\/c\/vp\/4a0cbcc0853c429aa70edc55130dbc6a\/4a0cbcc0853c429aa70edc55130dbc6a.m3u8?v=0","width":606}]},{"alt":"Labour TENS Machine Hire - The Birth Store - The Birth Store","id":28800751829181,"position":6,"preview_image":{"aspect_ratio":0.75,"height":2048,"width":1536,"src":"\/\/www.thebirthstore.com.au\/cdn\/shop\/files\/labour-tens-machine-hire-430497.jpg?v=1756446767"},"aspect_ratio":0.75,"height":2048,"media_type":"image","src":"\/\/www.thebirthstore.com.au\/cdn\/shop\/files\/labour-tens-machine-hire-430497.jpg?v=1756446767","width":1536},{"alt":null,"id":28770263662781,"position":7,"preview_image":{"aspect_ratio":0.563,"height":1920,"width":1080,"src":"\/\/www.thebirthstore.com.au\/cdn\/shop\/files\/preview_images\/32dcf082a8e24b0db258d949cda0bdf5.thumbnail.0000000000.jpg?v=1747288006"},"aspect_ratio":0.563,"duration":7150,"media_type":"video","sources":[{"format":"mp4","height":480,"mime_type":"video\/mp4","url":"\/\/www.thebirthstore.com.au\/cdn\/shop\/videos\/c\/vp\/32dcf082a8e24b0db258d949cda0bdf5\/32dcf082a8e24b0db258d949cda0bdf5.SD-480p-0.9Mbps-47614201.mp4?v=0","width":270},{"format":"mp4","height":1080,"mime_type":"video\/mp4","url":"\/\/www.thebirthstore.com.au\/cdn\/shop\/videos\/c\/vp\/32dcf082a8e24b0db258d949cda0bdf5\/32dcf082a8e24b0db258d949cda0bdf5.HD-1080p-2.5Mbps-47614201.mp4?v=0","width":606},{"format":"mp4","height":720,"mime_type":"video\/mp4","url":"\/\/www.thebirthstore.com.au\/cdn\/shop\/videos\/c\/vp\/32dcf082a8e24b0db258d949cda0bdf5\/32dcf082a8e24b0db258d949cda0bdf5.HD-720p-1.6Mbps-47614201.mp4?v=0","width":404},{"format":"m3u8","height":1080,"mime_type":"application\/x-mpegURL","url":"\/\/www.thebirthstore.com.au\/cdn\/shop\/videos\/c\/vp\/32dcf082a8e24b0db258d949cda0bdf5\/32dcf082a8e24b0db258d949cda0bdf5.m3u8?v=0","width":606}]},{"alt":"Labour TENS Machine Hire - The Birth Store - The Birth Store","id":29468042821821,"position":8,"preview_image":{"aspect_ratio":1.0,"height":1080,"width":1080,"src":"\/\/www.thebirthstore.com.au\/cdn\/shop\/files\/labour-tens-machine-hire-6971704.png?v=1756511826"},"aspect_ratio":1.0,"height":1080,"media_type":"image","src":"\/\/www.thebirthstore.com.au\/cdn\/shop\/files\/labour-tens-machine-hire-6971704.png?v=1756511826","width":1080},{"alt":"Labour TENS Machine Hire - The Birth Store - The Birth Store","id":29468043673789,"position":9,"preview_image":{"aspect_ratio":1.0,"height":1080,"width":1080,"src":"\/\/www.thebirthstore.com.au\/cdn\/shop\/files\/labour-tens-machine-hire-3380341.png?v=1756511826"},"aspect_ratio":1.0,"height":1080,"media_type":"image","src":"\/\/www.thebirthstore.com.au\/cdn\/shop\/files\/labour-tens-machine-hire-3380341.png?v=1756511826","width":1080},{"alt":"Labour TENS Machine Hire - The Birth Store - The Birth Store","id":29468045017277,"position":10,"preview_image":{"aspect_ratio":1.0,"height":1080,"width":1080,"src":"\/\/www.thebirthstore.com.au\/cdn\/shop\/files\/labour-tens-machine-hire-9652507.png?v=1756511826"},"aspect_ratio":1.0,"height":1080,"media_type":"image","src":"\/\/www.thebirthstore.com.au\/cdn\/shop\/files\/labour-tens-machine-hire-9652507.png?v=1756511826","width":1080},{"alt":"Labour TENS Machine Hire - The Birth Store - The Birth Store","id":29468045639869,"position":11,"preview_image":{"aspect_ratio":1.0,"height":1080,"width":1080,"src":"\/\/www.thebirthstore.com.au\/cdn\/shop\/files\/labour-tens-machine-hire-4267878.png?v=1756511826"},"aspect_ratio":1.0,"height":1080,"media_type":"image","src":"\/\/www.thebirthstore.com.au\/cdn\/shop\/files\/labour-tens-machine-hire-4267878.png?v=1756511826","width":1080}],"requires_selling_plan":false,"selling_plan_groups":[],"content":""},"options":[{"name":"Choose Your Machine","position":1,"values":["Elle TENS","Elle TENS 2","Elle TENS Plus"]},{"name":"Choose Your Hire Length","position":2,"values":["4 Weeks","6 Weeks","8 Weeks"]}],"custom_metafields":{},"metafields":{"badge":"\u003cdiv style='display:none' class='jdgm-prev-badge' data-average-rating='4.91' data-number-of-reviews='868' data-number-of-questions='0'\u003e \u003cspan class='jdgm-prev-badge__stars' data-score='4.91' tabindex='0' aria-label='4.91 stars' role='button'\u003e \u003cspan class='jdgm-star jdgm--on'\u003e\u003c\/span\u003e\u003cspan class='jdgm-star jdgm--on'\u003e\u003c\/span\u003e\u003cspan class='jdgm-star jdgm--on'\u003e\u003c\/span\u003e\u003cspan class='jdgm-star jdgm--on'\u003e\u003c\/span\u003e\u003cspan class='jdgm-star jdgm--on'\u003e\u003c\/span\u003e \u003c\/span\u003e \u003cspan class='jdgm-prev-badge__text'\u003e 868 reviews \u003c\/span\u003e \u003c\/div\u003e","widget":"\u003cdiv class='jdgm-rev-widg' data-updated-at='2025-12-27T06:25:44Z' data-average-rating='4.91' data-number-of-reviews='868' data-number-of-questions='0' data-image-url='https:\/\/cdn.shopify.com\/s\/files\/1\/0527\/3393\/5805\/files\/labour-tens-machine-hire-6853036.png?v=1756511826'\u003e \u003cstyle class='jdgm-temp-hiding-style'\u003e.jdgm-rev-widg{ display: none }\u003c\/style\u003e \u003cdiv class='jdgm-rev-widg__header'\u003e \u003ch2 class='jdgm-rev-widg__title'\u003eCustomer Reviews\u003c\/h2\u003e \u003cdiv class='jdgm-rev-widg__summary'\u003e \u003cdiv class='jdgm-rev-widg__summary-stars' aria-label='Average rating is 4.91 stars' role='img'\u003e \u003cspan class='jdgm-star jdgm--on'\u003e\u003c\/span\u003e\u003cspan class='jdgm-star jdgm--on'\u003e\u003c\/span\u003e\u003cspan class='jdgm-star jdgm--on'\u003e\u003c\/span\u003e\u003cspan class='jdgm-star jdgm--on'\u003e\u003c\/span\u003e\u003cspan class='jdgm-star jdgm--on'\u003e\u003c\/span\u003e \u003c\/div\u003e \u003cdiv class='jdgm-rev-widg__summary-text'\u003eBased on 868 reviews\u003c\/div\u003e \u003c\/div\u003e \u003ca style='display: none' href='#' class='jdgm-write-rev-link' role='button'\u003eWrite a review\u003c\/a\u003e \u003cdiv class='jdgm-histogram jdgm-temp-hidden'\u003e \u003cdiv class='jdgm-histogram__row' data-rating='5' data-frequency='838' data-percentage='97'\u003e \u003cdiv class='jdgm-histogram__star' role='button' aria-label=\"97% (838) reviews with 5 star rating\" tabindex='0' \u003e\u003cspan class='jdgm-star jdgm--on'\u003e\u003c\/span\u003e\u003cspan class='jdgm-star jdgm--on'\u003e\u003c\/span\u003e\u003cspan class='jdgm-star jdgm--on'\u003e\u003c\/span\u003e\u003cspan class='jdgm-star jdgm--on'\u003e\u003c\/span\u003e\u003cspan class='jdgm-star jdgm--on'\u003e\u003c\/span\u003e\u003c\/div\u003e \u003cdiv class='jdgm-histogram__bar'\u003e \u003cdiv class='jdgm-histogram__bar-content' style='width: 97%;'\u003e \u003c\/div\u003e \u003c\/div\u003e \u003cdiv class='jdgm-histogram__percentage'\u003e97%\u003c\/div\u003e \u003cdiv class='jdgm-histogram__frequency'\u003e(838)\u003c\/div\u003e \u003c\/div\u003e \u003cdiv class='jdgm-histogram__row' data-rating='4' data-frequency='8' data-percentage='1'\u003e \u003cdiv class='jdgm-histogram__star' role='button' aria-label=\"1% (8) reviews with 4 star rating\" tabindex='0' \u003e\u003cspan class='jdgm-star jdgm--on'\u003e\u003c\/span\u003e\u003cspan class='jdgm-star jdgm--on'\u003e\u003c\/span\u003e\u003cspan class='jdgm-star jdgm--on'\u003e\u003c\/span\u003e\u003cspan class='jdgm-star jdgm--on'\u003e\u003c\/span\u003e\u003cspan class='jdgm-star jdgm--off'\u003e\u003c\/span\u003e\u003c\/div\u003e \u003cdiv class='jdgm-histogram__bar'\u003e \u003cdiv class='jdgm-histogram__bar-content' style='width: 1%;'\u003e \u003c\/div\u003e \u003c\/div\u003e \u003cdiv class='jdgm-histogram__percentage'\u003e1%\u003c\/div\u003e \u003cdiv class='jdgm-histogram__frequency'\u003e(8)\u003c\/div\u003e \u003c\/div\u003e \u003cdiv class='jdgm-histogram__row' data-rating='3' data-frequency='9' data-percentage='1'\u003e \u003cdiv class='jdgm-histogram__star' role='button' aria-label=\"1% (9) reviews with 3 star rating\" tabindex='0' \u003e\u003cspan class='jdgm-star jdgm--on'\u003e\u003c\/span\u003e\u003cspan class='jdgm-star jdgm--on'\u003e\u003c\/span\u003e\u003cspan class='jdgm-star jdgm--on'\u003e\u003c\/span\u003e\u003cspan class='jdgm-star jdgm--off'\u003e\u003c\/span\u003e\u003cspan class='jdgm-star jdgm--off'\u003e\u003c\/span\u003e\u003c\/div\u003e \u003cdiv class='jdgm-histogram__bar'\u003e \u003cdiv class='jdgm-histogram__bar-content' style='width: 1%;'\u003e \u003c\/div\u003e \u003c\/div\u003e \u003cdiv class='jdgm-histogram__percentage'\u003e1%\u003c\/div\u003e \u003cdiv class='jdgm-histogram__frequency'\u003e(9)\u003c\/div\u003e \u003c\/div\u003e \u003cdiv class='jdgm-histogram__row' data-rating='2' data-frequency='3' data-percentage='0'\u003e \u003cdiv class='jdgm-histogram__star' role='button' aria-label=\"0% (3) reviews with 2 star rating\" tabindex='0' \u003e\u003cspan class='jdgm-star jdgm--on'\u003e\u003c\/span\u003e\u003cspan class='jdgm-star jdgm--on'\u003e\u003c\/span\u003e\u003cspan class='jdgm-star jdgm--off'\u003e\u003c\/span\u003e\u003cspan class='jdgm-star jdgm--off'\u003e\u003c\/span\u003e\u003cspan class='jdgm-star jdgm--off'\u003e\u003c\/span\u003e\u003c\/div\u003e \u003cdiv class='jdgm-histogram__bar'\u003e \u003cdiv class='jdgm-histogram__bar-content' style='width: 0%;'\u003e \u003c\/div\u003e \u003c\/div\u003e \u003cdiv class='jdgm-histogram__percentage'\u003e0%\u003c\/div\u003e \u003cdiv class='jdgm-histogram__frequency'\u003e(3)\u003c\/div\u003e \u003c\/div\u003e \u003cdiv class='jdgm-histogram__row' data-rating='1' data-frequency='10' data-percentage='1'\u003e \u003cdiv class='jdgm-histogram__star' role='button' aria-label=\"1% (10) reviews with 1 star rating\" tabindex='0' \u003e\u003cspan class='jdgm-star jdgm--on'\u003e\u003c\/span\u003e\u003cspan class='jdgm-star jdgm--off'\u003e\u003c\/span\u003e\u003cspan class='jdgm-star jdgm--off'\u003e\u003c\/span\u003e\u003cspan class='jdgm-star jdgm--off'\u003e\u003c\/span\u003e\u003cspan class='jdgm-star jdgm--off'\u003e\u003c\/span\u003e\u003c\/div\u003e \u003cdiv class='jdgm-histogram__bar'\u003e \u003cdiv class='jdgm-histogram__bar-content' style='width: 1%;'\u003e \u003c\/div\u003e \u003c\/div\u003e \u003cdiv class='jdgm-histogram__percentage'\u003e1%\u003c\/div\u003e \u003cdiv class='jdgm-histogram__frequency'\u003e(10)\u003c\/div\u003e \u003c\/div\u003e \u003cdiv class='jdgm-histogram__row jdgm-histogram__clear-filter' data-rating=null tabindex='0'\u003e\u003c\/div\u003e \u003c\/div\u003e \u003cdiv class='jdgm-gallery' data-url='reviews\/reviews_for_widget' data-per-page='10'\u003e \u003cdiv class='jdgm-gallery-data jdgm-hidden' data-json='[{\u0026quot;uuid\u0026quot;:\u0026quot;82ea54fc-245d-4a17-8459-7dff7b3ab60d\u0026quot;,\u0026quot;reviewer_name\u0026quot;:\u0026quot;C.M.\u0026quot;,\u0026quot;reviewer_initial\u0026quot;:\u0026quot;C\u0026quot;,\u0026quot;title\u0026quot;:\u0026quot;Life-saver!!!\u0026quot;,\u0026quot;body_html\u0026quot;:\u0026quot;\\u003cp\\u003eIt was a very last minute decision to hire this little beauty for my 2nd birth. So glad I did! I loved how easy it was to use. Honestly, I didn’t like the sensation of it initially. I only had it on a very low intensity at first \\u0026amp; I gradually worked my way up the levels. As my labour progressed at home I quickly fell in love with the distraction \\u0026amp; relief. It made the dreaded car ride to hospital manageable, enjoyable even! LOVED using the boost function, super helpful. I ended up keeping my TENS on for my entire birth, which was not the initial plan. My body was then relaxed \\u0026amp; tension-free enough to do its thing with the Fetal Ejection Reflex. So only a 1 minute pushing stage, compared to 2hrs with my first baby! This godsend of a device helped me to surrender much more effectively \\u0026amp; it beautifully aided the calm, natural birth of my daughter. \\n\\u003cbr \/\\u003eTruly invaluable, worth every penny, and THE must-have tool in your labour kit!\\u003c\/p\\u003e\u0026quot;,\u0026quot;verified_buyer\u0026quot;:true,\u0026quot;location\u0026quot;:\u0026quot;\u0026quot;,\u0026quot;video_external_ids\u0026quot;:[],\u0026quot;media_platform_hosted_video_infos\u0026quot;:[],\u0026quot;cf_answers\u0026quot;:[],\u0026quot;rating\u0026quot;:\u0026quot;5\u0026quot;,\u0026quot;created_at\u0026quot;:\u0026quot;2024-12-17 10:31:59 UTC\u0026quot;,\u0026quot;pictures_urls\u0026quot;:[{\u0026quot;compact\u0026quot;:\u0026quot;https:\/\/judgeme.imgix.net\/the-birth-store\/1734431520__img_2846__original.jpeg?auto=format\\u0026w=160\u0026quot;,\u0026quot;original\u0026quot;:\u0026quot;https:\/\/judgeme.imgix.net\/the-birth-store\/1734431520__img_2846__original.jpeg?auto=format\u0026quot;}]},{\u0026quot;uuid\u0026quot;:\u0026quot;f00f0360-b8b9-47f8-b4df-ac16ffcb0fe0\u0026quot;,\u0026quot;reviewer_name\u0026quot;:\u0026quot;Amanda Cao\u0026quot;,\u0026quot;reviewer_initial\u0026quot;:\u0026quot;A\u0026quot;,\u0026quot;title\u0026quot;:\u0026quot;Great tool for birth\u0026quot;,\u0026quot;body_html\u0026quot;:\u0026quot;\\u003cp\\u003eI loved using the TENS machine for my recent birth - it was the only pain relief I utilised and definitely helped take the edge off my contractions. \\u003c\/p\\u003e\\n\\n\\u003cp\\u003eI laboured for 8 hours and it helped get me through the first 6-7 hours. By the time I\u0026#39;d gotten to the pushing stage in the last hour, I\u0026#39;d forgotten all about it - but it helped me get there!\\n\\u003cbr \/\\u003eI personally find the first stage of labour the hardest mentally, so it was a relief to get through it.\\u003c\/p\\u003e\\n\\n\\u003cp\\u003eThe TENS machine is simple and straightforward to use.\\n\\u003cbr \/\\u003eI initially turned on the boost function during a contraction, then switched it off when my contraction tapered off. When my labour progressed and contractions got considerably intense, I just kept the boost function on and increased \\u0026amp; decreased the intensity as needed. \\u003c\/p\\u003e\\n\\n\\u003cp\\u003eIt also arrived very quickly in the mail, and is very easy to return. Don\u0026#39;t accidentally throw out the bubble wrap like I did though haha - you need it to protect the machine when returning it. Not a hassle, I just bought some more, but for the environmentalist in me it was just a waste of plastic when I could\u0026#39;ve just kept the original. \\u003c\/p\\u003e\\n\\n\\u003cp\\u003eI know some people (like me!) find a TENS machine very helpful during labour, others find it less so - the birth experience can be unpredictable. However it\u0026#39;s worth having as an option and I\u0026#39;d definitely recommend giving it a go! \\n\\u003cbr \/\\u003eIf you\u0026#39;re a pregnant person reading this - best of luck and sending love, you\u0026#39;ve got this ❤️\\u003c\/p\\u003e\u0026quot;,\u0026quot;verified_buyer\u0026quot;:true,\u0026quot;location\u0026quot;:\u0026quot;\u0026quot;,\u0026quot;video_external_ids\u0026quot;:[],\u0026quot;media_platform_hosted_video_infos\u0026quot;:[],\u0026quot;cf_answers\u0026quot;:[],\u0026quot;rating\u0026quot;:\u0026quot;5\u0026quot;,\u0026quot;created_at\u0026quot;:\u0026quot;2024-10-15 17:06:16 UTC\u0026quot;,\u0026quot;pictures_urls\u0026quot;:[{\u0026quot;compact\u0026quot;:\u0026quot;https:\/\/judgeme.imgix.net\/the-birth-store\/1729011976__1000031964__original.jpg?auto=format\\u0026w=160\u0026quot;,\u0026quot;original\u0026quot;:\u0026quot;https:\/\/judgeme.imgix.net\/the-birth-store\/1729011976__1000031964__original.jpg?auto=format\u0026quot;}]},{\u0026quot;uuid\u0026quot;:\u0026quot;de212dc0-8385-44f5-95a7-ecf1ed6a7c7f\u0026quot;,\u0026quot;reviewer_name\u0026quot;:\u0026quot;Rashaun Newbigging\u0026quot;,\u0026quot;reviewer_initial\u0026quot;:\u0026quot;R\u0026quot;,\u0026quot;title\u0026quot;:\u0026quot;The only thing that got me through!\u0026quot;,\u0026quot;body_html\u0026quot;:\u0026quot;\\u003cp\\u003eI started using my tens machine when contractions got painful, arrived at the hospital and was already 6cm dilated.\\n\\u003cbr \/\\u003ePushed through with the tens until I was 9cm dilated and required the epidural for theatre. \\n\\u003cbr \/\\u003eI truly don’t think I would have been able to get as far as I did without the tens machine! \\n\\u003cbr \/\\u003eHighly recommend!\\u003c\/p\\u003e\u0026quot;,\u0026quot;verified_buyer\u0026quot;:true,\u0026quot;location\u0026quot;:\u0026quot;\u0026quot;,\u0026quot;video_external_ids\u0026quot;:[],\u0026quot;media_platform_hosted_video_infos\u0026quot;:[],\u0026quot;cf_answers\u0026quot;:[],\u0026quot;rating\u0026quot;:\u0026quot;5\u0026quot;,\u0026quot;created_at\u0026quot;:\u0026quot;2024-09-03 23:47:30 UTC\u0026quot;,\u0026quot;pictures_urls\u0026quot;:[{\u0026quot;compact\u0026quot;:\u0026quot;https:\/\/judgeme.imgix.net\/the-birth-store\/1725407435__img_2376__original.jpeg?auto=format\\u0026w=160\u0026quot;,\u0026quot;original\u0026quot;:\u0026quot;https:\/\/judgeme.imgix.net\/the-birth-store\/1725407435__img_2376__original.jpeg?auto=format\u0026quot;}]},{\u0026quot;uuid\u0026quot;:\u0026quot;d883a03d-ae98-45da-af28-33620a34f32d\u0026quot;,\u0026quot;reviewer_name\u0026quot;:\u0026quot;Kimese Hogan\u0026quot;,\u0026quot;reviewer_initial\u0026quot;:\u0026quot;K\u0026quot;,\u0026quot;title\u0026quot;:\u0026quot;Amazing\u0026quot;,\u0026quot;body_html\u0026quot;:\u0026quot;\\u003cp\\u003eThis was my 8th natural birth, First time using a tens machine. I rate it 1000% it helped me manage my contractions to a comfortable level. Worth every dollar. I’m even considering purchasing one now.\\u003c\/p\\u003e\u0026quot;,\u0026quot;verified_buyer\u0026quot;:true,\u0026quot;location\u0026quot;:\u0026quot;\u0026quot;,\u0026quot;video_external_ids\u0026quot;:[],\u0026quot;media_platform_hosted_video_infos\u0026quot;:[],\u0026quot;cf_answers\u0026quot;:[],\u0026quot;rating\u0026quot;:\u0026quot;5\u0026quot;,\u0026quot;created_at\u0026quot;:\u0026quot;2024-04-16 02:57:45 UTC\u0026quot;,\u0026quot;pictures_urls\u0026quot;:[{\u0026quot;compact\u0026quot;:\u0026quot;https:\/\/judgeme.imgix.net\/the-birth-store\/1713236505__img_1172__original.jpeg?auto=format\\u0026w=160\u0026quot;,\u0026quot;original\u0026quot;:\u0026quot;https:\/\/judgeme.imgix.net\/the-birth-store\/1713236505__img_1172__original.jpeg?auto=format\u0026quot;}]},{\u0026quot;uuid\u0026quot;:\u0026quot;c56ac4a8-2905-4c79-aca1-4370523102ec\u0026quot;,\u0026quot;reviewer_name\u0026quot;:\u0026quot;Rebekah McIntosh\u0026quot;,\u0026quot;reviewer_initial\u0026quot;:\u0026quot;R\u0026quot;,\u0026quot;title\u0026quot;:\u0026quot;Absolutely would recommend !\u0026quot;,\u0026quot;body_html\u0026quot;:\u0026quot;\\u003cp\\u003eI was unsure if I would use it - however I thought because it wasn’t overly expensive to hire that I would just get it in case I wanted to use it. And man was I glad that I did. I used it at home for 3 hours before heading to hospital and was told I was 8cm dilated. I was only using half of the boost as well. I truly believe this is how I got that far along with the pain and can’t imagine how I’d felt if I used all of the boost! Amazing and have already recommended to friends who are due to give birth soon!\\u003c\/p\\u003e\u0026quot;,\u0026quot;verified_buyer\u0026quot;:true,\u0026quot;location\u0026quot;:\u0026quot;\u0026quot;,\u0026quot;video_external_ids\u0026quot;:[],\u0026quot;media_platform_hosted_video_infos\u0026quot;:[],\u0026quot;cf_answers\u0026quot;:[],\u0026quot;rating\u0026quot;:\u0026quot;5\u0026quot;,\u0026quot;created_at\u0026quot;:\u0026quot;2024-03-06 06:09:27 UTC\u0026quot;,\u0026quot;pictures_urls\u0026quot;:[{\u0026quot;compact\u0026quot;:\u0026quot;https:\/\/judgeme.imgix.net\/labour-tens-machine-hire-the-birth-store\/1709705367__img_6517__original.jpeg?auto=format\\u0026w=160\u0026quot;,\u0026quot;original\u0026quot;:\u0026quot;https:\/\/judgeme.imgix.net\/labour-tens-machine-hire-the-birth-store\/1709705367__img_6517__original.jpeg?auto=format\u0026quot;}]},{\u0026quot;uuid\u0026quot;:\u0026quot;1713c38a-5bea-4624-b699-4bb13f7628ae\u0026quot;,\u0026quot;reviewer_name\u0026quot;:\u0026quot;Cassie Fox\u0026quot;,\u0026quot;reviewer_initial\u0026quot;:\u0026quot;C\u0026quot;,\u0026quot;title\u0026quot;:\u0026quot;Highly recommend!\u0026quot;,\u0026quot;body_html\u0026quot;:\u0026quot;\\u003cp\\u003eFirst timing using a tens in labour (third birth), and I wish I’d had one for my others! Very fast labour and the only tool I used was the Elle tens. The whole hire experience was very straight forward and I love the inclusion of the post bag to make returns fast and easy.\\u003c\/p\\u003e\u0026quot;,\u0026quot;verified_buyer\u0026quot;:true,\u0026quot;location\u0026quot;:\u0026quot;\u0026quot;,\u0026quot;video_external_ids\u0026quot;:[],\u0026quot;media_platform_hosted_video_infos\u0026quot;:[],\u0026quot;cf_answers\u0026quot;:[],\u0026quot;rating\u0026quot;:\u0026quot;5\u0026quot;,\u0026quot;created_at\u0026quot;:\u0026quot;2024-02-14 06:50:30 UTC\u0026quot;,\u0026quot;pictures_urls\u0026quot;:[{\u0026quot;compact\u0026quot;:\u0026quot;https:\/\/judgeme.imgix.net\/labour-tens-machine-hire-the-birth-store\/1707893431__img_1131__original.jpeg?auto=format\\u0026w=160\u0026quot;,\u0026quot;original\u0026quot;:\u0026quot;https:\/\/judgeme.imgix.net\/labour-tens-machine-hire-the-birth-store\/1707893431__img_1131__original.jpeg?auto=format\u0026quot;}]},{\u0026quot;uuid\u0026quot;:\u0026quot;e43fb0e9-6c67-4987-bfa3-eefc6cbe8be9\u0026quot;,\u0026quot;reviewer_name\u0026quot;:\u0026quot;Joelleen Winduss Paye\u0026quot;,\u0026quot;reviewer_initial\u0026quot;:\u0026quot;J\u0026quot;,\u0026quot;title\u0026quot;:\u0026quot;Seamless experience\u0026quot;,\u0026quot;body_html\u0026quot;:\u0026quot;\\u003cp\\u003eThe hire period was generous, shipping was fast and the machine came well packaged with everything I needed. \\u003c\/p\\u003e\\n\\n\\u003cp\\u003eIt was great to try the machine before labour started so I knew what to expect.\\u003c\/p\\u003e\u0026quot;,\u0026quot;verified_buyer\u0026quot;:true,\u0026quot;location\u0026quot;:\u0026quot;\u0026quot;,\u0026quot;video_external_ids\u0026quot;:[],\u0026quot;media_platform_hosted_video_infos\u0026quot;:[],\u0026quot;cf_answers\u0026quot;:[],\u0026quot;rating\u0026quot;:\u0026quot;5\u0026quot;,\u0026quot;created_at\u0026quot;:\u0026quot;2024-01-05 10:37:37 UTC\u0026quot;,\u0026quot;pictures_urls\u0026quot;:[{\u0026quot;compact\u0026quot;:\u0026quot;https:\/\/judgeme.imgix.net\/labour-tens-machine-hire-the-birth-store\/1704451161__img_9509__original.jpeg?auto=format\\u0026w=160\u0026quot;,\u0026quot;original\u0026quot;:\u0026quot;https:\/\/judgeme.imgix.net\/labour-tens-machine-hire-the-birth-store\/1704451161__img_9509__original.jpeg?auto=format\u0026quot;},{\u0026quot;compact\u0026quot;:\u0026quot;https:\/\/judgeme.imgix.net\/labour-tens-machine-hire-the-birth-store\/1704451163__img_9515__original.jpeg?auto=format\\u0026w=160\u0026quot;,\u0026quot;original\u0026quot;:\u0026quot;https:\/\/judgeme.imgix.net\/labour-tens-machine-hire-the-birth-store\/1704451163__img_9515__original.jpeg?auto=format\u0026quot;}]},{\u0026quot;uuid\u0026quot;:\u0026quot;cd2bba52-a7ac-447f-82f4-e23bef479f27\u0026quot;,\u0026quot;reviewer_name\u0026quot;:\u0026quot;Customer\u0026quot;,\u0026quot;reviewer_initial\u0026quot;:\u0026quot;C\u0026quot;,\u0026quot;title\u0026quot;:\u0026quot;Best investment for my birth!\u0026quot;,\u0026quot;body_html\u0026quot;:\u0026quot;\\u003cp\\u003eAfter researching natural pain relief for my second birth I decided to go with the TENS machine hire. This machine was invaluable for making my induced labour a much easier process and getting me through right up to active labour with no other pain relief, then only using a little gas to push my girl out. The machine takes the edge off even the strongest labour pains and gives you another focus, along with my birth mantras repeating in my head I can honestly say my labor and birth was a great experience. 100% recommend for anyone giving birth and wanting more natural relief!\\u003c\/p\\u003e\u0026quot;,\u0026quot;verified_buyer\u0026quot;:false,\u0026quot;location\u0026quot;:\u0026quot;\u0026quot;,\u0026quot;video_external_ids\u0026quot;:[],\u0026quot;media_platform_hosted_video_infos\u0026quot;:[],\u0026quot;cf_answers\u0026quot;:[],\u0026quot;rating\u0026quot;:\u0026quot;5\u0026quot;,\u0026quot;created_at\u0026quot;:\u0026quot;2023-12-13 00:26:45 UTC\u0026quot;,\u0026quot;pictures_urls\u0026quot;:[{\u0026quot;compact\u0026quot;:\u0026quot;https:\/\/judgeme.imgix.net\/labour-tens-machine-hire-the-birth-store\/1702427205__pxl_20231129_005053294__original.jpeg?auto=format\\u0026w=160\u0026quot;,\u0026quot;original\u0026quot;:\u0026quot;https:\/\/judgeme.imgix.net\/labour-tens-machine-hire-the-birth-store\/1702427205__pxl_20231129_005053294__original.jpeg?auto=format\u0026quot;}]},{\u0026quot;uuid\u0026quot;:\u0026quot;0c46cbc4-4f89-4a8f-b8fa-b6b19ed68f84\u0026quot;,\u0026quot;reviewer_name\u0026quot;:\u0026quot;Keira Spencer\u0026quot;,\u0026quot;reviewer_initial\u0026quot;:\u0026quot;K\u0026quot;,\u0026quot;title\u0026quot;:\u0026quot;The TENS played a huge part in having the labour I wanted 🥹\u0026quot;,\u0026quot;body_html\u0026quot;:\u0026quot;\\u003cp\\u003eThe TENS machine took me from my first few contractions through to just before my active labour. They played a huge part in having the labour I wanted by allowing me to stay home as long as possible. I used it right up until I started feeling the urge to push and it was time to hop in the bath. My only regret is not getting one for my first birth (this was my second).\\u003c\/p\\u003e\u0026quot;,\u0026quot;verified_buyer\u0026quot;:false,\u0026quot;location\u0026quot;:\u0026quot;\u0026quot;,\u0026quot;video_external_ids\u0026quot;:[],\u0026quot;media_platform_hosted_video_infos\u0026quot;:[],\u0026quot;cf_answers\u0026quot;:[],\u0026quot;rating\u0026quot;:\u0026quot;5\u0026quot;,\u0026quot;created_at\u0026quot;:\u0026quot;2023-11-21 06:21:31 UTC\u0026quot;,\u0026quot;pictures_urls\u0026quot;:[{\u0026quot;compact\u0026quot;:\u0026quot;https:\/\/judgeme.imgix.net\/labour-tens-machine-hire-the-birth-store\/1700547692__img_0332__original.jpeg?auto=format\\u0026w=160\u0026quot;,\u0026quot;original\u0026quot;:\u0026quot;https:\/\/judgeme.imgix.net\/labour-tens-machine-hire-the-birth-store\/1700547692__img_0332__original.jpeg?auto=format\u0026quot;},{\u0026quot;compact\u0026quot;:\u0026quot;https:\/\/judgeme.imgix.net\/labour-tens-machine-hire-the-birth-store\/1700547694__img_0330__original.jpeg?auto=format\\u0026w=160\u0026quot;,\u0026quot;original\u0026quot;:\u0026quot;https:\/\/judgeme.imgix.net\/labour-tens-machine-hire-the-birth-store\/1700547694__img_0330__original.jpeg?auto=format\u0026quot;}]},{\u0026quot;uuid\u0026quot;:\u0026quot;d53d9982-8b46-49da-b590-16371b64bcf8\u0026quot;,\u0026quot;reviewer_name\u0026quot;:\u0026quot;Ashleigh Clifford\u0026quot;,\u0026quot;reviewer_initial\u0026quot;:\u0026quot;A\u0026quot;,\u0026quot;title\u0026quot;:\u0026quot;Tens machine hire\u0026quot;,\u0026quot;body_html\u0026quot;:\u0026quot;\\u003cp\\u003eI absolutely loved the tens machine! Made my labour so much more manageable and helped so much with the pain! I have recommended to everyone and will continue to as it really helped me feel in control and helped so much! Don’t hesitate, definitely get this as it will change your labour experience!\\u003c\/p\\u003e\u0026quot;,\u0026quot;verified_buyer\u0026quot;:true,\u0026quot;location\u0026quot;:\u0026quot;\u0026quot;,\u0026quot;video_external_ids\u0026quot;:[],\u0026quot;media_platform_hosted_video_infos\u0026quot;:[],\u0026quot;cf_answers\u0026quot;:[],\u0026quot;rating\u0026quot;:\u0026quot;5\u0026quot;,\u0026quot;created_at\u0026quot;:\u0026quot;2023-10-29 21:41:09 UTC\u0026quot;,\u0026quot;pictures_urls\u0026quot;:[{\u0026quot;compact\u0026quot;:\u0026quot;https:\/\/judgeme.imgix.net\/labour-tens-machine-hire-the-birth-store\/1698615815__img_6442__original.jpeg?auto=format\\u0026w=160\u0026quot;,\u0026quot;original\u0026quot;:\u0026quot;https:\/\/judgeme.imgix.net\/labour-tens-machine-hire-the-birth-store\/1698615815__img_6442__original.jpeg?auto=format\u0026quot;}]}]'\u003e\u003c\/div\u003e \u003c\/div\u003e \u003cdiv class=\"jdgm-medals-wrapper jdgm-hidden\"\u003e \u003cstyle type=\"text\/css\"\u003e\u003c\/style\u003e \u003cdiv class=\"jdgm-medals\" data-link=\"https:\/\/app.judge.me\/reviews\/stores\/www.thebirthstore.com.au\"\u003e \u003cdiv class=\"jdgm-medals__container\"\u003e \u003cdiv class=\"jdgm-medal-wrapper\" title=\"Bronze Authentic Shop. At least 80% of published reviews are verified reviews\"\u003e \u003ca class=\"jdgm-medal jdgm--loading\" data-value=\"89.6\" data-type=\"auth\" data-tier=\"bronze\"\u003e \u003cdiv class=\"jdgm-medal__image\" data-url=\"auth\/bronze.svg\" data-alt=\"Judge.me Bronze Authentic Shop medal\"\u003e\u003c\/div\u003e \u003cdiv class=\"jdgm-medal__value \"\u003e89.6\u003c\/div\u003e \u003c\/a\u003e \u003c\/div\u003e \u003cdiv class=\"jdgm-medal-wrapper\" title=\"Platinum Transparent Shop. Published at least 99% of verified reviews received in total\"\u003e \u003ca class=\"jdgm-medal jdgm--loading\" data-value=\"99.9\" data-type=\"tran\" data-tier=\"platinum\"\u003e \u003cdiv class=\"jdgm-medal__image\" data-url=\"tran\/platinum.svg\" data-alt=\"Judge.me Platinum Transparent Shop medal\"\u003e\u003c\/div\u003e \u003cdiv class=\"jdgm-medal__value \"\u003e99.9\u003c\/div\u003e \u003c\/a\u003e \u003c\/div\u003e \u003c\/div\u003e \u003c\/div\u003e \u003c\/div\u003e \u003cdiv class='jdgm-rev-widg__sort-wrapper'\u003e\u003c\/div\u003e \u003c\/div\u003e \u003cdiv class='jdgm-rev-widg__body'\u003e \u003cdiv class='jdgm-rev-widg__reviews'\u003e\u003cdiv class='jdgm-rev jdgm-divider-top' data-verified-buyer='true' data-review-id='00e5f0dc-bf2a-48ef-bf2f-44b62901d6e3' data-review-language='' data-product-title='Labour TENS Machine Hire' data-product-url='\/products\/labour-birth-tens-machine-hire' data-thumb-up-count='0' data-thumb-down-count='0'\u003e \u003cdiv class='jdgm-rev__header'\u003e \u003cdiv class='jdgm-rev__icon' \u003e S \u003c\/div\u003e \u003cspan class='jdgm-rev__rating' data-score='5' tabindex='0' aria-label='5 star review' role='img'\u003e \u003cspan class='jdgm-star jdgm--on'\u003e\u003c\/span\u003e\u003cspan class='jdgm-star jdgm--on'\u003e\u003c\/span\u003e\u003cspan class='jdgm-star jdgm--on'\u003e\u003c\/span\u003e\u003cspan class='jdgm-star jdgm--on'\u003e\u003c\/span\u003e\u003cspan class='jdgm-star jdgm--on'\u003e\u003c\/span\u003e \u003c\/span\u003e \u003cspan class='jdgm-rev__timestamp jdgm-spinner' data-content='2025-12-27 06:22:27 UTC'\u003e\u003c\/span\u003e \u003cdiv class='jdgm-rev__br'\u003e\u003c\/div\u003e \u003cspan class='jdgm-rev__buyer-badge-wrapper'\u003e \u003cspan class='jdgm-rev__buyer-badge'\u003e\u003c\/span\u003e \u003c\/span\u003e \u003cspan class='jdgm-rev__author-wrapper'\u003e \u003cspan class='jdgm-rev__author'\u003eSteph Ambroziak\u003c\/span\u003e \u003cspan class='jdgm-rev__location' \u003e \u003c\/span\u003e \u003c\/span\u003e \u003c\/div\u003e \u003cdiv class='jdgm-rev__content'\u003e \u003cdiv class='jdgm-rev__custom-form'\u003e \u003c\/div\u003e \u003cb class='jdgm-rev__title'\u003eTwin birth 🤍\u003c\/b\u003e \u003cdiv class='jdgm-rev__body'\u003e\u003cp\u003eWe achieved an unmediated natural twin birth with the use of the TENS machine. During transition contractions as well as pushing, the BOOST button was an absolute god send and helped to really push through those last few moments. Anyone birthing should have a TENS machine in their labour kit!\u003c\/p\u003e\u003c\/div\u003e \u003cdiv class='jdgm-rev__pics'\u003e \u003c\/div\u003e \u003cdiv class='jdgm-rev__vids'\u003e \u003c\/div\u003e \u003cdiv class='jdgm-rev__transparency-badge-wrapper'\u003e \u003c\/div\u003e \u003c\/div\u003e \u003cdiv class='jdgm-rev__actions'\u003e \u003cdiv class='jdgm-rev__social'\u003e\u003c\/div\u003e \u003cdiv class='jdgm-rev__votes'\u003e\u003c\/div\u003e \u003c\/div\u003e \u003cdiv class='jdgm-rev__reply'\u003e \u003c\/div\u003e \u003c\/div\u003e\u003cdiv class='jdgm-rev jdgm-divider-top' data-verified-buyer='true' data-review-id='396e7fce-f0a1-41a1-bd3a-156420184615' data-review-language='' data-product-title='Labour TENS Machine Hire' data-product-url='\/products\/labour-birth-tens-machine-hire' data-thumb-up-count='0' data-thumb-down-count='0'\u003e \u003cdiv class='jdgm-rev__header'\u003e \u003cdiv class='jdgm-rev__icon' \u003e J \u003c\/div\u003e \u003cspan class='jdgm-rev__rating' data-score='5' tabindex='0' aria-label='5 star review' role='img'\u003e \u003cspan class='jdgm-star jdgm--on'\u003e\u003c\/span\u003e\u003cspan class='jdgm-star jdgm--on'\u003e\u003c\/span\u003e\u003cspan class='jdgm-star jdgm--on'\u003e\u003c\/span\u003e\u003cspan class='jdgm-star jdgm--on'\u003e\u003c\/span\u003e\u003cspan class='jdgm-star jdgm--on'\u003e\u003c\/span\u003e \u003c\/span\u003e \u003cspan class='jdgm-rev__timestamp jdgm-spinner' data-content='2025-12-26 19:23:51 UTC'\u003e\u003c\/span\u003e \u003cdiv class='jdgm-rev__br'\u003e\u003c\/div\u003e \u003cspan class='jdgm-rev__buyer-badge-wrapper'\u003e \u003cspan class='jdgm-rev__buyer-badge'\u003e\u003c\/span\u003e \u003c\/span\u003e \u003cspan class='jdgm-rev__author-wrapper'\u003e \u003cspan class='jdgm-rev__author'\u003eJulie Bilongilot\u003c\/span\u003e \u003cspan class='jdgm-rev__location' \u003e \u003c\/span\u003e \u003c\/span\u003e \u003c\/div\u003e \u003cdiv class='jdgm-rev__content'\u003e \u003cdiv class='jdgm-rev__custom-form'\u003e \u003c\/div\u003e \u003cb class='jdgm-rev__title'\u003e\u003c\/b\u003e \u003cdiv class='jdgm-rev__body'\u003e\u003cp\u003eLabour TENS Machine Hire\u003c\/p\u003e\u003c\/div\u003e \u003cdiv class='jdgm-rev__pics'\u003e \u003c\/div\u003e \u003cdiv class='jdgm-rev__vids'\u003e \u003c\/div\u003e \u003cdiv class='jdgm-rev__transparency-badge-wrapper'\u003e \u003c\/div\u003e \u003c\/div\u003e \u003cdiv class='jdgm-rev__actions'\u003e \u003cdiv class='jdgm-rev__social'\u003e\u003c\/div\u003e \u003cdiv class='jdgm-rev__votes'\u003e\u003c\/div\u003e \u003c\/div\u003e \u003cdiv class='jdgm-rev__reply'\u003e \u003c\/div\u003e \u003c\/div\u003e\u003cdiv class='jdgm-rev jdgm-divider-top' data-verified-buyer='true' data-review-id='7cce7fe3-417c-4b00-b83c-75029112e8c1' data-review-language='' data-product-title='Labour TENS Machine Hire' data-product-url='\/products\/labour-birth-tens-machine-hire' data-thumb-up-count='0' data-thumb-down-count='0'\u003e \u003cdiv class='jdgm-rev__header'\u003e \u003cdiv class='jdgm-rev__icon' \u003e P \u003c\/div\u003e \u003cspan class='jdgm-rev__rating' data-score='5' tabindex='0' aria-label='5 star review' role='img'\u003e \u003cspan class='jdgm-star jdgm--on'\u003e\u003c\/span\u003e\u003cspan class='jdgm-star jdgm--on'\u003e\u003c\/span\u003e\u003cspan class='jdgm-star jdgm--on'\u003e\u003c\/span\u003e\u003cspan class='jdgm-star jdgm--on'\u003e\u003c\/span\u003e\u003cspan class='jdgm-star jdgm--on'\u003e\u003c\/span\u003e \u003c\/span\u003e \u003cspan class='jdgm-rev__timestamp jdgm-spinner' data-content='2025-12-25 23:55:02 UTC'\u003e\u003c\/span\u003e \u003cdiv class='jdgm-rev__br'\u003e\u003c\/div\u003e \u003cspan class='jdgm-rev__buyer-badge-wrapper'\u003e \u003cspan class='jdgm-rev__buyer-badge'\u003e\u003c\/span\u003e \u003c\/span\u003e \u003cspan class='jdgm-rev__author-wrapper'\u003e \u003cspan class='jdgm-rev__author'\u003ePaxton Roth\u003c\/span\u003e \u003cspan class='jdgm-rev__location' \u003e \u003c\/span\u003e \u003c\/span\u003e \u003c\/div\u003e \u003cdiv class='jdgm-rev__content'\u003e \u003cdiv class='jdgm-rev__custom-form'\u003e \u003c\/div\u003e \u003cb class='jdgm-rev__title'\u003eLabour game changer\u003c\/b\u003e \u003cdiv class='jdgm-rev__body'\u003e\u003cp\u003eUsed a TENS in both of my births. No other pain reliefs and I truely believe the TENS is what got me through!\u003c\/p\u003e\u003c\/div\u003e \u003cdiv class='jdgm-rev__pics'\u003e \u003c\/div\u003e \u003cdiv class='jdgm-rev__vids'\u003e \u003c\/div\u003e \u003cdiv class='jdgm-rev__transparency-badge-wrapper'\u003e \u003c\/div\u003e \u003c\/div\u003e \u003cdiv class='jdgm-rev__actions'\u003e \u003cdiv class='jdgm-rev__social'\u003e\u003c\/div\u003e \u003cdiv class='jdgm-rev__votes'\u003e\u003c\/div\u003e \u003c\/div\u003e \u003cdiv class='jdgm-rev__reply'\u003e \u003c\/div\u003e \u003c\/div\u003e\u003cdiv class='jdgm-rev jdgm-divider-top' data-verified-buyer='true' data-review-id='bd43a555-56c4-4ee8-90c1-c2fd16d28c9e' data-review-language='' data-product-title='Labour TENS Machine Hire' data-product-url='\/products\/labour-birth-tens-machine-hire' data-thumb-up-count='0' data-thumb-down-count='0'\u003e \u003cdiv class='jdgm-rev__header'\u003e \u003cdiv class='jdgm-rev__icon' \u003e M \u003c\/div\u003e \u003cspan class='jdgm-rev__rating' data-score='5' tabindex='0' aria-label='5 star review' role='img'\u003e \u003cspan class='jdgm-star jdgm--on'\u003e\u003c\/span\u003e\u003cspan class='jdgm-star jdgm--on'\u003e\u003c\/span\u003e\u003cspan class='jdgm-star jdgm--on'\u003e\u003c\/span\u003e\u003cspan class='jdgm-star jdgm--on'\u003e\u003c\/span\u003e\u003cspan class='jdgm-star jdgm--on'\u003e\u003c\/span\u003e \u003c\/span\u003e \u003cspan class='jdgm-rev__timestamp jdgm-spinner' data-content='2025-12-23 05:55:59 UTC'\u003e\u003c\/span\u003e \u003cdiv class='jdgm-rev__br'\u003e\u003c\/div\u003e \u003cspan class='jdgm-rev__buyer-badge-wrapper'\u003e \u003cspan class='jdgm-rev__buyer-badge'\u003e\u003c\/span\u003e \u003c\/span\u003e \u003cspan class='jdgm-rev__author-wrapper'\u003e \u003cspan class='jdgm-rev__author'\u003eMorgan\u003c\/span\u003e \u003cspan class='jdgm-rev__location' \u003e \u003c\/span\u003e \u003c\/span\u003e \u003c\/div\u003e \u003cdiv class='jdgm-rev__content'\u003e \u003cdiv class='jdgm-rev__custom-form'\u003e \u003c\/div\u003e \u003cb class='jdgm-rev__title'\u003ePerfect Service\u003c\/b\u003e \u003cdiv class='jdgm-rev__body'\u003e\u003cp\u003eThis is my second time hiring the TENS from The Birth Store, and again the service was perfect. The ordering delivery, and returns are so well thought out and easy!!! I love using the TENS machine (my husband also enjoyed trying it out). Thank you for such an amazing experience from start to finish.\u003c\/p\u003e\u003c\/div\u003e \u003cdiv class='jdgm-rev__pics'\u003e \u003c\/div\u003e \u003cdiv class='jdgm-rev__vids'\u003e \u003c\/div\u003e \u003cdiv class='jdgm-rev__transparency-badge-wrapper'\u003e \u003c\/div\u003e \u003c\/div\u003e \u003cdiv class='jdgm-rev__actions'\u003e \u003cdiv class='jdgm-rev__social'\u003e\u003c\/div\u003e \u003cdiv class='jdgm-rev__votes'\u003e\u003c\/div\u003e \u003c\/div\u003e \u003cdiv class='jdgm-rev__reply'\u003e \u003c\/div\u003e \u003c\/div\u003e\u003cdiv class='jdgm-rev jdgm-divider-top' data-verified-buyer='true' data-review-id='fb361aed-db99-45c5-830c-2352d0bb94b3' data-review-language='' data-product-title='Labour TENS Machine Hire' data-product-url='\/products\/labour-birth-tens-machine-hire' data-thumb-up-count='0' data-thumb-down-count='0'\u003e \u003cdiv class='jdgm-rev__header'\u003e \u003cdiv class='jdgm-rev__icon' \u003e M \u003c\/div\u003e \u003cspan class='jdgm-rev__rating' data-score='5' tabindex='0' aria-label='5 star review' role='img'\u003e \u003cspan class='jdgm-star jdgm--on'\u003e\u003c\/span\u003e\u003cspan class='jdgm-star jdgm--on'\u003e\u003c\/span\u003e\u003cspan class='jdgm-star jdgm--on'\u003e\u003c\/span\u003e\u003cspan class='jdgm-star jdgm--on'\u003e\u003c\/span\u003e\u003cspan class='jdgm-star jdgm--on'\u003e\u003c\/span\u003e \u003c\/span\u003e \u003cspan class='jdgm-rev__timestamp jdgm-spinner' data-content='2025-12-21 11:24:41 UTC'\u003e\u003c\/span\u003e \u003cdiv class='jdgm-rev__br'\u003e\u003c\/div\u003e \u003cspan class='jdgm-rev__buyer-badge-wrapper'\u003e \u003cspan class='jdgm-rev__buyer-badge'\u003e\u003c\/span\u003e \u003c\/span\u003e \u003cspan class='jdgm-rev__author-wrapper'\u003e \u003cspan class='jdgm-rev__author'\u003eMatea Adamec\u003c\/span\u003e \u003cspan class='jdgm-rev__location' \u003e \u003c\/span\u003e \u003c\/span\u003e \u003c\/div\u003e \u003cdiv class='jdgm-rev__content'\u003e \u003cdiv class='jdgm-rev__custom-form'\u003e \u003c\/div\u003e \u003cb class='jdgm-rev__title'\u003eFantastic rental TENS service, most useful thing I had on me for the birth!\u003c\/b\u003e \u003cdiv class='jdgm-rev__body'\u003e\u003cp\u003eMy ELLE tens worked perfectly from the birth store, it arrived on time and was very easy to ship back (the pre paid return packaging came with it). I relied so much on this device during labour, honestly it was a life saver during contractions!!\u003c\/p\u003e\u003c\/div\u003e \u003cdiv class='jdgm-rev__pics'\u003e \u003c\/div\u003e \u003cdiv class='jdgm-rev__vids'\u003e \u003c\/div\u003e \u003cdiv class='jdgm-rev__transparency-badge-wrapper'\u003e \u003c\/div\u003e \u003c\/div\u003e \u003cdiv class='jdgm-rev__actions'\u003e \u003cdiv class='jdgm-rev__social'\u003e\u003c\/div\u003e \u003cdiv class='jdgm-rev__votes'\u003e\u003c\/div\u003e \u003c\/div\u003e \u003cdiv class='jdgm-rev__reply'\u003e \u003c\/div\u003e \u003c\/div\u003e\u003cdiv class='jdgm-rev jdgm-divider-top' data-verified-buyer='true' data-review-id='71b4dd17-f7eb-426a-a10d-8dc50392515f' data-review-language='' data-product-title='Labour TENS Machine Hire' data-product-url='\/products\/labour-birth-tens-machine-hire' data-thumb-up-count='0' data-thumb-down-count='0'\u003e \u003cdiv class='jdgm-rev__header'\u003e \u003cdiv class='jdgm-rev__icon' \u003e T \u003c\/div\u003e \u003cspan class='jdgm-rev__rating' data-score='5' tabindex='0' aria-label='5 star review' role='img'\u003e \u003cspan class='jdgm-star jdgm--on'\u003e\u003c\/span\u003e\u003cspan class='jdgm-star jdgm--on'\u003e\u003c\/span\u003e\u003cspan class='jdgm-star jdgm--on'\u003e\u003c\/span\u003e\u003cspan class='jdgm-star jdgm--on'\u003e\u003c\/span\u003e\u003cspan class='jdgm-star jdgm--on'\u003e\u003c\/span\u003e \u003c\/span\u003e \u003cspan class='jdgm-rev__timestamp jdgm-spinner' data-content='2025-12-21 09:39:06 UTC'\u003e\u003c\/span\u003e \u003cdiv class='jdgm-rev__br'\u003e\u003c\/div\u003e \u003cspan class='jdgm-rev__buyer-badge-wrapper'\u003e \u003cspan class='jdgm-rev__buyer-badge'\u003e\u003c\/span\u003e \u003c\/span\u003e \u003cspan class='jdgm-rev__author-wrapper'\u003e \u003cspan class='jdgm-rev__author'\u003eTenae-Rose Montgomery\u003c\/span\u003e \u003cspan class='jdgm-rev__location' \u003e \u003c\/span\u003e \u003c\/span\u003e \u003c\/div\u003e \u003cdiv class='jdgm-rev__content'\u003e \u003cdiv class='jdgm-rev__custom-form'\u003e \u003c\/div\u003e \u003cb class='jdgm-rev__title'\u003e\u003c\/b\u003e \u003cdiv class='jdgm-rev__body'\u003e\u003cp\u003eLabour TENS Machine Hire\u003c\/p\u003e\u003c\/div\u003e \u003cdiv class='jdgm-rev__pics'\u003e \u003c\/div\u003e \u003cdiv class='jdgm-rev__vids'\u003e \u003c\/div\u003e \u003cdiv class='jdgm-rev__transparency-badge-wrapper'\u003e \u003c\/div\u003e \u003c\/div\u003e \u003cdiv class='jdgm-rev__actions'\u003e \u003cdiv class='jdgm-rev__social'\u003e\u003c\/div\u003e \u003cdiv class='jdgm-rev__votes'\u003e\u003c\/div\u003e \u003c\/div\u003e \u003cdiv class='jdgm-rev__reply'\u003e \u003c\/div\u003e \u003c\/div\u003e\u003cdiv class='jdgm-rev jdgm-divider-top' data-verified-buyer='true' data-review-id='8380040e-047e-4839-8842-75c5822d569b' data-review-language='' data-product-title='Labour TENS Machine Hire' data-product-url='\/products\/labour-birth-tens-machine-hire' data-thumb-up-count='0' data-thumb-down-count='0'\u003e \u003cdiv class='jdgm-rev__header'\u003e \u003cdiv class='jdgm-rev__icon' \u003e H \u003c\/div\u003e \u003cspan class='jdgm-rev__rating' data-score='5' tabindex='0' aria-label='5 star review' role='img'\u003e \u003cspan class='jdgm-star jdgm--on'\u003e\u003c\/span\u003e\u003cspan class='jdgm-star jdgm--on'\u003e\u003c\/span\u003e\u003cspan class='jdgm-star jdgm--on'\u003e\u003c\/span\u003e\u003cspan class='jdgm-star jdgm--on'\u003e\u003c\/span\u003e\u003cspan class='jdgm-star jdgm--on'\u003e\u003c\/span\u003e \u003c\/span\u003e \u003cspan class='jdgm-rev__timestamp jdgm-spinner' data-content='2025-12-21 02:22:58 UTC'\u003e\u003c\/span\u003e \u003cdiv class='jdgm-rev__br'\u003e\u003c\/div\u003e \u003cspan class='jdgm-rev__buyer-badge-wrapper'\u003e \u003cspan class='jdgm-rev__buyer-badge'\u003e\u003c\/span\u003e \u003c\/span\u003e \u003cspan class='jdgm-rev__author-wrapper'\u003e \u003cspan class='jdgm-rev__author'\u003eHeidi Thornberry\u003c\/span\u003e \u003cspan class='jdgm-rev__location' \u003e \u003c\/span\u003e \u003c\/span\u003e \u003c\/div\u003e \u003cdiv class='jdgm-rev__content'\u003e \u003cdiv class='jdgm-rev__custom-form'\u003e \u003c\/div\u003e \u003cb class='jdgm-rev__title'\u003eTens Machine Hire\u003c\/b\u003e \u003cdiv class='jdgm-rev__body'\u003e\u003cp\u003eHonestly, game changer. I was very sceptical about using one of these. My first labour I ended up having an epidural and a birth and labour I did not envision. Second pregnancy I thought if got nothing to lose my as well trying it. I didn't end up at the hospital until 8cm dilated and did not have an epidural. I am kicking myself that I did not hire one with my first pregnancy. I am recommending them to everyone and will be hiring for my next pregnancy\u003c\/p\u003e\u003c\/div\u003e \u003cdiv class='jdgm-rev__pics'\u003e \u003c\/div\u003e \u003cdiv class='jdgm-rev__vids'\u003e \u003c\/div\u003e \u003cdiv class='jdgm-rev__transparency-badge-wrapper'\u003e \u003c\/div\u003e \u003c\/div\u003e \u003cdiv class='jdgm-rev__actions'\u003e \u003cdiv class='jdgm-rev__social'\u003e\u003c\/div\u003e \u003cdiv class='jdgm-rev__votes'\u003e\u003c\/div\u003e \u003c\/div\u003e \u003cdiv class='jdgm-rev__reply'\u003e \u003c\/div\u003e \u003c\/div\u003e\u003cdiv class='jdgm-rev jdgm-divider-top' data-verified-buyer='true' data-review-id='955ccc0b-d67c-4239-8226-8a2765e77a46' data-review-language='' data-product-title='Labour TENS Machine Hire' data-product-url='\/products\/labour-birth-tens-machine-hire' data-thumb-up-count='0' data-thumb-down-count='0'\u003e \u003cdiv class='jdgm-rev__header'\u003e \u003cdiv class='jdgm-rev__icon' \u003e K \u003c\/div\u003e \u003cspan class='jdgm-rev__rating' data-score='5' tabindex='0' aria-label='5 star review' role='img'\u003e \u003cspan class='jdgm-star jdgm--on'\u003e\u003c\/span\u003e\u003cspan class='jdgm-star jdgm--on'\u003e\u003c\/span\u003e\u003cspan class='jdgm-star jdgm--on'\u003e\u003c\/span\u003e\u003cspan class='jdgm-star jdgm--on'\u003e\u003c\/span\u003e\u003cspan class='jdgm-star jdgm--on'\u003e\u003c\/span\u003e \u003c\/span\u003e \u003cspan class='jdgm-rev__timestamp jdgm-spinner' data-content='2025-12-20 04:38:48 UTC'\u003e\u003c\/span\u003e \u003cdiv class='jdgm-rev__br'\u003e\u003c\/div\u003e \u003cspan class='jdgm-rev__buyer-badge-wrapper'\u003e \u003cspan class='jdgm-rev__buyer-badge'\u003e\u003c\/span\u003e \u003c\/span\u003e \u003cspan class='jdgm-rev__author-wrapper'\u003e \u003cspan class='jdgm-rev__author'\u003eKayla Bosshard\u003c\/span\u003e \u003cspan class='jdgm-rev__location' \u003e \u003c\/span\u003e \u003c\/span\u003e \u003c\/div\u003e \u003cdiv class='jdgm-rev__content'\u003e \u003cdiv class='jdgm-rev__custom-form'\u003e \u003c\/div\u003e \u003cb class='jdgm-rev__title'\u003eYou need the tens in your toolbox!\u003c\/b\u003e \u003cdiv class='jdgm-rev__body'\u003e\u003cp\u003eThis was my 4th baby and unmediated labour. I previously had used a bath for my other labours but this wasn’t available at the hospital. I was recommended the tens machine and it helped me so much with pain relief and distraction as well as focusing with the contraction timer. I used the tens through active labour right up until it was time to push. It was a great labour and I’m thankful for being able to hire it. I would highly recommend to anyone wanting an unmediated birth\u003c\/p\u003e\u003c\/div\u003e \u003cdiv class='jdgm-rev__pics'\u003e \u003c\/div\u003e \u003cdiv class='jdgm-rev__vids'\u003e \u003c\/div\u003e \u003cdiv class='jdgm-rev__transparency-badge-wrapper'\u003e \u003c\/div\u003e \u003c\/div\u003e \u003cdiv class='jdgm-rev__actions'\u003e \u003cdiv class='jdgm-rev__social'\u003e\u003c\/div\u003e \u003cdiv class='jdgm-rev__votes'\u003e\u003c\/div\u003e \u003c\/div\u003e \u003cdiv class='jdgm-rev__reply'\u003e \u003c\/div\u003e \u003c\/div\u003e\u003cdiv class='jdgm-rev jdgm-divider-top' data-verified-buyer='true' data-review-id='9286be39-afe1-4df1-b9e7-b58d8632c9f8' data-review-language='' data-product-title='Labour TENS Machine Hire' data-product-url='\/products\/labour-birth-tens-machine-hire' data-thumb-up-count='0' data-thumb-down-count='0'\u003e \u003cdiv class='jdgm-rev__header'\u003e \u003cdiv class='jdgm-rev__icon' \u003e J \u003c\/div\u003e \u003cspan class='jdgm-rev__rating' data-score='5' tabindex='0' aria-label='5 star review' role='img'\u003e \u003cspan class='jdgm-star jdgm--on'\u003e\u003c\/span\u003e\u003cspan class='jdgm-star jdgm--on'\u003e\u003c\/span\u003e\u003cspan class='jdgm-star jdgm--on'\u003e\u003c\/span\u003e\u003cspan class='jdgm-star jdgm--on'\u003e\u003c\/span\u003e\u003cspan class='jdgm-star jdgm--on'\u003e\u003c\/span\u003e \u003c\/span\u003e \u003cspan class='jdgm-rev__timestamp jdgm-spinner' data-content='2025-12-20 03:28:16 UTC'\u003e\u003c\/span\u003e \u003cdiv class='jdgm-rev__br'\u003e\u003c\/div\u003e \u003cspan class='jdgm-rev__buyer-badge-wrapper'\u003e \u003cspan class='jdgm-rev__buyer-badge'\u003e\u003c\/span\u003e \u003c\/span\u003e \u003cspan class='jdgm-rev__author-wrapper'\u003e \u003cspan class='jdgm-rev__author'\u003eJessica Bauer\u003c\/span\u003e \u003cspan class='jdgm-rev__location' \u003e \u003c\/span\u003e \u003c\/span\u003e \u003c\/div\u003e \u003cdiv class='jdgm-rev__content'\u003e \u003cdiv class='jdgm-rev__custom-form'\u003e \u003c\/div\u003e \u003cb class='jdgm-rev__title'\u003eExcellent product hire\u003c\/b\u003e \u003cdiv class='jdgm-rev__body'\u003e\u003cp\u003eReally happy with my Tens machine hire from The Birth Store! The product arrived really well packaged with everything I needed and clear instructions. Returning product was easy. The machine itself was incredibly helpful for labour and I liked that the model I had timed contractions and their duration. I would definitely recommend this service to anyone planning for their upcoming labour!\u003c\/p\u003e\u003c\/div\u003e \u003cdiv class='jdgm-rev__pics'\u003e \u003c\/div\u003e \u003cdiv class='jdgm-rev__vids'\u003e \u003c\/div\u003e \u003cdiv class='jdgm-rev__transparency-badge-wrapper'\u003e \u003c\/div\u003e \u003c\/div\u003e \u003cdiv class='jdgm-rev__actions'\u003e \u003cdiv class='jdgm-rev__social'\u003e\u003c\/div\u003e \u003cdiv class='jdgm-rev__votes'\u003e\u003c\/div\u003e \u003c\/div\u003e \u003cdiv class='jdgm-rev__reply'\u003e \u003c\/div\u003e \u003c\/div\u003e\u003cdiv class='jdgm-rev jdgm-divider-top' data-verified-buyer='true' data-review-id='ef5eb4b0-c408-43f0-b089-389dc191ce42' data-review-language='' data-product-title='Labour TENS Machine Hire' data-product-url='\/products\/labour-birth-tens-machine-hire' data-thumb-up-count='0' data-thumb-down-count='0'\u003e \u003cdiv class='jdgm-rev__header'\u003e \u003cdiv class='jdgm-rev__icon' \u003e S \u003c\/div\u003e \u003cspan class='jdgm-rev__rating' data-score='5' tabindex='0' aria-label='5 star review' role='img'\u003e \u003cspan class='jdgm-star jdgm--on'\u003e\u003c\/span\u003e\u003cspan class='jdgm-star jdgm--on'\u003e\u003c\/span\u003e\u003cspan class='jdgm-star jdgm--on'\u003e\u003c\/span\u003e\u003cspan class='jdgm-star jdgm--on'\u003e\u003c\/span\u003e\u003cspan class='jdgm-star jdgm--on'\u003e\u003c\/span\u003e \u003c\/span\u003e \u003cspan class='jdgm-rev__timestamp jdgm-spinner' data-content='2025-12-20 02:09:22 UTC'\u003e\u003c\/span\u003e \u003cdiv class='jdgm-rev__br'\u003e\u003c\/div\u003e \u003cspan class='jdgm-rev__buyer-badge-wrapper'\u003e \u003cspan class='jdgm-rev__buyer-badge'\u003e\u003c\/span\u003e \u003c\/span\u003e \u003cspan class='jdgm-rev__author-wrapper'\u003e \u003cspan class='jdgm-rev__author'\u003eSophie Neill\u003c\/span\u003e \u003cspan class='jdgm-rev__location' \u003e \u003c\/span\u003e \u003c\/span\u003e \u003c\/div\u003e \u003cdiv class='jdgm-rev__content'\u003e \u003cdiv class='jdgm-rev__custom-form'\u003e \u003c\/div\u003e \u003cb class='jdgm-rev__title'\u003eCouldn\u0026#39;t have gone without it!\u003c\/b\u003e \u003cdiv class='jdgm-rev__body'\u003e\u003cp\u003eVery pleased with the Tens hire process \u0026amp; labour tool use. Easy returns. Wouldn't have survived natural labour without it.\u003c\/p\u003e\u003c\/div\u003e \u003cdiv class='jdgm-rev__pics'\u003e \u003c\/div\u003e \u003cdiv class='jdgm-rev__vids'\u003e \u003c\/div\u003e \u003cdiv class='jdgm-rev__transparency-badge-wrapper'\u003e \u003c\/div\u003e \u003c\/div\u003e \u003cdiv class='jdgm-rev__actions'\u003e \u003cdiv class='jdgm-rev__social'\u003e\u003c\/div\u003e \u003cdiv class='jdgm-rev__votes'\u003e\u003c\/div\u003e \u003c\/div\u003e \u003cdiv class='jdgm-rev__reply'\u003e \u003c\/div\u003e \u003c\/div\u003e\u003c\/div\u003e \u003cdiv class='jdgm-paginate' data-per-page='10' data-url='https:\/\/api.judge.me\/reviews\/reviews_for_widget' \u003e\u003ca class='jdgm-paginate__page jdgm-curt' data-page='1' aria-label='Page 1' tabindex='0' role='button'\u003e1\u003c\/a\u003e\u003ca class='jdgm-paginate__page ' data-page='2' aria-label='Page 2' tabindex='0' role='button'\u003e2\u003c\/a\u003e\u003ca class='jdgm-paginate__page ' data-page='3' aria-label='Page 3' tabindex='0' role='button'\u003e3\u003c\/a\u003e\u003ca class='jdgm-paginate__page jdgm-paginate__next-page' data-page='2' aria-label='Page 2' tabindex='0' rel='next' role='button'\u003e\u003c\/a\u003e\u003ca class='jdgm-paginate__page jdgm-paginate__last-page' data-page='87' aria-label='Page 87' tabindex='0' role='button'\u003e\u003c\/a\u003e\u003c\/div\u003e \u003c\/div\u003e \u003cdiv class='jdgm-rev-widg__paginate-spinner-wrapper'\u003e \u003cdiv class='jdgm-spinner'\u003e\u003c\/div\u003e \u003c\/div\u003e \u003c\/div\u003e"},"collections":[{"id":261658214589,"handle":"labour-and-birth-buy","title":"Labour \u0026 Birth","updated_at":"2025-12-28T20:10:01+08:00","body_html":"\u003cp\u003eWe stock a large range of Elle TENS machines for you to buy for your labour and birth. We stock the Elle TENS, Elle TENS 2 and Elle TENS Plus, we also hire these out if that suits you better, please head over to our TENS machine hire page for more information. We ship Australia wide or have options for local delivery\/pick-up in Perth if you are due ASAP. We also stock other items for your labour and birth. \u003c\/p\u003e\n\u003cp\u003eLooking for something we don't currently stock? Please reach out and let us know.\u003c\/p\u003e\n\u003cp\u003e\u003cspan\u003eYou can even buy now and pay later with Afterpay!\u003c\/span\u003e\u003c\/p\u003e","published_at":"2021-03-10T12:34:43+08:00","sort_order":"best-selling","template_suffix":"labour-birth-collection","disjunctive":false,"rules":[{"column":"tag","relation":"equals","condition":"Birth"}],"published_scope":"global","image":{"created_at":"2024-05-06T12:00:09+08:00","alt":"Labour \u0026 Birth - The Birth Store","width":1080,"height":981,"src":"\/\/www.thebirthstore.com.au\/cdn\/shop\/collections\/labour-birth-342038.jpg?v=1714968009"}},{"id":261226856637,"handle":"labour-tens-machine-hire","title":"Labour TENS Machine Hire","updated_at":"2025-12-28T20:10:01+08:00","body_html":"\u003cp\u003e \u003c\/p\u003e\n\u003cblockquote\u003e\u003c\/blockquote\u003e","published_at":"2021-03-05T22:34:14+08:00","sort_order":"best-selling","template_suffix":"tens-machine-hire-collect","disjunctive":false,"rules":[{"column":"tag","relation":"equals","condition":"TENS Hire"}],"published_scope":"global","image":{"created_at":"2024-05-06T12:00:15+08:00","alt":"Labour TENS Machine Hire - The Birth Store","width":1920,"height":1280,"src":"\/\/www.thebirthstore.com.au\/cdn\/shop\/collections\/labour-tens-machine-hire-546345.jpg?v=1714968015"}},{"id":281712591037,"handle":"pain-relief","title":"Pain Relief","updated_at":"2025-12-28T20:10:01+08:00","body_html":"","published_at":"2021-12-20T14:22:45+08:00","sort_order":"best-selling","template_suffix":"pain-relief-collection","disjunctive":false,"rules":[{"column":"tag","relation":"equals","condition":"Pain Relief"}],"published_scope":"global","image":{"created_at":"2024-05-06T12:00:27+08:00","alt":"Pain Relief - The Birth Store","width":1365,"height":2048,"src":"\/\/www.thebirthstore.com.au\/cdn\/shop\/collections\/pain-relief-878865.jpg?v=1714968027"}},{"id":291456483517,"handle":"shop-all","title":"Shop All - Mum","updated_at":"2025-12-28T20:10:01+08:00","body_html":"","published_at":"2022-12-23T22:04:39+08:00","sort_order":"best-selling","template_suffix":"shop-all-collection","disjunctive":false,"rules":[{"column":"variant_price","relation":"greater_than","condition":"1"},{"column":"title","relation":"not_contains","condition":"Batteries"},{"column":"tag","relation":"equals","condition":"Mum"}],"published_scope":"global","image":{"created_at":"2024-05-06T12:00:54+08:00","alt":"Shop All - The Birth Store","width":1365,"height":2048,"src":"\/\/www.thebirthstore.com.au\/cdn\/shop\/collections\/shop-all-693176.jpg?v=1714968055"}},{"id":310045933757,"handle":"shop-all-sale","title":"Shop All Sale","updated_at":"2025-12-28T20:10:01+08:00","body_html":"","published_at":"2024-11-12T13:22:43+08:00","sort_order":"alpha-asc","template_suffix":"","disjunctive":true,"rules":[{"column":"tag","relation":"equals","condition":"Bundles"},{"column":"vendor","relation":"equals","condition":"Franjos Kitchen"},{"column":"vendor","relation":"equals","condition":"Adored Illustrations"},{"column":"vendor","relation":"equals","condition":"Amazing Oils"},{"column":"vendor","relation":"equals","condition":"Ice Ice Booby"},{"column":"vendor","relation":"equals","condition":"Made to Milk"},{"column":"vendor","relation":"equals","condition":"Milky Goodness"},{"column":"vendor","relation":"equals","condition":"Seasons of Mama"},{"column":"vendor","relation":"equals","condition":"Silverette"},{"column":"vendor","relation":"equals","condition":"Snuggle Hunny"},{"column":"vendor","relation":"equals","condition":"Yung Bod"},{"column":"vendor","relation":"equals","condition":"Bare Love"},{"column":"vendor","relation":"equals","condition":"Haakaa"},{"column":"vendor","relation":"equals","condition":"Mere Botanicals"},{"column":"vendor","relation":"equals","condition":"The Birth Store Hire"},{"column":"vendor","relation":"equals","condition":"The Birth Store"}],"published_scope":"global","image":{"created_at":"2024-11-13T10:58:16+08:00","alt":"Shop All Sale - The Birth Store","width":2048,"height":1365,"src":"\/\/www.thebirthstore.com.au\/cdn\/shop\/collections\/shop-all-sale-297361.jpg?v=1731466697"}}]}
[{"alt":"Labour TENS Machine Hire - The Birth Store - The Birth Store","id":29467981873341,"position":1,"preview_image":{"aspect_ratio":1.0,"height":1080,"width":1080,"src":"\/\/www.thebirthstore.com.au\/cdn\/shop\/files\/labour-tens-machine-hire-6853036.png?v=1756511826"},"aspect_ratio":1.0,"height":1080,"media_type":"image","src":"\/\/www.thebirthstore.com.au\/cdn\/shop\/files\/labour-tens-machine-hire-6853036.png?v=1756511826","width":1080},{"alt":"Labour TENS Machine Hire - The Birth Store - The Birth Store","id":28800742883517,"position":2,"preview_image":{"aspect_ratio":0.667,"height":990,"width":660,"src":"\/\/www.thebirthstore.com.au\/cdn\/shop\/files\/labour-tens-machine-hire-414227.jpg?v=1756446767"},"aspect_ratio":0.667,"height":990,"media_type":"image","src":"\/\/www.thebirthstore.com.au\/cdn\/shop\/files\/labour-tens-machine-hire-414227.jpg?v=1756446767","width":660},{"alt":"Labour TENS Machine Hire - The Birth Store - The Birth Store","id":28800734036157,"position":3,"preview_image":{"aspect_ratio":0.8,"height":1800,"width":1440,"src":"\/\/www.thebirthstore.com.au\/cdn\/shop\/files\/labour-tens-machine-hire-543609.jpg?v=1756446767"},"aspect_ratio":0.8,"height":1800,"media_type":"image","src":"\/\/www.thebirthstore.com.au\/cdn\/shop\/files\/labour-tens-machine-hire-543609.jpg?v=1756446767","width":1440},{"alt":"Labour TENS Machine Hire - The Birth Store - The Birth Store","id":28800751796413,"position":4,"preview_image":{"aspect_ratio":0.75,"height":2048,"width":1536,"src":"\/\/www.thebirthstore.com.au\/cdn\/shop\/files\/labour-tens-machine-hire-857177.jpg?v=1756446767"},"aspect_ratio":0.75,"height":2048,"media_type":"image","src":"\/\/www.thebirthstore.com.au\/cdn\/shop\/files\/labour-tens-machine-hire-857177.jpg?v=1756446767","width":1536},{"alt":null,"id":28800734953661,"position":5,"preview_image":{"aspect_ratio":0.563,"height":1920,"width":1080,"src":"\/\/www.thebirthstore.com.au\/cdn\/shop\/files\/preview_images\/4a0cbcc0853c429aa70edc55130dbc6a.thumbnail.0000000000.jpg?v=1747837646"},"aspect_ratio":0.563,"duration":21920,"media_type":"video","sources":[{"format":"mp4","height":480,"mime_type":"video\/mp4","url":"\/\/www.thebirthstore.com.au\/cdn\/shop\/videos\/c\/vp\/4a0cbcc0853c429aa70edc55130dbc6a\/4a0cbcc0853c429aa70edc55130dbc6a.SD-480p-1.5Mbps-47978508.mp4?v=0","width":270},{"format":"mp4","height":1080,"mime_type":"video\/mp4","url":"\/\/www.thebirthstore.com.au\/cdn\/shop\/videos\/c\/vp\/4a0cbcc0853c429aa70edc55130dbc6a\/4a0cbcc0853c429aa70edc55130dbc6a.HD-1080p-7.2Mbps-47978508.mp4?v=0","width":606},{"format":"mp4","height":720,"mime_type":"video\/mp4","url":"\/\/www.thebirthstore.com.au\/cdn\/shop\/videos\/c\/vp\/4a0cbcc0853c429aa70edc55130dbc6a\/4a0cbcc0853c429aa70edc55130dbc6a.HD-720p-4.5Mbps-47978508.mp4?v=0","width":404},{"format":"m3u8","height":1080,"mime_type":"application\/x-mpegURL","url":"\/\/www.thebirthstore.com.au\/cdn\/shop\/videos\/c\/vp\/4a0cbcc0853c429aa70edc55130dbc6a\/4a0cbcc0853c429aa70edc55130dbc6a.m3u8?v=0","width":606}]},{"alt":"Labour TENS Machine Hire - The Birth Store - The Birth Store","id":28800751829181,"position":6,"preview_image":{"aspect_ratio":0.75,"height":2048,"width":1536,"src":"\/\/www.thebirthstore.com.au\/cdn\/shop\/files\/labour-tens-machine-hire-430497.jpg?v=1756446767"},"aspect_ratio":0.75,"height":2048,"media_type":"image","src":"\/\/www.thebirthstore.com.au\/cdn\/shop\/files\/labour-tens-machine-hire-430497.jpg?v=1756446767","width":1536},{"alt":null,"id":28770263662781,"position":7,"preview_image":{"aspect_ratio":0.563,"height":1920,"width":1080,"src":"\/\/www.thebirthstore.com.au\/cdn\/shop\/files\/preview_images\/32dcf082a8e24b0db258d949cda0bdf5.thumbnail.0000000000.jpg?v=1747288006"},"aspect_ratio":0.563,"duration":7150,"media_type":"video","sources":[{"format":"mp4","height":480,"mime_type":"video\/mp4","url":"\/\/www.thebirthstore.com.au\/cdn\/shop\/videos\/c\/vp\/32dcf082a8e24b0db258d949cda0bdf5\/32dcf082a8e24b0db258d949cda0bdf5.SD-480p-0.9Mbps-47614201.mp4?v=0","width":270},{"format":"mp4","height":1080,"mime_type":"video\/mp4","url":"\/\/www.thebirthstore.com.au\/cdn\/shop\/videos\/c\/vp\/32dcf082a8e24b0db258d949cda0bdf5\/32dcf082a8e24b0db258d949cda0bdf5.HD-1080p-2.5Mbps-47614201.mp4?v=0","width":606},{"format":"mp4","height":720,"mime_type":"video\/mp4","url":"\/\/www.thebirthstore.com.au\/cdn\/shop\/videos\/c\/vp\/32dcf082a8e24b0db258d949cda0bdf5\/32dcf082a8e24b0db258d949cda0bdf5.HD-720p-1.6Mbps-47614201.mp4?v=0","width":404},{"format":"m3u8","height":1080,"mime_type":"application\/x-mpegURL","url":"\/\/www.thebirthstore.com.au\/cdn\/shop\/videos\/c\/vp\/32dcf082a8e24b0db258d949cda0bdf5\/32dcf082a8e24b0db258d949cda0bdf5.m3u8?v=0","width":606}]},{"alt":"Labour TENS Machine Hire - The Birth Store - The Birth Store","id":29468042821821,"position":8,"preview_image":{"aspect_ratio":1.0,"height":1080,"width":1080,"src":"\/\/www.thebirthstore.com.au\/cdn\/shop\/files\/labour-tens-machine-hire-6971704.png?v=1756511826"},"aspect_ratio":1.0,"height":1080,"media_type":"image","src":"\/\/www.thebirthstore.com.au\/cdn\/shop\/files\/labour-tens-machine-hire-6971704.png?v=1756511826","width":1080},{"alt":"Labour TENS Machine Hire - The Birth Store - The Birth Store","id":29468043673789,"position":9,"preview_image":{"aspect_ratio":1.0,"height":1080,"width":1080,"src":"\/\/www.thebirthstore.com.au\/cdn\/shop\/files\/labour-tens-machine-hire-3380341.png?v=1756511826"},"aspect_ratio":1.0,"height":1080,"media_type":"image","src":"\/\/www.thebirthstore.com.au\/cdn\/shop\/files\/labour-tens-machine-hire-3380341.png?v=1756511826","width":1080},{"alt":"Labour TENS Machine Hire - The Birth Store - The Birth Store","id":29468045017277,"position":10,"preview_image":{"aspect_ratio":1.0,"height":1080,"width":1080,"src":"\/\/www.thebirthstore.com.au\/cdn\/shop\/files\/labour-tens-machine-hire-9652507.png?v=1756511826"},"aspect_ratio":1.0,"height":1080,"media_type":"image","src":"\/\/www.thebirthstore.com.au\/cdn\/shop\/files\/labour-tens-machine-hire-9652507.png?v=1756511826","width":1080},{"alt":"Labour TENS Machine Hire - The Birth Store - The Birth Store","id":29468045639869,"position":11,"preview_image":{"aspect_ratio":1.0,"height":1080,"width":1080,"src":"\/\/www.thebirthstore.com.au\/cdn\/shop\/files\/labour-tens-machine-hire-4267878.png?v=1756511826"},"aspect_ratio":1.0,"height":1080,"media_type":"image","src":"\/\/www.thebirthstore.com.au\/cdn\/shop\/files\/labour-tens-machine-hire-4267878.png?v=1756511826","width":1080}]
{"item":{"id":7470242234557,"title":"Lactation Drink Mix","handle":"lactation-chocolate-drink-mix","description":"\u003cp\u003eLooking for the perfect tantalising drink to boost your milk supply?\u003c\/p\u003e\n\u003cp\u003eMade with a smooth organic fair trade Dutch cocoa, this drink made\u003cem\u003e\u003cspan\u003e \u003c\/span\u003ehot or cold\u003c\/em\u003e\u003cspan\u003e \u003c\/span\u003ewill give a rich creamy taste.\u003cspan\u003e \u003c\/span\u003e\u003cb data-mce-fragment=\"1\"\u003e\u003ci data-mce-fragment=\"1\"\u003eFree from gluten, dairy, soy as well as vegan friendly\u003c\/i\u003e\u003c\/b\u003e this drink is perfect for anytime of the day.\u003c\/p\u003e\n\u003cp\u003eOur 550gm bag is going to keep you stocked up for over a month. Allowing for a total of 44 serves. \u003c\/p\u003e\n\u003cp\u003eWith a shelf life of 12 months. Ensure to reseal each time. Store in the cool dry place.\u003c\/p\u003e\n\u003cp\u003e\u003cem\u003e(Note, this product is gluten free however current packaging doesn’t reflect this due to a print error. If you have any questions or concerns please don’t hesitate to ask)\u003c\/em\u003e\u003c\/p\u003e","published_at":"2023-05-04T10:38:17+08:00","created_at":"2023-05-04T10:38:17+08:00","vendor":"Milky Goodness","type":"","tags":["Baby Shower Gifts - Mum","Breastfeeding","Lactation Products","Mum"],"price":3495,"price_min":3495,"price_max":3495,"available":false,"price_varies":false,"compare_at_price":null,"compare_at_price_min":0,"compare_at_price_max":0,"compare_at_price_varies":false,"variants":[{"id":43221250506941,"title":"Chocolate","option1":"Chocolate","option2":null,"option3":null,"sku":"","requires_shipping":true,"taxable":false,"featured_image":{"id":34641020158141,"product_id":7470242234557,"position":1,"created_at":"2024-05-06T11:59:48+08:00","updated_at":"2024-05-06T11:59:48+08:00","alt":"Lactation Drink Mix - 2 Flavours - The Birth Store-Milky Goodness","width":1080,"height":1080,"src":"\/\/www.thebirthstore.com.au\/cdn\/shop\/files\/lactation-drink-mix-2-flavours-638247.jpg?v=1714967988","variant_ids":[43221250506941]},"available":false,"name":"Lactation Drink Mix - Chocolate","public_title":"Chocolate","options":["Chocolate"],"price":3495,"weight":570,"compare_at_price":null,"inventory_management":"shopify","barcode":"49978813","featured_media":{"alt":"Lactation Drink Mix - 2 Flavours - The Birth Store-Milky Goodness","id":27007589056701,"position":1,"preview_image":{"aspect_ratio":1.0,"height":1080,"width":1080,"src":"\/\/www.thebirthstore.com.au\/cdn\/shop\/files\/lactation-drink-mix-2-flavours-638247.jpg?v=1714967988"}},"requires_selling_plan":false,"selling_plan_allocations":[]},{"id":43221250539709,"title":"Caramel","option1":"Caramel","option2":null,"option3":null,"sku":"","requires_shipping":true,"taxable":false,"featured_image":{"id":38738801852605,"product_id":7470242234557,"position":7,"created_at":"2025-11-02T23:00:05+08:00","updated_at":"2025-11-03T12:22:53+08:00","alt":"Lactation Drink Mix - The Birth Store - Milky Goodness","width":1080,"height":1080,"src":"\/\/www.thebirthstore.com.au\/cdn\/shop\/files\/lactation-drink-mix-7750148.png?v=1762143773","variant_ids":[43221250539709]},"available":false,"name":"Lactation Drink Mix - Caramel","public_title":"Caramel","options":["Caramel"],"price":3495,"weight":570,"compare_at_price":null,"inventory_management":"shopify","barcode":"50539709","featured_media":{"alt":"Lactation Drink Mix - The Birth Store - Milky Goodness","id":29988493754557,"position":7,"preview_image":{"aspect_ratio":1.0,"height":1080,"width":1080,"src":"\/\/www.thebirthstore.com.au\/cdn\/shop\/files\/lactation-drink-mix-7750148.png?v=1762143773"}},"requires_selling_plan":false,"selling_plan_allocations":[]}],"images":["\/\/www.thebirthstore.com.au\/cdn\/shop\/files\/lactation-drink-mix-2-flavours-638247.jpg?v=1714967988","\/\/www.thebirthstore.com.au\/cdn\/shop\/files\/lactation-drink-mix-2-flavours-524784.jpg?v=1714967988","\/\/www.thebirthstore.com.au\/cdn\/shop\/files\/lactation-drink-mix-2-flavours-310364.jpg?v=1714967988","\/\/www.thebirthstore.com.au\/cdn\/shop\/files\/lactation-drink-mix-2-flavours-976020.jpg?v=1714967988","\/\/www.thebirthstore.com.au\/cdn\/shop\/files\/lactation-drink-mix-2-flavours-888113.jpg?v=1714967988","\/\/www.thebirthstore.com.au\/cdn\/shop\/files\/lactation-drink-mix-2-flavours-793483.jpg?v=1714967988","\/\/www.thebirthstore.com.au\/cdn\/shop\/files\/lactation-drink-mix-7750148.png?v=1762143773"],"featured_image":"\/\/www.thebirthstore.com.au\/cdn\/shop\/files\/lactation-drink-mix-2-flavours-638247.jpg?v=1714967988","options":["Flavour"],"media":[{"alt":"Lactation Drink Mix - 2 Flavours - The Birth Store-Milky Goodness","id":27007589056701,"position":1,"preview_image":{"aspect_ratio":1.0,"height":1080,"width":1080,"src":"\/\/www.thebirthstore.com.au\/cdn\/shop\/files\/lactation-drink-mix-2-flavours-638247.jpg?v=1714967988"},"aspect_ratio":1.0,"height":1080,"media_type":"image","src":"\/\/www.thebirthstore.com.au\/cdn\/shop\/files\/lactation-drink-mix-2-flavours-638247.jpg?v=1714967988","width":1080},{"alt":"Lactation Drink Mix - 2 Flavours - The Birth Store-Milky Goodness","id":27007589286077,"position":2,"preview_image":{"aspect_ratio":1.0,"height":511,"width":511,"src":"\/\/www.thebirthstore.com.au\/cdn\/shop\/files\/lactation-drink-mix-2-flavours-524784.jpg?v=1714967988"},"aspect_ratio":1.0,"height":511,"media_type":"image","src":"\/\/www.thebirthstore.com.au\/cdn\/shop\/files\/lactation-drink-mix-2-flavours-524784.jpg?v=1714967988","width":511},{"alt":"Lactation Drink Mix - 2 Flavours - The Birth Store-Milky Goodness","id":27007589351613,"position":3,"preview_image":{"aspect_ratio":1.0,"height":1000,"width":1000,"src":"\/\/www.thebirthstore.com.au\/cdn\/shop\/files\/lactation-drink-mix-2-flavours-310364.jpg?v=1714967988"},"aspect_ratio":1.0,"height":1000,"media_type":"image","src":"\/\/www.thebirthstore.com.au\/cdn\/shop\/files\/lactation-drink-mix-2-flavours-310364.jpg?v=1714967988","width":1000},{"alt":"Lactation Drink Mix - 2 Flavours - The Birth Store-Milky Goodness","id":27007589449917,"position":4,"preview_image":{"aspect_ratio":1.0,"height":511,"width":511,"src":"\/\/www.thebirthstore.com.au\/cdn\/shop\/files\/lactation-drink-mix-2-flavours-976020.jpg?v=1714967988"},"aspect_ratio":1.0,"height":511,"media_type":"image","src":"\/\/www.thebirthstore.com.au\/cdn\/shop\/files\/lactation-drink-mix-2-flavours-976020.jpg?v=1714967988","width":511},{"alt":"Lactation Drink Mix - 2 Flavours - The Birth Store-Milky Goodness","id":27007589548221,"position":5,"preview_image":{"aspect_ratio":0.503,"height":1192,"width":600,"src":"\/\/www.thebirthstore.com.au\/cdn\/shop\/files\/lactation-drink-mix-2-flavours-888113.jpg?v=1714967988"},"aspect_ratio":0.503,"height":1192,"media_type":"image","src":"\/\/www.thebirthstore.com.au\/cdn\/shop\/files\/lactation-drink-mix-2-flavours-888113.jpg?v=1714967988","width":600},{"alt":"Lactation Drink Mix - 2 Flavours - The Birth Store-Milky Goodness","id":27007589646525,"position":6,"preview_image":{"aspect_ratio":0.502,"height":1258,"width":632,"src":"\/\/www.thebirthstore.com.au\/cdn\/shop\/files\/lactation-drink-mix-2-flavours-793483.jpg?v=1714967988"},"aspect_ratio":0.502,"height":1258,"media_type":"image","src":"\/\/www.thebirthstore.com.au\/cdn\/shop\/files\/lactation-drink-mix-2-flavours-793483.jpg?v=1714967988","width":632},{"alt":"Lactation Drink Mix - The Birth Store - Milky Goodness","id":29988493754557,"position":7,"preview_image":{"aspect_ratio":1.0,"height":1080,"width":1080,"src":"\/\/www.thebirthstore.com.au\/cdn\/shop\/files\/lactation-drink-mix-7750148.png?v=1762143773"},"aspect_ratio":1.0,"height":1080,"media_type":"image","src":"\/\/www.thebirthstore.com.au\/cdn\/shop\/files\/lactation-drink-mix-7750148.png?v=1762143773","width":1080}],"requires_selling_plan":false,"selling_plan_groups":[],"content":"\u003cp\u003eLooking for the perfect tantalising drink to boost your milk supply?\u003c\/p\u003e\n\u003cp\u003eMade with a smooth organic fair trade Dutch cocoa, this drink made\u003cem\u003e\u003cspan\u003e \u003c\/span\u003ehot or cold\u003c\/em\u003e\u003cspan\u003e \u003c\/span\u003ewill give a rich creamy taste.\u003cspan\u003e \u003c\/span\u003e\u003cb data-mce-fragment=\"1\"\u003e\u003ci data-mce-fragment=\"1\"\u003eFree from gluten, dairy, soy as well as vegan friendly\u003c\/i\u003e\u003c\/b\u003e this drink is perfect for anytime of the day.\u003c\/p\u003e\n\u003cp\u003eOur 550gm bag is going to keep you stocked up for over a month. Allowing for a total of 44 serves. \u003c\/p\u003e\n\u003cp\u003eWith a shelf life of 12 months. Ensure to reseal each time. Store in the cool dry place.\u003c\/p\u003e\n\u003cp\u003e\u003cem\u003e(Note, this product is gluten free however current packaging doesn’t reflect this due to a print error. If you have any questions or concerns please don’t hesitate to ask)\u003c\/em\u003e\u003c\/p\u003e"},"options":[{"name":"Flavour","position":1,"values":["Chocolate","Caramel"]}],"custom_metafields":{},"metafields":{"badge":"\u003cdiv style='display:none' class='jdgm-prev-badge' data-average-rating='0.00' data-number-of-reviews='0' data-number-of-questions='0'\u003e \u003cspan class='jdgm-prev-badge__stars' data-score='0.00' tabindex='0' aria-label='0.00 stars' role='button'\u003e \u003cspan class='jdgm-star jdgm--off'\u003e\u003c\/span\u003e\u003cspan class='jdgm-star jdgm--off'\u003e\u003c\/span\u003e\u003cspan class='jdgm-star jdgm--off'\u003e\u003c\/span\u003e\u003cspan class='jdgm-star jdgm--off'\u003e\u003c\/span\u003e\u003cspan class='jdgm-star jdgm--off'\u003e\u003c\/span\u003e \u003c\/span\u003e \u003cspan class='jdgm-prev-badge__text'\u003e No reviews \u003c\/span\u003e \u003c\/div\u003e","widget":"\u003cdiv class='jdgm-rev-widg' data-updated-at='2025-06-13T16:12:53Z' data-average-rating='0.00' data-number-of-reviews='0' data-number-of-questions='0'\u003e \u003cstyle class='jdgm-temp-hiding-style'\u003e.jdgm-rev-widg{ display: none }\u003c\/style\u003e \u003cdiv class='jdgm-rev-widg__header'\u003e \u003ch2 class='jdgm-rev-widg__title'\u003eCustomer Reviews\u003c\/h2\u003e \u003cdiv class='jdgm-rev-widg__summary'\u003e \u003cdiv class='jdgm-rev-widg__summary-stars' aria-label='Average rating is 0.00 stars' role='img'\u003e \u003cspan class='jdgm-star jdgm--off'\u003e\u003c\/span\u003e\u003cspan class='jdgm-star jdgm--off'\u003e\u003c\/span\u003e\u003cspan class='jdgm-star jdgm--off'\u003e\u003c\/span\u003e\u003cspan class='jdgm-star jdgm--off'\u003e\u003c\/span\u003e\u003cspan class='jdgm-star jdgm--off'\u003e\u003c\/span\u003e \u003c\/div\u003e \u003cdiv class='jdgm-rev-widg__summary-text'\u003eBe the first to write a review\u003c\/div\u003e \u003c\/div\u003e \u003ca style='display: none' href='#' class='jdgm-write-rev-link' role='button'\u003eWrite a review\u003c\/a\u003e \u003cdiv class='jdgm-histogram jdgm-temp-hidden'\u003e \u003cdiv class='jdgm-histogram__row' data-rating='5' data-frequency='0' data-percentage='0'\u003e \u003cdiv class='jdgm-histogram__star' role='button' aria-label=\"0% (0) reviews with 5 star rating\" tabindex='0' \u003e\u003cspan class='jdgm-star jdgm--on'\u003e\u003c\/span\u003e\u003cspan class='jdgm-star jdgm--on'\u003e\u003c\/span\u003e\u003cspan class='jdgm-star jdgm--on'\u003e\u003c\/span\u003e\u003cspan class='jdgm-star jdgm--on'\u003e\u003c\/span\u003e\u003cspan class='jdgm-star jdgm--on'\u003e\u003c\/span\u003e\u003c\/div\u003e \u003cdiv class='jdgm-histogram__bar'\u003e \u003cdiv class='jdgm-histogram__bar-content' style='width: 0%;'\u003e \u003c\/div\u003e \u003c\/div\u003e \u003cdiv class='jdgm-histogram__percentage'\u003e0%\u003c\/div\u003e \u003cdiv class='jdgm-histogram__frequency'\u003e(0)\u003c\/div\u003e \u003c\/div\u003e \u003cdiv class='jdgm-histogram__row' data-rating='4' data-frequency='0' data-percentage='0'\u003e \u003cdiv class='jdgm-histogram__star' role='button' aria-label=\"0% (0) reviews with 4 star rating\" tabindex='0' \u003e\u003cspan class='jdgm-star jdgm--on'\u003e\u003c\/span\u003e\u003cspan class='jdgm-star jdgm--on'\u003e\u003c\/span\u003e\u003cspan class='jdgm-star jdgm--on'\u003e\u003c\/span\u003e\u003cspan class='jdgm-star jdgm--on'\u003e\u003c\/span\u003e\u003cspan class='jdgm-star jdgm--off'\u003e\u003c\/span\u003e\u003c\/div\u003e \u003cdiv class='jdgm-histogram__bar'\u003e \u003cdiv class='jdgm-histogram__bar-content' style='width: 0%;'\u003e \u003c\/div\u003e \u003c\/div\u003e \u003cdiv class='jdgm-histogram__percentage'\u003e0%\u003c\/div\u003e \u003cdiv class='jdgm-histogram__frequency'\u003e(0)\u003c\/div\u003e \u003c\/div\u003e \u003cdiv class='jdgm-histogram__row' data-rating='3' data-frequency='0' data-percentage='0'\u003e \u003cdiv class='jdgm-histogram__star' role='button' aria-label=\"0% (0) reviews with 3 star rating\" tabindex='0' \u003e\u003cspan class='jdgm-star jdgm--on'\u003e\u003c\/span\u003e\u003cspan class='jdgm-star jdgm--on'\u003e\u003c\/span\u003e\u003cspan class='jdgm-star jdgm--on'\u003e\u003c\/span\u003e\u003cspan class='jdgm-star jdgm--off'\u003e\u003c\/span\u003e\u003cspan class='jdgm-star jdgm--off'\u003e\u003c\/span\u003e\u003c\/div\u003e \u003cdiv class='jdgm-histogram__bar'\u003e \u003cdiv class='jdgm-histogram__bar-content' style='width: 0%;'\u003e \u003c\/div\u003e \u003c\/div\u003e \u003cdiv class='jdgm-histogram__percentage'\u003e0%\u003c\/div\u003e \u003cdiv class='jdgm-histogram__frequency'\u003e(0)\u003c\/div\u003e \u003c\/div\u003e \u003cdiv class='jdgm-histogram__row' data-rating='2' data-frequency='0' data-percentage='0'\u003e \u003cdiv class='jdgm-histogram__star' role='button' aria-label=\"0% (0) reviews with 2 star rating\" tabindex='0' \u003e\u003cspan class='jdgm-star jdgm--on'\u003e\u003c\/span\u003e\u003cspan class='jdgm-star jdgm--on'\u003e\u003c\/span\u003e\u003cspan class='jdgm-star jdgm--off'\u003e\u003c\/span\u003e\u003cspan class='jdgm-star jdgm--off'\u003e\u003c\/span\u003e\u003cspan class='jdgm-star jdgm--off'\u003e\u003c\/span\u003e\u003c\/div\u003e \u003cdiv class='jdgm-histogram__bar'\u003e \u003cdiv class='jdgm-histogram__bar-content' style='width: 0%;'\u003e \u003c\/div\u003e \u003c\/div\u003e \u003cdiv class='jdgm-histogram__percentage'\u003e0%\u003c\/div\u003e \u003cdiv class='jdgm-histogram__frequency'\u003e(0)\u003c\/div\u003e \u003c\/div\u003e \u003cdiv class='jdgm-histogram__row' data-rating='1' data-frequency='0' data-percentage='0'\u003e \u003cdiv class='jdgm-histogram__star' role='button' aria-label=\"0% (0) reviews with 1 star rating\" tabindex='0' \u003e\u003cspan class='jdgm-star jdgm--on'\u003e\u003c\/span\u003e\u003cspan class='jdgm-star jdgm--off'\u003e\u003c\/span\u003e\u003cspan class='jdgm-star jdgm--off'\u003e\u003c\/span\u003e\u003cspan class='jdgm-star jdgm--off'\u003e\u003c\/span\u003e\u003cspan class='jdgm-star jdgm--off'\u003e\u003c\/span\u003e\u003c\/div\u003e \u003cdiv class='jdgm-histogram__bar'\u003e \u003cdiv class='jdgm-histogram__bar-content' style='width: 0%;'\u003e \u003c\/div\u003e \u003c\/div\u003e \u003cdiv class='jdgm-histogram__percentage'\u003e0%\u003c\/div\u003e \u003cdiv class='jdgm-histogram__frequency'\u003e(0)\u003c\/div\u003e \u003c\/div\u003e \u003cdiv class='jdgm-histogram__row jdgm-histogram__clear-filter' data-rating=null tabindex='0'\u003e\u003c\/div\u003e \u003c\/div\u003e \u003cdiv class='jdgm-rev-widg__sort-wrapper'\u003e\u003c\/div\u003e \u003c\/div\u003e \u003cdiv class='jdgm-rev-widg__body'\u003e \u003cdiv class='jdgm-rev-widg__reviews'\u003e\u003c\/div\u003e \u003cdiv class='jdgm-paginate' data-per-page='10' data-url='https:\/\/api.judge.me\/reviews\/reviews_for_widget' style=\"display: none;\"\u003e\u003c\/div\u003e \u003c\/div\u003e \u003cdiv class='jdgm-rev-widg__paginate-spinner-wrapper'\u003e \u003cdiv class='jdgm-spinner'\u003e\u003c\/div\u003e \u003c\/div\u003e \u003c\/div\u003e"},"collections":[{"id":281356533949,"handle":"baby-shower-gifts","title":"Baby Shower Gifts - Mum","updated_at":"2025-12-28T20:10:01+08:00","body_html":"\u003cp\u003eLooking for a unique baby shower gift? Or an all-in-one bundle pack to suit all your needs? We've got just the thing!\u003c\/p\u003e","published_at":"2021-12-06T13:43:56+08:00","sort_order":"best-selling","template_suffix":"baby-shower-gifts","disjunctive":true,"rules":[{"column":"tag","relation":"equals","condition":"Baby Shower Gifts - Mum"},{"column":"tag","relation":"equals","condition":"Gift Card"}],"published_scope":"global","image":{"created_at":"2024-05-06T11:59:28+08:00","alt":"Baby Shower Gifts - The Birth Store","width":1200,"height":1800,"src":"\/\/www.thebirthstore.com.au\/cdn\/shop\/collections\/baby-shower-gifts-401770.jpg?v=1761791272"}},{"id":281712427197,"handle":"breastfeeding","title":"Breastfeeding","updated_at":"2025-12-28T20:10:01+08:00","body_html":"","published_at":"2021-12-20T14:19:33+08:00","sort_order":"best-selling","template_suffix":"breastfeeding-collection","disjunctive":false,"rules":[{"column":"tag","relation":"equals","condition":"Breastfeeding"}],"published_scope":"global","image":{"created_at":"2024-05-06T11:59:34+08:00","alt":"Breastfeeding - The Birth Store","width":620,"height":635,"src":"\/\/www.thebirthstore.com.au\/cdn\/shop\/collections\/breastfeeding-793872.jpg?v=1714967974"}},{"id":261657460925,"handle":"buy","title":"Buy","updated_at":"2025-12-28T20:10:01+08:00","body_html":"\u003cp\u003eBrowse all of our pregnancy, labour \u0026amp; birth, postpartum and baby essentials here.\u003cbr\u003e\u003c\/p\u003e\n\u003cp\u003e\u003cspan\u003eYou can even buy now and pay later with Afterpay!\u003c\/span\u003e\u003c\/p\u003e","published_at":"2021-03-10T12:05:31+08:00","sort_order":"best-selling","template_suffix":"shop-all-collection","disjunctive":false,"rules":[{"column":"title","relation":"not_contains","condition":"Hire"}],"published_scope":"global","image":{"created_at":"2024-05-06T11:59:42+08:00","alt":"Buy - The Birth Store","width":2048,"height":2048,"src":"\/\/www.thebirthstore.com.au\/cdn\/shop\/collections\/buy-964856.jpg?v=1714967982"}},{"id":292919476413,"handle":"lactation-products","title":"Lactation Products","updated_at":"2025-12-28T20:10:01+08:00","body_html":"","published_at":"2023-03-22T12:22:41+08:00","sort_order":"best-selling","template_suffix":"lactation-products-collec","disjunctive":false,"rules":[{"column":"tag","relation":"equals","condition":"Lactation Products"}],"published_scope":"global","image":{"created_at":"2024-05-06T12:00:19+08:00","alt":"Lactation Products - The Birth Store","width":1034,"height":922,"src":"\/\/www.thebirthstore.com.au\/cdn\/shop\/collections\/lactation-products-752907.jpg?v=1714968019"}},{"id":291456483517,"handle":"shop-all","title":"Shop All - Mum","updated_at":"2025-12-28T20:10:01+08:00","body_html":"","published_at":"2022-12-23T22:04:39+08:00","sort_order":"best-selling","template_suffix":"shop-all-collection","disjunctive":false,"rules":[{"column":"variant_price","relation":"greater_than","condition":"1"},{"column":"title","relation":"not_contains","condition":"Batteries"},{"column":"tag","relation":"equals","condition":"Mum"}],"published_scope":"global","image":{"created_at":"2024-05-06T12:00:54+08:00","alt":"Shop All - The Birth Store","width":1365,"height":2048,"src":"\/\/www.thebirthstore.com.au\/cdn\/shop\/collections\/shop-all-693176.jpg?v=1714968055"}},{"id":310045933757,"handle":"shop-all-sale","title":"Shop All Sale","updated_at":"2025-12-28T20:10:01+08:00","body_html":"","published_at":"2024-11-12T13:22:43+08:00","sort_order":"alpha-asc","template_suffix":"","disjunctive":true,"rules":[{"column":"tag","relation":"equals","condition":"Bundles"},{"column":"vendor","relation":"equals","condition":"Franjos Kitchen"},{"column":"vendor","relation":"equals","condition":"Adored Illustrations"},{"column":"vendor","relation":"equals","condition":"Amazing Oils"},{"column":"vendor","relation":"equals","condition":"Ice Ice Booby"},{"column":"vendor","relation":"equals","condition":"Made to Milk"},{"column":"vendor","relation":"equals","condition":"Milky Goodness"},{"column":"vendor","relation":"equals","condition":"Seasons of Mama"},{"column":"vendor","relation":"equals","condition":"Silverette"},{"column":"vendor","relation":"equals","condition":"Snuggle Hunny"},{"column":"vendor","relation":"equals","condition":"Yung Bod"},{"column":"vendor","relation":"equals","condition":"Bare Love"},{"column":"vendor","relation":"equals","condition":"Haakaa"},{"column":"vendor","relation":"equals","condition":"Mere Botanicals"},{"column":"vendor","relation":"equals","condition":"The Birth Store Hire"},{"column":"vendor","relation":"equals","condition":"The Birth Store"}],"published_scope":"global","image":{"created_at":"2024-11-13T10:58:16+08:00","alt":"Shop All Sale - The Birth Store","width":2048,"height":1365,"src":"\/\/www.thebirthstore.com.au\/cdn\/shop\/collections\/shop-all-sale-297361.jpg?v=1731466697"}}]}
[{"alt":"Lactation Drink Mix - 2 Flavours - The Birth Store-Milky Goodness","id":27007589056701,"position":1,"preview_image":{"aspect_ratio":1.0,"height":1080,"width":1080,"src":"\/\/www.thebirthstore.com.au\/cdn\/shop\/files\/lactation-drink-mix-2-flavours-638247.jpg?v=1714967988"},"aspect_ratio":1.0,"height":1080,"media_type":"image","src":"\/\/www.thebirthstore.com.au\/cdn\/shop\/files\/lactation-drink-mix-2-flavours-638247.jpg?v=1714967988","width":1080},{"alt":"Lactation Drink Mix - 2 Flavours - The Birth Store-Milky Goodness","id":27007589286077,"position":2,"preview_image":{"aspect_ratio":1.0,"height":511,"width":511,"src":"\/\/www.thebirthstore.com.au\/cdn\/shop\/files\/lactation-drink-mix-2-flavours-524784.jpg?v=1714967988"},"aspect_ratio":1.0,"height":511,"media_type":"image","src":"\/\/www.thebirthstore.com.au\/cdn\/shop\/files\/lactation-drink-mix-2-flavours-524784.jpg?v=1714967988","width":511},{"alt":"Lactation Drink Mix - 2 Flavours - The Birth Store-Milky Goodness","id":27007589351613,"position":3,"preview_image":{"aspect_ratio":1.0,"height":1000,"width":1000,"src":"\/\/www.thebirthstore.com.au\/cdn\/shop\/files\/lactation-drink-mix-2-flavours-310364.jpg?v=1714967988"},"aspect_ratio":1.0,"height":1000,"media_type":"image","src":"\/\/www.thebirthstore.com.au\/cdn\/shop\/files\/lactation-drink-mix-2-flavours-310364.jpg?v=1714967988","width":1000},{"alt":"Lactation Drink Mix - 2 Flavours - The Birth Store-Milky Goodness","id":27007589449917,"position":4,"preview_image":{"aspect_ratio":1.0,"height":511,"width":511,"src":"\/\/www.thebirthstore.com.au\/cdn\/shop\/files\/lactation-drink-mix-2-flavours-976020.jpg?v=1714967988"},"aspect_ratio":1.0,"height":511,"media_type":"image","src":"\/\/www.thebirthstore.com.au\/cdn\/shop\/files\/lactation-drink-mix-2-flavours-976020.jpg?v=1714967988","width":511},{"alt":"Lactation Drink Mix - 2 Flavours - The Birth Store-Milky Goodness","id":27007589548221,"position":5,"preview_image":{"aspect_ratio":0.503,"height":1192,"width":600,"src":"\/\/www.thebirthstore.com.au\/cdn\/shop\/files\/lactation-drink-mix-2-flavours-888113.jpg?v=1714967988"},"aspect_ratio":0.503,"height":1192,"media_type":"image","src":"\/\/www.thebirthstore.com.au\/cdn\/shop\/files\/lactation-drink-mix-2-flavours-888113.jpg?v=1714967988","width":600},{"alt":"Lactation Drink Mix - 2 Flavours - The Birth Store-Milky Goodness","id":27007589646525,"position":6,"preview_image":{"aspect_ratio":0.502,"height":1258,"width":632,"src":"\/\/www.thebirthstore.com.au\/cdn\/shop\/files\/lactation-drink-mix-2-flavours-793483.jpg?v=1714967988"},"aspect_ratio":0.502,"height":1258,"media_type":"image","src":"\/\/www.thebirthstore.com.au\/cdn\/shop\/files\/lactation-drink-mix-2-flavours-793483.jpg?v=1714967988","width":632},{"alt":"Lactation Drink Mix - The Birth Store - Milky Goodness","id":29988493754557,"position":7,"preview_image":{"aspect_ratio":1.0,"height":1080,"width":1080,"src":"\/\/www.thebirthstore.com.au\/cdn\/shop\/files\/lactation-drink-mix-7750148.png?v=1762143773"},"aspect_ratio":1.0,"height":1080,"media_type":"image","src":"\/\/www.thebirthstore.com.au\/cdn\/shop\/files\/lactation-drink-mix-7750148.png?v=1762143773","width":1080}]
{"item":{"id":7455714705597,"title":"Lactation Drink Mixes","handle":"lactation-diy-drink-mixes-various-flavours","description":"\u003cp\u003e \u003c\/p\u003e\n\u003cp\u003eMade to Milk's selection of DIY packet mixes are perfect to enjoy in the comfort of your own home.\u003c\/p\u003e\n\u003cp\u003eThey are all packed full of natural galactagogues and Brewers Yeast which help to boost \u0026amp; support your milk supply while breastfeeding.\u003c\/p\u003e\n\u003c!----\u003e","published_at":"2023-03-22T21:51:53+08:00","created_at":"2023-03-22T21:51:53+08:00","vendor":"Made to Milk","type":"","tags":["Breastfeeding","Lactation Products","Mum"],"price":1795,"price_min":1795,"price_max":2295,"available":true,"price_varies":true,"compare_at_price":null,"compare_at_price_min":0,"compare_at_price_max":0,"compare_at_price_varies":false,"variants":[{"id":42740430569661,"title":"Smoothie Mix","option1":"Smoothie Mix","option2":null,"option3":null,"sku":"","requires_shipping":true,"taxable":false,"featured_image":{"id":38738841632957,"product_id":7455714705597,"position":7,"created_at":"2025-11-02T23:18:51+08:00","updated_at":"2025-11-03T12:22:56+08:00","alt":"Lactation Drink Mixes - The Birth Store - Made to Milk","width":1080,"height":1080,"src":"\/\/www.thebirthstore.com.au\/cdn\/shop\/files\/lactation-drink-mixes-8184831.png?v=1762143776","variant_ids":[42740430569661]},"available":false,"name":"Lactation Drink Mixes - Smoothie Mix","public_title":"Smoothie Mix","options":["Smoothie Mix"],"price":1795,"weight":320,"compare_at_price":null,"inventory_management":"shopify","barcode":"30569661","featured_media":{"alt":"Lactation Drink Mixes - The Birth Store - Made to Milk","id":29988520394941,"position":7,"preview_image":{"aspect_ratio":1.0,"height":1080,"width":1080,"src":"\/\/www.thebirthstore.com.au\/cdn\/shop\/files\/lactation-drink-mixes-8184831.png?v=1762143776"}},"requires_selling_plan":false,"selling_plan_allocations":[]},{"id":42740430602429,"title":"Toffee Caramel Latte","option1":"Toffee Caramel Latte","option2":null,"option3":null,"sku":"","requires_shipping":true,"taxable":false,"featured_image":{"id":38738838585533,"product_id":7455714705597,"position":8,"created_at":"2025-11-02T23:16:59+08:00","updated_at":"2025-11-03T12:22:56+08:00","alt":"Lactation Drink Mixes - The Birth Store - Made to Milk","width":1080,"height":1080,"src":"\/\/www.thebirthstore.com.au\/cdn\/shop\/files\/lactation-drink-mixes-8638463.png?v=1762143776","variant_ids":[42740430602429]},"available":true,"name":"Lactation Drink Mixes - Toffee Caramel Latte","public_title":"Toffee Caramel Latte","options":["Toffee Caramel Latte"],"price":2195,"weight":320,"compare_at_price":null,"inventory_management":"shopify","barcode":"30602429","featured_media":{"alt":"Lactation Drink Mixes - The Birth Store - Made to Milk","id":29988518953149,"position":8,"preview_image":{"aspect_ratio":1.0,"height":1080,"width":1080,"src":"\/\/www.thebirthstore.com.au\/cdn\/shop\/files\/lactation-drink-mixes-8638463.png?v=1762143776"}},"requires_selling_plan":false,"selling_plan_allocations":[]},{"id":42740430635197,"title":"White Hot Chocolate","option1":"White Hot Chocolate","option2":null,"option3":null,"sku":"","requires_shipping":true,"taxable":false,"featured_image":{"id":38738823971005,"product_id":7455714705597,"position":9,"created_at":"2025-11-02T23:08:47+08:00","updated_at":"2025-11-03T12:22:56+08:00","alt":"Lactation Drink Mixes - The Birth Store - Made to Milk","width":1080,"height":1080,"src":"\/\/www.thebirthstore.com.au\/cdn\/shop\/files\/lactation-drink-mixes-2979451.png?v=1762143776","variant_ids":[42740430635197]},"available":true,"name":"Lactation Drink Mixes - White Hot Chocolate","public_title":"White Hot Chocolate","options":["White Hot Chocolate"],"price":2195,"weight":320,"compare_at_price":null,"inventory_management":"shopify","barcode":"30635197","featured_media":{"alt":"Lactation Drink Mixes - The Birth Store - Made to Milk","id":29988511187133,"position":9,"preview_image":{"aspect_ratio":1.0,"height":1080,"width":1080,"src":"\/\/www.thebirthstore.com.au\/cdn\/shop\/files\/lactation-drink-mixes-2979451.png?v=1762143776"}},"requires_selling_plan":false,"selling_plan_allocations":[]},{"id":42740430667965,"title":"Creamy Chai Latte","option1":"Creamy Chai Latte","option2":null,"option3":null,"sku":"","requires_shipping":true,"taxable":false,"featured_image":{"id":38738845794493,"product_id":7455714705597,"position":10,"created_at":"2025-11-02T23:21:17+08:00","updated_at":"2025-11-03T12:22:56+08:00","alt":"Lactation Drink Mixes - The Birth Store - Made to Milk","width":1080,"height":1080,"src":"\/\/www.thebirthstore.com.au\/cdn\/shop\/files\/lactation-drink-mixes-1449595.png?v=1762143776","variant_ids":[42740430667965]},"available":true,"name":"Lactation Drink Mixes - Creamy Chai Latte","public_title":"Creamy Chai Latte","options":["Creamy Chai Latte"],"price":2295,"weight":320,"compare_at_price":null,"inventory_management":"shopify","barcode":"30667965","featured_media":{"alt":"Lactation Drink Mixes - The Birth Store - Made to Milk","id":29988522983613,"position":10,"preview_image":{"aspect_ratio":1.0,"height":1080,"width":1080,"src":"\/\/www.thebirthstore.com.au\/cdn\/shop\/files\/lactation-drink-mixes-1449595.png?v=1762143776"}},"requires_selling_plan":false,"selling_plan_allocations":[]},{"id":42889149317309,"title":"Deluxe Hot Chocolate","option1":"Deluxe Hot Chocolate","option2":null,"option3":null,"sku":"","requires_shipping":true,"taxable":false,"featured_image":{"id":38738818564285,"product_id":7455714705597,"position":11,"created_at":"2025-11-02T23:05:54+08:00","updated_at":"2025-11-03T12:22:56+08:00","alt":"Lactation Drink Mixes - The Birth Store - Made to Milk","width":1080,"height":1080,"src":"\/\/www.thebirthstore.com.au\/cdn\/shop\/files\/lactation-drink-mixes-7063831.png?v=1762143776","variant_ids":[42889149317309]},"available":true,"name":"Lactation Drink Mixes - Deluxe Hot Chocolate","public_title":"Deluxe Hot Chocolate","options":["Deluxe Hot Chocolate"],"price":2195,"weight":320,"compare_at_price":null,"inventory_management":"shopify","barcode":"49317309","featured_media":{"alt":"Lactation Drink Mixes - The Birth Store - Made to Milk","id":29988507549885,"position":11,"preview_image":{"aspect_ratio":1.0,"height":1080,"width":1080,"src":"\/\/www.thebirthstore.com.au\/cdn\/shop\/files\/lactation-drink-mixes-7063831.png?v=1762143776"}},"requires_selling_plan":false,"selling_plan_allocations":[]}],"images":["\/\/www.thebirthstore.com.au\/cdn\/shop\/files\/lactation-drink-mixes-various-flavours-407925.jpg?v=1714967988","\/\/www.thebirthstore.com.au\/cdn\/shop\/files\/lactation-drink-mixes-various-flavours-688625.jpg?v=1714967988","\/\/www.thebirthstore.com.au\/cdn\/shop\/files\/lactation-drink-mixes-various-flavours-677437.jpg?v=1714967988","\/\/www.thebirthstore.com.au\/cdn\/shop\/files\/lactation-drink-mixes-various-flavours-915472.jpg?v=1714967988","\/\/www.thebirthstore.com.au\/cdn\/shop\/files\/lactation-drink-mixes-various-flavours-235706.jpg?v=1714967988","\/\/www.thebirthstore.com.au\/cdn\/shop\/files\/lactation-drink-mixes-various-flavours-994353.jpg?v=1714967988","\/\/www.thebirthstore.com.au\/cdn\/shop\/files\/lactation-drink-mixes-8184831.png?v=1762143776","\/\/www.thebirthstore.com.au\/cdn\/shop\/files\/lactation-drink-mixes-8638463.png?v=1762143776","\/\/www.thebirthstore.com.au\/cdn\/shop\/files\/lactation-drink-mixes-2979451.png?v=1762143776","\/\/www.thebirthstore.com.au\/cdn\/shop\/files\/lactation-drink-mixes-1449595.png?v=1762143776","\/\/www.thebirthstore.com.au\/cdn\/shop\/files\/lactation-drink-mixes-7063831.png?v=1762143776"],"featured_image":"\/\/www.thebirthstore.com.au\/cdn\/shop\/files\/lactation-drink-mixes-various-flavours-407925.jpg?v=1714967988","options":["Flavours"],"media":[{"alt":"Lactation Drink Mixes - Various Flavours - The Birth Store-Made to Milk","id":27007589122237,"position":1,"preview_image":{"aspect_ratio":1.0,"height":1080,"width":1080,"src":"\/\/www.thebirthstore.com.au\/cdn\/shop\/files\/lactation-drink-mixes-various-flavours-407925.jpg?v=1714967988"},"aspect_ratio":1.0,"height":1080,"media_type":"image","src":"\/\/www.thebirthstore.com.au\/cdn\/shop\/files\/lactation-drink-mixes-various-flavours-407925.jpg?v=1714967988","width":1080},{"alt":"Lactation Drink Mixes - Various Flavours - The Birth Store-Made to Milk","id":27007589318845,"position":2,"preview_image":{"aspect_ratio":1.0,"height":1080,"width":1080,"src":"\/\/www.thebirthstore.com.au\/cdn\/shop\/files\/lactation-drink-mixes-various-flavours-688625.jpg?v=1714967988"},"aspect_ratio":1.0,"height":1080,"media_type":"image","src":"\/\/www.thebirthstore.com.au\/cdn\/shop\/files\/lactation-drink-mixes-various-flavours-688625.jpg?v=1714967988","width":1080},{"alt":"Lactation Drink Mixes - Various Flavours - The Birth Store-Made to Milk","id":27007589384381,"position":3,"preview_image":{"aspect_ratio":1.0,"height":1080,"width":1080,"src":"\/\/www.thebirthstore.com.au\/cdn\/shop\/files\/lactation-drink-mixes-various-flavours-677437.jpg?v=1714967988"},"aspect_ratio":1.0,"height":1080,"media_type":"image","src":"\/\/www.thebirthstore.com.au\/cdn\/shop\/files\/lactation-drink-mixes-various-flavours-677437.jpg?v=1714967988","width":1080},{"alt":"Lactation Drink Mixes - Various Flavours - The Birth Store-Made to Milk","id":27007589482685,"position":4,"preview_image":{"aspect_ratio":1.0,"height":1080,"width":1080,"src":"\/\/www.thebirthstore.com.au\/cdn\/shop\/files\/lactation-drink-mixes-various-flavours-915472.jpg?v=1714967988"},"aspect_ratio":1.0,"height":1080,"media_type":"image","src":"\/\/www.thebirthstore.com.au\/cdn\/shop\/files\/lactation-drink-mixes-various-flavours-915472.jpg?v=1714967988","width":1080},{"alt":"Lactation Drink Mixes - Various Flavours - The Birth Store-Made to Milk","id":27007589580989,"position":5,"preview_image":{"aspect_ratio":1.0,"height":1080,"width":1080,"src":"\/\/www.thebirthstore.com.au\/cdn\/shop\/files\/lactation-drink-mixes-various-flavours-235706.jpg?v=1714967988"},"aspect_ratio":1.0,"height":1080,"media_type":"image","src":"\/\/www.thebirthstore.com.au\/cdn\/shop\/files\/lactation-drink-mixes-various-flavours-235706.jpg?v=1714967988","width":1080},{"alt":"Lactation Drink Mixes - Various Flavours - The Birth Store-Made to Milk","id":27007589679293,"position":6,"preview_image":{"aspect_ratio":1.0,"height":720,"width":720,"src":"\/\/www.thebirthstore.com.au\/cdn\/shop\/files\/lactation-drink-mixes-various-flavours-994353.jpg?v=1714967988"},"aspect_ratio":1.0,"height":720,"media_type":"image","src":"\/\/www.thebirthstore.com.au\/cdn\/shop\/files\/lactation-drink-mixes-various-flavours-994353.jpg?v=1714967988","width":720},{"alt":"Lactation Drink Mixes - The Birth Store - Made to Milk","id":29988520394941,"position":7,"preview_image":{"aspect_ratio":1.0,"height":1080,"width":1080,"src":"\/\/www.thebirthstore.com.au\/cdn\/shop\/files\/lactation-drink-mixes-8184831.png?v=1762143776"},"aspect_ratio":1.0,"height":1080,"media_type":"image","src":"\/\/www.thebirthstore.com.au\/cdn\/shop\/files\/lactation-drink-mixes-8184831.png?v=1762143776","width":1080},{"alt":"Lactation Drink Mixes - The Birth Store - Made to Milk","id":29988518953149,"position":8,"preview_image":{"aspect_ratio":1.0,"height":1080,"width":1080,"src":"\/\/www.thebirthstore.com.au\/cdn\/shop\/files\/lactation-drink-mixes-8638463.png?v=1762143776"},"aspect_ratio":1.0,"height":1080,"media_type":"image","src":"\/\/www.thebirthstore.com.au\/cdn\/shop\/files\/lactation-drink-mixes-8638463.png?v=1762143776","width":1080},{"alt":"Lactation Drink Mixes - The Birth Store - Made to Milk","id":29988511187133,"position":9,"preview_image":{"aspect_ratio":1.0,"height":1080,"width":1080,"src":"\/\/www.thebirthstore.com.au\/cdn\/shop\/files\/lactation-drink-mixes-2979451.png?v=1762143776"},"aspect_ratio":1.0,"height":1080,"media_type":"image","src":"\/\/www.thebirthstore.com.au\/cdn\/shop\/files\/lactation-drink-mixes-2979451.png?v=1762143776","width":1080},{"alt":"Lactation Drink Mixes - The Birth Store - Made to Milk","id":29988522983613,"position":10,"preview_image":{"aspect_ratio":1.0,"height":1080,"width":1080,"src":"\/\/www.thebirthstore.com.au\/cdn\/shop\/files\/lactation-drink-mixes-1449595.png?v=1762143776"},"aspect_ratio":1.0,"height":1080,"media_type":"image","src":"\/\/www.thebirthstore.com.au\/cdn\/shop\/files\/lactation-drink-mixes-1449595.png?v=1762143776","width":1080},{"alt":"Lactation Drink Mixes - The Birth Store - Made to Milk","id":29988507549885,"position":11,"preview_image":{"aspect_ratio":1.0,"height":1080,"width":1080,"src":"\/\/www.thebirthstore.com.au\/cdn\/shop\/files\/lactation-drink-mixes-7063831.png?v=1762143776"},"aspect_ratio":1.0,"height":1080,"media_type":"image","src":"\/\/www.thebirthstore.com.au\/cdn\/shop\/files\/lactation-drink-mixes-7063831.png?v=1762143776","width":1080}],"requires_selling_plan":false,"selling_plan_groups":[],"content":"\u003cp\u003e \u003c\/p\u003e\n\u003cp\u003eMade to Milk's selection of DIY packet mixes are perfect to enjoy in the comfort of your own home.\u003c\/p\u003e\n\u003cp\u003eThey are all packed full of natural galactagogues and Brewers Yeast which help to boost \u0026amp; support your milk supply while breastfeeding.\u003c\/p\u003e\n\u003c!----\u003e"},"options":[{"name":"Flavours","position":1,"values":["Smoothie Mix","Toffee Caramel Latte","White Hot Chocolate","Creamy Chai Latte","Deluxe Hot Chocolate"]}],"custom_metafields":{},"metafields":{"badge":"\u003cdiv style='display:none' class='jdgm-prev-badge' data-average-rating='5.00' data-number-of-reviews='1' data-number-of-questions='0'\u003e \u003cspan class='jdgm-prev-badge__stars' data-score='5.00' tabindex='0' aria-label='5.00 stars' role='button'\u003e \u003cspan class='jdgm-star jdgm--on'\u003e\u003c\/span\u003e\u003cspan class='jdgm-star jdgm--on'\u003e\u003c\/span\u003e\u003cspan class='jdgm-star jdgm--on'\u003e\u003c\/span\u003e\u003cspan class='jdgm-star jdgm--on'\u003e\u003c\/span\u003e\u003cspan class='jdgm-star jdgm--on'\u003e\u003c\/span\u003e \u003c\/span\u003e \u003cspan class='jdgm-prev-badge__text'\u003e 1 review \u003c\/span\u003e \u003c\/div\u003e","review_snippet_widget":"\u003cdiv class='jdgm-widget jdgm-review-snippet-widget'\u003e \u003cstyle\u003e\n .jdgm-review-snippet-widget{position:relative}.jdgm-review-snippet-widget:hover{cursor:pointer}@media only screen and (max-width: 767px){.jdgm-review-snippet-widget .jdgm-rev-snippet-widget__cards-container{left:unset;right:unset}}.jdgm-review-snippet-widget .jdgm-rev-snippet-card{background:#fff}.jdgm-review-snippet-widget .jdgm-star{color:#399}.jdgm-review-snippet-widget .jdgm-rev-snippet-card{border-radius:8px;background:#fff}.jdgm-review-snippet-widget .jdgm-rev-snippet-card__rev-prod-wrapper{border-radius:8px}.jdgm-review-snippet-widget .jdgm-rev-snippet-card__rev-content-wrapper{max-width:360px}.jdgm-review-snippet-widget .jdgm-rev-snippet-widget__prev-btn,.jdgm-review-snippet-widget .jdgm-rev-snippet-widget__next-btn{border-radius:50%;background:#fff}.jdgm-review-snippet-widget .jdgm-rev-snippet-widget__prev-btn\u003esvg,.jdgm-review-snippet-widget .jdgm-rev-snippet-widget__next-btn\u003esvg{fill:#000}.jdgm-review-snippet-widget .jdgm-rev-snippet-widget__prev-btn{left:0;top:40%}.jdgm-review-snippet-widget .jdgm-rev-snippet-widget__next-btn{right:0;top:40%}.jdgm-full-rev-modal.review-snippet-widget .jm-mfp-content{border-radius:8px}.jdgm-full-rev-modal.review-snippet-widget .jdgm-full-rev__icon{border-radius:8px}.jdgm-full-rev-modal.review-snippet-widget .jdgm-full-rev[data-verified-buyer=\"true\"] .jdgm-full-rev__icon::after{border-radius:8px}.jdgm-full-rev-modal.review-snippet-widget .jdgm-rev__buyer-badge{border-radius:calc( 8px \/ 2 )}.jdgm-full-rev-modal.review-snippet-widget .jdgm-full-rev__pic-img{border-radius:8px}.jdgm-full-rev-modal.review-snippet-widget .jdgm-full-rev__reply{border-radius:8px}.jdgm-full-rev-modal.review-snippet-widget .jdgm-full-rev__replier::before{content:'thebirthstore.com.au'}.jdgm-full-rev-modal.review-snippet-widget .jdgm-full-rev__product-button{border-radius:calc( 8px * 6 )}\n\n \u003c\/style\u003e \u003ci class=\"jdgm-rev-snippet-widget__prev-btn\" style='display: none;'\u003e \u003csvg xmlns=\"http:\/\/www.w3.org\/2000\/svg\" height=\"12\" viewBox=\"0 0 8 12\" width=\"8\" fill=\"#000\"\u003e\u003cpath d=\"M3.09961 6.00005L6.99961 9.90005C7.18294 10.0834 7.27461 10.3167 7.27461 10.6C7.27461 10.8834 7.18294 11.1167 6.99961 11.3C6.81628 11.4834 6.58294 11.575 6.29961 11.575C6.01628 11.575 5.78294 11.4834 5.59961 11.3L0.999609 6.70005C0.899609 6.60005 0.828776 6.49172 0.787109 6.37505C0.745443 6.25838 0.724609 6.13338 0.724609 6.00005C0.724609 5.86672 0.745443 5.74172 0.787109 5.62505C0.828776 5.50838 0.899609 5.40005 0.999609 5.30005L5.59961 0.700049C5.78294 0.516715 6.01628 0.425049 6.29961 0.425049C6.58294 0.425049 6.81628 0.516715 6.99961 0.700049C7.18294 0.883382 7.27461 1.11672 7.27461 1.40005C7.27461 1.68338 7.18294 1.91672 6.99961 2.10005L3.09961 6.00005Z\"\/\u003e\u003c\/svg\u003e \u003c\/i\u003e \u003ci class=\"jdgm-rev-snippet-widget__next-btn\" style='display: none;'\u003e \u003csvg xmlns=\"http:\/\/www.w3.org\/2000\/svg\" height=\"12\" viewBox=\"0 0 8 12\" width=\"8\" fill=\"#000\"\u003e\u003cpath d=\"M4.89961 6.00005L0.999609 2.10005C0.816276 1.91672 0.724609 1.68338 0.724609 1.40005C0.724609 1.11672 0.816276 0.883382 0.999609 0.700049C1.18294 0.516715 1.41628 0.425049 1.69961 0.425049C1.98294 0.425049 2.21628 0.516715 2.39961 0.700049L6.99961 5.30005C7.09961 5.40005 7.17044 5.50838 7.21211 5.62505C7.25378 5.74172 7.27461 5.86672 7.27461 6.00005C7.27461 6.13338 7.25378 6.25838 7.21211 6.37505C7.17044 6.49172 7.09961 6.60005 6.99961 6.70005L2.39961 11.3C2.21628 11.4834 1.98294 11.575 1.69961 11.575C1.41628 11.575 1.18294 11.4834 0.999609 11.3C0.816276 11.1167 0.724609 10.8834 0.724609 10.6C0.724609 10.3167 0.816276 10.0834 0.999609 9.90005L4.89961 6.00005Z\"\/\u003e\u003c\/svg\u003e \u003c\/i\u003e \u003cdiv style=\"overflow: hidden;\"\u003e \u003cdiv class='jdgm-rev-snippet-widget__cards-container'\u003e \u003cdiv class='jdgm-rev-snippet-card' data-review-id='e7b9d08b-2518-4851-b106-22b181600a64' style='display: none;'\u003e \u003cdiv class=\"jdgm-rev-snippet-card__rev-prod-wrapper\"\u003e \u003ca class='jdgm-rev-snippet-card__rev-content-wrapper jdgm-rev-snippet-card__full-review-link' style='text-decoration: none; color: inherit;padding: 0 34px;' role='button' data-review-id='e7b9d08b-2518-4851-b106-22b181600a64'\u003e \u003cdiv class='jdgm-rev-snippet-card__rev-header'\u003e \u003cdiv class='jdgm-rev-snippet-card__rev-rating' aria-label='5 stars' role='img'\u003e \u003cspan class='jdgm-star jdgm--on'\u003e\u003c\/span\u003e\u003cspan class='jdgm-star jdgm--on'\u003e\u003c\/span\u003e\u003cspan class='jdgm-star jdgm--on'\u003e\u003c\/span\u003e\u003cspan class='jdgm-star jdgm--on'\u003e\u003c\/span\u003e\u003cspan class='jdgm-star jdgm--on'\u003e\u003c\/span\u003e \u003c\/div\u003e \u003cdiv class='jdgm-rev-snippet-card__reviewer'\u003e Rebecca Paust \u003c\/div\u003e \u003c\/div\u003e \u003cdiv class='jdgm-rev-snippet-card__rev-content'\u003e \u003cspan class='jdgm-rev-snippet-card__rev-body'\u003e \u003cp\u003eI tried the Deluxe Hot Chocolate and oh my goodness it’s amazing! It’s increased my supply like you wouldn’t believe, and the flavour is enjoyable compared to other lactation products that leave a funny aftertaste.\u003c\/p\u003e \u003c\/span\u003e \u003c\/div\u003e \u003c\/a\u003e \u003c\/div\u003e \u003c\/div\u003e \u003c\/div\u003e \u003c\/div\u003e \u003c\/div\u003e","widget":"\u003cdiv class='jdgm-rev-widg' data-updated-at='2025-06-13T16:12:53Z' data-average-rating='5.00' data-number-of-reviews='1' data-number-of-questions='0'\u003e \u003cstyle class='jdgm-temp-hiding-style'\u003e.jdgm-rev-widg{ display: none }\u003c\/style\u003e \u003cdiv class='jdgm-rev-widg__header'\u003e \u003ch2 class='jdgm-rev-widg__title'\u003eCustomer Reviews\u003c\/h2\u003e \u003cdiv class='jdgm-rev-widg__summary'\u003e \u003cdiv class='jdgm-rev-widg__summary-stars' aria-label='Average rating is 5.00 stars' role='img'\u003e \u003cspan class='jdgm-star jdgm--on'\u003e\u003c\/span\u003e\u003cspan class='jdgm-star jdgm--on'\u003e\u003c\/span\u003e\u003cspan class='jdgm-star jdgm--on'\u003e\u003c\/span\u003e\u003cspan class='jdgm-star jdgm--on'\u003e\u003c\/span\u003e\u003cspan class='jdgm-star jdgm--on'\u003e\u003c\/span\u003e \u003c\/div\u003e \u003cdiv class='jdgm-rev-widg__summary-text'\u003eBased on 1 review\u003c\/div\u003e \u003c\/div\u003e \u003ca style='display: none' href='#' class='jdgm-write-rev-link' role='button'\u003eWrite a review\u003c\/a\u003e \u003cdiv class='jdgm-histogram jdgm-temp-hidden'\u003e \u003cdiv class='jdgm-histogram__row' data-rating='5' data-frequency='1' data-percentage='100'\u003e \u003cdiv class='jdgm-histogram__star' role='button' aria-label=\"100% (1) reviews with 5 star rating\" tabindex='0' \u003e\u003cspan class='jdgm-star jdgm--on'\u003e\u003c\/span\u003e\u003cspan class='jdgm-star jdgm--on'\u003e\u003c\/span\u003e\u003cspan class='jdgm-star jdgm--on'\u003e\u003c\/span\u003e\u003cspan class='jdgm-star jdgm--on'\u003e\u003c\/span\u003e\u003cspan class='jdgm-star jdgm--on'\u003e\u003c\/span\u003e\u003c\/div\u003e \u003cdiv class='jdgm-histogram__bar'\u003e \u003cdiv class='jdgm-histogram__bar-content' style='width: 100%;'\u003e \u003c\/div\u003e \u003c\/div\u003e \u003cdiv class='jdgm-histogram__percentage'\u003e100%\u003c\/div\u003e \u003cdiv class='jdgm-histogram__frequency'\u003e(1)\u003c\/div\u003e \u003c\/div\u003e \u003cdiv class='jdgm-histogram__row' data-rating='4' data-frequency='0' data-percentage='0'\u003e \u003cdiv class='jdgm-histogram__star' role='button' aria-label=\"0% (0) reviews with 4 star rating\" tabindex='0' \u003e\u003cspan class='jdgm-star jdgm--on'\u003e\u003c\/span\u003e\u003cspan class='jdgm-star jdgm--on'\u003e\u003c\/span\u003e\u003cspan class='jdgm-star jdgm--on'\u003e\u003c\/span\u003e\u003cspan class='jdgm-star jdgm--on'\u003e\u003c\/span\u003e\u003cspan class='jdgm-star jdgm--off'\u003e\u003c\/span\u003e\u003c\/div\u003e \u003cdiv class='jdgm-histogram__bar'\u003e \u003cdiv class='jdgm-histogram__bar-content' style='width: 0%;'\u003e \u003c\/div\u003e \u003c\/div\u003e \u003cdiv class='jdgm-histogram__percentage'\u003e0%\u003c\/div\u003e \u003cdiv class='jdgm-histogram__frequency'\u003e(0)\u003c\/div\u003e \u003c\/div\u003e \u003cdiv class='jdgm-histogram__row' data-rating='3' data-frequency='0' data-percentage='0'\u003e \u003cdiv class='jdgm-histogram__star' role='button' aria-label=\"0% (0) reviews with 3 star rating\" tabindex='0' \u003e\u003cspan class='jdgm-star jdgm--on'\u003e\u003c\/span\u003e\u003cspan class='jdgm-star jdgm--on'\u003e\u003c\/span\u003e\u003cspan class='jdgm-star jdgm--on'\u003e\u003c\/span\u003e\u003cspan class='jdgm-star jdgm--off'\u003e\u003c\/span\u003e\u003cspan class='jdgm-star jdgm--off'\u003e\u003c\/span\u003e\u003c\/div\u003e \u003cdiv class='jdgm-histogram__bar'\u003e \u003cdiv class='jdgm-histogram__bar-content' style='width: 0%;'\u003e \u003c\/div\u003e \u003c\/div\u003e \u003cdiv class='jdgm-histogram__percentage'\u003e0%\u003c\/div\u003e \u003cdiv class='jdgm-histogram__frequency'\u003e(0)\u003c\/div\u003e \u003c\/div\u003e \u003cdiv class='jdgm-histogram__row' data-rating='2' data-frequency='0' data-percentage='0'\u003e \u003cdiv class='jdgm-histogram__star' role='button' aria-label=\"0% (0) reviews with 2 star rating\" tabindex='0' \u003e\u003cspan class='jdgm-star jdgm--on'\u003e\u003c\/span\u003e\u003cspan class='jdgm-star jdgm--on'\u003e\u003c\/span\u003e\u003cspan class='jdgm-star jdgm--off'\u003e\u003c\/span\u003e\u003cspan class='jdgm-star jdgm--off'\u003e\u003c\/span\u003e\u003cspan class='jdgm-star jdgm--off'\u003e\u003c\/span\u003e\u003c\/div\u003e \u003cdiv class='jdgm-histogram__bar'\u003e \u003cdiv class='jdgm-histogram__bar-content' style='width: 0%;'\u003e \u003c\/div\u003e \u003c\/div\u003e \u003cdiv class='jdgm-histogram__percentage'\u003e0%\u003c\/div\u003e \u003cdiv class='jdgm-histogram__frequency'\u003e(0)\u003c\/div\u003e \u003c\/div\u003e \u003cdiv class='jdgm-histogram__row' data-rating='1' data-frequency='0' data-percentage='0'\u003e \u003cdiv class='jdgm-histogram__star' role='button' aria-label=\"0% (0) reviews with 1 star rating\" tabindex='0' \u003e\u003cspan class='jdgm-star jdgm--on'\u003e\u003c\/span\u003e\u003cspan class='jdgm-star jdgm--off'\u003e\u003c\/span\u003e\u003cspan class='jdgm-star jdgm--off'\u003e\u003c\/span\u003e\u003cspan class='jdgm-star jdgm--off'\u003e\u003c\/span\u003e\u003cspan class='jdgm-star jdgm--off'\u003e\u003c\/span\u003e\u003c\/div\u003e \u003cdiv class='jdgm-histogram__bar'\u003e \u003cdiv class='jdgm-histogram__bar-content' style='width: 0%;'\u003e \u003c\/div\u003e \u003c\/div\u003e \u003cdiv class='jdgm-histogram__percentage'\u003e0%\u003c\/div\u003e \u003cdiv class='jdgm-histogram__frequency'\u003e(0)\u003c\/div\u003e \u003c\/div\u003e \u003cdiv class='jdgm-histogram__row jdgm-histogram__clear-filter' data-rating=null tabindex='0'\u003e\u003c\/div\u003e \u003c\/div\u003e \u003cdiv class='jdgm-rev-widg__sort-wrapper'\u003e\u003c\/div\u003e \u003c\/div\u003e \u003cdiv class='jdgm-rev-widg__body'\u003e \u003cdiv class='jdgm-rev-widg__reviews'\u003e\u003cdiv class='jdgm-rev jdgm-divider-top' data-verified-buyer='false' data-review-id='e7b9d08b-2518-4851-b106-22b181600a64' data-review-language='' data-product-title='Lactation Drink Mixes - Various Flavours' data-product-url='\/products\/lactation-diy-drink-mixes-various-flavours' data-thumb-up-count='0' data-thumb-down-count='0'\u003e \u003cdiv class='jdgm-rev__header'\u003e \u003cdiv class='jdgm-rev__icon' \u003e R \u003c\/div\u003e \u003cspan class='jdgm-rev__rating' data-score='5' tabindex='0' aria-label='5 star review' role='img'\u003e \u003cspan class='jdgm-star jdgm--on'\u003e\u003c\/span\u003e\u003cspan class='jdgm-star jdgm--on'\u003e\u003c\/span\u003e\u003cspan class='jdgm-star jdgm--on'\u003e\u003c\/span\u003e\u003cspan class='jdgm-star jdgm--on'\u003e\u003c\/span\u003e\u003cspan class='jdgm-star jdgm--on'\u003e\u003c\/span\u003e \u003c\/span\u003e \u003cspan class='jdgm-rev__timestamp jdgm-spinner' data-content='2024-05-30 03:49:39 UTC'\u003e\u003c\/span\u003e \u003cdiv class='jdgm-rev__br'\u003e\u003c\/div\u003e \u003cspan class='jdgm-rev__buyer-badge-wrapper'\u003e \u003c\/span\u003e \u003cspan class='jdgm-rev__author-wrapper'\u003e \u003cspan class='jdgm-rev__author'\u003eRebecca Paust\u003c\/span\u003e \u003cspan class='jdgm-rev__location' \u003e \u003c\/span\u003e \u003c\/span\u003e \u003c\/div\u003e \u003cdiv class='jdgm-rev__content'\u003e \u003cdiv class='jdgm-rev__custom-form'\u003e \u003c\/div\u003e \u003cb class='jdgm-rev__title'\u003eMade to Milk is Amazing!\u003c\/b\u003e \u003cdiv class='jdgm-rev__body'\u003e\u003cp\u003eI tried the Deluxe Hot Chocolate and oh my goodness it’s amazing! It’s increased my supply like you wouldn’t believe, and the flavour is enjoyable compared to other lactation products that leave a funny aftertaste.\u003c\/p\u003e\u003c\/div\u003e \u003cdiv class='jdgm-rev__pics'\u003e \u003c\/div\u003e \u003cdiv class='jdgm-rev__vids'\u003e \u003c\/div\u003e \u003cdiv class='jdgm-rev__transparency-badge-wrapper'\u003e \u003c\/div\u003e \u003c\/div\u003e \u003cdiv class='jdgm-rev__actions'\u003e \u003cdiv class='jdgm-rev__social'\u003e\u003c\/div\u003e \u003cdiv class='jdgm-rev__votes'\u003e\u003c\/div\u003e \u003c\/div\u003e \u003cdiv class='jdgm-rev__reply'\u003e \u003c\/div\u003e \u003c\/div\u003e\u003c\/div\u003e \u003cdiv class='jdgm-paginate' data-per-page='10' data-url='https:\/\/api.judge.me\/reviews\/reviews_for_widget' style=\"display: none;\"\u003e\u003c\/div\u003e \u003c\/div\u003e \u003cdiv class='jdgm-rev-widg__paginate-spinner-wrapper'\u003e \u003cdiv class='jdgm-spinner'\u003e\u003c\/div\u003e \u003c\/div\u003e \u003c\/div\u003e"},"collections":[{"id":281712427197,"handle":"breastfeeding","title":"Breastfeeding","updated_at":"2025-12-28T20:10:01+08:00","body_html":"","published_at":"2021-12-20T14:19:33+08:00","sort_order":"best-selling","template_suffix":"breastfeeding-collection","disjunctive":false,"rules":[{"column":"tag","relation":"equals","condition":"Breastfeeding"}],"published_scope":"global","image":{"created_at":"2024-05-06T11:59:34+08:00","alt":"Breastfeeding - The Birth Store","width":620,"height":635,"src":"\/\/www.thebirthstore.com.au\/cdn\/shop\/collections\/breastfeeding-793872.jpg?v=1714967974"}},{"id":261657460925,"handle":"buy","title":"Buy","updated_at":"2025-12-28T20:10:01+08:00","body_html":"\u003cp\u003eBrowse all of our pregnancy, labour \u0026amp; birth, postpartum and baby essentials here.\u003cbr\u003e\u003c\/p\u003e\n\u003cp\u003e\u003cspan\u003eYou can even buy now and pay later with Afterpay!\u003c\/span\u003e\u003c\/p\u003e","published_at":"2021-03-10T12:05:31+08:00","sort_order":"best-selling","template_suffix":"shop-all-collection","disjunctive":false,"rules":[{"column":"title","relation":"not_contains","condition":"Hire"}],"published_scope":"global","image":{"created_at":"2024-05-06T11:59:42+08:00","alt":"Buy - The Birth Store","width":2048,"height":2048,"src":"\/\/www.thebirthstore.com.au\/cdn\/shop\/collections\/buy-964856.jpg?v=1714967982"}},{"id":292919476413,"handle":"lactation-products","title":"Lactation Products","updated_at":"2025-12-28T20:10:01+08:00","body_html":"","published_at":"2023-03-22T12:22:41+08:00","sort_order":"best-selling","template_suffix":"lactation-products-collec","disjunctive":false,"rules":[{"column":"tag","relation":"equals","condition":"Lactation Products"}],"published_scope":"global","image":{"created_at":"2024-05-06T12:00:19+08:00","alt":"Lactation Products - The Birth Store","width":1034,"height":922,"src":"\/\/www.thebirthstore.com.au\/cdn\/shop\/collections\/lactation-products-752907.jpg?v=1714968019"}},{"id":291456483517,"handle":"shop-all","title":"Shop All - Mum","updated_at":"2025-12-28T20:10:01+08:00","body_html":"","published_at":"2022-12-23T22:04:39+08:00","sort_order":"best-selling","template_suffix":"shop-all-collection","disjunctive":false,"rules":[{"column":"variant_price","relation":"greater_than","condition":"1"},{"column":"title","relation":"not_contains","condition":"Batteries"},{"column":"tag","relation":"equals","condition":"Mum"}],"published_scope":"global","image":{"created_at":"2024-05-06T12:00:54+08:00","alt":"Shop All - The Birth Store","width":1365,"height":2048,"src":"\/\/www.thebirthstore.com.au\/cdn\/shop\/collections\/shop-all-693176.jpg?v=1714968055"}},{"id":310045933757,"handle":"shop-all-sale","title":"Shop All Sale","updated_at":"2025-12-28T20:10:01+08:00","body_html":"","published_at":"2024-11-12T13:22:43+08:00","sort_order":"alpha-asc","template_suffix":"","disjunctive":true,"rules":[{"column":"tag","relation":"equals","condition":"Bundles"},{"column":"vendor","relation":"equals","condition":"Franjos Kitchen"},{"column":"vendor","relation":"equals","condition":"Adored Illustrations"},{"column":"vendor","relation":"equals","condition":"Amazing Oils"},{"column":"vendor","relation":"equals","condition":"Ice Ice Booby"},{"column":"vendor","relation":"equals","condition":"Made to Milk"},{"column":"vendor","relation":"equals","condition":"Milky Goodness"},{"column":"vendor","relation":"equals","condition":"Seasons of Mama"},{"column":"vendor","relation":"equals","condition":"Silverette"},{"column":"vendor","relation":"equals","condition":"Snuggle Hunny"},{"column":"vendor","relation":"equals","condition":"Yung Bod"},{"column":"vendor","relation":"equals","condition":"Bare Love"},{"column":"vendor","relation":"equals","condition":"Haakaa"},{"column":"vendor","relation":"equals","condition":"Mere Botanicals"},{"column":"vendor","relation":"equals","condition":"The Birth Store Hire"},{"column":"vendor","relation":"equals","condition":"The Birth Store"}],"published_scope":"global","image":{"created_at":"2024-11-13T10:58:16+08:00","alt":"Shop All Sale - The Birth Store","width":2048,"height":1365,"src":"\/\/www.thebirthstore.com.au\/cdn\/shop\/collections\/shop-all-sale-297361.jpg?v=1731466697"}}]}
[{"alt":"Lactation Drink Mixes - Various Flavours - The Birth Store-Made to Milk","id":27007589122237,"position":1,"preview_image":{"aspect_ratio":1.0,"height":1080,"width":1080,"src":"\/\/www.thebirthstore.com.au\/cdn\/shop\/files\/lactation-drink-mixes-various-flavours-407925.jpg?v=1714967988"},"aspect_ratio":1.0,"height":1080,"media_type":"image","src":"\/\/www.thebirthstore.com.au\/cdn\/shop\/files\/lactation-drink-mixes-various-flavours-407925.jpg?v=1714967988","width":1080},{"alt":"Lactation Drink Mixes - Various Flavours - The Birth Store-Made to Milk","id":27007589318845,"position":2,"preview_image":{"aspect_ratio":1.0,"height":1080,"width":1080,"src":"\/\/www.thebirthstore.com.au\/cdn\/shop\/files\/lactation-drink-mixes-various-flavours-688625.jpg?v=1714967988"},"aspect_ratio":1.0,"height":1080,"media_type":"image","src":"\/\/www.thebirthstore.com.au\/cdn\/shop\/files\/lactation-drink-mixes-various-flavours-688625.jpg?v=1714967988","width":1080},{"alt":"Lactation Drink Mixes - Various Flavours - The Birth Store-Made to Milk","id":27007589384381,"position":3,"preview_image":{"aspect_ratio":1.0,"height":1080,"width":1080,"src":"\/\/www.thebirthstore.com.au\/cdn\/shop\/files\/lactation-drink-mixes-various-flavours-677437.jpg?v=1714967988"},"aspect_ratio":1.0,"height":1080,"media_type":"image","src":"\/\/www.thebirthstore.com.au\/cdn\/shop\/files\/lactation-drink-mixes-various-flavours-677437.jpg?v=1714967988","width":1080},{"alt":"Lactation Drink Mixes - Various Flavours - The Birth Store-Made to Milk","id":27007589482685,"position":4,"preview_image":{"aspect_ratio":1.0,"height":1080,"width":1080,"src":"\/\/www.thebirthstore.com.au\/cdn\/shop\/files\/lactation-drink-mixes-various-flavours-915472.jpg?v=1714967988"},"aspect_ratio":1.0,"height":1080,"media_type":"image","src":"\/\/www.thebirthstore.com.au\/cdn\/shop\/files\/lactation-drink-mixes-various-flavours-915472.jpg?v=1714967988","width":1080},{"alt":"Lactation Drink Mixes - Various Flavours - The Birth Store-Made to Milk","id":27007589580989,"position":5,"preview_image":{"aspect_ratio":1.0,"height":1080,"width":1080,"src":"\/\/www.thebirthstore.com.au\/cdn\/shop\/files\/lactation-drink-mixes-various-flavours-235706.jpg?v=1714967988"},"aspect_ratio":1.0,"height":1080,"media_type":"image","src":"\/\/www.thebirthstore.com.au\/cdn\/shop\/files\/lactation-drink-mixes-various-flavours-235706.jpg?v=1714967988","width":1080},{"alt":"Lactation Drink Mixes - Various Flavours - The Birth Store-Made to Milk","id":27007589679293,"position":6,"preview_image":{"aspect_ratio":1.0,"height":720,"width":720,"src":"\/\/www.thebirthstore.com.au\/cdn\/shop\/files\/lactation-drink-mixes-various-flavours-994353.jpg?v=1714967988"},"aspect_ratio":1.0,"height":720,"media_type":"image","src":"\/\/www.thebirthstore.com.au\/cdn\/shop\/files\/lactation-drink-mixes-various-flavours-994353.jpg?v=1714967988","width":720},{"alt":"Lactation Drink Mixes - The Birth Store - Made to Milk","id":29988520394941,"position":7,"preview_image":{"aspect_ratio":1.0,"height":1080,"width":1080,"src":"\/\/www.thebirthstore.com.au\/cdn\/shop\/files\/lactation-drink-mixes-8184831.png?v=1762143776"},"aspect_ratio":1.0,"height":1080,"media_type":"image","src":"\/\/www.thebirthstore.com.au\/cdn\/shop\/files\/lactation-drink-mixes-8184831.png?v=1762143776","width":1080},{"alt":"Lactation Drink Mixes - The Birth Store - Made to Milk","id":29988518953149,"position":8,"preview_image":{"aspect_ratio":1.0,"height":1080,"width":1080,"src":"\/\/www.thebirthstore.com.au\/cdn\/shop\/files\/lactation-drink-mixes-8638463.png?v=1762143776"},"aspect_ratio":1.0,"height":1080,"media_type":"image","src":"\/\/www.thebirthstore.com.au\/cdn\/shop\/files\/lactation-drink-mixes-8638463.png?v=1762143776","width":1080},{"alt":"Lactation Drink Mixes - The Birth Store - Made to Milk","id":29988511187133,"position":9,"preview_image":{"aspect_ratio":1.0,"height":1080,"width":1080,"src":"\/\/www.thebirthstore.com.au\/cdn\/shop\/files\/lactation-drink-mixes-2979451.png?v=1762143776"},"aspect_ratio":1.0,"height":1080,"media_type":"image","src":"\/\/www.thebirthstore.com.au\/cdn\/shop\/files\/lactation-drink-mixes-2979451.png?v=1762143776","width":1080},{"alt":"Lactation Drink Mixes - The Birth Store - Made to Milk","id":29988522983613,"position":10,"preview_image":{"aspect_ratio":1.0,"height":1080,"width":1080,"src":"\/\/www.thebirthstore.com.au\/cdn\/shop\/files\/lactation-drink-mixes-1449595.png?v=1762143776"},"aspect_ratio":1.0,"height":1080,"media_type":"image","src":"\/\/www.thebirthstore.com.au\/cdn\/shop\/files\/lactation-drink-mixes-1449595.png?v=1762143776","width":1080},{"alt":"Lactation Drink Mixes - The Birth Store - Made to Milk","id":29988507549885,"position":11,"preview_image":{"aspect_ratio":1.0,"height":1080,"width":1080,"src":"\/\/www.thebirthstore.com.au\/cdn\/shop\/files\/lactation-drink-mixes-7063831.png?v=1762143776"},"aspect_ratio":1.0,"height":1080,"media_type":"image","src":"\/\/www.thebirthstore.com.au\/cdn\/shop\/files\/lactation-drink-mixes-7063831.png?v=1762143776","width":1080}]
{"item":{"id":7322196574397,"title":"Ladybug Silicone Breast Milk Collector","handle":"ladybug-silicone-breast-milk-collector-40ml-75ml-150ml","description":"\u003cp\u003e\u003cspan data-mce-fragment=\"1\"\u003eThe Haakaa Ladybug Silicone Breast Milk Collector is the perfect breast pad alternative for those who want to save every drop of leakage and letdown instead of soaking it up.\u003c\/span\u003e\u003cbr data-mce-fragment=\"1\"\u003e\u003cbr data-mce-fragment=\"1\"\u003e\u003cspan data-mce-fragment=\"1\"\u003eThe one-piece design attaches to your breast with suction and sits securely and discreetly in your bra. This suction is light and gentle to hold the product in place. It won't draw out additional milk, so it's ideal for mums who leak breast milk and want to save it without increasing their supply.\u003c\/span\u003e\u003cbr data-mce-fragment=\"1\"\u003e\u003cbr data-mce-fragment=\"1\"\u003e\u003cspan data-mce-fragment=\"1\"\u003eYou can wear the Ladybug on the other side while you're breastfeeding to catch your letdown or wear one on each breast inside your bra as you carry on with your day. It is completely portable and has small feet on the bottom to stand upright on any flat surface, preventing spills after use.\u003c\/span\u003e\u003cbr data-mce-fragment=\"1\"\u003e\u003cbr data-mce-fragment=\"1\"\u003e\u003cspan data-mce-fragment=\"1\"\u003eOnce you have finished collecting your letdown, open the plug on the top and safely pour out your milk into a container or bottle.\u003c\/span\u003e\u003c\/p\u003e\n\u003cp\u003e\u003cstrong\u003eFeatures:\u003c\/strong\u003e\u003c\/p\u003e\n\u003cul\u003e\n\u003cli\u003eAttaches to your breast with light suction to help keep it in place inside your bra.\u003c\/li\u003e\n\u003cli\u003eMade of soft 100% medical-grade silicone.\u003c\/li\u003e\n\u003cli\u003eOne-piece design with no joints, cracks or edges for bacteria to harbour.\u003c\/li\u003e\n\u003cli\u003eSmall feet on the base allow it to stand upright on flat surfaces.\u003c\/li\u003e\n\u003cli\u003eNo cords or batteries required.\u003c\/li\u003e\n\u003cli\u003eEasy-care - just boil to sterilise.\u003c\/li\u003e\n\u003cli\u003eBPA, PVC and phthalate-free.\u003c\/li\u003e\n\u003c\/ul\u003e\n\u003cp\u003e\u003cstrong\u003eDirections:\u003c\/strong\u003e\u003c\/p\u003e\n\u003cp\u003e\u003cstrong\u003eCollecting Your Leakage and Letdown:\u003c\/strong\u003e\u003c\/p\u003e\n\u003col\u003e\n\u003cli\u003eEnsure the plug\u003cstrong\u003e (a)\u003c\/strong\u003e\u003cspan\u003e \u003c\/span\u003eis pushed into the outlet\u003cspan\u003e \u003c\/span\u003e\u003cstrong\u003e(b)\u003c\/strong\u003e.\u003c\/li\u003e\n\u003cli\u003eCentre the opening\u003cspan\u003e \u003c\/span\u003e\u003cstrong\u003e(e)\u003c\/strong\u003e\u003cspan\u003e \u003c\/span\u003eover your nipple and gently press down on the back of the Ladybug.\u003c\/li\u003e\n\u003cli\u003ePress to your breast and release to create gentle suction and begin collecting let-down. \u003c\/li\u003e\n\u003cli\u003eThe Ladybug should always be worn inside a bra to keep it secure.\u003c\/li\u003e\n\u003cli\u003eRemove the Ladybug regularly to store your breast milk in line with your country’s safe breast milk storage guidelines. Pull out the plug from the outlet and pour the milk from the outlet into a container before storing. \u003c\/li\u003e\n\u003c\/ol\u003e\n\u003cp dir=\"ltr\"\u003e\u003cstrong\u003eNOTE: \u003c\/strong\u003e\u003cem\u003eSuction is optional and helps to keep the Ladybug in place in your bra. The Ladybug will only collect milk that would have leaked anyway. It won't draw out any extra milk. \u003c\/em\u003e\u003c\/p\u003e\n\u003cp\u003e \u003c\/p\u003e\n\u003cp\u003e \u003c\/p\u003e\n\u003cp\u003e\u003cimg src=\"https:\/\/cdn.accentuate.cloud\/images\/11019058\/%E5%90%B8%E9%9B%86%E4%B9%B3%E5%99%A8-01.jpg?v=1642033976218\" class=\"fr-fic fr-dib\"\u003e\u003cstrong\u003eCleaning \u0026amp; Care:\u003c\/strong\u003e\u003c\/p\u003e\n\u003cp\u003e\u003cspan\u003eClean after each use. We strongly recommend cleaning and sterilising your Ladybug with any steam sterilising system or by boiling in water for 2-3 minutes. Only soft bristle brushes or soft sponges should be used to clean this product as hard scourers may scratch the surface. Exposure to detergent may make the clear silicone in this product appear cloudy. Instead, we recommend washing in warm water with soap\u003c\/span\u003e\u003cspan\u003e. Do not use any bleach-based agents or sterilising tablets to clean this product. Do not use UV sterilisers to clean this product as it may impact its lifespan.\u003c\/span\u003e\u003c\/p\u003e\n\u003cp\u003e\u003cstrong\u003eStorage:\u003c\/strong\u003e\u003c\/p\u003e\n\u003cp\u003e\u003cspan\u003eDo not store near any sharp objects. Store product in a cool, dry place and avoid direct sunlight\u003c\/span\u003e\u003c\/p\u003e\n\u003cp\u003e\u003cstrong\u003eCaution:\u003c\/strong\u003e\u003c\/p\u003e\n\u003cp dir=\"ltr\"\u003eAlways follow your country’s guidelines and recommendations to safely express and store breast milk. Check product condition regularly. \u003cbr\u003eReplace if this product shows any signs of damage. This product is not a toy. Do not use this product for anything other than its intended use. Adult supervision is required. Keep out of the reach of children and pets. \u003c\/p\u003e\n\u003cp\u003e\u003cstrong\u003ePlease ensure you are familiar with your country's guidelines on the safe storage of breast milk. Empty your Ladybug regularly to store your breast milk according to these guidelines. Consult your midwife or lactation consultant if you have any concerns before use.\u003c\/strong\u003e\u003c\/p\u003e","published_at":"2022-08-16T19:33:49+08:00","created_at":"2022-08-16T19:33:48+08:00","vendor":"Haakaa","type":"","tags":["Breastfeeding","Cracked Nipples","Mum","Post-Partum"],"price":2500,"price_min":2500,"price_max":2900,"available":true,"price_varies":true,"compare_at_price":null,"compare_at_price_min":0,"compare_at_price_max":0,"compare_at_price_varies":false,"variants":[{"id":42216895905981,"title":"40mls","option1":"40mls","option2":null,"option3":null,"sku":"","requires_shipping":true,"taxable":false,"featured_image":null,"available":true,"name":"Ladybug Silicone Breast Milk Collector - 40mls","public_title":"40mls","options":["40mls"],"price":2500,"weight":90,"compare_at_price":null,"inventory_management":"shopify","barcode":"95905981","requires_selling_plan":false,"selling_plan_allocations":[]},{"id":42216895938749,"title":"75mls","option1":"75mls","option2":null,"option3":null,"sku":"","requires_shipping":true,"taxable":false,"featured_image":null,"available":true,"name":"Ladybug Silicone Breast Milk Collector - 75mls","public_title":"75mls","options":["75mls"],"price":2700,"weight":102,"compare_at_price":null,"inventory_management":"shopify","barcode":"95938749","requires_selling_plan":false,"selling_plan_allocations":[]},{"id":42216895971517,"title":"150mls","option1":"150mls","option2":null,"option3":null,"sku":"","requires_shipping":true,"taxable":false,"featured_image":null,"available":false,"name":"Ladybug Silicone Breast Milk Collector - 150mls","public_title":"150mls","options":["150mls"],"price":2900,"weight":145,"compare_at_price":null,"inventory_management":"shopify","barcode":"95971517","requires_selling_plan":false,"selling_plan_allocations":[]}],"images":["\/\/www.thebirthstore.com.au\/cdn\/shop\/files\/ladybug-silicone-breast-milk-collector-873986.jpg?v=1714967990","\/\/www.thebirthstore.com.au\/cdn\/shop\/files\/ladybug-silicone-breast-milk-collector-183220.jpg?v=1714967990","\/\/www.thebirthstore.com.au\/cdn\/shop\/files\/ladybug-silicone-breast-milk-collector-821084.jpg?v=1714967990","\/\/www.thebirthstore.com.au\/cdn\/shop\/files\/ladybug-silicone-breast-milk-collector-724130.jpg?v=1714967990","\/\/www.thebirthstore.com.au\/cdn\/shop\/files\/ladybug-silicone-breast-milk-collector-280019.jpg?v=1714967990","\/\/www.thebirthstore.com.au\/cdn\/shop\/files\/ladybug-silicone-breast-milk-collector-729118.jpg?v=1714967990","\/\/www.thebirthstore.com.au\/cdn\/shop\/files\/ladybug-silicone-breast-milk-collector-984849.jpg?v=1714967990"],"featured_image":"\/\/www.thebirthstore.com.au\/cdn\/shop\/files\/ladybug-silicone-breast-milk-collector-873986.jpg?v=1714967990","options":["Size"],"media":[{"alt":"Ladybug Silicone Breast Milk Collector - The Birth Store-Haakaa","id":27007590662333,"position":1,"preview_image":{"aspect_ratio":1.0,"height":867,"width":867,"src":"\/\/www.thebirthstore.com.au\/cdn\/shop\/files\/ladybug-silicone-breast-milk-collector-873986.jpg?v=1714967990"},"aspect_ratio":1.0,"height":867,"media_type":"image","src":"\/\/www.thebirthstore.com.au\/cdn\/shop\/files\/ladybug-silicone-breast-milk-collector-873986.jpg?v=1714967990","width":867},{"alt":"Ladybug Silicone Breast Milk Collector - The Birth Store-Haakaa","id":27007590760637,"position":2,"preview_image":{"aspect_ratio":0.944,"height":678,"width":640,"src":"\/\/www.thebirthstore.com.au\/cdn\/shop\/files\/ladybug-silicone-breast-milk-collector-183220.jpg?v=1714967990"},"aspect_ratio":0.944,"height":678,"media_type":"image","src":"\/\/www.thebirthstore.com.au\/cdn\/shop\/files\/ladybug-silicone-breast-milk-collector-183220.jpg?v=1714967990","width":640},{"alt":"Ladybug Silicone Breast Milk Collector - The Birth Store-Haakaa","id":27007590826173,"position":3,"preview_image":{"aspect_ratio":1.0,"height":1000,"width":1000,"src":"\/\/www.thebirthstore.com.au\/cdn\/shop\/files\/ladybug-silicone-breast-milk-collector-821084.jpg?v=1714967990"},"aspect_ratio":1.0,"height":1000,"media_type":"image","src":"\/\/www.thebirthstore.com.au\/cdn\/shop\/files\/ladybug-silicone-breast-milk-collector-821084.jpg?v=1714967990","width":1000},{"alt":"Ladybug Silicone Breast Milk Collector - The Birth Store-Haakaa","id":27007590891709,"position":4,"preview_image":{"aspect_ratio":1.617,"height":600,"width":970,"src":"\/\/www.thebirthstore.com.au\/cdn\/shop\/files\/ladybug-silicone-breast-milk-collector-724130.jpg?v=1714967990"},"aspect_ratio":1.617,"height":600,"media_type":"image","src":"\/\/www.thebirthstore.com.au\/cdn\/shop\/files\/ladybug-silicone-breast-milk-collector-724130.jpg?v=1714967990","width":970},{"alt":"Ladybug Silicone Breast Milk Collector - The Birth Store-Haakaa","id":27007590957245,"position":5,"preview_image":{"aspect_ratio":1.0,"height":1000,"width":1000,"src":"\/\/www.thebirthstore.com.au\/cdn\/shop\/files\/ladybug-silicone-breast-milk-collector-280019.jpg?v=1714967990"},"aspect_ratio":1.0,"height":1000,"media_type":"image","src":"\/\/www.thebirthstore.com.au\/cdn\/shop\/files\/ladybug-silicone-breast-milk-collector-280019.jpg?v=1714967990","width":1000},{"alt":"Ladybug Silicone Breast Milk Collector - The Birth Store-Haakaa","id":27007591022781,"position":6,"preview_image":{"aspect_ratio":0.955,"height":619,"width":591,"src":"\/\/www.thebirthstore.com.au\/cdn\/shop\/files\/ladybug-silicone-breast-milk-collector-729118.jpg?v=1714967990"},"aspect_ratio":0.955,"height":619,"media_type":"image","src":"\/\/www.thebirthstore.com.au\/cdn\/shop\/files\/ladybug-silicone-breast-milk-collector-729118.jpg?v=1714967990","width":591},{"alt":"Ladybug Silicone Breast Milk Collector - The Birth Store-Haakaa","id":27007591088317,"position":7,"preview_image":{"aspect_ratio":0.976,"height":635,"width":620,"src":"\/\/www.thebirthstore.com.au\/cdn\/shop\/files\/ladybug-silicone-breast-milk-collector-984849.jpg?v=1714967990"},"aspect_ratio":0.976,"height":635,"media_type":"image","src":"\/\/www.thebirthstore.com.au\/cdn\/shop\/files\/ladybug-silicone-breast-milk-collector-984849.jpg?v=1714967990","width":620}],"requires_selling_plan":false,"selling_plan_groups":[],"content":"\u003cp\u003e\u003cspan data-mce-fragment=\"1\"\u003eThe Haakaa Ladybug Silicone Breast Milk Collector is the perfect breast pad alternative for those who want to save every drop of leakage and letdown instead of soaking it up.\u003c\/span\u003e\u003cbr data-mce-fragment=\"1\"\u003e\u003cbr data-mce-fragment=\"1\"\u003e\u003cspan data-mce-fragment=\"1\"\u003eThe one-piece design attaches to your breast with suction and sits securely and discreetly in your bra. This suction is light and gentle to hold the product in place. It won't draw out additional milk, so it's ideal for mums who leak breast milk and want to save it without increasing their supply.\u003c\/span\u003e\u003cbr data-mce-fragment=\"1\"\u003e\u003cbr data-mce-fragment=\"1\"\u003e\u003cspan data-mce-fragment=\"1\"\u003eYou can wear the Ladybug on the other side while you're breastfeeding to catch your letdown or wear one on each breast inside your bra as you carry on with your day. It is completely portable and has small feet on the bottom to stand upright on any flat surface, preventing spills after use.\u003c\/span\u003e\u003cbr data-mce-fragment=\"1\"\u003e\u003cbr data-mce-fragment=\"1\"\u003e\u003cspan data-mce-fragment=\"1\"\u003eOnce you have finished collecting your letdown, open the plug on the top and safely pour out your milk into a container or bottle.\u003c\/span\u003e\u003c\/p\u003e\n\u003cp\u003e\u003cstrong\u003eFeatures:\u003c\/strong\u003e\u003c\/p\u003e\n\u003cul\u003e\n\u003cli\u003eAttaches to your breast with light suction to help keep it in place inside your bra.\u003c\/li\u003e\n\u003cli\u003eMade of soft 100% medical-grade silicone.\u003c\/li\u003e\n\u003cli\u003eOne-piece design with no joints, cracks or edges for bacteria to harbour.\u003c\/li\u003e\n\u003cli\u003eSmall feet on the base allow it to stand upright on flat surfaces.\u003c\/li\u003e\n\u003cli\u003eNo cords or batteries required.\u003c\/li\u003e\n\u003cli\u003eEasy-care - just boil to sterilise.\u003c\/li\u003e\n\u003cli\u003eBPA, PVC and phthalate-free.\u003c\/li\u003e\n\u003c\/ul\u003e\n\u003cp\u003e\u003cstrong\u003eDirections:\u003c\/strong\u003e\u003c\/p\u003e\n\u003cp\u003e\u003cstrong\u003eCollecting Your Leakage and Letdown:\u003c\/strong\u003e\u003c\/p\u003e\n\u003col\u003e\n\u003cli\u003eEnsure the plug\u003cstrong\u003e (a)\u003c\/strong\u003e\u003cspan\u003e \u003c\/span\u003eis pushed into the outlet\u003cspan\u003e \u003c\/span\u003e\u003cstrong\u003e(b)\u003c\/strong\u003e.\u003c\/li\u003e\n\u003cli\u003eCentre the opening\u003cspan\u003e \u003c\/span\u003e\u003cstrong\u003e(e)\u003c\/strong\u003e\u003cspan\u003e \u003c\/span\u003eover your nipple and gently press down on the back of the Ladybug.\u003c\/li\u003e\n\u003cli\u003ePress to your breast and release to create gentle suction and begin collecting let-down. \u003c\/li\u003e\n\u003cli\u003eThe Ladybug should always be worn inside a bra to keep it secure.\u003c\/li\u003e\n\u003cli\u003eRemove the Ladybug regularly to store your breast milk in line with your country’s safe breast milk storage guidelines. Pull out the plug from the outlet and pour the milk from the outlet into a container before storing. \u003c\/li\u003e\n\u003c\/ol\u003e\n\u003cp dir=\"ltr\"\u003e\u003cstrong\u003eNOTE: \u003c\/strong\u003e\u003cem\u003eSuction is optional and helps to keep the Ladybug in place in your bra. The Ladybug will only collect milk that would have leaked anyway. It won't draw out any extra milk. \u003c\/em\u003e\u003c\/p\u003e\n\u003cp\u003e \u003c\/p\u003e\n\u003cp\u003e \u003c\/p\u003e\n\u003cp\u003e\u003cimg src=\"https:\/\/cdn.accentuate.cloud\/images\/11019058\/%E5%90%B8%E9%9B%86%E4%B9%B3%E5%99%A8-01.jpg?v=1642033976218\" class=\"fr-fic fr-dib\"\u003e\u003cstrong\u003eCleaning \u0026amp; Care:\u003c\/strong\u003e\u003c\/p\u003e\n\u003cp\u003e\u003cspan\u003eClean after each use. We strongly recommend cleaning and sterilising your Ladybug with any steam sterilising system or by boiling in water for 2-3 minutes. Only soft bristle brushes or soft sponges should be used to clean this product as hard scourers may scratch the surface. Exposure to detergent may make the clear silicone in this product appear cloudy. Instead, we recommend washing in warm water with soap\u003c\/span\u003e\u003cspan\u003e. Do not use any bleach-based agents or sterilising tablets to clean this product. Do not use UV sterilisers to clean this product as it may impact its lifespan.\u003c\/span\u003e\u003c\/p\u003e\n\u003cp\u003e\u003cstrong\u003eStorage:\u003c\/strong\u003e\u003c\/p\u003e\n\u003cp\u003e\u003cspan\u003eDo not store near any sharp objects. Store product in a cool, dry place and avoid direct sunlight\u003c\/span\u003e\u003c\/p\u003e\n\u003cp\u003e\u003cstrong\u003eCaution:\u003c\/strong\u003e\u003c\/p\u003e\n\u003cp dir=\"ltr\"\u003eAlways follow your country’s guidelines and recommendations to safely express and store breast milk. Check product condition regularly. \u003cbr\u003eReplace if this product shows any signs of damage. This product is not a toy. Do not use this product for anything other than its intended use. Adult supervision is required. Keep out of the reach of children and pets. \u003c\/p\u003e\n\u003cp\u003e\u003cstrong\u003ePlease ensure you are familiar with your country's guidelines on the safe storage of breast milk. Empty your Ladybug regularly to store your breast milk according to these guidelines. Consult your midwife or lactation consultant if you have any concerns before use.\u003c\/strong\u003e\u003c\/p\u003e"},"options":[{"name":"Size","position":1,"values":["40mls","75mls","150mls"]}],"custom_metafields":{},"metafields":{"badge":"\u003cdiv style='display:none' class='jdgm-prev-badge' data-average-rating='0.00' data-number-of-reviews='0' data-number-of-questions='0'\u003e \u003cspan class='jdgm-prev-badge__stars' data-score='0.00' tabindex='0' aria-label='0.00 stars' role='button'\u003e \u003cspan class='jdgm-star jdgm--off'\u003e\u003c\/span\u003e\u003cspan class='jdgm-star jdgm--off'\u003e\u003c\/span\u003e\u003cspan class='jdgm-star jdgm--off'\u003e\u003c\/span\u003e\u003cspan class='jdgm-star jdgm--off'\u003e\u003c\/span\u003e\u003cspan class='jdgm-star jdgm--off'\u003e\u003c\/span\u003e \u003c\/span\u003e \u003cspan class='jdgm-prev-badge__text'\u003e No reviews \u003c\/span\u003e \u003c\/div\u003e","widget":"\u003cdiv class='jdgm-rev-widg' data-updated-at='2025-06-13T16:12:10Z' data-average-rating='0.00' data-number-of-reviews='0' data-number-of-questions='0'\u003e \u003cstyle class='jdgm-temp-hiding-style'\u003e.jdgm-rev-widg{ display: none }\u003c\/style\u003e \u003cdiv class='jdgm-rev-widg__header'\u003e \u003ch2 class='jdgm-rev-widg__title'\u003eCustomer Reviews\u003c\/h2\u003e \u003cdiv class='jdgm-rev-widg__summary'\u003e \u003cdiv class='jdgm-rev-widg__summary-stars' aria-label='Average rating is 0.00 stars' role='img'\u003e \u003cspan class='jdgm-star jdgm--off'\u003e\u003c\/span\u003e\u003cspan class='jdgm-star jdgm--off'\u003e\u003c\/span\u003e\u003cspan class='jdgm-star jdgm--off'\u003e\u003c\/span\u003e\u003cspan class='jdgm-star jdgm--off'\u003e\u003c\/span\u003e\u003cspan class='jdgm-star jdgm--off'\u003e\u003c\/span\u003e \u003c\/div\u003e \u003cdiv class='jdgm-rev-widg__summary-text'\u003eBe the first to write a review\u003c\/div\u003e \u003c\/div\u003e \u003ca style='display: none' href='#' class='jdgm-write-rev-link' role='button'\u003eWrite a review\u003c\/a\u003e \u003cdiv class='jdgm-histogram jdgm-temp-hidden'\u003e \u003cdiv class='jdgm-histogram__row' data-rating='5' data-frequency='0' data-percentage='0'\u003e \u003cdiv class='jdgm-histogram__star' role='button' aria-label=\"0% (0) reviews with 5 star rating\" tabindex='0' \u003e\u003cspan class='jdgm-star jdgm--on'\u003e\u003c\/span\u003e\u003cspan class='jdgm-star jdgm--on'\u003e\u003c\/span\u003e\u003cspan class='jdgm-star jdgm--on'\u003e\u003c\/span\u003e\u003cspan class='jdgm-star jdgm--on'\u003e\u003c\/span\u003e\u003cspan class='jdgm-star jdgm--on'\u003e\u003c\/span\u003e\u003c\/div\u003e \u003cdiv class='jdgm-histogram__bar'\u003e \u003cdiv class='jdgm-histogram__bar-content' style='width: 0%;'\u003e \u003c\/div\u003e \u003c\/div\u003e \u003cdiv class='jdgm-histogram__percentage'\u003e0%\u003c\/div\u003e \u003cdiv class='jdgm-histogram__frequency'\u003e(0)\u003c\/div\u003e \u003c\/div\u003e \u003cdiv class='jdgm-histogram__row' data-rating='4' data-frequency='0' data-percentage='0'\u003e \u003cdiv class='jdgm-histogram__star' role='button' aria-label=\"0% (0) reviews with 4 star rating\" tabindex='0' \u003e\u003cspan class='jdgm-star jdgm--on'\u003e\u003c\/span\u003e\u003cspan class='jdgm-star jdgm--on'\u003e\u003c\/span\u003e\u003cspan class='jdgm-star jdgm--on'\u003e\u003c\/span\u003e\u003cspan class='jdgm-star jdgm--on'\u003e\u003c\/span\u003e\u003cspan class='jdgm-star jdgm--off'\u003e\u003c\/span\u003e\u003c\/div\u003e \u003cdiv class='jdgm-histogram__bar'\u003e \u003cdiv class='jdgm-histogram__bar-content' style='width: 0%;'\u003e \u003c\/div\u003e \u003c\/div\u003e \u003cdiv class='jdgm-histogram__percentage'\u003e0%\u003c\/div\u003e \u003cdiv class='jdgm-histogram__frequency'\u003e(0)\u003c\/div\u003e \u003c\/div\u003e \u003cdiv class='jdgm-histogram__row' data-rating='3' data-frequency='0' data-percentage='0'\u003e \u003cdiv class='jdgm-histogram__star' role='button' aria-label=\"0% (0) reviews with 3 star rating\" tabindex='0' \u003e\u003cspan class='jdgm-star jdgm--on'\u003e\u003c\/span\u003e\u003cspan class='jdgm-star jdgm--on'\u003e\u003c\/span\u003e\u003cspan class='jdgm-star jdgm--on'\u003e\u003c\/span\u003e\u003cspan class='jdgm-star jdgm--off'\u003e\u003c\/span\u003e\u003cspan class='jdgm-star jdgm--off'\u003e\u003c\/span\u003e\u003c\/div\u003e \u003cdiv class='jdgm-histogram__bar'\u003e \u003cdiv class='jdgm-histogram__bar-content' style='width: 0%;'\u003e \u003c\/div\u003e \u003c\/div\u003e \u003cdiv class='jdgm-histogram__percentage'\u003e0%\u003c\/div\u003e \u003cdiv class='jdgm-histogram__frequency'\u003e(0)\u003c\/div\u003e \u003c\/div\u003e \u003cdiv class='jdgm-histogram__row' data-rating='2' data-frequency='0' data-percentage='0'\u003e \u003cdiv class='jdgm-histogram__star' role='button' aria-label=\"0% (0) reviews with 2 star rating\" tabindex='0' \u003e\u003cspan class='jdgm-star jdgm--on'\u003e\u003c\/span\u003e\u003cspan class='jdgm-star jdgm--on'\u003e\u003c\/span\u003e\u003cspan class='jdgm-star jdgm--off'\u003e\u003c\/span\u003e\u003cspan class='jdgm-star jdgm--off'\u003e\u003c\/span\u003e\u003cspan class='jdgm-star jdgm--off'\u003e\u003c\/span\u003e\u003c\/div\u003e \u003cdiv class='jdgm-histogram__bar'\u003e \u003cdiv class='jdgm-histogram__bar-content' style='width: 0%;'\u003e \u003c\/div\u003e \u003c\/div\u003e \u003cdiv class='jdgm-histogram__percentage'\u003e0%\u003c\/div\u003e \u003cdiv class='jdgm-histogram__frequency'\u003e(0)\u003c\/div\u003e \u003c\/div\u003e \u003cdiv class='jdgm-histogram__row' data-rating='1' data-frequency='0' data-percentage='0'\u003e \u003cdiv class='jdgm-histogram__star' role='button' aria-label=\"0% (0) reviews with 1 star rating\" tabindex='0' \u003e\u003cspan class='jdgm-star jdgm--on'\u003e\u003c\/span\u003e\u003cspan class='jdgm-star jdgm--off'\u003e\u003c\/span\u003e\u003cspan class='jdgm-star jdgm--off'\u003e\u003c\/span\u003e\u003cspan class='jdgm-star jdgm--off'\u003e\u003c\/span\u003e\u003cspan class='jdgm-star jdgm--off'\u003e\u003c\/span\u003e\u003c\/div\u003e \u003cdiv class='jdgm-histogram__bar'\u003e \u003cdiv class='jdgm-histogram__bar-content' style='width: 0%;'\u003e \u003c\/div\u003e \u003c\/div\u003e \u003cdiv class='jdgm-histogram__percentage'\u003e0%\u003c\/div\u003e \u003cdiv class='jdgm-histogram__frequency'\u003e(0)\u003c\/div\u003e \u003c\/div\u003e \u003cdiv class='jdgm-histogram__row jdgm-histogram__clear-filter' data-rating=null tabindex='0'\u003e\u003c\/div\u003e \u003c\/div\u003e \u003cdiv class='jdgm-rev-widg__sort-wrapper'\u003e\u003c\/div\u003e \u003c\/div\u003e \u003cdiv class='jdgm-rev-widg__body'\u003e \u003cdiv class='jdgm-rev-widg__reviews'\u003e\u003c\/div\u003e \u003cdiv class='jdgm-paginate' data-per-page='10' data-url='https:\/\/api.judge.me\/reviews\/reviews_for_widget' style=\"display: none;\"\u003e\u003c\/div\u003e \u003c\/div\u003e \u003cdiv class='jdgm-rev-widg__paginate-spinner-wrapper'\u003e \u003cdiv class='jdgm-spinner'\u003e\u003c\/div\u003e \u003c\/div\u003e \u003c\/div\u003e"},"collections":[{"id":281712427197,"handle":"breastfeeding","title":"Breastfeeding","updated_at":"2025-12-28T20:10:01+08:00","body_html":"","published_at":"2021-12-20T14:19:33+08:00","sort_order":"best-selling","template_suffix":"breastfeeding-collection","disjunctive":false,"rules":[{"column":"tag","relation":"equals","condition":"Breastfeeding"}],"published_scope":"global","image":{"created_at":"2024-05-06T11:59:34+08:00","alt":"Breastfeeding - The Birth Store","width":620,"height":635,"src":"\/\/www.thebirthstore.com.au\/cdn\/shop\/collections\/breastfeeding-793872.jpg?v=1714967974"}},{"id":261657460925,"handle":"buy","title":"Buy","updated_at":"2025-12-28T20:10:01+08:00","body_html":"\u003cp\u003eBrowse all of our pregnancy, labour \u0026amp; birth, postpartum and baby essentials here.\u003cbr\u003e\u003c\/p\u003e\n\u003cp\u003e\u003cspan\u003eYou can even buy now and pay later with Afterpay!\u003c\/span\u003e\u003c\/p\u003e","published_at":"2021-03-10T12:05:31+08:00","sort_order":"best-selling","template_suffix":"shop-all-collection","disjunctive":false,"rules":[{"column":"title","relation":"not_contains","condition":"Hire"}],"published_scope":"global","image":{"created_at":"2024-05-06T11:59:42+08:00","alt":"Buy - The Birth Store","width":2048,"height":2048,"src":"\/\/www.thebirthstore.com.au\/cdn\/shop\/collections\/buy-964856.jpg?v=1714967982"}},{"id":294349865149,"handle":"cracked-nipples","title":"Cracked Nipples","updated_at":"2025-12-26T20:08:47+08:00","body_html":"","published_at":"2023-09-21T14:03:02+08:00","sort_order":"best-selling","template_suffix":"swaddles-collection","disjunctive":false,"rules":[{"column":"tag","relation":"equals","condition":"Cracked Nipples"}],"published_scope":"global","image":{"created_at":"2024-05-06T11:59:53+08:00","alt":"Cracked Nipples - The Birth Store","width":1050,"height":1050,"src":"\/\/www.thebirthstore.com.au\/cdn\/shop\/collections\/cracked-nipples-166971.jpg?v=1714967994"}},{"id":261658083517,"handle":"post-partum","title":"Postpartum","updated_at":"2025-12-28T20:10:01+08:00","body_html":"\u003cp\u003eShop your postpartum and hospital bag essentials below. Looking for something we don't currently stock? Please reach out and let us know.\u003cbr\u003e\u003c\/p\u003e\n\u003cp\u003e\u003cspan\u003eYou can even buy now and pay later with Afterpay!\u003c\/span\u003e\u003c\/p\u003e","published_at":"2021-03-10T12:33:47+08:00","sort_order":"best-selling","template_suffix":"postpartum-collection","disjunctive":false,"rules":[{"column":"tag","relation":"equals","condition":"Post-Partum"}],"published_scope":"global","image":{"created_at":"2024-05-06T12:00:36+08:00","alt":"Postpartum - The Birth Store","width":611,"height":702,"src":"\/\/www.thebirthstore.com.au\/cdn\/shop\/collections\/postpartum-150119.jpg?v=1714968037"}},{"id":291456483517,"handle":"shop-all","title":"Shop All - Mum","updated_at":"2025-12-28T20:10:01+08:00","body_html":"","published_at":"2022-12-23T22:04:39+08:00","sort_order":"best-selling","template_suffix":"shop-all-collection","disjunctive":false,"rules":[{"column":"variant_price","relation":"greater_than","condition":"1"},{"column":"title","relation":"not_contains","condition":"Batteries"},{"column":"tag","relation":"equals","condition":"Mum"}],"published_scope":"global","image":{"created_at":"2024-05-06T12:00:54+08:00","alt":"Shop All - The Birth Store","width":1365,"height":2048,"src":"\/\/www.thebirthstore.com.au\/cdn\/shop\/collections\/shop-all-693176.jpg?v=1714968055"}},{"id":310045933757,"handle":"shop-all-sale","title":"Shop All Sale","updated_at":"2025-12-28T20:10:01+08:00","body_html":"","published_at":"2024-11-12T13:22:43+08:00","sort_order":"alpha-asc","template_suffix":"","disjunctive":true,"rules":[{"column":"tag","relation":"equals","condition":"Bundles"},{"column":"vendor","relation":"equals","condition":"Franjos Kitchen"},{"column":"vendor","relation":"equals","condition":"Adored Illustrations"},{"column":"vendor","relation":"equals","condition":"Amazing Oils"},{"column":"vendor","relation":"equals","condition":"Ice Ice Booby"},{"column":"vendor","relation":"equals","condition":"Made to Milk"},{"column":"vendor","relation":"equals","condition":"Milky Goodness"},{"column":"vendor","relation":"equals","condition":"Seasons of Mama"},{"column":"vendor","relation":"equals","condition":"Silverette"},{"column":"vendor","relation":"equals","condition":"Snuggle Hunny"},{"column":"vendor","relation":"equals","condition":"Yung Bod"},{"column":"vendor","relation":"equals","condition":"Bare Love"},{"column":"vendor","relation":"equals","condition":"Haakaa"},{"column":"vendor","relation":"equals","condition":"Mere Botanicals"},{"column":"vendor","relation":"equals","condition":"The Birth Store Hire"},{"column":"vendor","relation":"equals","condition":"The Birth Store"}],"published_scope":"global","image":{"created_at":"2024-11-13T10:58:16+08:00","alt":"Shop All Sale - The Birth Store","width":2048,"height":1365,"src":"\/\/www.thebirthstore.com.au\/cdn\/shop\/collections\/shop-all-sale-297361.jpg?v=1731466697"}}]}
[{"alt":"Ladybug Silicone Breast Milk Collector - The Birth Store-Haakaa","id":27007590662333,"position":1,"preview_image":{"aspect_ratio":1.0,"height":867,"width":867,"src":"\/\/www.thebirthstore.com.au\/cdn\/shop\/files\/ladybug-silicone-breast-milk-collector-873986.jpg?v=1714967990"},"aspect_ratio":1.0,"height":867,"media_type":"image","src":"\/\/www.thebirthstore.com.au\/cdn\/shop\/files\/ladybug-silicone-breast-milk-collector-873986.jpg?v=1714967990","width":867},{"alt":"Ladybug Silicone Breast Milk Collector - The Birth Store-Haakaa","id":27007590760637,"position":2,"preview_image":{"aspect_ratio":0.944,"height":678,"width":640,"src":"\/\/www.thebirthstore.com.au\/cdn\/shop\/files\/ladybug-silicone-breast-milk-collector-183220.jpg?v=1714967990"},"aspect_ratio":0.944,"height":678,"media_type":"image","src":"\/\/www.thebirthstore.com.au\/cdn\/shop\/files\/ladybug-silicone-breast-milk-collector-183220.jpg?v=1714967990","width":640},{"alt":"Ladybug Silicone Breast Milk Collector - The Birth Store-Haakaa","id":27007590826173,"position":3,"preview_image":{"aspect_ratio":1.0,"height":1000,"width":1000,"src":"\/\/www.thebirthstore.com.au\/cdn\/shop\/files\/ladybug-silicone-breast-milk-collector-821084.jpg?v=1714967990"},"aspect_ratio":1.0,"height":1000,"media_type":"image","src":"\/\/www.thebirthstore.com.au\/cdn\/shop\/files\/ladybug-silicone-breast-milk-collector-821084.jpg?v=1714967990","width":1000},{"alt":"Ladybug Silicone Breast Milk Collector - The Birth Store-Haakaa","id":27007590891709,"position":4,"preview_image":{"aspect_ratio":1.617,"height":600,"width":970,"src":"\/\/www.thebirthstore.com.au\/cdn\/shop\/files\/ladybug-silicone-breast-milk-collector-724130.jpg?v=1714967990"},"aspect_ratio":1.617,"height":600,"media_type":"image","src":"\/\/www.thebirthstore.com.au\/cdn\/shop\/files\/ladybug-silicone-breast-milk-collector-724130.jpg?v=1714967990","width":970},{"alt":"Ladybug Silicone Breast Milk Collector - The Birth Store-Haakaa","id":27007590957245,"position":5,"preview_image":{"aspect_ratio":1.0,"height":1000,"width":1000,"src":"\/\/www.thebirthstore.com.au\/cdn\/shop\/files\/ladybug-silicone-breast-milk-collector-280019.jpg?v=1714967990"},"aspect_ratio":1.0,"height":1000,"media_type":"image","src":"\/\/www.thebirthstore.com.au\/cdn\/shop\/files\/ladybug-silicone-breast-milk-collector-280019.jpg?v=1714967990","width":1000},{"alt":"Ladybug Silicone Breast Milk Collector - The Birth Store-Haakaa","id":27007591022781,"position":6,"preview_image":{"aspect_ratio":0.955,"height":619,"width":591,"src":"\/\/www.thebirthstore.com.au\/cdn\/shop\/files\/ladybug-silicone-breast-milk-collector-729118.jpg?v=1714967990"},"aspect_ratio":0.955,"height":619,"media_type":"image","src":"\/\/www.thebirthstore.com.au\/cdn\/shop\/files\/ladybug-silicone-breast-milk-collector-729118.jpg?v=1714967990","width":591},{"alt":"Ladybug Silicone Breast Milk Collector - The Birth Store-Haakaa","id":27007591088317,"position":7,"preview_image":{"aspect_ratio":0.976,"height":635,"width":620,"src":"\/\/www.thebirthstore.com.au\/cdn\/shop\/files\/ladybug-silicone-breast-milk-collector-984849.jpg?v=1714967990"},"aspect_ratio":0.976,"height":635,"media_type":"image","src":"\/\/www.thebirthstore.com.au\/cdn\/shop\/files\/ladybug-silicone-breast-milk-collector-984849.jpg?v=1714967990","width":620}]
{"item":{"id":7483972157629,"title":"Little Words on Infertility","handle":"little-words-on-infertility","description":"\u003cdiv class=\"page\" title=\"Page 76\"\u003e\n\u003cdiv class=\"section\"\u003e\n\u003cdiv class=\"layoutArea\"\u003e\n\u003cdiv class=\"column\"\u003e\n\u003cdiv class=\"page\" title=\"Page 77\"\u003e\n\u003cdiv class=\"section\"\u003e\n\u003cdiv class=\"layoutArea\"\u003e\n\u003cdiv class=\"column\"\u003e\n\u003cem\u003eI’ve never known love like this before\u003c\/em\u003e\u003cem\u003e\u003c\/em\u003e\n\u003c\/div\u003e\n\u003cdiv class=\"column\"\u003e\u003cem\u003eI’ve never known what’s like to lose a love\u003c\/em\u003e\u003c\/div\u003e\n\u003cdiv class=\"column\"\u003e\n\u003cem\u003eI never really had\u003c\/em\u003e\u003cbr data-mce-fragment=\"1\"\u003e\u003cem\u003eBecause I never had you\u003c\/em\u003e\u003cbr data-mce-fragment=\"1\"\u003e\u003cem\u003eI never held you\u003c\/em\u003e\u003cbr data-mce-fragment=\"1\"\u003e\u003cem\u003eI never saw you\u003c\/em\u003e\u003cbr data-mce-fragment=\"1\"\u003e\u003cem\u003eAnd yet I loved you\u003c\/em\u003e\u003cbr data-mce-fragment=\"1\"\u003e\u003cem\u003eIn a way I’ve never loved before.\u003c\/em\u003e\n\u003c\/div\u003e\n\u003cp class=\"column\"\u003e\u003cspan data-mce-fragment=\"1\"\u003e\u003cbr data-mce-fragment=\"1\"\u003e\u003c\/span\u003e\u003cspan data-mce-fragment=\"1\"\u003e\u003c\/span\u003eWith beautiful words, Jessica delves into the challenging, difficult and life changing path of infertility that so many people bravely walk. \u003c\/p\u003e\n\u003cp class=\"column\"\u003eHaving gone through the trials and tribulations of infertility herself, Jessica writes about the subject in a way that is both respectful and realistic whilst also giving the hope that people experiencing infertility crave.\u003c\/p\u003e\n\u003cp class=\"column\"\u003eThis raw and honest recount of infertility is a must have for any one experiencing the unknown. It documents infertility in a way not often seen, through poetry and prose, giving readers the knowledge that they are not alone and that above all, there is always hope.\u003c\/p\u003e\n\u003c\/div\u003e\n\u003c\/div\u003e\n\u003c\/div\u003e\n\u003c\/div\u003e\n\u003c\/div\u003e\n\u003c\/div\u003e\n\u003c\/div\u003e\n\u003cp\u003e\u003cspan data-mce-fragment=\"1\"\u003eThe book measures 12.5cm x 20cm and is softcover with a matt finish. \u003c\/span\u003e\u003c\/p\u003e","published_at":"2023-06-08T21:44:52+08:00","created_at":"2023-06-08T21:44:52+08:00","vendor":"Adored Illustrations","type":"","tags":["Affirmations","Books","Mum","Pre-Conception","Pregnancy"],"price":2500,"price_min":2500,"price_max":2500,"available":true,"price_varies":false,"compare_at_price":null,"compare_at_price_min":0,"compare_at_price_max":0,"compare_at_price_varies":false,"variants":[{"id":42868947714237,"title":"Default Title","option1":"Default Title","option2":null,"option3":null,"sku":"","requires_shipping":true,"taxable":false,"featured_image":null,"available":true,"name":"Little Words on Infertility","public_title":null,"options":["Default Title"],"price":2500,"weight":125,"compare_at_price":null,"inventory_management":"shopify","barcode":"47714237","requires_selling_plan":false,"selling_plan_allocations":[]}],"images":["\/\/www.thebirthstore.com.au\/cdn\/shop\/files\/little-words-on-infertility-213672.jpg?v=1714967991","\/\/www.thebirthstore.com.au\/cdn\/shop\/files\/little-words-on-infertility-529840.jpg?v=1714967991","\/\/www.thebirthstore.com.au\/cdn\/shop\/files\/little-words-on-infertility-106290.jpg?v=1714967991","\/\/www.thebirthstore.com.au\/cdn\/shop\/files\/little-words-on-infertility-293904.jpg?v=1714967991","\/\/www.thebirthstore.com.au\/cdn\/shop\/files\/little-words-on-infertility-308014.jpg?v=1714967991","\/\/www.thebirthstore.com.au\/cdn\/shop\/files\/little-words-on-infertility-109945.jpg?v=1714967992","\/\/www.thebirthstore.com.au\/cdn\/shop\/files\/little-words-on-infertility-747241.jpg?v=1714967992"],"featured_image":"\/\/www.thebirthstore.com.au\/cdn\/shop\/files\/little-words-on-infertility-213672.jpg?v=1714967991","options":["Title"],"media":[{"alt":"Little Words on Infertility - The Birth Store-Adored Illustrations","id":27007591481533,"position":1,"preview_image":{"aspect_ratio":1.0,"height":1080,"width":1080,"src":"\/\/www.thebirthstore.com.au\/cdn\/shop\/files\/little-words-on-infertility-213672.jpg?v=1714967991"},"aspect_ratio":1.0,"height":1080,"media_type":"image","src":"\/\/www.thebirthstore.com.au\/cdn\/shop\/files\/little-words-on-infertility-213672.jpg?v=1714967991","width":1080},{"alt":"Little Words on Infertility - The Birth Store-Adored Illustrations","id":27007591514301,"position":2,"preview_image":{"aspect_ratio":1.0,"height":1080,"width":1080,"src":"\/\/www.thebirthstore.com.au\/cdn\/shop\/files\/little-words-on-infertility-529840.jpg?v=1714967991"},"aspect_ratio":1.0,"height":1080,"media_type":"image","src":"\/\/www.thebirthstore.com.au\/cdn\/shop\/files\/little-words-on-infertility-529840.jpg?v=1714967991","width":1080},{"alt":"Little Words on Infertility - The Birth Store-Adored Illustrations","id":27007591547069,"position":3,"preview_image":{"aspect_ratio":1.0,"height":1080,"width":1080,"src":"\/\/www.thebirthstore.com.au\/cdn\/shop\/files\/little-words-on-infertility-106290.jpg?v=1714967991"},"aspect_ratio":1.0,"height":1080,"media_type":"image","src":"\/\/www.thebirthstore.com.au\/cdn\/shop\/files\/little-words-on-infertility-106290.jpg?v=1714967991","width":1080},{"alt":"Little Words on Infertility - The Birth Store-Adored Illustrations","id":27007591612605,"position":4,"preview_image":{"aspect_ratio":1.0,"height":1080,"width":1080,"src":"\/\/www.thebirthstore.com.au\/cdn\/shop\/files\/little-words-on-infertility-293904.jpg?v=1714967991"},"aspect_ratio":1.0,"height":1080,"media_type":"image","src":"\/\/www.thebirthstore.com.au\/cdn\/shop\/files\/little-words-on-infertility-293904.jpg?v=1714967991","width":1080},{"alt":"Little Words on Infertility - The Birth Store-Adored Illustrations","id":27007591645373,"position":5,"preview_image":{"aspect_ratio":1.0,"height":1080,"width":1080,"src":"\/\/www.thebirthstore.com.au\/cdn\/shop\/files\/little-words-on-infertility-308014.jpg?v=1714967991"},"aspect_ratio":1.0,"height":1080,"media_type":"image","src":"\/\/www.thebirthstore.com.au\/cdn\/shop\/files\/little-words-on-infertility-308014.jpg?v=1714967991","width":1080},{"alt":"Little Words on Infertility - The Birth Store-Adored Illustrations","id":27007591710909,"position":6,"preview_image":{"aspect_ratio":1.0,"height":1080,"width":1080,"src":"\/\/www.thebirthstore.com.au\/cdn\/shop\/files\/little-words-on-infertility-109945.jpg?v=1714967992"},"aspect_ratio":1.0,"height":1080,"media_type":"image","src":"\/\/www.thebirthstore.com.au\/cdn\/shop\/files\/little-words-on-infertility-109945.jpg?v=1714967992","width":1080},{"alt":"Little Words on Infertility - The Birth Store-Adored Illustrations","id":27007591776445,"position":7,"preview_image":{"aspect_ratio":1.0,"height":1080,"width":1080,"src":"\/\/www.thebirthstore.com.au\/cdn\/shop\/files\/little-words-on-infertility-747241.jpg?v=1714967992"},"aspect_ratio":1.0,"height":1080,"media_type":"image","src":"\/\/www.thebirthstore.com.au\/cdn\/shop\/files\/little-words-on-infertility-747241.jpg?v=1714967992","width":1080}],"requires_selling_plan":false,"selling_plan_groups":[],"content":"\u003cdiv class=\"page\" title=\"Page 76\"\u003e\n\u003cdiv class=\"section\"\u003e\n\u003cdiv class=\"layoutArea\"\u003e\n\u003cdiv class=\"column\"\u003e\n\u003cdiv class=\"page\" title=\"Page 77\"\u003e\n\u003cdiv class=\"section\"\u003e\n\u003cdiv class=\"layoutArea\"\u003e\n\u003cdiv class=\"column\"\u003e\n\u003cem\u003eI’ve never known love like this before\u003c\/em\u003e\u003cem\u003e\u003c\/em\u003e\n\u003c\/div\u003e\n\u003cdiv class=\"column\"\u003e\u003cem\u003eI’ve never known what’s like to lose a love\u003c\/em\u003e\u003c\/div\u003e\n\u003cdiv class=\"column\"\u003e\n\u003cem\u003eI never really had\u003c\/em\u003e\u003cbr data-mce-fragment=\"1\"\u003e\u003cem\u003eBecause I never had you\u003c\/em\u003e\u003cbr data-mce-fragment=\"1\"\u003e\u003cem\u003eI never held you\u003c\/em\u003e\u003cbr data-mce-fragment=\"1\"\u003e\u003cem\u003eI never saw you\u003c\/em\u003e\u003cbr data-mce-fragment=\"1\"\u003e\u003cem\u003eAnd yet I loved you\u003c\/em\u003e\u003cbr data-mce-fragment=\"1\"\u003e\u003cem\u003eIn a way I’ve never loved before.\u003c\/em\u003e\n\u003c\/div\u003e\n\u003cp class=\"column\"\u003e\u003cspan data-mce-fragment=\"1\"\u003e\u003cbr data-mce-fragment=\"1\"\u003e\u003c\/span\u003e\u003cspan data-mce-fragment=\"1\"\u003e\u003c\/span\u003eWith beautiful words, Jessica delves into the challenging, difficult and life changing path of infertility that so many people bravely walk. \u003c\/p\u003e\n\u003cp class=\"column\"\u003eHaving gone through the trials and tribulations of infertility herself, Jessica writes about the subject in a way that is both respectful and realistic whilst also giving the hope that people experiencing infertility crave.\u003c\/p\u003e\n\u003cp class=\"column\"\u003eThis raw and honest recount of infertility is a must have for any one experiencing the unknown. It documents infertility in a way not often seen, through poetry and prose, giving readers the knowledge that they are not alone and that above all, there is always hope.\u003c\/p\u003e\n\u003c\/div\u003e\n\u003c\/div\u003e\n\u003c\/div\u003e\n\u003c\/div\u003e\n\u003c\/div\u003e\n\u003c\/div\u003e\n\u003c\/div\u003e\n\u003cp\u003e\u003cspan data-mce-fragment=\"1\"\u003eThe book measures 12.5cm x 20cm and is softcover with a matt finish. \u003c\/span\u003e\u003c\/p\u003e"},"options":[{"name":"Title","position":1,"values":["Default Title"]}],"custom_metafields":{},"metafields":{"badge":"\u003cdiv style='display:none' class='jdgm-prev-badge' data-average-rating='0.00' data-number-of-reviews='0' data-number-of-questions='0'\u003e \u003cspan class='jdgm-prev-badge__stars' data-score='0.00' tabindex='0' aria-label='0.00 stars' role='button'\u003e \u003cspan class='jdgm-star jdgm--off'\u003e\u003c\/span\u003e\u003cspan class='jdgm-star jdgm--off'\u003e\u003c\/span\u003e\u003cspan class='jdgm-star jdgm--off'\u003e\u003c\/span\u003e\u003cspan class='jdgm-star jdgm--off'\u003e\u003c\/span\u003e\u003cspan class='jdgm-star jdgm--off'\u003e\u003c\/span\u003e \u003c\/span\u003e \u003cspan class='jdgm-prev-badge__text'\u003e No reviews \u003c\/span\u003e \u003c\/div\u003e","widget":"\u003cdiv class='jdgm-rev-widg' data-updated-at='2025-06-13T16:12:53Z' data-average-rating='0.00' data-number-of-reviews='0' data-number-of-questions='0'\u003e \u003cstyle class='jdgm-temp-hiding-style'\u003e.jdgm-rev-widg{ display: none }\u003c\/style\u003e \u003cdiv class='jdgm-rev-widg__header'\u003e \u003ch2 class='jdgm-rev-widg__title'\u003eCustomer Reviews\u003c\/h2\u003e \u003cdiv class='jdgm-rev-widg__summary'\u003e \u003cdiv class='jdgm-rev-widg__summary-stars' aria-label='Average rating is 0.00 stars' role='img'\u003e \u003cspan class='jdgm-star jdgm--off'\u003e\u003c\/span\u003e\u003cspan class='jdgm-star jdgm--off'\u003e\u003c\/span\u003e\u003cspan class='jdgm-star jdgm--off'\u003e\u003c\/span\u003e\u003cspan class='jdgm-star jdgm--off'\u003e\u003c\/span\u003e\u003cspan class='jdgm-star jdgm--off'\u003e\u003c\/span\u003e \u003c\/div\u003e \u003cdiv class='jdgm-rev-widg__summary-text'\u003eBe the first to write a review\u003c\/div\u003e \u003c\/div\u003e \u003ca style='display: none' href='#' class='jdgm-write-rev-link' role='button'\u003eWrite a review\u003c\/a\u003e \u003cdiv class='jdgm-histogram jdgm-temp-hidden'\u003e \u003cdiv class='jdgm-histogram__row' data-rating='5' data-frequency='0' data-percentage='0'\u003e \u003cdiv class='jdgm-histogram__star' role='button' aria-label=\"0% (0) reviews with 5 star rating\" tabindex='0' \u003e\u003cspan class='jdgm-star jdgm--on'\u003e\u003c\/span\u003e\u003cspan class='jdgm-star jdgm--on'\u003e\u003c\/span\u003e\u003cspan class='jdgm-star jdgm--on'\u003e\u003c\/span\u003e\u003cspan class='jdgm-star jdgm--on'\u003e\u003c\/span\u003e\u003cspan class='jdgm-star jdgm--on'\u003e\u003c\/span\u003e\u003c\/div\u003e \u003cdiv class='jdgm-histogram__bar'\u003e \u003cdiv class='jdgm-histogram__bar-content' style='width: 0%;'\u003e \u003c\/div\u003e \u003c\/div\u003e \u003cdiv class='jdgm-histogram__percentage'\u003e0%\u003c\/div\u003e \u003cdiv class='jdgm-histogram__frequency'\u003e(0)\u003c\/div\u003e \u003c\/div\u003e \u003cdiv class='jdgm-histogram__row' data-rating='4' data-frequency='0' data-percentage='0'\u003e \u003cdiv class='jdgm-histogram__star' role='button' aria-label=\"0% (0) reviews with 4 star rating\" tabindex='0' \u003e\u003cspan class='jdgm-star jdgm--on'\u003e\u003c\/span\u003e\u003cspan class='jdgm-star jdgm--on'\u003e\u003c\/span\u003e\u003cspan class='jdgm-star jdgm--on'\u003e\u003c\/span\u003e\u003cspan class='jdgm-star jdgm--on'\u003e\u003c\/span\u003e\u003cspan class='jdgm-star jdgm--off'\u003e\u003c\/span\u003e\u003c\/div\u003e \u003cdiv class='jdgm-histogram__bar'\u003e \u003cdiv class='jdgm-histogram__bar-content' style='width: 0%;'\u003e \u003c\/div\u003e \u003c\/div\u003e \u003cdiv class='jdgm-histogram__percentage'\u003e0%\u003c\/div\u003e \u003cdiv class='jdgm-histogram__frequency'\u003e(0)\u003c\/div\u003e \u003c\/div\u003e \u003cdiv class='jdgm-histogram__row' data-rating='3' data-frequency='0' data-percentage='0'\u003e \u003cdiv class='jdgm-histogram__star' role='button' aria-label=\"0% (0) reviews with 3 star rating\" tabindex='0' \u003e\u003cspan class='jdgm-star jdgm--on'\u003e\u003c\/span\u003e\u003cspan class='jdgm-star jdgm--on'\u003e\u003c\/span\u003e\u003cspan class='jdgm-star jdgm--on'\u003e\u003c\/span\u003e\u003cspan class='jdgm-star jdgm--off'\u003e\u003c\/span\u003e\u003cspan class='jdgm-star jdgm--off'\u003e\u003c\/span\u003e\u003c\/div\u003e \u003cdiv class='jdgm-histogram__bar'\u003e \u003cdiv class='jdgm-histogram__bar-content' style='width: 0%;'\u003e \u003c\/div\u003e \u003c\/div\u003e \u003cdiv class='jdgm-histogram__percentage'\u003e0%\u003c\/div\u003e \u003cdiv class='jdgm-histogram__frequency'\u003e(0)\u003c\/div\u003e \u003c\/div\u003e \u003cdiv class='jdgm-histogram__row' data-rating='2' data-frequency='0' data-percentage='0'\u003e \u003cdiv class='jdgm-histogram__star' role='button' aria-label=\"0% (0) reviews with 2 star rating\" tabindex='0' \u003e\u003cspan class='jdgm-star jdgm--on'\u003e\u003c\/span\u003e\u003cspan class='jdgm-star jdgm--on'\u003e\u003c\/span\u003e\u003cspan class='jdgm-star jdgm--off'\u003e\u003c\/span\u003e\u003cspan class='jdgm-star jdgm--off'\u003e\u003c\/span\u003e\u003cspan class='jdgm-star jdgm--off'\u003e\u003c\/span\u003e\u003c\/div\u003e \u003cdiv class='jdgm-histogram__bar'\u003e \u003cdiv class='jdgm-histogram__bar-content' style='width: 0%;'\u003e \u003c\/div\u003e \u003c\/div\u003e \u003cdiv class='jdgm-histogram__percentage'\u003e0%\u003c\/div\u003e \u003cdiv class='jdgm-histogram__frequency'\u003e(0)\u003c\/div\u003e \u003c\/div\u003e \u003cdiv class='jdgm-histogram__row' data-rating='1' data-frequency='0' data-percentage='0'\u003e \u003cdiv class='jdgm-histogram__star' role='button' aria-label=\"0% (0) reviews with 1 star rating\" tabindex='0' \u003e\u003cspan class='jdgm-star jdgm--on'\u003e\u003c\/span\u003e\u003cspan class='jdgm-star jdgm--off'\u003e\u003c\/span\u003e\u003cspan class='jdgm-star jdgm--off'\u003e\u003c\/span\u003e\u003cspan class='jdgm-star jdgm--off'\u003e\u003c\/span\u003e\u003cspan class='jdgm-star jdgm--off'\u003e\u003c\/span\u003e\u003c\/div\u003e \u003cdiv class='jdgm-histogram__bar'\u003e \u003cdiv class='jdgm-histogram__bar-content' style='width: 0%;'\u003e \u003c\/div\u003e \u003c\/div\u003e \u003cdiv class='jdgm-histogram__percentage'\u003e0%\u003c\/div\u003e \u003cdiv class='jdgm-histogram__frequency'\u003e(0)\u003c\/div\u003e \u003c\/div\u003e \u003cdiv class='jdgm-histogram__row jdgm-histogram__clear-filter' data-rating=null tabindex='0'\u003e\u003c\/div\u003e \u003c\/div\u003e \u003cdiv class='jdgm-rev-widg__sort-wrapper'\u003e\u003c\/div\u003e \u003c\/div\u003e \u003cdiv class='jdgm-rev-widg__body'\u003e \u003cdiv class='jdgm-rev-widg__reviews'\u003e\u003c\/div\u003e \u003cdiv class='jdgm-paginate' data-per-page='10' data-url='https:\/\/api.judge.me\/reviews\/reviews_for_widget' style=\"display: none;\"\u003e\u003c\/div\u003e \u003c\/div\u003e \u003cdiv class='jdgm-rev-widg__paginate-spinner-wrapper'\u003e \u003cdiv class='jdgm-spinner'\u003e\u003c\/div\u003e \u003c\/div\u003e \u003c\/div\u003e"},"collections":[{"id":295224541373,"handle":"affirmations","title":"Affirmations","updated_at":"2025-12-28T20:10:01+08:00","body_html":"","published_at":"2023-11-10T20:37:58+08:00","sort_order":"best-selling","template_suffix":"swaddles-collection","disjunctive":false,"rules":[{"column":"tag","relation":"equals","condition":"Affirmations"}],"published_scope":"global","image":{"created_at":"2024-05-06T11:59:20+08:00","alt":"Affirmations - The Birth Store","width":1000,"height":1250,"src":"\/\/www.thebirthstore.com.au\/cdn\/shop\/collections\/affirmations-495130.jpg?v=1714967960"}},{"id":293669077181,"handle":"books","title":"Books","updated_at":"2025-12-24T20:09:23+08:00","body_html":"","published_at":"2023-06-08T21:27:34+08:00","sort_order":"best-selling","template_suffix":"swaddles-collection","disjunctive":false,"rules":[{"column":"tag","relation":"equals","condition":"Books"}],"published_scope":"global","image":{"created_at":"2024-05-06T11:59:31+08:00","alt":"Books - The Birth Store","width":1476,"height":2048,"src":"\/\/www.thebirthstore.com.au\/cdn\/shop\/collections\/books-814717.jpg?v=1714967972"}},{"id":261657460925,"handle":"buy","title":"Buy","updated_at":"2025-12-28T20:10:01+08:00","body_html":"\u003cp\u003eBrowse all of our pregnancy, labour \u0026amp; birth, postpartum and baby essentials here.\u003cbr\u003e\u003c\/p\u003e\n\u003cp\u003e\u003cspan\u003eYou can even buy now and pay later with Afterpay!\u003c\/span\u003e\u003c\/p\u003e","published_at":"2021-03-10T12:05:31+08:00","sort_order":"best-selling","template_suffix":"shop-all-collection","disjunctive":false,"rules":[{"column":"title","relation":"not_contains","condition":"Hire"}],"published_scope":"global","image":{"created_at":"2024-05-06T11:59:42+08:00","alt":"Buy - The Birth Store","width":2048,"height":2048,"src":"\/\/www.thebirthstore.com.au\/cdn\/shop\/collections\/buy-964856.jpg?v=1714967982"}},{"id":261658149053,"handle":"pregnancy-and-maternity-products","title":"Pregnancy","updated_at":"2025-12-28T20:10:01+08:00","body_html":"\u003cp\u003eShop your pregnancy essentials below. Looking for something we don't currently stock? Please reach out and let us know.\u003cbr\u003e\u003c\/p\u003e\n\u003cp\u003e\u003cspan\u003eYou can even buy now and pay later with Afterpay!\u003c\/span\u003e\u003c\/p\u003e","published_at":"2021-03-10T12:34:22+08:00","sort_order":"best-selling","template_suffix":"pregnancy-collection","disjunctive":false,"rules":[{"column":"tag","relation":"equals","condition":"Pregnancy"}],"published_scope":"global","image":{"created_at":"2024-05-06T12:00:40+08:00","alt":"Pregnancy - The Birth Store","width":1024,"height":1536,"src":"\/\/www.thebirthstore.com.au\/cdn\/shop\/collections\/pregnancy-899677.jpg?v=1714968040"}},{"id":291456483517,"handle":"shop-all","title":"Shop All - Mum","updated_at":"2025-12-28T20:10:01+08:00","body_html":"","published_at":"2022-12-23T22:04:39+08:00","sort_order":"best-selling","template_suffix":"shop-all-collection","disjunctive":false,"rules":[{"column":"variant_price","relation":"greater_than","condition":"1"},{"column":"title","relation":"not_contains","condition":"Batteries"},{"column":"tag","relation":"equals","condition":"Mum"}],"published_scope":"global","image":{"created_at":"2024-05-06T12:00:54+08:00","alt":"Shop All - The Birth Store","width":1365,"height":2048,"src":"\/\/www.thebirthstore.com.au\/cdn\/shop\/collections\/shop-all-693176.jpg?v=1714968055"}},{"id":310045933757,"handle":"shop-all-sale","title":"Shop All Sale","updated_at":"2025-12-28T20:10:01+08:00","body_html":"","published_at":"2024-11-12T13:22:43+08:00","sort_order":"alpha-asc","template_suffix":"","disjunctive":true,"rules":[{"column":"tag","relation":"equals","condition":"Bundles"},{"column":"vendor","relation":"equals","condition":"Franjos Kitchen"},{"column":"vendor","relation":"equals","condition":"Adored Illustrations"},{"column":"vendor","relation":"equals","condition":"Amazing Oils"},{"column":"vendor","relation":"equals","condition":"Ice Ice Booby"},{"column":"vendor","relation":"equals","condition":"Made to Milk"},{"column":"vendor","relation":"equals","condition":"Milky Goodness"},{"column":"vendor","relation":"equals","condition":"Seasons of Mama"},{"column":"vendor","relation":"equals","condition":"Silverette"},{"column":"vendor","relation":"equals","condition":"Snuggle Hunny"},{"column":"vendor","relation":"equals","condition":"Yung Bod"},{"column":"vendor","relation":"equals","condition":"Bare Love"},{"column":"vendor","relation":"equals","condition":"Haakaa"},{"column":"vendor","relation":"equals","condition":"Mere Botanicals"},{"column":"vendor","relation":"equals","condition":"The Birth Store Hire"},{"column":"vendor","relation":"equals","condition":"The Birth Store"}],"published_scope":"global","image":{"created_at":"2024-11-13T10:58:16+08:00","alt":"Shop All Sale - The Birth Store","width":2048,"height":1365,"src":"\/\/www.thebirthstore.com.au\/cdn\/shop\/collections\/shop-all-sale-297361.jpg?v=1731466697"}}]}
[{"alt":"Little Words on Infertility - The Birth Store-Adored Illustrations","id":27007591481533,"position":1,"preview_image":{"aspect_ratio":1.0,"height":1080,"width":1080,"src":"\/\/www.thebirthstore.com.au\/cdn\/shop\/files\/little-words-on-infertility-213672.jpg?v=1714967991"},"aspect_ratio":1.0,"height":1080,"media_type":"image","src":"\/\/www.thebirthstore.com.au\/cdn\/shop\/files\/little-words-on-infertility-213672.jpg?v=1714967991","width":1080},{"alt":"Little Words on Infertility - The Birth Store-Adored Illustrations","id":27007591514301,"position":2,"preview_image":{"aspect_ratio":1.0,"height":1080,"width":1080,"src":"\/\/www.thebirthstore.com.au\/cdn\/shop\/files\/little-words-on-infertility-529840.jpg?v=1714967991"},"aspect_ratio":1.0,"height":1080,"media_type":"image","src":"\/\/www.thebirthstore.com.au\/cdn\/shop\/files\/little-words-on-infertility-529840.jpg?v=1714967991","width":1080},{"alt":"Little Words on Infertility - The Birth Store-Adored Illustrations","id":27007591547069,"position":3,"preview_image":{"aspect_ratio":1.0,"height":1080,"width":1080,"src":"\/\/www.thebirthstore.com.au\/cdn\/shop\/files\/little-words-on-infertility-106290.jpg?v=1714967991"},"aspect_ratio":1.0,"height":1080,"media_type":"image","src":"\/\/www.thebirthstore.com.au\/cdn\/shop\/files\/little-words-on-infertility-106290.jpg?v=1714967991","width":1080},{"alt":"Little Words on Infertility - The Birth Store-Adored Illustrations","id":27007591612605,"position":4,"preview_image":{"aspect_ratio":1.0,"height":1080,"width":1080,"src":"\/\/www.thebirthstore.com.au\/cdn\/shop\/files\/little-words-on-infertility-293904.jpg?v=1714967991"},"aspect_ratio":1.0,"height":1080,"media_type":"image","src":"\/\/www.thebirthstore.com.au\/cdn\/shop\/files\/little-words-on-infertility-293904.jpg?v=1714967991","width":1080},{"alt":"Little Words on Infertility - The Birth Store-Adored Illustrations","id":27007591645373,"position":5,"preview_image":{"aspect_ratio":1.0,"height":1080,"width":1080,"src":"\/\/www.thebirthstore.com.au\/cdn\/shop\/files\/little-words-on-infertility-308014.jpg?v=1714967991"},"aspect_ratio":1.0,"height":1080,"media_type":"image","src":"\/\/www.thebirthstore.com.au\/cdn\/shop\/files\/little-words-on-infertility-308014.jpg?v=1714967991","width":1080},{"alt":"Little Words on Infertility - The Birth Store-Adored Illustrations","id":27007591710909,"position":6,"preview_image":{"aspect_ratio":1.0,"height":1080,"width":1080,"src":"\/\/www.thebirthstore.com.au\/cdn\/shop\/files\/little-words-on-infertility-109945.jpg?v=1714967992"},"aspect_ratio":1.0,"height":1080,"media_type":"image","src":"\/\/www.thebirthstore.com.au\/cdn\/shop\/files\/little-words-on-infertility-109945.jpg?v=1714967992","width":1080},{"alt":"Little Words on Infertility - The Birth Store-Adored Illustrations","id":27007591776445,"position":7,"preview_image":{"aspect_ratio":1.0,"height":1080,"width":1080,"src":"\/\/www.thebirthstore.com.au\/cdn\/shop\/files\/little-words-on-infertility-747241.jpg?v=1714967992"},"aspect_ratio":1.0,"height":1080,"media_type":"image","src":"\/\/www.thebirthstore.com.au\/cdn\/shop\/files\/little-words-on-infertility-747241.jpg?v=1714967992","width":1080}]
{"item":{"id":7483881193661,"title":"Little Words on Miscarriage","handle":"little-words-on-miscarriage","description":"\u003cp data-mce-fragment=\"1\"\u003e\u003cem data-mce-fragment=\"1\"\u003e\u003cspan class=\"a-text-italic\" data-mce-fragment=\"1\"\u003eThey don’t teach you about this part\u003cbr data-mce-fragment=\"1\"\u003eThe part where your dream almost came true,\u003cbr data-mce-fragment=\"1\"\u003eThe part where you almost became a mother\u003cbr data-mce-fragment=\"1\"\u003eThe part where your heart was shattered in two.\u003cbr data-mce-fragment=\"1\"\u003eThey don’t teach you about this part\u003cbr data-mce-fragment=\"1\"\u003eThe part where you go home to an empty house,\u003cbr data-mce-fragment=\"1\"\u003eWith an empty womb\u003cbr data-mce-fragment=\"1\"\u003eCradling an empty heart.\u003c\/span\u003e\u003c\/em\u003e\u003c\/p\u003e\n\u003cp data-mce-fragment=\"1\"\u003e\u003cspan data-mce-fragment=\"1\"\u003eLittle Words on Miscarriage is a collection of poetry for women going through one of the most difficult moments of their life. Pregnancy loss is something that people are often scared to talk about and it is Jessica’s hope that within these pages you find some solace and peace in knowing that you will never be alone in this journey.\u003cbr data-mce-fragment=\"1\"\u003e\u003cbr data-mce-fragment=\"1\"\u003eLittle Words on Miscarriage is a book that only those who have experienced it can truly relate to. It can also be a very lonely time but hopefully within the pages of this book anyone experiencing the loss of a pregnancy can feel like they don’t walk this journey alone and their fears and feelings are valid.\u003c\/span\u003e\u003cbr data-mce-fragment=\"1\"\u003e\u003c\/p\u003e\n\u003cp data-mce-fragment=\"1\"\u003e\u003cspan data-mce-fragment=\"1\"\u003eThe book measures 12.5cm x 20cm and is softcover with a matt finish. Colour may appear slightly different compared to photos due to lighting. \u003c\/span\u003e\u003c\/p\u003e","published_at":"2023-06-08T21:26:45+08:00","created_at":"2023-06-08T15:57:40+08:00","vendor":"Adored Illustrations","type":"","tags":["Affirmations","Books","Mum","Pregnancy"],"price":2500,"price_min":2500,"price_max":2500,"available":true,"price_varies":false,"compare_at_price":null,"compare_at_price_min":0,"compare_at_price_max":0,"compare_at_price_varies":false,"variants":[{"id":42868460552381,"title":"Default Title","option1":"Default Title","option2":null,"option3":null,"sku":"","requires_shipping":true,"taxable":false,"featured_image":null,"available":true,"name":"Little Words on Miscarriage","public_title":null,"options":["Default Title"],"price":2500,"weight":135,"compare_at_price":null,"inventory_management":"shopify","barcode":"60552381","requires_selling_plan":false,"selling_plan_allocations":[]}],"images":["\/\/www.thebirthstore.com.au\/cdn\/shop\/files\/little-words-on-miscarriage-435876.jpg?v=1714967991","\/\/www.thebirthstore.com.au\/cdn\/shop\/files\/little-words-on-miscarriage-140641.jpg?v=1714967991","\/\/www.thebirthstore.com.au\/cdn\/shop\/files\/little-words-on-miscarriage-330265.jpg?v=1714967991","\/\/www.thebirthstore.com.au\/cdn\/shop\/files\/little-words-on-miscarriage-938189.jpg?v=1714967991","\/\/www.thebirthstore.com.au\/cdn\/shop\/files\/little-words-on-miscarriage-679696.jpg?v=1714967991","\/\/www.thebirthstore.com.au\/cdn\/shop\/files\/little-words-on-miscarriage-234791.jpg?v=1714967991"],"featured_image":"\/\/www.thebirthstore.com.au\/cdn\/shop\/files\/little-words-on-miscarriage-435876.jpg?v=1714967991","options":["Title"],"media":[{"alt":"Little Words on Miscarriage - The Birth Store-Adored Illustrations","id":27007591284925,"position":1,"preview_image":{"aspect_ratio":1.0,"height":1080,"width":1080,"src":"\/\/www.thebirthstore.com.au\/cdn\/shop\/files\/little-words-on-miscarriage-435876.jpg?v=1714967991"},"aspect_ratio":1.0,"height":1080,"media_type":"image","src":"\/\/www.thebirthstore.com.au\/cdn\/shop\/files\/little-words-on-miscarriage-435876.jpg?v=1714967991","width":1080},{"alt":"Little Words on Miscarriage - The Birth Store-Adored Illustrations","id":27007591317693,"position":2,"preview_image":{"aspect_ratio":1.0,"height":1080,"width":1080,"src":"\/\/www.thebirthstore.com.au\/cdn\/shop\/files\/little-words-on-miscarriage-140641.jpg?v=1714967991"},"aspect_ratio":1.0,"height":1080,"media_type":"image","src":"\/\/www.thebirthstore.com.au\/cdn\/shop\/files\/little-words-on-miscarriage-140641.jpg?v=1714967991","width":1080},{"alt":"Little Words on Miscarriage - The Birth Store-Adored Illustrations","id":27007591350461,"position":3,"preview_image":{"aspect_ratio":1.0,"height":1080,"width":1080,"src":"\/\/www.thebirthstore.com.au\/cdn\/shop\/files\/little-words-on-miscarriage-330265.jpg?v=1714967991"},"aspect_ratio":1.0,"height":1080,"media_type":"image","src":"\/\/www.thebirthstore.com.au\/cdn\/shop\/files\/little-words-on-miscarriage-330265.jpg?v=1714967991","width":1080},{"alt":"Little Words on Miscarriage - The Birth Store-Adored Illustrations","id":27007591383229,"position":4,"preview_image":{"aspect_ratio":1.0,"height":1080,"width":1080,"src":"\/\/www.thebirthstore.com.au\/cdn\/shop\/files\/little-words-on-miscarriage-938189.jpg?v=1714967991"},"aspect_ratio":1.0,"height":1080,"media_type":"image","src":"\/\/www.thebirthstore.com.au\/cdn\/shop\/files\/little-words-on-miscarriage-938189.jpg?v=1714967991","width":1080},{"alt":"Little Words on Miscarriage - The Birth Store-Adored Illustrations","id":27007591415997,"position":5,"preview_image":{"aspect_ratio":1.0,"height":1080,"width":1080,"src":"\/\/www.thebirthstore.com.au\/cdn\/shop\/files\/little-words-on-miscarriage-679696.jpg?v=1714967991"},"aspect_ratio":1.0,"height":1080,"media_type":"image","src":"\/\/www.thebirthstore.com.au\/cdn\/shop\/files\/little-words-on-miscarriage-679696.jpg?v=1714967991","width":1080},{"alt":"Little Words on Miscarriage - The Birth Store-Adored Illustrations","id":27007591448765,"position":6,"preview_image":{"aspect_ratio":1.0,"height":1080,"width":1080,"src":"\/\/www.thebirthstore.com.au\/cdn\/shop\/files\/little-words-on-miscarriage-234791.jpg?v=1714967991"},"aspect_ratio":1.0,"height":1080,"media_type":"image","src":"\/\/www.thebirthstore.com.au\/cdn\/shop\/files\/little-words-on-miscarriage-234791.jpg?v=1714967991","width":1080}],"requires_selling_plan":false,"selling_plan_groups":[],"content":"\u003cp data-mce-fragment=\"1\"\u003e\u003cem data-mce-fragment=\"1\"\u003e\u003cspan class=\"a-text-italic\" data-mce-fragment=\"1\"\u003eThey don’t teach you about this part\u003cbr data-mce-fragment=\"1\"\u003eThe part where your dream almost came true,\u003cbr data-mce-fragment=\"1\"\u003eThe part where you almost became a mother\u003cbr data-mce-fragment=\"1\"\u003eThe part where your heart was shattered in two.\u003cbr data-mce-fragment=\"1\"\u003eThey don’t teach you about this part\u003cbr data-mce-fragment=\"1\"\u003eThe part where you go home to an empty house,\u003cbr data-mce-fragment=\"1\"\u003eWith an empty womb\u003cbr data-mce-fragment=\"1\"\u003eCradling an empty heart.\u003c\/span\u003e\u003c\/em\u003e\u003c\/p\u003e\n\u003cp data-mce-fragment=\"1\"\u003e\u003cspan data-mce-fragment=\"1\"\u003eLittle Words on Miscarriage is a collection of poetry for women going through one of the most difficult moments of their life. Pregnancy loss is something that people are often scared to talk about and it is Jessica’s hope that within these pages you find some solace and peace in knowing that you will never be alone in this journey.\u003cbr data-mce-fragment=\"1\"\u003e\u003cbr data-mce-fragment=\"1\"\u003eLittle Words on Miscarriage is a book that only those who have experienced it can truly relate to. It can also be a very lonely time but hopefully within the pages of this book anyone experiencing the loss of a pregnancy can feel like they don’t walk this journey alone and their fears and feelings are valid.\u003c\/span\u003e\u003cbr data-mce-fragment=\"1\"\u003e\u003c\/p\u003e\n\u003cp data-mce-fragment=\"1\"\u003e\u003cspan data-mce-fragment=\"1\"\u003eThe book measures 12.5cm x 20cm and is softcover with a matt finish. Colour may appear slightly different compared to photos due to lighting. \u003c\/span\u003e\u003c\/p\u003e"},"options":[{"name":"Title","position":1,"values":["Default Title"]}],"custom_metafields":{},"metafields":{"badge":"\u003cdiv style='display:none' class='jdgm-prev-badge' data-average-rating='0.00' data-number-of-reviews='0' data-number-of-questions='0'\u003e \u003cspan class='jdgm-prev-badge__stars' data-score='0.00' tabindex='0' aria-label='0.00 stars' role='button'\u003e \u003cspan class='jdgm-star jdgm--off'\u003e\u003c\/span\u003e\u003cspan class='jdgm-star jdgm--off'\u003e\u003c\/span\u003e\u003cspan class='jdgm-star jdgm--off'\u003e\u003c\/span\u003e\u003cspan class='jdgm-star jdgm--off'\u003e\u003c\/span\u003e\u003cspan class='jdgm-star jdgm--off'\u003e\u003c\/span\u003e \u003c\/span\u003e \u003cspan class='jdgm-prev-badge__text'\u003e No reviews \u003c\/span\u003e \u003c\/div\u003e","widget":"\u003cdiv class='jdgm-rev-widg' data-updated-at='2025-06-13T16:12:53Z' data-average-rating='0.00' data-number-of-reviews='0' data-number-of-questions='0'\u003e \u003cstyle class='jdgm-temp-hiding-style'\u003e.jdgm-rev-widg{ display: none }\u003c\/style\u003e \u003cdiv class='jdgm-rev-widg__header'\u003e \u003ch2 class='jdgm-rev-widg__title'\u003eCustomer Reviews\u003c\/h2\u003e \u003cdiv class='jdgm-rev-widg__summary'\u003e \u003cdiv class='jdgm-rev-widg__summary-stars' aria-label='Average rating is 0.00 stars' role='img'\u003e \u003cspan class='jdgm-star jdgm--off'\u003e\u003c\/span\u003e\u003cspan class='jdgm-star jdgm--off'\u003e\u003c\/span\u003e\u003cspan class='jdgm-star jdgm--off'\u003e\u003c\/span\u003e\u003cspan class='jdgm-star jdgm--off'\u003e\u003c\/span\u003e\u003cspan class='jdgm-star jdgm--off'\u003e\u003c\/span\u003e \u003c\/div\u003e \u003cdiv class='jdgm-rev-widg__summary-text'\u003eBe the first to write a review\u003c\/div\u003e \u003c\/div\u003e \u003ca style='display: none' href='#' class='jdgm-write-rev-link' role='button'\u003eWrite a review\u003c\/a\u003e \u003cdiv class='jdgm-histogram jdgm-temp-hidden'\u003e \u003cdiv class='jdgm-histogram__row' data-rating='5' data-frequency='0' data-percentage='0'\u003e \u003cdiv class='jdgm-histogram__star' role='button' aria-label=\"0% (0) reviews with 5 star rating\" tabindex='0' \u003e\u003cspan class='jdgm-star jdgm--on'\u003e\u003c\/span\u003e\u003cspan class='jdgm-star jdgm--on'\u003e\u003c\/span\u003e\u003cspan class='jdgm-star jdgm--on'\u003e\u003c\/span\u003e\u003cspan class='jdgm-star jdgm--on'\u003e\u003c\/span\u003e\u003cspan class='jdgm-star jdgm--on'\u003e\u003c\/span\u003e\u003c\/div\u003e \u003cdiv class='jdgm-histogram__bar'\u003e \u003cdiv class='jdgm-histogram__bar-content' style='width: 0%;'\u003e \u003c\/div\u003e \u003c\/div\u003e \u003cdiv class='jdgm-histogram__percentage'\u003e0%\u003c\/div\u003e \u003cdiv class='jdgm-histogram__frequency'\u003e(0)\u003c\/div\u003e \u003c\/div\u003e \u003cdiv class='jdgm-histogram__row' data-rating='4' data-frequency='0' data-percentage='0'\u003e \u003cdiv class='jdgm-histogram__star' role='button' aria-label=\"0% (0) reviews with 4 star rating\" tabindex='0' \u003e\u003cspan class='jdgm-star jdgm--on'\u003e\u003c\/span\u003e\u003cspan class='jdgm-star jdgm--on'\u003e\u003c\/span\u003e\u003cspan class='jdgm-star jdgm--on'\u003e\u003c\/span\u003e\u003cspan class='jdgm-star jdgm--on'\u003e\u003c\/span\u003e\u003cspan class='jdgm-star jdgm--off'\u003e\u003c\/span\u003e\u003c\/div\u003e \u003cdiv class='jdgm-histogram__bar'\u003e \u003cdiv class='jdgm-histogram__bar-content' style='width: 0%;'\u003e \u003c\/div\u003e \u003c\/div\u003e \u003cdiv class='jdgm-histogram__percentage'\u003e0%\u003c\/div\u003e \u003cdiv class='jdgm-histogram__frequency'\u003e(0)\u003c\/div\u003e \u003c\/div\u003e \u003cdiv class='jdgm-histogram__row' data-rating='3' data-frequency='0' data-percentage='0'\u003e \u003cdiv class='jdgm-histogram__star' role='button' aria-label=\"0% (0) reviews with 3 star rating\" tabindex='0' \u003e\u003cspan class='jdgm-star jdgm--on'\u003e\u003c\/span\u003e\u003cspan class='jdgm-star jdgm--on'\u003e\u003c\/span\u003e\u003cspan class='jdgm-star jdgm--on'\u003e\u003c\/span\u003e\u003cspan class='jdgm-star jdgm--off'\u003e\u003c\/span\u003e\u003cspan class='jdgm-star jdgm--off'\u003e\u003c\/span\u003e\u003c\/div\u003e \u003cdiv class='jdgm-histogram__bar'\u003e \u003cdiv class='jdgm-histogram__bar-content' style='width: 0%;'\u003e \u003c\/div\u003e \u003c\/div\u003e \u003cdiv class='jdgm-histogram__percentage'\u003e0%\u003c\/div\u003e \u003cdiv class='jdgm-histogram__frequency'\u003e(0)\u003c\/div\u003e \u003c\/div\u003e \u003cdiv class='jdgm-histogram__row' data-rating='2' data-frequency='0' data-percentage='0'\u003e \u003cdiv class='jdgm-histogram__star' role='button' aria-label=\"0% (0) reviews with 2 star rating\" tabindex='0' \u003e\u003cspan class='jdgm-star jdgm--on'\u003e\u003c\/span\u003e\u003cspan class='jdgm-star jdgm--on'\u003e\u003c\/span\u003e\u003cspan class='jdgm-star jdgm--off'\u003e\u003c\/span\u003e\u003cspan class='jdgm-star jdgm--off'\u003e\u003c\/span\u003e\u003cspan class='jdgm-star jdgm--off'\u003e\u003c\/span\u003e\u003c\/div\u003e \u003cdiv class='jdgm-histogram__bar'\u003e \u003cdiv class='jdgm-histogram__bar-content' style='width: 0%;'\u003e \u003c\/div\u003e \u003c\/div\u003e \u003cdiv class='jdgm-histogram__percentage'\u003e0%\u003c\/div\u003e \u003cdiv class='jdgm-histogram__frequency'\u003e(0)\u003c\/div\u003e \u003c\/div\u003e \u003cdiv class='jdgm-histogram__row' data-rating='1' data-frequency='0' data-percentage='0'\u003e \u003cdiv class='jdgm-histogram__star' role='button' aria-label=\"0% (0) reviews with 1 star rating\" tabindex='0' \u003e\u003cspan class='jdgm-star jdgm--on'\u003e\u003c\/span\u003e\u003cspan class='jdgm-star jdgm--off'\u003e\u003c\/span\u003e\u003cspan class='jdgm-star jdgm--off'\u003e\u003c\/span\u003e\u003cspan class='jdgm-star jdgm--off'\u003e\u003c\/span\u003e\u003cspan class='jdgm-star jdgm--off'\u003e\u003c\/span\u003e\u003c\/div\u003e \u003cdiv class='jdgm-histogram__bar'\u003e \u003cdiv class='jdgm-histogram__bar-content' style='width: 0%;'\u003e \u003c\/div\u003e \u003c\/div\u003e \u003cdiv class='jdgm-histogram__percentage'\u003e0%\u003c\/div\u003e \u003cdiv class='jdgm-histogram__frequency'\u003e(0)\u003c\/div\u003e \u003c\/div\u003e \u003cdiv class='jdgm-histogram__row jdgm-histogram__clear-filter' data-rating=null tabindex='0'\u003e\u003c\/div\u003e \u003c\/div\u003e \u003cdiv class='jdgm-rev-widg__sort-wrapper'\u003e\u003c\/div\u003e \u003c\/div\u003e \u003cdiv class='jdgm-rev-widg__body'\u003e \u003cdiv class='jdgm-rev-widg__reviews'\u003e\u003c\/div\u003e \u003cdiv class='jdgm-paginate' data-per-page='10' data-url='https:\/\/api.judge.me\/reviews\/reviews_for_widget' style=\"display: none;\"\u003e\u003c\/div\u003e \u003c\/div\u003e \u003cdiv class='jdgm-rev-widg__paginate-spinner-wrapper'\u003e \u003cdiv class='jdgm-spinner'\u003e\u003c\/div\u003e \u003c\/div\u003e \u003c\/div\u003e"},"collections":[{"id":295224541373,"handle":"affirmations","title":"Affirmations","updated_at":"2025-12-28T20:10:01+08:00","body_html":"","published_at":"2023-11-10T20:37:58+08:00","sort_order":"best-selling","template_suffix":"swaddles-collection","disjunctive":false,"rules":[{"column":"tag","relation":"equals","condition":"Affirmations"}],"published_scope":"global","image":{"created_at":"2024-05-06T11:59:20+08:00","alt":"Affirmations - The Birth Store","width":1000,"height":1250,"src":"\/\/www.thebirthstore.com.au\/cdn\/shop\/collections\/affirmations-495130.jpg?v=1714967960"}},{"id":293669077181,"handle":"books","title":"Books","updated_at":"2025-12-24T20:09:23+08:00","body_html":"","published_at":"2023-06-08T21:27:34+08:00","sort_order":"best-selling","template_suffix":"swaddles-collection","disjunctive":false,"rules":[{"column":"tag","relation":"equals","condition":"Books"}],"published_scope":"global","image":{"created_at":"2024-05-06T11:59:31+08:00","alt":"Books - The Birth Store","width":1476,"height":2048,"src":"\/\/www.thebirthstore.com.au\/cdn\/shop\/collections\/books-814717.jpg?v=1714967972"}},{"id":261657460925,"handle":"buy","title":"Buy","updated_at":"2025-12-28T20:10:01+08:00","body_html":"\u003cp\u003eBrowse all of our pregnancy, labour \u0026amp; birth, postpartum and baby essentials here.\u003cbr\u003e\u003c\/p\u003e\n\u003cp\u003e\u003cspan\u003eYou can even buy now and pay later with Afterpay!\u003c\/span\u003e\u003c\/p\u003e","published_at":"2021-03-10T12:05:31+08:00","sort_order":"best-selling","template_suffix":"shop-all-collection","disjunctive":false,"rules":[{"column":"title","relation":"not_contains","condition":"Hire"}],"published_scope":"global","image":{"created_at":"2024-05-06T11:59:42+08:00","alt":"Buy - The Birth Store","width":2048,"height":2048,"src":"\/\/www.thebirthstore.com.au\/cdn\/shop\/collections\/buy-964856.jpg?v=1714967982"}},{"id":261658149053,"handle":"pregnancy-and-maternity-products","title":"Pregnancy","updated_at":"2025-12-28T20:10:01+08:00","body_html":"\u003cp\u003eShop your pregnancy essentials below. Looking for something we don't currently stock? Please reach out and let us know.\u003cbr\u003e\u003c\/p\u003e\n\u003cp\u003e\u003cspan\u003eYou can even buy now and pay later with Afterpay!\u003c\/span\u003e\u003c\/p\u003e","published_at":"2021-03-10T12:34:22+08:00","sort_order":"best-selling","template_suffix":"pregnancy-collection","disjunctive":false,"rules":[{"column":"tag","relation":"equals","condition":"Pregnancy"}],"published_scope":"global","image":{"created_at":"2024-05-06T12:00:40+08:00","alt":"Pregnancy - The Birth Store","width":1024,"height":1536,"src":"\/\/www.thebirthstore.com.au\/cdn\/shop\/collections\/pregnancy-899677.jpg?v=1714968040"}},{"id":291456483517,"handle":"shop-all","title":"Shop All - Mum","updated_at":"2025-12-28T20:10:01+08:00","body_html":"","published_at":"2022-12-23T22:04:39+08:00","sort_order":"best-selling","template_suffix":"shop-all-collection","disjunctive":false,"rules":[{"column":"variant_price","relation":"greater_than","condition":"1"},{"column":"title","relation":"not_contains","condition":"Batteries"},{"column":"tag","relation":"equals","condition":"Mum"}],"published_scope":"global","image":{"created_at":"2024-05-06T12:00:54+08:00","alt":"Shop All - The Birth Store","width":1365,"height":2048,"src":"\/\/www.thebirthstore.com.au\/cdn\/shop\/collections\/shop-all-693176.jpg?v=1714968055"}},{"id":310045933757,"handle":"shop-all-sale","title":"Shop All Sale","updated_at":"2025-12-28T20:10:01+08:00","body_html":"","published_at":"2024-11-12T13:22:43+08:00","sort_order":"alpha-asc","template_suffix":"","disjunctive":true,"rules":[{"column":"tag","relation":"equals","condition":"Bundles"},{"column":"vendor","relation":"equals","condition":"Franjos Kitchen"},{"column":"vendor","relation":"equals","condition":"Adored Illustrations"},{"column":"vendor","relation":"equals","condition":"Amazing Oils"},{"column":"vendor","relation":"equals","condition":"Ice Ice Booby"},{"column":"vendor","relation":"equals","condition":"Made to Milk"},{"column":"vendor","relation":"equals","condition":"Milky Goodness"},{"column":"vendor","relation":"equals","condition":"Seasons of Mama"},{"column":"vendor","relation":"equals","condition":"Silverette"},{"column":"vendor","relation":"equals","condition":"Snuggle Hunny"},{"column":"vendor","relation":"equals","condition":"Yung Bod"},{"column":"vendor","relation":"equals","condition":"Bare Love"},{"column":"vendor","relation":"equals","condition":"Haakaa"},{"column":"vendor","relation":"equals","condition":"Mere Botanicals"},{"column":"vendor","relation":"equals","condition":"The Birth Store Hire"},{"column":"vendor","relation":"equals","condition":"The Birth Store"}],"published_scope":"global","image":{"created_at":"2024-11-13T10:58:16+08:00","alt":"Shop All Sale - The Birth Store","width":2048,"height":1365,"src":"\/\/www.thebirthstore.com.au\/cdn\/shop\/collections\/shop-all-sale-297361.jpg?v=1731466697"}}]}
[{"alt":"Little Words on Miscarriage - The Birth Store-Adored Illustrations","id":27007591284925,"position":1,"preview_image":{"aspect_ratio":1.0,"height":1080,"width":1080,"src":"\/\/www.thebirthstore.com.au\/cdn\/shop\/files\/little-words-on-miscarriage-435876.jpg?v=1714967991"},"aspect_ratio":1.0,"height":1080,"media_type":"image","src":"\/\/www.thebirthstore.com.au\/cdn\/shop\/files\/little-words-on-miscarriage-435876.jpg?v=1714967991","width":1080},{"alt":"Little Words on Miscarriage - The Birth Store-Adored Illustrations","id":27007591317693,"position":2,"preview_image":{"aspect_ratio":1.0,"height":1080,"width":1080,"src":"\/\/www.thebirthstore.com.au\/cdn\/shop\/files\/little-words-on-miscarriage-140641.jpg?v=1714967991"},"aspect_ratio":1.0,"height":1080,"media_type":"image","src":"\/\/www.thebirthstore.com.au\/cdn\/shop\/files\/little-words-on-miscarriage-140641.jpg?v=1714967991","width":1080},{"alt":"Little Words on Miscarriage - The Birth Store-Adored Illustrations","id":27007591350461,"position":3,"preview_image":{"aspect_ratio":1.0,"height":1080,"width":1080,"src":"\/\/www.thebirthstore.com.au\/cdn\/shop\/files\/little-words-on-miscarriage-330265.jpg?v=1714967991"},"aspect_ratio":1.0,"height":1080,"media_type":"image","src":"\/\/www.thebirthstore.com.au\/cdn\/shop\/files\/little-words-on-miscarriage-330265.jpg?v=1714967991","width":1080},{"alt":"Little Words on Miscarriage - The Birth Store-Adored Illustrations","id":27007591383229,"position":4,"preview_image":{"aspect_ratio":1.0,"height":1080,"width":1080,"src":"\/\/www.thebirthstore.com.au\/cdn\/shop\/files\/little-words-on-miscarriage-938189.jpg?v=1714967991"},"aspect_ratio":1.0,"height":1080,"media_type":"image","src":"\/\/www.thebirthstore.com.au\/cdn\/shop\/files\/little-words-on-miscarriage-938189.jpg?v=1714967991","width":1080},{"alt":"Little Words on Miscarriage - The Birth Store-Adored Illustrations","id":27007591415997,"position":5,"preview_image":{"aspect_ratio":1.0,"height":1080,"width":1080,"src":"\/\/www.thebirthstore.com.au\/cdn\/shop\/files\/little-words-on-miscarriage-679696.jpg?v=1714967991"},"aspect_ratio":1.0,"height":1080,"media_type":"image","src":"\/\/www.thebirthstore.com.au\/cdn\/shop\/files\/little-words-on-miscarriage-679696.jpg?v=1714967991","width":1080},{"alt":"Little Words on Miscarriage - The Birth Store-Adored Illustrations","id":27007591448765,"position":6,"preview_image":{"aspect_ratio":1.0,"height":1080,"width":1080,"src":"\/\/www.thebirthstore.com.au\/cdn\/shop\/files\/little-words-on-miscarriage-234791.jpg?v=1714967991"},"aspect_ratio":1.0,"height":1080,"media_type":"image","src":"\/\/www.thebirthstore.com.au\/cdn\/shop\/files\/little-words-on-miscarriage-234791.jpg?v=1714967991","width":1080}]
{"item":{"id":7483971338429,"title":"Little Words on Motherhood","handle":"little-words-on-motherhood","description":"\u003cp\u003e\u003cem\u003e\u003cspan class=\"a-text-italic\" data-mce-fragment=\"1\"\u003eMotherhood.\u003c\/span\u003e\u003cbr data-mce-fragment=\"1\"\u003e\u003cspan class=\"a-text-italic\" data-mce-fragment=\"1\"\u003eThe journey has broken me,\u003c\/span\u003e\u003cbr data-mce-fragment=\"1\"\u003e\u003cspan class=\"a-text-italic\" data-mce-fragment=\"1\"\u003ePut me back together\u003c\/span\u003e\u003cbr data-mce-fragment=\"1\"\u003e\u003cspan class=\"a-text-italic\" data-mce-fragment=\"1\"\u003eAnd stolen my heart.\u003c\/span\u003e\u003c\/em\u003e\u003cspan data-mce-fragment=\"1\"\u003e\u003cbr data-mce-fragment=\"1\"\u003e\u003cbr data-mce-fragment=\"1\"\u003e\u003c\/span\u003e\u003cspan class=\"a-text-italic\" data-mce-fragment=\"1\"\u003eLittle Words on Motherhood\u003c\/span\u003e\u003cspan data-mce-fragment=\"1\"\u003e is a book of beautifully written poetry and prose on one of the most joyful, incredible, difficult and challenging journeys women can go through - motherhood.\u003cbr data-mce-fragment=\"1\"\u003e\u003cbr data-mce-fragment=\"1\"\u003eJessica writes on the ups and downs, the highs and the lows and the amazing yet challenging aspects of motherhood, reflecting on her own experience as a mother of three. She shares her raw and honest account of motherhood, from the impact it has on relationships, to work to the individual relationships she shares with her three children.\u003cbr data-mce-fragment=\"1\"\u003e\u003cbr data-mce-fragment=\"1\"\u003eThis collection of words encompasses what it means to be a mother, to try and find the line between where a mother finishes and a child begins and how both beauty and darkness can exist in the world of motherhood - and that it’s ok to have no idea what you’re doing!\u003cbr data-mce-fragment=\"1\"\u003e\u003cbr data-mce-fragment=\"1\"\u003eThis is a must have for all mothers whether you are just beginning your motherhood journey or continuing to expand your family. There is no right or wrong in motherhood, we are all just doing our best and this book will remind that your best is more than enough.\u003c\/span\u003e\u003c\/p\u003e\n\u003cp\u003e\u003cspan data-mce-fragment=\"1\"\u003eThe book measures 12.5cm x 20cm and is softcover with a matt finish. \u003c\/span\u003e\u003c\/p\u003e","published_at":"2023-06-08T21:36:29+08:00","created_at":"2023-06-08T21:36:29+08:00","vendor":"Adored Illustrations","type":"","tags":["Affirmations","Baby Shower Gifts - Mum","Books","Mum","Post-Partum","Pregnancy"],"price":2500,"price_min":2500,"price_max":2500,"available":true,"price_varies":false,"compare_at_price":null,"compare_at_price_min":0,"compare_at_price_max":0,"compare_at_price_varies":false,"variants":[{"id":42868940046525,"title":"Default Title","option1":"Default Title","option2":null,"option3":null,"sku":"","requires_shipping":true,"taxable":false,"featured_image":null,"available":true,"name":"Little Words on Motherhood","public_title":null,"options":["Default Title"],"price":2500,"weight":166,"compare_at_price":null,"inventory_management":"shopify","barcode":"40046525","requires_selling_plan":false,"selling_plan_allocations":[]}],"images":["\/\/www.thebirthstore.com.au\/cdn\/shop\/files\/little-words-on-motherhood-792921.jpg?v=1714967992","\/\/www.thebirthstore.com.au\/cdn\/shop\/files\/little-words-on-motherhood-665893.jpg?v=1714967992","\/\/www.thebirthstore.com.au\/cdn\/shop\/files\/little-words-on-motherhood-773609.jpg?v=1714967992","\/\/www.thebirthstore.com.au\/cdn\/shop\/files\/little-words-on-motherhood-490945.jpg?v=1714967992","\/\/www.thebirthstore.com.au\/cdn\/shop\/files\/little-words-on-motherhood-220251.jpg?v=1714967992","\/\/www.thebirthstore.com.au\/cdn\/shop\/files\/little-words-on-motherhood-915074.jpg?v=1714967992"],"featured_image":"\/\/www.thebirthstore.com.au\/cdn\/shop\/files\/little-words-on-motherhood-792921.jpg?v=1714967992","options":["Title"],"media":[{"alt":"Little Words on Motherhood - The Birth Store-Adored Illustrations","id":27007591940285,"position":1,"preview_image":{"aspect_ratio":1.0,"height":955,"width":955,"src":"\/\/www.thebirthstore.com.au\/cdn\/shop\/files\/little-words-on-motherhood-792921.jpg?v=1714967992"},"aspect_ratio":1.0,"height":955,"media_type":"image","src":"\/\/www.thebirthstore.com.au\/cdn\/shop\/files\/little-words-on-motherhood-792921.jpg?v=1714967992","width":955},{"alt":"Little Words on Motherhood - The Birth Store-Adored Illustrations","id":27007592038589,"position":2,"preview_image":{"aspect_ratio":1.0,"height":1080,"width":1080,"src":"\/\/www.thebirthstore.com.au\/cdn\/shop\/files\/little-words-on-motherhood-665893.jpg?v=1714967992"},"aspect_ratio":1.0,"height":1080,"media_type":"image","src":"\/\/www.thebirthstore.com.au\/cdn\/shop\/files\/little-words-on-motherhood-665893.jpg?v=1714967992","width":1080},{"alt":"Little Words on Motherhood - The Birth Store-Adored Illustrations","id":27007592104125,"position":3,"preview_image":{"aspect_ratio":1.0,"height":1080,"width":1080,"src":"\/\/www.thebirthstore.com.au\/cdn\/shop\/files\/little-words-on-motherhood-773609.jpg?v=1714967992"},"aspect_ratio":1.0,"height":1080,"media_type":"image","src":"\/\/www.thebirthstore.com.au\/cdn\/shop\/files\/little-words-on-motherhood-773609.jpg?v=1714967992","width":1080},{"alt":"Little Words on Motherhood - The Birth Store-Adored Illustrations","id":27007592169661,"position":4,"preview_image":{"aspect_ratio":1.0,"height":1080,"width":1080,"src":"\/\/www.thebirthstore.com.au\/cdn\/shop\/files\/little-words-on-motherhood-490945.jpg?v=1714967992"},"aspect_ratio":1.0,"height":1080,"media_type":"image","src":"\/\/www.thebirthstore.com.au\/cdn\/shop\/files\/little-words-on-motherhood-490945.jpg?v=1714967992","width":1080},{"alt":"Little Words on Motherhood - The Birth Store-Adored Illustrations","id":27007592235197,"position":5,"preview_image":{"aspect_ratio":1.0,"height":1080,"width":1080,"src":"\/\/www.thebirthstore.com.au\/cdn\/shop\/files\/little-words-on-motherhood-220251.jpg?v=1714967992"},"aspect_ratio":1.0,"height":1080,"media_type":"image","src":"\/\/www.thebirthstore.com.au\/cdn\/shop\/files\/little-words-on-motherhood-220251.jpg?v=1714967992","width":1080},{"alt":"Little Words on Motherhood - The Birth Store-Adored Illustrations","id":27007592300733,"position":6,"preview_image":{"aspect_ratio":1.0,"height":1080,"width":1080,"src":"\/\/www.thebirthstore.com.au\/cdn\/shop\/files\/little-words-on-motherhood-915074.jpg?v=1714967992"},"aspect_ratio":1.0,"height":1080,"media_type":"image","src":"\/\/www.thebirthstore.com.au\/cdn\/shop\/files\/little-words-on-motherhood-915074.jpg?v=1714967992","width":1080}],"requires_selling_plan":false,"selling_plan_groups":[],"content":"\u003cp\u003e\u003cem\u003e\u003cspan class=\"a-text-italic\" data-mce-fragment=\"1\"\u003eMotherhood.\u003c\/span\u003e\u003cbr data-mce-fragment=\"1\"\u003e\u003cspan class=\"a-text-italic\" data-mce-fragment=\"1\"\u003eThe journey has broken me,\u003c\/span\u003e\u003cbr data-mce-fragment=\"1\"\u003e\u003cspan class=\"a-text-italic\" data-mce-fragment=\"1\"\u003ePut me back together\u003c\/span\u003e\u003cbr data-mce-fragment=\"1\"\u003e\u003cspan class=\"a-text-italic\" data-mce-fragment=\"1\"\u003eAnd stolen my heart.\u003c\/span\u003e\u003c\/em\u003e\u003cspan data-mce-fragment=\"1\"\u003e\u003cbr data-mce-fragment=\"1\"\u003e\u003cbr data-mce-fragment=\"1\"\u003e\u003c\/span\u003e\u003cspan class=\"a-text-italic\" data-mce-fragment=\"1\"\u003eLittle Words on Motherhood\u003c\/span\u003e\u003cspan data-mce-fragment=\"1\"\u003e is a book of beautifully written poetry and prose on one of the most joyful, incredible, difficult and challenging journeys women can go through - motherhood.\u003cbr data-mce-fragment=\"1\"\u003e\u003cbr data-mce-fragment=\"1\"\u003eJessica writes on the ups and downs, the highs and the lows and the amazing yet challenging aspects of motherhood, reflecting on her own experience as a mother of three. She shares her raw and honest account of motherhood, from the impact it has on relationships, to work to the individual relationships she shares with her three children.\u003cbr data-mce-fragment=\"1\"\u003e\u003cbr data-mce-fragment=\"1\"\u003eThis collection of words encompasses what it means to be a mother, to try and find the line between where a mother finishes and a child begins and how both beauty and darkness can exist in the world of motherhood - and that it’s ok to have no idea what you’re doing!\u003cbr data-mce-fragment=\"1\"\u003e\u003cbr data-mce-fragment=\"1\"\u003eThis is a must have for all mothers whether you are just beginning your motherhood journey or continuing to expand your family. There is no right or wrong in motherhood, we are all just doing our best and this book will remind that your best is more than enough.\u003c\/span\u003e\u003c\/p\u003e\n\u003cp\u003e\u003cspan data-mce-fragment=\"1\"\u003eThe book measures 12.5cm x 20cm and is softcover with a matt finish. \u003c\/span\u003e\u003c\/p\u003e"},"options":[{"name":"Title","position":1,"values":["Default Title"]}],"custom_metafields":{},"metafields":{"badge":"\u003cdiv style='display:none' class='jdgm-prev-badge' data-average-rating='0.00' data-number-of-reviews='0' data-number-of-questions='0'\u003e \u003cspan class='jdgm-prev-badge__stars' data-score='0.00' tabindex='0' aria-label='0.00 stars' role='button'\u003e \u003cspan class='jdgm-star jdgm--off'\u003e\u003c\/span\u003e\u003cspan class='jdgm-star jdgm--off'\u003e\u003c\/span\u003e\u003cspan class='jdgm-star jdgm--off'\u003e\u003c\/span\u003e\u003cspan class='jdgm-star jdgm--off'\u003e\u003c\/span\u003e\u003cspan class='jdgm-star jdgm--off'\u003e\u003c\/span\u003e \u003c\/span\u003e \u003cspan class='jdgm-prev-badge__text'\u003e No reviews \u003c\/span\u003e \u003c\/div\u003e","widget":"\u003cdiv class='jdgm-rev-widg' data-updated-at='2025-06-13T16:12:53Z' data-average-rating='0.00' data-number-of-reviews='0' data-number-of-questions='0'\u003e \u003cstyle class='jdgm-temp-hiding-style'\u003e.jdgm-rev-widg{ display: none }\u003c\/style\u003e \u003cdiv class='jdgm-rev-widg__header'\u003e \u003ch2 class='jdgm-rev-widg__title'\u003eCustomer Reviews\u003c\/h2\u003e \u003cdiv class='jdgm-rev-widg__summary'\u003e \u003cdiv class='jdgm-rev-widg__summary-stars' aria-label='Average rating is 0.00 stars' role='img'\u003e \u003cspan class='jdgm-star jdgm--off'\u003e\u003c\/span\u003e\u003cspan class='jdgm-star jdgm--off'\u003e\u003c\/span\u003e\u003cspan class='jdgm-star jdgm--off'\u003e\u003c\/span\u003e\u003cspan class='jdgm-star jdgm--off'\u003e\u003c\/span\u003e\u003cspan class='jdgm-star jdgm--off'\u003e\u003c\/span\u003e \u003c\/div\u003e \u003cdiv class='jdgm-rev-widg__summary-text'\u003eBe the first to write a review\u003c\/div\u003e \u003c\/div\u003e \u003ca style='display: none' href='#' class='jdgm-write-rev-link' role='button'\u003eWrite a review\u003c\/a\u003e \u003cdiv class='jdgm-histogram jdgm-temp-hidden'\u003e \u003cdiv class='jdgm-histogram__row' data-rating='5' data-frequency='0' data-percentage='0'\u003e \u003cdiv class='jdgm-histogram__star' role='button' aria-label=\"0% (0) reviews with 5 star rating\" tabindex='0' \u003e\u003cspan class='jdgm-star jdgm--on'\u003e\u003c\/span\u003e\u003cspan class='jdgm-star jdgm--on'\u003e\u003c\/span\u003e\u003cspan class='jdgm-star jdgm--on'\u003e\u003c\/span\u003e\u003cspan class='jdgm-star jdgm--on'\u003e\u003c\/span\u003e\u003cspan class='jdgm-star jdgm--on'\u003e\u003c\/span\u003e\u003c\/div\u003e \u003cdiv class='jdgm-histogram__bar'\u003e \u003cdiv class='jdgm-histogram__bar-content' style='width: 0%;'\u003e \u003c\/div\u003e \u003c\/div\u003e \u003cdiv class='jdgm-histogram__percentage'\u003e0%\u003c\/div\u003e \u003cdiv class='jdgm-histogram__frequency'\u003e(0)\u003c\/div\u003e \u003c\/div\u003e \u003cdiv class='jdgm-histogram__row' data-rating='4' data-frequency='0' data-percentage='0'\u003e \u003cdiv class='jdgm-histogram__star' role='button' aria-label=\"0% (0) reviews with 4 star rating\" tabindex='0' \u003e\u003cspan class='jdgm-star jdgm--on'\u003e\u003c\/span\u003e\u003cspan class='jdgm-star jdgm--on'\u003e\u003c\/span\u003e\u003cspan class='jdgm-star jdgm--on'\u003e\u003c\/span\u003e\u003cspan class='jdgm-star jdgm--on'\u003e\u003c\/span\u003e\u003cspan class='jdgm-star jdgm--off'\u003e\u003c\/span\u003e\u003c\/div\u003e \u003cdiv class='jdgm-histogram__bar'\u003e \u003cdiv class='jdgm-histogram__bar-content' style='width: 0%;'\u003e \u003c\/div\u003e \u003c\/div\u003e \u003cdiv class='jdgm-histogram__percentage'\u003e0%\u003c\/div\u003e \u003cdiv class='jdgm-histogram__frequency'\u003e(0)\u003c\/div\u003e \u003c\/div\u003e \u003cdiv class='jdgm-histogram__row' data-rating='3' data-frequency='0' data-percentage='0'\u003e \u003cdiv class='jdgm-histogram__star' role='button' aria-label=\"0% (0) reviews with 3 star rating\" tabindex='0' \u003e\u003cspan class='jdgm-star jdgm--on'\u003e\u003c\/span\u003e\u003cspan class='jdgm-star jdgm--on'\u003e\u003c\/span\u003e\u003cspan class='jdgm-star jdgm--on'\u003e\u003c\/span\u003e\u003cspan class='jdgm-star jdgm--off'\u003e\u003c\/span\u003e\u003cspan class='jdgm-star jdgm--off'\u003e\u003c\/span\u003e\u003c\/div\u003e \u003cdiv class='jdgm-histogram__bar'\u003e \u003cdiv class='jdgm-histogram__bar-content' style='width: 0%;'\u003e \u003c\/div\u003e \u003c\/div\u003e \u003cdiv class='jdgm-histogram__percentage'\u003e0%\u003c\/div\u003e \u003cdiv class='jdgm-histogram__frequency'\u003e(0)\u003c\/div\u003e \u003c\/div\u003e \u003cdiv class='jdgm-histogram__row' data-rating='2' data-frequency='0' data-percentage='0'\u003e \u003cdiv class='jdgm-histogram__star' role='button' aria-label=\"0% (0) reviews with 2 star rating\" tabindex='0' \u003e\u003cspan class='jdgm-star jdgm--on'\u003e\u003c\/span\u003e\u003cspan class='jdgm-star jdgm--on'\u003e\u003c\/span\u003e\u003cspan class='jdgm-star jdgm--off'\u003e\u003c\/span\u003e\u003cspan class='jdgm-star jdgm--off'\u003e\u003c\/span\u003e\u003cspan class='jdgm-star jdgm--off'\u003e\u003c\/span\u003e\u003c\/div\u003e \u003cdiv class='jdgm-histogram__bar'\u003e \u003cdiv class='jdgm-histogram__bar-content' style='width: 0%;'\u003e \u003c\/div\u003e \u003c\/div\u003e \u003cdiv class='jdgm-histogram__percentage'\u003e0%\u003c\/div\u003e \u003cdiv class='jdgm-histogram__frequency'\u003e(0)\u003c\/div\u003e \u003c\/div\u003e \u003cdiv class='jdgm-histogram__row' data-rating='1' data-frequency='0' data-percentage='0'\u003e \u003cdiv class='jdgm-histogram__star' role='button' aria-label=\"0% (0) reviews with 1 star rating\" tabindex='0' \u003e\u003cspan class='jdgm-star jdgm--on'\u003e\u003c\/span\u003e\u003cspan class='jdgm-star jdgm--off'\u003e\u003c\/span\u003e\u003cspan class='jdgm-star jdgm--off'\u003e\u003c\/span\u003e\u003cspan class='jdgm-star jdgm--off'\u003e\u003c\/span\u003e\u003cspan class='jdgm-star jdgm--off'\u003e\u003c\/span\u003e\u003c\/div\u003e \u003cdiv class='jdgm-histogram__bar'\u003e \u003cdiv class='jdgm-histogram__bar-content' style='width: 0%;'\u003e \u003c\/div\u003e \u003c\/div\u003e \u003cdiv class='jdgm-histogram__percentage'\u003e0%\u003c\/div\u003e \u003cdiv class='jdgm-histogram__frequency'\u003e(0)\u003c\/div\u003e \u003c\/div\u003e \u003cdiv class='jdgm-histogram__row jdgm-histogram__clear-filter' data-rating=null tabindex='0'\u003e\u003c\/div\u003e \u003c\/div\u003e \u003cdiv class='jdgm-rev-widg__sort-wrapper'\u003e\u003c\/div\u003e \u003c\/div\u003e \u003cdiv class='jdgm-rev-widg__body'\u003e \u003cdiv class='jdgm-rev-widg__reviews'\u003e\u003c\/div\u003e \u003cdiv class='jdgm-paginate' data-per-page='10' data-url='https:\/\/api.judge.me\/reviews\/reviews_for_widget' style=\"display: none;\"\u003e\u003c\/div\u003e \u003c\/div\u003e \u003cdiv class='jdgm-rev-widg__paginate-spinner-wrapper'\u003e \u003cdiv class='jdgm-spinner'\u003e\u003c\/div\u003e \u003c\/div\u003e \u003c\/div\u003e"},"collections":[{"id":295224541373,"handle":"affirmations","title":"Affirmations","updated_at":"2025-12-28T20:10:01+08:00","body_html":"","published_at":"2023-11-10T20:37:58+08:00","sort_order":"best-selling","template_suffix":"swaddles-collection","disjunctive":false,"rules":[{"column":"tag","relation":"equals","condition":"Affirmations"}],"published_scope":"global","image":{"created_at":"2024-05-06T11:59:20+08:00","alt":"Affirmations - The Birth Store","width":1000,"height":1250,"src":"\/\/www.thebirthstore.com.au\/cdn\/shop\/collections\/affirmations-495130.jpg?v=1714967960"}},{"id":281356533949,"handle":"baby-shower-gifts","title":"Baby Shower Gifts - Mum","updated_at":"2025-12-28T20:10:01+08:00","body_html":"\u003cp\u003eLooking for a unique baby shower gift? Or an all-in-one bundle pack to suit all your needs? We've got just the thing!\u003c\/p\u003e","published_at":"2021-12-06T13:43:56+08:00","sort_order":"best-selling","template_suffix":"baby-shower-gifts","disjunctive":true,"rules":[{"column":"tag","relation":"equals","condition":"Baby Shower Gifts - Mum"},{"column":"tag","relation":"equals","condition":"Gift Card"}],"published_scope":"global","image":{"created_at":"2024-05-06T11:59:28+08:00","alt":"Baby Shower Gifts - The Birth Store","width":1200,"height":1800,"src":"\/\/www.thebirthstore.com.au\/cdn\/shop\/collections\/baby-shower-gifts-401770.jpg?v=1761791272"}},{"id":293669077181,"handle":"books","title":"Books","updated_at":"2025-12-24T20:09:23+08:00","body_html":"","published_at":"2023-06-08T21:27:34+08:00","sort_order":"best-selling","template_suffix":"swaddles-collection","disjunctive":false,"rules":[{"column":"tag","relation":"equals","condition":"Books"}],"published_scope":"global","image":{"created_at":"2024-05-06T11:59:31+08:00","alt":"Books - The Birth Store","width":1476,"height":2048,"src":"\/\/www.thebirthstore.com.au\/cdn\/shop\/collections\/books-814717.jpg?v=1714967972"}},{"id":261657460925,"handle":"buy","title":"Buy","updated_at":"2025-12-28T20:10:01+08:00","body_html":"\u003cp\u003eBrowse all of our pregnancy, labour \u0026amp; birth, postpartum and baby essentials here.\u003cbr\u003e\u003c\/p\u003e\n\u003cp\u003e\u003cspan\u003eYou can even buy now and pay later with Afterpay!\u003c\/span\u003e\u003c\/p\u003e","published_at":"2021-03-10T12:05:31+08:00","sort_order":"best-selling","template_suffix":"shop-all-collection","disjunctive":false,"rules":[{"column":"title","relation":"not_contains","condition":"Hire"}],"published_scope":"global","image":{"created_at":"2024-05-06T11:59:42+08:00","alt":"Buy - The Birth Store","width":2048,"height":2048,"src":"\/\/www.thebirthstore.com.au\/cdn\/shop\/collections\/buy-964856.jpg?v=1714967982"}},{"id":261658083517,"handle":"post-partum","title":"Postpartum","updated_at":"2025-12-28T20:10:01+08:00","body_html":"\u003cp\u003eShop your postpartum and hospital bag essentials below. Looking for something we don't currently stock? Please reach out and let us know.\u003cbr\u003e\u003c\/p\u003e\n\u003cp\u003e\u003cspan\u003eYou can even buy now and pay later with Afterpay!\u003c\/span\u003e\u003c\/p\u003e","published_at":"2021-03-10T12:33:47+08:00","sort_order":"best-selling","template_suffix":"postpartum-collection","disjunctive":false,"rules":[{"column":"tag","relation":"equals","condition":"Post-Partum"}],"published_scope":"global","image":{"created_at":"2024-05-06T12:00:36+08:00","alt":"Postpartum - The Birth Store","width":611,"height":702,"src":"\/\/www.thebirthstore.com.au\/cdn\/shop\/collections\/postpartum-150119.jpg?v=1714968037"}},{"id":261658149053,"handle":"pregnancy-and-maternity-products","title":"Pregnancy","updated_at":"2025-12-28T20:10:01+08:00","body_html":"\u003cp\u003eShop your pregnancy essentials below. Looking for something we don't currently stock? Please reach out and let us know.\u003cbr\u003e\u003c\/p\u003e\n\u003cp\u003e\u003cspan\u003eYou can even buy now and pay later with Afterpay!\u003c\/span\u003e\u003c\/p\u003e","published_at":"2021-03-10T12:34:22+08:00","sort_order":"best-selling","template_suffix":"pregnancy-collection","disjunctive":false,"rules":[{"column":"tag","relation":"equals","condition":"Pregnancy"}],"published_scope":"global","image":{"created_at":"2024-05-06T12:00:40+08:00","alt":"Pregnancy - The Birth Store","width":1024,"height":1536,"src":"\/\/www.thebirthstore.com.au\/cdn\/shop\/collections\/pregnancy-899677.jpg?v=1714968040"}},{"id":291456483517,"handle":"shop-all","title":"Shop All - Mum","updated_at":"2025-12-28T20:10:01+08:00","body_html":"","published_at":"2022-12-23T22:04:39+08:00","sort_order":"best-selling","template_suffix":"shop-all-collection","disjunctive":false,"rules":[{"column":"variant_price","relation":"greater_than","condition":"1"},{"column":"title","relation":"not_contains","condition":"Batteries"},{"column":"tag","relation":"equals","condition":"Mum"}],"published_scope":"global","image":{"created_at":"2024-05-06T12:00:54+08:00","alt":"Shop All - The Birth Store","width":1365,"height":2048,"src":"\/\/www.thebirthstore.com.au\/cdn\/shop\/collections\/shop-all-693176.jpg?v=1714968055"}},{"id":310045933757,"handle":"shop-all-sale","title":"Shop All Sale","updated_at":"2025-12-28T20:10:01+08:00","body_html":"","published_at":"2024-11-12T13:22:43+08:00","sort_order":"alpha-asc","template_suffix":"","disjunctive":true,"rules":[{"column":"tag","relation":"equals","condition":"Bundles"},{"column":"vendor","relation":"equals","condition":"Franjos Kitchen"},{"column":"vendor","relation":"equals","condition":"Adored Illustrations"},{"column":"vendor","relation":"equals","condition":"Amazing Oils"},{"column":"vendor","relation":"equals","condition":"Ice Ice Booby"},{"column":"vendor","relation":"equals","condition":"Made to Milk"},{"column":"vendor","relation":"equals","condition":"Milky Goodness"},{"column":"vendor","relation":"equals","condition":"Seasons of Mama"},{"column":"vendor","relation":"equals","condition":"Silverette"},{"column":"vendor","relation":"equals","condition":"Snuggle Hunny"},{"column":"vendor","relation":"equals","condition":"Yung Bod"},{"column":"vendor","relation":"equals","condition":"Bare Love"},{"column":"vendor","relation":"equals","condition":"Haakaa"},{"column":"vendor","relation":"equals","condition":"Mere Botanicals"},{"column":"vendor","relation":"equals","condition":"The Birth Store Hire"},{"column":"vendor","relation":"equals","condition":"The Birth Store"}],"published_scope":"global","image":{"created_at":"2024-11-13T10:58:16+08:00","alt":"Shop All Sale - The Birth Store","width":2048,"height":1365,"src":"\/\/www.thebirthstore.com.au\/cdn\/shop\/collections\/shop-all-sale-297361.jpg?v=1731466697"}}]}
[{"alt":"Little Words on Motherhood - The Birth Store-Adored Illustrations","id":27007591940285,"position":1,"preview_image":{"aspect_ratio":1.0,"height":955,"width":955,"src":"\/\/www.thebirthstore.com.au\/cdn\/shop\/files\/little-words-on-motherhood-792921.jpg?v=1714967992"},"aspect_ratio":1.0,"height":955,"media_type":"image","src":"\/\/www.thebirthstore.com.au\/cdn\/shop\/files\/little-words-on-motherhood-792921.jpg?v=1714967992","width":955},{"alt":"Little Words on Motherhood - The Birth Store-Adored Illustrations","id":27007592038589,"position":2,"preview_image":{"aspect_ratio":1.0,"height":1080,"width":1080,"src":"\/\/www.thebirthstore.com.au\/cdn\/shop\/files\/little-words-on-motherhood-665893.jpg?v=1714967992"},"aspect_ratio":1.0,"height":1080,"media_type":"image","src":"\/\/www.thebirthstore.com.au\/cdn\/shop\/files\/little-words-on-motherhood-665893.jpg?v=1714967992","width":1080},{"alt":"Little Words on Motherhood - The Birth Store-Adored Illustrations","id":27007592104125,"position":3,"preview_image":{"aspect_ratio":1.0,"height":1080,"width":1080,"src":"\/\/www.thebirthstore.com.au\/cdn\/shop\/files\/little-words-on-motherhood-773609.jpg?v=1714967992"},"aspect_ratio":1.0,"height":1080,"media_type":"image","src":"\/\/www.thebirthstore.com.au\/cdn\/shop\/files\/little-words-on-motherhood-773609.jpg?v=1714967992","width":1080},{"alt":"Little Words on Motherhood - The Birth Store-Adored Illustrations","id":27007592169661,"position":4,"preview_image":{"aspect_ratio":1.0,"height":1080,"width":1080,"src":"\/\/www.thebirthstore.com.au\/cdn\/shop\/files\/little-words-on-motherhood-490945.jpg?v=1714967992"},"aspect_ratio":1.0,"height":1080,"media_type":"image","src":"\/\/www.thebirthstore.com.au\/cdn\/shop\/files\/little-words-on-motherhood-490945.jpg?v=1714967992","width":1080},{"alt":"Little Words on Motherhood - The Birth Store-Adored Illustrations","id":27007592235197,"position":5,"preview_image":{"aspect_ratio":1.0,"height":1080,"width":1080,"src":"\/\/www.thebirthstore.com.au\/cdn\/shop\/files\/little-words-on-motherhood-220251.jpg?v=1714967992"},"aspect_ratio":1.0,"height":1080,"media_type":"image","src":"\/\/www.thebirthstore.com.au\/cdn\/shop\/files\/little-words-on-motherhood-220251.jpg?v=1714967992","width":1080},{"alt":"Little Words on Motherhood - The Birth Store-Adored Illustrations","id":27007592300733,"position":6,"preview_image":{"aspect_ratio":1.0,"height":1080,"width":1080,"src":"\/\/www.thebirthstore.com.au\/cdn\/shop\/files\/little-words-on-motherhood-915074.jpg?v=1714967992"},"aspect_ratio":1.0,"height":1080,"media_type":"image","src":"\/\/www.thebirthstore.com.au\/cdn\/shop\/files\/little-words-on-motherhood-915074.jpg?v=1714967992","width":1080}]
{"item":{"id":7483971010749,"title":"Little Words on Pregnancy","handle":"little-words-on-pregnancy","description":"\u003cp data-mce-fragment=\"1\"\u003e\u003cem\u003e\u003cspan class=\"a-text-italic\"\u003e‘I loved you before we created you\u003c\/span\u003e\u003cbr\u003e\u003cspan class=\"a-text-italic\"\u003eI loved you before I knew what it felt like,\u003c\/span\u003e\u003cbr\u003e\u003cspan class=\"a-text-italic\"\u003eTo feel your kicks from the inside out\u003c\/span\u003e\u003cbr\u003e\u003cspan class=\"a-text-italic\"\u003eTo have your heart beating next to mine.\u003c\/span\u003e\u003cbr\u003e\u003cspan class=\"a-text-italic\"\u003eI loved you from the moment\u003c\/span\u003e\u003cbr\u003e\u003cspan class=\"a-text-italic\"\u003eI knew I wanted you,\u003c\/span\u003e\u003cbr\u003e\u003cspan class=\"a-text-italic\"\u003eI love you now, today and tomorrow\u003c\/span\u003e\u003cbr\u003e\u003cspan class=\"a-text-italic\"\u003eAnd I can’t wait to finally hold you in my arms.’\u003c\/span\u003e\u003c\/em\u003e\u003cspan\u003e\u003cbr\u003e\u003cbr\u003eLittle Words on Pregnancy shines a light on the most extraordinary time of woman’s life – when they are carrying another.\u003cbr\u003e\u003cbr\u003eThis book is full of beautiful poetry and prose on the magical journey that is pregnancy. With honest words Jessica describes the ups and downs of pregnancy, identifying that although it is a wonderful time there are also difficult days during those nine months.\u003cbr\u003e\u003cbr\u003eThis book is perfect for any pregnant woman, or any woman who has been through pregnancy, whether it’s their first of fourth child.\u003c\/span\u003e\u003c\/p\u003e","published_at":"2023-06-08T21:32:06+08:00","created_at":"2023-06-08T21:30:55+08:00","vendor":"Adored Illustrations","type":"","tags":["Affirmations","Baby Shower Gifts - Mum","Books","Mum","Pregnancy"],"price":2500,"price_min":2500,"price_max":2500,"available":true,"price_varies":false,"compare_at_price":null,"compare_at_price_min":0,"compare_at_price_max":0,"compare_at_price_varies":false,"variants":[{"id":42868937130173,"title":"Default Title","option1":"Default Title","option2":null,"option3":null,"sku":"","requires_shipping":true,"taxable":false,"featured_image":null,"available":true,"name":"Little Words on Pregnancy","public_title":null,"options":["Default Title"],"price":2500,"weight":140,"compare_at_price":null,"inventory_management":"shopify","barcode":"37130173","requires_selling_plan":false,"selling_plan_allocations":[]}],"images":["\/\/www.thebirthstore.com.au\/cdn\/shop\/files\/little-words-on-pregnancy-111185.jpg?v=1714967991","\/\/www.thebirthstore.com.au\/cdn\/shop\/files\/little-words-on-pregnancy-641929.jpg?v=1714967991","\/\/www.thebirthstore.com.au\/cdn\/shop\/files\/little-words-on-pregnancy-593518.jpg?v=1714967992","\/\/www.thebirthstore.com.au\/cdn\/shop\/files\/little-words-on-pregnancy-242743.jpg?v=1714967992","\/\/www.thebirthstore.com.au\/cdn\/shop\/files\/little-words-on-pregnancy-417681.jpg?v=1714967992","\/\/www.thebirthstore.com.au\/cdn\/shop\/files\/little-words-on-pregnancy-562501.jpg?v=1714967992"],"featured_image":"\/\/www.thebirthstore.com.au\/cdn\/shop\/files\/little-words-on-pregnancy-111185.jpg?v=1714967991","options":["Title"],"media":[{"alt":"Little Words on Pregnancy - The Birth Store-Adored Illustrations","id":27007591579837,"position":1,"preview_image":{"aspect_ratio":1.0,"height":960,"width":960,"src":"\/\/www.thebirthstore.com.au\/cdn\/shop\/files\/little-words-on-pregnancy-111185.jpg?v=1714967991"},"aspect_ratio":1.0,"height":960,"media_type":"image","src":"\/\/www.thebirthstore.com.au\/cdn\/shop\/files\/little-words-on-pregnancy-111185.jpg?v=1714967991","width":960},{"alt":"Little Words on Pregnancy - The Birth Store-Adored Illustrations","id":27007591678141,"position":2,"preview_image":{"aspect_ratio":1.0,"height":1080,"width":1080,"src":"\/\/www.thebirthstore.com.au\/cdn\/shop\/files\/little-words-on-pregnancy-641929.jpg?v=1714967991"},"aspect_ratio":1.0,"height":1080,"media_type":"image","src":"\/\/www.thebirthstore.com.au\/cdn\/shop\/files\/little-words-on-pregnancy-641929.jpg?v=1714967991","width":1080},{"alt":"Little Words on Pregnancy - The Birth Store-Adored Illustrations","id":27007591743677,"position":3,"preview_image":{"aspect_ratio":1.0,"height":1080,"width":1080,"src":"\/\/www.thebirthstore.com.au\/cdn\/shop\/files\/little-words-on-pregnancy-593518.jpg?v=1714967992"},"aspect_ratio":1.0,"height":1080,"media_type":"image","src":"\/\/www.thebirthstore.com.au\/cdn\/shop\/files\/little-words-on-pregnancy-593518.jpg?v=1714967992","width":1080},{"alt":"Little Words on Pregnancy - The Birth Store-Adored Illustrations","id":27007591809213,"position":4,"preview_image":{"aspect_ratio":1.0,"height":1080,"width":1080,"src":"\/\/www.thebirthstore.com.au\/cdn\/shop\/files\/little-words-on-pregnancy-242743.jpg?v=1714967992"},"aspect_ratio":1.0,"height":1080,"media_type":"image","src":"\/\/www.thebirthstore.com.au\/cdn\/shop\/files\/little-words-on-pregnancy-242743.jpg?v=1714967992","width":1080},{"alt":"Little Words on Pregnancy - The Birth Store-Adored Illustrations","id":27007591841981,"position":5,"preview_image":{"aspect_ratio":1.0,"height":1080,"width":1080,"src":"\/\/www.thebirthstore.com.au\/cdn\/shop\/files\/little-words-on-pregnancy-417681.jpg?v=1714967992"},"aspect_ratio":1.0,"height":1080,"media_type":"image","src":"\/\/www.thebirthstore.com.au\/cdn\/shop\/files\/little-words-on-pregnancy-417681.jpg?v=1714967992","width":1080},{"alt":"Little Words on Pregnancy - The Birth Store-Adored Illustrations","id":27007591874749,"position":6,"preview_image":{"aspect_ratio":1.0,"height":1080,"width":1080,"src":"\/\/www.thebirthstore.com.au\/cdn\/shop\/files\/little-words-on-pregnancy-562501.jpg?v=1714967992"},"aspect_ratio":1.0,"height":1080,"media_type":"image","src":"\/\/www.thebirthstore.com.au\/cdn\/shop\/files\/little-words-on-pregnancy-562501.jpg?v=1714967992","width":1080}],"requires_selling_plan":false,"selling_plan_groups":[],"content":"\u003cp data-mce-fragment=\"1\"\u003e\u003cem\u003e\u003cspan class=\"a-text-italic\"\u003e‘I loved you before we created you\u003c\/span\u003e\u003cbr\u003e\u003cspan class=\"a-text-italic\"\u003eI loved you before I knew what it felt like,\u003c\/span\u003e\u003cbr\u003e\u003cspan class=\"a-text-italic\"\u003eTo feel your kicks from the inside out\u003c\/span\u003e\u003cbr\u003e\u003cspan class=\"a-text-italic\"\u003eTo have your heart beating next to mine.\u003c\/span\u003e\u003cbr\u003e\u003cspan class=\"a-text-italic\"\u003eI loved you from the moment\u003c\/span\u003e\u003cbr\u003e\u003cspan class=\"a-text-italic\"\u003eI knew I wanted you,\u003c\/span\u003e\u003cbr\u003e\u003cspan class=\"a-text-italic\"\u003eI love you now, today and tomorrow\u003c\/span\u003e\u003cbr\u003e\u003cspan class=\"a-text-italic\"\u003eAnd I can’t wait to finally hold you in my arms.’\u003c\/span\u003e\u003c\/em\u003e\u003cspan\u003e\u003cbr\u003e\u003cbr\u003eLittle Words on Pregnancy shines a light on the most extraordinary time of woman’s life – when they are carrying another.\u003cbr\u003e\u003cbr\u003eThis book is full of beautiful poetry and prose on the magical journey that is pregnancy. With honest words Jessica describes the ups and downs of pregnancy, identifying that although it is a wonderful time there are also difficult days during those nine months.\u003cbr\u003e\u003cbr\u003eThis book is perfect for any pregnant woman, or any woman who has been through pregnancy, whether it’s their first of fourth child.\u003c\/span\u003e\u003c\/p\u003e"},"options":[{"name":"Title","position":1,"values":["Default Title"]}],"custom_metafields":{},"metafields":{"badge":"\u003cdiv style='display:none' class='jdgm-prev-badge' data-average-rating='0.00' data-number-of-reviews='0' data-number-of-questions='0'\u003e \u003cspan class='jdgm-prev-badge__stars' data-score='0.00' tabindex='0' aria-label='0.00 stars' role='button'\u003e \u003cspan class='jdgm-star jdgm--off'\u003e\u003c\/span\u003e\u003cspan class='jdgm-star jdgm--off'\u003e\u003c\/span\u003e\u003cspan class='jdgm-star jdgm--off'\u003e\u003c\/span\u003e\u003cspan class='jdgm-star jdgm--off'\u003e\u003c\/span\u003e\u003cspan class='jdgm-star jdgm--off'\u003e\u003c\/span\u003e \u003c\/span\u003e \u003cspan class='jdgm-prev-badge__text'\u003e No reviews \u003c\/span\u003e \u003c\/div\u003e","widget":"\u003cdiv class='jdgm-rev-widg' data-updated-at='2025-06-13T16:12:53Z' data-average-rating='0.00' data-number-of-reviews='0' data-number-of-questions='0'\u003e \u003cstyle class='jdgm-temp-hiding-style'\u003e.jdgm-rev-widg{ display: none }\u003c\/style\u003e \u003cdiv class='jdgm-rev-widg__header'\u003e \u003ch2 class='jdgm-rev-widg__title'\u003eCustomer Reviews\u003c\/h2\u003e \u003cdiv class='jdgm-rev-widg__summary'\u003e \u003cdiv class='jdgm-rev-widg__summary-stars' aria-label='Average rating is 0.00 stars' role='img'\u003e \u003cspan class='jdgm-star jdgm--off'\u003e\u003c\/span\u003e\u003cspan class='jdgm-star jdgm--off'\u003e\u003c\/span\u003e\u003cspan class='jdgm-star jdgm--off'\u003e\u003c\/span\u003e\u003cspan class='jdgm-star jdgm--off'\u003e\u003c\/span\u003e\u003cspan class='jdgm-star jdgm--off'\u003e\u003c\/span\u003e \u003c\/div\u003e \u003cdiv class='jdgm-rev-widg__summary-text'\u003eBe the first to write a review\u003c\/div\u003e \u003c\/div\u003e \u003ca style='display: none' href='#' class='jdgm-write-rev-link' role='button'\u003eWrite a review\u003c\/a\u003e \u003cdiv class='jdgm-histogram jdgm-temp-hidden'\u003e \u003cdiv class='jdgm-histogram__row' data-rating='5' data-frequency='0' data-percentage='0'\u003e \u003cdiv class='jdgm-histogram__star' role='button' aria-label=\"0% (0) reviews with 5 star rating\" tabindex='0' \u003e\u003cspan class='jdgm-star jdgm--on'\u003e\u003c\/span\u003e\u003cspan class='jdgm-star jdgm--on'\u003e\u003c\/span\u003e\u003cspan class='jdgm-star jdgm--on'\u003e\u003c\/span\u003e\u003cspan class='jdgm-star jdgm--on'\u003e\u003c\/span\u003e\u003cspan class='jdgm-star jdgm--on'\u003e\u003c\/span\u003e\u003c\/div\u003e \u003cdiv class='jdgm-histogram__bar'\u003e \u003cdiv class='jdgm-histogram__bar-content' style='width: 0%;'\u003e \u003c\/div\u003e \u003c\/div\u003e \u003cdiv class='jdgm-histogram__percentage'\u003e0%\u003c\/div\u003e \u003cdiv class='jdgm-histogram__frequency'\u003e(0)\u003c\/div\u003e \u003c\/div\u003e \u003cdiv class='jdgm-histogram__row' data-rating='4' data-frequency='0' data-percentage='0'\u003e \u003cdiv class='jdgm-histogram__star' role='button' aria-label=\"0% (0) reviews with 4 star rating\" tabindex='0' \u003e\u003cspan class='jdgm-star jdgm--on'\u003e\u003c\/span\u003e\u003cspan class='jdgm-star jdgm--on'\u003e\u003c\/span\u003e\u003cspan class='jdgm-star jdgm--on'\u003e\u003c\/span\u003e\u003cspan class='jdgm-star jdgm--on'\u003e\u003c\/span\u003e\u003cspan class='jdgm-star jdgm--off'\u003e\u003c\/span\u003e\u003c\/div\u003e \u003cdiv class='jdgm-histogram__bar'\u003e \u003cdiv class='jdgm-histogram__bar-content' style='width: 0%;'\u003e \u003c\/div\u003e \u003c\/div\u003e \u003cdiv class='jdgm-histogram__percentage'\u003e0%\u003c\/div\u003e \u003cdiv class='jdgm-histogram__frequency'\u003e(0)\u003c\/div\u003e \u003c\/div\u003e \u003cdiv class='jdgm-histogram__row' data-rating='3' data-frequency='0' data-percentage='0'\u003e \u003cdiv class='jdgm-histogram__star' role='button' aria-label=\"0% (0) reviews with 3 star rating\" tabindex='0' \u003e\u003cspan class='jdgm-star jdgm--on'\u003e\u003c\/span\u003e\u003cspan class='jdgm-star jdgm--on'\u003e\u003c\/span\u003e\u003cspan class='jdgm-star jdgm--on'\u003e\u003c\/span\u003e\u003cspan class='jdgm-star jdgm--off'\u003e\u003c\/span\u003e\u003cspan class='jdgm-star jdgm--off'\u003e\u003c\/span\u003e\u003c\/div\u003e \u003cdiv class='jdgm-histogram__bar'\u003e \u003cdiv class='jdgm-histogram__bar-content' style='width: 0%;'\u003e \u003c\/div\u003e \u003c\/div\u003e \u003cdiv class='jdgm-histogram__percentage'\u003e0%\u003c\/div\u003e \u003cdiv class='jdgm-histogram__frequency'\u003e(0)\u003c\/div\u003e \u003c\/div\u003e \u003cdiv class='jdgm-histogram__row' data-rating='2' data-frequency='0' data-percentage='0'\u003e \u003cdiv class='jdgm-histogram__star' role='button' aria-label=\"0% (0) reviews with 2 star rating\" tabindex='0' \u003e\u003cspan class='jdgm-star jdgm--on'\u003e\u003c\/span\u003e\u003cspan class='jdgm-star jdgm--on'\u003e\u003c\/span\u003e\u003cspan class='jdgm-star jdgm--off'\u003e\u003c\/span\u003e\u003cspan class='jdgm-star jdgm--off'\u003e\u003c\/span\u003e\u003cspan class='jdgm-star jdgm--off'\u003e\u003c\/span\u003e\u003c\/div\u003e \u003cdiv class='jdgm-histogram__bar'\u003e \u003cdiv class='jdgm-histogram__bar-content' style='width: 0%;'\u003e \u003c\/div\u003e \u003c\/div\u003e \u003cdiv class='jdgm-histogram__percentage'\u003e0%\u003c\/div\u003e \u003cdiv class='jdgm-histogram__frequency'\u003e(0)\u003c\/div\u003e \u003c\/div\u003e \u003cdiv class='jdgm-histogram__row' data-rating='1' data-frequency='0' data-percentage='0'\u003e \u003cdiv class='jdgm-histogram__star' role='button' aria-label=\"0% (0) reviews with 1 star rating\" tabindex='0' \u003e\u003cspan class='jdgm-star jdgm--on'\u003e\u003c\/span\u003e\u003cspan class='jdgm-star jdgm--off'\u003e\u003c\/span\u003e\u003cspan class='jdgm-star jdgm--off'\u003e\u003c\/span\u003e\u003cspan class='jdgm-star jdgm--off'\u003e\u003c\/span\u003e\u003cspan class='jdgm-star jdgm--off'\u003e\u003c\/span\u003e\u003c\/div\u003e \u003cdiv class='jdgm-histogram__bar'\u003e \u003cdiv class='jdgm-histogram__bar-content' style='width: 0%;'\u003e \u003c\/div\u003e \u003c\/div\u003e \u003cdiv class='jdgm-histogram__percentage'\u003e0%\u003c\/div\u003e \u003cdiv class='jdgm-histogram__frequency'\u003e(0)\u003c\/div\u003e \u003c\/div\u003e \u003cdiv class='jdgm-histogram__row jdgm-histogram__clear-filter' data-rating=null tabindex='0'\u003e\u003c\/div\u003e \u003c\/div\u003e \u003cdiv class='jdgm-rev-widg__sort-wrapper'\u003e\u003c\/div\u003e \u003c\/div\u003e \u003cdiv class='jdgm-rev-widg__body'\u003e \u003cdiv class='jdgm-rev-widg__reviews'\u003e\u003c\/div\u003e \u003cdiv class='jdgm-paginate' data-per-page='10' data-url='https:\/\/api.judge.me\/reviews\/reviews_for_widget' style=\"display: none;\"\u003e\u003c\/div\u003e \u003c\/div\u003e \u003cdiv class='jdgm-rev-widg__paginate-spinner-wrapper'\u003e \u003cdiv class='jdgm-spinner'\u003e\u003c\/div\u003e \u003c\/div\u003e \u003c\/div\u003e"},"collections":[{"id":295224541373,"handle":"affirmations","title":"Affirmations","updated_at":"2025-12-28T20:10:01+08:00","body_html":"","published_at":"2023-11-10T20:37:58+08:00","sort_order":"best-selling","template_suffix":"swaddles-collection","disjunctive":false,"rules":[{"column":"tag","relation":"equals","condition":"Affirmations"}],"published_scope":"global","image":{"created_at":"2024-05-06T11:59:20+08:00","alt":"Affirmations - The Birth Store","width":1000,"height":1250,"src":"\/\/www.thebirthstore.com.au\/cdn\/shop\/collections\/affirmations-495130.jpg?v=1714967960"}},{"id":281356533949,"handle":"baby-shower-gifts","title":"Baby Shower Gifts - Mum","updated_at":"2025-12-28T20:10:01+08:00","body_html":"\u003cp\u003eLooking for a unique baby shower gift? Or an all-in-one bundle pack to suit all your needs? We've got just the thing!\u003c\/p\u003e","published_at":"2021-12-06T13:43:56+08:00","sort_order":"best-selling","template_suffix":"baby-shower-gifts","disjunctive":true,"rules":[{"column":"tag","relation":"equals","condition":"Baby Shower Gifts - Mum"},{"column":"tag","relation":"equals","condition":"Gift Card"}],"published_scope":"global","image":{"created_at":"2024-05-06T11:59:28+08:00","alt":"Baby Shower Gifts - The Birth Store","width":1200,"height":1800,"src":"\/\/www.thebirthstore.com.au\/cdn\/shop\/collections\/baby-shower-gifts-401770.jpg?v=1761791272"}},{"id":293669077181,"handle":"books","title":"Books","updated_at":"2025-12-24T20:09:23+08:00","body_html":"","published_at":"2023-06-08T21:27:34+08:00","sort_order":"best-selling","template_suffix":"swaddles-collection","disjunctive":false,"rules":[{"column":"tag","relation":"equals","condition":"Books"}],"published_scope":"global","image":{"created_at":"2024-05-06T11:59:31+08:00","alt":"Books - The Birth Store","width":1476,"height":2048,"src":"\/\/www.thebirthstore.com.au\/cdn\/shop\/collections\/books-814717.jpg?v=1714967972"}},{"id":261657460925,"handle":"buy","title":"Buy","updated_at":"2025-12-28T20:10:01+08:00","body_html":"\u003cp\u003eBrowse all of our pregnancy, labour \u0026amp; birth, postpartum and baby essentials here.\u003cbr\u003e\u003c\/p\u003e\n\u003cp\u003e\u003cspan\u003eYou can even buy now and pay later with Afterpay!\u003c\/span\u003e\u003c\/p\u003e","published_at":"2021-03-10T12:05:31+08:00","sort_order":"best-selling","template_suffix":"shop-all-collection","disjunctive":false,"rules":[{"column":"title","relation":"not_contains","condition":"Hire"}],"published_scope":"global","image":{"created_at":"2024-05-06T11:59:42+08:00","alt":"Buy - The Birth Store","width":2048,"height":2048,"src":"\/\/www.thebirthstore.com.au\/cdn\/shop\/collections\/buy-964856.jpg?v=1714967982"}},{"id":261658149053,"handle":"pregnancy-and-maternity-products","title":"Pregnancy","updated_at":"2025-12-28T20:10:01+08:00","body_html":"\u003cp\u003eShop your pregnancy essentials below. Looking for something we don't currently stock? Please reach out and let us know.\u003cbr\u003e\u003c\/p\u003e\n\u003cp\u003e\u003cspan\u003eYou can even buy now and pay later with Afterpay!\u003c\/span\u003e\u003c\/p\u003e","published_at":"2021-03-10T12:34:22+08:00","sort_order":"best-selling","template_suffix":"pregnancy-collection","disjunctive":false,"rules":[{"column":"tag","relation":"equals","condition":"Pregnancy"}],"published_scope":"global","image":{"created_at":"2024-05-06T12:00:40+08:00","alt":"Pregnancy - The Birth Store","width":1024,"height":1536,"src":"\/\/www.thebirthstore.com.au\/cdn\/shop\/collections\/pregnancy-899677.jpg?v=1714968040"}},{"id":291456483517,"handle":"shop-all","title":"Shop All - Mum","updated_at":"2025-12-28T20:10:01+08:00","body_html":"","published_at":"2022-12-23T22:04:39+08:00","sort_order":"best-selling","template_suffix":"shop-all-collection","disjunctive":false,"rules":[{"column":"variant_price","relation":"greater_than","condition":"1"},{"column":"title","relation":"not_contains","condition":"Batteries"},{"column":"tag","relation":"equals","condition":"Mum"}],"published_scope":"global","image":{"created_at":"2024-05-06T12:00:54+08:00","alt":"Shop All - The Birth Store","width":1365,"height":2048,"src":"\/\/www.thebirthstore.com.au\/cdn\/shop\/collections\/shop-all-693176.jpg?v=1714968055"}},{"id":310045933757,"handle":"shop-all-sale","title":"Shop All Sale","updated_at":"2025-12-28T20:10:01+08:00","body_html":"","published_at":"2024-11-12T13:22:43+08:00","sort_order":"alpha-asc","template_suffix":"","disjunctive":true,"rules":[{"column":"tag","relation":"equals","condition":"Bundles"},{"column":"vendor","relation":"equals","condition":"Franjos Kitchen"},{"column":"vendor","relation":"equals","condition":"Adored Illustrations"},{"column":"vendor","relation":"equals","condition":"Amazing Oils"},{"column":"vendor","relation":"equals","condition":"Ice Ice Booby"},{"column":"vendor","relation":"equals","condition":"Made to Milk"},{"column":"vendor","relation":"equals","condition":"Milky Goodness"},{"column":"vendor","relation":"equals","condition":"Seasons of Mama"},{"column":"vendor","relation":"equals","condition":"Silverette"},{"column":"vendor","relation":"equals","condition":"Snuggle Hunny"},{"column":"vendor","relation":"equals","condition":"Yung Bod"},{"column":"vendor","relation":"equals","condition":"Bare Love"},{"column":"vendor","relation":"equals","condition":"Haakaa"},{"column":"vendor","relation":"equals","condition":"Mere Botanicals"},{"column":"vendor","relation":"equals","condition":"The Birth Store Hire"},{"column":"vendor","relation":"equals","condition":"The Birth Store"}],"published_scope":"global","image":{"created_at":"2024-11-13T10:58:16+08:00","alt":"Shop All Sale - The Birth Store","width":2048,"height":1365,"src":"\/\/www.thebirthstore.com.au\/cdn\/shop\/collections\/shop-all-sale-297361.jpg?v=1731466697"}}]}
[{"alt":"Little Words on Pregnancy - The Birth Store-Adored Illustrations","id":27007591579837,"position":1,"preview_image":{"aspect_ratio":1.0,"height":960,"width":960,"src":"\/\/www.thebirthstore.com.au\/cdn\/shop\/files\/little-words-on-pregnancy-111185.jpg?v=1714967991"},"aspect_ratio":1.0,"height":960,"media_type":"image","src":"\/\/www.thebirthstore.com.au\/cdn\/shop\/files\/little-words-on-pregnancy-111185.jpg?v=1714967991","width":960},{"alt":"Little Words on Pregnancy - The Birth Store-Adored Illustrations","id":27007591678141,"position":2,"preview_image":{"aspect_ratio":1.0,"height":1080,"width":1080,"src":"\/\/www.thebirthstore.com.au\/cdn\/shop\/files\/little-words-on-pregnancy-641929.jpg?v=1714967991"},"aspect_ratio":1.0,"height":1080,"media_type":"image","src":"\/\/www.thebirthstore.com.au\/cdn\/shop\/files\/little-words-on-pregnancy-641929.jpg?v=1714967991","width":1080},{"alt":"Little Words on Pregnancy - The Birth Store-Adored Illustrations","id":27007591743677,"position":3,"preview_image":{"aspect_ratio":1.0,"height":1080,"width":1080,"src":"\/\/www.thebirthstore.com.au\/cdn\/shop\/files\/little-words-on-pregnancy-593518.jpg?v=1714967992"},"aspect_ratio":1.0,"height":1080,"media_type":"image","src":"\/\/www.thebirthstore.com.au\/cdn\/shop\/files\/little-words-on-pregnancy-593518.jpg?v=1714967992","width":1080},{"alt":"Little Words on Pregnancy - The Birth Store-Adored Illustrations","id":27007591809213,"position":4,"preview_image":{"aspect_ratio":1.0,"height":1080,"width":1080,"src":"\/\/www.thebirthstore.com.au\/cdn\/shop\/files\/little-words-on-pregnancy-242743.jpg?v=1714967992"},"aspect_ratio":1.0,"height":1080,"media_type":"image","src":"\/\/www.thebirthstore.com.au\/cdn\/shop\/files\/little-words-on-pregnancy-242743.jpg?v=1714967992","width":1080},{"alt":"Little Words on Pregnancy - The Birth Store-Adored Illustrations","id":27007591841981,"position":5,"preview_image":{"aspect_ratio":1.0,"height":1080,"width":1080,"src":"\/\/www.thebirthstore.com.au\/cdn\/shop\/files\/little-words-on-pregnancy-417681.jpg?v=1714967992"},"aspect_ratio":1.0,"height":1080,"media_type":"image","src":"\/\/www.thebirthstore.com.au\/cdn\/shop\/files\/little-words-on-pregnancy-417681.jpg?v=1714967992","width":1080},{"alt":"Little Words on Pregnancy - The Birth Store-Adored Illustrations","id":27007591874749,"position":6,"preview_image":{"aspect_ratio":1.0,"height":1080,"width":1080,"src":"\/\/www.thebirthstore.com.au\/cdn\/shop\/files\/little-words-on-pregnancy-562501.jpg?v=1714967992"},"aspect_ratio":1.0,"height":1080,"media_type":"image","src":"\/\/www.thebirthstore.com.au\/cdn\/shop\/files\/little-words-on-pregnancy-562501.jpg?v=1714967992","width":1080}]
{"item":{"id":7576563810493,"title":"Made To Milk Lactation Cookies","handle":"copy-of-lactation-cookies-pre-selected-mixed-flavours","description":"\u003cp\u003e\u003cspan data-mce-fragment=\"1\"\u003eDeluxe, chunky lactation cookies to nourish and support the breastfeeding mum.\u003c\/span\u003e\u003c\/p\u003e\n\u003cp\u003eAll of our lactation cookies include the essential galactagogue ingredients - flaxseed and brewer's yeast.\u003c\/p\u003e\n\u003cp\u003e1 Box includes 12 x 25g cookies.\u003c\/p\u003e\n\u003cp\u003eEach cookie is individually sealed for maximum freshness! Made to take with you on the go or to keep by your bedside at night without the threat of being spoiled.\u003c\/p\u003e\n\u003cp\u003e\u003cstrong\u003eContains Wheat, Gluten, Milk, Egg, Soy \u0026amp; Sulphites.\u003c\/strong\u003e\u003c\/p\u003e\n\u003cp\u003eShelf life: 6 months from bake date (baked fresh weekly).\u003c\/p\u003e","published_at":"2023-12-16T13:29:06+08:00","created_at":"2023-12-16T11:10:12+08:00","vendor":"Made to Milk","type":"","tags":["Baby Shower Gifts - Mum","Breastfeeding","Hospital Bag","Lactation Products","Mum","Post-Partum"],"price":2795,"price_min":2795,"price_max":2795,"available":true,"price_varies":false,"compare_at_price":null,"compare_at_price_min":0,"compare_at_price_max":0,"compare_at_price_varies":false,"variants":[{"id":43334826655933,"title":"Triple Chocoholic","option1":"Triple Chocoholic","option2":null,"option3":null,"sku":"","requires_shipping":true,"taxable":false,"featured_image":{"id":38738873188541,"product_id":7576563810493,"position":17,"created_at":"2025-11-02T23:35:56+08:00","updated_at":"2025-11-03T12:22:56+08:00","alt":"Made To Milk Lactation Cookies - The Birth Store - Made to Milk","width":1080,"height":1080,"src":"\/\/www.thebirthstore.com.au\/cdn\/shop\/files\/made-to-milk-lactation-cookies-7512867.png?v=1762143776","variant_ids":[43334826655933]},"available":true,"name":"Made To Milk Lactation Cookies - Triple Chocoholic","public_title":"Triple Chocoholic","options":["Triple Chocoholic"],"price":2795,"weight":405,"compare_at_price":null,"inventory_management":"shopify","barcode":"26655933","featured_media":{"alt":"Made To Milk Lactation Cookies - The Birth Store - Made to Milk","id":29988537925821,"position":17,"preview_image":{"aspect_ratio":1.0,"height":1080,"width":1080,"src":"\/\/www.thebirthstore.com.au\/cdn\/shop\/files\/made-to-milk-lactation-cookies-7512867.png?v=1762143776"}},"requires_selling_plan":false,"selling_plan_allocations":[]},{"id":43334826688701,"title":"White Choc \u0026 Macadamia","option1":"White Choc \u0026 Macadamia","option2":null,"option3":null,"sku":"","requires_shipping":true,"taxable":false,"featured_image":{"id":38738869584061,"product_id":7576563810493,"position":16,"created_at":"2025-11-02T23:34:02+08:00","updated_at":"2025-11-03T12:22:56+08:00","alt":"Made To Milk Lactation Cookies - The Birth Store - Made to Milk","width":1080,"height":1080,"src":"\/\/www.thebirthstore.com.au\/cdn\/shop\/files\/made-to-milk-lactation-cookies-9838165.png?v=1762143776","variant_ids":[43334826688701]},"available":true,"name":"Made To Milk Lactation Cookies - White Choc \u0026 Macadamia","public_title":"White Choc \u0026 Macadamia","options":["White Choc \u0026 Macadamia"],"price":2795,"weight":405,"compare_at_price":null,"inventory_management":"shopify","barcode":"26688701","featured_media":{"alt":"Made To Milk Lactation Cookies - The Birth Store - Made to Milk","id":29988536385725,"position":16,"preview_image":{"aspect_ratio":1.0,"height":1080,"width":1080,"src":"\/\/www.thebirthstore.com.au\/cdn\/shop\/files\/made-to-milk-lactation-cookies-9838165.png?v=1762143776"}},"requires_selling_plan":false,"selling_plan_allocations":[]},{"id":43334826721469,"title":"Milk Choc Chip","option1":"Milk Choc Chip","option2":null,"option3":null,"sku":"","requires_shipping":true,"taxable":false,"featured_image":{"id":38738864767165,"product_id":7576563810493,"position":15,"created_at":"2025-11-02T23:31:48+08:00","updated_at":"2025-11-03T12:22:56+08:00","alt":"Made To Milk Lactation Cookies - The Birth Store - Made to Milk","width":1080,"height":1080,"src":"\/\/www.thebirthstore.com.au\/cdn\/shop\/files\/made-to-milk-lactation-cookies-9818433.png?v=1762143776","variant_ids":[43334826721469]},"available":true,"name":"Made To Milk Lactation Cookies - Milk Choc Chip","public_title":"Milk Choc Chip","options":["Milk Choc Chip"],"price":2795,"weight":405,"compare_at_price":null,"inventory_management":"shopify","barcode":"26721469","featured_media":{"alt":"Made To Milk Lactation Cookies - The Birth Store - Made to Milk","id":29988533633213,"position":15,"preview_image":{"aspect_ratio":1.0,"height":1080,"width":1080,"src":"\/\/www.thebirthstore.com.au\/cdn\/shop\/files\/made-to-milk-lactation-cookies-9818433.png?v=1762143776"}},"requires_selling_plan":false,"selling_plan_allocations":[]},{"id":43334826754237,"title":"Vanilla Cherry Delight","option1":"Vanilla Cherry Delight","option2":null,"option3":null,"sku":"","requires_shipping":true,"taxable":false,"featured_image":{"id":38738875318461,"product_id":7576563810493,"position":18,"created_at":"2025-11-02T23:37:03+08:00","updated_at":"2025-11-03T12:22:57+08:00","alt":"Made To Milk Lactation Cookies - The Birth Store - Made to Milk","width":1080,"height":1080,"src":"\/\/www.thebirthstore.com.au\/cdn\/shop\/files\/made-to-milk-lactation-cookies-4039882.png?v=1762143777","variant_ids":[43334826754237]},"available":true,"name":"Made To Milk Lactation Cookies - Vanilla Cherry Delight","public_title":"Vanilla Cherry Delight","options":["Vanilla Cherry Delight"],"price":2795,"weight":405,"compare_at_price":null,"inventory_management":"shopify","barcode":"26754237","featured_media":{"alt":"Made To Milk Lactation Cookies - The Birth Store - Made to Milk","id":29988539564221,"position":18,"preview_image":{"aspect_ratio":1.0,"height":1080,"width":1080,"src":"\/\/www.thebirthstore.com.au\/cdn\/shop\/files\/made-to-milk-lactation-cookies-4039882.png?v=1762143777"}},"requires_selling_plan":false,"selling_plan_allocations":[]},{"id":44598923854013,"title":"Salted Caramel Fudge","option1":"Salted Caramel Fudge","option2":null,"option3":null,"sku":"","requires_shipping":true,"taxable":false,"featured_image":{"id":38738858705085,"product_id":7576563810493,"position":14,"created_at":"2025-11-02T23:29:55+08:00","updated_at":"2025-11-03T12:22:55+08:00","alt":"Made To Milk Lactation Cookies - The Birth Store - Made to Milk","width":1080,"height":1080,"src":"\/\/www.thebirthstore.com.au\/cdn\/shop\/files\/made-to-milk-lactation-cookies-3883399.png?v=1762143775","variant_ids":[44598923854013]},"available":true,"name":"Made To Milk Lactation Cookies - Salted Caramel Fudge","public_title":"Salted Caramel Fudge","options":["Salted Caramel Fudge"],"price":2795,"weight":405,"compare_at_price":null,"inventory_management":"shopify","barcode":"23854013","featured_media":{"alt":"Made To Milk Lactation Cookies - The Birth Store - Made to Milk","id":29988529438909,"position":14,"preview_image":{"aspect_ratio":1.0,"height":1080,"width":1080,"src":"\/\/www.thebirthstore.com.au\/cdn\/shop\/files\/made-to-milk-lactation-cookies-3883399.png?v=1762143775"}},"requires_selling_plan":false,"selling_plan_allocations":[]}],"images":["\/\/www.thebirthstore.com.au\/cdn\/shop\/files\/lactation-cookies-multiple-flavours-737939.jpg?v=1714967993","\/\/www.thebirthstore.com.au\/cdn\/shop\/files\/lactation-cookies-multiple-flavours-197168.jpg?v=1714967993","\/\/www.thebirthstore.com.au\/cdn\/shop\/files\/lactation-cookies-multiple-flavours-828638.jpg?v=1714967993","\/\/www.thebirthstore.com.au\/cdn\/shop\/files\/lactation-cookies-multiple-flavours-272210.jpg?v=1714967993","\/\/www.thebirthstore.com.au\/cdn\/shop\/files\/lactation-cookies-multiple-flavours-127933.jpg?v=1714967993","\/\/www.thebirthstore.com.au\/cdn\/shop\/files\/lactation-cookies-multiple-flavours-827485.jpg?v=1714967993","\/\/www.thebirthstore.com.au\/cdn\/shop\/files\/lactation-cookies-multiple-flavours-586437.jpg?v=1714967993","\/\/www.thebirthstore.com.au\/cdn\/shop\/files\/lactation-cookies-multiple-flavours-447226.jpg?v=1714967993","\/\/www.thebirthstore.com.au\/cdn\/shop\/files\/lactation-cookies-multiple-flavours-264823.jpg?v=1714967993","\/\/www.thebirthstore.com.au\/cdn\/shop\/files\/lactation-cookies-multiple-flavours-899855.jpg?v=1714967993","\/\/www.thebirthstore.com.au\/cdn\/shop\/files\/lactation-cookies-multiple-flavours-344398.webp?v=1730223893","\/\/www.thebirthstore.com.au\/cdn\/shop\/files\/lactation-cookies-multiple-flavours-651687.webp?v=1730223893","\/\/www.thebirthstore.com.au\/cdn\/shop\/files\/lactation-cookies-multiple-flavours-400225.webp?v=1730223893","\/\/www.thebirthstore.com.au\/cdn\/shop\/files\/made-to-milk-lactation-cookies-3883399.png?v=1762143775","\/\/www.thebirthstore.com.au\/cdn\/shop\/files\/made-to-milk-lactation-cookies-9818433.png?v=1762143776","\/\/www.thebirthstore.com.au\/cdn\/shop\/files\/made-to-milk-lactation-cookies-9838165.png?v=1762143776","\/\/www.thebirthstore.com.au\/cdn\/shop\/files\/made-to-milk-lactation-cookies-7512867.png?v=1762143776","\/\/www.thebirthstore.com.au\/cdn\/shop\/files\/made-to-milk-lactation-cookies-4039882.png?v=1762143777"],"featured_image":"\/\/www.thebirthstore.com.au\/cdn\/shop\/files\/lactation-cookies-multiple-flavours-737939.jpg?v=1714967993","options":["Flavour"],"media":[{"alt":"Lactation Cookies - Multiple Flavours - The Birth Store-Made to Milk","id":27007592399037,"position":1,"preview_image":{"aspect_ratio":1.0,"height":1080,"width":1080,"src":"\/\/www.thebirthstore.com.au\/cdn\/shop\/files\/lactation-cookies-multiple-flavours-737939.jpg?v=1714967993"},"aspect_ratio":1.0,"height":1080,"media_type":"image","src":"\/\/www.thebirthstore.com.au\/cdn\/shop\/files\/lactation-cookies-multiple-flavours-737939.jpg?v=1714967993","width":1080},{"alt":"Lactation Cookies - Multiple Flavours - The Birth Store-Made to Milk","id":27007592431805,"position":2,"preview_image":{"aspect_ratio":1.0,"height":540,"width":540,"src":"\/\/www.thebirthstore.com.au\/cdn\/shop\/files\/lactation-cookies-multiple-flavours-197168.jpg?v=1714967993"},"aspect_ratio":1.0,"height":540,"media_type":"image","src":"\/\/www.thebirthstore.com.au\/cdn\/shop\/files\/lactation-cookies-multiple-flavours-197168.jpg?v=1714967993","width":540},{"alt":"Lactation Cookies - Multiple Flavours - The Birth Store-Made to Milk","id":27007592464573,"position":3,"preview_image":{"aspect_ratio":1.0,"height":540,"width":540,"src":"\/\/www.thebirthstore.com.au\/cdn\/shop\/files\/lactation-cookies-multiple-flavours-828638.jpg?v=1714967993"},"aspect_ratio":1.0,"height":540,"media_type":"image","src":"\/\/www.thebirthstore.com.au\/cdn\/shop\/files\/lactation-cookies-multiple-flavours-828638.jpg?v=1714967993","width":540},{"alt":"Lactation Cookies - Multiple Flavours - The Birth Store-Made to Milk","id":27007592497341,"position":4,"preview_image":{"aspect_ratio":1.0,"height":540,"width":540,"src":"\/\/www.thebirthstore.com.au\/cdn\/shop\/files\/lactation-cookies-multiple-flavours-272210.jpg?v=1714967993"},"aspect_ratio":1.0,"height":540,"media_type":"image","src":"\/\/www.thebirthstore.com.au\/cdn\/shop\/files\/lactation-cookies-multiple-flavours-272210.jpg?v=1714967993","width":540},{"alt":"Lactation Cookies - Multiple Flavours - The Birth Store-Made to Milk","id":27007592530109,"position":5,"preview_image":{"aspect_ratio":1.0,"height":540,"width":540,"src":"\/\/www.thebirthstore.com.au\/cdn\/shop\/files\/lactation-cookies-multiple-flavours-127933.jpg?v=1714967993"},"aspect_ratio":1.0,"height":540,"media_type":"image","src":"\/\/www.thebirthstore.com.au\/cdn\/shop\/files\/lactation-cookies-multiple-flavours-127933.jpg?v=1714967993","width":540},{"alt":"Lactation Cookies - Multiple Flavours - The Birth Store-Made to Milk","id":27007592562877,"position":6,"preview_image":{"aspect_ratio":1.0,"height":540,"width":540,"src":"\/\/www.thebirthstore.com.au\/cdn\/shop\/files\/lactation-cookies-multiple-flavours-827485.jpg?v=1714967993"},"aspect_ratio":1.0,"height":540,"media_type":"image","src":"\/\/www.thebirthstore.com.au\/cdn\/shop\/files\/lactation-cookies-multiple-flavours-827485.jpg?v=1714967993","width":540},{"alt":"Lactation Cookies - Multiple Flavours - The Birth Store-Made to Milk","id":27007592595645,"position":7,"preview_image":{"aspect_ratio":1.0,"height":540,"width":540,"src":"\/\/www.thebirthstore.com.au\/cdn\/shop\/files\/lactation-cookies-multiple-flavours-586437.jpg?v=1714967993"},"aspect_ratio":1.0,"height":540,"media_type":"image","src":"\/\/www.thebirthstore.com.au\/cdn\/shop\/files\/lactation-cookies-multiple-flavours-586437.jpg?v=1714967993","width":540},{"alt":"Lactation Cookies - Multiple Flavours - The Birth Store-Made to Milk","id":27007592628413,"position":8,"preview_image":{"aspect_ratio":1.0,"height":540,"width":540,"src":"\/\/www.thebirthstore.com.au\/cdn\/shop\/files\/lactation-cookies-multiple-flavours-447226.jpg?v=1714967993"},"aspect_ratio":1.0,"height":540,"media_type":"image","src":"\/\/www.thebirthstore.com.au\/cdn\/shop\/files\/lactation-cookies-multiple-flavours-447226.jpg?v=1714967993","width":540},{"alt":"Lactation Cookies - Multiple Flavours - The Birth Store-Made to Milk","id":27007592661181,"position":9,"preview_image":{"aspect_ratio":1.0,"height":540,"width":540,"src":"\/\/www.thebirthstore.com.au\/cdn\/shop\/files\/lactation-cookies-multiple-flavours-264823.jpg?v=1714967993"},"aspect_ratio":1.0,"height":540,"media_type":"image","src":"\/\/www.thebirthstore.com.au\/cdn\/shop\/files\/lactation-cookies-multiple-flavours-264823.jpg?v=1714967993","width":540},{"alt":"Lactation Cookies - Multiple Flavours - The Birth Store-Made to Milk","id":27007592693949,"position":10,"preview_image":{"aspect_ratio":0.667,"height":810,"width":540,"src":"\/\/www.thebirthstore.com.au\/cdn\/shop\/files\/lactation-cookies-multiple-flavours-899855.jpg?v=1714967993"},"aspect_ratio":0.667,"height":810,"media_type":"image","src":"\/\/www.thebirthstore.com.au\/cdn\/shop\/files\/lactation-cookies-multiple-flavours-899855.jpg?v=1714967993","width":540},{"alt":"Lactation Cookies - Multiple Flavours - The Birth Store - Made to Milk","id":27844281893053,"position":11,"preview_image":{"aspect_ratio":1.0,"height":540,"width":540,"src":"\/\/www.thebirthstore.com.au\/cdn\/shop\/files\/lactation-cookies-multiple-flavours-344398.webp?v=1730223893"},"aspect_ratio":1.0,"height":540,"media_type":"image","src":"\/\/www.thebirthstore.com.au\/cdn\/shop\/files\/lactation-cookies-multiple-flavours-344398.webp?v=1730223893","width":540},{"alt":"Lactation Cookies - Multiple Flavours - The Birth Store - Made to Milk","id":27844281925821,"position":12,"preview_image":{"aspect_ratio":1.0,"height":540,"width":540,"src":"\/\/www.thebirthstore.com.au\/cdn\/shop\/files\/lactation-cookies-multiple-flavours-651687.webp?v=1730223893"},"aspect_ratio":1.0,"height":540,"media_type":"image","src":"\/\/www.thebirthstore.com.au\/cdn\/shop\/files\/lactation-cookies-multiple-flavours-651687.webp?v=1730223893","width":540},{"alt":"Lactation Cookies - Multiple Flavours - The Birth Store - Made to Milk","id":27844281958589,"position":13,"preview_image":{"aspect_ratio":1.0,"height":540,"width":540,"src":"\/\/www.thebirthstore.com.au\/cdn\/shop\/files\/lactation-cookies-multiple-flavours-400225.webp?v=1730223893"},"aspect_ratio":1.0,"height":540,"media_type":"image","src":"\/\/www.thebirthstore.com.au\/cdn\/shop\/files\/lactation-cookies-multiple-flavours-400225.webp?v=1730223893","width":540},{"alt":"Made To Milk Lactation Cookies - The Birth Store - Made to Milk","id":29988529438909,"position":14,"preview_image":{"aspect_ratio":1.0,"height":1080,"width":1080,"src":"\/\/www.thebirthstore.com.au\/cdn\/shop\/files\/made-to-milk-lactation-cookies-3883399.png?v=1762143775"},"aspect_ratio":1.0,"height":1080,"media_type":"image","src":"\/\/www.thebirthstore.com.au\/cdn\/shop\/files\/made-to-milk-lactation-cookies-3883399.png?v=1762143775","width":1080},{"alt":"Made To Milk Lactation Cookies - The Birth Store - Made to Milk","id":29988533633213,"position":15,"preview_image":{"aspect_ratio":1.0,"height":1080,"width":1080,"src":"\/\/www.thebirthstore.com.au\/cdn\/shop\/files\/made-to-milk-lactation-cookies-9818433.png?v=1762143776"},"aspect_ratio":1.0,"height":1080,"media_type":"image","src":"\/\/www.thebirthstore.com.au\/cdn\/shop\/files\/made-to-milk-lactation-cookies-9818433.png?v=1762143776","width":1080},{"alt":"Made To Milk Lactation Cookies - The Birth Store - Made to Milk","id":29988536385725,"position":16,"preview_image":{"aspect_ratio":1.0,"height":1080,"width":1080,"src":"\/\/www.thebirthstore.com.au\/cdn\/shop\/files\/made-to-milk-lactation-cookies-9838165.png?v=1762143776"},"aspect_ratio":1.0,"height":1080,"media_type":"image","src":"\/\/www.thebirthstore.com.au\/cdn\/shop\/files\/made-to-milk-lactation-cookies-9838165.png?v=1762143776","width":1080},{"alt":"Made To Milk Lactation Cookies - The Birth Store - Made to Milk","id":29988537925821,"position":17,"preview_image":{"aspect_ratio":1.0,"height":1080,"width":1080,"src":"\/\/www.thebirthstore.com.au\/cdn\/shop\/files\/made-to-milk-lactation-cookies-7512867.png?v=1762143776"},"aspect_ratio":1.0,"height":1080,"media_type":"image","src":"\/\/www.thebirthstore.com.au\/cdn\/shop\/files\/made-to-milk-lactation-cookies-7512867.png?v=1762143776","width":1080},{"alt":"Made To Milk Lactation Cookies - The Birth Store - Made to Milk","id":29988539564221,"position":18,"preview_image":{"aspect_ratio":1.0,"height":1080,"width":1080,"src":"\/\/www.thebirthstore.com.au\/cdn\/shop\/files\/made-to-milk-lactation-cookies-4039882.png?v=1762143777"},"aspect_ratio":1.0,"height":1080,"media_type":"image","src":"\/\/www.thebirthstore.com.au\/cdn\/shop\/files\/made-to-milk-lactation-cookies-4039882.png?v=1762143777","width":1080}],"requires_selling_plan":false,"selling_plan_groups":[],"content":"\u003cp\u003e\u003cspan data-mce-fragment=\"1\"\u003eDeluxe, chunky lactation cookies to nourish and support the breastfeeding mum.\u003c\/span\u003e\u003c\/p\u003e\n\u003cp\u003eAll of our lactation cookies include the essential galactagogue ingredients - flaxseed and brewer's yeast.\u003c\/p\u003e\n\u003cp\u003e1 Box includes 12 x 25g cookies.\u003c\/p\u003e\n\u003cp\u003eEach cookie is individually sealed for maximum freshness! Made to take with you on the go or to keep by your bedside at night without the threat of being spoiled.\u003c\/p\u003e\n\u003cp\u003e\u003cstrong\u003eContains Wheat, Gluten, Milk, Egg, Soy \u0026amp; Sulphites.\u003c\/strong\u003e\u003c\/p\u003e\n\u003cp\u003eShelf life: 6 months from bake date (baked fresh weekly).\u003c\/p\u003e"},"options":[{"name":"Flavour","position":1,"values":["Triple Chocoholic","White Choc \u0026 Macadamia","Milk Choc Chip","Vanilla Cherry Delight","Salted Caramel Fudge"]}],"custom_metafields":{},"metafields":{"badge":"\u003cdiv style='display:none' class='jdgm-prev-badge' data-average-rating='0.00' data-number-of-reviews='0' data-number-of-questions='0'\u003e \u003cspan class='jdgm-prev-badge__stars' data-score='0.00' tabindex='0' aria-label='0.00 stars' role='button'\u003e \u003cspan class='jdgm-star jdgm--off'\u003e\u003c\/span\u003e\u003cspan class='jdgm-star jdgm--off'\u003e\u003c\/span\u003e\u003cspan class='jdgm-star jdgm--off'\u003e\u003c\/span\u003e\u003cspan class='jdgm-star jdgm--off'\u003e\u003c\/span\u003e\u003cspan class='jdgm-star jdgm--off'\u003e\u003c\/span\u003e \u003c\/span\u003e \u003cspan class='jdgm-prev-badge__text'\u003e No reviews \u003c\/span\u003e \u003c\/div\u003e","widget":"\u003cdiv class='jdgm-rev-widg' data-updated-at='2025-06-13T16:13:40Z' data-average-rating='0.00' data-number-of-reviews='0' data-number-of-questions='0'\u003e \u003cstyle class='jdgm-temp-hiding-style'\u003e.jdgm-rev-widg{ display: none }\u003c\/style\u003e \u003cdiv class='jdgm-rev-widg__header'\u003e \u003ch2 class='jdgm-rev-widg__title'\u003eCustomer Reviews\u003c\/h2\u003e \u003cdiv class='jdgm-rev-widg__summary'\u003e \u003cdiv class='jdgm-rev-widg__summary-stars' aria-label='Average rating is 0.00 stars' role='img'\u003e \u003cspan class='jdgm-star jdgm--off'\u003e\u003c\/span\u003e\u003cspan class='jdgm-star jdgm--off'\u003e\u003c\/span\u003e\u003cspan class='jdgm-star jdgm--off'\u003e\u003c\/span\u003e\u003cspan class='jdgm-star jdgm--off'\u003e\u003c\/span\u003e\u003cspan class='jdgm-star jdgm--off'\u003e\u003c\/span\u003e \u003c\/div\u003e \u003cdiv class='jdgm-rev-widg__summary-text'\u003eBe the first to write a review\u003c\/div\u003e \u003c\/div\u003e \u003ca style='display: none' href='#' class='jdgm-write-rev-link' role='button'\u003eWrite a review\u003c\/a\u003e \u003cdiv class='jdgm-histogram jdgm-temp-hidden'\u003e \u003cdiv class='jdgm-histogram__row' data-rating='5' data-frequency='0' data-percentage='0'\u003e \u003cdiv class='jdgm-histogram__star' role='button' aria-label=\"0% (0) reviews with 5 star rating\" tabindex='0' \u003e\u003cspan class='jdgm-star jdgm--on'\u003e\u003c\/span\u003e\u003cspan class='jdgm-star jdgm--on'\u003e\u003c\/span\u003e\u003cspan class='jdgm-star jdgm--on'\u003e\u003c\/span\u003e\u003cspan class='jdgm-star jdgm--on'\u003e\u003c\/span\u003e\u003cspan class='jdgm-star jdgm--on'\u003e\u003c\/span\u003e\u003c\/div\u003e \u003cdiv class='jdgm-histogram__bar'\u003e \u003cdiv class='jdgm-histogram__bar-content' style='width: 0%;'\u003e \u003c\/div\u003e \u003c\/div\u003e \u003cdiv class='jdgm-histogram__percentage'\u003e0%\u003c\/div\u003e \u003cdiv class='jdgm-histogram__frequency'\u003e(0)\u003c\/div\u003e \u003c\/div\u003e \u003cdiv class='jdgm-histogram__row' data-rating='4' data-frequency='0' data-percentage='0'\u003e \u003cdiv class='jdgm-histogram__star' role='button' aria-label=\"0% (0) reviews with 4 star rating\" tabindex='0' \u003e\u003cspan class='jdgm-star jdgm--on'\u003e\u003c\/span\u003e\u003cspan class='jdgm-star jdgm--on'\u003e\u003c\/span\u003e\u003cspan class='jdgm-star jdgm--on'\u003e\u003c\/span\u003e\u003cspan class='jdgm-star jdgm--on'\u003e\u003c\/span\u003e\u003cspan class='jdgm-star jdgm--off'\u003e\u003c\/span\u003e\u003c\/div\u003e \u003cdiv class='jdgm-histogram__bar'\u003e \u003cdiv class='jdgm-histogram__bar-content' style='width: 0%;'\u003e \u003c\/div\u003e \u003c\/div\u003e \u003cdiv class='jdgm-histogram__percentage'\u003e0%\u003c\/div\u003e \u003cdiv class='jdgm-histogram__frequency'\u003e(0)\u003c\/div\u003e \u003c\/div\u003e \u003cdiv class='jdgm-histogram__row' data-rating='3' data-frequency='0' data-percentage='0'\u003e \u003cdiv class='jdgm-histogram__star' role='button' aria-label=\"0% (0) reviews with 3 star rating\" tabindex='0' \u003e\u003cspan class='jdgm-star jdgm--on'\u003e\u003c\/span\u003e\u003cspan class='jdgm-star jdgm--on'\u003e\u003c\/span\u003e\u003cspan class='jdgm-star jdgm--on'\u003e\u003c\/span\u003e\u003cspan class='jdgm-star jdgm--off'\u003e\u003c\/span\u003e\u003cspan class='jdgm-star jdgm--off'\u003e\u003c\/span\u003e\u003c\/div\u003e \u003cdiv class='jdgm-histogram__bar'\u003e \u003cdiv class='jdgm-histogram__bar-content' style='width: 0%;'\u003e \u003c\/div\u003e \u003c\/div\u003e \u003cdiv class='jdgm-histogram__percentage'\u003e0%\u003c\/div\u003e \u003cdiv class='jdgm-histogram__frequency'\u003e(0)\u003c\/div\u003e \u003c\/div\u003e \u003cdiv class='jdgm-histogram__row' data-rating='2' data-frequency='0' data-percentage='0'\u003e \u003cdiv class='jdgm-histogram__star' role='button' aria-label=\"0% (0) reviews with 2 star rating\" tabindex='0' \u003e\u003cspan class='jdgm-star jdgm--on'\u003e\u003c\/span\u003e\u003cspan class='jdgm-star jdgm--on'\u003e\u003c\/span\u003e\u003cspan class='jdgm-star jdgm--off'\u003e\u003c\/span\u003e\u003cspan class='jdgm-star jdgm--off'\u003e\u003c\/span\u003e\u003cspan class='jdgm-star jdgm--off'\u003e\u003c\/span\u003e\u003c\/div\u003e \u003cdiv class='jdgm-histogram__bar'\u003e \u003cdiv class='jdgm-histogram__bar-content' style='width: 0%;'\u003e \u003c\/div\u003e \u003c\/div\u003e \u003cdiv class='jdgm-histogram__percentage'\u003e0%\u003c\/div\u003e \u003cdiv class='jdgm-histogram__frequency'\u003e(0)\u003c\/div\u003e \u003c\/div\u003e \u003cdiv class='jdgm-histogram__row' data-rating='1' data-frequency='0' data-percentage='0'\u003e \u003cdiv class='jdgm-histogram__star' role='button' aria-label=\"0% (0) reviews with 1 star rating\" tabindex='0' \u003e\u003cspan class='jdgm-star jdgm--on'\u003e\u003c\/span\u003e\u003cspan class='jdgm-star jdgm--off'\u003e\u003c\/span\u003e\u003cspan class='jdgm-star jdgm--off'\u003e\u003c\/span\u003e\u003cspan class='jdgm-star jdgm--off'\u003e\u003c\/span\u003e\u003cspan class='jdgm-star jdgm--off'\u003e\u003c\/span\u003e\u003c\/div\u003e \u003cdiv class='jdgm-histogram__bar'\u003e \u003cdiv class='jdgm-histogram__bar-content' style='width: 0%;'\u003e \u003c\/div\u003e \u003c\/div\u003e \u003cdiv class='jdgm-histogram__percentage'\u003e0%\u003c\/div\u003e \u003cdiv class='jdgm-histogram__frequency'\u003e(0)\u003c\/div\u003e \u003c\/div\u003e \u003cdiv class='jdgm-histogram__row jdgm-histogram__clear-filter' data-rating=null tabindex='0'\u003e\u003c\/div\u003e \u003c\/div\u003e \u003cdiv class='jdgm-rev-widg__sort-wrapper'\u003e\u003c\/div\u003e \u003c\/div\u003e \u003cdiv class='jdgm-rev-widg__body'\u003e \u003cdiv class='jdgm-rev-widg__reviews'\u003e\u003c\/div\u003e \u003cdiv class='jdgm-paginate' data-per-page='10' data-url='https:\/\/api.judge.me\/reviews\/reviews_for_widget' style=\"display: none;\"\u003e\u003c\/div\u003e \u003c\/div\u003e \u003cdiv class='jdgm-rev-widg__paginate-spinner-wrapper'\u003e \u003cdiv class='jdgm-spinner'\u003e\u003c\/div\u003e \u003c\/div\u003e \u003c\/div\u003e"},"collections":[{"id":281356533949,"handle":"baby-shower-gifts","title":"Baby Shower Gifts - Mum","updated_at":"2025-12-28T20:10:01+08:00","body_html":"\u003cp\u003eLooking for a unique baby shower gift? Or an all-in-one bundle pack to suit all your needs? We've got just the thing!\u003c\/p\u003e","published_at":"2021-12-06T13:43:56+08:00","sort_order":"best-selling","template_suffix":"baby-shower-gifts","disjunctive":true,"rules":[{"column":"tag","relation":"equals","condition":"Baby Shower Gifts - Mum"},{"column":"tag","relation":"equals","condition":"Gift Card"}],"published_scope":"global","image":{"created_at":"2024-05-06T11:59:28+08:00","alt":"Baby Shower Gifts - The Birth Store","width":1200,"height":1800,"src":"\/\/www.thebirthstore.com.au\/cdn\/shop\/collections\/baby-shower-gifts-401770.jpg?v=1761791272"}},{"id":281712427197,"handle":"breastfeeding","title":"Breastfeeding","updated_at":"2025-12-28T20:10:01+08:00","body_html":"","published_at":"2021-12-20T14:19:33+08:00","sort_order":"best-selling","template_suffix":"breastfeeding-collection","disjunctive":false,"rules":[{"column":"tag","relation":"equals","condition":"Breastfeeding"}],"published_scope":"global","image":{"created_at":"2024-05-06T11:59:34+08:00","alt":"Breastfeeding - The Birth Store","width":620,"height":635,"src":"\/\/www.thebirthstore.com.au\/cdn\/shop\/collections\/breastfeeding-793872.jpg?v=1714967974"}},{"id":261657460925,"handle":"buy","title":"Buy","updated_at":"2025-12-28T20:10:01+08:00","body_html":"\u003cp\u003eBrowse all of our pregnancy, labour \u0026amp; birth, postpartum and baby essentials here.\u003cbr\u003e\u003c\/p\u003e\n\u003cp\u003e\u003cspan\u003eYou can even buy now and pay later with Afterpay!\u003c\/span\u003e\u003c\/p\u003e","published_at":"2021-03-10T12:05:31+08:00","sort_order":"best-selling","template_suffix":"shop-all-collection","disjunctive":false,"rules":[{"column":"title","relation":"not_contains","condition":"Hire"}],"published_scope":"global","image":{"created_at":"2024-05-06T11:59:42+08:00","alt":"Buy - The Birth Store","width":2048,"height":2048,"src":"\/\/www.thebirthstore.com.au\/cdn\/shop\/collections\/buy-964856.jpg?v=1714967982"}},{"id":292919476413,"handle":"lactation-products","title":"Lactation Products","updated_at":"2025-12-28T20:10:01+08:00","body_html":"","published_at":"2023-03-22T12:22:41+08:00","sort_order":"best-selling","template_suffix":"lactation-products-collec","disjunctive":false,"rules":[{"column":"tag","relation":"equals","condition":"Lactation Products"}],"published_scope":"global","image":{"created_at":"2024-05-06T12:00:19+08:00","alt":"Lactation Products - The Birth Store","width":1034,"height":922,"src":"\/\/www.thebirthstore.com.au\/cdn\/shop\/collections\/lactation-products-752907.jpg?v=1714968019"}},{"id":261658083517,"handle":"post-partum","title":"Postpartum","updated_at":"2025-12-28T20:10:01+08:00","body_html":"\u003cp\u003eShop your postpartum and hospital bag essentials below. Looking for something we don't currently stock? Please reach out and let us know.\u003cbr\u003e\u003c\/p\u003e\n\u003cp\u003e\u003cspan\u003eYou can even buy now and pay later with Afterpay!\u003c\/span\u003e\u003c\/p\u003e","published_at":"2021-03-10T12:33:47+08:00","sort_order":"best-selling","template_suffix":"postpartum-collection","disjunctive":false,"rules":[{"column":"tag","relation":"equals","condition":"Post-Partum"}],"published_scope":"global","image":{"created_at":"2024-05-06T12:00:36+08:00","alt":"Postpartum - The Birth Store","width":611,"height":702,"src":"\/\/www.thebirthstore.com.au\/cdn\/shop\/collections\/postpartum-150119.jpg?v=1714968037"}},{"id":291456483517,"handle":"shop-all","title":"Shop All - Mum","updated_at":"2025-12-28T20:10:01+08:00","body_html":"","published_at":"2022-12-23T22:04:39+08:00","sort_order":"best-selling","template_suffix":"shop-all-collection","disjunctive":false,"rules":[{"column":"variant_price","relation":"greater_than","condition":"1"},{"column":"title","relation":"not_contains","condition":"Batteries"},{"column":"tag","relation":"equals","condition":"Mum"}],"published_scope":"global","image":{"created_at":"2024-05-06T12:00:54+08:00","alt":"Shop All - The Birth Store","width":1365,"height":2048,"src":"\/\/www.thebirthstore.com.au\/cdn\/shop\/collections\/shop-all-693176.jpg?v=1714968055"}},{"id":310045933757,"handle":"shop-all-sale","title":"Shop All Sale","updated_at":"2025-12-28T20:10:01+08:00","body_html":"","published_at":"2024-11-12T13:22:43+08:00","sort_order":"alpha-asc","template_suffix":"","disjunctive":true,"rules":[{"column":"tag","relation":"equals","condition":"Bundles"},{"column":"vendor","relation":"equals","condition":"Franjos Kitchen"},{"column":"vendor","relation":"equals","condition":"Adored Illustrations"},{"column":"vendor","relation":"equals","condition":"Amazing Oils"},{"column":"vendor","relation":"equals","condition":"Ice Ice Booby"},{"column":"vendor","relation":"equals","condition":"Made to Milk"},{"column":"vendor","relation":"equals","condition":"Milky Goodness"},{"column":"vendor","relation":"equals","condition":"Seasons of Mama"},{"column":"vendor","relation":"equals","condition":"Silverette"},{"column":"vendor","relation":"equals","condition":"Snuggle Hunny"},{"column":"vendor","relation":"equals","condition":"Yung Bod"},{"column":"vendor","relation":"equals","condition":"Bare Love"},{"column":"vendor","relation":"equals","condition":"Haakaa"},{"column":"vendor","relation":"equals","condition":"Mere Botanicals"},{"column":"vendor","relation":"equals","condition":"The Birth Store Hire"},{"column":"vendor","relation":"equals","condition":"The Birth Store"}],"published_scope":"global","image":{"created_at":"2024-11-13T10:58:16+08:00","alt":"Shop All Sale - The Birth Store","width":2048,"height":1365,"src":"\/\/www.thebirthstore.com.au\/cdn\/shop\/collections\/shop-all-sale-297361.jpg?v=1731466697"}}]}
[{"alt":"Lactation Cookies - Multiple Flavours - The Birth Store-Made to Milk","id":27007592399037,"position":1,"preview_image":{"aspect_ratio":1.0,"height":1080,"width":1080,"src":"\/\/www.thebirthstore.com.au\/cdn\/shop\/files\/lactation-cookies-multiple-flavours-737939.jpg?v=1714967993"},"aspect_ratio":1.0,"height":1080,"media_type":"image","src":"\/\/www.thebirthstore.com.au\/cdn\/shop\/files\/lactation-cookies-multiple-flavours-737939.jpg?v=1714967993","width":1080},{"alt":"Lactation Cookies - Multiple Flavours - The Birth Store-Made to Milk","id":27007592431805,"position":2,"preview_image":{"aspect_ratio":1.0,"height":540,"width":540,"src":"\/\/www.thebirthstore.com.au\/cdn\/shop\/files\/lactation-cookies-multiple-flavours-197168.jpg?v=1714967993"},"aspect_ratio":1.0,"height":540,"media_type":"image","src":"\/\/www.thebirthstore.com.au\/cdn\/shop\/files\/lactation-cookies-multiple-flavours-197168.jpg?v=1714967993","width":540},{"alt":"Lactation Cookies - Multiple Flavours - The Birth Store-Made to Milk","id":27007592464573,"position":3,"preview_image":{"aspect_ratio":1.0,"height":540,"width":540,"src":"\/\/www.thebirthstore.com.au\/cdn\/shop\/files\/lactation-cookies-multiple-flavours-828638.jpg?v=1714967993"},"aspect_ratio":1.0,"height":540,"media_type":"image","src":"\/\/www.thebirthstore.com.au\/cdn\/shop\/files\/lactation-cookies-multiple-flavours-828638.jpg?v=1714967993","width":540},{"alt":"Lactation Cookies - Multiple Flavours - The Birth Store-Made to Milk","id":27007592497341,"position":4,"preview_image":{"aspect_ratio":1.0,"height":540,"width":540,"src":"\/\/www.thebirthstore.com.au\/cdn\/shop\/files\/lactation-cookies-multiple-flavours-272210.jpg?v=1714967993"},"aspect_ratio":1.0,"height":540,"media_type":"image","src":"\/\/www.thebirthstore.com.au\/cdn\/shop\/files\/lactation-cookies-multiple-flavours-272210.jpg?v=1714967993","width":540},{"alt":"Lactation Cookies - Multiple Flavours - The Birth Store-Made to Milk","id":27007592530109,"position":5,"preview_image":{"aspect_ratio":1.0,"height":540,"width":540,"src":"\/\/www.thebirthstore.com.au\/cdn\/shop\/files\/lactation-cookies-multiple-flavours-127933.jpg?v=1714967993"},"aspect_ratio":1.0,"height":540,"media_type":"image","src":"\/\/www.thebirthstore.com.au\/cdn\/shop\/files\/lactation-cookies-multiple-flavours-127933.jpg?v=1714967993","width":540},{"alt":"Lactation Cookies - Multiple Flavours - The Birth Store-Made to Milk","id":27007592562877,"position":6,"preview_image":{"aspect_ratio":1.0,"height":540,"width":540,"src":"\/\/www.thebirthstore.com.au\/cdn\/shop\/files\/lactation-cookies-multiple-flavours-827485.jpg?v=1714967993"},"aspect_ratio":1.0,"height":540,"media_type":"image","src":"\/\/www.thebirthstore.com.au\/cdn\/shop\/files\/lactation-cookies-multiple-flavours-827485.jpg?v=1714967993","width":540},{"alt":"Lactation Cookies - Multiple Flavours - The Birth Store-Made to Milk","id":27007592595645,"position":7,"preview_image":{"aspect_ratio":1.0,"height":540,"width":540,"src":"\/\/www.thebirthstore.com.au\/cdn\/shop\/files\/lactation-cookies-multiple-flavours-586437.jpg?v=1714967993"},"aspect_ratio":1.0,"height":540,"media_type":"image","src":"\/\/www.thebirthstore.com.au\/cdn\/shop\/files\/lactation-cookies-multiple-flavours-586437.jpg?v=1714967993","width":540},{"alt":"Lactation Cookies - Multiple Flavours - The Birth Store-Made to Milk","id":27007592628413,"position":8,"preview_image":{"aspect_ratio":1.0,"height":540,"width":540,"src":"\/\/www.thebirthstore.com.au\/cdn\/shop\/files\/lactation-cookies-multiple-flavours-447226.jpg?v=1714967993"},"aspect_ratio":1.0,"height":540,"media_type":"image","src":"\/\/www.thebirthstore.com.au\/cdn\/shop\/files\/lactation-cookies-multiple-flavours-447226.jpg?v=1714967993","width":540},{"alt":"Lactation Cookies - Multiple Flavours - The Birth Store-Made to Milk","id":27007592661181,"position":9,"preview_image":{"aspect_ratio":1.0,"height":540,"width":540,"src":"\/\/www.thebirthstore.com.au\/cdn\/shop\/files\/lactation-cookies-multiple-flavours-264823.jpg?v=1714967993"},"aspect_ratio":1.0,"height":540,"media_type":"image","src":"\/\/www.thebirthstore.com.au\/cdn\/shop\/files\/lactation-cookies-multiple-flavours-264823.jpg?v=1714967993","width":540},{"alt":"Lactation Cookies - Multiple Flavours - The Birth Store-Made to Milk","id":27007592693949,"position":10,"preview_image":{"aspect_ratio":0.667,"height":810,"width":540,"src":"\/\/www.thebirthstore.com.au\/cdn\/shop\/files\/lactation-cookies-multiple-flavours-899855.jpg?v=1714967993"},"aspect_ratio":0.667,"height":810,"media_type":"image","src":"\/\/www.thebirthstore.com.au\/cdn\/shop\/files\/lactation-cookies-multiple-flavours-899855.jpg?v=1714967993","width":540},{"alt":"Lactation Cookies - Multiple Flavours - The Birth Store - Made to Milk","id":27844281893053,"position":11,"preview_image":{"aspect_ratio":1.0,"height":540,"width":540,"src":"\/\/www.thebirthstore.com.au\/cdn\/shop\/files\/lactation-cookies-multiple-flavours-344398.webp?v=1730223893"},"aspect_ratio":1.0,"height":540,"media_type":"image","src":"\/\/www.thebirthstore.com.au\/cdn\/shop\/files\/lactation-cookies-multiple-flavours-344398.webp?v=1730223893","width":540},{"alt":"Lactation Cookies - Multiple Flavours - The Birth Store - Made to Milk","id":27844281925821,"position":12,"preview_image":{"aspect_ratio":1.0,"height":540,"width":540,"src":"\/\/www.thebirthstore.com.au\/cdn\/shop\/files\/lactation-cookies-multiple-flavours-651687.webp?v=1730223893"},"aspect_ratio":1.0,"height":540,"media_type":"image","src":"\/\/www.thebirthstore.com.au\/cdn\/shop\/files\/lactation-cookies-multiple-flavours-651687.webp?v=1730223893","width":540},{"alt":"Lactation Cookies - Multiple Flavours - The Birth Store - Made to Milk","id":27844281958589,"position":13,"preview_image":{"aspect_ratio":1.0,"height":540,"width":540,"src":"\/\/www.thebirthstore.com.au\/cdn\/shop\/files\/lactation-cookies-multiple-flavours-400225.webp?v=1730223893"},"aspect_ratio":1.0,"height":540,"media_type":"image","src":"\/\/www.thebirthstore.com.au\/cdn\/shop\/files\/lactation-cookies-multiple-flavours-400225.webp?v=1730223893","width":540},{"alt":"Made To Milk Lactation Cookies - The Birth Store - Made to Milk","id":29988529438909,"position":14,"preview_image":{"aspect_ratio":1.0,"height":1080,"width":1080,"src":"\/\/www.thebirthstore.com.au\/cdn\/shop\/files\/made-to-milk-lactation-cookies-3883399.png?v=1762143775"},"aspect_ratio":1.0,"height":1080,"media_type":"image","src":"\/\/www.thebirthstore.com.au\/cdn\/shop\/files\/made-to-milk-lactation-cookies-3883399.png?v=1762143775","width":1080},{"alt":"Made To Milk Lactation Cookies - The Birth Store - Made to Milk","id":29988533633213,"position":15,"preview_image":{"aspect_ratio":1.0,"height":1080,"width":1080,"src":"\/\/www.thebirthstore.com.au\/cdn\/shop\/files\/made-to-milk-lactation-cookies-9818433.png?v=1762143776"},"aspect_ratio":1.0,"height":1080,"media_type":"image","src":"\/\/www.thebirthstore.com.au\/cdn\/shop\/files\/made-to-milk-lactation-cookies-9818433.png?v=1762143776","width":1080},{"alt":"Made To Milk Lactation Cookies - The Birth Store - Made to Milk","id":29988536385725,"position":16,"preview_image":{"aspect_ratio":1.0,"height":1080,"width":1080,"src":"\/\/www.thebirthstore.com.au\/cdn\/shop\/files\/made-to-milk-lactation-cookies-9838165.png?v=1762143776"},"aspect_ratio":1.0,"height":1080,"media_type":"image","src":"\/\/www.thebirthstore.com.au\/cdn\/shop\/files\/made-to-milk-lactation-cookies-9838165.png?v=1762143776","width":1080},{"alt":"Made To Milk Lactation Cookies - The Birth Store - Made to Milk","id":29988537925821,"position":17,"preview_image":{"aspect_ratio":1.0,"height":1080,"width":1080,"src":"\/\/www.thebirthstore.com.au\/cdn\/shop\/files\/made-to-milk-lactation-cookies-7512867.png?v=1762143776"},"aspect_ratio":1.0,"height":1080,"media_type":"image","src":"\/\/www.thebirthstore.com.au\/cdn\/shop\/files\/made-to-milk-lactation-cookies-7512867.png?v=1762143776","width":1080},{"alt":"Made To Milk Lactation Cookies - The Birth Store - Made to Milk","id":29988539564221,"position":18,"preview_image":{"aspect_ratio":1.0,"height":1080,"width":1080,"src":"\/\/www.thebirthstore.com.au\/cdn\/shop\/files\/made-to-milk-lactation-cookies-4039882.png?v=1762143777"},"aspect_ratio":1.0,"height":1080,"media_type":"image","src":"\/\/www.thebirthstore.com.au\/cdn\/shop\/files\/made-to-milk-lactation-cookies-4039882.png?v=1762143777","width":1080}]
{"item":{"id":7493037195453,"title":"Magnesium Daily Bath Flakes 800g","handle":"magnesium-daily-bath-flakes-800g","description":"\u003cp\u003e\u003cspan data-mce-fragment=\"1\"\u003eSoak away the days stresses and strains with \u003c\/span\u003e\u003cstrong data-mce-fragment=\"1\"\u003epure magnesium bath flakes\u003c\/strong\u003e\u003cspan data-mce-fragment=\"1\"\u003e. Let the day melt away and feel the soft, warm water against your skin. These flakes will be your personalised \u003c\/span\u003e\u003cstrong data-mce-fragment=\"1\"\u003erelaxation experience\u003c\/strong\u003e\u003cspan data-mce-fragment=\"1\"\u003e. Made from pure, magnesium chloride flakes (not magnesium sulfate (epsom salts). (Formerly, Natural Relief Flakes).\u003c\/span\u003e\u003c\/p\u003e\n\u003cp\u003e\u003cspan data-mce-fragment=\"1\"\u003eTaking a warm bath in these amazing magnesium flakes is a highly effective way to relax and unwind after a long day. Magnesium baths have traditionally been used in many ancient therapies around the world.\u003c\/span\u003e\u003c\/p\u003e\n\u003cp\u003eTear open the top of the bag and pour 1\/2 a cup into a regular sized bath or a tablespoon into a foot bath. Reseal bag after use. We recommend using in conjunction with daily use of your magnesium spray, gel or lotion.\u003c\/p\u003e\n\u003cp\u003e♻︎ Amazing Oils products are recyclable in your normal household recycling. They use recyclable plastic to reduce packaging waste. Please recycle your pouch after use.\u003c\/p\u003e\n\u003cp\u003e\u003cspan\u003eSingle Ingredient: Magnesium Chloride Flakes\u003c\/span\u003e\u003c\/p\u003e","published_at":"2023-07-17T13:17:36+08:00","created_at":"2023-07-17T12:22:03+08:00","vendor":"Amazing Oils","type":"","tags":["C-Section Birth Recovery","Hemorrhoids","Mum","Pain Relief","Peri Care","Post-Partum","Pregnancy","Pregnancy Health","Sleep Issues","Vaginal Birth Recovery"],"price":1995,"price_min":1995,"price_max":1995,"available":true,"price_varies":false,"compare_at_price":1995,"compare_at_price_min":1995,"compare_at_price_max":1995,"compare_at_price_varies":false,"variants":[{"id":42924359811261,"title":"Default Title","option1":"Default Title","option2":null,"option3":null,"sku":"","requires_shipping":true,"taxable":false,"featured_image":null,"available":true,"name":"Magnesium Daily Bath Flakes 800g","public_title":null,"options":["Default Title"],"price":1995,"weight":850,"compare_at_price":1995,"inventory_management":"shopify","barcode":"59811261","requires_selling_plan":false,"selling_plan_allocations":[]}],"images":["\/\/www.thebirthstore.com.au\/cdn\/shop\/files\/magnesium-daily-bath-flakes-800g-686024.jpg?v=1714967988","\/\/www.thebirthstore.com.au\/cdn\/shop\/files\/magnesium-daily-bath-flakes-800g-545744.jpg?v=1714967988","\/\/www.thebirthstore.com.au\/cdn\/shop\/files\/magnesium-daily-bath-flakes-800g-489593.jpg?v=1714967989"],"featured_image":"\/\/www.thebirthstore.com.au\/cdn\/shop\/files\/magnesium-daily-bath-flakes-800g-686024.jpg?v=1714967988","options":["Title"],"media":[{"alt":"Magnesium Daily Bath Flakes 800g - The Birth Store-Amazing Oils","id":27007589908669,"position":1,"preview_image":{"aspect_ratio":1.0,"height":1080,"width":1080,"src":"\/\/www.thebirthstore.com.au\/cdn\/shop\/files\/magnesium-daily-bath-flakes-800g-686024.jpg?v=1714967988"},"aspect_ratio":1.0,"height":1080,"media_type":"image","src":"\/\/www.thebirthstore.com.au\/cdn\/shop\/files\/magnesium-daily-bath-flakes-800g-686024.jpg?v=1714967988","width":1080},{"alt":"Magnesium Daily Bath Flakes 800g - The Birth Store-Amazing Oils","id":27007590039741,"position":2,"preview_image":{"aspect_ratio":1.0,"height":800,"width":800,"src":"\/\/www.thebirthstore.com.au\/cdn\/shop\/files\/magnesium-daily-bath-flakes-800g-545744.jpg?v=1714967988"},"aspect_ratio":1.0,"height":800,"media_type":"image","src":"\/\/www.thebirthstore.com.au\/cdn\/shop\/files\/magnesium-daily-bath-flakes-800g-545744.jpg?v=1714967988","width":800},{"alt":"Magnesium Daily Bath Flakes 800g - The Birth Store-Amazing Oils","id":27007590105277,"position":3,"preview_image":{"aspect_ratio":1.0,"height":800,"width":800,"src":"\/\/www.thebirthstore.com.au\/cdn\/shop\/files\/magnesium-daily-bath-flakes-800g-489593.jpg?v=1714967989"},"aspect_ratio":1.0,"height":800,"media_type":"image","src":"\/\/www.thebirthstore.com.au\/cdn\/shop\/files\/magnesium-daily-bath-flakes-800g-489593.jpg?v=1714967989","width":800}],"requires_selling_plan":false,"selling_plan_groups":[],"content":"\u003cp\u003e\u003cspan data-mce-fragment=\"1\"\u003eSoak away the days stresses and strains with \u003c\/span\u003e\u003cstrong data-mce-fragment=\"1\"\u003epure magnesium bath flakes\u003c\/strong\u003e\u003cspan data-mce-fragment=\"1\"\u003e. Let the day melt away and feel the soft, warm water against your skin. These flakes will be your personalised \u003c\/span\u003e\u003cstrong data-mce-fragment=\"1\"\u003erelaxation experience\u003c\/strong\u003e\u003cspan data-mce-fragment=\"1\"\u003e. Made from pure, magnesium chloride flakes (not magnesium sulfate (epsom salts). (Formerly, Natural Relief Flakes).\u003c\/span\u003e\u003c\/p\u003e\n\u003cp\u003e\u003cspan data-mce-fragment=\"1\"\u003eTaking a warm bath in these amazing magnesium flakes is a highly effective way to relax and unwind after a long day. Magnesium baths have traditionally been used in many ancient therapies around the world.\u003c\/span\u003e\u003c\/p\u003e\n\u003cp\u003eTear open the top of the bag and pour 1\/2 a cup into a regular sized bath or a tablespoon into a foot bath. Reseal bag after use. We recommend using in conjunction with daily use of your magnesium spray, gel or lotion.\u003c\/p\u003e\n\u003cp\u003e♻︎ Amazing Oils products are recyclable in your normal household recycling. They use recyclable plastic to reduce packaging waste. Please recycle your pouch after use.\u003c\/p\u003e\n\u003cp\u003e\u003cspan\u003eSingle Ingredient: Magnesium Chloride Flakes\u003c\/span\u003e\u003c\/p\u003e"},"options":[{"name":"Title","position":1,"values":["Default Title"]}],"custom_metafields":{},"metafields":{"badge":"\u003cdiv style='display:none' class='jdgm-prev-badge' data-average-rating='0.00' data-number-of-reviews='0' data-number-of-questions='0'\u003e \u003cspan class='jdgm-prev-badge__stars' data-score='0.00' tabindex='0' aria-label='0.00 stars' role='button'\u003e \u003cspan class='jdgm-star jdgm--off'\u003e\u003c\/span\u003e\u003cspan class='jdgm-star jdgm--off'\u003e\u003c\/span\u003e\u003cspan class='jdgm-star jdgm--off'\u003e\u003c\/span\u003e\u003cspan class='jdgm-star jdgm--off'\u003e\u003c\/span\u003e\u003cspan class='jdgm-star jdgm--off'\u003e\u003c\/span\u003e \u003c\/span\u003e \u003cspan class='jdgm-prev-badge__text'\u003e No reviews \u003c\/span\u003e \u003c\/div\u003e","widget":"\u003cdiv class='jdgm-rev-widg' data-updated-at='2025-06-13T16:12:53Z' data-average-rating='0.00' data-number-of-reviews='0' data-number-of-questions='0'\u003e \u003cstyle class='jdgm-temp-hiding-style'\u003e.jdgm-rev-widg{ display: none }\u003c\/style\u003e \u003cdiv class='jdgm-rev-widg__header'\u003e \u003ch2 class='jdgm-rev-widg__title'\u003eCustomer Reviews\u003c\/h2\u003e \u003cdiv class='jdgm-rev-widg__summary'\u003e \u003cdiv class='jdgm-rev-widg__summary-stars' aria-label='Average rating is 0.00 stars' role='img'\u003e \u003cspan class='jdgm-star jdgm--off'\u003e\u003c\/span\u003e\u003cspan class='jdgm-star jdgm--off'\u003e\u003c\/span\u003e\u003cspan class='jdgm-star jdgm--off'\u003e\u003c\/span\u003e\u003cspan class='jdgm-star jdgm--off'\u003e\u003c\/span\u003e\u003cspan class='jdgm-star jdgm--off'\u003e\u003c\/span\u003e \u003c\/div\u003e \u003cdiv class='jdgm-rev-widg__summary-text'\u003eBe the first to write a review\u003c\/div\u003e \u003c\/div\u003e \u003ca style='display: none' href='#' class='jdgm-write-rev-link' role='button'\u003eWrite a review\u003c\/a\u003e \u003cdiv class='jdgm-histogram jdgm-temp-hidden'\u003e \u003cdiv class='jdgm-histogram__row' data-rating='5' data-frequency='0' data-percentage='0'\u003e \u003cdiv class='jdgm-histogram__star' role='button' aria-label=\"0% (0) reviews with 5 star rating\" tabindex='0' \u003e\u003cspan class='jdgm-star jdgm--on'\u003e\u003c\/span\u003e\u003cspan class='jdgm-star jdgm--on'\u003e\u003c\/span\u003e\u003cspan class='jdgm-star jdgm--on'\u003e\u003c\/span\u003e\u003cspan class='jdgm-star jdgm--on'\u003e\u003c\/span\u003e\u003cspan class='jdgm-star jdgm--on'\u003e\u003c\/span\u003e\u003c\/div\u003e \u003cdiv class='jdgm-histogram__bar'\u003e \u003cdiv class='jdgm-histogram__bar-content' style='width: 0%;'\u003e \u003c\/div\u003e \u003c\/div\u003e \u003cdiv class='jdgm-histogram__percentage'\u003e0%\u003c\/div\u003e \u003cdiv class='jdgm-histogram__frequency'\u003e(0)\u003c\/div\u003e \u003c\/div\u003e \u003cdiv class='jdgm-histogram__row' data-rating='4' data-frequency='0' data-percentage='0'\u003e \u003cdiv class='jdgm-histogram__star' role='button' aria-label=\"0% (0) reviews with 4 star rating\" tabindex='0' \u003e\u003cspan class='jdgm-star jdgm--on'\u003e\u003c\/span\u003e\u003cspan class='jdgm-star jdgm--on'\u003e\u003c\/span\u003e\u003cspan class='jdgm-star jdgm--on'\u003e\u003c\/span\u003e\u003cspan class='jdgm-star jdgm--on'\u003e\u003c\/span\u003e\u003cspan class='jdgm-star jdgm--off'\u003e\u003c\/span\u003e\u003c\/div\u003e \u003cdiv class='jdgm-histogram__bar'\u003e \u003cdiv class='jdgm-histogram__bar-content' style='width: 0%;'\u003e \u003c\/div\u003e \u003c\/div\u003e \u003cdiv class='jdgm-histogram__percentage'\u003e0%\u003c\/div\u003e \u003cdiv class='jdgm-histogram__frequency'\u003e(0)\u003c\/div\u003e \u003c\/div\u003e \u003cdiv class='jdgm-histogram__row' data-rating='3' data-frequency='0' data-percentage='0'\u003e \u003cdiv class='jdgm-histogram__star' role='button' aria-label=\"0% (0) reviews with 3 star rating\" tabindex='0' \u003e\u003cspan class='jdgm-star jdgm--on'\u003e\u003c\/span\u003e\u003cspan class='jdgm-star jdgm--on'\u003e\u003c\/span\u003e\u003cspan class='jdgm-star jdgm--on'\u003e\u003c\/span\u003e\u003cspan class='jdgm-star jdgm--off'\u003e\u003c\/span\u003e\u003cspan class='jdgm-star jdgm--off'\u003e\u003c\/span\u003e\u003c\/div\u003e \u003cdiv class='jdgm-histogram__bar'\u003e \u003cdiv class='jdgm-histogram__bar-content' style='width: 0%;'\u003e \u003c\/div\u003e \u003c\/div\u003e \u003cdiv class='jdgm-histogram__percentage'\u003e0%\u003c\/div\u003e \u003cdiv class='jdgm-histogram__frequency'\u003e(0)\u003c\/div\u003e \u003c\/div\u003e \u003cdiv class='jdgm-histogram__row' data-rating='2' data-frequency='0' data-percentage='0'\u003e \u003cdiv class='jdgm-histogram__star' role='button' aria-label=\"0% (0) reviews with 2 star rating\" tabindex='0' \u003e\u003cspan class='jdgm-star jdgm--on'\u003e\u003c\/span\u003e\u003cspan class='jdgm-star jdgm--on'\u003e\u003c\/span\u003e\u003cspan class='jdgm-star jdgm--off'\u003e\u003c\/span\u003e\u003cspan class='jdgm-star jdgm--off'\u003e\u003c\/span\u003e\u003cspan class='jdgm-star jdgm--off'\u003e\u003c\/span\u003e\u003c\/div\u003e \u003cdiv class='jdgm-histogram__bar'\u003e \u003cdiv class='jdgm-histogram__bar-content' style='width: 0%;'\u003e \u003c\/div\u003e \u003c\/div\u003e \u003cdiv class='jdgm-histogram__percentage'\u003e0%\u003c\/div\u003e \u003cdiv class='jdgm-histogram__frequency'\u003e(0)\u003c\/div\u003e \u003c\/div\u003e \u003cdiv class='jdgm-histogram__row' data-rating='1' data-frequency='0' data-percentage='0'\u003e \u003cdiv class='jdgm-histogram__star' role='button' aria-label=\"0% (0) reviews with 1 star rating\" tabindex='0' \u003e\u003cspan class='jdgm-star jdgm--on'\u003e\u003c\/span\u003e\u003cspan class='jdgm-star jdgm--off'\u003e\u003c\/span\u003e\u003cspan class='jdgm-star jdgm--off'\u003e\u003c\/span\u003e\u003cspan class='jdgm-star jdgm--off'\u003e\u003c\/span\u003e\u003cspan class='jdgm-star jdgm--off'\u003e\u003c\/span\u003e\u003c\/div\u003e \u003cdiv class='jdgm-histogram__bar'\u003e \u003cdiv class='jdgm-histogram__bar-content' style='width: 0%;'\u003e \u003c\/div\u003e \u003c\/div\u003e \u003cdiv class='jdgm-histogram__percentage'\u003e0%\u003c\/div\u003e \u003cdiv class='jdgm-histogram__frequency'\u003e(0)\u003c\/div\u003e \u003c\/div\u003e \u003cdiv class='jdgm-histogram__row jdgm-histogram__clear-filter' data-rating=null tabindex='0'\u003e\u003c\/div\u003e \u003c\/div\u003e \u003cdiv class='jdgm-rev-widg__sort-wrapper'\u003e\u003c\/div\u003e \u003c\/div\u003e \u003cdiv class='jdgm-rev-widg__body'\u003e \u003cdiv class='jdgm-rev-widg__reviews'\u003e\u003c\/div\u003e \u003cdiv class='jdgm-paginate' data-per-page='10' data-url='https:\/\/api.judge.me\/reviews\/reviews_for_widget' style=\"display: none;\"\u003e\u003c\/div\u003e \u003c\/div\u003e \u003cdiv class='jdgm-rev-widg__paginate-spinner-wrapper'\u003e \u003cdiv class='jdgm-spinner'\u003e\u003c\/div\u003e \u003c\/div\u003e \u003c\/div\u003e"},"collections":[{"id":261657460925,"handle":"buy","title":"Buy","updated_at":"2025-12-28T20:10:01+08:00","body_html":"\u003cp\u003eBrowse all of our pregnancy, labour \u0026amp; birth, postpartum and baby essentials here.\u003cbr\u003e\u003c\/p\u003e\n\u003cp\u003e\u003cspan\u003eYou can even buy now and pay later with Afterpay!\u003c\/span\u003e\u003c\/p\u003e","published_at":"2021-03-10T12:05:31+08:00","sort_order":"best-selling","template_suffix":"shop-all-collection","disjunctive":false,"rules":[{"column":"title","relation":"not_contains","condition":"Hire"}],"published_scope":"global","image":{"created_at":"2024-05-06T11:59:42+08:00","alt":"Buy - The Birth Store","width":2048,"height":2048,"src":"\/\/www.thebirthstore.com.au\/cdn\/shop\/collections\/buy-964856.jpg?v=1714967982"}},{"id":281712361661,"handle":"c-section-birth-recovery","title":"C-Section Birth Recovery","updated_at":"2025-12-27T20:11:39+08:00","body_html":"","published_at":"2021-12-20T14:19:01+08:00","sort_order":"best-selling","template_suffix":"swaddles-collection","disjunctive":false,"rules":[{"column":"tag","relation":"equals","condition":"C-Section Birth Recovery"}],"published_scope":"global","image":{"created_at":"2024-05-06T11:59:49+08:00","alt":"C-Section Birth Recovery - The Birth Store","width":1366,"height":2048,"src":"\/\/www.thebirthstore.com.au\/cdn\/shop\/collections\/c-section-birth-recovery-359249.jpg?v=1714967990"}},{"id":281712066749,"handle":"hemorrhoid-care","title":"Haemorrhoid Care","updated_at":"2025-12-28T20:10:01+08:00","body_html":"","published_at":"2021-12-20T14:16:30+08:00","sort_order":"best-selling","template_suffix":"swaddles-collection","disjunctive":false,"rules":[{"column":"tag","relation":"equals","condition":"Hemorrhoids"}],"published_scope":"global","image":{"created_at":"2024-05-06T12:00:00+08:00","alt":"Haemorrhoid Care - The Birth Store","width":763,"height":556,"src":"\/\/www.thebirthstore.com.au\/cdn\/shop\/collections\/haemorrhoid-care-562138.jpg?v=1714968001"}},{"id":281712591037,"handle":"pain-relief","title":"Pain Relief","updated_at":"2025-12-28T20:10:01+08:00","body_html":"","published_at":"2021-12-20T14:22:45+08:00","sort_order":"best-selling","template_suffix":"pain-relief-collection","disjunctive":false,"rules":[{"column":"tag","relation":"equals","condition":"Pain Relief"}],"published_scope":"global","image":{"created_at":"2024-05-06T12:00:27+08:00","alt":"Pain Relief - The Birth Store","width":1365,"height":2048,"src":"\/\/www.thebirthstore.com.au\/cdn\/shop\/collections\/pain-relief-878865.jpg?v=1714968027"}},{"id":295224705213,"handle":"perineal-care","title":"Perineal Care","updated_at":"2025-12-28T20:10:01+08:00","body_html":"","published_at":"2023-11-10T20:43:30+08:00","sort_order":"best-selling","template_suffix":"perineal-care-collection","disjunctive":false,"rules":[{"column":"tag","relation":"equals","condition":"Peri Care"}],"published_scope":"global","image":{"created_at":"2024-05-06T12:00:33+08:00","alt":"Perineal Care - The Birth Store","width":1024,"height":1536,"src":"\/\/www.thebirthstore.com.au\/cdn\/shop\/collections\/perineal-care-657628.jpg?v=1714968034"}},{"id":261658083517,"handle":"post-partum","title":"Postpartum","updated_at":"2025-12-28T20:10:01+08:00","body_html":"\u003cp\u003eShop your postpartum and hospital bag essentials below. Looking for something we don't currently stock? Please reach out and let us know.\u003cbr\u003e\u003c\/p\u003e\n\u003cp\u003e\u003cspan\u003eYou can even buy now and pay later with Afterpay!\u003c\/span\u003e\u003c\/p\u003e","published_at":"2021-03-10T12:33:47+08:00","sort_order":"best-selling","template_suffix":"postpartum-collection","disjunctive":false,"rules":[{"column":"tag","relation":"equals","condition":"Post-Partum"}],"published_scope":"global","image":{"created_at":"2024-05-06T12:00:36+08:00","alt":"Postpartum - The Birth Store","width":611,"height":702,"src":"\/\/www.thebirthstore.com.au\/cdn\/shop\/collections\/postpartum-150119.jpg?v=1714968037"}},{"id":261658149053,"handle":"pregnancy-and-maternity-products","title":"Pregnancy","updated_at":"2025-12-28T20:10:01+08:00","body_html":"\u003cp\u003eShop your pregnancy essentials below. Looking for something we don't currently stock? Please reach out and let us know.\u003cbr\u003e\u003c\/p\u003e\n\u003cp\u003e\u003cspan\u003eYou can even buy now and pay later with Afterpay!\u003c\/span\u003e\u003c\/p\u003e","published_at":"2021-03-10T12:34:22+08:00","sort_order":"best-selling","template_suffix":"pregnancy-collection","disjunctive":false,"rules":[{"column":"tag","relation":"equals","condition":"Pregnancy"}],"published_scope":"global","image":{"created_at":"2024-05-06T12:00:40+08:00","alt":"Pregnancy - The Birth Store","width":1024,"height":1536,"src":"\/\/www.thebirthstore.com.au\/cdn\/shop\/collections\/pregnancy-899677.jpg?v=1714968040"}},{"id":295224901821,"handle":"pregnancy-health","title":"Pregnancy Health","updated_at":"2025-12-27T20:11:40+08:00","body_html":"","published_at":"2023-11-10T20:48:51+08:00","sort_order":"best-selling","template_suffix":"swaddles-collection","disjunctive":false,"rules":[{"column":"tag","relation":"equals","condition":"Pregnancy Health"}],"published_scope":"global","image":{"created_at":"2024-05-06T12:00:41+08:00","alt":"Pregnancy Health - The Birth Store","width":608,"height":410,"src":"\/\/www.thebirthstore.com.au\/cdn\/shop\/collections\/pregnancy-health-343983.jpg?v=1714968042"}},{"id":326523846845,"handle":"pregnancy-health-1","updated_at":"2025-12-27T20:11:40+08:00","published_at":"2025-10-30T10:44:54+08:00","sort_order":"best-selling","template_suffix":"","published_scope":"global","title":"Pregnancy Health","body_html":"","image":{"created_at":"2025-11-20T21:33:56+08:00","alt":"Pregnancy Health - The Birth Store","width":522,"height":525,"src":"\/\/www.thebirthstore.com.au\/cdn\/shop\/collections\/pregnancy-health-1617860.jpg?v=1763645636"}},{"id":291456483517,"handle":"shop-all","title":"Shop All - Mum","updated_at":"2025-12-28T20:10:01+08:00","body_html":"","published_at":"2022-12-23T22:04:39+08:00","sort_order":"best-selling","template_suffix":"shop-all-collection","disjunctive":false,"rules":[{"column":"variant_price","relation":"greater_than","condition":"1"},{"column":"title","relation":"not_contains","condition":"Batteries"},{"column":"tag","relation":"equals","condition":"Mum"}],"published_scope":"global","image":{"created_at":"2024-05-06T12:00:54+08:00","alt":"Shop All - The Birth Store","width":1365,"height":2048,"src":"\/\/www.thebirthstore.com.au\/cdn\/shop\/collections\/shop-all-693176.jpg?v=1714968055"}},{"id":310045933757,"handle":"shop-all-sale","title":"Shop All Sale","updated_at":"2025-12-28T20:10:01+08:00","body_html":"","published_at":"2024-11-12T13:22:43+08:00","sort_order":"alpha-asc","template_suffix":"","disjunctive":true,"rules":[{"column":"tag","relation":"equals","condition":"Bundles"},{"column":"vendor","relation":"equals","condition":"Franjos Kitchen"},{"column":"vendor","relation":"equals","condition":"Adored Illustrations"},{"column":"vendor","relation":"equals","condition":"Amazing Oils"},{"column":"vendor","relation":"equals","condition":"Ice Ice Booby"},{"column":"vendor","relation":"equals","condition":"Made to Milk"},{"column":"vendor","relation":"equals","condition":"Milky Goodness"},{"column":"vendor","relation":"equals","condition":"Seasons of Mama"},{"column":"vendor","relation":"equals","condition":"Silverette"},{"column":"vendor","relation":"equals","condition":"Snuggle Hunny"},{"column":"vendor","relation":"equals","condition":"Yung Bod"},{"column":"vendor","relation":"equals","condition":"Bare Love"},{"column":"vendor","relation":"equals","condition":"Haakaa"},{"column":"vendor","relation":"equals","condition":"Mere Botanicals"},{"column":"vendor","relation":"equals","condition":"The Birth Store Hire"},{"column":"vendor","relation":"equals","condition":"The Birth Store"}],"published_scope":"global","image":{"created_at":"2024-11-13T10:58:16+08:00","alt":"Shop All Sale - The Birth Store","width":2048,"height":1365,"src":"\/\/www.thebirthstore.com.au\/cdn\/shop\/collections\/shop-all-sale-297361.jpg?v=1731466697"}},{"id":295228211389,"handle":"sleep-issues","title":"Sleep Issues","updated_at":"2025-12-24T20:09:23+08:00","body_html":"","published_at":"2023-11-10T23:27:56+08:00","sort_order":"best-selling","template_suffix":"swaddles-collection","disjunctive":false,"rules":[{"column":"tag","relation":"equals","condition":"Sleep Issues"}],"published_scope":"global","image":{"created_at":"2024-05-06T12:00:57+08:00","alt":"Sleep Issues - The Birth Store","width":869,"height":868,"src":"\/\/www.thebirthstore.com.au\/cdn\/shop\/collections\/sleep-issues-572906.jpg?v=1714968058"}},{"id":281712197821,"handle":"vaginal-birth-recovery","title":"Vaginal Birth Recovery","updated_at":"2025-12-28T20:10:01+08:00","body_html":"","published_at":"2021-12-20T14:18:23+08:00","sort_order":"best-selling","template_suffix":"swaddles-collection","disjunctive":true,"rules":[{"column":"tag","relation":"equals","condition":"Vaginal Birth Recovery"},{"column":"tag","relation":"equals","condition":"Vaginal Birth Recover"}],"published_scope":"global","image":{"created_at":"2024-05-06T12:01:03+08:00","alt":"Vaginal Birth Recovery - The Birth Store","width":2048,"height":2048,"src":"\/\/www.thebirthstore.com.au\/cdn\/shop\/collections\/vaginal-birth-recovery-449034.jpg?v=1714968063"}}]}
[{"alt":"Magnesium Daily Bath Flakes 800g - The Birth Store-Amazing Oils","id":27007589908669,"position":1,"preview_image":{"aspect_ratio":1.0,"height":1080,"width":1080,"src":"\/\/www.thebirthstore.com.au\/cdn\/shop\/files\/magnesium-daily-bath-flakes-800g-686024.jpg?v=1714967988"},"aspect_ratio":1.0,"height":1080,"media_type":"image","src":"\/\/www.thebirthstore.com.au\/cdn\/shop\/files\/magnesium-daily-bath-flakes-800g-686024.jpg?v=1714967988","width":1080},{"alt":"Magnesium Daily Bath Flakes 800g - The Birth Store-Amazing Oils","id":27007590039741,"position":2,"preview_image":{"aspect_ratio":1.0,"height":800,"width":800,"src":"\/\/www.thebirthstore.com.au\/cdn\/shop\/files\/magnesium-daily-bath-flakes-800g-545744.jpg?v=1714967988"},"aspect_ratio":1.0,"height":800,"media_type":"image","src":"\/\/www.thebirthstore.com.au\/cdn\/shop\/files\/magnesium-daily-bath-flakes-800g-545744.jpg?v=1714967988","width":800},{"alt":"Magnesium Daily Bath Flakes 800g - The Birth Store-Amazing Oils","id":27007590105277,"position":3,"preview_image":{"aspect_ratio":1.0,"height":800,"width":800,"src":"\/\/www.thebirthstore.com.au\/cdn\/shop\/files\/magnesium-daily-bath-flakes-800g-489593.jpg?v=1714967989"},"aspect_ratio":1.0,"height":800,"media_type":"image","src":"\/\/www.thebirthstore.com.au\/cdn\/shop\/files\/magnesium-daily-bath-flakes-800g-489593.jpg?v=1714967989","width":800}]
{"item":{"id":7634629558461,"title":"Magnesium Daily Gel Roll-On 60ml","handle":"copy-of-magnesium-daily-spray-125ml","description":"\u003cdiv\u003eA simple, effective way to raise your magnesium levels.\u003c\/div\u003e\n\u003cdiv\u003e\n\u003cbr\u003eContains our 100% pure, organically sourced Magnesium Oil, from the Salt Lakes of\u003cspan\u003e \u003c\/span\u003e\u003cstrong\u003eAustralia.\u003c\/strong\u003e\n\u003c\/div\u003e\n\u003cdiv\u003e \u003c\/div\u003e\n\u003cdiv\u003eCombined with Xanthan Gum as a thickener.\u003c\/div\u003e\n\u003cdiv\u003e\u003c\/div\u003e\n\u003cdiv\u003e\n\u003cdiv class=\"shogun-accordion shogun-accordion-active\"\u003e\n\u003cdiv class=\"shogun-accordion-body shogun-accordion-active\"\u003e\n\u003cdiv class=\"shg-c\" id=\"s-511922e9-147f-4103-91c3-ab11493176d9\"\u003e\n\u003cdiv class=\"shg-rich-text shg-theme-text-content\"\u003e\n\u003cp\u003eAdding topical magnesium into your daily routine is a great way (efficacious \u0026amp; bio-available) to gain the benefits of magnesium and assist in preventing magnesium deficiency.\u003c\/p\u003e\n\u003cp\u003e\u003cstrong\u003eAustralian - Organically Sourced - Natural Magnesium\u003c\/strong\u003e\u003c\/p\u003e\n\u003cp\u003e\u003cbr\u003e\u003c\/p\u003e\n\u003c\/div\u003e\n\u003c\/div\u003e\n\u003c\/div\u003e\n\u003c\/div\u003e\n\u003cdiv class=\"shogun-accordion\"\u003e\n\u003cdiv class=\"shogun-accordion-heading\"\u003e\n\u003cdiv class=\"shogun-accordion-header\"\u003e\n\u003ch4 class=\"shogun-accordion-title\"\u003eDirections\u003c\/h4\u003e\n\u003cdiv class=\"shogun-accordion-icon shogun-icon-plus\"\u003e\n\u003cp\u003eUse daily, apply 4-5 rolls to your upper body in the morning to energise, then to lower body in the evening for relaxation (especially where skin is thin for optimal absorption). Rub in well for best results.\u003c\/p\u003e\n\u003cp\u003e*Tip - leave it either on the bathroom bench or next to the bed for easy regular access.\u003c\/p\u003e\n\u003cp\u003e \u003c\/p\u003e\n\u003cdiv id=\"s-51a8beb0-2560-4532-8f84-d8ea47b86c0d\" class=\"shg-c shogun-image-container shg-align-center\"\u003e\u003cimg loading=\"lazy\" decoding=\"async\" class=\"shogun-image\" alt=\"\" height=\"\" width=\"\" src=\"https:\/\/i.shgcdn.com\/eb534747-f73c-4fd5-8c57-aaac354d2e2e\/-\/format\/auto\/-\/preview\/3000x3000\/-\/quality\/lighter\/\"\u003e\u003c\/div\u003e\n\u003cdiv class=\"shg-c\" id=\"s-cd7f15f4-f32b-4758-a6f4-88987731bf14\"\u003e\n\u003cdiv class=\"shg-rich-text shg-theme-text-content\"\u003e\n\u003cp\u003e\u003cspan\u003eDetailed Ingredients List: Organically sourced Magnesium Chloride, Xanthan Gum.\u003c\/span\u003e\u003c\/p\u003e\n\u003cp\u003e \u003c\/p\u003e\n\u003cdiv\u003e\u003cstrong\u003eWhat is the 'oil' in the product?\u003c\/strong\u003e\u003c\/div\u003e\n\u003cdiv\u003eWhile commonly referred to as 'Magnesium Oil' this liquid contains no oil. The Magnesium liquid brine is organically sourced from natural salts lakes in Australian deserts.\u003c\/div\u003e\n\u003cdiv\u003e \u003c\/div\u003e\n\u003cdiv\u003e\u003cstrong\u003eHow long will this product last?\u003c\/strong\u003e\u003c\/div\u003e\n\u003cdiv\u003eThe 60ml bottle will last 1-2 months with daily use.\u003c\/div\u003e\n\u003cdiv\u003e\u003c\/div\u003e\n\u003cdiv\u003e\u003cspan\u003eIf you experience any reactions such as tingling or irritation; apply to damp skin (or over a light moisturiser) for the first week.\u003c\/span\u003e\u003c\/div\u003e\n\u003c\/div\u003e\n\u003c\/div\u003e\n\u003c\/div\u003e\n\u003c\/div\u003e\n\u003c\/div\u003e\n\u003c\/div\u003e\n\u003c\/div\u003e","published_at":"2024-03-16T12:43:35+08:00","created_at":"2024-03-16T12:29:32+08:00","vendor":"Amazing Oils","type":"","tags":["Hospital Bag","Mum","Post-Partum","Pregnancy","Pregnancy Health","Skin Care","Sleep Issues"],"price":1995,"price_min":1995,"price_max":1995,"available":true,"price_varies":false,"compare_at_price":null,"compare_at_price_min":0,"compare_at_price_max":0,"compare_at_price_varies":false,"variants":[{"id":43569977524413,"title":"Default Title","option1":"Default Title","option2":null,"option3":null,"sku":null,"requires_shipping":true,"taxable":false,"featured_image":null,"available":true,"name":"Magnesium Daily Gel Roll-On 60ml","public_title":null,"options":["Default Title"],"price":1995,"weight":92,"compare_at_price":null,"inventory_management":"shopify","barcode":"77524413","requires_selling_plan":false,"selling_plan_allocations":[]}],"images":["\/\/www.thebirthstore.com.au\/cdn\/shop\/files\/magnesium-daily-gel-roll-on-60ml-3836589.png?v=1758829420","\/\/www.thebirthstore.com.au\/cdn\/shop\/files\/magnesium-daily-gel-roll-on-60ml-500422.jpg?v=1758807673"],"featured_image":"\/\/www.thebirthstore.com.au\/cdn\/shop\/files\/magnesium-daily-gel-roll-on-60ml-3836589.png?v=1758829420","options":["Title"],"media":[{"alt":"Magnesium Daily Gel Roll - On 60ml - The Birth Store - Amazing Oils","id":29672216166589,"position":1,"preview_image":{"aspect_ratio":1.0,"height":1080,"width":1080,"src":"\/\/www.thebirthstore.com.au\/cdn\/shop\/files\/magnesium-daily-gel-roll-on-60ml-3836589.png?v=1758829420"},"aspect_ratio":1.0,"height":1080,"media_type":"image","src":"\/\/www.thebirthstore.com.au\/cdn\/shop\/files\/magnesium-daily-gel-roll-on-60ml-3836589.png?v=1758829420","width":1080},{"alt":"Magnesium Daily Gel Roll-On 60ml - The Birth Store-Amazing Oils","id":27007589155005,"position":2,"preview_image":{"aspect_ratio":1.0,"height":720,"width":720,"src":"\/\/www.thebirthstore.com.au\/cdn\/shop\/files\/magnesium-daily-gel-roll-on-60ml-500422.jpg?v=1758807673"},"aspect_ratio":1.0,"height":720,"media_type":"image","src":"\/\/www.thebirthstore.com.au\/cdn\/shop\/files\/magnesium-daily-gel-roll-on-60ml-500422.jpg?v=1758807673","width":720}],"requires_selling_plan":false,"selling_plan_groups":[],"content":"\u003cdiv\u003eA simple, effective way to raise your magnesium levels.\u003c\/div\u003e\n\u003cdiv\u003e\n\u003cbr\u003eContains our 100% pure, organically sourced Magnesium Oil, from the Salt Lakes of\u003cspan\u003e \u003c\/span\u003e\u003cstrong\u003eAustralia.\u003c\/strong\u003e\n\u003c\/div\u003e\n\u003cdiv\u003e \u003c\/div\u003e\n\u003cdiv\u003eCombined with Xanthan Gum as a thickener.\u003c\/div\u003e\n\u003cdiv\u003e\u003c\/div\u003e\n\u003cdiv\u003e\n\u003cdiv class=\"shogun-accordion shogun-accordion-active\"\u003e\n\u003cdiv class=\"shogun-accordion-body shogun-accordion-active\"\u003e\n\u003cdiv class=\"shg-c\" id=\"s-511922e9-147f-4103-91c3-ab11493176d9\"\u003e\n\u003cdiv class=\"shg-rich-text shg-theme-text-content\"\u003e\n\u003cp\u003eAdding topical magnesium into your daily routine is a great way (efficacious \u0026amp; bio-available) to gain the benefits of magnesium and assist in preventing magnesium deficiency.\u003c\/p\u003e\n\u003cp\u003e\u003cstrong\u003eAustralian - Organically Sourced - Natural Magnesium\u003c\/strong\u003e\u003c\/p\u003e\n\u003cp\u003e\u003cbr\u003e\u003c\/p\u003e\n\u003c\/div\u003e\n\u003c\/div\u003e\n\u003c\/div\u003e\n\u003c\/div\u003e\n\u003cdiv class=\"shogun-accordion\"\u003e\n\u003cdiv class=\"shogun-accordion-heading\"\u003e\n\u003cdiv class=\"shogun-accordion-header\"\u003e\n\u003ch4 class=\"shogun-accordion-title\"\u003eDirections\u003c\/h4\u003e\n\u003cdiv class=\"shogun-accordion-icon shogun-icon-plus\"\u003e\n\u003cp\u003eUse daily, apply 4-5 rolls to your upper body in the morning to energise, then to lower body in the evening for relaxation (especially where skin is thin for optimal absorption). Rub in well for best results.\u003c\/p\u003e\n\u003cp\u003e*Tip - leave it either on the bathroom bench or next to the bed for easy regular access.\u003c\/p\u003e\n\u003cp\u003e \u003c\/p\u003e\n\u003cdiv id=\"s-51a8beb0-2560-4532-8f84-d8ea47b86c0d\" class=\"shg-c shogun-image-container shg-align-center\"\u003e\u003cimg loading=\"lazy\" decoding=\"async\" class=\"shogun-image\" alt=\"\" height=\"\" width=\"\" src=\"https:\/\/i.shgcdn.com\/eb534747-f73c-4fd5-8c57-aaac354d2e2e\/-\/format\/auto\/-\/preview\/3000x3000\/-\/quality\/lighter\/\"\u003e\u003c\/div\u003e\n\u003cdiv class=\"shg-c\" id=\"s-cd7f15f4-f32b-4758-a6f4-88987731bf14\"\u003e\n\u003cdiv class=\"shg-rich-text shg-theme-text-content\"\u003e\n\u003cp\u003e\u003cspan\u003eDetailed Ingredients List: Organically sourced Magnesium Chloride, Xanthan Gum.\u003c\/span\u003e\u003c\/p\u003e\n\u003cp\u003e \u003c\/p\u003e\n\u003cdiv\u003e\u003cstrong\u003eWhat is the 'oil' in the product?\u003c\/strong\u003e\u003c\/div\u003e\n\u003cdiv\u003eWhile commonly referred to as 'Magnesium Oil' this liquid contains no oil. The Magnesium liquid brine is organically sourced from natural salts lakes in Australian deserts.\u003c\/div\u003e\n\u003cdiv\u003e \u003c\/div\u003e\n\u003cdiv\u003e\u003cstrong\u003eHow long will this product last?\u003c\/strong\u003e\u003c\/div\u003e\n\u003cdiv\u003eThe 60ml bottle will last 1-2 months with daily use.\u003c\/div\u003e\n\u003cdiv\u003e\u003c\/div\u003e\n\u003cdiv\u003e\u003cspan\u003eIf you experience any reactions such as tingling or irritation; apply to damp skin (or over a light moisturiser) for the first week.\u003c\/span\u003e\u003c\/div\u003e\n\u003c\/div\u003e\n\u003c\/div\u003e\n\u003c\/div\u003e\n\u003c\/div\u003e\n\u003c\/div\u003e\n\u003c\/div\u003e\n\u003c\/div\u003e"},"options":[{"name":"Title","position":1,"values":["Default Title"]}],"custom_metafields":{},"metafields":{"badge":"\u003cdiv style='display:none' class='jdgm-prev-badge' data-average-rating='0.00' data-number-of-reviews='0' data-number-of-questions='0'\u003e \u003cspan class='jdgm-prev-badge__stars' data-score='0.00' tabindex='0' aria-label='0.00 stars' role='button'\u003e \u003cspan class='jdgm-star jdgm--off'\u003e\u003c\/span\u003e\u003cspan class='jdgm-star jdgm--off'\u003e\u003c\/span\u003e\u003cspan class='jdgm-star jdgm--off'\u003e\u003c\/span\u003e\u003cspan class='jdgm-star jdgm--off'\u003e\u003c\/span\u003e\u003cspan class='jdgm-star jdgm--off'\u003e\u003c\/span\u003e \u003c\/span\u003e \u003cspan class='jdgm-prev-badge__text'\u003e No reviews \u003c\/span\u003e \u003c\/div\u003e","widget":"\u003cdiv class='jdgm-rev-widg' data-updated-at='2025-06-13T16:13:40Z' data-average-rating='0.00' data-number-of-reviews='0' data-number-of-questions='0'\u003e \u003cstyle class='jdgm-temp-hiding-style'\u003e.jdgm-rev-widg{ display: none }\u003c\/style\u003e \u003cdiv class='jdgm-rev-widg__header'\u003e \u003ch2 class='jdgm-rev-widg__title'\u003eCustomer Reviews\u003c\/h2\u003e \u003cdiv class='jdgm-rev-widg__summary'\u003e \u003cdiv class='jdgm-rev-widg__summary-stars' aria-label='Average rating is 0.00 stars' role='img'\u003e \u003cspan class='jdgm-star jdgm--off'\u003e\u003c\/span\u003e\u003cspan class='jdgm-star jdgm--off'\u003e\u003c\/span\u003e\u003cspan class='jdgm-star jdgm--off'\u003e\u003c\/span\u003e\u003cspan class='jdgm-star jdgm--off'\u003e\u003c\/span\u003e\u003cspan class='jdgm-star jdgm--off'\u003e\u003c\/span\u003e \u003c\/div\u003e \u003cdiv class='jdgm-rev-widg__summary-text'\u003eBe the first to write a review\u003c\/div\u003e \u003c\/div\u003e \u003ca style='display: none' href='#' class='jdgm-write-rev-link' role='button'\u003eWrite a review\u003c\/a\u003e \u003cdiv class='jdgm-histogram jdgm-temp-hidden'\u003e \u003cdiv class='jdgm-histogram__row' data-rating='5' data-frequency='0' data-percentage='0'\u003e \u003cdiv class='jdgm-histogram__star' role='button' aria-label=\"0% (0) reviews with 5 star rating\" tabindex='0' \u003e\u003cspan class='jdgm-star jdgm--on'\u003e\u003c\/span\u003e\u003cspan class='jdgm-star jdgm--on'\u003e\u003c\/span\u003e\u003cspan class='jdgm-star jdgm--on'\u003e\u003c\/span\u003e\u003cspan class='jdgm-star jdgm--on'\u003e\u003c\/span\u003e\u003cspan class='jdgm-star jdgm--on'\u003e\u003c\/span\u003e\u003c\/div\u003e \u003cdiv class='jdgm-histogram__bar'\u003e \u003cdiv class='jdgm-histogram__bar-content' style='width: 0%;'\u003e \u003c\/div\u003e \u003c\/div\u003e \u003cdiv class='jdgm-histogram__percentage'\u003e0%\u003c\/div\u003e \u003cdiv class='jdgm-histogram__frequency'\u003e(0)\u003c\/div\u003e \u003c\/div\u003e \u003cdiv class='jdgm-histogram__row' data-rating='4' data-frequency='0' data-percentage='0'\u003e \u003cdiv class='jdgm-histogram__star' role='button' aria-label=\"0% (0) reviews with 4 star rating\" tabindex='0' \u003e\u003cspan class='jdgm-star jdgm--on'\u003e\u003c\/span\u003e\u003cspan class='jdgm-star jdgm--on'\u003e\u003c\/span\u003e\u003cspan class='jdgm-star jdgm--on'\u003e\u003c\/span\u003e\u003cspan class='jdgm-star jdgm--on'\u003e\u003c\/span\u003e\u003cspan class='jdgm-star jdgm--off'\u003e\u003c\/span\u003e\u003c\/div\u003e \u003cdiv class='jdgm-histogram__bar'\u003e \u003cdiv class='jdgm-histogram__bar-content' style='width: 0%;'\u003e \u003c\/div\u003e \u003c\/div\u003e \u003cdiv class='jdgm-histogram__percentage'\u003e0%\u003c\/div\u003e \u003cdiv class='jdgm-histogram__frequency'\u003e(0)\u003c\/div\u003e \u003c\/div\u003e \u003cdiv class='jdgm-histogram__row' data-rating='3' data-frequency='0' data-percentage='0'\u003e \u003cdiv class='jdgm-histogram__star' role='button' aria-label=\"0% (0) reviews with 3 star rating\" tabindex='0' \u003e\u003cspan class='jdgm-star jdgm--on'\u003e\u003c\/span\u003e\u003cspan class='jdgm-star jdgm--on'\u003e\u003c\/span\u003e\u003cspan class='jdgm-star jdgm--on'\u003e\u003c\/span\u003e\u003cspan class='jdgm-star jdgm--off'\u003e\u003c\/span\u003e\u003cspan class='jdgm-star jdgm--off'\u003e\u003c\/span\u003e\u003c\/div\u003e \u003cdiv class='jdgm-histogram__bar'\u003e \u003cdiv class='jdgm-histogram__bar-content' style='width: 0%;'\u003e \u003c\/div\u003e \u003c\/div\u003e \u003cdiv class='jdgm-histogram__percentage'\u003e0%\u003c\/div\u003e \u003cdiv class='jdgm-histogram__frequency'\u003e(0)\u003c\/div\u003e \u003c\/div\u003e \u003cdiv class='jdgm-histogram__row' data-rating='2' data-frequency='0' data-percentage='0'\u003e \u003cdiv class='jdgm-histogram__star' role='button' aria-label=\"0% (0) reviews with 2 star rating\" tabindex='0' \u003e\u003cspan class='jdgm-star jdgm--on'\u003e\u003c\/span\u003e\u003cspan class='jdgm-star jdgm--on'\u003e\u003c\/span\u003e\u003cspan class='jdgm-star jdgm--off'\u003e\u003c\/span\u003e\u003cspan class='jdgm-star jdgm--off'\u003e\u003c\/span\u003e\u003cspan class='jdgm-star jdgm--off'\u003e\u003c\/span\u003e\u003c\/div\u003e \u003cdiv class='jdgm-histogram__bar'\u003e \u003cdiv class='jdgm-histogram__bar-content' style='width: 0%;'\u003e \u003c\/div\u003e \u003c\/div\u003e \u003cdiv class='jdgm-histogram__percentage'\u003e0%\u003c\/div\u003e \u003cdiv class='jdgm-histogram__frequency'\u003e(0)\u003c\/div\u003e \u003c\/div\u003e \u003cdiv class='jdgm-histogram__row' data-rating='1' data-frequency='0' data-percentage='0'\u003e \u003cdiv class='jdgm-histogram__star' role='button' aria-label=\"0% (0) reviews with 1 star rating\" tabindex='0' \u003e\u003cspan class='jdgm-star jdgm--on'\u003e\u003c\/span\u003e\u003cspan class='jdgm-star jdgm--off'\u003e\u003c\/span\u003e\u003cspan class='jdgm-star jdgm--off'\u003e\u003c\/span\u003e\u003cspan class='jdgm-star jdgm--off'\u003e\u003c\/span\u003e\u003cspan class='jdgm-star jdgm--off'\u003e\u003c\/span\u003e\u003c\/div\u003e \u003cdiv class='jdgm-histogram__bar'\u003e \u003cdiv class='jdgm-histogram__bar-content' style='width: 0%;'\u003e \u003c\/div\u003e \u003c\/div\u003e \u003cdiv class='jdgm-histogram__percentage'\u003e0%\u003c\/div\u003e \u003cdiv class='jdgm-histogram__frequency'\u003e(0)\u003c\/div\u003e \u003c\/div\u003e \u003cdiv class='jdgm-histogram__row jdgm-histogram__clear-filter' data-rating=null tabindex='0'\u003e\u003c\/div\u003e \u003c\/div\u003e \u003cdiv class='jdgm-rev-widg__sort-wrapper'\u003e\u003c\/div\u003e \u003c\/div\u003e \u003cdiv class='jdgm-rev-widg__body'\u003e \u003cdiv class='jdgm-rev-widg__reviews'\u003e\u003c\/div\u003e \u003cdiv class='jdgm-paginate' data-per-page='10' data-url='https:\/\/api.judge.me\/reviews\/reviews_for_widget' style=\"display: none;\"\u003e\u003c\/div\u003e \u003c\/div\u003e \u003cdiv class='jdgm-rev-widg__paginate-spinner-wrapper'\u003e \u003cdiv class='jdgm-spinner'\u003e\u003c\/div\u003e \u003c\/div\u003e \u003c\/div\u003e"},"collections":[{"id":261657460925,"handle":"buy","title":"Buy","updated_at":"2025-12-28T20:10:01+08:00","body_html":"\u003cp\u003eBrowse all of our pregnancy, labour \u0026amp; birth, postpartum and baby essentials here.\u003cbr\u003e\u003c\/p\u003e\n\u003cp\u003e\u003cspan\u003eYou can even buy now and pay later with Afterpay!\u003c\/span\u003e\u003c\/p\u003e","published_at":"2021-03-10T12:05:31+08:00","sort_order":"best-selling","template_suffix":"shop-all-collection","disjunctive":false,"rules":[{"column":"title","relation":"not_contains","condition":"Hire"}],"published_scope":"global","image":{"created_at":"2024-05-06T11:59:42+08:00","alt":"Buy - The Birth Store","width":2048,"height":2048,"src":"\/\/www.thebirthstore.com.au\/cdn\/shop\/collections\/buy-964856.jpg?v=1714967982"}},{"id":261658083517,"handle":"post-partum","title":"Postpartum","updated_at":"2025-12-28T20:10:01+08:00","body_html":"\u003cp\u003eShop your postpartum and hospital bag essentials below. Looking for something we don't currently stock? Please reach out and let us know.\u003cbr\u003e\u003c\/p\u003e\n\u003cp\u003e\u003cspan\u003eYou can even buy now and pay later with Afterpay!\u003c\/span\u003e\u003c\/p\u003e","published_at":"2021-03-10T12:33:47+08:00","sort_order":"best-selling","template_suffix":"postpartum-collection","disjunctive":false,"rules":[{"column":"tag","relation":"equals","condition":"Post-Partum"}],"published_scope":"global","image":{"created_at":"2024-05-06T12:00:36+08:00","alt":"Postpartum - The Birth Store","width":611,"height":702,"src":"\/\/www.thebirthstore.com.au\/cdn\/shop\/collections\/postpartum-150119.jpg?v=1714968037"}},{"id":261658149053,"handle":"pregnancy-and-maternity-products","title":"Pregnancy","updated_at":"2025-12-28T20:10:01+08:00","body_html":"\u003cp\u003eShop your pregnancy essentials below. Looking for something we don't currently stock? Please reach out and let us know.\u003cbr\u003e\u003c\/p\u003e\n\u003cp\u003e\u003cspan\u003eYou can even buy now and pay later with Afterpay!\u003c\/span\u003e\u003c\/p\u003e","published_at":"2021-03-10T12:34:22+08:00","sort_order":"best-selling","template_suffix":"pregnancy-collection","disjunctive":false,"rules":[{"column":"tag","relation":"equals","condition":"Pregnancy"}],"published_scope":"global","image":{"created_at":"2024-05-06T12:00:40+08:00","alt":"Pregnancy - The Birth Store","width":1024,"height":1536,"src":"\/\/www.thebirthstore.com.au\/cdn\/shop\/collections\/pregnancy-899677.jpg?v=1714968040"}},{"id":295224901821,"handle":"pregnancy-health","title":"Pregnancy Health","updated_at":"2025-12-27T20:11:40+08:00","body_html":"","published_at":"2023-11-10T20:48:51+08:00","sort_order":"best-selling","template_suffix":"swaddles-collection","disjunctive":false,"rules":[{"column":"tag","relation":"equals","condition":"Pregnancy Health"}],"published_scope":"global","image":{"created_at":"2024-05-06T12:00:41+08:00","alt":"Pregnancy Health - The Birth Store","width":608,"height":410,"src":"\/\/www.thebirthstore.com.au\/cdn\/shop\/collections\/pregnancy-health-343983.jpg?v=1714968042"}},{"id":326523846845,"handle":"pregnancy-health-1","updated_at":"2025-12-27T20:11:40+08:00","published_at":"2025-10-30T10:44:54+08:00","sort_order":"best-selling","template_suffix":"","published_scope":"global","title":"Pregnancy Health","body_html":"","image":{"created_at":"2025-11-20T21:33:56+08:00","alt":"Pregnancy Health - The Birth Store","width":522,"height":525,"src":"\/\/www.thebirthstore.com.au\/cdn\/shop\/collections\/pregnancy-health-1617860.jpg?v=1763645636"}},{"id":291456483517,"handle":"shop-all","title":"Shop All - Mum","updated_at":"2025-12-28T20:10:01+08:00","body_html":"","published_at":"2022-12-23T22:04:39+08:00","sort_order":"best-selling","template_suffix":"shop-all-collection","disjunctive":false,"rules":[{"column":"variant_price","relation":"greater_than","condition":"1"},{"column":"title","relation":"not_contains","condition":"Batteries"},{"column":"tag","relation":"equals","condition":"Mum"}],"published_scope":"global","image":{"created_at":"2024-05-06T12:00:54+08:00","alt":"Shop All - The Birth Store","width":1365,"height":2048,"src":"\/\/www.thebirthstore.com.au\/cdn\/shop\/collections\/shop-all-693176.jpg?v=1714968055"}},{"id":310045933757,"handle":"shop-all-sale","title":"Shop All Sale","updated_at":"2025-12-28T20:10:01+08:00","body_html":"","published_at":"2024-11-12T13:22:43+08:00","sort_order":"alpha-asc","template_suffix":"","disjunctive":true,"rules":[{"column":"tag","relation":"equals","condition":"Bundles"},{"column":"vendor","relation":"equals","condition":"Franjos Kitchen"},{"column":"vendor","relation":"equals","condition":"Adored Illustrations"},{"column":"vendor","relation":"equals","condition":"Amazing Oils"},{"column":"vendor","relation":"equals","condition":"Ice Ice Booby"},{"column":"vendor","relation":"equals","condition":"Made to Milk"},{"column":"vendor","relation":"equals","condition":"Milky Goodness"},{"column":"vendor","relation":"equals","condition":"Seasons of Mama"},{"column":"vendor","relation":"equals","condition":"Silverette"},{"column":"vendor","relation":"equals","condition":"Snuggle Hunny"},{"column":"vendor","relation":"equals","condition":"Yung Bod"},{"column":"vendor","relation":"equals","condition":"Bare Love"},{"column":"vendor","relation":"equals","condition":"Haakaa"},{"column":"vendor","relation":"equals","condition":"Mere Botanicals"},{"column":"vendor","relation":"equals","condition":"The Birth Store Hire"},{"column":"vendor","relation":"equals","condition":"The Birth Store"}],"published_scope":"global","image":{"created_at":"2024-11-13T10:58:16+08:00","alt":"Shop All Sale - The Birth Store","width":2048,"height":1365,"src":"\/\/www.thebirthstore.com.au\/cdn\/shop\/collections\/shop-all-sale-297361.jpg?v=1731466697"}},{"id":324680483005,"handle":"skin-care","title":"Skin Care","updated_at":"2025-12-28T20:10:01+08:00","body_html":"","published_at":"2025-09-23T22:14:11+08:00","sort_order":"best-selling","template_suffix":"","disjunctive":false,"rules":[{"column":"tag","relation":"equals","condition":"Skin Care"}],"published_scope":"global","image":{"created_at":"2025-10-30T16:17:08+08:00","alt":"Skin Care - The Birth Store","width":800,"height":800,"src":"\/\/www.thebirthstore.com.au\/cdn\/shop\/collections\/skin-care-6874549.jpg?v=1761812228"}},{"id":295228211389,"handle":"sleep-issues","title":"Sleep Issues","updated_at":"2025-12-24T20:09:23+08:00","body_html":"","published_at":"2023-11-10T23:27:56+08:00","sort_order":"best-selling","template_suffix":"swaddles-collection","disjunctive":false,"rules":[{"column":"tag","relation":"equals","condition":"Sleep Issues"}],"published_scope":"global","image":{"created_at":"2024-05-06T12:00:57+08:00","alt":"Sleep Issues - The Birth Store","width":869,"height":868,"src":"\/\/www.thebirthstore.com.au\/cdn\/shop\/collections\/sleep-issues-572906.jpg?v=1714968058"}}]}
[{"alt":"Magnesium Daily Gel Roll - On 60ml - The Birth Store - Amazing Oils","id":29672216166589,"position":1,"preview_image":{"aspect_ratio":1.0,"height":1080,"width":1080,"src":"\/\/www.thebirthstore.com.au\/cdn\/shop\/files\/magnesium-daily-gel-roll-on-60ml-3836589.png?v=1758829420"},"aspect_ratio":1.0,"height":1080,"media_type":"image","src":"\/\/www.thebirthstore.com.au\/cdn\/shop\/files\/magnesium-daily-gel-roll-on-60ml-3836589.png?v=1758829420","width":1080},{"alt":"Magnesium Daily Gel Roll-On 60ml - The Birth Store-Amazing Oils","id":27007589155005,"position":2,"preview_image":{"aspect_ratio":1.0,"height":720,"width":720,"src":"\/\/www.thebirthstore.com.au\/cdn\/shop\/files\/magnesium-daily-gel-roll-on-60ml-500422.jpg?v=1758807673"},"aspect_ratio":1.0,"height":720,"media_type":"image","src":"\/\/www.thebirthstore.com.au\/cdn\/shop\/files\/magnesium-daily-gel-roll-on-60ml-500422.jpg?v=1758807673","width":720}]
{"item":{"id":7493037228221,"title":"Magnesium Daily Spray 125ml","handle":"magnesium-daily-spray-125ml","description":"\u003cp\u003e\u003cspan data-mce-fragment=\"1\"\u003eBy combining the amazing benefits of \u003c\/span\u003e\u003cstrong data-mce-fragment=\"1\"\u003emagnesium\u003c\/strong\u003e\u003cspan data-mce-fragment=\"1\"\u003e with the traditional healing properties of \u003c\/span\u003e\u003cstrong data-mce-fragment=\"1\"\u003elavender\u003c\/strong\u003e\u003cspan data-mce-fragment=\"1\"\u003e and \u003c\/span\u003e\u003cstrong data-mce-fragment=\"1\"\u003echamomile\u003c\/strong\u003e\u003cspan data-mce-fragment=\"1\"\u003e, Amazing Oils have formulated a luxurious pre-sleep experience that will leave you feeling refreshed and rejuvenated after a peaceful nights sleep.\u003c\/span\u003e\u003c\/p\u003e\n\u003cp\u003eThis Magnesium\u003cspan\u003e \u003c\/span\u003e\u003cstrong\u003eSleep Lotion\u003c\/strong\u003e\u003cspan\u003e \u003c\/span\u003eis one of our most exciting products yet. Now available after years of research and development. The creamy lotion glides onto skin smoothly and leaves behind a very subtle fragrance of natural oils.\u003c\/p\u003e\n\u003cp\u003e\u003cstrong\u003eAustralian-Made | Vegan | Scientifically Formulated\u003c\/strong\u003e\u003c\/p\u003e\n\u003cp\u003e\u003cem\u003e\"I have been applying to my feet and legs each night and I fall asleep faster and my quality of sleep has improved. Smells great and feels nice on the skin. Would recommend and will be buying again.\" - Kim K.\u003c\/em\u003e\u003c\/p\u003e\n\u003cp\u003eThese ingredients in this Sleep Lotion have been traditionally used in Western herbal medicine to:\u003c\/p\u003e\n\u003cul\u003e\n\u003cli\u003eAssist mind relaxation.\u003c\/li\u003e\n\u003cli\u003eCalm and relax the nervous system.\u003c\/li\u003e\n\u003cli\u003eInduce sleep.\u003c\/li\u003e\n\u003cli\u003eRelieve sleeplessness.\u003c\/li\u003e\n\u003cli\u003eReduce time to fall asleep.\u003c\/li\u003e\n\u003cli\u003eRelieve disturbed\/restless sleep.\u003c\/li\u003e\n\u003cli\u003eRelieve skin inflammation and irritation.\u003c\/li\u003e\n\u003c\/ul\u003e\n\u003cp\u003e\u003cspan\u003e\u003cstrong\u003eThe Magnesium Pro Sleep Lotion is a TGA Listed Product (AUST L 318335)\u003c\/strong\u003e\u003c\/span\u003e\u003c\/p\u003e\n\u003cp\u003eApply 2-3 pumps (5ml, equivalent to approximately 100mg of elemental magnesium) into the palm of your hand and massage into your lower back, behind you knees and tops of your feet 20 minutes before bedtime.\u003c\/p\u003e\n\u003cp\u003eYou can also apply 2-3 pumps to your upper body, chest and arms anytime during the day to assist mind relaxation.\u003c\/p\u003e\n\u003cp\u003e♻︎ Amazing Oils products are recyclable in your normal household recycling. They use HDPE \u0026amp; PET recyclable plastic to reduce packaging waste. Please recycle your bottle after use.\u003c\/p\u003e\n\u003cp\u003e\u003cspan data-mce-fragment=\"1\"\u003eActive Ingredients p\/mL: Magnesium Chloride Hexahydrate 160mg (equivalent Magnesium 19.13mg), Chamomilla Recutita (Matricaria) Flower Extract 1.049mg\/ml (from 23.26mg\/ml Dry Flower), Lavandula Angustifolia (Lavender) Oil 2.625mg\/ml.\u003c\/span\u003e\u003c\/p\u003e\n\u003cp\u003e\u003cspan data-mce-fragment=\"1\"\u003eIf you experience any reactions such as tingling or irritation; apply to damp skin (or over a light moisturiser) for the first week.\u003c\/span\u003e\u003c\/p\u003e\n\u003cp\u003eIf symptoms persist, talk to your health professional. This product contains sodium benzoate and potassium sorbate.\u003c\/p\u003e\n\u003cp\u003eThis product needs to be stored below 25'C in a cool dry place away from direct sunlight.\u003c\/p\u003e","published_at":"2023-07-17T13:17:37+08:00","created_at":"2023-07-17T12:22:14+08:00","vendor":"Amazing Oils","type":"","tags":["Hospital Bag","Mum","Post-Partum","Pregnancy","Pregnancy Health","Skin Care","Sleep Issues"],"price":2295,"price_min":2295,"price_max":2295,"available":true,"price_varies":false,"compare_at_price":null,"compare_at_price_min":0,"compare_at_price_max":0,"compare_at_price_varies":false,"variants":[{"id":42924359942333,"title":"Default Title","option1":"Default Title","option2":null,"option3":null,"sku":"","requires_shipping":true,"taxable":false,"featured_image":null,"available":true,"name":"Magnesium Daily Spray 125ml","public_title":null,"options":["Default Title"],"price":2295,"weight":180,"compare_at_price":null,"inventory_management":"shopify","barcode":"59942333","requires_selling_plan":false,"selling_plan_allocations":[]}],"images":["\/\/www.thebirthstore.com.au\/cdn\/shop\/files\/magnesium-daily-spray-125ml-740443.jpg?v=1714967989","\/\/www.thebirthstore.com.au\/cdn\/shop\/files\/magnesium-daily-spray-125ml-662263.jpg?v=1714967989","\/\/www.thebirthstore.com.au\/cdn\/shop\/files\/magnesium-daily-spray-125ml-321838.jpg?v=1714967989"],"featured_image":"\/\/www.thebirthstore.com.au\/cdn\/shop\/files\/magnesium-daily-spray-125ml-740443.jpg?v=1714967989","options":["Title"],"media":[{"alt":"Magnesium Daily Spray 125ml - The Birth Store-Amazing Oils","id":27007590301885,"position":1,"preview_image":{"aspect_ratio":1.0,"height":1080,"width":1080,"src":"\/\/www.thebirthstore.com.au\/cdn\/shop\/files\/magnesium-daily-spray-125ml-740443.jpg?v=1714967989"},"aspect_ratio":1.0,"height":1080,"media_type":"image","src":"\/\/www.thebirthstore.com.au\/cdn\/shop\/files\/magnesium-daily-spray-125ml-740443.jpg?v=1714967989","width":1080},{"alt":"Magnesium Daily Spray 125ml - The Birth Store-Amazing Oils","id":27007590432957,"position":2,"preview_image":{"aspect_ratio":1.0,"height":800,"width":800,"src":"\/\/www.thebirthstore.com.au\/cdn\/shop\/files\/magnesium-daily-spray-125ml-662263.jpg?v=1714967989"},"aspect_ratio":1.0,"height":800,"media_type":"image","src":"\/\/www.thebirthstore.com.au\/cdn\/shop\/files\/magnesium-daily-spray-125ml-662263.jpg?v=1714967989","width":800},{"alt":"Magnesium Daily Spray 125ml - The Birth Store-Amazing Oils","id":27007590498493,"position":3,"preview_image":{"aspect_ratio":1.0,"height":800,"width":800,"src":"\/\/www.thebirthstore.com.au\/cdn\/shop\/files\/magnesium-daily-spray-125ml-321838.jpg?v=1714967989"},"aspect_ratio":1.0,"height":800,"media_type":"image","src":"\/\/www.thebirthstore.com.au\/cdn\/shop\/files\/magnesium-daily-spray-125ml-321838.jpg?v=1714967989","width":800}],"requires_selling_plan":false,"selling_plan_groups":[],"content":"\u003cp\u003e\u003cspan data-mce-fragment=\"1\"\u003eBy combining the amazing benefits of \u003c\/span\u003e\u003cstrong data-mce-fragment=\"1\"\u003emagnesium\u003c\/strong\u003e\u003cspan data-mce-fragment=\"1\"\u003e with the traditional healing properties of \u003c\/span\u003e\u003cstrong data-mce-fragment=\"1\"\u003elavender\u003c\/strong\u003e\u003cspan data-mce-fragment=\"1\"\u003e and \u003c\/span\u003e\u003cstrong data-mce-fragment=\"1\"\u003echamomile\u003c\/strong\u003e\u003cspan data-mce-fragment=\"1\"\u003e, Amazing Oils have formulated a luxurious pre-sleep experience that will leave you feeling refreshed and rejuvenated after a peaceful nights sleep.\u003c\/span\u003e\u003c\/p\u003e\n\u003cp\u003eThis Magnesium\u003cspan\u003e \u003c\/span\u003e\u003cstrong\u003eSleep Lotion\u003c\/strong\u003e\u003cspan\u003e \u003c\/span\u003eis one of our most exciting products yet. Now available after years of research and development. The creamy lotion glides onto skin smoothly and leaves behind a very subtle fragrance of natural oils.\u003c\/p\u003e\n\u003cp\u003e\u003cstrong\u003eAustralian-Made | Vegan | Scientifically Formulated\u003c\/strong\u003e\u003c\/p\u003e\n\u003cp\u003e\u003cem\u003e\"I have been applying to my feet and legs each night and I fall asleep faster and my quality of sleep has improved. Smells great and feels nice on the skin. Would recommend and will be buying again.\" - Kim K.\u003c\/em\u003e\u003c\/p\u003e\n\u003cp\u003eThese ingredients in this Sleep Lotion have been traditionally used in Western herbal medicine to:\u003c\/p\u003e\n\u003cul\u003e\n\u003cli\u003eAssist mind relaxation.\u003c\/li\u003e\n\u003cli\u003eCalm and relax the nervous system.\u003c\/li\u003e\n\u003cli\u003eInduce sleep.\u003c\/li\u003e\n\u003cli\u003eRelieve sleeplessness.\u003c\/li\u003e\n\u003cli\u003eReduce time to fall asleep.\u003c\/li\u003e\n\u003cli\u003eRelieve disturbed\/restless sleep.\u003c\/li\u003e\n\u003cli\u003eRelieve skin inflammation and irritation.\u003c\/li\u003e\n\u003c\/ul\u003e\n\u003cp\u003e\u003cspan\u003e\u003cstrong\u003eThe Magnesium Pro Sleep Lotion is a TGA Listed Product (AUST L 318335)\u003c\/strong\u003e\u003c\/span\u003e\u003c\/p\u003e\n\u003cp\u003eApply 2-3 pumps (5ml, equivalent to approximately 100mg of elemental magnesium) into the palm of your hand and massage into your lower back, behind you knees and tops of your feet 20 minutes before bedtime.\u003c\/p\u003e\n\u003cp\u003eYou can also apply 2-3 pumps to your upper body, chest and arms anytime during the day to assist mind relaxation.\u003c\/p\u003e\n\u003cp\u003e♻︎ Amazing Oils products are recyclable in your normal household recycling. They use HDPE \u0026amp; PET recyclable plastic to reduce packaging waste. Please recycle your bottle after use.\u003c\/p\u003e\n\u003cp\u003e\u003cspan data-mce-fragment=\"1\"\u003eActive Ingredients p\/mL: Magnesium Chloride Hexahydrate 160mg (equivalent Magnesium 19.13mg), Chamomilla Recutita (Matricaria) Flower Extract 1.049mg\/ml (from 23.26mg\/ml Dry Flower), Lavandula Angustifolia (Lavender) Oil 2.625mg\/ml.\u003c\/span\u003e\u003c\/p\u003e\n\u003cp\u003e\u003cspan data-mce-fragment=\"1\"\u003eIf you experience any reactions such as tingling or irritation; apply to damp skin (or over a light moisturiser) for the first week.\u003c\/span\u003e\u003c\/p\u003e\n\u003cp\u003eIf symptoms persist, talk to your health professional. This product contains sodium benzoate and potassium sorbate.\u003c\/p\u003e\n\u003cp\u003eThis product needs to be stored below 25'C in a cool dry place away from direct sunlight.\u003c\/p\u003e"},"options":[{"name":"Title","position":1,"values":["Default Title"]}],"custom_metafields":{},"metafields":{"badge":"\u003cdiv style='display:none' class='jdgm-prev-badge' data-average-rating='0.00' data-number-of-reviews='0' data-number-of-questions='0'\u003e \u003cspan class='jdgm-prev-badge__stars' data-score='0.00' tabindex='0' aria-label='0.00 stars' role='button'\u003e \u003cspan class='jdgm-star jdgm--off'\u003e\u003c\/span\u003e\u003cspan class='jdgm-star jdgm--off'\u003e\u003c\/span\u003e\u003cspan class='jdgm-star jdgm--off'\u003e\u003c\/span\u003e\u003cspan class='jdgm-star jdgm--off'\u003e\u003c\/span\u003e\u003cspan class='jdgm-star jdgm--off'\u003e\u003c\/span\u003e \u003c\/span\u003e \u003cspan class='jdgm-prev-badge__text'\u003e No reviews \u003c\/span\u003e \u003c\/div\u003e","widget":"\u003cdiv class='jdgm-rev-widg' data-updated-at='2025-06-13T16:12:53Z' data-average-rating='0.00' data-number-of-reviews='0' data-number-of-questions='0'\u003e \u003cstyle class='jdgm-temp-hiding-style'\u003e.jdgm-rev-widg{ display: none }\u003c\/style\u003e \u003cdiv class='jdgm-rev-widg__header'\u003e \u003ch2 class='jdgm-rev-widg__title'\u003eCustomer Reviews\u003c\/h2\u003e \u003cdiv class='jdgm-rev-widg__summary'\u003e \u003cdiv class='jdgm-rev-widg__summary-stars' aria-label='Average rating is 0.00 stars' role='img'\u003e \u003cspan class='jdgm-star jdgm--off'\u003e\u003c\/span\u003e\u003cspan class='jdgm-star jdgm--off'\u003e\u003c\/span\u003e\u003cspan class='jdgm-star jdgm--off'\u003e\u003c\/span\u003e\u003cspan class='jdgm-star jdgm--off'\u003e\u003c\/span\u003e\u003cspan class='jdgm-star jdgm--off'\u003e\u003c\/span\u003e \u003c\/div\u003e \u003cdiv class='jdgm-rev-widg__summary-text'\u003eBe the first to write a review\u003c\/div\u003e \u003c\/div\u003e \u003ca style='display: none' href='#' class='jdgm-write-rev-link' role='button'\u003eWrite a review\u003c\/a\u003e \u003cdiv class='jdgm-histogram jdgm-temp-hidden'\u003e \u003cdiv class='jdgm-histogram__row' data-rating='5' data-frequency='0' data-percentage='0'\u003e \u003cdiv class='jdgm-histogram__star' role='button' aria-label=\"0% (0) reviews with 5 star rating\" tabindex='0' \u003e\u003cspan class='jdgm-star jdgm--on'\u003e\u003c\/span\u003e\u003cspan class='jdgm-star jdgm--on'\u003e\u003c\/span\u003e\u003cspan class='jdgm-star jdgm--on'\u003e\u003c\/span\u003e\u003cspan class='jdgm-star jdgm--on'\u003e\u003c\/span\u003e\u003cspan class='jdgm-star jdgm--on'\u003e\u003c\/span\u003e\u003c\/div\u003e \u003cdiv class='jdgm-histogram__bar'\u003e \u003cdiv class='jdgm-histogram__bar-content' style='width: 0%;'\u003e \u003c\/div\u003e \u003c\/div\u003e \u003cdiv class='jdgm-histogram__percentage'\u003e0%\u003c\/div\u003e \u003cdiv class='jdgm-histogram__frequency'\u003e(0)\u003c\/div\u003e \u003c\/div\u003e \u003cdiv class='jdgm-histogram__row' data-rating='4' data-frequency='0' data-percentage='0'\u003e \u003cdiv class='jdgm-histogram__star' role='button' aria-label=\"0% (0) reviews with 4 star rating\" tabindex='0' \u003e\u003cspan class='jdgm-star jdgm--on'\u003e\u003c\/span\u003e\u003cspan class='jdgm-star jdgm--on'\u003e\u003c\/span\u003e\u003cspan class='jdgm-star jdgm--on'\u003e\u003c\/span\u003e\u003cspan class='jdgm-star jdgm--on'\u003e\u003c\/span\u003e\u003cspan class='jdgm-star jdgm--off'\u003e\u003c\/span\u003e\u003c\/div\u003e \u003cdiv class='jdgm-histogram__bar'\u003e \u003cdiv class='jdgm-histogram__bar-content' style='width: 0%;'\u003e \u003c\/div\u003e \u003c\/div\u003e \u003cdiv class='jdgm-histogram__percentage'\u003e0%\u003c\/div\u003e \u003cdiv class='jdgm-histogram__frequency'\u003e(0)\u003c\/div\u003e \u003c\/div\u003e \u003cdiv class='jdgm-histogram__row' data-rating='3' data-frequency='0' data-percentage='0'\u003e \u003cdiv class='jdgm-histogram__star' role='button' aria-label=\"0% (0) reviews with 3 star rating\" tabindex='0' \u003e\u003cspan class='jdgm-star jdgm--on'\u003e\u003c\/span\u003e\u003cspan class='jdgm-star jdgm--on'\u003e\u003c\/span\u003e\u003cspan class='jdgm-star jdgm--on'\u003e\u003c\/span\u003e\u003cspan class='jdgm-star jdgm--off'\u003e\u003c\/span\u003e\u003cspan class='jdgm-star jdgm--off'\u003e\u003c\/span\u003e\u003c\/div\u003e \u003cdiv class='jdgm-histogram__bar'\u003e \u003cdiv class='jdgm-histogram__bar-content' style='width: 0%;'\u003e \u003c\/div\u003e \u003c\/div\u003e \u003cdiv class='jdgm-histogram__percentage'\u003e0%\u003c\/div\u003e \u003cdiv class='jdgm-histogram__frequency'\u003e(0)\u003c\/div\u003e \u003c\/div\u003e \u003cdiv class='jdgm-histogram__row' data-rating='2' data-frequency='0' data-percentage='0'\u003e \u003cdiv class='jdgm-histogram__star' role='button' aria-label=\"0% (0) reviews with 2 star rating\" tabindex='0' \u003e\u003cspan class='jdgm-star jdgm--on'\u003e\u003c\/span\u003e\u003cspan class='jdgm-star jdgm--on'\u003e\u003c\/span\u003e\u003cspan class='jdgm-star jdgm--off'\u003e\u003c\/span\u003e\u003cspan class='jdgm-star jdgm--off'\u003e\u003c\/span\u003e\u003cspan class='jdgm-star jdgm--off'\u003e\u003c\/span\u003e\u003c\/div\u003e \u003cdiv class='jdgm-histogram__bar'\u003e \u003cdiv class='jdgm-histogram__bar-content' style='width: 0%;'\u003e \u003c\/div\u003e \u003c\/div\u003e \u003cdiv class='jdgm-histogram__percentage'\u003e0%\u003c\/div\u003e \u003cdiv class='jdgm-histogram__frequency'\u003e(0)\u003c\/div\u003e \u003c\/div\u003e \u003cdiv class='jdgm-histogram__row' data-rating='1' data-frequency='0' data-percentage='0'\u003e \u003cdiv class='jdgm-histogram__star' role='button' aria-label=\"0% (0) reviews with 1 star rating\" tabindex='0' \u003e\u003cspan class='jdgm-star jdgm--on'\u003e\u003c\/span\u003e\u003cspan class='jdgm-star jdgm--off'\u003e\u003c\/span\u003e\u003cspan class='jdgm-star jdgm--off'\u003e\u003c\/span\u003e\u003cspan class='jdgm-star jdgm--off'\u003e\u003c\/span\u003e\u003cspan class='jdgm-star jdgm--off'\u003e\u003c\/span\u003e\u003c\/div\u003e \u003cdiv class='jdgm-histogram__bar'\u003e \u003cdiv class='jdgm-histogram__bar-content' style='width: 0%;'\u003e \u003c\/div\u003e \u003c\/div\u003e \u003cdiv class='jdgm-histogram__percentage'\u003e0%\u003c\/div\u003e \u003cdiv class='jdgm-histogram__frequency'\u003e(0)\u003c\/div\u003e \u003c\/div\u003e \u003cdiv class='jdgm-histogram__row jdgm-histogram__clear-filter' data-rating=null tabindex='0'\u003e\u003c\/div\u003e \u003c\/div\u003e \u003cdiv class='jdgm-rev-widg__sort-wrapper'\u003e\u003c\/div\u003e \u003c\/div\u003e \u003cdiv class='jdgm-rev-widg__body'\u003e \u003cdiv class='jdgm-rev-widg__reviews'\u003e\u003c\/div\u003e \u003cdiv class='jdgm-paginate' data-per-page='10' data-url='https:\/\/api.judge.me\/reviews\/reviews_for_widget' style=\"display: none;\"\u003e\u003c\/div\u003e \u003c\/div\u003e \u003cdiv class='jdgm-rev-widg__paginate-spinner-wrapper'\u003e \u003cdiv class='jdgm-spinner'\u003e\u003c\/div\u003e \u003c\/div\u003e \u003c\/div\u003e"},"collections":[{"id":261657460925,"handle":"buy","title":"Buy","updated_at":"2025-12-28T20:10:01+08:00","body_html":"\u003cp\u003eBrowse all of our pregnancy, labour \u0026amp; birth, postpartum and baby essentials here.\u003cbr\u003e\u003c\/p\u003e\n\u003cp\u003e\u003cspan\u003eYou can even buy now and pay later with Afterpay!\u003c\/span\u003e\u003c\/p\u003e","published_at":"2021-03-10T12:05:31+08:00","sort_order":"best-selling","template_suffix":"shop-all-collection","disjunctive":false,"rules":[{"column":"title","relation":"not_contains","condition":"Hire"}],"published_scope":"global","image":{"created_at":"2024-05-06T11:59:42+08:00","alt":"Buy - The Birth Store","width":2048,"height":2048,"src":"\/\/www.thebirthstore.com.au\/cdn\/shop\/collections\/buy-964856.jpg?v=1714967982"}},{"id":261658083517,"handle":"post-partum","title":"Postpartum","updated_at":"2025-12-28T20:10:01+08:00","body_html":"\u003cp\u003eShop your postpartum and hospital bag essentials below. Looking for something we don't currently stock? Please reach out and let us know.\u003cbr\u003e\u003c\/p\u003e\n\u003cp\u003e\u003cspan\u003eYou can even buy now and pay later with Afterpay!\u003c\/span\u003e\u003c\/p\u003e","published_at":"2021-03-10T12:33:47+08:00","sort_order":"best-selling","template_suffix":"postpartum-collection","disjunctive":false,"rules":[{"column":"tag","relation":"equals","condition":"Post-Partum"}],"published_scope":"global","image":{"created_at":"2024-05-06T12:00:36+08:00","alt":"Postpartum - The Birth Store","width":611,"height":702,"src":"\/\/www.thebirthstore.com.au\/cdn\/shop\/collections\/postpartum-150119.jpg?v=1714968037"}},{"id":261658149053,"handle":"pregnancy-and-maternity-products","title":"Pregnancy","updated_at":"2025-12-28T20:10:01+08:00","body_html":"\u003cp\u003eShop your pregnancy essentials below. Looking for something we don't currently stock? Please reach out and let us know.\u003cbr\u003e\u003c\/p\u003e\n\u003cp\u003e\u003cspan\u003eYou can even buy now and pay later with Afterpay!\u003c\/span\u003e\u003c\/p\u003e","published_at":"2021-03-10T12:34:22+08:00","sort_order":"best-selling","template_suffix":"pregnancy-collection","disjunctive":false,"rules":[{"column":"tag","relation":"equals","condition":"Pregnancy"}],"published_scope":"global","image":{"created_at":"2024-05-06T12:00:40+08:00","alt":"Pregnancy - The Birth Store","width":1024,"height":1536,"src":"\/\/www.thebirthstore.com.au\/cdn\/shop\/collections\/pregnancy-899677.jpg?v=1714968040"}},{"id":295224901821,"handle":"pregnancy-health","title":"Pregnancy Health","updated_at":"2025-12-27T20:11:40+08:00","body_html":"","published_at":"2023-11-10T20:48:51+08:00","sort_order":"best-selling","template_suffix":"swaddles-collection","disjunctive":false,"rules":[{"column":"tag","relation":"equals","condition":"Pregnancy Health"}],"published_scope":"global","image":{"created_at":"2024-05-06T12:00:41+08:00","alt":"Pregnancy Health - The Birth Store","width":608,"height":410,"src":"\/\/www.thebirthstore.com.au\/cdn\/shop\/collections\/pregnancy-health-343983.jpg?v=1714968042"}},{"id":326523846845,"handle":"pregnancy-health-1","updated_at":"2025-12-27T20:11:40+08:00","published_at":"2025-10-30T10:44:54+08:00","sort_order":"best-selling","template_suffix":"","published_scope":"global","title":"Pregnancy Health","body_html":"","image":{"created_at":"2025-11-20T21:33:56+08:00","alt":"Pregnancy Health - The Birth Store","width":522,"height":525,"src":"\/\/www.thebirthstore.com.au\/cdn\/shop\/collections\/pregnancy-health-1617860.jpg?v=1763645636"}},{"id":291456483517,"handle":"shop-all","title":"Shop All - Mum","updated_at":"2025-12-28T20:10:01+08:00","body_html":"","published_at":"2022-12-23T22:04:39+08:00","sort_order":"best-selling","template_suffix":"shop-all-collection","disjunctive":false,"rules":[{"column":"variant_price","relation":"greater_than","condition":"1"},{"column":"title","relation":"not_contains","condition":"Batteries"},{"column":"tag","relation":"equals","condition":"Mum"}],"published_scope":"global","image":{"created_at":"2024-05-06T12:00:54+08:00","alt":"Shop All - The Birth Store","width":1365,"height":2048,"src":"\/\/www.thebirthstore.com.au\/cdn\/shop\/collections\/shop-all-693176.jpg?v=1714968055"}},{"id":310045933757,"handle":"shop-all-sale","title":"Shop All Sale","updated_at":"2025-12-28T20:10:01+08:00","body_html":"","published_at":"2024-11-12T13:22:43+08:00","sort_order":"alpha-asc","template_suffix":"","disjunctive":true,"rules":[{"column":"tag","relation":"equals","condition":"Bundles"},{"column":"vendor","relation":"equals","condition":"Franjos Kitchen"},{"column":"vendor","relation":"equals","condition":"Adored Illustrations"},{"column":"vendor","relation":"equals","condition":"Amazing Oils"},{"column":"vendor","relation":"equals","condition":"Ice Ice Booby"},{"column":"vendor","relation":"equals","condition":"Made to Milk"},{"column":"vendor","relation":"equals","condition":"Milky Goodness"},{"column":"vendor","relation":"equals","condition":"Seasons of Mama"},{"column":"vendor","relation":"equals","condition":"Silverette"},{"column":"vendor","relation":"equals","condition":"Snuggle Hunny"},{"column":"vendor","relation":"equals","condition":"Yung Bod"},{"column":"vendor","relation":"equals","condition":"Bare Love"},{"column":"vendor","relation":"equals","condition":"Haakaa"},{"column":"vendor","relation":"equals","condition":"Mere Botanicals"},{"column":"vendor","relation":"equals","condition":"The Birth Store Hire"},{"column":"vendor","relation":"equals","condition":"The Birth Store"}],"published_scope":"global","image":{"created_at":"2024-11-13T10:58:16+08:00","alt":"Shop All Sale - The Birth Store","width":2048,"height":1365,"src":"\/\/www.thebirthstore.com.au\/cdn\/shop\/collections\/shop-all-sale-297361.jpg?v=1731466697"}},{"id":324680483005,"handle":"skin-care","title":"Skin Care","updated_at":"2025-12-28T20:10:01+08:00","body_html":"","published_at":"2025-09-23T22:14:11+08:00","sort_order":"best-selling","template_suffix":"","disjunctive":false,"rules":[{"column":"tag","relation":"equals","condition":"Skin Care"}],"published_scope":"global","image":{"created_at":"2025-10-30T16:17:08+08:00","alt":"Skin Care - The Birth Store","width":800,"height":800,"src":"\/\/www.thebirthstore.com.au\/cdn\/shop\/collections\/skin-care-6874549.jpg?v=1761812228"}},{"id":295228211389,"handle":"sleep-issues","title":"Sleep Issues","updated_at":"2025-12-24T20:09:23+08:00","body_html":"","published_at":"2023-11-10T23:27:56+08:00","sort_order":"best-selling","template_suffix":"swaddles-collection","disjunctive":false,"rules":[{"column":"tag","relation":"equals","condition":"Sleep Issues"}],"published_scope":"global","image":{"created_at":"2024-05-06T12:00:57+08:00","alt":"Sleep Issues - The Birth Store","width":869,"height":868,"src":"\/\/www.thebirthstore.com.au\/cdn\/shop\/collections\/sleep-issues-572906.jpg?v=1714968058"}}]}
[{"alt":"Magnesium Daily Spray 125ml - The Birth Store-Amazing Oils","id":27007590301885,"position":1,"preview_image":{"aspect_ratio":1.0,"height":1080,"width":1080,"src":"\/\/www.thebirthstore.com.au\/cdn\/shop\/files\/magnesium-daily-spray-125ml-740443.jpg?v=1714967989"},"aspect_ratio":1.0,"height":1080,"media_type":"image","src":"\/\/www.thebirthstore.com.au\/cdn\/shop\/files\/magnesium-daily-spray-125ml-740443.jpg?v=1714967989","width":1080},{"alt":"Magnesium Daily Spray 125ml - The Birth Store-Amazing Oils","id":27007590432957,"position":2,"preview_image":{"aspect_ratio":1.0,"height":800,"width":800,"src":"\/\/www.thebirthstore.com.au\/cdn\/shop\/files\/magnesium-daily-spray-125ml-662263.jpg?v=1714967989"},"aspect_ratio":1.0,"height":800,"media_type":"image","src":"\/\/www.thebirthstore.com.au\/cdn\/shop\/files\/magnesium-daily-spray-125ml-662263.jpg?v=1714967989","width":800},{"alt":"Magnesium Daily Spray 125ml - The Birth Store-Amazing Oils","id":27007590498493,"position":3,"preview_image":{"aspect_ratio":1.0,"height":800,"width":800,"src":"\/\/www.thebirthstore.com.au\/cdn\/shop\/files\/magnesium-daily-spray-125ml-321838.jpg?v=1714967989"},"aspect_ratio":1.0,"height":800,"media_type":"image","src":"\/\/www.thebirthstore.com.au\/cdn\/shop\/files\/magnesium-daily-spray-125ml-321838.jpg?v=1714967989","width":800}]
{"item":{"id":7493037162685,"title":"Magnesium Sensitive Spray 200ml","handle":"magnesium-sensitive-spray-125ml","description":"\u003cp data-mce-fragment=\"1\"\u003eMagnesium Sensitive Spray (formerly Magnesium Pro Spray) has been formulated to be less oily and more user-friendly for those who experience an itchy or tingly sensation from regular magnesium oil products. This makes it ideal for those with sensitive skin or if you're using topical magnesium for the first time.\u003c\/p\u003e\n\u003cp data-mce-fragment=\"1\"\u003eThe Sensitive Magnesium Oil features a trigger spray that can be easier to use than our regular mist sprays.\u003c\/p\u003e\n\u003cp\u003e\u003cstrong\u003eAustralian-Made | Vegan | Scientifically Formulated\u003c\/strong\u003e\u003c\/p\u003e\n\u003cp\u003eMagnesium Sensitive Spray has been scientifically formulated to be as powerful as you would expect, whilst being gentle on sensitive skin\u003c\/p\u003e\n\u003cp\u003e\u003cspan\u003e\u003cem\u003e\"It is the best. I spray it on my feet every night and also now the backs of my lower legs for a better sleep. And I use it on my lower back when I have a dull ache. And I also have gluteal tendinopathy in my hip, which I use it for. I think it definitely helps.\" - Carolyn M.\u003c\/em\u003e\u003c\/span\u003e\u003c\/p\u003e\n\u003cp\u003e\u003cspan\u003eMagnesium Sensitive Spray can assist:\u003c\/span\u003e\u003c\/p\u003e\n\u003cul\u003e\n\u003cli\u003eSupporting general health and wellbeing\u003c\/li\u003e\n\u003cli\u003eRelieve symptoms of mild arthritis\/mild osteoarthritis\u003c\/li\u003e\n\u003cli\u003eMaintain immune system health\u003c\/li\u003e\n\u003cli\u003eReduce muscle cramps\/leg cramps\/muscle spasm\u003c\/li\u003e\n\u003cli\u003eSupport healthy muscles\u003c\/li\u003e\n\u003cli\u003eHelps prevent dietary (state vitamin\/mineral\/nutrient) deficiency\u003c\/li\u003e\n\u003cli\u003eReduce symptoms of mild anxiety\u003c\/li\u003e\n\u003cli\u003eReduce headache \u0026amp; mild migraine symptoms\u003c\/li\u003e\n\u003cli\u003eRelieve mild nerve pain\/neuralgia\u003c\/li\u003e\n\u003cli\u003eDecrease symptoms of premenstrual tension\u003c\/li\u003e\n\u003c\/ul\u003e\n\u003cp\u003eIdeal for sensitive skin. Use daily, apply 4-5 sprays to your upper body in the morning to energise, then to lower body in the evening for relaxation (especially where skin is thin for optimal absorption). Rub in well for best results. Additionally, apply to area(s) of concern as needed.\u003c\/p\u003e\n\u003cp\u003e*Tip - leave it either on the bathroom bench or next to the bed for easy regular access.\u003c\/p\u003e\n\u003cp\u003e♻︎ Amazing Oils products are recyclable in your normal household recycling. They use HDPE \u0026amp; PET recyclable plastic to reduce packaging waste. Please recycle your bottle after use.\u003c\/p\u003e\n\u003cp\u003e\u003cspan\u003eActive Ingredients p\/mL:\u003c\/span\u003e\u003cspan\u003e Magnesium Chloride Hexahydrate160.4 mg\/mL (equivalent Magnesium 19.2 mg\/mL).\u003c\/span\u003e\u003c\/p\u003e\n\u003cp\u003e\u003cspan\u003eIf you experience any reactions such as tingling or irritation; apply to damp skin (or over a light moisturiser) for the first week.\u003c\/span\u003e\u003c\/p\u003e\n\u003cp\u003eIf symptoms persist, talk to your health professional. This product contains sodium benzoate and potassium sorbate.\u003c\/p\u003e\n\u003cp\u003eThis product needs to be stored below 25'C in a cool dry place away from direct sunlight.\u003c\/p\u003e","published_at":"2023-07-17T13:17:35+08:00","created_at":"2023-07-17T12:21:50+08:00","vendor":"Amazing Oils","type":"","tags":["Hospital Bag","Mum","Post-Partum","Pregnancy","Pregnancy Health","Skin Care","Sleep Issues"],"price":3795,"price_min":3795,"price_max":3795,"available":true,"price_varies":false,"compare_at_price":2795,"compare_at_price_min":2795,"compare_at_price_max":2795,"compare_at_price_varies":false,"variants":[{"id":44995359015101,"title":"Default Title","option1":"Default Title","option2":null,"option3":null,"sku":"","requires_shipping":true,"taxable":false,"featured_image":null,"available":true,"name":"Magnesium Sensitive Spray 200ml","public_title":null,"options":["Default Title"],"price":3795,"weight":170,"compare_at_price":2795,"inventory_management":"shopify","barcode":"59015101","requires_selling_plan":false,"selling_plan_allocations":[]}],"images":["\/\/www.thebirthstore.com.au\/cdn\/shop\/files\/magnesium-sensitive-spray-125ml-505223.jpg?v=1714967988","\/\/www.thebirthstore.com.au\/cdn\/shop\/files\/magnesium-sensitive-spray-125ml-911649.jpg?v=1714967988","\/\/www.thebirthstore.com.au\/cdn\/shop\/files\/magnesium-sensitive-spray-125ml-707167.webp?v=1745718725"],"featured_image":"\/\/www.thebirthstore.com.au\/cdn\/shop\/files\/magnesium-sensitive-spray-125ml-505223.jpg?v=1714967988","options":["Title"],"media":[{"alt":"Magnesium Sensitive Spray 125ml - The Birth Store-Amazing Oils","id":27007589843133,"position":1,"preview_image":{"aspect_ratio":1.0,"height":1080,"width":1080,"src":"\/\/www.thebirthstore.com.au\/cdn\/shop\/files\/magnesium-sensitive-spray-125ml-505223.jpg?v=1714967988"},"aspect_ratio":1.0,"height":1080,"media_type":"image","src":"\/\/www.thebirthstore.com.au\/cdn\/shop\/files\/magnesium-sensitive-spray-125ml-505223.jpg?v=1714967988","width":1080},{"alt":"Magnesium Sensitive Spray 125ml - The Birth Store-Amazing Oils","id":27007589974205,"position":2,"preview_image":{"aspect_ratio":1.0,"height":800,"width":800,"src":"\/\/www.thebirthstore.com.au\/cdn\/shop\/files\/magnesium-sensitive-spray-125ml-911649.jpg?v=1714967988"},"aspect_ratio":1.0,"height":800,"media_type":"image","src":"\/\/www.thebirthstore.com.au\/cdn\/shop\/files\/magnesium-sensitive-spray-125ml-911649.jpg?v=1714967988","width":800},{"alt":"Magnesium Sensitive Spray 125ml - The Birth Store - Amazing Oils","id":28629742715069,"position":3,"preview_image":{"aspect_ratio":1.0,"height":1024,"width":1024,"src":"\/\/www.thebirthstore.com.au\/cdn\/shop\/files\/magnesium-sensitive-spray-125ml-707167.webp?v=1745718725"},"aspect_ratio":1.0,"height":1024,"media_type":"image","src":"\/\/www.thebirthstore.com.au\/cdn\/shop\/files\/magnesium-sensitive-spray-125ml-707167.webp?v=1745718725","width":1024}],"requires_selling_plan":false,"selling_plan_groups":[],"content":"\u003cp data-mce-fragment=\"1\"\u003eMagnesium Sensitive Spray (formerly Magnesium Pro Spray) has been formulated to be less oily and more user-friendly for those who experience an itchy or tingly sensation from regular magnesium oil products. This makes it ideal for those with sensitive skin or if you're using topical magnesium for the first time.\u003c\/p\u003e\n\u003cp data-mce-fragment=\"1\"\u003eThe Sensitive Magnesium Oil features a trigger spray that can be easier to use than our regular mist sprays.\u003c\/p\u003e\n\u003cp\u003e\u003cstrong\u003eAustralian-Made | Vegan | Scientifically Formulated\u003c\/strong\u003e\u003c\/p\u003e\n\u003cp\u003eMagnesium Sensitive Spray has been scientifically formulated to be as powerful as you would expect, whilst being gentle on sensitive skin\u003c\/p\u003e\n\u003cp\u003e\u003cspan\u003e\u003cem\u003e\"It is the best. I spray it on my feet every night and also now the backs of my lower legs for a better sleep. And I use it on my lower back when I have a dull ache. And I also have gluteal tendinopathy in my hip, which I use it for. I think it definitely helps.\" - Carolyn M.\u003c\/em\u003e\u003c\/span\u003e\u003c\/p\u003e\n\u003cp\u003e\u003cspan\u003eMagnesium Sensitive Spray can assist:\u003c\/span\u003e\u003c\/p\u003e\n\u003cul\u003e\n\u003cli\u003eSupporting general health and wellbeing\u003c\/li\u003e\n\u003cli\u003eRelieve symptoms of mild arthritis\/mild osteoarthritis\u003c\/li\u003e\n\u003cli\u003eMaintain immune system health\u003c\/li\u003e\n\u003cli\u003eReduce muscle cramps\/leg cramps\/muscle spasm\u003c\/li\u003e\n\u003cli\u003eSupport healthy muscles\u003c\/li\u003e\n\u003cli\u003eHelps prevent dietary (state vitamin\/mineral\/nutrient) deficiency\u003c\/li\u003e\n\u003cli\u003eReduce symptoms of mild anxiety\u003c\/li\u003e\n\u003cli\u003eReduce headache \u0026amp; mild migraine symptoms\u003c\/li\u003e\n\u003cli\u003eRelieve mild nerve pain\/neuralgia\u003c\/li\u003e\n\u003cli\u003eDecrease symptoms of premenstrual tension\u003c\/li\u003e\n\u003c\/ul\u003e\n\u003cp\u003eIdeal for sensitive skin. Use daily, apply 4-5 sprays to your upper body in the morning to energise, then to lower body in the evening for relaxation (especially where skin is thin for optimal absorption). Rub in well for best results. Additionally, apply to area(s) of concern as needed.\u003c\/p\u003e\n\u003cp\u003e*Tip - leave it either on the bathroom bench or next to the bed for easy regular access.\u003c\/p\u003e\n\u003cp\u003e♻︎ Amazing Oils products are recyclable in your normal household recycling. They use HDPE \u0026amp; PET recyclable plastic to reduce packaging waste. Please recycle your bottle after use.\u003c\/p\u003e\n\u003cp\u003e\u003cspan\u003eActive Ingredients p\/mL:\u003c\/span\u003e\u003cspan\u003e Magnesium Chloride Hexahydrate160.4 mg\/mL (equivalent Magnesium 19.2 mg\/mL).\u003c\/span\u003e\u003c\/p\u003e\n\u003cp\u003e\u003cspan\u003eIf you experience any reactions such as tingling or irritation; apply to damp skin (or over a light moisturiser) for the first week.\u003c\/span\u003e\u003c\/p\u003e\n\u003cp\u003eIf symptoms persist, talk to your health professional. This product contains sodium benzoate and potassium sorbate.\u003c\/p\u003e\n\u003cp\u003eThis product needs to be stored below 25'C in a cool dry place away from direct sunlight.\u003c\/p\u003e"},"options":[{"name":"Title","position":1,"values":["Default Title"]}],"custom_metafields":{},"metafields":{"badge":"\u003cdiv style='display:none' class='jdgm-prev-badge' data-average-rating='0.00' data-number-of-reviews='0' data-number-of-questions='0'\u003e \u003cspan class='jdgm-prev-badge__stars' data-score='0.00' tabindex='0' aria-label='0.00 stars' role='button'\u003e \u003cspan class='jdgm-star jdgm--off'\u003e\u003c\/span\u003e\u003cspan class='jdgm-star jdgm--off'\u003e\u003c\/span\u003e\u003cspan class='jdgm-star jdgm--off'\u003e\u003c\/span\u003e\u003cspan class='jdgm-star jdgm--off'\u003e\u003c\/span\u003e\u003cspan class='jdgm-star jdgm--off'\u003e\u003c\/span\u003e \u003c\/span\u003e \u003cspan class='jdgm-prev-badge__text'\u003e No reviews \u003c\/span\u003e \u003c\/div\u003e","widget":"\u003cdiv class='jdgm-rev-widg' data-updated-at='2025-06-13T16:12:53Z' data-average-rating='0.00' data-number-of-reviews='0' data-number-of-questions='0'\u003e \u003cstyle class='jdgm-temp-hiding-style'\u003e.jdgm-rev-widg{ display: none }\u003c\/style\u003e \u003cdiv class='jdgm-rev-widg__header'\u003e \u003ch2 class='jdgm-rev-widg__title'\u003eCustomer Reviews\u003c\/h2\u003e \u003cdiv class='jdgm-rev-widg__summary'\u003e \u003cdiv class='jdgm-rev-widg__summary-stars' aria-label='Average rating is 0.00 stars' role='img'\u003e \u003cspan class='jdgm-star jdgm--off'\u003e\u003c\/span\u003e\u003cspan class='jdgm-star jdgm--off'\u003e\u003c\/span\u003e\u003cspan class='jdgm-star jdgm--off'\u003e\u003c\/span\u003e\u003cspan class='jdgm-star jdgm--off'\u003e\u003c\/span\u003e\u003cspan class='jdgm-star jdgm--off'\u003e\u003c\/span\u003e \u003c\/div\u003e \u003cdiv class='jdgm-rev-widg__summary-text'\u003eBe the first to write a review\u003c\/div\u003e \u003c\/div\u003e \u003ca style='display: none' href='#' class='jdgm-write-rev-link' role='button'\u003eWrite a review\u003c\/a\u003e \u003cdiv class='jdgm-histogram jdgm-temp-hidden'\u003e \u003cdiv class='jdgm-histogram__row' data-rating='5' data-frequency='0' data-percentage='0'\u003e \u003cdiv class='jdgm-histogram__star' role='button' aria-label=\"0% (0) reviews with 5 star rating\" tabindex='0' \u003e\u003cspan class='jdgm-star jdgm--on'\u003e\u003c\/span\u003e\u003cspan class='jdgm-star jdgm--on'\u003e\u003c\/span\u003e\u003cspan class='jdgm-star jdgm--on'\u003e\u003c\/span\u003e\u003cspan class='jdgm-star jdgm--on'\u003e\u003c\/span\u003e\u003cspan class='jdgm-star jdgm--on'\u003e\u003c\/span\u003e\u003c\/div\u003e \u003cdiv class='jdgm-histogram__bar'\u003e \u003cdiv class='jdgm-histogram__bar-content' style='width: 0%;'\u003e \u003c\/div\u003e \u003c\/div\u003e \u003cdiv class='jdgm-histogram__percentage'\u003e0%\u003c\/div\u003e \u003cdiv class='jdgm-histogram__frequency'\u003e(0)\u003c\/div\u003e \u003c\/div\u003e \u003cdiv class='jdgm-histogram__row' data-rating='4' data-frequency='0' data-percentage='0'\u003e \u003cdiv class='jdgm-histogram__star' role='button' aria-label=\"0% (0) reviews with 4 star rating\" tabindex='0' \u003e\u003cspan class='jdgm-star jdgm--on'\u003e\u003c\/span\u003e\u003cspan class='jdgm-star jdgm--on'\u003e\u003c\/span\u003e\u003cspan class='jdgm-star jdgm--on'\u003e\u003c\/span\u003e\u003cspan class='jdgm-star jdgm--on'\u003e\u003c\/span\u003e\u003cspan class='jdgm-star jdgm--off'\u003e\u003c\/span\u003e\u003c\/div\u003e \u003cdiv class='jdgm-histogram__bar'\u003e \u003cdiv class='jdgm-histogram__bar-content' style='width: 0%;'\u003e \u003c\/div\u003e \u003c\/div\u003e \u003cdiv class='jdgm-histogram__percentage'\u003e0%\u003c\/div\u003e \u003cdiv class='jdgm-histogram__frequency'\u003e(0)\u003c\/div\u003e \u003c\/div\u003e \u003cdiv class='jdgm-histogram__row' data-rating='3' data-frequency='0' data-percentage='0'\u003e \u003cdiv class='jdgm-histogram__star' role='button' aria-label=\"0% (0) reviews with 3 star rating\" tabindex='0' \u003e\u003cspan class='jdgm-star jdgm--on'\u003e\u003c\/span\u003e\u003cspan class='jdgm-star jdgm--on'\u003e\u003c\/span\u003e\u003cspan class='jdgm-star jdgm--on'\u003e\u003c\/span\u003e\u003cspan class='jdgm-star jdgm--off'\u003e\u003c\/span\u003e\u003cspan class='jdgm-star jdgm--off'\u003e\u003c\/span\u003e\u003c\/div\u003e \u003cdiv class='jdgm-histogram__bar'\u003e \u003cdiv class='jdgm-histogram__bar-content' style='width: 0%;'\u003e \u003c\/div\u003e \u003c\/div\u003e \u003cdiv class='jdgm-histogram__percentage'\u003e0%\u003c\/div\u003e \u003cdiv class='jdgm-histogram__frequency'\u003e(0)\u003c\/div\u003e \u003c\/div\u003e \u003cdiv class='jdgm-histogram__row' data-rating='2' data-frequency='0' data-percentage='0'\u003e \u003cdiv class='jdgm-histogram__star' role='button' aria-label=\"0% (0) reviews with 2 star rating\" tabindex='0' \u003e\u003cspan class='jdgm-star jdgm--on'\u003e\u003c\/span\u003e\u003cspan class='jdgm-star jdgm--on'\u003e\u003c\/span\u003e\u003cspan class='jdgm-star jdgm--off'\u003e\u003c\/span\u003e\u003cspan class='jdgm-star jdgm--off'\u003e\u003c\/span\u003e\u003cspan class='jdgm-star jdgm--off'\u003e\u003c\/span\u003e\u003c\/div\u003e \u003cdiv class='jdgm-histogram__bar'\u003e \u003cdiv class='jdgm-histogram__bar-content' style='width: 0%;'\u003e \u003c\/div\u003e \u003c\/div\u003e \u003cdiv class='jdgm-histogram__percentage'\u003e0%\u003c\/div\u003e \u003cdiv class='jdgm-histogram__frequency'\u003e(0)\u003c\/div\u003e \u003c\/div\u003e \u003cdiv class='jdgm-histogram__row' data-rating='1' data-frequency='0' data-percentage='0'\u003e \u003cdiv class='jdgm-histogram__star' role='button' aria-label=\"0% (0) reviews with 1 star rating\" tabindex='0' \u003e\u003cspan class='jdgm-star jdgm--on'\u003e\u003c\/span\u003e\u003cspan class='jdgm-star jdgm--off'\u003e\u003c\/span\u003e\u003cspan class='jdgm-star jdgm--off'\u003e\u003c\/span\u003e\u003cspan class='jdgm-star jdgm--off'\u003e\u003c\/span\u003e\u003cspan class='jdgm-star jdgm--off'\u003e\u003c\/span\u003e\u003c\/div\u003e \u003cdiv class='jdgm-histogram__bar'\u003e \u003cdiv class='jdgm-histogram__bar-content' style='width: 0%;'\u003e \u003c\/div\u003e \u003c\/div\u003e \u003cdiv class='jdgm-histogram__percentage'\u003e0%\u003c\/div\u003e \u003cdiv class='jdgm-histogram__frequency'\u003e(0)\u003c\/div\u003e \u003c\/div\u003e \u003cdiv class='jdgm-histogram__row jdgm-histogram__clear-filter' data-rating=null tabindex='0'\u003e\u003c\/div\u003e \u003c\/div\u003e \u003cdiv class='jdgm-rev-widg__sort-wrapper'\u003e\u003c\/div\u003e \u003c\/div\u003e \u003cdiv class='jdgm-rev-widg__body'\u003e \u003cdiv class='jdgm-rev-widg__reviews'\u003e\u003c\/div\u003e \u003cdiv class='jdgm-paginate' data-per-page='10' data-url='https:\/\/api.judge.me\/reviews\/reviews_for_widget' style=\"display: none;\"\u003e\u003c\/div\u003e \u003c\/div\u003e \u003cdiv class='jdgm-rev-widg__paginate-spinner-wrapper'\u003e \u003cdiv class='jdgm-spinner'\u003e\u003c\/div\u003e \u003c\/div\u003e \u003c\/div\u003e"},"collections":[{"id":261657460925,"handle":"buy","title":"Buy","updated_at":"2025-12-28T20:10:01+08:00","body_html":"\u003cp\u003eBrowse all of our pregnancy, labour \u0026amp; birth, postpartum and baby essentials here.\u003cbr\u003e\u003c\/p\u003e\n\u003cp\u003e\u003cspan\u003eYou can even buy now and pay later with Afterpay!\u003c\/span\u003e\u003c\/p\u003e","published_at":"2021-03-10T12:05:31+08:00","sort_order":"best-selling","template_suffix":"shop-all-collection","disjunctive":false,"rules":[{"column":"title","relation":"not_contains","condition":"Hire"}],"published_scope":"global","image":{"created_at":"2024-05-06T11:59:42+08:00","alt":"Buy - The Birth Store","width":2048,"height":2048,"src":"\/\/www.thebirthstore.com.au\/cdn\/shop\/collections\/buy-964856.jpg?v=1714967982"}},{"id":261658083517,"handle":"post-partum","title":"Postpartum","updated_at":"2025-12-28T20:10:01+08:00","body_html":"\u003cp\u003eShop your postpartum and hospital bag essentials below. Looking for something we don't currently stock? Please reach out and let us know.\u003cbr\u003e\u003c\/p\u003e\n\u003cp\u003e\u003cspan\u003eYou can even buy now and pay later with Afterpay!\u003c\/span\u003e\u003c\/p\u003e","published_at":"2021-03-10T12:33:47+08:00","sort_order":"best-selling","template_suffix":"postpartum-collection","disjunctive":false,"rules":[{"column":"tag","relation":"equals","condition":"Post-Partum"}],"published_scope":"global","image":{"created_at":"2024-05-06T12:00:36+08:00","alt":"Postpartum - The Birth Store","width":611,"height":702,"src":"\/\/www.thebirthstore.com.au\/cdn\/shop\/collections\/postpartum-150119.jpg?v=1714968037"}},{"id":261658149053,"handle":"pregnancy-and-maternity-products","title":"Pregnancy","updated_at":"2025-12-28T20:10:01+08:00","body_html":"\u003cp\u003eShop your pregnancy essentials below. Looking for something we don't currently stock? Please reach out and let us know.\u003cbr\u003e\u003c\/p\u003e\n\u003cp\u003e\u003cspan\u003eYou can even buy now and pay later with Afterpay!\u003c\/span\u003e\u003c\/p\u003e","published_at":"2021-03-10T12:34:22+08:00","sort_order":"best-selling","template_suffix":"pregnancy-collection","disjunctive":false,"rules":[{"column":"tag","relation":"equals","condition":"Pregnancy"}],"published_scope":"global","image":{"created_at":"2024-05-06T12:00:40+08:00","alt":"Pregnancy - The Birth Store","width":1024,"height":1536,"src":"\/\/www.thebirthstore.com.au\/cdn\/shop\/collections\/pregnancy-899677.jpg?v=1714968040"}},{"id":295224901821,"handle":"pregnancy-health","title":"Pregnancy Health","updated_at":"2025-12-27T20:11:40+08:00","body_html":"","published_at":"2023-11-10T20:48:51+08:00","sort_order":"best-selling","template_suffix":"swaddles-collection","disjunctive":false,"rules":[{"column":"tag","relation":"equals","condition":"Pregnancy Health"}],"published_scope":"global","image":{"created_at":"2024-05-06T12:00:41+08:00","alt":"Pregnancy Health - The Birth Store","width":608,"height":410,"src":"\/\/www.thebirthstore.com.au\/cdn\/shop\/collections\/pregnancy-health-343983.jpg?v=1714968042"}},{"id":326523846845,"handle":"pregnancy-health-1","updated_at":"2025-12-27T20:11:40+08:00","published_at":"2025-10-30T10:44:54+08:00","sort_order":"best-selling","template_suffix":"","published_scope":"global","title":"Pregnancy Health","body_html":"","image":{"created_at":"2025-11-20T21:33:56+08:00","alt":"Pregnancy Health - The Birth Store","width":522,"height":525,"src":"\/\/www.thebirthstore.com.au\/cdn\/shop\/collections\/pregnancy-health-1617860.jpg?v=1763645636"}},{"id":291456483517,"handle":"shop-all","title":"Shop All - Mum","updated_at":"2025-12-28T20:10:01+08:00","body_html":"","published_at":"2022-12-23T22:04:39+08:00","sort_order":"best-selling","template_suffix":"shop-all-collection","disjunctive":false,"rules":[{"column":"variant_price","relation":"greater_than","condition":"1"},{"column":"title","relation":"not_contains","condition":"Batteries"},{"column":"tag","relation":"equals","condition":"Mum"}],"published_scope":"global","image":{"created_at":"2024-05-06T12:00:54+08:00","alt":"Shop All - The Birth Store","width":1365,"height":2048,"src":"\/\/www.thebirthstore.com.au\/cdn\/shop\/collections\/shop-all-693176.jpg?v=1714968055"}},{"id":310045933757,"handle":"shop-all-sale","title":"Shop All Sale","updated_at":"2025-12-28T20:10:01+08:00","body_html":"","published_at":"2024-11-12T13:22:43+08:00","sort_order":"alpha-asc","template_suffix":"","disjunctive":true,"rules":[{"column":"tag","relation":"equals","condition":"Bundles"},{"column":"vendor","relation":"equals","condition":"Franjos Kitchen"},{"column":"vendor","relation":"equals","condition":"Adored Illustrations"},{"column":"vendor","relation":"equals","condition":"Amazing Oils"},{"column":"vendor","relation":"equals","condition":"Ice Ice Booby"},{"column":"vendor","relation":"equals","condition":"Made to Milk"},{"column":"vendor","relation":"equals","condition":"Milky Goodness"},{"column":"vendor","relation":"equals","condition":"Seasons of Mama"},{"column":"vendor","relation":"equals","condition":"Silverette"},{"column":"vendor","relation":"equals","condition":"Snuggle Hunny"},{"column":"vendor","relation":"equals","condition":"Yung Bod"},{"column":"vendor","relation":"equals","condition":"Bare Love"},{"column":"vendor","relation":"equals","condition":"Haakaa"},{"column":"vendor","relation":"equals","condition":"Mere Botanicals"},{"column":"vendor","relation":"equals","condition":"The Birth Store Hire"},{"column":"vendor","relation":"equals","condition":"The Birth Store"}],"published_scope":"global","image":{"created_at":"2024-11-13T10:58:16+08:00","alt":"Shop All Sale - The Birth Store","width":2048,"height":1365,"src":"\/\/www.thebirthstore.com.au\/cdn\/shop\/collections\/shop-all-sale-297361.jpg?v=1731466697"}},{"id":324680483005,"handle":"skin-care","title":"Skin Care","updated_at":"2025-12-28T20:10:01+08:00","body_html":"","published_at":"2025-09-23T22:14:11+08:00","sort_order":"best-selling","template_suffix":"","disjunctive":false,"rules":[{"column":"tag","relation":"equals","condition":"Skin Care"}],"published_scope":"global","image":{"created_at":"2025-10-30T16:17:08+08:00","alt":"Skin Care - The Birth Store","width":800,"height":800,"src":"\/\/www.thebirthstore.com.au\/cdn\/shop\/collections\/skin-care-6874549.jpg?v=1761812228"}},{"id":295228211389,"handle":"sleep-issues","title":"Sleep Issues","updated_at":"2025-12-24T20:09:23+08:00","body_html":"","published_at":"2023-11-10T23:27:56+08:00","sort_order":"best-selling","template_suffix":"swaddles-collection","disjunctive":false,"rules":[{"column":"tag","relation":"equals","condition":"Sleep Issues"}],"published_scope":"global","image":{"created_at":"2024-05-06T12:00:57+08:00","alt":"Sleep Issues - The Birth Store","width":869,"height":868,"src":"\/\/www.thebirthstore.com.au\/cdn\/shop\/collections\/sleep-issues-572906.jpg?v=1714968058"}}]}
[{"alt":"Magnesium Sensitive Spray 125ml - The Birth Store-Amazing Oils","id":27007589843133,"position":1,"preview_image":{"aspect_ratio":1.0,"height":1080,"width":1080,"src":"\/\/www.thebirthstore.com.au\/cdn\/shop\/files\/magnesium-sensitive-spray-125ml-505223.jpg?v=1714967988"},"aspect_ratio":1.0,"height":1080,"media_type":"image","src":"\/\/www.thebirthstore.com.au\/cdn\/shop\/files\/magnesium-sensitive-spray-125ml-505223.jpg?v=1714967988","width":1080},{"alt":"Magnesium Sensitive Spray 125ml - The Birth Store-Amazing Oils","id":27007589974205,"position":2,"preview_image":{"aspect_ratio":1.0,"height":800,"width":800,"src":"\/\/www.thebirthstore.com.au\/cdn\/shop\/files\/magnesium-sensitive-spray-125ml-911649.jpg?v=1714967988"},"aspect_ratio":1.0,"height":800,"media_type":"image","src":"\/\/www.thebirthstore.com.au\/cdn\/shop\/files\/magnesium-sensitive-spray-125ml-911649.jpg?v=1714967988","width":800},{"alt":"Magnesium Sensitive Spray 125ml - The Birth Store - Amazing Oils","id":28629742715069,"position":3,"preview_image":{"aspect_ratio":1.0,"height":1024,"width":1024,"src":"\/\/www.thebirthstore.com.au\/cdn\/shop\/files\/magnesium-sensitive-spray-125ml-707167.webp?v=1745718725"},"aspect_ratio":1.0,"height":1024,"media_type":"image","src":"\/\/www.thebirthstore.com.au\/cdn\/shop\/files\/magnesium-sensitive-spray-125ml-707167.webp?v=1745718725","width":1024}]
{"item":{"id":7493037129917,"title":"Magnesium Sleep Bath Flakes 800g","handle":"magnesium-sleep-bath-flakes-800g","description":"\u003cp\u003e\u003cspan data-mce-fragment=\"1\"\u003eSoak away the days stresses and strains with \u003c\/span\u003e\u003cstrong data-mce-fragment=\"1\"\u003epure magnesium bath flakes, infused with lavender and chamomile\u003c\/strong\u003e\u003cspan data-mce-fragment=\"1\"\u003e. Let the day melt away and feel the soft, warm water against your skin. These flakes will be your personalised \u003c\/span\u003e\u003cstrong data-mce-fragment=\"1\"\u003erelaxation experience\u003c\/strong\u003e\u003cspan data-mce-fragment=\"1\"\u003e. Made from pure, magnesium chloride flakes (not magnesium sulfate (epsom salts).\u003c\/span\u003e\u003c\/p\u003e\n\u003cp\u003e\u003cspan data-mce-fragment=\"1\"\u003eTaking a warm bath in these amazing magnesium flakes is a highly effective way to relax and unwind after a long day. Magnesium baths have traditionally been used in many ancient therapies around the world. The addition of lavender and chamomile essentials oils also support sleep and relaxation.\u003c\/span\u003e\u003c\/p\u003e\n\u003cp\u003eTear open the top of the bag and pour 1\/2 a cup into a regular sized bath or a tablespoon into a foot bath. Reseal bag after use. We recommend using in conjunction with daily use of your magnesium spray, gel or lotion.\u003c\/p\u003e\n\u003cp\u003e♻︎ Amazing Oils products are recyclable in your normal household recycling. They use recyclable plastic to reduce packaging waste. Please recycle your pouch after use.\u003c\/p\u003e\n\u003cp\u003e\u003cspan\u003eThis product needs to be stored below 25'C in a cool dry place away from direct sunlight.\u003c\/span\u003e\u003c\/p\u003e","published_at":"2023-07-17T13:17:35+08:00","created_at":"2023-07-17T12:21:35+08:00","vendor":"Amazing Oils","type":"","tags":["C-Section Birth Recovery","Hemorrhoids","Mum","Pain Relief","Peri Care","Post-Partum","Pregnancy","Pregnancy Health","Sleep Issues","Vaginal Birth Recovery"],"price":2495,"price_min":2495,"price_max":2495,"available":true,"price_varies":false,"compare_at_price":null,"compare_at_price_min":0,"compare_at_price_max":0,"compare_at_price_varies":false,"variants":[{"id":42924359549117,"title":"Default Title","option1":"Default Title","option2":null,"option3":null,"sku":"","requires_shipping":true,"taxable":false,"featured_image":null,"available":true,"name":"Magnesium Sleep Bath Flakes 800g","public_title":null,"options":["Default Title"],"price":2495,"weight":880,"compare_at_price":null,"inventory_management":"shopify","barcode":"59549117","requires_selling_plan":false,"selling_plan_allocations":[]}],"images":["\/\/www.thebirthstore.com.au\/cdn\/shop\/files\/magnesium-sleep-bath-flakes-800g-138211.jpg?v=1714967990","\/\/www.thebirthstore.com.au\/cdn\/shop\/files\/magnesium-sleep-bath-flakes-800g-958661.jpg?v=1714967990","\/\/www.thebirthstore.com.au\/cdn\/shop\/files\/magnesium-sleep-bath-flakes-800g-294680.jpg?v=1714967990"],"featured_image":"\/\/www.thebirthstore.com.au\/cdn\/shop\/files\/magnesium-sleep-bath-flakes-800g-138211.jpg?v=1714967990","options":["Title"],"media":[{"alt":"Magnesium Sleep Bath Flakes 800g - The Birth Store-Amazing Oils","id":27007591186621,"position":1,"preview_image":{"aspect_ratio":1.0,"height":1080,"width":1080,"src":"\/\/www.thebirthstore.com.au\/cdn\/shop\/files\/magnesium-sleep-bath-flakes-800g-138211.jpg?v=1714967990"},"aspect_ratio":1.0,"height":1080,"media_type":"image","src":"\/\/www.thebirthstore.com.au\/cdn\/shop\/files\/magnesium-sleep-bath-flakes-800g-138211.jpg?v=1714967990","width":1080},{"alt":"Magnesium Sleep Bath Flakes 800g - The Birth Store-Amazing Oils","id":27007591219389,"position":2,"preview_image":{"aspect_ratio":1.0,"height":800,"width":800,"src":"\/\/www.thebirthstore.com.au\/cdn\/shop\/files\/magnesium-sleep-bath-flakes-800g-958661.jpg?v=1714967990"},"aspect_ratio":1.0,"height":800,"media_type":"image","src":"\/\/www.thebirthstore.com.au\/cdn\/shop\/files\/magnesium-sleep-bath-flakes-800g-958661.jpg?v=1714967990","width":800},{"alt":"Magnesium Sleep Bath Flakes 800g - The Birth Store-Amazing Oils","id":27007591252157,"position":3,"preview_image":{"aspect_ratio":1.0,"height":800,"width":800,"src":"\/\/www.thebirthstore.com.au\/cdn\/shop\/files\/magnesium-sleep-bath-flakes-800g-294680.jpg?v=1714967990"},"aspect_ratio":1.0,"height":800,"media_type":"image","src":"\/\/www.thebirthstore.com.au\/cdn\/shop\/files\/magnesium-sleep-bath-flakes-800g-294680.jpg?v=1714967990","width":800}],"requires_selling_plan":false,"selling_plan_groups":[],"content":"\u003cp\u003e\u003cspan data-mce-fragment=\"1\"\u003eSoak away the days stresses and strains with \u003c\/span\u003e\u003cstrong data-mce-fragment=\"1\"\u003epure magnesium bath flakes, infused with lavender and chamomile\u003c\/strong\u003e\u003cspan data-mce-fragment=\"1\"\u003e. Let the day melt away and feel the soft, warm water against your skin. These flakes will be your personalised \u003c\/span\u003e\u003cstrong data-mce-fragment=\"1\"\u003erelaxation experience\u003c\/strong\u003e\u003cspan data-mce-fragment=\"1\"\u003e. Made from pure, magnesium chloride flakes (not magnesium sulfate (epsom salts).\u003c\/span\u003e\u003c\/p\u003e\n\u003cp\u003e\u003cspan data-mce-fragment=\"1\"\u003eTaking a warm bath in these amazing magnesium flakes is a highly effective way to relax and unwind after a long day. Magnesium baths have traditionally been used in many ancient therapies around the world. The addition of lavender and chamomile essentials oils also support sleep and relaxation.\u003c\/span\u003e\u003c\/p\u003e\n\u003cp\u003eTear open the top of the bag and pour 1\/2 a cup into a regular sized bath or a tablespoon into a foot bath. Reseal bag after use. We recommend using in conjunction with daily use of your magnesium spray, gel or lotion.\u003c\/p\u003e\n\u003cp\u003e♻︎ Amazing Oils products are recyclable in your normal household recycling. They use recyclable plastic to reduce packaging waste. Please recycle your pouch after use.\u003c\/p\u003e\n\u003cp\u003e\u003cspan\u003eThis product needs to be stored below 25'C in a cool dry place away from direct sunlight.\u003c\/span\u003e\u003c\/p\u003e"},"options":[{"name":"Title","position":1,"values":["Default Title"]}],"custom_metafields":{},"metafields":{"badge":"\u003cdiv style='display:none' class='jdgm-prev-badge' data-average-rating='0.00' data-number-of-reviews='0' data-number-of-questions='0'\u003e \u003cspan class='jdgm-prev-badge__stars' data-score='0.00' tabindex='0' aria-label='0.00 stars' role='button'\u003e \u003cspan class='jdgm-star jdgm--off'\u003e\u003c\/span\u003e\u003cspan class='jdgm-star jdgm--off'\u003e\u003c\/span\u003e\u003cspan class='jdgm-star jdgm--off'\u003e\u003c\/span\u003e\u003cspan class='jdgm-star jdgm--off'\u003e\u003c\/span\u003e\u003cspan class='jdgm-star jdgm--off'\u003e\u003c\/span\u003e \u003c\/span\u003e \u003cspan class='jdgm-prev-badge__text'\u003e No reviews \u003c\/span\u003e \u003c\/div\u003e","widget":"\u003cdiv class='jdgm-rev-widg' data-updated-at='2025-06-13T16:12:53Z' data-average-rating='0.00' data-number-of-reviews='0' data-number-of-questions='0'\u003e \u003cstyle class='jdgm-temp-hiding-style'\u003e.jdgm-rev-widg{ display: none }\u003c\/style\u003e \u003cdiv class='jdgm-rev-widg__header'\u003e \u003ch2 class='jdgm-rev-widg__title'\u003eCustomer Reviews\u003c\/h2\u003e \u003cdiv class='jdgm-rev-widg__summary'\u003e \u003cdiv class='jdgm-rev-widg__summary-stars' aria-label='Average rating is 0.00 stars' role='img'\u003e \u003cspan class='jdgm-star jdgm--off'\u003e\u003c\/span\u003e\u003cspan class='jdgm-star jdgm--off'\u003e\u003c\/span\u003e\u003cspan class='jdgm-star jdgm--off'\u003e\u003c\/span\u003e\u003cspan class='jdgm-star jdgm--off'\u003e\u003c\/span\u003e\u003cspan class='jdgm-star jdgm--off'\u003e\u003c\/span\u003e \u003c\/div\u003e \u003cdiv class='jdgm-rev-widg__summary-text'\u003eBe the first to write a review\u003c\/div\u003e \u003c\/div\u003e \u003ca style='display: none' href='#' class='jdgm-write-rev-link' role='button'\u003eWrite a review\u003c\/a\u003e \u003cdiv class='jdgm-histogram jdgm-temp-hidden'\u003e \u003cdiv class='jdgm-histogram__row' data-rating='5' data-frequency='0' data-percentage='0'\u003e \u003cdiv class='jdgm-histogram__star' role='button' aria-label=\"0% (0) reviews with 5 star rating\" tabindex='0' \u003e\u003cspan class='jdgm-star jdgm--on'\u003e\u003c\/span\u003e\u003cspan class='jdgm-star jdgm--on'\u003e\u003c\/span\u003e\u003cspan class='jdgm-star jdgm--on'\u003e\u003c\/span\u003e\u003cspan class='jdgm-star jdgm--on'\u003e\u003c\/span\u003e\u003cspan class='jdgm-star jdgm--on'\u003e\u003c\/span\u003e\u003c\/div\u003e \u003cdiv class='jdgm-histogram__bar'\u003e \u003cdiv class='jdgm-histogram__bar-content' style='width: 0%;'\u003e \u003c\/div\u003e \u003c\/div\u003e \u003cdiv class='jdgm-histogram__percentage'\u003e0%\u003c\/div\u003e \u003cdiv class='jdgm-histogram__frequency'\u003e(0)\u003c\/div\u003e \u003c\/div\u003e \u003cdiv class='jdgm-histogram__row' data-rating='4' data-frequency='0' data-percentage='0'\u003e \u003cdiv class='jdgm-histogram__star' role='button' aria-label=\"0% (0) reviews with 4 star rating\" tabindex='0' \u003e\u003cspan class='jdgm-star jdgm--on'\u003e\u003c\/span\u003e\u003cspan class='jdgm-star jdgm--on'\u003e\u003c\/span\u003e\u003cspan class='jdgm-star jdgm--on'\u003e\u003c\/span\u003e\u003cspan class='jdgm-star jdgm--on'\u003e\u003c\/span\u003e\u003cspan class='jdgm-star jdgm--off'\u003e\u003c\/span\u003e\u003c\/div\u003e \u003cdiv class='jdgm-histogram__bar'\u003e \u003cdiv class='jdgm-histogram__bar-content' style='width: 0%;'\u003e \u003c\/div\u003e \u003c\/div\u003e \u003cdiv class='jdgm-histogram__percentage'\u003e0%\u003c\/div\u003e \u003cdiv class='jdgm-histogram__frequency'\u003e(0)\u003c\/div\u003e \u003c\/div\u003e \u003cdiv class='jdgm-histogram__row' data-rating='3' data-frequency='0' data-percentage='0'\u003e \u003cdiv class='jdgm-histogram__star' role='button' aria-label=\"0% (0) reviews with 3 star rating\" tabindex='0' \u003e\u003cspan class='jdgm-star jdgm--on'\u003e\u003c\/span\u003e\u003cspan class='jdgm-star jdgm--on'\u003e\u003c\/span\u003e\u003cspan class='jdgm-star jdgm--on'\u003e\u003c\/span\u003e\u003cspan class='jdgm-star jdgm--off'\u003e\u003c\/span\u003e\u003cspan class='jdgm-star jdgm--off'\u003e\u003c\/span\u003e\u003c\/div\u003e \u003cdiv class='jdgm-histogram__bar'\u003e \u003cdiv class='jdgm-histogram__bar-content' style='width: 0%;'\u003e \u003c\/div\u003e \u003c\/div\u003e \u003cdiv class='jdgm-histogram__percentage'\u003e0%\u003c\/div\u003e \u003cdiv class='jdgm-histogram__frequency'\u003e(0)\u003c\/div\u003e \u003c\/div\u003e \u003cdiv class='jdgm-histogram__row' data-rating='2' data-frequency='0' data-percentage='0'\u003e \u003cdiv class='jdgm-histogram__star' role='button' aria-label=\"0% (0) reviews with 2 star rating\" tabindex='0' \u003e\u003cspan class='jdgm-star jdgm--on'\u003e\u003c\/span\u003e\u003cspan class='jdgm-star jdgm--on'\u003e\u003c\/span\u003e\u003cspan class='jdgm-star jdgm--off'\u003e\u003c\/span\u003e\u003cspan class='jdgm-star jdgm--off'\u003e\u003c\/span\u003e\u003cspan class='jdgm-star jdgm--off'\u003e\u003c\/span\u003e\u003c\/div\u003e \u003cdiv class='jdgm-histogram__bar'\u003e \u003cdiv class='jdgm-histogram__bar-content' style='width: 0%;'\u003e \u003c\/div\u003e \u003c\/div\u003e \u003cdiv class='jdgm-histogram__percentage'\u003e0%\u003c\/div\u003e \u003cdiv class='jdgm-histogram__frequency'\u003e(0)\u003c\/div\u003e \u003c\/div\u003e \u003cdiv class='jdgm-histogram__row' data-rating='1' data-frequency='0' data-percentage='0'\u003e \u003cdiv class='jdgm-histogram__star' role='button' aria-label=\"0% (0) reviews with 1 star rating\" tabindex='0' \u003e\u003cspan class='jdgm-star jdgm--on'\u003e\u003c\/span\u003e\u003cspan class='jdgm-star jdgm--off'\u003e\u003c\/span\u003e\u003cspan class='jdgm-star jdgm--off'\u003e\u003c\/span\u003e\u003cspan class='jdgm-star jdgm--off'\u003e\u003c\/span\u003e\u003cspan class='jdgm-star jdgm--off'\u003e\u003c\/span\u003e\u003c\/div\u003e \u003cdiv class='jdgm-histogram__bar'\u003e \u003cdiv class='jdgm-histogram__bar-content' style='width: 0%;'\u003e \u003c\/div\u003e \u003c\/div\u003e \u003cdiv class='jdgm-histogram__percentage'\u003e0%\u003c\/div\u003e \u003cdiv class='jdgm-histogram__frequency'\u003e(0)\u003c\/div\u003e \u003c\/div\u003e \u003cdiv class='jdgm-histogram__row jdgm-histogram__clear-filter' data-rating=null tabindex='0'\u003e\u003c\/div\u003e \u003c\/div\u003e \u003cdiv class='jdgm-rev-widg__sort-wrapper'\u003e\u003c\/div\u003e \u003c\/div\u003e \u003cdiv class='jdgm-rev-widg__body'\u003e \u003cdiv class='jdgm-rev-widg__reviews'\u003e\u003c\/div\u003e \u003cdiv class='jdgm-paginate' data-per-page='10' data-url='https:\/\/api.judge.me\/reviews\/reviews_for_widget' style=\"display: none;\"\u003e\u003c\/div\u003e \u003c\/div\u003e \u003cdiv class='jdgm-rev-widg__paginate-spinner-wrapper'\u003e \u003cdiv class='jdgm-spinner'\u003e\u003c\/div\u003e \u003c\/div\u003e \u003c\/div\u003e"},"collections":[{"id":261657460925,"handle":"buy","title":"Buy","updated_at":"2025-12-28T20:10:01+08:00","body_html":"\u003cp\u003eBrowse all of our pregnancy, labour \u0026amp; birth, postpartum and baby essentials here.\u003cbr\u003e\u003c\/p\u003e\n\u003cp\u003e\u003cspan\u003eYou can even buy now and pay later with Afterpay!\u003c\/span\u003e\u003c\/p\u003e","published_at":"2021-03-10T12:05:31+08:00","sort_order":"best-selling","template_suffix":"shop-all-collection","disjunctive":false,"rules":[{"column":"title","relation":"not_contains","condition":"Hire"}],"published_scope":"global","image":{"created_at":"2024-05-06T11:59:42+08:00","alt":"Buy - The Birth Store","width":2048,"height":2048,"src":"\/\/www.thebirthstore.com.au\/cdn\/shop\/collections\/buy-964856.jpg?v=1714967982"}},{"id":281712361661,"handle":"c-section-birth-recovery","title":"C-Section Birth Recovery","updated_at":"2025-12-27T20:11:39+08:00","body_html":"","published_at":"2021-12-20T14:19:01+08:00","sort_order":"best-selling","template_suffix":"swaddles-collection","disjunctive":false,"rules":[{"column":"tag","relation":"equals","condition":"C-Section Birth Recovery"}],"published_scope":"global","image":{"created_at":"2024-05-06T11:59:49+08:00","alt":"C-Section Birth Recovery - The Birth Store","width":1366,"height":2048,"src":"\/\/www.thebirthstore.com.au\/cdn\/shop\/collections\/c-section-birth-recovery-359249.jpg?v=1714967990"}},{"id":281712066749,"handle":"hemorrhoid-care","title":"Haemorrhoid Care","updated_at":"2025-12-28T20:10:01+08:00","body_html":"","published_at":"2021-12-20T14:16:30+08:00","sort_order":"best-selling","template_suffix":"swaddles-collection","disjunctive":false,"rules":[{"column":"tag","relation":"equals","condition":"Hemorrhoids"}],"published_scope":"global","image":{"created_at":"2024-05-06T12:00:00+08:00","alt":"Haemorrhoid Care - The Birth Store","width":763,"height":556,"src":"\/\/www.thebirthstore.com.au\/cdn\/shop\/collections\/haemorrhoid-care-562138.jpg?v=1714968001"}},{"id":281712591037,"handle":"pain-relief","title":"Pain Relief","updated_at":"2025-12-28T20:10:01+08:00","body_html":"","published_at":"2021-12-20T14:22:45+08:00","sort_order":"best-selling","template_suffix":"pain-relief-collection","disjunctive":false,"rules":[{"column":"tag","relation":"equals","condition":"Pain Relief"}],"published_scope":"global","image":{"created_at":"2024-05-06T12:00:27+08:00","alt":"Pain Relief - The Birth Store","width":1365,"height":2048,"src":"\/\/www.thebirthstore.com.au\/cdn\/shop\/collections\/pain-relief-878865.jpg?v=1714968027"}},{"id":295224705213,"handle":"perineal-care","title":"Perineal Care","updated_at":"2025-12-28T20:10:01+08:00","body_html":"","published_at":"2023-11-10T20:43:30+08:00","sort_order":"best-selling","template_suffix":"perineal-care-collection","disjunctive":false,"rules":[{"column":"tag","relation":"equals","condition":"Peri Care"}],"published_scope":"global","image":{"created_at":"2024-05-06T12:00:33+08:00","alt":"Perineal Care - The Birth Store","width":1024,"height":1536,"src":"\/\/www.thebirthstore.com.au\/cdn\/shop\/collections\/perineal-care-657628.jpg?v=1714968034"}},{"id":261658083517,"handle":"post-partum","title":"Postpartum","updated_at":"2025-12-28T20:10:01+08:00","body_html":"\u003cp\u003eShop your postpartum and hospital bag essentials below. Looking for something we don't currently stock? Please reach out and let us know.\u003cbr\u003e\u003c\/p\u003e\n\u003cp\u003e\u003cspan\u003eYou can even buy now and pay later with Afterpay!\u003c\/span\u003e\u003c\/p\u003e","published_at":"2021-03-10T12:33:47+08:00","sort_order":"best-selling","template_suffix":"postpartum-collection","disjunctive":false,"rules":[{"column":"tag","relation":"equals","condition":"Post-Partum"}],"published_scope":"global","image":{"created_at":"2024-05-06T12:00:36+08:00","alt":"Postpartum - The Birth Store","width":611,"height":702,"src":"\/\/www.thebirthstore.com.au\/cdn\/shop\/collections\/postpartum-150119.jpg?v=1714968037"}},{"id":261658149053,"handle":"pregnancy-and-maternity-products","title":"Pregnancy","updated_at":"2025-12-28T20:10:01+08:00","body_html":"\u003cp\u003eShop your pregnancy essentials below. Looking for something we don't currently stock? Please reach out and let us know.\u003cbr\u003e\u003c\/p\u003e\n\u003cp\u003e\u003cspan\u003eYou can even buy now and pay later with Afterpay!\u003c\/span\u003e\u003c\/p\u003e","published_at":"2021-03-10T12:34:22+08:00","sort_order":"best-selling","template_suffix":"pregnancy-collection","disjunctive":false,"rules":[{"column":"tag","relation":"equals","condition":"Pregnancy"}],"published_scope":"global","image":{"created_at":"2024-05-06T12:00:40+08:00","alt":"Pregnancy - The Birth Store","width":1024,"height":1536,"src":"\/\/www.thebirthstore.com.au\/cdn\/shop\/collections\/pregnancy-899677.jpg?v=1714968040"}},{"id":295224901821,"handle":"pregnancy-health","title":"Pregnancy Health","updated_at":"2025-12-27T20:11:40+08:00","body_html":"","published_at":"2023-11-10T20:48:51+08:00","sort_order":"best-selling","template_suffix":"swaddles-collection","disjunctive":false,"rules":[{"column":"tag","relation":"equals","condition":"Pregnancy Health"}],"published_scope":"global","image":{"created_at":"2024-05-06T12:00:41+08:00","alt":"Pregnancy Health - The Birth Store","width":608,"height":410,"src":"\/\/www.thebirthstore.com.au\/cdn\/shop\/collections\/pregnancy-health-343983.jpg?v=1714968042"}},{"id":326523846845,"handle":"pregnancy-health-1","updated_at":"2025-12-27T20:11:40+08:00","published_at":"2025-10-30T10:44:54+08:00","sort_order":"best-selling","template_suffix":"","published_scope":"global","title":"Pregnancy Health","body_html":"","image":{"created_at":"2025-11-20T21:33:56+08:00","alt":"Pregnancy Health - The Birth Store","width":522,"height":525,"src":"\/\/www.thebirthstore.com.au\/cdn\/shop\/collections\/pregnancy-health-1617860.jpg?v=1763645636"}},{"id":291456483517,"handle":"shop-all","title":"Shop All - Mum","updated_at":"2025-12-28T20:10:01+08:00","body_html":"","published_at":"2022-12-23T22:04:39+08:00","sort_order":"best-selling","template_suffix":"shop-all-collection","disjunctive":false,"rules":[{"column":"variant_price","relation":"greater_than","condition":"1"},{"column":"title","relation":"not_contains","condition":"Batteries"},{"column":"tag","relation":"equals","condition":"Mum"}],"published_scope":"global","image":{"created_at":"2024-05-06T12:00:54+08:00","alt":"Shop All - The Birth Store","width":1365,"height":2048,"src":"\/\/www.thebirthstore.com.au\/cdn\/shop\/collections\/shop-all-693176.jpg?v=1714968055"}},{"id":310045933757,"handle":"shop-all-sale","title":"Shop All Sale","updated_at":"2025-12-28T20:10:01+08:00","body_html":"","published_at":"2024-11-12T13:22:43+08:00","sort_order":"alpha-asc","template_suffix":"","disjunctive":true,"rules":[{"column":"tag","relation":"equals","condition":"Bundles"},{"column":"vendor","relation":"equals","condition":"Franjos Kitchen"},{"column":"vendor","relation":"equals","condition":"Adored Illustrations"},{"column":"vendor","relation":"equals","condition":"Amazing Oils"},{"column":"vendor","relation":"equals","condition":"Ice Ice Booby"},{"column":"vendor","relation":"equals","condition":"Made to Milk"},{"column":"vendor","relation":"equals","condition":"Milky Goodness"},{"column":"vendor","relation":"equals","condition":"Seasons of Mama"},{"column":"vendor","relation":"equals","condition":"Silverette"},{"column":"vendor","relation":"equals","condition":"Snuggle Hunny"},{"column":"vendor","relation":"equals","condition":"Yung Bod"},{"column":"vendor","relation":"equals","condition":"Bare Love"},{"column":"vendor","relation":"equals","condition":"Haakaa"},{"column":"vendor","relation":"equals","condition":"Mere Botanicals"},{"column":"vendor","relation":"equals","condition":"The Birth Store Hire"},{"column":"vendor","relation":"equals","condition":"The Birth Store"}],"published_scope":"global","image":{"created_at":"2024-11-13T10:58:16+08:00","alt":"Shop All Sale - The Birth Store","width":2048,"height":1365,"src":"\/\/www.thebirthstore.com.au\/cdn\/shop\/collections\/shop-all-sale-297361.jpg?v=1731466697"}},{"id":295228211389,"handle":"sleep-issues","title":"Sleep Issues","updated_at":"2025-12-24T20:09:23+08:00","body_html":"","published_at":"2023-11-10T23:27:56+08:00","sort_order":"best-selling","template_suffix":"swaddles-collection","disjunctive":false,"rules":[{"column":"tag","relation":"equals","condition":"Sleep Issues"}],"published_scope":"global","image":{"created_at":"2024-05-06T12:00:57+08:00","alt":"Sleep Issues - The Birth Store","width":869,"height":868,"src":"\/\/www.thebirthstore.com.au\/cdn\/shop\/collections\/sleep-issues-572906.jpg?v=1714968058"}},{"id":281712197821,"handle":"vaginal-birth-recovery","title":"Vaginal Birth Recovery","updated_at":"2025-12-28T20:10:01+08:00","body_html":"","published_at":"2021-12-20T14:18:23+08:00","sort_order":"best-selling","template_suffix":"swaddles-collection","disjunctive":true,"rules":[{"column":"tag","relation":"equals","condition":"Vaginal Birth Recovery"},{"column":"tag","relation":"equals","condition":"Vaginal Birth Recover"}],"published_scope":"global","image":{"created_at":"2024-05-06T12:01:03+08:00","alt":"Vaginal Birth Recovery - The Birth Store","width":2048,"height":2048,"src":"\/\/www.thebirthstore.com.au\/cdn\/shop\/collections\/vaginal-birth-recovery-449034.jpg?v=1714968063"}}]}
[{"alt":"Magnesium Sleep Bath Flakes 800g - The Birth Store-Amazing Oils","id":27007591186621,"position":1,"preview_image":{"aspect_ratio":1.0,"height":1080,"width":1080,"src":"\/\/www.thebirthstore.com.au\/cdn\/shop\/files\/magnesium-sleep-bath-flakes-800g-138211.jpg?v=1714967990"},"aspect_ratio":1.0,"height":1080,"media_type":"image","src":"\/\/www.thebirthstore.com.au\/cdn\/shop\/files\/magnesium-sleep-bath-flakes-800g-138211.jpg?v=1714967990","width":1080},{"alt":"Magnesium Sleep Bath Flakes 800g - The Birth Store-Amazing Oils","id":27007591219389,"position":2,"preview_image":{"aspect_ratio":1.0,"height":800,"width":800,"src":"\/\/www.thebirthstore.com.au\/cdn\/shop\/files\/magnesium-sleep-bath-flakes-800g-958661.jpg?v=1714967990"},"aspect_ratio":1.0,"height":800,"media_type":"image","src":"\/\/www.thebirthstore.com.au\/cdn\/shop\/files\/magnesium-sleep-bath-flakes-800g-958661.jpg?v=1714967990","width":800},{"alt":"Magnesium Sleep Bath Flakes 800g - The Birth Store-Amazing Oils","id":27007591252157,"position":3,"preview_image":{"aspect_ratio":1.0,"height":800,"width":800,"src":"\/\/www.thebirthstore.com.au\/cdn\/shop\/files\/magnesium-sleep-bath-flakes-800g-294680.jpg?v=1714967990"},"aspect_ratio":1.0,"height":800,"media_type":"image","src":"\/\/www.thebirthstore.com.au\/cdn\/shop\/files\/magnesium-sleep-bath-flakes-800g-294680.jpg?v=1714967990","width":800}]
{"item":{"id":7493037097149,"title":"Magnesium Sleep Lotion 125ml","handle":"magnesium-sleep-lotion-125ml","description":"\u003cp\u003e\u003cspan data-mce-fragment=\"1\"\u003eBy combining the amazing benefits of \u003c\/span\u003e\u003cstrong data-mce-fragment=\"1\"\u003emagnesium\u003c\/strong\u003e\u003cspan data-mce-fragment=\"1\"\u003e with the traditional healing properties of \u003c\/span\u003e\u003cstrong data-mce-fragment=\"1\"\u003elavender\u003c\/strong\u003e\u003cspan data-mce-fragment=\"1\"\u003e and \u003c\/span\u003e\u003cstrong data-mce-fragment=\"1\"\u003echamomile\u003c\/strong\u003e\u003cspan data-mce-fragment=\"1\"\u003e, we have formulated a luxurious pre-sleep experience that will leave you feeling refreshed and rejuvenated after a peaceful nights sleep.\u003c\/span\u003e\u003c\/p\u003e\n\u003cp\u003eOur Magnesium\u003cspan\u003e \u003c\/span\u003e\u003cstrong\u003eSleep Lotion\u003c\/strong\u003e\u003cspan\u003e \u003c\/span\u003eis one of our most exciting products yet. Now available after years of research and development. The creamy lotion glides onto skin smoothly and leaves behind a very subtle fragrance of natural oils.\u003c\/p\u003e\n\u003cp\u003e\u003cstrong\u003eAustralian-Made | Vegan | Scientifically Formulated\u003c\/strong\u003e\u003c\/p\u003e\n\u003cp\u003e\u003cem\u003e\"I have been applying to my feet and legs each night and I fall asleep faster and my quality of sleep has improved. Smells great and feels nice on the skin. Would recommend and will be buying again.\" - Kim K.\u003c\/em\u003e\u003c\/p\u003e\n\u003cp\u003eThese ingredients in our Sleep Lotion have been traditionally used in Western herbal medicine to:\u003c\/p\u003e\n\u003cul\u003e\n\u003cli\u003eAssist mind relaxation.\u003c\/li\u003e\n\u003cli\u003eCalm and relax the nervous system.\u003c\/li\u003e\n\u003cli\u003eInduce sleep.\u003c\/li\u003e\n\u003cli\u003eRelieve sleeplessness.\u003c\/li\u003e\n\u003cli\u003eReduce time to fall asleep.\u003c\/li\u003e\n\u003cli\u003eRelieve disturbed\/restless sleep.\u003c\/li\u003e\n\u003cli\u003eRelieve skin inflammation and irritation.\u003c\/li\u003e\n\u003c\/ul\u003e\n\u003cp\u003e\u003cspan\u003e\u003cstrong\u003eThe Magnesium Pro Sleep Lotion is a TGA Listed Product (AUST L 318335)\u003c\/strong\u003e\u003c\/span\u003e\u003c\/p\u003e\n\u003cdiv class=\"product-block\n product-block--description\"\u003e\n\u003cdiv class=\"description\"\u003e\n\u003cdiv class=\"rte\"\u003e\n\u003cdiv data-region=\"main\" data-shogun-variant-id=\"64a6841971ca6000ccce858c\" data-shogun-platform-type=\"shopify\" data-shogun-page-version-id=\"64a6841971ca6000ccce8542\" data-shogun-page-id=\"60c980d0414b8800cfe2491a\" data-shogun-site-id=\"92cde865-2f52-4894-ae53-8ce6374e67dd\" data-shogun-id=\"60c980d0414b8800cfe2491a\" class=\"shogun-root\"\u003e\n\u003cdiv class=\"shg-c\" id=\"s-725e85c8-1af3-4840-87e5-88e4c975166d\"\u003e\n\u003cdiv data-multi=\"\" class=\"shogun-accordion-wrapper\"\u003e\n\u003cdiv class=\"shogun-accordion shogun-accordion-active\"\u003e\n\u003cdiv class=\"shogun-accordion-body shogun-accordion-active\"\u003e\n\u003cdiv class=\"shg-c\" id=\"s-1b2b37b4-6a88-44cc-8566-68cb7321841a\"\u003e\n\u003cdiv class=\"shg-rich-text shg-theme-text-content\"\u003e\n\u003cp\u003eApply 2-3 pumps (5ml, equivalent to approximately 100mg of elemental magnesium) into the palm of your hand and massage into your lower back, behind you knees and tops of your feet 20 minutes before bedtime.\u003c\/p\u003e\n\u003cp\u003eYou can also apply 2-3 pumps to your upper body, chest and arms anytime during the day to assist mind relaxation.\u003c\/p\u003e\n\u003cp\u003e♻︎ Amazing Oils products are recyclable in your normal household recycling. They use HDPE \u0026amp; PET recyclable plastic to reduce packaging waste. Please recycle your bottle after use.\u003c\/p\u003e\n\u003cp\u003e\u003cspan\u003eActive Ingredients p\/mL: Magnesium Chloride Hexahydrate 160mg (equivalent Magnesium 19.13mg), Chamomilla Recutita (Matricaria) Flower Extract 1.049mg\/ml (from 23.26mg\/ml Dry Flower), Lavandula Angustifolia (Lavender) Oil 2.625mg\/ml. For a list of excipients please contact customer support.\u003c\/span\u003e\u003c\/p\u003e\n\u003cp\u003e\u003cspan\u003eIf you experience any reactions such as tingling or irritation; apply to damp skin (or over a light moisturiser) for the first week.\u003c\/span\u003e\u003c\/p\u003e\n\u003c\/div\u003e\n\u003c\/div\u003e\n\u003c\/div\u003e\n\u003c\/div\u003e\n\u003c\/div\u003e\n\u003c\/div\u003e\n\u003c\/div\u003e\n\u003c\/div\u003e\n\u003c\/div\u003e\n\u003c\/div\u003e","published_at":"2023-07-17T13:17:26+08:00","created_at":"2023-07-17T12:20:39+08:00","vendor":"Amazing Oils","type":"","tags":["Hospital Bag","Mum","Post-Partum","Pregnancy","Pregnancy Health","Skin Care","Sleep Issues"],"price":3495,"price_min":3495,"price_max":3495,"available":false,"price_varies":false,"compare_at_price":null,"compare_at_price_min":0,"compare_at_price_max":0,"compare_at_price_varies":false,"variants":[{"id":42924358992061,"title":"Default Title","option1":"Default Title","option2":null,"option3":null,"sku":"","requires_shipping":true,"taxable":false,"featured_image":null,"available":false,"name":"Magnesium Sleep Lotion 125ml","public_title":null,"options":["Default Title"],"price":3495,"weight":167,"compare_at_price":null,"inventory_management":"shopify","barcode":"58992061","requires_selling_plan":false,"selling_plan_allocations":[]}],"images":["\/\/www.thebirthstore.com.au\/cdn\/shop\/files\/magnesium-sleep-lotion-125ml-854226.jpg?v=1714967996","\/\/www.thebirthstore.com.au\/cdn\/shop\/files\/magnesium-sleep-lotion-125ml-765712.jpg?v=1714967996","\/\/www.thebirthstore.com.au\/cdn\/shop\/files\/magnesium-sleep-lotion-125ml-819452.jpg?v=1714967996","\/\/www.thebirthstore.com.au\/cdn\/shop\/files\/magnesium-sleep-lotion-125ml-847323.jpg?v=1714967996"],"featured_image":"\/\/www.thebirthstore.com.au\/cdn\/shop\/files\/magnesium-sleep-lotion-125ml-854226.jpg?v=1714967996","options":["Title"],"media":[{"alt":"Magnesium Sleep Lotion 125ml - The Birth Store-Amazing Oils","id":27007592825021,"position":1,"preview_image":{"aspect_ratio":1.0,"height":1080,"width":1080,"src":"\/\/www.thebirthstore.com.au\/cdn\/shop\/files\/magnesium-sleep-lotion-125ml-854226.jpg?v=1714967996"},"aspect_ratio":1.0,"height":1080,"media_type":"image","src":"\/\/www.thebirthstore.com.au\/cdn\/shop\/files\/magnesium-sleep-lotion-125ml-854226.jpg?v=1714967996","width":1080},{"alt":"Magnesium Sleep Lotion 125ml - The Birth Store-Amazing Oils","id":27007592857789,"position":2,"preview_image":{"aspect_ratio":1.0,"height":800,"width":800,"src":"\/\/www.thebirthstore.com.au\/cdn\/shop\/files\/magnesium-sleep-lotion-125ml-765712.jpg?v=1714967996"},"aspect_ratio":1.0,"height":800,"media_type":"image","src":"\/\/www.thebirthstore.com.au\/cdn\/shop\/files\/magnesium-sleep-lotion-125ml-765712.jpg?v=1714967996","width":800},{"alt":"Magnesium Sleep Lotion 125ml - The Birth Store-Amazing Oils","id":27007592890557,"position":3,"preview_image":{"aspect_ratio":1.0,"height":800,"width":800,"src":"\/\/www.thebirthstore.com.au\/cdn\/shop\/files\/magnesium-sleep-lotion-125ml-819452.jpg?v=1714967996"},"aspect_ratio":1.0,"height":800,"media_type":"image","src":"\/\/www.thebirthstore.com.au\/cdn\/shop\/files\/magnesium-sleep-lotion-125ml-819452.jpg?v=1714967996","width":800},{"alt":"Magnesium Sleep Lotion 125ml - The Birth Store-Amazing Oils","id":27007592923325,"position":4,"preview_image":{"aspect_ratio":1.0,"height":800,"width":800,"src":"\/\/www.thebirthstore.com.au\/cdn\/shop\/files\/magnesium-sleep-lotion-125ml-847323.jpg?v=1714967996"},"aspect_ratio":1.0,"height":800,"media_type":"image","src":"\/\/www.thebirthstore.com.au\/cdn\/shop\/files\/magnesium-sleep-lotion-125ml-847323.jpg?v=1714967996","width":800}],"requires_selling_plan":false,"selling_plan_groups":[],"content":"\u003cp\u003e\u003cspan data-mce-fragment=\"1\"\u003eBy combining the amazing benefits of \u003c\/span\u003e\u003cstrong data-mce-fragment=\"1\"\u003emagnesium\u003c\/strong\u003e\u003cspan data-mce-fragment=\"1\"\u003e with the traditional healing properties of \u003c\/span\u003e\u003cstrong data-mce-fragment=\"1\"\u003elavender\u003c\/strong\u003e\u003cspan data-mce-fragment=\"1\"\u003e and \u003c\/span\u003e\u003cstrong data-mce-fragment=\"1\"\u003echamomile\u003c\/strong\u003e\u003cspan data-mce-fragment=\"1\"\u003e, we have formulated a luxurious pre-sleep experience that will leave you feeling refreshed and rejuvenated after a peaceful nights sleep.\u003c\/span\u003e\u003c\/p\u003e\n\u003cp\u003eOur Magnesium\u003cspan\u003e \u003c\/span\u003e\u003cstrong\u003eSleep Lotion\u003c\/strong\u003e\u003cspan\u003e \u003c\/span\u003eis one of our most exciting products yet. Now available after years of research and development. The creamy lotion glides onto skin smoothly and leaves behind a very subtle fragrance of natural oils.\u003c\/p\u003e\n\u003cp\u003e\u003cstrong\u003eAustralian-Made | Vegan | Scientifically Formulated\u003c\/strong\u003e\u003c\/p\u003e\n\u003cp\u003e\u003cem\u003e\"I have been applying to my feet and legs each night and I fall asleep faster and my quality of sleep has improved. Smells great and feels nice on the skin. Would recommend and will be buying again.\" - Kim K.\u003c\/em\u003e\u003c\/p\u003e\n\u003cp\u003eThese ingredients in our Sleep Lotion have been traditionally used in Western herbal medicine to:\u003c\/p\u003e\n\u003cul\u003e\n\u003cli\u003eAssist mind relaxation.\u003c\/li\u003e\n\u003cli\u003eCalm and relax the nervous system.\u003c\/li\u003e\n\u003cli\u003eInduce sleep.\u003c\/li\u003e\n\u003cli\u003eRelieve sleeplessness.\u003c\/li\u003e\n\u003cli\u003eReduce time to fall asleep.\u003c\/li\u003e\n\u003cli\u003eRelieve disturbed\/restless sleep.\u003c\/li\u003e\n\u003cli\u003eRelieve skin inflammation and irritation.\u003c\/li\u003e\n\u003c\/ul\u003e\n\u003cp\u003e\u003cspan\u003e\u003cstrong\u003eThe Magnesium Pro Sleep Lotion is a TGA Listed Product (AUST L 318335)\u003c\/strong\u003e\u003c\/span\u003e\u003c\/p\u003e\n\u003cdiv class=\"product-block\n product-block--description\"\u003e\n\u003cdiv class=\"description\"\u003e\n\u003cdiv class=\"rte\"\u003e\n\u003cdiv data-region=\"main\" data-shogun-variant-id=\"64a6841971ca6000ccce858c\" data-shogun-platform-type=\"shopify\" data-shogun-page-version-id=\"64a6841971ca6000ccce8542\" data-shogun-page-id=\"60c980d0414b8800cfe2491a\" data-shogun-site-id=\"92cde865-2f52-4894-ae53-8ce6374e67dd\" data-shogun-id=\"60c980d0414b8800cfe2491a\" class=\"shogun-root\"\u003e\n\u003cdiv class=\"shg-c\" id=\"s-725e85c8-1af3-4840-87e5-88e4c975166d\"\u003e\n\u003cdiv data-multi=\"\" class=\"shogun-accordion-wrapper\"\u003e\n\u003cdiv class=\"shogun-accordion shogun-accordion-active\"\u003e\n\u003cdiv class=\"shogun-accordion-body shogun-accordion-active\"\u003e\n\u003cdiv class=\"shg-c\" id=\"s-1b2b37b4-6a88-44cc-8566-68cb7321841a\"\u003e\n\u003cdiv class=\"shg-rich-text shg-theme-text-content\"\u003e\n\u003cp\u003eApply 2-3 pumps (5ml, equivalent to approximately 100mg of elemental magnesium) into the palm of your hand and massage into your lower back, behind you knees and tops of your feet 20 minutes before bedtime.\u003c\/p\u003e\n\u003cp\u003eYou can also apply 2-3 pumps to your upper body, chest and arms anytime during the day to assist mind relaxation.\u003c\/p\u003e\n\u003cp\u003e♻︎ Amazing Oils products are recyclable in your normal household recycling. They use HDPE \u0026amp; PET recyclable plastic to reduce packaging waste. Please recycle your bottle after use.\u003c\/p\u003e\n\u003cp\u003e\u003cspan\u003eActive Ingredients p\/mL: Magnesium Chloride Hexahydrate 160mg (equivalent Magnesium 19.13mg), Chamomilla Recutita (Matricaria) Flower Extract 1.049mg\/ml (from 23.26mg\/ml Dry Flower), Lavandula Angustifolia (Lavender) Oil 2.625mg\/ml. For a list of excipients please contact customer support.\u003c\/span\u003e\u003c\/p\u003e\n\u003cp\u003e\u003cspan\u003eIf you experience any reactions such as tingling or irritation; apply to damp skin (or over a light moisturiser) for the first week.\u003c\/span\u003e\u003c\/p\u003e\n\u003c\/div\u003e\n\u003c\/div\u003e\n\u003c\/div\u003e\n\u003c\/div\u003e\n\u003c\/div\u003e\n\u003c\/div\u003e\n\u003c\/div\u003e\n\u003c\/div\u003e\n\u003c\/div\u003e\n\u003c\/div\u003e"},"options":[{"name":"Title","position":1,"values":["Default Title"]}],"custom_metafields":{},"metafields":{"badge":"\u003cdiv style='display:none' class='jdgm-prev-badge' data-average-rating='0.00' data-number-of-reviews='0' data-number-of-questions='0'\u003e \u003cspan class='jdgm-prev-badge__stars' data-score='0.00' tabindex='0' aria-label='0.00 stars' role='button'\u003e \u003cspan class='jdgm-star jdgm--off'\u003e\u003c\/span\u003e\u003cspan class='jdgm-star jdgm--off'\u003e\u003c\/span\u003e\u003cspan class='jdgm-star jdgm--off'\u003e\u003c\/span\u003e\u003cspan class='jdgm-star jdgm--off'\u003e\u003c\/span\u003e\u003cspan class='jdgm-star jdgm--off'\u003e\u003c\/span\u003e \u003c\/span\u003e \u003cspan class='jdgm-prev-badge__text'\u003e No reviews \u003c\/span\u003e \u003c\/div\u003e","widget":"\u003cdiv class='jdgm-rev-widg' data-updated-at='2025-06-13T16:12:53Z' data-average-rating='0.00' data-number-of-reviews='0' data-number-of-questions='0'\u003e \u003cstyle class='jdgm-temp-hiding-style'\u003e.jdgm-rev-widg{ display: none }\u003c\/style\u003e \u003cdiv class='jdgm-rev-widg__header'\u003e \u003ch2 class='jdgm-rev-widg__title'\u003eCustomer Reviews\u003c\/h2\u003e \u003cdiv class='jdgm-rev-widg__summary'\u003e \u003cdiv class='jdgm-rev-widg__summary-stars' aria-label='Average rating is 0.00 stars' role='img'\u003e \u003cspan class='jdgm-star jdgm--off'\u003e\u003c\/span\u003e\u003cspan class='jdgm-star jdgm--off'\u003e\u003c\/span\u003e\u003cspan class='jdgm-star jdgm--off'\u003e\u003c\/span\u003e\u003cspan class='jdgm-star jdgm--off'\u003e\u003c\/span\u003e\u003cspan class='jdgm-star jdgm--off'\u003e\u003c\/span\u003e \u003c\/div\u003e \u003cdiv class='jdgm-rev-widg__summary-text'\u003eBe the first to write a review\u003c\/div\u003e \u003c\/div\u003e \u003ca style='display: none' href='#' class='jdgm-write-rev-link' role='button'\u003eWrite a review\u003c\/a\u003e \u003cdiv class='jdgm-histogram jdgm-temp-hidden'\u003e \u003cdiv class='jdgm-histogram__row' data-rating='5' data-frequency='0' data-percentage='0'\u003e \u003cdiv class='jdgm-histogram__star' role='button' aria-label=\"0% (0) reviews with 5 star rating\" tabindex='0' \u003e\u003cspan class='jdgm-star jdgm--on'\u003e\u003c\/span\u003e\u003cspan class='jdgm-star jdgm--on'\u003e\u003c\/span\u003e\u003cspan class='jdgm-star jdgm--on'\u003e\u003c\/span\u003e\u003cspan class='jdgm-star jdgm--on'\u003e\u003c\/span\u003e\u003cspan class='jdgm-star jdgm--on'\u003e\u003c\/span\u003e\u003c\/div\u003e \u003cdiv class='jdgm-histogram__bar'\u003e \u003cdiv class='jdgm-histogram__bar-content' style='width: 0%;'\u003e \u003c\/div\u003e \u003c\/div\u003e \u003cdiv class='jdgm-histogram__percentage'\u003e0%\u003c\/div\u003e \u003cdiv class='jdgm-histogram__frequency'\u003e(0)\u003c\/div\u003e \u003c\/div\u003e \u003cdiv class='jdgm-histogram__row' data-rating='4' data-frequency='0' data-percentage='0'\u003e \u003cdiv class='jdgm-histogram__star' role='button' aria-label=\"0% (0) reviews with 4 star rating\" tabindex='0' \u003e\u003cspan class='jdgm-star jdgm--on'\u003e\u003c\/span\u003e\u003cspan class='jdgm-star jdgm--on'\u003e\u003c\/span\u003e\u003cspan class='jdgm-star jdgm--on'\u003e\u003c\/span\u003e\u003cspan class='jdgm-star jdgm--on'\u003e\u003c\/span\u003e\u003cspan class='jdgm-star jdgm--off'\u003e\u003c\/span\u003e\u003c\/div\u003e \u003cdiv class='jdgm-histogram__bar'\u003e \u003cdiv class='jdgm-histogram__bar-content' style='width: 0%;'\u003e \u003c\/div\u003e \u003c\/div\u003e \u003cdiv class='jdgm-histogram__percentage'\u003e0%\u003c\/div\u003e \u003cdiv class='jdgm-histogram__frequency'\u003e(0)\u003c\/div\u003e \u003c\/div\u003e \u003cdiv class='jdgm-histogram__row' data-rating='3' data-frequency='0' data-percentage='0'\u003e \u003cdiv class='jdgm-histogram__star' role='button' aria-label=\"0% (0) reviews with 3 star rating\" tabindex='0' \u003e\u003cspan class='jdgm-star jdgm--on'\u003e\u003c\/span\u003e\u003cspan class='jdgm-star jdgm--on'\u003e\u003c\/span\u003e\u003cspan class='jdgm-star jdgm--on'\u003e\u003c\/span\u003e\u003cspan class='jdgm-star jdgm--off'\u003e\u003c\/span\u003e\u003cspan class='jdgm-star jdgm--off'\u003e\u003c\/span\u003e\u003c\/div\u003e \u003cdiv class='jdgm-histogram__bar'\u003e \u003cdiv class='jdgm-histogram__bar-content' style='width: 0%;'\u003e \u003c\/div\u003e \u003c\/div\u003e \u003cdiv class='jdgm-histogram__percentage'\u003e0%\u003c\/div\u003e \u003cdiv class='jdgm-histogram__frequency'\u003e(0)\u003c\/div\u003e \u003c\/div\u003e \u003cdiv class='jdgm-histogram__row' data-rating='2' data-frequency='0' data-percentage='0'\u003e \u003cdiv class='jdgm-histogram__star' role='button' aria-label=\"0% (0) reviews with 2 star rating\" tabindex='0' \u003e\u003cspan class='jdgm-star jdgm--on'\u003e\u003c\/span\u003e\u003cspan class='jdgm-star jdgm--on'\u003e\u003c\/span\u003e\u003cspan class='jdgm-star jdgm--off'\u003e\u003c\/span\u003e\u003cspan class='jdgm-star jdgm--off'\u003e\u003c\/span\u003e\u003cspan class='jdgm-star jdgm--off'\u003e\u003c\/span\u003e\u003c\/div\u003e \u003cdiv class='jdgm-histogram__bar'\u003e \u003cdiv class='jdgm-histogram__bar-content' style='width: 0%;'\u003e \u003c\/div\u003e \u003c\/div\u003e \u003cdiv class='jdgm-histogram__percentage'\u003e0%\u003c\/div\u003e \u003cdiv class='jdgm-histogram__frequency'\u003e(0)\u003c\/div\u003e \u003c\/div\u003e \u003cdiv class='jdgm-histogram__row' data-rating='1' data-frequency='0' data-percentage='0'\u003e \u003cdiv class='jdgm-histogram__star' role='button' aria-label=\"0% (0) reviews with 1 star rating\" tabindex='0' \u003e\u003cspan class='jdgm-star jdgm--on'\u003e\u003c\/span\u003e\u003cspan class='jdgm-star jdgm--off'\u003e\u003c\/span\u003e\u003cspan class='jdgm-star jdgm--off'\u003e\u003c\/span\u003e\u003cspan class='jdgm-star jdgm--off'\u003e\u003c\/span\u003e\u003cspan class='jdgm-star jdgm--off'\u003e\u003c\/span\u003e\u003c\/div\u003e \u003cdiv class='jdgm-histogram__bar'\u003e \u003cdiv class='jdgm-histogram__bar-content' style='width: 0%;'\u003e \u003c\/div\u003e \u003c\/div\u003e \u003cdiv class='jdgm-histogram__percentage'\u003e0%\u003c\/div\u003e \u003cdiv class='jdgm-histogram__frequency'\u003e(0)\u003c\/div\u003e \u003c\/div\u003e \u003cdiv class='jdgm-histogram__row jdgm-histogram__clear-filter' data-rating=null tabindex='0'\u003e\u003c\/div\u003e \u003c\/div\u003e \u003cdiv class='jdgm-rev-widg__sort-wrapper'\u003e\u003c\/div\u003e \u003c\/div\u003e \u003cdiv class='jdgm-rev-widg__body'\u003e \u003cdiv class='jdgm-rev-widg__reviews'\u003e\u003c\/div\u003e \u003cdiv class='jdgm-paginate' data-per-page='10' data-url='https:\/\/api.judge.me\/reviews\/reviews_for_widget' style=\"display: none;\"\u003e\u003c\/div\u003e \u003c\/div\u003e \u003cdiv class='jdgm-rev-widg__paginate-spinner-wrapper'\u003e \u003cdiv class='jdgm-spinner'\u003e\u003c\/div\u003e \u003c\/div\u003e \u003c\/div\u003e"},"collections":[{"id":261657460925,"handle":"buy","title":"Buy","updated_at":"2025-12-28T20:10:01+08:00","body_html":"\u003cp\u003eBrowse all of our pregnancy, labour \u0026amp; birth, postpartum and baby essentials here.\u003cbr\u003e\u003c\/p\u003e\n\u003cp\u003e\u003cspan\u003eYou can even buy now and pay later with Afterpay!\u003c\/span\u003e\u003c\/p\u003e","published_at":"2021-03-10T12:05:31+08:00","sort_order":"best-selling","template_suffix":"shop-all-collection","disjunctive":false,"rules":[{"column":"title","relation":"not_contains","condition":"Hire"}],"published_scope":"global","image":{"created_at":"2024-05-06T11:59:42+08:00","alt":"Buy - The Birth Store","width":2048,"height":2048,"src":"\/\/www.thebirthstore.com.au\/cdn\/shop\/collections\/buy-964856.jpg?v=1714967982"}},{"id":261658083517,"handle":"post-partum","title":"Postpartum","updated_at":"2025-12-28T20:10:01+08:00","body_html":"\u003cp\u003eShop your postpartum and hospital bag essentials below. Looking for something we don't currently stock? Please reach out and let us know.\u003cbr\u003e\u003c\/p\u003e\n\u003cp\u003e\u003cspan\u003eYou can even buy now and pay later with Afterpay!\u003c\/span\u003e\u003c\/p\u003e","published_at":"2021-03-10T12:33:47+08:00","sort_order":"best-selling","template_suffix":"postpartum-collection","disjunctive":false,"rules":[{"column":"tag","relation":"equals","condition":"Post-Partum"}],"published_scope":"global","image":{"created_at":"2024-05-06T12:00:36+08:00","alt":"Postpartum - The Birth Store","width":611,"height":702,"src":"\/\/www.thebirthstore.com.au\/cdn\/shop\/collections\/postpartum-150119.jpg?v=1714968037"}},{"id":261658149053,"handle":"pregnancy-and-maternity-products","title":"Pregnancy","updated_at":"2025-12-28T20:10:01+08:00","body_html":"\u003cp\u003eShop your pregnancy essentials below. Looking for something we don't currently stock? Please reach out and let us know.\u003cbr\u003e\u003c\/p\u003e\n\u003cp\u003e\u003cspan\u003eYou can even buy now and pay later with Afterpay!\u003c\/span\u003e\u003c\/p\u003e","published_at":"2021-03-10T12:34:22+08:00","sort_order":"best-selling","template_suffix":"pregnancy-collection","disjunctive":false,"rules":[{"column":"tag","relation":"equals","condition":"Pregnancy"}],"published_scope":"global","image":{"created_at":"2024-05-06T12:00:40+08:00","alt":"Pregnancy - The Birth Store","width":1024,"height":1536,"src":"\/\/www.thebirthstore.com.au\/cdn\/shop\/collections\/pregnancy-899677.jpg?v=1714968040"}},{"id":295224901821,"handle":"pregnancy-health","title":"Pregnancy Health","updated_at":"2025-12-27T20:11:40+08:00","body_html":"","published_at":"2023-11-10T20:48:51+08:00","sort_order":"best-selling","template_suffix":"swaddles-collection","disjunctive":false,"rules":[{"column":"tag","relation":"equals","condition":"Pregnancy Health"}],"published_scope":"global","image":{"created_at":"2024-05-06T12:00:41+08:00","alt":"Pregnancy Health - The Birth Store","width":608,"height":410,"src":"\/\/www.thebirthstore.com.au\/cdn\/shop\/collections\/pregnancy-health-343983.jpg?v=1714968042"}},{"id":326523846845,"handle":"pregnancy-health-1","updated_at":"2025-12-27T20:11:40+08:00","published_at":"2025-10-30T10:44:54+08:00","sort_order":"best-selling","template_suffix":"","published_scope":"global","title":"Pregnancy Health","body_html":"","image":{"created_at":"2025-11-20T21:33:56+08:00","alt":"Pregnancy Health - The Birth Store","width":522,"height":525,"src":"\/\/www.thebirthstore.com.au\/cdn\/shop\/collections\/pregnancy-health-1617860.jpg?v=1763645636"}},{"id":291456483517,"handle":"shop-all","title":"Shop All - Mum","updated_at":"2025-12-28T20:10:01+08:00","body_html":"","published_at":"2022-12-23T22:04:39+08:00","sort_order":"best-selling","template_suffix":"shop-all-collection","disjunctive":false,"rules":[{"column":"variant_price","relation":"greater_than","condition":"1"},{"column":"title","relation":"not_contains","condition":"Batteries"},{"column":"tag","relation":"equals","condition":"Mum"}],"published_scope":"global","image":{"created_at":"2024-05-06T12:00:54+08:00","alt":"Shop All - The Birth Store","width":1365,"height":2048,"src":"\/\/www.thebirthstore.com.au\/cdn\/shop\/collections\/shop-all-693176.jpg?v=1714968055"}},{"id":310045933757,"handle":"shop-all-sale","title":"Shop All Sale","updated_at":"2025-12-28T20:10:01+08:00","body_html":"","published_at":"2024-11-12T13:22:43+08:00","sort_order":"alpha-asc","template_suffix":"","disjunctive":true,"rules":[{"column":"tag","relation":"equals","condition":"Bundles"},{"column":"vendor","relation":"equals","condition":"Franjos Kitchen"},{"column":"vendor","relation":"equals","condition":"Adored Illustrations"},{"column":"vendor","relation":"equals","condition":"Amazing Oils"},{"column":"vendor","relation":"equals","condition":"Ice Ice Booby"},{"column":"vendor","relation":"equals","condition":"Made to Milk"},{"column":"vendor","relation":"equals","condition":"Milky Goodness"},{"column":"vendor","relation":"equals","condition":"Seasons of Mama"},{"column":"vendor","relation":"equals","condition":"Silverette"},{"column":"vendor","relation":"equals","condition":"Snuggle Hunny"},{"column":"vendor","relation":"equals","condition":"Yung Bod"},{"column":"vendor","relation":"equals","condition":"Bare Love"},{"column":"vendor","relation":"equals","condition":"Haakaa"},{"column":"vendor","relation":"equals","condition":"Mere Botanicals"},{"column":"vendor","relation":"equals","condition":"The Birth Store Hire"},{"column":"vendor","relation":"equals","condition":"The Birth Store"}],"published_scope":"global","image":{"created_at":"2024-11-13T10:58:16+08:00","alt":"Shop All Sale - The Birth Store","width":2048,"height":1365,"src":"\/\/www.thebirthstore.com.au\/cdn\/shop\/collections\/shop-all-sale-297361.jpg?v=1731466697"}},{"id":324680483005,"handle":"skin-care","title":"Skin Care","updated_at":"2025-12-28T20:10:01+08:00","body_html":"","published_at":"2025-09-23T22:14:11+08:00","sort_order":"best-selling","template_suffix":"","disjunctive":false,"rules":[{"column":"tag","relation":"equals","condition":"Skin Care"}],"published_scope":"global","image":{"created_at":"2025-10-30T16:17:08+08:00","alt":"Skin Care - The Birth Store","width":800,"height":800,"src":"\/\/www.thebirthstore.com.au\/cdn\/shop\/collections\/skin-care-6874549.jpg?v=1761812228"}},{"id":295228211389,"handle":"sleep-issues","title":"Sleep Issues","updated_at":"2025-12-24T20:09:23+08:00","body_html":"","published_at":"2023-11-10T23:27:56+08:00","sort_order":"best-selling","template_suffix":"swaddles-collection","disjunctive":false,"rules":[{"column":"tag","relation":"equals","condition":"Sleep Issues"}],"published_scope":"global","image":{"created_at":"2024-05-06T12:00:57+08:00","alt":"Sleep Issues - The Birth Store","width":869,"height":868,"src":"\/\/www.thebirthstore.com.au\/cdn\/shop\/collections\/sleep-issues-572906.jpg?v=1714968058"}}]}
[{"alt":"Magnesium Sleep Lotion 125ml - The Birth Store-Amazing Oils","id":27007592825021,"position":1,"preview_image":{"aspect_ratio":1.0,"height":1080,"width":1080,"src":"\/\/www.thebirthstore.com.au\/cdn\/shop\/files\/magnesium-sleep-lotion-125ml-854226.jpg?v=1714967996"},"aspect_ratio":1.0,"height":1080,"media_type":"image","src":"\/\/www.thebirthstore.com.au\/cdn\/shop\/files\/magnesium-sleep-lotion-125ml-854226.jpg?v=1714967996","width":1080},{"alt":"Magnesium Sleep Lotion 125ml - The Birth Store-Amazing Oils","id":27007592857789,"position":2,"preview_image":{"aspect_ratio":1.0,"height":800,"width":800,"src":"\/\/www.thebirthstore.com.au\/cdn\/shop\/files\/magnesium-sleep-lotion-125ml-765712.jpg?v=1714967996"},"aspect_ratio":1.0,"height":800,"media_type":"image","src":"\/\/www.thebirthstore.com.au\/cdn\/shop\/files\/magnesium-sleep-lotion-125ml-765712.jpg?v=1714967996","width":800},{"alt":"Magnesium Sleep Lotion 125ml - The Birth Store-Amazing Oils","id":27007592890557,"position":3,"preview_image":{"aspect_ratio":1.0,"height":800,"width":800,"src":"\/\/www.thebirthstore.com.au\/cdn\/shop\/files\/magnesium-sleep-lotion-125ml-819452.jpg?v=1714967996"},"aspect_ratio":1.0,"height":800,"media_type":"image","src":"\/\/www.thebirthstore.com.au\/cdn\/shop\/files\/magnesium-sleep-lotion-125ml-819452.jpg?v=1714967996","width":800},{"alt":"Magnesium Sleep Lotion 125ml - The Birth Store-Amazing Oils","id":27007592923325,"position":4,"preview_image":{"aspect_ratio":1.0,"height":800,"width":800,"src":"\/\/www.thebirthstore.com.au\/cdn\/shop\/files\/magnesium-sleep-lotion-125ml-847323.jpg?v=1714967996"},"aspect_ratio":1.0,"height":800,"media_type":"image","src":"\/\/www.thebirthstore.com.au\/cdn\/shop\/files\/magnesium-sleep-lotion-125ml-847323.jpg?v=1714967996","width":800}]
{"item":{"id":7499031052477,"title":"Mama Mantra Cards with Timber Stand","handle":"mama-mantra-cards-with-timber-stand","description":"\u003cp class=\"\" data-mce-fragment=\"1\"\u003eMama Mantra Cards with Timber Stand\u003c\/p\u003e\n\u003cp class=\"\" data-mce-fragment=\"1\"\u003eThe sister-set to the Pregnancy, Birth and Beyond Affirmation Cards ....this Self Love set has been thoughtfully designed to honour Mother’s during their sacred postpartum period which as we know, postpartum is forever\u003c\/p\u003e\n\u003cp class=\"\" data-mce-fragment=\"1\"\u003eEvery quote has been carefully and meticulously chosen (by incredible poets\/authors such Tess Guinery, Beau Taplin Amethyst Joy just to name a few) to remind Mother’s of their incredible importance as the heart-centre of their family with full permission to slowww it all down. We live in a fast-paced society that celebrates the hustle but during this season it is all about going the present moment. Just as the caterpillar goes into their cocoon and emerges a beautiful butterfly, still the same but somehow also morphed, transformed, anew. We too must do the same.\u003c\/p\u003e\n\u003cp class=\"\" data-mce-fragment=\"1\"\u003eIf you are outgrowing who you’ve been Mama then you are right on schedule!\u003c\/p\u003e\n\u003cp class=\"\" data-mce-fragment=\"1\"\u003eEach individual card comes with it’s own hand-drawn illustrations, a hand crafted timber stand (made locally by a Dad of 2) and packaged in a Seasons of Mama calico bag. This set contains 15 cards and was designed with the intention to draw a single card and sit with it for a week or longer at a time, to really savour the message\u003c\/p\u003e\n\u003cp class=\"\" data-mce-fragment=\"1\"\u003e \u003c\/p\u003e","published_at":"2023-08-14T22:24:15+08:00","created_at":"2023-08-07T12:15:27+08:00","vendor":"Seasons of Mama","type":"","tags":["Affirmations","Baby Shower Gifts - Mum","Birth","Hospital Bag","Mum","Pre-Conception","Pregnancy"],"price":3295,"price_min":3295,"price_max":3295,"available":true,"price_varies":false,"compare_at_price":null,"compare_at_price_min":0,"compare_at_price_max":0,"compare_at_price_varies":false,"variants":[{"id":42958228422845,"title":"Default Title","option1":"Default Title","option2":null,"option3":null,"sku":null,"requires_shipping":true,"taxable":false,"featured_image":null,"available":true,"name":"Mama Mantra Cards with Timber Stand","public_title":null,"options":["Default Title"],"price":3295,"weight":142,"compare_at_price":null,"inventory_management":"shopify","barcode":"28422845","requires_selling_plan":false,"selling_plan_allocations":[]}],"images":["\/\/www.thebirthstore.com.au\/cdn\/shop\/files\/mama-mantra-cards-with-timber-stand-606995.jpg?v=1714968002","\/\/www.thebirthstore.com.au\/cdn\/shop\/files\/mama-mantra-cards-with-timber-stand-441911.jpg?v=1714968002","\/\/www.thebirthstore.com.au\/cdn\/shop\/files\/mama-mantra-cards-with-timber-stand-869384.jpg?v=1714968002","\/\/www.thebirthstore.com.au\/cdn\/shop\/files\/mama-mantra-cards-with-timber-stand-507220.jpg?v=1714968002","\/\/www.thebirthstore.com.au\/cdn\/shop\/files\/mama-mantra-cards-with-timber-stand-526517.jpg?v=1714968002","\/\/www.thebirthstore.com.au\/cdn\/shop\/files\/mama-mantra-cards-with-timber-stand-833227.jpg?v=1714968002","\/\/www.thebirthstore.com.au\/cdn\/shop\/files\/mama-mantra-cards-with-timber-stand-115645.jpg?v=1714968002","\/\/www.thebirthstore.com.au\/cdn\/shop\/files\/mama-mantra-cards-with-timber-stand-411664.jpg?v=1714968002"],"featured_image":"\/\/www.thebirthstore.com.au\/cdn\/shop\/files\/mama-mantra-cards-with-timber-stand-606995.jpg?v=1714968002","options":["Title"],"media":[{"alt":"Mama Mantra Cards with Timber Stand - The Birth Store-Seasons of Mama","id":27007593513149,"position":1,"preview_image":{"aspect_ratio":1.0,"height":1080,"width":1080,"src":"\/\/www.thebirthstore.com.au\/cdn\/shop\/files\/mama-mantra-cards-with-timber-stand-606995.jpg?v=1714968002"},"aspect_ratio":1.0,"height":1080,"media_type":"image","src":"\/\/www.thebirthstore.com.au\/cdn\/shop\/files\/mama-mantra-cards-with-timber-stand-606995.jpg?v=1714968002","width":1080},{"alt":"Mama Mantra Cards with Timber Stand - The Birth Store-Seasons of Mama","id":27007593578685,"position":2,"preview_image":{"aspect_ratio":1.0,"height":500,"width":500,"src":"\/\/www.thebirthstore.com.au\/cdn\/shop\/files\/mama-mantra-cards-with-timber-stand-441911.jpg?v=1714968002"},"aspect_ratio":1.0,"height":500,"media_type":"image","src":"\/\/www.thebirthstore.com.au\/cdn\/shop\/files\/mama-mantra-cards-with-timber-stand-441911.jpg?v=1714968002","width":500},{"alt":"Mama Mantra Cards with Timber Stand - The Birth Store-Seasons of Mama","id":27007593611453,"position":3,"preview_image":{"aspect_ratio":1.0,"height":500,"width":500,"src":"\/\/www.thebirthstore.com.au\/cdn\/shop\/files\/mama-mantra-cards-with-timber-stand-869384.jpg?v=1714968002"},"aspect_ratio":1.0,"height":500,"media_type":"image","src":"\/\/www.thebirthstore.com.au\/cdn\/shop\/files\/mama-mantra-cards-with-timber-stand-869384.jpg?v=1714968002","width":500},{"alt":"Mama Mantra Cards with Timber Stand - The Birth Store-Seasons of Mama","id":27007593644221,"position":4,"preview_image":{"aspect_ratio":1.0,"height":500,"width":500,"src":"\/\/www.thebirthstore.com.au\/cdn\/shop\/files\/mama-mantra-cards-with-timber-stand-507220.jpg?v=1714968002"},"aspect_ratio":1.0,"height":500,"media_type":"image","src":"\/\/www.thebirthstore.com.au\/cdn\/shop\/files\/mama-mantra-cards-with-timber-stand-507220.jpg?v=1714968002","width":500},{"alt":"Mama Mantra Cards with Timber Stand - The Birth Store-Seasons of Mama","id":27007593709757,"position":5,"preview_image":{"aspect_ratio":1.0,"height":500,"width":500,"src":"\/\/www.thebirthstore.com.au\/cdn\/shop\/files\/mama-mantra-cards-with-timber-stand-526517.jpg?v=1714968002"},"aspect_ratio":1.0,"height":500,"media_type":"image","src":"\/\/www.thebirthstore.com.au\/cdn\/shop\/files\/mama-mantra-cards-with-timber-stand-526517.jpg?v=1714968002","width":500},{"alt":"Mama Mantra Cards with Timber Stand - The Birth Store-Seasons of Mama","id":27007593742525,"position":6,"preview_image":{"aspect_ratio":1.0,"height":500,"width":500,"src":"\/\/www.thebirthstore.com.au\/cdn\/shop\/files\/mama-mantra-cards-with-timber-stand-833227.jpg?v=1714968002"},"aspect_ratio":1.0,"height":500,"media_type":"image","src":"\/\/www.thebirthstore.com.au\/cdn\/shop\/files\/mama-mantra-cards-with-timber-stand-833227.jpg?v=1714968002","width":500},{"alt":"Mama Mantra Cards with Timber Stand - The Birth Store-Seasons of Mama","id":27007593775293,"position":7,"preview_image":{"aspect_ratio":1.0,"height":500,"width":500,"src":"\/\/www.thebirthstore.com.au\/cdn\/shop\/files\/mama-mantra-cards-with-timber-stand-115645.jpg?v=1714968002"},"aspect_ratio":1.0,"height":500,"media_type":"image","src":"\/\/www.thebirthstore.com.au\/cdn\/shop\/files\/mama-mantra-cards-with-timber-stand-115645.jpg?v=1714968002","width":500},{"alt":"Mama Mantra Cards with Timber Stand - The Birth Store-Seasons of Mama","id":27007593808061,"position":8,"preview_image":{"aspect_ratio":1.0,"height":500,"width":500,"src":"\/\/www.thebirthstore.com.au\/cdn\/shop\/files\/mama-mantra-cards-with-timber-stand-411664.jpg?v=1714968002"},"aspect_ratio":1.0,"height":500,"media_type":"image","src":"\/\/www.thebirthstore.com.au\/cdn\/shop\/files\/mama-mantra-cards-with-timber-stand-411664.jpg?v=1714968002","width":500}],"requires_selling_plan":false,"selling_plan_groups":[],"content":"\u003cp class=\"\" data-mce-fragment=\"1\"\u003eMama Mantra Cards with Timber Stand\u003c\/p\u003e\n\u003cp class=\"\" data-mce-fragment=\"1\"\u003eThe sister-set to the Pregnancy, Birth and Beyond Affirmation Cards ....this Self Love set has been thoughtfully designed to honour Mother’s during their sacred postpartum period which as we know, postpartum is forever\u003c\/p\u003e\n\u003cp class=\"\" data-mce-fragment=\"1\"\u003eEvery quote has been carefully and meticulously chosen (by incredible poets\/authors such Tess Guinery, Beau Taplin Amethyst Joy just to name a few) to remind Mother’s of their incredible importance as the heart-centre of their family with full permission to slowww it all down. We live in a fast-paced society that celebrates the hustle but during this season it is all about going the present moment. Just as the caterpillar goes into their cocoon and emerges a beautiful butterfly, still the same but somehow also morphed, transformed, anew. We too must do the same.\u003c\/p\u003e\n\u003cp class=\"\" data-mce-fragment=\"1\"\u003eIf you are outgrowing who you’ve been Mama then you are right on schedule!\u003c\/p\u003e\n\u003cp class=\"\" data-mce-fragment=\"1\"\u003eEach individual card comes with it’s own hand-drawn illustrations, a hand crafted timber stand (made locally by a Dad of 2) and packaged in a Seasons of Mama calico bag. This set contains 15 cards and was designed with the intention to draw a single card and sit with it for a week or longer at a time, to really savour the message\u003c\/p\u003e\n\u003cp class=\"\" data-mce-fragment=\"1\"\u003e \u003c\/p\u003e"},"options":[{"name":"Title","position":1,"values":["Default Title"]}],"custom_metafields":{},"metafields":{"badge":"\u003cdiv style='display:none' class='jdgm-prev-badge' data-average-rating='0.00' data-number-of-reviews='0' data-number-of-questions='0'\u003e \u003cspan class='jdgm-prev-badge__stars' data-score='0.00' tabindex='0' aria-label='0.00 stars' role='button'\u003e \u003cspan class='jdgm-star jdgm--off'\u003e\u003c\/span\u003e\u003cspan class='jdgm-star jdgm--off'\u003e\u003c\/span\u003e\u003cspan class='jdgm-star jdgm--off'\u003e\u003c\/span\u003e\u003cspan class='jdgm-star jdgm--off'\u003e\u003c\/span\u003e\u003cspan class='jdgm-star jdgm--off'\u003e\u003c\/span\u003e \u003c\/span\u003e \u003cspan class='jdgm-prev-badge__text'\u003e No reviews \u003c\/span\u003e \u003c\/div\u003e","widget":"\u003cdiv class='jdgm-rev-widg' data-updated-at='2025-06-13T16:12:53Z' data-average-rating='0.00' data-number-of-reviews='0' data-number-of-questions='0'\u003e \u003cstyle class='jdgm-temp-hiding-style'\u003e.jdgm-rev-widg{ display: none }\u003c\/style\u003e \u003cdiv class='jdgm-rev-widg__header'\u003e \u003ch2 class='jdgm-rev-widg__title'\u003eCustomer Reviews\u003c\/h2\u003e \u003cdiv class='jdgm-rev-widg__summary'\u003e \u003cdiv class='jdgm-rev-widg__summary-stars' aria-label='Average rating is 0.00 stars' role='img'\u003e \u003cspan class='jdgm-star jdgm--off'\u003e\u003c\/span\u003e\u003cspan class='jdgm-star jdgm--off'\u003e\u003c\/span\u003e\u003cspan class='jdgm-star jdgm--off'\u003e\u003c\/span\u003e\u003cspan class='jdgm-star jdgm--off'\u003e\u003c\/span\u003e\u003cspan class='jdgm-star jdgm--off'\u003e\u003c\/span\u003e \u003c\/div\u003e \u003cdiv class='jdgm-rev-widg__summary-text'\u003eBe the first to write a review\u003c\/div\u003e \u003c\/div\u003e \u003ca style='display: none' href='#' class='jdgm-write-rev-link' role='button'\u003eWrite a review\u003c\/a\u003e \u003cdiv class='jdgm-histogram jdgm-temp-hidden'\u003e \u003cdiv class='jdgm-histogram__row' data-rating='5' data-frequency='0' data-percentage='0'\u003e \u003cdiv class='jdgm-histogram__star' role='button' aria-label=\"0% (0) reviews with 5 star rating\" tabindex='0' \u003e\u003cspan class='jdgm-star jdgm--on'\u003e\u003c\/span\u003e\u003cspan class='jdgm-star jdgm--on'\u003e\u003c\/span\u003e\u003cspan class='jdgm-star jdgm--on'\u003e\u003c\/span\u003e\u003cspan class='jdgm-star jdgm--on'\u003e\u003c\/span\u003e\u003cspan class='jdgm-star jdgm--on'\u003e\u003c\/span\u003e\u003c\/div\u003e \u003cdiv class='jdgm-histogram__bar'\u003e \u003cdiv class='jdgm-histogram__bar-content' style='width: 0%;'\u003e \u003c\/div\u003e \u003c\/div\u003e \u003cdiv class='jdgm-histogram__percentage'\u003e0%\u003c\/div\u003e \u003cdiv class='jdgm-histogram__frequency'\u003e(0)\u003c\/div\u003e \u003c\/div\u003e \u003cdiv class='jdgm-histogram__row' data-rating='4' data-frequency='0' data-percentage='0'\u003e \u003cdiv class='jdgm-histogram__star' role='button' aria-label=\"0% (0) reviews with 4 star rating\" tabindex='0' \u003e\u003cspan class='jdgm-star jdgm--on'\u003e\u003c\/span\u003e\u003cspan class='jdgm-star jdgm--on'\u003e\u003c\/span\u003e\u003cspan class='jdgm-star jdgm--on'\u003e\u003c\/span\u003e\u003cspan class='jdgm-star jdgm--on'\u003e\u003c\/span\u003e\u003cspan class='jdgm-star jdgm--off'\u003e\u003c\/span\u003e\u003c\/div\u003e \u003cdiv class='jdgm-histogram__bar'\u003e \u003cdiv class='jdgm-histogram__bar-content' style='width: 0%;'\u003e \u003c\/div\u003e \u003c\/div\u003e \u003cdiv class='jdgm-histogram__percentage'\u003e0%\u003c\/div\u003e \u003cdiv class='jdgm-histogram__frequency'\u003e(0)\u003c\/div\u003e \u003c\/div\u003e \u003cdiv class='jdgm-histogram__row' data-rating='3' data-frequency='0' data-percentage='0'\u003e \u003cdiv class='jdgm-histogram__star' role='button' aria-label=\"0% (0) reviews with 3 star rating\" tabindex='0' \u003e\u003cspan class='jdgm-star jdgm--on'\u003e\u003c\/span\u003e\u003cspan class='jdgm-star jdgm--on'\u003e\u003c\/span\u003e\u003cspan class='jdgm-star jdgm--on'\u003e\u003c\/span\u003e\u003cspan class='jdgm-star jdgm--off'\u003e\u003c\/span\u003e\u003cspan class='jdgm-star jdgm--off'\u003e\u003c\/span\u003e\u003c\/div\u003e \u003cdiv class='jdgm-histogram__bar'\u003e \u003cdiv class='jdgm-histogram__bar-content' style='width: 0%;'\u003e \u003c\/div\u003e \u003c\/div\u003e \u003cdiv class='jdgm-histogram__percentage'\u003e0%\u003c\/div\u003e \u003cdiv class='jdgm-histogram__frequency'\u003e(0)\u003c\/div\u003e \u003c\/div\u003e \u003cdiv class='jdgm-histogram__row' data-rating='2' data-frequency='0' data-percentage='0'\u003e \u003cdiv class='jdgm-histogram__star' role='button' aria-label=\"0% (0) reviews with 2 star rating\" tabindex='0' \u003e\u003cspan class='jdgm-star jdgm--on'\u003e\u003c\/span\u003e\u003cspan class='jdgm-star jdgm--on'\u003e\u003c\/span\u003e\u003cspan class='jdgm-star jdgm--off'\u003e\u003c\/span\u003e\u003cspan class='jdgm-star jdgm--off'\u003e\u003c\/span\u003e\u003cspan class='jdgm-star jdgm--off'\u003e\u003c\/span\u003e\u003c\/div\u003e \u003cdiv class='jdgm-histogram__bar'\u003e \u003cdiv class='jdgm-histogram__bar-content' style='width: 0%;'\u003e \u003c\/div\u003e \u003c\/div\u003e \u003cdiv class='jdgm-histogram__percentage'\u003e0%\u003c\/div\u003e \u003cdiv class='jdgm-histogram__frequency'\u003e(0)\u003c\/div\u003e \u003c\/div\u003e \u003cdiv class='jdgm-histogram__row' data-rating='1' data-frequency='0' data-percentage='0'\u003e \u003cdiv class='jdgm-histogram__star' role='button' aria-label=\"0% (0) reviews with 1 star rating\" tabindex='0' \u003e\u003cspan class='jdgm-star jdgm--on'\u003e\u003c\/span\u003e\u003cspan class='jdgm-star jdgm--off'\u003e\u003c\/span\u003e\u003cspan class='jdgm-star jdgm--off'\u003e\u003c\/span\u003e\u003cspan class='jdgm-star jdgm--off'\u003e\u003c\/span\u003e\u003cspan class='jdgm-star jdgm--off'\u003e\u003c\/span\u003e\u003c\/div\u003e \u003cdiv class='jdgm-histogram__bar'\u003e \u003cdiv class='jdgm-histogram__bar-content' style='width: 0%;'\u003e \u003c\/div\u003e \u003c\/div\u003e \u003cdiv class='jdgm-histogram__percentage'\u003e0%\u003c\/div\u003e \u003cdiv class='jdgm-histogram__frequency'\u003e(0)\u003c\/div\u003e \u003c\/div\u003e \u003cdiv class='jdgm-histogram__row jdgm-histogram__clear-filter' data-rating=null tabindex='0'\u003e\u003c\/div\u003e \u003c\/div\u003e \u003cdiv class='jdgm-rev-widg__sort-wrapper'\u003e\u003c\/div\u003e \u003c\/div\u003e \u003cdiv class='jdgm-rev-widg__body'\u003e \u003cdiv class='jdgm-rev-widg__reviews'\u003e\u003c\/div\u003e \u003cdiv class='jdgm-paginate' data-per-page='10' data-url='https:\/\/api.judge.me\/reviews\/reviews_for_widget' style=\"display: none;\"\u003e\u003c\/div\u003e \u003c\/div\u003e \u003cdiv class='jdgm-rev-widg__paginate-spinner-wrapper'\u003e \u003cdiv class='jdgm-spinner'\u003e\u003c\/div\u003e \u003c\/div\u003e \u003c\/div\u003e"},"collections":[{"id":295224541373,"handle":"affirmations","title":"Affirmations","updated_at":"2025-12-28T20:10:01+08:00","body_html":"","published_at":"2023-11-10T20:37:58+08:00","sort_order":"best-selling","template_suffix":"swaddles-collection","disjunctive":false,"rules":[{"column":"tag","relation":"equals","condition":"Affirmations"}],"published_scope":"global","image":{"created_at":"2024-05-06T11:59:20+08:00","alt":"Affirmations - The Birth Store","width":1000,"height":1250,"src":"\/\/www.thebirthstore.com.au\/cdn\/shop\/collections\/affirmations-495130.jpg?v=1714967960"}},{"id":281356533949,"handle":"baby-shower-gifts","title":"Baby Shower Gifts - Mum","updated_at":"2025-12-28T20:10:01+08:00","body_html":"\u003cp\u003eLooking for a unique baby shower gift? Or an all-in-one bundle pack to suit all your needs? We've got just the thing!\u003c\/p\u003e","published_at":"2021-12-06T13:43:56+08:00","sort_order":"best-selling","template_suffix":"baby-shower-gifts","disjunctive":true,"rules":[{"column":"tag","relation":"equals","condition":"Baby Shower Gifts - Mum"},{"column":"tag","relation":"equals","condition":"Gift Card"}],"published_scope":"global","image":{"created_at":"2024-05-06T11:59:28+08:00","alt":"Baby Shower Gifts - The Birth Store","width":1200,"height":1800,"src":"\/\/www.thebirthstore.com.au\/cdn\/shop\/collections\/baby-shower-gifts-401770.jpg?v=1761791272"}},{"id":261657460925,"handle":"buy","title":"Buy","updated_at":"2025-12-28T20:10:01+08:00","body_html":"\u003cp\u003eBrowse all of our pregnancy, labour \u0026amp; birth, postpartum and baby essentials here.\u003cbr\u003e\u003c\/p\u003e\n\u003cp\u003e\u003cspan\u003eYou can even buy now and pay later with Afterpay!\u003c\/span\u003e\u003c\/p\u003e","published_at":"2021-03-10T12:05:31+08:00","sort_order":"best-selling","template_suffix":"shop-all-collection","disjunctive":false,"rules":[{"column":"title","relation":"not_contains","condition":"Hire"}],"published_scope":"global","image":{"created_at":"2024-05-06T11:59:42+08:00","alt":"Buy - The Birth Store","width":2048,"height":2048,"src":"\/\/www.thebirthstore.com.au\/cdn\/shop\/collections\/buy-964856.jpg?v=1714967982"}},{"id":261658214589,"handle":"labour-and-birth-buy","title":"Labour \u0026 Birth","updated_at":"2025-12-28T20:10:01+08:00","body_html":"\u003cp\u003eWe stock a large range of Elle TENS machines for you to buy for your labour and birth. We stock the Elle TENS, Elle TENS 2 and Elle TENS Plus, we also hire these out if that suits you better, please head over to our TENS machine hire page for more information. We ship Australia wide or have options for local delivery\/pick-up in Perth if you are due ASAP. We also stock other items for your labour and birth. \u003c\/p\u003e\n\u003cp\u003eLooking for something we don't currently stock? Please reach out and let us know.\u003c\/p\u003e\n\u003cp\u003e\u003cspan\u003eYou can even buy now and pay later with Afterpay!\u003c\/span\u003e\u003c\/p\u003e","published_at":"2021-03-10T12:34:43+08:00","sort_order":"best-selling","template_suffix":"labour-birth-collection","disjunctive":false,"rules":[{"column":"tag","relation":"equals","condition":"Birth"}],"published_scope":"global","image":{"created_at":"2024-05-06T12:00:09+08:00","alt":"Labour \u0026 Birth - The Birth Store","width":1080,"height":981,"src":"\/\/www.thebirthstore.com.au\/cdn\/shop\/collections\/labour-birth-342038.jpg?v=1714968009"}},{"id":261658149053,"handle":"pregnancy-and-maternity-products","title":"Pregnancy","updated_at":"2025-12-28T20:10:01+08:00","body_html":"\u003cp\u003eShop your pregnancy essentials below. Looking for something we don't currently stock? Please reach out and let us know.\u003cbr\u003e\u003c\/p\u003e\n\u003cp\u003e\u003cspan\u003eYou can even buy now and pay later with Afterpay!\u003c\/span\u003e\u003c\/p\u003e","published_at":"2021-03-10T12:34:22+08:00","sort_order":"best-selling","template_suffix":"pregnancy-collection","disjunctive":false,"rules":[{"column":"tag","relation":"equals","condition":"Pregnancy"}],"published_scope":"global","image":{"created_at":"2024-05-06T12:00:40+08:00","alt":"Pregnancy - The Birth Store","width":1024,"height":1536,"src":"\/\/www.thebirthstore.com.au\/cdn\/shop\/collections\/pregnancy-899677.jpg?v=1714968040"}},{"id":291456483517,"handle":"shop-all","title":"Shop All - Mum","updated_at":"2025-12-28T20:10:01+08:00","body_html":"","published_at":"2022-12-23T22:04:39+08:00","sort_order":"best-selling","template_suffix":"shop-all-collection","disjunctive":false,"rules":[{"column":"variant_price","relation":"greater_than","condition":"1"},{"column":"title","relation":"not_contains","condition":"Batteries"},{"column":"tag","relation":"equals","condition":"Mum"}],"published_scope":"global","image":{"created_at":"2024-05-06T12:00:54+08:00","alt":"Shop All - The Birth Store","width":1365,"height":2048,"src":"\/\/www.thebirthstore.com.au\/cdn\/shop\/collections\/shop-all-693176.jpg?v=1714968055"}},{"id":310045933757,"handle":"shop-all-sale","title":"Shop All Sale","updated_at":"2025-12-28T20:10:01+08:00","body_html":"","published_at":"2024-11-12T13:22:43+08:00","sort_order":"alpha-asc","template_suffix":"","disjunctive":true,"rules":[{"column":"tag","relation":"equals","condition":"Bundles"},{"column":"vendor","relation":"equals","condition":"Franjos Kitchen"},{"column":"vendor","relation":"equals","condition":"Adored Illustrations"},{"column":"vendor","relation":"equals","condition":"Amazing Oils"},{"column":"vendor","relation":"equals","condition":"Ice Ice Booby"},{"column":"vendor","relation":"equals","condition":"Made to Milk"},{"column":"vendor","relation":"equals","condition":"Milky Goodness"},{"column":"vendor","relation":"equals","condition":"Seasons of Mama"},{"column":"vendor","relation":"equals","condition":"Silverette"},{"column":"vendor","relation":"equals","condition":"Snuggle Hunny"},{"column":"vendor","relation":"equals","condition":"Yung Bod"},{"column":"vendor","relation":"equals","condition":"Bare Love"},{"column":"vendor","relation":"equals","condition":"Haakaa"},{"column":"vendor","relation":"equals","condition":"Mere Botanicals"},{"column":"vendor","relation":"equals","condition":"The Birth Store Hire"},{"column":"vendor","relation":"equals","condition":"The Birth Store"}],"published_scope":"global","image":{"created_at":"2024-11-13T10:58:16+08:00","alt":"Shop All Sale - The Birth Store","width":2048,"height":1365,"src":"\/\/www.thebirthstore.com.au\/cdn\/shop\/collections\/shop-all-sale-297361.jpg?v=1731466697"}}]}
[{"alt":"Mama Mantra Cards with Timber Stand - The Birth Store-Seasons of Mama","id":27007593513149,"position":1,"preview_image":{"aspect_ratio":1.0,"height":1080,"width":1080,"src":"\/\/www.thebirthstore.com.au\/cdn\/shop\/files\/mama-mantra-cards-with-timber-stand-606995.jpg?v=1714968002"},"aspect_ratio":1.0,"height":1080,"media_type":"image","src":"\/\/www.thebirthstore.com.au\/cdn\/shop\/files\/mama-mantra-cards-with-timber-stand-606995.jpg?v=1714968002","width":1080},{"alt":"Mama Mantra Cards with Timber Stand - The Birth Store-Seasons of Mama","id":27007593578685,"position":2,"preview_image":{"aspect_ratio":1.0,"height":500,"width":500,"src":"\/\/www.thebirthstore.com.au\/cdn\/shop\/files\/mama-mantra-cards-with-timber-stand-441911.jpg?v=1714968002"},"aspect_ratio":1.0,"height":500,"media_type":"image","src":"\/\/www.thebirthstore.com.au\/cdn\/shop\/files\/mama-mantra-cards-with-timber-stand-441911.jpg?v=1714968002","width":500},{"alt":"Mama Mantra Cards with Timber Stand - The Birth Store-Seasons of Mama","id":27007593611453,"position":3,"preview_image":{"aspect_ratio":1.0,"height":500,"width":500,"src":"\/\/www.thebirthstore.com.au\/cdn\/shop\/files\/mama-mantra-cards-with-timber-stand-869384.jpg?v=1714968002"},"aspect_ratio":1.0,"height":500,"media_type":"image","src":"\/\/www.thebirthstore.com.au\/cdn\/shop\/files\/mama-mantra-cards-with-timber-stand-869384.jpg?v=1714968002","width":500},{"alt":"Mama Mantra Cards with Timber Stand - The Birth Store-Seasons of Mama","id":27007593644221,"position":4,"preview_image":{"aspect_ratio":1.0,"height":500,"width":500,"src":"\/\/www.thebirthstore.com.au\/cdn\/shop\/files\/mama-mantra-cards-with-timber-stand-507220.jpg?v=1714968002"},"aspect_ratio":1.0,"height":500,"media_type":"image","src":"\/\/www.thebirthstore.com.au\/cdn\/shop\/files\/mama-mantra-cards-with-timber-stand-507220.jpg?v=1714968002","width":500},{"alt":"Mama Mantra Cards with Timber Stand - The Birth Store-Seasons of Mama","id":27007593709757,"position":5,"preview_image":{"aspect_ratio":1.0,"height":500,"width":500,"src":"\/\/www.thebirthstore.com.au\/cdn\/shop\/files\/mama-mantra-cards-with-timber-stand-526517.jpg?v=1714968002"},"aspect_ratio":1.0,"height":500,"media_type":"image","src":"\/\/www.thebirthstore.com.au\/cdn\/shop\/files\/mama-mantra-cards-with-timber-stand-526517.jpg?v=1714968002","width":500},{"alt":"Mama Mantra Cards with Timber Stand - The Birth Store-Seasons of Mama","id":27007593742525,"position":6,"preview_image":{"aspect_ratio":1.0,"height":500,"width":500,"src":"\/\/www.thebirthstore.com.au\/cdn\/shop\/files\/mama-mantra-cards-with-timber-stand-833227.jpg?v=1714968002"},"aspect_ratio":1.0,"height":500,"media_type":"image","src":"\/\/www.thebirthstore.com.au\/cdn\/shop\/files\/mama-mantra-cards-with-timber-stand-833227.jpg?v=1714968002","width":500},{"alt":"Mama Mantra Cards with Timber Stand - The Birth Store-Seasons of Mama","id":27007593775293,"position":7,"preview_image":{"aspect_ratio":1.0,"height":500,"width":500,"src":"\/\/www.thebirthstore.com.au\/cdn\/shop\/files\/mama-mantra-cards-with-timber-stand-115645.jpg?v=1714968002"},"aspect_ratio":1.0,"height":500,"media_type":"image","src":"\/\/www.thebirthstore.com.au\/cdn\/shop\/files\/mama-mantra-cards-with-timber-stand-115645.jpg?v=1714968002","width":500},{"alt":"Mama Mantra Cards with Timber Stand - The Birth Store-Seasons of Mama","id":27007593808061,"position":8,"preview_image":{"aspect_ratio":1.0,"height":500,"width":500,"src":"\/\/www.thebirthstore.com.au\/cdn\/shop\/files\/mama-mantra-cards-with-timber-stand-411664.jpg?v=1714968002"},"aspect_ratio":1.0,"height":500,"media_type":"image","src":"\/\/www.thebirthstore.com.au\/cdn\/shop\/files\/mama-mantra-cards-with-timber-stand-411664.jpg?v=1714968002","width":500}]
{"item":{"id":7455576981693,"title":"Milky Goodness Lactation Cookies","handle":"lactation-cookies-select-your-flavour","description":"\u003cp\u003e\u003cmeta charset=\"utf-8\"\u003e\u003cspan\u003eThese Lactation Cookies are packed full of natural galactagogues including Flaxseed, Brewers Yeast \u0026amp; Oats which help to boost \u0026amp; support your milk supply while breastfeeding \u003c\/span\u003e\u003c\/p\u003e","published_at":"2023-03-22T13:42:02+08:00","created_at":"2023-03-22T12:24:58+08:00","vendor":"Milky Goodness","type":"","tags":["Baby Shower Gifts - Mum","Breastfeeding","Lactation Products","Mum"],"price":2695,"price_min":2695,"price_max":3195,"available":true,"price_varies":true,"compare_at_price":null,"compare_at_price_min":0,"compare_at_price_max":0,"compare_at_price_varies":false,"variants":[{"id":42739921158333,"title":"Triple Choc","option1":"Triple Choc","option2":null,"option3":null,"sku":"","requires_shipping":true,"taxable":false,"featured_image":{"id":34641024024765,"product_id":7455576981693,"position":2,"created_at":"2024-05-06T11:59:56+08:00","updated_at":"2024-05-06T11:59:56+08:00","alt":"Lactation Cookies – Select Your Flavour - The Birth Store-Milky Goodness","width":1080,"height":1080,"src":"\/\/www.thebirthstore.com.au\/cdn\/shop\/files\/lactation-cookies-select-your-flavour-767555.jpg?v=1714967996","variant_ids":[42739921158333]},"available":false,"name":"Milky Goodness Lactation Cookies - Triple Choc","public_title":"Triple Choc","options":["Triple Choc"],"price":2895,"weight":460,"compare_at_price":null,"inventory_management":"shopify","barcode":"21158333","featured_media":{"alt":"Lactation Cookies – Select Your Flavour - The Birth Store-Milky Goodness","id":27007593021629,"position":2,"preview_image":{"aspect_ratio":1.0,"height":1080,"width":1080,"src":"\/\/www.thebirthstore.com.au\/cdn\/shop\/files\/lactation-cookies-select-your-flavour-767555.jpg?v=1714967996"}},"requires_selling_plan":false,"selling_plan_allocations":[]},{"id":42740002390205,"title":"Vanilla (Dairy \u0026 Soy Free)","option1":"Vanilla (Dairy \u0026 Soy Free)","option2":null,"option3":null,"sku":"","requires_shipping":true,"taxable":false,"featured_image":{"id":34641024057533,"product_id":7455576981693,"position":3,"created_at":"2024-05-06T11:59:56+08:00","updated_at":"2024-05-06T11:59:56+08:00","alt":"Lactation Cookies – Select Your Flavour - The Birth Store-Milky Goodness","width":1080,"height":1080,"src":"\/\/www.thebirthstore.com.au\/cdn\/shop\/files\/lactation-cookies-select-your-flavour-351431.jpg?v=1714967996","variant_ids":[42740002390205]},"available":true,"name":"Milky Goodness Lactation Cookies - Vanilla (Dairy \u0026 Soy Free)","public_title":"Vanilla (Dairy \u0026 Soy Free)","options":["Vanilla (Dairy \u0026 Soy Free)"],"price":2895,"weight":460,"compare_at_price":null,"inventory_management":"shopify","barcode":"02390205","featured_media":{"alt":"Lactation Cookies – Select Your Flavour - The Birth Store-Milky Goodness","id":27007593054397,"position":3,"preview_image":{"aspect_ratio":1.0,"height":1080,"width":1080,"src":"\/\/www.thebirthstore.com.au\/cdn\/shop\/files\/lactation-cookies-select-your-flavour-351431.jpg?v=1714967996"}},"requires_selling_plan":false,"selling_plan_allocations":[]},{"id":42739921223869,"title":"Double Choc","option1":"Double Choc","option2":null,"option3":null,"sku":"","requires_shipping":true,"taxable":false,"featured_image":{"id":34641024090301,"product_id":7455576981693,"position":4,"created_at":"2024-05-06T11:59:56+08:00","updated_at":"2024-05-06T11:59:56+08:00","alt":"Lactation Cookies – Select Your Flavour - The Birth Store-Milky Goodness","width":1080,"height":1080,"src":"\/\/www.thebirthstore.com.au\/cdn\/shop\/files\/lactation-cookies-select-your-flavour-837468.jpg?v=1714967996","variant_ids":[42739921223869]},"available":true,"name":"Milky Goodness Lactation Cookies - Double Choc","public_title":"Double Choc","options":["Double Choc"],"price":2895,"weight":460,"compare_at_price":null,"inventory_management":"shopify","barcode":"21223869","featured_media":{"alt":"Lactation Cookies – Select Your Flavour - The Birth Store-Milky Goodness","id":27007593087165,"position":4,"preview_image":{"aspect_ratio":1.0,"height":1080,"width":1080,"src":"\/\/www.thebirthstore.com.au\/cdn\/shop\/files\/lactation-cookies-select-your-flavour-837468.jpg?v=1714967996"}},"requires_selling_plan":false,"selling_plan_allocations":[]},{"id":42739921256637,"title":"Raspberry","option1":"Raspberry","option2":null,"option3":null,"sku":"","requires_shipping":true,"taxable":false,"featured_image":{"id":34641024123069,"product_id":7455576981693,"position":5,"created_at":"2024-05-06T11:59:56+08:00","updated_at":"2024-05-06T11:59:57+08:00","alt":"Lactation Cookies – Select Your Flavour - The Birth Store-Milky Goodness","width":1080,"height":1080,"src":"\/\/www.thebirthstore.com.au\/cdn\/shop\/files\/lactation-cookies-select-your-flavour-490349.jpg?v=1714967997","variant_ids":[42739921256637]},"available":false,"name":"Milky Goodness Lactation Cookies - Raspberry","public_title":"Raspberry","options":["Raspberry"],"price":3095,"weight":460,"compare_at_price":null,"inventory_management":"shopify","barcode":"21256637","featured_media":{"alt":"Lactation Cookies – Select Your Flavour - The Birth Store-Milky Goodness","id":27007593119933,"position":5,"preview_image":{"aspect_ratio":1.0,"height":1080,"width":1080,"src":"\/\/www.thebirthstore.com.au\/cdn\/shop\/files\/lactation-cookies-select-your-flavour-490349.jpg?v=1714967997"}},"requires_selling_plan":false,"selling_plan_allocations":[]},{"id":42739921289405,"title":"Biscoff","option1":"Biscoff","option2":null,"option3":null,"sku":"","requires_shipping":true,"taxable":false,"featured_image":{"id":34641024155837,"product_id":7455576981693,"position":6,"created_at":"2024-05-06T11:59:57+08:00","updated_at":"2024-05-06T11:59:57+08:00","alt":"Lactation Cookies – Select Your Flavour - The Birth Store-Milky Goodness","width":1080,"height":1080,"src":"\/\/www.thebirthstore.com.au\/cdn\/shop\/files\/lactation-cookies-select-your-flavour-892342.jpg?v=1714967997","variant_ids":[42739921289405]},"available":true,"name":"Milky Goodness Lactation Cookies - Biscoff","public_title":"Biscoff","options":["Biscoff"],"price":3095,"weight":460,"compare_at_price":null,"inventory_management":"shopify","barcode":"21289405","featured_media":{"alt":"Lactation Cookies – Select Your Flavour - The Birth Store-Milky Goodness","id":27007593152701,"position":6,"preview_image":{"aspect_ratio":1.0,"height":1080,"width":1080,"src":"\/\/www.thebirthstore.com.au\/cdn\/shop\/files\/lactation-cookies-select-your-flavour-892342.jpg?v=1714967997"}},"requires_selling_plan":false,"selling_plan_allocations":[]},{"id":42739921322173,"title":"Caramilk","option1":"Caramilk","option2":null,"option3":null,"sku":"","requires_shipping":true,"taxable":false,"featured_image":{"id":34641024188605,"product_id":7455576981693,"position":7,"created_at":"2024-05-06T11:59:57+08:00","updated_at":"2024-05-06T11:59:57+08:00","alt":"Lactation Cookies – Select Your Flavour - The Birth Store-Milky Goodness","width":1080,"height":1080,"src":"\/\/www.thebirthstore.com.au\/cdn\/shop\/files\/lactation-cookies-select-your-flavour-674032.jpg?v=1714967997","variant_ids":[42739921322173]},"available":true,"name":"Milky Goodness Lactation Cookies - Caramilk","public_title":"Caramilk","options":["Caramilk"],"price":3095,"weight":460,"compare_at_price":null,"inventory_management":"shopify","barcode":"21322173","featured_media":{"alt":"Lactation Cookies – Select Your Flavour - The Birth Store-Milky Goodness","id":27007593185469,"position":7,"preview_image":{"aspect_ratio":1.0,"height":1080,"width":1080,"src":"\/\/www.thebirthstore.com.au\/cdn\/shop\/files\/lactation-cookies-select-your-flavour-674032.jpg?v=1714967997"}},"requires_selling_plan":false,"selling_plan_allocations":[]},{"id":42739921354941,"title":"Nutella","option1":"Nutella","option2":null,"option3":null,"sku":"","requires_shipping":true,"taxable":false,"featured_image":{"id":34641024221373,"product_id":7455576981693,"position":8,"created_at":"2024-05-06T11:59:57+08:00","updated_at":"2024-05-06T11:59:57+08:00","alt":"Lactation Cookies – Select Your Flavour - The Birth Store-Milky Goodness","width":1080,"height":1080,"src":"\/\/www.thebirthstore.com.au\/cdn\/shop\/files\/lactation-cookies-select-your-flavour-458424.jpg?v=1714967997","variant_ids":[42739921354941]},"available":true,"name":"Milky Goodness Lactation Cookies - Nutella","public_title":"Nutella","options":["Nutella"],"price":3095,"weight":460,"compare_at_price":null,"inventory_management":"shopify","barcode":"21354941","featured_media":{"alt":"Lactation Cookies – Select Your Flavour - The Birth Store-Milky Goodness","id":27007593218237,"position":8,"preview_image":{"aspect_ratio":1.0,"height":1080,"width":1080,"src":"\/\/www.thebirthstore.com.au\/cdn\/shop\/files\/lactation-cookies-select-your-flavour-458424.jpg?v=1714967997"}},"requires_selling_plan":false,"selling_plan_allocations":[]},{"id":42739921420477,"title":"Dark Chocolate Chip","option1":"Dark Chocolate Chip","option2":null,"option3":null,"sku":"","requires_shipping":true,"taxable":false,"featured_image":{"id":34641024286909,"product_id":7455576981693,"position":10,"created_at":"2024-05-06T11:59:57+08:00","updated_at":"2024-05-06T11:59:57+08:00","alt":"Lactation Cookies – Select Your Flavour - The Birth Store-Milky Goodness","width":1080,"height":1080,"src":"\/\/www.thebirthstore.com.au\/cdn\/shop\/files\/lactation-cookies-select-your-flavour-905330.jpg?v=1714967997","variant_ids":[42739921420477]},"available":false,"name":"Milky Goodness Lactation Cookies - Dark Chocolate Chip","public_title":"Dark Chocolate Chip","options":["Dark Chocolate Chip"],"price":2695,"weight":460,"compare_at_price":null,"inventory_management":"shopify","barcode":"21420477","featured_media":{"alt":"Lactation Cookies – Select Your Flavour - The Birth Store-Milky Goodness","id":27007593283773,"position":10,"preview_image":{"aspect_ratio":1.0,"height":1080,"width":1080,"src":"\/\/www.thebirthstore.com.au\/cdn\/shop\/files\/lactation-cookies-select-your-flavour-905330.jpg?v=1714967997"}},"requires_selling_plan":false,"selling_plan_allocations":[]},{"id":42739921453245,"title":"White Chocolate Chip \u0026 Macadamia","option1":"White Chocolate Chip \u0026 Macadamia","option2":null,"option3":null,"sku":"","requires_shipping":true,"taxable":false,"featured_image":{"id":34641024319677,"product_id":7455576981693,"position":11,"created_at":"2024-05-06T11:59:57+08:00","updated_at":"2024-05-06T11:59:57+08:00","alt":"Lactation Cookies – Select Your Flavour - The Birth Store-Milky Goodness","width":1080,"height":1080,"src":"\/\/www.thebirthstore.com.au\/cdn\/shop\/files\/lactation-cookies-select-your-flavour-987399.jpg?v=1714967997","variant_ids":[42739921453245]},"available":true,"name":"Milky Goodness Lactation Cookies - White Chocolate Chip \u0026 Macadamia","public_title":"White Chocolate Chip \u0026 Macadamia","options":["White Chocolate Chip \u0026 Macadamia"],"price":2695,"weight":460,"compare_at_price":null,"inventory_management":"shopify","barcode":"21453245","featured_media":{"alt":"Lactation Cookies – Select Your Flavour - The Birth Store-Milky Goodness","id":27007593316541,"position":11,"preview_image":{"aspect_ratio":1.0,"height":1080,"width":1080,"src":"\/\/www.thebirthstore.com.au\/cdn\/shop\/files\/lactation-cookies-select-your-flavour-987399.jpg?v=1714967997"}},"requires_selling_plan":false,"selling_plan_allocations":[]},{"id":42739921486013,"title":"Chocolate Chip","option1":"Chocolate Chip","option2":null,"option3":null,"sku":"","requires_shipping":true,"taxable":false,"featured_image":{"id":34641024352445,"product_id":7455576981693,"position":12,"created_at":"2024-05-06T11:59:57+08:00","updated_at":"2024-05-06T11:59:57+08:00","alt":"Lactation Cookies – Select Your Flavour - The Birth Store-Milky Goodness","width":1080,"height":1080,"src":"\/\/www.thebirthstore.com.au\/cdn\/shop\/files\/lactation-cookies-select-your-flavour-309897.jpg?v=1714967997","variant_ids":[42739921486013]},"available":true,"name":"Milky Goodness Lactation Cookies - Chocolate Chip","public_title":"Chocolate Chip","options":["Chocolate Chip"],"price":2695,"weight":460,"compare_at_price":null,"inventory_management":"shopify","barcode":"21486013","featured_media":{"alt":"Lactation Cookies – Select Your Flavour - The Birth Store-Milky Goodness","id":27007593349309,"position":12,"preview_image":{"aspect_ratio":1.0,"height":1080,"width":1080,"src":"\/\/www.thebirthstore.com.au\/cdn\/shop\/files\/lactation-cookies-select-your-flavour-309897.jpg?v=1714967997"}},"requires_selling_plan":false,"selling_plan_allocations":[]},{"id":44839651115197,"title":"Nutella \u0026 M\u0026M's Lactation Cookies","option1":"Nutella \u0026 M\u0026M's Lactation Cookies","option2":null,"option3":null,"sku":"","requires_shipping":true,"taxable":false,"featured_image":{"id":38738877874365,"product_id":7455576981693,"position":18,"created_at":"2025-11-02T23:38:49+08:00","updated_at":"2025-11-03T12:22:55+08:00","alt":"Milky Goodness Lactation Cookies - The Birth Store - Milky Goodness","width":1080,"height":1080,"src":"\/\/www.thebirthstore.com.au\/cdn\/shop\/files\/milky-goodness-lactation-cookies-5400492.png?v=1762143775","variant_ids":[44839651115197]},"available":true,"name":"Milky Goodness Lactation Cookies - Nutella \u0026 M\u0026M's Lactation Cookies","public_title":"Nutella \u0026 M\u0026M's Lactation Cookies","options":["Nutella \u0026 M\u0026M's Lactation Cookies"],"price":3195,"weight":460,"compare_at_price":null,"inventory_management":"shopify","barcode":"51115197","featured_media":{"alt":"Milky Goodness Lactation Cookies - The Birth Store - Milky Goodness","id":29988541366461,"position":18,"preview_image":{"aspect_ratio":1.0,"height":1080,"width":1080,"src":"\/\/www.thebirthstore.com.au\/cdn\/shop\/files\/milky-goodness-lactation-cookies-5400492.png?v=1762143775"}},"requires_selling_plan":false,"selling_plan_allocations":[]},{"id":44839652425917,"title":"Strawberry","option1":"Strawberry","option2":null,"option3":null,"sku":"","requires_shipping":true,"taxable":false,"featured_image":{"id":38738878922941,"product_id":7455576981693,"position":19,"created_at":"2025-11-02T23:39:29+08:00","updated_at":"2025-11-03T12:22:55+08:00","alt":"Milky Goodness Lactation Cookies - The Birth Store - Milky Goodness","width":1080,"height":1080,"src":"\/\/www.thebirthstore.com.au\/cdn\/shop\/files\/milky-goodness-lactation-cookies-9540997.png?v=1762143775","variant_ids":[44839652425917]},"available":false,"name":"Milky Goodness Lactation Cookies - Strawberry","public_title":"Strawberry","options":["Strawberry"],"price":3195,"weight":460,"compare_at_price":null,"inventory_management":"shopify","barcode":"52425917","featured_media":{"alt":"Milky Goodness Lactation Cookies - The Birth Store - Milky Goodness","id":29988541497533,"position":19,"preview_image":{"aspect_ratio":1.0,"height":1080,"width":1080,"src":"\/\/www.thebirthstore.com.au\/cdn\/shop\/files\/milky-goodness-lactation-cookies-9540997.png?v=1762143775"}},"requires_selling_plan":false,"selling_plan_allocations":[]},{"id":44839652851901,"title":"Mint Slice","option1":"Mint Slice","option2":null,"option3":null,"sku":"","requires_shipping":true,"taxable":false,"featured_image":{"id":38738881577149,"product_id":7455576981693,"position":20,"created_at":"2025-11-02T23:40:39+08:00","updated_at":"2025-11-03T12:22:55+08:00","alt":"Milky Goodness Lactation Cookies - The Birth Store - Milky Goodness","width":1080,"height":1080,"src":"\/\/www.thebirthstore.com.au\/cdn\/shop\/files\/milky-goodness-lactation-cookies-9278775.png?v=1762143775","variant_ids":[44839652851901]},"available":false,"name":"Milky Goodness Lactation Cookies - Mint Slice","public_title":"Mint Slice","options":["Mint Slice"],"price":3195,"weight":460,"compare_at_price":null,"inventory_management":"shopify","barcode":"52851901","featured_media":{"alt":"Milky Goodness Lactation Cookies - The Birth Store - Milky Goodness","id":29988542808253,"position":20,"preview_image":{"aspect_ratio":1.0,"height":1080,"width":1080,"src":"\/\/www.thebirthstore.com.au\/cdn\/shop\/files\/milky-goodness-lactation-cookies-9278775.png?v=1762143775"}},"requires_selling_plan":false,"selling_plan_allocations":[]},{"id":44839653507261,"title":"Birthday Cake","option1":"Birthday Cake","option2":null,"option3":null,"sku":"","requires_shipping":true,"taxable":false,"featured_image":{"id":38738882068669,"product_id":7455576981693,"position":21,"created_at":"2025-11-02T23:40:54+08:00","updated_at":"2025-11-03T12:22:56+08:00","alt":"Milky Goodness Lactation Cookies - The Birth Store - Milky Goodness","width":1080,"height":1080,"src":"\/\/www.thebirthstore.com.au\/cdn\/shop\/files\/milky-goodness-lactation-cookies-4715685.png?v=1762143776","variant_ids":[44839653507261]},"available":false,"name":"Milky Goodness Lactation Cookies - Birthday Cake","public_title":"Birthday Cake","options":["Birthday Cake"],"price":3195,"weight":460,"compare_at_price":null,"inventory_management":"shopify","barcode":"53507261","featured_media":{"alt":"Milky Goodness Lactation Cookies - The Birth Store - Milky Goodness","id":29988543037629,"position":21,"preview_image":{"aspect_ratio":1.0,"height":1080,"width":1080,"src":"\/\/www.thebirthstore.com.au\/cdn\/shop\/files\/milky-goodness-lactation-cookies-4715685.png?v=1762143776"}},"requires_selling_plan":false,"selling_plan_allocations":[]},{"id":44921536184509,"title":"Mixed Box","option1":"Mixed Box","option2":null,"option3":null,"sku":"","requires_shipping":true,"taxable":false,"featured_image":{"id":36251126366397,"product_id":7455576981693,"position":13,"created_at":"2025-02-10T13:52:14+08:00","updated_at":"2025-02-11T14:34:00+08:00","alt":"Milky Goodness Lactation Cookies - The Birth Store - Milky Goodness","width":1080,"height":1080,"src":"\/\/www.thebirthstore.com.au\/cdn\/shop\/files\/milky-goodness-lactation-cookies-167661.jpg?v=1739255640","variant_ids":[44921536184509]},"available":false,"name":"Milky Goodness Lactation Cookies - Mixed Box","public_title":"Mixed Box","options":["Mixed Box"],"price":2795,"weight":460,"compare_at_price":null,"inventory_management":"shopify","barcode":"06912189","featured_media":{"alt":"Milky Goodness Lactation Cookies - The Birth Store - Milky Goodness","id":28269590249661,"position":13,"preview_image":{"aspect_ratio":1.0,"height":1080,"width":1080,"src":"\/\/www.thebirthstore.com.au\/cdn\/shop\/files\/milky-goodness-lactation-cookies-167661.jpg?v=1739255640"}},"requires_selling_plan":false,"selling_plan_allocations":[]}],"images":["\/\/www.thebirthstore.com.au\/cdn\/shop\/files\/lactation-cookies-select-your-flavour-197058.jpg?v=1714967996","\/\/www.thebirthstore.com.au\/cdn\/shop\/files\/lactation-cookies-select-your-flavour-767555.jpg?v=1714967996","\/\/www.thebirthstore.com.au\/cdn\/shop\/files\/lactation-cookies-select-your-flavour-351431.jpg?v=1714967996","\/\/www.thebirthstore.com.au\/cdn\/shop\/files\/lactation-cookies-select-your-flavour-837468.jpg?v=1714967996","\/\/www.thebirthstore.com.au\/cdn\/shop\/files\/lactation-cookies-select-your-flavour-490349.jpg?v=1714967997","\/\/www.thebirthstore.com.au\/cdn\/shop\/files\/lactation-cookies-select-your-flavour-892342.jpg?v=1714967997","\/\/www.thebirthstore.com.au\/cdn\/shop\/files\/lactation-cookies-select-your-flavour-674032.jpg?v=1714967997","\/\/www.thebirthstore.com.au\/cdn\/shop\/files\/lactation-cookies-select-your-flavour-458424.jpg?v=1714967997","\/\/www.thebirthstore.com.au\/cdn\/shop\/files\/lactation-cookies-select-your-flavour-495552.jpg?v=1714967997","\/\/www.thebirthstore.com.au\/cdn\/shop\/files\/lactation-cookies-select-your-flavour-905330.jpg?v=1714967997","\/\/www.thebirthstore.com.au\/cdn\/shop\/files\/lactation-cookies-select-your-flavour-987399.jpg?v=1714967997","\/\/www.thebirthstore.com.au\/cdn\/shop\/files\/lactation-cookies-select-your-flavour-309897.jpg?v=1714967997","\/\/www.thebirthstore.com.au\/cdn\/shop\/files\/milky-goodness-lactation-cookies-167661.jpg?v=1739255640","\/\/www.thebirthstore.com.au\/cdn\/shop\/files\/milky-goodness-lactation-cookies-952411.png?v=1739255641","\/\/www.thebirthstore.com.au\/cdn\/shop\/files\/milky-goodness-lactation-cookies-962628.png?v=1739255641","\/\/www.thebirthstore.com.au\/cdn\/shop\/files\/milky-goodness-lactation-cookies-972826.png?v=1739255641","\/\/www.thebirthstore.com.au\/cdn\/shop\/files\/milky-goodness-lactation-cookies-933276.png?v=1739255641","\/\/www.thebirthstore.com.au\/cdn\/shop\/files\/milky-goodness-lactation-cookies-5400492.png?v=1762143775","\/\/www.thebirthstore.com.au\/cdn\/shop\/files\/milky-goodness-lactation-cookies-9540997.png?v=1762143775","\/\/www.thebirthstore.com.au\/cdn\/shop\/files\/milky-goodness-lactation-cookies-9278775.png?v=1762143775","\/\/www.thebirthstore.com.au\/cdn\/shop\/files\/milky-goodness-lactation-cookies-4715685.png?v=1762143776"],"featured_image":"\/\/www.thebirthstore.com.au\/cdn\/shop\/files\/lactation-cookies-select-your-flavour-197058.jpg?v=1714967996","options":["Flavours"],"media":[{"alt":"Lactation Cookies – Select Your Flavour - The Birth Store-Milky Goodness","id":27007592956093,"position":1,"preview_image":{"aspect_ratio":1.0,"height":1080,"width":1080,"src":"\/\/www.thebirthstore.com.au\/cdn\/shop\/files\/lactation-cookies-select-your-flavour-197058.jpg?v=1714967996"},"aspect_ratio":1.0,"height":1080,"media_type":"image","src":"\/\/www.thebirthstore.com.au\/cdn\/shop\/files\/lactation-cookies-select-your-flavour-197058.jpg?v=1714967996","width":1080},{"alt":"Lactation Cookies – Select Your Flavour - The Birth Store-Milky Goodness","id":27007593021629,"position":2,"preview_image":{"aspect_ratio":1.0,"height":1080,"width":1080,"src":"\/\/www.thebirthstore.com.au\/cdn\/shop\/files\/lactation-cookies-select-your-flavour-767555.jpg?v=1714967996"},"aspect_ratio":1.0,"height":1080,"media_type":"image","src":"\/\/www.thebirthstore.com.au\/cdn\/shop\/files\/lactation-cookies-select-your-flavour-767555.jpg?v=1714967996","width":1080},{"alt":"Lactation Cookies – Select Your Flavour - The Birth Store-Milky Goodness","id":27007593054397,"position":3,"preview_image":{"aspect_ratio":1.0,"height":1080,"width":1080,"src":"\/\/www.thebirthstore.com.au\/cdn\/shop\/files\/lactation-cookies-select-your-flavour-351431.jpg?v=1714967996"},"aspect_ratio":1.0,"height":1080,"media_type":"image","src":"\/\/www.thebirthstore.com.au\/cdn\/shop\/files\/lactation-cookies-select-your-flavour-351431.jpg?v=1714967996","width":1080},{"alt":"Lactation Cookies – Select Your Flavour - The Birth Store-Milky Goodness","id":27007593087165,"position":4,"preview_image":{"aspect_ratio":1.0,"height":1080,"width":1080,"src":"\/\/www.thebirthstore.com.au\/cdn\/shop\/files\/lactation-cookies-select-your-flavour-837468.jpg?v=1714967996"},"aspect_ratio":1.0,"height":1080,"media_type":"image","src":"\/\/www.thebirthstore.com.au\/cdn\/shop\/files\/lactation-cookies-select-your-flavour-837468.jpg?v=1714967996","width":1080},{"alt":"Lactation Cookies – Select Your Flavour - The Birth Store-Milky Goodness","id":27007593119933,"position":5,"preview_image":{"aspect_ratio":1.0,"height":1080,"width":1080,"src":"\/\/www.thebirthstore.com.au\/cdn\/shop\/files\/lactation-cookies-select-your-flavour-490349.jpg?v=1714967997"},"aspect_ratio":1.0,"height":1080,"media_type":"image","src":"\/\/www.thebirthstore.com.au\/cdn\/shop\/files\/lactation-cookies-select-your-flavour-490349.jpg?v=1714967997","width":1080},{"alt":"Lactation Cookies – Select Your Flavour - The Birth Store-Milky Goodness","id":27007593152701,"position":6,"preview_image":{"aspect_ratio":1.0,"height":1080,"width":1080,"src":"\/\/www.thebirthstore.com.au\/cdn\/shop\/files\/lactation-cookies-select-your-flavour-892342.jpg?v=1714967997"},"aspect_ratio":1.0,"height":1080,"media_type":"image","src":"\/\/www.thebirthstore.com.au\/cdn\/shop\/files\/lactation-cookies-select-your-flavour-892342.jpg?v=1714967997","width":1080},{"alt":"Lactation Cookies – Select Your Flavour - The Birth Store-Milky Goodness","id":27007593185469,"position":7,"preview_image":{"aspect_ratio":1.0,"height":1080,"width":1080,"src":"\/\/www.thebirthstore.com.au\/cdn\/shop\/files\/lactation-cookies-select-your-flavour-674032.jpg?v=1714967997"},"aspect_ratio":1.0,"height":1080,"media_type":"image","src":"\/\/www.thebirthstore.com.au\/cdn\/shop\/files\/lactation-cookies-select-your-flavour-674032.jpg?v=1714967997","width":1080},{"alt":"Lactation Cookies – Select Your Flavour - The Birth Store-Milky Goodness","id":27007593218237,"position":8,"preview_image":{"aspect_ratio":1.0,"height":1080,"width":1080,"src":"\/\/www.thebirthstore.com.au\/cdn\/shop\/files\/lactation-cookies-select-your-flavour-458424.jpg?v=1714967997"},"aspect_ratio":1.0,"height":1080,"media_type":"image","src":"\/\/www.thebirthstore.com.au\/cdn\/shop\/files\/lactation-cookies-select-your-flavour-458424.jpg?v=1714967997","width":1080},{"alt":"Lactation Cookies – Select Your Flavour - The Birth Store-Milky Goodness","id":27007593251005,"position":9,"preview_image":{"aspect_ratio":1.0,"height":1080,"width":1080,"src":"\/\/www.thebirthstore.com.au\/cdn\/shop\/files\/lactation-cookies-select-your-flavour-495552.jpg?v=1714967997"},"aspect_ratio":1.0,"height":1080,"media_type":"image","src":"\/\/www.thebirthstore.com.au\/cdn\/shop\/files\/lactation-cookies-select-your-flavour-495552.jpg?v=1714967997","width":1080},{"alt":"Lactation Cookies – Select Your Flavour - The Birth Store-Milky Goodness","id":27007593283773,"position":10,"preview_image":{"aspect_ratio":1.0,"height":1080,"width":1080,"src":"\/\/www.thebirthstore.com.au\/cdn\/shop\/files\/lactation-cookies-select-your-flavour-905330.jpg?v=1714967997"},"aspect_ratio":1.0,"height":1080,"media_type":"image","src":"\/\/www.thebirthstore.com.au\/cdn\/shop\/files\/lactation-cookies-select-your-flavour-905330.jpg?v=1714967997","width":1080},{"alt":"Lactation Cookies – Select Your Flavour - The Birth Store-Milky Goodness","id":27007593316541,"position":11,"preview_image":{"aspect_ratio":1.0,"height":1080,"width":1080,"src":"\/\/www.thebirthstore.com.au\/cdn\/shop\/files\/lactation-cookies-select-your-flavour-987399.jpg?v=1714967997"},"aspect_ratio":1.0,"height":1080,"media_type":"image","src":"\/\/www.thebirthstore.com.au\/cdn\/shop\/files\/lactation-cookies-select-your-flavour-987399.jpg?v=1714967997","width":1080},{"alt":"Lactation Cookies – Select Your Flavour - The Birth Store-Milky Goodness","id":27007593349309,"position":12,"preview_image":{"aspect_ratio":1.0,"height":1080,"width":1080,"src":"\/\/www.thebirthstore.com.au\/cdn\/shop\/files\/lactation-cookies-select-your-flavour-309897.jpg?v=1714967997"},"aspect_ratio":1.0,"height":1080,"media_type":"image","src":"\/\/www.thebirthstore.com.au\/cdn\/shop\/files\/lactation-cookies-select-your-flavour-309897.jpg?v=1714967997","width":1080},{"alt":"Milky Goodness Lactation Cookies - The Birth Store - Milky Goodness","id":28269590249661,"position":13,"preview_image":{"aspect_ratio":1.0,"height":1080,"width":1080,"src":"\/\/www.thebirthstore.com.au\/cdn\/shop\/files\/milky-goodness-lactation-cookies-167661.jpg?v=1739255640"},"aspect_ratio":1.0,"height":1080,"media_type":"image","src":"\/\/www.thebirthstore.com.au\/cdn\/shop\/files\/milky-goodness-lactation-cookies-167661.jpg?v=1739255640","width":1080},{"alt":"Milky Goodness Lactation Cookies - The Birth Store - Milky Goodness","id":28269607911613,"position":14,"preview_image":{"aspect_ratio":1.026,"height":581,"width":596,"src":"\/\/www.thebirthstore.com.au\/cdn\/shop\/files\/milky-goodness-lactation-cookies-952411.png?v=1739255641"},"aspect_ratio":1.026,"height":581,"media_type":"image","src":"\/\/www.thebirthstore.com.au\/cdn\/shop\/files\/milky-goodness-lactation-cookies-952411.png?v=1739255641","width":596},{"alt":"Milky Goodness Lactation Cookies - The Birth Store - Milky Goodness","id":28269626884285,"position":15,"preview_image":{"aspect_ratio":1.015,"height":532,"width":540,"src":"\/\/www.thebirthstore.com.au\/cdn\/shop\/files\/milky-goodness-lactation-cookies-962628.png?v=1739255641"},"aspect_ratio":1.015,"height":532,"media_type":"image","src":"\/\/www.thebirthstore.com.au\/cdn\/shop\/files\/milky-goodness-lactation-cookies-962628.png?v=1739255641","width":540},{"alt":"Milky Goodness Lactation Cookies - The Birth Store - Milky Goodness","id":28269629079741,"position":16,"preview_image":{"aspect_ratio":1.015,"height":518,"width":526,"src":"\/\/www.thebirthstore.com.au\/cdn\/shop\/files\/milky-goodness-lactation-cookies-972826.png?v=1739255641"},"aspect_ratio":1.015,"height":518,"media_type":"image","src":"\/\/www.thebirthstore.com.au\/cdn\/shop\/files\/milky-goodness-lactation-cookies-972826.png?v=1739255641","width":526},{"alt":"Milky Goodness Lactation Cookies - The Birth Store - Milky Goodness","id":28269632323773,"position":17,"preview_image":{"aspect_ratio":1.011,"height":522,"width":528,"src":"\/\/www.thebirthstore.com.au\/cdn\/shop\/files\/milky-goodness-lactation-cookies-933276.png?v=1739255641"},"aspect_ratio":1.011,"height":522,"media_type":"image","src":"\/\/www.thebirthstore.com.au\/cdn\/shop\/files\/milky-goodness-lactation-cookies-933276.png?v=1739255641","width":528},{"alt":"Milky Goodness Lactation Cookies - The Birth Store - Milky Goodness","id":29988541366461,"position":18,"preview_image":{"aspect_ratio":1.0,"height":1080,"width":1080,"src":"\/\/www.thebirthstore.com.au\/cdn\/shop\/files\/milky-goodness-lactation-cookies-5400492.png?v=1762143775"},"aspect_ratio":1.0,"height":1080,"media_type":"image","src":"\/\/www.thebirthstore.com.au\/cdn\/shop\/files\/milky-goodness-lactation-cookies-5400492.png?v=1762143775","width":1080},{"alt":"Milky Goodness Lactation Cookies - The Birth Store - Milky Goodness","id":29988541497533,"position":19,"preview_image":{"aspect_ratio":1.0,"height":1080,"width":1080,"src":"\/\/www.thebirthstore.com.au\/cdn\/shop\/files\/milky-goodness-lactation-cookies-9540997.png?v=1762143775"},"aspect_ratio":1.0,"height":1080,"media_type":"image","src":"\/\/www.thebirthstore.com.au\/cdn\/shop\/files\/milky-goodness-lactation-cookies-9540997.png?v=1762143775","width":1080},{"alt":"Milky Goodness Lactation Cookies - The Birth Store - Milky Goodness","id":29988542808253,"position":20,"preview_image":{"aspect_ratio":1.0,"height":1080,"width":1080,"src":"\/\/www.thebirthstore.com.au\/cdn\/shop\/files\/milky-goodness-lactation-cookies-9278775.png?v=1762143775"},"aspect_ratio":1.0,"height":1080,"media_type":"image","src":"\/\/www.thebirthstore.com.au\/cdn\/shop\/files\/milky-goodness-lactation-cookies-9278775.png?v=1762143775","width":1080},{"alt":"Milky Goodness Lactation Cookies - The Birth Store - Milky Goodness","id":29988543037629,"position":21,"preview_image":{"aspect_ratio":1.0,"height":1080,"width":1080,"src":"\/\/www.thebirthstore.com.au\/cdn\/shop\/files\/milky-goodness-lactation-cookies-4715685.png?v=1762143776"},"aspect_ratio":1.0,"height":1080,"media_type":"image","src":"\/\/www.thebirthstore.com.au\/cdn\/shop\/files\/milky-goodness-lactation-cookies-4715685.png?v=1762143776","width":1080}],"requires_selling_plan":false,"selling_plan_groups":[],"content":"\u003cp\u003e\u003cmeta charset=\"utf-8\"\u003e\u003cspan\u003eThese Lactation Cookies are packed full of natural galactagogues including Flaxseed, Brewers Yeast \u0026amp; Oats which help to boost \u0026amp; support your milk supply while breastfeeding \u003c\/span\u003e\u003c\/p\u003e"},"options":[{"name":"Flavours","position":1,"values":["Triple Choc","Vanilla (Dairy \u0026 Soy Free)","Double Choc","Raspberry","Biscoff","Caramilk","Nutella","Dark Chocolate Chip","White Chocolate Chip \u0026 Macadamia","Chocolate Chip","Nutella \u0026 M\u0026M's Lactation Cookies","Strawberry","Mint Slice","Birthday Cake","Mixed Box"]}],"custom_metafields":{},"metafields":{"badge":"\u003cdiv style='display:none' class='jdgm-prev-badge' data-average-rating='0.00' data-number-of-reviews='0' data-number-of-questions='0'\u003e \u003cspan class='jdgm-prev-badge__stars' data-score='0.00' tabindex='0' aria-label='0.00 stars' role='button'\u003e \u003cspan class='jdgm-star jdgm--off'\u003e\u003c\/span\u003e\u003cspan class='jdgm-star jdgm--off'\u003e\u003c\/span\u003e\u003cspan class='jdgm-star jdgm--off'\u003e\u003c\/span\u003e\u003cspan class='jdgm-star jdgm--off'\u003e\u003c\/span\u003e\u003cspan class='jdgm-star jdgm--off'\u003e\u003c\/span\u003e \u003c\/span\u003e \u003cspan class='jdgm-prev-badge__text'\u003e No reviews \u003c\/span\u003e \u003c\/div\u003e","widget":"\u003cdiv class='jdgm-rev-widg' data-updated-at='2025-06-13T16:12:53Z' data-average-rating='0.00' data-number-of-reviews='0' data-number-of-questions='0'\u003e \u003cstyle class='jdgm-temp-hiding-style'\u003e.jdgm-rev-widg{ display: none }\u003c\/style\u003e \u003cdiv class='jdgm-rev-widg__header'\u003e \u003ch2 class='jdgm-rev-widg__title'\u003eCustomer Reviews\u003c\/h2\u003e \u003cdiv class='jdgm-rev-widg__summary'\u003e \u003cdiv class='jdgm-rev-widg__summary-stars' aria-label='Average rating is 0.00 stars' role='img'\u003e \u003cspan class='jdgm-star jdgm--off'\u003e\u003c\/span\u003e\u003cspan class='jdgm-star jdgm--off'\u003e\u003c\/span\u003e\u003cspan class='jdgm-star jdgm--off'\u003e\u003c\/span\u003e\u003cspan class='jdgm-star jdgm--off'\u003e\u003c\/span\u003e\u003cspan class='jdgm-star jdgm--off'\u003e\u003c\/span\u003e \u003c\/div\u003e \u003cdiv class='jdgm-rev-widg__summary-text'\u003eBe the first to write a review\u003c\/div\u003e \u003c\/div\u003e \u003ca style='display: none' href='#' class='jdgm-write-rev-link' role='button'\u003eWrite a review\u003c\/a\u003e \u003cdiv class='jdgm-histogram jdgm-temp-hidden'\u003e \u003cdiv class='jdgm-histogram__row' data-rating='5' data-frequency='0' data-percentage='0'\u003e \u003cdiv class='jdgm-histogram__star' role='button' aria-label=\"0% (0) reviews with 5 star rating\" tabindex='0' \u003e\u003cspan class='jdgm-star jdgm--on'\u003e\u003c\/span\u003e\u003cspan class='jdgm-star jdgm--on'\u003e\u003c\/span\u003e\u003cspan class='jdgm-star jdgm--on'\u003e\u003c\/span\u003e\u003cspan class='jdgm-star jdgm--on'\u003e\u003c\/span\u003e\u003cspan class='jdgm-star jdgm--on'\u003e\u003c\/span\u003e\u003c\/div\u003e \u003cdiv class='jdgm-histogram__bar'\u003e \u003cdiv class='jdgm-histogram__bar-content' style='width: 0%;'\u003e \u003c\/div\u003e \u003c\/div\u003e \u003cdiv class='jdgm-histogram__percentage'\u003e0%\u003c\/div\u003e \u003cdiv class='jdgm-histogram__frequency'\u003e(0)\u003c\/div\u003e \u003c\/div\u003e \u003cdiv class='jdgm-histogram__row' data-rating='4' data-frequency='0' data-percentage='0'\u003e \u003cdiv class='jdgm-histogram__star' role='button' aria-label=\"0% (0) reviews with 4 star rating\" tabindex='0' \u003e\u003cspan class='jdgm-star jdgm--on'\u003e\u003c\/span\u003e\u003cspan class='jdgm-star jdgm--on'\u003e\u003c\/span\u003e\u003cspan class='jdgm-star jdgm--on'\u003e\u003c\/span\u003e\u003cspan class='jdgm-star jdgm--on'\u003e\u003c\/span\u003e\u003cspan class='jdgm-star jdgm--off'\u003e\u003c\/span\u003e\u003c\/div\u003e \u003cdiv class='jdgm-histogram__bar'\u003e \u003cdiv class='jdgm-histogram__bar-content' style='width: 0%;'\u003e \u003c\/div\u003e \u003c\/div\u003e \u003cdiv class='jdgm-histogram__percentage'\u003e0%\u003c\/div\u003e \u003cdiv class='jdgm-histogram__frequency'\u003e(0)\u003c\/div\u003e \u003c\/div\u003e \u003cdiv class='jdgm-histogram__row' data-rating='3' data-frequency='0' data-percentage='0'\u003e \u003cdiv class='jdgm-histogram__star' role='button' aria-label=\"0% (0) reviews with 3 star rating\" tabindex='0' \u003e\u003cspan class='jdgm-star jdgm--on'\u003e\u003c\/span\u003e\u003cspan class='jdgm-star jdgm--on'\u003e\u003c\/span\u003e\u003cspan class='jdgm-star jdgm--on'\u003e\u003c\/span\u003e\u003cspan class='jdgm-star jdgm--off'\u003e\u003c\/span\u003e\u003cspan class='jdgm-star jdgm--off'\u003e\u003c\/span\u003e\u003c\/div\u003e \u003cdiv class='jdgm-histogram__bar'\u003e \u003cdiv class='jdgm-histogram__bar-content' style='width: 0%;'\u003e \u003c\/div\u003e \u003c\/div\u003e \u003cdiv class='jdgm-histogram__percentage'\u003e0%\u003c\/div\u003e \u003cdiv class='jdgm-histogram__frequency'\u003e(0)\u003c\/div\u003e \u003c\/div\u003e \u003cdiv class='jdgm-histogram__row' data-rating='2' data-frequency='0' data-percentage='0'\u003e \u003cdiv class='jdgm-histogram__star' role='button' aria-label=\"0% (0) reviews with 2 star rating\" tabindex='0' \u003e\u003cspan class='jdgm-star jdgm--on'\u003e\u003c\/span\u003e\u003cspan class='jdgm-star jdgm--on'\u003e\u003c\/span\u003e\u003cspan class='jdgm-star jdgm--off'\u003e\u003c\/span\u003e\u003cspan class='jdgm-star jdgm--off'\u003e\u003c\/span\u003e\u003cspan class='jdgm-star jdgm--off'\u003e\u003c\/span\u003e\u003c\/div\u003e \u003cdiv class='jdgm-histogram__bar'\u003e \u003cdiv class='jdgm-histogram__bar-content' style='width: 0%;'\u003e \u003c\/div\u003e \u003c\/div\u003e \u003cdiv class='jdgm-histogram__percentage'\u003e0%\u003c\/div\u003e \u003cdiv class='jdgm-histogram__frequency'\u003e(0)\u003c\/div\u003e \u003c\/div\u003e \u003cdiv class='jdgm-histogram__row' data-rating='1' data-frequency='0' data-percentage='0'\u003e \u003cdiv class='jdgm-histogram__star' role='button' aria-label=\"0% (0) reviews with 1 star rating\" tabindex='0' \u003e\u003cspan class='jdgm-star jdgm--on'\u003e\u003c\/span\u003e\u003cspan class='jdgm-star jdgm--off'\u003e\u003c\/span\u003e\u003cspan class='jdgm-star jdgm--off'\u003e\u003c\/span\u003e\u003cspan class='jdgm-star jdgm--off'\u003e\u003c\/span\u003e\u003cspan class='jdgm-star jdgm--off'\u003e\u003c\/span\u003e\u003c\/div\u003e \u003cdiv class='jdgm-histogram__bar'\u003e \u003cdiv class='jdgm-histogram__bar-content' style='width: 0%;'\u003e \u003c\/div\u003e \u003c\/div\u003e \u003cdiv class='jdgm-histogram__percentage'\u003e0%\u003c\/div\u003e \u003cdiv class='jdgm-histogram__frequency'\u003e(0)\u003c\/div\u003e \u003c\/div\u003e \u003cdiv class='jdgm-histogram__row jdgm-histogram__clear-filter' data-rating=null tabindex='0'\u003e\u003c\/div\u003e \u003c\/div\u003e \u003cdiv class='jdgm-rev-widg__sort-wrapper'\u003e\u003c\/div\u003e \u003c\/div\u003e \u003cdiv class='jdgm-rev-widg__body'\u003e \u003cdiv class='jdgm-rev-widg__reviews'\u003e\u003c\/div\u003e \u003cdiv class='jdgm-paginate' data-per-page='10' data-url='https:\/\/api.judge.me\/reviews\/reviews_for_widget' style=\"display: none;\"\u003e\u003c\/div\u003e \u003c\/div\u003e \u003cdiv class='jdgm-rev-widg__paginate-spinner-wrapper'\u003e \u003cdiv class='jdgm-spinner'\u003e\u003c\/div\u003e \u003c\/div\u003e \u003c\/div\u003e"},"collections":[{"id":281356533949,"handle":"baby-shower-gifts","title":"Baby Shower Gifts - Mum","updated_at":"2025-12-28T20:10:01+08:00","body_html":"\u003cp\u003eLooking for a unique baby shower gift? Or an all-in-one bundle pack to suit all your needs? We've got just the thing!\u003c\/p\u003e","published_at":"2021-12-06T13:43:56+08:00","sort_order":"best-selling","template_suffix":"baby-shower-gifts","disjunctive":true,"rules":[{"column":"tag","relation":"equals","condition":"Baby Shower Gifts - Mum"},{"column":"tag","relation":"equals","condition":"Gift Card"}],"published_scope":"global","image":{"created_at":"2024-05-06T11:59:28+08:00","alt":"Baby Shower Gifts - The Birth Store","width":1200,"height":1800,"src":"\/\/www.thebirthstore.com.au\/cdn\/shop\/collections\/baby-shower-gifts-401770.jpg?v=1761791272"}},{"id":281712427197,"handle":"breastfeeding","title":"Breastfeeding","updated_at":"2025-12-28T20:10:01+08:00","body_html":"","published_at":"2021-12-20T14:19:33+08:00","sort_order":"best-selling","template_suffix":"breastfeeding-collection","disjunctive":false,"rules":[{"column":"tag","relation":"equals","condition":"Breastfeeding"}],"published_scope":"global","image":{"created_at":"2024-05-06T11:59:34+08:00","alt":"Breastfeeding - The Birth Store","width":620,"height":635,"src":"\/\/www.thebirthstore.com.au\/cdn\/shop\/collections\/breastfeeding-793872.jpg?v=1714967974"}},{"id":261657460925,"handle":"buy","title":"Buy","updated_at":"2025-12-28T20:10:01+08:00","body_html":"\u003cp\u003eBrowse all of our pregnancy, labour \u0026amp; birth, postpartum and baby essentials here.\u003cbr\u003e\u003c\/p\u003e\n\u003cp\u003e\u003cspan\u003eYou can even buy now and pay later with Afterpay!\u003c\/span\u003e\u003c\/p\u003e","published_at":"2021-03-10T12:05:31+08:00","sort_order":"best-selling","template_suffix":"shop-all-collection","disjunctive":false,"rules":[{"column":"title","relation":"not_contains","condition":"Hire"}],"published_scope":"global","image":{"created_at":"2024-05-06T11:59:42+08:00","alt":"Buy - The Birth Store","width":2048,"height":2048,"src":"\/\/www.thebirthstore.com.au\/cdn\/shop\/collections\/buy-964856.jpg?v=1714967982"}},{"id":292919476413,"handle":"lactation-products","title":"Lactation Products","updated_at":"2025-12-28T20:10:01+08:00","body_html":"","published_at":"2023-03-22T12:22:41+08:00","sort_order":"best-selling","template_suffix":"lactation-products-collec","disjunctive":false,"rules":[{"column":"tag","relation":"equals","condition":"Lactation Products"}],"published_scope":"global","image":{"created_at":"2024-05-06T12:00:19+08:00","alt":"Lactation Products - The Birth Store","width":1034,"height":922,"src":"\/\/www.thebirthstore.com.au\/cdn\/shop\/collections\/lactation-products-752907.jpg?v=1714968019"}},{"id":291456483517,"handle":"shop-all","title":"Shop All - Mum","updated_at":"2025-12-28T20:10:01+08:00","body_html":"","published_at":"2022-12-23T22:04:39+08:00","sort_order":"best-selling","template_suffix":"shop-all-collection","disjunctive":false,"rules":[{"column":"variant_price","relation":"greater_than","condition":"1"},{"column":"title","relation":"not_contains","condition":"Batteries"},{"column":"tag","relation":"equals","condition":"Mum"}],"published_scope":"global","image":{"created_at":"2024-05-06T12:00:54+08:00","alt":"Shop All - The Birth Store","width":1365,"height":2048,"src":"\/\/www.thebirthstore.com.au\/cdn\/shop\/collections\/shop-all-693176.jpg?v=1714968055"}},{"id":310045933757,"handle":"shop-all-sale","title":"Shop All Sale","updated_at":"2025-12-28T20:10:01+08:00","body_html":"","published_at":"2024-11-12T13:22:43+08:00","sort_order":"alpha-asc","template_suffix":"","disjunctive":true,"rules":[{"column":"tag","relation":"equals","condition":"Bundles"},{"column":"vendor","relation":"equals","condition":"Franjos Kitchen"},{"column":"vendor","relation":"equals","condition":"Adored Illustrations"},{"column":"vendor","relation":"equals","condition":"Amazing Oils"},{"column":"vendor","relation":"equals","condition":"Ice Ice Booby"},{"column":"vendor","relation":"equals","condition":"Made to Milk"},{"column":"vendor","relation":"equals","condition":"Milky Goodness"},{"column":"vendor","relation":"equals","condition":"Seasons of Mama"},{"column":"vendor","relation":"equals","condition":"Silverette"},{"column":"vendor","relation":"equals","condition":"Snuggle Hunny"},{"column":"vendor","relation":"equals","condition":"Yung Bod"},{"column":"vendor","relation":"equals","condition":"Bare Love"},{"column":"vendor","relation":"equals","condition":"Haakaa"},{"column":"vendor","relation":"equals","condition":"Mere Botanicals"},{"column":"vendor","relation":"equals","condition":"The Birth Store Hire"},{"column":"vendor","relation":"equals","condition":"The Birth Store"}],"published_scope":"global","image":{"created_at":"2024-11-13T10:58:16+08:00","alt":"Shop All Sale - The Birth Store","width":2048,"height":1365,"src":"\/\/www.thebirthstore.com.au\/cdn\/shop\/collections\/shop-all-sale-297361.jpg?v=1731466697"}}]}
[{"alt":"Lactation Cookies – Select Your Flavour - The Birth Store-Milky Goodness","id":27007592956093,"position":1,"preview_image":{"aspect_ratio":1.0,"height":1080,"width":1080,"src":"\/\/www.thebirthstore.com.au\/cdn\/shop\/files\/lactation-cookies-select-your-flavour-197058.jpg?v=1714967996"},"aspect_ratio":1.0,"height":1080,"media_type":"image","src":"\/\/www.thebirthstore.com.au\/cdn\/shop\/files\/lactation-cookies-select-your-flavour-197058.jpg?v=1714967996","width":1080},{"alt":"Lactation Cookies – Select Your Flavour - The Birth Store-Milky Goodness","id":27007593021629,"position":2,"preview_image":{"aspect_ratio":1.0,"height":1080,"width":1080,"src":"\/\/www.thebirthstore.com.au\/cdn\/shop\/files\/lactation-cookies-select-your-flavour-767555.jpg?v=1714967996"},"aspect_ratio":1.0,"height":1080,"media_type":"image","src":"\/\/www.thebirthstore.com.au\/cdn\/shop\/files\/lactation-cookies-select-your-flavour-767555.jpg?v=1714967996","width":1080},{"alt":"Lactation Cookies – Select Your Flavour - The Birth Store-Milky Goodness","id":27007593054397,"position":3,"preview_image":{"aspect_ratio":1.0,"height":1080,"width":1080,"src":"\/\/www.thebirthstore.com.au\/cdn\/shop\/files\/lactation-cookies-select-your-flavour-351431.jpg?v=1714967996"},"aspect_ratio":1.0,"height":1080,"media_type":"image","src":"\/\/www.thebirthstore.com.au\/cdn\/shop\/files\/lactation-cookies-select-your-flavour-351431.jpg?v=1714967996","width":1080},{"alt":"Lactation Cookies – Select Your Flavour - The Birth Store-Milky Goodness","id":27007593087165,"position":4,"preview_image":{"aspect_ratio":1.0,"height":1080,"width":1080,"src":"\/\/www.thebirthstore.com.au\/cdn\/shop\/files\/lactation-cookies-select-your-flavour-837468.jpg?v=1714967996"},"aspect_ratio":1.0,"height":1080,"media_type":"image","src":"\/\/www.thebirthstore.com.au\/cdn\/shop\/files\/lactation-cookies-select-your-flavour-837468.jpg?v=1714967996","width":1080},{"alt":"Lactation Cookies – Select Your Flavour - The Birth Store-Milky Goodness","id":27007593119933,"position":5,"preview_image":{"aspect_ratio":1.0,"height":1080,"width":1080,"src":"\/\/www.thebirthstore.com.au\/cdn\/shop\/files\/lactation-cookies-select-your-flavour-490349.jpg?v=1714967997"},"aspect_ratio":1.0,"height":1080,"media_type":"image","src":"\/\/www.thebirthstore.com.au\/cdn\/shop\/files\/lactation-cookies-select-your-flavour-490349.jpg?v=1714967997","width":1080},{"alt":"Lactation Cookies – Select Your Flavour - The Birth Store-Milky Goodness","id":27007593152701,"position":6,"preview_image":{"aspect_ratio":1.0,"height":1080,"width":1080,"src":"\/\/www.thebirthstore.com.au\/cdn\/shop\/files\/lactation-cookies-select-your-flavour-892342.jpg?v=1714967997"},"aspect_ratio":1.0,"height":1080,"media_type":"image","src":"\/\/www.thebirthstore.com.au\/cdn\/shop\/files\/lactation-cookies-select-your-flavour-892342.jpg?v=1714967997","width":1080},{"alt":"Lactation Cookies – Select Your Flavour - The Birth Store-Milky Goodness","id":27007593185469,"position":7,"preview_image":{"aspect_ratio":1.0,"height":1080,"width":1080,"src":"\/\/www.thebirthstore.com.au\/cdn\/shop\/files\/lactation-cookies-select-your-flavour-674032.jpg?v=1714967997"},"aspect_ratio":1.0,"height":1080,"media_type":"image","src":"\/\/www.thebirthstore.com.au\/cdn\/shop\/files\/lactation-cookies-select-your-flavour-674032.jpg?v=1714967997","width":1080},{"alt":"Lactation Cookies – Select Your Flavour - The Birth Store-Milky Goodness","id":27007593218237,"position":8,"preview_image":{"aspect_ratio":1.0,"height":1080,"width":1080,"src":"\/\/www.thebirthstore.com.au\/cdn\/shop\/files\/lactation-cookies-select-your-flavour-458424.jpg?v=1714967997"},"aspect_ratio":1.0,"height":1080,"media_type":"image","src":"\/\/www.thebirthstore.com.au\/cdn\/shop\/files\/lactation-cookies-select-your-flavour-458424.jpg?v=1714967997","width":1080},{"alt":"Lactation Cookies – Select Your Flavour - The Birth Store-Milky Goodness","id":27007593251005,"position":9,"preview_image":{"aspect_ratio":1.0,"height":1080,"width":1080,"src":"\/\/www.thebirthstore.com.au\/cdn\/shop\/files\/lactation-cookies-select-your-flavour-495552.jpg?v=1714967997"},"aspect_ratio":1.0,"height":1080,"media_type":"image","src":"\/\/www.thebirthstore.com.au\/cdn\/shop\/files\/lactation-cookies-select-your-flavour-495552.jpg?v=1714967997","width":1080},{"alt":"Lactation Cookies – Select Your Flavour - The Birth Store-Milky Goodness","id":27007593283773,"position":10,"preview_image":{"aspect_ratio":1.0,"height":1080,"width":1080,"src":"\/\/www.thebirthstore.com.au\/cdn\/shop\/files\/lactation-cookies-select-your-flavour-905330.jpg?v=1714967997"},"aspect_ratio":1.0,"height":1080,"media_type":"image","src":"\/\/www.thebirthstore.com.au\/cdn\/shop\/files\/lactation-cookies-select-your-flavour-905330.jpg?v=1714967997","width":1080},{"alt":"Lactation Cookies – Select Your Flavour - The Birth Store-Milky Goodness","id":27007593316541,"position":11,"preview_image":{"aspect_ratio":1.0,"height":1080,"width":1080,"src":"\/\/www.thebirthstore.com.au\/cdn\/shop\/files\/lactation-cookies-select-your-flavour-987399.jpg?v=1714967997"},"aspect_ratio":1.0,"height":1080,"media_type":"image","src":"\/\/www.thebirthstore.com.au\/cdn\/shop\/files\/lactation-cookies-select-your-flavour-987399.jpg?v=1714967997","width":1080},{"alt":"Lactation Cookies – Select Your Flavour - The Birth Store-Milky Goodness","id":27007593349309,"position":12,"preview_image":{"aspect_ratio":1.0,"height":1080,"width":1080,"src":"\/\/www.thebirthstore.com.au\/cdn\/shop\/files\/lactation-cookies-select-your-flavour-309897.jpg?v=1714967997"},"aspect_ratio":1.0,"height":1080,"media_type":"image","src":"\/\/www.thebirthstore.com.au\/cdn\/shop\/files\/lactation-cookies-select-your-flavour-309897.jpg?v=1714967997","width":1080},{"alt":"Milky Goodness Lactation Cookies - The Birth Store - Milky Goodness","id":28269590249661,"position":13,"preview_image":{"aspect_ratio":1.0,"height":1080,"width":1080,"src":"\/\/www.thebirthstore.com.au\/cdn\/shop\/files\/milky-goodness-lactation-cookies-167661.jpg?v=1739255640"},"aspect_ratio":1.0,"height":1080,"media_type":"image","src":"\/\/www.thebirthstore.com.au\/cdn\/shop\/files\/milky-goodness-lactation-cookies-167661.jpg?v=1739255640","width":1080},{"alt":"Milky Goodness Lactation Cookies - The Birth Store - Milky Goodness","id":28269607911613,"position":14,"preview_image":{"aspect_ratio":1.026,"height":581,"width":596,"src":"\/\/www.thebirthstore.com.au\/cdn\/shop\/files\/milky-goodness-lactation-cookies-952411.png?v=1739255641"},"aspect_ratio":1.026,"height":581,"media_type":"image","src":"\/\/www.thebirthstore.com.au\/cdn\/shop\/files\/milky-goodness-lactation-cookies-952411.png?v=1739255641","width":596},{"alt":"Milky Goodness Lactation Cookies - The Birth Store - Milky Goodness","id":28269626884285,"position":15,"preview_image":{"aspect_ratio":1.015,"height":532,"width":540,"src":"\/\/www.thebirthstore.com.au\/cdn\/shop\/files\/milky-goodness-lactation-cookies-962628.png?v=1739255641"},"aspect_ratio":1.015,"height":532,"media_type":"image","src":"\/\/www.thebirthstore.com.au\/cdn\/shop\/files\/milky-goodness-lactation-cookies-962628.png?v=1739255641","width":540},{"alt":"Milky Goodness Lactation Cookies - The Birth Store - Milky Goodness","id":28269629079741,"position":16,"preview_image":{"aspect_ratio":1.015,"height":518,"width":526,"src":"\/\/www.thebirthstore.com.au\/cdn\/shop\/files\/milky-goodness-lactation-cookies-972826.png?v=1739255641"},"aspect_ratio":1.015,"height":518,"media_type":"image","src":"\/\/www.thebirthstore.com.au\/cdn\/shop\/files\/milky-goodness-lactation-cookies-972826.png?v=1739255641","width":526},{"alt":"Milky Goodness Lactation Cookies - The Birth Store - Milky Goodness","id":28269632323773,"position":17,"preview_image":{"aspect_ratio":1.011,"height":522,"width":528,"src":"\/\/www.thebirthstore.com.au\/cdn\/shop\/files\/milky-goodness-lactation-cookies-933276.png?v=1739255641"},"aspect_ratio":1.011,"height":522,"media_type":"image","src":"\/\/www.thebirthstore.com.au\/cdn\/shop\/files\/milky-goodness-lactation-cookies-933276.png?v=1739255641","width":528},{"alt":"Milky Goodness Lactation Cookies - The Birth Store - Milky Goodness","id":29988541366461,"position":18,"preview_image":{"aspect_ratio":1.0,"height":1080,"width":1080,"src":"\/\/www.thebirthstore.com.au\/cdn\/shop\/files\/milky-goodness-lactation-cookies-5400492.png?v=1762143775"},"aspect_ratio":1.0,"height":1080,"media_type":"image","src":"\/\/www.thebirthstore.com.au\/cdn\/shop\/files\/milky-goodness-lactation-cookies-5400492.png?v=1762143775","width":1080},{"alt":"Milky Goodness Lactation Cookies - The Birth Store - Milky Goodness","id":29988541497533,"position":19,"preview_image":{"aspect_ratio":1.0,"height":1080,"width":1080,"src":"\/\/www.thebirthstore.com.au\/cdn\/shop\/files\/milky-goodness-lactation-cookies-9540997.png?v=1762143775"},"aspect_ratio":1.0,"height":1080,"media_type":"image","src":"\/\/www.thebirthstore.com.au\/cdn\/shop\/files\/milky-goodness-lactation-cookies-9540997.png?v=1762143775","width":1080},{"alt":"Milky Goodness Lactation Cookies - The Birth Store - Milky Goodness","id":29988542808253,"position":20,"preview_image":{"aspect_ratio":1.0,"height":1080,"width":1080,"src":"\/\/www.thebirthstore.com.au\/cdn\/shop\/files\/milky-goodness-lactation-cookies-9278775.png?v=1762143775"},"aspect_ratio":1.0,"height":1080,"media_type":"image","src":"\/\/www.thebirthstore.com.au\/cdn\/shop\/files\/milky-goodness-lactation-cookies-9278775.png?v=1762143775","width":1080},{"alt":"Milky Goodness Lactation Cookies - The Birth Store - Milky Goodness","id":29988543037629,"position":21,"preview_image":{"aspect_ratio":1.0,"height":1080,"width":1080,"src":"\/\/www.thebirthstore.com.au\/cdn\/shop\/files\/milky-goodness-lactation-cookies-4715685.png?v=1762143776"},"aspect_ratio":1.0,"height":1080,"media_type":"image","src":"\/\/www.thebirthstore.com.au\/cdn\/shop\/files\/milky-goodness-lactation-cookies-4715685.png?v=1762143776","width":1080}]
{"item":{"id":7499247976637,"title":"Mini Oracle Cards","handle":"mini-oracle-cards","description":"\u003cp class=\"\" data-mce-fragment=\"1\"\u003eMini Oracle Cards\u003c\/p\u003e\n\u003cp\u003e \u003c\/p\u003e\n\u003cp\u003eIntroducing Seasons of Mama Mini Oracle Cards.\u003c\/p\u003e\n\u003cp class=\"\" data-mce-fragment=\"1\"\u003eFrom this sweet set you can expect 55 oracle cards to help bring you an abundance of love, energy and guidance towards your soul purpose.\u003c\/p\u003e\n\u003cp class=\"\" data-mce-fragment=\"1\"\u003eSo how do you use these little honeys? Maybe you have a question which you need some help to answer? Or perhaps some clarity around a situation? Using your intuition and help from your spirit guides, you would pull a card that you feel drawn to. Turn it over and just feel into whatever comes up for you. Maybe your word for the day hits you right in the heart centre or your inner knowing. Or perhaps it requires some quiet contemplation and reflection to uncover the deeper meaning within! If you draw a blank card let a word come to your mind freely, without judgement. Journal on this for a moment if you wish or simply thank the Universe\/Source\/Higher Power\/God\/Spirit (whoever you feel called to) for sending you the right message at the right time.\u003c\/p\u003e\n\u003cp class=\"\" data-mce-fragment=\"1\"\u003e \u003c\/p\u003e","published_at":"2023-08-14T22:24:31+08:00","created_at":"2023-08-08T09:50:12+08:00","vendor":"Seasons of Mama","type":"","tags":["Affirmations","Baby Shower Gifts - Mum","Mum","Post-Partum","Pre-Conception","Pregnancy"],"price":2495,"price_min":2495,"price_max":2495,"available":true,"price_varies":false,"compare_at_price":null,"compare_at_price_min":0,"compare_at_price_max":0,"compare_at_price_varies":false,"variants":[{"id":42959909322941,"title":"Default Title","option1":"Default Title","option2":null,"option3":null,"sku":null,"requires_shipping":true,"taxable":false,"featured_image":null,"available":true,"name":"Mini Oracle Cards","public_title":null,"options":["Default Title"],"price":2495,"weight":70,"compare_at_price":null,"inventory_management":"shopify","barcode":"09322941","requires_selling_plan":false,"selling_plan_allocations":[]}],"images":["\/\/www.thebirthstore.com.au\/cdn\/shop\/files\/mini-oracle-cards-304290.jpg?v=1714968003","\/\/www.thebirthstore.com.au\/cdn\/shop\/files\/mini-oracle-cards-178578.jpg?v=1714968003","\/\/www.thebirthstore.com.au\/cdn\/shop\/files\/mini-oracle-cards-375372.jpg?v=1714968003","\/\/www.thebirthstore.com.au\/cdn\/shop\/files\/mini-oracle-cards-987019.jpg?v=1714968003","\/\/www.thebirthstore.com.au\/cdn\/shop\/files\/mini-oracle-cards-298593.jpg?v=1714968003"],"featured_image":"\/\/www.thebirthstore.com.au\/cdn\/shop\/files\/mini-oracle-cards-304290.jpg?v=1714968003","options":["Title"],"media":[{"alt":"Mini Oracle Cards - The Birth Store-Seasons of Mama","id":27007593906365,"position":1,"preview_image":{"aspect_ratio":1.0,"height":1080,"width":1080,"src":"\/\/www.thebirthstore.com.au\/cdn\/shop\/files\/mini-oracle-cards-304290.jpg?v=1714968003"},"aspect_ratio":1.0,"height":1080,"media_type":"image","src":"\/\/www.thebirthstore.com.au\/cdn\/shop\/files\/mini-oracle-cards-304290.jpg?v=1714968003","width":1080},{"alt":"Mini Oracle Cards - The Birth Store-Seasons of Mama","id":27007594004669,"position":2,"preview_image":{"aspect_ratio":0.691,"height":724,"width":500,"src":"\/\/www.thebirthstore.com.au\/cdn\/shop\/files\/mini-oracle-cards-178578.jpg?v=1714968003"},"aspect_ratio":0.691,"height":724,"media_type":"image","src":"\/\/www.thebirthstore.com.au\/cdn\/shop\/files\/mini-oracle-cards-178578.jpg?v=1714968003","width":500},{"alt":"Mini Oracle Cards - The Birth Store-Seasons of Mama","id":27007594037437,"position":3,"preview_image":{"aspect_ratio":1.0,"height":500,"width":500,"src":"\/\/www.thebirthstore.com.au\/cdn\/shop\/files\/mini-oracle-cards-375372.jpg?v=1714968003"},"aspect_ratio":1.0,"height":500,"media_type":"image","src":"\/\/www.thebirthstore.com.au\/cdn\/shop\/files\/mini-oracle-cards-375372.jpg?v=1714968003","width":500},{"alt":"Mini Oracle Cards - The Birth Store-Seasons of Mama","id":27007594070205,"position":4,"preview_image":{"aspect_ratio":0.853,"height":586,"width":500,"src":"\/\/www.thebirthstore.com.au\/cdn\/shop\/files\/mini-oracle-cards-987019.jpg?v=1714968003"},"aspect_ratio":0.853,"height":586,"media_type":"image","src":"\/\/www.thebirthstore.com.au\/cdn\/shop\/files\/mini-oracle-cards-987019.jpg?v=1714968003","width":500},{"alt":"Mini Oracle Cards - The Birth Store-Seasons of Mama","id":27007594102973,"position":5,"preview_image":{"aspect_ratio":0.877,"height":570,"width":500,"src":"\/\/www.thebirthstore.com.au\/cdn\/shop\/files\/mini-oracle-cards-298593.jpg?v=1714968003"},"aspect_ratio":0.877,"height":570,"media_type":"image","src":"\/\/www.thebirthstore.com.au\/cdn\/shop\/files\/mini-oracle-cards-298593.jpg?v=1714968003","width":500}],"requires_selling_plan":false,"selling_plan_groups":[],"content":"\u003cp class=\"\" data-mce-fragment=\"1\"\u003eMini Oracle Cards\u003c\/p\u003e\n\u003cp\u003e \u003c\/p\u003e\n\u003cp\u003eIntroducing Seasons of Mama Mini Oracle Cards.\u003c\/p\u003e\n\u003cp class=\"\" data-mce-fragment=\"1\"\u003eFrom this sweet set you can expect 55 oracle cards to help bring you an abundance of love, energy and guidance towards your soul purpose.\u003c\/p\u003e\n\u003cp class=\"\" data-mce-fragment=\"1\"\u003eSo how do you use these little honeys? Maybe you have a question which you need some help to answer? Or perhaps some clarity around a situation? Using your intuition and help from your spirit guides, you would pull a card that you feel drawn to. Turn it over and just feel into whatever comes up for you. Maybe your word for the day hits you right in the heart centre or your inner knowing. Or perhaps it requires some quiet contemplation and reflection to uncover the deeper meaning within! If you draw a blank card let a word come to your mind freely, without judgement. Journal on this for a moment if you wish or simply thank the Universe\/Source\/Higher Power\/God\/Spirit (whoever you feel called to) for sending you the right message at the right time.\u003c\/p\u003e\n\u003cp class=\"\" data-mce-fragment=\"1\"\u003e \u003c\/p\u003e"},"options":[{"name":"Title","position":1,"values":["Default Title"]}],"custom_metafields":{},"metafields":{"badge":"\u003cdiv style='display:none' class='jdgm-prev-badge' data-average-rating='0.00' data-number-of-reviews='0' data-number-of-questions='0'\u003e \u003cspan class='jdgm-prev-badge__stars' data-score='0.00' tabindex='0' aria-label='0.00 stars' role='button'\u003e \u003cspan class='jdgm-star jdgm--off'\u003e\u003c\/span\u003e\u003cspan class='jdgm-star jdgm--off'\u003e\u003c\/span\u003e\u003cspan class='jdgm-star jdgm--off'\u003e\u003c\/span\u003e\u003cspan class='jdgm-star jdgm--off'\u003e\u003c\/span\u003e\u003cspan class='jdgm-star jdgm--off'\u003e\u003c\/span\u003e \u003c\/span\u003e \u003cspan class='jdgm-prev-badge__text'\u003e No reviews \u003c\/span\u003e \u003c\/div\u003e","widget":"\u003cdiv class='jdgm-rev-widg' data-updated-at='2025-06-13T16:12:53Z' data-average-rating='0.00' data-number-of-reviews='0' data-number-of-questions='0'\u003e \u003cstyle class='jdgm-temp-hiding-style'\u003e.jdgm-rev-widg{ display: none }\u003c\/style\u003e \u003cdiv class='jdgm-rev-widg__header'\u003e \u003ch2 class='jdgm-rev-widg__title'\u003eCustomer Reviews\u003c\/h2\u003e \u003cdiv class='jdgm-rev-widg__summary'\u003e \u003cdiv class='jdgm-rev-widg__summary-stars' aria-label='Average rating is 0.00 stars' role='img'\u003e \u003cspan class='jdgm-star jdgm--off'\u003e\u003c\/span\u003e\u003cspan class='jdgm-star jdgm--off'\u003e\u003c\/span\u003e\u003cspan class='jdgm-star jdgm--off'\u003e\u003c\/span\u003e\u003cspan class='jdgm-star jdgm--off'\u003e\u003c\/span\u003e\u003cspan class='jdgm-star jdgm--off'\u003e\u003c\/span\u003e \u003c\/div\u003e \u003cdiv class='jdgm-rev-widg__summary-text'\u003eBe the first to write a review\u003c\/div\u003e \u003c\/div\u003e \u003ca style='display: none' href='#' class='jdgm-write-rev-link' role='button'\u003eWrite a review\u003c\/a\u003e \u003cdiv class='jdgm-histogram jdgm-temp-hidden'\u003e \u003cdiv class='jdgm-histogram__row' data-rating='5' data-frequency='0' data-percentage='0'\u003e \u003cdiv class='jdgm-histogram__star' role='button' aria-label=\"0% (0) reviews with 5 star rating\" tabindex='0' \u003e\u003cspan class='jdgm-star jdgm--on'\u003e\u003c\/span\u003e\u003cspan class='jdgm-star jdgm--on'\u003e\u003c\/span\u003e\u003cspan class='jdgm-star jdgm--on'\u003e\u003c\/span\u003e\u003cspan class='jdgm-star jdgm--on'\u003e\u003c\/span\u003e\u003cspan class='jdgm-star jdgm--on'\u003e\u003c\/span\u003e\u003c\/div\u003e \u003cdiv class='jdgm-histogram__bar'\u003e \u003cdiv class='jdgm-histogram__bar-content' style='width: 0%;'\u003e \u003c\/div\u003e \u003c\/div\u003e \u003cdiv class='jdgm-histogram__percentage'\u003e0%\u003c\/div\u003e \u003cdiv class='jdgm-histogram__frequency'\u003e(0)\u003c\/div\u003e \u003c\/div\u003e \u003cdiv class='jdgm-histogram__row' data-rating='4' data-frequency='0' data-percentage='0'\u003e \u003cdiv class='jdgm-histogram__star' role='button' aria-label=\"0% (0) reviews with 4 star rating\" tabindex='0' \u003e\u003cspan class='jdgm-star jdgm--on'\u003e\u003c\/span\u003e\u003cspan class='jdgm-star jdgm--on'\u003e\u003c\/span\u003e\u003cspan class='jdgm-star jdgm--on'\u003e\u003c\/span\u003e\u003cspan class='jdgm-star jdgm--on'\u003e\u003c\/span\u003e\u003cspan class='jdgm-star jdgm--off'\u003e\u003c\/span\u003e\u003c\/div\u003e \u003cdiv class='jdgm-histogram__bar'\u003e \u003cdiv class='jdgm-histogram__bar-content' style='width: 0%;'\u003e \u003c\/div\u003e \u003c\/div\u003e \u003cdiv class='jdgm-histogram__percentage'\u003e0%\u003c\/div\u003e \u003cdiv class='jdgm-histogram__frequency'\u003e(0)\u003c\/div\u003e \u003c\/div\u003e \u003cdiv class='jdgm-histogram__row' data-rating='3' data-frequency='0' data-percentage='0'\u003e \u003cdiv class='jdgm-histogram__star' role='button' aria-label=\"0% (0) reviews with 3 star rating\" tabindex='0' \u003e\u003cspan class='jdgm-star jdgm--on'\u003e\u003c\/span\u003e\u003cspan class='jdgm-star jdgm--on'\u003e\u003c\/span\u003e\u003cspan class='jdgm-star jdgm--on'\u003e\u003c\/span\u003e\u003cspan class='jdgm-star jdgm--off'\u003e\u003c\/span\u003e\u003cspan class='jdgm-star jdgm--off'\u003e\u003c\/span\u003e\u003c\/div\u003e \u003cdiv class='jdgm-histogram__bar'\u003e \u003cdiv class='jdgm-histogram__bar-content' style='width: 0%;'\u003e \u003c\/div\u003e \u003c\/div\u003e \u003cdiv class='jdgm-histogram__percentage'\u003e0%\u003c\/div\u003e \u003cdiv class='jdgm-histogram__frequency'\u003e(0)\u003c\/div\u003e \u003c\/div\u003e \u003cdiv class='jdgm-histogram__row' data-rating='2' data-frequency='0' data-percentage='0'\u003e \u003cdiv class='jdgm-histogram__star' role='button' aria-label=\"0% (0) reviews with 2 star rating\" tabindex='0' \u003e\u003cspan class='jdgm-star jdgm--on'\u003e\u003c\/span\u003e\u003cspan class='jdgm-star jdgm--on'\u003e\u003c\/span\u003e\u003cspan class='jdgm-star jdgm--off'\u003e\u003c\/span\u003e\u003cspan class='jdgm-star jdgm--off'\u003e\u003c\/span\u003e\u003cspan class='jdgm-star jdgm--off'\u003e\u003c\/span\u003e\u003c\/div\u003e \u003cdiv class='jdgm-histogram__bar'\u003e \u003cdiv class='jdgm-histogram__bar-content' style='width: 0%;'\u003e \u003c\/div\u003e \u003c\/div\u003e \u003cdiv class='jdgm-histogram__percentage'\u003e0%\u003c\/div\u003e \u003cdiv class='jdgm-histogram__frequency'\u003e(0)\u003c\/div\u003e \u003c\/div\u003e \u003cdiv class='jdgm-histogram__row' data-rating='1' data-frequency='0' data-percentage='0'\u003e \u003cdiv class='jdgm-histogram__star' role='button' aria-label=\"0% (0) reviews with 1 star rating\" tabindex='0' \u003e\u003cspan class='jdgm-star jdgm--on'\u003e\u003c\/span\u003e\u003cspan class='jdgm-star jdgm--off'\u003e\u003c\/span\u003e\u003cspan class='jdgm-star jdgm--off'\u003e\u003c\/span\u003e\u003cspan class='jdgm-star jdgm--off'\u003e\u003c\/span\u003e\u003cspan class='jdgm-star jdgm--off'\u003e\u003c\/span\u003e\u003c\/div\u003e \u003cdiv class='jdgm-histogram__bar'\u003e \u003cdiv class='jdgm-histogram__bar-content' style='width: 0%;'\u003e \u003c\/div\u003e \u003c\/div\u003e \u003cdiv class='jdgm-histogram__percentage'\u003e0%\u003c\/div\u003e \u003cdiv class='jdgm-histogram__frequency'\u003e(0)\u003c\/div\u003e \u003c\/div\u003e \u003cdiv class='jdgm-histogram__row jdgm-histogram__clear-filter' data-rating=null tabindex='0'\u003e\u003c\/div\u003e \u003c\/div\u003e \u003cdiv class='jdgm-rev-widg__sort-wrapper'\u003e\u003c\/div\u003e \u003c\/div\u003e \u003cdiv class='jdgm-rev-widg__body'\u003e \u003cdiv class='jdgm-rev-widg__reviews'\u003e\u003c\/div\u003e \u003cdiv class='jdgm-paginate' data-per-page='10' data-url='https:\/\/api.judge.me\/reviews\/reviews_for_widget' style=\"display: none;\"\u003e\u003c\/div\u003e \u003c\/div\u003e \u003cdiv class='jdgm-rev-widg__paginate-spinner-wrapper'\u003e \u003cdiv class='jdgm-spinner'\u003e\u003c\/div\u003e \u003c\/div\u003e \u003c\/div\u003e"},"collections":[{"id":295224541373,"handle":"affirmations","title":"Affirmations","updated_at":"2025-12-28T20:10:01+08:00","body_html":"","published_at":"2023-11-10T20:37:58+08:00","sort_order":"best-selling","template_suffix":"swaddles-collection","disjunctive":false,"rules":[{"column":"tag","relation":"equals","condition":"Affirmations"}],"published_scope":"global","image":{"created_at":"2024-05-06T11:59:20+08:00","alt":"Affirmations - The Birth Store","width":1000,"height":1250,"src":"\/\/www.thebirthstore.com.au\/cdn\/shop\/collections\/affirmations-495130.jpg?v=1714967960"}},{"id":281356533949,"handle":"baby-shower-gifts","title":"Baby Shower Gifts - Mum","updated_at":"2025-12-28T20:10:01+08:00","body_html":"\u003cp\u003eLooking for a unique baby shower gift? Or an all-in-one bundle pack to suit all your needs? We've got just the thing!\u003c\/p\u003e","published_at":"2021-12-06T13:43:56+08:00","sort_order":"best-selling","template_suffix":"baby-shower-gifts","disjunctive":true,"rules":[{"column":"tag","relation":"equals","condition":"Baby Shower Gifts - Mum"},{"column":"tag","relation":"equals","condition":"Gift Card"}],"published_scope":"global","image":{"created_at":"2024-05-06T11:59:28+08:00","alt":"Baby Shower Gifts - The Birth Store","width":1200,"height":1800,"src":"\/\/www.thebirthstore.com.au\/cdn\/shop\/collections\/baby-shower-gifts-401770.jpg?v=1761791272"}},{"id":261657460925,"handle":"buy","title":"Buy","updated_at":"2025-12-28T20:10:01+08:00","body_html":"\u003cp\u003eBrowse all of our pregnancy, labour \u0026amp; birth, postpartum and baby essentials here.\u003cbr\u003e\u003c\/p\u003e\n\u003cp\u003e\u003cspan\u003eYou can even buy now and pay later with Afterpay!\u003c\/span\u003e\u003c\/p\u003e","published_at":"2021-03-10T12:05:31+08:00","sort_order":"best-selling","template_suffix":"shop-all-collection","disjunctive":false,"rules":[{"column":"title","relation":"not_contains","condition":"Hire"}],"published_scope":"global","image":{"created_at":"2024-05-06T11:59:42+08:00","alt":"Buy - The Birth Store","width":2048,"height":2048,"src":"\/\/www.thebirthstore.com.au\/cdn\/shop\/collections\/buy-964856.jpg?v=1714967982"}},{"id":261658083517,"handle":"post-partum","title":"Postpartum","updated_at":"2025-12-28T20:10:01+08:00","body_html":"\u003cp\u003eShop your postpartum and hospital bag essentials below. Looking for something we don't currently stock? Please reach out and let us know.\u003cbr\u003e\u003c\/p\u003e\n\u003cp\u003e\u003cspan\u003eYou can even buy now and pay later with Afterpay!\u003c\/span\u003e\u003c\/p\u003e","published_at":"2021-03-10T12:33:47+08:00","sort_order":"best-selling","template_suffix":"postpartum-collection","disjunctive":false,"rules":[{"column":"tag","relation":"equals","condition":"Post-Partum"}],"published_scope":"global","image":{"created_at":"2024-05-06T12:00:36+08:00","alt":"Postpartum - The Birth Store","width":611,"height":702,"src":"\/\/www.thebirthstore.com.au\/cdn\/shop\/collections\/postpartum-150119.jpg?v=1714968037"}},{"id":261658149053,"handle":"pregnancy-and-maternity-products","title":"Pregnancy","updated_at":"2025-12-28T20:10:01+08:00","body_html":"\u003cp\u003eShop your pregnancy essentials below. Looking for something we don't currently stock? Please reach out and let us know.\u003cbr\u003e\u003c\/p\u003e\n\u003cp\u003e\u003cspan\u003eYou can even buy now and pay later with Afterpay!\u003c\/span\u003e\u003c\/p\u003e","published_at":"2021-03-10T12:34:22+08:00","sort_order":"best-selling","template_suffix":"pregnancy-collection","disjunctive":false,"rules":[{"column":"tag","relation":"equals","condition":"Pregnancy"}],"published_scope":"global","image":{"created_at":"2024-05-06T12:00:40+08:00","alt":"Pregnancy - The Birth Store","width":1024,"height":1536,"src":"\/\/www.thebirthstore.com.au\/cdn\/shop\/collections\/pregnancy-899677.jpg?v=1714968040"}},{"id":291456483517,"handle":"shop-all","title":"Shop All - Mum","updated_at":"2025-12-28T20:10:01+08:00","body_html":"","published_at":"2022-12-23T22:04:39+08:00","sort_order":"best-selling","template_suffix":"shop-all-collection","disjunctive":false,"rules":[{"column":"variant_price","relation":"greater_than","condition":"1"},{"column":"title","relation":"not_contains","condition":"Batteries"},{"column":"tag","relation":"equals","condition":"Mum"}],"published_scope":"global","image":{"created_at":"2024-05-06T12:00:54+08:00","alt":"Shop All - The Birth Store","width":1365,"height":2048,"src":"\/\/www.thebirthstore.com.au\/cdn\/shop\/collections\/shop-all-693176.jpg?v=1714968055"}},{"id":310045933757,"handle":"shop-all-sale","title":"Shop All Sale","updated_at":"2025-12-28T20:10:01+08:00","body_html":"","published_at":"2024-11-12T13:22:43+08:00","sort_order":"alpha-asc","template_suffix":"","disjunctive":true,"rules":[{"column":"tag","relation":"equals","condition":"Bundles"},{"column":"vendor","relation":"equals","condition":"Franjos Kitchen"},{"column":"vendor","relation":"equals","condition":"Adored Illustrations"},{"column":"vendor","relation":"equals","condition":"Amazing Oils"},{"column":"vendor","relation":"equals","condition":"Ice Ice Booby"},{"column":"vendor","relation":"equals","condition":"Made to Milk"},{"column":"vendor","relation":"equals","condition":"Milky Goodness"},{"column":"vendor","relation":"equals","condition":"Seasons of Mama"},{"column":"vendor","relation":"equals","condition":"Silverette"},{"column":"vendor","relation":"equals","condition":"Snuggle Hunny"},{"column":"vendor","relation":"equals","condition":"Yung Bod"},{"column":"vendor","relation":"equals","condition":"Bare Love"},{"column":"vendor","relation":"equals","condition":"Haakaa"},{"column":"vendor","relation":"equals","condition":"Mere Botanicals"},{"column":"vendor","relation":"equals","condition":"The Birth Store Hire"},{"column":"vendor","relation":"equals","condition":"The Birth Store"}],"published_scope":"global","image":{"created_at":"2024-11-13T10:58:16+08:00","alt":"Shop All Sale - The Birth Store","width":2048,"height":1365,"src":"\/\/www.thebirthstore.com.au\/cdn\/shop\/collections\/shop-all-sale-297361.jpg?v=1731466697"}}]}
[{"alt":"Mini Oracle Cards - The Birth Store-Seasons of Mama","id":27007593906365,"position":1,"preview_image":{"aspect_ratio":1.0,"height":1080,"width":1080,"src":"\/\/www.thebirthstore.com.au\/cdn\/shop\/files\/mini-oracle-cards-304290.jpg?v=1714968003"},"aspect_ratio":1.0,"height":1080,"media_type":"image","src":"\/\/www.thebirthstore.com.au\/cdn\/shop\/files\/mini-oracle-cards-304290.jpg?v=1714968003","width":1080},{"alt":"Mini Oracle Cards - The Birth Store-Seasons of Mama","id":27007594004669,"position":2,"preview_image":{"aspect_ratio":0.691,"height":724,"width":500,"src":"\/\/www.thebirthstore.com.au\/cdn\/shop\/files\/mini-oracle-cards-178578.jpg?v=1714968003"},"aspect_ratio":0.691,"height":724,"media_type":"image","src":"\/\/www.thebirthstore.com.au\/cdn\/shop\/files\/mini-oracle-cards-178578.jpg?v=1714968003","width":500},{"alt":"Mini Oracle Cards - The Birth Store-Seasons of Mama","id":27007594037437,"position":3,"preview_image":{"aspect_ratio":1.0,"height":500,"width":500,"src":"\/\/www.thebirthstore.com.au\/cdn\/shop\/files\/mini-oracle-cards-375372.jpg?v=1714968003"},"aspect_ratio":1.0,"height":500,"media_type":"image","src":"\/\/www.thebirthstore.com.au\/cdn\/shop\/files\/mini-oracle-cards-375372.jpg?v=1714968003","width":500},{"alt":"Mini Oracle Cards - The Birth Store-Seasons of Mama","id":27007594070205,"position":4,"preview_image":{"aspect_ratio":0.853,"height":586,"width":500,"src":"\/\/www.thebirthstore.com.au\/cdn\/shop\/files\/mini-oracle-cards-987019.jpg?v=1714968003"},"aspect_ratio":0.853,"height":586,"media_type":"image","src":"\/\/www.thebirthstore.com.au\/cdn\/shop\/files\/mini-oracle-cards-987019.jpg?v=1714968003","width":500},{"alt":"Mini Oracle Cards - The Birth Store-Seasons of Mama","id":27007594102973,"position":5,"preview_image":{"aspect_ratio":0.877,"height":570,"width":500,"src":"\/\/www.thebirthstore.com.au\/cdn\/shop\/files\/mini-oracle-cards-298593.jpg?v=1714968003"},"aspect_ratio":0.877,"height":570,"media_type":"image","src":"\/\/www.thebirthstore.com.au\/cdn\/shop\/files\/mini-oracle-cards-298593.jpg?v=1714968003","width":500}]


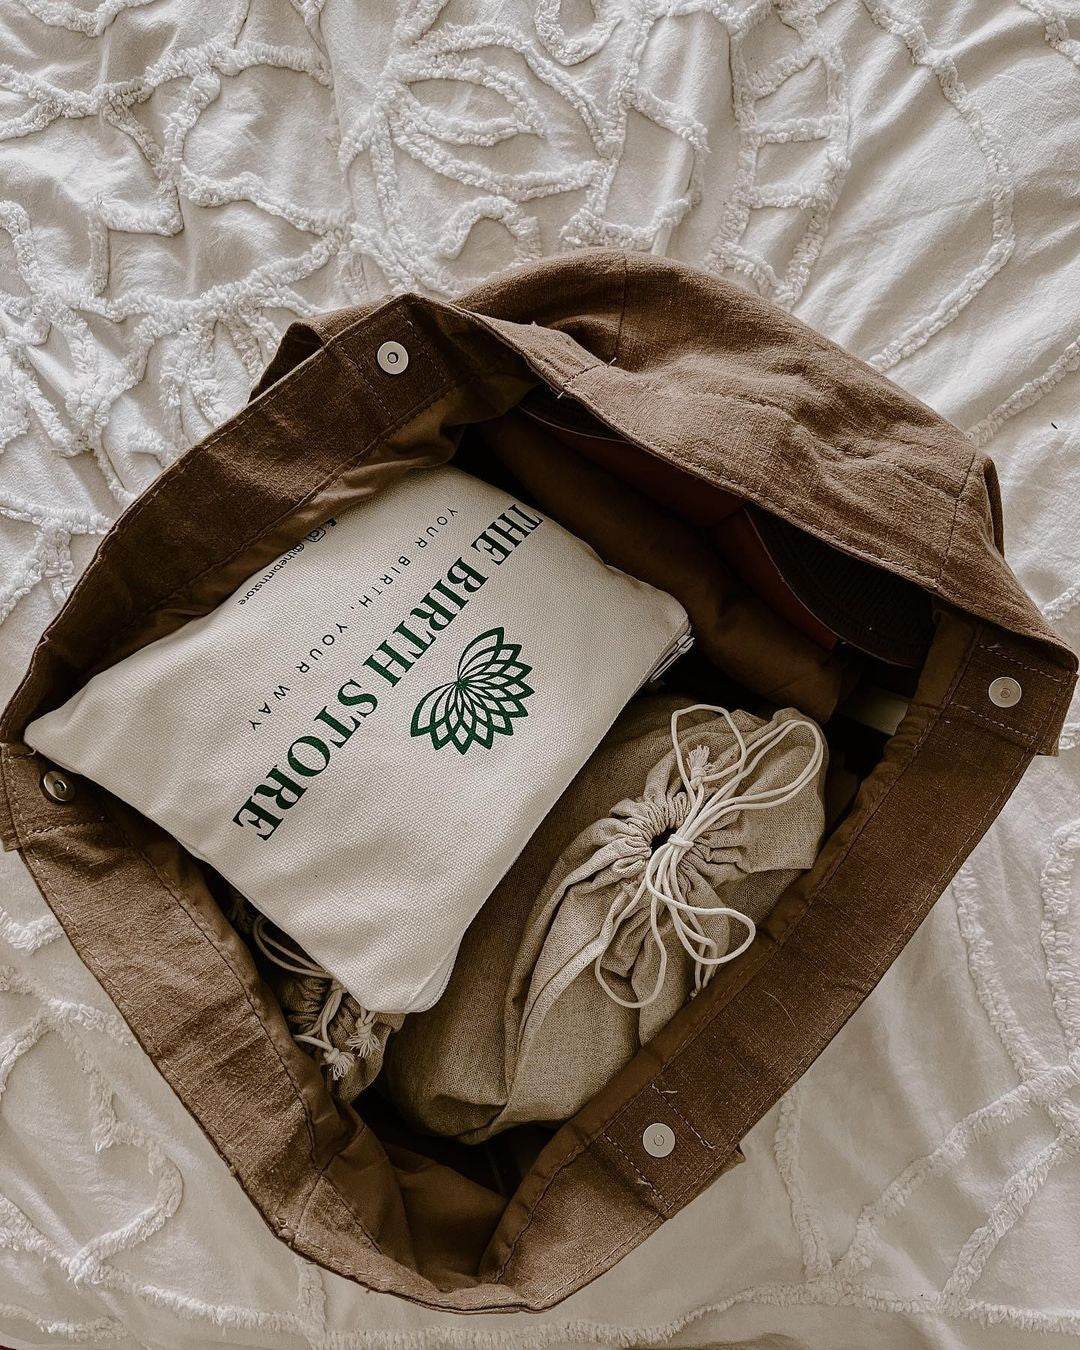
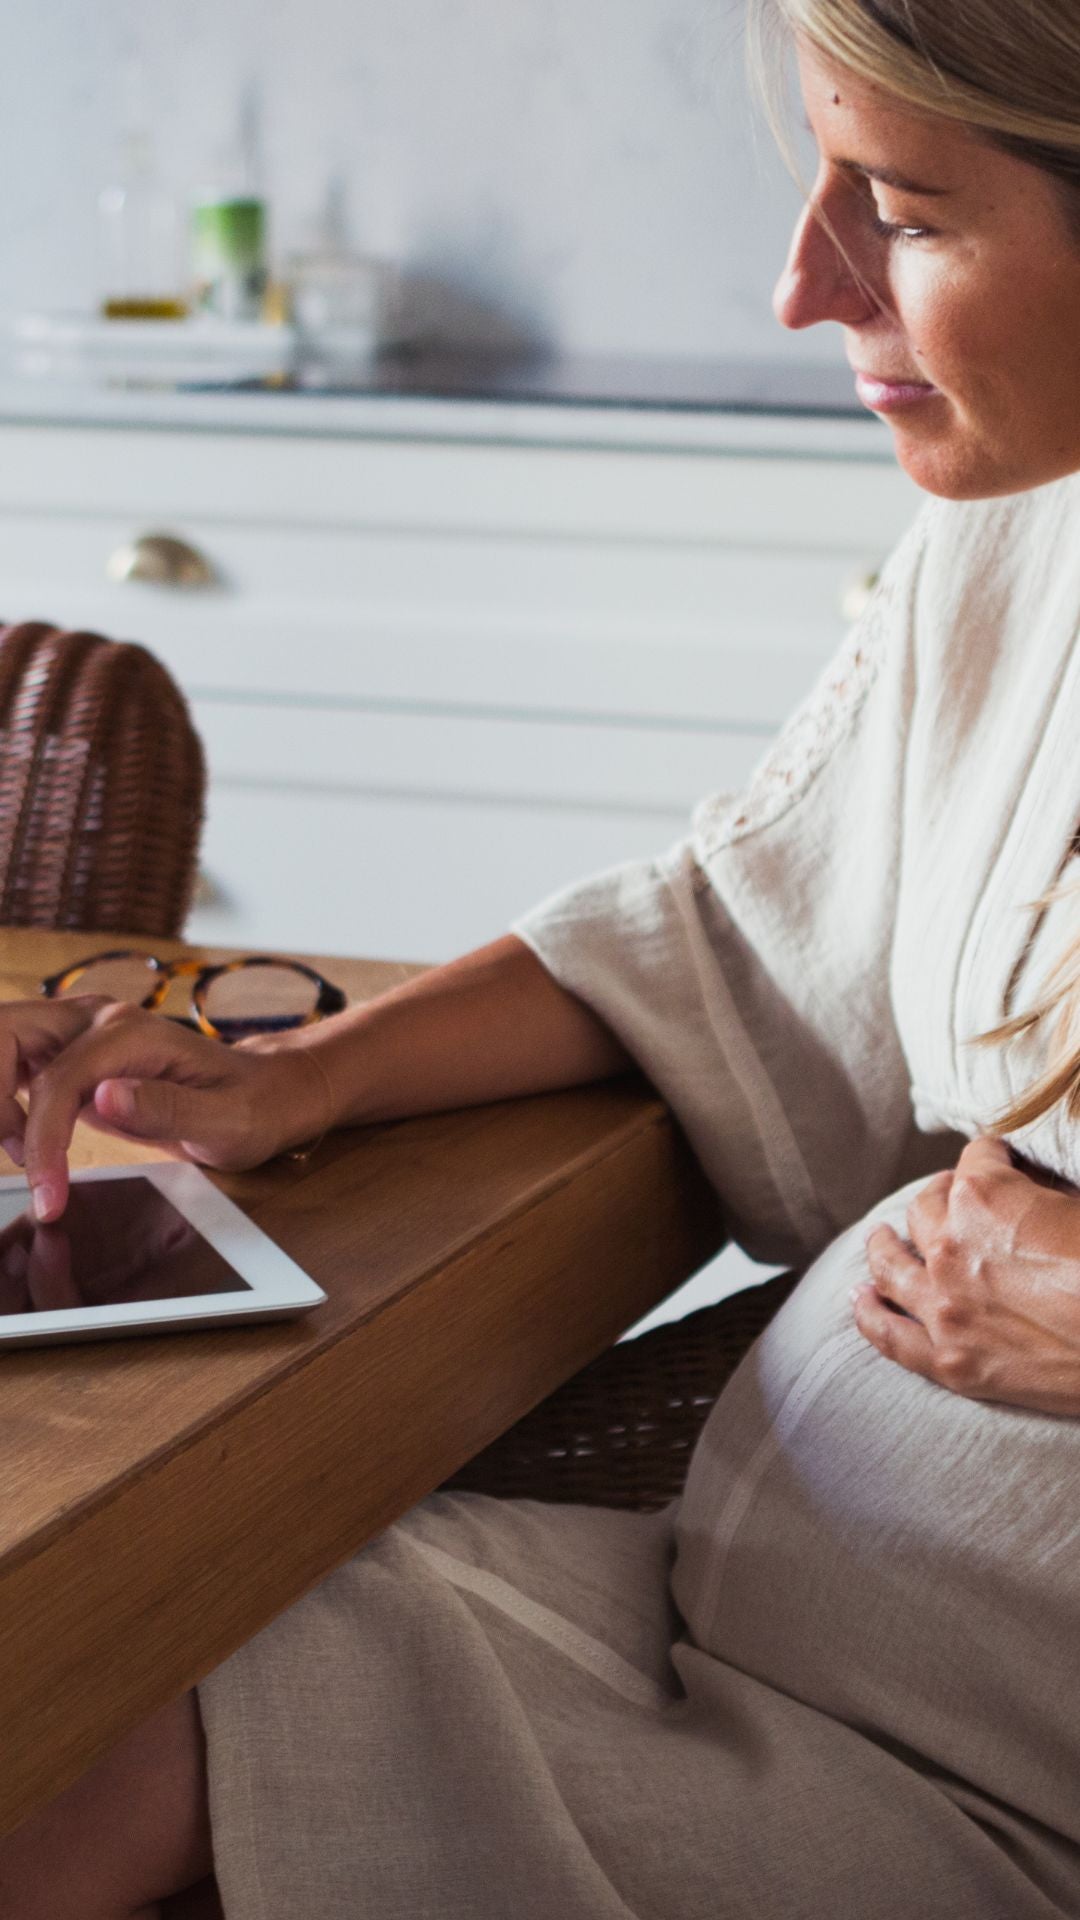

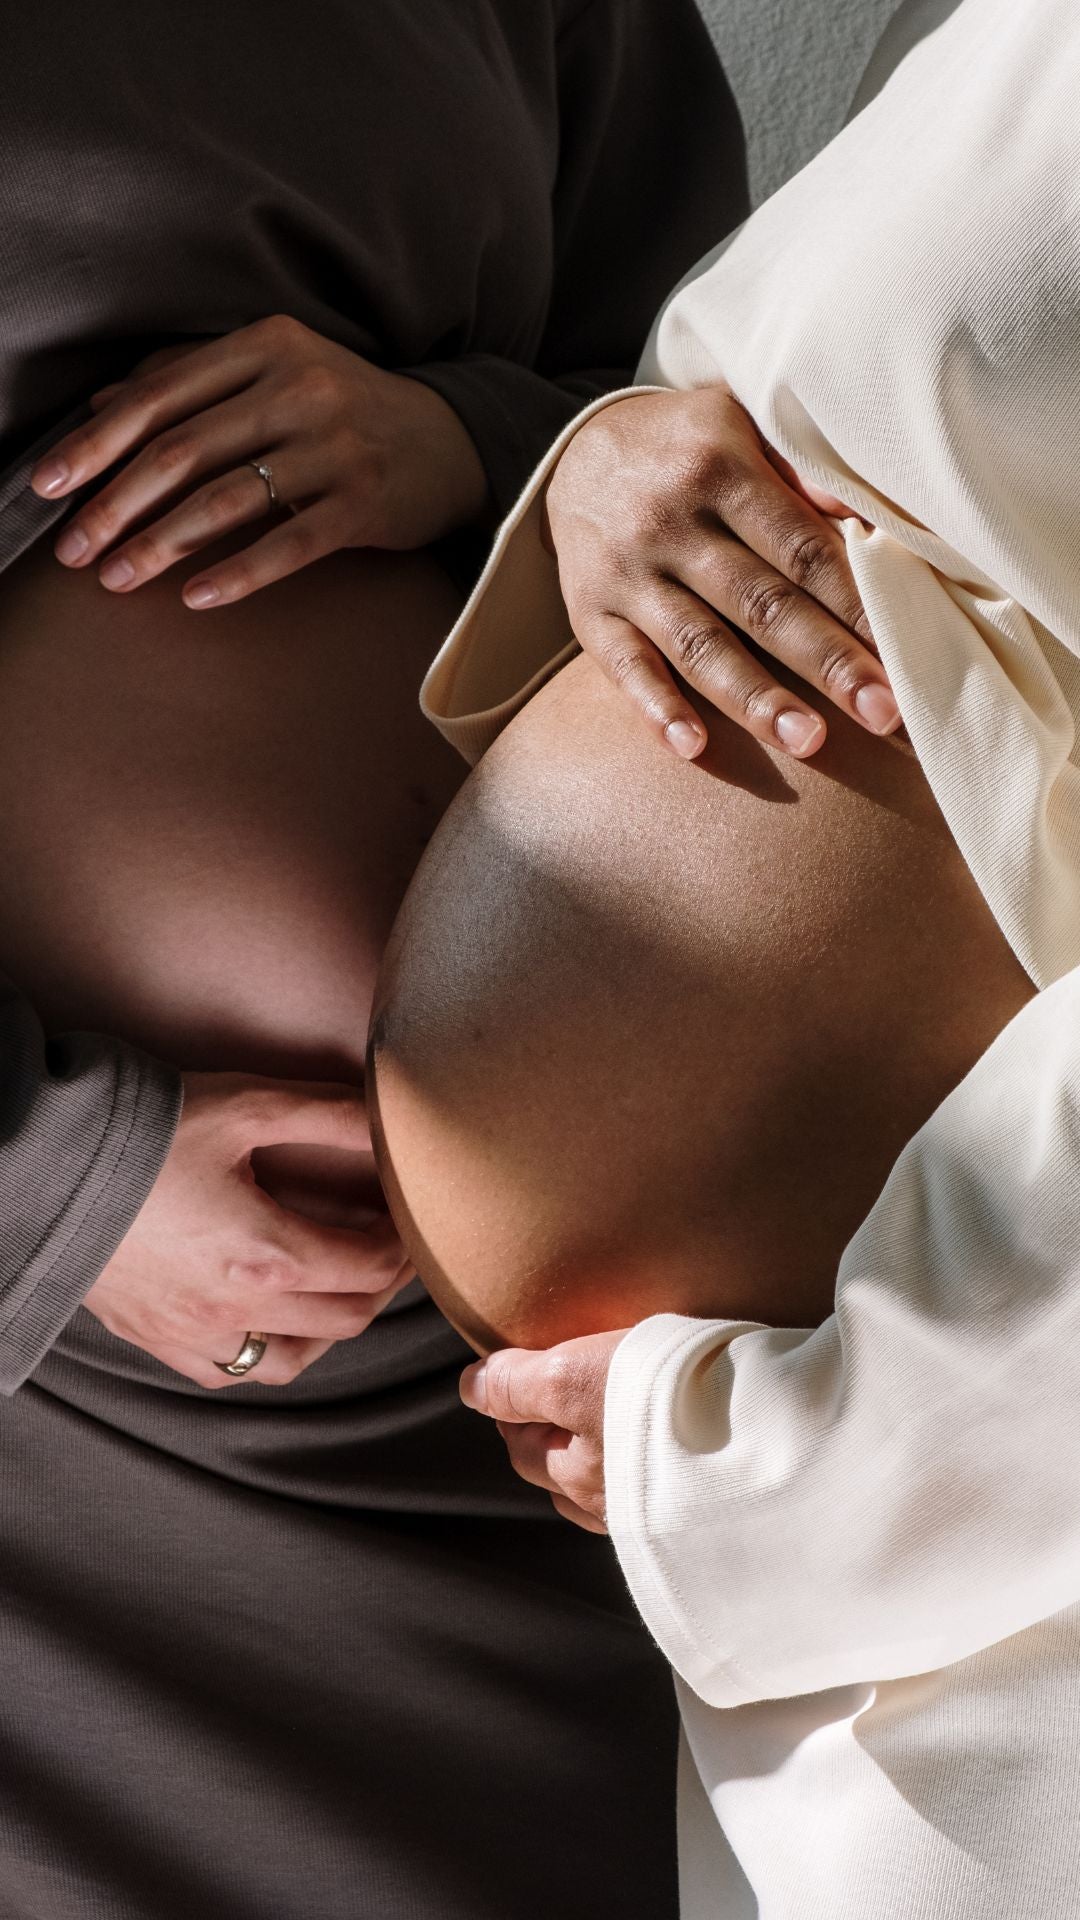
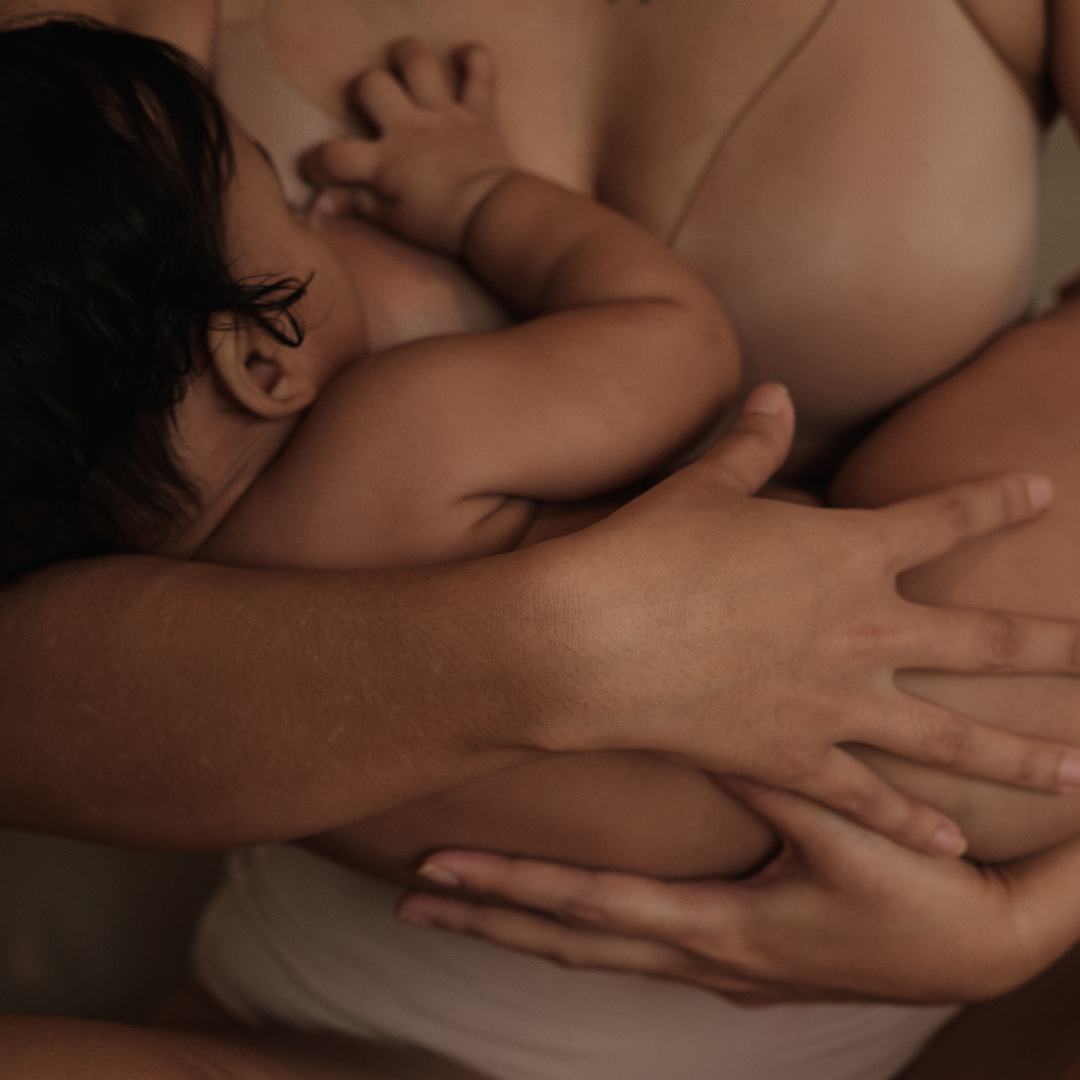


