×
Skip to content
Collect and save those precious drops of liquid gold for when you need it the most!
When You Support a Small Business You're Supporting Someone's Dream
So, from the bottom of our hearts, thank you for supporting our dream ❤️
{"item":{"id":7917653557437,"title":"Mini + Me Hydramama","handle":"mini-me-hydramama","description":"\u003ch1 class=\"text-left margin-b-20 col8 black\"\u003eHydramama®\u003c\/h1\u003e\n\u003ch2 class=\"text-left margin-b-20 primary\"\u003eSay Hello to your Hydration Hero\u003cspan\u003e\u003c\/span\u003e\n\u003c\/h2\u003e\n\u003cp dir=\"ltr\"\u003e\u003cspan\u003eHydramama is a zero sugar hydration drink made with Sodium, Potassium, Magnesium, Vitamin B6, Vitamin C and Methylated Folate. Designed with expecting and new parents in mind, from pre-conception right through to postpartum and beyond.\u003c\/span\u003e\u003c\/p\u003e\n\u003cp dir=\"ltr\"\u003e\u003cspan\u003e\u003cbr\u003e\u003c\/span\u003e\u003cspan\u003eCreated by a mum who’s been there, and backed by midwives.\u003c\/span\u003e\u003c\/p\u003e\n\u003cp\u003e\u003cb\u003e\u003cbr\u003e\u003c\/b\u003e\u003c\/p\u003e\n\u003ch3 dir=\"ltr\"\u003e\n\u003cspan\u003eDescription \/ Why it is great:\u003c\/span\u003e\u003cb\u003e\u003c\/b\u003e\n\u003c\/h3\u003e\n\u003cp dir=\"ltr\"\u003e\u003cspan\u003eHydramama is a formulated beverage designed with expecting and new parents in mind, from pre-conception right through to postpartum and beyond.\u003c\/span\u003e\u003cb\u003e\u003c\/b\u003e\u003c\/p\u003e\n\u003cp dir=\"ltr\"\u003e\u003cspan\u003eFormulated with Magnesium, Sodium, Potassium, Vitamin C, Vitamin B6 and bioavailable Methylated Folate, and available in 10 delicious flavours, it’s simple to mix and easy to love. \u003c\/span\u003e\u003cb\u003e\u003c\/b\u003e\u003c\/p\u003e\n\u003cp dir=\"ltr\"\u003e\u003cspan\u003e🥇 CLEAN + CONSCIOUS AWARDS 2024: Gold in the \"Best Women's Health Product\" category.\u003c\/span\u003e\u003c\/p\u003e\n\u003cp dir=\"ltr\"\u003e\u003cspan\u003e🥇 BOUNTY BABY AWARDS 2025: Gold Medal in \"Best Product or Service for Mum\" category.\u003c\/span\u003e\u003c\/p\u003e\n\u003cp dir=\"ltr\"\u003e\u003cspan\u003e🥈 BOUNTY BABY AWARDS 2025: Silver Medal in \"Best Vitamin or Supplement for Mum\" category.\u003c\/span\u003e\u003c\/p\u003e\n\u003cp dir=\"ltr\"\u003e\u003cspan\u003e🥈 BOUNTY BABY AWARDS 2024: Silver Medal in \"Best Vitamin or Supplement for Mum\" category.\u003c\/span\u003e\u003c\/p\u003e\n\u003cp dir=\"ltr\"\u003e\u003cspan\u003e🥉 BOUNTY BABY AWARDS 2024\" Bronze Medal in \"Best Product or Service for Mum\" category.\u003c\/span\u003e\u003c\/p\u003e\n\u003cp\u003e\u003cb\u003e\u003cbr\u003e\u003c\/b\u003e\u003c\/p\u003e\n\u003ch3 dir=\"ltr\"\u003e\u003cspan\u003eWhy Hydramama?\u003c\/span\u003e\u003c\/h3\u003e\n\u003cp dir=\"ltr\"\u003e\u003cspan\u003eClean hydration support, every day. Some days, water just doesn't cut it. Designed with real parents at the centre, Hydramama is a great-tasting, sugar-free hydration drink, simple to use and make a part of your daily routine.\u003c\/span\u003e\u003cb\u003e\u003c\/b\u003e\u003c\/p\u003e\n\u003cp dir=\"ltr\"\u003e\u003cspan\u003eHydramama is carefully formulated with the nutritional needs of women in mind, a true hydration support for motherhood. Suitable for use during pregnancy, while breastfeeding, and for the whole family. \u003c\/span\u003e\u003c\/p\u003e\n\u003cp\u003e\u003cb\u003e\u003cbr\u003e\u003c\/b\u003e\u003c\/p\u003e\n\u003ch3 dir=\"ltr\"\u003e\u003cspan\u003eFormulated with: \u003c\/span\u003e\u003c\/h3\u003e\n\u003cul\u003e\n\u003cli dir=\"ltr\" aria-level=\"1\"\u003e\n\u003cp dir=\"ltr\" role=\"presentation\"\u003e\u003cspan\u003eMagnesium + sodium + potassium: magnesium supports electrolyte balance and nerve and muscle function.\u003c\/span\u003e\u003c\/p\u003e\n\u003c\/li\u003e\n\u003cli dir=\"ltr\" aria-level=\"1\"\u003e\n\u003cp dir=\"ltr\" role=\"presentation\"\u003e\u003cspan\u003eMethylated Folate \u0026amp; Vitamin B6: containing a bioavailable source of folate alongside vitamin B6, nutrients involved in energy metabolism and general wellness.\u003c\/span\u003e\u003c\/p\u003e\n\u003c\/li\u003e\n\u003cli dir=\"ltr\" aria-level=\"1\"\u003e\n\u003cp dir=\"ltr\" role=\"presentation\"\u003e\u003cspan\u003eVitamin C: helps to reduce tiredness and fatigue and support immunity.\u003c\/span\u003e\u003c\/p\u003e\n\u003c\/li\u003e\n\u003c\/ul\u003e\n\u003cp\u003e\u003cb\u003e\u003cbr\u003e\u003c\/b\u003e\u003c\/p\u003e\n\u003cp dir=\"ltr\"\u003e\u003cspan\u003eZero sugar, no artificial colours, full of flavour. The Hydramama range offers clean, refreshing hydration support.\u003c\/span\u003e\u003cb\u003e\u003c\/b\u003e\u003c\/p\u003e\n\u003cp dir=\"ltr\"\u003e\u003cspan\u003eHydramama is proudly Endorsed by the Australian College of Midwives, and designed to support parents from pre-conception to postpartum and beyond. \u003c\/span\u003e\u003c\/p\u003e\n\u003cp\u003e\u003cb\u003e\u003cbr\u003e\u003c\/b\u003e\u003c\/p\u003e\n\u003ch3 dir=\"ltr\"\u003e\u003cspan\u003eHow to Use\u003c\/span\u003e\u003c\/h3\u003e\n\u003cp dir=\"ltr\"\u003e\u003cspan\u003eMix one sachet (8g) into 250-600mL of cold water. Enjoy as required. Suitable for pregnancy, breastfeeding and for children, following advice from your healthcare professional.\u003c\/span\u003e\u003cb\u003e\u003c\/b\u003e\u003c\/p\u003e\n\u003cp dir=\"ltr\"\u003e \u003c\/p\u003e\n\u003ch3 dir=\"ltr\"\u003e\u003cspan\u003eWhat’s Inside Hydramama?\u003c\/span\u003e\u003c\/h3\u003e\n\u003ch5 dir=\"ltr\"\u003e\u003cspan\u003eMagnesium + Minerals (Sodium + Potassium) \u003c\/span\u003e\u003c\/h5\u003e\n\u003cp dir=\"ltr\"\u003e\u003cspan\u003eMagnesium supports electrolyte balance, as well as nerve and muscle function. It also contributes to a reduction of tiredness and fatigue and supports psychological function.\u003c\/span\u003e\u003cb\u003e\u003c\/b\u003e\u003c\/p\u003e\n\u003ch5 dir=\"ltr\"\u003e\u003cspan\u003eVitamin C\u003c\/span\u003e\u003c\/h5\u003e\n\u003cp dir=\"ltr\"\u003e\u003cspan\u003eVitamin C contributes to energy metabolism, immune system function, and connective tissue function. It also contributes to a reduction of tiredness and fatigue.\u003c\/span\u003e\u003cb\u003e\u003c\/b\u003e\u003c\/p\u003e\n\u003ch5 dir=\"ltr\"\u003e\u003cspan\u003eVitamin B6\u003c\/span\u003e\u003c\/h5\u003e\n\u003cp dir=\"ltr\"\u003e\u003cspan\u003eVitamin B6 contributes to normal energy metabolism, nervous system function, red blood cell formation, and the regulation of hormonal activity.\u003c\/span\u003e\u003cb\u003e\u003c\/b\u003e\u003c\/p\u003e\n\u003ch5 dir=\"ltr\"\u003e\u003cspan\u003eBioavailable Methylated Folate\u003c\/span\u003e\u003c\/h5\u003e\n\u003cp dir=\"ltr\"\u003e\u003cspan\u003eContains bioavailable folate (50µg per serve, 25% RDI). Folate contributes to maternal tissue growth during pregnancy, normal blood formation, and a reduction of tiredness and fatigue.\u003c\/span\u003e\u003c\/p\u003e\n\u003cp\u003e\u003cb\u003e\u003cbr\u003e\u003c\/b\u003e\u003c\/p\u003e\n\u003cp dir=\"ltr\"\u003e\u003cem\u003e*Please note: Hydramama is designed to complement a balanced diet and is not intended as a replacement for prenatal vitamins.\u003c\/em\u003e\u003c\/p\u003e\n\u003cp\u003e\u003cb\u003e\u003cbr\u003e\u003c\/b\u003e\u003c\/p\u003e\n\u003ch3 dir=\"ltr\"\u003e\u003cspan\u003eIngredients:\u003c\/span\u003e\u003c\/h3\u003e\n\u003cp dir=\"ltr\"\u003e\u003cspan\u003eNatural Sweetener (Erythritol), Mineral Salts (Sodium Chloride, Potassium Phosphate, Magnesium Glycinate, Sodium Citrate), Food Acid (Citric), Natural Flavours, Natural Colour, Vitamins [Ascorbic Acid, Pyridoxine Hydrochloride (Vitamin B6), L-Methyl Folate Calcium (Vitamin B9)].\u003c\/span\u003e\u003cb\u003e\u003c\/b\u003e\u003c\/p\u003e\n\u003cp dir=\"ltr\"\u003e\u003cspan\u003eFormulated beverage when made up as per instruction. This product should be consumed alongside a nutritious diet. Store below 25°C in a cool dry place, away from direct sunlight.\u003c\/span\u003e\u003c\/p\u003e\n\u003cp dir=\"ltr\"\u003e\u003cspan\u003eHydramama is a formulated beverage when prepared as directed, made in accordance with the Food Standards Code (FSANZ) for Australia and New Zealand. It is intended to be enjoyed alongside a balanced diet. If you are pregnant or breastfeeding, considering use for a child, have any underlying health conditions, take medications or supplements, consult a healthcare professional before use.\u003c\/span\u003e\u003c\/p\u003e","published_at":"2024-11-23T13:00:02+08:00","created_at":"2024-11-23T11:40:52+08:00","vendor":"Mini + Me","type":"","tags":["Baby Shower Gifts - Mum","Birth","Breastfeeding","Hospital Bag","Lactation Products","Mum","Nausea","Post-Partum","Pre-Conception","Pregnancy","Pregnancy Health"],"price":3999,"price_min":3999,"price_max":3999,"available":true,"price_varies":false,"compare_at_price":null,"compare_at_price_min":0,"compare_at_price_max":0,"compare_at_price_varies":false,"variants":[{"id":44666117587133,"title":"Blackcurrant","option1":"Blackcurrant","option2":null,"option3":null,"sku":"","requires_shipping":true,"taxable":false,"featured_image":{"id":38742134784189,"product_id":7917653557437,"position":23,"created_at":"2025-11-03T10:37:07+08:00","updated_at":"2025-11-03T12:22:56+08:00","alt":"Mini + Me Hydramama - The Birth Store - Mini + Me","width":1080,"height":1080,"src":"\/\/www.thebirthstore.com.au\/cdn\/shop\/files\/mini-me-hydramama-9530031.png?v=1762143776","variant_ids":[44666117587133]},"available":true,"name":"Mini + Me Hydramama - Blackcurrant","public_title":"Blackcurrant","options":["Blackcurrant"],"price":3999,"weight":300,"compare_at_price":null,"inventory_management":"shopify","barcode":"17587133","featured_media":{"alt":"Mini + Me Hydramama - The Birth Store - Mini + Me","id":29991211434173,"position":23,"preview_image":{"aspect_ratio":1.0,"height":1080,"width":1080,"src":"\/\/www.thebirthstore.com.au\/cdn\/shop\/files\/mini-me-hydramama-9530031.png?v=1762143776"}},"requires_selling_plan":false,"selling_plan_allocations":[],"quantity_rule":{"min":1,"max":null,"increment":1}},{"id":44666117619901,"title":"Lemonade","option1":"Lemonade","option2":null,"option3":null,"sku":"","requires_shipping":true,"taxable":false,"featured_image":{"id":38742138552509,"product_id":7917653557437,"position":24,"created_at":"2025-11-03T10:38:33+08:00","updated_at":"2025-11-03T12:22:56+08:00","alt":"Mini + Me Hydramama - The Birth Store - Mini + Me","width":1080,"height":1080,"src":"\/\/www.thebirthstore.com.au\/cdn\/shop\/files\/mini-me-hydramama-6807804.png?v=1762143776","variant_ids":[44666117619901]},"available":true,"name":"Mini + Me Hydramama - Lemonade","public_title":"Lemonade","options":["Lemonade"],"price":3999,"weight":300,"compare_at_price":null,"inventory_management":"shopify","barcode":"17619901","featured_media":{"alt":"Mini + Me Hydramama - The Birth Store - Mini + Me","id":29991214710973,"position":24,"preview_image":{"aspect_ratio":1.0,"height":1080,"width":1080,"src":"\/\/www.thebirthstore.com.au\/cdn\/shop\/files\/mini-me-hydramama-6807804.png?v=1762143776"}},"requires_selling_plan":false,"selling_plan_allocations":[],"quantity_rule":{"min":1,"max":null,"increment":1}},{"id":44666329694397,"title":"Cola","option1":"Cola","option2":null,"option3":null,"sku":"","requires_shipping":true,"taxable":false,"featured_image":{"id":38742136848573,"product_id":7917653557437,"position":25,"created_at":"2025-11-03T10:37:50+08:00","updated_at":"2025-11-03T12:22:56+08:00","alt":"Mini + Me Hydramama - The Birth Store - Mini + Me","width":1080,"height":1080,"src":"\/\/www.thebirthstore.com.au\/cdn\/shop\/files\/mini-me-hydramama-7128187.png?v=1762143776","variant_ids":[44666329694397]},"available":true,"name":"Mini + Me Hydramama - Cola","public_title":"Cola","options":["Cola"],"price":3999,"weight":300,"compare_at_price":null,"inventory_management":"shopify","barcode":"29694397","featured_media":{"alt":"Mini + Me Hydramama - The Birth Store - Mini + Me","id":29991213105341,"position":25,"preview_image":{"aspect_ratio":1.0,"height":1080,"width":1080,"src":"\/\/www.thebirthstore.com.au\/cdn\/shop\/files\/mini-me-hydramama-7128187.png?v=1762143776"}},"requires_selling_plan":false,"selling_plan_allocations":[],"quantity_rule":{"min":1,"max":null,"increment":1}},{"id":44666361577661,"title":"Watermelon + Lime","option1":"Watermelon + Lime","option2":null,"option3":null,"sku":"","requires_shipping":true,"taxable":false,"featured_image":{"id":38742143762621,"product_id":7917653557437,"position":26,"created_at":"2025-11-03T10:40:55+08:00","updated_at":"2025-11-03T12:22:57+08:00","alt":"Mini + Me Hydramama - The Birth Store - Mini + Me","width":1080,"height":1080,"src":"\/\/www.thebirthstore.com.au\/cdn\/shop\/files\/mini-me-hydramama-5447464.png?v=1762143777","variant_ids":[44666361577661]},"available":true,"name":"Mini + Me Hydramama - Watermelon + Lime","public_title":"Watermelon + Lime","options":["Watermelon + Lime"],"price":3999,"weight":300,"compare_at_price":null,"inventory_management":"shopify","barcode":"61577661","featured_media":{"alt":"Mini + Me Hydramama - The Birth Store - Mini + Me","id":29991218905277,"position":26,"preview_image":{"aspect_ratio":1.0,"height":1080,"width":1080,"src":"\/\/www.thebirthstore.com.au\/cdn\/shop\/files\/mini-me-hydramama-5447464.png?v=1762143777"}},"requires_selling_plan":false,"selling_plan_allocations":[],"quantity_rule":{"min":1,"max":null,"increment":1}},{"id":44666362200253,"title":"Passionfruit + Orange","option1":"Passionfruit + Orange","option2":null,"option3":null,"sku":"","requires_shipping":true,"taxable":false,"featured_image":{"id":38742137962685,"product_id":7917653557437,"position":27,"created_at":"2025-11-03T10:38:18+08:00","updated_at":"2025-11-03T12:22:57+08:00","alt":"Mini + Me Hydramama - The Birth Store - Mini + Me","width":1080,"height":1080,"src":"\/\/www.thebirthstore.com.au\/cdn\/shop\/files\/mini-me-hydramama-5259142.png?v=1762143777","variant_ids":[44666362200253]},"available":true,"name":"Mini + Me Hydramama - Passionfruit + Orange","public_title":"Passionfruit + Orange","options":["Passionfruit + Orange"],"price":3999,"weight":300,"compare_at_price":null,"inventory_management":"shopify","barcode":"62200253","featured_media":{"alt":"Mini + Me Hydramama - The Birth Store - Mini + Me","id":29991214284989,"position":27,"preview_image":{"aspect_ratio":1.0,"height":1080,"width":1080,"src":"\/\/www.thebirthstore.com.au\/cdn\/shop\/files\/mini-me-hydramama-5259142.png?v=1762143777"}},"requires_selling_plan":false,"selling_plan_allocations":[],"quantity_rule":{"min":1,"max":null,"increment":1}},{"id":44666363150525,"title":"Apple + Ginger","option1":"Apple + Ginger","option2":null,"option3":null,"sku":"","requires_shipping":true,"taxable":false,"featured_image":{"id":38742135636157,"product_id":7917653557437,"position":28,"created_at":"2025-11-03T10:37:26+08:00","updated_at":"2025-11-03T12:22:57+08:00","alt":"Mini + Me Hydramama - The Birth Store - Mini + Me","width":1080,"height":1080,"src":"\/\/www.thebirthstore.com.au\/cdn\/shop\/files\/mini-me-hydramama-4894441.png?v=1762143777","variant_ids":[44666363150525]},"available":true,"name":"Mini + Me Hydramama - Apple + Ginger","public_title":"Apple + Ginger","options":["Apple + Ginger"],"price":3999,"weight":300,"compare_at_price":null,"inventory_management":"shopify","barcode":"63150525","featured_media":{"alt":"Mini + Me Hydramama - The Birth Store - Mini + Me","id":29991212155069,"position":28,"preview_image":{"aspect_ratio":1.0,"height":1080,"width":1080,"src":"\/\/www.thebirthstore.com.au\/cdn\/shop\/files\/mini-me-hydramama-4894441.png?v=1762143777"}},"requires_selling_plan":false,"selling_plan_allocations":[],"quantity_rule":{"min":1,"max":null,"increment":1}},{"id":44729555714237,"title":"Peach Iced Tea","option1":"Peach Iced Tea","option2":null,"option3":null,"sku":"","requires_shipping":true,"taxable":false,"featured_image":{"id":38742139568317,"product_id":7917653557437,"position":29,"created_at":"2025-11-03T10:38:58+08:00","updated_at":"2025-11-03T12:22:58+08:00","alt":"Mini + Me Hydramama - The Birth Store - Mini + Me","width":1080,"height":1080,"src":"\/\/www.thebirthstore.com.au\/cdn\/shop\/files\/mini-me-hydramama-9357362.png?v=1762143778","variant_ids":[44729555714237]},"available":true,"name":"Mini + Me Hydramama - Peach Iced Tea","public_title":"Peach Iced Tea","options":["Peach Iced Tea"],"price":3999,"weight":300,"compare_at_price":null,"inventory_management":"shopify","barcode":"55714237","featured_media":{"alt":"Mini + Me Hydramama - The Birth Store - Mini + Me","id":29991215497405,"position":29,"preview_image":{"aspect_ratio":1.0,"height":1080,"width":1080,"src":"\/\/www.thebirthstore.com.au\/cdn\/shop\/files\/mini-me-hydramama-9357362.png?v=1762143778"}},"requires_selling_plan":false,"selling_plan_allocations":[],"quantity_rule":{"min":1,"max":null,"increment":1}},{"id":44729560006845,"title":"Tropical","option1":"Tropical","option2":null,"option3":null,"sku":"","requires_shipping":true,"taxable":false,"featured_image":{"id":38742142189757,"product_id":7917653557437,"position":30,"created_at":"2025-11-03T10:40:14+08:00","updated_at":"2025-11-03T12:22:58+08:00","alt":"Mini + Me Hydramama - The Birth Store - Mini + Me","width":1080,"height":1080,"src":"\/\/www.thebirthstore.com.au\/cdn\/shop\/files\/mini-me-hydramama-3590130.png?v=1762143778","variant_ids":[44729560006845]},"available":true,"name":"Mini + Me Hydramama - Tropical","public_title":"Tropical","options":["Tropical"],"price":3999,"weight":300,"compare_at_price":null,"inventory_management":"shopify","barcode":"60006845","featured_media":{"alt":"Mini + Me Hydramama - The Birth Store - Mini + Me","id":29991217725629,"position":30,"preview_image":{"aspect_ratio":1.0,"height":1080,"width":1080,"src":"\/\/www.thebirthstore.com.au\/cdn\/shop\/files\/mini-me-hydramama-3590130.png?v=1762143778"}},"requires_selling_plan":false,"selling_plan_allocations":[],"quantity_rule":{"min":1,"max":null,"increment":1}},{"id":46726916800701,"title":"Mixed Berry","option1":"Mixed Berry","option2":null,"option3":null,"sku":null,"requires_shipping":true,"taxable":false,"featured_image":{"id":40210116477117,"product_id":7917653557437,"position":31,"created_at":"2026-05-06T12:02:47+08:00","updated_at":"2026-05-06T18:32:05+08:00","alt":"Mini + Me Hydramama - The Birth Store - Mini + Me","width":1000,"height":1000,"src":"\/\/www.thebirthstore.com.au\/cdn\/shop\/files\/mini-me-hydramama-7796965.png?v=1778063525","variant_ids":[46726916800701]},"available":true,"name":"Mini + Me Hydramama - Mixed Berry","public_title":"Mixed Berry","options":["Mixed Berry"],"price":3999,"weight":300,"compare_at_price":null,"inventory_management":"shopify","barcode":"16800701","featured_media":{"alt":"Mini + Me Hydramama - The Birth Store - Mini + Me","id":31321970802877,"position":31,"preview_image":{"aspect_ratio":1.0,"height":1000,"width":1000,"src":"\/\/www.thebirthstore.com.au\/cdn\/shop\/files\/mini-me-hydramama-7796965.png?v=1778063525"}},"requires_selling_plan":false,"selling_plan_allocations":[],"quantity_rule":{"min":1,"max":null,"increment":1}}],"images":["\/\/www.thebirthstore.com.au\/cdn\/shop\/files\/mini-me-hydramama-978042.jpg?v=1732461065","\/\/www.thebirthstore.com.au\/cdn\/shop\/files\/mini-me-hydramama-533803.webp?v=1732378254","\/\/www.thebirthstore.com.au\/cdn\/shop\/files\/mini-me-hydramama-916939.jpg?v=1732378254","\/\/www.thebirthstore.com.au\/cdn\/shop\/files\/mini-me-hydramama-8621853.png?v=1778560746","\/\/www.thebirthstore.com.au\/cdn\/shop\/files\/mini-me-hydramama-393133.webp?v=1732378254","\/\/www.thebirthstore.com.au\/cdn\/shop\/files\/mini-me-hydramama-487372.webp?v=1732378254","\/\/www.thebirthstore.com.au\/cdn\/shop\/files\/mini-me-hydramama-287801.webp?v=1732378254","\/\/www.thebirthstore.com.au\/cdn\/shop\/files\/mini-me-hydramama-843305.webp?v=1732378254","\/\/www.thebirthstore.com.au\/cdn\/shop\/files\/mini-me-hydramama-509062.webp?v=1732378254","\/\/www.thebirthstore.com.au\/cdn\/shop\/files\/mini-me-hydramama-292065.webp?v=1732378254","\/\/www.thebirthstore.com.au\/cdn\/shop\/files\/mini-me-hydramama-296847.jpg?v=1732378254","\/\/www.thebirthstore.com.au\/cdn\/shop\/files\/mini-me-hydramama-521878.webp?v=1732378254","\/\/www.thebirthstore.com.au\/cdn\/shop\/files\/mini-me-hydramama-632449.webp?v=1732378254","\/\/www.thebirthstore.com.au\/cdn\/shop\/files\/mini-me-hydramama-327387.webp?v=1732378254","\/\/www.thebirthstore.com.au\/cdn\/shop\/files\/mini-me-hydramama-366357.webp?v=1732378254","\/\/www.thebirthstore.com.au\/cdn\/shop\/files\/mini-me-hydramama-130389.webp?v=1732378254","\/\/www.thebirthstore.com.au\/cdn\/shop\/files\/mini-me-hydramama-651803.webp?v=1732378254","\/\/www.thebirthstore.com.au\/cdn\/shop\/files\/mini-me-hydramama-908370.webp?v=1732626991","\/\/www.thebirthstore.com.au\/cdn\/shop\/files\/mini-me-hydramama-611420.webp?v=1734946846","\/\/www.thebirthstore.com.au\/cdn\/shop\/files\/Passionfruit_Orange.webp?v=1734933927","\/\/www.thebirthstore.com.au\/cdn\/shop\/files\/mini-me-hydramama-115601.webp?v=1734946846","\/\/www.thebirthstore.com.au\/cdn\/shop\/files\/mini-me-hydramama-962335.webp?v=1734946846","\/\/www.thebirthstore.com.au\/cdn\/shop\/files\/mini-me-hydramama-9530031.png?v=1762143776","\/\/www.thebirthstore.com.au\/cdn\/shop\/files\/mini-me-hydramama-6807804.png?v=1762143776","\/\/www.thebirthstore.com.au\/cdn\/shop\/files\/mini-me-hydramama-7128187.png?v=1762143776","\/\/www.thebirthstore.com.au\/cdn\/shop\/files\/mini-me-hydramama-5447464.png?v=1762143777","\/\/www.thebirthstore.com.au\/cdn\/shop\/files\/mini-me-hydramama-5259142.png?v=1762143777","\/\/www.thebirthstore.com.au\/cdn\/shop\/files\/mini-me-hydramama-4894441.png?v=1762143777","\/\/www.thebirthstore.com.au\/cdn\/shop\/files\/mini-me-hydramama-9357362.png?v=1762143778","\/\/www.thebirthstore.com.au\/cdn\/shop\/files\/mini-me-hydramama-3590130.png?v=1762143778","\/\/www.thebirthstore.com.au\/cdn\/shop\/files\/mini-me-hydramama-7796965.png?v=1778063525"],"featured_image":"\/\/www.thebirthstore.com.au\/cdn\/shop\/files\/mini-me-hydramama-978042.jpg?v=1732461065","options":["Flavour"],"media":[{"alt":"Mini + Me Hydramama - The Birth Store - Mini + Me","id":27925714305213,"position":1,"preview_image":{"aspect_ratio":1.0,"height":1080,"width":1080,"src":"\/\/www.thebirthstore.com.au\/cdn\/shop\/files\/mini-me-hydramama-978042.jpg?v=1732461065"},"aspect_ratio":1.0,"height":1080,"media_type":"image","src":"\/\/www.thebirthstore.com.au\/cdn\/shop\/files\/mini-me-hydramama-978042.jpg?v=1732461065","width":1080},{"alt":"Mini + Me Hydramama - The Birth Store - Mini + Me","id":27923398688957,"position":2,"preview_image":{"aspect_ratio":1.0,"height":1080,"width":1080,"src":"\/\/www.thebirthstore.com.au\/cdn\/shop\/files\/mini-me-hydramama-533803.webp?v=1732378254"},"aspect_ratio":1.0,"height":1080,"media_type":"image","src":"\/\/www.thebirthstore.com.au\/cdn\/shop\/files\/mini-me-hydramama-533803.webp?v=1732378254","width":1080},{"alt":"Mini + Me Hydramama - The Birth Store - Mini + Me","id":27923398656189,"position":3,"preview_image":{"aspect_ratio":1.681,"height":545,"width":916,"src":"\/\/www.thebirthstore.com.au\/cdn\/shop\/files\/mini-me-hydramama-916939.jpg?v=1732378254"},"aspect_ratio":1.681,"height":545,"media_type":"image","src":"\/\/www.thebirthstore.com.au\/cdn\/shop\/files\/mini-me-hydramama-916939.jpg?v=1732378254","width":916},{"alt":"Mini + Me Hydramama - The Birth Store - Mini + Me","id":31355251654845,"position":4,"preview_image":{"aspect_ratio":1.0,"height":2000,"width":2000,"src":"\/\/www.thebirthstore.com.au\/cdn\/shop\/files\/mini-me-hydramama-8621853.png?v=1778560746"},"aspect_ratio":1.0,"height":2000,"media_type":"image","src":"\/\/www.thebirthstore.com.au\/cdn\/shop\/files\/mini-me-hydramama-8621853.png?v=1778560746","width":2000},{"alt":"Mini + Me Hydramama - The Birth Store - Mini + Me","id":27923398721725,"position":5,"preview_image":{"aspect_ratio":1.0,"height":1080,"width":1080,"src":"\/\/www.thebirthstore.com.au\/cdn\/shop\/files\/mini-me-hydramama-393133.webp?v=1732378254"},"aspect_ratio":1.0,"height":1080,"media_type":"image","src":"\/\/www.thebirthstore.com.au\/cdn\/shop\/files\/mini-me-hydramama-393133.webp?v=1732378254","width":1080},{"alt":"Mini + Me Hydramama - The Birth Store - Mini + Me","id":27923398754493,"position":6,"preview_image":{"aspect_ratio":1.0,"height":1445,"width":1445,"src":"\/\/www.thebirthstore.com.au\/cdn\/shop\/files\/mini-me-hydramama-487372.webp?v=1732378254"},"aspect_ratio":1.0,"height":1445,"media_type":"image","src":"\/\/www.thebirthstore.com.au\/cdn\/shop\/files\/mini-me-hydramama-487372.webp?v=1732378254","width":1445},{"alt":"Mini + Me Hydramama - The Birth Store - Mini + Me","id":27923398787261,"position":7,"preview_image":{"aspect_ratio":1.0,"height":1445,"width":1445,"src":"\/\/www.thebirthstore.com.au\/cdn\/shop\/files\/mini-me-hydramama-287801.webp?v=1732378254"},"aspect_ratio":1.0,"height":1445,"media_type":"image","src":"\/\/www.thebirthstore.com.au\/cdn\/shop\/files\/mini-me-hydramama-287801.webp?v=1732378254","width":1445},{"alt":"Mini + Me Hydramama - The Birth Store - Mini + Me","id":27923398820029,"position":8,"preview_image":{"aspect_ratio":1.0,"height":1080,"width":1080,"src":"\/\/www.thebirthstore.com.au\/cdn\/shop\/files\/mini-me-hydramama-843305.webp?v=1732378254"},"aspect_ratio":1.0,"height":1080,"media_type":"image","src":"\/\/www.thebirthstore.com.au\/cdn\/shop\/files\/mini-me-hydramama-843305.webp?v=1732378254","width":1080},{"alt":"Mini + Me Hydramama - The Birth Store - Mini + Me","id":27923398885565,"position":9,"preview_image":{"aspect_ratio":1.0,"height":1080,"width":1080,"src":"\/\/www.thebirthstore.com.au\/cdn\/shop\/files\/mini-me-hydramama-509062.webp?v=1732378254"},"aspect_ratio":1.0,"height":1080,"media_type":"image","src":"\/\/www.thebirthstore.com.au\/cdn\/shop\/files\/mini-me-hydramama-509062.webp?v=1732378254","width":1080},{"alt":"Mini + Me Hydramama - The Birth Store - Mini + Me","id":27923398918333,"position":10,"preview_image":{"aspect_ratio":1.0,"height":1445,"width":1445,"src":"\/\/www.thebirthstore.com.au\/cdn\/shop\/files\/mini-me-hydramama-292065.webp?v=1732378254"},"aspect_ratio":1.0,"height":1445,"media_type":"image","src":"\/\/www.thebirthstore.com.au\/cdn\/shop\/files\/mini-me-hydramama-292065.webp?v=1732378254","width":1445},{"alt":"Mini + Me Hydramama - The Birth Store - Mini + Me","id":27923398951101,"position":11,"preview_image":{"aspect_ratio":1.681,"height":545,"width":916,"src":"\/\/www.thebirthstore.com.au\/cdn\/shop\/files\/mini-me-hydramama-296847.jpg?v=1732378254"},"aspect_ratio":1.681,"height":545,"media_type":"image","src":"\/\/www.thebirthstore.com.au\/cdn\/shop\/files\/mini-me-hydramama-296847.jpg?v=1732378254","width":916},{"alt":"Mini + Me Hydramama - The Birth Store - Mini + Me","id":27923398983869,"position":12,"preview_image":{"aspect_ratio":1.0,"height":1080,"width":1080,"src":"\/\/www.thebirthstore.com.au\/cdn\/shop\/files\/mini-me-hydramama-521878.webp?v=1732378254"},"aspect_ratio":1.0,"height":1080,"media_type":"image","src":"\/\/www.thebirthstore.com.au\/cdn\/shop\/files\/mini-me-hydramama-521878.webp?v=1732378254","width":1080},{"alt":"Mini + Me Hydramama - The Birth Store - Mini + Me","id":27923399016637,"position":13,"preview_image":{"aspect_ratio":1.0,"height":1445,"width":1445,"src":"\/\/www.thebirthstore.com.au\/cdn\/shop\/files\/mini-me-hydramama-632449.webp?v=1732378254"},"aspect_ratio":1.0,"height":1445,"media_type":"image","src":"\/\/www.thebirthstore.com.au\/cdn\/shop\/files\/mini-me-hydramama-632449.webp?v=1732378254","width":1445},{"alt":"Mini + Me Hydramama - The Birth Store - Mini + Me","id":27923399049405,"position":14,"preview_image":{"aspect_ratio":1.0,"height":1080,"width":1080,"src":"\/\/www.thebirthstore.com.au\/cdn\/shop\/files\/mini-me-hydramama-327387.webp?v=1732378254"},"aspect_ratio":1.0,"height":1080,"media_type":"image","src":"\/\/www.thebirthstore.com.au\/cdn\/shop\/files\/mini-me-hydramama-327387.webp?v=1732378254","width":1080},{"alt":"Mini + Me Hydramama - The Birth Store - Mini + Me","id":27923399082173,"position":15,"preview_image":{"aspect_ratio":1.0,"height":1445,"width":1445,"src":"\/\/www.thebirthstore.com.au\/cdn\/shop\/files\/mini-me-hydramama-366357.webp?v=1732378254"},"aspect_ratio":1.0,"height":1445,"media_type":"image","src":"\/\/www.thebirthstore.com.au\/cdn\/shop\/files\/mini-me-hydramama-366357.webp?v=1732378254","width":1445},{"alt":"Mini + Me Hydramama - The Birth Store - Mini + Me","id":27923399114941,"position":16,"preview_image":{"aspect_ratio":1.0,"height":1080,"width":1080,"src":"\/\/www.thebirthstore.com.au\/cdn\/shop\/files\/mini-me-hydramama-130389.webp?v=1732378254"},"aspect_ratio":1.0,"height":1080,"media_type":"image","src":"\/\/www.thebirthstore.com.au\/cdn\/shop\/files\/mini-me-hydramama-130389.webp?v=1732378254","width":1080},{"alt":"Mini + Me Hydramama - The Birth Store - Mini + Me","id":27923399147709,"position":17,"preview_image":{"aspect_ratio":1.0,"height":1445,"width":1445,"src":"\/\/www.thebirthstore.com.au\/cdn\/shop\/files\/mini-me-hydramama-651803.webp?v=1732378254"},"aspect_ratio":1.0,"height":1445,"media_type":"image","src":"\/\/www.thebirthstore.com.au\/cdn\/shop\/files\/mini-me-hydramama-651803.webp?v=1732378254","width":1445},{"alt":"Mini + Me Hydramama - The Birth Store - Mini + Me","id":27930820018365,"position":18,"preview_image":{"aspect_ratio":1.0,"height":700,"width":700,"src":"\/\/www.thebirthstore.com.au\/cdn\/shop\/files\/mini-me-hydramama-908370.webp?v=1732626991"},"aspect_ratio":1.0,"height":700,"media_type":"image","src":"\/\/www.thebirthstore.com.au\/cdn\/shop\/files\/mini-me-hydramama-908370.webp?v=1732626991","width":700},{"alt":"Mini + Me Hydramama - The Birth Store - Mini + Me","id":28045888913597,"position":19,"preview_image":{"aspect_ratio":1.0,"height":1080,"width":1080,"src":"\/\/www.thebirthstore.com.au\/cdn\/shop\/files\/mini-me-hydramama-611420.webp?v=1734946846"},"aspect_ratio":1.0,"height":1080,"media_type":"image","src":"\/\/www.thebirthstore.com.au\/cdn\/shop\/files\/mini-me-hydramama-611420.webp?v=1734946846","width":1080},{"alt":null,"id":28045193511101,"position":20,"preview_image":{"aspect_ratio":1.0,"height":1080,"width":1080,"src":"\/\/www.thebirthstore.com.au\/cdn\/shop\/files\/Passionfruit_Orange.webp?v=1734933927"},"aspect_ratio":1.0,"height":1080,"media_type":"image","src":"\/\/www.thebirthstore.com.au\/cdn\/shop\/files\/Passionfruit_Orange.webp?v=1734933927","width":1080},{"alt":"Mini + Me Hydramama - The Birth Store - Mini + Me","id":28045888946365,"position":21,"preview_image":{"aspect_ratio":1.0,"height":1680,"width":1680,"src":"\/\/www.thebirthstore.com.au\/cdn\/shop\/files\/mini-me-hydramama-115601.webp?v=1734946846"},"aspect_ratio":1.0,"height":1680,"media_type":"image","src":"\/\/www.thebirthstore.com.au\/cdn\/shop\/files\/mini-me-hydramama-115601.webp?v=1734946846","width":1680},{"alt":"Mini + Me Hydramama - The Birth Store - Mini + Me","id":28045888979133,"position":22,"preview_image":{"aspect_ratio":1.0,"height":1680,"width":1680,"src":"\/\/www.thebirthstore.com.au\/cdn\/shop\/files\/mini-me-hydramama-962335.webp?v=1734946846"},"aspect_ratio":1.0,"height":1680,"media_type":"image","src":"\/\/www.thebirthstore.com.au\/cdn\/shop\/files\/mini-me-hydramama-962335.webp?v=1734946846","width":1680},{"alt":"Mini + Me Hydramama - The Birth Store - Mini + Me","id":29991211434173,"position":23,"preview_image":{"aspect_ratio":1.0,"height":1080,"width":1080,"src":"\/\/www.thebirthstore.com.au\/cdn\/shop\/files\/mini-me-hydramama-9530031.png?v=1762143776"},"aspect_ratio":1.0,"height":1080,"media_type":"image","src":"\/\/www.thebirthstore.com.au\/cdn\/shop\/files\/mini-me-hydramama-9530031.png?v=1762143776","width":1080},{"alt":"Mini + Me Hydramama - The Birth Store - Mini + Me","id":29991214710973,"position":24,"preview_image":{"aspect_ratio":1.0,"height":1080,"width":1080,"src":"\/\/www.thebirthstore.com.au\/cdn\/shop\/files\/mini-me-hydramama-6807804.png?v=1762143776"},"aspect_ratio":1.0,"height":1080,"media_type":"image","src":"\/\/www.thebirthstore.com.au\/cdn\/shop\/files\/mini-me-hydramama-6807804.png?v=1762143776","width":1080},{"alt":"Mini + Me Hydramama - The Birth Store - Mini + Me","id":29991213105341,"position":25,"preview_image":{"aspect_ratio":1.0,"height":1080,"width":1080,"src":"\/\/www.thebirthstore.com.au\/cdn\/shop\/files\/mini-me-hydramama-7128187.png?v=1762143776"},"aspect_ratio":1.0,"height":1080,"media_type":"image","src":"\/\/www.thebirthstore.com.au\/cdn\/shop\/files\/mini-me-hydramama-7128187.png?v=1762143776","width":1080},{"alt":"Mini + Me Hydramama - The Birth Store - Mini + Me","id":29991218905277,"position":26,"preview_image":{"aspect_ratio":1.0,"height":1080,"width":1080,"src":"\/\/www.thebirthstore.com.au\/cdn\/shop\/files\/mini-me-hydramama-5447464.png?v=1762143777"},"aspect_ratio":1.0,"height":1080,"media_type":"image","src":"\/\/www.thebirthstore.com.au\/cdn\/shop\/files\/mini-me-hydramama-5447464.png?v=1762143777","width":1080},{"alt":"Mini + Me Hydramama - The Birth Store - Mini + Me","id":29991214284989,"position":27,"preview_image":{"aspect_ratio":1.0,"height":1080,"width":1080,"src":"\/\/www.thebirthstore.com.au\/cdn\/shop\/files\/mini-me-hydramama-5259142.png?v=1762143777"},"aspect_ratio":1.0,"height":1080,"media_type":"image","src":"\/\/www.thebirthstore.com.au\/cdn\/shop\/files\/mini-me-hydramama-5259142.png?v=1762143777","width":1080},{"alt":"Mini + Me Hydramama - The Birth Store - Mini + Me","id":29991212155069,"position":28,"preview_image":{"aspect_ratio":1.0,"height":1080,"width":1080,"src":"\/\/www.thebirthstore.com.au\/cdn\/shop\/files\/mini-me-hydramama-4894441.png?v=1762143777"},"aspect_ratio":1.0,"height":1080,"media_type":"image","src":"\/\/www.thebirthstore.com.au\/cdn\/shop\/files\/mini-me-hydramama-4894441.png?v=1762143777","width":1080},{"alt":"Mini + Me Hydramama - The Birth Store - Mini + Me","id":29991215497405,"position":29,"preview_image":{"aspect_ratio":1.0,"height":1080,"width":1080,"src":"\/\/www.thebirthstore.com.au\/cdn\/shop\/files\/mini-me-hydramama-9357362.png?v=1762143778"},"aspect_ratio":1.0,"height":1080,"media_type":"image","src":"\/\/www.thebirthstore.com.au\/cdn\/shop\/files\/mini-me-hydramama-9357362.png?v=1762143778","width":1080},{"alt":"Mini + Me Hydramama - The Birth Store - Mini + Me","id":29991217725629,"position":30,"preview_image":{"aspect_ratio":1.0,"height":1080,"width":1080,"src":"\/\/www.thebirthstore.com.au\/cdn\/shop\/files\/mini-me-hydramama-3590130.png?v=1762143778"},"aspect_ratio":1.0,"height":1080,"media_type":"image","src":"\/\/www.thebirthstore.com.au\/cdn\/shop\/files\/mini-me-hydramama-3590130.png?v=1762143778","width":1080},{"alt":"Mini + Me Hydramama - The Birth Store - Mini + Me","id":31321970802877,"position":31,"preview_image":{"aspect_ratio":1.0,"height":1000,"width":1000,"src":"\/\/www.thebirthstore.com.au\/cdn\/shop\/files\/mini-me-hydramama-7796965.png?v=1778063525"},"aspect_ratio":1.0,"height":1000,"media_type":"image","src":"\/\/www.thebirthstore.com.au\/cdn\/shop\/files\/mini-me-hydramama-7796965.png?v=1778063525","width":1000}],"requires_selling_plan":false,"selling_plan_groups":[],"content":"\u003ch1 class=\"text-left margin-b-20 col8 black\"\u003eHydramama®\u003c\/h1\u003e\n\u003ch2 class=\"text-left margin-b-20 primary\"\u003eSay Hello to your Hydration Hero\u003cspan\u003e\u003c\/span\u003e\n\u003c\/h2\u003e\n\u003cp dir=\"ltr\"\u003e\u003cspan\u003eHydramama is a zero sugar hydration drink made with Sodium, Potassium, Magnesium, Vitamin B6, Vitamin C and Methylated Folate. Designed with expecting and new parents in mind, from pre-conception right through to postpartum and beyond.\u003c\/span\u003e\u003c\/p\u003e\n\u003cp dir=\"ltr\"\u003e\u003cspan\u003e\u003cbr\u003e\u003c\/span\u003e\u003cspan\u003eCreated by a mum who’s been there, and backed by midwives.\u003c\/span\u003e\u003c\/p\u003e\n\u003cp\u003e\u003cb\u003e\u003cbr\u003e\u003c\/b\u003e\u003c\/p\u003e\n\u003ch3 dir=\"ltr\"\u003e\n\u003cspan\u003eDescription \/ Why it is great:\u003c\/span\u003e\u003cb\u003e\u003c\/b\u003e\n\u003c\/h3\u003e\n\u003cp dir=\"ltr\"\u003e\u003cspan\u003eHydramama is a formulated beverage designed with expecting and new parents in mind, from pre-conception right through to postpartum and beyond.\u003c\/span\u003e\u003cb\u003e\u003c\/b\u003e\u003c\/p\u003e\n\u003cp dir=\"ltr\"\u003e\u003cspan\u003eFormulated with Magnesium, Sodium, Potassium, Vitamin C, Vitamin B6 and bioavailable Methylated Folate, and available in 10 delicious flavours, it’s simple to mix and easy to love. \u003c\/span\u003e\u003cb\u003e\u003c\/b\u003e\u003c\/p\u003e\n\u003cp dir=\"ltr\"\u003e\u003cspan\u003e🥇 CLEAN + CONSCIOUS AWARDS 2024: Gold in the \"Best Women's Health Product\" category.\u003c\/span\u003e\u003c\/p\u003e\n\u003cp dir=\"ltr\"\u003e\u003cspan\u003e🥇 BOUNTY BABY AWARDS 2025: Gold Medal in \"Best Product or Service for Mum\" category.\u003c\/span\u003e\u003c\/p\u003e\n\u003cp dir=\"ltr\"\u003e\u003cspan\u003e🥈 BOUNTY BABY AWARDS 2025: Silver Medal in \"Best Vitamin or Supplement for Mum\" category.\u003c\/span\u003e\u003c\/p\u003e\n\u003cp dir=\"ltr\"\u003e\u003cspan\u003e🥈 BOUNTY BABY AWARDS 2024: Silver Medal in \"Best Vitamin or Supplement for Mum\" category.\u003c\/span\u003e\u003c\/p\u003e\n\u003cp dir=\"ltr\"\u003e\u003cspan\u003e🥉 BOUNTY BABY AWARDS 2024\" Bronze Medal in \"Best Product or Service for Mum\" category.\u003c\/span\u003e\u003c\/p\u003e\n\u003cp\u003e\u003cb\u003e\u003cbr\u003e\u003c\/b\u003e\u003c\/p\u003e\n\u003ch3 dir=\"ltr\"\u003e\u003cspan\u003eWhy Hydramama?\u003c\/span\u003e\u003c\/h3\u003e\n\u003cp dir=\"ltr\"\u003e\u003cspan\u003eClean hydration support, every day. Some days, water just doesn't cut it. Designed with real parents at the centre, Hydramama is a great-tasting, sugar-free hydration drink, simple to use and make a part of your daily routine.\u003c\/span\u003e\u003cb\u003e\u003c\/b\u003e\u003c\/p\u003e\n\u003cp dir=\"ltr\"\u003e\u003cspan\u003eHydramama is carefully formulated with the nutritional needs of women in mind, a true hydration support for motherhood. Suitable for use during pregnancy, while breastfeeding, and for the whole family. \u003c\/span\u003e\u003c\/p\u003e\n\u003cp\u003e\u003cb\u003e\u003cbr\u003e\u003c\/b\u003e\u003c\/p\u003e\n\u003ch3 dir=\"ltr\"\u003e\u003cspan\u003eFormulated with: \u003c\/span\u003e\u003c\/h3\u003e\n\u003cul\u003e\n\u003cli dir=\"ltr\" aria-level=\"1\"\u003e\n\u003cp dir=\"ltr\" role=\"presentation\"\u003e\u003cspan\u003eMagnesium + sodium + potassium: magnesium supports electrolyte balance and nerve and muscle function.\u003c\/span\u003e\u003c\/p\u003e\n\u003c\/li\u003e\n\u003cli dir=\"ltr\" aria-level=\"1\"\u003e\n\u003cp dir=\"ltr\" role=\"presentation\"\u003e\u003cspan\u003eMethylated Folate \u0026amp; Vitamin B6: containing a bioavailable source of folate alongside vitamin B6, nutrients involved in energy metabolism and general wellness.\u003c\/span\u003e\u003c\/p\u003e\n\u003c\/li\u003e\n\u003cli dir=\"ltr\" aria-level=\"1\"\u003e\n\u003cp dir=\"ltr\" role=\"presentation\"\u003e\u003cspan\u003eVitamin C: helps to reduce tiredness and fatigue and support immunity.\u003c\/span\u003e\u003c\/p\u003e\n\u003c\/li\u003e\n\u003c\/ul\u003e\n\u003cp\u003e\u003cb\u003e\u003cbr\u003e\u003c\/b\u003e\u003c\/p\u003e\n\u003cp dir=\"ltr\"\u003e\u003cspan\u003eZero sugar, no artificial colours, full of flavour. The Hydramama range offers clean, refreshing hydration support.\u003c\/span\u003e\u003cb\u003e\u003c\/b\u003e\u003c\/p\u003e\n\u003cp dir=\"ltr\"\u003e\u003cspan\u003eHydramama is proudly Endorsed by the Australian College of Midwives, and designed to support parents from pre-conception to postpartum and beyond. \u003c\/span\u003e\u003c\/p\u003e\n\u003cp\u003e\u003cb\u003e\u003cbr\u003e\u003c\/b\u003e\u003c\/p\u003e\n\u003ch3 dir=\"ltr\"\u003e\u003cspan\u003eHow to Use\u003c\/span\u003e\u003c\/h3\u003e\n\u003cp dir=\"ltr\"\u003e\u003cspan\u003eMix one sachet (8g) into 250-600mL of cold water. Enjoy as required. Suitable for pregnancy, breastfeeding and for children, following advice from your healthcare professional.\u003c\/span\u003e\u003cb\u003e\u003c\/b\u003e\u003c\/p\u003e\n\u003cp dir=\"ltr\"\u003e \u003c\/p\u003e\n\u003ch3 dir=\"ltr\"\u003e\u003cspan\u003eWhat’s Inside Hydramama?\u003c\/span\u003e\u003c\/h3\u003e\n\u003ch5 dir=\"ltr\"\u003e\u003cspan\u003eMagnesium + Minerals (Sodium + Potassium) \u003c\/span\u003e\u003c\/h5\u003e\n\u003cp dir=\"ltr\"\u003e\u003cspan\u003eMagnesium supports electrolyte balance, as well as nerve and muscle function. It also contributes to a reduction of tiredness and fatigue and supports psychological function.\u003c\/span\u003e\u003cb\u003e\u003c\/b\u003e\u003c\/p\u003e\n\u003ch5 dir=\"ltr\"\u003e\u003cspan\u003eVitamin C\u003c\/span\u003e\u003c\/h5\u003e\n\u003cp dir=\"ltr\"\u003e\u003cspan\u003eVitamin C contributes to energy metabolism, immune system function, and connective tissue function. It also contributes to a reduction of tiredness and fatigue.\u003c\/span\u003e\u003cb\u003e\u003c\/b\u003e\u003c\/p\u003e\n\u003ch5 dir=\"ltr\"\u003e\u003cspan\u003eVitamin B6\u003c\/span\u003e\u003c\/h5\u003e\n\u003cp dir=\"ltr\"\u003e\u003cspan\u003eVitamin B6 contributes to normal energy metabolism, nervous system function, red blood cell formation, and the regulation of hormonal activity.\u003c\/span\u003e\u003cb\u003e\u003c\/b\u003e\u003c\/p\u003e\n\u003ch5 dir=\"ltr\"\u003e\u003cspan\u003eBioavailable Methylated Folate\u003c\/span\u003e\u003c\/h5\u003e\n\u003cp dir=\"ltr\"\u003e\u003cspan\u003eContains bioavailable folate (50µg per serve, 25% RDI). Folate contributes to maternal tissue growth during pregnancy, normal blood formation, and a reduction of tiredness and fatigue.\u003c\/span\u003e\u003c\/p\u003e\n\u003cp\u003e\u003cb\u003e\u003cbr\u003e\u003c\/b\u003e\u003c\/p\u003e\n\u003cp dir=\"ltr\"\u003e\u003cem\u003e*Please note: Hydramama is designed to complement a balanced diet and is not intended as a replacement for prenatal vitamins.\u003c\/em\u003e\u003c\/p\u003e\n\u003cp\u003e\u003cb\u003e\u003cbr\u003e\u003c\/b\u003e\u003c\/p\u003e\n\u003ch3 dir=\"ltr\"\u003e\u003cspan\u003eIngredients:\u003c\/span\u003e\u003c\/h3\u003e\n\u003cp dir=\"ltr\"\u003e\u003cspan\u003eNatural Sweetener (Erythritol), Mineral Salts (Sodium Chloride, Potassium Phosphate, Magnesium Glycinate, Sodium Citrate), Food Acid (Citric), Natural Flavours, Natural Colour, Vitamins [Ascorbic Acid, Pyridoxine Hydrochloride (Vitamin B6), L-Methyl Folate Calcium (Vitamin B9)].\u003c\/span\u003e\u003cb\u003e\u003c\/b\u003e\u003c\/p\u003e\n\u003cp dir=\"ltr\"\u003e\u003cspan\u003eFormulated beverage when made up as per instruction. This product should be consumed alongside a nutritious diet. Store below 25°C in a cool dry place, away from direct sunlight.\u003c\/span\u003e\u003c\/p\u003e\n\u003cp dir=\"ltr\"\u003e\u003cspan\u003eHydramama is a formulated beverage when prepared as directed, made in accordance with the Food Standards Code (FSANZ) for Australia and New Zealand. It is intended to be enjoyed alongside a balanced diet. If you are pregnant or breastfeeding, considering use for a child, have any underlying health conditions, take medications or supplements, consult a healthcare professional before use.\u003c\/span\u003e\u003c\/p\u003e"},"options":[{"name":"Flavour","position":1,"values":["Blackcurrant","Lemonade","Cola","Watermelon + Lime","Passionfruit + Orange","Apple + Ginger","Peach Iced Tea","Tropical","Mixed Berry"]}],"custom_metafields":{},"metafields":{"badge":"\u003cdiv style='display:none' class='jdgm-prev-badge' data-average-rating='5.00' data-number-of-reviews='1' data-number-of-questions='0'\u003e \u003cspan class='jdgm-prev-badge__stars' data-score='5.00' tabindex='0' aria-label='5.00 stars' role='button'\u003e \u003cspan class='jdgm-star jdgm--on'\u003e\u003c\/span\u003e\u003cspan class='jdgm-star jdgm--on'\u003e\u003c\/span\u003e\u003cspan class='jdgm-star jdgm--on'\u003e\u003c\/span\u003e\u003cspan class='jdgm-star jdgm--on'\u003e\u003c\/span\u003e\u003cspan class='jdgm-star jdgm--on'\u003e\u003c\/span\u003e \u003c\/span\u003e \u003cspan class='jdgm-prev-badge__text'\u003e 1 review \u003c\/span\u003e \u003c\/div\u003e","widget":"\u003cdiv class='jdgm-rev-widg' data-updated-at='2026-03-25T11:50:24Z' data-average-rating='5.00' data-number-of-reviews='1' data-number-of-questions='0' data-image-url='https:\/\/cdn.shopify.com\/s\/files\/1\/0527\/3393\/5805\/files\/mini-me-hydramama-978042.jpg?v=1732461065'\u003e \u003cstyle class='jdgm-temp-hiding-style'\u003e.jdgm-rev-widg{ display: none }\u003c\/style\u003e \u003cdiv class='jdgm-rev-widg__header'\u003e \u003ch2 class='jdgm-rev-widg__title'\u003eCustomer Reviews\u003c\/h2\u003e \u003cdiv class='jdgm-rev-widg__summary'\u003e \u003cdiv class='jdgm-rev-widg__summary-stars' aria-label='Average rating is 5.00 stars' role='img'\u003e \u003cspan class='jdgm-star jdgm--on'\u003e\u003c\/span\u003e\u003cspan class='jdgm-star jdgm--on'\u003e\u003c\/span\u003e\u003cspan class='jdgm-star jdgm--on'\u003e\u003c\/span\u003e\u003cspan class='jdgm-star jdgm--on'\u003e\u003c\/span\u003e\u003cspan class='jdgm-star jdgm--on'\u003e\u003c\/span\u003e \u003c\/div\u003e \u003cdiv class='jdgm-rev-widg__summary-text'\u003eBased on 1 review\u003c\/div\u003e \u003c\/div\u003e \u003ca style='display: none' href='#' class='jdgm-write-rev-link' role='button'\u003eWrite a review\u003c\/a\u003e \u003cdiv class='jdgm-histogram jdgm-temp-hidden'\u003e \u003cdiv class='jdgm-histogram__row' data-rating='5' data-frequency='1' data-percentage='100'\u003e \u003cdiv class='jdgm-histogram__star' role='button' aria-label=\"100% (1) reviews with 5 star rating\" tabindex='0' \u003e\u003cspan class='jdgm-star jdgm--on'\u003e\u003c\/span\u003e\u003cspan class='jdgm-star jdgm--on'\u003e\u003c\/span\u003e\u003cspan class='jdgm-star jdgm--on'\u003e\u003c\/span\u003e\u003cspan class='jdgm-star jdgm--on'\u003e\u003c\/span\u003e\u003cspan class='jdgm-star jdgm--on'\u003e\u003c\/span\u003e\u003c\/div\u003e \u003cdiv class='jdgm-histogram__bar'\u003e \u003cdiv class='jdgm-histogram__bar-content' style='width: 100%;'\u003e \u003c\/div\u003e \u003c\/div\u003e \u003cdiv class='jdgm-histogram__percentage'\u003e100%\u003c\/div\u003e \u003cdiv class='jdgm-histogram__frequency'\u003e(1)\u003c\/div\u003e \u003c\/div\u003e \u003cdiv class='jdgm-histogram__row' data-rating='4' data-frequency='0' data-percentage='0'\u003e \u003cdiv class='jdgm-histogram__star' role='button' aria-label=\"0% (0) reviews with 4 star rating\" tabindex='0' \u003e\u003cspan class='jdgm-star jdgm--on'\u003e\u003c\/span\u003e\u003cspan class='jdgm-star jdgm--on'\u003e\u003c\/span\u003e\u003cspan class='jdgm-star jdgm--on'\u003e\u003c\/span\u003e\u003cspan class='jdgm-star jdgm--on'\u003e\u003c\/span\u003e\u003cspan class='jdgm-star jdgm--off'\u003e\u003c\/span\u003e\u003c\/div\u003e \u003cdiv class='jdgm-histogram__bar'\u003e \u003cdiv class='jdgm-histogram__bar-content' style='width: 0%;'\u003e \u003c\/div\u003e \u003c\/div\u003e \u003cdiv class='jdgm-histogram__percentage'\u003e0%\u003c\/div\u003e \u003cdiv class='jdgm-histogram__frequency'\u003e(0)\u003c\/div\u003e \u003c\/div\u003e \u003cdiv class='jdgm-histogram__row' data-rating='3' data-frequency='0' data-percentage='0'\u003e \u003cdiv class='jdgm-histogram__star' role='button' aria-label=\"0% (0) reviews with 3 star rating\" tabindex='0' \u003e\u003cspan class='jdgm-star jdgm--on'\u003e\u003c\/span\u003e\u003cspan class='jdgm-star jdgm--on'\u003e\u003c\/span\u003e\u003cspan class='jdgm-star jdgm--on'\u003e\u003c\/span\u003e\u003cspan class='jdgm-star jdgm--off'\u003e\u003c\/span\u003e\u003cspan class='jdgm-star jdgm--off'\u003e\u003c\/span\u003e\u003c\/div\u003e \u003cdiv class='jdgm-histogram__bar'\u003e \u003cdiv class='jdgm-histogram__bar-content' style='width: 0%;'\u003e \u003c\/div\u003e \u003c\/div\u003e \u003cdiv class='jdgm-histogram__percentage'\u003e0%\u003c\/div\u003e \u003cdiv class='jdgm-histogram__frequency'\u003e(0)\u003c\/div\u003e \u003c\/div\u003e \u003cdiv class='jdgm-histogram__row' data-rating='2' data-frequency='0' data-percentage='0'\u003e \u003cdiv class='jdgm-histogram__star' role='button' aria-label=\"0% (0) reviews with 2 star rating\" tabindex='0' \u003e\u003cspan class='jdgm-star jdgm--on'\u003e\u003c\/span\u003e\u003cspan class='jdgm-star jdgm--on'\u003e\u003c\/span\u003e\u003cspan class='jdgm-star jdgm--off'\u003e\u003c\/span\u003e\u003cspan class='jdgm-star jdgm--off'\u003e\u003c\/span\u003e\u003cspan class='jdgm-star jdgm--off'\u003e\u003c\/span\u003e\u003c\/div\u003e \u003cdiv class='jdgm-histogram__bar'\u003e \u003cdiv class='jdgm-histogram__bar-content' style='width: 0%;'\u003e \u003c\/div\u003e \u003c\/div\u003e \u003cdiv class='jdgm-histogram__percentage'\u003e0%\u003c\/div\u003e \u003cdiv class='jdgm-histogram__frequency'\u003e(0)\u003c\/div\u003e \u003c\/div\u003e \u003cdiv class='jdgm-histogram__row' data-rating='1' data-frequency='0' data-percentage='0'\u003e \u003cdiv class='jdgm-histogram__star' role='button' aria-label=\"0% (0) reviews with 1 star rating\" tabindex='0' \u003e\u003cspan class='jdgm-star jdgm--on'\u003e\u003c\/span\u003e\u003cspan class='jdgm-star jdgm--off'\u003e\u003c\/span\u003e\u003cspan class='jdgm-star jdgm--off'\u003e\u003c\/span\u003e\u003cspan class='jdgm-star jdgm--off'\u003e\u003c\/span\u003e\u003cspan class='jdgm-star jdgm--off'\u003e\u003c\/span\u003e\u003c\/div\u003e \u003cdiv class='jdgm-histogram__bar'\u003e \u003cdiv class='jdgm-histogram__bar-content' style='width: 0%;'\u003e \u003c\/div\u003e \u003c\/div\u003e \u003cdiv class='jdgm-histogram__percentage'\u003e0%\u003c\/div\u003e \u003cdiv class='jdgm-histogram__frequency'\u003e(0)\u003c\/div\u003e \u003c\/div\u003e \u003cdiv class='jdgm-histogram__row jdgm-histogram__clear-filter' data-rating=null tabindex='0'\u003e\u003c\/div\u003e \u003c\/div\u003e \u003cdiv class='jdgm-rev-widg__sort-wrapper'\u003e\u003c\/div\u003e \u003c\/div\u003e \u003cdiv class='jdgm-rev-widg__body'\u003e \u003cdiv class='jdgm-rev-widg__reviews'\u003e\u003cdiv class='jdgm-rev jdgm-divider-top' data-verified-buyer='true' data-review-id='fb8761c7-a9d7-47d2-b424-872858d59b68' data-review-language='' data-product-title='Mini + Me Hydramama' data-product-url='\/products\/mini-me-hydramama' data-thumb-up-count='0' data-thumb-down-count='0'\u003e \u003cdiv class='jdgm-rev__header'\u003e \u003cdiv class='jdgm-rev__icon' \u003e R \u003c\/div\u003e \u003cspan class='jdgm-rev__rating' data-score='5' tabindex='0' aria-label='5 star review' role='img'\u003e \u003cspan class='jdgm-star jdgm--on'\u003e\u003c\/span\u003e\u003cspan class='jdgm-star jdgm--on'\u003e\u003c\/span\u003e\u003cspan class='jdgm-star jdgm--on'\u003e\u003c\/span\u003e\u003cspan class='jdgm-star jdgm--on'\u003e\u003c\/span\u003e\u003cspan class='jdgm-star jdgm--on'\u003e\u003c\/span\u003e \u003c\/span\u003e \u003cspan class='jdgm-rev__timestamp jdgm-spinner' data-content='2025-08-20 06:33:19 UTC'\u003e\u003c\/span\u003e \u003cdiv class='jdgm-rev__br'\u003e\u003c\/div\u003e \u003cspan class='jdgm-rev__buyer-badge-wrapper'\u003e \u003cspan class='jdgm-rev__buyer-badge'\u003e\u003c\/span\u003e \u003c\/span\u003e \u003cspan class='jdgm-rev__author-wrapper'\u003e \u003cspan class='jdgm-rev__author'\u003eRuhamah Tennant\u003c\/span\u003e \u003cspan class='jdgm-rev__location' \u003e \u003c\/span\u003e \u003c\/span\u003e \u003c\/div\u003e \u003cdiv class='jdgm-rev__content'\u003e \u003cdiv class='jdgm-rev__custom-form'\u003e \u003c\/div\u003e \u003cb class='jdgm-rev__title'\u003e\u003c\/b\u003e \u003cdiv class='jdgm-rev__body'\u003e\u003cp\u003eMini + Me Hydramama\u003c\/p\u003e\u003c\/div\u003e \u003cdiv class='jdgm-rev__pics'\u003e \u003c\/div\u003e \u003cdiv class='jdgm-rev__vids'\u003e \u003c\/div\u003e \u003cdiv class='jdgm-rev__transparency-badge-wrapper'\u003e \u003cdiv class='jdgm-rev__transparency-badge' data-badge-type=review_collected_via_store_invitation\u003e\u003c\/div\u003e \u003c\/div\u003e \u003c\/div\u003e \u003cdiv class='jdgm-rev__actions'\u003e \u003cdiv class='jdgm-rev__social'\u003e\u003c\/div\u003e \u003cdiv class='jdgm-rev__votes'\u003e\u003c\/div\u003e \u003c\/div\u003e \u003cdiv class='jdgm-rev__reply'\u003e \u003cdiv class='jdgm-rev__replier-wrapper'\u003e \u003cb class='jdgm-rev__replier'\u003e\u003c\/b\u003e \u003c\/div\u003e \u003cdiv class='jdgm-rev__reply-content'\u003e\u003cp\u003eWe’re so glad you chose the Mini + Me Hydramama, Ruhamah. ❤️ Thank you for your support, we hope you loved it.\u003c\/p\u003e\u003c\/div\u003e \u003c\/div\u003e \u003c\/div\u003e\u003c\/div\u003e \u003cdiv class='jdgm-paginate' data-per-page='10' data-url='https:\/\/api.judge.me\/reviews\/reviews_for_widget' style=\"display: none;\"\u003e\u003c\/div\u003e \u003c\/div\u003e \u003cdiv class='jdgm-rev-widg__paginate-spinner-wrapper'\u003e \u003cdiv class='jdgm-spinner'\u003e\u003c\/div\u003e \u003c\/div\u003e \u003c\/div\u003e"},"collections":[{"id":281356533949,"handle":"baby-shower-gifts","title":"Baby Shower Gifts - Mum","updated_at":"2026-06-12T19:10:25+08:00","body_html":"\u003cp\u003eLooking for a unique baby shower gift? Or an all-in-one bundle pack to suit all your needs? We've got just the thing!\u003c\/p\u003e","published_at":"2021-12-06T13:43:56+08:00","sort_order":"best-selling","template_suffix":"baby-shower-gifts","disjunctive":true,"rules":[{"column":"tag","relation":"equals","condition":"Baby Shower Gifts - Mum"},{"column":"tag","relation":"equals","condition":"Gift Card"}],"published_scope":"global","image":{"created_at":"2024-05-06T11:59:28+08:00","alt":"Baby Shower Gifts - The Birth Store","width":1200,"height":1800,"src":"\/\/www.thebirthstore.com.au\/cdn\/shop\/collections\/baby-shower-gifts-401770.jpg?v=1761791272"}},{"id":281712427197,"handle":"breastfeeding","title":"Breastfeeding","updated_at":"2026-06-12T19:10:26+08:00","body_html":"","published_at":"2021-12-20T14:19:33+08:00","sort_order":"best-selling","template_suffix":"breastfeeding-collection","disjunctive":false,"rules":[{"column":"tag","relation":"equals","condition":"Breastfeeding"}],"published_scope":"global","image":{"created_at":"2024-05-06T11:59:34+08:00","alt":"Breastfeeding - The Birth Store","width":620,"height":635,"src":"\/\/www.thebirthstore.com.au\/cdn\/shop\/collections\/breastfeeding-793872.jpg?v=1714967974"}},{"id":261657460925,"handle":"buy","title":"Buy","updated_at":"2026-06-12T19:10:26+08:00","body_html":"\u003cp\u003eBrowse all of our pregnancy, labour \u0026amp; birth, postpartum and baby essentials here.\u003cbr\u003e\u003c\/p\u003e\n\u003cp\u003e\u003cspan\u003eYou can even buy now and pay later with Afterpay!\u003c\/span\u003e\u003c\/p\u003e","published_at":"2021-03-10T12:05:31+08:00","sort_order":"best-selling","template_suffix":"shop-all-collection","disjunctive":false,"rules":[{"column":"title","relation":"not_contains","condition":"Hire"}],"published_scope":"global","image":{"created_at":"2024-05-06T11:59:42+08:00","alt":"Buy - The Birth Store","width":2048,"height":2048,"src":"\/\/www.thebirthstore.com.au\/cdn\/shop\/collections\/buy-964856.jpg?v=1714967982"}},{"id":337429201085,"handle":"hospital-bag","title":"Hospital Bag","updated_at":"2026-06-12T19:10:26+08:00","body_html":"","published_at":"2026-06-03T11:36:29+08:00","sort_order":"most-relevant","template_suffix":"","disjunctive":false,"rules":[{"column":"tag","relation":"equals","condition":"Hospital Bag"}],"published_scope":"global"},{"id":261658214589,"handle":"labour-and-birth-buy","title":"Labour \u0026 Birth","updated_at":"2026-06-12T19:10:26+08:00","body_html":"\u003cp\u003eWe stock a large range of Elle TENS machines for you to buy for your labour and birth. We stock the Elle TENS, Elle TENS 2 and Elle TENS Plus, we also hire these out if that suits you better, please head over to our TENS machine hire page for more information. We ship Australia wide or have options for local delivery\/pick-up in Perth if you are due ASAP. We also stock other items for your labour and birth. \u003c\/p\u003e\n\u003cp\u003eLooking for something we don't currently stock? Please reach out and let us know.\u003c\/p\u003e\n\u003cp\u003e\u003cspan\u003eYou can even buy now and pay later with Afterpay!\u003c\/span\u003e\u003c\/p\u003e","published_at":"2021-03-10T12:34:43+08:00","sort_order":"best-selling","template_suffix":"labour-birth-collection","disjunctive":false,"rules":[{"column":"tag","relation":"equals","condition":"Birth"}],"published_scope":"global","image":{"created_at":"2024-05-06T12:00:09+08:00","alt":"Labour \u0026 Birth - The Birth Store","width":1080,"height":981,"src":"\/\/www.thebirthstore.com.au\/cdn\/shop\/collections\/labour-birth-342038.jpg?v=1714968009"}},{"id":292919476413,"handle":"lactation-products","title":"Lactation Products","updated_at":"2026-06-12T19:10:26+08:00","body_html":"","published_at":"2023-03-22T12:22:41+08:00","sort_order":"best-selling","template_suffix":"lactation-products-collec","disjunctive":false,"rules":[{"column":"tag","relation":"equals","condition":"Lactation Products"}],"published_scope":"global","image":{"created_at":"2024-05-06T12:00:19+08:00","alt":"Lactation Products - The Birth Store","width":1034,"height":922,"src":"\/\/www.thebirthstore.com.au\/cdn\/shop\/collections\/lactation-products-752907.jpg?v=1714968019"}},{"id":295224836285,"handle":"nausea","title":"Nausea","updated_at":"2026-06-12T19:10:26+08:00","body_html":"","published_at":"2023-11-10T20:47:34+08:00","sort_order":"best-selling","template_suffix":"nausea-collection","disjunctive":false,"rules":[{"column":"tag","relation":"equals","condition":"Nausea"}],"published_scope":"global","image":{"created_at":"2024-05-06T12:00:24+08:00","alt":"Nausea - The Birth Store","width":610,"height":915,"src":"\/\/www.thebirthstore.com.au\/cdn\/shop\/collections\/nausea-404101.jpg?v=1714968024"}},{"id":261658083517,"handle":"post-partum","title":"Postpartum","updated_at":"2026-06-12T19:10:26+08:00","body_html":"\u003cp\u003eShop your postpartum and hospital bag essentials below. Looking for something we don't currently stock? Please reach out and let us know.\u003cbr\u003e\u003c\/p\u003e\n\u003cp\u003e\u003cspan\u003eYou can even buy now and pay later with Afterpay!\u003c\/span\u003e\u003c\/p\u003e","published_at":"2021-03-10T12:33:47+08:00","sort_order":"best-selling","template_suffix":"postpartum-collection","disjunctive":false,"rules":[{"column":"tag","relation":"equals","condition":"Post-Partum"}],"published_scope":"global","image":{"created_at":"2024-05-06T12:00:36+08:00","alt":"Postpartum - The Birth Store","width":611,"height":702,"src":"\/\/www.thebirthstore.com.au\/cdn\/shop\/collections\/postpartum-150119.jpg?v=1714968037"}},{"id":261658149053,"handle":"pregnancy-and-maternity-products","title":"Pregnancy","updated_at":"2026-06-12T19:10:26+08:00","body_html":"\u003cp\u003eShop your pregnancy essentials below. Looking for something we don't currently stock? Please reach out and let us know.\u003cbr\u003e\u003c\/p\u003e\n\u003cp\u003e\u003cspan\u003eYou can even buy now and pay later with Afterpay!\u003c\/span\u003e\u003c\/p\u003e","published_at":"2021-03-10T12:34:22+08:00","sort_order":"best-selling","template_suffix":"pregnancy-collection","disjunctive":false,"rules":[{"column":"tag","relation":"equals","condition":"Pregnancy"}],"published_scope":"global","image":{"created_at":"2024-05-06T12:00:40+08:00","alt":"Pregnancy - The Birth Store","width":1024,"height":1536,"src":"\/\/www.thebirthstore.com.au\/cdn\/shop\/collections\/pregnancy-899677.jpg?v=1714968040"}},{"id":295224901821,"handle":"pregnancy-health","title":"Pregnancy Health","updated_at":"2026-06-12T19:10:26+08:00","body_html":"","published_at":"2023-11-10T20:48:51+08:00","sort_order":"best-selling","template_suffix":"swaddles-collection","disjunctive":false,"rules":[{"column":"tag","relation":"equals","condition":"Pregnancy Health"}],"published_scope":"global","image":{"created_at":"2024-05-06T12:00:41+08:00","alt":"Pregnancy Health - The Birth Store","width":608,"height":410,"src":"\/\/www.thebirthstore.com.au\/cdn\/shop\/collections\/pregnancy-health-343983.jpg?v=1714968042"}},{"id":326523846845,"handle":"pregnancy-health-1","updated_at":"2026-06-12T19:10:26+08:00","published_at":"2025-10-30T10:44:54+08:00","sort_order":"best-selling","template_suffix":"","published_scope":"global","title":"Pregnancy Health","body_html":"","image":{"created_at":"2025-11-20T21:33:56+08:00","alt":"Pregnancy Health - The Birth Store","width":522,"height":525,"src":"\/\/www.thebirthstore.com.au\/cdn\/shop\/collections\/pregnancy-health-1617860.jpg?v=1763645636"}},{"id":291456483517,"handle":"shop-all","title":"Shop All - Mum","updated_at":"2026-06-12T19:10:26+08:00","body_html":"","published_at":"2022-12-23T22:04:39+08:00","sort_order":"best-selling","template_suffix":"shop-all-collection","disjunctive":false,"rules":[{"column":"variant_price","relation":"greater_than","condition":"1"},{"column":"title","relation":"not_contains","condition":"Batteries"},{"column":"tag","relation":"equals","condition":"Mum"}],"published_scope":"global","image":{"created_at":"2024-05-06T12:00:54+08:00","alt":"Shop All - The Birth Store","width":1365,"height":2048,"src":"\/\/www.thebirthstore.com.au\/cdn\/shop\/collections\/shop-all-693176.jpg?v=1714968055"}}]}
{"item":{"id":7137010286781,"title":"Silverette Nursing Cups","handle":"silverette-nursing-cups","description":"\u003cp data-mce-fragment=\"1\"\u003eMade from 925 silver with silver proven to have antimicrobial, anti-inflammatory, anti-fungal and antibacterial benefits to prevent and repair the nipple skin at all stages of the breastfeeding or pumping journey.\u003c\/p\u003e\n\u003cp data-mce-fragment=\"1\"\u003eEasy to use. The cups are designed to sit comfortably on the breasts. Worn in between feeds, the cups will naturally prevent, protect and alleviate soreness, blisters and irritation from the result of breastfeeding or pumping.\u003c\/p\u003e\n\u003cp data-mce-fragment=\"1\"\u003eA perfect choice for those who want an effective and natural way to prevent soreness from breastfeeding or pumping and a perfect gift for those who plan to breastfeed.\u003c\/p\u003e\n\u003cp data-mce-fragment=\"1\"\u003e \u003c\/p\u003e\n\u003cp data-mce-fragment=\"1\"\u003e\u003cimg alt=\"\" src=\"https:\/\/cdn.shopify.com\/s\/files\/1\/0527\/3393\/5805\/files\/Screenshot_2022-01-22_230646_480x480.png?v=1642864030\"\u003e\u003c\/p\u003e\n\u003cp data-mce-fragment=\"1\"\u003e\u003cspan data-mce-fragment=\"1\" mce-data-marked=\"1\"\u003eNot sure which size to choose? \u003c\/span\u003e\u003c\/p\u003e\n\u003cp data-mce-fragment=\"1\"\u003e\u003cspan data-mce-fragment=\"1\" mce-data-marked=\"1\"\u003e\u003cimg alt=\"\" src=\"https:\/\/cdn.shopify.com\/s\/files\/1\/0527\/3393\/5805\/files\/Sizing_Chart_Header_Final_0df84378-aff1-4628-a789-e955d38a53e8_480x480.png?v=1642864085\"\u003e\u003c\/span\u003e\u003c\/p\u003e","published_at":"2022-01-27T13:58:56+08:00","created_at":"2022-01-22T23:11:03+08:00","vendor":"Silverette","type":"","tags":["Baby Shower Gifts - Mum","Breastfeeding","Cracked Nipples","Hospital Bag","Mum"],"price":9100,"price_min":9100,"price_max":11100,"available":true,"price_varies":true,"compare_at_price":null,"compare_at_price_min":0,"compare_at_price_max":0,"compare_at_price_varies":false,"variants":[{"id":41365266301117,"title":"Regular \/ Standard","option1":"Regular","option2":"Standard","option3":null,"sku":"","requires_shipping":true,"taxable":false,"featured_image":{"id":34641031561405,"product_id":7137010286781,"position":5,"created_at":"2024-05-06T12:00:48+08:00","updated_at":"2024-05-06T12:00:48+08:00","alt":"Silverette Nursing Cups - The Birth Store-Silverette","width":2000,"height":2000,"src":"\/\/www.thebirthstore.com.au\/cdn\/shop\/files\/silverette-nursing-cups-759292.jpg?v=1714968048","variant_ids":[41365266301117,41365266333885]},"available":true,"name":"Silverette Nursing Cups - Regular \/ Standard","public_title":"Regular \/ Standard","options":["Regular","Standard"],"price":9100,"weight":29,"compare_at_price":null,"inventory_management":"shopify","barcode":"66301117","featured_media":{"alt":"Silverette Nursing Cups - The Birth Store-Silverette","id":27007600591037,"position":5,"preview_image":{"aspect_ratio":1.0,"height":2000,"width":2000,"src":"\/\/www.thebirthstore.com.au\/cdn\/shop\/files\/silverette-nursing-cups-759292.jpg?v=1714968048"}},"requires_selling_plan":false,"selling_plan_allocations":[],"quantity_rule":{"min":1,"max":null,"increment":1}},{"id":43367635648701,"title":"Regular \/ O-Feel","option1":"Regular","option2":"O-Feel","option3":null,"sku":"","requires_shipping":true,"taxable":false,"featured_image":{"id":34641031725245,"product_id":7137010286781,"position":10,"created_at":"2024-05-06T12:00:48+08:00","updated_at":"2024-05-06T12:00:48+08:00","alt":"Silverette Nursing Cups - The Birth Store-Silverette","width":480,"height":411,"src":"\/\/www.thebirthstore.com.au\/cdn\/shop\/files\/silverette-nursing-cups-719376.jpg?v=1714968048","variant_ids":[43367635648701,43367635681469]},"available":true,"name":"Silverette Nursing Cups - Regular \/ O-Feel","public_title":"Regular \/ O-Feel","options":["Regular","O-Feel"],"price":11100,"weight":29,"compare_at_price":null,"inventory_management":"shopify","barcode":"35648701","featured_media":{"alt":"Silverette Nursing Cups - The Birth Store-Silverette","id":27007600754877,"position":10,"preview_image":{"aspect_ratio":1.168,"height":411,"width":480,"src":"\/\/www.thebirthstore.com.au\/cdn\/shop\/files\/silverette-nursing-cups-719376.jpg?v=1714968048"}},"requires_selling_plan":false,"selling_plan_allocations":[],"quantity_rule":{"min":1,"max":null,"increment":1}},{"id":41365266333885,"title":"Extra Large \/ Standard","option1":"Extra Large","option2":"Standard","option3":null,"sku":"","requires_shipping":true,"taxable":false,"featured_image":{"id":34641031561405,"product_id":7137010286781,"position":5,"created_at":"2024-05-06T12:00:48+08:00","updated_at":"2024-05-06T12:00:48+08:00","alt":"Silverette Nursing Cups - The Birth Store-Silverette","width":2000,"height":2000,"src":"\/\/www.thebirthstore.com.au\/cdn\/shop\/files\/silverette-nursing-cups-759292.jpg?v=1714968048","variant_ids":[41365266301117,41365266333885]},"available":true,"name":"Silverette Nursing Cups - Extra Large \/ Standard","public_title":"Extra Large \/ Standard","options":["Extra Large","Standard"],"price":9100,"weight":29,"compare_at_price":null,"inventory_management":"shopify","barcode":"66333885","featured_media":{"alt":"Silverette Nursing Cups - The Birth Store-Silverette","id":27007600591037,"position":5,"preview_image":{"aspect_ratio":1.0,"height":2000,"width":2000,"src":"\/\/www.thebirthstore.com.au\/cdn\/shop\/files\/silverette-nursing-cups-759292.jpg?v=1714968048"}},"requires_selling_plan":false,"selling_plan_allocations":[],"quantity_rule":{"min":1,"max":null,"increment":1}},{"id":43367635681469,"title":"Extra Large \/ O-Feel","option1":"Extra Large","option2":"O-Feel","option3":null,"sku":"","requires_shipping":true,"taxable":false,"featured_image":{"id":34641031725245,"product_id":7137010286781,"position":10,"created_at":"2024-05-06T12:00:48+08:00","updated_at":"2024-05-06T12:00:48+08:00","alt":"Silverette Nursing Cups - The Birth Store-Silverette","width":480,"height":411,"src":"\/\/www.thebirthstore.com.au\/cdn\/shop\/files\/silverette-nursing-cups-719376.jpg?v=1714968048","variant_ids":[43367635648701,43367635681469]},"available":false,"name":"Silverette Nursing Cups - Extra Large \/ O-Feel","public_title":"Extra Large \/ O-Feel","options":["Extra Large","O-Feel"],"price":11100,"weight":29,"compare_at_price":null,"inventory_management":"shopify","barcode":"35681469","featured_media":{"alt":"Silverette Nursing Cups - The Birth Store-Silverette","id":27007600754877,"position":10,"preview_image":{"aspect_ratio":1.168,"height":411,"width":480,"src":"\/\/www.thebirthstore.com.au\/cdn\/shop\/files\/silverette-nursing-cups-719376.jpg?v=1714968048"}},"requires_selling_plan":false,"selling_plan_allocations":[],"quantity_rule":{"min":1,"max":null,"increment":1}}],"images":["\/\/www.thebirthstore.com.au\/cdn\/shop\/files\/silverette-nursing-cups-830931.jpg?v=1714968048","\/\/www.thebirthstore.com.au\/cdn\/shop\/files\/silverette-nursing-cups-733488.jpg?v=1714968048","\/\/www.thebirthstore.com.au\/cdn\/shop\/files\/silverette-nursing-cups-570935.jpg?v=1714968048","\/\/www.thebirthstore.com.au\/cdn\/shop\/files\/silverette-nursing-cups-811005.jpg?v=1714968048","\/\/www.thebirthstore.com.au\/cdn\/shop\/files\/silverette-nursing-cups-759292.jpg?v=1714968048","\/\/www.thebirthstore.com.au\/cdn\/shop\/files\/silverette-nursing-cups-711606.jpg?v=1714968048","\/\/www.thebirthstore.com.au\/cdn\/shop\/files\/silverette-nursing-cups-591260.jpg?v=1714968048","\/\/www.thebirthstore.com.au\/cdn\/shop\/files\/silverette-nursing-cups-319470.jpg?v=1714968048","\/\/www.thebirthstore.com.au\/cdn\/shop\/files\/silverette-nursing-cups-227150.gif?v=1714968048","\/\/www.thebirthstore.com.au\/cdn\/shop\/files\/silverette-nursing-cups-719376.jpg?v=1714968048"],"featured_image":"\/\/www.thebirthstore.com.au\/cdn\/shop\/files\/silverette-nursing-cups-830931.jpg?v=1714968048","options":["Size","Type"],"media":[{"alt":"Silverette Nursing Cups - The Birth Store-Silverette","id":27007600459965,"position":1,"preview_image":{"aspect_ratio":1.0,"height":867,"width":867,"src":"\/\/www.thebirthstore.com.au\/cdn\/shop\/files\/silverette-nursing-cups-830931.jpg?v=1714968048"},"aspect_ratio":1.0,"height":867,"media_type":"image","src":"\/\/www.thebirthstore.com.au\/cdn\/shop\/files\/silverette-nursing-cups-830931.jpg?v=1714968048","width":867},{"alt":"Silverette Nursing Cups - The Birth Store-Silverette","id":27007600492733,"position":2,"preview_image":{"aspect_ratio":1.246,"height":570,"width":710,"src":"\/\/www.thebirthstore.com.au\/cdn\/shop\/files\/silverette-nursing-cups-733488.jpg?v=1714968048"},"aspect_ratio":1.246,"height":570,"media_type":"image","src":"\/\/www.thebirthstore.com.au\/cdn\/shop\/files\/silverette-nursing-cups-733488.jpg?v=1714968048","width":710},{"alt":"Silverette Nursing Cups - The Birth Store-Silverette","id":27007600525501,"position":3,"preview_image":{"aspect_ratio":2.802,"height":516,"width":1446,"src":"\/\/www.thebirthstore.com.au\/cdn\/shop\/files\/silverette-nursing-cups-570935.jpg?v=1714968048"},"aspect_ratio":2.802,"height":516,"media_type":"image","src":"\/\/www.thebirthstore.com.au\/cdn\/shop\/files\/silverette-nursing-cups-570935.jpg?v=1714968048","width":1446},{"alt":"Silverette Nursing Cups - The Birth Store-Silverette","id":27007600558269,"position":4,"preview_image":{"aspect_ratio":2.857,"height":168,"width":480,"src":"\/\/www.thebirthstore.com.au\/cdn\/shop\/files\/silverette-nursing-cups-811005.jpg?v=1714968048"},"aspect_ratio":2.857,"height":168,"media_type":"image","src":"\/\/www.thebirthstore.com.au\/cdn\/shop\/files\/silverette-nursing-cups-811005.jpg?v=1714968048","width":480},{"alt":"Silverette Nursing Cups - The Birth Store-Silverette","id":27007600591037,"position":5,"preview_image":{"aspect_ratio":1.0,"height":2000,"width":2000,"src":"\/\/www.thebirthstore.com.au\/cdn\/shop\/files\/silverette-nursing-cups-759292.jpg?v=1714968048"},"aspect_ratio":1.0,"height":2000,"media_type":"image","src":"\/\/www.thebirthstore.com.au\/cdn\/shop\/files\/silverette-nursing-cups-759292.jpg?v=1714968048","width":2000},{"alt":"Silverette Nursing Cups - The Birth Store-Silverette","id":27007600623805,"position":6,"preview_image":{"aspect_ratio":1.0,"height":1080,"width":1080,"src":"\/\/www.thebirthstore.com.au\/cdn\/shop\/files\/silverette-nursing-cups-711606.jpg?v=1714968048"},"aspect_ratio":1.0,"height":1080,"media_type":"image","src":"\/\/www.thebirthstore.com.au\/cdn\/shop\/files\/silverette-nursing-cups-711606.jpg?v=1714968048","width":1080},{"alt":"Silverette Nursing Cups - The Birth Store-Silverette","id":27007600656573,"position":7,"preview_image":{"aspect_ratio":1.0,"height":1050,"width":1050,"src":"\/\/www.thebirthstore.com.au\/cdn\/shop\/files\/silverette-nursing-cups-591260.jpg?v=1714968048"},"aspect_ratio":1.0,"height":1050,"media_type":"image","src":"\/\/www.thebirthstore.com.au\/cdn\/shop\/files\/silverette-nursing-cups-591260.jpg?v=1714968048","width":1050},{"alt":"Silverette Nursing Cups - The Birth Store-Silverette","id":27007600689341,"position":8,"preview_image":{"aspect_ratio":1.168,"height":411,"width":480,"src":"\/\/www.thebirthstore.com.au\/cdn\/shop\/files\/silverette-nursing-cups-319470.jpg?v=1714968048"},"aspect_ratio":1.168,"height":411,"media_type":"image","src":"\/\/www.thebirthstore.com.au\/cdn\/shop\/files\/silverette-nursing-cups-319470.jpg?v=1714968048","width":480},{"alt":"Silverette Nursing Cups - The Birth Store-Silverette","id":27007600722109,"position":9,"preview_image":{"aspect_ratio":1.0,"height":480,"width":480,"src":"\/\/www.thebirthstore.com.au\/cdn\/shop\/files\/silverette-nursing-cups-227150.gif?v=1714968048"},"aspect_ratio":1.0,"height":480,"media_type":"image","src":"\/\/www.thebirthstore.com.au\/cdn\/shop\/files\/silverette-nursing-cups-227150.gif?v=1714968048","width":480},{"alt":"Silverette Nursing Cups - The Birth Store-Silverette","id":27007600754877,"position":10,"preview_image":{"aspect_ratio":1.168,"height":411,"width":480,"src":"\/\/www.thebirthstore.com.au\/cdn\/shop\/files\/silverette-nursing-cups-719376.jpg?v=1714968048"},"aspect_ratio":1.168,"height":411,"media_type":"image","src":"\/\/www.thebirthstore.com.au\/cdn\/shop\/files\/silverette-nursing-cups-719376.jpg?v=1714968048","width":480}],"requires_selling_plan":false,"selling_plan_groups":[],"content":"\u003cp data-mce-fragment=\"1\"\u003eMade from 925 silver with silver proven to have antimicrobial, anti-inflammatory, anti-fungal and antibacterial benefits to prevent and repair the nipple skin at all stages of the breastfeeding or pumping journey.\u003c\/p\u003e\n\u003cp data-mce-fragment=\"1\"\u003eEasy to use. The cups are designed to sit comfortably on the breasts. Worn in between feeds, the cups will naturally prevent, protect and alleviate soreness, blisters and irritation from the result of breastfeeding or pumping.\u003c\/p\u003e\n\u003cp data-mce-fragment=\"1\"\u003eA perfect choice for those who want an effective and natural way to prevent soreness from breastfeeding or pumping and a perfect gift for those who plan to breastfeed.\u003c\/p\u003e\n\u003cp data-mce-fragment=\"1\"\u003e \u003c\/p\u003e\n\u003cp data-mce-fragment=\"1\"\u003e\u003cimg alt=\"\" src=\"https:\/\/cdn.shopify.com\/s\/files\/1\/0527\/3393\/5805\/files\/Screenshot_2022-01-22_230646_480x480.png?v=1642864030\"\u003e\u003c\/p\u003e\n\u003cp data-mce-fragment=\"1\"\u003e\u003cspan data-mce-fragment=\"1\" mce-data-marked=\"1\"\u003eNot sure which size to choose? \u003c\/span\u003e\u003c\/p\u003e\n\u003cp data-mce-fragment=\"1\"\u003e\u003cspan data-mce-fragment=\"1\" mce-data-marked=\"1\"\u003e\u003cimg alt=\"\" src=\"https:\/\/cdn.shopify.com\/s\/files\/1\/0527\/3393\/5805\/files\/Sizing_Chart_Header_Final_0df84378-aff1-4628-a789-e955d38a53e8_480x480.png?v=1642864085\"\u003e\u003c\/span\u003e\u003c\/p\u003e"},"options":[{"name":"Size","position":1,"values":["Regular","Extra Large"]},{"name":"Type","position":2,"values":["Standard","O-Feel"]}],"custom_metafields":{},"metafields":{"badge":"\u003cdiv style='display:none' class='jdgm-prev-badge' data-average-rating='5.00' data-number-of-reviews='9' data-number-of-questions='0'\u003e \u003cspan class='jdgm-prev-badge__stars' data-score='5.00' tabindex='0' aria-label='5.00 stars' role='button'\u003e \u003cspan class='jdgm-star jdgm--on'\u003e\u003c\/span\u003e\u003cspan class='jdgm-star jdgm--on'\u003e\u003c\/span\u003e\u003cspan class='jdgm-star jdgm--on'\u003e\u003c\/span\u003e\u003cspan class='jdgm-star jdgm--on'\u003e\u003c\/span\u003e\u003cspan class='jdgm-star jdgm--on'\u003e\u003c\/span\u003e \u003c\/span\u003e \u003cspan class='jdgm-prev-badge__text'\u003e 9 reviews \u003c\/span\u003e \u003c\/div\u003e","review_snippet_widget":"\u003cdiv class='jdgm-widget jdgm-review-snippet-widget'\u003e \u003cstyle\u003e\n .jdgm-review-snippet-widget{position:relative}.jdgm-review-snippet-widget:hover{cursor:pointer}@media only screen and (max-width: 767px){.jdgm-review-snippet-widget .jdgm-rev-snippet-widget__cards-container{left:unset;right:unset}}.jdgm-review-snippet-widget .jdgm-rev-snippet-card{background:#fff}.jdgm-review-snippet-widget .jdgm-star{color:#399}.jdgm-review-snippet-widget .jdgm-rev-snippet-card{border-radius:8px;background:#fff}.jdgm-review-snippet-widget .jdgm-rev-snippet-card__rev-prod-wrapper{border-radius:8px}.jdgm-review-snippet-widget .jdgm-rev-snippet-card__rev-content-wrapper{max-width:360px}.jdgm-review-snippet-widget .jdgm-rev-snippet-widget__prev-btn,.jdgm-review-snippet-widget .jdgm-rev-snippet-widget__next-btn{border-radius:50%;background:#fff}.jdgm-review-snippet-widget .jdgm-rev-snippet-widget__prev-btn\u003esvg,.jdgm-review-snippet-widget .jdgm-rev-snippet-widget__next-btn\u003esvg{fill:#000}.jdgm-review-snippet-widget .jdgm-rev-snippet-widget__prev-btn{left:0;top:40%}.jdgm-review-snippet-widget .jdgm-rev-snippet-widget__next-btn{right:0;top:40%}.jdgm-full-rev-modal.review-snippet-widget .jm-mfp-content{border-radius:8px}.jdgm-full-rev-modal.review-snippet-widget .jdgm-full-rev__icon{border-radius:8px}.jdgm-full-rev-modal.review-snippet-widget .jdgm-full-rev[data-verified-buyer=\"true\"] .jdgm-full-rev__icon::after{border-radius:8px}.jdgm-full-rev-modal.review-snippet-widget .jdgm-rev__buyer-badge{border-radius:calc( 8px \/ 2 )}.jdgm-full-rev-modal.review-snippet-widget .jdgm-full-rev__pic-img{border-radius:8px}.jdgm-full-rev-modal.review-snippet-widget .jdgm-full-rev__reply{border-radius:8px}.jdgm-full-rev-modal.review-snippet-widget .jdgm-full-rev__replier::before{content:'thebirthstore.com.au'}.jdgm-full-rev-modal.review-snippet-widget .jdgm-full-rev__product-button{border-radius:calc( 8px * 6 )}\n\n \u003c\/style\u003e \u003ci class=\"jdgm-rev-snippet-widget__prev-btn\" style='display: none;'\u003e \u003csvg xmlns=\"http:\/\/www.w3.org\/2000\/svg\" height=\"12\" viewBox=\"0 0 8 12\" width=\"8\" fill=\"#000\"\u003e\u003cpath d=\"M3.09961 6.00005L6.99961 9.90005C7.18294 10.0834 7.27461 10.3167 7.27461 10.6C7.27461 10.8834 7.18294 11.1167 6.99961 11.3C6.81628 11.4834 6.58294 11.575 6.29961 11.575C6.01628 11.575 5.78294 11.4834 5.59961 11.3L0.999609 6.70005C0.899609 6.60005 0.828776 6.49172 0.787109 6.37505C0.745443 6.25838 0.724609 6.13338 0.724609 6.00005C0.724609 5.86672 0.745443 5.74172 0.787109 5.62505C0.828776 5.50838 0.899609 5.40005 0.999609 5.30005L5.59961 0.700049C5.78294 0.516715 6.01628 0.425049 6.29961 0.425049C6.58294 0.425049 6.81628 0.516715 6.99961 0.700049C7.18294 0.883382 7.27461 1.11672 7.27461 1.40005C7.27461 1.68338 7.18294 1.91672 6.99961 2.10005L3.09961 6.00005Z\"\/\u003e\u003c\/svg\u003e \u003c\/i\u003e \u003ci class=\"jdgm-rev-snippet-widget__next-btn\" style='display: none;'\u003e \u003csvg xmlns=\"http:\/\/www.w3.org\/2000\/svg\" height=\"12\" viewBox=\"0 0 8 12\" width=\"8\" fill=\"#000\"\u003e\u003cpath d=\"M4.89961 6.00005L0.999609 2.10005C0.816276 1.91672 0.724609 1.68338 0.724609 1.40005C0.724609 1.11672 0.816276 0.883382 0.999609 0.700049C1.18294 0.516715 1.41628 0.425049 1.69961 0.425049C1.98294 0.425049 2.21628 0.516715 2.39961 0.700049L6.99961 5.30005C7.09961 5.40005 7.17044 5.50838 7.21211 5.62505C7.25378 5.74172 7.27461 5.86672 7.27461 6.00005C7.27461 6.13338 7.25378 6.25838 7.21211 6.37505C7.17044 6.49172 7.09961 6.60005 6.99961 6.70005L2.39961 11.3C2.21628 11.4834 1.98294 11.575 1.69961 11.575C1.41628 11.575 1.18294 11.4834 0.999609 11.3C0.816276 11.1167 0.724609 10.8834 0.724609 10.6C0.724609 10.3167 0.816276 10.0834 0.999609 9.90005L4.89961 6.00005Z\"\/\u003e\u003c\/svg\u003e \u003c\/i\u003e \u003cdiv style=\"overflow: hidden;\"\u003e \u003cdiv class='jdgm-rev-snippet-widget__cards-container'\u003e \u003cdiv class='jdgm-rev-snippet-card' data-review-id='f896f290-f066-428b-ac4e-a9eb69184851' style='display: none;'\u003e \u003cdiv class=\"jdgm-rev-snippet-card__rev-prod-wrapper\"\u003e \u003ca class='jdgm-rev-snippet-card__rev-content-wrapper jdgm-rev-snippet-card__full-review-link' style='text-decoration: none; color: inherit;padding: 0 34px;' role='button' data-review-id='f896f290-f066-428b-ac4e-a9eb69184851'\u003e \u003cdiv class='jdgm-rev-snippet-card__rev-header'\u003e \u003cdiv class='jdgm-rev-snippet-card__rev-rating' aria-label='5 stars' role='img'\u003e \u003cspan class='jdgm-star jdgm--on'\u003e\u003c\/span\u003e\u003cspan class='jdgm-star jdgm--on'\u003e\u003c\/span\u003e\u003cspan class='jdgm-star jdgm--on'\u003e\u003c\/span\u003e\u003cspan class='jdgm-star jdgm--on'\u003e\u003c\/span\u003e\u003cspan class='jdgm-star jdgm--on'\u003e\u003c\/span\u003e \u003c\/div\u003e \u003cdiv class='jdgm-rev-snippet-card__reviewer'\u003e Katie Bavister \u003c\/div\u003e \u003c\/div\u003e \u003cdiv class='jdgm-rev-snippet-card__rev-content'\u003e \u003cspan class='jdgm-rev-snippet-card__rev-body'\u003e \u003cp\u003eI am currently 4 weeks into nursing my first baby. I have been using these from the very beginning in hospital, and couldn't be happier. No sore or cracked nipples, no leaking, and breast feeding has been a breeze so far. I did wonder if these may have been an Instagram trend but they have really been helping.\u003c\/p\u003e \u003c\/span\u003e \u003c\/div\u003e \u003c\/a\u003e \u003c\/div\u003e \u003c\/div\u003e\u003cdiv class='jdgm-rev-snippet-card' data-review-id='116548a4-004b-4ec8-be7e-e6a8c38f218b' style='display: none;'\u003e \u003cdiv class=\"jdgm-rev-snippet-card__rev-prod-wrapper\"\u003e \u003ca class='jdgm-rev-snippet-card__rev-content-wrapper jdgm-rev-snippet-card__full-review-link' style='text-decoration: none; color: inherit;padding: 0 34px;' role='button' data-review-id='116548a4-004b-4ec8-be7e-e6a8c38f218b'\u003e \u003cdiv class='jdgm-rev-snippet-card__rev-header'\u003e \u003cdiv class='jdgm-rev-snippet-card__rev-rating' aria-label='5 stars' role='img'\u003e \u003cspan class='jdgm-star jdgm--on'\u003e\u003c\/span\u003e\u003cspan class='jdgm-star jdgm--on'\u003e\u003c\/span\u003e\u003cspan class='jdgm-star jdgm--on'\u003e\u003c\/span\u003e\u003cspan class='jdgm-star jdgm--on'\u003e\u003c\/span\u003e\u003cspan class='jdgm-star jdgm--on'\u003e\u003c\/span\u003e \u003c\/div\u003e \u003cdiv class='jdgm-rev-snippet-card__reviewer'\u003e Customer \u003c\/div\u003e \u003c\/div\u003e \u003cdiv class='jdgm-rev-snippet-card__rev-content'\u003e \u003cspan class='jdgm-rev-snippet-card__rev-body'\u003e \u003cp\u003eSilverette Nursing Cups\u003c\/p\u003e \u003c\/span\u003e \u003c\/div\u003e \u003c\/a\u003e \u003c\/div\u003e \u003c\/div\u003e\u003cdiv class='jdgm-rev-snippet-card' data-review-id='074599a1-047a-4119-b8ea-dfa6bcab1b3c' style='display: none;'\u003e \u003cdiv class=\"jdgm-rev-snippet-card__rev-prod-wrapper\"\u003e \u003ca class='jdgm-rev-snippet-card__rev-content-wrapper jdgm-rev-snippet-card__full-review-link' style='text-decoration: none; color: inherit;padding: 0 34px;' role='button' data-review-id='074599a1-047a-4119-b8ea-dfa6bcab1b3c'\u003e \u003cdiv class='jdgm-rev-snippet-card__rev-header'\u003e \u003cdiv class='jdgm-rev-snippet-card__rev-rating' aria-label='5 stars' role='img'\u003e \u003cspan class='jdgm-star jdgm--on'\u003e\u003c\/span\u003e\u003cspan class='jdgm-star jdgm--on'\u003e\u003c\/span\u003e\u003cspan class='jdgm-star jdgm--on'\u003e\u003c\/span\u003e\u003cspan class='jdgm-star jdgm--on'\u003e\u003c\/span\u003e\u003cspan class='jdgm-star jdgm--on'\u003e\u003c\/span\u003e \u003c\/div\u003e \u003cdiv class='jdgm-rev-snippet-card__reviewer'\u003e SarahJade \u003c\/div\u003e \u003c\/div\u003e \u003cdiv class='jdgm-rev-snippet-card__rev-content'\u003e \u003cspan class='jdgm-rev-snippet-card__rev-body'\u003e \u003cp\u003eIf you are questioning buying these do you nipples a favour and buy them! They have saved me during my breastfeeding journey.\u003c\/p\u003e \u003c\/span\u003e \u003c\/div\u003e \u003c\/a\u003e \u003c\/div\u003e \u003c\/div\u003e\u003cdiv class='jdgm-rev-snippet-card' data-review-id='392f4272-0e77-4cc7-8bd7-3e4f95943187' style='display: none;'\u003e \u003cdiv class=\"jdgm-rev-snippet-card__rev-prod-wrapper\"\u003e \u003ca class='jdgm-rev-snippet-card__rev-content-wrapper jdgm-rev-snippet-card__full-review-link' style='text-decoration: none; color: inherit;padding: 0 34px;' role='button' data-review-id='392f4272-0e77-4cc7-8bd7-3e4f95943187'\u003e \u003cdiv class='jdgm-rev-snippet-card__rev-header'\u003e \u003cdiv class='jdgm-rev-snippet-card__rev-rating' aria-label='5 stars' role='img'\u003e \u003cspan class='jdgm-star jdgm--on'\u003e\u003c\/span\u003e\u003cspan class='jdgm-star jdgm--on'\u003e\u003c\/span\u003e\u003cspan class='jdgm-star jdgm--on'\u003e\u003c\/span\u003e\u003cspan class='jdgm-star jdgm--on'\u003e\u003c\/span\u003e\u003cspan class='jdgm-star jdgm--on'\u003e\u003c\/span\u003e \u003c\/div\u003e \u003cdiv class='jdgm-rev-snippet-card__reviewer'\u003e Cass \u003c\/div\u003e \u003c\/div\u003e \u003cdiv class='jdgm-rev-snippet-card__rev-content'\u003e \u003cspan class='jdgm-rev-snippet-card__rev-body'\u003e \u003cp\u003eHave been using these from day 1 with my third baby. They have been a game changer in healing and protecting my damaged nipples in the first few weeks. I’ve found they work best when a little colostrum\/milk is expressed into the cup when placed over the nipple. Wish I knew about these with my previous babies!\u003c\/p\u003e \u003c\/span\u003e \u003c\/div\u003e \u003c\/a\u003e \u003c\/div\u003e \u003c\/div\u003e\u003cdiv class='jdgm-rev-snippet-card' data-review-id='5583395d-70c9-4207-b1d6-218eaf27ead3' style='display: none;'\u003e \u003cdiv class=\"jdgm-rev-snippet-card__rev-prod-wrapper\"\u003e \u003ca class='jdgm-rev-snippet-card__rev-content-wrapper jdgm-rev-snippet-card__full-review-link' style='text-decoration: none; color: inherit;padding: 0 34px;' role='button' data-review-id='5583395d-70c9-4207-b1d6-218eaf27ead3'\u003e \u003cdiv class='jdgm-rev-snippet-card__rev-header'\u003e \u003cdiv class='jdgm-rev-snippet-card__rev-rating' aria-label='5 stars' role='img'\u003e \u003cspan class='jdgm-star jdgm--on'\u003e\u003c\/span\u003e\u003cspan class='jdgm-star jdgm--on'\u003e\u003c\/span\u003e\u003cspan class='jdgm-star jdgm--on'\u003e\u003c\/span\u003e\u003cspan class='jdgm-star jdgm--on'\u003e\u003c\/span\u003e\u003cspan class='jdgm-star jdgm--on'\u003e\u003c\/span\u003e \u003c\/div\u003e \u003cdiv class='jdgm-rev-snippet-card__reviewer'\u003e Simon Kawanishi \u003c\/div\u003e \u003c\/div\u003e \u003cdiv class='jdgm-rev-snippet-card__rev-content'\u003e \u003cspan class='jdgm-rev-snippet-card__rev-body'\u003e \u003cp\u003eShe is using these every day and believes it makes a big difference for her. She is very happy with her purchase.\u003c\/p\u003e \u003c\/span\u003e \u003c\/div\u003e \u003c\/a\u003e \u003c\/div\u003e \u003c\/div\u003e \u003c\/div\u003e \u003c\/div\u003e \u003c\/div\u003e","widget":"\u003cdiv class='jdgm-rev-widg' data-updated-at='2026-04-06T07:54:58Z' data-average-rating='5.00' data-number-of-reviews='9' data-number-of-questions='0' data-image-url='https:\/\/cdn.shopify.com\/s\/files\/1\/0527\/3393\/5805\/files\/silverette-nursing-cups-830931.jpg?v=1714968048'\u003e \u003cstyle class='jdgm-temp-hiding-style'\u003e.jdgm-rev-widg{ display: none }\u003c\/style\u003e \u003cdiv class='jdgm-rev-widg__header'\u003e \u003ch2 class='jdgm-rev-widg__title'\u003eCustomer Reviews\u003c\/h2\u003e \u003cdiv class='jdgm-rev-widg__summary'\u003e \u003cdiv class='jdgm-rev-widg__summary-stars' aria-label='Average rating is 5.00 stars' role='img'\u003e \u003cspan class='jdgm-star jdgm--on'\u003e\u003c\/span\u003e\u003cspan class='jdgm-star jdgm--on'\u003e\u003c\/span\u003e\u003cspan class='jdgm-star jdgm--on'\u003e\u003c\/span\u003e\u003cspan class='jdgm-star jdgm--on'\u003e\u003c\/span\u003e\u003cspan class='jdgm-star jdgm--on'\u003e\u003c\/span\u003e \u003c\/div\u003e \u003cdiv class='jdgm-rev-widg__summary-text'\u003eBased on 9 reviews\u003c\/div\u003e \u003c\/div\u003e \u003ca style='display: none' href='#' class='jdgm-write-rev-link' role='button'\u003eWrite a review\u003c\/a\u003e \u003cdiv class='jdgm-histogram jdgm-temp-hidden'\u003e \u003cdiv class='jdgm-histogram__row' data-rating='5' data-frequency='9' data-percentage='100'\u003e \u003cdiv class='jdgm-histogram__star' role='button' aria-label=\"100% (9) reviews with 5 star rating\" tabindex='0' \u003e\u003cspan class='jdgm-star jdgm--on'\u003e\u003c\/span\u003e\u003cspan class='jdgm-star jdgm--on'\u003e\u003c\/span\u003e\u003cspan class='jdgm-star jdgm--on'\u003e\u003c\/span\u003e\u003cspan class='jdgm-star jdgm--on'\u003e\u003c\/span\u003e\u003cspan class='jdgm-star jdgm--on'\u003e\u003c\/span\u003e\u003c\/div\u003e \u003cdiv class='jdgm-histogram__bar'\u003e \u003cdiv class='jdgm-histogram__bar-content' style='width: 100%;'\u003e \u003c\/div\u003e \u003c\/div\u003e \u003cdiv class='jdgm-histogram__percentage'\u003e100%\u003c\/div\u003e \u003cdiv class='jdgm-histogram__frequency'\u003e(9)\u003c\/div\u003e \u003c\/div\u003e \u003cdiv class='jdgm-histogram__row' data-rating='4' data-frequency='0' data-percentage='0'\u003e \u003cdiv class='jdgm-histogram__star' role='button' aria-label=\"0% (0) reviews with 4 star rating\" tabindex='0' \u003e\u003cspan class='jdgm-star jdgm--on'\u003e\u003c\/span\u003e\u003cspan class='jdgm-star jdgm--on'\u003e\u003c\/span\u003e\u003cspan class='jdgm-star jdgm--on'\u003e\u003c\/span\u003e\u003cspan class='jdgm-star jdgm--on'\u003e\u003c\/span\u003e\u003cspan class='jdgm-star jdgm--off'\u003e\u003c\/span\u003e\u003c\/div\u003e \u003cdiv class='jdgm-histogram__bar'\u003e \u003cdiv class='jdgm-histogram__bar-content' style='width: 0%;'\u003e \u003c\/div\u003e \u003c\/div\u003e \u003cdiv class='jdgm-histogram__percentage'\u003e0%\u003c\/div\u003e \u003cdiv class='jdgm-histogram__frequency'\u003e(0)\u003c\/div\u003e \u003c\/div\u003e \u003cdiv class='jdgm-histogram__row' data-rating='3' data-frequency='0' data-percentage='0'\u003e \u003cdiv class='jdgm-histogram__star' role='button' aria-label=\"0% (0) reviews with 3 star rating\" tabindex='0' \u003e\u003cspan class='jdgm-star jdgm--on'\u003e\u003c\/span\u003e\u003cspan class='jdgm-star jdgm--on'\u003e\u003c\/span\u003e\u003cspan class='jdgm-star jdgm--on'\u003e\u003c\/span\u003e\u003cspan class='jdgm-star jdgm--off'\u003e\u003c\/span\u003e\u003cspan class='jdgm-star jdgm--off'\u003e\u003c\/span\u003e\u003c\/div\u003e \u003cdiv class='jdgm-histogram__bar'\u003e \u003cdiv class='jdgm-histogram__bar-content' style='width: 0%;'\u003e \u003c\/div\u003e \u003c\/div\u003e \u003cdiv class='jdgm-histogram__percentage'\u003e0%\u003c\/div\u003e \u003cdiv class='jdgm-histogram__frequency'\u003e(0)\u003c\/div\u003e \u003c\/div\u003e \u003cdiv class='jdgm-histogram__row' data-rating='2' data-frequency='0' data-percentage='0'\u003e \u003cdiv class='jdgm-histogram__star' role='button' aria-label=\"0% (0) reviews with 2 star rating\" tabindex='0' \u003e\u003cspan class='jdgm-star jdgm--on'\u003e\u003c\/span\u003e\u003cspan class='jdgm-star jdgm--on'\u003e\u003c\/span\u003e\u003cspan class='jdgm-star jdgm--off'\u003e\u003c\/span\u003e\u003cspan class='jdgm-star jdgm--off'\u003e\u003c\/span\u003e\u003cspan class='jdgm-star jdgm--off'\u003e\u003c\/span\u003e\u003c\/div\u003e \u003cdiv class='jdgm-histogram__bar'\u003e \u003cdiv class='jdgm-histogram__bar-content' style='width: 0%;'\u003e \u003c\/div\u003e \u003c\/div\u003e \u003cdiv class='jdgm-histogram__percentage'\u003e0%\u003c\/div\u003e \u003cdiv class='jdgm-histogram__frequency'\u003e(0)\u003c\/div\u003e \u003c\/div\u003e \u003cdiv class='jdgm-histogram__row' data-rating='1' data-frequency='0' data-percentage='0'\u003e \u003cdiv class='jdgm-histogram__star' role='button' aria-label=\"0% (0) reviews with 1 star rating\" tabindex='0' \u003e\u003cspan class='jdgm-star jdgm--on'\u003e\u003c\/span\u003e\u003cspan class='jdgm-star jdgm--off'\u003e\u003c\/span\u003e\u003cspan class='jdgm-star jdgm--off'\u003e\u003c\/span\u003e\u003cspan class='jdgm-star jdgm--off'\u003e\u003c\/span\u003e\u003cspan class='jdgm-star jdgm--off'\u003e\u003c\/span\u003e\u003c\/div\u003e \u003cdiv class='jdgm-histogram__bar'\u003e \u003cdiv class='jdgm-histogram__bar-content' style='width: 0%;'\u003e \u003c\/div\u003e \u003c\/div\u003e \u003cdiv class='jdgm-histogram__percentage'\u003e0%\u003c\/div\u003e \u003cdiv class='jdgm-histogram__frequency'\u003e(0)\u003c\/div\u003e \u003c\/div\u003e \u003cdiv class='jdgm-histogram__row jdgm-histogram__clear-filter' data-rating=null tabindex='0'\u003e\u003c\/div\u003e \u003c\/div\u003e \u003cdiv class='jdgm-rev-widg__sort-wrapper'\u003e\u003c\/div\u003e \u003c\/div\u003e \u003cdiv class='jdgm-rev-widg__body'\u003e \u003cdiv class='jdgm-rev-widg__reviews'\u003e\u003cdiv class='jdgm-rev jdgm-divider-top' data-verified-buyer='true' data-review-id='a4edaf32-1cac-4594-9a45-ccef00d96e6e' data-review-language='' data-product-title='Silverette Nursing Cups' data-product-url='\/products\/silverette-nursing-cups' data-thumb-up-count='0' data-thumb-down-count='0'\u003e \u003cdiv class='jdgm-rev__header'\u003e \u003cdiv class='jdgm-rev__icon' \u003e M \u003c\/div\u003e \u003cspan class='jdgm-rev__rating' data-score='5' tabindex='0' aria-label='5 star review' role='img'\u003e \u003cspan class='jdgm-star jdgm--on'\u003e\u003c\/span\u003e\u003cspan class='jdgm-star jdgm--on'\u003e\u003c\/span\u003e\u003cspan class='jdgm-star jdgm--on'\u003e\u003c\/span\u003e\u003cspan class='jdgm-star jdgm--on'\u003e\u003c\/span\u003e\u003cspan class='jdgm-star jdgm--on'\u003e\u003c\/span\u003e \u003c\/span\u003e \u003cspan class='jdgm-rev__timestamp jdgm-spinner' data-content='2025-02-11 22:40:28 UTC'\u003e\u003c\/span\u003e \u003cdiv class='jdgm-rev__br'\u003e\u003c\/div\u003e \u003cspan class='jdgm-rev__buyer-badge-wrapper'\u003e \u003cspan class='jdgm-rev__buyer-badge'\u003e\u003c\/span\u003e \u003c\/span\u003e \u003cspan class='jdgm-rev__author-wrapper'\u003e \u003cspan class='jdgm-rev__author'\u003eMichaela\u003c\/span\u003e \u003cspan class='jdgm-rev__location' \u003e \u003c\/span\u003e \u003c\/span\u003e \u003c\/div\u003e \u003cdiv class='jdgm-rev__content'\u003e \u003cdiv class='jdgm-rev__custom-form'\u003e \u003c\/div\u003e \u003cb class='jdgm-rev__title'\u003eLifesaver Postpartum\u003c\/b\u003e \u003cdiv class='jdgm-rev__body'\u003e\u003cp\u003eThese were amazing!! Really helped in the first few days and two weeks when we were still getting the hang of breastfeeding and latching. Stand by these and would gift to any expecting friends as a must!\u003c\/p\u003e\u003c\/div\u003e \u003cdiv class='jdgm-rev__pics'\u003e \u003c\/div\u003e \u003cdiv class='jdgm-rev__vids'\u003e \u003c\/div\u003e \u003cdiv class='jdgm-rev__transparency-badge-wrapper'\u003e \u003cdiv class='jdgm-rev__transparency-badge' data-badge-type=review_collected_via_store_invitation\u003e\u003c\/div\u003e \u003c\/div\u003e \u003c\/div\u003e \u003cdiv class='jdgm-rev__actions'\u003e \u003cdiv class='jdgm-rev__social'\u003e\u003c\/div\u003e \u003cdiv class='jdgm-rev__votes'\u003e\u003c\/div\u003e \u003c\/div\u003e \u003cdiv class='jdgm-rev__reply'\u003e \u003cdiv class='jdgm-rev__replier-wrapper'\u003e \u003cb class='jdgm-rev__replier'\u003e\u003c\/b\u003e \u003c\/div\u003e \u003cdiv class='jdgm-rev__reply-content'\u003e\u003cp\u003eThank you so much for sharing your experience, Michaela. We’re so glad these supported you during those early postpartum days and made things a little easier while finding your rhythm. We truly appreciate your recommendation and support ❤️\u003c\/p\u003e\u003c\/div\u003e \u003c\/div\u003e \u003c\/div\u003e\u003cdiv class='jdgm-rev jdgm-divider-top' data-verified-buyer='true' data-review-id='380d6120-4291-458e-8ba7-4c755ff83f97' data-review-language='' data-product-title='Silverette Nursing Cups' data-product-url='\/products\/silverette-nursing-cups' data-thumb-up-count='0' data-thumb-down-count='0'\u003e \u003cdiv class='jdgm-rev__header'\u003e \u003cdiv class='jdgm-rev__icon' \u003e K \u003c\/div\u003e \u003cspan class='jdgm-rev__rating' data-score='5' tabindex='0' aria-label='5 star review' role='img'\u003e \u003cspan class='jdgm-star jdgm--on'\u003e\u003c\/span\u003e\u003cspan class='jdgm-star jdgm--on'\u003e\u003c\/span\u003e\u003cspan class='jdgm-star jdgm--on'\u003e\u003c\/span\u003e\u003cspan class='jdgm-star jdgm--on'\u003e\u003c\/span\u003e\u003cspan class='jdgm-star jdgm--on'\u003e\u003c\/span\u003e \u003c\/span\u003e \u003cspan class='jdgm-rev__timestamp jdgm-spinner' data-content='2024-12-28 13:50:27 UTC'\u003e\u003c\/span\u003e \u003cdiv class='jdgm-rev__br'\u003e\u003c\/div\u003e \u003cspan class='jdgm-rev__buyer-badge-wrapper'\u003e \u003cspan class='jdgm-rev__buyer-badge'\u003e\u003c\/span\u003e \u003c\/span\u003e \u003cspan class='jdgm-rev__author-wrapper'\u003e \u003cspan class='jdgm-rev__author'\u003eKatherine Norberry\u003c\/span\u003e \u003cspan class='jdgm-rev__location' \u003e \u003c\/span\u003e \u003c\/span\u003e \u003c\/div\u003e \u003cdiv class='jdgm-rev__content'\u003e \u003cdiv class='jdgm-rev__custom-form'\u003e \u003c\/div\u003e \u003cb class='jdgm-rev__title'\u003eActual magic\u003c\/b\u003e \u003cdiv class='jdgm-rev__body'\u003e\u003cp\u003eI’ve just delivered my 6th baby recently and this is my first time using Silverettes- when I say that they are magic, I am not kidding. I cannot believe how by wearing them and having a small amount of breastmilk in them, leaves your nipples feeling repaired almost instantly. Whether it’s your first baby or sixth baby- when establishing your breastfeeding routine, you’re bound to have some discomfort initially. By using my silverettes it’s allowed that initial period of discomfort to be over nice and fast and by wearing them all day long it’s given my nipples the exact right amount of healing time.\u003c\/p\u003e\u003c\/div\u003e \u003cdiv class='jdgm-rev__pics'\u003e \u003c\/div\u003e \u003cdiv class='jdgm-rev__vids'\u003e \u003c\/div\u003e \u003cdiv class='jdgm-rev__transparency-badge-wrapper'\u003e \u003cdiv class='jdgm-rev__transparency-badge' data-badge-type=review_collected_via_store_invitation\u003e\u003c\/div\u003e \u003c\/div\u003e \u003c\/div\u003e \u003cdiv class='jdgm-rev__actions'\u003e \u003cdiv class='jdgm-rev__social'\u003e\u003c\/div\u003e \u003cdiv class='jdgm-rev__votes'\u003e\u003c\/div\u003e \u003c\/div\u003e \u003cdiv class='jdgm-rev__reply'\u003e \u003cdiv class='jdgm-rev__replier-wrapper'\u003e \u003cb class='jdgm-rev__replier'\u003e\u003c\/b\u003e \u003c\/div\u003e \u003cdiv class='jdgm-rev__reply-content'\u003e\u003cp\u003eDear Katherine, thank you so much for sharing your experience with us. We are truly delighted to hear that the Silverettes made such a difference for you and supported you through those early breastfeeding days, especially with your sixth baby, your kind words mean so much to us. ❤️\u003c\/p\u003e\u003c\/div\u003e \u003c\/div\u003e \u003c\/div\u003e\u003cdiv class='jdgm-rev jdgm-divider-top' data-verified-buyer='true' data-review-id='f896f290-f066-428b-ac4e-a9eb69184851' data-review-language='' data-product-title='Silverette Nursing Cups' data-product-url='\/products\/silverette-nursing-cups' data-thumb-up-count='0' data-thumb-down-count='0'\u003e \u003cdiv class='jdgm-rev__header'\u003e \u003cdiv class='jdgm-rev__icon' \u003e K \u003c\/div\u003e \u003cspan class='jdgm-rev__rating' data-score='5' tabindex='0' aria-label='5 star review' role='img'\u003e \u003cspan class='jdgm-star jdgm--on'\u003e\u003c\/span\u003e\u003cspan class='jdgm-star jdgm--on'\u003e\u003c\/span\u003e\u003cspan class='jdgm-star jdgm--on'\u003e\u003c\/span\u003e\u003cspan class='jdgm-star jdgm--on'\u003e\u003c\/span\u003e\u003cspan class='jdgm-star jdgm--on'\u003e\u003c\/span\u003e \u003c\/span\u003e \u003cspan class='jdgm-rev__timestamp jdgm-spinner' data-content='2024-08-14 00:32:42 UTC'\u003e\u003c\/span\u003e \u003cdiv class='jdgm-rev__br'\u003e\u003c\/div\u003e \u003cspan class='jdgm-rev__buyer-badge-wrapper'\u003e \u003cspan class='jdgm-rev__buyer-badge'\u003e\u003c\/span\u003e \u003c\/span\u003e \u003cspan class='jdgm-rev__author-wrapper'\u003e \u003cspan class='jdgm-rev__author'\u003eKatie Bavister\u003c\/span\u003e \u003cspan class='jdgm-rev__location' \u003e \u003c\/span\u003e \u003c\/span\u003e \u003c\/div\u003e \u003cdiv class='jdgm-rev__content'\u003e \u003cdiv class='jdgm-rev__custom-form'\u003e \u003c\/div\u003e \u003cb class='jdgm-rev__title'\u003eLife Saver\u003c\/b\u003e \u003cdiv class='jdgm-rev__body'\u003e\u003cp\u003eI am currently 4 weeks into nursing my first baby. I have been using these from the very beginning in hospital, and couldn't be happier. No sore or cracked nipples, no leaking, and breast feeding has been a breeze so far. I did wonder if these may have been an Instagram trend but they have really been helping.\u003c\/p\u003e\u003c\/div\u003e \u003cdiv class='jdgm-rev__pics'\u003e \u003c\/div\u003e \u003cdiv class='jdgm-rev__vids'\u003e \u003c\/div\u003e \u003cdiv class='jdgm-rev__transparency-badge-wrapper'\u003e \u003cdiv class='jdgm-rev__transparency-badge' data-badge-type=review_collected_via_store_invitation\u003e\u003c\/div\u003e \u003c\/div\u003e \u003c\/div\u003e \u003cdiv class='jdgm-rev__actions'\u003e \u003cdiv class='jdgm-rev__social'\u003e\u003c\/div\u003e \u003cdiv class='jdgm-rev__votes'\u003e\u003c\/div\u003e \u003c\/div\u003e \u003cdiv class='jdgm-rev__reply'\u003e \u003cdiv class='jdgm-rev__replier-wrapper'\u003e \u003cb class='jdgm-rev__replier'\u003e\u003c\/b\u003e \u003c\/div\u003e \u003cdiv class='jdgm-rev__reply-content'\u003e\u003cp\u003eKatie, thank you so much for sharing your experience, and huge congratulations on your little one. We’re so happy to hear that things have felt smooth and comfortable for you from the very beginning, especially during those early weeks which can be such an adjustment. It means a lot to know the products truly supported you beyond expectations, and we really appreciate you taking the time to share this ❤️\u003c\/p\u003e\u003c\/div\u003e \u003c\/div\u003e \u003c\/div\u003e\u003cdiv class='jdgm-rev jdgm-divider-top' data-verified-buyer='true' data-review-id='116548a4-004b-4ec8-be7e-e6a8c38f218b' data-review-language='' data-product-title='Silverette Nursing Cups' data-product-url='\/products\/silverette-nursing-cups' data-thumb-up-count='0' data-thumb-down-count='0'\u003e \u003cdiv class='jdgm-rev__header'\u003e \u003cdiv class='jdgm-rev__icon' \u003e M \u003c\/div\u003e \u003cspan class='jdgm-rev__rating' data-score='5' tabindex='0' aria-label='5 star review' role='img'\u003e \u003cspan class='jdgm-star jdgm--on'\u003e\u003c\/span\u003e\u003cspan class='jdgm-star jdgm--on'\u003e\u003c\/span\u003e\u003cspan class='jdgm-star jdgm--on'\u003e\u003c\/span\u003e\u003cspan class='jdgm-star jdgm--on'\u003e\u003c\/span\u003e\u003cspan class='jdgm-star jdgm--on'\u003e\u003c\/span\u003e \u003c\/span\u003e \u003cspan class='jdgm-rev__timestamp jdgm-spinner' data-content='2024-07-27 00:26:04 UTC'\u003e\u003c\/span\u003e \u003cdiv class='jdgm-rev__br'\u003e\u003c\/div\u003e \u003cspan class='jdgm-rev__buyer-badge-wrapper'\u003e \u003cspan class='jdgm-rev__buyer-badge'\u003e\u003c\/span\u003e \u003c\/span\u003e \u003cspan class='jdgm-rev__author-wrapper'\u003e \u003cspan class='jdgm-rev__author'\u003eMs Stephanie L Sugito\u003c\/span\u003e \u003cspan class='jdgm-rev__location' \u003e \u003c\/span\u003e \u003c\/span\u003e \u003c\/div\u003e \u003cdiv class='jdgm-rev__content'\u003e \u003cdiv class='jdgm-rev__custom-form'\u003e \u003c\/div\u003e \u003cb class='jdgm-rev__title'\u003e\u003c\/b\u003e \u003cdiv class='jdgm-rev__body'\u003e\u003cp\u003eSilverette Nursing Cups\u003c\/p\u003e\u003c\/div\u003e \u003cdiv class='jdgm-rev__pics'\u003e \u003c\/div\u003e \u003cdiv class='jdgm-rev__vids'\u003e \u003c\/div\u003e \u003cdiv class='jdgm-rev__transparency-badge-wrapper'\u003e \u003cdiv class='jdgm-rev__transparency-badge' data-badge-type=review_collected_via_store_invitation\u003e\u003c\/div\u003e \u003c\/div\u003e \u003c\/div\u003e \u003cdiv class='jdgm-rev__actions'\u003e \u003cdiv class='jdgm-rev__social'\u003e\u003c\/div\u003e \u003cdiv class='jdgm-rev__votes'\u003e\u003c\/div\u003e \u003c\/div\u003e \u003cdiv class='jdgm-rev__reply'\u003e \u003cdiv class='jdgm-rev__replier-wrapper'\u003e \u003cb class='jdgm-rev__replier'\u003e\u003c\/b\u003e \u003c\/div\u003e \u003cdiv class='jdgm-rev__reply-content'\u003e\u003cp\u003eStephanie, thank you so much for choosing the Silverette Nursing Cups, we truly appreciate your support and are so glad you chose us to be part of your feeding journey. It means a lot to be trusted during such a special time ❤️\u003c\/p\u003e\u003c\/div\u003e \u003c\/div\u003e \u003c\/div\u003e\u003cdiv class='jdgm-rev jdgm-divider-top' data-verified-buyer='true' data-review-id='074599a1-047a-4119-b8ea-dfa6bcab1b3c' data-review-language='' data-product-title='Silverette Nursing Cups' data-product-url='\/products\/silverette-nursing-cups' data-thumb-up-count='0' data-thumb-down-count='0'\u003e \u003cdiv class='jdgm-rev__header'\u003e \u003cdiv class='jdgm-rev__icon' \u003e S \u003c\/div\u003e \u003cspan class='jdgm-rev__rating' data-score='5' tabindex='0' aria-label='5 star review' role='img'\u003e \u003cspan class='jdgm-star jdgm--on'\u003e\u003c\/span\u003e\u003cspan class='jdgm-star jdgm--on'\u003e\u003c\/span\u003e\u003cspan class='jdgm-star jdgm--on'\u003e\u003c\/span\u003e\u003cspan class='jdgm-star jdgm--on'\u003e\u003c\/span\u003e\u003cspan class='jdgm-star jdgm--on'\u003e\u003c\/span\u003e \u003c\/span\u003e \u003cspan class='jdgm-rev__timestamp jdgm-spinner' data-content='2024-03-05 06:28:31 UTC'\u003e\u003c\/span\u003e \u003cdiv class='jdgm-rev__br'\u003e\u003c\/div\u003e \u003cspan class='jdgm-rev__buyer-badge-wrapper'\u003e \u003cspan class='jdgm-rev__buyer-badge'\u003e\u003c\/span\u003e \u003c\/span\u003e \u003cspan class='jdgm-rev__author-wrapper'\u003e \u003cspan class='jdgm-rev__author'\u003eSarah Taylor\u003c\/span\u003e \u003cspan class='jdgm-rev__location' \u003e \u003c\/span\u003e \u003c\/span\u003e \u003c\/div\u003e \u003cdiv class='jdgm-rev__content'\u003e \u003cdiv class='jdgm-rev__custom-form'\u003e \u003c\/div\u003e \u003cb class='jdgm-rev__title'\u003eLife saver\u003c\/b\u003e \u003cdiv class='jdgm-rev__body'\u003e\u003cp\u003eIf you are questioning buying these do you nipples a favour and buy them! They have saved me during my breastfeeding journey.\u003c\/p\u003e\u003c\/div\u003e \u003cdiv class='jdgm-rev__pics'\u003e \u003c\/div\u003e \u003cdiv class='jdgm-rev__vids'\u003e \u003c\/div\u003e \u003cdiv class='jdgm-rev__transparency-badge-wrapper'\u003e \u003cdiv class='jdgm-rev__transparency-badge' data-badge-type=review_collected_via_store_invitation\u003e\u003c\/div\u003e \u003c\/div\u003e \u003c\/div\u003e \u003cdiv class='jdgm-rev__actions'\u003e \u003cdiv class='jdgm-rev__social'\u003e\u003c\/div\u003e \u003cdiv class='jdgm-rev__votes'\u003e\u003c\/div\u003e \u003c\/div\u003e \u003cdiv class='jdgm-rev__reply'\u003e \u003cdiv class='jdgm-rev__replier-wrapper'\u003e \u003cb class='jdgm-rev__replier'\u003e\u003c\/b\u003e \u003c\/div\u003e \u003cdiv class='jdgm-rev__reply-content'\u003e\u003cp\u003eWe 100% agree SarahJade. We are so happy it saved you. Thank you for your review\u003c\/p\u003e\u003c\/div\u003e \u003c\/div\u003e \u003c\/div\u003e\u003cdiv class='jdgm-rev jdgm-divider-top' data-verified-buyer='true' data-review-id='392f4272-0e77-4cc7-8bd7-3e4f95943187' data-review-language='' data-product-title='Silverette Nursing Cups' data-product-url='\/products\/silverette-nursing-cups' data-thumb-up-count='0' data-thumb-down-count='0'\u003e \u003cdiv class='jdgm-rev__header'\u003e \u003cdiv class='jdgm-rev__icon' \u003e C \u003c\/div\u003e \u003cspan class='jdgm-rev__rating' data-score='5' tabindex='0' aria-label='5 star review' role='img'\u003e \u003cspan class='jdgm-star jdgm--on'\u003e\u003c\/span\u003e\u003cspan class='jdgm-star jdgm--on'\u003e\u003c\/span\u003e\u003cspan class='jdgm-star jdgm--on'\u003e\u003c\/span\u003e\u003cspan class='jdgm-star jdgm--on'\u003e\u003c\/span\u003e\u003cspan class='jdgm-star jdgm--on'\u003e\u003c\/span\u003e \u003c\/span\u003e \u003cspan class='jdgm-rev__timestamp jdgm-spinner' data-content='2024-02-25 05:55:46 UTC'\u003e\u003c\/span\u003e \u003cdiv class='jdgm-rev__br'\u003e\u003c\/div\u003e \u003cspan class='jdgm-rev__buyer-badge-wrapper'\u003e \u003cspan class='jdgm-rev__buyer-badge'\u003e\u003c\/span\u003e \u003c\/span\u003e \u003cspan class='jdgm-rev__author-wrapper'\u003e \u003cspan class='jdgm-rev__author'\u003eCassie Fox\u003c\/span\u003e \u003cspan class='jdgm-rev__location' \u003e \u003c\/span\u003e \u003c\/span\u003e \u003c\/div\u003e \u003cdiv class='jdgm-rev__content'\u003e \u003cdiv class='jdgm-rev__custom-form'\u003e \u003c\/div\u003e \u003cb class='jdgm-rev__title'\u003eA necessity if breastfeeding\u003c\/b\u003e \u003cdiv class='jdgm-rev__body'\u003e\u003cp\u003eHave been using these from day 1 with my third baby. They have been a game changer in healing and protecting my damaged nipples in the first few weeks. I’ve found they work best when a little colostrum\/milk is expressed into the cup when placed over the nipple. Wish I knew about these with my previous babies!\u003c\/p\u003e\u003c\/div\u003e \u003cdiv class='jdgm-rev__pics'\u003e \u003c\/div\u003e \u003cdiv class='jdgm-rev__vids'\u003e \u003c\/div\u003e \u003cdiv class='jdgm-rev__transparency-badge-wrapper'\u003e \u003cdiv class='jdgm-rev__transparency-badge' data-badge-type=review_collected_via_store_invitation\u003e\u003c\/div\u003e \u003c\/div\u003e \u003c\/div\u003e \u003cdiv class='jdgm-rev__actions'\u003e \u003cdiv class='jdgm-rev__social'\u003e\u003c\/div\u003e \u003cdiv class='jdgm-rev__votes'\u003e\u003c\/div\u003e \u003c\/div\u003e \u003cdiv class='jdgm-rev__reply'\u003e \u003cdiv class='jdgm-rev__replier-wrapper'\u003e \u003cb class='jdgm-rev__replier'\u003e\u003c\/b\u003e \u003c\/div\u003e \u003cdiv class='jdgm-rev__reply-content'\u003e\u003cp\u003eHi Cass, we 100% agree! Makes such a difference and saves those poor nipples. Thank you for your review :)\u003c\/p\u003e\u003c\/div\u003e \u003c\/div\u003e \u003c\/div\u003e\u003cdiv class='jdgm-rev jdgm-divider-top' data-verified-buyer='true' data-review-id='5583395d-70c9-4207-b1d6-218eaf27ead3' data-review-language='' data-product-title='Silverette Nursing Cups' data-product-url='\/products\/silverette-nursing-cups' data-thumb-up-count='0' data-thumb-down-count='0'\u003e \u003cdiv class='jdgm-rev__header'\u003e \u003cdiv class='jdgm-rev__icon' \u003e S \u003c\/div\u003e \u003cspan class='jdgm-rev__rating' data-score='5' tabindex='0' aria-label='5 star review' role='img'\u003e \u003cspan class='jdgm-star jdgm--on'\u003e\u003c\/span\u003e\u003cspan class='jdgm-star jdgm--on'\u003e\u003c\/span\u003e\u003cspan class='jdgm-star jdgm--on'\u003e\u003c\/span\u003e\u003cspan class='jdgm-star jdgm--on'\u003e\u003c\/span\u003e\u003cspan class='jdgm-star jdgm--on'\u003e\u003c\/span\u003e \u003c\/span\u003e \u003cspan class='jdgm-rev__timestamp jdgm-spinner' data-content='2023-08-03 06:00:07 UTC'\u003e\u003c\/span\u003e \u003cdiv class='jdgm-rev__br'\u003e\u003c\/div\u003e \u003cspan class='jdgm-rev__buyer-badge-wrapper'\u003e \u003cspan class='jdgm-rev__buyer-badge'\u003e\u003c\/span\u003e \u003c\/span\u003e \u003cspan class='jdgm-rev__author-wrapper'\u003e \u003cspan class='jdgm-rev__author'\u003eSimon Kawanishi\u003c\/span\u003e \u003cspan class='jdgm-rev__location' \u003e \u003c\/span\u003e \u003c\/span\u003e \u003c\/div\u003e \u003cdiv class='jdgm-rev__content'\u003e \u003cdiv class='jdgm-rev__custom-form'\u003e \u003c\/div\u003e \u003cb class='jdgm-rev__title'\u003eMy wife swears by these.\u003c\/b\u003e \u003cdiv class='jdgm-rev__body'\u003e\u003cp\u003eShe is using these every day and believes it makes a big difference for her. She is very happy with her purchase.\u003c\/p\u003e\u003c\/div\u003e \u003cdiv class='jdgm-rev__pics'\u003e \u003c\/div\u003e \u003cdiv class='jdgm-rev__vids'\u003e \u003c\/div\u003e \u003cdiv class='jdgm-rev__transparency-badge-wrapper'\u003e \u003cdiv class='jdgm-rev__transparency-badge' data-badge-type=review_collected_via_store_invitation\u003e\u003c\/div\u003e \u003c\/div\u003e \u003c\/div\u003e \u003cdiv class='jdgm-rev__actions'\u003e \u003cdiv class='jdgm-rev__social'\u003e\u003c\/div\u003e \u003cdiv class='jdgm-rev__votes'\u003e\u003c\/div\u003e \u003c\/div\u003e \u003cdiv class='jdgm-rev__reply'\u003e \u003cdiv class='jdgm-rev__replier-wrapper'\u003e \u003cb class='jdgm-rev__replier'\u003e\u003c\/b\u003e \u003c\/div\u003e \u003cdiv class='jdgm-rev__reply-content'\u003e\u003cp\u003eHi Simon, thank you for the review. So glad to hear your wife loves them, we think they are amazing too. Hope all is going well for your new little family.\u003c\/p\u003e\u003c\/div\u003e \u003c\/div\u003e \u003c\/div\u003e\u003cdiv class='jdgm-rev jdgm-divider-top' data-verified-buyer='true' data-review-id='bd2dcc0c-000e-47d8-84c5-ebd97588c5b2' data-review-language='' data-product-title='Silverette Nursing Cups' data-product-url='\/products\/silverette-nursing-cups' data-thumb-up-count='0' data-thumb-down-count='0'\u003e \u003cdiv class='jdgm-rev__header'\u003e \u003cdiv class='jdgm-rev__icon' \u003e D \u003c\/div\u003e \u003cspan class='jdgm-rev__rating' data-score='5' tabindex='0' aria-label='5 star review' role='img'\u003e \u003cspan class='jdgm-star jdgm--on'\u003e\u003c\/span\u003e\u003cspan class='jdgm-star jdgm--on'\u003e\u003c\/span\u003e\u003cspan class='jdgm-star jdgm--on'\u003e\u003c\/span\u003e\u003cspan class='jdgm-star jdgm--on'\u003e\u003c\/span\u003e\u003cspan class='jdgm-star jdgm--on'\u003e\u003c\/span\u003e \u003c\/span\u003e \u003cspan class='jdgm-rev__timestamp jdgm-spinner' data-content='2023-03-17 06:05:02 UTC'\u003e\u003c\/span\u003e \u003cdiv class='jdgm-rev__br'\u003e\u003c\/div\u003e \u003cspan class='jdgm-rev__buyer-badge-wrapper'\u003e \u003cspan class='jdgm-rev__buyer-badge'\u003e\u003c\/span\u003e \u003c\/span\u003e \u003cspan class='jdgm-rev__author-wrapper'\u003e \u003cspan class='jdgm-rev__author'\u003eDemi Harm\u003c\/span\u003e \u003cspan class='jdgm-rev__location' \u003e \u003c\/span\u003e \u003c\/span\u003e \u003c\/div\u003e \u003cdiv class='jdgm-rev__content'\u003e \u003cdiv class='jdgm-rev__custom-form'\u003e \u003c\/div\u003e \u003cb class='jdgm-rev__title'\u003eAn Absolute NECESSITY!\u003c\/b\u003e \u003cdiv class='jdgm-rev__body'\u003e\u003cp\u003eAt first I thought will I need these. Hadn’t looked at reviews and didn’t really know what they were for. The cost was pretty steep as well but for some reason thought “just get them”. I’m a first time mum that wants to breastfeed and I’m so glad I over prepared and stocked myself up on everything that I might need because these were in use after Bub came off my breast the first time and all the way up til now. They’ve helped heal my cracked nipples after I apply a balm, any let down I’ve had gets stopped because of the cups. You have no idea how tender and sensitive your nipples will be and these silverettes help with all that. The fabric from my bras even though they were bamboo, soft and washed it was still too much to handle fabric on my nipples and wearing these cups helped with that and still helps with it. I’m only 2 weeks post pardum but I wear them everyday and night when Bub isn’t feeding or I’m letting the nips get some airtime. So so worth it!\u003c\/p\u003e\u003c\/div\u003e \u003cdiv class='jdgm-rev__pics'\u003e \u003c\/div\u003e \u003cdiv class='jdgm-rev__vids'\u003e \u003c\/div\u003e \u003cdiv class='jdgm-rev__transparency-badge-wrapper'\u003e \u003cdiv class='jdgm-rev__transparency-badge' data-badge-type=review_collected_via_store_invitation\u003e\u003c\/div\u003e \u003c\/div\u003e \u003c\/div\u003e \u003cdiv class='jdgm-rev__actions'\u003e \u003cdiv class='jdgm-rev__social'\u003e\u003c\/div\u003e \u003cdiv class='jdgm-rev__votes'\u003e\u003c\/div\u003e \u003c\/div\u003e \u003cdiv class='jdgm-rev__reply'\u003e \u003c\/div\u003e \u003c\/div\u003e\u003cdiv class='jdgm-rev jdgm-divider-top' data-verified-buyer='true' data-review-id='c62c77a6-867b-4dbd-978a-8ded3d267f66' data-review-language='' data-product-title='Silverette Nursing Cups' data-product-url='\/products\/silverette-nursing-cups' data-thumb-up-count='0' data-thumb-down-count='0'\u003e \u003cdiv class='jdgm-rev__header'\u003e \u003cdiv class='jdgm-rev__icon' \u003e A \u003c\/div\u003e \u003cspan class='jdgm-rev__rating' data-score='5' tabindex='0' aria-label='5 star review' role='img'\u003e \u003cspan class='jdgm-star jdgm--on'\u003e\u003c\/span\u003e\u003cspan class='jdgm-star jdgm--on'\u003e\u003c\/span\u003e\u003cspan class='jdgm-star jdgm--on'\u003e\u003c\/span\u003e\u003cspan class='jdgm-star jdgm--on'\u003e\u003c\/span\u003e\u003cspan class='jdgm-star jdgm--on'\u003e\u003c\/span\u003e \u003c\/span\u003e \u003cspan class='jdgm-rev__timestamp jdgm-spinner' data-content='2022-11-06 14:10:43 UTC'\u003e\u003c\/span\u003e \u003cdiv class='jdgm-rev__br'\u003e\u003c\/div\u003e \u003cspan class='jdgm-rev__buyer-badge-wrapper'\u003e \u003cspan class='jdgm-rev__buyer-badge'\u003e\u003c\/span\u003e \u003c\/span\u003e \u003cspan class='jdgm-rev__author-wrapper'\u003e \u003cspan class='jdgm-rev__author'\u003eAlissa m\u003c\/span\u003e \u003cspan class='jdgm-rev__location' \u003e \u003c\/span\u003e \u003c\/span\u003e \u003c\/div\u003e \u003cdiv class='jdgm-rev__content'\u003e \u003cdiv class='jdgm-rev__custom-form'\u003e \u003c\/div\u003e \u003cb class='jdgm-rev__title'\u003eBuy them!\u003c\/b\u003e \u003cdiv class='jdgm-rev__body'\u003e\u003cp\u003eCan not recommend enough. If you are on the fence, just buy them you won’t regret it!\u003c\/p\u003e\u003c\/div\u003e \u003cdiv class='jdgm-rev__pics'\u003e \u003c\/div\u003e \u003cdiv class='jdgm-rev__vids'\u003e \u003c\/div\u003e \u003cdiv class='jdgm-rev__transparency-badge-wrapper'\u003e \u003cdiv class='jdgm-rev__transparency-badge' data-badge-type=review_collected_via_store_invitation\u003e\u003c\/div\u003e \u003c\/div\u003e \u003c\/div\u003e \u003cdiv class='jdgm-rev__actions'\u003e \u003cdiv class='jdgm-rev__social'\u003e\u003c\/div\u003e \u003cdiv class='jdgm-rev__votes'\u003e\u003c\/div\u003e \u003c\/div\u003e \u003cdiv class='jdgm-rev__reply'\u003e \u003cdiv class='jdgm-rev__replier-wrapper'\u003e \u003cb class='jdgm-rev__replier'\u003e\u003c\/b\u003e \u003c\/div\u003e \u003cdiv class='jdgm-rev__reply-content'\u003e\u003cp\u003eThank you so much for your review, I’m so glad you loved it!\u003c\/p\u003e\u003c\/div\u003e \u003c\/div\u003e \u003c\/div\u003e\u003c\/div\u003e \u003cdiv class='jdgm-paginate' data-per-page='10' data-url='https:\/\/api.judge.me\/reviews\/reviews_for_widget' style=\"display: none;\"\u003e\u003c\/div\u003e \u003c\/div\u003e \u003cdiv class='jdgm-rev-widg__paginate-spinner-wrapper'\u003e \u003cdiv class='jdgm-spinner'\u003e\u003c\/div\u003e \u003c\/div\u003e \u003c\/div\u003e"},"collections":[{"id":281356533949,"handle":"baby-shower-gifts","title":"Baby Shower Gifts - Mum","updated_at":"2026-06-12T19:10:25+08:00","body_html":"\u003cp\u003eLooking for a unique baby shower gift? Or an all-in-one bundle pack to suit all your needs? We've got just the thing!\u003c\/p\u003e","published_at":"2021-12-06T13:43:56+08:00","sort_order":"best-selling","template_suffix":"baby-shower-gifts","disjunctive":true,"rules":[{"column":"tag","relation":"equals","condition":"Baby Shower Gifts - Mum"},{"column":"tag","relation":"equals","condition":"Gift Card"}],"published_scope":"global","image":{"created_at":"2024-05-06T11:59:28+08:00","alt":"Baby Shower Gifts - The Birth Store","width":1200,"height":1800,"src":"\/\/www.thebirthstore.com.au\/cdn\/shop\/collections\/baby-shower-gifts-401770.jpg?v=1761791272"}},{"id":281712427197,"handle":"breastfeeding","title":"Breastfeeding","updated_at":"2026-06-12T19:10:26+08:00","body_html":"","published_at":"2021-12-20T14:19:33+08:00","sort_order":"best-selling","template_suffix":"breastfeeding-collection","disjunctive":false,"rules":[{"column":"tag","relation":"equals","condition":"Breastfeeding"}],"published_scope":"global","image":{"created_at":"2024-05-06T11:59:34+08:00","alt":"Breastfeeding - The Birth Store","width":620,"height":635,"src":"\/\/www.thebirthstore.com.au\/cdn\/shop\/collections\/breastfeeding-793872.jpg?v=1714967974"}},{"id":261657460925,"handle":"buy","title":"Buy","updated_at":"2026-06-12T19:10:26+08:00","body_html":"\u003cp\u003eBrowse all of our pregnancy, labour \u0026amp; birth, postpartum and baby essentials here.\u003cbr\u003e\u003c\/p\u003e\n\u003cp\u003e\u003cspan\u003eYou can even buy now and pay later with Afterpay!\u003c\/span\u003e\u003c\/p\u003e","published_at":"2021-03-10T12:05:31+08:00","sort_order":"best-selling","template_suffix":"shop-all-collection","disjunctive":false,"rules":[{"column":"title","relation":"not_contains","condition":"Hire"}],"published_scope":"global","image":{"created_at":"2024-05-06T11:59:42+08:00","alt":"Buy - The Birth Store","width":2048,"height":2048,"src":"\/\/www.thebirthstore.com.au\/cdn\/shop\/collections\/buy-964856.jpg?v=1714967982"}},{"id":294349865149,"handle":"cracked-nipples","title":"Cracked Nipples","updated_at":"2026-06-02T19:09:48+08:00","body_html":"","published_at":"2023-09-21T14:03:02+08:00","sort_order":"best-selling","template_suffix":"swaddles-collection","disjunctive":false,"rules":[{"column":"tag","relation":"equals","condition":"Cracked Nipples"}],"published_scope":"global","image":{"created_at":"2024-05-06T11:59:53+08:00","alt":"Cracked Nipples - The Birth Store","width":1050,"height":1050,"src":"\/\/www.thebirthstore.com.au\/cdn\/shop\/collections\/cracked-nipples-166971.jpg?v=1714967994"}},{"id":337429201085,"handle":"hospital-bag","title":"Hospital Bag","updated_at":"2026-06-12T19:10:26+08:00","body_html":"","published_at":"2026-06-03T11:36:29+08:00","sort_order":"most-relevant","template_suffix":"","disjunctive":false,"rules":[{"column":"tag","relation":"equals","condition":"Hospital Bag"}],"published_scope":"global"},{"id":291456483517,"handle":"shop-all","title":"Shop All - Mum","updated_at":"2026-06-12T19:10:26+08:00","body_html":"","published_at":"2022-12-23T22:04:39+08:00","sort_order":"best-selling","template_suffix":"shop-all-collection","disjunctive":false,"rules":[{"column":"variant_price","relation":"greater_than","condition":"1"},{"column":"title","relation":"not_contains","condition":"Batteries"},{"column":"tag","relation":"equals","condition":"Mum"}],"published_scope":"global","image":{"created_at":"2024-05-06T12:00:54+08:00","alt":"Shop All - The Birth Store","width":1365,"height":2048,"src":"\/\/www.thebirthstore.com.au\/cdn\/shop\/collections\/shop-all-693176.jpg?v=1714968055"}},{"id":310045933757,"handle":"shop-all-sale","title":"Shop All Sale","updated_at":"2026-06-12T19:10:26+08:00","body_html":"","published_at":"2024-11-12T13:22:43+08:00","sort_order":"alpha-asc","template_suffix":"","disjunctive":true,"rules":[{"column":"tag","relation":"equals","condition":"Bundles"},{"column":"vendor","relation":"equals","condition":"Franjos Kitchen"},{"column":"vendor","relation":"equals","condition":"Adored Illustrations"},{"column":"vendor","relation":"equals","condition":"Amazing Oils"},{"column":"vendor","relation":"equals","condition":"Ice Ice Booby"},{"column":"vendor","relation":"equals","condition":"Made to Milk"},{"column":"vendor","relation":"equals","condition":"Milky Goodness"},{"column":"vendor","relation":"equals","condition":"Seasons of Mama"},{"column":"vendor","relation":"equals","condition":"Silverette"},{"column":"vendor","relation":"equals","condition":"Snuggle Hunny"},{"column":"vendor","relation":"equals","condition":"Yung Bod"},{"column":"vendor","relation":"equals","condition":"Bare Love"},{"column":"vendor","relation":"equals","condition":"Haakaa"},{"column":"vendor","relation":"equals","condition":"Mere Botanicals"},{"column":"vendor","relation":"equals","condition":"The Birth Store Hire"},{"column":"vendor","relation":"equals","condition":"The Birth Store"}],"published_scope":"global","image":{"created_at":"2024-11-13T10:58:16+08:00","alt":"Shop All Sale - The Birth Store","width":2048,"height":1365,"src":"\/\/www.thebirthstore.com.au\/cdn\/shop\/collections\/shop-all-sale-297361.jpg?v=1731466697"}}]}
{"item":{"id":7455576981693,"title":"Milky Goodness Lactation Cookies","handle":"lactation-cookies-select-your-flavour","description":"\u003cp\u003e\u003cmeta charset=\"utf-8\"\u003e\u003cspan\u003eThese Lactation Cookies are packed full of natural galactagogues including Flaxseed, Brewers Yeast \u0026amp; Oats which help to boost \u0026amp; support your milk supply while breastfeeding \u003c\/span\u003e\u003c\/p\u003e","published_at":"2023-03-22T13:42:02+08:00","created_at":"2023-03-22T12:24:58+08:00","vendor":"Milky Goodness","type":"","tags":["Baby Shower Gifts - Mum","Breastfeeding","Lactation Products","Mum"],"price":2695,"price_min":2695,"price_max":3195,"available":true,"price_varies":true,"compare_at_price":null,"compare_at_price_min":0,"compare_at_price_max":0,"compare_at_price_varies":false,"variants":[{"id":42739921158333,"title":"Triple Choc","option1":"Triple Choc","option2":null,"option3":null,"sku":"","requires_shipping":true,"taxable":false,"featured_image":{"id":34641024024765,"product_id":7455576981693,"position":2,"created_at":"2024-05-06T11:59:56+08:00","updated_at":"2024-05-06T11:59:56+08:00","alt":"Lactation Cookies – Select Your Flavour - The Birth Store-Milky Goodness","width":1080,"height":1080,"src":"\/\/www.thebirthstore.com.au\/cdn\/shop\/files\/lactation-cookies-select-your-flavour-767555.jpg?v=1714967996","variant_ids":[42739921158333]},"available":true,"name":"Milky Goodness Lactation Cookies - Triple Choc","public_title":"Triple Choc","options":["Triple Choc"],"price":2895,"weight":460,"compare_at_price":null,"inventory_management":"shopify","barcode":"21158333","featured_media":{"alt":"Lactation Cookies – Select Your Flavour - The Birth Store-Milky Goodness","id":27007593021629,"position":2,"preview_image":{"aspect_ratio":1.0,"height":1080,"width":1080,"src":"\/\/www.thebirthstore.com.au\/cdn\/shop\/files\/lactation-cookies-select-your-flavour-767555.jpg?v=1714967996"}},"requires_selling_plan":false,"selling_plan_allocations":[],"quantity_rule":{"min":1,"max":null,"increment":1}},{"id":42740002390205,"title":"Vanilla (Dairy \u0026 Soy Free)","option1":"Vanilla (Dairy \u0026 Soy Free)","option2":null,"option3":null,"sku":"","requires_shipping":true,"taxable":false,"featured_image":{"id":34641024057533,"product_id":7455576981693,"position":3,"created_at":"2024-05-06T11:59:56+08:00","updated_at":"2024-05-06T11:59:56+08:00","alt":"Lactation Cookies – Select Your Flavour - The Birth Store-Milky Goodness","width":1080,"height":1080,"src":"\/\/www.thebirthstore.com.au\/cdn\/shop\/files\/lactation-cookies-select-your-flavour-351431.jpg?v=1714967996","variant_ids":[42740002390205]},"available":true,"name":"Milky Goodness Lactation Cookies - Vanilla (Dairy \u0026 Soy Free)","public_title":"Vanilla (Dairy \u0026 Soy Free)","options":["Vanilla (Dairy \u0026 Soy Free)"],"price":2895,"weight":460,"compare_at_price":null,"inventory_management":"shopify","barcode":"02390205","featured_media":{"alt":"Lactation Cookies – Select Your Flavour - The Birth Store-Milky Goodness","id":27007593054397,"position":3,"preview_image":{"aspect_ratio":1.0,"height":1080,"width":1080,"src":"\/\/www.thebirthstore.com.au\/cdn\/shop\/files\/lactation-cookies-select-your-flavour-351431.jpg?v=1714967996"}},"requires_selling_plan":false,"selling_plan_allocations":[],"quantity_rule":{"min":1,"max":null,"increment":1}},{"id":42739921223869,"title":"Double Choc","option1":"Double Choc","option2":null,"option3":null,"sku":"","requires_shipping":true,"taxable":false,"featured_image":{"id":34641024090301,"product_id":7455576981693,"position":4,"created_at":"2024-05-06T11:59:56+08:00","updated_at":"2024-05-06T11:59:56+08:00","alt":"Lactation Cookies – Select Your Flavour - The Birth Store-Milky Goodness","width":1080,"height":1080,"src":"\/\/www.thebirthstore.com.au\/cdn\/shop\/files\/lactation-cookies-select-your-flavour-837468.jpg?v=1714967996","variant_ids":[42739921223869]},"available":true,"name":"Milky Goodness Lactation Cookies - Double Choc","public_title":"Double Choc","options":["Double Choc"],"price":2895,"weight":460,"compare_at_price":null,"inventory_management":"shopify","barcode":"21223869","featured_media":{"alt":"Lactation Cookies – Select Your Flavour - The Birth Store-Milky Goodness","id":27007593087165,"position":4,"preview_image":{"aspect_ratio":1.0,"height":1080,"width":1080,"src":"\/\/www.thebirthstore.com.au\/cdn\/shop\/files\/lactation-cookies-select-your-flavour-837468.jpg?v=1714967996"}},"requires_selling_plan":false,"selling_plan_allocations":[],"quantity_rule":{"min":1,"max":null,"increment":1}},{"id":42739921256637,"title":"Raspberry","option1":"Raspberry","option2":null,"option3":null,"sku":"","requires_shipping":true,"taxable":false,"featured_image":{"id":34641024123069,"product_id":7455576981693,"position":5,"created_at":"2024-05-06T11:59:56+08:00","updated_at":"2024-05-06T11:59:57+08:00","alt":"Lactation Cookies – Select Your Flavour - The Birth Store-Milky Goodness","width":1080,"height":1080,"src":"\/\/www.thebirthstore.com.au\/cdn\/shop\/files\/lactation-cookies-select-your-flavour-490349.jpg?v=1714967997","variant_ids":[42739921256637]},"available":true,"name":"Milky Goodness Lactation Cookies - Raspberry","public_title":"Raspberry","options":["Raspberry"],"price":3095,"weight":460,"compare_at_price":null,"inventory_management":"shopify","barcode":"21256637","featured_media":{"alt":"Lactation Cookies – Select Your Flavour - The Birth Store-Milky Goodness","id":27007593119933,"position":5,"preview_image":{"aspect_ratio":1.0,"height":1080,"width":1080,"src":"\/\/www.thebirthstore.com.au\/cdn\/shop\/files\/lactation-cookies-select-your-flavour-490349.jpg?v=1714967997"}},"requires_selling_plan":false,"selling_plan_allocations":[],"quantity_rule":{"min":1,"max":null,"increment":1}},{"id":42739921289405,"title":"Biscoff","option1":"Biscoff","option2":null,"option3":null,"sku":"","requires_shipping":true,"taxable":false,"featured_image":{"id":34641024155837,"product_id":7455576981693,"position":6,"created_at":"2024-05-06T11:59:57+08:00","updated_at":"2024-05-06T11:59:57+08:00","alt":"Lactation Cookies – Select Your Flavour - The Birth Store-Milky Goodness","width":1080,"height":1080,"src":"\/\/www.thebirthstore.com.au\/cdn\/shop\/files\/lactation-cookies-select-your-flavour-892342.jpg?v=1714967997","variant_ids":[42739921289405]},"available":true,"name":"Milky Goodness Lactation Cookies - Biscoff","public_title":"Biscoff","options":["Biscoff"],"price":3095,"weight":460,"compare_at_price":null,"inventory_management":"shopify","barcode":"21289405","featured_media":{"alt":"Lactation Cookies – Select Your Flavour - The Birth Store-Milky Goodness","id":27007593152701,"position":6,"preview_image":{"aspect_ratio":1.0,"height":1080,"width":1080,"src":"\/\/www.thebirthstore.com.au\/cdn\/shop\/files\/lactation-cookies-select-your-flavour-892342.jpg?v=1714967997"}},"requires_selling_plan":false,"selling_plan_allocations":[],"quantity_rule":{"min":1,"max":null,"increment":1}},{"id":42739921322173,"title":"Caramilk","option1":"Caramilk","option2":null,"option3":null,"sku":"","requires_shipping":true,"taxable":false,"featured_image":{"id":34641024188605,"product_id":7455576981693,"position":7,"created_at":"2024-05-06T11:59:57+08:00","updated_at":"2024-05-06T11:59:57+08:00","alt":"Lactation Cookies – Select Your Flavour - The Birth Store-Milky Goodness","width":1080,"height":1080,"src":"\/\/www.thebirthstore.com.au\/cdn\/shop\/files\/lactation-cookies-select-your-flavour-674032.jpg?v=1714967997","variant_ids":[42739921322173]},"available":true,"name":"Milky Goodness Lactation Cookies - Caramilk","public_title":"Caramilk","options":["Caramilk"],"price":3095,"weight":460,"compare_at_price":null,"inventory_management":"shopify","barcode":"21322173","featured_media":{"alt":"Lactation Cookies – Select Your Flavour - The Birth Store-Milky Goodness","id":27007593185469,"position":7,"preview_image":{"aspect_ratio":1.0,"height":1080,"width":1080,"src":"\/\/www.thebirthstore.com.au\/cdn\/shop\/files\/lactation-cookies-select-your-flavour-674032.jpg?v=1714967997"}},"requires_selling_plan":false,"selling_plan_allocations":[],"quantity_rule":{"min":1,"max":null,"increment":1}},{"id":42739921354941,"title":"Nutella","option1":"Nutella","option2":null,"option3":null,"sku":"","requires_shipping":true,"taxable":false,"featured_image":{"id":34641024221373,"product_id":7455576981693,"position":8,"created_at":"2024-05-06T11:59:57+08:00","updated_at":"2024-05-06T11:59:57+08:00","alt":"Lactation Cookies – Select Your Flavour - The Birth Store-Milky Goodness","width":1080,"height":1080,"src":"\/\/www.thebirthstore.com.au\/cdn\/shop\/files\/lactation-cookies-select-your-flavour-458424.jpg?v=1714967997","variant_ids":[42739921354941]},"available":true,"name":"Milky Goodness Lactation Cookies - Nutella","public_title":"Nutella","options":["Nutella"],"price":3095,"weight":460,"compare_at_price":null,"inventory_management":"shopify","barcode":"21354941","featured_media":{"alt":"Lactation Cookies – Select Your Flavour - The Birth Store-Milky Goodness","id":27007593218237,"position":8,"preview_image":{"aspect_ratio":1.0,"height":1080,"width":1080,"src":"\/\/www.thebirthstore.com.au\/cdn\/shop\/files\/lactation-cookies-select-your-flavour-458424.jpg?v=1714967997"}},"requires_selling_plan":false,"selling_plan_allocations":[],"quantity_rule":{"min":1,"max":null,"increment":1}},{"id":42739921420477,"title":"Dark Chocolate Chip","option1":"Dark Chocolate Chip","option2":null,"option3":null,"sku":"","requires_shipping":true,"taxable":false,"featured_image":{"id":34641024286909,"product_id":7455576981693,"position":10,"created_at":"2024-05-06T11:59:57+08:00","updated_at":"2024-05-06T11:59:57+08:00","alt":"Lactation Cookies – Select Your Flavour - The Birth Store-Milky Goodness","width":1080,"height":1080,"src":"\/\/www.thebirthstore.com.au\/cdn\/shop\/files\/lactation-cookies-select-your-flavour-905330.jpg?v=1714967997","variant_ids":[42739921420477]},"available":true,"name":"Milky Goodness Lactation Cookies - Dark Chocolate Chip","public_title":"Dark Chocolate Chip","options":["Dark Chocolate Chip"],"price":2695,"weight":460,"compare_at_price":null,"inventory_management":"shopify","barcode":"21420477","featured_media":{"alt":"Lactation Cookies – Select Your Flavour - The Birth Store-Milky Goodness","id":27007593283773,"position":10,"preview_image":{"aspect_ratio":1.0,"height":1080,"width":1080,"src":"\/\/www.thebirthstore.com.au\/cdn\/shop\/files\/lactation-cookies-select-your-flavour-905330.jpg?v=1714967997"}},"requires_selling_plan":false,"selling_plan_allocations":[],"quantity_rule":{"min":1,"max":null,"increment":1}},{"id":42739921453245,"title":"White Chocolate Chip \u0026 Macadamia","option1":"White Chocolate Chip \u0026 Macadamia","option2":null,"option3":null,"sku":"","requires_shipping":true,"taxable":false,"featured_image":{"id":34641024319677,"product_id":7455576981693,"position":11,"created_at":"2024-05-06T11:59:57+08:00","updated_at":"2024-05-06T11:59:57+08:00","alt":"Lactation Cookies – Select Your Flavour - The Birth Store-Milky Goodness","width":1080,"height":1080,"src":"\/\/www.thebirthstore.com.au\/cdn\/shop\/files\/lactation-cookies-select-your-flavour-987399.jpg?v=1714967997","variant_ids":[42739921453245]},"available":true,"name":"Milky Goodness Lactation Cookies - White Chocolate Chip \u0026 Macadamia","public_title":"White Chocolate Chip \u0026 Macadamia","options":["White Chocolate Chip \u0026 Macadamia"],"price":2695,"weight":460,"compare_at_price":null,"inventory_management":"shopify","barcode":"21453245","featured_media":{"alt":"Lactation Cookies – Select Your Flavour - The Birth Store-Milky Goodness","id":27007593316541,"position":11,"preview_image":{"aspect_ratio":1.0,"height":1080,"width":1080,"src":"\/\/www.thebirthstore.com.au\/cdn\/shop\/files\/lactation-cookies-select-your-flavour-987399.jpg?v=1714967997"}},"requires_selling_plan":false,"selling_plan_allocations":[],"quantity_rule":{"min":1,"max":null,"increment":1}},{"id":42739921486013,"title":"Chocolate Chip","option1":"Chocolate Chip","option2":null,"option3":null,"sku":"","requires_shipping":true,"taxable":false,"featured_image":{"id":34641024352445,"product_id":7455576981693,"position":12,"created_at":"2024-05-06T11:59:57+08:00","updated_at":"2024-05-06T11:59:57+08:00","alt":"Lactation Cookies – Select Your Flavour - The Birth Store-Milky Goodness","width":1080,"height":1080,"src":"\/\/www.thebirthstore.com.au\/cdn\/shop\/files\/lactation-cookies-select-your-flavour-309897.jpg?v=1714967997","variant_ids":[42739921486013]},"available":true,"name":"Milky Goodness Lactation Cookies - Chocolate Chip","public_title":"Chocolate Chip","options":["Chocolate Chip"],"price":2695,"weight":460,"compare_at_price":null,"inventory_management":"shopify","barcode":"21486013","featured_media":{"alt":"Lactation Cookies – Select Your Flavour - The Birth Store-Milky Goodness","id":27007593349309,"position":12,"preview_image":{"aspect_ratio":1.0,"height":1080,"width":1080,"src":"\/\/www.thebirthstore.com.au\/cdn\/shop\/files\/lactation-cookies-select-your-flavour-309897.jpg?v=1714967997"}},"requires_selling_plan":false,"selling_plan_allocations":[],"quantity_rule":{"min":1,"max":null,"increment":1}},{"id":44839651115197,"title":"Nutella \u0026 M\u0026M's","option1":"Nutella \u0026 M\u0026M's","option2":null,"option3":null,"sku":"","requires_shipping":true,"taxable":false,"featured_image":{"id":38738877874365,"product_id":7455576981693,"position":18,"created_at":"2025-11-02T23:38:49+08:00","updated_at":"2025-11-03T12:22:55+08:00","alt":"Milky Goodness Lactation Cookies - The Birth Store - Milky Goodness","width":1080,"height":1080,"src":"\/\/www.thebirthstore.com.au\/cdn\/shop\/files\/milky-goodness-lactation-cookies-5400492.png?v=1762143775","variant_ids":[44839651115197]},"available":true,"name":"Milky Goodness Lactation Cookies - Nutella \u0026 M\u0026M's","public_title":"Nutella \u0026 M\u0026M's","options":["Nutella \u0026 M\u0026M's"],"price":3195,"weight":460,"compare_at_price":null,"inventory_management":"shopify","barcode":"51115197","featured_media":{"alt":"Milky Goodness Lactation Cookies - The Birth Store - Milky Goodness","id":29988541366461,"position":18,"preview_image":{"aspect_ratio":1.0,"height":1080,"width":1080,"src":"\/\/www.thebirthstore.com.au\/cdn\/shop\/files\/milky-goodness-lactation-cookies-5400492.png?v=1762143775"}},"requires_selling_plan":false,"selling_plan_allocations":[],"quantity_rule":{"min":1,"max":null,"increment":1}},{"id":44839652425917,"title":"Strawberry","option1":"Strawberry","option2":null,"option3":null,"sku":"","requires_shipping":true,"taxable":false,"featured_image":{"id":38738878922941,"product_id":7455576981693,"position":19,"created_at":"2025-11-02T23:39:29+08:00","updated_at":"2025-11-03T12:22:55+08:00","alt":"Milky Goodness Lactation Cookies - The Birth Store - Milky Goodness","width":1080,"height":1080,"src":"\/\/www.thebirthstore.com.au\/cdn\/shop\/files\/milky-goodness-lactation-cookies-9540997.png?v=1762143775","variant_ids":[44839652425917]},"available":true,"name":"Milky Goodness Lactation Cookies - Strawberry","public_title":"Strawberry","options":["Strawberry"],"price":3195,"weight":460,"compare_at_price":null,"inventory_management":"shopify","barcode":"52425917","featured_media":{"alt":"Milky Goodness Lactation Cookies - The Birth Store - Milky Goodness","id":29988541497533,"position":19,"preview_image":{"aspect_ratio":1.0,"height":1080,"width":1080,"src":"\/\/www.thebirthstore.com.au\/cdn\/shop\/files\/milky-goodness-lactation-cookies-9540997.png?v=1762143775"}},"requires_selling_plan":false,"selling_plan_allocations":[],"quantity_rule":{"min":1,"max":null,"increment":1}},{"id":44839652851901,"title":"Mint Slice","option1":"Mint Slice","option2":null,"option3":null,"sku":"","requires_shipping":true,"taxable":false,"featured_image":{"id":38738881577149,"product_id":7455576981693,"position":20,"created_at":"2025-11-02T23:40:39+08:00","updated_at":"2025-11-03T12:22:55+08:00","alt":"Milky Goodness Lactation Cookies - The Birth Store - Milky Goodness","width":1080,"height":1080,"src":"\/\/www.thebirthstore.com.au\/cdn\/shop\/files\/milky-goodness-lactation-cookies-9278775.png?v=1762143775","variant_ids":[44839652851901]},"available":false,"name":"Milky Goodness Lactation Cookies - Mint Slice","public_title":"Mint Slice","options":["Mint Slice"],"price":3195,"weight":460,"compare_at_price":null,"inventory_management":"shopify","barcode":"52851901","featured_media":{"alt":"Milky Goodness Lactation Cookies - The Birth Store - Milky Goodness","id":29988542808253,"position":20,"preview_image":{"aspect_ratio":1.0,"height":1080,"width":1080,"src":"\/\/www.thebirthstore.com.au\/cdn\/shop\/files\/milky-goodness-lactation-cookies-9278775.png?v=1762143775"}},"requires_selling_plan":false,"selling_plan_allocations":[],"quantity_rule":{"min":1,"max":null,"increment":1}},{"id":44839653507261,"title":"Birthday Cake","option1":"Birthday Cake","option2":null,"option3":null,"sku":"","requires_shipping":true,"taxable":false,"featured_image":{"id":38738882068669,"product_id":7455576981693,"position":21,"created_at":"2025-11-02T23:40:54+08:00","updated_at":"2025-11-03T12:22:56+08:00","alt":"Milky Goodness Lactation Cookies - The Birth Store - Milky Goodness","width":1080,"height":1080,"src":"\/\/www.thebirthstore.com.au\/cdn\/shop\/files\/milky-goodness-lactation-cookies-4715685.png?v=1762143776","variant_ids":[44839653507261]},"available":true,"name":"Milky Goodness Lactation Cookies - Birthday Cake","public_title":"Birthday Cake","options":["Birthday Cake"],"price":3195,"weight":460,"compare_at_price":null,"inventory_management":"shopify","barcode":"53507261","featured_media":{"alt":"Milky Goodness Lactation Cookies - The Birth Store - Milky Goodness","id":29988543037629,"position":21,"preview_image":{"aspect_ratio":1.0,"height":1080,"width":1080,"src":"\/\/www.thebirthstore.com.au\/cdn\/shop\/files\/milky-goodness-lactation-cookies-4715685.png?v=1762143776"}},"requires_selling_plan":false,"selling_plan_allocations":[],"quantity_rule":{"min":1,"max":null,"increment":1}},{"id":44921536184509,"title":"Mixed Box","option1":"Mixed Box","option2":null,"option3":null,"sku":"","requires_shipping":true,"taxable":false,"featured_image":{"id":36251126366397,"product_id":7455576981693,"position":13,"created_at":"2025-02-10T13:52:14+08:00","updated_at":"2025-02-11T14:34:00+08:00","alt":"Milky Goodness Lactation Cookies - The Birth Store - Milky Goodness","width":1080,"height":1080,"src":"\/\/www.thebirthstore.com.au\/cdn\/shop\/files\/milky-goodness-lactation-cookies-167661.jpg?v=1739255640","variant_ids":[44921536184509]},"available":true,"name":"Milky Goodness Lactation Cookies - Mixed Box","public_title":"Mixed Box","options":["Mixed Box"],"price":2795,"weight":460,"compare_at_price":null,"inventory_management":"shopify","barcode":"06912189","featured_media":{"alt":"Milky Goodness Lactation Cookies - The Birth Store - Milky Goodness","id":28269590249661,"position":13,"preview_image":{"aspect_ratio":1.0,"height":1080,"width":1080,"src":"\/\/www.thebirthstore.com.au\/cdn\/shop\/files\/milky-goodness-lactation-cookies-167661.jpg?v=1739255640"}},"requires_selling_plan":false,"selling_plan_allocations":[],"quantity_rule":{"min":1,"max":null,"increment":1}}],"images":["\/\/www.thebirthstore.com.au\/cdn\/shop\/files\/lactation-cookies-select-your-flavour-197058.jpg?v=1714967996","\/\/www.thebirthstore.com.au\/cdn\/shop\/files\/lactation-cookies-select-your-flavour-767555.jpg?v=1714967996","\/\/www.thebirthstore.com.au\/cdn\/shop\/files\/lactation-cookies-select-your-flavour-351431.jpg?v=1714967996","\/\/www.thebirthstore.com.au\/cdn\/shop\/files\/lactation-cookies-select-your-flavour-837468.jpg?v=1714967996","\/\/www.thebirthstore.com.au\/cdn\/shop\/files\/lactation-cookies-select-your-flavour-490349.jpg?v=1714967997","\/\/www.thebirthstore.com.au\/cdn\/shop\/files\/lactation-cookies-select-your-flavour-892342.jpg?v=1714967997","\/\/www.thebirthstore.com.au\/cdn\/shop\/files\/lactation-cookies-select-your-flavour-674032.jpg?v=1714967997","\/\/www.thebirthstore.com.au\/cdn\/shop\/files\/lactation-cookies-select-your-flavour-458424.jpg?v=1714967997","\/\/www.thebirthstore.com.au\/cdn\/shop\/files\/lactation-cookies-select-your-flavour-495552.jpg?v=1714967997","\/\/www.thebirthstore.com.au\/cdn\/shop\/files\/lactation-cookies-select-your-flavour-905330.jpg?v=1714967997","\/\/www.thebirthstore.com.au\/cdn\/shop\/files\/lactation-cookies-select-your-flavour-987399.jpg?v=1714967997","\/\/www.thebirthstore.com.au\/cdn\/shop\/files\/lactation-cookies-select-your-flavour-309897.jpg?v=1714967997","\/\/www.thebirthstore.com.au\/cdn\/shop\/files\/milky-goodness-lactation-cookies-167661.jpg?v=1739255640","\/\/www.thebirthstore.com.au\/cdn\/shop\/files\/milky-goodness-lactation-cookies-952411.png?v=1739255641","\/\/www.thebirthstore.com.au\/cdn\/shop\/files\/milky-goodness-lactation-cookies-962628.png?v=1739255641","\/\/www.thebirthstore.com.au\/cdn\/shop\/files\/milky-goodness-lactation-cookies-972826.png?v=1739255641","\/\/www.thebirthstore.com.au\/cdn\/shop\/files\/milky-goodness-lactation-cookies-933276.png?v=1739255641","\/\/www.thebirthstore.com.au\/cdn\/shop\/files\/milky-goodness-lactation-cookies-5400492.png?v=1762143775","\/\/www.thebirthstore.com.au\/cdn\/shop\/files\/milky-goodness-lactation-cookies-9540997.png?v=1762143775","\/\/www.thebirthstore.com.au\/cdn\/shop\/files\/milky-goodness-lactation-cookies-9278775.png?v=1762143775","\/\/www.thebirthstore.com.au\/cdn\/shop\/files\/milky-goodness-lactation-cookies-4715685.png?v=1762143776"],"featured_image":"\/\/www.thebirthstore.com.au\/cdn\/shop\/files\/lactation-cookies-select-your-flavour-197058.jpg?v=1714967996","options":["Flavours"],"media":[{"alt":"Lactation Cookies – Select Your Flavour - The Birth Store-Milky Goodness","id":27007592956093,"position":1,"preview_image":{"aspect_ratio":1.0,"height":1080,"width":1080,"src":"\/\/www.thebirthstore.com.au\/cdn\/shop\/files\/lactation-cookies-select-your-flavour-197058.jpg?v=1714967996"},"aspect_ratio":1.0,"height":1080,"media_type":"image","src":"\/\/www.thebirthstore.com.au\/cdn\/shop\/files\/lactation-cookies-select-your-flavour-197058.jpg?v=1714967996","width":1080},{"alt":"Lactation Cookies – Select Your Flavour - The Birth Store-Milky Goodness","id":27007593021629,"position":2,"preview_image":{"aspect_ratio":1.0,"height":1080,"width":1080,"src":"\/\/www.thebirthstore.com.au\/cdn\/shop\/files\/lactation-cookies-select-your-flavour-767555.jpg?v=1714967996"},"aspect_ratio":1.0,"height":1080,"media_type":"image","src":"\/\/www.thebirthstore.com.au\/cdn\/shop\/files\/lactation-cookies-select-your-flavour-767555.jpg?v=1714967996","width":1080},{"alt":"Lactation Cookies – Select Your Flavour - The Birth Store-Milky Goodness","id":27007593054397,"position":3,"preview_image":{"aspect_ratio":1.0,"height":1080,"width":1080,"src":"\/\/www.thebirthstore.com.au\/cdn\/shop\/files\/lactation-cookies-select-your-flavour-351431.jpg?v=1714967996"},"aspect_ratio":1.0,"height":1080,"media_type":"image","src":"\/\/www.thebirthstore.com.au\/cdn\/shop\/files\/lactation-cookies-select-your-flavour-351431.jpg?v=1714967996","width":1080},{"alt":"Lactation Cookies – Select Your Flavour - The Birth Store-Milky Goodness","id":27007593087165,"position":4,"preview_image":{"aspect_ratio":1.0,"height":1080,"width":1080,"src":"\/\/www.thebirthstore.com.au\/cdn\/shop\/files\/lactation-cookies-select-your-flavour-837468.jpg?v=1714967996"},"aspect_ratio":1.0,"height":1080,"media_type":"image","src":"\/\/www.thebirthstore.com.au\/cdn\/shop\/files\/lactation-cookies-select-your-flavour-837468.jpg?v=1714967996","width":1080},{"alt":"Lactation Cookies – Select Your Flavour - The Birth Store-Milky Goodness","id":27007593119933,"position":5,"preview_image":{"aspect_ratio":1.0,"height":1080,"width":1080,"src":"\/\/www.thebirthstore.com.au\/cdn\/shop\/files\/lactation-cookies-select-your-flavour-490349.jpg?v=1714967997"},"aspect_ratio":1.0,"height":1080,"media_type":"image","src":"\/\/www.thebirthstore.com.au\/cdn\/shop\/files\/lactation-cookies-select-your-flavour-490349.jpg?v=1714967997","width":1080},{"alt":"Lactation Cookies – Select Your Flavour - The Birth Store-Milky Goodness","id":27007593152701,"position":6,"preview_image":{"aspect_ratio":1.0,"height":1080,"width":1080,"src":"\/\/www.thebirthstore.com.au\/cdn\/shop\/files\/lactation-cookies-select-your-flavour-892342.jpg?v=1714967997"},"aspect_ratio":1.0,"height":1080,"media_type":"image","src":"\/\/www.thebirthstore.com.au\/cdn\/shop\/files\/lactation-cookies-select-your-flavour-892342.jpg?v=1714967997","width":1080},{"alt":"Lactation Cookies – Select Your Flavour - The Birth Store-Milky Goodness","id":27007593185469,"position":7,"preview_image":{"aspect_ratio":1.0,"height":1080,"width":1080,"src":"\/\/www.thebirthstore.com.au\/cdn\/shop\/files\/lactation-cookies-select-your-flavour-674032.jpg?v=1714967997"},"aspect_ratio":1.0,"height":1080,"media_type":"image","src":"\/\/www.thebirthstore.com.au\/cdn\/shop\/files\/lactation-cookies-select-your-flavour-674032.jpg?v=1714967997","width":1080},{"alt":"Lactation Cookies – Select Your Flavour - The Birth Store-Milky Goodness","id":27007593218237,"position":8,"preview_image":{"aspect_ratio":1.0,"height":1080,"width":1080,"src":"\/\/www.thebirthstore.com.au\/cdn\/shop\/files\/lactation-cookies-select-your-flavour-458424.jpg?v=1714967997"},"aspect_ratio":1.0,"height":1080,"media_type":"image","src":"\/\/www.thebirthstore.com.au\/cdn\/shop\/files\/lactation-cookies-select-your-flavour-458424.jpg?v=1714967997","width":1080},{"alt":"Lactation Cookies – Select Your Flavour - The Birth Store-Milky Goodness","id":27007593251005,"position":9,"preview_image":{"aspect_ratio":1.0,"height":1080,"width":1080,"src":"\/\/www.thebirthstore.com.au\/cdn\/shop\/files\/lactation-cookies-select-your-flavour-495552.jpg?v=1714967997"},"aspect_ratio":1.0,"height":1080,"media_type":"image","src":"\/\/www.thebirthstore.com.au\/cdn\/shop\/files\/lactation-cookies-select-your-flavour-495552.jpg?v=1714967997","width":1080},{"alt":"Lactation Cookies – Select Your Flavour - The Birth Store-Milky Goodness","id":27007593283773,"position":10,"preview_image":{"aspect_ratio":1.0,"height":1080,"width":1080,"src":"\/\/www.thebirthstore.com.au\/cdn\/shop\/files\/lactation-cookies-select-your-flavour-905330.jpg?v=1714967997"},"aspect_ratio":1.0,"height":1080,"media_type":"image","src":"\/\/www.thebirthstore.com.au\/cdn\/shop\/files\/lactation-cookies-select-your-flavour-905330.jpg?v=1714967997","width":1080},{"alt":"Lactation Cookies – Select Your Flavour - The Birth Store-Milky Goodness","id":27007593316541,"position":11,"preview_image":{"aspect_ratio":1.0,"height":1080,"width":1080,"src":"\/\/www.thebirthstore.com.au\/cdn\/shop\/files\/lactation-cookies-select-your-flavour-987399.jpg?v=1714967997"},"aspect_ratio":1.0,"height":1080,"media_type":"image","src":"\/\/www.thebirthstore.com.au\/cdn\/shop\/files\/lactation-cookies-select-your-flavour-987399.jpg?v=1714967997","width":1080},{"alt":"Lactation Cookies – Select Your Flavour - The Birth Store-Milky Goodness","id":27007593349309,"position":12,"preview_image":{"aspect_ratio":1.0,"height":1080,"width":1080,"src":"\/\/www.thebirthstore.com.au\/cdn\/shop\/files\/lactation-cookies-select-your-flavour-309897.jpg?v=1714967997"},"aspect_ratio":1.0,"height":1080,"media_type":"image","src":"\/\/www.thebirthstore.com.au\/cdn\/shop\/files\/lactation-cookies-select-your-flavour-309897.jpg?v=1714967997","width":1080},{"alt":"Milky Goodness Lactation Cookies - The Birth Store - Milky Goodness","id":28269590249661,"position":13,"preview_image":{"aspect_ratio":1.0,"height":1080,"width":1080,"src":"\/\/www.thebirthstore.com.au\/cdn\/shop\/files\/milky-goodness-lactation-cookies-167661.jpg?v=1739255640"},"aspect_ratio":1.0,"height":1080,"media_type":"image","src":"\/\/www.thebirthstore.com.au\/cdn\/shop\/files\/milky-goodness-lactation-cookies-167661.jpg?v=1739255640","width":1080},{"alt":"Milky Goodness Lactation Cookies - The Birth Store - Milky Goodness","id":28269607911613,"position":14,"preview_image":{"aspect_ratio":1.026,"height":581,"width":596,"src":"\/\/www.thebirthstore.com.au\/cdn\/shop\/files\/milky-goodness-lactation-cookies-952411.png?v=1739255641"},"aspect_ratio":1.026,"height":581,"media_type":"image","src":"\/\/www.thebirthstore.com.au\/cdn\/shop\/files\/milky-goodness-lactation-cookies-952411.png?v=1739255641","width":596},{"alt":"Milky Goodness Lactation Cookies - The Birth Store - Milky Goodness","id":28269626884285,"position":15,"preview_image":{"aspect_ratio":1.015,"height":532,"width":540,"src":"\/\/www.thebirthstore.com.au\/cdn\/shop\/files\/milky-goodness-lactation-cookies-962628.png?v=1739255641"},"aspect_ratio":1.015,"height":532,"media_type":"image","src":"\/\/www.thebirthstore.com.au\/cdn\/shop\/files\/milky-goodness-lactation-cookies-962628.png?v=1739255641","width":540},{"alt":"Milky Goodness Lactation Cookies - The Birth Store - Milky Goodness","id":28269629079741,"position":16,"preview_image":{"aspect_ratio":1.015,"height":518,"width":526,"src":"\/\/www.thebirthstore.com.au\/cdn\/shop\/files\/milky-goodness-lactation-cookies-972826.png?v=1739255641"},"aspect_ratio":1.015,"height":518,"media_type":"image","src":"\/\/www.thebirthstore.com.au\/cdn\/shop\/files\/milky-goodness-lactation-cookies-972826.png?v=1739255641","width":526},{"alt":"Milky Goodness Lactation Cookies - The Birth Store - Milky Goodness","id":28269632323773,"position":17,"preview_image":{"aspect_ratio":1.011,"height":522,"width":528,"src":"\/\/www.thebirthstore.com.au\/cdn\/shop\/files\/milky-goodness-lactation-cookies-933276.png?v=1739255641"},"aspect_ratio":1.011,"height":522,"media_type":"image","src":"\/\/www.thebirthstore.com.au\/cdn\/shop\/files\/milky-goodness-lactation-cookies-933276.png?v=1739255641","width":528},{"alt":"Milky Goodness Lactation Cookies - The Birth Store - Milky Goodness","id":29988541366461,"position":18,"preview_image":{"aspect_ratio":1.0,"height":1080,"width":1080,"src":"\/\/www.thebirthstore.com.au\/cdn\/shop\/files\/milky-goodness-lactation-cookies-5400492.png?v=1762143775"},"aspect_ratio":1.0,"height":1080,"media_type":"image","src":"\/\/www.thebirthstore.com.au\/cdn\/shop\/files\/milky-goodness-lactation-cookies-5400492.png?v=1762143775","width":1080},{"alt":"Milky Goodness Lactation Cookies - The Birth Store - Milky Goodness","id":29988541497533,"position":19,"preview_image":{"aspect_ratio":1.0,"height":1080,"width":1080,"src":"\/\/www.thebirthstore.com.au\/cdn\/shop\/files\/milky-goodness-lactation-cookies-9540997.png?v=1762143775"},"aspect_ratio":1.0,"height":1080,"media_type":"image","src":"\/\/www.thebirthstore.com.au\/cdn\/shop\/files\/milky-goodness-lactation-cookies-9540997.png?v=1762143775","width":1080},{"alt":"Milky Goodness Lactation Cookies - The Birth Store - Milky Goodness","id":29988542808253,"position":20,"preview_image":{"aspect_ratio":1.0,"height":1080,"width":1080,"src":"\/\/www.thebirthstore.com.au\/cdn\/shop\/files\/milky-goodness-lactation-cookies-9278775.png?v=1762143775"},"aspect_ratio":1.0,"height":1080,"media_type":"image","src":"\/\/www.thebirthstore.com.au\/cdn\/shop\/files\/milky-goodness-lactation-cookies-9278775.png?v=1762143775","width":1080},{"alt":"Milky Goodness Lactation Cookies - The Birth Store - Milky Goodness","id":29988543037629,"position":21,"preview_image":{"aspect_ratio":1.0,"height":1080,"width":1080,"src":"\/\/www.thebirthstore.com.au\/cdn\/shop\/files\/milky-goodness-lactation-cookies-4715685.png?v=1762143776"},"aspect_ratio":1.0,"height":1080,"media_type":"image","src":"\/\/www.thebirthstore.com.au\/cdn\/shop\/files\/milky-goodness-lactation-cookies-4715685.png?v=1762143776","width":1080}],"requires_selling_plan":false,"selling_plan_groups":[],"content":"\u003cp\u003e\u003cmeta charset=\"utf-8\"\u003e\u003cspan\u003eThese Lactation Cookies are packed full of natural galactagogues including Flaxseed, Brewers Yeast \u0026amp; Oats which help to boost \u0026amp; support your milk supply while breastfeeding \u003c\/span\u003e\u003c\/p\u003e"},"options":[{"name":"Flavours","position":1,"values":["Triple Choc","Vanilla (Dairy \u0026 Soy Free)","Double Choc","Raspberry","Biscoff","Caramilk","Nutella","Dark Chocolate Chip","White Chocolate Chip \u0026 Macadamia","Chocolate Chip","Nutella \u0026 M\u0026M's","Strawberry","Mint Slice","Birthday Cake","Mixed Box"]}],"custom_metafields":{},"metafields":{"badge":"\u003cdiv style='display:none' class='jdgm-prev-badge' data-average-rating='0.00' data-number-of-reviews='0' data-number-of-questions='0'\u003e \u003cspan class='jdgm-prev-badge__stars' data-score='0.00' tabindex='0' aria-label='0.00 stars' role='button'\u003e \u003cspan class='jdgm-star jdgm--off'\u003e\u003c\/span\u003e\u003cspan class='jdgm-star jdgm--off'\u003e\u003c\/span\u003e\u003cspan class='jdgm-star jdgm--off'\u003e\u003c\/span\u003e\u003cspan class='jdgm-star jdgm--off'\u003e\u003c\/span\u003e\u003cspan class='jdgm-star jdgm--off'\u003e\u003c\/span\u003e \u003c\/span\u003e \u003cspan class='jdgm-prev-badge__text'\u003e No reviews \u003c\/span\u003e \u003c\/div\u003e","widget":"\u003cdiv class='jdgm-rev-widg' data-updated-at='2025-06-13T16:12:53Z' data-average-rating='0.00' data-number-of-reviews='0' data-number-of-questions='0'\u003e \u003cstyle class='jdgm-temp-hiding-style'\u003e.jdgm-rev-widg{ display: none }\u003c\/style\u003e \u003cdiv class='jdgm-rev-widg__header'\u003e \u003ch2 class='jdgm-rev-widg__title'\u003eCustomer Reviews\u003c\/h2\u003e \u003cdiv class='jdgm-rev-widg__summary'\u003e \u003cdiv class='jdgm-rev-widg__summary-stars' aria-label='Average rating is 0.00 stars' role='img'\u003e \u003cspan class='jdgm-star jdgm--off'\u003e\u003c\/span\u003e\u003cspan class='jdgm-star jdgm--off'\u003e\u003c\/span\u003e\u003cspan class='jdgm-star jdgm--off'\u003e\u003c\/span\u003e\u003cspan class='jdgm-star jdgm--off'\u003e\u003c\/span\u003e\u003cspan class='jdgm-star jdgm--off'\u003e\u003c\/span\u003e \u003c\/div\u003e \u003cdiv class='jdgm-rev-widg__summary-text'\u003eBe the first to write a review\u003c\/div\u003e \u003c\/div\u003e \u003ca style='display: none' href='#' class='jdgm-write-rev-link' role='button'\u003eWrite a review\u003c\/a\u003e \u003cdiv class='jdgm-histogram jdgm-temp-hidden'\u003e \u003cdiv class='jdgm-histogram__row' data-rating='5' data-frequency='0' data-percentage='0'\u003e \u003cdiv class='jdgm-histogram__star' role='button' aria-label=\"0% (0) reviews with 5 star rating\" tabindex='0' \u003e\u003cspan class='jdgm-star jdgm--on'\u003e\u003c\/span\u003e\u003cspan class='jdgm-star jdgm--on'\u003e\u003c\/span\u003e\u003cspan class='jdgm-star jdgm--on'\u003e\u003c\/span\u003e\u003cspan class='jdgm-star jdgm--on'\u003e\u003c\/span\u003e\u003cspan class='jdgm-star jdgm--on'\u003e\u003c\/span\u003e\u003c\/div\u003e \u003cdiv class='jdgm-histogram__bar'\u003e \u003cdiv class='jdgm-histogram__bar-content' style='width: 0%;'\u003e \u003c\/div\u003e \u003c\/div\u003e \u003cdiv class='jdgm-histogram__percentage'\u003e0%\u003c\/div\u003e \u003cdiv class='jdgm-histogram__frequency'\u003e(0)\u003c\/div\u003e \u003c\/div\u003e \u003cdiv class='jdgm-histogram__row' data-rating='4' data-frequency='0' data-percentage='0'\u003e \u003cdiv class='jdgm-histogram__star' role='button' aria-label=\"0% (0) reviews with 4 star rating\" tabindex='0' \u003e\u003cspan class='jdgm-star jdgm--on'\u003e\u003c\/span\u003e\u003cspan class='jdgm-star jdgm--on'\u003e\u003c\/span\u003e\u003cspan class='jdgm-star jdgm--on'\u003e\u003c\/span\u003e\u003cspan class='jdgm-star jdgm--on'\u003e\u003c\/span\u003e\u003cspan class='jdgm-star jdgm--off'\u003e\u003c\/span\u003e\u003c\/div\u003e \u003cdiv class='jdgm-histogram__bar'\u003e \u003cdiv class='jdgm-histogram__bar-content' style='width: 0%;'\u003e \u003c\/div\u003e \u003c\/div\u003e \u003cdiv class='jdgm-histogram__percentage'\u003e0%\u003c\/div\u003e \u003cdiv class='jdgm-histogram__frequency'\u003e(0)\u003c\/div\u003e \u003c\/div\u003e \u003cdiv class='jdgm-histogram__row' data-rating='3' data-frequency='0' data-percentage='0'\u003e \u003cdiv class='jdgm-histogram__star' role='button' aria-label=\"0% (0) reviews with 3 star rating\" tabindex='0' \u003e\u003cspan class='jdgm-star jdgm--on'\u003e\u003c\/span\u003e\u003cspan class='jdgm-star jdgm--on'\u003e\u003c\/span\u003e\u003cspan class='jdgm-star jdgm--on'\u003e\u003c\/span\u003e\u003cspan class='jdgm-star jdgm--off'\u003e\u003c\/span\u003e\u003cspan class='jdgm-star jdgm--off'\u003e\u003c\/span\u003e\u003c\/div\u003e \u003cdiv class='jdgm-histogram__bar'\u003e \u003cdiv class='jdgm-histogram__bar-content' style='width: 0%;'\u003e \u003c\/div\u003e \u003c\/div\u003e \u003cdiv class='jdgm-histogram__percentage'\u003e0%\u003c\/div\u003e \u003cdiv class='jdgm-histogram__frequency'\u003e(0)\u003c\/div\u003e \u003c\/div\u003e \u003cdiv class='jdgm-histogram__row' data-rating='2' data-frequency='0' data-percentage='0'\u003e \u003cdiv class='jdgm-histogram__star' role='button' aria-label=\"0% (0) reviews with 2 star rating\" tabindex='0' \u003e\u003cspan class='jdgm-star jdgm--on'\u003e\u003c\/span\u003e\u003cspan class='jdgm-star jdgm--on'\u003e\u003c\/span\u003e\u003cspan class='jdgm-star jdgm--off'\u003e\u003c\/span\u003e\u003cspan class='jdgm-star jdgm--off'\u003e\u003c\/span\u003e\u003cspan class='jdgm-star jdgm--off'\u003e\u003c\/span\u003e\u003c\/div\u003e \u003cdiv class='jdgm-histogram__bar'\u003e \u003cdiv class='jdgm-histogram__bar-content' style='width: 0%;'\u003e \u003c\/div\u003e \u003c\/div\u003e \u003cdiv class='jdgm-histogram__percentage'\u003e0%\u003c\/div\u003e \u003cdiv class='jdgm-histogram__frequency'\u003e(0)\u003c\/div\u003e \u003c\/div\u003e \u003cdiv class='jdgm-histogram__row' data-rating='1' data-frequency='0' data-percentage='0'\u003e \u003cdiv class='jdgm-histogram__star' role='button' aria-label=\"0% (0) reviews with 1 star rating\" tabindex='0' \u003e\u003cspan class='jdgm-star jdgm--on'\u003e\u003c\/span\u003e\u003cspan class='jdgm-star jdgm--off'\u003e\u003c\/span\u003e\u003cspan class='jdgm-star jdgm--off'\u003e\u003c\/span\u003e\u003cspan class='jdgm-star jdgm--off'\u003e\u003c\/span\u003e\u003cspan class='jdgm-star jdgm--off'\u003e\u003c\/span\u003e\u003c\/div\u003e \u003cdiv class='jdgm-histogram__bar'\u003e \u003cdiv class='jdgm-histogram__bar-content' style='width: 0%;'\u003e \u003c\/div\u003e \u003c\/div\u003e \u003cdiv class='jdgm-histogram__percentage'\u003e0%\u003c\/div\u003e \u003cdiv class='jdgm-histogram__frequency'\u003e(0)\u003c\/div\u003e \u003c\/div\u003e \u003cdiv class='jdgm-histogram__row jdgm-histogram__clear-filter' data-rating=null tabindex='0'\u003e\u003c\/div\u003e \u003c\/div\u003e \u003cdiv class='jdgm-rev-widg__sort-wrapper'\u003e\u003c\/div\u003e \u003c\/div\u003e \u003cdiv class='jdgm-rev-widg__body'\u003e \u003cdiv class='jdgm-rev-widg__reviews'\u003e\u003c\/div\u003e \u003cdiv class='jdgm-paginate' data-per-page='10' data-url='https:\/\/api.judge.me\/reviews\/reviews_for_widget' style=\"display: none;\"\u003e\u003c\/div\u003e \u003c\/div\u003e \u003cdiv class='jdgm-rev-widg__paginate-spinner-wrapper'\u003e \u003cdiv class='jdgm-spinner'\u003e\u003c\/div\u003e \u003c\/div\u003e \u003c\/div\u003e"},"collections":[{"id":281356533949,"handle":"baby-shower-gifts","title":"Baby Shower Gifts - Mum","updated_at":"2026-06-12T19:10:25+08:00","body_html":"\u003cp\u003eLooking for a unique baby shower gift? Or an all-in-one bundle pack to suit all your needs? We've got just the thing!\u003c\/p\u003e","published_at":"2021-12-06T13:43:56+08:00","sort_order":"best-selling","template_suffix":"baby-shower-gifts","disjunctive":true,"rules":[{"column":"tag","relation":"equals","condition":"Baby Shower Gifts - Mum"},{"column":"tag","relation":"equals","condition":"Gift Card"}],"published_scope":"global","image":{"created_at":"2024-05-06T11:59:28+08:00","alt":"Baby Shower Gifts - The Birth Store","width":1200,"height":1800,"src":"\/\/www.thebirthstore.com.au\/cdn\/shop\/collections\/baby-shower-gifts-401770.jpg?v=1761791272"}},{"id":281712427197,"handle":"breastfeeding","title":"Breastfeeding","updated_at":"2026-06-12T19:10:26+08:00","body_html":"","published_at":"2021-12-20T14:19:33+08:00","sort_order":"best-selling","template_suffix":"breastfeeding-collection","disjunctive":false,"rules":[{"column":"tag","relation":"equals","condition":"Breastfeeding"}],"published_scope":"global","image":{"created_at":"2024-05-06T11:59:34+08:00","alt":"Breastfeeding - The Birth Store","width":620,"height":635,"src":"\/\/www.thebirthstore.com.au\/cdn\/shop\/collections\/breastfeeding-793872.jpg?v=1714967974"}},{"id":261657460925,"handle":"buy","title":"Buy","updated_at":"2026-06-12T19:10:26+08:00","body_html":"\u003cp\u003eBrowse all of our pregnancy, labour \u0026amp; birth, postpartum and baby essentials here.\u003cbr\u003e\u003c\/p\u003e\n\u003cp\u003e\u003cspan\u003eYou can even buy now and pay later with Afterpay!\u003c\/span\u003e\u003c\/p\u003e","published_at":"2021-03-10T12:05:31+08:00","sort_order":"best-selling","template_suffix":"shop-all-collection","disjunctive":false,"rules":[{"column":"title","relation":"not_contains","condition":"Hire"}],"published_scope":"global","image":{"created_at":"2024-05-06T11:59:42+08:00","alt":"Buy - The Birth Store","width":2048,"height":2048,"src":"\/\/www.thebirthstore.com.au\/cdn\/shop\/collections\/buy-964856.jpg?v=1714967982"}},{"id":292919476413,"handle":"lactation-products","title":"Lactation Products","updated_at":"2026-06-12T19:10:26+08:00","body_html":"","published_at":"2023-03-22T12:22:41+08:00","sort_order":"best-selling","template_suffix":"lactation-products-collec","disjunctive":false,"rules":[{"column":"tag","relation":"equals","condition":"Lactation Products"}],"published_scope":"global","image":{"created_at":"2024-05-06T12:00:19+08:00","alt":"Lactation Products - The Birth Store","width":1034,"height":922,"src":"\/\/www.thebirthstore.com.au\/cdn\/shop\/collections\/lactation-products-752907.jpg?v=1714968019"}},{"id":291456483517,"handle":"shop-all","title":"Shop All - Mum","updated_at":"2026-06-12T19:10:26+08:00","body_html":"","published_at":"2022-12-23T22:04:39+08:00","sort_order":"best-selling","template_suffix":"shop-all-collection","disjunctive":false,"rules":[{"column":"variant_price","relation":"greater_than","condition":"1"},{"column":"title","relation":"not_contains","condition":"Batteries"},{"column":"tag","relation":"equals","condition":"Mum"}],"published_scope":"global","image":{"created_at":"2024-05-06T12:00:54+08:00","alt":"Shop All - The Birth Store","width":1365,"height":2048,"src":"\/\/www.thebirthstore.com.au\/cdn\/shop\/collections\/shop-all-693176.jpg?v=1714968055"}},{"id":310045933757,"handle":"shop-all-sale","title":"Shop All Sale","updated_at":"2026-06-12T19:10:26+08:00","body_html":"","published_at":"2024-11-12T13:22:43+08:00","sort_order":"alpha-asc","template_suffix":"","disjunctive":true,"rules":[{"column":"tag","relation":"equals","condition":"Bundles"},{"column":"vendor","relation":"equals","condition":"Franjos Kitchen"},{"column":"vendor","relation":"equals","condition":"Adored Illustrations"},{"column":"vendor","relation":"equals","condition":"Amazing Oils"},{"column":"vendor","relation":"equals","condition":"Ice Ice Booby"},{"column":"vendor","relation":"equals","condition":"Made to Milk"},{"column":"vendor","relation":"equals","condition":"Milky Goodness"},{"column":"vendor","relation":"equals","condition":"Seasons of Mama"},{"column":"vendor","relation":"equals","condition":"Silverette"},{"column":"vendor","relation":"equals","condition":"Snuggle Hunny"},{"column":"vendor","relation":"equals","condition":"Yung Bod"},{"column":"vendor","relation":"equals","condition":"Bare Love"},{"column":"vendor","relation":"equals","condition":"Haakaa"},{"column":"vendor","relation":"equals","condition":"Mere Botanicals"},{"column":"vendor","relation":"equals","condition":"The Birth Store Hire"},{"column":"vendor","relation":"equals","condition":"The Birth Store"}],"published_scope":"global","image":{"created_at":"2024-11-13T10:58:16+08:00","alt":"Shop All Sale - The Birth Store","width":2048,"height":1365,"src":"\/\/www.thebirthstore.com.au\/cdn\/shop\/collections\/shop-all-sale-297361.jpg?v=1731466697"}}]}
{"item":{"id":7455714214077,"title":"Antenatal Colostrum Expressing Kit - Made to Milk","handle":"antenatal-colostrum-expressing-kit-made-to-milk","description":"\u003cp\u003e\u003cmeta charset=\"utf-8\"\u003e\u003cspan\u003eThe Milky Goodness Antenatal Colostrum Expressing Kit is a comprehensive yet convenient kit designed to help you prepare \u0026amp; store your expressed colostrum. This kit is perfect for a new mum or those experienced in this wonderful journey of motherhood.\u003c\/span\u003e\u003c\/p\u003e","published_at":"2023-03-22T21:49:12+08:00","created_at":"2023-03-22T21:49:12+08:00","vendor":"Made to Milk","type":"","tags":["Breastfeeding","Hospital Bag","Labour Preparation","Labour Progression","Lactation Products","Mum","Pregnancy"],"price":3995,"price_min":3995,"price_max":3995,"available":true,"price_varies":false,"compare_at_price":null,"compare_at_price_min":0,"compare_at_price_max":0,"compare_at_price_varies":false,"variants":[{"id":42740426866877,"title":"Default Title","option1":"Default Title","option2":null,"option3":null,"sku":"","requires_shipping":true,"taxable":false,"featured_image":null,"available":true,"name":"Antenatal Colostrum Expressing Kit - Made to Milk","public_title":null,"options":["Default Title"],"price":3995,"weight":335,"compare_at_price":null,"inventory_management":"shopify","barcode":"26866877","requires_selling_plan":false,"selling_plan_allocations":[],"quantity_rule":{"min":1,"max":null,"increment":1}}],"images":["\/\/www.thebirthstore.com.au\/cdn\/shop\/files\/antenatal-colostrum-expressing-kit-made-to-milk-382319.jpg?v=1714967948","\/\/www.thebirthstore.com.au\/cdn\/shop\/files\/antenatal-colostrum-expressing-kit-made-to-milk-700625.jpg?v=1714967948"],"featured_image":"\/\/www.thebirthstore.com.au\/cdn\/shop\/files\/antenatal-colostrum-expressing-kit-made-to-milk-382319.jpg?v=1714967948","options":["Title"],"media":[{"alt":"Antenatal Colostrum Expressing Kit - Made to Milk - The Birth Store-Made to Milk","id":27007579685053,"position":1,"preview_image":{"aspect_ratio":1.0,"height":2048,"width":2048,"src":"\/\/www.thebirthstore.com.au\/cdn\/shop\/files\/antenatal-colostrum-expressing-kit-made-to-milk-382319.jpg?v=1714967948"},"aspect_ratio":1.0,"height":2048,"media_type":"image","src":"\/\/www.thebirthstore.com.au\/cdn\/shop\/files\/antenatal-colostrum-expressing-kit-made-to-milk-382319.jpg?v=1714967948","width":2048},{"alt":"Antenatal Colostrum Expressing Kit - Made to Milk - The Birth Store-Made to Milk","id":27007579750589,"position":2,"preview_image":{"aspect_ratio":0.667,"height":810,"width":540,"src":"\/\/www.thebirthstore.com.au\/cdn\/shop\/files\/antenatal-colostrum-expressing-kit-made-to-milk-700625.jpg?v=1714967948"},"aspect_ratio":0.667,"height":810,"media_type":"image","src":"\/\/www.thebirthstore.com.au\/cdn\/shop\/files\/antenatal-colostrum-expressing-kit-made-to-milk-700625.jpg?v=1714967948","width":540}],"requires_selling_plan":false,"selling_plan_groups":[],"content":"\u003cp\u003e\u003cmeta charset=\"utf-8\"\u003e\u003cspan\u003eThe Milky Goodness Antenatal Colostrum Expressing Kit is a comprehensive yet convenient kit designed to help you prepare \u0026amp; store your expressed colostrum. This kit is perfect for a new mum or those experienced in this wonderful journey of motherhood.\u003c\/span\u003e\u003c\/p\u003e"},"options":[{"name":"Title","position":1,"values":["Default Title"]}],"custom_metafields":{},"metafields":{"badge":"\u003cdiv style='display:none' class='jdgm-prev-badge' data-average-rating='5.00' data-number-of-reviews='1' data-number-of-questions='0'\u003e \u003cspan class='jdgm-prev-badge__stars' data-score='5.00' tabindex='0' aria-label='5.00 stars' role='button'\u003e \u003cspan class='jdgm-star jdgm--on'\u003e\u003c\/span\u003e\u003cspan class='jdgm-star jdgm--on'\u003e\u003c\/span\u003e\u003cspan class='jdgm-star jdgm--on'\u003e\u003c\/span\u003e\u003cspan class='jdgm-star jdgm--on'\u003e\u003c\/span\u003e\u003cspan class='jdgm-star jdgm--on'\u003e\u003c\/span\u003e \u003c\/span\u003e \u003cspan class='jdgm-prev-badge__text'\u003e 1 review \u003c\/span\u003e \u003c\/div\u003e","review_snippet_widget":"\u003cdiv class='jdgm-widget jdgm-review-snippet-widget'\u003e \u003cstyle\u003e\n .jdgm-review-snippet-widget{position:relative}.jdgm-review-snippet-widget:hover{cursor:pointer}@media only screen and (max-width: 767px){.jdgm-review-snippet-widget .jdgm-rev-snippet-widget__cards-container{left:unset;right:unset}}.jdgm-review-snippet-widget .jdgm-rev-snippet-card{background:#fff}.jdgm-review-snippet-widget .jdgm-star{color:#399}.jdgm-review-snippet-widget .jdgm-rev-snippet-card{border-radius:8px;background:#fff}.jdgm-review-snippet-widget .jdgm-rev-snippet-card__rev-prod-wrapper{border-radius:8px}.jdgm-review-snippet-widget .jdgm-rev-snippet-card__rev-content-wrapper{max-width:360px}.jdgm-review-snippet-widget .jdgm-rev-snippet-widget__prev-btn,.jdgm-review-snippet-widget .jdgm-rev-snippet-widget__next-btn{border-radius:50%;background:#fff}.jdgm-review-snippet-widget .jdgm-rev-snippet-widget__prev-btn\u003esvg,.jdgm-review-snippet-widget .jdgm-rev-snippet-widget__next-btn\u003esvg{fill:#000}.jdgm-review-snippet-widget .jdgm-rev-snippet-widget__prev-btn{left:0;top:40%}.jdgm-review-snippet-widget .jdgm-rev-snippet-widget__next-btn{right:0;top:40%}.jdgm-full-rev-modal.review-snippet-widget .jm-mfp-content{border-radius:8px}.jdgm-full-rev-modal.review-snippet-widget .jdgm-full-rev__icon{border-radius:8px}.jdgm-full-rev-modal.review-snippet-widget .jdgm-full-rev[data-verified-buyer=\"true\"] .jdgm-full-rev__icon::after{border-radius:8px}.jdgm-full-rev-modal.review-snippet-widget .jdgm-rev__buyer-badge{border-radius:calc( 8px \/ 2 )}.jdgm-full-rev-modal.review-snippet-widget .jdgm-full-rev__pic-img{border-radius:8px}.jdgm-full-rev-modal.review-snippet-widget .jdgm-full-rev__reply{border-radius:8px}.jdgm-full-rev-modal.review-snippet-widget .jdgm-full-rev__replier::before{content:'thebirthstore.com.au'}.jdgm-full-rev-modal.review-snippet-widget .jdgm-full-rev__product-button{border-radius:calc( 8px * 6 )}\n\n \u003c\/style\u003e \u003ci class=\"jdgm-rev-snippet-widget__prev-btn\" style='display: none;'\u003e \u003csvg xmlns=\"http:\/\/www.w3.org\/2000\/svg\" height=\"12\" viewBox=\"0 0 8 12\" width=\"8\" fill=\"#000\"\u003e\u003cpath d=\"M3.09961 6.00005L6.99961 9.90005C7.18294 10.0834 7.27461 10.3167 7.27461 10.6C7.27461 10.8834 7.18294 11.1167 6.99961 11.3C6.81628 11.4834 6.58294 11.575 6.29961 11.575C6.01628 11.575 5.78294 11.4834 5.59961 11.3L0.999609 6.70005C0.899609 6.60005 0.828776 6.49172 0.787109 6.37505C0.745443 6.25838 0.724609 6.13338 0.724609 6.00005C0.724609 5.86672 0.745443 5.74172 0.787109 5.62505C0.828776 5.50838 0.899609 5.40005 0.999609 5.30005L5.59961 0.700049C5.78294 0.516715 6.01628 0.425049 6.29961 0.425049C6.58294 0.425049 6.81628 0.516715 6.99961 0.700049C7.18294 0.883382 7.27461 1.11672 7.27461 1.40005C7.27461 1.68338 7.18294 1.91672 6.99961 2.10005L3.09961 6.00005Z\"\/\u003e\u003c\/svg\u003e \u003c\/i\u003e \u003ci class=\"jdgm-rev-snippet-widget__next-btn\" style='display: none;'\u003e \u003csvg xmlns=\"http:\/\/www.w3.org\/2000\/svg\" height=\"12\" viewBox=\"0 0 8 12\" width=\"8\" fill=\"#000\"\u003e\u003cpath d=\"M4.89961 6.00005L0.999609 2.10005C0.816276 1.91672 0.724609 1.68338 0.724609 1.40005C0.724609 1.11672 0.816276 0.883382 0.999609 0.700049C1.18294 0.516715 1.41628 0.425049 1.69961 0.425049C1.98294 0.425049 2.21628 0.516715 2.39961 0.700049L6.99961 5.30005C7.09961 5.40005 7.17044 5.50838 7.21211 5.62505C7.25378 5.74172 7.27461 5.86672 7.27461 6.00005C7.27461 6.13338 7.25378 6.25838 7.21211 6.37505C7.17044 6.49172 7.09961 6.60005 6.99961 6.70005L2.39961 11.3C2.21628 11.4834 1.98294 11.575 1.69961 11.575C1.41628 11.575 1.18294 11.4834 0.999609 11.3C0.816276 11.1167 0.724609 10.8834 0.724609 10.6C0.724609 10.3167 0.816276 10.0834 0.999609 9.90005L4.89961 6.00005Z\"\/\u003e\u003c\/svg\u003e \u003c\/i\u003e \u003cdiv style=\"overflow: hidden;\"\u003e \u003cdiv class='jdgm-rev-snippet-widget__cards-container'\u003e \u003cdiv class='jdgm-rev-snippet-card' data-review-id='143bdb7d-9f59-53e8-ab31-3931e347f6c3' style='display: none;'\u003e \u003cdiv class=\"jdgm-rev-snippet-card__rev-prod-wrapper\"\u003e \u003ca class='jdgm-rev-snippet-card__rev-content-wrapper jdgm-rev-snippet-card__full-review-link' style='text-decoration: none; color: inherit;padding: 0 34px;' role='button' data-review-id='143bdb7d-9f59-53e8-ab31-3931e347f6c3'\u003e \u003cdiv class='jdgm-rev-snippet-card__rev-header'\u003e \u003cdiv class='jdgm-rev-snippet-card__rev-rating' aria-label='5 stars' role='img'\u003e \u003cspan class='jdgm-star jdgm--on'\u003e\u003c\/span\u003e\u003cspan class='jdgm-star jdgm--on'\u003e\u003c\/span\u003e\u003cspan class='jdgm-star jdgm--on'\u003e\u003c\/span\u003e\u003cspan class='jdgm-star jdgm--on'\u003e\u003c\/span\u003e\u003cspan class='jdgm-star jdgm--on'\u003e\u003c\/span\u003e \u003c\/div\u003e \u003cdiv class='jdgm-rev-snippet-card__reviewer'\u003e Linda \u003c\/div\u003e \u003c\/div\u003e \u003cdiv class='jdgm-rev-snippet-card__rev-content'\u003e \u003cspan class='jdgm-rev-snippet-card__rev-body'\u003e \u003cp\u003eLove this kit!\u003c\/p\u003e \u003c\/span\u003e \u003c\/div\u003e \u003c\/a\u003e \u003c\/div\u003e \u003c\/div\u003e \u003c\/div\u003e \u003c\/div\u003e \u003c\/div\u003e","widget":"\u003cdiv class='jdgm-rev-widg' data-updated-at='2025-09-24T04:10:28Z' data-average-rating='5.00' data-number-of-reviews='1' data-number-of-questions='0' data-image-url='https:\/\/cdn.shopify.com\/s\/files\/1\/0527\/3393\/5805\/files\/antenatal-colostrum-expressing-kit-made-to-milk-382319.jpg?v=1714967948'\u003e \u003cstyle class='jdgm-temp-hiding-style'\u003e.jdgm-rev-widg{ display: none }\u003c\/style\u003e \u003cdiv class='jdgm-rev-widg__header'\u003e \u003ch2 class='jdgm-rev-widg__title'\u003eCustomer Reviews\u003c\/h2\u003e \u003cdiv class='jdgm-rev-widg__summary'\u003e \u003cdiv class='jdgm-rev-widg__summary-stars' aria-label='Average rating is 5.00 stars' role='img'\u003e \u003cspan class='jdgm-star jdgm--on'\u003e\u003c\/span\u003e\u003cspan class='jdgm-star jdgm--on'\u003e\u003c\/span\u003e\u003cspan class='jdgm-star jdgm--on'\u003e\u003c\/span\u003e\u003cspan class='jdgm-star jdgm--on'\u003e\u003c\/span\u003e\u003cspan class='jdgm-star jdgm--on'\u003e\u003c\/span\u003e \u003c\/div\u003e \u003cdiv class='jdgm-rev-widg__summary-text'\u003eBased on 1 review\u003c\/div\u003e \u003c\/div\u003e \u003ca style='display: none' href='#' class='jdgm-write-rev-link' role='button'\u003eWrite a review\u003c\/a\u003e \u003cdiv class='jdgm-histogram jdgm-temp-hidden'\u003e \u003cdiv class='jdgm-histogram__row' data-rating='5' data-frequency='1' data-percentage='100'\u003e \u003cdiv class='jdgm-histogram__star' role='button' aria-label=\"100% (1) reviews with 5 star rating\" tabindex='0' \u003e\u003cspan class='jdgm-star jdgm--on'\u003e\u003c\/span\u003e\u003cspan class='jdgm-star jdgm--on'\u003e\u003c\/span\u003e\u003cspan class='jdgm-star jdgm--on'\u003e\u003c\/span\u003e\u003cspan class='jdgm-star jdgm--on'\u003e\u003c\/span\u003e\u003cspan class='jdgm-star jdgm--on'\u003e\u003c\/span\u003e\u003c\/div\u003e \u003cdiv class='jdgm-histogram__bar'\u003e \u003cdiv class='jdgm-histogram__bar-content' style='width: 100%;'\u003e \u003c\/div\u003e \u003c\/div\u003e \u003cdiv class='jdgm-histogram__percentage'\u003e100%\u003c\/div\u003e \u003cdiv class='jdgm-histogram__frequency'\u003e(1)\u003c\/div\u003e \u003c\/div\u003e \u003cdiv class='jdgm-histogram__row' data-rating='4' data-frequency='0' data-percentage='0'\u003e \u003cdiv class='jdgm-histogram__star' role='button' aria-label=\"0% (0) reviews with 4 star rating\" tabindex='0' \u003e\u003cspan class='jdgm-star jdgm--on'\u003e\u003c\/span\u003e\u003cspan class='jdgm-star jdgm--on'\u003e\u003c\/span\u003e\u003cspan class='jdgm-star jdgm--on'\u003e\u003c\/span\u003e\u003cspan class='jdgm-star jdgm--on'\u003e\u003c\/span\u003e\u003cspan class='jdgm-star jdgm--off'\u003e\u003c\/span\u003e\u003c\/div\u003e \u003cdiv class='jdgm-histogram__bar'\u003e \u003cdiv class='jdgm-histogram__bar-content' style='width: 0%;'\u003e \u003c\/div\u003e \u003c\/div\u003e \u003cdiv class='jdgm-histogram__percentage'\u003e0%\u003c\/div\u003e \u003cdiv class='jdgm-histogram__frequency'\u003e(0)\u003c\/div\u003e \u003c\/div\u003e \u003cdiv class='jdgm-histogram__row' data-rating='3' data-frequency='0' data-percentage='0'\u003e \u003cdiv class='jdgm-histogram__star' role='button' aria-label=\"0% (0) reviews with 3 star rating\" tabindex='0' \u003e\u003cspan class='jdgm-star jdgm--on'\u003e\u003c\/span\u003e\u003cspan class='jdgm-star jdgm--on'\u003e\u003c\/span\u003e\u003cspan class='jdgm-star jdgm--on'\u003e\u003c\/span\u003e\u003cspan class='jdgm-star jdgm--off'\u003e\u003c\/span\u003e\u003cspan class='jdgm-star jdgm--off'\u003e\u003c\/span\u003e\u003c\/div\u003e \u003cdiv class='jdgm-histogram__bar'\u003e \u003cdiv class='jdgm-histogram__bar-content' style='width: 0%;'\u003e \u003c\/div\u003e \u003c\/div\u003e \u003cdiv class='jdgm-histogram__percentage'\u003e0%\u003c\/div\u003e \u003cdiv class='jdgm-histogram__frequency'\u003e(0)\u003c\/div\u003e \u003c\/div\u003e \u003cdiv class='jdgm-histogram__row' data-rating='2' data-frequency='0' data-percentage='0'\u003e \u003cdiv class='jdgm-histogram__star' role='button' aria-label=\"0% (0) reviews with 2 star rating\" tabindex='0' \u003e\u003cspan class='jdgm-star jdgm--on'\u003e\u003c\/span\u003e\u003cspan class='jdgm-star jdgm--on'\u003e\u003c\/span\u003e\u003cspan class='jdgm-star jdgm--off'\u003e\u003c\/span\u003e\u003cspan class='jdgm-star jdgm--off'\u003e\u003c\/span\u003e\u003cspan class='jdgm-star jdgm--off'\u003e\u003c\/span\u003e\u003c\/div\u003e \u003cdiv class='jdgm-histogram__bar'\u003e \u003cdiv class='jdgm-histogram__bar-content' style='width: 0%;'\u003e \u003c\/div\u003e \u003c\/div\u003e \u003cdiv class='jdgm-histogram__percentage'\u003e0%\u003c\/div\u003e \u003cdiv class='jdgm-histogram__frequency'\u003e(0)\u003c\/div\u003e \u003c\/div\u003e \u003cdiv class='jdgm-histogram__row' data-rating='1' data-frequency='0' data-percentage='0'\u003e \u003cdiv class='jdgm-histogram__star' role='button' aria-label=\"0% (0) reviews with 1 star rating\" tabindex='0' \u003e\u003cspan class='jdgm-star jdgm--on'\u003e\u003c\/span\u003e\u003cspan class='jdgm-star jdgm--off'\u003e\u003c\/span\u003e\u003cspan class='jdgm-star jdgm--off'\u003e\u003c\/span\u003e\u003cspan class='jdgm-star jdgm--off'\u003e\u003c\/span\u003e\u003cspan class='jdgm-star jdgm--off'\u003e\u003c\/span\u003e\u003c\/div\u003e \u003cdiv class='jdgm-histogram__bar'\u003e \u003cdiv class='jdgm-histogram__bar-content' style='width: 0%;'\u003e \u003c\/div\u003e \u003c\/div\u003e \u003cdiv class='jdgm-histogram__percentage'\u003e0%\u003c\/div\u003e \u003cdiv class='jdgm-histogram__frequency'\u003e(0)\u003c\/div\u003e \u003c\/div\u003e \u003cdiv class='jdgm-histogram__row jdgm-histogram__clear-filter' data-rating=null tabindex='0'\u003e\u003c\/div\u003e \u003c\/div\u003e \u003cdiv class='jdgm-rev-widg__sort-wrapper'\u003e\u003c\/div\u003e \u003c\/div\u003e \u003cdiv class='jdgm-rev-widg__body'\u003e \u003cdiv class='jdgm-rev-widg__reviews'\u003e\u003cdiv class='jdgm-rev jdgm-divider-top' data-verified-buyer='true' data-review-id='143bdb7d-9f59-53e8-ab31-3931e347f6c3' data-review-language='' data-product-title='Antenatal Colostrum Expressing Kit - Made to Milk' data-product-url='\/products\/antenatal-colostrum-expressing-kit-made-to-milk' data-thumb-up-count='1' data-thumb-down-count='0'\u003e \u003cdiv class='jdgm-rev__header'\u003e \u003cdiv class='jdgm-rev__icon' \u003e E \u003c\/div\u003e \u003cspan class='jdgm-rev__rating' data-score='5' tabindex='0' aria-label='5 star review' role='img'\u003e \u003cspan class='jdgm-star jdgm--on'\u003e\u003c\/span\u003e\u003cspan class='jdgm-star jdgm--on'\u003e\u003c\/span\u003e\u003cspan class='jdgm-star jdgm--on'\u003e\u003c\/span\u003e\u003cspan class='jdgm-star jdgm--on'\u003e\u003c\/span\u003e\u003cspan class='jdgm-star jdgm--on'\u003e\u003c\/span\u003e \u003c\/span\u003e \u003cspan class='jdgm-rev__timestamp jdgm-spinner' data-content='2024-08-18 02:18:34 UTC'\u003e\u003c\/span\u003e \u003cdiv class='jdgm-rev__br'\u003e\u003c\/div\u003e \u003cspan class='jdgm-rev__buyer-badge-wrapper'\u003e \u003cspan class='jdgm-rev__buyer-badge'\u003e\u003c\/span\u003e \u003c\/span\u003e \u003cspan class='jdgm-rev__author-wrapper'\u003e \u003cspan class='jdgm-rev__author'\u003eEmma\u003c\/span\u003e \u003cspan class='jdgm-rev__location' \u003e \u003c\/span\u003e \u003cspan class='jdgm-rev__source' data-source=\"shop-app\"\u003e\u003c\/span\u003e \u003c\/span\u003e \u003c\/div\u003e \u003cdiv class='jdgm-rev__content'\u003e \u003cdiv class='jdgm-rev__custom-form'\u003e \u003c\/div\u003e \u003cb class='jdgm-rev__title'\u003e\u003c\/b\u003e \u003cdiv class='jdgm-rev__body'\u003e\u003cp\u003eLove this kit!\u003c\/p\u003e\u003c\/div\u003e \u003cdiv class='jdgm-rev__pics'\u003e \u003c\/div\u003e \u003cdiv class='jdgm-rev__vids'\u003e \u003c\/div\u003e \u003cdiv class='jdgm-rev__transparency-badge-wrapper'\u003e \u003c\/div\u003e \u003c\/div\u003e \u003cdiv class='jdgm-rev__actions'\u003e \u003cdiv class='jdgm-rev__social'\u003e\u003c\/div\u003e \u003cdiv class='jdgm-rev__votes'\u003e\u003c\/div\u003e \u003c\/div\u003e \u003cdiv class='jdgm-rev__reply'\u003e \u003c\/div\u003e \u003c\/div\u003e\u003c\/div\u003e \u003cdiv class='jdgm-paginate' data-per-page='10' data-url='https:\/\/api.judge.me\/reviews\/reviews_for_widget' style=\"display: none;\"\u003e\u003c\/div\u003e \u003c\/div\u003e \u003cdiv class='jdgm-rev-widg__paginate-spinner-wrapper'\u003e \u003cdiv class='jdgm-spinner'\u003e\u003c\/div\u003e \u003c\/div\u003e \u003c\/div\u003e"},"collections":[{"id":281712427197,"handle":"breastfeeding","title":"Breastfeeding","updated_at":"2026-06-12T19:10:26+08:00","body_html":"","published_at":"2021-12-20T14:19:33+08:00","sort_order":"best-selling","template_suffix":"breastfeeding-collection","disjunctive":false,"rules":[{"column":"tag","relation":"equals","condition":"Breastfeeding"}],"published_scope":"global","image":{"created_at":"2024-05-06T11:59:34+08:00","alt":"Breastfeeding - The Birth Store","width":620,"height":635,"src":"\/\/www.thebirthstore.com.au\/cdn\/shop\/collections\/breastfeeding-793872.jpg?v=1714967974"}},{"id":261657460925,"handle":"buy","title":"Buy","updated_at":"2026-06-12T19:10:26+08:00","body_html":"\u003cp\u003eBrowse all of our pregnancy, labour \u0026amp; birth, postpartum and baby essentials here.\u003cbr\u003e\u003c\/p\u003e\n\u003cp\u003e\u003cspan\u003eYou can even buy now and pay later with Afterpay!\u003c\/span\u003e\u003c\/p\u003e","published_at":"2021-03-10T12:05:31+08:00","sort_order":"best-selling","template_suffix":"shop-all-collection","disjunctive":false,"rules":[{"column":"title","relation":"not_contains","condition":"Hire"}],"published_scope":"global","image":{"created_at":"2024-05-06T11:59:42+08:00","alt":"Buy - The Birth Store","width":2048,"height":2048,"src":"\/\/www.thebirthstore.com.au\/cdn\/shop\/collections\/buy-964856.jpg?v=1714967982"}},{"id":337429201085,"handle":"hospital-bag","title":"Hospital Bag","updated_at":"2026-06-12T19:10:26+08:00","body_html":"","published_at":"2026-06-03T11:36:29+08:00","sort_order":"most-relevant","template_suffix":"","disjunctive":false,"rules":[{"column":"tag","relation":"equals","condition":"Hospital Bag"}],"published_scope":"global"},{"id":281712558269,"handle":"labour-aids","title":"Labour Aids","updated_at":"2026-06-12T19:10:26+08:00","body_html":"","published_at":"2021-12-20T14:22:16+08:00","sort_order":"best-selling","template_suffix":"labour-aids-collection","disjunctive":false,"rules":[{"column":"tag","relation":"equals","condition":"Labour Progression"}],"published_scope":"global","image":{"created_at":"2024-05-06T12:00:11+08:00","alt":"Labour Aids - The Birth Store","width":1365,"height":2048,"src":"\/\/www.thebirthstore.com.au\/cdn\/shop\/collections\/labour-aids-211824.jpg?v=1714968012"}},{"id":281712525501,"handle":"labour-preparation","title":"Labour Preparation","updated_at":"2026-06-12T19:10:26+08:00","body_html":"","published_at":"2021-12-20T14:20:12+08:00","sort_order":"best-selling","template_suffix":"labour-preparation-collec","disjunctive":false,"rules":[{"column":"tag","relation":"equals","condition":"Labour Preparation"}],"published_scope":"global","image":{"created_at":"2024-05-06T12:00:13+08:00","alt":"Labour Preparation - The Birth Store","width":1024,"height":1536,"src":"\/\/www.thebirthstore.com.au\/cdn\/shop\/collections\/labour-preparation-271961.jpg?v=1714968013"}},{"id":292919476413,"handle":"lactation-products","title":"Lactation Products","updated_at":"2026-06-12T19:10:26+08:00","body_html":"","published_at":"2023-03-22T12:22:41+08:00","sort_order":"best-selling","template_suffix":"lactation-products-collec","disjunctive":false,"rules":[{"column":"tag","relation":"equals","condition":"Lactation Products"}],"published_scope":"global","image":{"created_at":"2024-05-06T12:00:19+08:00","alt":"Lactation Products - The Birth Store","width":1034,"height":922,"src":"\/\/www.thebirthstore.com.au\/cdn\/shop\/collections\/lactation-products-752907.jpg?v=1714968019"}},{"id":261658149053,"handle":"pregnancy-and-maternity-products","title":"Pregnancy","updated_at":"2026-06-12T19:10:26+08:00","body_html":"\u003cp\u003eShop your pregnancy essentials below. Looking for something we don't currently stock? Please reach out and let us know.\u003cbr\u003e\u003c\/p\u003e\n\u003cp\u003e\u003cspan\u003eYou can even buy now and pay later with Afterpay!\u003c\/span\u003e\u003c\/p\u003e","published_at":"2021-03-10T12:34:22+08:00","sort_order":"best-selling","template_suffix":"pregnancy-collection","disjunctive":false,"rules":[{"column":"tag","relation":"equals","condition":"Pregnancy"}],"published_scope":"global","image":{"created_at":"2024-05-06T12:00:40+08:00","alt":"Pregnancy - The Birth Store","width":1024,"height":1536,"src":"\/\/www.thebirthstore.com.au\/cdn\/shop\/collections\/pregnancy-899677.jpg?v=1714968040"}},{"id":291456483517,"handle":"shop-all","title":"Shop All - Mum","updated_at":"2026-06-12T19:10:26+08:00","body_html":"","published_at":"2022-12-23T22:04:39+08:00","sort_order":"best-selling","template_suffix":"shop-all-collection","disjunctive":false,"rules":[{"column":"variant_price","relation":"greater_than","condition":"1"},{"column":"title","relation":"not_contains","condition":"Batteries"},{"column":"tag","relation":"equals","condition":"Mum"}],"published_scope":"global","image":{"created_at":"2024-05-06T12:00:54+08:00","alt":"Shop All - The Birth Store","width":1365,"height":2048,"src":"\/\/www.thebirthstore.com.au\/cdn\/shop\/collections\/shop-all-693176.jpg?v=1714968055"}},{"id":310045933757,"handle":"shop-all-sale","title":"Shop All Sale","updated_at":"2026-06-12T19:10:26+08:00","body_html":"","published_at":"2024-11-12T13:22:43+08:00","sort_order":"alpha-asc","template_suffix":"","disjunctive":true,"rules":[{"column":"tag","relation":"equals","condition":"Bundles"},{"column":"vendor","relation":"equals","condition":"Franjos Kitchen"},{"column":"vendor","relation":"equals","condition":"Adored Illustrations"},{"column":"vendor","relation":"equals","condition":"Amazing Oils"},{"column":"vendor","relation":"equals","condition":"Ice Ice Booby"},{"column":"vendor","relation":"equals","condition":"Made to Milk"},{"column":"vendor","relation":"equals","condition":"Milky Goodness"},{"column":"vendor","relation":"equals","condition":"Seasons of Mama"},{"column":"vendor","relation":"equals","condition":"Silverette"},{"column":"vendor","relation":"equals","condition":"Snuggle Hunny"},{"column":"vendor","relation":"equals","condition":"Yung Bod"},{"column":"vendor","relation":"equals","condition":"Bare Love"},{"column":"vendor","relation":"equals","condition":"Haakaa"},{"column":"vendor","relation":"equals","condition":"Mere Botanicals"},{"column":"vendor","relation":"equals","condition":"The Birth Store Hire"},{"column":"vendor","relation":"equals","condition":"The Birth Store"}],"published_scope":"global","image":{"created_at":"2024-11-13T10:58:16+08:00","alt":"Shop All Sale - The Birth Store","width":2048,"height":1365,"src":"\/\/www.thebirthstore.com.au\/cdn\/shop\/collections\/shop-all-sale-297361.jpg?v=1731466697"}}]}
{"item":{"id":7455714705597,"title":"Lactation Drink Mixes","handle":"lactation-diy-drink-mixes-various-flavours","description":"\u003cp\u003e \u003c\/p\u003e\n\u003cp\u003eMade to Milk's selection of DIY packet mixes are perfect to enjoy in the comfort of your own home.\u003c\/p\u003e\n\u003cp\u003eThey are all packed full of natural galactagogues and Brewers Yeast which help to boost \u0026amp; support your milk supply while breastfeeding.\u003c\/p\u003e\n\u003c!----\u003e","published_at":"2023-03-22T21:51:53+08:00","created_at":"2023-03-22T21:51:53+08:00","vendor":"Made to Milk","type":"","tags":["Breastfeeding","Lactation Products","Mum"],"price":1795,"price_min":1795,"price_max":2295,"available":true,"price_varies":true,"compare_at_price":null,"compare_at_price_min":0,"compare_at_price_max":0,"compare_at_price_varies":false,"variants":[{"id":42740430569661,"title":"Smoothie Mix","option1":"Smoothie Mix","option2":null,"option3":null,"sku":"","requires_shipping":true,"taxable":false,"featured_image":{"id":38738841632957,"product_id":7455714705597,"position":7,"created_at":"2025-11-02T23:18:51+08:00","updated_at":"2025-11-03T12:22:56+08:00","alt":"Lactation Drink Mixes - The Birth Store - Made to Milk","width":1080,"height":1080,"src":"\/\/www.thebirthstore.com.au\/cdn\/shop\/files\/lactation-drink-mixes-8184831.png?v=1762143776","variant_ids":[42740430569661]},"available":false,"name":"Lactation Drink Mixes - Smoothie Mix","public_title":"Smoothie Mix","options":["Smoothie Mix"],"price":1795,"weight":320,"compare_at_price":null,"inventory_management":"shopify","barcode":"30569661","featured_media":{"alt":"Lactation Drink Mixes - The Birth Store - Made to Milk","id":29988520394941,"position":7,"preview_image":{"aspect_ratio":1.0,"height":1080,"width":1080,"src":"\/\/www.thebirthstore.com.au\/cdn\/shop\/files\/lactation-drink-mixes-8184831.png?v=1762143776"}},"requires_selling_plan":false,"selling_plan_allocations":[],"quantity_rule":{"min":1,"max":null,"increment":1}},{"id":42740430602429,"title":"Toffee Caramel Latte","option1":"Toffee Caramel Latte","option2":null,"option3":null,"sku":"","requires_shipping":true,"taxable":false,"featured_image":{"id":38738838585533,"product_id":7455714705597,"position":8,"created_at":"2025-11-02T23:16:59+08:00","updated_at":"2025-11-03T12:22:56+08:00","alt":"Lactation Drink Mixes - The Birth Store - Made to Milk","width":1080,"height":1080,"src":"\/\/www.thebirthstore.com.au\/cdn\/shop\/files\/lactation-drink-mixes-8638463.png?v=1762143776","variant_ids":[42740430602429]},"available":true,"name":"Lactation Drink Mixes - Toffee Caramel Latte","public_title":"Toffee Caramel Latte","options":["Toffee Caramel Latte"],"price":2195,"weight":320,"compare_at_price":null,"inventory_management":"shopify","barcode":"30602429","featured_media":{"alt":"Lactation Drink Mixes - The Birth Store - Made to Milk","id":29988518953149,"position":8,"preview_image":{"aspect_ratio":1.0,"height":1080,"width":1080,"src":"\/\/www.thebirthstore.com.au\/cdn\/shop\/files\/lactation-drink-mixes-8638463.png?v=1762143776"}},"requires_selling_plan":false,"selling_plan_allocations":[],"quantity_rule":{"min":1,"max":null,"increment":1}},{"id":42740430635197,"title":"White Hot Chocolate","option1":"White Hot Chocolate","option2":null,"option3":null,"sku":"","requires_shipping":true,"taxable":false,"featured_image":{"id":38738823971005,"product_id":7455714705597,"position":9,"created_at":"2025-11-02T23:08:47+08:00","updated_at":"2025-11-03T12:22:56+08:00","alt":"Lactation Drink Mixes - The Birth Store - Made to Milk","width":1080,"height":1080,"src":"\/\/www.thebirthstore.com.au\/cdn\/shop\/files\/lactation-drink-mixes-2979451.png?v=1762143776","variant_ids":[42740430635197]},"available":true,"name":"Lactation Drink Mixes - White Hot Chocolate","public_title":"White Hot Chocolate","options":["White Hot Chocolate"],"price":2195,"weight":320,"compare_at_price":null,"inventory_management":"shopify","barcode":"30635197","featured_media":{"alt":"Lactation Drink Mixes - The Birth Store - Made to Milk","id":29988511187133,"position":9,"preview_image":{"aspect_ratio":1.0,"height":1080,"width":1080,"src":"\/\/www.thebirthstore.com.au\/cdn\/shop\/files\/lactation-drink-mixes-2979451.png?v=1762143776"}},"requires_selling_plan":false,"selling_plan_allocations":[],"quantity_rule":{"min":1,"max":null,"increment":1}},{"id":42740430667965,"title":"Creamy Chai Latte","option1":"Creamy Chai Latte","option2":null,"option3":null,"sku":"","requires_shipping":true,"taxable":false,"featured_image":{"id":38738845794493,"product_id":7455714705597,"position":10,"created_at":"2025-11-02T23:21:17+08:00","updated_at":"2025-11-03T12:22:56+08:00","alt":"Lactation Drink Mixes - The Birth Store - Made to Milk","width":1080,"height":1080,"src":"\/\/www.thebirthstore.com.au\/cdn\/shop\/files\/lactation-drink-mixes-1449595.png?v=1762143776","variant_ids":[42740430667965]},"available":true,"name":"Lactation Drink Mixes - Creamy Chai Latte","public_title":"Creamy Chai Latte","options":["Creamy Chai Latte"],"price":2295,"weight":320,"compare_at_price":null,"inventory_management":"shopify","barcode":"30667965","featured_media":{"alt":"Lactation Drink Mixes - The Birth Store - Made to Milk","id":29988522983613,"position":10,"preview_image":{"aspect_ratio":1.0,"height":1080,"width":1080,"src":"\/\/www.thebirthstore.com.au\/cdn\/shop\/files\/lactation-drink-mixes-1449595.png?v=1762143776"}},"requires_selling_plan":false,"selling_plan_allocations":[],"quantity_rule":{"min":1,"max":null,"increment":1}},{"id":42889149317309,"title":"Deluxe Hot Chocolate","option1":"Deluxe Hot Chocolate","option2":null,"option3":null,"sku":"","requires_shipping":true,"taxable":false,"featured_image":{"id":38738818564285,"product_id":7455714705597,"position":11,"created_at":"2025-11-02T23:05:54+08:00","updated_at":"2025-11-03T12:22:56+08:00","alt":"Lactation Drink Mixes - The Birth Store - Made to Milk","width":1080,"height":1080,"src":"\/\/www.thebirthstore.com.au\/cdn\/shop\/files\/lactation-drink-mixes-7063831.png?v=1762143776","variant_ids":[42889149317309]},"available":true,"name":"Lactation Drink Mixes - Deluxe Hot Chocolate","public_title":"Deluxe Hot Chocolate","options":["Deluxe Hot Chocolate"],"price":2195,"weight":320,"compare_at_price":null,"inventory_management":"shopify","barcode":"49317309","featured_media":{"alt":"Lactation Drink Mixes - The Birth Store - Made to Milk","id":29988507549885,"position":11,"preview_image":{"aspect_ratio":1.0,"height":1080,"width":1080,"src":"\/\/www.thebirthstore.com.au\/cdn\/shop\/files\/lactation-drink-mixes-7063831.png?v=1762143776"}},"requires_selling_plan":false,"selling_plan_allocations":[],"quantity_rule":{"min":1,"max":null,"increment":1}}],"images":["\/\/www.thebirthstore.com.au\/cdn\/shop\/files\/lactation-drink-mixes-various-flavours-407925.jpg?v=1714967988","\/\/www.thebirthstore.com.au\/cdn\/shop\/files\/lactation-drink-mixes-various-flavours-688625.jpg?v=1714967988","\/\/www.thebirthstore.com.au\/cdn\/shop\/files\/lactation-drink-mixes-various-flavours-677437.jpg?v=1714967988","\/\/www.thebirthstore.com.au\/cdn\/shop\/files\/lactation-drink-mixes-various-flavours-915472.jpg?v=1714967988","\/\/www.thebirthstore.com.au\/cdn\/shop\/files\/lactation-drink-mixes-various-flavours-235706.jpg?v=1714967988","\/\/www.thebirthstore.com.au\/cdn\/shop\/files\/lactation-drink-mixes-various-flavours-994353.jpg?v=1714967988","\/\/www.thebirthstore.com.au\/cdn\/shop\/files\/lactation-drink-mixes-8184831.png?v=1762143776","\/\/www.thebirthstore.com.au\/cdn\/shop\/files\/lactation-drink-mixes-8638463.png?v=1762143776","\/\/www.thebirthstore.com.au\/cdn\/shop\/files\/lactation-drink-mixes-2979451.png?v=1762143776","\/\/www.thebirthstore.com.au\/cdn\/shop\/files\/lactation-drink-mixes-1449595.png?v=1762143776","\/\/www.thebirthstore.com.au\/cdn\/shop\/files\/lactation-drink-mixes-7063831.png?v=1762143776"],"featured_image":"\/\/www.thebirthstore.com.au\/cdn\/shop\/files\/lactation-drink-mixes-various-flavours-407925.jpg?v=1714967988","options":["Flavours"],"media":[{"alt":"Lactation Drink Mixes - Various Flavours - The Birth Store-Made to Milk","id":27007589122237,"position":1,"preview_image":{"aspect_ratio":1.0,"height":1080,"width":1080,"src":"\/\/www.thebirthstore.com.au\/cdn\/shop\/files\/lactation-drink-mixes-various-flavours-407925.jpg?v=1714967988"},"aspect_ratio":1.0,"height":1080,"media_type":"image","src":"\/\/www.thebirthstore.com.au\/cdn\/shop\/files\/lactation-drink-mixes-various-flavours-407925.jpg?v=1714967988","width":1080},{"alt":"Lactation Drink Mixes - Various Flavours - The Birth Store-Made to Milk","id":27007589318845,"position":2,"preview_image":{"aspect_ratio":1.0,"height":1080,"width":1080,"src":"\/\/www.thebirthstore.com.au\/cdn\/shop\/files\/lactation-drink-mixes-various-flavours-688625.jpg?v=1714967988"},"aspect_ratio":1.0,"height":1080,"media_type":"image","src":"\/\/www.thebirthstore.com.au\/cdn\/shop\/files\/lactation-drink-mixes-various-flavours-688625.jpg?v=1714967988","width":1080},{"alt":"Lactation Drink Mixes - Various Flavours - The Birth Store-Made to Milk","id":27007589384381,"position":3,"preview_image":{"aspect_ratio":1.0,"height":1080,"width":1080,"src":"\/\/www.thebirthstore.com.au\/cdn\/shop\/files\/lactation-drink-mixes-various-flavours-677437.jpg?v=1714967988"},"aspect_ratio":1.0,"height":1080,"media_type":"image","src":"\/\/www.thebirthstore.com.au\/cdn\/shop\/files\/lactation-drink-mixes-various-flavours-677437.jpg?v=1714967988","width":1080},{"alt":"Lactation Drink Mixes - Various Flavours - The Birth Store-Made to Milk","id":27007589482685,"position":4,"preview_image":{"aspect_ratio":1.0,"height":1080,"width":1080,"src":"\/\/www.thebirthstore.com.au\/cdn\/shop\/files\/lactation-drink-mixes-various-flavours-915472.jpg?v=1714967988"},"aspect_ratio":1.0,"height":1080,"media_type":"image","src":"\/\/www.thebirthstore.com.au\/cdn\/shop\/files\/lactation-drink-mixes-various-flavours-915472.jpg?v=1714967988","width":1080},{"alt":"Lactation Drink Mixes - Various Flavours - The Birth Store-Made to Milk","id":27007589580989,"position":5,"preview_image":{"aspect_ratio":1.0,"height":1080,"width":1080,"src":"\/\/www.thebirthstore.com.au\/cdn\/shop\/files\/lactation-drink-mixes-various-flavours-235706.jpg?v=1714967988"},"aspect_ratio":1.0,"height":1080,"media_type":"image","src":"\/\/www.thebirthstore.com.au\/cdn\/shop\/files\/lactation-drink-mixes-various-flavours-235706.jpg?v=1714967988","width":1080},{"alt":"Lactation Drink Mixes - Various Flavours - The Birth Store-Made to Milk","id":27007589679293,"position":6,"preview_image":{"aspect_ratio":1.0,"height":720,"width":720,"src":"\/\/www.thebirthstore.com.au\/cdn\/shop\/files\/lactation-drink-mixes-various-flavours-994353.jpg?v=1714967988"},"aspect_ratio":1.0,"height":720,"media_type":"image","src":"\/\/www.thebirthstore.com.au\/cdn\/shop\/files\/lactation-drink-mixes-various-flavours-994353.jpg?v=1714967988","width":720},{"alt":"Lactation Drink Mixes - The Birth Store - Made to Milk","id":29988520394941,"position":7,"preview_image":{"aspect_ratio":1.0,"height":1080,"width":1080,"src":"\/\/www.thebirthstore.com.au\/cdn\/shop\/files\/lactation-drink-mixes-8184831.png?v=1762143776"},"aspect_ratio":1.0,"height":1080,"media_type":"image","src":"\/\/www.thebirthstore.com.au\/cdn\/shop\/files\/lactation-drink-mixes-8184831.png?v=1762143776","width":1080},{"alt":"Lactation Drink Mixes - The Birth Store - Made to Milk","id":29988518953149,"position":8,"preview_image":{"aspect_ratio":1.0,"height":1080,"width":1080,"src":"\/\/www.thebirthstore.com.au\/cdn\/shop\/files\/lactation-drink-mixes-8638463.png?v=1762143776"},"aspect_ratio":1.0,"height":1080,"media_type":"image","src":"\/\/www.thebirthstore.com.au\/cdn\/shop\/files\/lactation-drink-mixes-8638463.png?v=1762143776","width":1080},{"alt":"Lactation Drink Mixes - The Birth Store - Made to Milk","id":29988511187133,"position":9,"preview_image":{"aspect_ratio":1.0,"height":1080,"width":1080,"src":"\/\/www.thebirthstore.com.au\/cdn\/shop\/files\/lactation-drink-mixes-2979451.png?v=1762143776"},"aspect_ratio":1.0,"height":1080,"media_type":"image","src":"\/\/www.thebirthstore.com.au\/cdn\/shop\/files\/lactation-drink-mixes-2979451.png?v=1762143776","width":1080},{"alt":"Lactation Drink Mixes - The Birth Store - Made to Milk","id":29988522983613,"position":10,"preview_image":{"aspect_ratio":1.0,"height":1080,"width":1080,"src":"\/\/www.thebirthstore.com.au\/cdn\/shop\/files\/lactation-drink-mixes-1449595.png?v=1762143776"},"aspect_ratio":1.0,"height":1080,"media_type":"image","src":"\/\/www.thebirthstore.com.au\/cdn\/shop\/files\/lactation-drink-mixes-1449595.png?v=1762143776","width":1080},{"alt":"Lactation Drink Mixes - The Birth Store - Made to Milk","id":29988507549885,"position":11,"preview_image":{"aspect_ratio":1.0,"height":1080,"width":1080,"src":"\/\/www.thebirthstore.com.au\/cdn\/shop\/files\/lactation-drink-mixes-7063831.png?v=1762143776"},"aspect_ratio":1.0,"height":1080,"media_type":"image","src":"\/\/www.thebirthstore.com.au\/cdn\/shop\/files\/lactation-drink-mixes-7063831.png?v=1762143776","width":1080}],"requires_selling_plan":false,"selling_plan_groups":[],"content":"\u003cp\u003e \u003c\/p\u003e\n\u003cp\u003eMade to Milk's selection of DIY packet mixes are perfect to enjoy in the comfort of your own home.\u003c\/p\u003e\n\u003cp\u003eThey are all packed full of natural galactagogues and Brewers Yeast which help to boost \u0026amp; support your milk supply while breastfeeding.\u003c\/p\u003e\n\u003c!----\u003e"},"options":[{"name":"Flavours","position":1,"values":["Smoothie Mix","Toffee Caramel Latte","White Hot Chocolate","Creamy Chai Latte","Deluxe Hot Chocolate"]}],"custom_metafields":{},"metafields":{"badge":"\u003cdiv style='display:none' class='jdgm-prev-badge' data-average-rating='5.00' data-number-of-reviews='1' data-number-of-questions='0'\u003e \u003cspan class='jdgm-prev-badge__stars' data-score='5.00' tabindex='0' aria-label='5.00 stars' role='button'\u003e \u003cspan class='jdgm-star jdgm--on'\u003e\u003c\/span\u003e\u003cspan class='jdgm-star jdgm--on'\u003e\u003c\/span\u003e\u003cspan class='jdgm-star jdgm--on'\u003e\u003c\/span\u003e\u003cspan class='jdgm-star jdgm--on'\u003e\u003c\/span\u003e\u003cspan class='jdgm-star jdgm--on'\u003e\u003c\/span\u003e \u003c\/span\u003e \u003cspan class='jdgm-prev-badge__text'\u003e 1 review \u003c\/span\u003e \u003c\/div\u003e","review_snippet_widget":"\u003cdiv class='jdgm-widget jdgm-review-snippet-widget'\u003e \u003cstyle\u003e\n .jdgm-review-snippet-widget{position:relative}.jdgm-review-snippet-widget:hover{cursor:pointer}@media only screen and (max-width: 767px){.jdgm-review-snippet-widget .jdgm-rev-snippet-widget__cards-container{left:unset;right:unset}}.jdgm-review-snippet-widget .jdgm-rev-snippet-card{background:#fff}.jdgm-review-snippet-widget .jdgm-star{color:#399}.jdgm-review-snippet-widget .jdgm-rev-snippet-card{border-radius:8px;background:#fff}.jdgm-review-snippet-widget .jdgm-rev-snippet-card__rev-prod-wrapper{border-radius:8px}.jdgm-review-snippet-widget .jdgm-rev-snippet-card__rev-content-wrapper{max-width:360px}.jdgm-review-snippet-widget .jdgm-rev-snippet-widget__prev-btn,.jdgm-review-snippet-widget .jdgm-rev-snippet-widget__next-btn{border-radius:50%;background:#fff}.jdgm-review-snippet-widget .jdgm-rev-snippet-widget__prev-btn\u003esvg,.jdgm-review-snippet-widget .jdgm-rev-snippet-widget__next-btn\u003esvg{fill:#000}.jdgm-review-snippet-widget .jdgm-rev-snippet-widget__prev-btn{left:0;top:40%}.jdgm-review-snippet-widget .jdgm-rev-snippet-widget__next-btn{right:0;top:40%}.jdgm-full-rev-modal.review-snippet-widget .jm-mfp-content{border-radius:8px}.jdgm-full-rev-modal.review-snippet-widget .jdgm-full-rev__icon{border-radius:8px}.jdgm-full-rev-modal.review-snippet-widget .jdgm-full-rev[data-verified-buyer=\"true\"] .jdgm-full-rev__icon::after{border-radius:8px}.jdgm-full-rev-modal.review-snippet-widget .jdgm-rev__buyer-badge{border-radius:calc( 8px \/ 2 )}.jdgm-full-rev-modal.review-snippet-widget .jdgm-full-rev__pic-img{border-radius:8px}.jdgm-full-rev-modal.review-snippet-widget .jdgm-full-rev__reply{border-radius:8px}.jdgm-full-rev-modal.review-snippet-widget .jdgm-full-rev__replier::before{content:'thebirthstore.com.au'}.jdgm-full-rev-modal.review-snippet-widget .jdgm-full-rev__product-button{border-radius:calc( 8px * 6 )}\n\n \u003c\/style\u003e \u003ci class=\"jdgm-rev-snippet-widget__prev-btn\" style='display: none;'\u003e \u003csvg xmlns=\"http:\/\/www.w3.org\/2000\/svg\" height=\"12\" viewBox=\"0 0 8 12\" width=\"8\" fill=\"#000\"\u003e\u003cpath d=\"M3.09961 6.00005L6.99961 9.90005C7.18294 10.0834 7.27461 10.3167 7.27461 10.6C7.27461 10.8834 7.18294 11.1167 6.99961 11.3C6.81628 11.4834 6.58294 11.575 6.29961 11.575C6.01628 11.575 5.78294 11.4834 5.59961 11.3L0.999609 6.70005C0.899609 6.60005 0.828776 6.49172 0.787109 6.37505C0.745443 6.25838 0.724609 6.13338 0.724609 6.00005C0.724609 5.86672 0.745443 5.74172 0.787109 5.62505C0.828776 5.50838 0.899609 5.40005 0.999609 5.30005L5.59961 0.700049C5.78294 0.516715 6.01628 0.425049 6.29961 0.425049C6.58294 0.425049 6.81628 0.516715 6.99961 0.700049C7.18294 0.883382 7.27461 1.11672 7.27461 1.40005C7.27461 1.68338 7.18294 1.91672 6.99961 2.10005L3.09961 6.00005Z\"\/\u003e\u003c\/svg\u003e \u003c\/i\u003e \u003ci class=\"jdgm-rev-snippet-widget__next-btn\" style='display: none;'\u003e \u003csvg xmlns=\"http:\/\/www.w3.org\/2000\/svg\" height=\"12\" viewBox=\"0 0 8 12\" width=\"8\" fill=\"#000\"\u003e\u003cpath d=\"M4.89961 6.00005L0.999609 2.10005C0.816276 1.91672 0.724609 1.68338 0.724609 1.40005C0.724609 1.11672 0.816276 0.883382 0.999609 0.700049C1.18294 0.516715 1.41628 0.425049 1.69961 0.425049C1.98294 0.425049 2.21628 0.516715 2.39961 0.700049L6.99961 5.30005C7.09961 5.40005 7.17044 5.50838 7.21211 5.62505C7.25378 5.74172 7.27461 5.86672 7.27461 6.00005C7.27461 6.13338 7.25378 6.25838 7.21211 6.37505C7.17044 6.49172 7.09961 6.60005 6.99961 6.70005L2.39961 11.3C2.21628 11.4834 1.98294 11.575 1.69961 11.575C1.41628 11.575 1.18294 11.4834 0.999609 11.3C0.816276 11.1167 0.724609 10.8834 0.724609 10.6C0.724609 10.3167 0.816276 10.0834 0.999609 9.90005L4.89961 6.00005Z\"\/\u003e\u003c\/svg\u003e \u003c\/i\u003e \u003cdiv style=\"overflow: hidden;\"\u003e \u003cdiv class='jdgm-rev-snippet-widget__cards-container'\u003e \u003cdiv class='jdgm-rev-snippet-card' data-review-id='e7b9d08b-2518-4851-b106-22b181600a64' style='display: none;'\u003e \u003cdiv class=\"jdgm-rev-snippet-card__rev-prod-wrapper\"\u003e \u003ca class='jdgm-rev-snippet-card__rev-content-wrapper jdgm-rev-snippet-card__full-review-link' style='text-decoration: none; color: inherit;padding: 0 34px;' role='button' data-review-id='e7b9d08b-2518-4851-b106-22b181600a64'\u003e \u003cdiv class='jdgm-rev-snippet-card__rev-header'\u003e \u003cdiv class='jdgm-rev-snippet-card__rev-rating' aria-label='5 stars' role='img'\u003e \u003cspan class='jdgm-star jdgm--on'\u003e\u003c\/span\u003e\u003cspan class='jdgm-star jdgm--on'\u003e\u003c\/span\u003e\u003cspan class='jdgm-star jdgm--on'\u003e\u003c\/span\u003e\u003cspan class='jdgm-star jdgm--on'\u003e\u003c\/span\u003e\u003cspan class='jdgm-star jdgm--on'\u003e\u003c\/span\u003e \u003c\/div\u003e \u003cdiv class='jdgm-rev-snippet-card__reviewer'\u003e Rebecca Paust \u003c\/div\u003e \u003c\/div\u003e \u003cdiv class='jdgm-rev-snippet-card__rev-content'\u003e \u003cspan class='jdgm-rev-snippet-card__rev-body'\u003e \u003cp\u003eI tried the Deluxe Hot Chocolate and oh my goodness it’s amazing! It’s increased my supply like you wouldn’t believe, and the flavour is enjoyable compared to other lactation products that leave a funny aftertaste.\u003c\/p\u003e \u003c\/span\u003e \u003c\/div\u003e \u003c\/a\u003e \u003c\/div\u003e \u003c\/div\u003e \u003c\/div\u003e \u003c\/div\u003e \u003c\/div\u003e","widget":"\u003cdiv class='jdgm-rev-widg' data-updated-at='2026-04-09T08:11:07Z' data-average-rating='5.00' data-number-of-reviews='1' data-number-of-questions='0' data-image-url='https:\/\/cdn.shopify.com\/s\/files\/1\/0527\/3393\/5805\/files\/lactation-drink-mixes-various-flavours-407925.jpg?v=1714967988'\u003e \u003cstyle class='jdgm-temp-hiding-style'\u003e.jdgm-rev-widg{ display: none }\u003c\/style\u003e \u003cdiv class='jdgm-rev-widg__header'\u003e \u003ch2 class='jdgm-rev-widg__title'\u003eCustomer Reviews\u003c\/h2\u003e \u003cdiv class='jdgm-rev-widg__summary'\u003e \u003cdiv class='jdgm-rev-widg__summary-stars' aria-label='Average rating is 5.00 stars' role='img'\u003e \u003cspan class='jdgm-star jdgm--on'\u003e\u003c\/span\u003e\u003cspan class='jdgm-star jdgm--on'\u003e\u003c\/span\u003e\u003cspan class='jdgm-star jdgm--on'\u003e\u003c\/span\u003e\u003cspan class='jdgm-star jdgm--on'\u003e\u003c\/span\u003e\u003cspan class='jdgm-star jdgm--on'\u003e\u003c\/span\u003e \u003c\/div\u003e \u003cdiv class='jdgm-rev-widg__summary-text'\u003eBased on 1 review\u003c\/div\u003e \u003c\/div\u003e \u003ca style='display: none' href='#' class='jdgm-write-rev-link' role='button'\u003eWrite a review\u003c\/a\u003e \u003cdiv class='jdgm-histogram jdgm-temp-hidden'\u003e \u003cdiv class='jdgm-histogram__row' data-rating='5' data-frequency='1' data-percentage='100'\u003e \u003cdiv class='jdgm-histogram__star' role='button' aria-label=\"100% (1) reviews with 5 star rating\" tabindex='0' \u003e\u003cspan class='jdgm-star jdgm--on'\u003e\u003c\/span\u003e\u003cspan class='jdgm-star jdgm--on'\u003e\u003c\/span\u003e\u003cspan class='jdgm-star jdgm--on'\u003e\u003c\/span\u003e\u003cspan class='jdgm-star jdgm--on'\u003e\u003c\/span\u003e\u003cspan class='jdgm-star jdgm--on'\u003e\u003c\/span\u003e\u003c\/div\u003e \u003cdiv class='jdgm-histogram__bar'\u003e \u003cdiv class='jdgm-histogram__bar-content' style='width: 100%;'\u003e \u003c\/div\u003e \u003c\/div\u003e \u003cdiv class='jdgm-histogram__percentage'\u003e100%\u003c\/div\u003e \u003cdiv class='jdgm-histogram__frequency'\u003e(1)\u003c\/div\u003e \u003c\/div\u003e \u003cdiv class='jdgm-histogram__row' data-rating='4' data-frequency='0' data-percentage='0'\u003e \u003cdiv class='jdgm-histogram__star' role='button' aria-label=\"0% (0) reviews with 4 star rating\" tabindex='0' \u003e\u003cspan class='jdgm-star jdgm--on'\u003e\u003c\/span\u003e\u003cspan class='jdgm-star jdgm--on'\u003e\u003c\/span\u003e\u003cspan class='jdgm-star jdgm--on'\u003e\u003c\/span\u003e\u003cspan class='jdgm-star jdgm--on'\u003e\u003c\/span\u003e\u003cspan class='jdgm-star jdgm--off'\u003e\u003c\/span\u003e\u003c\/div\u003e \u003cdiv class='jdgm-histogram__bar'\u003e \u003cdiv class='jdgm-histogram__bar-content' style='width: 0%;'\u003e \u003c\/div\u003e \u003c\/div\u003e \u003cdiv class='jdgm-histogram__percentage'\u003e0%\u003c\/div\u003e \u003cdiv class='jdgm-histogram__frequency'\u003e(0)\u003c\/div\u003e \u003c\/div\u003e \u003cdiv class='jdgm-histogram__row' data-rating='3' data-frequency='0' data-percentage='0'\u003e \u003cdiv class='jdgm-histogram__star' role='button' aria-label=\"0% (0) reviews with 3 star rating\" tabindex='0' \u003e\u003cspan class='jdgm-star jdgm--on'\u003e\u003c\/span\u003e\u003cspan class='jdgm-star jdgm--on'\u003e\u003c\/span\u003e\u003cspan class='jdgm-star jdgm--on'\u003e\u003c\/span\u003e\u003cspan class='jdgm-star jdgm--off'\u003e\u003c\/span\u003e\u003cspan class='jdgm-star jdgm--off'\u003e\u003c\/span\u003e\u003c\/div\u003e \u003cdiv class='jdgm-histogram__bar'\u003e \u003cdiv class='jdgm-histogram__bar-content' style='width: 0%;'\u003e \u003c\/div\u003e \u003c\/div\u003e \u003cdiv class='jdgm-histogram__percentage'\u003e0%\u003c\/div\u003e \u003cdiv class='jdgm-histogram__frequency'\u003e(0)\u003c\/div\u003e \u003c\/div\u003e \u003cdiv class='jdgm-histogram__row' data-rating='2' data-frequency='0' data-percentage='0'\u003e \u003cdiv class='jdgm-histogram__star' role='button' aria-label=\"0% (0) reviews with 2 star rating\" tabindex='0' \u003e\u003cspan class='jdgm-star jdgm--on'\u003e\u003c\/span\u003e\u003cspan class='jdgm-star jdgm--on'\u003e\u003c\/span\u003e\u003cspan class='jdgm-star jdgm--off'\u003e\u003c\/span\u003e\u003cspan class='jdgm-star jdgm--off'\u003e\u003c\/span\u003e\u003cspan class='jdgm-star jdgm--off'\u003e\u003c\/span\u003e\u003c\/div\u003e \u003cdiv class='jdgm-histogram__bar'\u003e \u003cdiv class='jdgm-histogram__bar-content' style='width: 0%;'\u003e \u003c\/div\u003e \u003c\/div\u003e \u003cdiv class='jdgm-histogram__percentage'\u003e0%\u003c\/div\u003e \u003cdiv class='jdgm-histogram__frequency'\u003e(0)\u003c\/div\u003e \u003c\/div\u003e \u003cdiv class='jdgm-histogram__row' data-rating='1' data-frequency='0' data-percentage='0'\u003e \u003cdiv class='jdgm-histogram__star' role='button' aria-label=\"0% (0) reviews with 1 star rating\" tabindex='0' \u003e\u003cspan class='jdgm-star jdgm--on'\u003e\u003c\/span\u003e\u003cspan class='jdgm-star jdgm--off'\u003e\u003c\/span\u003e\u003cspan class='jdgm-star jdgm--off'\u003e\u003c\/span\u003e\u003cspan class='jdgm-star jdgm--off'\u003e\u003c\/span\u003e\u003cspan class='jdgm-star jdgm--off'\u003e\u003c\/span\u003e\u003c\/div\u003e \u003cdiv class='jdgm-histogram__bar'\u003e \u003cdiv class='jdgm-histogram__bar-content' style='width: 0%;'\u003e \u003c\/div\u003e \u003c\/div\u003e \u003cdiv class='jdgm-histogram__percentage'\u003e0%\u003c\/div\u003e \u003cdiv class='jdgm-histogram__frequency'\u003e(0)\u003c\/div\u003e \u003c\/div\u003e \u003cdiv class='jdgm-histogram__row jdgm-histogram__clear-filter' data-rating=null tabindex='0'\u003e\u003c\/div\u003e \u003c\/div\u003e \u003cdiv class='jdgm-rev-widg__sort-wrapper'\u003e\u003c\/div\u003e \u003c\/div\u003e \u003cdiv class='jdgm-rev-widg__body'\u003e \u003cdiv class='jdgm-rev-widg__reviews'\u003e\u003cdiv class='jdgm-rev jdgm-divider-top' data-verified-buyer='false' data-review-id='e7b9d08b-2518-4851-b106-22b181600a64' data-review-language='' data-product-title='Lactation Drink Mixes' data-product-url='\/products\/lactation-diy-drink-mixes-various-flavours' data-thumb-up-count='0' data-thumb-down-count='0'\u003e \u003cdiv class='jdgm-rev__header'\u003e \u003cdiv class='jdgm-rev__icon' \u003e R \u003c\/div\u003e \u003cspan class='jdgm-rev__rating' data-score='5' tabindex='0' aria-label='5 star review' role='img'\u003e \u003cspan class='jdgm-star jdgm--on'\u003e\u003c\/span\u003e\u003cspan class='jdgm-star jdgm--on'\u003e\u003c\/span\u003e\u003cspan class='jdgm-star jdgm--on'\u003e\u003c\/span\u003e\u003cspan class='jdgm-star jdgm--on'\u003e\u003c\/span\u003e\u003cspan class='jdgm-star jdgm--on'\u003e\u003c\/span\u003e \u003c\/span\u003e \u003cspan class='jdgm-rev__timestamp jdgm-spinner' data-content='2024-05-30 03:49:39 UTC'\u003e\u003c\/span\u003e \u003cdiv class='jdgm-rev__br'\u003e\u003c\/div\u003e \u003cspan class='jdgm-rev__buyer-badge-wrapper'\u003e \u003c\/span\u003e \u003cspan class='jdgm-rev__author-wrapper'\u003e \u003cspan class='jdgm-rev__author'\u003eRebecca Paust\u003c\/span\u003e \u003cspan class='jdgm-rev__location' \u003e \u003c\/span\u003e \u003c\/span\u003e \u003c\/div\u003e \u003cdiv class='jdgm-rev__content'\u003e \u003cdiv class='jdgm-rev__custom-form'\u003e \u003c\/div\u003e \u003cb class='jdgm-rev__title'\u003eMade to Milk is Amazing!\u003c\/b\u003e \u003cdiv class='jdgm-rev__body'\u003e\u003cp\u003eI tried the Deluxe Hot Chocolate and oh my goodness it’s amazing! It’s increased my supply like you wouldn’t believe, and the flavour is enjoyable compared to other lactation products that leave a funny aftertaste.\u003c\/p\u003e\u003c\/div\u003e \u003cdiv class='jdgm-rev__pics'\u003e \u003c\/div\u003e \u003cdiv class='jdgm-rev__vids'\u003e \u003c\/div\u003e \u003cdiv class='jdgm-rev__transparency-badge-wrapper'\u003e \u003cdiv class='jdgm-rev__transparency-badge' data-badge-type=review_collected_from_store_visitor\u003e\u003c\/div\u003e \u003c\/div\u003e \u003c\/div\u003e \u003cdiv class='jdgm-rev__actions'\u003e \u003cdiv class='jdgm-rev__social'\u003e\u003c\/div\u003e \u003cdiv class='jdgm-rev__votes'\u003e\u003c\/div\u003e \u003c\/div\u003e \u003cdiv class='jdgm-rev__reply'\u003e \u003cdiv class='jdgm-rev__replier-wrapper'\u003e \u003cb class='jdgm-rev__replier'\u003e\u003c\/b\u003e \u003c\/div\u003e \u003cdiv class='jdgm-rev__reply-content'\u003e\u003cp\u003eRebecca, thank you so much for sharing your experience, we’re so glad to hear you loved the Deluxe Hot Chocolate and that it supported your supply so well. It means a lot to know the taste stood out for you too, especially compared to other products. We truly appreciate your kind words and support ❤️\u003c\/p\u003e\u003c\/div\u003e \u003c\/div\u003e \u003c\/div\u003e\u003c\/div\u003e \u003cdiv class='jdgm-paginate' data-per-page='10' data-url='https:\/\/api.judge.me\/reviews\/reviews_for_widget' style=\"display: none;\"\u003e\u003c\/div\u003e \u003c\/div\u003e \u003cdiv class='jdgm-rev-widg__paginate-spinner-wrapper'\u003e \u003cdiv class='jdgm-spinner'\u003e\u003c\/div\u003e \u003c\/div\u003e \u003c\/div\u003e"},"collections":[{"id":281712427197,"handle":"breastfeeding","title":"Breastfeeding","updated_at":"2026-06-12T19:10:26+08:00","body_html":"","published_at":"2021-12-20T14:19:33+08:00","sort_order":"best-selling","template_suffix":"breastfeeding-collection","disjunctive":false,"rules":[{"column":"tag","relation":"equals","condition":"Breastfeeding"}],"published_scope":"global","image":{"created_at":"2024-05-06T11:59:34+08:00","alt":"Breastfeeding - The Birth Store","width":620,"height":635,"src":"\/\/www.thebirthstore.com.au\/cdn\/shop\/collections\/breastfeeding-793872.jpg?v=1714967974"}},{"id":261657460925,"handle":"buy","title":"Buy","updated_at":"2026-06-12T19:10:26+08:00","body_html":"\u003cp\u003eBrowse all of our pregnancy, labour \u0026amp; birth, postpartum and baby essentials here.\u003cbr\u003e\u003c\/p\u003e\n\u003cp\u003e\u003cspan\u003eYou can even buy now and pay later with Afterpay!\u003c\/span\u003e\u003c\/p\u003e","published_at":"2021-03-10T12:05:31+08:00","sort_order":"best-selling","template_suffix":"shop-all-collection","disjunctive":false,"rules":[{"column":"title","relation":"not_contains","condition":"Hire"}],"published_scope":"global","image":{"created_at":"2024-05-06T11:59:42+08:00","alt":"Buy - The Birth Store","width":2048,"height":2048,"src":"\/\/www.thebirthstore.com.au\/cdn\/shop\/collections\/buy-964856.jpg?v=1714967982"}},{"id":292919476413,"handle":"lactation-products","title":"Lactation Products","updated_at":"2026-06-12T19:10:26+08:00","body_html":"","published_at":"2023-03-22T12:22:41+08:00","sort_order":"best-selling","template_suffix":"lactation-products-collec","disjunctive":false,"rules":[{"column":"tag","relation":"equals","condition":"Lactation Products"}],"published_scope":"global","image":{"created_at":"2024-05-06T12:00:19+08:00","alt":"Lactation Products - The Birth Store","width":1034,"height":922,"src":"\/\/www.thebirthstore.com.au\/cdn\/shop\/collections\/lactation-products-752907.jpg?v=1714968019"}},{"id":291456483517,"handle":"shop-all","title":"Shop All - Mum","updated_at":"2026-06-12T19:10:26+08:00","body_html":"","published_at":"2022-12-23T22:04:39+08:00","sort_order":"best-selling","template_suffix":"shop-all-collection","disjunctive":false,"rules":[{"column":"variant_price","relation":"greater_than","condition":"1"},{"column":"title","relation":"not_contains","condition":"Batteries"},{"column":"tag","relation":"equals","condition":"Mum"}],"published_scope":"global","image":{"created_at":"2024-05-06T12:00:54+08:00","alt":"Shop All - The Birth Store","width":1365,"height":2048,"src":"\/\/www.thebirthstore.com.au\/cdn\/shop\/collections\/shop-all-693176.jpg?v=1714968055"}},{"id":310045933757,"handle":"shop-all-sale","title":"Shop All Sale","updated_at":"2026-06-12T19:10:26+08:00","body_html":"","published_at":"2024-11-12T13:22:43+08:00","sort_order":"alpha-asc","template_suffix":"","disjunctive":true,"rules":[{"column":"tag","relation":"equals","condition":"Bundles"},{"column":"vendor","relation":"equals","condition":"Franjos Kitchen"},{"column":"vendor","relation":"equals","condition":"Adored Illustrations"},{"column":"vendor","relation":"equals","condition":"Amazing Oils"},{"column":"vendor","relation":"equals","condition":"Ice Ice Booby"},{"column":"vendor","relation":"equals","condition":"Made to Milk"},{"column":"vendor","relation":"equals","condition":"Milky Goodness"},{"column":"vendor","relation":"equals","condition":"Seasons of Mama"},{"column":"vendor","relation":"equals","condition":"Silverette"},{"column":"vendor","relation":"equals","condition":"Snuggle Hunny"},{"column":"vendor","relation":"equals","condition":"Yung Bod"},{"column":"vendor","relation":"equals","condition":"Bare Love"},{"column":"vendor","relation":"equals","condition":"Haakaa"},{"column":"vendor","relation":"equals","condition":"Mere Botanicals"},{"column":"vendor","relation":"equals","condition":"The Birth Store Hire"},{"column":"vendor","relation":"equals","condition":"The Birth Store"}],"published_scope":"global","image":{"created_at":"2024-11-13T10:58:16+08:00","alt":"Shop All Sale - The Birth Store","width":2048,"height":1365,"src":"\/\/www.thebirthstore.com.au\/cdn\/shop\/collections\/shop-all-sale-297361.jpg?v=1731466697"}}]}
{"item":{"id":7322196574397,"title":"Ladybug Silicone Breast Milk Collector","handle":"ladybug-silicone-breast-milk-collector-40ml-75ml-150ml","description":"\u003cp\u003e\u003cspan data-mce-fragment=\"1\"\u003eThe Haakaa Ladybug Silicone Breast Milk Collector is the perfect breast pad alternative for those who want to save every drop of leakage and letdown instead of soaking it up.\u003c\/span\u003e\u003cbr data-mce-fragment=\"1\"\u003e\u003cbr data-mce-fragment=\"1\"\u003e\u003cspan data-mce-fragment=\"1\"\u003eThe one-piece design attaches to your breast with suction and sits securely and discreetly in your bra. This suction is light and gentle to hold the product in place. It won't draw out additional milk, so it's ideal for mums who leak breast milk and want to save it without increasing their supply.\u003c\/span\u003e\u003cbr data-mce-fragment=\"1\"\u003e\u003cbr data-mce-fragment=\"1\"\u003e\u003cspan data-mce-fragment=\"1\"\u003eYou can wear the Ladybug on the other side while you're breastfeeding to catch your letdown or wear one on each breast inside your bra as you carry on with your day. It is completely portable and has small feet on the bottom to stand upright on any flat surface, preventing spills after use.\u003c\/span\u003e\u003cbr data-mce-fragment=\"1\"\u003e\u003cbr data-mce-fragment=\"1\"\u003e\u003cspan data-mce-fragment=\"1\"\u003eOnce you have finished collecting your letdown, open the plug on the top and safely pour out your milk into a container or bottle.\u003c\/span\u003e\u003c\/p\u003e\n\u003cp\u003e\u003cstrong\u003eFeatures:\u003c\/strong\u003e\u003c\/p\u003e\n\u003cul\u003e\n\u003cli\u003eAttaches to your breast with light suction to help keep it in place inside your bra.\u003c\/li\u003e\n\u003cli\u003eMade of soft 100% medical-grade silicone.\u003c\/li\u003e\n\u003cli\u003eOne-piece design with no joints, cracks or edges for bacteria to harbour.\u003c\/li\u003e\n\u003cli\u003eSmall feet on the base allow it to stand upright on flat surfaces.\u003c\/li\u003e\n\u003cli\u003eNo cords or batteries required.\u003c\/li\u003e\n\u003cli\u003eEasy-care - just boil to sterilise.\u003c\/li\u003e\n\u003cli\u003eBPA, PVC and phthalate-free.\u003c\/li\u003e\n\u003c\/ul\u003e\n\u003cp\u003e\u003cstrong\u003eDirections:\u003c\/strong\u003e\u003c\/p\u003e\n\u003cp\u003e\u003cstrong\u003eCollecting Your Leakage and Letdown:\u003c\/strong\u003e\u003c\/p\u003e\n\u003col\u003e\n\u003cli\u003eEnsure the plug\u003cstrong\u003e (a)\u003c\/strong\u003e\u003cspan\u003e \u003c\/span\u003eis pushed into the outlet\u003cspan\u003e \u003c\/span\u003e\u003cstrong\u003e(b)\u003c\/strong\u003e.\u003c\/li\u003e\n\u003cli\u003eCentre the opening\u003cspan\u003e \u003c\/span\u003e\u003cstrong\u003e(e)\u003c\/strong\u003e\u003cspan\u003e \u003c\/span\u003eover your nipple and gently press down on the back of the Ladybug.\u003c\/li\u003e\n\u003cli\u003ePress to your breast and release to create gentle suction and begin collecting let-down. \u003c\/li\u003e\n\u003cli\u003eThe Ladybug should always be worn inside a bra to keep it secure.\u003c\/li\u003e\n\u003cli\u003eRemove the Ladybug regularly to store your breast milk in line with your country’s safe breast milk storage guidelines. Pull out the plug from the outlet and pour the milk from the outlet into a container before storing. \u003c\/li\u003e\n\u003c\/ol\u003e\n\u003cp dir=\"ltr\"\u003e\u003cstrong\u003eNOTE: \u003c\/strong\u003e\u003cem\u003eSuction is optional and helps to keep the Ladybug in place in your bra. The Ladybug will only collect milk that would have leaked anyway. It won't draw out any extra milk. \u003c\/em\u003e\u003c\/p\u003e\n\u003cp\u003e \u003c\/p\u003e\n\u003cp\u003e \u003c\/p\u003e\n\u003cp\u003e\u003cimg src=\"https:\/\/cdn.accentuate.cloud\/images\/11019058\/%E5%90%B8%E9%9B%86%E4%B9%B3%E5%99%A8-01.jpg?v=1642033976218\" class=\"fr-fic fr-dib\"\u003e\u003cstrong\u003eCleaning \u0026amp; Care:\u003c\/strong\u003e\u003c\/p\u003e\n\u003cp\u003e\u003cspan\u003eClean after each use. We strongly recommend cleaning and sterilising your Ladybug with any steam sterilising system or by boiling in water for 2-3 minutes. Only soft bristle brushes or soft sponges should be used to clean this product as hard scourers may scratch the surface. Exposure to detergent may make the clear silicone in this product appear cloudy. Instead, we recommend washing in warm water with soap\u003c\/span\u003e\u003cspan\u003e. Do not use any bleach-based agents or sterilising tablets to clean this product. Do not use UV sterilisers to clean this product as it may impact its lifespan.\u003c\/span\u003e\u003c\/p\u003e\n\u003cp\u003e\u003cstrong\u003eStorage:\u003c\/strong\u003e\u003c\/p\u003e\n\u003cp\u003e\u003cspan\u003eDo not store near any sharp objects. Store product in a cool, dry place and avoid direct sunlight\u003c\/span\u003e\u003c\/p\u003e\n\u003cp\u003e\u003cstrong\u003eCaution:\u003c\/strong\u003e\u003c\/p\u003e\n\u003cp dir=\"ltr\"\u003eAlways follow your country’s guidelines and recommendations to safely express and store breast milk. Check product condition regularly. \u003cbr\u003eReplace if this product shows any signs of damage. This product is not a toy. Do not use this product for anything other than its intended use. Adult supervision is required. Keep out of the reach of children and pets. \u003c\/p\u003e\n\u003cp\u003e\u003cstrong\u003ePlease ensure you are familiar with your country's guidelines on the safe storage of breast milk. Empty your Ladybug regularly to store your breast milk according to these guidelines. Consult your midwife or lactation consultant if you have any concerns before use.\u003c\/strong\u003e\u003c\/p\u003e","published_at":"2022-08-16T19:33:49+08:00","created_at":"2022-08-16T19:33:48+08:00","vendor":"Haakaa","type":"","tags":["Breastfeeding","Cracked Nipples","Mum","Post-Partum"],"price":2500,"price_min":2500,"price_max":2900,"available":true,"price_varies":true,"compare_at_price":null,"compare_at_price_min":0,"compare_at_price_max":0,"compare_at_price_varies":false,"variants":[{"id":42216895905981,"title":"40mls","option1":"40mls","option2":null,"option3":null,"sku":"","requires_shipping":true,"taxable":false,"featured_image":null,"available":true,"name":"Ladybug Silicone Breast Milk Collector - 40mls","public_title":"40mls","options":["40mls"],"price":2500,"weight":90,"compare_at_price":null,"inventory_management":"shopify","barcode":"95905981","requires_selling_plan":false,"selling_plan_allocations":[],"quantity_rule":{"min":1,"max":null,"increment":1}},{"id":42216895938749,"title":"75mls","option1":"75mls","option2":null,"option3":null,"sku":"","requires_shipping":true,"taxable":false,"featured_image":null,"available":true,"name":"Ladybug Silicone Breast Milk Collector - 75mls","public_title":"75mls","options":["75mls"],"price":2700,"weight":102,"compare_at_price":null,"inventory_management":"shopify","barcode":"95938749","requires_selling_plan":false,"selling_plan_allocations":[],"quantity_rule":{"min":1,"max":null,"increment":1}},{"id":42216895971517,"title":"150mls","option1":"150mls","option2":null,"option3":null,"sku":"","requires_shipping":true,"taxable":false,"featured_image":null,"available":true,"name":"Ladybug Silicone Breast Milk Collector - 150mls","public_title":"150mls","options":["150mls"],"price":2900,"weight":145,"compare_at_price":null,"inventory_management":"shopify","barcode":"95971517","requires_selling_plan":false,"selling_plan_allocations":[],"quantity_rule":{"min":1,"max":null,"increment":1}}],"images":["\/\/www.thebirthstore.com.au\/cdn\/shop\/files\/ladybug-silicone-breast-milk-collector-873986.jpg?v=1714967990","\/\/www.thebirthstore.com.au\/cdn\/shop\/files\/ladybug-silicone-breast-milk-collector-183220.jpg?v=1714967990","\/\/www.thebirthstore.com.au\/cdn\/shop\/files\/ladybug-silicone-breast-milk-collector-821084.jpg?v=1714967990","\/\/www.thebirthstore.com.au\/cdn\/shop\/files\/ladybug-silicone-breast-milk-collector-724130.jpg?v=1714967990","\/\/www.thebirthstore.com.au\/cdn\/shop\/files\/ladybug-silicone-breast-milk-collector-280019.jpg?v=1714967990","\/\/www.thebirthstore.com.au\/cdn\/shop\/files\/ladybug-silicone-breast-milk-collector-729118.jpg?v=1714967990","\/\/www.thebirthstore.com.au\/cdn\/shop\/files\/ladybug-silicone-breast-milk-collector-984849.jpg?v=1714967990"],"featured_image":"\/\/www.thebirthstore.com.au\/cdn\/shop\/files\/ladybug-silicone-breast-milk-collector-873986.jpg?v=1714967990","options":["Size"],"media":[{"alt":"Ladybug Silicone Breast Milk Collector - The Birth Store-Haakaa","id":27007590662333,"position":1,"preview_image":{"aspect_ratio":1.0,"height":867,"width":867,"src":"\/\/www.thebirthstore.com.au\/cdn\/shop\/files\/ladybug-silicone-breast-milk-collector-873986.jpg?v=1714967990"},"aspect_ratio":1.0,"height":867,"media_type":"image","src":"\/\/www.thebirthstore.com.au\/cdn\/shop\/files\/ladybug-silicone-breast-milk-collector-873986.jpg?v=1714967990","width":867},{"alt":"Ladybug Silicone Breast Milk Collector - The Birth Store-Haakaa","id":27007590760637,"position":2,"preview_image":{"aspect_ratio":0.944,"height":678,"width":640,"src":"\/\/www.thebirthstore.com.au\/cdn\/shop\/files\/ladybug-silicone-breast-milk-collector-183220.jpg?v=1714967990"},"aspect_ratio":0.944,"height":678,"media_type":"image","src":"\/\/www.thebirthstore.com.au\/cdn\/shop\/files\/ladybug-silicone-breast-milk-collector-183220.jpg?v=1714967990","width":640},{"alt":"Ladybug Silicone Breast Milk Collector - The Birth Store-Haakaa","id":27007590826173,"position":3,"preview_image":{"aspect_ratio":1.0,"height":1000,"width":1000,"src":"\/\/www.thebirthstore.com.au\/cdn\/shop\/files\/ladybug-silicone-breast-milk-collector-821084.jpg?v=1714967990"},"aspect_ratio":1.0,"height":1000,"media_type":"image","src":"\/\/www.thebirthstore.com.au\/cdn\/shop\/files\/ladybug-silicone-breast-milk-collector-821084.jpg?v=1714967990","width":1000},{"alt":"Ladybug Silicone Breast Milk Collector - The Birth Store-Haakaa","id":27007590891709,"position":4,"preview_image":{"aspect_ratio":1.617,"height":600,"width":970,"src":"\/\/www.thebirthstore.com.au\/cdn\/shop\/files\/ladybug-silicone-breast-milk-collector-724130.jpg?v=1714967990"},"aspect_ratio":1.617,"height":600,"media_type":"image","src":"\/\/www.thebirthstore.com.au\/cdn\/shop\/files\/ladybug-silicone-breast-milk-collector-724130.jpg?v=1714967990","width":970},{"alt":"Ladybug Silicone Breast Milk Collector - The Birth Store-Haakaa","id":27007590957245,"position":5,"preview_image":{"aspect_ratio":1.0,"height":1000,"width":1000,"src":"\/\/www.thebirthstore.com.au\/cdn\/shop\/files\/ladybug-silicone-breast-milk-collector-280019.jpg?v=1714967990"},"aspect_ratio":1.0,"height":1000,"media_type":"image","src":"\/\/www.thebirthstore.com.au\/cdn\/shop\/files\/ladybug-silicone-breast-milk-collector-280019.jpg?v=1714967990","width":1000},{"alt":"Ladybug Silicone Breast Milk Collector - The Birth Store-Haakaa","id":27007591022781,"position":6,"preview_image":{"aspect_ratio":0.955,"height":619,"width":591,"src":"\/\/www.thebirthstore.com.au\/cdn\/shop\/files\/ladybug-silicone-breast-milk-collector-729118.jpg?v=1714967990"},"aspect_ratio":0.955,"height":619,"media_type":"image","src":"\/\/www.thebirthstore.com.au\/cdn\/shop\/files\/ladybug-silicone-breast-milk-collector-729118.jpg?v=1714967990","width":591},{"alt":"Ladybug Silicone Breast Milk Collector - The Birth Store-Haakaa","id":27007591088317,"position":7,"preview_image":{"aspect_ratio":0.976,"height":635,"width":620,"src":"\/\/www.thebirthstore.com.au\/cdn\/shop\/files\/ladybug-silicone-breast-milk-collector-984849.jpg?v=1714967990"},"aspect_ratio":0.976,"height":635,"media_type":"image","src":"\/\/www.thebirthstore.com.au\/cdn\/shop\/files\/ladybug-silicone-breast-milk-collector-984849.jpg?v=1714967990","width":620}],"requires_selling_plan":false,"selling_plan_groups":[],"content":"\u003cp\u003e\u003cspan data-mce-fragment=\"1\"\u003eThe Haakaa Ladybug Silicone Breast Milk Collector is the perfect breast pad alternative for those who want to save every drop of leakage and letdown instead of soaking it up.\u003c\/span\u003e\u003cbr data-mce-fragment=\"1\"\u003e\u003cbr data-mce-fragment=\"1\"\u003e\u003cspan data-mce-fragment=\"1\"\u003eThe one-piece design attaches to your breast with suction and sits securely and discreetly in your bra. This suction is light and gentle to hold the product in place. It won't draw out additional milk, so it's ideal for mums who leak breast milk and want to save it without increasing their supply.\u003c\/span\u003e\u003cbr data-mce-fragment=\"1\"\u003e\u003cbr data-mce-fragment=\"1\"\u003e\u003cspan data-mce-fragment=\"1\"\u003eYou can wear the Ladybug on the other side while you're breastfeeding to catch your letdown or wear one on each breast inside your bra as you carry on with your day. It is completely portable and has small feet on the bottom to stand upright on any flat surface, preventing spills after use.\u003c\/span\u003e\u003cbr data-mce-fragment=\"1\"\u003e\u003cbr data-mce-fragment=\"1\"\u003e\u003cspan data-mce-fragment=\"1\"\u003eOnce you have finished collecting your letdown, open the plug on the top and safely pour out your milk into a container or bottle.\u003c\/span\u003e\u003c\/p\u003e\n\u003cp\u003e\u003cstrong\u003eFeatures:\u003c\/strong\u003e\u003c\/p\u003e\n\u003cul\u003e\n\u003cli\u003eAttaches to your breast with light suction to help keep it in place inside your bra.\u003c\/li\u003e\n\u003cli\u003eMade of soft 100% medical-grade silicone.\u003c\/li\u003e\n\u003cli\u003eOne-piece design with no joints, cracks or edges for bacteria to harbour.\u003c\/li\u003e\n\u003cli\u003eSmall feet on the base allow it to stand upright on flat surfaces.\u003c\/li\u003e\n\u003cli\u003eNo cords or batteries required.\u003c\/li\u003e\n\u003cli\u003eEasy-care - just boil to sterilise.\u003c\/li\u003e\n\u003cli\u003eBPA, PVC and phthalate-free.\u003c\/li\u003e\n\u003c\/ul\u003e\n\u003cp\u003e\u003cstrong\u003eDirections:\u003c\/strong\u003e\u003c\/p\u003e\n\u003cp\u003e\u003cstrong\u003eCollecting Your Leakage and Letdown:\u003c\/strong\u003e\u003c\/p\u003e\n\u003col\u003e\n\u003cli\u003eEnsure the plug\u003cstrong\u003e (a)\u003c\/strong\u003e\u003cspan\u003e \u003c\/span\u003eis pushed into the outlet\u003cspan\u003e \u003c\/span\u003e\u003cstrong\u003e(b)\u003c\/strong\u003e.\u003c\/li\u003e\n\u003cli\u003eCentre the opening\u003cspan\u003e \u003c\/span\u003e\u003cstrong\u003e(e)\u003c\/strong\u003e\u003cspan\u003e \u003c\/span\u003eover your nipple and gently press down on the back of the Ladybug.\u003c\/li\u003e\n\u003cli\u003ePress to your breast and release to create gentle suction and begin collecting let-down. \u003c\/li\u003e\n\u003cli\u003eThe Ladybug should always be worn inside a bra to keep it secure.\u003c\/li\u003e\n\u003cli\u003eRemove the Ladybug regularly to store your breast milk in line with your country’s safe breast milk storage guidelines. Pull out the plug from the outlet and pour the milk from the outlet into a container before storing. \u003c\/li\u003e\n\u003c\/ol\u003e\n\u003cp dir=\"ltr\"\u003e\u003cstrong\u003eNOTE: \u003c\/strong\u003e\u003cem\u003eSuction is optional and helps to keep the Ladybug in place in your bra. The Ladybug will only collect milk that would have leaked anyway. It won't draw out any extra milk. \u003c\/em\u003e\u003c\/p\u003e\n\u003cp\u003e \u003c\/p\u003e\n\u003cp\u003e \u003c\/p\u003e\n\u003cp\u003e\u003cimg src=\"https:\/\/cdn.accentuate.cloud\/images\/11019058\/%E5%90%B8%E9%9B%86%E4%B9%B3%E5%99%A8-01.jpg?v=1642033976218\" class=\"fr-fic fr-dib\"\u003e\u003cstrong\u003eCleaning \u0026amp; Care:\u003c\/strong\u003e\u003c\/p\u003e\n\u003cp\u003e\u003cspan\u003eClean after each use. We strongly recommend cleaning and sterilising your Ladybug with any steam sterilising system or by boiling in water for 2-3 minutes. Only soft bristle brushes or soft sponges should be used to clean this product as hard scourers may scratch the surface. Exposure to detergent may make the clear silicone in this product appear cloudy. Instead, we recommend washing in warm water with soap\u003c\/span\u003e\u003cspan\u003e. Do not use any bleach-based agents or sterilising tablets to clean this product. Do not use UV sterilisers to clean this product as it may impact its lifespan.\u003c\/span\u003e\u003c\/p\u003e\n\u003cp\u003e\u003cstrong\u003eStorage:\u003c\/strong\u003e\u003c\/p\u003e\n\u003cp\u003e\u003cspan\u003eDo not store near any sharp objects. Store product in a cool, dry place and avoid direct sunlight\u003c\/span\u003e\u003c\/p\u003e\n\u003cp\u003e\u003cstrong\u003eCaution:\u003c\/strong\u003e\u003c\/p\u003e\n\u003cp dir=\"ltr\"\u003eAlways follow your country’s guidelines and recommendations to safely express and store breast milk. Check product condition regularly. \u003cbr\u003eReplace if this product shows any signs of damage. This product is not a toy. Do not use this product for anything other than its intended use. Adult supervision is required. Keep out of the reach of children and pets. \u003c\/p\u003e\n\u003cp\u003e\u003cstrong\u003ePlease ensure you are familiar with your country's guidelines on the safe storage of breast milk. Empty your Ladybug regularly to store your breast milk according to these guidelines. Consult your midwife or lactation consultant if you have any concerns before use.\u003c\/strong\u003e\u003c\/p\u003e"},"options":[{"name":"Size","position":1,"values":["40mls","75mls","150mls"]}],"custom_metafields":{},"metafields":{"badge":"\u003cdiv style='display:none' class='jdgm-prev-badge' data-average-rating='0.00' data-number-of-reviews='0' data-number-of-questions='0'\u003e \u003cspan class='jdgm-prev-badge__stars' data-score='0.00' tabindex='0' aria-label='0.00 stars' role='button'\u003e \u003cspan class='jdgm-star jdgm--off'\u003e\u003c\/span\u003e\u003cspan class='jdgm-star jdgm--off'\u003e\u003c\/span\u003e\u003cspan class='jdgm-star jdgm--off'\u003e\u003c\/span\u003e\u003cspan class='jdgm-star jdgm--off'\u003e\u003c\/span\u003e\u003cspan class='jdgm-star jdgm--off'\u003e\u003c\/span\u003e \u003c\/span\u003e \u003cspan class='jdgm-prev-badge__text'\u003e No reviews \u003c\/span\u003e \u003c\/div\u003e","widget":"\u003cdiv class='jdgm-rev-widg' data-updated-at='2025-06-13T16:12:10Z' data-average-rating='0.00' data-number-of-reviews='0' data-number-of-questions='0'\u003e \u003cstyle class='jdgm-temp-hiding-style'\u003e.jdgm-rev-widg{ display: none }\u003c\/style\u003e \u003cdiv class='jdgm-rev-widg__header'\u003e \u003ch2 class='jdgm-rev-widg__title'\u003eCustomer Reviews\u003c\/h2\u003e \u003cdiv class='jdgm-rev-widg__summary'\u003e \u003cdiv class='jdgm-rev-widg__summary-stars' aria-label='Average rating is 0.00 stars' role='img'\u003e \u003cspan class='jdgm-star jdgm--off'\u003e\u003c\/span\u003e\u003cspan class='jdgm-star jdgm--off'\u003e\u003c\/span\u003e\u003cspan class='jdgm-star jdgm--off'\u003e\u003c\/span\u003e\u003cspan class='jdgm-star jdgm--off'\u003e\u003c\/span\u003e\u003cspan class='jdgm-star jdgm--off'\u003e\u003c\/span\u003e \u003c\/div\u003e \u003cdiv class='jdgm-rev-widg__summary-text'\u003eBe the first to write a review\u003c\/div\u003e \u003c\/div\u003e \u003ca style='display: none' href='#' class='jdgm-write-rev-link' role='button'\u003eWrite a review\u003c\/a\u003e \u003cdiv class='jdgm-histogram jdgm-temp-hidden'\u003e \u003cdiv class='jdgm-histogram__row' data-rating='5' data-frequency='0' data-percentage='0'\u003e \u003cdiv class='jdgm-histogram__star' role='button' aria-label=\"0% (0) reviews with 5 star rating\" tabindex='0' \u003e\u003cspan class='jdgm-star jdgm--on'\u003e\u003c\/span\u003e\u003cspan class='jdgm-star jdgm--on'\u003e\u003c\/span\u003e\u003cspan class='jdgm-star jdgm--on'\u003e\u003c\/span\u003e\u003cspan class='jdgm-star jdgm--on'\u003e\u003c\/span\u003e\u003cspan class='jdgm-star jdgm--on'\u003e\u003c\/span\u003e\u003c\/div\u003e \u003cdiv class='jdgm-histogram__bar'\u003e \u003cdiv class='jdgm-histogram__bar-content' style='width: 0%;'\u003e \u003c\/div\u003e \u003c\/div\u003e \u003cdiv class='jdgm-histogram__percentage'\u003e0%\u003c\/div\u003e \u003cdiv class='jdgm-histogram__frequency'\u003e(0)\u003c\/div\u003e \u003c\/div\u003e \u003cdiv class='jdgm-histogram__row' data-rating='4' data-frequency='0' data-percentage='0'\u003e \u003cdiv class='jdgm-histogram__star' role='button' aria-label=\"0% (0) reviews with 4 star rating\" tabindex='0' \u003e\u003cspan class='jdgm-star jdgm--on'\u003e\u003c\/span\u003e\u003cspan class='jdgm-star jdgm--on'\u003e\u003c\/span\u003e\u003cspan class='jdgm-star jdgm--on'\u003e\u003c\/span\u003e\u003cspan class='jdgm-star jdgm--on'\u003e\u003c\/span\u003e\u003cspan class='jdgm-star jdgm--off'\u003e\u003c\/span\u003e\u003c\/div\u003e \u003cdiv class='jdgm-histogram__bar'\u003e \u003cdiv class='jdgm-histogram__bar-content' style='width: 0%;'\u003e \u003c\/div\u003e \u003c\/div\u003e \u003cdiv class='jdgm-histogram__percentage'\u003e0%\u003c\/div\u003e \u003cdiv class='jdgm-histogram__frequency'\u003e(0)\u003c\/div\u003e \u003c\/div\u003e \u003cdiv class='jdgm-histogram__row' data-rating='3' data-frequency='0' data-percentage='0'\u003e \u003cdiv class='jdgm-histogram__star' role='button' aria-label=\"0% (0) reviews with 3 star rating\" tabindex='0' \u003e\u003cspan class='jdgm-star jdgm--on'\u003e\u003c\/span\u003e\u003cspan class='jdgm-star jdgm--on'\u003e\u003c\/span\u003e\u003cspan class='jdgm-star jdgm--on'\u003e\u003c\/span\u003e\u003cspan class='jdgm-star jdgm--off'\u003e\u003c\/span\u003e\u003cspan class='jdgm-star jdgm--off'\u003e\u003c\/span\u003e\u003c\/div\u003e \u003cdiv class='jdgm-histogram__bar'\u003e \u003cdiv class='jdgm-histogram__bar-content' style='width: 0%;'\u003e \u003c\/div\u003e \u003c\/div\u003e \u003cdiv class='jdgm-histogram__percentage'\u003e0%\u003c\/div\u003e \u003cdiv class='jdgm-histogram__frequency'\u003e(0)\u003c\/div\u003e \u003c\/div\u003e \u003cdiv class='jdgm-histogram__row' data-rating='2' data-frequency='0' data-percentage='0'\u003e \u003cdiv class='jdgm-histogram__star' role='button' aria-label=\"0% (0) reviews with 2 star rating\" tabindex='0' \u003e\u003cspan class='jdgm-star jdgm--on'\u003e\u003c\/span\u003e\u003cspan class='jdgm-star jdgm--on'\u003e\u003c\/span\u003e\u003cspan class='jdgm-star jdgm--off'\u003e\u003c\/span\u003e\u003cspan class='jdgm-star jdgm--off'\u003e\u003c\/span\u003e\u003cspan class='jdgm-star jdgm--off'\u003e\u003c\/span\u003e\u003c\/div\u003e \u003cdiv class='jdgm-histogram__bar'\u003e \u003cdiv class='jdgm-histogram__bar-content' style='width: 0%;'\u003e \u003c\/div\u003e \u003c\/div\u003e \u003cdiv class='jdgm-histogram__percentage'\u003e0%\u003c\/div\u003e \u003cdiv class='jdgm-histogram__frequency'\u003e(0)\u003c\/div\u003e \u003c\/div\u003e \u003cdiv class='jdgm-histogram__row' data-rating='1' data-frequency='0' data-percentage='0'\u003e \u003cdiv class='jdgm-histogram__star' role='button' aria-label=\"0% (0) reviews with 1 star rating\" tabindex='0' \u003e\u003cspan class='jdgm-star jdgm--on'\u003e\u003c\/span\u003e\u003cspan class='jdgm-star jdgm--off'\u003e\u003c\/span\u003e\u003cspan class='jdgm-star jdgm--off'\u003e\u003c\/span\u003e\u003cspan class='jdgm-star jdgm--off'\u003e\u003c\/span\u003e\u003cspan class='jdgm-star jdgm--off'\u003e\u003c\/span\u003e\u003c\/div\u003e \u003cdiv class='jdgm-histogram__bar'\u003e \u003cdiv class='jdgm-histogram__bar-content' style='width: 0%;'\u003e \u003c\/div\u003e \u003c\/div\u003e \u003cdiv class='jdgm-histogram__percentage'\u003e0%\u003c\/div\u003e \u003cdiv class='jdgm-histogram__frequency'\u003e(0)\u003c\/div\u003e \u003c\/div\u003e \u003cdiv class='jdgm-histogram__row jdgm-histogram__clear-filter' data-rating=null tabindex='0'\u003e\u003c\/div\u003e \u003c\/div\u003e \u003cdiv class='jdgm-rev-widg__sort-wrapper'\u003e\u003c\/div\u003e \u003c\/div\u003e \u003cdiv class='jdgm-rev-widg__body'\u003e \u003cdiv class='jdgm-rev-widg__reviews'\u003e\u003c\/div\u003e \u003cdiv class='jdgm-paginate' data-per-page='10' data-url='https:\/\/api.judge.me\/reviews\/reviews_for_widget' style=\"display: none;\"\u003e\u003c\/div\u003e \u003c\/div\u003e \u003cdiv class='jdgm-rev-widg__paginate-spinner-wrapper'\u003e \u003cdiv class='jdgm-spinner'\u003e\u003c\/div\u003e \u003c\/div\u003e \u003c\/div\u003e"},"collections":[{"id":281712427197,"handle":"breastfeeding","title":"Breastfeeding","updated_at":"2026-06-12T19:10:26+08:00","body_html":"","published_at":"2021-12-20T14:19:33+08:00","sort_order":"best-selling","template_suffix":"breastfeeding-collection","disjunctive":false,"rules":[{"column":"tag","relation":"equals","condition":"Breastfeeding"}],"published_scope":"global","image":{"created_at":"2024-05-06T11:59:34+08:00","alt":"Breastfeeding - The Birth Store","width":620,"height":635,"src":"\/\/www.thebirthstore.com.au\/cdn\/shop\/collections\/breastfeeding-793872.jpg?v=1714967974"}},{"id":261657460925,"handle":"buy","title":"Buy","updated_at":"2026-06-12T19:10:26+08:00","body_html":"\u003cp\u003eBrowse all of our pregnancy, labour \u0026amp; birth, postpartum and baby essentials here.\u003cbr\u003e\u003c\/p\u003e\n\u003cp\u003e\u003cspan\u003eYou can even buy now and pay later with Afterpay!\u003c\/span\u003e\u003c\/p\u003e","published_at":"2021-03-10T12:05:31+08:00","sort_order":"best-selling","template_suffix":"shop-all-collection","disjunctive":false,"rules":[{"column":"title","relation":"not_contains","condition":"Hire"}],"published_scope":"global","image":{"created_at":"2024-05-06T11:59:42+08:00","alt":"Buy - The Birth Store","width":2048,"height":2048,"src":"\/\/www.thebirthstore.com.au\/cdn\/shop\/collections\/buy-964856.jpg?v=1714967982"}},{"id":294349865149,"handle":"cracked-nipples","title":"Cracked Nipples","updated_at":"2026-06-02T19:09:48+08:00","body_html":"","published_at":"2023-09-21T14:03:02+08:00","sort_order":"best-selling","template_suffix":"swaddles-collection","disjunctive":false,"rules":[{"column":"tag","relation":"equals","condition":"Cracked Nipples"}],"published_scope":"global","image":{"created_at":"2024-05-06T11:59:53+08:00","alt":"Cracked Nipples - The Birth Store","width":1050,"height":1050,"src":"\/\/www.thebirthstore.com.au\/cdn\/shop\/collections\/cracked-nipples-166971.jpg?v=1714967994"}},{"id":261658083517,"handle":"post-partum","title":"Postpartum","updated_at":"2026-06-12T19:10:26+08:00","body_html":"\u003cp\u003eShop your postpartum and hospital bag essentials below. Looking for something we don't currently stock? Please reach out and let us know.\u003cbr\u003e\u003c\/p\u003e\n\u003cp\u003e\u003cspan\u003eYou can even buy now and pay later with Afterpay!\u003c\/span\u003e\u003c\/p\u003e","published_at":"2021-03-10T12:33:47+08:00","sort_order":"best-selling","template_suffix":"postpartum-collection","disjunctive":false,"rules":[{"column":"tag","relation":"equals","condition":"Post-Partum"}],"published_scope":"global","image":{"created_at":"2024-05-06T12:00:36+08:00","alt":"Postpartum - The Birth Store","width":611,"height":702,"src":"\/\/www.thebirthstore.com.au\/cdn\/shop\/collections\/postpartum-150119.jpg?v=1714968037"}},{"id":291456483517,"handle":"shop-all","title":"Shop All - Mum","updated_at":"2026-06-12T19:10:26+08:00","body_html":"","published_at":"2022-12-23T22:04:39+08:00","sort_order":"best-selling","template_suffix":"shop-all-collection","disjunctive":false,"rules":[{"column":"variant_price","relation":"greater_than","condition":"1"},{"column":"title","relation":"not_contains","condition":"Batteries"},{"column":"tag","relation":"equals","condition":"Mum"}],"published_scope":"global","image":{"created_at":"2024-05-06T12:00:54+08:00","alt":"Shop All - The Birth Store","width":1365,"height":2048,"src":"\/\/www.thebirthstore.com.au\/cdn\/shop\/collections\/shop-all-693176.jpg?v=1714968055"}},{"id":310045933757,"handle":"shop-all-sale","title":"Shop All Sale","updated_at":"2026-06-12T19:10:26+08:00","body_html":"","published_at":"2024-11-12T13:22:43+08:00","sort_order":"alpha-asc","template_suffix":"","disjunctive":true,"rules":[{"column":"tag","relation":"equals","condition":"Bundles"},{"column":"vendor","relation":"equals","condition":"Franjos Kitchen"},{"column":"vendor","relation":"equals","condition":"Adored Illustrations"},{"column":"vendor","relation":"equals","condition":"Amazing Oils"},{"column":"vendor","relation":"equals","condition":"Ice Ice Booby"},{"column":"vendor","relation":"equals","condition":"Made to Milk"},{"column":"vendor","relation":"equals","condition":"Milky Goodness"},{"column":"vendor","relation":"equals","condition":"Seasons of Mama"},{"column":"vendor","relation":"equals","condition":"Silverette"},{"column":"vendor","relation":"equals","condition":"Snuggle Hunny"},{"column":"vendor","relation":"equals","condition":"Yung Bod"},{"column":"vendor","relation":"equals","condition":"Bare Love"},{"column":"vendor","relation":"equals","condition":"Haakaa"},{"column":"vendor","relation":"equals","condition":"Mere Botanicals"},{"column":"vendor","relation":"equals","condition":"The Birth Store Hire"},{"column":"vendor","relation":"equals","condition":"The Birth Store"}],"published_scope":"global","image":{"created_at":"2024-11-13T10:58:16+08:00","alt":"Shop All Sale - The Birth Store","width":2048,"height":1365,"src":"\/\/www.thebirthstore.com.au\/cdn\/shop\/collections\/shop-all-sale-297361.jpg?v=1731466697"}}]}
{"item":{"id":7455574130877,"title":"Breast Milk Storage Magnet","handle":"breast-milk-storage-magnet","description":"\u003cp\u003eKeep this baby on your fridge!\u003cbr\u003eYou will never have to wonder again...\u003c\/p\u003e\n\u003cp\u003eHaving the correct temps \u0026amp; time frames available for breast milk storage is key to ensuring you never waste a precious drop of your breast milk.\u003c\/p\u003e\n\u003cp\u003eThis is the perfect addition to a baby shower gift, take a look at the rest of our breastfeeding range to find many other great products to go along with this.\u003c\/p\u003e","published_at":"2023-03-22T12:21:10+08:00","created_at":"2023-03-22T12:21:10+08:00","vendor":"Milky Goodness","type":"","tags":["Breastfeeding","Mum"],"price":300,"price_min":300,"price_max":300,"available":true,"price_varies":false,"compare_at_price":null,"compare_at_price_min":0,"compare_at_price_max":0,"compare_at_price_varies":false,"variants":[{"id":42739908739261,"title":"Default Title","option1":"Default Title","option2":null,"option3":null,"sku":"","requires_shipping":true,"taxable":false,"featured_image":null,"available":true,"name":"Breast Milk Storage Magnet","public_title":null,"options":["Default Title"],"price":300,"weight":21,"compare_at_price":null,"inventory_management":"shopify","barcode":"08739261","requires_selling_plan":false,"selling_plan_allocations":[],"quantity_rule":{"min":1,"max":null,"increment":1}}],"images":["\/\/www.thebirthstore.com.au\/cdn\/shop\/files\/breast-milk-storage-magnet-799280.jpg?v=1714967948","\/\/www.thebirthstore.com.au\/cdn\/shop\/files\/breast-milk-storage-magnet-543956.jpg?v=1714967948"],"featured_image":"\/\/www.thebirthstore.com.au\/cdn\/shop\/files\/breast-milk-storage-magnet-799280.jpg?v=1714967948","options":["Title"],"media":[{"alt":"Breast Milk Storage Magnet - The Birth Store-Milky Goodness","id":27007579717821,"position":1,"preview_image":{"aspect_ratio":1.0,"height":2048,"width":2048,"src":"\/\/www.thebirthstore.com.au\/cdn\/shop\/files\/breast-milk-storage-magnet-799280.jpg?v=1714967948"},"aspect_ratio":1.0,"height":2048,"media_type":"image","src":"\/\/www.thebirthstore.com.au\/cdn\/shop\/files\/breast-milk-storage-magnet-799280.jpg?v=1714967948","width":2048},{"alt":"Breast Milk Storage Magnet - The Birth Store-Milky Goodness","id":27007579783357,"position":2,"preview_image":{"aspect_ratio":1.125,"height":513,"width":577,"src":"\/\/www.thebirthstore.com.au\/cdn\/shop\/files\/breast-milk-storage-magnet-543956.jpg?v=1714967948"},"aspect_ratio":1.125,"height":513,"media_type":"image","src":"\/\/www.thebirthstore.com.au\/cdn\/shop\/files\/breast-milk-storage-magnet-543956.jpg?v=1714967948","width":577}],"requires_selling_plan":false,"selling_plan_groups":[],"content":"\u003cp\u003eKeep this baby on your fridge!\u003cbr\u003eYou will never have to wonder again...\u003c\/p\u003e\n\u003cp\u003eHaving the correct temps \u0026amp; time frames available for breast milk storage is key to ensuring you never waste a precious drop of your breast milk.\u003c\/p\u003e\n\u003cp\u003eThis is the perfect addition to a baby shower gift, take a look at the rest of our breastfeeding range to find many other great products to go along with this.\u003c\/p\u003e"},"options":[{"name":"Title","position":1,"values":["Default Title"]}],"custom_metafields":{},"metafields":{"badge":"\u003cdiv style='display:none' class='jdgm-prev-badge' data-average-rating='5.00' data-number-of-reviews='1' data-number-of-questions='0'\u003e \u003cspan class='jdgm-prev-badge__stars' data-score='5.00' tabindex='0' aria-label='5.00 stars' role='button'\u003e \u003cspan class='jdgm-star jdgm--on'\u003e\u003c\/span\u003e\u003cspan class='jdgm-star jdgm--on'\u003e\u003c\/span\u003e\u003cspan class='jdgm-star jdgm--on'\u003e\u003c\/span\u003e\u003cspan class='jdgm-star jdgm--on'\u003e\u003c\/span\u003e\u003cspan class='jdgm-star jdgm--on'\u003e\u003c\/span\u003e \u003c\/span\u003e \u003cspan class='jdgm-prev-badge__text'\u003e 1 review \u003c\/span\u003e \u003c\/div\u003e","review_snippet_widget":"\u003cdiv class='jdgm-widget jdgm-review-snippet-widget'\u003e \u003cstyle\u003e\n .jdgm-review-snippet-widget{position:relative}.jdgm-review-snippet-widget:hover{cursor:pointer}@media only screen and (max-width: 767px){.jdgm-review-snippet-widget .jdgm-rev-snippet-widget__cards-container{left:unset;right:unset}}.jdgm-review-snippet-widget .jdgm-rev-snippet-card{background:#fff}.jdgm-review-snippet-widget .jdgm-star{color:#399}.jdgm-review-snippet-widget .jdgm-rev-snippet-card{border-radius:8px;background:#fff}.jdgm-review-snippet-widget .jdgm-rev-snippet-card__rev-prod-wrapper{border-radius:8px}.jdgm-review-snippet-widget .jdgm-rev-snippet-card__rev-content-wrapper{max-width:360px}.jdgm-review-snippet-widget .jdgm-rev-snippet-widget__prev-btn,.jdgm-review-snippet-widget .jdgm-rev-snippet-widget__next-btn{border-radius:50%;background:#fff}.jdgm-review-snippet-widget .jdgm-rev-snippet-widget__prev-btn\u003esvg,.jdgm-review-snippet-widget .jdgm-rev-snippet-widget__next-btn\u003esvg{fill:#000}.jdgm-review-snippet-widget .jdgm-rev-snippet-widget__prev-btn{left:0;top:40%}.jdgm-review-snippet-widget .jdgm-rev-snippet-widget__next-btn{right:0;top:40%}.jdgm-full-rev-modal.review-snippet-widget .jm-mfp-content{border-radius:8px}.jdgm-full-rev-modal.review-snippet-widget .jdgm-full-rev__icon{border-radius:8px}.jdgm-full-rev-modal.review-snippet-widget .jdgm-full-rev[data-verified-buyer=\"true\"] .jdgm-full-rev__icon::after{border-radius:8px}.jdgm-full-rev-modal.review-snippet-widget .jdgm-rev__buyer-badge{border-radius:calc( 8px \/ 2 )}.jdgm-full-rev-modal.review-snippet-widget .jdgm-full-rev__pic-img{border-radius:8px}.jdgm-full-rev-modal.review-snippet-widget .jdgm-full-rev__reply{border-radius:8px}.jdgm-full-rev-modal.review-snippet-widget .jdgm-full-rev__replier::before{content:'thebirthstore.com.au'}.jdgm-full-rev-modal.review-snippet-widget .jdgm-full-rev__product-button{border-radius:calc( 8px * 6 )}\n\n \u003c\/style\u003e \u003ci class=\"jdgm-rev-snippet-widget__prev-btn\" style='display: none;'\u003e \u003csvg xmlns=\"http:\/\/www.w3.org\/2000\/svg\" height=\"12\" viewBox=\"0 0 8 12\" width=\"8\" fill=\"#000\"\u003e\u003cpath d=\"M3.09961 6.00005L6.99961 9.90005C7.18294 10.0834 7.27461 10.3167 7.27461 10.6C7.27461 10.8834 7.18294 11.1167 6.99961 11.3C6.81628 11.4834 6.58294 11.575 6.29961 11.575C6.01628 11.575 5.78294 11.4834 5.59961 11.3L0.999609 6.70005C0.899609 6.60005 0.828776 6.49172 0.787109 6.37505C0.745443 6.25838 0.724609 6.13338 0.724609 6.00005C0.724609 5.86672 0.745443 5.74172 0.787109 5.62505C0.828776 5.50838 0.899609 5.40005 0.999609 5.30005L5.59961 0.700049C5.78294 0.516715 6.01628 0.425049 6.29961 0.425049C6.58294 0.425049 6.81628 0.516715 6.99961 0.700049C7.18294 0.883382 7.27461 1.11672 7.27461 1.40005C7.27461 1.68338 7.18294 1.91672 6.99961 2.10005L3.09961 6.00005Z\"\/\u003e\u003c\/svg\u003e \u003c\/i\u003e \u003ci class=\"jdgm-rev-snippet-widget__next-btn\" style='display: none;'\u003e \u003csvg xmlns=\"http:\/\/www.w3.org\/2000\/svg\" height=\"12\" viewBox=\"0 0 8 12\" width=\"8\" fill=\"#000\"\u003e\u003cpath d=\"M4.89961 6.00005L0.999609 2.10005C0.816276 1.91672 0.724609 1.68338 0.724609 1.40005C0.724609 1.11672 0.816276 0.883382 0.999609 0.700049C1.18294 0.516715 1.41628 0.425049 1.69961 0.425049C1.98294 0.425049 2.21628 0.516715 2.39961 0.700049L6.99961 5.30005C7.09961 5.40005 7.17044 5.50838 7.21211 5.62505C7.25378 5.74172 7.27461 5.86672 7.27461 6.00005C7.27461 6.13338 7.25378 6.25838 7.21211 6.37505C7.17044 6.49172 7.09961 6.60005 6.99961 6.70005L2.39961 11.3C2.21628 11.4834 1.98294 11.575 1.69961 11.575C1.41628 11.575 1.18294 11.4834 0.999609 11.3C0.816276 11.1167 0.724609 10.8834 0.724609 10.6C0.724609 10.3167 0.816276 10.0834 0.999609 9.90005L4.89961 6.00005Z\"\/\u003e\u003c\/svg\u003e \u003c\/i\u003e \u003cdiv style=\"overflow: hidden;\"\u003e \u003cdiv class='jdgm-rev-snippet-widget__cards-container'\u003e \u003cdiv class='jdgm-rev-snippet-card' data-review-id='3151ff80-356d-5a6a-a5f0-bbbd8d4f84f4' style='display: none;'\u003e \u003cdiv class=\"jdgm-rev-snippet-card__rev-prod-wrapper\"\u003e \u003ca class='jdgm-rev-snippet-card__rev-content-wrapper jdgm-rev-snippet-card__full-review-link' style='text-decoration: none; color: inherit;padding: 0 34px;' role='button' data-review-id='3151ff80-356d-5a6a-a5f0-bbbd8d4f84f4'\u003e \u003cdiv class='jdgm-rev-snippet-card__rev-header'\u003e \u003cdiv class='jdgm-rev-snippet-card__rev-rating' aria-label='5 stars' role='img'\u003e \u003cspan class='jdgm-star jdgm--on'\u003e\u003c\/span\u003e\u003cspan class='jdgm-star jdgm--on'\u003e\u003c\/span\u003e\u003cspan class='jdgm-star jdgm--on'\u003e\u003c\/span\u003e\u003cspan class='jdgm-star jdgm--on'\u003e\u003c\/span\u003e\u003cspan class='jdgm-star jdgm--on'\u003e\u003c\/span\u003e \u003c\/div\u003e \u003cdiv class='jdgm-rev-snippet-card__reviewer'\u003e Linda \u003c\/div\u003e \u003c\/div\u003e \u003cdiv class='jdgm-rev-snippet-card__rev-content'\u003e \u003cspan class='jdgm-rev-snippet-card__rev-body'\u003e \u003cp\u003eHandy guide to have\u003c\/p\u003e \u003c\/span\u003e \u003c\/div\u003e \u003c\/a\u003e \u003c\/div\u003e \u003c\/div\u003e \u003c\/div\u003e \u003c\/div\u003e \u003c\/div\u003e","widget":"\u003cdiv class='jdgm-rev-widg' data-updated-at='2025-06-13T16:12:53Z' data-average-rating='5.00' data-number-of-reviews='1' data-number-of-questions='0'\u003e \u003cstyle class='jdgm-temp-hiding-style'\u003e.jdgm-rev-widg{ display: none }\u003c\/style\u003e \u003cdiv class='jdgm-rev-widg__header'\u003e \u003ch2 class='jdgm-rev-widg__title'\u003eCustomer Reviews\u003c\/h2\u003e \u003cdiv class='jdgm-rev-widg__summary'\u003e \u003cdiv class='jdgm-rev-widg__summary-stars' aria-label='Average rating is 5.00 stars' role='img'\u003e \u003cspan class='jdgm-star jdgm--on'\u003e\u003c\/span\u003e\u003cspan class='jdgm-star jdgm--on'\u003e\u003c\/span\u003e\u003cspan class='jdgm-star jdgm--on'\u003e\u003c\/span\u003e\u003cspan class='jdgm-star jdgm--on'\u003e\u003c\/span\u003e\u003cspan class='jdgm-star jdgm--on'\u003e\u003c\/span\u003e \u003c\/div\u003e \u003cdiv class='jdgm-rev-widg__summary-text'\u003eBased on 1 review\u003c\/div\u003e \u003c\/div\u003e \u003ca style='display: none' href='#' class='jdgm-write-rev-link' role='button'\u003eWrite a review\u003c\/a\u003e \u003cdiv class='jdgm-histogram jdgm-temp-hidden'\u003e \u003cdiv class='jdgm-histogram__row' data-rating='5' data-frequency='1' data-percentage='100'\u003e \u003cdiv class='jdgm-histogram__star' role='button' aria-label=\"100% (1) reviews with 5 star rating\" tabindex='0' \u003e\u003cspan class='jdgm-star jdgm--on'\u003e\u003c\/span\u003e\u003cspan class='jdgm-star jdgm--on'\u003e\u003c\/span\u003e\u003cspan class='jdgm-star jdgm--on'\u003e\u003c\/span\u003e\u003cspan class='jdgm-star jdgm--on'\u003e\u003c\/span\u003e\u003cspan class='jdgm-star jdgm--on'\u003e\u003c\/span\u003e\u003c\/div\u003e \u003cdiv class='jdgm-histogram__bar'\u003e \u003cdiv class='jdgm-histogram__bar-content' style='width: 100%;'\u003e \u003c\/div\u003e \u003c\/div\u003e \u003cdiv class='jdgm-histogram__percentage'\u003e100%\u003c\/div\u003e \u003cdiv class='jdgm-histogram__frequency'\u003e(1)\u003c\/div\u003e \u003c\/div\u003e \u003cdiv class='jdgm-histogram__row' data-rating='4' data-frequency='0' data-percentage='0'\u003e \u003cdiv class='jdgm-histogram__star' role='button' aria-label=\"0% (0) reviews with 4 star rating\" tabindex='0' \u003e\u003cspan class='jdgm-star jdgm--on'\u003e\u003c\/span\u003e\u003cspan class='jdgm-star jdgm--on'\u003e\u003c\/span\u003e\u003cspan class='jdgm-star jdgm--on'\u003e\u003c\/span\u003e\u003cspan class='jdgm-star jdgm--on'\u003e\u003c\/span\u003e\u003cspan class='jdgm-star jdgm--off'\u003e\u003c\/span\u003e\u003c\/div\u003e \u003cdiv class='jdgm-histogram__bar'\u003e \u003cdiv class='jdgm-histogram__bar-content' style='width: 0%;'\u003e \u003c\/div\u003e \u003c\/div\u003e \u003cdiv class='jdgm-histogram__percentage'\u003e0%\u003c\/div\u003e \u003cdiv class='jdgm-histogram__frequency'\u003e(0)\u003c\/div\u003e \u003c\/div\u003e \u003cdiv class='jdgm-histogram__row' data-rating='3' data-frequency='0' data-percentage='0'\u003e \u003cdiv class='jdgm-histogram__star' role='button' aria-label=\"0% (0) reviews with 3 star rating\" tabindex='0' \u003e\u003cspan class='jdgm-star jdgm--on'\u003e\u003c\/span\u003e\u003cspan class='jdgm-star jdgm--on'\u003e\u003c\/span\u003e\u003cspan class='jdgm-star jdgm--on'\u003e\u003c\/span\u003e\u003cspan class='jdgm-star jdgm--off'\u003e\u003c\/span\u003e\u003cspan class='jdgm-star jdgm--off'\u003e\u003c\/span\u003e\u003c\/div\u003e \u003cdiv class='jdgm-histogram__bar'\u003e \u003cdiv class='jdgm-histogram__bar-content' style='width: 0%;'\u003e \u003c\/div\u003e \u003c\/div\u003e \u003cdiv class='jdgm-histogram__percentage'\u003e0%\u003c\/div\u003e \u003cdiv class='jdgm-histogram__frequency'\u003e(0)\u003c\/div\u003e \u003c\/div\u003e \u003cdiv class='jdgm-histogram__row' data-rating='2' data-frequency='0' data-percentage='0'\u003e \u003cdiv class='jdgm-histogram__star' role='button' aria-label=\"0% (0) reviews with 2 star rating\" tabindex='0' \u003e\u003cspan class='jdgm-star jdgm--on'\u003e\u003c\/span\u003e\u003cspan class='jdgm-star jdgm--on'\u003e\u003c\/span\u003e\u003cspan class='jdgm-star jdgm--off'\u003e\u003c\/span\u003e\u003cspan class='jdgm-star jdgm--off'\u003e\u003c\/span\u003e\u003cspan class='jdgm-star jdgm--off'\u003e\u003c\/span\u003e\u003c\/div\u003e \u003cdiv class='jdgm-histogram__bar'\u003e \u003cdiv class='jdgm-histogram__bar-content' style='width: 0%;'\u003e \u003c\/div\u003e \u003c\/div\u003e \u003cdiv class='jdgm-histogram__percentage'\u003e0%\u003c\/div\u003e \u003cdiv class='jdgm-histogram__frequency'\u003e(0)\u003c\/div\u003e \u003c\/div\u003e \u003cdiv class='jdgm-histogram__row' data-rating='1' data-frequency='0' data-percentage='0'\u003e \u003cdiv class='jdgm-histogram__star' role='button' aria-label=\"0% (0) reviews with 1 star rating\" tabindex='0' \u003e\u003cspan class='jdgm-star jdgm--on'\u003e\u003c\/span\u003e\u003cspan class='jdgm-star jdgm--off'\u003e\u003c\/span\u003e\u003cspan class='jdgm-star jdgm--off'\u003e\u003c\/span\u003e\u003cspan class='jdgm-star jdgm--off'\u003e\u003c\/span\u003e\u003cspan class='jdgm-star jdgm--off'\u003e\u003c\/span\u003e\u003c\/div\u003e \u003cdiv class='jdgm-histogram__bar'\u003e \u003cdiv class='jdgm-histogram__bar-content' style='width: 0%;'\u003e \u003c\/div\u003e \u003c\/div\u003e \u003cdiv class='jdgm-histogram__percentage'\u003e0%\u003c\/div\u003e \u003cdiv class='jdgm-histogram__frequency'\u003e(0)\u003c\/div\u003e \u003c\/div\u003e \u003cdiv class='jdgm-histogram__row jdgm-histogram__clear-filter' data-rating=null tabindex='0'\u003e\u003c\/div\u003e \u003c\/div\u003e \u003cdiv class='jdgm-rev-widg__sort-wrapper'\u003e\u003c\/div\u003e \u003c\/div\u003e \u003cdiv class='jdgm-rev-widg__body'\u003e \u003cdiv class='jdgm-rev-widg__reviews'\u003e\u003cdiv class='jdgm-rev jdgm-divider-top' data-verified-buyer='true' data-review-id='3151ff80-356d-5a6a-a5f0-bbbd8d4f84f4' data-review-language='' data-product-title='Breast Milk Storage Magnet' data-product-url='\/products\/breast-milk-storage-magnet' data-thumb-up-count='0' data-thumb-down-count='0'\u003e \u003cdiv class='jdgm-rev__header'\u003e \u003cdiv class='jdgm-rev__icon' \u003e E \u003c\/div\u003e \u003cspan class='jdgm-rev__rating' data-score='5' tabindex='0' aria-label='5 star review' role='img'\u003e \u003cspan class='jdgm-star jdgm--on'\u003e\u003c\/span\u003e\u003cspan class='jdgm-star jdgm--on'\u003e\u003c\/span\u003e\u003cspan class='jdgm-star jdgm--on'\u003e\u003c\/span\u003e\u003cspan class='jdgm-star jdgm--on'\u003e\u003c\/span\u003e\u003cspan class='jdgm-star jdgm--on'\u003e\u003c\/span\u003e \u003c\/span\u003e \u003cspan class='jdgm-rev__timestamp jdgm-spinner' data-content='2024-08-18 02:19:08 UTC'\u003e\u003c\/span\u003e \u003cdiv class='jdgm-rev__br'\u003e\u003c\/div\u003e \u003cspan class='jdgm-rev__buyer-badge-wrapper'\u003e \u003cspan class='jdgm-rev__buyer-badge'\u003e\u003c\/span\u003e \u003c\/span\u003e \u003cspan class='jdgm-rev__author-wrapper'\u003e \u003cspan class='jdgm-rev__author'\u003eEmma\u003c\/span\u003e \u003cspan class='jdgm-rev__location' \u003e \u003c\/span\u003e \u003cspan class='jdgm-rev__source' data-source=\"shop-app\"\u003e\u003c\/span\u003e \u003c\/span\u003e \u003c\/div\u003e \u003cdiv class='jdgm-rev__content'\u003e \u003cdiv class='jdgm-rev__custom-form'\u003e \u003c\/div\u003e \u003cb class='jdgm-rev__title'\u003e\u003c\/b\u003e \u003cdiv class='jdgm-rev__body'\u003e\u003cp\u003eHandy guide to have\u003c\/p\u003e\u003c\/div\u003e \u003cdiv class='jdgm-rev__pics'\u003e \u003c\/div\u003e \u003cdiv class='jdgm-rev__vids'\u003e \u003c\/div\u003e \u003cdiv class='jdgm-rev__transparency-badge-wrapper'\u003e \u003c\/div\u003e \u003c\/div\u003e \u003cdiv class='jdgm-rev__actions'\u003e \u003cdiv class='jdgm-rev__social'\u003e\u003c\/div\u003e \u003cdiv class='jdgm-rev__votes'\u003e\u003c\/div\u003e \u003c\/div\u003e \u003cdiv class='jdgm-rev__reply'\u003e \u003c\/div\u003e \u003c\/div\u003e\u003c\/div\u003e \u003cdiv class='jdgm-paginate' data-per-page='10' data-url='https:\/\/api.judge.me\/reviews\/reviews_for_widget' style=\"display: none;\"\u003e\u003c\/div\u003e \u003c\/div\u003e \u003cdiv class='jdgm-rev-widg__paginate-spinner-wrapper'\u003e \u003cdiv class='jdgm-spinner'\u003e\u003c\/div\u003e \u003c\/div\u003e \u003c\/div\u003e"},"collections":[{"id":281712427197,"handle":"breastfeeding","title":"Breastfeeding","updated_at":"2026-06-12T19:10:26+08:00","body_html":"","published_at":"2021-12-20T14:19:33+08:00","sort_order":"best-selling","template_suffix":"breastfeeding-collection","disjunctive":false,"rules":[{"column":"tag","relation":"equals","condition":"Breastfeeding"}],"published_scope":"global","image":{"created_at":"2024-05-06T11:59:34+08:00","alt":"Breastfeeding - The Birth Store","width":620,"height":635,"src":"\/\/www.thebirthstore.com.au\/cdn\/shop\/collections\/breastfeeding-793872.jpg?v=1714967974"}},{"id":261657460925,"handle":"buy","title":"Buy","updated_at":"2026-06-12T19:10:26+08:00","body_html":"\u003cp\u003eBrowse all of our pregnancy, labour \u0026amp; birth, postpartum and baby essentials here.\u003cbr\u003e\u003c\/p\u003e\n\u003cp\u003e\u003cspan\u003eYou can even buy now and pay later with Afterpay!\u003c\/span\u003e\u003c\/p\u003e","published_at":"2021-03-10T12:05:31+08:00","sort_order":"best-selling","template_suffix":"shop-all-collection","disjunctive":false,"rules":[{"column":"title","relation":"not_contains","condition":"Hire"}],"published_scope":"global","image":{"created_at":"2024-05-06T11:59:42+08:00","alt":"Buy - The Birth Store","width":2048,"height":2048,"src":"\/\/www.thebirthstore.com.au\/cdn\/shop\/collections\/buy-964856.jpg?v=1714967982"}},{"id":291456483517,"handle":"shop-all","title":"Shop All - Mum","updated_at":"2026-06-12T19:10:26+08:00","body_html":"","published_at":"2022-12-23T22:04:39+08:00","sort_order":"best-selling","template_suffix":"shop-all-collection","disjunctive":false,"rules":[{"column":"variant_price","relation":"greater_than","condition":"1"},{"column":"title","relation":"not_contains","condition":"Batteries"},{"column":"tag","relation":"equals","condition":"Mum"}],"published_scope":"global","image":{"created_at":"2024-05-06T12:00:54+08:00","alt":"Shop All - The Birth Store","width":1365,"height":2048,"src":"\/\/www.thebirthstore.com.au\/cdn\/shop\/collections\/shop-all-693176.jpg?v=1714968055"}},{"id":310045933757,"handle":"shop-all-sale","title":"Shop All Sale","updated_at":"2026-06-12T19:10:26+08:00","body_html":"","published_at":"2024-11-12T13:22:43+08:00","sort_order":"alpha-asc","template_suffix":"","disjunctive":true,"rules":[{"column":"tag","relation":"equals","condition":"Bundles"},{"column":"vendor","relation":"equals","condition":"Franjos Kitchen"},{"column":"vendor","relation":"equals","condition":"Adored Illustrations"},{"column":"vendor","relation":"equals","condition":"Amazing Oils"},{"column":"vendor","relation":"equals","condition":"Ice Ice Booby"},{"column":"vendor","relation":"equals","condition":"Made to Milk"},{"column":"vendor","relation":"equals","condition":"Milky Goodness"},{"column":"vendor","relation":"equals","condition":"Seasons of Mama"},{"column":"vendor","relation":"equals","condition":"Silverette"},{"column":"vendor","relation":"equals","condition":"Snuggle Hunny"},{"column":"vendor","relation":"equals","condition":"Yung Bod"},{"column":"vendor","relation":"equals","condition":"Bare Love"},{"column":"vendor","relation":"equals","condition":"Haakaa"},{"column":"vendor","relation":"equals","condition":"Mere Botanicals"},{"column":"vendor","relation":"equals","condition":"The Birth Store Hire"},{"column":"vendor","relation":"equals","condition":"The Birth Store"}],"published_scope":"global","image":{"created_at":"2024-11-13T10:58:16+08:00","alt":"Shop All Sale - The Birth Store","width":2048,"height":1365,"src":"\/\/www.thebirthstore.com.au\/cdn\/shop\/collections\/shop-all-sale-297361.jpg?v=1731466697"}}]}
{"item":{"id":7455714115773,"title":"Boobie Busters","handle":"boobie-busters","description":"\u003cp\u003eMade to Milk's Boobie Buster are all packed full of natural galactagogues including Brewers Yeast to boost \u0026amp; support your milk supply while breastfeeding.\u003c\/p\u003e\n\u003cp\u003eThese little gold nuggets contain the most concentrated and highest performing galactagogues out there - brewer's yeast \u0026amp; flaxseed!\u003c\/p\u003e","published_at":"2023-03-22T21:48:36+08:00","created_at":"2023-03-22T21:48:36+08:00","vendor":"Made to Milk","type":"","tags":["Breastfeeding","Lactation Products","Mum"],"price":2995,"price_min":2995,"price_max":2995,"available":true,"price_varies":false,"compare_at_price":null,"compare_at_price_min":0,"compare_at_price_max":0,"compare_at_price_varies":false,"variants":[{"id":42740426473661,"title":"Default Title","option1":"Default Title","option2":null,"option3":null,"sku":"","requires_shipping":true,"taxable":false,"featured_image":null,"available":true,"name":"Boobie Busters","public_title":null,"options":["Default Title"],"price":2995,"weight":85,"compare_at_price":null,"inventory_management":"shopify","barcode":"26473661","requires_selling_plan":false,"selling_plan_allocations":[],"quantity_rule":{"min":1,"max":null,"increment":1}}],"images":["\/\/www.thebirthstore.com.au\/cdn\/shop\/files\/boobie-busters-246183.jpg?v=1714967948","\/\/www.thebirthstore.com.au\/cdn\/shop\/files\/boobie-busters-370614.jpg?v=1714967948"],"featured_image":"\/\/www.thebirthstore.com.au\/cdn\/shop\/files\/boobie-busters-246183.jpg?v=1714967948","options":["Title"],"media":[{"alt":"Boobie Busters - The Birth Store-Made to Milk","id":27007579619517,"position":1,"preview_image":{"aspect_ratio":1.0,"height":2048,"width":2048,"src":"\/\/www.thebirthstore.com.au\/cdn\/shop\/files\/boobie-busters-246183.jpg?v=1714967948"},"aspect_ratio":1.0,"height":2048,"media_type":"image","src":"\/\/www.thebirthstore.com.au\/cdn\/shop\/files\/boobie-busters-246183.jpg?v=1714967948","width":2048},{"alt":"Boobie Busters - The Birth Store-Made to Milk","id":27007579652285,"position":2,"preview_image":{"aspect_ratio":0.667,"height":810,"width":540,"src":"\/\/www.thebirthstore.com.au\/cdn\/shop\/files\/boobie-busters-370614.jpg?v=1714967948"},"aspect_ratio":0.667,"height":810,"media_type":"image","src":"\/\/www.thebirthstore.com.au\/cdn\/shop\/files\/boobie-busters-370614.jpg?v=1714967948","width":540}],"requires_selling_plan":false,"selling_plan_groups":[],"content":"\u003cp\u003eMade to Milk's Boobie Buster are all packed full of natural galactagogues including Brewers Yeast to boost \u0026amp; support your milk supply while breastfeeding.\u003c\/p\u003e\n\u003cp\u003eThese little gold nuggets contain the most concentrated and highest performing galactagogues out there - brewer's yeast \u0026amp; flaxseed!\u003c\/p\u003e"},"options":[{"name":"Title","position":1,"values":["Default Title"]}],"custom_metafields":{},"metafields":{"badge":"\u003cdiv style='display:none' class='jdgm-prev-badge' data-average-rating='5.00' data-number-of-reviews='1' data-number-of-questions='0'\u003e \u003cspan class='jdgm-prev-badge__stars' data-score='5.00' tabindex='0' aria-label='5.00 stars' role='button'\u003e \u003cspan class='jdgm-star jdgm--on'\u003e\u003c\/span\u003e\u003cspan class='jdgm-star jdgm--on'\u003e\u003c\/span\u003e\u003cspan class='jdgm-star jdgm--on'\u003e\u003c\/span\u003e\u003cspan class='jdgm-star jdgm--on'\u003e\u003c\/span\u003e\u003cspan class='jdgm-star jdgm--on'\u003e\u003c\/span\u003e \u003c\/span\u003e \u003cspan class='jdgm-prev-badge__text'\u003e 1 review \u003c\/span\u003e \u003c\/div\u003e","widget":"\u003cdiv class='jdgm-rev-widg' data-updated-at='2026-03-23T14:11:55Z' data-average-rating='5.00' data-number-of-reviews='1' data-number-of-questions='0' data-image-url='https:\/\/cdn.shopify.com\/s\/files\/1\/0527\/3393\/5805\/files\/boobie-busters-246183.jpg?v=1714967948'\u003e \u003cstyle class='jdgm-temp-hiding-style'\u003e.jdgm-rev-widg{ display: none }\u003c\/style\u003e \u003cdiv class='jdgm-rev-widg__header'\u003e \u003ch2 class='jdgm-rev-widg__title'\u003eCustomer Reviews\u003c\/h2\u003e \u003cdiv class='jdgm-rev-widg__summary'\u003e \u003cdiv class='jdgm-rev-widg__summary-stars' aria-label='Average rating is 5.00 stars' role='img'\u003e \u003cspan class='jdgm-star jdgm--on'\u003e\u003c\/span\u003e\u003cspan class='jdgm-star jdgm--on'\u003e\u003c\/span\u003e\u003cspan class='jdgm-star jdgm--on'\u003e\u003c\/span\u003e\u003cspan class='jdgm-star jdgm--on'\u003e\u003c\/span\u003e\u003cspan class='jdgm-star jdgm--on'\u003e\u003c\/span\u003e \u003c\/div\u003e \u003cdiv class='jdgm-rev-widg__summary-text'\u003eBased on 1 review\u003c\/div\u003e \u003c\/div\u003e \u003ca style='display: none' href='#' class='jdgm-write-rev-link' role='button'\u003eWrite a review\u003c\/a\u003e \u003cdiv class='jdgm-histogram jdgm-temp-hidden'\u003e \u003cdiv class='jdgm-histogram__row' data-rating='5' data-frequency='1' data-percentage='100'\u003e \u003cdiv class='jdgm-histogram__star' role='button' aria-label=\"100% (1) reviews with 5 star rating\" tabindex='0' \u003e\u003cspan class='jdgm-star jdgm--on'\u003e\u003c\/span\u003e\u003cspan class='jdgm-star jdgm--on'\u003e\u003c\/span\u003e\u003cspan class='jdgm-star jdgm--on'\u003e\u003c\/span\u003e\u003cspan class='jdgm-star jdgm--on'\u003e\u003c\/span\u003e\u003cspan class='jdgm-star jdgm--on'\u003e\u003c\/span\u003e\u003c\/div\u003e \u003cdiv class='jdgm-histogram__bar'\u003e \u003cdiv class='jdgm-histogram__bar-content' style='width: 100%;'\u003e \u003c\/div\u003e \u003c\/div\u003e \u003cdiv class='jdgm-histogram__percentage'\u003e100%\u003c\/div\u003e \u003cdiv class='jdgm-histogram__frequency'\u003e(1)\u003c\/div\u003e \u003c\/div\u003e \u003cdiv class='jdgm-histogram__row' data-rating='4' data-frequency='0' data-percentage='0'\u003e \u003cdiv class='jdgm-histogram__star' role='button' aria-label=\"0% (0) reviews with 4 star rating\" tabindex='0' \u003e\u003cspan class='jdgm-star jdgm--on'\u003e\u003c\/span\u003e\u003cspan class='jdgm-star jdgm--on'\u003e\u003c\/span\u003e\u003cspan class='jdgm-star jdgm--on'\u003e\u003c\/span\u003e\u003cspan class='jdgm-star jdgm--on'\u003e\u003c\/span\u003e\u003cspan class='jdgm-star jdgm--off'\u003e\u003c\/span\u003e\u003c\/div\u003e \u003cdiv class='jdgm-histogram__bar'\u003e \u003cdiv class='jdgm-histogram__bar-content' style='width: 0%;'\u003e \u003c\/div\u003e \u003c\/div\u003e \u003cdiv class='jdgm-histogram__percentage'\u003e0%\u003c\/div\u003e \u003cdiv class='jdgm-histogram__frequency'\u003e(0)\u003c\/div\u003e \u003c\/div\u003e \u003cdiv class='jdgm-histogram__row' data-rating='3' data-frequency='0' data-percentage='0'\u003e \u003cdiv class='jdgm-histogram__star' role='button' aria-label=\"0% (0) reviews with 3 star rating\" tabindex='0' \u003e\u003cspan class='jdgm-star jdgm--on'\u003e\u003c\/span\u003e\u003cspan class='jdgm-star jdgm--on'\u003e\u003c\/span\u003e\u003cspan class='jdgm-star jdgm--on'\u003e\u003c\/span\u003e\u003cspan class='jdgm-star jdgm--off'\u003e\u003c\/span\u003e\u003cspan class='jdgm-star jdgm--off'\u003e\u003c\/span\u003e\u003c\/div\u003e \u003cdiv class='jdgm-histogram__bar'\u003e \u003cdiv class='jdgm-histogram__bar-content' style='width: 0%;'\u003e \u003c\/div\u003e \u003c\/div\u003e \u003cdiv class='jdgm-histogram__percentage'\u003e0%\u003c\/div\u003e \u003cdiv class='jdgm-histogram__frequency'\u003e(0)\u003c\/div\u003e \u003c\/div\u003e \u003cdiv class='jdgm-histogram__row' data-rating='2' data-frequency='0' data-percentage='0'\u003e \u003cdiv class='jdgm-histogram__star' role='button' aria-label=\"0% (0) reviews with 2 star rating\" tabindex='0' \u003e\u003cspan class='jdgm-star jdgm--on'\u003e\u003c\/span\u003e\u003cspan class='jdgm-star jdgm--on'\u003e\u003c\/span\u003e\u003cspan class='jdgm-star jdgm--off'\u003e\u003c\/span\u003e\u003cspan class='jdgm-star jdgm--off'\u003e\u003c\/span\u003e\u003cspan class='jdgm-star jdgm--off'\u003e\u003c\/span\u003e\u003c\/div\u003e \u003cdiv class='jdgm-histogram__bar'\u003e \u003cdiv class='jdgm-histogram__bar-content' style='width: 0%;'\u003e \u003c\/div\u003e \u003c\/div\u003e \u003cdiv class='jdgm-histogram__percentage'\u003e0%\u003c\/div\u003e \u003cdiv class='jdgm-histogram__frequency'\u003e(0)\u003c\/div\u003e \u003c\/div\u003e \u003cdiv class='jdgm-histogram__row' data-rating='1' data-frequency='0' data-percentage='0'\u003e \u003cdiv class='jdgm-histogram__star' role='button' aria-label=\"0% (0) reviews with 1 star rating\" tabindex='0' \u003e\u003cspan class='jdgm-star jdgm--on'\u003e\u003c\/span\u003e\u003cspan class='jdgm-star jdgm--off'\u003e\u003c\/span\u003e\u003cspan class='jdgm-star jdgm--off'\u003e\u003c\/span\u003e\u003cspan class='jdgm-star jdgm--off'\u003e\u003c\/span\u003e\u003cspan class='jdgm-star jdgm--off'\u003e\u003c\/span\u003e\u003c\/div\u003e \u003cdiv class='jdgm-histogram__bar'\u003e \u003cdiv class='jdgm-histogram__bar-content' style='width: 0%;'\u003e \u003c\/div\u003e \u003c\/div\u003e \u003cdiv class='jdgm-histogram__percentage'\u003e0%\u003c\/div\u003e \u003cdiv class='jdgm-histogram__frequency'\u003e(0)\u003c\/div\u003e \u003c\/div\u003e \u003cdiv class='jdgm-histogram__row jdgm-histogram__clear-filter' data-rating=null tabindex='0'\u003e\u003c\/div\u003e \u003c\/div\u003e \u003cdiv class='jdgm-rev-widg__sort-wrapper'\u003e\u003c\/div\u003e \u003c\/div\u003e \u003cdiv class='jdgm-rev-widg__body'\u003e \u003cdiv class='jdgm-rev-widg__reviews'\u003e\u003cdiv class='jdgm-rev jdgm-divider-top' data-verified-buyer='true' data-review-id='b38e9b24-4985-4a7b-a015-d44db210cbed' data-review-language='' data-product-title='Boobie Busters' data-product-url='\/products\/boobie-busters' data-thumb-up-count='0' data-thumb-down-count='0'\u003e \u003cdiv class='jdgm-rev__header'\u003e \u003cdiv class='jdgm-rev__icon' \u003e J \u003c\/div\u003e \u003cspan class='jdgm-rev__rating' data-score='5' tabindex='0' aria-label='5 star review' role='img'\u003e \u003cspan class='jdgm-star jdgm--on'\u003e\u003c\/span\u003e\u003cspan class='jdgm-star jdgm--on'\u003e\u003c\/span\u003e\u003cspan class='jdgm-star jdgm--on'\u003e\u003c\/span\u003e\u003cspan class='jdgm-star jdgm--on'\u003e\u003c\/span\u003e\u003cspan class='jdgm-star jdgm--on'\u003e\u003c\/span\u003e \u003c\/span\u003e \u003cspan class='jdgm-rev__timestamp jdgm-spinner' data-content='2025-10-05 02:06:10 UTC'\u003e\u003c\/span\u003e \u003cdiv class='jdgm-rev__br'\u003e\u003c\/div\u003e \u003cspan class='jdgm-rev__buyer-badge-wrapper'\u003e \u003cspan class='jdgm-rev__buyer-badge'\u003e\u003c\/span\u003e \u003c\/span\u003e \u003cspan class='jdgm-rev__author-wrapper'\u003e \u003cspan class='jdgm-rev__author'\u003eJacqueline Lee\u003c\/span\u003e \u003cspan class='jdgm-rev__location' \u003e \u003c\/span\u003e \u003c\/span\u003e \u003c\/div\u003e \u003cdiv class='jdgm-rev__content'\u003e \u003cdiv class='jdgm-rev__custom-form'\u003e \u003c\/div\u003e \u003cb class='jdgm-rev__title'\u003eAMAZING!\u003c\/b\u003e \u003cdiv class='jdgm-rev__body'\u003e\u003cp\u003eLove the Boobie Busters. They have increased my milk supply greatly. Let downs are more frequent, my boobs feel so much fuller, my baby is so content and I’m not worrying about my supply being low like I was with my other children. Highly recommend this amazing product!\u003c\/p\u003e\u003c\/div\u003e \u003cdiv class='jdgm-rev__pics'\u003e \u003c\/div\u003e \u003cdiv class='jdgm-rev__vids'\u003e \u003c\/div\u003e \u003cdiv class='jdgm-rev__transparency-badge-wrapper'\u003e \u003cdiv class='jdgm-rev__transparency-badge' data-badge-type=review_collected_via_store_invitation\u003e\u003c\/div\u003e \u003c\/div\u003e \u003c\/div\u003e \u003cdiv class='jdgm-rev__actions'\u003e \u003cdiv class='jdgm-rev__social'\u003e\u003c\/div\u003e \u003cdiv class='jdgm-rev__votes'\u003e\u003c\/div\u003e \u003c\/div\u003e \u003cdiv class='jdgm-rev__reply'\u003e \u003cdiv class='jdgm-rev__replier-wrapper'\u003e \u003cb class='jdgm-rev__replier'\u003e\u003c\/b\u003e \u003c\/div\u003e \u003cdiv class='jdgm-rev__reply-content'\u003e\u003cp\u003eWe’re so glad to hear the Boobie Busters made such a difference for you, Jacqueline. ❤️ It means so much to know they’ve supported your feeding journey and helped ease those worries. Thank you for your recommendation and for sharing your experience.\u003c\/p\u003e\u003c\/div\u003e \u003c\/div\u003e \u003c\/div\u003e\u003c\/div\u003e \u003cdiv class='jdgm-paginate' data-per-page='10' data-url='https:\/\/api.judge.me\/reviews\/reviews_for_widget' style=\"display: none;\"\u003e\u003c\/div\u003e \u003c\/div\u003e \u003cdiv class='jdgm-rev-widg__paginate-spinner-wrapper'\u003e \u003cdiv class='jdgm-spinner'\u003e\u003c\/div\u003e \u003c\/div\u003e \u003c\/div\u003e"},"collections":[{"id":281712427197,"handle":"breastfeeding","title":"Breastfeeding","updated_at":"2026-06-12T19:10:26+08:00","body_html":"","published_at":"2021-12-20T14:19:33+08:00","sort_order":"best-selling","template_suffix":"breastfeeding-collection","disjunctive":false,"rules":[{"column":"tag","relation":"equals","condition":"Breastfeeding"}],"published_scope":"global","image":{"created_at":"2024-05-06T11:59:34+08:00","alt":"Breastfeeding - The Birth Store","width":620,"height":635,"src":"\/\/www.thebirthstore.com.au\/cdn\/shop\/collections\/breastfeeding-793872.jpg?v=1714967974"}},{"id":261657460925,"handle":"buy","title":"Buy","updated_at":"2026-06-12T19:10:26+08:00","body_html":"\u003cp\u003eBrowse all of our pregnancy, labour \u0026amp; birth, postpartum and baby essentials here.\u003cbr\u003e\u003c\/p\u003e\n\u003cp\u003e\u003cspan\u003eYou can even buy now and pay later with Afterpay!\u003c\/span\u003e\u003c\/p\u003e","published_at":"2021-03-10T12:05:31+08:00","sort_order":"best-selling","template_suffix":"shop-all-collection","disjunctive":false,"rules":[{"column":"title","relation":"not_contains","condition":"Hire"}],"published_scope":"global","image":{"created_at":"2024-05-06T11:59:42+08:00","alt":"Buy - The Birth Store","width":2048,"height":2048,"src":"\/\/www.thebirthstore.com.au\/cdn\/shop\/collections\/buy-964856.jpg?v=1714967982"}},{"id":292919476413,"handle":"lactation-products","title":"Lactation Products","updated_at":"2026-06-12T19:10:26+08:00","body_html":"","published_at":"2023-03-22T12:22:41+08:00","sort_order":"best-selling","template_suffix":"lactation-products-collec","disjunctive":false,"rules":[{"column":"tag","relation":"equals","condition":"Lactation Products"}],"published_scope":"global","image":{"created_at":"2024-05-06T12:00:19+08:00","alt":"Lactation Products - The Birth Store","width":1034,"height":922,"src":"\/\/www.thebirthstore.com.au\/cdn\/shop\/collections\/lactation-products-752907.jpg?v=1714968019"}},{"id":291456483517,"handle":"shop-all","title":"Shop All - Mum","updated_at":"2026-06-12T19:10:26+08:00","body_html":"","published_at":"2022-12-23T22:04:39+08:00","sort_order":"best-selling","template_suffix":"shop-all-collection","disjunctive":false,"rules":[{"column":"variant_price","relation":"greater_than","condition":"1"},{"column":"title","relation":"not_contains","condition":"Batteries"},{"column":"tag","relation":"equals","condition":"Mum"}],"published_scope":"global","image":{"created_at":"2024-05-06T12:00:54+08:00","alt":"Shop All - The Birth Store","width":1365,"height":2048,"src":"\/\/www.thebirthstore.com.au\/cdn\/shop\/collections\/shop-all-693176.jpg?v=1714968055"}},{"id":310045933757,"handle":"shop-all-sale","title":"Shop All Sale","updated_at":"2026-06-12T19:10:26+08:00","body_html":"","published_at":"2024-11-12T13:22:43+08:00","sort_order":"alpha-asc","template_suffix":"","disjunctive":true,"rules":[{"column":"tag","relation":"equals","condition":"Bundles"},{"column":"vendor","relation":"equals","condition":"Franjos Kitchen"},{"column":"vendor","relation":"equals","condition":"Adored Illustrations"},{"column":"vendor","relation":"equals","condition":"Amazing Oils"},{"column":"vendor","relation":"equals","condition":"Ice Ice Booby"},{"column":"vendor","relation":"equals","condition":"Made to Milk"},{"column":"vendor","relation":"equals","condition":"Milky Goodness"},{"column":"vendor","relation":"equals","condition":"Seasons of Mama"},{"column":"vendor","relation":"equals","condition":"Silverette"},{"column":"vendor","relation":"equals","condition":"Snuggle Hunny"},{"column":"vendor","relation":"equals","condition":"Yung Bod"},{"column":"vendor","relation":"equals","condition":"Bare Love"},{"column":"vendor","relation":"equals","condition":"Haakaa"},{"column":"vendor","relation":"equals","condition":"Mere Botanicals"},{"column":"vendor","relation":"equals","condition":"The Birth Store Hire"},{"column":"vendor","relation":"equals","condition":"The Birth Store"}],"published_scope":"global","image":{"created_at":"2024-11-13T10:58:16+08:00","alt":"Shop All Sale - The Birth Store","width":2048,"height":1365,"src":"\/\/www.thebirthstore.com.au\/cdn\/shop\/collections\/shop-all-sale-297361.jpg?v=1731466697"}}]}
{"item":{"id":7576563810493,"title":"Made To Milk Lactation Cookies","handle":"copy-of-lactation-cookies-pre-selected-mixed-flavours","description":"\u003cp\u003e\u003cspan data-mce-fragment=\"1\"\u003eDeluxe, chunky lactation cookies to nourish and support the breastfeeding mum.\u003c\/span\u003e\u003c\/p\u003e\n\u003cp\u003eAll of our lactation cookies include the essential galactagogue ingredients - flaxseed and brewer's yeast.\u003c\/p\u003e\n\u003cp\u003e1 Box includes 12 x 25g cookies.\u003c\/p\u003e\n\u003cp\u003eEach cookie is individually sealed for maximum freshness! Made to take with you on the go or to keep by your bedside at night without the threat of being spoiled.\u003c\/p\u003e\n\u003cp\u003e\u003cstrong\u003eContains Wheat, Gluten, Milk, Egg, Soy \u0026amp; Sulphites.\u003c\/strong\u003e\u003c\/p\u003e\n\u003cp\u003eShelf life: 6 months from bake date (baked fresh weekly).\u003c\/p\u003e","published_at":"2023-12-16T13:29:06+08:00","created_at":"2023-12-16T11:10:12+08:00","vendor":"Made to Milk","type":"","tags":["Baby Shower Gifts - Mum","Breastfeeding","Hospital Bag","Lactation Products","Mum","Post-Partum"],"price":2795,"price_min":2795,"price_max":2795,"available":true,"price_varies":false,"compare_at_price":null,"compare_at_price_min":0,"compare_at_price_max":0,"compare_at_price_varies":false,"variants":[{"id":43334826655933,"title":"Triple Chocoholic","option1":"Triple Chocoholic","option2":null,"option3":null,"sku":"","requires_shipping":true,"taxable":false,"featured_image":{"id":38738873188541,"product_id":7576563810493,"position":17,"created_at":"2025-11-02T23:35:56+08:00","updated_at":"2025-11-03T12:22:56+08:00","alt":"Made To Milk Lactation Cookies - The Birth Store - Made to Milk","width":1080,"height":1080,"src":"\/\/www.thebirthstore.com.au\/cdn\/shop\/files\/made-to-milk-lactation-cookies-7512867.png?v=1762143776","variant_ids":[43334826655933]},"available":true,"name":"Made To Milk Lactation Cookies - Triple Chocoholic","public_title":"Triple Chocoholic","options":["Triple Chocoholic"],"price":2795,"weight":405,"compare_at_price":null,"inventory_management":"shopify","barcode":"26655933","featured_media":{"alt":"Made To Milk Lactation Cookies - The Birth Store - Made to Milk","id":29988537925821,"position":17,"preview_image":{"aspect_ratio":1.0,"height":1080,"width":1080,"src":"\/\/www.thebirthstore.com.au\/cdn\/shop\/files\/made-to-milk-lactation-cookies-7512867.png?v=1762143776"}},"requires_selling_plan":false,"selling_plan_allocations":[],"quantity_rule":{"min":1,"max":null,"increment":1}},{"id":43334826688701,"title":"White Choc \u0026 Macadamia","option1":"White Choc \u0026 Macadamia","option2":null,"option3":null,"sku":"","requires_shipping":true,"taxable":false,"featured_image":{"id":38738869584061,"product_id":7576563810493,"position":16,"created_at":"2025-11-02T23:34:02+08:00","updated_at":"2025-11-03T12:22:56+08:00","alt":"Made To Milk Lactation Cookies - The Birth Store - Made to Milk","width":1080,"height":1080,"src":"\/\/www.thebirthstore.com.au\/cdn\/shop\/files\/made-to-milk-lactation-cookies-9838165.png?v=1762143776","variant_ids":[43334826688701]},"available":true,"name":"Made To Milk Lactation Cookies - White Choc \u0026 Macadamia","public_title":"White Choc \u0026 Macadamia","options":["White Choc \u0026 Macadamia"],"price":2795,"weight":405,"compare_at_price":null,"inventory_management":"shopify","barcode":"26688701","featured_media":{"alt":"Made To Milk Lactation Cookies - The Birth Store - Made to Milk","id":29988536385725,"position":16,"preview_image":{"aspect_ratio":1.0,"height":1080,"width":1080,"src":"\/\/www.thebirthstore.com.au\/cdn\/shop\/files\/made-to-milk-lactation-cookies-9838165.png?v=1762143776"}},"requires_selling_plan":false,"selling_plan_allocations":[],"quantity_rule":{"min":1,"max":null,"increment":1}},{"id":43334826721469,"title":"Milk Choc Chip","option1":"Milk Choc Chip","option2":null,"option3":null,"sku":"","requires_shipping":true,"taxable":false,"featured_image":{"id":38738864767165,"product_id":7576563810493,"position":15,"created_at":"2025-11-02T23:31:48+08:00","updated_at":"2025-11-03T12:22:56+08:00","alt":"Made To Milk Lactation Cookies - The Birth Store - Made to Milk","width":1080,"height":1080,"src":"\/\/www.thebirthstore.com.au\/cdn\/shop\/files\/made-to-milk-lactation-cookies-9818433.png?v=1762143776","variant_ids":[43334826721469]},"available":true,"name":"Made To Milk Lactation Cookies - Milk Choc Chip","public_title":"Milk Choc Chip","options":["Milk Choc Chip"],"price":2795,"weight":405,"compare_at_price":null,"inventory_management":"shopify","barcode":"26721469","featured_media":{"alt":"Made To Milk Lactation Cookies - The Birth Store - Made to Milk","id":29988533633213,"position":15,"preview_image":{"aspect_ratio":1.0,"height":1080,"width":1080,"src":"\/\/www.thebirthstore.com.au\/cdn\/shop\/files\/made-to-milk-lactation-cookies-9818433.png?v=1762143776"}},"requires_selling_plan":false,"selling_plan_allocations":[],"quantity_rule":{"min":1,"max":null,"increment":1}},{"id":43334826754237,"title":"Vanilla Cherry Delight","option1":"Vanilla Cherry Delight","option2":null,"option3":null,"sku":"","requires_shipping":true,"taxable":false,"featured_image":{"id":38738875318461,"product_id":7576563810493,"position":18,"created_at":"2025-11-02T23:37:03+08:00","updated_at":"2025-11-03T12:22:57+08:00","alt":"Made To Milk Lactation Cookies - The Birth Store - Made to Milk","width":1080,"height":1080,"src":"\/\/www.thebirthstore.com.au\/cdn\/shop\/files\/made-to-milk-lactation-cookies-4039882.png?v=1762143777","variant_ids":[43334826754237]},"available":true,"name":"Made To Milk Lactation Cookies - Vanilla Cherry Delight","public_title":"Vanilla Cherry Delight","options":["Vanilla Cherry Delight"],"price":2795,"weight":405,"compare_at_price":null,"inventory_management":"shopify","barcode":"26754237","featured_media":{"alt":"Made To Milk Lactation Cookies - The Birth Store - Made to Milk","id":29988539564221,"position":18,"preview_image":{"aspect_ratio":1.0,"height":1080,"width":1080,"src":"\/\/www.thebirthstore.com.au\/cdn\/shop\/files\/made-to-milk-lactation-cookies-4039882.png?v=1762143777"}},"requires_selling_plan":false,"selling_plan_allocations":[],"quantity_rule":{"min":1,"max":null,"increment":1}},{"id":44598923854013,"title":"Salted Caramel Fudge","option1":"Salted Caramel Fudge","option2":null,"option3":null,"sku":"","requires_shipping":true,"taxable":false,"featured_image":{"id":38738858705085,"product_id":7576563810493,"position":14,"created_at":"2025-11-02T23:29:55+08:00","updated_at":"2025-11-03T12:22:55+08:00","alt":"Made To Milk Lactation Cookies - The Birth Store - Made to Milk","width":1080,"height":1080,"src":"\/\/www.thebirthstore.com.au\/cdn\/shop\/files\/made-to-milk-lactation-cookies-3883399.png?v=1762143775","variant_ids":[44598923854013]},"available":true,"name":"Made To Milk Lactation Cookies - Salted Caramel Fudge","public_title":"Salted Caramel Fudge","options":["Salted Caramel Fudge"],"price":2795,"weight":405,"compare_at_price":null,"inventory_management":"shopify","barcode":"23854013","featured_media":{"alt":"Made To Milk Lactation Cookies - The Birth Store - Made to Milk","id":29988529438909,"position":14,"preview_image":{"aspect_ratio":1.0,"height":1080,"width":1080,"src":"\/\/www.thebirthstore.com.au\/cdn\/shop\/files\/made-to-milk-lactation-cookies-3883399.png?v=1762143775"}},"requires_selling_plan":false,"selling_plan_allocations":[],"quantity_rule":{"min":1,"max":null,"increment":1}}],"images":["\/\/www.thebirthstore.com.au\/cdn\/shop\/files\/lactation-cookies-multiple-flavours-737939.jpg?v=1714967993","\/\/www.thebirthstore.com.au\/cdn\/shop\/files\/lactation-cookies-multiple-flavours-197168.jpg?v=1714967993","\/\/www.thebirthstore.com.au\/cdn\/shop\/files\/lactation-cookies-multiple-flavours-828638.jpg?v=1714967993","\/\/www.thebirthstore.com.au\/cdn\/shop\/files\/lactation-cookies-multiple-flavours-272210.jpg?v=1714967993","\/\/www.thebirthstore.com.au\/cdn\/shop\/files\/lactation-cookies-multiple-flavours-127933.jpg?v=1714967993","\/\/www.thebirthstore.com.au\/cdn\/shop\/files\/lactation-cookies-multiple-flavours-827485.jpg?v=1714967993","\/\/www.thebirthstore.com.au\/cdn\/shop\/files\/lactation-cookies-multiple-flavours-586437.jpg?v=1714967993","\/\/www.thebirthstore.com.au\/cdn\/shop\/files\/lactation-cookies-multiple-flavours-447226.jpg?v=1714967993","\/\/www.thebirthstore.com.au\/cdn\/shop\/files\/lactation-cookies-multiple-flavours-264823.jpg?v=1714967993","\/\/www.thebirthstore.com.au\/cdn\/shop\/files\/lactation-cookies-multiple-flavours-899855.jpg?v=1714967993","\/\/www.thebirthstore.com.au\/cdn\/shop\/files\/lactation-cookies-multiple-flavours-344398.webp?v=1730223893","\/\/www.thebirthstore.com.au\/cdn\/shop\/files\/lactation-cookies-multiple-flavours-651687.webp?v=1730223893","\/\/www.thebirthstore.com.au\/cdn\/shop\/files\/lactation-cookies-multiple-flavours-400225.webp?v=1730223893","\/\/www.thebirthstore.com.au\/cdn\/shop\/files\/made-to-milk-lactation-cookies-3883399.png?v=1762143775","\/\/www.thebirthstore.com.au\/cdn\/shop\/files\/made-to-milk-lactation-cookies-9818433.png?v=1762143776","\/\/www.thebirthstore.com.au\/cdn\/shop\/files\/made-to-milk-lactation-cookies-9838165.png?v=1762143776","\/\/www.thebirthstore.com.au\/cdn\/shop\/files\/made-to-milk-lactation-cookies-7512867.png?v=1762143776","\/\/www.thebirthstore.com.au\/cdn\/shop\/files\/made-to-milk-lactation-cookies-4039882.png?v=1762143777"],"featured_image":"\/\/www.thebirthstore.com.au\/cdn\/shop\/files\/lactation-cookies-multiple-flavours-737939.jpg?v=1714967993","options":["Flavour"],"media":[{"alt":"Lactation Cookies - Multiple Flavours - The Birth Store-Made to Milk","id":27007592399037,"position":1,"preview_image":{"aspect_ratio":1.0,"height":1080,"width":1080,"src":"\/\/www.thebirthstore.com.au\/cdn\/shop\/files\/lactation-cookies-multiple-flavours-737939.jpg?v=1714967993"},"aspect_ratio":1.0,"height":1080,"media_type":"image","src":"\/\/www.thebirthstore.com.au\/cdn\/shop\/files\/lactation-cookies-multiple-flavours-737939.jpg?v=1714967993","width":1080},{"alt":"Lactation Cookies - Multiple Flavours - The Birth Store-Made to Milk","id":27007592431805,"position":2,"preview_image":{"aspect_ratio":1.0,"height":540,"width":540,"src":"\/\/www.thebirthstore.com.au\/cdn\/shop\/files\/lactation-cookies-multiple-flavours-197168.jpg?v=1714967993"},"aspect_ratio":1.0,"height":540,"media_type":"image","src":"\/\/www.thebirthstore.com.au\/cdn\/shop\/files\/lactation-cookies-multiple-flavours-197168.jpg?v=1714967993","width":540},{"alt":"Lactation Cookies - Multiple Flavours - The Birth Store-Made to Milk","id":27007592464573,"position":3,"preview_image":{"aspect_ratio":1.0,"height":540,"width":540,"src":"\/\/www.thebirthstore.com.au\/cdn\/shop\/files\/lactation-cookies-multiple-flavours-828638.jpg?v=1714967993"},"aspect_ratio":1.0,"height":540,"media_type":"image","src":"\/\/www.thebirthstore.com.au\/cdn\/shop\/files\/lactation-cookies-multiple-flavours-828638.jpg?v=1714967993","width":540},{"alt":"Lactation Cookies - Multiple Flavours - The Birth Store-Made to Milk","id":27007592497341,"position":4,"preview_image":{"aspect_ratio":1.0,"height":540,"width":540,"src":"\/\/www.thebirthstore.com.au\/cdn\/shop\/files\/lactation-cookies-multiple-flavours-272210.jpg?v=1714967993"},"aspect_ratio":1.0,"height":540,"media_type":"image","src":"\/\/www.thebirthstore.com.au\/cdn\/shop\/files\/lactation-cookies-multiple-flavours-272210.jpg?v=1714967993","width":540},{"alt":"Lactation Cookies - Multiple Flavours - The Birth Store-Made to Milk","id":27007592530109,"position":5,"preview_image":{"aspect_ratio":1.0,"height":540,"width":540,"src":"\/\/www.thebirthstore.com.au\/cdn\/shop\/files\/lactation-cookies-multiple-flavours-127933.jpg?v=1714967993"},"aspect_ratio":1.0,"height":540,"media_type":"image","src":"\/\/www.thebirthstore.com.au\/cdn\/shop\/files\/lactation-cookies-multiple-flavours-127933.jpg?v=1714967993","width":540},{"alt":"Lactation Cookies - Multiple Flavours - The Birth Store-Made to Milk","id":27007592562877,"position":6,"preview_image":{"aspect_ratio":1.0,"height":540,"width":540,"src":"\/\/www.thebirthstore.com.au\/cdn\/shop\/files\/lactation-cookies-multiple-flavours-827485.jpg?v=1714967993"},"aspect_ratio":1.0,"height":540,"media_type":"image","src":"\/\/www.thebirthstore.com.au\/cdn\/shop\/files\/lactation-cookies-multiple-flavours-827485.jpg?v=1714967993","width":540},{"alt":"Lactation Cookies - Multiple Flavours - The Birth Store-Made to Milk","id":27007592595645,"position":7,"preview_image":{"aspect_ratio":1.0,"height":540,"width":540,"src":"\/\/www.thebirthstore.com.au\/cdn\/shop\/files\/lactation-cookies-multiple-flavours-586437.jpg?v=1714967993"},"aspect_ratio":1.0,"height":540,"media_type":"image","src":"\/\/www.thebirthstore.com.au\/cdn\/shop\/files\/lactation-cookies-multiple-flavours-586437.jpg?v=1714967993","width":540},{"alt":"Lactation Cookies - Multiple Flavours - The Birth Store-Made to Milk","id":27007592628413,"position":8,"preview_image":{"aspect_ratio":1.0,"height":540,"width":540,"src":"\/\/www.thebirthstore.com.au\/cdn\/shop\/files\/lactation-cookies-multiple-flavours-447226.jpg?v=1714967993"},"aspect_ratio":1.0,"height":540,"media_type":"image","src":"\/\/www.thebirthstore.com.au\/cdn\/shop\/files\/lactation-cookies-multiple-flavours-447226.jpg?v=1714967993","width":540},{"alt":"Lactation Cookies - Multiple Flavours - The Birth Store-Made to Milk","id":27007592661181,"position":9,"preview_image":{"aspect_ratio":1.0,"height":540,"width":540,"src":"\/\/www.thebirthstore.com.au\/cdn\/shop\/files\/lactation-cookies-multiple-flavours-264823.jpg?v=1714967993"},"aspect_ratio":1.0,"height":540,"media_type":"image","src":"\/\/www.thebirthstore.com.au\/cdn\/shop\/files\/lactation-cookies-multiple-flavours-264823.jpg?v=1714967993","width":540},{"alt":"Lactation Cookies - Multiple Flavours - The Birth Store-Made to Milk","id":27007592693949,"position":10,"preview_image":{"aspect_ratio":0.667,"height":810,"width":540,"src":"\/\/www.thebirthstore.com.au\/cdn\/shop\/files\/lactation-cookies-multiple-flavours-899855.jpg?v=1714967993"},"aspect_ratio":0.667,"height":810,"media_type":"image","src":"\/\/www.thebirthstore.com.au\/cdn\/shop\/files\/lactation-cookies-multiple-flavours-899855.jpg?v=1714967993","width":540},{"alt":"Lactation Cookies - Multiple Flavours - The Birth Store - Made to Milk","id":27844281893053,"position":11,"preview_image":{"aspect_ratio":1.0,"height":540,"width":540,"src":"\/\/www.thebirthstore.com.au\/cdn\/shop\/files\/lactation-cookies-multiple-flavours-344398.webp?v=1730223893"},"aspect_ratio":1.0,"height":540,"media_type":"image","src":"\/\/www.thebirthstore.com.au\/cdn\/shop\/files\/lactation-cookies-multiple-flavours-344398.webp?v=1730223893","width":540},{"alt":"Lactation Cookies - Multiple Flavours - The Birth Store - Made to Milk","id":27844281925821,"position":12,"preview_image":{"aspect_ratio":1.0,"height":540,"width":540,"src":"\/\/www.thebirthstore.com.au\/cdn\/shop\/files\/lactation-cookies-multiple-flavours-651687.webp?v=1730223893"},"aspect_ratio":1.0,"height":540,"media_type":"image","src":"\/\/www.thebirthstore.com.au\/cdn\/shop\/files\/lactation-cookies-multiple-flavours-651687.webp?v=1730223893","width":540},{"alt":"Lactation Cookies - Multiple Flavours - The Birth Store - Made to Milk","id":27844281958589,"position":13,"preview_image":{"aspect_ratio":1.0,"height":540,"width":540,"src":"\/\/www.thebirthstore.com.au\/cdn\/shop\/files\/lactation-cookies-multiple-flavours-400225.webp?v=1730223893"},"aspect_ratio":1.0,"height":540,"media_type":"image","src":"\/\/www.thebirthstore.com.au\/cdn\/shop\/files\/lactation-cookies-multiple-flavours-400225.webp?v=1730223893","width":540},{"alt":"Made To Milk Lactation Cookies - The Birth Store - Made to Milk","id":29988529438909,"position":14,"preview_image":{"aspect_ratio":1.0,"height":1080,"width":1080,"src":"\/\/www.thebirthstore.com.au\/cdn\/shop\/files\/made-to-milk-lactation-cookies-3883399.png?v=1762143775"},"aspect_ratio":1.0,"height":1080,"media_type":"image","src":"\/\/www.thebirthstore.com.au\/cdn\/shop\/files\/made-to-milk-lactation-cookies-3883399.png?v=1762143775","width":1080},{"alt":"Made To Milk Lactation Cookies - The Birth Store - Made to Milk","id":29988533633213,"position":15,"preview_image":{"aspect_ratio":1.0,"height":1080,"width":1080,"src":"\/\/www.thebirthstore.com.au\/cdn\/shop\/files\/made-to-milk-lactation-cookies-9818433.png?v=1762143776"},"aspect_ratio":1.0,"height":1080,"media_type":"image","src":"\/\/www.thebirthstore.com.au\/cdn\/shop\/files\/made-to-milk-lactation-cookies-9818433.png?v=1762143776","width":1080},{"alt":"Made To Milk Lactation Cookies - The Birth Store - Made to Milk","id":29988536385725,"position":16,"preview_image":{"aspect_ratio":1.0,"height":1080,"width":1080,"src":"\/\/www.thebirthstore.com.au\/cdn\/shop\/files\/made-to-milk-lactation-cookies-9838165.png?v=1762143776"},"aspect_ratio":1.0,"height":1080,"media_type":"image","src":"\/\/www.thebirthstore.com.au\/cdn\/shop\/files\/made-to-milk-lactation-cookies-9838165.png?v=1762143776","width":1080},{"alt":"Made To Milk Lactation Cookies - The Birth Store - Made to Milk","id":29988537925821,"position":17,"preview_image":{"aspect_ratio":1.0,"height":1080,"width":1080,"src":"\/\/www.thebirthstore.com.au\/cdn\/shop\/files\/made-to-milk-lactation-cookies-7512867.png?v=1762143776"},"aspect_ratio":1.0,"height":1080,"media_type":"image","src":"\/\/www.thebirthstore.com.au\/cdn\/shop\/files\/made-to-milk-lactation-cookies-7512867.png?v=1762143776","width":1080},{"alt":"Made To Milk Lactation Cookies - The Birth Store - Made to Milk","id":29988539564221,"position":18,"preview_image":{"aspect_ratio":1.0,"height":1080,"width":1080,"src":"\/\/www.thebirthstore.com.au\/cdn\/shop\/files\/made-to-milk-lactation-cookies-4039882.png?v=1762143777"},"aspect_ratio":1.0,"height":1080,"media_type":"image","src":"\/\/www.thebirthstore.com.au\/cdn\/shop\/files\/made-to-milk-lactation-cookies-4039882.png?v=1762143777","width":1080}],"requires_selling_plan":false,"selling_plan_groups":[],"content":"\u003cp\u003e\u003cspan data-mce-fragment=\"1\"\u003eDeluxe, chunky lactation cookies to nourish and support the breastfeeding mum.\u003c\/span\u003e\u003c\/p\u003e\n\u003cp\u003eAll of our lactation cookies include the essential galactagogue ingredients - flaxseed and brewer's yeast.\u003c\/p\u003e\n\u003cp\u003e1 Box includes 12 x 25g cookies.\u003c\/p\u003e\n\u003cp\u003eEach cookie is individually sealed for maximum freshness! Made to take with you on the go or to keep by your bedside at night without the threat of being spoiled.\u003c\/p\u003e\n\u003cp\u003e\u003cstrong\u003eContains Wheat, Gluten, Milk, Egg, Soy \u0026amp; Sulphites.\u003c\/strong\u003e\u003c\/p\u003e\n\u003cp\u003eShelf life: 6 months from bake date (baked fresh weekly).\u003c\/p\u003e"},"options":[{"name":"Flavour","position":1,"values":["Triple Chocoholic","White Choc \u0026 Macadamia","Milk Choc Chip","Vanilla Cherry Delight","Salted Caramel Fudge"]}],"custom_metafields":{},"metafields":{"badge":"\u003cdiv style='display:none' class='jdgm-prev-badge' data-average-rating='0.00' data-number-of-reviews='0' data-number-of-questions='0'\u003e \u003cspan class='jdgm-prev-badge__stars' data-score='0.00' tabindex='0' aria-label='0.00 stars' role='button'\u003e \u003cspan class='jdgm-star jdgm--off'\u003e\u003c\/span\u003e\u003cspan class='jdgm-star jdgm--off'\u003e\u003c\/span\u003e\u003cspan class='jdgm-star jdgm--off'\u003e\u003c\/span\u003e\u003cspan class='jdgm-star jdgm--off'\u003e\u003c\/span\u003e\u003cspan class='jdgm-star jdgm--off'\u003e\u003c\/span\u003e \u003c\/span\u003e \u003cspan class='jdgm-prev-badge__text'\u003e No reviews \u003c\/span\u003e \u003c\/div\u003e","widget":"\u003cdiv class='jdgm-rev-widg' data-updated-at='2025-06-13T16:13:40Z' data-average-rating='0.00' data-number-of-reviews='0' data-number-of-questions='0'\u003e \u003cstyle class='jdgm-temp-hiding-style'\u003e.jdgm-rev-widg{ display: none }\u003c\/style\u003e \u003cdiv class='jdgm-rev-widg__header'\u003e \u003ch2 class='jdgm-rev-widg__title'\u003eCustomer Reviews\u003c\/h2\u003e \u003cdiv class='jdgm-rev-widg__summary'\u003e \u003cdiv class='jdgm-rev-widg__summary-stars' aria-label='Average rating is 0.00 stars' role='img'\u003e \u003cspan class='jdgm-star jdgm--off'\u003e\u003c\/span\u003e\u003cspan class='jdgm-star jdgm--off'\u003e\u003c\/span\u003e\u003cspan class='jdgm-star jdgm--off'\u003e\u003c\/span\u003e\u003cspan class='jdgm-star jdgm--off'\u003e\u003c\/span\u003e\u003cspan class='jdgm-star jdgm--off'\u003e\u003c\/span\u003e \u003c\/div\u003e \u003cdiv class='jdgm-rev-widg__summary-text'\u003eBe the first to write a review\u003c\/div\u003e \u003c\/div\u003e \u003ca style='display: none' href='#' class='jdgm-write-rev-link' role='button'\u003eWrite a review\u003c\/a\u003e \u003cdiv class='jdgm-histogram jdgm-temp-hidden'\u003e \u003cdiv class='jdgm-histogram__row' data-rating='5' data-frequency='0' data-percentage='0'\u003e \u003cdiv class='jdgm-histogram__star' role='button' aria-label=\"0% (0) reviews with 5 star rating\" tabindex='0' \u003e\u003cspan class='jdgm-star jdgm--on'\u003e\u003c\/span\u003e\u003cspan class='jdgm-star jdgm--on'\u003e\u003c\/span\u003e\u003cspan class='jdgm-star jdgm--on'\u003e\u003c\/span\u003e\u003cspan class='jdgm-star jdgm--on'\u003e\u003c\/span\u003e\u003cspan class='jdgm-star jdgm--on'\u003e\u003c\/span\u003e\u003c\/div\u003e \u003cdiv class='jdgm-histogram__bar'\u003e \u003cdiv class='jdgm-histogram__bar-content' style='width: 0%;'\u003e \u003c\/div\u003e \u003c\/div\u003e \u003cdiv class='jdgm-histogram__percentage'\u003e0%\u003c\/div\u003e \u003cdiv class='jdgm-histogram__frequency'\u003e(0)\u003c\/div\u003e \u003c\/div\u003e \u003cdiv class='jdgm-histogram__row' data-rating='4' data-frequency='0' data-percentage='0'\u003e \u003cdiv class='jdgm-histogram__star' role='button' aria-label=\"0% (0) reviews with 4 star rating\" tabindex='0' \u003e\u003cspan class='jdgm-star jdgm--on'\u003e\u003c\/span\u003e\u003cspan class='jdgm-star jdgm--on'\u003e\u003c\/span\u003e\u003cspan class='jdgm-star jdgm--on'\u003e\u003c\/span\u003e\u003cspan class='jdgm-star jdgm--on'\u003e\u003c\/span\u003e\u003cspan class='jdgm-star jdgm--off'\u003e\u003c\/span\u003e\u003c\/div\u003e \u003cdiv class='jdgm-histogram__bar'\u003e \u003cdiv class='jdgm-histogram__bar-content' style='width: 0%;'\u003e \u003c\/div\u003e \u003c\/div\u003e \u003cdiv class='jdgm-histogram__percentage'\u003e0%\u003c\/div\u003e \u003cdiv class='jdgm-histogram__frequency'\u003e(0)\u003c\/div\u003e \u003c\/div\u003e \u003cdiv class='jdgm-histogram__row' data-rating='3' data-frequency='0' data-percentage='0'\u003e \u003cdiv class='jdgm-histogram__star' role='button' aria-label=\"0% (0) reviews with 3 star rating\" tabindex='0' \u003e\u003cspan class='jdgm-star jdgm--on'\u003e\u003c\/span\u003e\u003cspan class='jdgm-star jdgm--on'\u003e\u003c\/span\u003e\u003cspan class='jdgm-star jdgm--on'\u003e\u003c\/span\u003e\u003cspan class='jdgm-star jdgm--off'\u003e\u003c\/span\u003e\u003cspan class='jdgm-star jdgm--off'\u003e\u003c\/span\u003e\u003c\/div\u003e \u003cdiv class='jdgm-histogram__bar'\u003e \u003cdiv class='jdgm-histogram__bar-content' style='width: 0%;'\u003e \u003c\/div\u003e \u003c\/div\u003e \u003cdiv class='jdgm-histogram__percentage'\u003e0%\u003c\/div\u003e \u003cdiv class='jdgm-histogram__frequency'\u003e(0)\u003c\/div\u003e \u003c\/div\u003e \u003cdiv class='jdgm-histogram__row' data-rating='2' data-frequency='0' data-percentage='0'\u003e \u003cdiv class='jdgm-histogram__star' role='button' aria-label=\"0% (0) reviews with 2 star rating\" tabindex='0' \u003e\u003cspan class='jdgm-star jdgm--on'\u003e\u003c\/span\u003e\u003cspan class='jdgm-star jdgm--on'\u003e\u003c\/span\u003e\u003cspan class='jdgm-star jdgm--off'\u003e\u003c\/span\u003e\u003cspan class='jdgm-star jdgm--off'\u003e\u003c\/span\u003e\u003cspan class='jdgm-star jdgm--off'\u003e\u003c\/span\u003e\u003c\/div\u003e \u003cdiv class='jdgm-histogram__bar'\u003e \u003cdiv class='jdgm-histogram__bar-content' style='width: 0%;'\u003e \u003c\/div\u003e \u003c\/div\u003e \u003cdiv class='jdgm-histogram__percentage'\u003e0%\u003c\/div\u003e \u003cdiv class='jdgm-histogram__frequency'\u003e(0)\u003c\/div\u003e \u003c\/div\u003e \u003cdiv class='jdgm-histogram__row' data-rating='1' data-frequency='0' data-percentage='0'\u003e \u003cdiv class='jdgm-histogram__star' role='button' aria-label=\"0% (0) reviews with 1 star rating\" tabindex='0' \u003e\u003cspan class='jdgm-star jdgm--on'\u003e\u003c\/span\u003e\u003cspan class='jdgm-star jdgm--off'\u003e\u003c\/span\u003e\u003cspan class='jdgm-star jdgm--off'\u003e\u003c\/span\u003e\u003cspan class='jdgm-star jdgm--off'\u003e\u003c\/span\u003e\u003cspan class='jdgm-star jdgm--off'\u003e\u003c\/span\u003e\u003c\/div\u003e \u003cdiv class='jdgm-histogram__bar'\u003e \u003cdiv class='jdgm-histogram__bar-content' style='width: 0%;'\u003e \u003c\/div\u003e \u003c\/div\u003e \u003cdiv class='jdgm-histogram__percentage'\u003e0%\u003c\/div\u003e \u003cdiv class='jdgm-histogram__frequency'\u003e(0)\u003c\/div\u003e \u003c\/div\u003e \u003cdiv class='jdgm-histogram__row jdgm-histogram__clear-filter' data-rating=null tabindex='0'\u003e\u003c\/div\u003e \u003c\/div\u003e \u003cdiv class='jdgm-rev-widg__sort-wrapper'\u003e\u003c\/div\u003e \u003c\/div\u003e \u003cdiv class='jdgm-rev-widg__body'\u003e \u003cdiv class='jdgm-rev-widg__reviews'\u003e\u003c\/div\u003e \u003cdiv class='jdgm-paginate' data-per-page='10' data-url='https:\/\/api.judge.me\/reviews\/reviews_for_widget' style=\"display: none;\"\u003e\u003c\/div\u003e \u003c\/div\u003e \u003cdiv class='jdgm-rev-widg__paginate-spinner-wrapper'\u003e \u003cdiv class='jdgm-spinner'\u003e\u003c\/div\u003e \u003c\/div\u003e \u003c\/div\u003e"},"collections":[{"id":281356533949,"handle":"baby-shower-gifts","title":"Baby Shower Gifts - Mum","updated_at":"2026-06-12T19:10:25+08:00","body_html":"\u003cp\u003eLooking for a unique baby shower gift? Or an all-in-one bundle pack to suit all your needs? We've got just the thing!\u003c\/p\u003e","published_at":"2021-12-06T13:43:56+08:00","sort_order":"best-selling","template_suffix":"baby-shower-gifts","disjunctive":true,"rules":[{"column":"tag","relation":"equals","condition":"Baby Shower Gifts - Mum"},{"column":"tag","relation":"equals","condition":"Gift Card"}],"published_scope":"global","image":{"created_at":"2024-05-06T11:59:28+08:00","alt":"Baby Shower Gifts - The Birth Store","width":1200,"height":1800,"src":"\/\/www.thebirthstore.com.au\/cdn\/shop\/collections\/baby-shower-gifts-401770.jpg?v=1761791272"}},{"id":281712427197,"handle":"breastfeeding","title":"Breastfeeding","updated_at":"2026-06-12T19:10:26+08:00","body_html":"","published_at":"2021-12-20T14:19:33+08:00","sort_order":"best-selling","template_suffix":"breastfeeding-collection","disjunctive":false,"rules":[{"column":"tag","relation":"equals","condition":"Breastfeeding"}],"published_scope":"global","image":{"created_at":"2024-05-06T11:59:34+08:00","alt":"Breastfeeding - The Birth Store","width":620,"height":635,"src":"\/\/www.thebirthstore.com.au\/cdn\/shop\/collections\/breastfeeding-793872.jpg?v=1714967974"}},{"id":261657460925,"handle":"buy","title":"Buy","updated_at":"2026-06-12T19:10:26+08:00","body_html":"\u003cp\u003eBrowse all of our pregnancy, labour \u0026amp; birth, postpartum and baby essentials here.\u003cbr\u003e\u003c\/p\u003e\n\u003cp\u003e\u003cspan\u003eYou can even buy now and pay later with Afterpay!\u003c\/span\u003e\u003c\/p\u003e","published_at":"2021-03-10T12:05:31+08:00","sort_order":"best-selling","template_suffix":"shop-all-collection","disjunctive":false,"rules":[{"column":"title","relation":"not_contains","condition":"Hire"}],"published_scope":"global","image":{"created_at":"2024-05-06T11:59:42+08:00","alt":"Buy - The Birth Store","width":2048,"height":2048,"src":"\/\/www.thebirthstore.com.au\/cdn\/shop\/collections\/buy-964856.jpg?v=1714967982"}},{"id":337429201085,"handle":"hospital-bag","title":"Hospital Bag","updated_at":"2026-06-12T19:10:26+08:00","body_html":"","published_at":"2026-06-03T11:36:29+08:00","sort_order":"most-relevant","template_suffix":"","disjunctive":false,"rules":[{"column":"tag","relation":"equals","condition":"Hospital Bag"}],"published_scope":"global"},{"id":292919476413,"handle":"lactation-products","title":"Lactation Products","updated_at":"2026-06-12T19:10:26+08:00","body_html":"","published_at":"2023-03-22T12:22:41+08:00","sort_order":"best-selling","template_suffix":"lactation-products-collec","disjunctive":false,"rules":[{"column":"tag","relation":"equals","condition":"Lactation Products"}],"published_scope":"global","image":{"created_at":"2024-05-06T12:00:19+08:00","alt":"Lactation Products - The Birth Store","width":1034,"height":922,"src":"\/\/www.thebirthstore.com.au\/cdn\/shop\/collections\/lactation-products-752907.jpg?v=1714968019"}},{"id":261658083517,"handle":"post-partum","title":"Postpartum","updated_at":"2026-06-12T19:10:26+08:00","body_html":"\u003cp\u003eShop your postpartum and hospital bag essentials below. Looking for something we don't currently stock? Please reach out and let us know.\u003cbr\u003e\u003c\/p\u003e\n\u003cp\u003e\u003cspan\u003eYou can even buy now and pay later with Afterpay!\u003c\/span\u003e\u003c\/p\u003e","published_at":"2021-03-10T12:33:47+08:00","sort_order":"best-selling","template_suffix":"postpartum-collection","disjunctive":false,"rules":[{"column":"tag","relation":"equals","condition":"Post-Partum"}],"published_scope":"global","image":{"created_at":"2024-05-06T12:00:36+08:00","alt":"Postpartum - The Birth Store","width":611,"height":702,"src":"\/\/www.thebirthstore.com.au\/cdn\/shop\/collections\/postpartum-150119.jpg?v=1714968037"}},{"id":291456483517,"handle":"shop-all","title":"Shop All - Mum","updated_at":"2026-06-12T19:10:26+08:00","body_html":"","published_at":"2022-12-23T22:04:39+08:00","sort_order":"best-selling","template_suffix":"shop-all-collection","disjunctive":false,"rules":[{"column":"variant_price","relation":"greater_than","condition":"1"},{"column":"title","relation":"not_contains","condition":"Batteries"},{"column":"tag","relation":"equals","condition":"Mum"}],"published_scope":"global","image":{"created_at":"2024-05-06T12:00:54+08:00","alt":"Shop All - The Birth Store","width":1365,"height":2048,"src":"\/\/www.thebirthstore.com.au\/cdn\/shop\/collections\/shop-all-693176.jpg?v=1714968055"}},{"id":310045933757,"handle":"shop-all-sale","title":"Shop All Sale","updated_at":"2026-06-12T19:10:26+08:00","body_html":"","published_at":"2024-11-12T13:22:43+08:00","sort_order":"alpha-asc","template_suffix":"","disjunctive":true,"rules":[{"column":"tag","relation":"equals","condition":"Bundles"},{"column":"vendor","relation":"equals","condition":"Franjos Kitchen"},{"column":"vendor","relation":"equals","condition":"Adored Illustrations"},{"column":"vendor","relation":"equals","condition":"Amazing Oils"},{"column":"vendor","relation":"equals","condition":"Ice Ice Booby"},{"column":"vendor","relation":"equals","condition":"Made to Milk"},{"column":"vendor","relation":"equals","condition":"Milky Goodness"},{"column":"vendor","relation":"equals","condition":"Seasons of Mama"},{"column":"vendor","relation":"equals","condition":"Silverette"},{"column":"vendor","relation":"equals","condition":"Snuggle Hunny"},{"column":"vendor","relation":"equals","condition":"Yung Bod"},{"column":"vendor","relation":"equals","condition":"Bare Love"},{"column":"vendor","relation":"equals","condition":"Haakaa"},{"column":"vendor","relation":"equals","condition":"Mere Botanicals"},{"column":"vendor","relation":"equals","condition":"The Birth Store Hire"},{"column":"vendor","relation":"equals","condition":"The Birth Store"}],"published_scope":"global","image":{"created_at":"2024-11-13T10:58:16+08:00","alt":"Shop All Sale - The Birth Store","width":2048,"height":1365,"src":"\/\/www.thebirthstore.com.au\/cdn\/shop\/collections\/shop-all-sale-297361.jpg?v=1731466697"}}]}
{"item":{"id":7410253889725,"title":"Qiara Pregnancy \u0026 Breastfeeding","handle":"qiara-pregnancy-breastfeeding","description":"\u003cp\u003e\u003cmeta charset=\"utf-8\"\u003e\u003cspan\u003eQiara Pregnancy \u0026amp; Breastfeeding contains a probiotic strain, isolated from breastmilk, formulated for your needs.\u003c\/span\u003e\u003c\/p\u003e","published_at":"2022-12-12T00:00:00+08:00","created_at":"2022-12-05T20:43:56+08:00","vendor":"Qiara","type":"","tags":["Baby Shower Gifts - Mum","Breastfeeding","Hospital Bag","Mastitis","Mum","Post-Partum","Pregnancy","Pregnancy Health"],"price":8495,"price_min":8495,"price_max":8495,"available":true,"price_varies":false,"compare_at_price":null,"compare_at_price_min":0,"compare_at_price_max":0,"compare_at_price_varies":false,"variants":[{"id":42533813878973,"title":"Default Title","option1":"Default Title","option2":null,"option3":null,"sku":"","requires_shipping":true,"taxable":false,"featured_image":null,"available":true,"name":"Qiara Pregnancy \u0026 Breastfeeding","public_title":null,"options":["Default Title"],"price":8495,"weight":200,"compare_at_price":null,"inventory_management":"shopify","barcode":"13878973","requires_selling_plan":false,"selling_plan_allocations":[],"quantity_rule":{"min":1,"max":null,"increment":1}}],"images":["\/\/www.thebirthstore.com.au\/cdn\/shop\/files\/qiara-pregnancy-breastfeeding-263434.jpg?v=1714968410","\/\/www.thebirthstore.com.au\/cdn\/shop\/files\/qiara-pregnancy-breastfeeding-691027.jpg?v=1714968410","\/\/www.thebirthstore.com.au\/cdn\/shop\/files\/qiara-pregnancy-breastfeeding-423262.jpg?v=1714968410","\/\/www.thebirthstore.com.au\/cdn\/shop\/files\/qiara-pregnancy-breastfeeding-828022.jpg?v=1714968410"],"featured_image":"\/\/www.thebirthstore.com.au\/cdn\/shop\/files\/qiara-pregnancy-breastfeeding-263434.jpg?v=1714968410","options":["Title"],"media":[{"alt":"Qiara Pregnancy \u0026 Breastfeeding - The Birth Store-Qiara","id":27007596265661,"position":1,"preview_image":{"aspect_ratio":1.0,"height":2048,"width":2048,"src":"\/\/www.thebirthstore.com.au\/cdn\/shop\/files\/qiara-pregnancy-breastfeeding-263434.jpg?v=1714968410"},"aspect_ratio":1.0,"height":2048,"media_type":"image","src":"\/\/www.thebirthstore.com.au\/cdn\/shop\/files\/qiara-pregnancy-breastfeeding-263434.jpg?v=1714968410","width":2048},{"alt":"Qiara Pregnancy \u0026 Breastfeeding - The Birth Store-Qiara","id":27007596331197,"position":2,"preview_image":{"aspect_ratio":1.0,"height":800,"width":800,"src":"\/\/www.thebirthstore.com.au\/cdn\/shop\/files\/qiara-pregnancy-breastfeeding-691027.jpg?v=1714968410"},"aspect_ratio":1.0,"height":800,"media_type":"image","src":"\/\/www.thebirthstore.com.au\/cdn\/shop\/files\/qiara-pregnancy-breastfeeding-691027.jpg?v=1714968410","width":800},{"alt":"Qiara Pregnancy \u0026 Breastfeeding - The Birth Store-Qiara","id":27007596363965,"position":3,"preview_image":{"aspect_ratio":0.643,"height":800,"width":514,"src":"\/\/www.thebirthstore.com.au\/cdn\/shop\/files\/qiara-pregnancy-breastfeeding-423262.jpg?v=1714968410"},"aspect_ratio":0.643,"height":800,"media_type":"image","src":"\/\/www.thebirthstore.com.au\/cdn\/shop\/files\/qiara-pregnancy-breastfeeding-423262.jpg?v=1714968410","width":514},{"alt":"Qiara Pregnancy \u0026 Breastfeeding - The Birth Store-Qiara","id":27007596396733,"position":4,"preview_image":{"aspect_ratio":0.994,"height":525,"width":522,"src":"\/\/www.thebirthstore.com.au\/cdn\/shop\/files\/qiara-pregnancy-breastfeeding-828022.jpg?v=1714968410"},"aspect_ratio":0.994,"height":525,"media_type":"image","src":"\/\/www.thebirthstore.com.au\/cdn\/shop\/files\/qiara-pregnancy-breastfeeding-828022.jpg?v=1714968410","width":522},{"alt":null,"id":26241679392957,"position":5,"preview_image":{"aspect_ratio":1.777,"height":166,"width":295,"src":"\/\/www.thebirthstore.com.au\/cdn\/shop\/files\/preview_images\/1163351671-2ea2175640fa7f808998e27a8898ad26c000f80c59189e38cd0338914f6b9eb6-d_295x166_54a1d571-ce9a-4861-8573-9a46633ab8bd.jpg?v=1701343810"},"aspect_ratio":1.775,"external_id":"177510272","host":"vimeo","media_type":"external_video"}],"requires_selling_plan":false,"selling_plan_groups":[],"content":"\u003cp\u003e\u003cmeta charset=\"utf-8\"\u003e\u003cspan\u003eQiara Pregnancy \u0026amp; Breastfeeding contains a probiotic strain, isolated from breastmilk, formulated for your needs.\u003c\/span\u003e\u003c\/p\u003e"},"options":[{"name":"Title","position":1,"values":["Default Title"]}],"custom_metafields":{},"metafields":{"badge":"\u003cdiv style='display:none' class='jdgm-prev-badge' data-average-rating='5.00' data-number-of-reviews='1' data-number-of-questions='0'\u003e \u003cspan class='jdgm-prev-badge__stars' data-score='5.00' tabindex='0' aria-label='5.00 stars' role='button'\u003e \u003cspan class='jdgm-star jdgm--on'\u003e\u003c\/span\u003e\u003cspan class='jdgm-star jdgm--on'\u003e\u003c\/span\u003e\u003cspan class='jdgm-star jdgm--on'\u003e\u003c\/span\u003e\u003cspan class='jdgm-star jdgm--on'\u003e\u003c\/span\u003e\u003cspan class='jdgm-star jdgm--on'\u003e\u003c\/span\u003e \u003c\/span\u003e \u003cspan class='jdgm-prev-badge__text'\u003e 1 review \u003c\/span\u003e \u003c\/div\u003e","widget":"\u003cdiv class='jdgm-rev-widg' data-updated-at='2026-03-27T08:40:01Z' data-average-rating='5.00' data-number-of-reviews='1' data-number-of-questions='0' data-image-url='https:\/\/cdn.shopify.com\/s\/files\/1\/0527\/3393\/5805\/files\/qiara-pregnancy-breastfeeding-263434.jpg?v=1714968410'\u003e \u003cstyle class='jdgm-temp-hiding-style'\u003e.jdgm-rev-widg{ display: none }\u003c\/style\u003e \u003cdiv class='jdgm-rev-widg__header'\u003e \u003ch2 class='jdgm-rev-widg__title'\u003eCustomer Reviews\u003c\/h2\u003e \u003cdiv class='jdgm-rev-widg__summary'\u003e \u003cdiv class='jdgm-rev-widg__summary-stars' aria-label='Average rating is 5.00 stars' role='img'\u003e \u003cspan class='jdgm-star jdgm--on'\u003e\u003c\/span\u003e\u003cspan class='jdgm-star jdgm--on'\u003e\u003c\/span\u003e\u003cspan class='jdgm-star jdgm--on'\u003e\u003c\/span\u003e\u003cspan class='jdgm-star jdgm--on'\u003e\u003c\/span\u003e\u003cspan class='jdgm-star jdgm--on'\u003e\u003c\/span\u003e \u003c\/div\u003e \u003cdiv class='jdgm-rev-widg__summary-text'\u003eBased on 1 review\u003c\/div\u003e \u003c\/div\u003e \u003ca style='display: none' href='#' class='jdgm-write-rev-link' role='button'\u003eWrite a review\u003c\/a\u003e \u003cdiv class='jdgm-histogram jdgm-temp-hidden'\u003e \u003cdiv class='jdgm-histogram__row' data-rating='5' data-frequency='1' data-percentage='100'\u003e \u003cdiv class='jdgm-histogram__star' role='button' aria-label=\"100% (1) reviews with 5 star rating\" tabindex='0' \u003e\u003cspan class='jdgm-star jdgm--on'\u003e\u003c\/span\u003e\u003cspan class='jdgm-star jdgm--on'\u003e\u003c\/span\u003e\u003cspan class='jdgm-star jdgm--on'\u003e\u003c\/span\u003e\u003cspan class='jdgm-star jdgm--on'\u003e\u003c\/span\u003e\u003cspan class='jdgm-star jdgm--on'\u003e\u003c\/span\u003e\u003c\/div\u003e \u003cdiv class='jdgm-histogram__bar'\u003e \u003cdiv class='jdgm-histogram__bar-content' style='width: 100%;'\u003e \u003c\/div\u003e \u003c\/div\u003e \u003cdiv class='jdgm-histogram__percentage'\u003e100%\u003c\/div\u003e \u003cdiv class='jdgm-histogram__frequency'\u003e(1)\u003c\/div\u003e \u003c\/div\u003e \u003cdiv class='jdgm-histogram__row' data-rating='4' data-frequency='0' data-percentage='0'\u003e \u003cdiv class='jdgm-histogram__star' role='button' aria-label=\"0% (0) reviews with 4 star rating\" tabindex='0' \u003e\u003cspan class='jdgm-star jdgm--on'\u003e\u003c\/span\u003e\u003cspan class='jdgm-star jdgm--on'\u003e\u003c\/span\u003e\u003cspan class='jdgm-star jdgm--on'\u003e\u003c\/span\u003e\u003cspan class='jdgm-star jdgm--on'\u003e\u003c\/span\u003e\u003cspan class='jdgm-star jdgm--off'\u003e\u003c\/span\u003e\u003c\/div\u003e \u003cdiv class='jdgm-histogram__bar'\u003e \u003cdiv class='jdgm-histogram__bar-content' style='width: 0%;'\u003e \u003c\/div\u003e \u003c\/div\u003e \u003cdiv class='jdgm-histogram__percentage'\u003e0%\u003c\/div\u003e \u003cdiv class='jdgm-histogram__frequency'\u003e(0)\u003c\/div\u003e \u003c\/div\u003e \u003cdiv class='jdgm-histogram__row' data-rating='3' data-frequency='0' data-percentage='0'\u003e \u003cdiv class='jdgm-histogram__star' role='button' aria-label=\"0% (0) reviews with 3 star rating\" tabindex='0' \u003e\u003cspan class='jdgm-star jdgm--on'\u003e\u003c\/span\u003e\u003cspan class='jdgm-star jdgm--on'\u003e\u003c\/span\u003e\u003cspan class='jdgm-star jdgm--on'\u003e\u003c\/span\u003e\u003cspan class='jdgm-star jdgm--off'\u003e\u003c\/span\u003e\u003cspan class='jdgm-star jdgm--off'\u003e\u003c\/span\u003e\u003c\/div\u003e \u003cdiv class='jdgm-histogram__bar'\u003e \u003cdiv class='jdgm-histogram__bar-content' style='width: 0%;'\u003e \u003c\/div\u003e \u003c\/div\u003e \u003cdiv class='jdgm-histogram__percentage'\u003e0%\u003c\/div\u003e \u003cdiv class='jdgm-histogram__frequency'\u003e(0)\u003c\/div\u003e \u003c\/div\u003e \u003cdiv class='jdgm-histogram__row' data-rating='2' data-frequency='0' data-percentage='0'\u003e \u003cdiv class='jdgm-histogram__star' role='button' aria-label=\"0% (0) reviews with 2 star rating\" tabindex='0' \u003e\u003cspan class='jdgm-star jdgm--on'\u003e\u003c\/span\u003e\u003cspan class='jdgm-star jdgm--on'\u003e\u003c\/span\u003e\u003cspan class='jdgm-star jdgm--off'\u003e\u003c\/span\u003e\u003cspan class='jdgm-star jdgm--off'\u003e\u003c\/span\u003e\u003cspan class='jdgm-star jdgm--off'\u003e\u003c\/span\u003e\u003c\/div\u003e \u003cdiv class='jdgm-histogram__bar'\u003e \u003cdiv class='jdgm-histogram__bar-content' style='width: 0%;'\u003e \u003c\/div\u003e \u003c\/div\u003e \u003cdiv class='jdgm-histogram__percentage'\u003e0%\u003c\/div\u003e \u003cdiv class='jdgm-histogram__frequency'\u003e(0)\u003c\/div\u003e \u003c\/div\u003e \u003cdiv class='jdgm-histogram__row' data-rating='1' data-frequency='0' data-percentage='0'\u003e \u003cdiv class='jdgm-histogram__star' role='button' aria-label=\"0% (0) reviews with 1 star rating\" tabindex='0' \u003e\u003cspan class='jdgm-star jdgm--on'\u003e\u003c\/span\u003e\u003cspan class='jdgm-star jdgm--off'\u003e\u003c\/span\u003e\u003cspan class='jdgm-star jdgm--off'\u003e\u003c\/span\u003e\u003cspan class='jdgm-star jdgm--off'\u003e\u003c\/span\u003e\u003cspan class='jdgm-star jdgm--off'\u003e\u003c\/span\u003e\u003c\/div\u003e \u003cdiv class='jdgm-histogram__bar'\u003e \u003cdiv class='jdgm-histogram__bar-content' style='width: 0%;'\u003e \u003c\/div\u003e \u003c\/div\u003e \u003cdiv class='jdgm-histogram__percentage'\u003e0%\u003c\/div\u003e \u003cdiv class='jdgm-histogram__frequency'\u003e(0)\u003c\/div\u003e \u003c\/div\u003e \u003cdiv class='jdgm-histogram__row jdgm-histogram__clear-filter' data-rating=null tabindex='0'\u003e\u003c\/div\u003e \u003c\/div\u003e \u003cdiv class='jdgm-rev-widg__sort-wrapper'\u003e\u003c\/div\u003e \u003c\/div\u003e \u003cdiv class='jdgm-rev-widg__body'\u003e \u003cdiv class='jdgm-rev-widg__reviews'\u003e\u003cdiv class='jdgm-rev jdgm-divider-top' data-verified-buyer='true' data-review-id='9a8404ee-dc82-4bd5-ae37-1f80f555e75c' data-review-language='' data-product-title='Qiara Pregnancy \u0026amp; Breastfeeding' data-product-url='\/products\/qiara-pregnancy-breastfeeding' data-thumb-up-count='0' data-thumb-down-count='0'\u003e \u003cdiv class='jdgm-rev__header'\u003e \u003cdiv class='jdgm-rev__icon' \u003e J \u003c\/div\u003e \u003cspan class='jdgm-rev__rating' data-score='5' tabindex='0' aria-label='5 star review' role='img'\u003e \u003cspan class='jdgm-star jdgm--on'\u003e\u003c\/span\u003e\u003cspan class='jdgm-star jdgm--on'\u003e\u003c\/span\u003e\u003cspan class='jdgm-star jdgm--on'\u003e\u003c\/span\u003e\u003cspan class='jdgm-star jdgm--on'\u003e\u003c\/span\u003e\u003cspan class='jdgm-star jdgm--on'\u003e\u003c\/span\u003e \u003c\/span\u003e \u003cspan class='jdgm-rev__timestamp jdgm-spinner' data-content='2025-07-06 02:30:08 UTC'\u003e\u003c\/span\u003e \u003cdiv class='jdgm-rev__br'\u003e\u003c\/div\u003e \u003cspan class='jdgm-rev__buyer-badge-wrapper'\u003e \u003cspan class='jdgm-rev__buyer-badge'\u003e\u003c\/span\u003e \u003c\/span\u003e \u003cspan class='jdgm-rev__author-wrapper'\u003e \u003cspan class='jdgm-rev__author'\u003eJess Loren\u003c\/span\u003e \u003cspan class='jdgm-rev__location' \u003e \u003c\/span\u003e \u003c\/span\u003e \u003c\/div\u003e \u003cdiv class='jdgm-rev__content'\u003e \u003cdiv class='jdgm-rev__custom-form'\u003e \u003c\/div\u003e \u003cb class='jdgm-rev__title'\u003ePerfect purchase\u003c\/b\u003e \u003cdiv class='jdgm-rev__body'\u003e\u003cp\u003eThe birth store was easy to use and easy for pick up (although a bit hard to find)\n\u003cbr \/\u003eMy Qiara probiotics were great, I didn’t notice a huge impact whilst taking them although I’m certain it helped my newborn with colic symptoms. Either way they are flavourless and easy to consume.\n\u003cbr \/\u003eWould buy from the birth store again.\u003c\/p\u003e\u003c\/div\u003e \u003cdiv class='jdgm-rev__pics'\u003e \u003c\/div\u003e \u003cdiv class='jdgm-rev__vids'\u003e \u003c\/div\u003e \u003cdiv class='jdgm-rev__transparency-badge-wrapper'\u003e \u003cdiv class='jdgm-rev__transparency-badge' data-badge-type=review_collected_via_store_invitation\u003e\u003c\/div\u003e \u003c\/div\u003e \u003c\/div\u003e \u003cdiv class='jdgm-rev__actions'\u003e \u003cdiv class='jdgm-rev__social'\u003e\u003c\/div\u003e \u003cdiv class='jdgm-rev__votes'\u003e\u003c\/div\u003e \u003c\/div\u003e \u003cdiv class='jdgm-rev__reply'\u003e \u003cdiv class='jdgm-rev__replier-wrapper'\u003e \u003cb class='jdgm-rev__replier'\u003e\u003c\/b\u003e \u003c\/div\u003e \u003cdiv class='jdgm-rev__reply-content'\u003e\u003cp\u003eHi Jess, thank you so much for your kind words, we’re so glad you had a positive experience and that the Qiara probiotics were easy to take and helpful for your newborn, we really appreciate your feedback and support ❤️\u003c\/p\u003e\u003c\/div\u003e \u003c\/div\u003e \u003c\/div\u003e\u003c\/div\u003e \u003cdiv class='jdgm-paginate' data-per-page='10' data-url='https:\/\/api.judge.me\/reviews\/reviews_for_widget' style=\"display: none;\"\u003e\u003c\/div\u003e \u003c\/div\u003e \u003cdiv class='jdgm-rev-widg__paginate-spinner-wrapper'\u003e \u003cdiv class='jdgm-spinner'\u003e\u003c\/div\u003e \u003c\/div\u003e \u003c\/div\u003e"},"collections":[{"id":281356533949,"handle":"baby-shower-gifts","title":"Baby Shower Gifts - Mum","updated_at":"2026-06-12T19:10:25+08:00","body_html":"\u003cp\u003eLooking for a unique baby shower gift? Or an all-in-one bundle pack to suit all your needs? We've got just the thing!\u003c\/p\u003e","published_at":"2021-12-06T13:43:56+08:00","sort_order":"best-selling","template_suffix":"baby-shower-gifts","disjunctive":true,"rules":[{"column":"tag","relation":"equals","condition":"Baby Shower Gifts - Mum"},{"column":"tag","relation":"equals","condition":"Gift Card"}],"published_scope":"global","image":{"created_at":"2024-05-06T11:59:28+08:00","alt":"Baby Shower Gifts - The Birth Store","width":1200,"height":1800,"src":"\/\/www.thebirthstore.com.au\/cdn\/shop\/collections\/baby-shower-gifts-401770.jpg?v=1761791272"}},{"id":281712427197,"handle":"breastfeeding","title":"Breastfeeding","updated_at":"2026-06-12T19:10:26+08:00","body_html":"","published_at":"2021-12-20T14:19:33+08:00","sort_order":"best-selling","template_suffix":"breastfeeding-collection","disjunctive":false,"rules":[{"column":"tag","relation":"equals","condition":"Breastfeeding"}],"published_scope":"global","image":{"created_at":"2024-05-06T11:59:34+08:00","alt":"Breastfeeding - The Birth Store","width":620,"height":635,"src":"\/\/www.thebirthstore.com.au\/cdn\/shop\/collections\/breastfeeding-793872.jpg?v=1714967974"}},{"id":261657460925,"handle":"buy","title":"Buy","updated_at":"2026-06-12T19:10:26+08:00","body_html":"\u003cp\u003eBrowse all of our pregnancy, labour \u0026amp; birth, postpartum and baby essentials here.\u003cbr\u003e\u003c\/p\u003e\n\u003cp\u003e\u003cspan\u003eYou can even buy now and pay later with Afterpay!\u003c\/span\u003e\u003c\/p\u003e","published_at":"2021-03-10T12:05:31+08:00","sort_order":"best-selling","template_suffix":"shop-all-collection","disjunctive":false,"rules":[{"column":"title","relation":"not_contains","condition":"Hire"}],"published_scope":"global","image":{"created_at":"2024-05-06T11:59:42+08:00","alt":"Buy - The Birth Store","width":2048,"height":2048,"src":"\/\/www.thebirthstore.com.au\/cdn\/shop\/collections\/buy-964856.jpg?v=1714967982"}},{"id":337429201085,"handle":"hospital-bag","title":"Hospital Bag","updated_at":"2026-06-12T19:10:26+08:00","body_html":"","published_at":"2026-06-03T11:36:29+08:00","sort_order":"most-relevant","template_suffix":"","disjunctive":false,"rules":[{"column":"tag","relation":"equals","condition":"Hospital Bag"}],"published_scope":"global"},{"id":290869313725,"handle":"mastitis-blocked-ducts","title":"Mastitis \u0026 Blocked Ducts","updated_at":"2026-06-12T19:10:26+08:00","body_html":"","published_at":"2022-11-17T10:50:01+08:00","sort_order":"best-selling","template_suffix":"swaddles-collection","disjunctive":false,"rules":[{"column":"tag","relation":"equals","condition":"Mastitis"}],"published_scope":"global","image":{"created_at":"2024-05-06T12:00:21+08:00","alt":"Mastitis \u0026 Blocked Ducts - The Birth Store","width":494,"height":487,"src":"\/\/www.thebirthstore.com.au\/cdn\/shop\/collections\/mastitis-blocked-ducts-488726.jpg?v=1714968021"}},{"id":261658083517,"handle":"post-partum","title":"Postpartum","updated_at":"2026-06-12T19:10:26+08:00","body_html":"\u003cp\u003eShop your postpartum and hospital bag essentials below. Looking for something we don't currently stock? Please reach out and let us know.\u003cbr\u003e\u003c\/p\u003e\n\u003cp\u003e\u003cspan\u003eYou can even buy now and pay later with Afterpay!\u003c\/span\u003e\u003c\/p\u003e","published_at":"2021-03-10T12:33:47+08:00","sort_order":"best-selling","template_suffix":"postpartum-collection","disjunctive":false,"rules":[{"column":"tag","relation":"equals","condition":"Post-Partum"}],"published_scope":"global","image":{"created_at":"2024-05-06T12:00:36+08:00","alt":"Postpartum - The Birth Store","width":611,"height":702,"src":"\/\/www.thebirthstore.com.au\/cdn\/shop\/collections\/postpartum-150119.jpg?v=1714968037"}},{"id":261658149053,"handle":"pregnancy-and-maternity-products","title":"Pregnancy","updated_at":"2026-06-12T19:10:26+08:00","body_html":"\u003cp\u003eShop your pregnancy essentials below. Looking for something we don't currently stock? Please reach out and let us know.\u003cbr\u003e\u003c\/p\u003e\n\u003cp\u003e\u003cspan\u003eYou can even buy now and pay later with Afterpay!\u003c\/span\u003e\u003c\/p\u003e","published_at":"2021-03-10T12:34:22+08:00","sort_order":"best-selling","template_suffix":"pregnancy-collection","disjunctive":false,"rules":[{"column":"tag","relation":"equals","condition":"Pregnancy"}],"published_scope":"global","image":{"created_at":"2024-05-06T12:00:40+08:00","alt":"Pregnancy - The Birth Store","width":1024,"height":1536,"src":"\/\/www.thebirthstore.com.au\/cdn\/shop\/collections\/pregnancy-899677.jpg?v=1714968040"}},{"id":295224901821,"handle":"pregnancy-health","title":"Pregnancy Health","updated_at":"2026-06-12T19:10:26+08:00","body_html":"","published_at":"2023-11-10T20:48:51+08:00","sort_order":"best-selling","template_suffix":"swaddles-collection","disjunctive":false,"rules":[{"column":"tag","relation":"equals","condition":"Pregnancy Health"}],"published_scope":"global","image":{"created_at":"2024-05-06T12:00:41+08:00","alt":"Pregnancy Health - The Birth Store","width":608,"height":410,"src":"\/\/www.thebirthstore.com.au\/cdn\/shop\/collections\/pregnancy-health-343983.jpg?v=1714968042"}},{"id":326523846845,"handle":"pregnancy-health-1","updated_at":"2026-06-12T19:10:26+08:00","published_at":"2025-10-30T10:44:54+08:00","sort_order":"best-selling","template_suffix":"","published_scope":"global","title":"Pregnancy Health","body_html":"","image":{"created_at":"2025-11-20T21:33:56+08:00","alt":"Pregnancy Health - The Birth Store","width":522,"height":525,"src":"\/\/www.thebirthstore.com.au\/cdn\/shop\/collections\/pregnancy-health-1617860.jpg?v=1763645636"}},{"id":291456483517,"handle":"shop-all","title":"Shop All - Mum","updated_at":"2026-06-12T19:10:26+08:00","body_html":"","published_at":"2022-12-23T22:04:39+08:00","sort_order":"best-selling","template_suffix":"shop-all-collection","disjunctive":false,"rules":[{"column":"variant_price","relation":"greater_than","condition":"1"},{"column":"title","relation":"not_contains","condition":"Batteries"},{"column":"tag","relation":"equals","condition":"Mum"}],"published_scope":"global","image":{"created_at":"2024-05-06T12:00:54+08:00","alt":"Shop All - The Birth Store","width":1365,"height":2048,"src":"\/\/www.thebirthstore.com.au\/cdn\/shop\/collections\/shop-all-693176.jpg?v=1714968055"}}]}
{"item":{"id":7322242613437,"title":"Silicone Colostrum Collector Set - 6pcs (4ml)","handle":"silicone-colostrum-collector-set-6pcs-4ml","description":"\u003cp data-mce-fragment=\"1\"\u003eThe Haakaa Silicone Colostrum Collector is a\u003cspan data-mce-fragment=\"1\"\u003e \u003c\/span\u003e\u003cstrong data-mce-fragment=\"1\"\u003eworld-first design\u003c\/strong\u003e, giving mums the option to express colostrum antenatally and postnatally in a safe, easy-to-use storage solution. \u003c\/p\u003e\n\u003cp data-mce-fragment=\"1\"\u003eColostrum is traditionally collected in single-use syringes often made from harmful plastics. Our collector is made of\u003cspan data-mce-fragment=\"1\"\u003e \u003c\/span\u003e\u003cstrong data-mce-fragment=\"1\"\u003e100% medical-grade silicone\u003c\/strong\u003e, which means it won't leach nasty toxins and can be safely stored in the fridge or freezer. It's easy-to-use and reuse, making it the ideal option for mums both before and after birth!\u003c\/p\u003e\n\u003cp\u003eEach colostrum collector comes with its own sticker for convenient labeling of each tube. \u003c\/p\u003e\n\u003cp\u003e\u003cem\u003e\u003cstrong\u003ePlease note:\u003c\/strong\u003e\u003cspan\u003e \u003c\/span\u003eEnsure clearance from your health professional prior to antenatal expressing as there may be a risk of early labour.\u003c\/em\u003e\u003c\/p\u003e\n\u003cp\u003e\u003cstrong\u003e\u003cem\u003eFeatures:\u003c\/em\u003e\u003c\/strong\u003e\u003c\/p\u003e\n\u003cul\u003e\n\u003cli\u003eCollect, store and feed colostrum from the same container.\u003c\/li\u003e\n\u003cli\u003eMade of 100% medical-grade silicone.\u003c\/li\u003e\n\u003cli\u003eSoft squeezable silicone has a vacuum effect to collect droplets.\u003c\/li\u003e\n\u003cli\u003eNib suctions colostrum off the nipple, can also be removed to express directly into the collector.\u003c\/li\u003e\n\u003cli\u003ePortable, leakproof and reusable.\u003c\/li\u003e\n\u003cli\u003eHeat and freeze resistant.\u003c\/li\u003e\n\u003cli\u003eClear measurements.\u003c\/li\u003e\n\u003cli\u003eNon-toxic and safe for newborns.\u003c\/li\u003e\n\u003cli\u003eBPA, PVC and phthalate-free.\u003c\/li\u003e\n\u003cli\u003eFridge, freezer, dishwasher and microwave steriliser safe.\u003c\/li\u003e\n\u003c\/ul\u003e\n\u003cp\u003e\u003cstrong\u003eCleaning \u0026amp; care:\u003c\/strong\u003e\u003c\/p\u003e\n\u003cp\u003e\u003cstrong\u003eSterilise each colostrum collector before use with any steam sterilising system or by boiling in water for 2-3 minutes.\u003cspan\u003e \u003c\/span\u003e\u003c\/strong\u003e\u003cspan\u003eDo not use bleach-based agents to clean this product.\u003c\/span\u003e\u003cspan\u003e \u003c\/span\u003e\u003cspan\u003eUse all the colostrum in the container for one feed and discard any left over.\u003c\/span\u003e\u003c\/p\u003e\n\u003cp\u003e\u003cstrong\u003eStorage:\u003c\/strong\u003e\u003c\/p\u003e\n\u003cp\u003e\u003cspan\u003eStore products in a cool, dry place and avoid direct sunlight.\u003c\/span\u003e\u003c\/p\u003e\n\u003cp\u003e\u003cem\u003e\u003cstrong\u003ePlease note:\u003c\/strong\u003e Ensure clearance from your health professional prior to antenatal expressing as there may be a risk of early labour.\u003c\/em\u003e\u003c\/p\u003e\n\u003cp\u003eCheck product condition regularly and replace if it shows any signs of damage. Do not store near any sharp objects. Only soft bristle brushes or soft sponges should be used to clean this product. Hard scourers may scratch the surface. This product is not a toy. Do not use this product for anything other than its intended use. \u003c\/p\u003e","published_at":"2022-08-16T20:07:28+08:00","created_at":"2022-08-16T20:07:25+08:00","vendor":"Haakaa","type":"","tags":["Breastfeeding","Hospital Bag","Labour Preparation","Labour Progression","Mum","Post-Partum","Pregnancy"],"price":3200,"price_min":3200,"price_max":3200,"available":true,"price_varies":false,"compare_at_price":null,"compare_at_price_min":0,"compare_at_price_max":0,"compare_at_price_varies":false,"variants":[{"id":42216941191357,"title":"Default Title","option1":"Default Title","option2":null,"option3":null,"sku":"","requires_shipping":true,"taxable":false,"featured_image":null,"available":true,"name":"Silicone Colostrum Collector Set - 6pcs (4ml)","public_title":null,"options":["Default Title"],"price":3200,"weight":168,"compare_at_price":null,"inventory_management":"shopify","barcode":"41191357","requires_selling_plan":false,"selling_plan_allocations":[],"quantity_rule":{"min":1,"max":null,"increment":1}}],"images":["\/\/www.thebirthstore.com.au\/cdn\/shop\/files\/silicone-colostrum-collector-set-6pcs-4ml-110064.jpg?v=1714968040","\/\/www.thebirthstore.com.au\/cdn\/shop\/files\/silicone-colostrum-collector-set-6pcs-4ml-645648.jpg?v=1714968040","\/\/www.thebirthstore.com.au\/cdn\/shop\/files\/silicone-colostrum-collector-set-6pcs-4ml-732826.jpg?v=1714968040","\/\/www.thebirthstore.com.au\/cdn\/shop\/files\/silicone-colostrum-collector-set-6pcs-4ml-634271.jpg?v=1714968040"],"featured_image":"\/\/www.thebirthstore.com.au\/cdn\/shop\/files\/silicone-colostrum-collector-set-6pcs-4ml-110064.jpg?v=1714968040","options":["Title"],"media":[{"alt":"Silicone Colostrum Collector Set - 6pcs (4ml) - The Birth Store-Haakaa","id":27007598690493,"position":1,"preview_image":{"aspect_ratio":1.0,"height":881,"width":881,"src":"\/\/www.thebirthstore.com.au\/cdn\/shop\/files\/silicone-colostrum-collector-set-6pcs-4ml-110064.jpg?v=1714968040"},"aspect_ratio":1.0,"height":881,"media_type":"image","src":"\/\/www.thebirthstore.com.au\/cdn\/shop\/files\/silicone-colostrum-collector-set-6pcs-4ml-110064.jpg?v=1714968040","width":881},{"alt":"Silicone Colostrum Collector Set - 6pcs (4ml) - The Birth Store-Haakaa","id":27007598756029,"position":2,"preview_image":{"aspect_ratio":1.014,"height":808,"width":819,"src":"\/\/www.thebirthstore.com.au\/cdn\/shop\/files\/silicone-colostrum-collector-set-6pcs-4ml-645648.jpg?v=1714968040"},"aspect_ratio":1.014,"height":808,"media_type":"image","src":"\/\/www.thebirthstore.com.au\/cdn\/shop\/files\/silicone-colostrum-collector-set-6pcs-4ml-645648.jpg?v=1714968040","width":819},{"alt":"Silicone Colostrum Collector Set - 6pcs (4ml) - The Birth Store-Haakaa","id":27007598788797,"position":3,"preview_image":{"aspect_ratio":1.289,"height":485,"width":625,"src":"\/\/www.thebirthstore.com.au\/cdn\/shop\/files\/silicone-colostrum-collector-set-6pcs-4ml-732826.jpg?v=1714968040"},"aspect_ratio":1.289,"height":485,"media_type":"image","src":"\/\/www.thebirthstore.com.au\/cdn\/shop\/files\/silicone-colostrum-collector-set-6pcs-4ml-732826.jpg?v=1714968040","width":625},{"alt":"Silicone Colostrum Collector Set - 6pcs (4ml) - The Birth Store-Haakaa","id":27007598854333,"position":4,"preview_image":{"aspect_ratio":0.905,"height":643,"width":582,"src":"\/\/www.thebirthstore.com.au\/cdn\/shop\/files\/silicone-colostrum-collector-set-6pcs-4ml-634271.jpg?v=1714968040"},"aspect_ratio":0.905,"height":643,"media_type":"image","src":"\/\/www.thebirthstore.com.au\/cdn\/shop\/files\/silicone-colostrum-collector-set-6pcs-4ml-634271.jpg?v=1714968040","width":582}],"requires_selling_plan":false,"selling_plan_groups":[],"content":"\u003cp data-mce-fragment=\"1\"\u003eThe Haakaa Silicone Colostrum Collector is a\u003cspan data-mce-fragment=\"1\"\u003e \u003c\/span\u003e\u003cstrong data-mce-fragment=\"1\"\u003eworld-first design\u003c\/strong\u003e, giving mums the option to express colostrum antenatally and postnatally in a safe, easy-to-use storage solution. \u003c\/p\u003e\n\u003cp data-mce-fragment=\"1\"\u003eColostrum is traditionally collected in single-use syringes often made from harmful plastics. Our collector is made of\u003cspan data-mce-fragment=\"1\"\u003e \u003c\/span\u003e\u003cstrong data-mce-fragment=\"1\"\u003e100% medical-grade silicone\u003c\/strong\u003e, which means it won't leach nasty toxins and can be safely stored in the fridge or freezer. It's easy-to-use and reuse, making it the ideal option for mums both before and after birth!\u003c\/p\u003e\n\u003cp\u003eEach colostrum collector comes with its own sticker for convenient labeling of each tube. \u003c\/p\u003e\n\u003cp\u003e\u003cem\u003e\u003cstrong\u003ePlease note:\u003c\/strong\u003e\u003cspan\u003e \u003c\/span\u003eEnsure clearance from your health professional prior to antenatal expressing as there may be a risk of early labour.\u003c\/em\u003e\u003c\/p\u003e\n\u003cp\u003e\u003cstrong\u003e\u003cem\u003eFeatures:\u003c\/em\u003e\u003c\/strong\u003e\u003c\/p\u003e\n\u003cul\u003e\n\u003cli\u003eCollect, store and feed colostrum from the same container.\u003c\/li\u003e\n\u003cli\u003eMade of 100% medical-grade silicone.\u003c\/li\u003e\n\u003cli\u003eSoft squeezable silicone has a vacuum effect to collect droplets.\u003c\/li\u003e\n\u003cli\u003eNib suctions colostrum off the nipple, can also be removed to express directly into the collector.\u003c\/li\u003e\n\u003cli\u003ePortable, leakproof and reusable.\u003c\/li\u003e\n\u003cli\u003eHeat and freeze resistant.\u003c\/li\u003e\n\u003cli\u003eClear measurements.\u003c\/li\u003e\n\u003cli\u003eNon-toxic and safe for newborns.\u003c\/li\u003e\n\u003cli\u003eBPA, PVC and phthalate-free.\u003c\/li\u003e\n\u003cli\u003eFridge, freezer, dishwasher and microwave steriliser safe.\u003c\/li\u003e\n\u003c\/ul\u003e\n\u003cp\u003e\u003cstrong\u003eCleaning \u0026amp; care:\u003c\/strong\u003e\u003c\/p\u003e\n\u003cp\u003e\u003cstrong\u003eSterilise each colostrum collector before use with any steam sterilising system or by boiling in water for 2-3 minutes.\u003cspan\u003e \u003c\/span\u003e\u003c\/strong\u003e\u003cspan\u003eDo not use bleach-based agents to clean this product.\u003c\/span\u003e\u003cspan\u003e \u003c\/span\u003e\u003cspan\u003eUse all the colostrum in the container for one feed and discard any left over.\u003c\/span\u003e\u003c\/p\u003e\n\u003cp\u003e\u003cstrong\u003eStorage:\u003c\/strong\u003e\u003c\/p\u003e\n\u003cp\u003e\u003cspan\u003eStore products in a cool, dry place and avoid direct sunlight.\u003c\/span\u003e\u003c\/p\u003e\n\u003cp\u003e\u003cem\u003e\u003cstrong\u003ePlease note:\u003c\/strong\u003e Ensure clearance from your health professional prior to antenatal expressing as there may be a risk of early labour.\u003c\/em\u003e\u003c\/p\u003e\n\u003cp\u003eCheck product condition regularly and replace if it shows any signs of damage. Do not store near any sharp objects. Only soft bristle brushes or soft sponges should be used to clean this product. Hard scourers may scratch the surface. This product is not a toy. Do not use this product for anything other than its intended use. \u003c\/p\u003e"},"options":[{"name":"Title","position":1,"values":["Default Title"]}],"custom_metafields":{},"metafields":{"badge":"\u003cdiv style='display:none' class='jdgm-prev-badge' data-average-rating='0.00' data-number-of-reviews='0' data-number-of-questions='0'\u003e \u003cspan class='jdgm-prev-badge__stars' data-score='0.00' tabindex='0' aria-label='0.00 stars' role='button'\u003e \u003cspan class='jdgm-star jdgm--off'\u003e\u003c\/span\u003e\u003cspan class='jdgm-star jdgm--off'\u003e\u003c\/span\u003e\u003cspan class='jdgm-star jdgm--off'\u003e\u003c\/span\u003e\u003cspan class='jdgm-star jdgm--off'\u003e\u003c\/span\u003e\u003cspan class='jdgm-star jdgm--off'\u003e\u003c\/span\u003e \u003c\/span\u003e \u003cspan class='jdgm-prev-badge__text'\u003e No reviews \u003c\/span\u003e \u003c\/div\u003e","widget":"\u003cdiv class='jdgm-rev-widg' data-updated-at='2025-06-13T16:12:10Z' data-average-rating='0.00' data-number-of-reviews='0' data-number-of-questions='0'\u003e \u003cstyle class='jdgm-temp-hiding-style'\u003e.jdgm-rev-widg{ display: none }\u003c\/style\u003e \u003cdiv class='jdgm-rev-widg__header'\u003e \u003ch2 class='jdgm-rev-widg__title'\u003eCustomer Reviews\u003c\/h2\u003e \u003cdiv class='jdgm-rev-widg__summary'\u003e \u003cdiv class='jdgm-rev-widg__summary-stars' aria-label='Average rating is 0.00 stars' role='img'\u003e \u003cspan class='jdgm-star jdgm--off'\u003e\u003c\/span\u003e\u003cspan class='jdgm-star jdgm--off'\u003e\u003c\/span\u003e\u003cspan class='jdgm-star jdgm--off'\u003e\u003c\/span\u003e\u003cspan class='jdgm-star jdgm--off'\u003e\u003c\/span\u003e\u003cspan class='jdgm-star jdgm--off'\u003e\u003c\/span\u003e \u003c\/div\u003e \u003cdiv class='jdgm-rev-widg__summary-text'\u003eBe the first to write a review\u003c\/div\u003e \u003c\/div\u003e \u003ca style='display: none' href='#' class='jdgm-write-rev-link' role='button'\u003eWrite a review\u003c\/a\u003e \u003cdiv class='jdgm-histogram jdgm-temp-hidden'\u003e \u003cdiv class='jdgm-histogram__row' data-rating='5' data-frequency='0' data-percentage='0'\u003e \u003cdiv class='jdgm-histogram__star' role='button' aria-label=\"0% (0) reviews with 5 star rating\" tabindex='0' \u003e\u003cspan class='jdgm-star jdgm--on'\u003e\u003c\/span\u003e\u003cspan class='jdgm-star jdgm--on'\u003e\u003c\/span\u003e\u003cspan class='jdgm-star jdgm--on'\u003e\u003c\/span\u003e\u003cspan class='jdgm-star jdgm--on'\u003e\u003c\/span\u003e\u003cspan class='jdgm-star jdgm--on'\u003e\u003c\/span\u003e\u003c\/div\u003e \u003cdiv class='jdgm-histogram__bar'\u003e \u003cdiv class='jdgm-histogram__bar-content' style='width: 0%;'\u003e \u003c\/div\u003e \u003c\/div\u003e \u003cdiv class='jdgm-histogram__percentage'\u003e0%\u003c\/div\u003e \u003cdiv class='jdgm-histogram__frequency'\u003e(0)\u003c\/div\u003e \u003c\/div\u003e \u003cdiv class='jdgm-histogram__row' data-rating='4' data-frequency='0' data-percentage='0'\u003e \u003cdiv class='jdgm-histogram__star' role='button' aria-label=\"0% (0) reviews with 4 star rating\" tabindex='0' \u003e\u003cspan class='jdgm-star jdgm--on'\u003e\u003c\/span\u003e\u003cspan class='jdgm-star jdgm--on'\u003e\u003c\/span\u003e\u003cspan class='jdgm-star jdgm--on'\u003e\u003c\/span\u003e\u003cspan class='jdgm-star jdgm--on'\u003e\u003c\/span\u003e\u003cspan class='jdgm-star jdgm--off'\u003e\u003c\/span\u003e\u003c\/div\u003e \u003cdiv class='jdgm-histogram__bar'\u003e \u003cdiv class='jdgm-histogram__bar-content' style='width: 0%;'\u003e \u003c\/div\u003e \u003c\/div\u003e \u003cdiv class='jdgm-histogram__percentage'\u003e0%\u003c\/div\u003e \u003cdiv class='jdgm-histogram__frequency'\u003e(0)\u003c\/div\u003e \u003c\/div\u003e \u003cdiv class='jdgm-histogram__row' data-rating='3' data-frequency='0' data-percentage='0'\u003e \u003cdiv class='jdgm-histogram__star' role='button' aria-label=\"0% (0) reviews with 3 star rating\" tabindex='0' \u003e\u003cspan class='jdgm-star jdgm--on'\u003e\u003c\/span\u003e\u003cspan class='jdgm-star jdgm--on'\u003e\u003c\/span\u003e\u003cspan class='jdgm-star jdgm--on'\u003e\u003c\/span\u003e\u003cspan class='jdgm-star jdgm--off'\u003e\u003c\/span\u003e\u003cspan class='jdgm-star jdgm--off'\u003e\u003c\/span\u003e\u003c\/div\u003e \u003cdiv class='jdgm-histogram__bar'\u003e \u003cdiv class='jdgm-histogram__bar-content' style='width: 0%;'\u003e \u003c\/div\u003e \u003c\/div\u003e \u003cdiv class='jdgm-histogram__percentage'\u003e0%\u003c\/div\u003e \u003cdiv class='jdgm-histogram__frequency'\u003e(0)\u003c\/div\u003e \u003c\/div\u003e \u003cdiv class='jdgm-histogram__row' data-rating='2' data-frequency='0' data-percentage='0'\u003e \u003cdiv class='jdgm-histogram__star' role='button' aria-label=\"0% (0) reviews with 2 star rating\" tabindex='0' \u003e\u003cspan class='jdgm-star jdgm--on'\u003e\u003c\/span\u003e\u003cspan class='jdgm-star jdgm--on'\u003e\u003c\/span\u003e\u003cspan class='jdgm-star jdgm--off'\u003e\u003c\/span\u003e\u003cspan class='jdgm-star jdgm--off'\u003e\u003c\/span\u003e\u003cspan class='jdgm-star jdgm--off'\u003e\u003c\/span\u003e\u003c\/div\u003e \u003cdiv class='jdgm-histogram__bar'\u003e \u003cdiv class='jdgm-histogram__bar-content' style='width: 0%;'\u003e \u003c\/div\u003e \u003c\/div\u003e \u003cdiv class='jdgm-histogram__percentage'\u003e0%\u003c\/div\u003e \u003cdiv class='jdgm-histogram__frequency'\u003e(0)\u003c\/div\u003e \u003c\/div\u003e \u003cdiv class='jdgm-histogram__row' data-rating='1' data-frequency='0' data-percentage='0'\u003e \u003cdiv class='jdgm-histogram__star' role='button' aria-label=\"0% (0) reviews with 1 star rating\" tabindex='0' \u003e\u003cspan class='jdgm-star jdgm--on'\u003e\u003c\/span\u003e\u003cspan class='jdgm-star jdgm--off'\u003e\u003c\/span\u003e\u003cspan class='jdgm-star jdgm--off'\u003e\u003c\/span\u003e\u003cspan class='jdgm-star jdgm--off'\u003e\u003c\/span\u003e\u003cspan class='jdgm-star jdgm--off'\u003e\u003c\/span\u003e\u003c\/div\u003e \u003cdiv class='jdgm-histogram__bar'\u003e \u003cdiv class='jdgm-histogram__bar-content' style='width: 0%;'\u003e \u003c\/div\u003e \u003c\/div\u003e \u003cdiv class='jdgm-histogram__percentage'\u003e0%\u003c\/div\u003e \u003cdiv class='jdgm-histogram__frequency'\u003e(0)\u003c\/div\u003e \u003c\/div\u003e \u003cdiv class='jdgm-histogram__row jdgm-histogram__clear-filter' data-rating=null tabindex='0'\u003e\u003c\/div\u003e \u003c\/div\u003e \u003cdiv class='jdgm-rev-widg__sort-wrapper'\u003e\u003c\/div\u003e \u003c\/div\u003e \u003cdiv class='jdgm-rev-widg__body'\u003e \u003cdiv class='jdgm-rev-widg__reviews'\u003e\u003c\/div\u003e \u003cdiv class='jdgm-paginate' data-per-page='10' data-url='https:\/\/api.judge.me\/reviews\/reviews_for_widget' style=\"display: none;\"\u003e\u003c\/div\u003e \u003c\/div\u003e \u003cdiv class='jdgm-rev-widg__paginate-spinner-wrapper'\u003e \u003cdiv class='jdgm-spinner'\u003e\u003c\/div\u003e \u003c\/div\u003e \u003c\/div\u003e"},"collections":[{"id":281712427197,"handle":"breastfeeding","title":"Breastfeeding","updated_at":"2026-06-12T19:10:26+08:00","body_html":"","published_at":"2021-12-20T14:19:33+08:00","sort_order":"best-selling","template_suffix":"breastfeeding-collection","disjunctive":false,"rules":[{"column":"tag","relation":"equals","condition":"Breastfeeding"}],"published_scope":"global","image":{"created_at":"2024-05-06T11:59:34+08:00","alt":"Breastfeeding - The Birth Store","width":620,"height":635,"src":"\/\/www.thebirthstore.com.au\/cdn\/shop\/collections\/breastfeeding-793872.jpg?v=1714967974"}},{"id":261657460925,"handle":"buy","title":"Buy","updated_at":"2026-06-12T19:10:26+08:00","body_html":"\u003cp\u003eBrowse all of our pregnancy, labour \u0026amp; birth, postpartum and baby essentials here.\u003cbr\u003e\u003c\/p\u003e\n\u003cp\u003e\u003cspan\u003eYou can even buy now and pay later with Afterpay!\u003c\/span\u003e\u003c\/p\u003e","published_at":"2021-03-10T12:05:31+08:00","sort_order":"best-selling","template_suffix":"shop-all-collection","disjunctive":false,"rules":[{"column":"title","relation":"not_contains","condition":"Hire"}],"published_scope":"global","image":{"created_at":"2024-05-06T11:59:42+08:00","alt":"Buy - The Birth Store","width":2048,"height":2048,"src":"\/\/www.thebirthstore.com.au\/cdn\/shop\/collections\/buy-964856.jpg?v=1714967982"}},{"id":337429201085,"handle":"hospital-bag","title":"Hospital Bag","updated_at":"2026-06-12T19:10:26+08:00","body_html":"","published_at":"2026-06-03T11:36:29+08:00","sort_order":"most-relevant","template_suffix":"","disjunctive":false,"rules":[{"column":"tag","relation":"equals","condition":"Hospital Bag"}],"published_scope":"global"},{"id":281712558269,"handle":"labour-aids","title":"Labour Aids","updated_at":"2026-06-12T19:10:26+08:00","body_html":"","published_at":"2021-12-20T14:22:16+08:00","sort_order":"best-selling","template_suffix":"labour-aids-collection","disjunctive":false,"rules":[{"column":"tag","relation":"equals","condition":"Labour Progression"}],"published_scope":"global","image":{"created_at":"2024-05-06T12:00:11+08:00","alt":"Labour Aids - The Birth Store","width":1365,"height":2048,"src":"\/\/www.thebirthstore.com.au\/cdn\/shop\/collections\/labour-aids-211824.jpg?v=1714968012"}},{"id":281712525501,"handle":"labour-preparation","title":"Labour Preparation","updated_at":"2026-06-12T19:10:26+08:00","body_html":"","published_at":"2021-12-20T14:20:12+08:00","sort_order":"best-selling","template_suffix":"labour-preparation-collec","disjunctive":false,"rules":[{"column":"tag","relation":"equals","condition":"Labour Preparation"}],"published_scope":"global","image":{"created_at":"2024-05-06T12:00:13+08:00","alt":"Labour Preparation - The Birth Store","width":1024,"height":1536,"src":"\/\/www.thebirthstore.com.au\/cdn\/shop\/collections\/labour-preparation-271961.jpg?v=1714968013"}},{"id":261658083517,"handle":"post-partum","title":"Postpartum","updated_at":"2026-06-12T19:10:26+08:00","body_html":"\u003cp\u003eShop your postpartum and hospital bag essentials below. Looking for something we don't currently stock? Please reach out and let us know.\u003cbr\u003e\u003c\/p\u003e\n\u003cp\u003e\u003cspan\u003eYou can even buy now and pay later with Afterpay!\u003c\/span\u003e\u003c\/p\u003e","published_at":"2021-03-10T12:33:47+08:00","sort_order":"best-selling","template_suffix":"postpartum-collection","disjunctive":false,"rules":[{"column":"tag","relation":"equals","condition":"Post-Partum"}],"published_scope":"global","image":{"created_at":"2024-05-06T12:00:36+08:00","alt":"Postpartum - The Birth Store","width":611,"height":702,"src":"\/\/www.thebirthstore.com.au\/cdn\/shop\/collections\/postpartum-150119.jpg?v=1714968037"}},{"id":261658149053,"handle":"pregnancy-and-maternity-products","title":"Pregnancy","updated_at":"2026-06-12T19:10:26+08:00","body_html":"\u003cp\u003eShop your pregnancy essentials below. Looking for something we don't currently stock? Please reach out and let us know.\u003cbr\u003e\u003c\/p\u003e\n\u003cp\u003e\u003cspan\u003eYou can even buy now and pay later with Afterpay!\u003c\/span\u003e\u003c\/p\u003e","published_at":"2021-03-10T12:34:22+08:00","sort_order":"best-selling","template_suffix":"pregnancy-collection","disjunctive":false,"rules":[{"column":"tag","relation":"equals","condition":"Pregnancy"}],"published_scope":"global","image":{"created_at":"2024-05-06T12:00:40+08:00","alt":"Pregnancy - The Birth Store","width":1024,"height":1536,"src":"\/\/www.thebirthstore.com.au\/cdn\/shop\/collections\/pregnancy-899677.jpg?v=1714968040"}},{"id":291456483517,"handle":"shop-all","title":"Shop All - Mum","updated_at":"2026-06-12T19:10:26+08:00","body_html":"","published_at":"2022-12-23T22:04:39+08:00","sort_order":"best-selling","template_suffix":"shop-all-collection","disjunctive":false,"rules":[{"column":"variant_price","relation":"greater_than","condition":"1"},{"column":"title","relation":"not_contains","condition":"Batteries"},{"column":"tag","relation":"equals","condition":"Mum"}],"published_scope":"global","image":{"created_at":"2024-05-06T12:00:54+08:00","alt":"Shop All - The Birth Store","width":1365,"height":2048,"src":"\/\/www.thebirthstore.com.au\/cdn\/shop\/collections\/shop-all-693176.jpg?v=1714968055"}},{"id":310045933757,"handle":"shop-all-sale","title":"Shop All Sale","updated_at":"2026-06-12T19:10:26+08:00","body_html":"","published_at":"2024-11-12T13:22:43+08:00","sort_order":"alpha-asc","template_suffix":"","disjunctive":true,"rules":[{"column":"tag","relation":"equals","condition":"Bundles"},{"column":"vendor","relation":"equals","condition":"Franjos Kitchen"},{"column":"vendor","relation":"equals","condition":"Adored Illustrations"},{"column":"vendor","relation":"equals","condition":"Amazing Oils"},{"column":"vendor","relation":"equals","condition":"Ice Ice Booby"},{"column":"vendor","relation":"equals","condition":"Made to Milk"},{"column":"vendor","relation":"equals","condition":"Milky Goodness"},{"column":"vendor","relation":"equals","condition":"Seasons of Mama"},{"column":"vendor","relation":"equals","condition":"Silverette"},{"column":"vendor","relation":"equals","condition":"Snuggle Hunny"},{"column":"vendor","relation":"equals","condition":"Yung Bod"},{"column":"vendor","relation":"equals","condition":"Bare Love"},{"column":"vendor","relation":"equals","condition":"Haakaa"},{"column":"vendor","relation":"equals","condition":"Mere Botanicals"},{"column":"vendor","relation":"equals","condition":"The Birth Store Hire"},{"column":"vendor","relation":"equals","condition":"The Birth Store"}],"published_scope":"global","image":{"created_at":"2024-11-13T10:58:16+08:00","alt":"Shop All Sale - The Birth Store","width":2048,"height":1365,"src":"\/\/www.thebirthstore.com.au\/cdn\/shop\/collections\/shop-all-sale-297361.jpg?v=1731466697"}}]}
{"item":{"id":7322273448125,"title":"Haakaa Generation 2 Silicone Breast Pump with Suction Base","handle":"generation-2-100-150ml-silicone-breast-pump-with-suction-base","description":"\u003cp data-mce-fragment=\"1\"\u003e\u003cspan data-mce-fragment=\"1\"\u003eIf you're breastfeeding, the Haakaa Silicone Breast Pump is the perfect little essential to incorporate into your nursing journey.\u003c\/span\u003e\u003c\/p\u003e\n\u003cp data-mce-fragment=\"1\"\u003eWe've updated the famous Haakaa Silicone Breast Pump! Although it works in the same way as the original Haakaa breast pump, our new pump has a few added features to make your life that little bit easier. Available in two larger capacities of 100ml and 150ml, and with a new suction base that sticks to flat surfaces to prevent accidental spills, it is the easiest and most simple way to express breast milk. \u003cbr data-mce-fragment=\"1\"\u003e\u003c\/p\u003e\n\u003cp data-mce-fragment=\"1\"\u003eMade from 100% food-grade silicone, this compact pump is perfect for long-distance trips, planes, car rides, family BBQs, or anywhere you would like to express discreetly, silently and quickly. Simply suction to your breast and let the pump do the work for you as it draws your milk using suction. It's 100% eco-friendly and safe for mum, baby and our environment.\u003c\/p\u003e\n\u003cul\u003e\n\u003cli\u003eExpress breast milk using the power of natural suction!\u003c\/li\u003e\n\u003cli\u003eMade from soft 100% food-grade silicone.\u003c\/li\u003e\n\u003cli\u003eCompact size fits perfectly into any handbag or baby bag.\u003c\/li\u003e\n\u003cli\u003eOne-piece design with no joints, cracks or edges for bacteria to harbour.\u003c\/li\u003e\n\u003cli\u003eSuction base stops accidental spills.\u003c\/li\u003e\n\u003cli\u003e100\/150ml capacity.\u003c\/li\u003e\n\u003cli\u003eNo cords, batteries or assembly required.\u003c\/li\u003e\n\u003cli\u003eEasy to use and clean.\u003c\/li\u003e\n\u003cli\u003eBPA, PVC and phthalate-free. \u003c\/li\u003e\n\u003cli\u003eMicrowave steriliser and dishwasher safe.\u003c\/li\u003e\n\u003c\/ul\u003e\n\u003cp\u003e\u003cstrong\u003eHow to Use Your Haakaa Breast Pump:\u003c\/strong\u003e\u003c\/p\u003e\n\u003col\u003e\n\u003cli\u003eSterilise your pump by boiling in water for 2-3 minutes.\u003c\/li\u003e\n\u003cli\u003ePlace the pump flange over your nipple – make sure your nipple is centred comfortably in the neck of the pump.\u003c\/li\u003e\n\u003cli\u003eApply suction – you may need to adjust the position of your pump a couple of times. Once the pump is secure and comfortable, apply suction by squeezing the base of the pump to start the flow of milk.\u003c\/li\u003e\n\u003cli\u003eOnce milk begins to flow, simply leave the pump alone to do its thing!\u003c\/li\u003e\n\u003cli\u003eWhen the pump is full, empty into a safe storage container and reposition.\u003c\/li\u003e\n\u003cli\u003eIf the flow of milk slows or you've expressed your desired amount, simply stick the suction base to a flat surface while you finish your feeding or redress.\u003c\/li\u003e\n\u003c\/ol\u003e\n\u003cp\u003eTips: Encourage let-down by placing a warm flannel on top of your breast and massaging gently. While your child is feeding, attach your Haakaa pump to the other breast to catch precious milk that would otherwise be lost in a nursing pad.\u003c\/p\u003e\n\u003cp\u003e\u003cstrong\u003eCleaning \u0026amp; Care:\u003c\/strong\u003e\u003c\/p\u003e\n\u003cp\u003e\u003cspan\u003eClean after each use. We strongly recommend cleaning and sterilising your Haakaa Breast Pump with any steam sterilising system or by boiling in water for 2-3 minutes. Do not use any bleach-based agents or sterilising tablets to clean this product. \u003c\/span\u003e\u003cspan\u003eDo not use UV sterilisers to clean this product as it may impact the lifespan of your pump.\u003c\/span\u003e\u003c\/p\u003e\n\u003cp\u003e\u003cstrong\u003eCaution:\u003c\/strong\u003e\u003c\/p\u003e\n\u003cp\u003eCheck product condition regularly. Replace if this product shows any signs of damage. Do not store near any sharp objects. Only soft bristle brushes or soft sponges should be used to clean this product as hard scourers may scratch the surface. Exposure to detergent may make the silicone in this product appear cloudy. This product is not a toy. Do not use this product for anything other than its intended use. Store product in a cool, dry place and avoid direct sunlight. Adult supervision is required. \u003c\/p\u003e\n\u003cp\u003e\u003cem\u003ePlease note: Always consult with a medical professional regarding dietary requirements if you or your child is ill or on medication. Results may vary as each woman and her milk supply are unique.\u003c\/em\u003e\u003c\/p\u003e\n\u003cp\u003eThe guidelines of health organisations should be followed at all times with regards to catching let-down\/expressing and storing milk safely.\u003c\/p\u003e","published_at":"2022-08-16T20:24:39+08:00","created_at":"2022-08-16T20:24:37+08:00","vendor":"Haakaa","type":"","tags":["Baby Shower Gifts - Mum","Breastfeeding","Hospital Bag","Mum","Post-Partum"],"price":2795,"price_min":2795,"price_max":2995,"available":true,"price_varies":true,"compare_at_price":null,"compare_at_price_min":0,"compare_at_price_max":0,"compare_at_price_varies":false,"variants":[{"id":42217014132925,"title":"100mls","option1":"100mls","option2":null,"option3":null,"sku":"","requires_shipping":true,"taxable":false,"featured_image":null,"available":true,"name":"Haakaa Generation 2 Silicone Breast Pump with Suction Base - 100mls","public_title":"100mls","options":["100mls"],"price":2795,"weight":176,"compare_at_price":null,"inventory_management":"shopify","barcode":"14132925","requires_selling_plan":false,"selling_plan_allocations":[],"quantity_rule":{"min":1,"max":null,"increment":1}},{"id":42217014165693,"title":"150mls","option1":"150mls","option2":null,"option3":null,"sku":"","requires_shipping":true,"taxable":false,"featured_image":null,"available":true,"name":"Haakaa Generation 2 Silicone Breast Pump with Suction Base - 150mls","public_title":"150mls","options":["150mls"],"price":2995,"weight":203,"compare_at_price":null,"inventory_management":"shopify","barcode":"14165693","requires_selling_plan":false,"selling_plan_allocations":[],"quantity_rule":{"min":1,"max":null,"increment":1}}],"images":["\/\/www.thebirthstore.com.au\/cdn\/shop\/files\/haakaa-generation-2-silicone-breast-pump-with-suction-base-238344.jpg?v=1714967970","\/\/www.thebirthstore.com.au\/cdn\/shop\/files\/haakaa-generation-2-silicone-breast-pump-with-suction-base-596943.jpg?v=1714967970","\/\/www.thebirthstore.com.au\/cdn\/shop\/files\/haakaa-generation-2-silicone-breast-pump-with-suction-base-809663.jpg?v=1714967970","\/\/www.thebirthstore.com.au\/cdn\/shop\/files\/haakaa-generation-2-silicone-breast-pump-with-suction-base-786701.jpg?v=1714967970","\/\/www.thebirthstore.com.au\/cdn\/shop\/files\/haakaa-generation-2-silicone-breast-pump-with-suction-base-973994.jpg?v=1714967970"],"featured_image":"\/\/www.thebirthstore.com.au\/cdn\/shop\/files\/haakaa-generation-2-silicone-breast-pump-with-suction-base-238344.jpg?v=1714967970","options":["Size"],"media":[{"alt":"Haakaa Generation 2 Silicone Breast Pump with Suction Base - The Birth Store-Haakaa","id":27007585943741,"position":1,"preview_image":{"aspect_ratio":1.0,"height":949,"width":949,"src":"\/\/www.thebirthstore.com.au\/cdn\/shop\/files\/haakaa-generation-2-silicone-breast-pump-with-suction-base-238344.jpg?v=1714967970"},"aspect_ratio":1.0,"height":949,"media_type":"image","src":"\/\/www.thebirthstore.com.au\/cdn\/shop\/files\/haakaa-generation-2-silicone-breast-pump-with-suction-base-238344.jpg?v=1714967970","width":949},{"alt":"Haakaa Generation 2 Silicone Breast Pump with Suction Base - The Birth Store-Haakaa","id":27007585976509,"position":2,"preview_image":{"aspect_ratio":1.0,"height":800,"width":800,"src":"\/\/www.thebirthstore.com.au\/cdn\/shop\/files\/haakaa-generation-2-silicone-breast-pump-with-suction-base-596943.jpg?v=1714967970"},"aspect_ratio":1.0,"height":800,"media_type":"image","src":"\/\/www.thebirthstore.com.au\/cdn\/shop\/files\/haakaa-generation-2-silicone-breast-pump-with-suction-base-596943.jpg?v=1714967970","width":800},{"alt":"Haakaa Generation 2 Silicone Breast Pump with Suction Base - The Birth Store-Haakaa","id":27007586009277,"position":3,"preview_image":{"aspect_ratio":1.0,"height":800,"width":800,"src":"\/\/www.thebirthstore.com.au\/cdn\/shop\/files\/haakaa-generation-2-silicone-breast-pump-with-suction-base-809663.jpg?v=1714967970"},"aspect_ratio":1.0,"height":800,"media_type":"image","src":"\/\/www.thebirthstore.com.au\/cdn\/shop\/files\/haakaa-generation-2-silicone-breast-pump-with-suction-base-809663.jpg?v=1714967970","width":800},{"alt":"Haakaa Generation 2 Silicone Breast Pump with Suction Base - The Birth Store-Haakaa","id":27007586042045,"position":4,"preview_image":{"aspect_ratio":1.367,"height":447,"width":611,"src":"\/\/www.thebirthstore.com.au\/cdn\/shop\/files\/haakaa-generation-2-silicone-breast-pump-with-suction-base-786701.jpg?v=1714967970"},"aspect_ratio":1.367,"height":447,"media_type":"image","src":"\/\/www.thebirthstore.com.au\/cdn\/shop\/files\/haakaa-generation-2-silicone-breast-pump-with-suction-base-786701.jpg?v=1714967970","width":611},{"alt":"Haakaa Generation 2 Silicone Breast Pump with Suction Base - The Birth Store-Haakaa","id":27007586074813,"position":5,"preview_image":{"aspect_ratio":1.086,"height":594,"width":645,"src":"\/\/www.thebirthstore.com.au\/cdn\/shop\/files\/haakaa-generation-2-silicone-breast-pump-with-suction-base-973994.jpg?v=1714967970"},"aspect_ratio":1.086,"height":594,"media_type":"image","src":"\/\/www.thebirthstore.com.au\/cdn\/shop\/files\/haakaa-generation-2-silicone-breast-pump-with-suction-base-973994.jpg?v=1714967970","width":645}],"requires_selling_plan":false,"selling_plan_groups":[],"content":"\u003cp data-mce-fragment=\"1\"\u003e\u003cspan data-mce-fragment=\"1\"\u003eIf you're breastfeeding, the Haakaa Silicone Breast Pump is the perfect little essential to incorporate into your nursing journey.\u003c\/span\u003e\u003c\/p\u003e\n\u003cp data-mce-fragment=\"1\"\u003eWe've updated the famous Haakaa Silicone Breast Pump! Although it works in the same way as the original Haakaa breast pump, our new pump has a few added features to make your life that little bit easier. Available in two larger capacities of 100ml and 150ml, and with a new suction base that sticks to flat surfaces to prevent accidental spills, it is the easiest and most simple way to express breast milk. \u003cbr data-mce-fragment=\"1\"\u003e\u003c\/p\u003e\n\u003cp data-mce-fragment=\"1\"\u003eMade from 100% food-grade silicone, this compact pump is perfect for long-distance trips, planes, car rides, family BBQs, or anywhere you would like to express discreetly, silently and quickly. Simply suction to your breast and let the pump do the work for you as it draws your milk using suction. It's 100% eco-friendly and safe for mum, baby and our environment.\u003c\/p\u003e\n\u003cul\u003e\n\u003cli\u003eExpress breast milk using the power of natural suction!\u003c\/li\u003e\n\u003cli\u003eMade from soft 100% food-grade silicone.\u003c\/li\u003e\n\u003cli\u003eCompact size fits perfectly into any handbag or baby bag.\u003c\/li\u003e\n\u003cli\u003eOne-piece design with no joints, cracks or edges for bacteria to harbour.\u003c\/li\u003e\n\u003cli\u003eSuction base stops accidental spills.\u003c\/li\u003e\n\u003cli\u003e100\/150ml capacity.\u003c\/li\u003e\n\u003cli\u003eNo cords, batteries or assembly required.\u003c\/li\u003e\n\u003cli\u003eEasy to use and clean.\u003c\/li\u003e\n\u003cli\u003eBPA, PVC and phthalate-free. \u003c\/li\u003e\n\u003cli\u003eMicrowave steriliser and dishwasher safe.\u003c\/li\u003e\n\u003c\/ul\u003e\n\u003cp\u003e\u003cstrong\u003eHow to Use Your Haakaa Breast Pump:\u003c\/strong\u003e\u003c\/p\u003e\n\u003col\u003e\n\u003cli\u003eSterilise your pump by boiling in water for 2-3 minutes.\u003c\/li\u003e\n\u003cli\u003ePlace the pump flange over your nipple – make sure your nipple is centred comfortably in the neck of the pump.\u003c\/li\u003e\n\u003cli\u003eApply suction – you may need to adjust the position of your pump a couple of times. Once the pump is secure and comfortable, apply suction by squeezing the base of the pump to start the flow of milk.\u003c\/li\u003e\n\u003cli\u003eOnce milk begins to flow, simply leave the pump alone to do its thing!\u003c\/li\u003e\n\u003cli\u003eWhen the pump is full, empty into a safe storage container and reposition.\u003c\/li\u003e\n\u003cli\u003eIf the flow of milk slows or you've expressed your desired amount, simply stick the suction base to a flat surface while you finish your feeding or redress.\u003c\/li\u003e\n\u003c\/ol\u003e\n\u003cp\u003eTips: Encourage let-down by placing a warm flannel on top of your breast and massaging gently. While your child is feeding, attach your Haakaa pump to the other breast to catch precious milk that would otherwise be lost in a nursing pad.\u003c\/p\u003e\n\u003cp\u003e\u003cstrong\u003eCleaning \u0026amp; Care:\u003c\/strong\u003e\u003c\/p\u003e\n\u003cp\u003e\u003cspan\u003eClean after each use. We strongly recommend cleaning and sterilising your Haakaa Breast Pump with any steam sterilising system or by boiling in water for 2-3 minutes. Do not use any bleach-based agents or sterilising tablets to clean this product. \u003c\/span\u003e\u003cspan\u003eDo not use UV sterilisers to clean this product as it may impact the lifespan of your pump.\u003c\/span\u003e\u003c\/p\u003e\n\u003cp\u003e\u003cstrong\u003eCaution:\u003c\/strong\u003e\u003c\/p\u003e\n\u003cp\u003eCheck product condition regularly. Replace if this product shows any signs of damage. Do not store near any sharp objects. Only soft bristle brushes or soft sponges should be used to clean this product as hard scourers may scratch the surface. Exposure to detergent may make the silicone in this product appear cloudy. This product is not a toy. Do not use this product for anything other than its intended use. Store product in a cool, dry place and avoid direct sunlight. Adult supervision is required. \u003c\/p\u003e\n\u003cp\u003e\u003cem\u003ePlease note: Always consult with a medical professional regarding dietary requirements if you or your child is ill or on medication. Results may vary as each woman and her milk supply are unique.\u003c\/em\u003e\u003c\/p\u003e\n\u003cp\u003eThe guidelines of health organisations should be followed at all times with regards to catching let-down\/expressing and storing milk safely.\u003c\/p\u003e"},"options":[{"name":"Size","position":1,"values":["100mls","150mls"]}],"custom_metafields":{},"metafields":{"badge":"\u003cdiv style='display:none' class='jdgm-prev-badge' data-average-rating='0.00' data-number-of-reviews='0' data-number-of-questions='0'\u003e \u003cspan class='jdgm-prev-badge__stars' data-score='0.00' tabindex='0' aria-label='0.00 stars' role='button'\u003e \u003cspan class='jdgm-star jdgm--off'\u003e\u003c\/span\u003e\u003cspan class='jdgm-star jdgm--off'\u003e\u003c\/span\u003e\u003cspan class='jdgm-star jdgm--off'\u003e\u003c\/span\u003e\u003cspan class='jdgm-star jdgm--off'\u003e\u003c\/span\u003e\u003cspan class='jdgm-star jdgm--off'\u003e\u003c\/span\u003e \u003c\/span\u003e \u003cspan class='jdgm-prev-badge__text'\u003e No reviews \u003c\/span\u003e \u003c\/div\u003e","widget":"\u003cdiv class='jdgm-rev-widg' data-updated-at='2025-06-13T16:12:10Z' data-average-rating='0.00' data-number-of-reviews='0' data-number-of-questions='0'\u003e \u003cstyle class='jdgm-temp-hiding-style'\u003e.jdgm-rev-widg{ display: none }\u003c\/style\u003e \u003cdiv class='jdgm-rev-widg__header'\u003e \u003ch2 class='jdgm-rev-widg__title'\u003eCustomer Reviews\u003c\/h2\u003e \u003cdiv class='jdgm-rev-widg__summary'\u003e \u003cdiv class='jdgm-rev-widg__summary-stars' aria-label='Average rating is 0.00 stars' role='img'\u003e \u003cspan class='jdgm-star jdgm--off'\u003e\u003c\/span\u003e\u003cspan class='jdgm-star jdgm--off'\u003e\u003c\/span\u003e\u003cspan class='jdgm-star jdgm--off'\u003e\u003c\/span\u003e\u003cspan class='jdgm-star jdgm--off'\u003e\u003c\/span\u003e\u003cspan class='jdgm-star jdgm--off'\u003e\u003c\/span\u003e \u003c\/div\u003e \u003cdiv class='jdgm-rev-widg__summary-text'\u003eBe the first to write a review\u003c\/div\u003e \u003c\/div\u003e \u003ca style='display: none' href='#' class='jdgm-write-rev-link' role='button'\u003eWrite a review\u003c\/a\u003e \u003cdiv class='jdgm-histogram jdgm-temp-hidden'\u003e \u003cdiv class='jdgm-histogram__row' data-rating='5' data-frequency='0' data-percentage='0'\u003e \u003cdiv class='jdgm-histogram__star' role='button' aria-label=\"0% (0) reviews with 5 star rating\" tabindex='0' \u003e\u003cspan class='jdgm-star jdgm--on'\u003e\u003c\/span\u003e\u003cspan class='jdgm-star jdgm--on'\u003e\u003c\/span\u003e\u003cspan class='jdgm-star jdgm--on'\u003e\u003c\/span\u003e\u003cspan class='jdgm-star jdgm--on'\u003e\u003c\/span\u003e\u003cspan class='jdgm-star jdgm--on'\u003e\u003c\/span\u003e\u003c\/div\u003e \u003cdiv class='jdgm-histogram__bar'\u003e \u003cdiv class='jdgm-histogram__bar-content' style='width: 0%;'\u003e \u003c\/div\u003e \u003c\/div\u003e \u003cdiv class='jdgm-histogram__percentage'\u003e0%\u003c\/div\u003e \u003cdiv class='jdgm-histogram__frequency'\u003e(0)\u003c\/div\u003e \u003c\/div\u003e \u003cdiv class='jdgm-histogram__row' data-rating='4' data-frequency='0' data-percentage='0'\u003e \u003cdiv class='jdgm-histogram__star' role='button' aria-label=\"0% (0) reviews with 4 star rating\" tabindex='0' \u003e\u003cspan class='jdgm-star jdgm--on'\u003e\u003c\/span\u003e\u003cspan class='jdgm-star jdgm--on'\u003e\u003c\/span\u003e\u003cspan class='jdgm-star jdgm--on'\u003e\u003c\/span\u003e\u003cspan class='jdgm-star jdgm--on'\u003e\u003c\/span\u003e\u003cspan class='jdgm-star jdgm--off'\u003e\u003c\/span\u003e\u003c\/div\u003e \u003cdiv class='jdgm-histogram__bar'\u003e \u003cdiv class='jdgm-histogram__bar-content' style='width: 0%;'\u003e \u003c\/div\u003e \u003c\/div\u003e \u003cdiv class='jdgm-histogram__percentage'\u003e0%\u003c\/div\u003e \u003cdiv class='jdgm-histogram__frequency'\u003e(0)\u003c\/div\u003e \u003c\/div\u003e \u003cdiv class='jdgm-histogram__row' data-rating='3' data-frequency='0' data-percentage='0'\u003e \u003cdiv class='jdgm-histogram__star' role='button' aria-label=\"0% (0) reviews with 3 star rating\" tabindex='0' \u003e\u003cspan class='jdgm-star jdgm--on'\u003e\u003c\/span\u003e\u003cspan class='jdgm-star jdgm--on'\u003e\u003c\/span\u003e\u003cspan class='jdgm-star jdgm--on'\u003e\u003c\/span\u003e\u003cspan class='jdgm-star jdgm--off'\u003e\u003c\/span\u003e\u003cspan class='jdgm-star jdgm--off'\u003e\u003c\/span\u003e\u003c\/div\u003e \u003cdiv class='jdgm-histogram__bar'\u003e \u003cdiv class='jdgm-histogram__bar-content' style='width: 0%;'\u003e \u003c\/div\u003e \u003c\/div\u003e \u003cdiv class='jdgm-histogram__percentage'\u003e0%\u003c\/div\u003e \u003cdiv class='jdgm-histogram__frequency'\u003e(0)\u003c\/div\u003e \u003c\/div\u003e \u003cdiv class='jdgm-histogram__row' data-rating='2' data-frequency='0' data-percentage='0'\u003e \u003cdiv class='jdgm-histogram__star' role='button' aria-label=\"0% (0) reviews with 2 star rating\" tabindex='0' \u003e\u003cspan class='jdgm-star jdgm--on'\u003e\u003c\/span\u003e\u003cspan class='jdgm-star jdgm--on'\u003e\u003c\/span\u003e\u003cspan class='jdgm-star jdgm--off'\u003e\u003c\/span\u003e\u003cspan class='jdgm-star jdgm--off'\u003e\u003c\/span\u003e\u003cspan class='jdgm-star jdgm--off'\u003e\u003c\/span\u003e\u003c\/div\u003e \u003cdiv class='jdgm-histogram__bar'\u003e \u003cdiv class='jdgm-histogram__bar-content' style='width: 0%;'\u003e \u003c\/div\u003e \u003c\/div\u003e \u003cdiv class='jdgm-histogram__percentage'\u003e0%\u003c\/div\u003e \u003cdiv class='jdgm-histogram__frequency'\u003e(0)\u003c\/div\u003e \u003c\/div\u003e \u003cdiv class='jdgm-histogram__row' data-rating='1' data-frequency='0' data-percentage='0'\u003e \u003cdiv class='jdgm-histogram__star' role='button' aria-label=\"0% (0) reviews with 1 star rating\" tabindex='0' \u003e\u003cspan class='jdgm-star jdgm--on'\u003e\u003c\/span\u003e\u003cspan class='jdgm-star jdgm--off'\u003e\u003c\/span\u003e\u003cspan class='jdgm-star jdgm--off'\u003e\u003c\/span\u003e\u003cspan class='jdgm-star jdgm--off'\u003e\u003c\/span\u003e\u003cspan class='jdgm-star jdgm--off'\u003e\u003c\/span\u003e\u003c\/div\u003e \u003cdiv class='jdgm-histogram__bar'\u003e \u003cdiv class='jdgm-histogram__bar-content' style='width: 0%;'\u003e \u003c\/div\u003e \u003c\/div\u003e \u003cdiv class='jdgm-histogram__percentage'\u003e0%\u003c\/div\u003e \u003cdiv class='jdgm-histogram__frequency'\u003e(0)\u003c\/div\u003e \u003c\/div\u003e \u003cdiv class='jdgm-histogram__row jdgm-histogram__clear-filter' data-rating=null tabindex='0'\u003e\u003c\/div\u003e \u003c\/div\u003e \u003cdiv class='jdgm-rev-widg__sort-wrapper'\u003e\u003c\/div\u003e \u003c\/div\u003e \u003cdiv class='jdgm-rev-widg__body'\u003e \u003cdiv class='jdgm-rev-widg__reviews'\u003e\u003c\/div\u003e \u003cdiv class='jdgm-paginate' data-per-page='10' data-url='https:\/\/api.judge.me\/reviews\/reviews_for_widget' style=\"display: none;\"\u003e\u003c\/div\u003e \u003c\/div\u003e \u003cdiv class='jdgm-rev-widg__paginate-spinner-wrapper'\u003e \u003cdiv class='jdgm-spinner'\u003e\u003c\/div\u003e \u003c\/div\u003e \u003c\/div\u003e"},"collections":[{"id":281356533949,"handle":"baby-shower-gifts","title":"Baby Shower Gifts - Mum","updated_at":"2026-06-12T19:10:25+08:00","body_html":"\u003cp\u003eLooking for a unique baby shower gift? Or an all-in-one bundle pack to suit all your needs? We've got just the thing!\u003c\/p\u003e","published_at":"2021-12-06T13:43:56+08:00","sort_order":"best-selling","template_suffix":"baby-shower-gifts","disjunctive":true,"rules":[{"column":"tag","relation":"equals","condition":"Baby Shower Gifts - Mum"},{"column":"tag","relation":"equals","condition":"Gift Card"}],"published_scope":"global","image":{"created_at":"2024-05-06T11:59:28+08:00","alt":"Baby Shower Gifts - The Birth Store","width":1200,"height":1800,"src":"\/\/www.thebirthstore.com.au\/cdn\/shop\/collections\/baby-shower-gifts-401770.jpg?v=1761791272"}},{"id":281712427197,"handle":"breastfeeding","title":"Breastfeeding","updated_at":"2026-06-12T19:10:26+08:00","body_html":"","published_at":"2021-12-20T14:19:33+08:00","sort_order":"best-selling","template_suffix":"breastfeeding-collection","disjunctive":false,"rules":[{"column":"tag","relation":"equals","condition":"Breastfeeding"}],"published_scope":"global","image":{"created_at":"2024-05-06T11:59:34+08:00","alt":"Breastfeeding - The Birth Store","width":620,"height":635,"src":"\/\/www.thebirthstore.com.au\/cdn\/shop\/collections\/breastfeeding-793872.jpg?v=1714967974"}},{"id":261657460925,"handle":"buy","title":"Buy","updated_at":"2026-06-12T19:10:26+08:00","body_html":"\u003cp\u003eBrowse all of our pregnancy, labour \u0026amp; birth, postpartum and baby essentials here.\u003cbr\u003e\u003c\/p\u003e\n\u003cp\u003e\u003cspan\u003eYou can even buy now and pay later with Afterpay!\u003c\/span\u003e\u003c\/p\u003e","published_at":"2021-03-10T12:05:31+08:00","sort_order":"best-selling","template_suffix":"shop-all-collection","disjunctive":false,"rules":[{"column":"title","relation":"not_contains","condition":"Hire"}],"published_scope":"global","image":{"created_at":"2024-05-06T11:59:42+08:00","alt":"Buy - The Birth Store","width":2048,"height":2048,"src":"\/\/www.thebirthstore.com.au\/cdn\/shop\/collections\/buy-964856.jpg?v=1714967982"}},{"id":337429201085,"handle":"hospital-bag","title":"Hospital Bag","updated_at":"2026-06-12T19:10:26+08:00","body_html":"","published_at":"2026-06-03T11:36:29+08:00","sort_order":"most-relevant","template_suffix":"","disjunctive":false,"rules":[{"column":"tag","relation":"equals","condition":"Hospital Bag"}],"published_scope":"global"},{"id":261658083517,"handle":"post-partum","title":"Postpartum","updated_at":"2026-06-12T19:10:26+08:00","body_html":"\u003cp\u003eShop your postpartum and hospital bag essentials below. Looking for something we don't currently stock? Please reach out and let us know.\u003cbr\u003e\u003c\/p\u003e\n\u003cp\u003e\u003cspan\u003eYou can even buy now and pay later with Afterpay!\u003c\/span\u003e\u003c\/p\u003e","published_at":"2021-03-10T12:33:47+08:00","sort_order":"best-selling","template_suffix":"postpartum-collection","disjunctive":false,"rules":[{"column":"tag","relation":"equals","condition":"Post-Partum"}],"published_scope":"global","image":{"created_at":"2024-05-06T12:00:36+08:00","alt":"Postpartum - The Birth Store","width":611,"height":702,"src":"\/\/www.thebirthstore.com.au\/cdn\/shop\/collections\/postpartum-150119.jpg?v=1714968037"}},{"id":291456483517,"handle":"shop-all","title":"Shop All - Mum","updated_at":"2026-06-12T19:10:26+08:00","body_html":"","published_at":"2022-12-23T22:04:39+08:00","sort_order":"best-selling","template_suffix":"shop-all-collection","disjunctive":false,"rules":[{"column":"variant_price","relation":"greater_than","condition":"1"},{"column":"title","relation":"not_contains","condition":"Batteries"},{"column":"tag","relation":"equals","condition":"Mum"}],"published_scope":"global","image":{"created_at":"2024-05-06T12:00:54+08:00","alt":"Shop All - The Birth Store","width":1365,"height":2048,"src":"\/\/www.thebirthstore.com.au\/cdn\/shop\/collections\/shop-all-693176.jpg?v=1714968055"}},{"id":310045933757,"handle":"shop-all-sale","title":"Shop All Sale","updated_at":"2026-06-12T19:10:26+08:00","body_html":"","published_at":"2024-11-12T13:22:43+08:00","sort_order":"alpha-asc","template_suffix":"","disjunctive":true,"rules":[{"column":"tag","relation":"equals","condition":"Bundles"},{"column":"vendor","relation":"equals","condition":"Franjos Kitchen"},{"column":"vendor","relation":"equals","condition":"Adored Illustrations"},{"column":"vendor","relation":"equals","condition":"Amazing Oils"},{"column":"vendor","relation":"equals","condition":"Ice Ice Booby"},{"column":"vendor","relation":"equals","condition":"Made to Milk"},{"column":"vendor","relation":"equals","condition":"Milky Goodness"},{"column":"vendor","relation":"equals","condition":"Seasons of Mama"},{"column":"vendor","relation":"equals","condition":"Silverette"},{"column":"vendor","relation":"equals","condition":"Snuggle Hunny"},{"column":"vendor","relation":"equals","condition":"Yung Bod"},{"column":"vendor","relation":"equals","condition":"Bare Love"},{"column":"vendor","relation":"equals","condition":"Haakaa"},{"column":"vendor","relation":"equals","condition":"Mere Botanicals"},{"column":"vendor","relation":"equals","condition":"The Birth Store Hire"},{"column":"vendor","relation":"equals","condition":"The Birth Store"}],"published_scope":"global","image":{"created_at":"2024-11-13T10:58:16+08:00","alt":"Shop All Sale - The Birth Store","width":2048,"height":1365,"src":"\/\/www.thebirthstore.com.au\/cdn\/shop\/collections\/shop-all-sale-297361.jpg?v=1731466697"}}]}
{"item":{"id":7455628984509,"title":"Antenatal Colostrum Expressing Kit","handle":"antenatal-colostrum-expressing-kit","description":"\u003cp\u003e\u003cmeta charset=\"utf-8\"\u003e\u003cspan\u003eThe Milky Goodness Antenatal Colostrum Expressing Kit is a comprehensive yet convenient kit designed to help you prepare \u0026amp; store your expressed colostrum. This kit is perfect for a new mum or those experienced in this wonderful journey of motherhood.\u003c\/span\u003e\u003c\/p\u003e","published_at":"2023-03-22T14:05:32+08:00","created_at":"2023-03-22T14:05:32+08:00","vendor":"Milky Goodness","type":"","tags":["Breastfeeding","Hospital Bag","Labour Preparation","Labour Progression","Lactation Products","Mum","Pregnancy"],"price":3295,"price_min":3295,"price_max":3295,"available":true,"price_varies":false,"compare_at_price":null,"compare_at_price_min":0,"compare_at_price_max":0,"compare_at_price_varies":false,"variants":[{"id":42740024148157,"title":"Default Title","option1":"Default Title","option2":null,"option3":null,"sku":"","requires_shipping":true,"taxable":false,"featured_image":null,"available":true,"name":"Antenatal Colostrum Expressing Kit","public_title":null,"options":["Default Title"],"price":3295,"weight":104,"compare_at_price":null,"inventory_management":"shopify","barcode":"24148157","requires_selling_plan":false,"selling_plan_allocations":[],"quantity_rule":{"min":1,"max":null,"increment":1}}],"images":["\/\/www.thebirthstore.com.au\/cdn\/shop\/files\/antenatal-colostrum-expressing-kit-299493.jpg?v=1714967953","\/\/www.thebirthstore.com.au\/cdn\/shop\/files\/antenatal-colostrum-expressing-kit-582565.jpg?v=1714967953","\/\/www.thebirthstore.com.au\/cdn\/shop\/files\/antenatal-colostrum-expressing-kit-536934.jpg?v=1714967953","\/\/www.thebirthstore.com.au\/cdn\/shop\/files\/antenatal-colostrum-expressing-kit-835314.jpg?v=1714967953","\/\/www.thebirthstore.com.au\/cdn\/shop\/files\/antenatal-colostrum-expressing-kit-315192.jpg?v=1714967953","\/\/www.thebirthstore.com.au\/cdn\/shop\/files\/antenatal-colostrum-expressing-kit-917437.jpg?v=1714967953"],"featured_image":"\/\/www.thebirthstore.com.au\/cdn\/shop\/files\/antenatal-colostrum-expressing-kit-299493.jpg?v=1714967953","options":["Title"],"media":[{"alt":"Antenatal Colostrum Expressing Kit - The Birth Store-Milky Goodness","id":27007581388989,"position":1,"preview_image":{"aspect_ratio":1.0,"height":2048,"width":2048,"src":"\/\/www.thebirthstore.com.au\/cdn\/shop\/files\/antenatal-colostrum-expressing-kit-299493.jpg?v=1714967953"},"aspect_ratio":1.0,"height":2048,"media_type":"image","src":"\/\/www.thebirthstore.com.au\/cdn\/shop\/files\/antenatal-colostrum-expressing-kit-299493.jpg?v=1714967953","width":2048},{"alt":"Antenatal Colostrum Expressing Kit - The Birth Store-Milky Goodness","id":27007581421757,"position":2,"preview_image":{"aspect_ratio":0.75,"height":2048,"width":1536,"src":"\/\/www.thebirthstore.com.au\/cdn\/shop\/files\/antenatal-colostrum-expressing-kit-582565.jpg?v=1714967953"},"aspect_ratio":0.75,"height":2048,"media_type":"image","src":"\/\/www.thebirthstore.com.au\/cdn\/shop\/files\/antenatal-colostrum-expressing-kit-582565.jpg?v=1714967953","width":1536},{"alt":"Antenatal Colostrum Expressing Kit - The Birth Store-Milky Goodness","id":27007581454525,"position":3,"preview_image":{"aspect_ratio":1.0,"height":800,"width":800,"src":"\/\/www.thebirthstore.com.au\/cdn\/shop\/files\/antenatal-colostrum-expressing-kit-536934.jpg?v=1714967953"},"aspect_ratio":1.0,"height":800,"media_type":"image","src":"\/\/www.thebirthstore.com.au\/cdn\/shop\/files\/antenatal-colostrum-expressing-kit-536934.jpg?v=1714967953","width":800},{"alt":"Antenatal Colostrum Expressing Kit - The Birth Store-Milky Goodness","id":27007581487293,"position":4,"preview_image":{"aspect_ratio":1.0,"height":300,"width":300,"src":"\/\/www.thebirthstore.com.au\/cdn\/shop\/files\/antenatal-colostrum-expressing-kit-835314.jpg?v=1714967953"},"aspect_ratio":1.0,"height":300,"media_type":"image","src":"\/\/www.thebirthstore.com.au\/cdn\/shop\/files\/antenatal-colostrum-expressing-kit-835314.jpg?v=1714967953","width":300},{"alt":"Antenatal Colostrum Expressing Kit - The Birth Store-Milky Goodness","id":27007581520061,"position":5,"preview_image":{"aspect_ratio":0.75,"height":2048,"width":1536,"src":"\/\/www.thebirthstore.com.au\/cdn\/shop\/files\/antenatal-colostrum-expressing-kit-315192.jpg?v=1714967953"},"aspect_ratio":0.75,"height":2048,"media_type":"image","src":"\/\/www.thebirthstore.com.au\/cdn\/shop\/files\/antenatal-colostrum-expressing-kit-315192.jpg?v=1714967953","width":1536},{"alt":"Antenatal Colostrum Expressing Kit - The Birth Store-Milky Goodness","id":27007581552829,"position":6,"preview_image":{"aspect_ratio":0.75,"height":2048,"width":1536,"src":"\/\/www.thebirthstore.com.au\/cdn\/shop\/files\/antenatal-colostrum-expressing-kit-917437.jpg?v=1714967953"},"aspect_ratio":0.75,"height":2048,"media_type":"image","src":"\/\/www.thebirthstore.com.au\/cdn\/shop\/files\/antenatal-colostrum-expressing-kit-917437.jpg?v=1714967953","width":1536}],"requires_selling_plan":false,"selling_plan_groups":[],"content":"\u003cp\u003e\u003cmeta charset=\"utf-8\"\u003e\u003cspan\u003eThe Milky Goodness Antenatal Colostrum Expressing Kit is a comprehensive yet convenient kit designed to help you prepare \u0026amp; store your expressed colostrum. This kit is perfect for a new mum or those experienced in this wonderful journey of motherhood.\u003c\/span\u003e\u003c\/p\u003e"},"options":[{"name":"Title","position":1,"values":["Default Title"]}],"custom_metafields":{},"metafields":{"badge":"\u003cdiv style='display:none' class='jdgm-prev-badge' data-average-rating='0.00' data-number-of-reviews='0' data-number-of-questions='0'\u003e \u003cspan class='jdgm-prev-badge__stars' data-score='0.00' tabindex='0' aria-label='0.00 stars' role='button'\u003e \u003cspan class='jdgm-star jdgm--off'\u003e\u003c\/span\u003e\u003cspan class='jdgm-star jdgm--off'\u003e\u003c\/span\u003e\u003cspan class='jdgm-star jdgm--off'\u003e\u003c\/span\u003e\u003cspan class='jdgm-star jdgm--off'\u003e\u003c\/span\u003e\u003cspan class='jdgm-star jdgm--off'\u003e\u003c\/span\u003e \u003c\/span\u003e \u003cspan class='jdgm-prev-badge__text'\u003e No reviews \u003c\/span\u003e \u003c\/div\u003e","widget":"\u003cdiv class='jdgm-rev-widg' data-updated-at='2025-06-13T16:12:53Z' data-average-rating='0.00' data-number-of-reviews='0' data-number-of-questions='0'\u003e \u003cstyle class='jdgm-temp-hiding-style'\u003e.jdgm-rev-widg{ display: none }\u003c\/style\u003e \u003cdiv class='jdgm-rev-widg__header'\u003e \u003ch2 class='jdgm-rev-widg__title'\u003eCustomer Reviews\u003c\/h2\u003e \u003cdiv class='jdgm-rev-widg__summary'\u003e \u003cdiv class='jdgm-rev-widg__summary-stars' aria-label='Average rating is 0.00 stars' role='img'\u003e \u003cspan class='jdgm-star jdgm--off'\u003e\u003c\/span\u003e\u003cspan class='jdgm-star jdgm--off'\u003e\u003c\/span\u003e\u003cspan class='jdgm-star jdgm--off'\u003e\u003c\/span\u003e\u003cspan class='jdgm-star jdgm--off'\u003e\u003c\/span\u003e\u003cspan class='jdgm-star jdgm--off'\u003e\u003c\/span\u003e \u003c\/div\u003e \u003cdiv class='jdgm-rev-widg__summary-text'\u003eBe the first to write a review\u003c\/div\u003e \u003c\/div\u003e \u003ca style='display: none' href='#' class='jdgm-write-rev-link' role='button'\u003eWrite a review\u003c\/a\u003e \u003cdiv class='jdgm-histogram jdgm-temp-hidden'\u003e \u003cdiv class='jdgm-histogram__row' data-rating='5' data-frequency='0' data-percentage='0'\u003e \u003cdiv class='jdgm-histogram__star' role='button' aria-label=\"0% (0) reviews with 5 star rating\" tabindex='0' \u003e\u003cspan class='jdgm-star jdgm--on'\u003e\u003c\/span\u003e\u003cspan class='jdgm-star jdgm--on'\u003e\u003c\/span\u003e\u003cspan class='jdgm-star jdgm--on'\u003e\u003c\/span\u003e\u003cspan class='jdgm-star jdgm--on'\u003e\u003c\/span\u003e\u003cspan class='jdgm-star jdgm--on'\u003e\u003c\/span\u003e\u003c\/div\u003e \u003cdiv class='jdgm-histogram__bar'\u003e \u003cdiv class='jdgm-histogram__bar-content' style='width: 0%;'\u003e \u003c\/div\u003e \u003c\/div\u003e \u003cdiv class='jdgm-histogram__percentage'\u003e0%\u003c\/div\u003e \u003cdiv class='jdgm-histogram__frequency'\u003e(0)\u003c\/div\u003e \u003c\/div\u003e \u003cdiv class='jdgm-histogram__row' data-rating='4' data-frequency='0' data-percentage='0'\u003e \u003cdiv class='jdgm-histogram__star' role='button' aria-label=\"0% (0) reviews with 4 star rating\" tabindex='0' \u003e\u003cspan class='jdgm-star jdgm--on'\u003e\u003c\/span\u003e\u003cspan class='jdgm-star jdgm--on'\u003e\u003c\/span\u003e\u003cspan class='jdgm-star jdgm--on'\u003e\u003c\/span\u003e\u003cspan class='jdgm-star jdgm--on'\u003e\u003c\/span\u003e\u003cspan class='jdgm-star jdgm--off'\u003e\u003c\/span\u003e\u003c\/div\u003e \u003cdiv class='jdgm-histogram__bar'\u003e \u003cdiv class='jdgm-histogram__bar-content' style='width: 0%;'\u003e \u003c\/div\u003e \u003c\/div\u003e \u003cdiv class='jdgm-histogram__percentage'\u003e0%\u003c\/div\u003e \u003cdiv class='jdgm-histogram__frequency'\u003e(0)\u003c\/div\u003e \u003c\/div\u003e \u003cdiv class='jdgm-histogram__row' data-rating='3' data-frequency='0' data-percentage='0'\u003e \u003cdiv class='jdgm-histogram__star' role='button' aria-label=\"0% (0) reviews with 3 star rating\" tabindex='0' \u003e\u003cspan class='jdgm-star jdgm--on'\u003e\u003c\/span\u003e\u003cspan class='jdgm-star jdgm--on'\u003e\u003c\/span\u003e\u003cspan class='jdgm-star jdgm--on'\u003e\u003c\/span\u003e\u003cspan class='jdgm-star jdgm--off'\u003e\u003c\/span\u003e\u003cspan class='jdgm-star jdgm--off'\u003e\u003c\/span\u003e\u003c\/div\u003e \u003cdiv class='jdgm-histogram__bar'\u003e \u003cdiv class='jdgm-histogram__bar-content' style='width: 0%;'\u003e \u003c\/div\u003e \u003c\/div\u003e \u003cdiv class='jdgm-histogram__percentage'\u003e0%\u003c\/div\u003e \u003cdiv class='jdgm-histogram__frequency'\u003e(0)\u003c\/div\u003e \u003c\/div\u003e \u003cdiv class='jdgm-histogram__row' data-rating='2' data-frequency='0' data-percentage='0'\u003e \u003cdiv class='jdgm-histogram__star' role='button' aria-label=\"0% (0) reviews with 2 star rating\" tabindex='0' \u003e\u003cspan class='jdgm-star jdgm--on'\u003e\u003c\/span\u003e\u003cspan class='jdgm-star jdgm--on'\u003e\u003c\/span\u003e\u003cspan class='jdgm-star jdgm--off'\u003e\u003c\/span\u003e\u003cspan class='jdgm-star jdgm--off'\u003e\u003c\/span\u003e\u003cspan class='jdgm-star jdgm--off'\u003e\u003c\/span\u003e\u003c\/div\u003e \u003cdiv class='jdgm-histogram__bar'\u003e \u003cdiv class='jdgm-histogram__bar-content' style='width: 0%;'\u003e \u003c\/div\u003e \u003c\/div\u003e \u003cdiv class='jdgm-histogram__percentage'\u003e0%\u003c\/div\u003e \u003cdiv class='jdgm-histogram__frequency'\u003e(0)\u003c\/div\u003e \u003c\/div\u003e \u003cdiv class='jdgm-histogram__row' data-rating='1' data-frequency='0' data-percentage='0'\u003e \u003cdiv class='jdgm-histogram__star' role='button' aria-label=\"0% (0) reviews with 1 star rating\" tabindex='0' \u003e\u003cspan class='jdgm-star jdgm--on'\u003e\u003c\/span\u003e\u003cspan class='jdgm-star jdgm--off'\u003e\u003c\/span\u003e\u003cspan class='jdgm-star jdgm--off'\u003e\u003c\/span\u003e\u003cspan class='jdgm-star jdgm--off'\u003e\u003c\/span\u003e\u003cspan class='jdgm-star jdgm--off'\u003e\u003c\/span\u003e\u003c\/div\u003e \u003cdiv class='jdgm-histogram__bar'\u003e \u003cdiv class='jdgm-histogram__bar-content' style='width: 0%;'\u003e \u003c\/div\u003e \u003c\/div\u003e \u003cdiv class='jdgm-histogram__percentage'\u003e0%\u003c\/div\u003e \u003cdiv class='jdgm-histogram__frequency'\u003e(0)\u003c\/div\u003e \u003c\/div\u003e \u003cdiv class='jdgm-histogram__row jdgm-histogram__clear-filter' data-rating=null tabindex='0'\u003e\u003c\/div\u003e \u003c\/div\u003e \u003cdiv class='jdgm-rev-widg__sort-wrapper'\u003e\u003c\/div\u003e \u003c\/div\u003e \u003cdiv class='jdgm-rev-widg__body'\u003e \u003cdiv class='jdgm-rev-widg__reviews'\u003e\u003c\/div\u003e \u003cdiv class='jdgm-paginate' data-per-page='10' data-url='https:\/\/api.judge.me\/reviews\/reviews_for_widget' style=\"display: none;\"\u003e\u003c\/div\u003e \u003c\/div\u003e \u003cdiv class='jdgm-rev-widg__paginate-spinner-wrapper'\u003e \u003cdiv class='jdgm-spinner'\u003e\u003c\/div\u003e \u003c\/div\u003e \u003c\/div\u003e"},"collections":[{"id":281712427197,"handle":"breastfeeding","title":"Breastfeeding","updated_at":"2026-06-12T19:10:26+08:00","body_html":"","published_at":"2021-12-20T14:19:33+08:00","sort_order":"best-selling","template_suffix":"breastfeeding-collection","disjunctive":false,"rules":[{"column":"tag","relation":"equals","condition":"Breastfeeding"}],"published_scope":"global","image":{"created_at":"2024-05-06T11:59:34+08:00","alt":"Breastfeeding - The Birth Store","width":620,"height":635,"src":"\/\/www.thebirthstore.com.au\/cdn\/shop\/collections\/breastfeeding-793872.jpg?v=1714967974"}},{"id":261657460925,"handle":"buy","title":"Buy","updated_at":"2026-06-12T19:10:26+08:00","body_html":"\u003cp\u003eBrowse all of our pregnancy, labour \u0026amp; birth, postpartum and baby essentials here.\u003cbr\u003e\u003c\/p\u003e\n\u003cp\u003e\u003cspan\u003eYou can even buy now and pay later with Afterpay!\u003c\/span\u003e\u003c\/p\u003e","published_at":"2021-03-10T12:05:31+08:00","sort_order":"best-selling","template_suffix":"shop-all-collection","disjunctive":false,"rules":[{"column":"title","relation":"not_contains","condition":"Hire"}],"published_scope":"global","image":{"created_at":"2024-05-06T11:59:42+08:00","alt":"Buy - The Birth Store","width":2048,"height":2048,"src":"\/\/www.thebirthstore.com.au\/cdn\/shop\/collections\/buy-964856.jpg?v=1714967982"}},{"id":337429201085,"handle":"hospital-bag","title":"Hospital Bag","updated_at":"2026-06-12T19:10:26+08:00","body_html":"","published_at":"2026-06-03T11:36:29+08:00","sort_order":"most-relevant","template_suffix":"","disjunctive":false,"rules":[{"column":"tag","relation":"equals","condition":"Hospital Bag"}],"published_scope":"global"},{"id":281712558269,"handle":"labour-aids","title":"Labour Aids","updated_at":"2026-06-12T19:10:26+08:00","body_html":"","published_at":"2021-12-20T14:22:16+08:00","sort_order":"best-selling","template_suffix":"labour-aids-collection","disjunctive":false,"rules":[{"column":"tag","relation":"equals","condition":"Labour Progression"}],"published_scope":"global","image":{"created_at":"2024-05-06T12:00:11+08:00","alt":"Labour Aids - The Birth Store","width":1365,"height":2048,"src":"\/\/www.thebirthstore.com.au\/cdn\/shop\/collections\/labour-aids-211824.jpg?v=1714968012"}},{"id":281712525501,"handle":"labour-preparation","title":"Labour Preparation","updated_at":"2026-06-12T19:10:26+08:00","body_html":"","published_at":"2021-12-20T14:20:12+08:00","sort_order":"best-selling","template_suffix":"labour-preparation-collec","disjunctive":false,"rules":[{"column":"tag","relation":"equals","condition":"Labour Preparation"}],"published_scope":"global","image":{"created_at":"2024-05-06T12:00:13+08:00","alt":"Labour Preparation - The Birth Store","width":1024,"height":1536,"src":"\/\/www.thebirthstore.com.au\/cdn\/shop\/collections\/labour-preparation-271961.jpg?v=1714968013"}},{"id":292919476413,"handle":"lactation-products","title":"Lactation Products","updated_at":"2026-06-12T19:10:26+08:00","body_html":"","published_at":"2023-03-22T12:22:41+08:00","sort_order":"best-selling","template_suffix":"lactation-products-collec","disjunctive":false,"rules":[{"column":"tag","relation":"equals","condition":"Lactation Products"}],"published_scope":"global","image":{"created_at":"2024-05-06T12:00:19+08:00","alt":"Lactation Products - The Birth Store","width":1034,"height":922,"src":"\/\/www.thebirthstore.com.au\/cdn\/shop\/collections\/lactation-products-752907.jpg?v=1714968019"}},{"id":261658149053,"handle":"pregnancy-and-maternity-products","title":"Pregnancy","updated_at":"2026-06-12T19:10:26+08:00","body_html":"\u003cp\u003eShop your pregnancy essentials below. Looking for something we don't currently stock? Please reach out and let us know.\u003cbr\u003e\u003c\/p\u003e\n\u003cp\u003e\u003cspan\u003eYou can even buy now and pay later with Afterpay!\u003c\/span\u003e\u003c\/p\u003e","published_at":"2021-03-10T12:34:22+08:00","sort_order":"best-selling","template_suffix":"pregnancy-collection","disjunctive":false,"rules":[{"column":"tag","relation":"equals","condition":"Pregnancy"}],"published_scope":"global","image":{"created_at":"2024-05-06T12:00:40+08:00","alt":"Pregnancy - The Birth Store","width":1024,"height":1536,"src":"\/\/www.thebirthstore.com.au\/cdn\/shop\/collections\/pregnancy-899677.jpg?v=1714968040"}},{"id":291456483517,"handle":"shop-all","title":"Shop All - Mum","updated_at":"2026-06-12T19:10:26+08:00","body_html":"","published_at":"2022-12-23T22:04:39+08:00","sort_order":"best-selling","template_suffix":"shop-all-collection","disjunctive":false,"rules":[{"column":"variant_price","relation":"greater_than","condition":"1"},{"column":"title","relation":"not_contains","condition":"Batteries"},{"column":"tag","relation":"equals","condition":"Mum"}],"published_scope":"global","image":{"created_at":"2024-05-06T12:00:54+08:00","alt":"Shop All - The Birth Store","width":1365,"height":2048,"src":"\/\/www.thebirthstore.com.au\/cdn\/shop\/collections\/shop-all-693176.jpg?v=1714968055"}},{"id":310045933757,"handle":"shop-all-sale","title":"Shop All Sale","updated_at":"2026-06-12T19:10:26+08:00","body_html":"","published_at":"2024-11-12T13:22:43+08:00","sort_order":"alpha-asc","template_suffix":"","disjunctive":true,"rules":[{"column":"tag","relation":"equals","condition":"Bundles"},{"column":"vendor","relation":"equals","condition":"Franjos Kitchen"},{"column":"vendor","relation":"equals","condition":"Adored Illustrations"},{"column":"vendor","relation":"equals","condition":"Amazing Oils"},{"column":"vendor","relation":"equals","condition":"Ice Ice Booby"},{"column":"vendor","relation":"equals","condition":"Made to Milk"},{"column":"vendor","relation":"equals","condition":"Milky Goodness"},{"column":"vendor","relation":"equals","condition":"Seasons of Mama"},{"column":"vendor","relation":"equals","condition":"Silverette"},{"column":"vendor","relation":"equals","condition":"Snuggle Hunny"},{"column":"vendor","relation":"equals","condition":"Yung Bod"},{"column":"vendor","relation":"equals","condition":"Bare Love"},{"column":"vendor","relation":"equals","condition":"Haakaa"},{"column":"vendor","relation":"equals","condition":"Mere Botanicals"},{"column":"vendor","relation":"equals","condition":"The Birth Store Hire"},{"column":"vendor","relation":"equals","condition":"The Birth Store"}],"published_scope":"global","image":{"created_at":"2024-11-13T10:58:16+08:00","alt":"Shop All Sale - The Birth Store","width":2048,"height":1365,"src":"\/\/www.thebirthstore.com.au\/cdn\/shop\/collections\/shop-all-sale-297361.jpg?v=1731466697"}}]}
{"item":{"id":7973359091901,"title":"Breast \u0026 Perineal Recovery Ice \u0026 Heat Packs","handle":"breast-perineal-recovery-ice-heat-packs","description":"\u003cp data-pm-slice=\"1 1 []\"\u003e\u003cspan\u003eWhen your body is healing after birth, every little bit of comfort counts. Our Breast \u0026amp; Perineal Recovery Ice \u0026amp; Heat Pack Set is the ultimate postpartum care duo — designed to provide relief from top to bottom.\u003c\/span\u003e\u003c\/p\u003e\n\u003cp\u003e\u003cspan\u003e\u003cstrong\u003eTo Help With:\u003c\/strong\u003e\u003c\/span\u003e\u003c\/p\u003e\n\u003cul data-spread=\"false\"\u003e\n\u003cli\u003e\n\u003cp\u003e\u003cspan\u003eEngorgement, mastitis, and blocked ducts\u003c\/span\u003e\u003c\/p\u003e\n\u003c\/li\u003e\n\u003cli\u003e\n\u003cp\u003e\u003cspan\u003ePerineal swelling and discomfort\u003c\/span\u003e\u003c\/p\u003e\n\u003c\/li\u003e\n\u003cli\u003e\n\u003cp\u003e\u003cspan\u003ePostpartum stitches and tearing\u003c\/span\u003e\u003c\/p\u003e\n\u003c\/li\u003e\n\u003cli\u003e\n\u003cp\u003e\u003cspan\u003eGeneral breast and perineal tenderness\u003c\/span\u003e\u003c\/p\u003e\n\u003c\/li\u003e\n\u003c\/ul\u003e\n\u003cp\u003e\u003cspan\u003e\u003cstrong\u003eFeatures:\u003c\/strong\u003e\u003c\/span\u003e\u003c\/p\u003e\n\u003cul data-spread=\"false\"\u003e\n\u003cli\u003e\n\u003cp\u003e\u003cspan\u003eBreast packs: Dual-sided with direct ice\/heat contact on one side and plush, soft backing on the other — no extra covers needed.\u003c\/span\u003e\u003c\/p\u003e\n\u003c\/li\u003e\n\u003cli\u003e\n\u003cp\u003e\u003cspan\u003ePerineal packs: Comes with two packs so you can always have one ready to go.\u003c\/span\u003e\u003c\/p\u003e\n\u003c\/li\u003e\n\u003cli\u003e\n\u003cp\u003e\u003cspan\u003eFlexible design: Contours comfortably to your body.\u003c\/span\u003e\u003c\/p\u003e\n\u003c\/li\u003e\n\u003cli\u003e\n\u003cp\u003e\u003cspan\u003ePerineal covers sold separately, so you can choose to keep things simple or invest in reusable covers.\u003c\/span\u003e\u003c\/p\u003e\n\u003c\/li\u003e\n\u003c\/ul\u003e\n\u003cp\u003e\u003cspan\u003e\u003cstrong\u003eHow to Use:\u003c\/strong\u003e\u003c\/span\u003e\u003c\/p\u003e\n\u003cul data-spread=\"false\"\u003e\n\u003cli\u003e\n\u003cp\u003e\u003cspan\u003eFor cold therapy: Place in the freezer without covers for at least 2 hours before use or submerge in ice water until the desired temperature is achieved.\u003c\/span\u003e\u003c\/p\u003e\n\u003c\/li\u003e\n\u003cli\u003e\n\u003cspan\u003eFor heat therapy: Microwave without covers for 10-20 seconds depending on the microwave (wattage table on product instructions), checking the temperature before applying.\u003c\/span\u003e\u003cspan\u003e\u003c\/span\u003e\n\u003c\/li\u003e\n\u003cli\u003e\n\u003cp\u003e\u003cspan\u003eApply to the affected area for up to 20 minutes, as needed.\u003c\/span\u003e\u003c\/p\u003e\n\u003c\/li\u003e\n\u003c\/ul\u003e\n\u003cp\u003e\u003cspan\u003e\u003cstrong\u003eSafety Information:\u003c\/strong\u003e\u003c\/span\u003e\u003c\/p\u003e\n\u003cul\u003e\n\u003cli\u003e\u003cspan\u003eAlways test the temperature before applying to avoid burns or frostbite.\u003c\/span\u003e\u003c\/li\u003e\n\u003cli\u003e\u003cspan\u003eConsult with a healthcare professional if symptoms persist.\u003c\/span\u003e\u003c\/li\u003e\n\u003cli\u003e\u003cspan\u003e\u003cspan class=\"OYPEnA font-feature-liga-off font-feature-clig-off font-feature-calt-off text-decoration-none text-strikethrough-none\"\u003eThis product is not recommended f\u003c\/span\u003e\u003cspan class=\"OYPEnA font-feature-liga-off font-feature-clig-off font-feature-calt-off text-decoration-none text-strikethrough-none\"\u003eor people with reduced awareness of temperature or feeling in their skin.\u003c\/span\u003e\u003c\/span\u003e\u003c\/li\u003e\n\u003c\/ul\u003e","published_at":"2025-03-18T17:40:07+08:00","created_at":"2025-03-09T13:09:38+08:00","vendor":"The Birth Store","type":"Ice Packs","tags":["Breastfeeding","Hemorrhoids","Mastitis","Mum","Pain Relief","Peri Care","Post-Partum","Pregnancy","The Birth Store","Vaginal Birth Recovery"],"price":4200,"price_min":4200,"price_max":4200,"available":true,"price_varies":false,"compare_at_price":null,"compare_at_price_min":0,"compare_at_price_max":0,"compare_at_price_varies":false,"variants":[{"id":44896065028285,"title":"Default Title","option1":"Default Title","option2":null,"option3":null,"sku":null,"requires_shipping":true,"taxable":false,"featured_image":null,"available":true,"name":"Breast \u0026 Perineal Recovery Ice \u0026 Heat Packs","public_title":null,"options":["Default Title"],"price":4200,"weight":514,"compare_at_price":null,"inventory_management":"shopify","barcode":"65028285","requires_selling_plan":false,"selling_plan_allocations":[],"quantity_rule":{"min":1,"max":null,"increment":1}}],"images":["\/\/www.thebirthstore.com.au\/cdn\/shop\/files\/breast-perineal-recovery-ice-heat-packs-299362.jpg?v=1750253241","\/\/www.thebirthstore.com.au\/cdn\/shop\/files\/breast-perineal-recovery-ice-heat-packs-165433.png?v=1750219344","\/\/www.thebirthstore.com.au\/cdn\/shop\/files\/breast-perineal-recovery-ice-heat-packs-574145.jpg?v=1750219380","\/\/www.thebirthstore.com.au\/cdn\/shop\/files\/perineal-ice-pack-sleeves-664034.jpg?v=1750219344","\/\/www.thebirthstore.com.au\/cdn\/shop\/files\/perineal-ice-pack-sleeves-220916.jpg?v=1750219380","\/\/www.thebirthstore.com.au\/cdn\/shop\/files\/breast-perineal-recovery-ice-heat-packs-652289.jpg?v=1750219380","\/\/www.thebirthstore.com.au\/cdn\/shop\/files\/perineal-ice-pack-sleeves-411950.jpg?v=1750219344","\/\/www.thebirthstore.com.au\/cdn\/shop\/files\/breast-perineal-recovery-ice-heat-packs-763864.jpg?v=1750219344","\/\/www.thebirthstore.com.au\/cdn\/shop\/files\/breast-perineal-recovery-ice-heat-packs-607493.jpg?v=1750219344","\/\/www.thebirthstore.com.au\/cdn\/shop\/files\/instant-peri-ice-packs-137615.jpg?v=1750219380","\/\/www.thebirthstore.com.au\/cdn\/shop\/files\/breast-perineal-recovery-ice-heat-packs-202703.jpg?v=1750219380","\/\/www.thebirthstore.com.au\/cdn\/shop\/files\/breast-perineal-recovery-ice-heat-packs-149616.jpg?v=1750219344","\/\/www.thebirthstore.com.au\/cdn\/shop\/files\/breast-perineal-recovery-ice-heat-packs-275768.jpg?v=1750219344","\/\/www.thebirthstore.com.au\/cdn\/shop\/files\/breast-perineal-recovery-ice-heat-packs-606688.jpg?v=1750219344"],"featured_image":"\/\/www.thebirthstore.com.au\/cdn\/shop\/files\/breast-perineal-recovery-ice-heat-packs-299362.jpg?v=1750253241","options":["Title"],"media":[{"alt":"Breast \u0026 Perineal Recovery Ice \u0026 Heat Packs - The Birth Store - The Birth Store","id":28995619848381,"position":1,"preview_image":{"aspect_ratio":1.0,"height":1080,"width":1080,"src":"\/\/www.thebirthstore.com.au\/cdn\/shop\/files\/breast-perineal-recovery-ice-heat-packs-299362.jpg?v=1750253241"},"aspect_ratio":1.0,"height":1080,"media_type":"image","src":"\/\/www.thebirthstore.com.au\/cdn\/shop\/files\/breast-perineal-recovery-ice-heat-packs-299362.jpg?v=1750253241","width":1080},{"alt":"Breast \u0026 Perineal Recovery Ice \u0026 Heat Packs - The Birth Store - The Birth Store","id":28435577143485,"position":2,"preview_image":{"aspect_ratio":1.0,"height":1080,"width":1080,"src":"\/\/www.thebirthstore.com.au\/cdn\/shop\/files\/breast-perineal-recovery-ice-heat-packs-165433.png?v=1750219344"},"aspect_ratio":1.0,"height":1080,"media_type":"image","src":"\/\/www.thebirthstore.com.au\/cdn\/shop\/files\/breast-perineal-recovery-ice-heat-packs-165433.png?v=1750219344","width":1080},{"alt":"Breast \u0026 Perineal Recovery Ice \u0026 Heat Packs - The Birth Store - The Birth Store","id":28436124958909,"position":3,"preview_image":{"aspect_ratio":0.668,"height":1440,"width":962,"src":"\/\/www.thebirthstore.com.au\/cdn\/shop\/files\/breast-perineal-recovery-ice-heat-packs-574145.jpg?v=1750219380"},"aspect_ratio":0.668,"height":1440,"media_type":"image","src":"\/\/www.thebirthstore.com.au\/cdn\/shop\/files\/breast-perineal-recovery-ice-heat-packs-574145.jpg?v=1750219380","width":962},{"alt":"Perineal Ice Pack Sleeves - The Birth Store - The Birth Store","id":28436124663997,"position":4,"preview_image":{"aspect_ratio":1.497,"height":684,"width":1024,"src":"\/\/www.thebirthstore.com.au\/cdn\/shop\/files\/perineal-ice-pack-sleeves-664034.jpg?v=1750219344"},"aspect_ratio":1.497,"height":684,"media_type":"image","src":"\/\/www.thebirthstore.com.au\/cdn\/shop\/files\/perineal-ice-pack-sleeves-664034.jpg?v=1750219344","width":1024},{"alt":"Perineal Ice Pack Sleeves - The Birth Store - The Birth Store","id":28436124926141,"position":5,"preview_image":{"aspect_ratio":1.497,"height":684,"width":1024,"src":"\/\/www.thebirthstore.com.au\/cdn\/shop\/files\/perineal-ice-pack-sleeves-220916.jpg?v=1750219380"},"aspect_ratio":1.497,"height":684,"media_type":"image","src":"\/\/www.thebirthstore.com.au\/cdn\/shop\/files\/perineal-ice-pack-sleeves-220916.jpg?v=1750219380","width":1024},{"alt":"Breast \u0026 Perineal Recovery Ice \u0026 Heat Packs - The Birth Store - The Birth Store","id":28410309935293,"position":6,"preview_image":{"aspect_ratio":0.667,"height":1536,"width":1024,"src":"\/\/www.thebirthstore.com.au\/cdn\/shop\/files\/breast-perineal-recovery-ice-heat-packs-652289.jpg?v=1750219380"},"aspect_ratio":0.667,"height":1536,"media_type":"image","src":"\/\/www.thebirthstore.com.au\/cdn\/shop\/files\/breast-perineal-recovery-ice-heat-packs-652289.jpg?v=1750219380","width":1024},{"alt":"Perineal Ice Pack Sleeves - The Birth Store - The Birth Store","id":28436124893373,"position":7,"preview_image":{"aspect_ratio":1.775,"height":502,"width":891,"src":"\/\/www.thebirthstore.com.au\/cdn\/shop\/files\/perineal-ice-pack-sleeves-411950.jpg?v=1750219344"},"aspect_ratio":1.775,"height":502,"media_type":"image","src":"\/\/www.thebirthstore.com.au\/cdn\/shop\/files\/perineal-ice-pack-sleeves-411950.jpg?v=1750219344","width":891},{"alt":"Breast \u0026 Perineal Recovery Ice \u0026 Heat Packs - The Birth Store - The Birth Store","id":28410319372477,"position":8,"preview_image":{"aspect_ratio":0.667,"height":1536,"width":1024,"src":"\/\/www.thebirthstore.com.au\/cdn\/shop\/files\/breast-perineal-recovery-ice-heat-packs-763864.jpg?v=1750219344"},"aspect_ratio":0.667,"height":1536,"media_type":"image","src":"\/\/www.thebirthstore.com.au\/cdn\/shop\/files\/breast-perineal-recovery-ice-heat-packs-763864.jpg?v=1750219344","width":1024},{"alt":"Breast \u0026 Perineal Recovery Ice \u0026 Heat Packs - The Birth Store - The Birth Store","id":28410319438013,"position":9,"preview_image":{"aspect_ratio":0.667,"height":1536,"width":1024,"src":"\/\/www.thebirthstore.com.au\/cdn\/shop\/files\/breast-perineal-recovery-ice-heat-packs-607493.jpg?v=1750219344"},"aspect_ratio":0.667,"height":1536,"media_type":"image","src":"\/\/www.thebirthstore.com.au\/cdn\/shop\/files\/breast-perineal-recovery-ice-heat-packs-607493.jpg?v=1750219344","width":1024},{"alt":"Instant Peri Ice Packs - The Birth Store - The Birth Store","id":28436124860605,"position":10,"preview_image":{"aspect_ratio":1.497,"height":684,"width":1024,"src":"\/\/www.thebirthstore.com.au\/cdn\/shop\/files\/instant-peri-ice-packs-137615.jpg?v=1750219380"},"aspect_ratio":1.497,"height":684,"media_type":"image","src":"\/\/www.thebirthstore.com.au\/cdn\/shop\/files\/instant-peri-ice-packs-137615.jpg?v=1750219380","width":1024},{"alt":"Breast \u0026 Perineal Recovery Ice \u0026 Heat Packs - The Birth Store - The Birth Store","id":28436124729533,"position":11,"preview_image":{"aspect_ratio":1.497,"height":684,"width":1024,"src":"\/\/www.thebirthstore.com.au\/cdn\/shop\/files\/breast-perineal-recovery-ice-heat-packs-202703.jpg?v=1750219380"},"aspect_ratio":1.497,"height":684,"media_type":"image","src":"\/\/www.thebirthstore.com.au\/cdn\/shop\/files\/breast-perineal-recovery-ice-heat-packs-202703.jpg?v=1750219380","width":1024},{"alt":"Breast \u0026 Perineal Recovery Ice \u0026 Heat Packs - The Birth Store - The Birth Store","id":28410310033597,"position":12,"preview_image":{"aspect_ratio":0.667,"height":1536,"width":1024,"src":"\/\/www.thebirthstore.com.au\/cdn\/shop\/files\/breast-perineal-recovery-ice-heat-packs-149616.jpg?v=1750219344"},"aspect_ratio":0.667,"height":1536,"media_type":"image","src":"\/\/www.thebirthstore.com.au\/cdn\/shop\/files\/breast-perineal-recovery-ice-heat-packs-149616.jpg?v=1750219344","width":1024},{"alt":"Breast \u0026 Perineal Recovery Ice \u0026 Heat Packs - The Birth Store - The Birth Store","id":28436124696765,"position":13,"preview_image":{"aspect_ratio":1.497,"height":684,"width":1024,"src":"\/\/www.thebirthstore.com.au\/cdn\/shop\/files\/breast-perineal-recovery-ice-heat-packs-275768.jpg?v=1750219344"},"aspect_ratio":1.497,"height":684,"media_type":"image","src":"\/\/www.thebirthstore.com.au\/cdn\/shop\/files\/breast-perineal-recovery-ice-heat-packs-275768.jpg?v=1750219344","width":1024},{"alt":"Breast \u0026 Perineal Recovery Ice \u0026 Heat Packs - The Birth Store - The Birth Store","id":28410310099133,"position":14,"preview_image":{"aspect_ratio":0.667,"height":1536,"width":1024,"src":"\/\/www.thebirthstore.com.au\/cdn\/shop\/files\/breast-perineal-recovery-ice-heat-packs-606688.jpg?v=1750219344"},"aspect_ratio":0.667,"height":1536,"media_type":"image","src":"\/\/www.thebirthstore.com.au\/cdn\/shop\/files\/breast-perineal-recovery-ice-heat-packs-606688.jpg?v=1750219344","width":1024}],"requires_selling_plan":false,"selling_plan_groups":[],"content":"\u003cp data-pm-slice=\"1 1 []\"\u003e\u003cspan\u003eWhen your body is healing after birth, every little bit of comfort counts. Our Breast \u0026amp; Perineal Recovery Ice \u0026amp; Heat Pack Set is the ultimate postpartum care duo — designed to provide relief from top to bottom.\u003c\/span\u003e\u003c\/p\u003e\n\u003cp\u003e\u003cspan\u003e\u003cstrong\u003eTo Help With:\u003c\/strong\u003e\u003c\/span\u003e\u003c\/p\u003e\n\u003cul data-spread=\"false\"\u003e\n\u003cli\u003e\n\u003cp\u003e\u003cspan\u003eEngorgement, mastitis, and blocked ducts\u003c\/span\u003e\u003c\/p\u003e\n\u003c\/li\u003e\n\u003cli\u003e\n\u003cp\u003e\u003cspan\u003ePerineal swelling and discomfort\u003c\/span\u003e\u003c\/p\u003e\n\u003c\/li\u003e\n\u003cli\u003e\n\u003cp\u003e\u003cspan\u003ePostpartum stitches and tearing\u003c\/span\u003e\u003c\/p\u003e\n\u003c\/li\u003e\n\u003cli\u003e\n\u003cp\u003e\u003cspan\u003eGeneral breast and perineal tenderness\u003c\/span\u003e\u003c\/p\u003e\n\u003c\/li\u003e\n\u003c\/ul\u003e\n\u003cp\u003e\u003cspan\u003e\u003cstrong\u003eFeatures:\u003c\/strong\u003e\u003c\/span\u003e\u003c\/p\u003e\n\u003cul data-spread=\"false\"\u003e\n\u003cli\u003e\n\u003cp\u003e\u003cspan\u003eBreast packs: Dual-sided with direct ice\/heat contact on one side and plush, soft backing on the other — no extra covers needed.\u003c\/span\u003e\u003c\/p\u003e\n\u003c\/li\u003e\n\u003cli\u003e\n\u003cp\u003e\u003cspan\u003ePerineal packs: Comes with two packs so you can always have one ready to go.\u003c\/span\u003e\u003c\/p\u003e\n\u003c\/li\u003e\n\u003cli\u003e\n\u003cp\u003e\u003cspan\u003eFlexible design: Contours comfortably to your body.\u003c\/span\u003e\u003c\/p\u003e\n\u003c\/li\u003e\n\u003cli\u003e\n\u003cp\u003e\u003cspan\u003ePerineal covers sold separately, so you can choose to keep things simple or invest in reusable covers.\u003c\/span\u003e\u003c\/p\u003e\n\u003c\/li\u003e\n\u003c\/ul\u003e\n\u003cp\u003e\u003cspan\u003e\u003cstrong\u003eHow to Use:\u003c\/strong\u003e\u003c\/span\u003e\u003c\/p\u003e\n\u003cul data-spread=\"false\"\u003e\n\u003cli\u003e\n\u003cp\u003e\u003cspan\u003eFor cold therapy: Place in the freezer without covers for at least 2 hours before use or submerge in ice water until the desired temperature is achieved.\u003c\/span\u003e\u003c\/p\u003e\n\u003c\/li\u003e\n\u003cli\u003e\n\u003cspan\u003eFor heat therapy: Microwave without covers for 10-20 seconds depending on the microwave (wattage table on product instructions), checking the temperature before applying.\u003c\/span\u003e\u003cspan\u003e\u003c\/span\u003e\n\u003c\/li\u003e\n\u003cli\u003e\n\u003cp\u003e\u003cspan\u003eApply to the affected area for up to 20 minutes, as needed.\u003c\/span\u003e\u003c\/p\u003e\n\u003c\/li\u003e\n\u003c\/ul\u003e\n\u003cp\u003e\u003cspan\u003e\u003cstrong\u003eSafety Information:\u003c\/strong\u003e\u003c\/span\u003e\u003c\/p\u003e\n\u003cul\u003e\n\u003cli\u003e\u003cspan\u003eAlways test the temperature before applying to avoid burns or frostbite.\u003c\/span\u003e\u003c\/li\u003e\n\u003cli\u003e\u003cspan\u003eConsult with a healthcare professional if symptoms persist.\u003c\/span\u003e\u003c\/li\u003e\n\u003cli\u003e\u003cspan\u003e\u003cspan class=\"OYPEnA font-feature-liga-off font-feature-clig-off font-feature-calt-off text-decoration-none text-strikethrough-none\"\u003eThis product is not recommended f\u003c\/span\u003e\u003cspan class=\"OYPEnA font-feature-liga-off font-feature-clig-off font-feature-calt-off text-decoration-none text-strikethrough-none\"\u003eor people with reduced awareness of temperature or feeling in their skin.\u003c\/span\u003e\u003c\/span\u003e\u003c\/li\u003e\n\u003c\/ul\u003e"},"options":[{"name":"Title","position":1,"values":["Default Title"]}],"custom_metafields":{},"metafields":{"badge":"\u003cdiv style='display:none' class='jdgm-prev-badge' data-average-rating='0.00' data-number-of-reviews='0' data-number-of-questions='0'\u003e \u003cspan class='jdgm-prev-badge__stars' data-score='0.00' tabindex='0' aria-label='0.00 stars' role='button'\u003e \u003cspan class='jdgm-star jdgm--off'\u003e\u003c\/span\u003e\u003cspan class='jdgm-star jdgm--off'\u003e\u003c\/span\u003e\u003cspan class='jdgm-star jdgm--off'\u003e\u003c\/span\u003e\u003cspan class='jdgm-star jdgm--off'\u003e\u003c\/span\u003e\u003cspan class='jdgm-star jdgm--off'\u003e\u003c\/span\u003e \u003c\/span\u003e \u003cspan class='jdgm-prev-badge__text'\u003e No reviews \u003c\/span\u003e \u003c\/div\u003e","widget":"\u003cdiv class='jdgm-rev-widg' data-updated-at='2025-06-13T16:13:40Z' data-average-rating='0.00' data-number-of-reviews='0' data-number-of-questions='0'\u003e \u003cstyle class='jdgm-temp-hiding-style'\u003e.jdgm-rev-widg{ display: none }\u003c\/style\u003e \u003cdiv class='jdgm-rev-widg__header'\u003e \u003ch2 class='jdgm-rev-widg__title'\u003eCustomer Reviews\u003c\/h2\u003e \u003cdiv class='jdgm-rev-widg__summary'\u003e \u003cdiv class='jdgm-rev-widg__summary-stars' aria-label='Average rating is 0.00 stars' role='img'\u003e \u003cspan class='jdgm-star jdgm--off'\u003e\u003c\/span\u003e\u003cspan class='jdgm-star jdgm--off'\u003e\u003c\/span\u003e\u003cspan class='jdgm-star jdgm--off'\u003e\u003c\/span\u003e\u003cspan class='jdgm-star jdgm--off'\u003e\u003c\/span\u003e\u003cspan class='jdgm-star jdgm--off'\u003e\u003c\/span\u003e \u003c\/div\u003e \u003cdiv class='jdgm-rev-widg__summary-text'\u003eBe the first to write a review\u003c\/div\u003e \u003c\/div\u003e \u003ca style='display: none' href='#' class='jdgm-write-rev-link' role='button'\u003eWrite a review\u003c\/a\u003e \u003cdiv class='jdgm-histogram jdgm-temp-hidden'\u003e \u003cdiv class='jdgm-histogram__row' data-rating='5' data-frequency='0' data-percentage='0'\u003e \u003cdiv class='jdgm-histogram__star' role='button' aria-label=\"0% (0) reviews with 5 star rating\" tabindex='0' \u003e\u003cspan class='jdgm-star jdgm--on'\u003e\u003c\/span\u003e\u003cspan class='jdgm-star jdgm--on'\u003e\u003c\/span\u003e\u003cspan class='jdgm-star jdgm--on'\u003e\u003c\/span\u003e\u003cspan class='jdgm-star jdgm--on'\u003e\u003c\/span\u003e\u003cspan class='jdgm-star jdgm--on'\u003e\u003c\/span\u003e\u003c\/div\u003e \u003cdiv class='jdgm-histogram__bar'\u003e \u003cdiv class='jdgm-histogram__bar-content' style='width: 0%;'\u003e \u003c\/div\u003e \u003c\/div\u003e \u003cdiv class='jdgm-histogram__percentage'\u003e0%\u003c\/div\u003e \u003cdiv class='jdgm-histogram__frequency'\u003e(0)\u003c\/div\u003e \u003c\/div\u003e \u003cdiv class='jdgm-histogram__row' data-rating='4' data-frequency='0' data-percentage='0'\u003e \u003cdiv class='jdgm-histogram__star' role='button' aria-label=\"0% (0) reviews with 4 star rating\" tabindex='0' \u003e\u003cspan class='jdgm-star jdgm--on'\u003e\u003c\/span\u003e\u003cspan class='jdgm-star jdgm--on'\u003e\u003c\/span\u003e\u003cspan class='jdgm-star jdgm--on'\u003e\u003c\/span\u003e\u003cspan class='jdgm-star jdgm--on'\u003e\u003c\/span\u003e\u003cspan class='jdgm-star jdgm--off'\u003e\u003c\/span\u003e\u003c\/div\u003e \u003cdiv class='jdgm-histogram__bar'\u003e \u003cdiv class='jdgm-histogram__bar-content' style='width: 0%;'\u003e \u003c\/div\u003e \u003c\/div\u003e \u003cdiv class='jdgm-histogram__percentage'\u003e0%\u003c\/div\u003e \u003cdiv class='jdgm-histogram__frequency'\u003e(0)\u003c\/div\u003e \u003c\/div\u003e \u003cdiv class='jdgm-histogram__row' data-rating='3' data-frequency='0' data-percentage='0'\u003e \u003cdiv class='jdgm-histogram__star' role='button' aria-label=\"0% (0) reviews with 3 star rating\" tabindex='0' \u003e\u003cspan class='jdgm-star jdgm--on'\u003e\u003c\/span\u003e\u003cspan class='jdgm-star jdgm--on'\u003e\u003c\/span\u003e\u003cspan class='jdgm-star jdgm--on'\u003e\u003c\/span\u003e\u003cspan class='jdgm-star jdgm--off'\u003e\u003c\/span\u003e\u003cspan class='jdgm-star jdgm--off'\u003e\u003c\/span\u003e\u003c\/div\u003e \u003cdiv class='jdgm-histogram__bar'\u003e \u003cdiv class='jdgm-histogram__bar-content' style='width: 0%;'\u003e \u003c\/div\u003e \u003c\/div\u003e \u003cdiv class='jdgm-histogram__percentage'\u003e0%\u003c\/div\u003e \u003cdiv class='jdgm-histogram__frequency'\u003e(0)\u003c\/div\u003e \u003c\/div\u003e \u003cdiv class='jdgm-histogram__row' data-rating='2' data-frequency='0' data-percentage='0'\u003e \u003cdiv class='jdgm-histogram__star' role='button' aria-label=\"0% (0) reviews with 2 star rating\" tabindex='0' \u003e\u003cspan class='jdgm-star jdgm--on'\u003e\u003c\/span\u003e\u003cspan class='jdgm-star jdgm--on'\u003e\u003c\/span\u003e\u003cspan class='jdgm-star jdgm--off'\u003e\u003c\/span\u003e\u003cspan class='jdgm-star jdgm--off'\u003e\u003c\/span\u003e\u003cspan class='jdgm-star jdgm--off'\u003e\u003c\/span\u003e\u003c\/div\u003e \u003cdiv class='jdgm-histogram__bar'\u003e \u003cdiv class='jdgm-histogram__bar-content' style='width: 0%;'\u003e \u003c\/div\u003e \u003c\/div\u003e \u003cdiv class='jdgm-histogram__percentage'\u003e0%\u003c\/div\u003e \u003cdiv class='jdgm-histogram__frequency'\u003e(0)\u003c\/div\u003e \u003c\/div\u003e \u003cdiv class='jdgm-histogram__row' data-rating='1' data-frequency='0' data-percentage='0'\u003e \u003cdiv class='jdgm-histogram__star' role='button' aria-label=\"0% (0) reviews with 1 star rating\" tabindex='0' \u003e\u003cspan class='jdgm-star jdgm--on'\u003e\u003c\/span\u003e\u003cspan class='jdgm-star jdgm--off'\u003e\u003c\/span\u003e\u003cspan class='jdgm-star jdgm--off'\u003e\u003c\/span\u003e\u003cspan class='jdgm-star jdgm--off'\u003e\u003c\/span\u003e\u003cspan class='jdgm-star jdgm--off'\u003e\u003c\/span\u003e\u003c\/div\u003e \u003cdiv class='jdgm-histogram__bar'\u003e \u003cdiv class='jdgm-histogram__bar-content' style='width: 0%;'\u003e \u003c\/div\u003e \u003c\/div\u003e \u003cdiv class='jdgm-histogram__percentage'\u003e0%\u003c\/div\u003e \u003cdiv class='jdgm-histogram__frequency'\u003e(0)\u003c\/div\u003e \u003c\/div\u003e \u003cdiv class='jdgm-histogram__row jdgm-histogram__clear-filter' data-rating=null tabindex='0'\u003e\u003c\/div\u003e \u003c\/div\u003e \u003cdiv class='jdgm-rev-widg__sort-wrapper'\u003e\u003c\/div\u003e \u003c\/div\u003e \u003cdiv class='jdgm-rev-widg__body'\u003e \u003cdiv class='jdgm-rev-widg__reviews'\u003e\u003c\/div\u003e \u003cdiv class='jdgm-paginate' data-per-page='10' data-url='https:\/\/api.judge.me\/reviews\/reviews_for_widget' style=\"display: none;\"\u003e\u003c\/div\u003e \u003c\/div\u003e \u003cdiv class='jdgm-rev-widg__paginate-spinner-wrapper'\u003e \u003cdiv class='jdgm-spinner'\u003e\u003c\/div\u003e \u003c\/div\u003e \u003c\/div\u003e"},"collections":[{"id":309505622205,"handle":"the-birth-store-range","title":"'The Birth Store' Range","updated_at":"2026-06-12T19:10:26+08:00","body_html":"","published_at":"2024-10-28T13:24:26+08:00","sort_order":"alpha-asc","template_suffix":"","disjunctive":false,"rules":[{"column":"tag","relation":"equals","condition":"The Birth Store"}],"published_scope":"global","image":{"created_at":"2025-10-30T16:16:56+08:00","alt":"'The Birth Store' Range - The Birth Store","width":1365,"height":2048,"src":"\/\/www.thebirthstore.com.au\/cdn\/shop\/collections\/the-birth-store-range-5183880.jpg?v=1761812217"}},{"id":281712427197,"handle":"breastfeeding","title":"Breastfeeding","updated_at":"2026-06-12T19:10:26+08:00","body_html":"","published_at":"2021-12-20T14:19:33+08:00","sort_order":"best-selling","template_suffix":"breastfeeding-collection","disjunctive":false,"rules":[{"column":"tag","relation":"equals","condition":"Breastfeeding"}],"published_scope":"global","image":{"created_at":"2024-05-06T11:59:34+08:00","alt":"Breastfeeding - The Birth Store","width":620,"height":635,"src":"\/\/www.thebirthstore.com.au\/cdn\/shop\/collections\/breastfeeding-793872.jpg?v=1714967974"}},{"id":261657460925,"handle":"buy","title":"Buy","updated_at":"2026-06-12T19:10:26+08:00","body_html":"\u003cp\u003eBrowse all of our pregnancy, labour \u0026amp; birth, postpartum and baby essentials here.\u003cbr\u003e\u003c\/p\u003e\n\u003cp\u003e\u003cspan\u003eYou can even buy now and pay later with Afterpay!\u003c\/span\u003e\u003c\/p\u003e","published_at":"2021-03-10T12:05:31+08:00","sort_order":"best-selling","template_suffix":"shop-all-collection","disjunctive":false,"rules":[{"column":"title","relation":"not_contains","condition":"Hire"}],"published_scope":"global","image":{"created_at":"2024-05-06T11:59:42+08:00","alt":"Buy - The Birth Store","width":2048,"height":2048,"src":"\/\/www.thebirthstore.com.au\/cdn\/shop\/collections\/buy-964856.jpg?v=1714967982"}},{"id":281712066749,"handle":"hemorrhoid-care","title":"Haemorrhoid Care","updated_at":"2026-06-12T19:10:26+08:00","body_html":"","published_at":"2021-12-20T14:16:30+08:00","sort_order":"best-selling","template_suffix":"swaddles-collection","disjunctive":false,"rules":[{"column":"tag","relation":"equals","condition":"Hemorrhoids"}],"published_scope":"global","image":{"created_at":"2024-05-06T12:00:00+08:00","alt":"Haemorrhoid Care - The Birth Store","width":763,"height":556,"src":"\/\/www.thebirthstore.com.au\/cdn\/shop\/collections\/haemorrhoid-care-562138.jpg?v=1714968001"}},{"id":319580635325,"handle":"ice-heat-packs","updated_at":"2026-06-12T19:10:26+08:00","published_at":"2025-06-08T20:45:57+08:00","sort_order":"best-selling","template_suffix":"","published_scope":"global","title":"Ice \u0026 Heat Packs","body_html":"","image":{"created_at":"2025-10-30T16:16:45+08:00","alt":"Ice \u0026 Heat Packs - The Birth Store","width":1024,"height":684,"src":"\/\/www.thebirthstore.com.au\/cdn\/shop\/collections\/ice-heat-packs-1501133.jpg?v=1761812205"}},{"id":290869313725,"handle":"mastitis-blocked-ducts","title":"Mastitis \u0026 Blocked Ducts","updated_at":"2026-06-12T19:10:26+08:00","body_html":"","published_at":"2022-11-17T10:50:01+08:00","sort_order":"best-selling","template_suffix":"swaddles-collection","disjunctive":false,"rules":[{"column":"tag","relation":"equals","condition":"Mastitis"}],"published_scope":"global","image":{"created_at":"2024-05-06T12:00:21+08:00","alt":"Mastitis \u0026 Blocked Ducts - The Birth Store","width":494,"height":487,"src":"\/\/www.thebirthstore.com.au\/cdn\/shop\/collections\/mastitis-blocked-ducts-488726.jpg?v=1714968021"}},{"id":281712591037,"handle":"pain-relief","title":"Pain Relief","updated_at":"2026-06-12T19:10:26+08:00","body_html":"","published_at":"2021-12-20T14:22:45+08:00","sort_order":"best-selling","template_suffix":"pain-relief-collection","disjunctive":false,"rules":[{"column":"tag","relation":"equals","condition":"Pain Relief"}],"published_scope":"global","image":{"created_at":"2024-05-06T12:00:27+08:00","alt":"Pain Relief - The Birth Store","width":1365,"height":2048,"src":"\/\/www.thebirthstore.com.au\/cdn\/shop\/collections\/pain-relief-878865.jpg?v=1714968027"}},{"id":295224705213,"handle":"perineal-care","title":"Perineal Care","updated_at":"2026-06-12T19:10:26+08:00","body_html":"","published_at":"2023-11-10T20:43:30+08:00","sort_order":"best-selling","template_suffix":"perineal-care-collection","disjunctive":false,"rules":[{"column":"tag","relation":"equals","condition":"Peri Care"}],"published_scope":"global","image":{"created_at":"2024-05-06T12:00:33+08:00","alt":"Perineal Care - The Birth Store","width":1024,"height":1536,"src":"\/\/www.thebirthstore.com.au\/cdn\/shop\/collections\/perineal-care-657628.jpg?v=1714968034"}},{"id":261658083517,"handle":"post-partum","title":"Postpartum","updated_at":"2026-06-12T19:10:26+08:00","body_html":"\u003cp\u003eShop your postpartum and hospital bag essentials below. Looking for something we don't currently stock? Please reach out and let us know.\u003cbr\u003e\u003c\/p\u003e\n\u003cp\u003e\u003cspan\u003eYou can even buy now and pay later with Afterpay!\u003c\/span\u003e\u003c\/p\u003e","published_at":"2021-03-10T12:33:47+08:00","sort_order":"best-selling","template_suffix":"postpartum-collection","disjunctive":false,"rules":[{"column":"tag","relation":"equals","condition":"Post-Partum"}],"published_scope":"global","image":{"created_at":"2024-05-06T12:00:36+08:00","alt":"Postpartum - The Birth Store","width":611,"height":702,"src":"\/\/www.thebirthstore.com.au\/cdn\/shop\/collections\/postpartum-150119.jpg?v=1714968037"}},{"id":261658149053,"handle":"pregnancy-and-maternity-products","title":"Pregnancy","updated_at":"2026-06-12T19:10:26+08:00","body_html":"\u003cp\u003eShop your pregnancy essentials below. Looking for something we don't currently stock? Please reach out and let us know.\u003cbr\u003e\u003c\/p\u003e\n\u003cp\u003e\u003cspan\u003eYou can even buy now and pay later with Afterpay!\u003c\/span\u003e\u003c\/p\u003e","published_at":"2021-03-10T12:34:22+08:00","sort_order":"best-selling","template_suffix":"pregnancy-collection","disjunctive":false,"rules":[{"column":"tag","relation":"equals","condition":"Pregnancy"}],"published_scope":"global","image":{"created_at":"2024-05-06T12:00:40+08:00","alt":"Pregnancy - The Birth Store","width":1024,"height":1536,"src":"\/\/www.thebirthstore.com.au\/cdn\/shop\/collections\/pregnancy-899677.jpg?v=1714968040"}},{"id":315407761597,"handle":"the-birth-store-2025-product-launch","updated_at":"2026-06-12T19:10:26+08:00","published_at":"2025-03-15T21:46:34+08:00","sort_order":"created-desc","template_suffix":"ice-pack-launch","published_scope":"global","title":"Recovery Ice \u0026 Heat Packs","body_html":"","image":{"created_at":"2025-10-30T16:16:46+08:00","alt":"Recovery Ice \u0026 Heat Packs - The Birth Store","width":1024,"height":684,"src":"\/\/www.thebirthstore.com.au\/cdn\/shop\/collections\/recovery-ice-heat-packs-9023381.jpg?v=1761812207"}},{"id":291456483517,"handle":"shop-all","title":"Shop All - Mum","updated_at":"2026-06-12T19:10:26+08:00","body_html":"","published_at":"2022-12-23T22:04:39+08:00","sort_order":"best-selling","template_suffix":"shop-all-collection","disjunctive":false,"rules":[{"column":"variant_price","relation":"greater_than","condition":"1"},{"column":"title","relation":"not_contains","condition":"Batteries"},{"column":"tag","relation":"equals","condition":"Mum"}],"published_scope":"global","image":{"created_at":"2024-05-06T12:00:54+08:00","alt":"Shop All - The Birth Store","width":1365,"height":2048,"src":"\/\/www.thebirthstore.com.au\/cdn\/shop\/collections\/shop-all-693176.jpg?v=1714968055"}},{"id":310045933757,"handle":"shop-all-sale","title":"Shop All Sale","updated_at":"2026-06-12T19:10:26+08:00","body_html":"","published_at":"2024-11-12T13:22:43+08:00","sort_order":"alpha-asc","template_suffix":"","disjunctive":true,"rules":[{"column":"tag","relation":"equals","condition":"Bundles"},{"column":"vendor","relation":"equals","condition":"Franjos Kitchen"},{"column":"vendor","relation":"equals","condition":"Adored Illustrations"},{"column":"vendor","relation":"equals","condition":"Amazing Oils"},{"column":"vendor","relation":"equals","condition":"Ice Ice Booby"},{"column":"vendor","relation":"equals","condition":"Made to Milk"},{"column":"vendor","relation":"equals","condition":"Milky Goodness"},{"column":"vendor","relation":"equals","condition":"Seasons of Mama"},{"column":"vendor","relation":"equals","condition":"Silverette"},{"column":"vendor","relation":"equals","condition":"Snuggle Hunny"},{"column":"vendor","relation":"equals","condition":"Yung Bod"},{"column":"vendor","relation":"equals","condition":"Bare Love"},{"column":"vendor","relation":"equals","condition":"Haakaa"},{"column":"vendor","relation":"equals","condition":"Mere Botanicals"},{"column":"vendor","relation":"equals","condition":"The Birth Store Hire"},{"column":"vendor","relation":"equals","condition":"The Birth Store"}],"published_scope":"global","image":{"created_at":"2024-11-13T10:58:16+08:00","alt":"Shop All Sale - The Birth Store","width":2048,"height":1365,"src":"\/\/www.thebirthstore.com.au\/cdn\/shop\/collections\/shop-all-sale-297361.jpg?v=1731466697"}},{"id":281712197821,"handle":"vaginal-birth-recovery","title":"Vaginal Birth Recovery","updated_at":"2026-06-12T19:10:26+08:00","body_html":"","published_at":"2021-12-20T14:18:23+08:00","sort_order":"best-selling","template_suffix":"swaddles-collection","disjunctive":true,"rules":[{"column":"tag","relation":"equals","condition":"Vaginal Birth Recovery"},{"column":"tag","relation":"equals","condition":"Vaginal Birth Recover"}],"published_scope":"global","image":{"created_at":"2024-05-06T12:01:03+08:00","alt":"Vaginal Birth Recovery - The Birth Store","width":2048,"height":2048,"src":"\/\/www.thebirthstore.com.au\/cdn\/shop\/collections\/vaginal-birth-recovery-449034.jpg?v=1714968063"}},{"id":316942287037,"handle":"wholesale-products","updated_at":"2026-06-12T19:10:26+08:00","published_at":"2025-04-19T15:30:53+08:00","sort_order":"best-selling","template_suffix":"","published_scope":"global","title":"Wholesale Products","body_html":"","image":{"created_at":"2025-11-20T21:33:57+08:00","alt":"Wholesale Products - The Birth Store","width":1024,"height":684,"src":"\/\/www.thebirthstore.com.au\/cdn\/shop\/collections\/wholesale-products-3833919.jpg?v=1763645638"}}]}
{"item":{"id":7054946631869,"title":"Nipple Cream 60gm","handle":"nipple-cream-60gm","description":"\u003cp data-mce-fragment=\"1\"\u003e\u003cspan data-mce-fragment=\"1\"\u003eThis beautifully formulated, non-greasy formulation of moisturising active botanicals naturally soothes, heals and hydrates. Mère Nipple Cream has no added fragrances, so the smell of Mum’s milk isn’t affected. For your convenience, this cream does not need to be removed before a feed.\u003c\/span\u003e\u003c\/p\u003e\n\u003cp data-mce-fragment=\"1\"\u003e\u003cspan data-mce-fragment=\"1\"\u003e\u003cstrong\u003eINGREDIENTS:\u003c\/strong\u003e Organic Prunus Amygdalus Dulcis (Sweet Almond) oil, Organic Calendula officinalis (Calendula) oil, Organic Matricaria chamomilla (Chamomile) flower infusion, Shea Butter, Aloe Barbadensis (Aloe Vera) leaf juice, Organic Lavandula angustifolia (Lavender) infusion, Organic Hypericum perforatum (St. John’s wort) oil, Zinc Sulphate, Cera alba (Bee's wax), Equisetum arvense (Horsetail) Extract, Althaea officinalis (Marshmallow) root extract, Organic Simmondsia Chinensis (Jojoba) seed oil, Organic Cocos nucifera (Coconut) oil, Natural Vitamin E (Mixed Tocopherols 70%), Natural rosemary antioxidant, Grapefruit seed extract.\u003cbr data-mce-fragment=\"1\"\u003e\u003cbr data-mce-fragment=\"1\"\u003eFree from silicones, parabens, PEGs, sulfates (SLS\/SLES), GMOs, mineral oils, petrolatum, synthetic colours and fragrances, or animal testing.\u003c\/span\u003e\u003c\/p\u003e\n\u003cp data-mce-fragment=\"1\"\u003e\u003cspan data-mce-fragment=\"1\"\u003eEvery product is created in with a conscious effort to support your body, your baby and the environment\u003c\/span\u003e\u003c\/p\u003e","published_at":"2021-11-18T14:35:51+08:00","created_at":"2021-11-02T13:24:40+08:00","vendor":"Mere Botanicals","type":"","tags":["Breastfeeding","Cracked Nipples","Hospital Bag","Mum"],"price":2995,"price_min":2995,"price_max":2995,"available":true,"price_varies":false,"compare_at_price":2995,"compare_at_price_min":2995,"compare_at_price_max":2995,"compare_at_price_varies":false,"variants":[{"id":40977760452797,"title":"Default Title","option1":"Default Title","option2":null,"option3":null,"sku":"","requires_shipping":true,"taxable":false,"featured_image":null,"available":true,"name":"Nipple Cream 60gm","public_title":null,"options":["Default Title"],"price":2995,"weight":84,"compare_at_price":2995,"inventory_management":"shopify","barcode":"60452797","requires_selling_plan":false,"selling_plan_allocations":[],"quantity_rule":{"min":1,"max":null,"increment":1}}],"images":["\/\/www.thebirthstore.com.au\/cdn\/shop\/files\/nipple-cream-60gm-989970.jpg?v=1714968005","\/\/www.thebirthstore.com.au\/cdn\/shop\/files\/nipple-cream-60gm-521797.jpg?v=1714968005","\/\/www.thebirthstore.com.au\/cdn\/shop\/files\/nipple-cream-60gm-617514.webp?v=1714968005","\/\/www.thebirthstore.com.au\/cdn\/shop\/files\/nipple-cream-60gm-672989.webp?v=1714968005","\/\/www.thebirthstore.com.au\/cdn\/shop\/files\/nipple-cream-60gm-537665.jpg?v=1714968005"],"featured_image":"\/\/www.thebirthstore.com.au\/cdn\/shop\/files\/nipple-cream-60gm-989970.jpg?v=1714968005","options":["Title"],"media":[{"alt":"Nipple Cream 60gm - The Birth Store-Mere Botanicals","id":27007594528957,"position":1,"preview_image":{"aspect_ratio":1.0,"height":950,"width":950,"src":"\/\/www.thebirthstore.com.au\/cdn\/shop\/files\/nipple-cream-60gm-989970.jpg?v=1714968005"},"aspect_ratio":1.0,"height":950,"media_type":"image","src":"\/\/www.thebirthstore.com.au\/cdn\/shop\/files\/nipple-cream-60gm-989970.jpg?v=1714968005","width":950},{"alt":"Nipple Cream 60gm - The Birth Store-Mere Botanicals","id":27007594594493,"position":2,"preview_image":{"aspect_ratio":0.667,"height":2048,"width":1366,"src":"\/\/www.thebirthstore.com.au\/cdn\/shop\/files\/nipple-cream-60gm-521797.jpg?v=1714968005"},"aspect_ratio":0.667,"height":2048,"media_type":"image","src":"\/\/www.thebirthstore.com.au\/cdn\/shop\/files\/nipple-cream-60gm-521797.jpg?v=1714968005","width":1366},{"alt":"Nipple Cream 60gm - The Birth Store-Mere Botanicals","id":27007594627261,"position":3,"preview_image":{"aspect_ratio":1.0,"height":1125,"width":1125,"src":"\/\/www.thebirthstore.com.au\/cdn\/shop\/files\/nipple-cream-60gm-617514.webp?v=1714968005"},"aspect_ratio":1.0,"height":1125,"media_type":"image","src":"\/\/www.thebirthstore.com.au\/cdn\/shop\/files\/nipple-cream-60gm-617514.webp?v=1714968005","width":1125},{"alt":"Nipple Cream 60gm - The Birth Store-Mere Botanicals","id":27007594692797,"position":4,"preview_image":{"aspect_ratio":0.75,"height":1728,"width":1296,"src":"\/\/www.thebirthstore.com.au\/cdn\/shop\/files\/nipple-cream-60gm-672989.webp?v=1714968005"},"aspect_ratio":0.75,"height":1728,"media_type":"image","src":"\/\/www.thebirthstore.com.au\/cdn\/shop\/files\/nipple-cream-60gm-672989.webp?v=1714968005","width":1296},{"alt":"Nipple Cream 60gm - The Birth Store-Mere Botanicals","id":27007594758333,"position":5,"preview_image":{"aspect_ratio":0.667,"height":1536,"width":1024,"src":"\/\/www.thebirthstore.com.au\/cdn\/shop\/files\/nipple-cream-60gm-537665.jpg?v=1714968005"},"aspect_ratio":0.667,"height":1536,"media_type":"image","src":"\/\/www.thebirthstore.com.au\/cdn\/shop\/files\/nipple-cream-60gm-537665.jpg?v=1714968005","width":1024}],"requires_selling_plan":false,"selling_plan_groups":[],"content":"\u003cp data-mce-fragment=\"1\"\u003e\u003cspan data-mce-fragment=\"1\"\u003eThis beautifully formulated, non-greasy formulation of moisturising active botanicals naturally soothes, heals and hydrates. Mère Nipple Cream has no added fragrances, so the smell of Mum’s milk isn’t affected. For your convenience, this cream does not need to be removed before a feed.\u003c\/span\u003e\u003c\/p\u003e\n\u003cp data-mce-fragment=\"1\"\u003e\u003cspan data-mce-fragment=\"1\"\u003e\u003cstrong\u003eINGREDIENTS:\u003c\/strong\u003e Organic Prunus Amygdalus Dulcis (Sweet Almond) oil, Organic Calendula officinalis (Calendula) oil, Organic Matricaria chamomilla (Chamomile) flower infusion, Shea Butter, Aloe Barbadensis (Aloe Vera) leaf juice, Organic Lavandula angustifolia (Lavender) infusion, Organic Hypericum perforatum (St. John’s wort) oil, Zinc Sulphate, Cera alba (Bee's wax), Equisetum arvense (Horsetail) Extract, Althaea officinalis (Marshmallow) root extract, Organic Simmondsia Chinensis (Jojoba) seed oil, Organic Cocos nucifera (Coconut) oil, Natural Vitamin E (Mixed Tocopherols 70%), Natural rosemary antioxidant, Grapefruit seed extract.\u003cbr data-mce-fragment=\"1\"\u003e\u003cbr data-mce-fragment=\"1\"\u003eFree from silicones, parabens, PEGs, sulfates (SLS\/SLES), GMOs, mineral oils, petrolatum, synthetic colours and fragrances, or animal testing.\u003c\/span\u003e\u003c\/p\u003e\n\u003cp data-mce-fragment=\"1\"\u003e\u003cspan data-mce-fragment=\"1\"\u003eEvery product is created in with a conscious effort to support your body, your baby and the environment\u003c\/span\u003e\u003c\/p\u003e"},"options":[{"name":"Title","position":1,"values":["Default Title"]}],"custom_metafields":{},"metafields":{"badge":"\u003cdiv style='display:none' class='jdgm-prev-badge' data-average-rating='3.00' data-number-of-reviews='1' data-number-of-questions='0'\u003e \u003cspan class='jdgm-prev-badge__stars' data-score='3.00' tabindex='0' aria-label='3.00 stars' role='button'\u003e \u003cspan class='jdgm-star jdgm--on'\u003e\u003c\/span\u003e\u003cspan class='jdgm-star jdgm--on'\u003e\u003c\/span\u003e\u003cspan class='jdgm-star jdgm--on'\u003e\u003c\/span\u003e\u003cspan class='jdgm-star jdgm--off'\u003e\u003c\/span\u003e\u003cspan class='jdgm-star jdgm--off'\u003e\u003c\/span\u003e \u003c\/span\u003e \u003cspan class='jdgm-prev-badge__text'\u003e 1 review \u003c\/span\u003e \u003c\/div\u003e","widget":"\u003cdiv class='jdgm-rev-widg' data-updated-at='2026-03-30T07:38:30Z' data-average-rating='3.00' data-number-of-reviews='1' data-number-of-questions='0' data-image-url='https:\/\/cdn.shopify.com\/s\/files\/1\/0527\/3393\/5805\/files\/nipple-cream-60gm-989970.jpg?v=1714968005'\u003e \u003cstyle class='jdgm-temp-hiding-style'\u003e.jdgm-rev-widg{ display: none }\u003c\/style\u003e \u003cdiv class='jdgm-rev-widg__header'\u003e \u003ch2 class='jdgm-rev-widg__title'\u003eCustomer Reviews\u003c\/h2\u003e \u003cdiv class='jdgm-rev-widg__summary'\u003e \u003cdiv class='jdgm-rev-widg__summary-stars' aria-label='Average rating is 3.00 stars' role='img'\u003e \u003cspan class='jdgm-star jdgm--on'\u003e\u003c\/span\u003e\u003cspan class='jdgm-star jdgm--on'\u003e\u003c\/span\u003e\u003cspan class='jdgm-star jdgm--on'\u003e\u003c\/span\u003e\u003cspan class='jdgm-star jdgm--off'\u003e\u003c\/span\u003e\u003cspan class='jdgm-star jdgm--off'\u003e\u003c\/span\u003e \u003c\/div\u003e \u003cdiv class='jdgm-rev-widg__summary-text'\u003eBased on 1 review\u003c\/div\u003e \u003c\/div\u003e \u003ca style='display: none' href='#' class='jdgm-write-rev-link' role='button'\u003eWrite a review\u003c\/a\u003e \u003cdiv class='jdgm-histogram jdgm-temp-hidden'\u003e \u003cdiv class='jdgm-histogram__row' data-rating='5' data-frequency='0' data-percentage='0'\u003e \u003cdiv class='jdgm-histogram__star' role='button' aria-label=\"0% (0) reviews with 5 star rating\" tabindex='0' \u003e\u003cspan class='jdgm-star jdgm--on'\u003e\u003c\/span\u003e\u003cspan class='jdgm-star jdgm--on'\u003e\u003c\/span\u003e\u003cspan class='jdgm-star jdgm--on'\u003e\u003c\/span\u003e\u003cspan class='jdgm-star jdgm--on'\u003e\u003c\/span\u003e\u003cspan class='jdgm-star jdgm--on'\u003e\u003c\/span\u003e\u003c\/div\u003e \u003cdiv class='jdgm-histogram__bar'\u003e \u003cdiv class='jdgm-histogram__bar-content' style='width: 0%;'\u003e \u003c\/div\u003e \u003c\/div\u003e \u003cdiv class='jdgm-histogram__percentage'\u003e0%\u003c\/div\u003e \u003cdiv class='jdgm-histogram__frequency'\u003e(0)\u003c\/div\u003e \u003c\/div\u003e \u003cdiv class='jdgm-histogram__row' data-rating='4' data-frequency='0' data-percentage='0'\u003e \u003cdiv class='jdgm-histogram__star' role='button' aria-label=\"0% (0) reviews with 4 star rating\" tabindex='0' \u003e\u003cspan class='jdgm-star jdgm--on'\u003e\u003c\/span\u003e\u003cspan class='jdgm-star jdgm--on'\u003e\u003c\/span\u003e\u003cspan class='jdgm-star jdgm--on'\u003e\u003c\/span\u003e\u003cspan class='jdgm-star jdgm--on'\u003e\u003c\/span\u003e\u003cspan class='jdgm-star jdgm--off'\u003e\u003c\/span\u003e\u003c\/div\u003e \u003cdiv class='jdgm-histogram__bar'\u003e \u003cdiv class='jdgm-histogram__bar-content' style='width: 0%;'\u003e \u003c\/div\u003e \u003c\/div\u003e \u003cdiv class='jdgm-histogram__percentage'\u003e0%\u003c\/div\u003e \u003cdiv class='jdgm-histogram__frequency'\u003e(0)\u003c\/div\u003e \u003c\/div\u003e \u003cdiv class='jdgm-histogram__row' data-rating='3' data-frequency='1' data-percentage='100'\u003e \u003cdiv class='jdgm-histogram__star' role='button' aria-label=\"100% (1) reviews with 3 star rating\" tabindex='0' \u003e\u003cspan class='jdgm-star jdgm--on'\u003e\u003c\/span\u003e\u003cspan class='jdgm-star jdgm--on'\u003e\u003c\/span\u003e\u003cspan class='jdgm-star jdgm--on'\u003e\u003c\/span\u003e\u003cspan class='jdgm-star jdgm--off'\u003e\u003c\/span\u003e\u003cspan class='jdgm-star jdgm--off'\u003e\u003c\/span\u003e\u003c\/div\u003e \u003cdiv class='jdgm-histogram__bar'\u003e \u003cdiv class='jdgm-histogram__bar-content' style='width: 100%;'\u003e \u003c\/div\u003e \u003c\/div\u003e \u003cdiv class='jdgm-histogram__percentage'\u003e100%\u003c\/div\u003e \u003cdiv class='jdgm-histogram__frequency'\u003e(1)\u003c\/div\u003e \u003c\/div\u003e \u003cdiv class='jdgm-histogram__row' data-rating='2' data-frequency='0' data-percentage='0'\u003e \u003cdiv class='jdgm-histogram__star' role='button' aria-label=\"0% (0) reviews with 2 star rating\" tabindex='0' \u003e\u003cspan class='jdgm-star jdgm--on'\u003e\u003c\/span\u003e\u003cspan class='jdgm-star jdgm--on'\u003e\u003c\/span\u003e\u003cspan class='jdgm-star jdgm--off'\u003e\u003c\/span\u003e\u003cspan class='jdgm-star jdgm--off'\u003e\u003c\/span\u003e\u003cspan class='jdgm-star jdgm--off'\u003e\u003c\/span\u003e\u003c\/div\u003e \u003cdiv class='jdgm-histogram__bar'\u003e \u003cdiv class='jdgm-histogram__bar-content' style='width: 0%;'\u003e \u003c\/div\u003e \u003c\/div\u003e \u003cdiv class='jdgm-histogram__percentage'\u003e0%\u003c\/div\u003e \u003cdiv class='jdgm-histogram__frequency'\u003e(0)\u003c\/div\u003e \u003c\/div\u003e \u003cdiv class='jdgm-histogram__row' data-rating='1' data-frequency='0' data-percentage='0'\u003e \u003cdiv class='jdgm-histogram__star' role='button' aria-label=\"0% (0) reviews with 1 star rating\" tabindex='0' \u003e\u003cspan class='jdgm-star jdgm--on'\u003e\u003c\/span\u003e\u003cspan class='jdgm-star jdgm--off'\u003e\u003c\/span\u003e\u003cspan class='jdgm-star jdgm--off'\u003e\u003c\/span\u003e\u003cspan class='jdgm-star jdgm--off'\u003e\u003c\/span\u003e\u003cspan class='jdgm-star jdgm--off'\u003e\u003c\/span\u003e\u003c\/div\u003e \u003cdiv class='jdgm-histogram__bar'\u003e \u003cdiv class='jdgm-histogram__bar-content' style='width: 0%;'\u003e \u003c\/div\u003e \u003c\/div\u003e \u003cdiv class='jdgm-histogram__percentage'\u003e0%\u003c\/div\u003e \u003cdiv class='jdgm-histogram__frequency'\u003e(0)\u003c\/div\u003e \u003c\/div\u003e \u003cdiv class='jdgm-histogram__row jdgm-histogram__clear-filter' data-rating=null tabindex='0'\u003e\u003c\/div\u003e \u003c\/div\u003e \u003cdiv class='jdgm-rev-widg__sort-wrapper'\u003e\u003c\/div\u003e \u003c\/div\u003e \u003cdiv class='jdgm-rev-widg__body'\u003e \u003cdiv class='jdgm-rev-widg__reviews'\u003e\u003cdiv class='jdgm-rev jdgm-divider-top' data-verified-buyer='true' data-review-id='1ee5ea54-6d86-4290-946f-91e601f23120' data-review-language='' data-product-title='Nipple Cream 60gm' data-product-url='\/products\/nipple-cream-60gm' data-thumb-up-count='0' data-thumb-down-count='0'\u003e \u003cdiv class='jdgm-rev__header'\u003e \u003cdiv class='jdgm-rev__icon' \u003e C \u003c\/div\u003e \u003cspan class='jdgm-rev__rating' data-score='3' tabindex='0' aria-label='3 star review' role='img'\u003e \u003cspan class='jdgm-star jdgm--on'\u003e\u003c\/span\u003e\u003cspan class='jdgm-star jdgm--on'\u003e\u003c\/span\u003e\u003cspan class='jdgm-star jdgm--on'\u003e\u003c\/span\u003e\u003cspan class='jdgm-star jdgm--off'\u003e\u003c\/span\u003e\u003cspan class='jdgm-star jdgm--off'\u003e\u003c\/span\u003e \u003c\/span\u003e \u003cspan class='jdgm-rev__timestamp jdgm-spinner' data-content='2025-03-16 21:20:19 UTC'\u003e\u003c\/span\u003e \u003cdiv class='jdgm-rev__br'\u003e\u003c\/div\u003e \u003cspan class='jdgm-rev__buyer-badge-wrapper'\u003e \u003cspan class='jdgm-rev__buyer-badge'\u003e\u003c\/span\u003e \u003c\/span\u003e \u003cspan class='jdgm-rev__author-wrapper'\u003e \u003cspan class='jdgm-rev__author'\u003eChloe\u003c\/span\u003e \u003cspan class='jdgm-rev__location' \u003e \u003c\/span\u003e \u003c\/span\u003e \u003c\/div\u003e \u003cdiv class='jdgm-rev__content'\u003e \u003cdiv class='jdgm-rev__custom-form'\u003e \u003c\/div\u003e \u003cb class='jdgm-rev__title'\u003eNot midwife recommended\u003c\/b\u003e \u003cdiv class='jdgm-rev__body'\u003e\u003cp\u003eAt first glance, this looks lovely. When I received it, I noticed the main active ingredient is nut oils. My midwife advised only lanolin has been deemed as a safe nipple cream for babies and told me not to use it :(\u003c\/p\u003e\u003c\/div\u003e \u003cdiv class='jdgm-rev__pics'\u003e \u003c\/div\u003e \u003cdiv class='jdgm-rev__vids'\u003e \u003c\/div\u003e \u003cdiv class='jdgm-rev__transparency-badge-wrapper'\u003e \u003cdiv class='jdgm-rev__transparency-badge' data-badge-type=review_collected_via_store_invitation\u003e\u003c\/div\u003e \u003c\/div\u003e \u003c\/div\u003e \u003cdiv class='jdgm-rev__actions'\u003e \u003cdiv class='jdgm-rev__social'\u003e\u003c\/div\u003e \u003cdiv class='jdgm-rev__votes'\u003e\u003c\/div\u003e \u003c\/div\u003e \u003cdiv class='jdgm-rev__reply'\u003e \u003cdiv class='jdgm-rev__replier-wrapper'\u003e \u003cb class='jdgm-rev__replier'\u003e\u003c\/b\u003e \u003c\/div\u003e \u003cdiv class='jdgm-rev__reply-content'\u003e\u003cp\u003eThank you for sharing your feedback, Chloe. We’re sorry to hear this wasn’t the right fit for you. We always recommend checking ingredients and following guidance from your healthcare provider, and we truly appreciate you taking the time to share your experience with us ❤️\u003c\/p\u003e\u003c\/div\u003e \u003c\/div\u003e \u003c\/div\u003e\u003c\/div\u003e \u003cdiv class='jdgm-paginate' data-per-page='10' data-url='https:\/\/api.judge.me\/reviews\/reviews_for_widget' style=\"display: none;\"\u003e\u003c\/div\u003e \u003c\/div\u003e \u003cdiv class='jdgm-rev-widg__paginate-spinner-wrapper'\u003e \u003cdiv class='jdgm-spinner'\u003e\u003c\/div\u003e \u003c\/div\u003e \u003c\/div\u003e"},"collections":[{"id":281712427197,"handle":"breastfeeding","title":"Breastfeeding","updated_at":"2026-06-12T19:10:26+08:00","body_html":"","published_at":"2021-12-20T14:19:33+08:00","sort_order":"best-selling","template_suffix":"breastfeeding-collection","disjunctive":false,"rules":[{"column":"tag","relation":"equals","condition":"Breastfeeding"}],"published_scope":"global","image":{"created_at":"2024-05-06T11:59:34+08:00","alt":"Breastfeeding - The Birth Store","width":620,"height":635,"src":"\/\/www.thebirthstore.com.au\/cdn\/shop\/collections\/breastfeeding-793872.jpg?v=1714967974"}},{"id":261657460925,"handle":"buy","title":"Buy","updated_at":"2026-06-12T19:10:26+08:00","body_html":"\u003cp\u003eBrowse all of our pregnancy, labour \u0026amp; birth, postpartum and baby essentials here.\u003cbr\u003e\u003c\/p\u003e\n\u003cp\u003e\u003cspan\u003eYou can even buy now and pay later with Afterpay!\u003c\/span\u003e\u003c\/p\u003e","published_at":"2021-03-10T12:05:31+08:00","sort_order":"best-selling","template_suffix":"shop-all-collection","disjunctive":false,"rules":[{"column":"title","relation":"not_contains","condition":"Hire"}],"published_scope":"global","image":{"created_at":"2024-05-06T11:59:42+08:00","alt":"Buy - The Birth Store","width":2048,"height":2048,"src":"\/\/www.thebirthstore.com.au\/cdn\/shop\/collections\/buy-964856.jpg?v=1714967982"}},{"id":294349865149,"handle":"cracked-nipples","title":"Cracked Nipples","updated_at":"2026-06-02T19:09:48+08:00","body_html":"","published_at":"2023-09-21T14:03:02+08:00","sort_order":"best-selling","template_suffix":"swaddles-collection","disjunctive":false,"rules":[{"column":"tag","relation":"equals","condition":"Cracked Nipples"}],"published_scope":"global","image":{"created_at":"2024-05-06T11:59:53+08:00","alt":"Cracked Nipples - The Birth Store","width":1050,"height":1050,"src":"\/\/www.thebirthstore.com.au\/cdn\/shop\/collections\/cracked-nipples-166971.jpg?v=1714967994"}},{"id":337429201085,"handle":"hospital-bag","title":"Hospital Bag","updated_at":"2026-06-12T19:10:26+08:00","body_html":"","published_at":"2026-06-03T11:36:29+08:00","sort_order":"most-relevant","template_suffix":"","disjunctive":false,"rules":[{"column":"tag","relation":"equals","condition":"Hospital Bag"}],"published_scope":"global"},{"id":291456483517,"handle":"shop-all","title":"Shop All - Mum","updated_at":"2026-06-12T19:10:26+08:00","body_html":"","published_at":"2022-12-23T22:04:39+08:00","sort_order":"best-selling","template_suffix":"shop-all-collection","disjunctive":false,"rules":[{"column":"variant_price","relation":"greater_than","condition":"1"},{"column":"title","relation":"not_contains","condition":"Batteries"},{"column":"tag","relation":"equals","condition":"Mum"}],"published_scope":"global","image":{"created_at":"2024-05-06T12:00:54+08:00","alt":"Shop All - The Birth Store","width":1365,"height":2048,"src":"\/\/www.thebirthstore.com.au\/cdn\/shop\/collections\/shop-all-693176.jpg?v=1714968055"}},{"id":310045933757,"handle":"shop-all-sale","title":"Shop All Sale","updated_at":"2026-06-12T19:10:26+08:00","body_html":"","published_at":"2024-11-12T13:22:43+08:00","sort_order":"alpha-asc","template_suffix":"","disjunctive":true,"rules":[{"column":"tag","relation":"equals","condition":"Bundles"},{"column":"vendor","relation":"equals","condition":"Franjos Kitchen"},{"column":"vendor","relation":"equals","condition":"Adored Illustrations"},{"column":"vendor","relation":"equals","condition":"Amazing Oils"},{"column":"vendor","relation":"equals","condition":"Ice Ice Booby"},{"column":"vendor","relation":"equals","condition":"Made to Milk"},{"column":"vendor","relation":"equals","condition":"Milky Goodness"},{"column":"vendor","relation":"equals","condition":"Seasons of Mama"},{"column":"vendor","relation":"equals","condition":"Silverette"},{"column":"vendor","relation":"equals","condition":"Snuggle Hunny"},{"column":"vendor","relation":"equals","condition":"Yung Bod"},{"column":"vendor","relation":"equals","condition":"Bare Love"},{"column":"vendor","relation":"equals","condition":"Haakaa"},{"column":"vendor","relation":"equals","condition":"Mere Botanicals"},{"column":"vendor","relation":"equals","condition":"The Birth Store Hire"},{"column":"vendor","relation":"equals","condition":"The Birth Store"}],"published_scope":"global","image":{"created_at":"2024-11-13T10:58:16+08:00","alt":"Shop All Sale - The Birth Store","width":2048,"height":1365,"src":"\/\/www.thebirthstore.com.au\/cdn\/shop\/collections\/shop-all-sale-297361.jpg?v=1731466697"}}]}
{"item":{"id":7278215168189,"title":"Nursing Tea","handle":"nursing-tea","description":"\u003cp data-mce-fragment=\"1\"\u003e\u003cspan data-mce-fragment=\"1\"\u003eNaturopath formulated blend of 100% organic traditional herbs to support healthy breastfeeding. This \u003cspan class=\"il\" data-mce-fragment=\"1\"\u003etea\u003c\/span\u003e is blended with galactagogue herbs to help to stimulate breast milk production, calm a new mothers nerves and settle the new baby's tummy. Additionally, these herbs are known to have calming effects on babies digestive systems and help ease wind and colic.\u003c\/span\u003e\u003c\/p\u003e\n\u003cp data-mce-fragment=\"1\"\u003e\u003cspan data-mce-fragment=\"1\"\u003eMère Nursing \u003cspan class=\"il\" data-mce-fragment=\"1\"\u003etea\u003c\/span\u003e contains:\u003c\/span\u003e\u003cspan data-mce-fragment=\"1\"\u003e \u003c\/span\u003e\u003cspan data-mce-fragment=\"1\"\u003e blessed thistle \u003c\/span\u003e\u003cspan data-mce-fragment=\"1\"\u003e\/ fennel\u003c\/span\u003e\u003cspan data-mce-fragment=\"1\"\u003e \u003c\/span\u003e\u003cspan data-mce-fragment=\"1\"\u003e\/ alfalfa \/ nettle\u003c\/span\u003e\u003cspan data-mce-fragment=\"1\"\u003e \u003c\/span\u003e\u003cspan data-mce-fragment=\"1\"\u003e\/ caraway\u003c\/span\u003e\u003cspan data-mce-fragment=\"1\"\u003e \u003c\/span\u003e\u003cspan data-mce-fragment=\"1\"\u003e\/ lemon balm\u003c\/span\u003e\u003cspan data-mce-fragment=\"1\"\u003e \u003c\/span\u003e\u003cspan data-mce-fragment=\"1\"\u003e\/ fenugreek\u003c\/span\u003e\u003c\/p\u003e","published_at":"2022-07-01T21:54:35+08:00","created_at":"2022-06-29T13:03:48+08:00","vendor":"Mere Botanicals","type":"","tags":["Breastfeeding","Lactation Products","Mum"],"price":1695,"price_min":1695,"price_max":1695,"available":false,"price_varies":false,"compare_at_price":1695,"compare_at_price_min":1695,"compare_at_price_max":1695,"compare_at_price_varies":false,"variants":[{"id":42071934009533,"title":"Default Title","option1":"Default Title","option2":null,"option3":null,"sku":"","requires_shipping":true,"taxable":false,"featured_image":null,"available":false,"name":"Nursing Tea","public_title":null,"options":["Default Title"],"price":1695,"weight":71,"compare_at_price":1695,"inventory_management":"shopify","barcode":"34009533","requires_selling_plan":false,"selling_plan_allocations":[],"quantity_rule":{"min":1,"max":null,"increment":1}}],"images":["\/\/www.thebirthstore.com.au\/cdn\/shop\/files\/nursing-tea-441741.jpg?v=1714968005","\/\/www.thebirthstore.com.au\/cdn\/shop\/files\/nursing-tea-808861.jpg?v=1714968005","\/\/www.thebirthstore.com.au\/cdn\/shop\/files\/nursing-tea-176326.jpg?v=1714968005","\/\/www.thebirthstore.com.au\/cdn\/shop\/files\/nursing-tea-909354.jpg?v=1714968005"],"featured_image":"\/\/www.thebirthstore.com.au\/cdn\/shop\/files\/nursing-tea-441741.jpg?v=1714968005","options":["Title"],"media":[{"alt":"Nursing Tea - The Birth Store-Mere Botanicals","id":27007594397885,"position":1,"preview_image":{"aspect_ratio":1.0,"height":828,"width":828,"src":"\/\/www.thebirthstore.com.au\/cdn\/shop\/files\/nursing-tea-441741.jpg?v=1714968005"},"aspect_ratio":1.0,"height":828,"media_type":"image","src":"\/\/www.thebirthstore.com.au\/cdn\/shop\/files\/nursing-tea-441741.jpg?v=1714968005","width":828},{"alt":"Nursing Tea - The Birth Store-Mere Botanicals","id":27007594430653,"position":2,"preview_image":{"aspect_ratio":0.719,"height":1391,"width":1000,"src":"\/\/www.thebirthstore.com.au\/cdn\/shop\/files\/nursing-tea-808861.jpg?v=1714968005"},"aspect_ratio":0.719,"height":1391,"media_type":"image","src":"\/\/www.thebirthstore.com.au\/cdn\/shop\/files\/nursing-tea-808861.jpg?v=1714968005","width":1000},{"alt":"Nursing Tea - The Birth Store-Mere Botanicals","id":27007594463421,"position":3,"preview_image":{"aspect_ratio":0.667,"height":1242,"width":828,"src":"\/\/www.thebirthstore.com.au\/cdn\/shop\/files\/nursing-tea-176326.jpg?v=1714968005"},"aspect_ratio":0.667,"height":1242,"media_type":"image","src":"\/\/www.thebirthstore.com.au\/cdn\/shop\/files\/nursing-tea-176326.jpg?v=1714968005","width":828},{"alt":"Nursing Tea - The Birth Store-Mere Botanicals","id":27007594496189,"position":4,"preview_image":{"aspect_ratio":1.5,"height":1365,"width":2048,"src":"\/\/www.thebirthstore.com.au\/cdn\/shop\/files\/nursing-tea-909354.jpg?v=1714968005"},"aspect_ratio":1.5,"height":1365,"media_type":"image","src":"\/\/www.thebirthstore.com.au\/cdn\/shop\/files\/nursing-tea-909354.jpg?v=1714968005","width":2048}],"requires_selling_plan":false,"selling_plan_groups":[],"content":"\u003cp data-mce-fragment=\"1\"\u003e\u003cspan data-mce-fragment=\"1\"\u003eNaturopath formulated blend of 100% organic traditional herbs to support healthy breastfeeding. This \u003cspan class=\"il\" data-mce-fragment=\"1\"\u003etea\u003c\/span\u003e is blended with galactagogue herbs to help to stimulate breast milk production, calm a new mothers nerves and settle the new baby's tummy. Additionally, these herbs are known to have calming effects on babies digestive systems and help ease wind and colic.\u003c\/span\u003e\u003c\/p\u003e\n\u003cp data-mce-fragment=\"1\"\u003e\u003cspan data-mce-fragment=\"1\"\u003eMère Nursing \u003cspan class=\"il\" data-mce-fragment=\"1\"\u003etea\u003c\/span\u003e contains:\u003c\/span\u003e\u003cspan data-mce-fragment=\"1\"\u003e \u003c\/span\u003e\u003cspan data-mce-fragment=\"1\"\u003e blessed thistle \u003c\/span\u003e\u003cspan data-mce-fragment=\"1\"\u003e\/ fennel\u003c\/span\u003e\u003cspan data-mce-fragment=\"1\"\u003e \u003c\/span\u003e\u003cspan data-mce-fragment=\"1\"\u003e\/ alfalfa \/ nettle\u003c\/span\u003e\u003cspan data-mce-fragment=\"1\"\u003e \u003c\/span\u003e\u003cspan data-mce-fragment=\"1\"\u003e\/ caraway\u003c\/span\u003e\u003cspan data-mce-fragment=\"1\"\u003e \u003c\/span\u003e\u003cspan data-mce-fragment=\"1\"\u003e\/ lemon balm\u003c\/span\u003e\u003cspan data-mce-fragment=\"1\"\u003e \u003c\/span\u003e\u003cspan data-mce-fragment=\"1\"\u003e\/ fenugreek\u003c\/span\u003e\u003c\/p\u003e"},"options":[{"name":"Title","position":1,"values":["Default Title"]}],"custom_metafields":{},"metafields":{"badge":"\u003cdiv style='display:none' class='jdgm-prev-badge' data-average-rating='0.00' data-number-of-reviews='0' data-number-of-questions='0'\u003e \u003cspan class='jdgm-prev-badge__stars' data-score='0.00' tabindex='0' aria-label='0.00 stars' role='button'\u003e \u003cspan class='jdgm-star jdgm--off'\u003e\u003c\/span\u003e\u003cspan class='jdgm-star jdgm--off'\u003e\u003c\/span\u003e\u003cspan class='jdgm-star jdgm--off'\u003e\u003c\/span\u003e\u003cspan class='jdgm-star jdgm--off'\u003e\u003c\/span\u003e\u003cspan class='jdgm-star jdgm--off'\u003e\u003c\/span\u003e \u003c\/span\u003e \u003cspan class='jdgm-prev-badge__text'\u003e No reviews \u003c\/span\u003e \u003c\/div\u003e","widget":"\u003cdiv class='jdgm-rev-widg' data-updated-at='2025-06-13T16:12:10Z' data-average-rating='0.00' data-number-of-reviews='0' data-number-of-questions='0'\u003e \u003cstyle class='jdgm-temp-hiding-style'\u003e.jdgm-rev-widg{ display: none }\u003c\/style\u003e \u003cdiv class='jdgm-rev-widg__header'\u003e \u003ch2 class='jdgm-rev-widg__title'\u003eCustomer Reviews\u003c\/h2\u003e \u003cdiv class='jdgm-rev-widg__summary'\u003e \u003cdiv class='jdgm-rev-widg__summary-stars' aria-label='Average rating is 0.00 stars' role='img'\u003e \u003cspan class='jdgm-star jdgm--off'\u003e\u003c\/span\u003e\u003cspan class='jdgm-star jdgm--off'\u003e\u003c\/span\u003e\u003cspan class='jdgm-star jdgm--off'\u003e\u003c\/span\u003e\u003cspan class='jdgm-star jdgm--off'\u003e\u003c\/span\u003e\u003cspan class='jdgm-star jdgm--off'\u003e\u003c\/span\u003e \u003c\/div\u003e \u003cdiv class='jdgm-rev-widg__summary-text'\u003eBe the first to write a review\u003c\/div\u003e \u003c\/div\u003e \u003ca style='display: none' href='#' class='jdgm-write-rev-link' role='button'\u003eWrite a review\u003c\/a\u003e \u003cdiv class='jdgm-histogram jdgm-temp-hidden'\u003e \u003cdiv class='jdgm-histogram__row' data-rating='5' data-frequency='0' data-percentage='0'\u003e \u003cdiv class='jdgm-histogram__star' role='button' aria-label=\"0% (0) reviews with 5 star rating\" tabindex='0' \u003e\u003cspan class='jdgm-star jdgm--on'\u003e\u003c\/span\u003e\u003cspan class='jdgm-star jdgm--on'\u003e\u003c\/span\u003e\u003cspan class='jdgm-star jdgm--on'\u003e\u003c\/span\u003e\u003cspan class='jdgm-star jdgm--on'\u003e\u003c\/span\u003e\u003cspan class='jdgm-star jdgm--on'\u003e\u003c\/span\u003e\u003c\/div\u003e \u003cdiv class='jdgm-histogram__bar'\u003e \u003cdiv class='jdgm-histogram__bar-content' style='width: 0%;'\u003e \u003c\/div\u003e \u003c\/div\u003e \u003cdiv class='jdgm-histogram__percentage'\u003e0%\u003c\/div\u003e \u003cdiv class='jdgm-histogram__frequency'\u003e(0)\u003c\/div\u003e \u003c\/div\u003e \u003cdiv class='jdgm-histogram__row' data-rating='4' data-frequency='0' data-percentage='0'\u003e \u003cdiv class='jdgm-histogram__star' role='button' aria-label=\"0% (0) reviews with 4 star rating\" tabindex='0' \u003e\u003cspan class='jdgm-star jdgm--on'\u003e\u003c\/span\u003e\u003cspan class='jdgm-star jdgm--on'\u003e\u003c\/span\u003e\u003cspan class='jdgm-star jdgm--on'\u003e\u003c\/span\u003e\u003cspan class='jdgm-star jdgm--on'\u003e\u003c\/span\u003e\u003cspan class='jdgm-star jdgm--off'\u003e\u003c\/span\u003e\u003c\/div\u003e \u003cdiv class='jdgm-histogram__bar'\u003e \u003cdiv class='jdgm-histogram__bar-content' style='width: 0%;'\u003e \u003c\/div\u003e \u003c\/div\u003e \u003cdiv class='jdgm-histogram__percentage'\u003e0%\u003c\/div\u003e \u003cdiv class='jdgm-histogram__frequency'\u003e(0)\u003c\/div\u003e \u003c\/div\u003e \u003cdiv class='jdgm-histogram__row' data-rating='3' data-frequency='0' data-percentage='0'\u003e \u003cdiv class='jdgm-histogram__star' role='button' aria-label=\"0% (0) reviews with 3 star rating\" tabindex='0' \u003e\u003cspan class='jdgm-star jdgm--on'\u003e\u003c\/span\u003e\u003cspan class='jdgm-star jdgm--on'\u003e\u003c\/span\u003e\u003cspan class='jdgm-star jdgm--on'\u003e\u003c\/span\u003e\u003cspan class='jdgm-star jdgm--off'\u003e\u003c\/span\u003e\u003cspan class='jdgm-star jdgm--off'\u003e\u003c\/span\u003e\u003c\/div\u003e \u003cdiv class='jdgm-histogram__bar'\u003e \u003cdiv class='jdgm-histogram__bar-content' style='width: 0%;'\u003e \u003c\/div\u003e \u003c\/div\u003e \u003cdiv class='jdgm-histogram__percentage'\u003e0%\u003c\/div\u003e \u003cdiv class='jdgm-histogram__frequency'\u003e(0)\u003c\/div\u003e \u003c\/div\u003e \u003cdiv class='jdgm-histogram__row' data-rating='2' data-frequency='0' data-percentage='0'\u003e \u003cdiv class='jdgm-histogram__star' role='button' aria-label=\"0% (0) reviews with 2 star rating\" tabindex='0' \u003e\u003cspan class='jdgm-star jdgm--on'\u003e\u003c\/span\u003e\u003cspan class='jdgm-star jdgm--on'\u003e\u003c\/span\u003e\u003cspan class='jdgm-star jdgm--off'\u003e\u003c\/span\u003e\u003cspan class='jdgm-star jdgm--off'\u003e\u003c\/span\u003e\u003cspan class='jdgm-star jdgm--off'\u003e\u003c\/span\u003e\u003c\/div\u003e \u003cdiv class='jdgm-histogram__bar'\u003e \u003cdiv class='jdgm-histogram__bar-content' style='width: 0%;'\u003e \u003c\/div\u003e \u003c\/div\u003e \u003cdiv class='jdgm-histogram__percentage'\u003e0%\u003c\/div\u003e \u003cdiv class='jdgm-histogram__frequency'\u003e(0)\u003c\/div\u003e \u003c\/div\u003e \u003cdiv class='jdgm-histogram__row' data-rating='1' data-frequency='0' data-percentage='0'\u003e \u003cdiv class='jdgm-histogram__star' role='button' aria-label=\"0% (0) reviews with 1 star rating\" tabindex='0' \u003e\u003cspan class='jdgm-star jdgm--on'\u003e\u003c\/span\u003e\u003cspan class='jdgm-star jdgm--off'\u003e\u003c\/span\u003e\u003cspan class='jdgm-star jdgm--off'\u003e\u003c\/span\u003e\u003cspan class='jdgm-star jdgm--off'\u003e\u003c\/span\u003e\u003cspan class='jdgm-star jdgm--off'\u003e\u003c\/span\u003e\u003c\/div\u003e \u003cdiv class='jdgm-histogram__bar'\u003e \u003cdiv class='jdgm-histogram__bar-content' style='width: 0%;'\u003e \u003c\/div\u003e \u003c\/div\u003e \u003cdiv class='jdgm-histogram__percentage'\u003e0%\u003c\/div\u003e \u003cdiv class='jdgm-histogram__frequency'\u003e(0)\u003c\/div\u003e \u003c\/div\u003e \u003cdiv class='jdgm-histogram__row jdgm-histogram__clear-filter' data-rating=null tabindex='0'\u003e\u003c\/div\u003e \u003c\/div\u003e \u003cdiv class='jdgm-rev-widg__sort-wrapper'\u003e\u003c\/div\u003e \u003c\/div\u003e \u003cdiv class='jdgm-rev-widg__body'\u003e \u003cdiv class='jdgm-rev-widg__reviews'\u003e\u003c\/div\u003e \u003cdiv class='jdgm-paginate' data-per-page='10' data-url='https:\/\/api.judge.me\/reviews\/reviews_for_widget' style=\"display: none;\"\u003e\u003c\/div\u003e \u003c\/div\u003e \u003cdiv class='jdgm-rev-widg__paginate-spinner-wrapper'\u003e \u003cdiv class='jdgm-spinner'\u003e\u003c\/div\u003e \u003c\/div\u003e \u003c\/div\u003e"},"collections":[{"id":281712427197,"handle":"breastfeeding","title":"Breastfeeding","updated_at":"2026-06-12T19:10:26+08:00","body_html":"","published_at":"2021-12-20T14:19:33+08:00","sort_order":"best-selling","template_suffix":"breastfeeding-collection","disjunctive":false,"rules":[{"column":"tag","relation":"equals","condition":"Breastfeeding"}],"published_scope":"global","image":{"created_at":"2024-05-06T11:59:34+08:00","alt":"Breastfeeding - The Birth Store","width":620,"height":635,"src":"\/\/www.thebirthstore.com.au\/cdn\/shop\/collections\/breastfeeding-793872.jpg?v=1714967974"}},{"id":261657460925,"handle":"buy","title":"Buy","updated_at":"2026-06-12T19:10:26+08:00","body_html":"\u003cp\u003eBrowse all of our pregnancy, labour \u0026amp; birth, postpartum and baby essentials here.\u003cbr\u003e\u003c\/p\u003e\n\u003cp\u003e\u003cspan\u003eYou can even buy now and pay later with Afterpay!\u003c\/span\u003e\u003c\/p\u003e","published_at":"2021-03-10T12:05:31+08:00","sort_order":"best-selling","template_suffix":"shop-all-collection","disjunctive":false,"rules":[{"column":"title","relation":"not_contains","condition":"Hire"}],"published_scope":"global","image":{"created_at":"2024-05-06T11:59:42+08:00","alt":"Buy - The Birth Store","width":2048,"height":2048,"src":"\/\/www.thebirthstore.com.au\/cdn\/shop\/collections\/buy-964856.jpg?v=1714967982"}},{"id":292919476413,"handle":"lactation-products","title":"Lactation Products","updated_at":"2026-06-12T19:10:26+08:00","body_html":"","published_at":"2023-03-22T12:22:41+08:00","sort_order":"best-selling","template_suffix":"lactation-products-collec","disjunctive":false,"rules":[{"column":"tag","relation":"equals","condition":"Lactation Products"}],"published_scope":"global","image":{"created_at":"2024-05-06T12:00:19+08:00","alt":"Lactation Products - The Birth Store","width":1034,"height":922,"src":"\/\/www.thebirthstore.com.au\/cdn\/shop\/collections\/lactation-products-752907.jpg?v=1714968019"}},{"id":291456483517,"handle":"shop-all","title":"Shop All - Mum","updated_at":"2026-06-12T19:10:26+08:00","body_html":"","published_at":"2022-12-23T22:04:39+08:00","sort_order":"best-selling","template_suffix":"shop-all-collection","disjunctive":false,"rules":[{"column":"variant_price","relation":"greater_than","condition":"1"},{"column":"title","relation":"not_contains","condition":"Batteries"},{"column":"tag","relation":"equals","condition":"Mum"}],"published_scope":"global","image":{"created_at":"2024-05-06T12:00:54+08:00","alt":"Shop All - The Birth Store","width":1365,"height":2048,"src":"\/\/www.thebirthstore.com.au\/cdn\/shop\/collections\/shop-all-693176.jpg?v=1714968055"}},{"id":310045933757,"handle":"shop-all-sale","title":"Shop All Sale","updated_at":"2026-06-12T19:10:26+08:00","body_html":"","published_at":"2024-11-12T13:22:43+08:00","sort_order":"alpha-asc","template_suffix":"","disjunctive":true,"rules":[{"column":"tag","relation":"equals","condition":"Bundles"},{"column":"vendor","relation":"equals","condition":"Franjos Kitchen"},{"column":"vendor","relation":"equals","condition":"Adored Illustrations"},{"column":"vendor","relation":"equals","condition":"Amazing Oils"},{"column":"vendor","relation":"equals","condition":"Ice Ice Booby"},{"column":"vendor","relation":"equals","condition":"Made to Milk"},{"column":"vendor","relation":"equals","condition":"Milky Goodness"},{"column":"vendor","relation":"equals","condition":"Seasons of Mama"},{"column":"vendor","relation":"equals","condition":"Silverette"},{"column":"vendor","relation":"equals","condition":"Snuggle Hunny"},{"column":"vendor","relation":"equals","condition":"Yung Bod"},{"column":"vendor","relation":"equals","condition":"Bare Love"},{"column":"vendor","relation":"equals","condition":"Haakaa"},{"column":"vendor","relation":"equals","condition":"Mere Botanicals"},{"column":"vendor","relation":"equals","condition":"The Birth Store Hire"},{"column":"vendor","relation":"equals","condition":"The Birth Store"}],"published_scope":"global","image":{"created_at":"2024-11-13T10:58:16+08:00","alt":"Shop All Sale - The Birth Store","width":2048,"height":1365,"src":"\/\/www.thebirthstore.com.au\/cdn\/shop\/collections\/shop-all-sale-297361.jpg?v=1731466697"}}]}
{"item":{"id":7470242234557,"title":"Lactation Drink Mix","handle":"lactation-chocolate-drink-mix","description":"\u003cp\u003eLooking for the perfect tantalising drink to boost your milk supply?\u003c\/p\u003e\n\u003cp\u003eMade with a smooth organic fair trade Dutch cocoa, this drink made\u003cem\u003e\u003cspan\u003e \u003c\/span\u003ehot or cold\u003c\/em\u003e\u003cspan\u003e \u003c\/span\u003ewill give a rich creamy taste.\u003cspan\u003e \u003c\/span\u003e\u003cb data-mce-fragment=\"1\"\u003e\u003ci data-mce-fragment=\"1\"\u003eFree from gluten, dairy, soy as well as vegan friendly\u003c\/i\u003e\u003c\/b\u003e this drink is perfect for anytime of the day.\u003c\/p\u003e\n\u003cp\u003eOur 550gm bag is going to keep you stocked up for over a month. Allowing for a total of 44 serves. \u003c\/p\u003e\n\u003cp\u003eWith a shelf life of 12 months. Ensure to reseal each time. Store in the cool dry place.\u003c\/p\u003e\n\u003cp\u003e\u003cem\u003e(Note, this product is gluten free however current packaging doesn’t reflect this due to a print error. If you have any questions or concerns please don’t hesitate to ask)\u003c\/em\u003e\u003c\/p\u003e","published_at":"2023-05-04T10:38:17+08:00","created_at":"2023-05-04T10:38:17+08:00","vendor":"Milky Goodness","type":"","tags":["Baby Shower Gifts - Mum","Breastfeeding","Lactation Products","Mum"],"price":3495,"price_min":3495,"price_max":3495,"available":true,"price_varies":false,"compare_at_price":null,"compare_at_price_min":0,"compare_at_price_max":0,"compare_at_price_varies":false,"variants":[{"id":43221250506941,"title":"Chocolate","option1":"Chocolate","option2":null,"option3":null,"sku":"","requires_shipping":true,"taxable":false,"featured_image":{"id":34641020158141,"product_id":7470242234557,"position":1,"created_at":"2024-05-06T11:59:48+08:00","updated_at":"2024-05-06T11:59:48+08:00","alt":"Lactation Drink Mix - 2 Flavours - The Birth Store-Milky Goodness","width":1080,"height":1080,"src":"\/\/www.thebirthstore.com.au\/cdn\/shop\/files\/lactation-drink-mix-2-flavours-638247.jpg?v=1714967988","variant_ids":[43221250506941]},"available":true,"name":"Lactation Drink Mix - Chocolate","public_title":"Chocolate","options":["Chocolate"],"price":3495,"weight":570,"compare_at_price":null,"inventory_management":"shopify","barcode":"49978813","featured_media":{"alt":"Lactation Drink Mix - 2 Flavours - The Birth Store-Milky Goodness","id":27007589056701,"position":1,"preview_image":{"aspect_ratio":1.0,"height":1080,"width":1080,"src":"\/\/www.thebirthstore.com.au\/cdn\/shop\/files\/lactation-drink-mix-2-flavours-638247.jpg?v=1714967988"}},"requires_selling_plan":false,"selling_plan_allocations":[],"quantity_rule":{"min":1,"max":null,"increment":1}},{"id":43221250539709,"title":"Caramel","option1":"Caramel","option2":null,"option3":null,"sku":"","requires_shipping":true,"taxable":false,"featured_image":{"id":38738801852605,"product_id":7470242234557,"position":7,"created_at":"2025-11-02T23:00:05+08:00","updated_at":"2025-11-03T12:22:53+08:00","alt":"Lactation Drink Mix - The Birth Store - Milky Goodness","width":1080,"height":1080,"src":"\/\/www.thebirthstore.com.au\/cdn\/shop\/files\/lactation-drink-mix-7750148.png?v=1762143773","variant_ids":[43221250539709]},"available":true,"name":"Lactation Drink Mix - Caramel","public_title":"Caramel","options":["Caramel"],"price":3495,"weight":570,"compare_at_price":null,"inventory_management":"shopify","barcode":"50539709","featured_media":{"alt":"Lactation Drink Mix - The Birth Store - Milky Goodness","id":29988493754557,"position":7,"preview_image":{"aspect_ratio":1.0,"height":1080,"width":1080,"src":"\/\/www.thebirthstore.com.au\/cdn\/shop\/files\/lactation-drink-mix-7750148.png?v=1762143773"}},"requires_selling_plan":false,"selling_plan_allocations":[],"quantity_rule":{"min":1,"max":null,"increment":1}}],"images":["\/\/www.thebirthstore.com.au\/cdn\/shop\/files\/lactation-drink-mix-2-flavours-638247.jpg?v=1714967988","\/\/www.thebirthstore.com.au\/cdn\/shop\/files\/lactation-drink-mix-2-flavours-524784.jpg?v=1714967988","\/\/www.thebirthstore.com.au\/cdn\/shop\/files\/lactation-drink-mix-2-flavours-310364.jpg?v=1714967988","\/\/www.thebirthstore.com.au\/cdn\/shop\/files\/lactation-drink-mix-2-flavours-976020.jpg?v=1714967988","\/\/www.thebirthstore.com.au\/cdn\/shop\/files\/lactation-drink-mix-2-flavours-888113.jpg?v=1714967988","\/\/www.thebirthstore.com.au\/cdn\/shop\/files\/lactation-drink-mix-2-flavours-793483.jpg?v=1714967988","\/\/www.thebirthstore.com.au\/cdn\/shop\/files\/lactation-drink-mix-7750148.png?v=1762143773"],"featured_image":"\/\/www.thebirthstore.com.au\/cdn\/shop\/files\/lactation-drink-mix-2-flavours-638247.jpg?v=1714967988","options":["Flavour"],"media":[{"alt":"Lactation Drink Mix - 2 Flavours - The Birth Store-Milky Goodness","id":27007589056701,"position":1,"preview_image":{"aspect_ratio":1.0,"height":1080,"width":1080,"src":"\/\/www.thebirthstore.com.au\/cdn\/shop\/files\/lactation-drink-mix-2-flavours-638247.jpg?v=1714967988"},"aspect_ratio":1.0,"height":1080,"media_type":"image","src":"\/\/www.thebirthstore.com.au\/cdn\/shop\/files\/lactation-drink-mix-2-flavours-638247.jpg?v=1714967988","width":1080},{"alt":"Lactation Drink Mix - 2 Flavours - The Birth Store-Milky Goodness","id":27007589286077,"position":2,"preview_image":{"aspect_ratio":1.0,"height":511,"width":511,"src":"\/\/www.thebirthstore.com.au\/cdn\/shop\/files\/lactation-drink-mix-2-flavours-524784.jpg?v=1714967988"},"aspect_ratio":1.0,"height":511,"media_type":"image","src":"\/\/www.thebirthstore.com.au\/cdn\/shop\/files\/lactation-drink-mix-2-flavours-524784.jpg?v=1714967988","width":511},{"alt":"Lactation Drink Mix - 2 Flavours - The Birth Store-Milky Goodness","id":27007589351613,"position":3,"preview_image":{"aspect_ratio":1.0,"height":1000,"width":1000,"src":"\/\/www.thebirthstore.com.au\/cdn\/shop\/files\/lactation-drink-mix-2-flavours-310364.jpg?v=1714967988"},"aspect_ratio":1.0,"height":1000,"media_type":"image","src":"\/\/www.thebirthstore.com.au\/cdn\/shop\/files\/lactation-drink-mix-2-flavours-310364.jpg?v=1714967988","width":1000},{"alt":"Lactation Drink Mix - 2 Flavours - The Birth Store-Milky Goodness","id":27007589449917,"position":4,"preview_image":{"aspect_ratio":1.0,"height":511,"width":511,"src":"\/\/www.thebirthstore.com.au\/cdn\/shop\/files\/lactation-drink-mix-2-flavours-976020.jpg?v=1714967988"},"aspect_ratio":1.0,"height":511,"media_type":"image","src":"\/\/www.thebirthstore.com.au\/cdn\/shop\/files\/lactation-drink-mix-2-flavours-976020.jpg?v=1714967988","width":511},{"alt":"Lactation Drink Mix - 2 Flavours - The Birth Store-Milky Goodness","id":27007589548221,"position":5,"preview_image":{"aspect_ratio":0.503,"height":1192,"width":600,"src":"\/\/www.thebirthstore.com.au\/cdn\/shop\/files\/lactation-drink-mix-2-flavours-888113.jpg?v=1714967988"},"aspect_ratio":0.503,"height":1192,"media_type":"image","src":"\/\/www.thebirthstore.com.au\/cdn\/shop\/files\/lactation-drink-mix-2-flavours-888113.jpg?v=1714967988","width":600},{"alt":"Lactation Drink Mix - 2 Flavours - The Birth Store-Milky Goodness","id":27007589646525,"position":6,"preview_image":{"aspect_ratio":0.502,"height":1258,"width":632,"src":"\/\/www.thebirthstore.com.au\/cdn\/shop\/files\/lactation-drink-mix-2-flavours-793483.jpg?v=1714967988"},"aspect_ratio":0.502,"height":1258,"media_type":"image","src":"\/\/www.thebirthstore.com.au\/cdn\/shop\/files\/lactation-drink-mix-2-flavours-793483.jpg?v=1714967988","width":632},{"alt":"Lactation Drink Mix - The Birth Store - Milky Goodness","id":29988493754557,"position":7,"preview_image":{"aspect_ratio":1.0,"height":1080,"width":1080,"src":"\/\/www.thebirthstore.com.au\/cdn\/shop\/files\/lactation-drink-mix-7750148.png?v=1762143773"},"aspect_ratio":1.0,"height":1080,"media_type":"image","src":"\/\/www.thebirthstore.com.au\/cdn\/shop\/files\/lactation-drink-mix-7750148.png?v=1762143773","width":1080}],"requires_selling_plan":false,"selling_plan_groups":[],"content":"\u003cp\u003eLooking for the perfect tantalising drink to boost your milk supply?\u003c\/p\u003e\n\u003cp\u003eMade with a smooth organic fair trade Dutch cocoa, this drink made\u003cem\u003e\u003cspan\u003e \u003c\/span\u003ehot or cold\u003c\/em\u003e\u003cspan\u003e \u003c\/span\u003ewill give a rich creamy taste.\u003cspan\u003e \u003c\/span\u003e\u003cb data-mce-fragment=\"1\"\u003e\u003ci data-mce-fragment=\"1\"\u003eFree from gluten, dairy, soy as well as vegan friendly\u003c\/i\u003e\u003c\/b\u003e this drink is perfect for anytime of the day.\u003c\/p\u003e\n\u003cp\u003eOur 550gm bag is going to keep you stocked up for over a month. Allowing for a total of 44 serves. \u003c\/p\u003e\n\u003cp\u003eWith a shelf life of 12 months. Ensure to reseal each time. Store in the cool dry place.\u003c\/p\u003e\n\u003cp\u003e\u003cem\u003e(Note, this product is gluten free however current packaging doesn’t reflect this due to a print error. If you have any questions or concerns please don’t hesitate to ask)\u003c\/em\u003e\u003c\/p\u003e"},"options":[{"name":"Flavour","position":1,"values":["Chocolate","Caramel"]}],"custom_metafields":{},"metafields":{"badge":"\u003cdiv style='display:none' class='jdgm-prev-badge' data-average-rating='0.00' data-number-of-reviews='0' data-number-of-questions='0'\u003e \u003cspan class='jdgm-prev-badge__stars' data-score='0.00' tabindex='0' aria-label='0.00 stars' role='button'\u003e \u003cspan class='jdgm-star jdgm--off'\u003e\u003c\/span\u003e\u003cspan class='jdgm-star jdgm--off'\u003e\u003c\/span\u003e\u003cspan class='jdgm-star jdgm--off'\u003e\u003c\/span\u003e\u003cspan class='jdgm-star jdgm--off'\u003e\u003c\/span\u003e\u003cspan class='jdgm-star jdgm--off'\u003e\u003c\/span\u003e \u003c\/span\u003e \u003cspan class='jdgm-prev-badge__text'\u003e No reviews \u003c\/span\u003e \u003c\/div\u003e","widget":"\u003cdiv class='jdgm-rev-widg' data-updated-at='2025-06-13T16:12:53Z' data-average-rating='0.00' data-number-of-reviews='0' data-number-of-questions='0'\u003e \u003cstyle class='jdgm-temp-hiding-style'\u003e.jdgm-rev-widg{ display: none }\u003c\/style\u003e \u003cdiv class='jdgm-rev-widg__header'\u003e \u003ch2 class='jdgm-rev-widg__title'\u003eCustomer Reviews\u003c\/h2\u003e \u003cdiv class='jdgm-rev-widg__summary'\u003e \u003cdiv class='jdgm-rev-widg__summary-stars' aria-label='Average rating is 0.00 stars' role='img'\u003e \u003cspan class='jdgm-star jdgm--off'\u003e\u003c\/span\u003e\u003cspan class='jdgm-star jdgm--off'\u003e\u003c\/span\u003e\u003cspan class='jdgm-star jdgm--off'\u003e\u003c\/span\u003e\u003cspan class='jdgm-star jdgm--off'\u003e\u003c\/span\u003e\u003cspan class='jdgm-star jdgm--off'\u003e\u003c\/span\u003e \u003c\/div\u003e \u003cdiv class='jdgm-rev-widg__summary-text'\u003eBe the first to write a review\u003c\/div\u003e \u003c\/div\u003e \u003ca style='display: none' href='#' class='jdgm-write-rev-link' role='button'\u003eWrite a review\u003c\/a\u003e \u003cdiv class='jdgm-histogram jdgm-temp-hidden'\u003e \u003cdiv class='jdgm-histogram__row' data-rating='5' data-frequency='0' data-percentage='0'\u003e \u003cdiv class='jdgm-histogram__star' role='button' aria-label=\"0% (0) reviews with 5 star rating\" tabindex='0' \u003e\u003cspan class='jdgm-star jdgm--on'\u003e\u003c\/span\u003e\u003cspan class='jdgm-star jdgm--on'\u003e\u003c\/span\u003e\u003cspan class='jdgm-star jdgm--on'\u003e\u003c\/span\u003e\u003cspan class='jdgm-star jdgm--on'\u003e\u003c\/span\u003e\u003cspan class='jdgm-star jdgm--on'\u003e\u003c\/span\u003e\u003c\/div\u003e \u003cdiv class='jdgm-histogram__bar'\u003e \u003cdiv class='jdgm-histogram__bar-content' style='width: 0%;'\u003e \u003c\/div\u003e \u003c\/div\u003e \u003cdiv class='jdgm-histogram__percentage'\u003e0%\u003c\/div\u003e \u003cdiv class='jdgm-histogram__frequency'\u003e(0)\u003c\/div\u003e \u003c\/div\u003e \u003cdiv class='jdgm-histogram__row' data-rating='4' data-frequency='0' data-percentage='0'\u003e \u003cdiv class='jdgm-histogram__star' role='button' aria-label=\"0% (0) reviews with 4 star rating\" tabindex='0' \u003e\u003cspan class='jdgm-star jdgm--on'\u003e\u003c\/span\u003e\u003cspan class='jdgm-star jdgm--on'\u003e\u003c\/span\u003e\u003cspan class='jdgm-star jdgm--on'\u003e\u003c\/span\u003e\u003cspan class='jdgm-star jdgm--on'\u003e\u003c\/span\u003e\u003cspan class='jdgm-star jdgm--off'\u003e\u003c\/span\u003e\u003c\/div\u003e \u003cdiv class='jdgm-histogram__bar'\u003e \u003cdiv class='jdgm-histogram__bar-content' style='width: 0%;'\u003e \u003c\/div\u003e \u003c\/div\u003e \u003cdiv class='jdgm-histogram__percentage'\u003e0%\u003c\/div\u003e \u003cdiv class='jdgm-histogram__frequency'\u003e(0)\u003c\/div\u003e \u003c\/div\u003e \u003cdiv class='jdgm-histogram__row' data-rating='3' data-frequency='0' data-percentage='0'\u003e \u003cdiv class='jdgm-histogram__star' role='button' aria-label=\"0% (0) reviews with 3 star rating\" tabindex='0' \u003e\u003cspan class='jdgm-star jdgm--on'\u003e\u003c\/span\u003e\u003cspan class='jdgm-star jdgm--on'\u003e\u003c\/span\u003e\u003cspan class='jdgm-star jdgm--on'\u003e\u003c\/span\u003e\u003cspan class='jdgm-star jdgm--off'\u003e\u003c\/span\u003e\u003cspan class='jdgm-star jdgm--off'\u003e\u003c\/span\u003e\u003c\/div\u003e \u003cdiv class='jdgm-histogram__bar'\u003e \u003cdiv class='jdgm-histogram__bar-content' style='width: 0%;'\u003e \u003c\/div\u003e \u003c\/div\u003e \u003cdiv class='jdgm-histogram__percentage'\u003e0%\u003c\/div\u003e \u003cdiv class='jdgm-histogram__frequency'\u003e(0)\u003c\/div\u003e \u003c\/div\u003e \u003cdiv class='jdgm-histogram__row' data-rating='2' data-frequency='0' data-percentage='0'\u003e \u003cdiv class='jdgm-histogram__star' role='button' aria-label=\"0% (0) reviews with 2 star rating\" tabindex='0' \u003e\u003cspan class='jdgm-star jdgm--on'\u003e\u003c\/span\u003e\u003cspan class='jdgm-star jdgm--on'\u003e\u003c\/span\u003e\u003cspan class='jdgm-star jdgm--off'\u003e\u003c\/span\u003e\u003cspan class='jdgm-star jdgm--off'\u003e\u003c\/span\u003e\u003cspan class='jdgm-star jdgm--off'\u003e\u003c\/span\u003e\u003c\/div\u003e \u003cdiv class='jdgm-histogram__bar'\u003e \u003cdiv class='jdgm-histogram__bar-content' style='width: 0%;'\u003e \u003c\/div\u003e \u003c\/div\u003e \u003cdiv class='jdgm-histogram__percentage'\u003e0%\u003c\/div\u003e \u003cdiv class='jdgm-histogram__frequency'\u003e(0)\u003c\/div\u003e \u003c\/div\u003e \u003cdiv class='jdgm-histogram__row' data-rating='1' data-frequency='0' data-percentage='0'\u003e \u003cdiv class='jdgm-histogram__star' role='button' aria-label=\"0% (0) reviews with 1 star rating\" tabindex='0' \u003e\u003cspan class='jdgm-star jdgm--on'\u003e\u003c\/span\u003e\u003cspan class='jdgm-star jdgm--off'\u003e\u003c\/span\u003e\u003cspan class='jdgm-star jdgm--off'\u003e\u003c\/span\u003e\u003cspan class='jdgm-star jdgm--off'\u003e\u003c\/span\u003e\u003cspan class='jdgm-star jdgm--off'\u003e\u003c\/span\u003e\u003c\/div\u003e \u003cdiv class='jdgm-histogram__bar'\u003e \u003cdiv class='jdgm-histogram__bar-content' style='width: 0%;'\u003e \u003c\/div\u003e \u003c\/div\u003e \u003cdiv class='jdgm-histogram__percentage'\u003e0%\u003c\/div\u003e \u003cdiv class='jdgm-histogram__frequency'\u003e(0)\u003c\/div\u003e \u003c\/div\u003e \u003cdiv class='jdgm-histogram__row jdgm-histogram__clear-filter' data-rating=null tabindex='0'\u003e\u003c\/div\u003e \u003c\/div\u003e \u003cdiv class='jdgm-rev-widg__sort-wrapper'\u003e\u003c\/div\u003e \u003c\/div\u003e \u003cdiv class='jdgm-rev-widg__body'\u003e \u003cdiv class='jdgm-rev-widg__reviews'\u003e\u003c\/div\u003e \u003cdiv class='jdgm-paginate' data-per-page='10' data-url='https:\/\/api.judge.me\/reviews\/reviews_for_widget' style=\"display: none;\"\u003e\u003c\/div\u003e \u003c\/div\u003e \u003cdiv class='jdgm-rev-widg__paginate-spinner-wrapper'\u003e \u003cdiv class='jdgm-spinner'\u003e\u003c\/div\u003e \u003c\/div\u003e \u003c\/div\u003e"},"collections":[{"id":281356533949,"handle":"baby-shower-gifts","title":"Baby Shower Gifts - Mum","updated_at":"2026-06-12T19:10:25+08:00","body_html":"\u003cp\u003eLooking for a unique baby shower gift? Or an all-in-one bundle pack to suit all your needs? We've got just the thing!\u003c\/p\u003e","published_at":"2021-12-06T13:43:56+08:00","sort_order":"best-selling","template_suffix":"baby-shower-gifts","disjunctive":true,"rules":[{"column":"tag","relation":"equals","condition":"Baby Shower Gifts - Mum"},{"column":"tag","relation":"equals","condition":"Gift Card"}],"published_scope":"global","image":{"created_at":"2024-05-06T11:59:28+08:00","alt":"Baby Shower Gifts - The Birth Store","width":1200,"height":1800,"src":"\/\/www.thebirthstore.com.au\/cdn\/shop\/collections\/baby-shower-gifts-401770.jpg?v=1761791272"}},{"id":281712427197,"handle":"breastfeeding","title":"Breastfeeding","updated_at":"2026-06-12T19:10:26+08:00","body_html":"","published_at":"2021-12-20T14:19:33+08:00","sort_order":"best-selling","template_suffix":"breastfeeding-collection","disjunctive":false,"rules":[{"column":"tag","relation":"equals","condition":"Breastfeeding"}],"published_scope":"global","image":{"created_at":"2024-05-06T11:59:34+08:00","alt":"Breastfeeding - The Birth Store","width":620,"height":635,"src":"\/\/www.thebirthstore.com.au\/cdn\/shop\/collections\/breastfeeding-793872.jpg?v=1714967974"}},{"id":261657460925,"handle":"buy","title":"Buy","updated_at":"2026-06-12T19:10:26+08:00","body_html":"\u003cp\u003eBrowse all of our pregnancy, labour \u0026amp; birth, postpartum and baby essentials here.\u003cbr\u003e\u003c\/p\u003e\n\u003cp\u003e\u003cspan\u003eYou can even buy now and pay later with Afterpay!\u003c\/span\u003e\u003c\/p\u003e","published_at":"2021-03-10T12:05:31+08:00","sort_order":"best-selling","template_suffix":"shop-all-collection","disjunctive":false,"rules":[{"column":"title","relation":"not_contains","condition":"Hire"}],"published_scope":"global","image":{"created_at":"2024-05-06T11:59:42+08:00","alt":"Buy - The Birth Store","width":2048,"height":2048,"src":"\/\/www.thebirthstore.com.au\/cdn\/shop\/collections\/buy-964856.jpg?v=1714967982"}},{"id":292919476413,"handle":"lactation-products","title":"Lactation Products","updated_at":"2026-06-12T19:10:26+08:00","body_html":"","published_at":"2023-03-22T12:22:41+08:00","sort_order":"best-selling","template_suffix":"lactation-products-collec","disjunctive":false,"rules":[{"column":"tag","relation":"equals","condition":"Lactation Products"}],"published_scope":"global","image":{"created_at":"2024-05-06T12:00:19+08:00","alt":"Lactation Products - The Birth Store","width":1034,"height":922,"src":"\/\/www.thebirthstore.com.au\/cdn\/shop\/collections\/lactation-products-752907.jpg?v=1714968019"}},{"id":291456483517,"handle":"shop-all","title":"Shop All - Mum","updated_at":"2026-06-12T19:10:26+08:00","body_html":"","published_at":"2022-12-23T22:04:39+08:00","sort_order":"best-selling","template_suffix":"shop-all-collection","disjunctive":false,"rules":[{"column":"variant_price","relation":"greater_than","condition":"1"},{"column":"title","relation":"not_contains","condition":"Batteries"},{"column":"tag","relation":"equals","condition":"Mum"}],"published_scope":"global","image":{"created_at":"2024-05-06T12:00:54+08:00","alt":"Shop All - The Birth Store","width":1365,"height":2048,"src":"\/\/www.thebirthstore.com.au\/cdn\/shop\/collections\/shop-all-693176.jpg?v=1714968055"}},{"id":310045933757,"handle":"shop-all-sale","title":"Shop All Sale","updated_at":"2026-06-12T19:10:26+08:00","body_html":"","published_at":"2024-11-12T13:22:43+08:00","sort_order":"alpha-asc","template_suffix":"","disjunctive":true,"rules":[{"column":"tag","relation":"equals","condition":"Bundles"},{"column":"vendor","relation":"equals","condition":"Franjos Kitchen"},{"column":"vendor","relation":"equals","condition":"Adored Illustrations"},{"column":"vendor","relation":"equals","condition":"Amazing Oils"},{"column":"vendor","relation":"equals","condition":"Ice Ice Booby"},{"column":"vendor","relation":"equals","condition":"Made to Milk"},{"column":"vendor","relation":"equals","condition":"Milky Goodness"},{"column":"vendor","relation":"equals","condition":"Seasons of Mama"},{"column":"vendor","relation":"equals","condition":"Silverette"},{"column":"vendor","relation":"equals","condition":"Snuggle Hunny"},{"column":"vendor","relation":"equals","condition":"Yung Bod"},{"column":"vendor","relation":"equals","condition":"Bare Love"},{"column":"vendor","relation":"equals","condition":"Haakaa"},{"column":"vendor","relation":"equals","condition":"Mere Botanicals"},{"column":"vendor","relation":"equals","condition":"The Birth Store Hire"},{"column":"vendor","relation":"equals","condition":"The Birth Store"}],"published_scope":"global","image":{"created_at":"2024-11-13T10:58:16+08:00","alt":"Shop All Sale - The Birth Store","width":2048,"height":1365,"src":"\/\/www.thebirthstore.com.au\/cdn\/shop\/collections\/shop-all-sale-297361.jpg?v=1731466697"}}]}
{"item":{"id":8115729268925,"title":"Hydration Booster","handle":"hydro-bump-hydration-booster","description":"\u003ch1\u003eHydration Booster\u003c\/h1\u003e\n\u003cp\u003e \u003c\/p\u003e\n\u003cdiv class=\"text-left col9 black\"\u003e\n\u003cp\u003e\u003cspan\u003eDid you know a lack of hydration can lead to severe pregnancy complications? We did! In one easy-to-use sachet, we’ve packed all the ingredients you need to have the optimal hydrations level during pregnancy and postpartum based on recommended daily in-takes and Australian Guidelines. \u003c\/span\u003e\u003c\/p\u003e\n\u003cp\u003e \u003c\/p\u003e\n\u003cp\u003e\u003cstrong\u003eFlavours;\u003c\/strong\u003e\u003c\/p\u003e\n\u003cp\u003e\u003cspan\u003e\u003cstrong\u003eWatermelon flavour -\u003c\/strong\u003e is a juicy and succulent sensation that captures the essence of summer, delivering a burst of sweet and refreshing notes reminiscent of biting into a perfectly ripe, chilled watermelon on a hot day.\u003cbr\u003e\u003cbr\u003e\u003cstrong\u003eTropical flavour - \u003c\/strong\u003eis a juicy and succulent sensation that captures the essence of summer, delivering a burst of sweet yet citrusy and refreshing notes reminiscent of biting into a fresh fruit on a hot day.\u003cbr\u003e\u003c\/span\u003e\u003c\/p\u003e\n\u003cp\u003e\u003cspan\u003e\u003cstrong\u003eSour Berry - \u003c\/strong\u003eflavour is a tantalising blend of sourness and sweetness (think of Zapoo’s!), invoking the crisp and refreshing taste of a bowl of berries with a zesty kick that awakens the taste buds.\u003c\/span\u003e\u003c\/p\u003e\n\u003cp\u003e\u003cspan\u003e\u003cstrong\u003eSour Apple - \u003c\/strong\u003eflavour is a tantalising blend of tartness and sweetness, invoking the crisp and refreshing taste of green apples with a zesty kick that awakens the taste buds.\u003c\/span\u003e\u003c\/p\u003e\n\u003cp\u003e \u003c\/p\u003e\n\u003cp\u003e\u003cspan\u003e12 X 11.36g Sachets per box\u003c\/span\u003e\u003c\/p\u003e\n\u003c\/div\u003e","published_at":"2025-10-25T11:21:55+08:00","created_at":"2025-10-25T11:10:12+08:00","vendor":"HydroBump","type":"","tags":["Baby Shower Gifts - Mum","Birth","Breastfeeding","Hospital Bag","Lactation Products","Mum","Nausea","Post-Partum","Pre-Conception","Pregnancy","Pregnancy Health"],"price":1995,"price_min":1995,"price_max":1995,"available":true,"price_varies":false,"compare_at_price":null,"compare_at_price_min":0,"compare_at_price_max":0,"compare_at_price_varies":false,"variants":[{"id":45841286201533,"title":"Watermelon","option1":"Watermelon","option2":null,"option3":null,"sku":null,"requires_shipping":true,"taxable":false,"featured_image":{"id":38738791628989,"product_id":8115729268925,"position":6,"created_at":"2025-11-02T22:56:30+08:00","updated_at":"2025-11-06T22:16:27+08:00","alt":"Hydro Bump Hydration Booster - The Birth Store - HydroBump","width":1080,"height":1080,"src":"\/\/www.thebirthstore.com.au\/cdn\/shop\/files\/hydro-bump-hydration-booster-3454516.png?v=1762438587","variant_ids":[45841286201533]},"available":true,"name":"Hydration Booster - Watermelon","public_title":"Watermelon","options":["Watermelon"],"price":1995,"weight":150,"compare_at_price":null,"inventory_management":"shopify","barcode":"86201533","featured_media":{"alt":"Hydro Bump Hydration Booster - The Birth Store - HydroBump","id":29988486381757,"position":6,"preview_image":{"aspect_ratio":1.0,"height":1080,"width":1080,"src":"\/\/www.thebirthstore.com.au\/cdn\/shop\/files\/hydro-bump-hydration-booster-3454516.png?v=1762438587"}},"requires_selling_plan":false,"selling_plan_allocations":[],"quantity_rule":{"min":1,"max":null,"increment":1}},{"id":45841286299837,"title":"Sour Berry","option1":"Sour Berry","option2":null,"option3":null,"sku":null,"requires_shipping":true,"taxable":false,"featured_image":{"id":38738783043773,"product_id":8115729268925,"position":1,"created_at":"2025-11-02T22:53:57+08:00","updated_at":"2025-11-06T22:16:27+08:00","alt":"Hydro Bump Hydration Booster - The Birth Store - HydroBump","width":1080,"height":1080,"src":"\/\/www.thebirthstore.com.au\/cdn\/shop\/files\/hydro-bump-hydration-booster-1398499.png?v=1762438587","variant_ids":[45841286299837]},"available":true,"name":"Hydration Booster - Sour Berry","public_title":"Sour Berry","options":["Sour Berry"],"price":1995,"weight":150,"compare_at_price":null,"inventory_management":"shopify","barcode":"86299837","featured_media":{"alt":"Hydro Bump Hydration Booster - The Birth Store - HydroBump","id":29988479926461,"position":1,"preview_image":{"aspect_ratio":1.0,"height":1080,"width":1080,"src":"\/\/www.thebirthstore.com.au\/cdn\/shop\/files\/hydro-bump-hydration-booster-1398499.png?v=1762438587"}},"requires_selling_plan":false,"selling_plan_allocations":[],"quantity_rule":{"min":1,"max":null,"increment":1}},{"id":45841286365373,"title":"Sour Apple","option1":"Sour Apple","option2":null,"option3":null,"sku":null,"requires_shipping":true,"taxable":false,"featured_image":{"id":38738788679869,"product_id":8115729268925,"position":7,"created_at":"2025-11-02T22:55:45+08:00","updated_at":"2025-11-03T12:22:55+08:00","alt":"Hydro Bump Hydration Booster - The Birth Store - HydroBump","width":1080,"height":1080,"src":"\/\/www.thebirthstore.com.au\/cdn\/shop\/files\/hydro-bump-hydration-booster-1395674.png?v=1762143775","variant_ids":[45841286365373]},"available":true,"name":"Hydration Booster - Sour Apple","public_title":"Sour Apple","options":["Sour Apple"],"price":1995,"weight":150,"compare_at_price":null,"inventory_management":"shopify","barcode":"86365373","featured_media":{"alt":"Hydro Bump Hydration Booster - The Birth Store - HydroBump","id":29988484087997,"position":7,"preview_image":{"aspect_ratio":1.0,"height":1080,"width":1080,"src":"\/\/www.thebirthstore.com.au\/cdn\/shop\/files\/hydro-bump-hydration-booster-1395674.png?v=1762143775"}},"requires_selling_plan":false,"selling_plan_allocations":[],"quantity_rule":{"min":1,"max":null,"increment":1}},{"id":45841286430909,"title":"Tropical","option1":"Tropical","option2":null,"option3":null,"sku":null,"requires_shipping":true,"taxable":false,"featured_image":{"id":38738785501373,"product_id":8115729268925,"position":8,"created_at":"2025-11-02T22:54:50+08:00","updated_at":"2025-11-03T12:22:55+08:00","alt":"Hydro Bump Hydration Booster - The Birth Store - HydroBump","width":1080,"height":1080,"src":"\/\/www.thebirthstore.com.au\/cdn\/shop\/files\/hydro-bump-hydration-booster-5058892.png?v=1762143775","variant_ids":[45841286430909]},"available":true,"name":"Hydration Booster - Tropical","public_title":"Tropical","options":["Tropical"],"price":1995,"weight":150,"compare_at_price":null,"inventory_management":"shopify","barcode":"86430909","featured_media":{"alt":"Hydro Bump Hydration Booster - The Birth Store - HydroBump","id":29988481859773,"position":8,"preview_image":{"aspect_ratio":1.0,"height":1080,"width":1080,"src":"\/\/www.thebirthstore.com.au\/cdn\/shop\/files\/hydro-bump-hydration-booster-5058892.png?v=1762143775"}},"requires_selling_plan":false,"selling_plan_allocations":[],"quantity_rule":{"min":1,"max":null,"increment":1}},{"id":46852766073021,"title":"Strawberries \u0026 Cream","option1":"Strawberries \u0026 Cream","option2":null,"option3":null,"sku":null,"requires_shipping":true,"taxable":false,"featured_image":{"id":40391116619965,"product_id":8115729268925,"position":9,"created_at":"2026-06-06T11:26:46+08:00","updated_at":"2026-06-07T10:05:10+08:00","alt":"Hydration Booster - The Birth Store - HydroBump","width":300,"height":200,"src":"\/\/www.thebirthstore.com.au\/cdn\/shop\/files\/hydration-booster-8314770.jpg?v=1780797910","variant_ids":[46852766073021]},"available":true,"name":"Hydration Booster - Strawberries \u0026 Cream","public_title":"Strawberries \u0026 Cream","options":["Strawberries \u0026 Cream"],"price":1995,"weight":150,"compare_at_price":null,"inventory_management":"shopify","barcode":"66073021","featured_media":{"alt":"Hydration Booster - The Birth Store - HydroBump","id":31492662984893,"position":9,"preview_image":{"aspect_ratio":1.5,"height":200,"width":300,"src":"\/\/www.thebirthstore.com.au\/cdn\/shop\/files\/hydration-booster-8314770.jpg?v=1780797910"}},"requires_selling_plan":false,"selling_plan_allocations":[],"quantity_rule":{"min":1,"max":null,"increment":1}},{"id":46852766761149,"title":"Sour Gummy","option1":"Sour Gummy","option2":null,"option3":null,"sku":null,"requires_shipping":true,"taxable":false,"featured_image":{"id":40391118880957,"product_id":8115729268925,"position":10,"created_at":"2026-06-06T11:27:14+08:00","updated_at":"2026-06-07T10:05:11+08:00","alt":"Hydration Booster - The Birth Store - HydroBump","width":1500,"height":1000,"src":"\/\/www.thebirthstore.com.au\/cdn\/shop\/files\/hydration-booster-6137322.jpg?v=1780797911","variant_ids":[46852766761149]},"available":true,"name":"Hydration Booster - Sour Gummy","public_title":"Sour Gummy","options":["Sour Gummy"],"price":1995,"weight":150,"compare_at_price":null,"inventory_management":"shopify","barcode":"66761149","featured_media":{"alt":"Hydration Booster - The Birth Store - HydroBump","id":31492665245885,"position":10,"preview_image":{"aspect_ratio":1.5,"height":1000,"width":1500,"src":"\/\/www.thebirthstore.com.au\/cdn\/shop\/files\/hydration-booster-6137322.jpg?v=1780797911"}},"requires_selling_plan":false,"selling_plan_allocations":[],"quantity_rule":{"min":1,"max":null,"increment":1}}],"images":["\/\/www.thebirthstore.com.au\/cdn\/shop\/files\/hydro-bump-hydration-booster-1398499.png?v=1762438587","\/\/www.thebirthstore.com.au\/cdn\/shop\/files\/hydro-bump-hydration-booster-2809712.png?v=1762438587","\/\/www.thebirthstore.com.au\/cdn\/shop\/files\/hydro-bump-hydration-booster-2731290.png?v=1762438587","\/\/www.thebirthstore.com.au\/cdn\/shop\/files\/hydro-bump-hydration-booster-6133242.png?v=1762438587","\/\/www.thebirthstore.com.au\/cdn\/shop\/files\/hydro-bump-hydration-booster-2769763.png?v=1762438587","\/\/www.thebirthstore.com.au\/cdn\/shop\/files\/hydro-bump-hydration-booster-3454516.png?v=1762438587","\/\/www.thebirthstore.com.au\/cdn\/shop\/files\/hydro-bump-hydration-booster-1395674.png?v=1762143775","\/\/www.thebirthstore.com.au\/cdn\/shop\/files\/hydro-bump-hydration-booster-5058892.png?v=1762143775","\/\/www.thebirthstore.com.au\/cdn\/shop\/files\/hydration-booster-8314770.jpg?v=1780797910","\/\/www.thebirthstore.com.au\/cdn\/shop\/files\/hydration-booster-6137322.jpg?v=1780797911"],"featured_image":"\/\/www.thebirthstore.com.au\/cdn\/shop\/files\/hydro-bump-hydration-booster-1398499.png?v=1762438587","options":["Flavour"],"media":[{"alt":"Hydro Bump Hydration Booster - The Birth Store - HydroBump","id":29988479926461,"position":1,"preview_image":{"aspect_ratio":1.0,"height":1080,"width":1080,"src":"\/\/www.thebirthstore.com.au\/cdn\/shop\/files\/hydro-bump-hydration-booster-1398499.png?v=1762438587"},"aspect_ratio":1.0,"height":1080,"media_type":"image","src":"\/\/www.thebirthstore.com.au\/cdn\/shop\/files\/hydro-bump-hydration-booster-1398499.png?v=1762438587","width":1080},{"alt":"Hydro Bump Hydration Booster - The Birth Store - HydroBump","id":29906136400061,"position":2,"preview_image":{"aspect_ratio":0.998,"height":468,"width":467,"src":"\/\/www.thebirthstore.com.au\/cdn\/shop\/files\/hydro-bump-hydration-booster-2809712.png?v=1762438587"},"aspect_ratio":0.998,"height":468,"media_type":"image","src":"\/\/www.thebirthstore.com.au\/cdn\/shop\/files\/hydro-bump-hydration-booster-2809712.png?v=1762438587","width":467},{"alt":"Hydro Bump Hydration Booster - The Birth Store - HydroBump","id":29906136498365,"position":3,"preview_image":{"aspect_ratio":0.998,"height":455,"width":454,"src":"\/\/www.thebirthstore.com.au\/cdn\/shop\/files\/hydro-bump-hydration-booster-2731290.png?v=1762438587"},"aspect_ratio":0.998,"height":455,"media_type":"image","src":"\/\/www.thebirthstore.com.au\/cdn\/shop\/files\/hydro-bump-hydration-booster-2731290.png?v=1762438587","width":454},{"alt":"Hydro Bump Hydration Booster - The Birth Store - HydroBump","id":29906136465597,"position":4,"preview_image":{"aspect_ratio":1.08,"height":451,"width":487,"src":"\/\/www.thebirthstore.com.au\/cdn\/shop\/files\/hydro-bump-hydration-booster-6133242.png?v=1762438587"},"aspect_ratio":1.08,"height":451,"media_type":"image","src":"\/\/www.thebirthstore.com.au\/cdn\/shop\/files\/hydro-bump-hydration-booster-6133242.png?v=1762438587","width":487},{"alt":"Hydro Bump Hydration Booster - The Birth Store - HydroBump","id":29906136432829,"position":5,"preview_image":{"aspect_ratio":0.998,"height":458,"width":457,"src":"\/\/www.thebirthstore.com.au\/cdn\/shop\/files\/hydro-bump-hydration-booster-2769763.png?v=1762438587"},"aspect_ratio":0.998,"height":458,"media_type":"image","src":"\/\/www.thebirthstore.com.au\/cdn\/shop\/files\/hydro-bump-hydration-booster-2769763.png?v=1762438587","width":457},{"alt":"Hydro Bump Hydration Booster - The Birth Store - HydroBump","id":29988486381757,"position":6,"preview_image":{"aspect_ratio":1.0,"height":1080,"width":1080,"src":"\/\/www.thebirthstore.com.au\/cdn\/shop\/files\/hydro-bump-hydration-booster-3454516.png?v=1762438587"},"aspect_ratio":1.0,"height":1080,"media_type":"image","src":"\/\/www.thebirthstore.com.au\/cdn\/shop\/files\/hydro-bump-hydration-booster-3454516.png?v=1762438587","width":1080},{"alt":"Hydro Bump Hydration Booster - The Birth Store - HydroBump","id":29988484087997,"position":7,"preview_image":{"aspect_ratio":1.0,"height":1080,"width":1080,"src":"\/\/www.thebirthstore.com.au\/cdn\/shop\/files\/hydro-bump-hydration-booster-1395674.png?v=1762143775"},"aspect_ratio":1.0,"height":1080,"media_type":"image","src":"\/\/www.thebirthstore.com.au\/cdn\/shop\/files\/hydro-bump-hydration-booster-1395674.png?v=1762143775","width":1080},{"alt":"Hydro Bump Hydration Booster - The Birth Store - HydroBump","id":29988481859773,"position":8,"preview_image":{"aspect_ratio":1.0,"height":1080,"width":1080,"src":"\/\/www.thebirthstore.com.au\/cdn\/shop\/files\/hydro-bump-hydration-booster-5058892.png?v=1762143775"},"aspect_ratio":1.0,"height":1080,"media_type":"image","src":"\/\/www.thebirthstore.com.au\/cdn\/shop\/files\/hydro-bump-hydration-booster-5058892.png?v=1762143775","width":1080},{"alt":"Hydration Booster - The Birth Store - HydroBump","id":31492662984893,"position":9,"preview_image":{"aspect_ratio":1.5,"height":200,"width":300,"src":"\/\/www.thebirthstore.com.au\/cdn\/shop\/files\/hydration-booster-8314770.jpg?v=1780797910"},"aspect_ratio":1.5,"height":200,"media_type":"image","src":"\/\/www.thebirthstore.com.au\/cdn\/shop\/files\/hydration-booster-8314770.jpg?v=1780797910","width":300},{"alt":"Hydration Booster - The Birth Store - HydroBump","id":31492665245885,"position":10,"preview_image":{"aspect_ratio":1.5,"height":1000,"width":1500,"src":"\/\/www.thebirthstore.com.au\/cdn\/shop\/files\/hydration-booster-6137322.jpg?v=1780797911"},"aspect_ratio":1.5,"height":1000,"media_type":"image","src":"\/\/www.thebirthstore.com.au\/cdn\/shop\/files\/hydration-booster-6137322.jpg?v=1780797911","width":1500}],"requires_selling_plan":false,"selling_plan_groups":[],"content":"\u003ch1\u003eHydration Booster\u003c\/h1\u003e\n\u003cp\u003e \u003c\/p\u003e\n\u003cdiv class=\"text-left col9 black\"\u003e\n\u003cp\u003e\u003cspan\u003eDid you know a lack of hydration can lead to severe pregnancy complications? We did! In one easy-to-use sachet, we’ve packed all the ingredients you need to have the optimal hydrations level during pregnancy and postpartum based on recommended daily in-takes and Australian Guidelines. \u003c\/span\u003e\u003c\/p\u003e\n\u003cp\u003e \u003c\/p\u003e\n\u003cp\u003e\u003cstrong\u003eFlavours;\u003c\/strong\u003e\u003c\/p\u003e\n\u003cp\u003e\u003cspan\u003e\u003cstrong\u003eWatermelon flavour -\u003c\/strong\u003e is a juicy and succulent sensation that captures the essence of summer, delivering a burst of sweet and refreshing notes reminiscent of biting into a perfectly ripe, chilled watermelon on a hot day.\u003cbr\u003e\u003cbr\u003e\u003cstrong\u003eTropical flavour - \u003c\/strong\u003eis a juicy and succulent sensation that captures the essence of summer, delivering a burst of sweet yet citrusy and refreshing notes reminiscent of biting into a fresh fruit on a hot day.\u003cbr\u003e\u003c\/span\u003e\u003c\/p\u003e\n\u003cp\u003e\u003cspan\u003e\u003cstrong\u003eSour Berry - \u003c\/strong\u003eflavour is a tantalising blend of sourness and sweetness (think of Zapoo’s!), invoking the crisp and refreshing taste of a bowl of berries with a zesty kick that awakens the taste buds.\u003c\/span\u003e\u003c\/p\u003e\n\u003cp\u003e\u003cspan\u003e\u003cstrong\u003eSour Apple - \u003c\/strong\u003eflavour is a tantalising blend of tartness and sweetness, invoking the crisp and refreshing taste of green apples with a zesty kick that awakens the taste buds.\u003c\/span\u003e\u003c\/p\u003e\n\u003cp\u003e \u003c\/p\u003e\n\u003cp\u003e\u003cspan\u003e12 X 11.36g Sachets per box\u003c\/span\u003e\u003c\/p\u003e\n\u003c\/div\u003e"},"options":[{"name":"Flavour","position":1,"values":["Watermelon","Sour Berry","Sour Apple","Tropical","Strawberries \u0026 Cream","Sour Gummy"]}],"custom_metafields":{},"metafields":{"badge":"\u003cdiv style='display:none' class='jdgm-prev-badge' data-average-rating='0.00' data-number-of-reviews='0' data-number-of-questions='0'\u003e \u003cspan class='jdgm-prev-badge__stars' data-score='0.00' tabindex='0' aria-label='0.00 stars' role='button'\u003e \u003cspan class='jdgm-star jdgm--off'\u003e\u003c\/span\u003e\u003cspan class='jdgm-star jdgm--off'\u003e\u003c\/span\u003e\u003cspan class='jdgm-star jdgm--off'\u003e\u003c\/span\u003e\u003cspan class='jdgm-star jdgm--off'\u003e\u003c\/span\u003e\u003cspan class='jdgm-star jdgm--off'\u003e\u003c\/span\u003e \u003c\/span\u003e \u003cspan class='jdgm-prev-badge__text'\u003e No reviews \u003c\/span\u003e \u003c\/div\u003e","widget":"\u003cdiv class='jdgm-rev-widg' data-updated-at='2025-10-25T03:24:33Z' data-average-rating='0.00' data-number-of-reviews='0' data-number-of-questions='0' data-image-url='https:\/\/cdn.shopify.com\/s\/files\/1\/0527\/3393\/5805\/files\/Sour_Apple.png?v=1761362315'\u003e \u003cstyle class='jdgm-temp-hiding-style'\u003e.jdgm-rev-widg{ display: none }\u003c\/style\u003e \u003cdiv class='jdgm-rev-widg__header'\u003e \u003ch2 class='jdgm-rev-widg__title'\u003eCustomer Reviews\u003c\/h2\u003e \u003cdiv class='jdgm-rev-widg__summary'\u003e \u003cdiv class='jdgm-rev-widg__summary-stars' aria-label='Average rating is 0.00 stars' role='img'\u003e \u003cspan class='jdgm-star jdgm--off'\u003e\u003c\/span\u003e\u003cspan class='jdgm-star jdgm--off'\u003e\u003c\/span\u003e\u003cspan class='jdgm-star jdgm--off'\u003e\u003c\/span\u003e\u003cspan class='jdgm-star jdgm--off'\u003e\u003c\/span\u003e\u003cspan class='jdgm-star jdgm--off'\u003e\u003c\/span\u003e \u003c\/div\u003e \u003cdiv class='jdgm-rev-widg__summary-text'\u003eBe the first to write a review\u003c\/div\u003e \u003c\/div\u003e \u003ca style='display: none' href='#' class='jdgm-write-rev-link' role='button'\u003eWrite a review\u003c\/a\u003e \u003cdiv class='jdgm-histogram jdgm-temp-hidden'\u003e \u003cdiv class='jdgm-histogram__row' data-rating='5' data-frequency='0' data-percentage='0'\u003e \u003cdiv class='jdgm-histogram__star' role='button' aria-label=\"0% (0) reviews with 5 star rating\" tabindex='0' \u003e\u003cspan class='jdgm-star jdgm--on'\u003e\u003c\/span\u003e\u003cspan class='jdgm-star jdgm--on'\u003e\u003c\/span\u003e\u003cspan class='jdgm-star jdgm--on'\u003e\u003c\/span\u003e\u003cspan class='jdgm-star jdgm--on'\u003e\u003c\/span\u003e\u003cspan class='jdgm-star jdgm--on'\u003e\u003c\/span\u003e\u003c\/div\u003e \u003cdiv class='jdgm-histogram__bar'\u003e \u003cdiv class='jdgm-histogram__bar-content' style='width: 0%;'\u003e \u003c\/div\u003e \u003c\/div\u003e \u003cdiv class='jdgm-histogram__percentage'\u003e0%\u003c\/div\u003e \u003cdiv class='jdgm-histogram__frequency'\u003e(0)\u003c\/div\u003e \u003c\/div\u003e \u003cdiv class='jdgm-histogram__row' data-rating='4' data-frequency='0' data-percentage='0'\u003e \u003cdiv class='jdgm-histogram__star' role='button' aria-label=\"0% (0) reviews with 4 star rating\" tabindex='0' \u003e\u003cspan class='jdgm-star jdgm--on'\u003e\u003c\/span\u003e\u003cspan class='jdgm-star jdgm--on'\u003e\u003c\/span\u003e\u003cspan class='jdgm-star jdgm--on'\u003e\u003c\/span\u003e\u003cspan class='jdgm-star jdgm--on'\u003e\u003c\/span\u003e\u003cspan class='jdgm-star jdgm--off'\u003e\u003c\/span\u003e\u003c\/div\u003e \u003cdiv class='jdgm-histogram__bar'\u003e \u003cdiv class='jdgm-histogram__bar-content' style='width: 0%;'\u003e \u003c\/div\u003e \u003c\/div\u003e \u003cdiv class='jdgm-histogram__percentage'\u003e0%\u003c\/div\u003e \u003cdiv class='jdgm-histogram__frequency'\u003e(0)\u003c\/div\u003e \u003c\/div\u003e \u003cdiv class='jdgm-histogram__row' data-rating='3' data-frequency='0' data-percentage='0'\u003e \u003cdiv class='jdgm-histogram__star' role='button' aria-label=\"0% (0) reviews with 3 star rating\" tabindex='0' \u003e\u003cspan class='jdgm-star jdgm--on'\u003e\u003c\/span\u003e\u003cspan class='jdgm-star jdgm--on'\u003e\u003c\/span\u003e\u003cspan class='jdgm-star jdgm--on'\u003e\u003c\/span\u003e\u003cspan class='jdgm-star jdgm--off'\u003e\u003c\/span\u003e\u003cspan class='jdgm-star jdgm--off'\u003e\u003c\/span\u003e\u003c\/div\u003e \u003cdiv class='jdgm-histogram__bar'\u003e \u003cdiv class='jdgm-histogram__bar-content' style='width: 0%;'\u003e \u003c\/div\u003e \u003c\/div\u003e \u003cdiv class='jdgm-histogram__percentage'\u003e0%\u003c\/div\u003e \u003cdiv class='jdgm-histogram__frequency'\u003e(0)\u003c\/div\u003e \u003c\/div\u003e \u003cdiv class='jdgm-histogram__row' data-rating='2' data-frequency='0' data-percentage='0'\u003e \u003cdiv class='jdgm-histogram__star' role='button' aria-label=\"0% (0) reviews with 2 star rating\" tabindex='0' \u003e\u003cspan class='jdgm-star jdgm--on'\u003e\u003c\/span\u003e\u003cspan class='jdgm-star jdgm--on'\u003e\u003c\/span\u003e\u003cspan class='jdgm-star jdgm--off'\u003e\u003c\/span\u003e\u003cspan class='jdgm-star jdgm--off'\u003e\u003c\/span\u003e\u003cspan class='jdgm-star jdgm--off'\u003e\u003c\/span\u003e\u003c\/div\u003e \u003cdiv class='jdgm-histogram__bar'\u003e \u003cdiv class='jdgm-histogram__bar-content' style='width: 0%;'\u003e \u003c\/div\u003e \u003c\/div\u003e \u003cdiv class='jdgm-histogram__percentage'\u003e0%\u003c\/div\u003e \u003cdiv class='jdgm-histogram__frequency'\u003e(0)\u003c\/div\u003e \u003c\/div\u003e \u003cdiv class='jdgm-histogram__row' data-rating='1' data-frequency='0' data-percentage='0'\u003e \u003cdiv class='jdgm-histogram__star' role='button' aria-label=\"0% (0) reviews with 1 star rating\" tabindex='0' \u003e\u003cspan class='jdgm-star jdgm--on'\u003e\u003c\/span\u003e\u003cspan class='jdgm-star jdgm--off'\u003e\u003c\/span\u003e\u003cspan class='jdgm-star jdgm--off'\u003e\u003c\/span\u003e\u003cspan class='jdgm-star jdgm--off'\u003e\u003c\/span\u003e\u003cspan class='jdgm-star jdgm--off'\u003e\u003c\/span\u003e\u003c\/div\u003e \u003cdiv class='jdgm-histogram__bar'\u003e \u003cdiv class='jdgm-histogram__bar-content' style='width: 0%;'\u003e \u003c\/div\u003e \u003c\/div\u003e \u003cdiv class='jdgm-histogram__percentage'\u003e0%\u003c\/div\u003e \u003cdiv class='jdgm-histogram__frequency'\u003e(0)\u003c\/div\u003e \u003c\/div\u003e \u003cdiv class='jdgm-histogram__row jdgm-histogram__clear-filter' data-rating=null tabindex='0'\u003e\u003c\/div\u003e \u003c\/div\u003e \u003cdiv class='jdgm-rev-widg__sort-wrapper'\u003e\u003c\/div\u003e \u003c\/div\u003e \u003cdiv class='jdgm-rev-widg__body'\u003e \u003cdiv class='jdgm-rev-widg__reviews'\u003e\u003c\/div\u003e \u003cdiv class='jdgm-paginate' data-per-page='10' data-url='https:\/\/api.judge.me\/reviews\/reviews_for_widget' style=\"display: none;\"\u003e\u003c\/div\u003e \u003c\/div\u003e \u003cdiv class='jdgm-rev-widg__paginate-spinner-wrapper'\u003e \u003cdiv class='jdgm-spinner'\u003e\u003c\/div\u003e \u003c\/div\u003e \u003c\/div\u003e"},"collections":[{"id":281356533949,"handle":"baby-shower-gifts","title":"Baby Shower Gifts - Mum","updated_at":"2026-06-12T19:10:25+08:00","body_html":"\u003cp\u003eLooking for a unique baby shower gift? Or an all-in-one bundle pack to suit all your needs? We've got just the thing!\u003c\/p\u003e","published_at":"2021-12-06T13:43:56+08:00","sort_order":"best-selling","template_suffix":"baby-shower-gifts","disjunctive":true,"rules":[{"column":"tag","relation":"equals","condition":"Baby Shower Gifts - Mum"},{"column":"tag","relation":"equals","condition":"Gift Card"}],"published_scope":"global","image":{"created_at":"2024-05-06T11:59:28+08:00","alt":"Baby Shower Gifts - The Birth Store","width":1200,"height":1800,"src":"\/\/www.thebirthstore.com.au\/cdn\/shop\/collections\/baby-shower-gifts-401770.jpg?v=1761791272"}},{"id":281712427197,"handle":"breastfeeding","title":"Breastfeeding","updated_at":"2026-06-12T19:10:26+08:00","body_html":"","published_at":"2021-12-20T14:19:33+08:00","sort_order":"best-selling","template_suffix":"breastfeeding-collection","disjunctive":false,"rules":[{"column":"tag","relation":"equals","condition":"Breastfeeding"}],"published_scope":"global","image":{"created_at":"2024-05-06T11:59:34+08:00","alt":"Breastfeeding - The Birth Store","width":620,"height":635,"src":"\/\/www.thebirthstore.com.au\/cdn\/shop\/collections\/breastfeeding-793872.jpg?v=1714967974"}},{"id":261657460925,"handle":"buy","title":"Buy","updated_at":"2026-06-12T19:10:26+08:00","body_html":"\u003cp\u003eBrowse all of our pregnancy, labour \u0026amp; birth, postpartum and baby essentials here.\u003cbr\u003e\u003c\/p\u003e\n\u003cp\u003e\u003cspan\u003eYou can even buy now and pay later with Afterpay!\u003c\/span\u003e\u003c\/p\u003e","published_at":"2021-03-10T12:05:31+08:00","sort_order":"best-selling","template_suffix":"shop-all-collection","disjunctive":false,"rules":[{"column":"title","relation":"not_contains","condition":"Hire"}],"published_scope":"global","image":{"created_at":"2024-05-06T11:59:42+08:00","alt":"Buy - The Birth Store","width":2048,"height":2048,"src":"\/\/www.thebirthstore.com.au\/cdn\/shop\/collections\/buy-964856.jpg?v=1714967982"}},{"id":337429201085,"handle":"hospital-bag","title":"Hospital Bag","updated_at":"2026-06-12T19:10:26+08:00","body_html":"","published_at":"2026-06-03T11:36:29+08:00","sort_order":"most-relevant","template_suffix":"","disjunctive":false,"rules":[{"column":"tag","relation":"equals","condition":"Hospital Bag"}],"published_scope":"global"},{"id":261658214589,"handle":"labour-and-birth-buy","title":"Labour \u0026 Birth","updated_at":"2026-06-12T19:10:26+08:00","body_html":"\u003cp\u003eWe stock a large range of Elle TENS machines for you to buy for your labour and birth. We stock the Elle TENS, Elle TENS 2 and Elle TENS Plus, we also hire these out if that suits you better, please head over to our TENS machine hire page for more information. We ship Australia wide or have options for local delivery\/pick-up in Perth if you are due ASAP. We also stock other items for your labour and birth. \u003c\/p\u003e\n\u003cp\u003eLooking for something we don't currently stock? Please reach out and let us know.\u003c\/p\u003e\n\u003cp\u003e\u003cspan\u003eYou can even buy now and pay later with Afterpay!\u003c\/span\u003e\u003c\/p\u003e","published_at":"2021-03-10T12:34:43+08:00","sort_order":"best-selling","template_suffix":"labour-birth-collection","disjunctive":false,"rules":[{"column":"tag","relation":"equals","condition":"Birth"}],"published_scope":"global","image":{"created_at":"2024-05-06T12:00:09+08:00","alt":"Labour \u0026 Birth - The Birth Store","width":1080,"height":981,"src":"\/\/www.thebirthstore.com.au\/cdn\/shop\/collections\/labour-birth-342038.jpg?v=1714968009"}},{"id":292919476413,"handle":"lactation-products","title":"Lactation Products","updated_at":"2026-06-12T19:10:26+08:00","body_html":"","published_at":"2023-03-22T12:22:41+08:00","sort_order":"best-selling","template_suffix":"lactation-products-collec","disjunctive":false,"rules":[{"column":"tag","relation":"equals","condition":"Lactation Products"}],"published_scope":"global","image":{"created_at":"2024-05-06T12:00:19+08:00","alt":"Lactation Products - The Birth Store","width":1034,"height":922,"src":"\/\/www.thebirthstore.com.au\/cdn\/shop\/collections\/lactation-products-752907.jpg?v=1714968019"}},{"id":295224836285,"handle":"nausea","title":"Nausea","updated_at":"2026-06-12T19:10:26+08:00","body_html":"","published_at":"2023-11-10T20:47:34+08:00","sort_order":"best-selling","template_suffix":"nausea-collection","disjunctive":false,"rules":[{"column":"tag","relation":"equals","condition":"Nausea"}],"published_scope":"global","image":{"created_at":"2024-05-06T12:00:24+08:00","alt":"Nausea - The Birth Store","width":610,"height":915,"src":"\/\/www.thebirthstore.com.au\/cdn\/shop\/collections\/nausea-404101.jpg?v=1714968024"}},{"id":261658083517,"handle":"post-partum","title":"Postpartum","updated_at":"2026-06-12T19:10:26+08:00","body_html":"\u003cp\u003eShop your postpartum and hospital bag essentials below. Looking for something we don't currently stock? Please reach out and let us know.\u003cbr\u003e\u003c\/p\u003e\n\u003cp\u003e\u003cspan\u003eYou can even buy now and pay later with Afterpay!\u003c\/span\u003e\u003c\/p\u003e","published_at":"2021-03-10T12:33:47+08:00","sort_order":"best-selling","template_suffix":"postpartum-collection","disjunctive":false,"rules":[{"column":"tag","relation":"equals","condition":"Post-Partum"}],"published_scope":"global","image":{"created_at":"2024-05-06T12:00:36+08:00","alt":"Postpartum - The Birth Store","width":611,"height":702,"src":"\/\/www.thebirthstore.com.au\/cdn\/shop\/collections\/postpartum-150119.jpg?v=1714968037"}},{"id":261658149053,"handle":"pregnancy-and-maternity-products","title":"Pregnancy","updated_at":"2026-06-12T19:10:26+08:00","body_html":"\u003cp\u003eShop your pregnancy essentials below. Looking for something we don't currently stock? Please reach out and let us know.\u003cbr\u003e\u003c\/p\u003e\n\u003cp\u003e\u003cspan\u003eYou can even buy now and pay later with Afterpay!\u003c\/span\u003e\u003c\/p\u003e","published_at":"2021-03-10T12:34:22+08:00","sort_order":"best-selling","template_suffix":"pregnancy-collection","disjunctive":false,"rules":[{"column":"tag","relation":"equals","condition":"Pregnancy"}],"published_scope":"global","image":{"created_at":"2024-05-06T12:00:40+08:00","alt":"Pregnancy - The Birth Store","width":1024,"height":1536,"src":"\/\/www.thebirthstore.com.au\/cdn\/shop\/collections\/pregnancy-899677.jpg?v=1714968040"}},{"id":295224901821,"handle":"pregnancy-health","title":"Pregnancy Health","updated_at":"2026-06-12T19:10:26+08:00","body_html":"","published_at":"2023-11-10T20:48:51+08:00","sort_order":"best-selling","template_suffix":"swaddles-collection","disjunctive":false,"rules":[{"column":"tag","relation":"equals","condition":"Pregnancy Health"}],"published_scope":"global","image":{"created_at":"2024-05-06T12:00:41+08:00","alt":"Pregnancy Health - The Birth Store","width":608,"height":410,"src":"\/\/www.thebirthstore.com.au\/cdn\/shop\/collections\/pregnancy-health-343983.jpg?v=1714968042"}},{"id":326523846845,"handle":"pregnancy-health-1","updated_at":"2026-06-12T19:10:26+08:00","published_at":"2025-10-30T10:44:54+08:00","sort_order":"best-selling","template_suffix":"","published_scope":"global","title":"Pregnancy Health","body_html":"","image":{"created_at":"2025-11-20T21:33:56+08:00","alt":"Pregnancy Health - The Birth Store","width":522,"height":525,"src":"\/\/www.thebirthstore.com.au\/cdn\/shop\/collections\/pregnancy-health-1617860.jpg?v=1763645636"}},{"id":291456483517,"handle":"shop-all","title":"Shop All - Mum","updated_at":"2026-06-12T19:10:26+08:00","body_html":"","published_at":"2022-12-23T22:04:39+08:00","sort_order":"best-selling","template_suffix":"shop-all-collection","disjunctive":false,"rules":[{"column":"variant_price","relation":"greater_than","condition":"1"},{"column":"title","relation":"not_contains","condition":"Batteries"},{"column":"tag","relation":"equals","condition":"Mum"}],"published_scope":"global","image":{"created_at":"2024-05-06T12:00:54+08:00","alt":"Shop All - The Birth Store","width":1365,"height":2048,"src":"\/\/www.thebirthstore.com.au\/cdn\/shop\/collections\/shop-all-693176.jpg?v=1714968055"}}]}
{"item":{"id":7322191462589,"title":"Disposable Nursing Pads","handle":"disposable-nursing-pads","description":"\u003cp data-mce-fragment=\"1\"\u003eIf you're breastfeeding, Haakaa Disposable Nursing Pads will help to keep you and your clothing dry to avoid milk stains during the day!\u003cbr data-mce-fragment=\"1\"\u003e\u003c\/p\u003e\n\u003cp data-mce-fragment=\"1\"\u003eThese Disposable Nursing Pads are designed with a special absorbent polymer and stay-dry lining to draw milk away from the skin and into the pad's core. They're low profile, giving you the confidence to wear them during the day without worrying about lumps and bumps under your clothes. \u003c\/p\u003e\n\u003cul\u003e\n\u003cli\u003eSuper-absorbent polymer material prevents leaks. \u003c\/li\u003e\n\u003cli\u003eSoft, stay-dry lining. \u003c\/li\u003e\n\u003cli\u003eButterfly-shaped for extra coverage. \u003c\/li\u003e\n\u003cli\u003eUltra-slim and lightweight.\u003c\/li\u003e\n\u003cli\u003eWaterproof tissue keeps clothing protected. \u003c\/li\u003e\n\u003cli\u003eTwo adhesive strips keep pad in place.\u003c\/li\u003e\n\u003cli\u003eDraws moisture away from the skin.\u003c\/li\u003e\n\u003cli\u003eMade with 100% natural materials.\u003c\/li\u003e\n\u003cli\u003eLow profile design for discreet and comfortable wear.\u003c\/li\u003e\n\u003cli\u003eContains 36 disposable pads in each pack.\u003c\/li\u003e\n\u003c\/ul\u003e\n\u003cp\u003e\u003cstrong\u003eDirections:\u003c\/strong\u003e\u003c\/p\u003e\n\u003col\u003e\n\u003cli\u003eOpen the individual pack and remove the pad.\u003c\/li\u003e\n\u003cli\u003eRemove backing tape.\u003c\/li\u003e\n\u003cli\u003ePlace pad into bra, with tapes positioned at the top and bottom facing outward (away from your skin).\u003c\/li\u003e\n\u003cli\u003ePress pad onto bra to secure. \u003c\/li\u003e\n\u003c\/ol\u003e\n\u003cp\u003e\u003cstrong\u003eCaution:\u003c\/strong\u003e\u003c\/p\u003e\n\u003cp\u003eReplace if this product shows any signs of damage. This product is not a toy. Do not use this product for anything other than its intended use. Adult use only. Keep out of the reach of children and pets. Do not store near any sharp objects. Store product in a cool, dry place and avoid direct sunlight. \u003cspan\u003e\u003c\/span\u003e\u003cspan\u003e\u003c\/span\u003e\u003cspan\u003e\u003c\/span\u003e\u003cspan\u003e\u003c\/span\u003e\u003c\/p\u003e\n\u003cdiv\u003e\n\u003carticle\u003e\n\u003csection\u003e\n\u003cdiv\u003e\n\u003cdiv\u003e\u003c\/div\u003e\n\u003c\/div\u003e\n\u003c\/section\u003e\n\u003c\/article\u003e\n\u003c\/div\u003e","published_at":"2022-08-16T19:26:19+08:00","created_at":"2022-08-16T19:26:17+08:00","vendor":"Haakaa","type":"","tags":["Breastfeeding","Cracked Nipples","Hospital Bag","Labour Preparation","Mum","Pregnancy"],"price":1490,"price_min":1490,"price_max":1490,"available":true,"price_varies":false,"compare_at_price":1490,"compare_at_price_min":1490,"compare_at_price_max":1490,"compare_at_price_varies":false,"variants":[{"id":42216829878461,"title":"Default Title","option1":"Default Title","option2":null,"option3":null,"sku":"","requires_shipping":true,"taxable":false,"featured_image":null,"available":true,"name":"Disposable Nursing Pads","public_title":null,"options":["Default Title"],"price":1490,"weight":210,"compare_at_price":1490,"inventory_management":"shopify","barcode":"29878461","requires_selling_plan":false,"selling_plan_allocations":[],"quantity_rule":{"min":1,"max":null,"increment":1}}],"images":["\/\/www.thebirthstore.com.au\/cdn\/shop\/files\/disposable-nursing-pads-340462.jpg?v=1714967959","\/\/www.thebirthstore.com.au\/cdn\/shop\/files\/disposable-nursing-pads-916130.jpg?v=1714967959"],"featured_image":"\/\/www.thebirthstore.com.au\/cdn\/shop\/files\/disposable-nursing-pads-340462.jpg?v=1714967959","options":["Title"],"media":[{"alt":"Disposable Nursing Pads - The Birth Store-Haakaa","id":27007582798013,"position":1,"preview_image":{"aspect_ratio":1.0,"height":1080,"width":1080,"src":"\/\/www.thebirthstore.com.au\/cdn\/shop\/files\/disposable-nursing-pads-340462.jpg?v=1714967959"},"aspect_ratio":1.0,"height":1080,"media_type":"image","src":"\/\/www.thebirthstore.com.au\/cdn\/shop\/files\/disposable-nursing-pads-340462.jpg?v=1714967959","width":1080},{"alt":"Disposable Nursing Pads - The Birth Store-Haakaa","id":27007582830781,"position":2,"preview_image":{"aspect_ratio":1.0,"height":1000,"width":1000,"src":"\/\/www.thebirthstore.com.au\/cdn\/shop\/files\/disposable-nursing-pads-916130.jpg?v=1714967959"},"aspect_ratio":1.0,"height":1000,"media_type":"image","src":"\/\/www.thebirthstore.com.au\/cdn\/shop\/files\/disposable-nursing-pads-916130.jpg?v=1714967959","width":1000}],"requires_selling_plan":false,"selling_plan_groups":[],"content":"\u003cp data-mce-fragment=\"1\"\u003eIf you're breastfeeding, Haakaa Disposable Nursing Pads will help to keep you and your clothing dry to avoid milk stains during the day!\u003cbr data-mce-fragment=\"1\"\u003e\u003c\/p\u003e\n\u003cp data-mce-fragment=\"1\"\u003eThese Disposable Nursing Pads are designed with a special absorbent polymer and stay-dry lining to draw milk away from the skin and into the pad's core. They're low profile, giving you the confidence to wear them during the day without worrying about lumps and bumps under your clothes. \u003c\/p\u003e\n\u003cul\u003e\n\u003cli\u003eSuper-absorbent polymer material prevents leaks. \u003c\/li\u003e\n\u003cli\u003eSoft, stay-dry lining. \u003c\/li\u003e\n\u003cli\u003eButterfly-shaped for extra coverage. \u003c\/li\u003e\n\u003cli\u003eUltra-slim and lightweight.\u003c\/li\u003e\n\u003cli\u003eWaterproof tissue keeps clothing protected. \u003c\/li\u003e\n\u003cli\u003eTwo adhesive strips keep pad in place.\u003c\/li\u003e\n\u003cli\u003eDraws moisture away from the skin.\u003c\/li\u003e\n\u003cli\u003eMade with 100% natural materials.\u003c\/li\u003e\n\u003cli\u003eLow profile design for discreet and comfortable wear.\u003c\/li\u003e\n\u003cli\u003eContains 36 disposable pads in each pack.\u003c\/li\u003e\n\u003c\/ul\u003e\n\u003cp\u003e\u003cstrong\u003eDirections:\u003c\/strong\u003e\u003c\/p\u003e\n\u003col\u003e\n\u003cli\u003eOpen the individual pack and remove the pad.\u003c\/li\u003e\n\u003cli\u003eRemove backing tape.\u003c\/li\u003e\n\u003cli\u003ePlace pad into bra, with tapes positioned at the top and bottom facing outward (away from your skin).\u003c\/li\u003e\n\u003cli\u003ePress pad onto bra to secure. \u003c\/li\u003e\n\u003c\/ol\u003e\n\u003cp\u003e\u003cstrong\u003eCaution:\u003c\/strong\u003e\u003c\/p\u003e\n\u003cp\u003eReplace if this product shows any signs of damage. This product is not a toy. Do not use this product for anything other than its intended use. Adult use only. Keep out of the reach of children and pets. Do not store near any sharp objects. Store product in a cool, dry place and avoid direct sunlight. \u003cspan\u003e\u003c\/span\u003e\u003cspan\u003e\u003c\/span\u003e\u003cspan\u003e\u003c\/span\u003e\u003cspan\u003e\u003c\/span\u003e\u003c\/p\u003e\n\u003cdiv\u003e\n\u003carticle\u003e\n\u003csection\u003e\n\u003cdiv\u003e\n\u003cdiv\u003e\u003c\/div\u003e\n\u003c\/div\u003e\n\u003c\/section\u003e\n\u003c\/article\u003e\n\u003c\/div\u003e"},"options":[{"name":"Title","position":1,"values":["Default Title"]}],"custom_metafields":{},"metafields":{"badge":"\u003cdiv style='display:none' class='jdgm-prev-badge' data-average-rating='0.00' data-number-of-reviews='0' data-number-of-questions='0'\u003e \u003cspan class='jdgm-prev-badge__stars' data-score='0.00' tabindex='0' aria-label='0.00 stars' role='button'\u003e \u003cspan class='jdgm-star jdgm--off'\u003e\u003c\/span\u003e\u003cspan class='jdgm-star jdgm--off'\u003e\u003c\/span\u003e\u003cspan class='jdgm-star jdgm--off'\u003e\u003c\/span\u003e\u003cspan class='jdgm-star jdgm--off'\u003e\u003c\/span\u003e\u003cspan class='jdgm-star jdgm--off'\u003e\u003c\/span\u003e \u003c\/span\u003e \u003cspan class='jdgm-prev-badge__text'\u003e No reviews \u003c\/span\u003e \u003c\/div\u003e","widget":"\u003cdiv class='jdgm-rev-widg' data-updated-at='2025-06-13T16:12:10Z' data-average-rating='0.00' data-number-of-reviews='0' data-number-of-questions='0'\u003e \u003cstyle class='jdgm-temp-hiding-style'\u003e.jdgm-rev-widg{ display: none }\u003c\/style\u003e \u003cdiv class='jdgm-rev-widg__header'\u003e \u003ch2 class='jdgm-rev-widg__title'\u003eCustomer Reviews\u003c\/h2\u003e \u003cdiv class='jdgm-rev-widg__summary'\u003e \u003cdiv class='jdgm-rev-widg__summary-stars' aria-label='Average rating is 0.00 stars' role='img'\u003e \u003cspan class='jdgm-star jdgm--off'\u003e\u003c\/span\u003e\u003cspan class='jdgm-star jdgm--off'\u003e\u003c\/span\u003e\u003cspan class='jdgm-star jdgm--off'\u003e\u003c\/span\u003e\u003cspan class='jdgm-star jdgm--off'\u003e\u003c\/span\u003e\u003cspan class='jdgm-star jdgm--off'\u003e\u003c\/span\u003e \u003c\/div\u003e \u003cdiv class='jdgm-rev-widg__summary-text'\u003eBe the first to write a review\u003c\/div\u003e \u003c\/div\u003e \u003ca style='display: none' href='#' class='jdgm-write-rev-link' role='button'\u003eWrite a review\u003c\/a\u003e \u003cdiv class='jdgm-histogram jdgm-temp-hidden'\u003e \u003cdiv class='jdgm-histogram__row' data-rating='5' data-frequency='0' data-percentage='0'\u003e \u003cdiv class='jdgm-histogram__star' role='button' aria-label=\"0% (0) reviews with 5 star rating\" tabindex='0' \u003e\u003cspan class='jdgm-star jdgm--on'\u003e\u003c\/span\u003e\u003cspan class='jdgm-star jdgm--on'\u003e\u003c\/span\u003e\u003cspan class='jdgm-star jdgm--on'\u003e\u003c\/span\u003e\u003cspan class='jdgm-star jdgm--on'\u003e\u003c\/span\u003e\u003cspan class='jdgm-star jdgm--on'\u003e\u003c\/span\u003e\u003c\/div\u003e \u003cdiv class='jdgm-histogram__bar'\u003e \u003cdiv class='jdgm-histogram__bar-content' style='width: 0%;'\u003e \u003c\/div\u003e \u003c\/div\u003e \u003cdiv class='jdgm-histogram__percentage'\u003e0%\u003c\/div\u003e \u003cdiv class='jdgm-histogram__frequency'\u003e(0)\u003c\/div\u003e \u003c\/div\u003e \u003cdiv class='jdgm-histogram__row' data-rating='4' data-frequency='0' data-percentage='0'\u003e \u003cdiv class='jdgm-histogram__star' role='button' aria-label=\"0% (0) reviews with 4 star rating\" tabindex='0' \u003e\u003cspan class='jdgm-star jdgm--on'\u003e\u003c\/span\u003e\u003cspan class='jdgm-star jdgm--on'\u003e\u003c\/span\u003e\u003cspan class='jdgm-star jdgm--on'\u003e\u003c\/span\u003e\u003cspan class='jdgm-star jdgm--on'\u003e\u003c\/span\u003e\u003cspan class='jdgm-star jdgm--off'\u003e\u003c\/span\u003e\u003c\/div\u003e \u003cdiv class='jdgm-histogram__bar'\u003e \u003cdiv class='jdgm-histogram__bar-content' style='width: 0%;'\u003e \u003c\/div\u003e \u003c\/div\u003e \u003cdiv class='jdgm-histogram__percentage'\u003e0%\u003c\/div\u003e \u003cdiv class='jdgm-histogram__frequency'\u003e(0)\u003c\/div\u003e \u003c\/div\u003e \u003cdiv class='jdgm-histogram__row' data-rating='3' data-frequency='0' data-percentage='0'\u003e \u003cdiv class='jdgm-histogram__star' role='button' aria-label=\"0% (0) reviews with 3 star rating\" tabindex='0' \u003e\u003cspan class='jdgm-star jdgm--on'\u003e\u003c\/span\u003e\u003cspan class='jdgm-star jdgm--on'\u003e\u003c\/span\u003e\u003cspan class='jdgm-star jdgm--on'\u003e\u003c\/span\u003e\u003cspan class='jdgm-star jdgm--off'\u003e\u003c\/span\u003e\u003cspan class='jdgm-star jdgm--off'\u003e\u003c\/span\u003e\u003c\/div\u003e \u003cdiv class='jdgm-histogram__bar'\u003e \u003cdiv class='jdgm-histogram__bar-content' style='width: 0%;'\u003e \u003c\/div\u003e \u003c\/div\u003e \u003cdiv class='jdgm-histogram__percentage'\u003e0%\u003c\/div\u003e \u003cdiv class='jdgm-histogram__frequency'\u003e(0)\u003c\/div\u003e \u003c\/div\u003e \u003cdiv class='jdgm-histogram__row' data-rating='2' data-frequency='0' data-percentage='0'\u003e \u003cdiv class='jdgm-histogram__star' role='button' aria-label=\"0% (0) reviews with 2 star rating\" tabindex='0' \u003e\u003cspan class='jdgm-star jdgm--on'\u003e\u003c\/span\u003e\u003cspan class='jdgm-star jdgm--on'\u003e\u003c\/span\u003e\u003cspan class='jdgm-star jdgm--off'\u003e\u003c\/span\u003e\u003cspan class='jdgm-star jdgm--off'\u003e\u003c\/span\u003e\u003cspan class='jdgm-star jdgm--off'\u003e\u003c\/span\u003e\u003c\/div\u003e \u003cdiv class='jdgm-histogram__bar'\u003e \u003cdiv class='jdgm-histogram__bar-content' style='width: 0%;'\u003e \u003c\/div\u003e \u003c\/div\u003e \u003cdiv class='jdgm-histogram__percentage'\u003e0%\u003c\/div\u003e \u003cdiv class='jdgm-histogram__frequency'\u003e(0)\u003c\/div\u003e \u003c\/div\u003e \u003cdiv class='jdgm-histogram__row' data-rating='1' data-frequency='0' data-percentage='0'\u003e \u003cdiv class='jdgm-histogram__star' role='button' aria-label=\"0% (0) reviews with 1 star rating\" tabindex='0' \u003e\u003cspan class='jdgm-star jdgm--on'\u003e\u003c\/span\u003e\u003cspan class='jdgm-star jdgm--off'\u003e\u003c\/span\u003e\u003cspan class='jdgm-star jdgm--off'\u003e\u003c\/span\u003e\u003cspan class='jdgm-star jdgm--off'\u003e\u003c\/span\u003e\u003cspan class='jdgm-star jdgm--off'\u003e\u003c\/span\u003e\u003c\/div\u003e \u003cdiv class='jdgm-histogram__bar'\u003e \u003cdiv class='jdgm-histogram__bar-content' style='width: 0%;'\u003e \u003c\/div\u003e \u003c\/div\u003e \u003cdiv class='jdgm-histogram__percentage'\u003e0%\u003c\/div\u003e \u003cdiv class='jdgm-histogram__frequency'\u003e(0)\u003c\/div\u003e \u003c\/div\u003e \u003cdiv class='jdgm-histogram__row jdgm-histogram__clear-filter' data-rating=null tabindex='0'\u003e\u003c\/div\u003e \u003c\/div\u003e \u003cdiv class='jdgm-rev-widg__sort-wrapper'\u003e\u003c\/div\u003e \u003c\/div\u003e \u003cdiv class='jdgm-rev-widg__body'\u003e \u003cdiv class='jdgm-rev-widg__reviews'\u003e\u003c\/div\u003e \u003cdiv class='jdgm-paginate' data-per-page='10' data-url='https:\/\/api.judge.me\/reviews\/reviews_for_widget' style=\"display: none;\"\u003e\u003c\/div\u003e \u003c\/div\u003e \u003cdiv class='jdgm-rev-widg__paginate-spinner-wrapper'\u003e \u003cdiv class='jdgm-spinner'\u003e\u003c\/div\u003e \u003c\/div\u003e \u003c\/div\u003e"},"collections":[{"id":281712427197,"handle":"breastfeeding","title":"Breastfeeding","updated_at":"2026-06-12T19:10:26+08:00","body_html":"","published_at":"2021-12-20T14:19:33+08:00","sort_order":"best-selling","template_suffix":"breastfeeding-collection","disjunctive":false,"rules":[{"column":"tag","relation":"equals","condition":"Breastfeeding"}],"published_scope":"global","image":{"created_at":"2024-05-06T11:59:34+08:00","alt":"Breastfeeding - The Birth Store","width":620,"height":635,"src":"\/\/www.thebirthstore.com.au\/cdn\/shop\/collections\/breastfeeding-793872.jpg?v=1714967974"}},{"id":261657460925,"handle":"buy","title":"Buy","updated_at":"2026-06-12T19:10:26+08:00","body_html":"\u003cp\u003eBrowse all of our pregnancy, labour \u0026amp; birth, postpartum and baby essentials here.\u003cbr\u003e\u003c\/p\u003e\n\u003cp\u003e\u003cspan\u003eYou can even buy now and pay later with Afterpay!\u003c\/span\u003e\u003c\/p\u003e","published_at":"2021-03-10T12:05:31+08:00","sort_order":"best-selling","template_suffix":"shop-all-collection","disjunctive":false,"rules":[{"column":"title","relation":"not_contains","condition":"Hire"}],"published_scope":"global","image":{"created_at":"2024-05-06T11:59:42+08:00","alt":"Buy - The Birth Store","width":2048,"height":2048,"src":"\/\/www.thebirthstore.com.au\/cdn\/shop\/collections\/buy-964856.jpg?v=1714967982"}},{"id":294349865149,"handle":"cracked-nipples","title":"Cracked Nipples","updated_at":"2026-06-02T19:09:48+08:00","body_html":"","published_at":"2023-09-21T14:03:02+08:00","sort_order":"best-selling","template_suffix":"swaddles-collection","disjunctive":false,"rules":[{"column":"tag","relation":"equals","condition":"Cracked Nipples"}],"published_scope":"global","image":{"created_at":"2024-05-06T11:59:53+08:00","alt":"Cracked Nipples - The Birth Store","width":1050,"height":1050,"src":"\/\/www.thebirthstore.com.au\/cdn\/shop\/collections\/cracked-nipples-166971.jpg?v=1714967994"}},{"id":337429201085,"handle":"hospital-bag","title":"Hospital Bag","updated_at":"2026-06-12T19:10:26+08:00","body_html":"","published_at":"2026-06-03T11:36:29+08:00","sort_order":"most-relevant","template_suffix":"","disjunctive":false,"rules":[{"column":"tag","relation":"equals","condition":"Hospital Bag"}],"published_scope":"global"},{"id":281712525501,"handle":"labour-preparation","title":"Labour Preparation","updated_at":"2026-06-12T19:10:26+08:00","body_html":"","published_at":"2021-12-20T14:20:12+08:00","sort_order":"best-selling","template_suffix":"labour-preparation-collec","disjunctive":false,"rules":[{"column":"tag","relation":"equals","condition":"Labour Preparation"}],"published_scope":"global","image":{"created_at":"2024-05-06T12:00:13+08:00","alt":"Labour Preparation - The Birth Store","width":1024,"height":1536,"src":"\/\/www.thebirthstore.com.au\/cdn\/shop\/collections\/labour-preparation-271961.jpg?v=1714968013"}},{"id":261658149053,"handle":"pregnancy-and-maternity-products","title":"Pregnancy","updated_at":"2026-06-12T19:10:26+08:00","body_html":"\u003cp\u003eShop your pregnancy essentials below. Looking for something we don't currently stock? Please reach out and let us know.\u003cbr\u003e\u003c\/p\u003e\n\u003cp\u003e\u003cspan\u003eYou can even buy now and pay later with Afterpay!\u003c\/span\u003e\u003c\/p\u003e","published_at":"2021-03-10T12:34:22+08:00","sort_order":"best-selling","template_suffix":"pregnancy-collection","disjunctive":false,"rules":[{"column":"tag","relation":"equals","condition":"Pregnancy"}],"published_scope":"global","image":{"created_at":"2024-05-06T12:00:40+08:00","alt":"Pregnancy - The Birth Store","width":1024,"height":1536,"src":"\/\/www.thebirthstore.com.au\/cdn\/shop\/collections\/pregnancy-899677.jpg?v=1714968040"}},{"id":291456483517,"handle":"shop-all","title":"Shop All - Mum","updated_at":"2026-06-12T19:10:26+08:00","body_html":"","published_at":"2022-12-23T22:04:39+08:00","sort_order":"best-selling","template_suffix":"shop-all-collection","disjunctive":false,"rules":[{"column":"variant_price","relation":"greater_than","condition":"1"},{"column":"title","relation":"not_contains","condition":"Batteries"},{"column":"tag","relation":"equals","condition":"Mum"}],"published_scope":"global","image":{"created_at":"2024-05-06T12:00:54+08:00","alt":"Shop All - The Birth Store","width":1365,"height":2048,"src":"\/\/www.thebirthstore.com.au\/cdn\/shop\/collections\/shop-all-693176.jpg?v=1714968055"}},{"id":310045933757,"handle":"shop-all-sale","title":"Shop All Sale","updated_at":"2026-06-12T19:10:26+08:00","body_html":"","published_at":"2024-11-12T13:22:43+08:00","sort_order":"alpha-asc","template_suffix":"","disjunctive":true,"rules":[{"column":"tag","relation":"equals","condition":"Bundles"},{"column":"vendor","relation":"equals","condition":"Franjos Kitchen"},{"column":"vendor","relation":"equals","condition":"Adored Illustrations"},{"column":"vendor","relation":"equals","condition":"Amazing Oils"},{"column":"vendor","relation":"equals","condition":"Ice Ice Booby"},{"column":"vendor","relation":"equals","condition":"Made to Milk"},{"column":"vendor","relation":"equals","condition":"Milky Goodness"},{"column":"vendor","relation":"equals","condition":"Seasons of Mama"},{"column":"vendor","relation":"equals","condition":"Silverette"},{"column":"vendor","relation":"equals","condition":"Snuggle Hunny"},{"column":"vendor","relation":"equals","condition":"Yung Bod"},{"column":"vendor","relation":"equals","condition":"Bare Love"},{"column":"vendor","relation":"equals","condition":"Haakaa"},{"column":"vendor","relation":"equals","condition":"Mere Botanicals"},{"column":"vendor","relation":"equals","condition":"The Birth Store Hire"},{"column":"vendor","relation":"equals","condition":"The Birth Store"}],"published_scope":"global","image":{"created_at":"2024-11-13T10:58:16+08:00","alt":"Shop All Sale - The Birth Store","width":2048,"height":1365,"src":"\/\/www.thebirthstore.com.au\/cdn\/shop\/collections\/shop-all-sale-297361.jpg?v=1731466697"}}]}
{"item":{"id":7455628427453,"title":"Breast Milk Storage Bags","handle":"breast-milk-storage-bags","description":"\u003cp\u003eMilky Goodness Breast Milk Storage Bags allows you to safely refrigerate or freeze your breast milk. These storage bags are pre-sterilized and are ready to use. With a dual zip preventing any milk leakage. Made with a durable material that allows for freezing, heating, thawing \u0026amp; transportation. A designated area for making note of expressed date, expiration date \u0026amp; volume. Each bag is designed with the capability of self standing or laying flat to optimize freezer space. Made free from BPA\u003c\/p\u003e\n\u003cp\u003eEach box contains 25 breast milk storage bags with a 180ml capacity.\u003c\/p\u003e","published_at":"2023-03-22T14:02:53+08:00","created_at":"2023-03-22T14:02:53+08:00","vendor":"Milky Goodness","type":"","tags":["Breastfeeding","Lactation Products","Mum"],"price":1995,"price_min":1995,"price_max":1995,"available":false,"price_varies":false,"compare_at_price":null,"compare_at_price_min":0,"compare_at_price_max":0,"compare_at_price_varies":false,"variants":[{"id":42740020773053,"title":"Default Title","option1":"Default Title","option2":null,"option3":null,"sku":"","requires_shipping":true,"taxable":false,"featured_image":null,"available":false,"name":"Breast Milk Storage Bags","public_title":null,"options":["Default Title"],"price":1995,"weight":132,"compare_at_price":null,"inventory_management":"shopify","barcode":"20773053","requires_selling_plan":false,"selling_plan_allocations":[],"quantity_rule":{"min":1,"max":null,"increment":1}}],"images":["\/\/www.thebirthstore.com.au\/cdn\/shop\/files\/breast-milk-storage-bags-980456.jpg?v=1714967949","\/\/www.thebirthstore.com.au\/cdn\/shop\/files\/breast-milk-storage-bags-839704.jpg?v=1714967949","\/\/www.thebirthstore.com.au\/cdn\/shop\/files\/breast-milk-storage-bags-365203.jpg?v=1714967949"],"featured_image":"\/\/www.thebirthstore.com.au\/cdn\/shop\/files\/breast-milk-storage-bags-980456.jpg?v=1714967949","options":["Title"],"media":[{"alt":"Breast Milk Storage Bags - The Birth Store-Milky Goodness","id":27007579947197,"position":1,"preview_image":{"aspect_ratio":1.0,"height":2048,"width":2048,"src":"\/\/www.thebirthstore.com.au\/cdn\/shop\/files\/breast-milk-storage-bags-980456.jpg?v=1714967949"},"aspect_ratio":1.0,"height":2048,"media_type":"image","src":"\/\/www.thebirthstore.com.au\/cdn\/shop\/files\/breast-milk-storage-bags-980456.jpg?v=1714967949","width":2048},{"alt":"Breast Milk Storage Bags - The Birth Store-Milky Goodness","id":27007579979965,"position":2,"preview_image":{"aspect_ratio":1.0,"height":900,"width":900,"src":"\/\/www.thebirthstore.com.au\/cdn\/shop\/files\/breast-milk-storage-bags-839704.jpg?v=1714967949"},"aspect_ratio":1.0,"height":900,"media_type":"image","src":"\/\/www.thebirthstore.com.au\/cdn\/shop\/files\/breast-milk-storage-bags-839704.jpg?v=1714967949","width":900},{"alt":"Breast Milk Storage Bags - The Birth Store-Milky Goodness","id":27007580012733,"position":3,"preview_image":{"aspect_ratio":1.0,"height":750,"width":750,"src":"\/\/www.thebirthstore.com.au\/cdn\/shop\/files\/breast-milk-storage-bags-365203.jpg?v=1714967949"},"aspect_ratio":1.0,"height":750,"media_type":"image","src":"\/\/www.thebirthstore.com.au\/cdn\/shop\/files\/breast-milk-storage-bags-365203.jpg?v=1714967949","width":750}],"requires_selling_plan":false,"selling_plan_groups":[],"content":"\u003cp\u003eMilky Goodness Breast Milk Storage Bags allows you to safely refrigerate or freeze your breast milk. These storage bags are pre-sterilized and are ready to use. With a dual zip preventing any milk leakage. Made with a durable material that allows for freezing, heating, thawing \u0026amp; transportation. A designated area for making note of expressed date, expiration date \u0026amp; volume. Each bag is designed with the capability of self standing or laying flat to optimize freezer space. Made free from BPA\u003c\/p\u003e\n\u003cp\u003eEach box contains 25 breast milk storage bags with a 180ml capacity.\u003c\/p\u003e"},"options":[{"name":"Title","position":1,"values":["Default Title"]}],"custom_metafields":{},"metafields":{"badge":"\u003cdiv style='display:none' class='jdgm-prev-badge' data-average-rating='0.00' data-number-of-reviews='0' data-number-of-questions='0'\u003e \u003cspan class='jdgm-prev-badge__stars' data-score='0.00' tabindex='0' aria-label='0.00 stars' role='button'\u003e \u003cspan class='jdgm-star jdgm--off'\u003e\u003c\/span\u003e\u003cspan class='jdgm-star jdgm--off'\u003e\u003c\/span\u003e\u003cspan class='jdgm-star jdgm--off'\u003e\u003c\/span\u003e\u003cspan class='jdgm-star jdgm--off'\u003e\u003c\/span\u003e\u003cspan class='jdgm-star jdgm--off'\u003e\u003c\/span\u003e \u003c\/span\u003e \u003cspan class='jdgm-prev-badge__text'\u003e No reviews \u003c\/span\u003e \u003c\/div\u003e","widget":"\u003cdiv class='jdgm-rev-widg' data-updated-at='2025-06-13T16:12:53Z' data-average-rating='0.00' data-number-of-reviews='0' data-number-of-questions='0'\u003e \u003cstyle class='jdgm-temp-hiding-style'\u003e.jdgm-rev-widg{ display: none }\u003c\/style\u003e \u003cdiv class='jdgm-rev-widg__header'\u003e \u003ch2 class='jdgm-rev-widg__title'\u003eCustomer Reviews\u003c\/h2\u003e \u003cdiv class='jdgm-rev-widg__summary'\u003e \u003cdiv class='jdgm-rev-widg__summary-stars' aria-label='Average rating is 0.00 stars' role='img'\u003e \u003cspan class='jdgm-star jdgm--off'\u003e\u003c\/span\u003e\u003cspan class='jdgm-star jdgm--off'\u003e\u003c\/span\u003e\u003cspan class='jdgm-star jdgm--off'\u003e\u003c\/span\u003e\u003cspan class='jdgm-star jdgm--off'\u003e\u003c\/span\u003e\u003cspan class='jdgm-star jdgm--off'\u003e\u003c\/span\u003e \u003c\/div\u003e \u003cdiv class='jdgm-rev-widg__summary-text'\u003eBe the first to write a review\u003c\/div\u003e \u003c\/div\u003e \u003ca style='display: none' href='#' class='jdgm-write-rev-link' role='button'\u003eWrite a review\u003c\/a\u003e \u003cdiv class='jdgm-histogram jdgm-temp-hidden'\u003e \u003cdiv class='jdgm-histogram__row' data-rating='5' data-frequency='0' data-percentage='0'\u003e \u003cdiv class='jdgm-histogram__star' role='button' aria-label=\"0% (0) reviews with 5 star rating\" tabindex='0' \u003e\u003cspan class='jdgm-star jdgm--on'\u003e\u003c\/span\u003e\u003cspan class='jdgm-star jdgm--on'\u003e\u003c\/span\u003e\u003cspan class='jdgm-star jdgm--on'\u003e\u003c\/span\u003e\u003cspan class='jdgm-star jdgm--on'\u003e\u003c\/span\u003e\u003cspan class='jdgm-star jdgm--on'\u003e\u003c\/span\u003e\u003c\/div\u003e \u003cdiv class='jdgm-histogram__bar'\u003e \u003cdiv class='jdgm-histogram__bar-content' style='width: 0%;'\u003e \u003c\/div\u003e \u003c\/div\u003e \u003cdiv class='jdgm-histogram__percentage'\u003e0%\u003c\/div\u003e \u003cdiv class='jdgm-histogram__frequency'\u003e(0)\u003c\/div\u003e \u003c\/div\u003e \u003cdiv class='jdgm-histogram__row' data-rating='4' data-frequency='0' data-percentage='0'\u003e \u003cdiv class='jdgm-histogram__star' role='button' aria-label=\"0% (0) reviews with 4 star rating\" tabindex='0' \u003e\u003cspan class='jdgm-star jdgm--on'\u003e\u003c\/span\u003e\u003cspan class='jdgm-star jdgm--on'\u003e\u003c\/span\u003e\u003cspan class='jdgm-star jdgm--on'\u003e\u003c\/span\u003e\u003cspan class='jdgm-star jdgm--on'\u003e\u003c\/span\u003e\u003cspan class='jdgm-star jdgm--off'\u003e\u003c\/span\u003e\u003c\/div\u003e \u003cdiv class='jdgm-histogram__bar'\u003e \u003cdiv class='jdgm-histogram__bar-content' style='width: 0%;'\u003e \u003c\/div\u003e \u003c\/div\u003e \u003cdiv class='jdgm-histogram__percentage'\u003e0%\u003c\/div\u003e \u003cdiv class='jdgm-histogram__frequency'\u003e(0)\u003c\/div\u003e \u003c\/div\u003e \u003cdiv class='jdgm-histogram__row' data-rating='3' data-frequency='0' data-percentage='0'\u003e \u003cdiv class='jdgm-histogram__star' role='button' aria-label=\"0% (0) reviews with 3 star rating\" tabindex='0' \u003e\u003cspan class='jdgm-star jdgm--on'\u003e\u003c\/span\u003e\u003cspan class='jdgm-star jdgm--on'\u003e\u003c\/span\u003e\u003cspan class='jdgm-star jdgm--on'\u003e\u003c\/span\u003e\u003cspan class='jdgm-star jdgm--off'\u003e\u003c\/span\u003e\u003cspan class='jdgm-star jdgm--off'\u003e\u003c\/span\u003e\u003c\/div\u003e \u003cdiv class='jdgm-histogram__bar'\u003e \u003cdiv class='jdgm-histogram__bar-content' style='width: 0%;'\u003e \u003c\/div\u003e \u003c\/div\u003e \u003cdiv class='jdgm-histogram__percentage'\u003e0%\u003c\/div\u003e \u003cdiv class='jdgm-histogram__frequency'\u003e(0)\u003c\/div\u003e \u003c\/div\u003e \u003cdiv class='jdgm-histogram__row' data-rating='2' data-frequency='0' data-percentage='0'\u003e \u003cdiv class='jdgm-histogram__star' role='button' aria-label=\"0% (0) reviews with 2 star rating\" tabindex='0' \u003e\u003cspan class='jdgm-star jdgm--on'\u003e\u003c\/span\u003e\u003cspan class='jdgm-star jdgm--on'\u003e\u003c\/span\u003e\u003cspan class='jdgm-star jdgm--off'\u003e\u003c\/span\u003e\u003cspan class='jdgm-star jdgm--off'\u003e\u003c\/span\u003e\u003cspan class='jdgm-star jdgm--off'\u003e\u003c\/span\u003e\u003c\/div\u003e \u003cdiv class='jdgm-histogram__bar'\u003e \u003cdiv class='jdgm-histogram__bar-content' style='width: 0%;'\u003e \u003c\/div\u003e \u003c\/div\u003e \u003cdiv class='jdgm-histogram__percentage'\u003e0%\u003c\/div\u003e \u003cdiv class='jdgm-histogram__frequency'\u003e(0)\u003c\/div\u003e \u003c\/div\u003e \u003cdiv class='jdgm-histogram__row' data-rating='1' data-frequency='0' data-percentage='0'\u003e \u003cdiv class='jdgm-histogram__star' role='button' aria-label=\"0% (0) reviews with 1 star rating\" tabindex='0' \u003e\u003cspan class='jdgm-star jdgm--on'\u003e\u003c\/span\u003e\u003cspan class='jdgm-star jdgm--off'\u003e\u003c\/span\u003e\u003cspan class='jdgm-star jdgm--off'\u003e\u003c\/span\u003e\u003cspan class='jdgm-star jdgm--off'\u003e\u003c\/span\u003e\u003cspan class='jdgm-star jdgm--off'\u003e\u003c\/span\u003e\u003c\/div\u003e \u003cdiv class='jdgm-histogram__bar'\u003e \u003cdiv class='jdgm-histogram__bar-content' style='width: 0%;'\u003e \u003c\/div\u003e \u003c\/div\u003e \u003cdiv class='jdgm-histogram__percentage'\u003e0%\u003c\/div\u003e \u003cdiv class='jdgm-histogram__frequency'\u003e(0)\u003c\/div\u003e \u003c\/div\u003e \u003cdiv class='jdgm-histogram__row jdgm-histogram__clear-filter' data-rating=null tabindex='0'\u003e\u003c\/div\u003e \u003c\/div\u003e \u003cdiv class='jdgm-rev-widg__sort-wrapper'\u003e\u003c\/div\u003e \u003c\/div\u003e \u003cdiv class='jdgm-rev-widg__body'\u003e \u003cdiv class='jdgm-rev-widg__reviews'\u003e\u003c\/div\u003e \u003cdiv class='jdgm-paginate' data-per-page='10' data-url='https:\/\/api.judge.me\/reviews\/reviews_for_widget' style=\"display: none;\"\u003e\u003c\/div\u003e \u003c\/div\u003e \u003cdiv class='jdgm-rev-widg__paginate-spinner-wrapper'\u003e \u003cdiv class='jdgm-spinner'\u003e\u003c\/div\u003e \u003c\/div\u003e \u003c\/div\u003e"},"collections":[{"id":281712427197,"handle":"breastfeeding","title":"Breastfeeding","updated_at":"2026-06-12T19:10:26+08:00","body_html":"","published_at":"2021-12-20T14:19:33+08:00","sort_order":"best-selling","template_suffix":"breastfeeding-collection","disjunctive":false,"rules":[{"column":"tag","relation":"equals","condition":"Breastfeeding"}],"published_scope":"global","image":{"created_at":"2024-05-06T11:59:34+08:00","alt":"Breastfeeding - The Birth Store","width":620,"height":635,"src":"\/\/www.thebirthstore.com.au\/cdn\/shop\/collections\/breastfeeding-793872.jpg?v=1714967974"}},{"id":261657460925,"handle":"buy","title":"Buy","updated_at":"2026-06-12T19:10:26+08:00","body_html":"\u003cp\u003eBrowse all of our pregnancy, labour \u0026amp; birth, postpartum and baby essentials here.\u003cbr\u003e\u003c\/p\u003e\n\u003cp\u003e\u003cspan\u003eYou can even buy now and pay later with Afterpay!\u003c\/span\u003e\u003c\/p\u003e","published_at":"2021-03-10T12:05:31+08:00","sort_order":"best-selling","template_suffix":"shop-all-collection","disjunctive":false,"rules":[{"column":"title","relation":"not_contains","condition":"Hire"}],"published_scope":"global","image":{"created_at":"2024-05-06T11:59:42+08:00","alt":"Buy - The Birth Store","width":2048,"height":2048,"src":"\/\/www.thebirthstore.com.au\/cdn\/shop\/collections\/buy-964856.jpg?v=1714967982"}},{"id":292919476413,"handle":"lactation-products","title":"Lactation Products","updated_at":"2026-06-12T19:10:26+08:00","body_html":"","published_at":"2023-03-22T12:22:41+08:00","sort_order":"best-selling","template_suffix":"lactation-products-collec","disjunctive":false,"rules":[{"column":"tag","relation":"equals","condition":"Lactation Products"}],"published_scope":"global","image":{"created_at":"2024-05-06T12:00:19+08:00","alt":"Lactation Products - The Birth Store","width":1034,"height":922,"src":"\/\/www.thebirthstore.com.au\/cdn\/shop\/collections\/lactation-products-752907.jpg?v=1714968019"}},{"id":291456483517,"handle":"shop-all","title":"Shop All - Mum","updated_at":"2026-06-12T19:10:26+08:00","body_html":"","published_at":"2022-12-23T22:04:39+08:00","sort_order":"best-selling","template_suffix":"shop-all-collection","disjunctive":false,"rules":[{"column":"variant_price","relation":"greater_than","condition":"1"},{"column":"title","relation":"not_contains","condition":"Batteries"},{"column":"tag","relation":"equals","condition":"Mum"}],"published_scope":"global","image":{"created_at":"2024-05-06T12:00:54+08:00","alt":"Shop All - The Birth Store","width":1365,"height":2048,"src":"\/\/www.thebirthstore.com.au\/cdn\/shop\/collections\/shop-all-693176.jpg?v=1714968055"}},{"id":310045933757,"handle":"shop-all-sale","title":"Shop All Sale","updated_at":"2026-06-12T19:10:26+08:00","body_html":"","published_at":"2024-11-12T13:22:43+08:00","sort_order":"alpha-asc","template_suffix":"","disjunctive":true,"rules":[{"column":"tag","relation":"equals","condition":"Bundles"},{"column":"vendor","relation":"equals","condition":"Franjos Kitchen"},{"column":"vendor","relation":"equals","condition":"Adored Illustrations"},{"column":"vendor","relation":"equals","condition":"Amazing Oils"},{"column":"vendor","relation":"equals","condition":"Ice Ice Booby"},{"column":"vendor","relation":"equals","condition":"Made to Milk"},{"column":"vendor","relation":"equals","condition":"Milky Goodness"},{"column":"vendor","relation":"equals","condition":"Seasons of Mama"},{"column":"vendor","relation":"equals","condition":"Silverette"},{"column":"vendor","relation":"equals","condition":"Snuggle Hunny"},{"column":"vendor","relation":"equals","condition":"Yung Bod"},{"column":"vendor","relation":"equals","condition":"Bare Love"},{"column":"vendor","relation":"equals","condition":"Haakaa"},{"column":"vendor","relation":"equals","condition":"Mere Botanicals"},{"column":"vendor","relation":"equals","condition":"The Birth Store Hire"},{"column":"vendor","relation":"equals","condition":"The Birth Store"}],"published_scope":"global","image":{"created_at":"2024-11-13T10:58:16+08:00","alt":"Shop All Sale - The Birth Store","width":2048,"height":1365,"src":"\/\/www.thebirthstore.com.au\/cdn\/shop\/collections\/shop-all-sale-297361.jpg?v=1731466697"}}]}
{"item":{"id":7862826434749,"title":"Deluxe Lactation Mug Cake Mix - Single Serve","handle":"deluxe-lactation-mug-cake-mix-single-serve","description":"\u003cp data-mce-fragment=\"1\"\u003eOur devilishly decadent new mug cake mix is sure to be a crowd favourite! 5 single serve sachets individually packed into a money-saving box, this is the perfect treat for dessert loving mamas to get that milk flowing.\u003c\/p\u003e\n\u003cp data-mce-fragment=\"1\"\u003eSweet, but not too sweet, this mug cake mix ticks allergy boxes being DAIRY FREE and SOY FREE!\u003c\/p\u003e\n\u003cp data-mce-fragment=\"1\"\u003eEach sachet contains a single serve mug cake mix only needing two simple staple pantry\/fridge items - milk (of your choice) and oil (of your choice).\u003c\/p\u003e\n\u003cp data-mce-fragment=\"1\"\u003eThrow this bad boy in the microwave and in 60 SECONDS you have yourself a milk-boosting dessert.\u003c\/p\u003e\n\u003cp data-mce-fragment=\"1\"\u003eIngredients: Wheat flour, Australian cane sugar, Cocoa, Brewers yeast, Baking powder.\u003c\/p\u003e","published_at":"2024-08-17T12:50:21+08:00","created_at":"2024-08-17T12:50:21+08:00","vendor":"Made to Milk","type":"","tags":["Breastfeeding","Lactation Products","Mum","Post-Partum","Pregnancy"],"price":650,"price_min":650,"price_max":650,"available":true,"price_varies":false,"compare_at_price":null,"compare_at_price_min":0,"compare_at_price_max":0,"compare_at_price_varies":false,"variants":[{"id":44598930112701,"title":"Blondie Mug Cake Mix","option1":"Blondie Mug Cake Mix","option2":null,"option3":null,"sku":"","requires_shipping":true,"taxable":false,"featured_image":{"id":38738729730237,"product_id":7862826434749,"position":9,"created_at":"2025-11-02T22:36:56+08:00","updated_at":"2025-11-03T12:22:53+08:00","alt":"Deluxe Lactation Mug Cake Mix - Single Serve - The Birth Store - Made to Milk","width":1080,"height":1080,"src":"\/\/www.thebirthstore.com.au\/cdn\/shop\/files\/deluxe-lactation-mug-cake-mix-single-serve-4257651.png?v=1762143773","variant_ids":[44598930112701]},"available":true,"name":"Deluxe Lactation Mug Cake Mix - Single Serve - Blondie Mug Cake Mix","public_title":"Blondie Mug Cake Mix","options":["Blondie Mug Cake Mix"],"price":650,"weight":56,"compare_at_price":null,"inventory_management":"shopify","barcode":"88160701","featured_media":{"alt":"Deluxe Lactation Mug Cake Mix - Single Serve - The Birth Store - Made to Milk","id":29988439523517,"position":9,"preview_image":{"aspect_ratio":1.0,"height":1080,"width":1080,"src":"\/\/www.thebirthstore.com.au\/cdn\/shop\/files\/deluxe-lactation-mug-cake-mix-single-serve-4257651.png?v=1762143773"}},"requires_selling_plan":false,"selling_plan_allocations":[],"quantity_rule":{"min":1,"max":null,"increment":1}},{"id":44598930145469,"title":"Chocolate Mug Cake Mix","option1":"Chocolate Mug Cake Mix","option2":null,"option3":null,"sku":"","requires_shipping":true,"taxable":false,"featured_image":{"id":38404723605693,"product_id":7862826434749,"position":1,"created_at":"2025-09-25T21:07:13+08:00","updated_at":"2025-09-26T03:43:40+08:00","alt":"Deluxe Lactation Mug Cake Mix - Single Serve - The Birth Store - Made to Milk","width":1080,"height":1080,"src":"\/\/www.thebirthstore.com.au\/cdn\/shop\/files\/deluxe-lactation-mug-cake-mix-single-serve-5001791.png?v=1758829420","variant_ids":[44598930145469]},"available":true,"name":"Deluxe Lactation Mug Cake Mix - Single Serve - Chocolate Mug Cake Mix","public_title":"Chocolate Mug Cake Mix","options":["Chocolate Mug Cake Mix"],"price":650,"weight":56,"compare_at_price":null,"inventory_management":"shopify","barcode":"30145469","featured_media":{"alt":"Deluxe Lactation Mug Cake Mix - Single Serve - The Birth Store - Made to Milk","id":29672056225981,"position":1,"preview_image":{"aspect_ratio":1.0,"height":1080,"width":1080,"src":"\/\/www.thebirthstore.com.au\/cdn\/shop\/files\/deluxe-lactation-mug-cake-mix-single-serve-5001791.png?v=1758829420"}},"requires_selling_plan":false,"selling_plan_allocations":[],"quantity_rule":{"min":1,"max":null,"increment":1}}],"images":["\/\/www.thebirthstore.com.au\/cdn\/shop\/files\/deluxe-lactation-mug-cake-mix-single-serve-5001791.png?v=1758829420","\/\/www.thebirthstore.com.au\/cdn\/shop\/files\/deluxe-lactation-mug-cake-mix-single-serve-488756.jpg?v=1758805663","\/\/www.thebirthstore.com.au\/cdn\/shop\/files\/deluxe-lactation-mug-cake-mix-single-serve-521372.jpg?v=1758805663","\/\/www.thebirthstore.com.au\/cdn\/shop\/files\/deluxe-lactation-mug-cake-mix-single-serve-509306.jpg?v=1758805663","\/\/www.thebirthstore.com.au\/cdn\/shop\/files\/deluxe-lactation-mug-cake-mix-single-serve-196575.webp?v=1758805663","\/\/www.thebirthstore.com.au\/cdn\/shop\/files\/deluxe-lactation-mug-cake-mix-single-serve-268481.jpg?v=1758805663","\/\/www.thebirthstore.com.au\/cdn\/shop\/files\/deluxe-lactation-mug-cake-mix-single-serve-993017.jpg?v=1758805663","\/\/www.thebirthstore.com.au\/cdn\/shop\/files\/deluxe-lactation-mug-cake-mix-single-serve-546456.jpg?v=1758805663","\/\/www.thebirthstore.com.au\/cdn\/shop\/files\/deluxe-lactation-mug-cake-mix-single-serve-4257651.png?v=1762143773"],"featured_image":"\/\/www.thebirthstore.com.au\/cdn\/shop\/files\/deluxe-lactation-mug-cake-mix-single-serve-5001791.png?v=1758829420","options":["Flavour"],"media":[{"alt":"Deluxe Lactation Mug Cake Mix - Single Serve - The Birth Store - Made to Milk","id":29672056225981,"position":1,"preview_image":{"aspect_ratio":1.0,"height":1080,"width":1080,"src":"\/\/www.thebirthstore.com.au\/cdn\/shop\/files\/deluxe-lactation-mug-cake-mix-single-serve-5001791.png?v=1758829420"},"aspect_ratio":1.0,"height":1080,"media_type":"image","src":"\/\/www.thebirthstore.com.au\/cdn\/shop\/files\/deluxe-lactation-mug-cake-mix-single-serve-5001791.png?v=1758829420","width":1080},{"alt":"Deluxe Lactation Mug Cake Mix - Single Serve - The Birth Store - Made to Milk","id":27561192095933,"position":2,"preview_image":{"aspect_ratio":0.667,"height":1080,"width":720,"src":"\/\/www.thebirthstore.com.au\/cdn\/shop\/files\/deluxe-lactation-mug-cake-mix-single-serve-488756.jpg?v=1758805663"},"aspect_ratio":0.667,"height":1080,"media_type":"image","src":"\/\/www.thebirthstore.com.au\/cdn\/shop\/files\/deluxe-lactation-mug-cake-mix-single-serve-488756.jpg?v=1758805663","width":720},{"alt":"Deluxe Lactation Mug Cake Mix - Single Serve - The Birth Store - Made to Milk","id":27561192128701,"position":3,"preview_image":{"aspect_ratio":0.667,"height":1080,"width":720,"src":"\/\/www.thebirthstore.com.au\/cdn\/shop\/files\/deluxe-lactation-mug-cake-mix-single-serve-521372.jpg?v=1758805663"},"aspect_ratio":0.667,"height":1080,"media_type":"image","src":"\/\/www.thebirthstore.com.au\/cdn\/shop\/files\/deluxe-lactation-mug-cake-mix-single-serve-521372.jpg?v=1758805663","width":720},{"alt":"Deluxe Lactation Mug Cake Mix - Single Serve - The Birth Store - Made to Milk","id":27561192161469,"position":4,"preview_image":{"aspect_ratio":0.667,"height":1080,"width":720,"src":"\/\/www.thebirthstore.com.au\/cdn\/shop\/files\/deluxe-lactation-mug-cake-mix-single-serve-509306.jpg?v=1758805663"},"aspect_ratio":0.667,"height":1080,"media_type":"image","src":"\/\/www.thebirthstore.com.au\/cdn\/shop\/files\/deluxe-lactation-mug-cake-mix-single-serve-509306.jpg?v=1758805663","width":720},{"alt":"Deluxe Lactation Mug Cake Mix - Single Serve - The Birth Store - Made to Milk","id":27561192194237,"position":5,"preview_image":{"aspect_ratio":1.0,"height":1006,"width":1006,"src":"\/\/www.thebirthstore.com.au\/cdn\/shop\/files\/deluxe-lactation-mug-cake-mix-single-serve-196575.webp?v=1758805663"},"aspect_ratio":1.0,"height":1006,"media_type":"image","src":"\/\/www.thebirthstore.com.au\/cdn\/shop\/files\/deluxe-lactation-mug-cake-mix-single-serve-196575.webp?v=1758805663","width":1006},{"alt":"Deluxe Lactation Mug Cake Mix - Single Serve - The Birth Store - Made to Milk","id":27844281794749,"position":6,"preview_image":{"aspect_ratio":1.0,"height":540,"width":540,"src":"\/\/www.thebirthstore.com.au\/cdn\/shop\/files\/deluxe-lactation-mug-cake-mix-single-serve-268481.jpg?v=1758805663"},"aspect_ratio":1.0,"height":540,"media_type":"image","src":"\/\/www.thebirthstore.com.au\/cdn\/shop\/files\/deluxe-lactation-mug-cake-mix-single-serve-268481.jpg?v=1758805663","width":540},{"alt":"Deluxe Lactation Mug Cake Mix - Single Serve - The Birth Store - Made to Milk","id":27844281827517,"position":7,"preview_image":{"aspect_ratio":1.0,"height":540,"width":540,"src":"\/\/www.thebirthstore.com.au\/cdn\/shop\/files\/deluxe-lactation-mug-cake-mix-single-serve-993017.jpg?v=1758805663"},"aspect_ratio":1.0,"height":540,"media_type":"image","src":"\/\/www.thebirthstore.com.au\/cdn\/shop\/files\/deluxe-lactation-mug-cake-mix-single-serve-993017.jpg?v=1758805663","width":540},{"alt":"Deluxe Lactation Mug Cake Mix - Single Serve - The Birth Store - Made to Milk","id":27844281860285,"position":8,"preview_image":{"aspect_ratio":1.0,"height":540,"width":540,"src":"\/\/www.thebirthstore.com.au\/cdn\/shop\/files\/deluxe-lactation-mug-cake-mix-single-serve-546456.jpg?v=1758805663"},"aspect_ratio":1.0,"height":540,"media_type":"image","src":"\/\/www.thebirthstore.com.au\/cdn\/shop\/files\/deluxe-lactation-mug-cake-mix-single-serve-546456.jpg?v=1758805663","width":540},{"alt":"Deluxe Lactation Mug Cake Mix - Single Serve - The Birth Store - Made to Milk","id":29988439523517,"position":9,"preview_image":{"aspect_ratio":1.0,"height":1080,"width":1080,"src":"\/\/www.thebirthstore.com.au\/cdn\/shop\/files\/deluxe-lactation-mug-cake-mix-single-serve-4257651.png?v=1762143773"},"aspect_ratio":1.0,"height":1080,"media_type":"image","src":"\/\/www.thebirthstore.com.au\/cdn\/shop\/files\/deluxe-lactation-mug-cake-mix-single-serve-4257651.png?v=1762143773","width":1080}],"requires_selling_plan":false,"selling_plan_groups":[],"content":"\u003cp data-mce-fragment=\"1\"\u003eOur devilishly decadent new mug cake mix is sure to be a crowd favourite! 5 single serve sachets individually packed into a money-saving box, this is the perfect treat for dessert loving mamas to get that milk flowing.\u003c\/p\u003e\n\u003cp data-mce-fragment=\"1\"\u003eSweet, but not too sweet, this mug cake mix ticks allergy boxes being DAIRY FREE and SOY FREE!\u003c\/p\u003e\n\u003cp data-mce-fragment=\"1\"\u003eEach sachet contains a single serve mug cake mix only needing two simple staple pantry\/fridge items - milk (of your choice) and oil (of your choice).\u003c\/p\u003e\n\u003cp data-mce-fragment=\"1\"\u003eThrow this bad boy in the microwave and in 60 SECONDS you have yourself a milk-boosting dessert.\u003c\/p\u003e\n\u003cp data-mce-fragment=\"1\"\u003eIngredients: Wheat flour, Australian cane sugar, Cocoa, Brewers yeast, Baking powder.\u003c\/p\u003e"},"options":[{"name":"Flavour","position":1,"values":["Blondie Mug Cake Mix","Chocolate Mug Cake Mix"]}],"custom_metafields":{},"metafields":{"badge":"\u003cdiv style='display:none' class='jdgm-prev-badge' data-average-rating='0.00' data-number-of-reviews='0' data-number-of-questions='0'\u003e \u003cspan class='jdgm-prev-badge__stars' data-score='0.00' tabindex='0' aria-label='0.00 stars' role='button'\u003e \u003cspan class='jdgm-star jdgm--off'\u003e\u003c\/span\u003e\u003cspan class='jdgm-star jdgm--off'\u003e\u003c\/span\u003e\u003cspan class='jdgm-star jdgm--off'\u003e\u003c\/span\u003e\u003cspan class='jdgm-star jdgm--off'\u003e\u003c\/span\u003e\u003cspan class='jdgm-star jdgm--off'\u003e\u003c\/span\u003e \u003c\/span\u003e \u003cspan class='jdgm-prev-badge__text'\u003e No reviews \u003c\/span\u003e \u003c\/div\u003e","widget":"\u003cdiv class='jdgm-rev-widg' data-updated-at='2025-06-13T16:13:40Z' data-average-rating='0.00' data-number-of-reviews='0' data-number-of-questions='0'\u003e \u003cstyle class='jdgm-temp-hiding-style'\u003e.jdgm-rev-widg{ display: none }\u003c\/style\u003e \u003cdiv class='jdgm-rev-widg__header'\u003e \u003ch2 class='jdgm-rev-widg__title'\u003eCustomer Reviews\u003c\/h2\u003e \u003cdiv class='jdgm-rev-widg__summary'\u003e \u003cdiv class='jdgm-rev-widg__summary-stars' aria-label='Average rating is 0.00 stars' role='img'\u003e \u003cspan class='jdgm-star jdgm--off'\u003e\u003c\/span\u003e\u003cspan class='jdgm-star jdgm--off'\u003e\u003c\/span\u003e\u003cspan class='jdgm-star jdgm--off'\u003e\u003c\/span\u003e\u003cspan class='jdgm-star jdgm--off'\u003e\u003c\/span\u003e\u003cspan class='jdgm-star jdgm--off'\u003e\u003c\/span\u003e \u003c\/div\u003e \u003cdiv class='jdgm-rev-widg__summary-text'\u003eBe the first to write a review\u003c\/div\u003e \u003c\/div\u003e \u003ca style='display: none' href='#' class='jdgm-write-rev-link' role='button'\u003eWrite a review\u003c\/a\u003e \u003cdiv class='jdgm-histogram jdgm-temp-hidden'\u003e \u003cdiv class='jdgm-histogram__row' data-rating='5' data-frequency='0' data-percentage='0'\u003e \u003cdiv class='jdgm-histogram__star' role='button' aria-label=\"0% (0) reviews with 5 star rating\" tabindex='0' \u003e\u003cspan class='jdgm-star jdgm--on'\u003e\u003c\/span\u003e\u003cspan class='jdgm-star jdgm--on'\u003e\u003c\/span\u003e\u003cspan class='jdgm-star jdgm--on'\u003e\u003c\/span\u003e\u003cspan class='jdgm-star jdgm--on'\u003e\u003c\/span\u003e\u003cspan class='jdgm-star jdgm--on'\u003e\u003c\/span\u003e\u003c\/div\u003e \u003cdiv class='jdgm-histogram__bar'\u003e \u003cdiv class='jdgm-histogram__bar-content' style='width: 0%;'\u003e \u003c\/div\u003e \u003c\/div\u003e \u003cdiv class='jdgm-histogram__percentage'\u003e0%\u003c\/div\u003e \u003cdiv class='jdgm-histogram__frequency'\u003e(0)\u003c\/div\u003e \u003c\/div\u003e \u003cdiv class='jdgm-histogram__row' data-rating='4' data-frequency='0' data-percentage='0'\u003e \u003cdiv class='jdgm-histogram__star' role='button' aria-label=\"0% (0) reviews with 4 star rating\" tabindex='0' \u003e\u003cspan class='jdgm-star jdgm--on'\u003e\u003c\/span\u003e\u003cspan class='jdgm-star jdgm--on'\u003e\u003c\/span\u003e\u003cspan class='jdgm-star jdgm--on'\u003e\u003c\/span\u003e\u003cspan class='jdgm-star jdgm--on'\u003e\u003c\/span\u003e\u003cspan class='jdgm-star jdgm--off'\u003e\u003c\/span\u003e\u003c\/div\u003e \u003cdiv class='jdgm-histogram__bar'\u003e \u003cdiv class='jdgm-histogram__bar-content' style='width: 0%;'\u003e \u003c\/div\u003e \u003c\/div\u003e \u003cdiv class='jdgm-histogram__percentage'\u003e0%\u003c\/div\u003e \u003cdiv class='jdgm-histogram__frequency'\u003e(0)\u003c\/div\u003e \u003c\/div\u003e \u003cdiv class='jdgm-histogram__row' data-rating='3' data-frequency='0' data-percentage='0'\u003e \u003cdiv class='jdgm-histogram__star' role='button' aria-label=\"0% (0) reviews with 3 star rating\" tabindex='0' \u003e\u003cspan class='jdgm-star jdgm--on'\u003e\u003c\/span\u003e\u003cspan class='jdgm-star jdgm--on'\u003e\u003c\/span\u003e\u003cspan class='jdgm-star jdgm--on'\u003e\u003c\/span\u003e\u003cspan class='jdgm-star jdgm--off'\u003e\u003c\/span\u003e\u003cspan class='jdgm-star jdgm--off'\u003e\u003c\/span\u003e\u003c\/div\u003e \u003cdiv class='jdgm-histogram__bar'\u003e \u003cdiv class='jdgm-histogram__bar-content' style='width: 0%;'\u003e \u003c\/div\u003e \u003c\/div\u003e \u003cdiv class='jdgm-histogram__percentage'\u003e0%\u003c\/div\u003e \u003cdiv class='jdgm-histogram__frequency'\u003e(0)\u003c\/div\u003e \u003c\/div\u003e \u003cdiv class='jdgm-histogram__row' data-rating='2' data-frequency='0' data-percentage='0'\u003e \u003cdiv class='jdgm-histogram__star' role='button' aria-label=\"0% (0) reviews with 2 star rating\" tabindex='0' \u003e\u003cspan class='jdgm-star jdgm--on'\u003e\u003c\/span\u003e\u003cspan class='jdgm-star jdgm--on'\u003e\u003c\/span\u003e\u003cspan class='jdgm-star jdgm--off'\u003e\u003c\/span\u003e\u003cspan class='jdgm-star jdgm--off'\u003e\u003c\/span\u003e\u003cspan class='jdgm-star jdgm--off'\u003e\u003c\/span\u003e\u003c\/div\u003e \u003cdiv class='jdgm-histogram__bar'\u003e \u003cdiv class='jdgm-histogram__bar-content' style='width: 0%;'\u003e \u003c\/div\u003e \u003c\/div\u003e \u003cdiv class='jdgm-histogram__percentage'\u003e0%\u003c\/div\u003e \u003cdiv class='jdgm-histogram__frequency'\u003e(0)\u003c\/div\u003e \u003c\/div\u003e \u003cdiv class='jdgm-histogram__row' data-rating='1' data-frequency='0' data-percentage='0'\u003e \u003cdiv class='jdgm-histogram__star' role='button' aria-label=\"0% (0) reviews with 1 star rating\" tabindex='0' \u003e\u003cspan class='jdgm-star jdgm--on'\u003e\u003c\/span\u003e\u003cspan class='jdgm-star jdgm--off'\u003e\u003c\/span\u003e\u003cspan class='jdgm-star jdgm--off'\u003e\u003c\/span\u003e\u003cspan class='jdgm-star jdgm--off'\u003e\u003c\/span\u003e\u003cspan class='jdgm-star jdgm--off'\u003e\u003c\/span\u003e\u003c\/div\u003e \u003cdiv class='jdgm-histogram__bar'\u003e \u003cdiv class='jdgm-histogram__bar-content' style='width: 0%;'\u003e \u003c\/div\u003e \u003c\/div\u003e \u003cdiv class='jdgm-histogram__percentage'\u003e0%\u003c\/div\u003e \u003cdiv class='jdgm-histogram__frequency'\u003e(0)\u003c\/div\u003e \u003c\/div\u003e \u003cdiv class='jdgm-histogram__row jdgm-histogram__clear-filter' data-rating=null tabindex='0'\u003e\u003c\/div\u003e \u003c\/div\u003e \u003cdiv class='jdgm-rev-widg__sort-wrapper'\u003e\u003c\/div\u003e \u003c\/div\u003e \u003cdiv class='jdgm-rev-widg__body'\u003e \u003cdiv class='jdgm-rev-widg__reviews'\u003e\u003c\/div\u003e \u003cdiv class='jdgm-paginate' data-per-page='10' data-url='https:\/\/api.judge.me\/reviews\/reviews_for_widget' style=\"display: none;\"\u003e\u003c\/div\u003e \u003c\/div\u003e \u003cdiv class='jdgm-rev-widg__paginate-spinner-wrapper'\u003e \u003cdiv class='jdgm-spinner'\u003e\u003c\/div\u003e \u003c\/div\u003e \u003c\/div\u003e"},"collections":[{"id":281712427197,"handle":"breastfeeding","title":"Breastfeeding","updated_at":"2026-06-12T19:10:26+08:00","body_html":"","published_at":"2021-12-20T14:19:33+08:00","sort_order":"best-selling","template_suffix":"breastfeeding-collection","disjunctive":false,"rules":[{"column":"tag","relation":"equals","condition":"Breastfeeding"}],"published_scope":"global","image":{"created_at":"2024-05-06T11:59:34+08:00","alt":"Breastfeeding - The Birth Store","width":620,"height":635,"src":"\/\/www.thebirthstore.com.au\/cdn\/shop\/collections\/breastfeeding-793872.jpg?v=1714967974"}},{"id":261657460925,"handle":"buy","title":"Buy","updated_at":"2026-06-12T19:10:26+08:00","body_html":"\u003cp\u003eBrowse all of our pregnancy, labour \u0026amp; birth, postpartum and baby essentials here.\u003cbr\u003e\u003c\/p\u003e\n\u003cp\u003e\u003cspan\u003eYou can even buy now and pay later with Afterpay!\u003c\/span\u003e\u003c\/p\u003e","published_at":"2021-03-10T12:05:31+08:00","sort_order":"best-selling","template_suffix":"shop-all-collection","disjunctive":false,"rules":[{"column":"title","relation":"not_contains","condition":"Hire"}],"published_scope":"global","image":{"created_at":"2024-05-06T11:59:42+08:00","alt":"Buy - The Birth Store","width":2048,"height":2048,"src":"\/\/www.thebirthstore.com.au\/cdn\/shop\/collections\/buy-964856.jpg?v=1714967982"}},{"id":292919476413,"handle":"lactation-products","title":"Lactation Products","updated_at":"2026-06-12T19:10:26+08:00","body_html":"","published_at":"2023-03-22T12:22:41+08:00","sort_order":"best-selling","template_suffix":"lactation-products-collec","disjunctive":false,"rules":[{"column":"tag","relation":"equals","condition":"Lactation Products"}],"published_scope":"global","image":{"created_at":"2024-05-06T12:00:19+08:00","alt":"Lactation Products - The Birth Store","width":1034,"height":922,"src":"\/\/www.thebirthstore.com.au\/cdn\/shop\/collections\/lactation-products-752907.jpg?v=1714968019"}},{"id":261658083517,"handle":"post-partum","title":"Postpartum","updated_at":"2026-06-12T19:10:26+08:00","body_html":"\u003cp\u003eShop your postpartum and hospital bag essentials below. Looking for something we don't currently stock? Please reach out and let us know.\u003cbr\u003e\u003c\/p\u003e\n\u003cp\u003e\u003cspan\u003eYou can even buy now and pay later with Afterpay!\u003c\/span\u003e\u003c\/p\u003e","published_at":"2021-03-10T12:33:47+08:00","sort_order":"best-selling","template_suffix":"postpartum-collection","disjunctive":false,"rules":[{"column":"tag","relation":"equals","condition":"Post-Partum"}],"published_scope":"global","image":{"created_at":"2024-05-06T12:00:36+08:00","alt":"Postpartum - The Birth Store","width":611,"height":702,"src":"\/\/www.thebirthstore.com.au\/cdn\/shop\/collections\/postpartum-150119.jpg?v=1714968037"}},{"id":261658149053,"handle":"pregnancy-and-maternity-products","title":"Pregnancy","updated_at":"2026-06-12T19:10:26+08:00","body_html":"\u003cp\u003eShop your pregnancy essentials below. Looking for something we don't currently stock? Please reach out and let us know.\u003cbr\u003e\u003c\/p\u003e\n\u003cp\u003e\u003cspan\u003eYou can even buy now and pay later with Afterpay!\u003c\/span\u003e\u003c\/p\u003e","published_at":"2021-03-10T12:34:22+08:00","sort_order":"best-selling","template_suffix":"pregnancy-collection","disjunctive":false,"rules":[{"column":"tag","relation":"equals","condition":"Pregnancy"}],"published_scope":"global","image":{"created_at":"2024-05-06T12:00:40+08:00","alt":"Pregnancy - The Birth Store","width":1024,"height":1536,"src":"\/\/www.thebirthstore.com.au\/cdn\/shop\/collections\/pregnancy-899677.jpg?v=1714968040"}},{"id":291456483517,"handle":"shop-all","title":"Shop All - Mum","updated_at":"2026-06-12T19:10:26+08:00","body_html":"","published_at":"2022-12-23T22:04:39+08:00","sort_order":"best-selling","template_suffix":"shop-all-collection","disjunctive":false,"rules":[{"column":"variant_price","relation":"greater_than","condition":"1"},{"column":"title","relation":"not_contains","condition":"Batteries"},{"column":"tag","relation":"equals","condition":"Mum"}],"published_scope":"global","image":{"created_at":"2024-05-06T12:00:54+08:00","alt":"Shop All - The Birth Store","width":1365,"height":2048,"src":"\/\/www.thebirthstore.com.au\/cdn\/shop\/collections\/shop-all-693176.jpg?v=1714968055"}},{"id":310045933757,"handle":"shop-all-sale","title":"Shop All Sale","updated_at":"2026-06-12T19:10:26+08:00","body_html":"","published_at":"2024-11-12T13:22:43+08:00","sort_order":"alpha-asc","template_suffix":"","disjunctive":true,"rules":[{"column":"tag","relation":"equals","condition":"Bundles"},{"column":"vendor","relation":"equals","condition":"Franjos Kitchen"},{"column":"vendor","relation":"equals","condition":"Adored Illustrations"},{"column":"vendor","relation":"equals","condition":"Amazing Oils"},{"column":"vendor","relation":"equals","condition":"Ice Ice Booby"},{"column":"vendor","relation":"equals","condition":"Made to Milk"},{"column":"vendor","relation":"equals","condition":"Milky Goodness"},{"column":"vendor","relation":"equals","condition":"Seasons of Mama"},{"column":"vendor","relation":"equals","condition":"Silverette"},{"column":"vendor","relation":"equals","condition":"Snuggle Hunny"},{"column":"vendor","relation":"equals","condition":"Yung Bod"},{"column":"vendor","relation":"equals","condition":"Bare Love"},{"column":"vendor","relation":"equals","condition":"Haakaa"},{"column":"vendor","relation":"equals","condition":"Mere Botanicals"},{"column":"vendor","relation":"equals","condition":"The Birth Store Hire"},{"column":"vendor","relation":"equals","condition":"The Birth Store"}],"published_scope":"global","image":{"created_at":"2024-11-13T10:58:16+08:00","alt":"Shop All Sale - The Birth Store","width":2048,"height":1365,"src":"\/\/www.thebirthstore.com.au\/cdn\/shop\/collections\/shop-all-sale-297361.jpg?v=1731466697"}}]}
{"item":{"id":7973358829757,"title":"Breast Recovery Ice \u0026 Heat Packs","handle":"breast-recovery-ice-heat-packs","description":"\u003cp data-pm-slice=\"1 3 []\"\u003e\u003cspan\u003eBreastfeeding is beautiful, but let’s be honest - the early days can be tough. Whether you’re navigating the early days of engorgement, managing mastitis, or just looking for a little extra comfort, our Breast Recovery Ice \u0026amp; Heat Packs are here to help you feel supported every step of the way, and with our unique plush backing, it's never been more comfortable.\u003c\/span\u003e\u003c\/p\u003e\n\u003cp\u003e\u003cspan\u003e\u003cstrong\u003eTo Help With:\u003c\/strong\u003e\u003c\/span\u003e\u003c\/p\u003e\n\u003cul data-spread=\"false\"\u003e\n\u003cli\u003e\n\u003cp\u003e\u003cspan\u003eEngorgement relief\u003c\/span\u003e\u003c\/p\u003e\n\u003c\/li\u003e\n\u003cli\u003e\n\u003cp\u003e\u003cspan\u003eMastitis and blocked ducts\u003c\/span\u003e\u003c\/p\u003e\n\u003c\/li\u003e\n\u003cli\u003e\n\u003cp\u003e\u003cspan\u003eSoothing tenderness during pumping\u003c\/span\u003e\u003c\/p\u003e\n\u003c\/li\u003e\n\u003cli\u003e\n\u003cp\u003e\u003cspan\u003eGeneral breast discomfort\u003c\/span\u003e\u003c\/p\u003e\n\u003c\/li\u003e\n\u003c\/ul\u003e\n\u003cp\u003e\u003cspan\u003e\u003cstrong\u003eFeatures:\u003c\/strong\u003e\u003c\/span\u003e\u003c\/p\u003e\n\u003cul data-spread=\"false\"\u003e\n\u003cli\u003e\n\u003cp\u003e\u003cspan\u003eDual-sided design: one side provides direct contact with ice or heat once it's cooled down, while the other has a plush backing for soft, gentle comfort when you first start using it.\u003c\/span\u003e\u003c\/p\u003e\n\u003c\/li\u003e\n\u003cli\u003e\n\u003cp\u003e\u003cspan\u003eNo need for fiddly covers — perfect when you’re doing everything one-handed.\u003c\/span\u003e\u003c\/p\u003e\n\u003c\/li\u003e\n\u003cli\u003e\n\u003cp\u003e\u003cspan\u003eFlexible and contoured to comfortably fit around your breast.\u003c\/span\u003e\u003c\/p\u003e\n\u003c\/li\u003e\n\u003c\/ul\u003e\n\u003cp\u003e\u003cspan\u003e\u003cstrong\u003eHow to Use:\u003c\/strong\u003e\u003c\/span\u003e\u003c\/p\u003e\n\u003cul data-spread=\"false\"\u003e\n\u003cli\u003e\n\u003cp\u003e\u003cspan\u003eFor cold therapy: Place in the freezer for at least 2 hours before use or submerge in ice water until the desired temperature is achieved.\u003c\/span\u003e\u003c\/p\u003e\n\u003c\/li\u003e\n\u003cli\u003e\n\u003cp\u003e\u003cspan\u003eFor heat therapy: Microwave for 10-20 seconds depending on the microwave (wattage table on product instructions), checking the temperature before applying.\u003c\/span\u003e\u003c\/p\u003e\n\u003c\/li\u003e\n\u003cli\u003e\n\u003cp\u003e\u003cspan\u003eApply to the affected area for up to 20 minutes, as needed.\u003c\/span\u003e\u003c\/p\u003e\n\u003c\/li\u003e\n\u003c\/ul\u003e\n\u003cp\u003e\u003cspan\u003e\u003cstrong\u003eSafety Information:\u003c\/strong\u003e\u003c\/span\u003e\u003c\/p\u003e\n\u003cul data-spread=\"false\"\u003e\n\u003cli\u003e\n\u003cp\u003e\u003cspan\u003eAlways test the temperature before applying to avoid burns or frostbite.\u003c\/span\u003e\u003c\/p\u003e\n\u003c\/li\u003e\n\u003cli\u003e\u003cspan\u003eConsult with a healthcare professional if symptoms persist.\u003c\/span\u003e\u003c\/li\u003e\n\u003cli\u003e\u003cspan\u003e\u003cspan class=\"OYPEnA font-feature-liga-off font-feature-clig-off font-feature-calt-off text-decoration-none text-strikethrough-none\"\u003eThis product is not recommended f\u003c\/span\u003e\u003cspan class=\"OYPEnA font-feature-liga-off font-feature-clig-off font-feature-calt-off text-decoration-none text-strikethrough-none\"\u003eor people with reduced awareness of temperature or feeling in their skin.\u003c\/span\u003e\u003c\/span\u003e\u003c\/li\u003e\n\u003c\/ul\u003e","published_at":"2025-03-18T17:40:22+08:00","created_at":"2025-03-09T13:07:38+08:00","vendor":"The Birth Store","type":"Ice Packs","tags":["Breastfeeding","Hospital Bag","Mastitis","Mum","Pain Relief","The Birth Store"],"price":3000,"price_min":3000,"price_max":3000,"available":true,"price_varies":false,"compare_at_price":null,"compare_at_price_min":0,"compare_at_price_max":0,"compare_at_price_varies":false,"variants":[{"id":44896064503997,"title":"Default Title","option1":"Default Title","option2":null,"option3":null,"sku":"","requires_shipping":true,"taxable":false,"featured_image":null,"available":true,"name":"Breast Recovery Ice \u0026 Heat Packs","public_title":null,"options":["Default Title"],"price":3000,"weight":319,"compare_at_price":null,"inventory_management":"shopify","barcode":"64503997","requires_selling_plan":false,"selling_plan_allocations":[],"quantity_rule":{"min":1,"max":null,"increment":1}}],"images":["\/\/www.thebirthstore.com.au\/cdn\/shop\/files\/breast-recovery-ice-heat-packs-755802.jpg?v=1750253241","\/\/www.thebirthstore.com.au\/cdn\/shop\/files\/breast-recovery-ice-heat-packs-623437.png?v=1750219380","\/\/www.thebirthstore.com.au\/cdn\/shop\/files\/breast-perineal-recovery-ice-heat-packs-202703.jpg?v=1750219380","\/\/www.thebirthstore.com.au\/cdn\/shop\/files\/breast-perineal-recovery-ice-heat-packs-574145.jpg?v=1750219380","\/\/www.thebirthstore.com.au\/cdn\/shop\/files\/breast-perineal-recovery-ice-heat-packs-652289.jpg?v=1750219380","\/\/www.thebirthstore.com.au\/cdn\/shop\/files\/instant-peri-ice-packs-137615.jpg?v=1750219380","\/\/www.thebirthstore.com.au\/cdn\/shop\/files\/breast-recovery-ice-heat-packs-505635.jpg?v=1750219380","\/\/www.thebirthstore.com.au\/cdn\/shop\/files\/perineal-ice-pack-sleeves-220916.jpg?v=1750219380"],"featured_image":"\/\/www.thebirthstore.com.au\/cdn\/shop\/files\/breast-recovery-ice-heat-packs-755802.jpg?v=1750253241","options":["Title"],"media":[{"alt":"Breast Recovery Ice \u0026 Heat Packs - The Birth Store - The Birth Store","id":28995619815613,"position":1,"preview_image":{"aspect_ratio":1.0,"height":1080,"width":1080,"src":"\/\/www.thebirthstore.com.au\/cdn\/shop\/files\/breast-recovery-ice-heat-packs-755802.jpg?v=1750253241"},"aspect_ratio":1.0,"height":1080,"media_type":"image","src":"\/\/www.thebirthstore.com.au\/cdn\/shop\/files\/breast-recovery-ice-heat-packs-755802.jpg?v=1750253241","width":1080},{"alt":"Breast Recovery Ice \u0026 Heat Packs - The Birth Store - The Birth Store","id":28435577110717,"position":2,"preview_image":{"aspect_ratio":1.0,"height":1080,"width":1080,"src":"\/\/www.thebirthstore.com.au\/cdn\/shop\/files\/breast-recovery-ice-heat-packs-623437.png?v=1750219380"},"aspect_ratio":1.0,"height":1080,"media_type":"image","src":"\/\/www.thebirthstore.com.au\/cdn\/shop\/files\/breast-recovery-ice-heat-packs-623437.png?v=1750219380","width":1080},{"alt":"Breast \u0026 Perineal Recovery Ice \u0026 Heat Packs - The Birth Store - The Birth Store","id":28436124729533,"position":3,"preview_image":{"aspect_ratio":1.497,"height":684,"width":1024,"src":"\/\/www.thebirthstore.com.au\/cdn\/shop\/files\/breast-perineal-recovery-ice-heat-packs-202703.jpg?v=1750219380"},"aspect_ratio":1.497,"height":684,"media_type":"image","src":"\/\/www.thebirthstore.com.au\/cdn\/shop\/files\/breast-perineal-recovery-ice-heat-packs-202703.jpg?v=1750219380","width":1024},{"alt":"Breast \u0026 Perineal Recovery Ice \u0026 Heat Packs - The Birth Store - The Birth Store","id":28436124958909,"position":4,"preview_image":{"aspect_ratio":0.668,"height":1440,"width":962,"src":"\/\/www.thebirthstore.com.au\/cdn\/shop\/files\/breast-perineal-recovery-ice-heat-packs-574145.jpg?v=1750219380"},"aspect_ratio":0.668,"height":1440,"media_type":"image","src":"\/\/www.thebirthstore.com.au\/cdn\/shop\/files\/breast-perineal-recovery-ice-heat-packs-574145.jpg?v=1750219380","width":962},{"alt":"Breast \u0026 Perineal Recovery Ice \u0026 Heat Packs - The Birth Store - The Birth Store","id":28410309935293,"position":5,"preview_image":{"aspect_ratio":0.667,"height":1536,"width":1024,"src":"\/\/www.thebirthstore.com.au\/cdn\/shop\/files\/breast-perineal-recovery-ice-heat-packs-652289.jpg?v=1750219380"},"aspect_ratio":0.667,"height":1536,"media_type":"image","src":"\/\/www.thebirthstore.com.au\/cdn\/shop\/files\/breast-perineal-recovery-ice-heat-packs-652289.jpg?v=1750219380","width":1024},{"alt":"Instant Peri Ice Packs - The Birth Store - The Birth Store","id":28436124860605,"position":6,"preview_image":{"aspect_ratio":1.497,"height":684,"width":1024,"src":"\/\/www.thebirthstore.com.au\/cdn\/shop\/files\/instant-peri-ice-packs-137615.jpg?v=1750219380"},"aspect_ratio":1.497,"height":684,"media_type":"image","src":"\/\/www.thebirthstore.com.au\/cdn\/shop\/files\/instant-peri-ice-packs-137615.jpg?v=1750219380","width":1024},{"alt":"Breast Recovery Ice \u0026 Heat Packs - The Birth Store - The Birth Store","id":28436124795069,"position":7,"preview_image":{"aspect_ratio":0.668,"height":1369,"width":915,"src":"\/\/www.thebirthstore.com.au\/cdn\/shop\/files\/breast-recovery-ice-heat-packs-505635.jpg?v=1750219380"},"aspect_ratio":0.668,"height":1369,"media_type":"image","src":"\/\/www.thebirthstore.com.au\/cdn\/shop\/files\/breast-recovery-ice-heat-packs-505635.jpg?v=1750219380","width":915},{"alt":"Perineal Ice Pack Sleeves - The Birth Store - The Birth Store","id":28436124926141,"position":8,"preview_image":{"aspect_ratio":1.497,"height":684,"width":1024,"src":"\/\/www.thebirthstore.com.au\/cdn\/shop\/files\/perineal-ice-pack-sleeves-220916.jpg?v=1750219380"},"aspect_ratio":1.497,"height":684,"media_type":"image","src":"\/\/www.thebirthstore.com.au\/cdn\/shop\/files\/perineal-ice-pack-sleeves-220916.jpg?v=1750219380","width":1024}],"requires_selling_plan":false,"selling_plan_groups":[],"content":"\u003cp data-pm-slice=\"1 3 []\"\u003e\u003cspan\u003eBreastfeeding is beautiful, but let’s be honest - the early days can be tough. Whether you’re navigating the early days of engorgement, managing mastitis, or just looking for a little extra comfort, our Breast Recovery Ice \u0026amp; Heat Packs are here to help you feel supported every step of the way, and with our unique plush backing, it's never been more comfortable.\u003c\/span\u003e\u003c\/p\u003e\n\u003cp\u003e\u003cspan\u003e\u003cstrong\u003eTo Help With:\u003c\/strong\u003e\u003c\/span\u003e\u003c\/p\u003e\n\u003cul data-spread=\"false\"\u003e\n\u003cli\u003e\n\u003cp\u003e\u003cspan\u003eEngorgement relief\u003c\/span\u003e\u003c\/p\u003e\n\u003c\/li\u003e\n\u003cli\u003e\n\u003cp\u003e\u003cspan\u003eMastitis and blocked ducts\u003c\/span\u003e\u003c\/p\u003e\n\u003c\/li\u003e\n\u003cli\u003e\n\u003cp\u003e\u003cspan\u003eSoothing tenderness during pumping\u003c\/span\u003e\u003c\/p\u003e\n\u003c\/li\u003e\n\u003cli\u003e\n\u003cp\u003e\u003cspan\u003eGeneral breast discomfort\u003c\/span\u003e\u003c\/p\u003e\n\u003c\/li\u003e\n\u003c\/ul\u003e\n\u003cp\u003e\u003cspan\u003e\u003cstrong\u003eFeatures:\u003c\/strong\u003e\u003c\/span\u003e\u003c\/p\u003e\n\u003cul data-spread=\"false\"\u003e\n\u003cli\u003e\n\u003cp\u003e\u003cspan\u003eDual-sided design: one side provides direct contact with ice or heat once it's cooled down, while the other has a plush backing for soft, gentle comfort when you first start using it.\u003c\/span\u003e\u003c\/p\u003e\n\u003c\/li\u003e\n\u003cli\u003e\n\u003cp\u003e\u003cspan\u003eNo need for fiddly covers — perfect when you’re doing everything one-handed.\u003c\/span\u003e\u003c\/p\u003e\n\u003c\/li\u003e\n\u003cli\u003e\n\u003cp\u003e\u003cspan\u003eFlexible and contoured to comfortably fit around your breast.\u003c\/span\u003e\u003c\/p\u003e\n\u003c\/li\u003e\n\u003c\/ul\u003e\n\u003cp\u003e\u003cspan\u003e\u003cstrong\u003eHow to Use:\u003c\/strong\u003e\u003c\/span\u003e\u003c\/p\u003e\n\u003cul data-spread=\"false\"\u003e\n\u003cli\u003e\n\u003cp\u003e\u003cspan\u003eFor cold therapy: Place in the freezer for at least 2 hours before use or submerge in ice water until the desired temperature is achieved.\u003c\/span\u003e\u003c\/p\u003e\n\u003c\/li\u003e\n\u003cli\u003e\n\u003cp\u003e\u003cspan\u003eFor heat therapy: Microwave for 10-20 seconds depending on the microwave (wattage table on product instructions), checking the temperature before applying.\u003c\/span\u003e\u003c\/p\u003e\n\u003c\/li\u003e\n\u003cli\u003e\n\u003cp\u003e\u003cspan\u003eApply to the affected area for up to 20 minutes, as needed.\u003c\/span\u003e\u003c\/p\u003e\n\u003c\/li\u003e\n\u003c\/ul\u003e\n\u003cp\u003e\u003cspan\u003e\u003cstrong\u003eSafety Information:\u003c\/strong\u003e\u003c\/span\u003e\u003c\/p\u003e\n\u003cul data-spread=\"false\"\u003e\n\u003cli\u003e\n\u003cp\u003e\u003cspan\u003eAlways test the temperature before applying to avoid burns or frostbite.\u003c\/span\u003e\u003c\/p\u003e\n\u003c\/li\u003e\n\u003cli\u003e\u003cspan\u003eConsult with a healthcare professional if symptoms persist.\u003c\/span\u003e\u003c\/li\u003e\n\u003cli\u003e\u003cspan\u003e\u003cspan class=\"OYPEnA font-feature-liga-off font-feature-clig-off font-feature-calt-off text-decoration-none text-strikethrough-none\"\u003eThis product is not recommended f\u003c\/span\u003e\u003cspan class=\"OYPEnA font-feature-liga-off font-feature-clig-off font-feature-calt-off text-decoration-none text-strikethrough-none\"\u003eor people with reduced awareness of temperature or feeling in their skin.\u003c\/span\u003e\u003c\/span\u003e\u003c\/li\u003e\n\u003c\/ul\u003e"},"options":[{"name":"Title","position":1,"values":["Default Title"]}],"custom_metafields":{},"metafields":{"badge":"\u003cdiv style='display:none' class='jdgm-prev-badge' data-average-rating='0.00' data-number-of-reviews='0' data-number-of-questions='0'\u003e \u003cspan class='jdgm-prev-badge__stars' data-score='0.00' tabindex='0' aria-label='0.00 stars' role='button'\u003e \u003cspan class='jdgm-star jdgm--off'\u003e\u003c\/span\u003e\u003cspan class='jdgm-star jdgm--off'\u003e\u003c\/span\u003e\u003cspan class='jdgm-star jdgm--off'\u003e\u003c\/span\u003e\u003cspan class='jdgm-star jdgm--off'\u003e\u003c\/span\u003e\u003cspan class='jdgm-star jdgm--off'\u003e\u003c\/span\u003e \u003c\/span\u003e \u003cspan class='jdgm-prev-badge__text'\u003e No reviews \u003c\/span\u003e \u003c\/div\u003e","widget":"\u003cdiv class='jdgm-rev-widg' data-updated-at='2025-06-13T16:13:40Z' data-average-rating='0.00' data-number-of-reviews='0' data-number-of-questions='0'\u003e \u003cstyle class='jdgm-temp-hiding-style'\u003e.jdgm-rev-widg{ display: none }\u003c\/style\u003e \u003cdiv class='jdgm-rev-widg__header'\u003e \u003ch2 class='jdgm-rev-widg__title'\u003eCustomer Reviews\u003c\/h2\u003e \u003cdiv class='jdgm-rev-widg__summary'\u003e \u003cdiv class='jdgm-rev-widg__summary-stars' aria-label='Average rating is 0.00 stars' role='img'\u003e \u003cspan class='jdgm-star jdgm--off'\u003e\u003c\/span\u003e\u003cspan class='jdgm-star jdgm--off'\u003e\u003c\/span\u003e\u003cspan class='jdgm-star jdgm--off'\u003e\u003c\/span\u003e\u003cspan class='jdgm-star jdgm--off'\u003e\u003c\/span\u003e\u003cspan class='jdgm-star jdgm--off'\u003e\u003c\/span\u003e \u003c\/div\u003e \u003cdiv class='jdgm-rev-widg__summary-text'\u003eBe the first to write a review\u003c\/div\u003e \u003c\/div\u003e \u003ca style='display: none' href='#' class='jdgm-write-rev-link' role='button'\u003eWrite a review\u003c\/a\u003e \u003cdiv class='jdgm-histogram jdgm-temp-hidden'\u003e \u003cdiv class='jdgm-histogram__row' data-rating='5' data-frequency='0' data-percentage='0'\u003e \u003cdiv class='jdgm-histogram__star' role='button' aria-label=\"0% (0) reviews with 5 star rating\" tabindex='0' \u003e\u003cspan class='jdgm-star jdgm--on'\u003e\u003c\/span\u003e\u003cspan class='jdgm-star jdgm--on'\u003e\u003c\/span\u003e\u003cspan class='jdgm-star jdgm--on'\u003e\u003c\/span\u003e\u003cspan class='jdgm-star jdgm--on'\u003e\u003c\/span\u003e\u003cspan class='jdgm-star jdgm--on'\u003e\u003c\/span\u003e\u003c\/div\u003e \u003cdiv class='jdgm-histogram__bar'\u003e \u003cdiv class='jdgm-histogram__bar-content' style='width: 0%;'\u003e \u003c\/div\u003e \u003c\/div\u003e \u003cdiv class='jdgm-histogram__percentage'\u003e0%\u003c\/div\u003e \u003cdiv class='jdgm-histogram__frequency'\u003e(0)\u003c\/div\u003e \u003c\/div\u003e \u003cdiv class='jdgm-histogram__row' data-rating='4' data-frequency='0' data-percentage='0'\u003e \u003cdiv class='jdgm-histogram__star' role='button' aria-label=\"0% (0) reviews with 4 star rating\" tabindex='0' \u003e\u003cspan class='jdgm-star jdgm--on'\u003e\u003c\/span\u003e\u003cspan class='jdgm-star jdgm--on'\u003e\u003c\/span\u003e\u003cspan class='jdgm-star jdgm--on'\u003e\u003c\/span\u003e\u003cspan class='jdgm-star jdgm--on'\u003e\u003c\/span\u003e\u003cspan class='jdgm-star jdgm--off'\u003e\u003c\/span\u003e\u003c\/div\u003e \u003cdiv class='jdgm-histogram__bar'\u003e \u003cdiv class='jdgm-histogram__bar-content' style='width: 0%;'\u003e \u003c\/div\u003e \u003c\/div\u003e \u003cdiv class='jdgm-histogram__percentage'\u003e0%\u003c\/div\u003e \u003cdiv class='jdgm-histogram__frequency'\u003e(0)\u003c\/div\u003e \u003c\/div\u003e \u003cdiv class='jdgm-histogram__row' data-rating='3' data-frequency='0' data-percentage='0'\u003e \u003cdiv class='jdgm-histogram__star' role='button' aria-label=\"0% (0) reviews with 3 star rating\" tabindex='0' \u003e\u003cspan class='jdgm-star jdgm--on'\u003e\u003c\/span\u003e\u003cspan class='jdgm-star jdgm--on'\u003e\u003c\/span\u003e\u003cspan class='jdgm-star jdgm--on'\u003e\u003c\/span\u003e\u003cspan class='jdgm-star jdgm--off'\u003e\u003c\/span\u003e\u003cspan class='jdgm-star jdgm--off'\u003e\u003c\/span\u003e\u003c\/div\u003e \u003cdiv class='jdgm-histogram__bar'\u003e \u003cdiv class='jdgm-histogram__bar-content' style='width: 0%;'\u003e \u003c\/div\u003e \u003c\/div\u003e \u003cdiv class='jdgm-histogram__percentage'\u003e0%\u003c\/div\u003e \u003cdiv class='jdgm-histogram__frequency'\u003e(0)\u003c\/div\u003e \u003c\/div\u003e \u003cdiv class='jdgm-histogram__row' data-rating='2' data-frequency='0' data-percentage='0'\u003e \u003cdiv class='jdgm-histogram__star' role='button' aria-label=\"0% (0) reviews with 2 star rating\" tabindex='0' \u003e\u003cspan class='jdgm-star jdgm--on'\u003e\u003c\/span\u003e\u003cspan class='jdgm-star jdgm--on'\u003e\u003c\/span\u003e\u003cspan class='jdgm-star jdgm--off'\u003e\u003c\/span\u003e\u003cspan class='jdgm-star jdgm--off'\u003e\u003c\/span\u003e\u003cspan class='jdgm-star jdgm--off'\u003e\u003c\/span\u003e\u003c\/div\u003e \u003cdiv class='jdgm-histogram__bar'\u003e \u003cdiv class='jdgm-histogram__bar-content' style='width: 0%;'\u003e \u003c\/div\u003e \u003c\/div\u003e \u003cdiv class='jdgm-histogram__percentage'\u003e0%\u003c\/div\u003e \u003cdiv class='jdgm-histogram__frequency'\u003e(0)\u003c\/div\u003e \u003c\/div\u003e \u003cdiv class='jdgm-histogram__row' data-rating='1' data-frequency='0' data-percentage='0'\u003e \u003cdiv class='jdgm-histogram__star' role='button' aria-label=\"0% (0) reviews with 1 star rating\" tabindex='0' \u003e\u003cspan class='jdgm-star jdgm--on'\u003e\u003c\/span\u003e\u003cspan class='jdgm-star jdgm--off'\u003e\u003c\/span\u003e\u003cspan class='jdgm-star jdgm--off'\u003e\u003c\/span\u003e\u003cspan class='jdgm-star jdgm--off'\u003e\u003c\/span\u003e\u003cspan class='jdgm-star jdgm--off'\u003e\u003c\/span\u003e\u003c\/div\u003e \u003cdiv class='jdgm-histogram__bar'\u003e \u003cdiv class='jdgm-histogram__bar-content' style='width: 0%;'\u003e \u003c\/div\u003e \u003c\/div\u003e \u003cdiv class='jdgm-histogram__percentage'\u003e0%\u003c\/div\u003e \u003cdiv class='jdgm-histogram__frequency'\u003e(0)\u003c\/div\u003e \u003c\/div\u003e \u003cdiv class='jdgm-histogram__row jdgm-histogram__clear-filter' data-rating=null tabindex='0'\u003e\u003c\/div\u003e \u003c\/div\u003e \u003cdiv class='jdgm-rev-widg__sort-wrapper'\u003e\u003c\/div\u003e \u003c\/div\u003e \u003cdiv class='jdgm-rev-widg__body'\u003e \u003cdiv class='jdgm-rev-widg__reviews'\u003e\u003c\/div\u003e \u003cdiv class='jdgm-paginate' data-per-page='10' data-url='https:\/\/api.judge.me\/reviews\/reviews_for_widget' style=\"display: none;\"\u003e\u003c\/div\u003e \u003c\/div\u003e \u003cdiv class='jdgm-rev-widg__paginate-spinner-wrapper'\u003e \u003cdiv class='jdgm-spinner'\u003e\u003c\/div\u003e \u003c\/div\u003e \u003c\/div\u003e"},"collections":[{"id":309505622205,"handle":"the-birth-store-range","title":"'The Birth Store' Range","updated_at":"2026-06-12T19:10:26+08:00","body_html":"","published_at":"2024-10-28T13:24:26+08:00","sort_order":"alpha-asc","template_suffix":"","disjunctive":false,"rules":[{"column":"tag","relation":"equals","condition":"The Birth Store"}],"published_scope":"global","image":{"created_at":"2025-10-30T16:16:56+08:00","alt":"'The Birth Store' Range - The Birth Store","width":1365,"height":2048,"src":"\/\/www.thebirthstore.com.au\/cdn\/shop\/collections\/the-birth-store-range-5183880.jpg?v=1761812217"}},{"id":281712427197,"handle":"breastfeeding","title":"Breastfeeding","updated_at":"2026-06-12T19:10:26+08:00","body_html":"","published_at":"2021-12-20T14:19:33+08:00","sort_order":"best-selling","template_suffix":"breastfeeding-collection","disjunctive":false,"rules":[{"column":"tag","relation":"equals","condition":"Breastfeeding"}],"published_scope":"global","image":{"created_at":"2024-05-06T11:59:34+08:00","alt":"Breastfeeding - The Birth Store","width":620,"height":635,"src":"\/\/www.thebirthstore.com.au\/cdn\/shop\/collections\/breastfeeding-793872.jpg?v=1714967974"}},{"id":261657460925,"handle":"buy","title":"Buy","updated_at":"2026-06-12T19:10:26+08:00","body_html":"\u003cp\u003eBrowse all of our pregnancy, labour \u0026amp; birth, postpartum and baby essentials here.\u003cbr\u003e\u003c\/p\u003e\n\u003cp\u003e\u003cspan\u003eYou can even buy now and pay later with Afterpay!\u003c\/span\u003e\u003c\/p\u003e","published_at":"2021-03-10T12:05:31+08:00","sort_order":"best-selling","template_suffix":"shop-all-collection","disjunctive":false,"rules":[{"column":"title","relation":"not_contains","condition":"Hire"}],"published_scope":"global","image":{"created_at":"2024-05-06T11:59:42+08:00","alt":"Buy - The Birth Store","width":2048,"height":2048,"src":"\/\/www.thebirthstore.com.au\/cdn\/shop\/collections\/buy-964856.jpg?v=1714967982"}},{"id":337429201085,"handle":"hospital-bag","title":"Hospital Bag","updated_at":"2026-06-12T19:10:26+08:00","body_html":"","published_at":"2026-06-03T11:36:29+08:00","sort_order":"most-relevant","template_suffix":"","disjunctive":false,"rules":[{"column":"tag","relation":"equals","condition":"Hospital Bag"}],"published_scope":"global"},{"id":319580635325,"handle":"ice-heat-packs","updated_at":"2026-06-12T19:10:26+08:00","published_at":"2025-06-08T20:45:57+08:00","sort_order":"best-selling","template_suffix":"","published_scope":"global","title":"Ice \u0026 Heat Packs","body_html":"","image":{"created_at":"2025-10-30T16:16:45+08:00","alt":"Ice \u0026 Heat Packs - The Birth Store","width":1024,"height":684,"src":"\/\/www.thebirthstore.com.au\/cdn\/shop\/collections\/ice-heat-packs-1501133.jpg?v=1761812205"}},{"id":290869313725,"handle":"mastitis-blocked-ducts","title":"Mastitis \u0026 Blocked Ducts","updated_at":"2026-06-12T19:10:26+08:00","body_html":"","published_at":"2022-11-17T10:50:01+08:00","sort_order":"best-selling","template_suffix":"swaddles-collection","disjunctive":false,"rules":[{"column":"tag","relation":"equals","condition":"Mastitis"}],"published_scope":"global","image":{"created_at":"2024-05-06T12:00:21+08:00","alt":"Mastitis \u0026 Blocked Ducts - The Birth Store","width":494,"height":487,"src":"\/\/www.thebirthstore.com.au\/cdn\/shop\/collections\/mastitis-blocked-ducts-488726.jpg?v=1714968021"}},{"id":281712591037,"handle":"pain-relief","title":"Pain Relief","updated_at":"2026-06-12T19:10:26+08:00","body_html":"","published_at":"2021-12-20T14:22:45+08:00","sort_order":"best-selling","template_suffix":"pain-relief-collection","disjunctive":false,"rules":[{"column":"tag","relation":"equals","condition":"Pain Relief"}],"published_scope":"global","image":{"created_at":"2024-05-06T12:00:27+08:00","alt":"Pain Relief - The Birth Store","width":1365,"height":2048,"src":"\/\/www.thebirthstore.com.au\/cdn\/shop\/collections\/pain-relief-878865.jpg?v=1714968027"}},{"id":315407761597,"handle":"the-birth-store-2025-product-launch","updated_at":"2026-06-12T19:10:26+08:00","published_at":"2025-03-15T21:46:34+08:00","sort_order":"created-desc","template_suffix":"ice-pack-launch","published_scope":"global","title":"Recovery Ice \u0026 Heat Packs","body_html":"","image":{"created_at":"2025-10-30T16:16:46+08:00","alt":"Recovery Ice \u0026 Heat Packs - The Birth Store","width":1024,"height":684,"src":"\/\/www.thebirthstore.com.au\/cdn\/shop\/collections\/recovery-ice-heat-packs-9023381.jpg?v=1761812207"}},{"id":291456483517,"handle":"shop-all","title":"Shop All - Mum","updated_at":"2026-06-12T19:10:26+08:00","body_html":"","published_at":"2022-12-23T22:04:39+08:00","sort_order":"best-selling","template_suffix":"shop-all-collection","disjunctive":false,"rules":[{"column":"variant_price","relation":"greater_than","condition":"1"},{"column":"title","relation":"not_contains","condition":"Batteries"},{"column":"tag","relation":"equals","condition":"Mum"}],"published_scope":"global","image":{"created_at":"2024-05-06T12:00:54+08:00","alt":"Shop All - The Birth Store","width":1365,"height":2048,"src":"\/\/www.thebirthstore.com.au\/cdn\/shop\/collections\/shop-all-693176.jpg?v=1714968055"}},{"id":310045933757,"handle":"shop-all-sale","title":"Shop All Sale","updated_at":"2026-06-12T19:10:26+08:00","body_html":"","published_at":"2024-11-12T13:22:43+08:00","sort_order":"alpha-asc","template_suffix":"","disjunctive":true,"rules":[{"column":"tag","relation":"equals","condition":"Bundles"},{"column":"vendor","relation":"equals","condition":"Franjos Kitchen"},{"column":"vendor","relation":"equals","condition":"Adored Illustrations"},{"column":"vendor","relation":"equals","condition":"Amazing Oils"},{"column":"vendor","relation":"equals","condition":"Ice Ice Booby"},{"column":"vendor","relation":"equals","condition":"Made to Milk"},{"column":"vendor","relation":"equals","condition":"Milky Goodness"},{"column":"vendor","relation":"equals","condition":"Seasons of Mama"},{"column":"vendor","relation":"equals","condition":"Silverette"},{"column":"vendor","relation":"equals","condition":"Snuggle Hunny"},{"column":"vendor","relation":"equals","condition":"Yung Bod"},{"column":"vendor","relation":"equals","condition":"Bare Love"},{"column":"vendor","relation":"equals","condition":"Haakaa"},{"column":"vendor","relation":"equals","condition":"Mere Botanicals"},{"column":"vendor","relation":"equals","condition":"The Birth Store Hire"},{"column":"vendor","relation":"equals","condition":"The Birth Store"}],"published_scope":"global","image":{"created_at":"2024-11-13T10:58:16+08:00","alt":"Shop All Sale - The Birth Store","width":2048,"height":1365,"src":"\/\/www.thebirthstore.com.au\/cdn\/shop\/collections\/shop-all-sale-297361.jpg?v=1731466697"}},{"id":316942287037,"handle":"wholesale-products","updated_at":"2026-06-12T19:10:26+08:00","published_at":"2025-04-19T15:30:53+08:00","sort_order":"best-selling","template_suffix":"","published_scope":"global","title":"Wholesale Products","body_html":"","image":{"created_at":"2025-11-20T21:33:57+08:00","alt":"Wholesale Products - The Birth Store","width":1024,"height":684,"src":"\/\/www.thebirthstore.com.au\/cdn\/shop\/collections\/wholesale-products-3833919.jpg?v=1763645638"}}]}
{"item":{"id":7322281115837,"title":"Silicone Breast Pump Flower Stopper","handle":"silicone-breast-pump-flower-stopper","description":"\u003cp\u003e\u003cspan data-mce-fragment=\"1\"\u003ePrevent accidental spills and preserve the beneficial properties of your breast milk with the Haakaa Silicone Flower Stopper! It sits tightly in the neck of your pump to keep your liquid gold safe. Made of 100% silicone, our flower stopper is compatible with all generations of Haakaa breast pumps. \u003c\/span\u003e\u003c\/p\u003e\n\u003cul\u003e\n\u003cli\u003eMade from 100% silicone.\u003c\/li\u003e\n\u003cli\u003eCompatible with all three generations of Haakaa Breast Pumps\u003c\/li\u003e\n\u003cli\u003ePrevents accidental spills.\u003c\/li\u003e\n\u003cli\u003ePreserves the beneficial properties of breast milk.\u003c\/li\u003e\n\u003cli\u003eMicrowave steriliser and dishwasher safe.\u003c\/li\u003e\n\u003c\/ul\u003e\n\u003cp\u003e\u003cspan\u003eWash before and after each use. Although dishwasher safe, we strongly recommend sterilising using a steam steriliser or by boiling in water for 2-3 minutes. Do not use any bleach-based cleaners or tablets to clean or sterilise this product.\u003c\/span\u003e\u003c\/p\u003e\n\u003cp\u003eCheck product condition regularly - replace if this product shows any signs of damage. This product is not a toy. For adult use only. Keep out of reach of children and pets. Please do not use this product for anything other than its intended use.\u003c\/p\u003e\n\u003cp\u003e \u003c\/p\u003e","published_at":"2022-08-16T20:40:17+08:00","created_at":"2022-08-16T20:40:15+08:00","vendor":"Haakaa","type":"","tags":["Breastfeeding","Lactation Products","Mum","Post-Partum"],"price":1100,"price_min":1100,"price_max":1100,"available":true,"price_varies":false,"compare_at_price":null,"compare_at_price_min":0,"compare_at_price_max":0,"compare_at_price_varies":false,"variants":[{"id":42217064104125,"title":"Purple","option1":"Purple","option2":null,"option3":null,"sku":"","requires_shipping":true,"taxable":false,"featured_image":null,"available":true,"name":"Silicone Breast Pump Flower Stopper - Purple","public_title":"Purple","options":["Purple"],"price":1100,"weight":21,"compare_at_price":null,"inventory_management":"shopify","barcode":"64104125","requires_selling_plan":false,"selling_plan_allocations":[],"quantity_rule":{"min":1,"max":null,"increment":1}},{"id":42217064136893,"title":"White","option1":"White","option2":null,"option3":null,"sku":"","requires_shipping":true,"taxable":false,"featured_image":null,"available":true,"name":"Silicone Breast Pump Flower Stopper - White","public_title":"White","options":["White"],"price":1100,"weight":21,"compare_at_price":null,"inventory_management":"shopify","barcode":"64136893","requires_selling_plan":false,"selling_plan_allocations":[],"quantity_rule":{"min":1,"max":null,"increment":1}},{"id":42801452810429,"title":"Blue","option1":"Blue","option2":null,"option3":null,"sku":"","requires_shipping":true,"taxable":false,"featured_image":null,"available":true,"name":"Silicone Breast Pump Flower Stopper - Blue","public_title":"Blue","options":["Blue"],"price":1100,"weight":21,"compare_at_price":null,"inventory_management":"shopify","barcode":"52810429","requires_selling_plan":false,"selling_plan_allocations":[],"quantity_rule":{"min":1,"max":null,"increment":1}},{"id":42801453891773,"title":"Pink","option1":"Pink","option2":null,"option3":null,"sku":"","requires_shipping":true,"taxable":false,"featured_image":null,"available":true,"name":"Silicone Breast Pump Flower Stopper - Pink","public_title":"Pink","options":["Pink"],"price":1100,"weight":21,"compare_at_price":null,"inventory_management":"shopify","barcode":"53891773","requires_selling_plan":false,"selling_plan_allocations":[],"quantity_rule":{"min":1,"max":null,"increment":1}}],"images":["\/\/www.thebirthstore.com.au\/cdn\/shop\/files\/silicone-breast-pump-flower-stopper-774192.jpg?v=1714968038","\/\/www.thebirthstore.com.au\/cdn\/shop\/files\/silicone-breast-pump-flower-stopper-585604.jpg?v=1714968039","\/\/www.thebirthstore.com.au\/cdn\/shop\/files\/silicone-breast-pump-flower-stopper-625891.jpg?v=1714968039"],"featured_image":"\/\/www.thebirthstore.com.au\/cdn\/shop\/files\/silicone-breast-pump-flower-stopper-774192.jpg?v=1714968038","options":["Color"],"media":[{"alt":"Silicone Breast Pump Flower Stopper - The Birth Store-Haakaa","id":27007598592189,"position":1,"preview_image":{"aspect_ratio":1.0,"height":743,"width":743,"src":"\/\/www.thebirthstore.com.au\/cdn\/shop\/files\/silicone-breast-pump-flower-stopper-774192.jpg?v=1714968038"},"aspect_ratio":1.0,"height":743,"media_type":"image","src":"\/\/www.thebirthstore.com.au\/cdn\/shop\/files\/silicone-breast-pump-flower-stopper-774192.jpg?v=1714968038","width":743},{"alt":"Silicone Breast Pump Flower Stopper - The Birth Store-Haakaa","id":27007598624957,"position":2,"preview_image":{"aspect_ratio":0.912,"height":682,"width":622,"src":"\/\/www.thebirthstore.com.au\/cdn\/shop\/files\/silicone-breast-pump-flower-stopper-585604.jpg?v=1714968039"},"aspect_ratio":0.912,"height":682,"media_type":"image","src":"\/\/www.thebirthstore.com.au\/cdn\/shop\/files\/silicone-breast-pump-flower-stopper-585604.jpg?v=1714968039","width":622},{"alt":"Silicone Breast Pump Flower Stopper - The Birth Store-Haakaa","id":27007598657725,"position":3,"preview_image":{"aspect_ratio":1.324,"height":488,"width":646,"src":"\/\/www.thebirthstore.com.au\/cdn\/shop\/files\/silicone-breast-pump-flower-stopper-625891.jpg?v=1714968039"},"aspect_ratio":1.324,"height":488,"media_type":"image","src":"\/\/www.thebirthstore.com.au\/cdn\/shop\/files\/silicone-breast-pump-flower-stopper-625891.jpg?v=1714968039","width":646}],"requires_selling_plan":false,"selling_plan_groups":[],"content":"\u003cp\u003e\u003cspan data-mce-fragment=\"1\"\u003ePrevent accidental spills and preserve the beneficial properties of your breast milk with the Haakaa Silicone Flower Stopper! It sits tightly in the neck of your pump to keep your liquid gold safe. Made of 100% silicone, our flower stopper is compatible with all generations of Haakaa breast pumps. \u003c\/span\u003e\u003c\/p\u003e\n\u003cul\u003e\n\u003cli\u003eMade from 100% silicone.\u003c\/li\u003e\n\u003cli\u003eCompatible with all three generations of Haakaa Breast Pumps\u003c\/li\u003e\n\u003cli\u003ePrevents accidental spills.\u003c\/li\u003e\n\u003cli\u003ePreserves the beneficial properties of breast milk.\u003c\/li\u003e\n\u003cli\u003eMicrowave steriliser and dishwasher safe.\u003c\/li\u003e\n\u003c\/ul\u003e\n\u003cp\u003e\u003cspan\u003eWash before and after each use. Although dishwasher safe, we strongly recommend sterilising using a steam steriliser or by boiling in water for 2-3 minutes. Do not use any bleach-based cleaners or tablets to clean or sterilise this product.\u003c\/span\u003e\u003c\/p\u003e\n\u003cp\u003eCheck product condition regularly - replace if this product shows any signs of damage. This product is not a toy. For adult use only. Keep out of reach of children and pets. Please do not use this product for anything other than its intended use.\u003c\/p\u003e\n\u003cp\u003e \u003c\/p\u003e"},"options":[{"name":"Color","position":1,"values":["Purple","White","Blue","Pink"]}],"custom_metafields":{},"metafields":{"badge":"\u003cdiv style='display:none' class='jdgm-prev-badge' data-average-rating='0.00' data-number-of-reviews='0' data-number-of-questions='0'\u003e \u003cspan class='jdgm-prev-badge__stars' data-score='0.00' tabindex='0' aria-label='0.00 stars' role='button'\u003e \u003cspan class='jdgm-star jdgm--off'\u003e\u003c\/span\u003e\u003cspan class='jdgm-star jdgm--off'\u003e\u003c\/span\u003e\u003cspan class='jdgm-star jdgm--off'\u003e\u003c\/span\u003e\u003cspan class='jdgm-star jdgm--off'\u003e\u003c\/span\u003e\u003cspan class='jdgm-star jdgm--off'\u003e\u003c\/span\u003e \u003c\/span\u003e \u003cspan class='jdgm-prev-badge__text'\u003e No reviews \u003c\/span\u003e \u003c\/div\u003e","widget":"\u003cdiv class='jdgm-rev-widg' data-updated-at='2025-06-13T16:12:10Z' data-average-rating='0.00' data-number-of-reviews='0' data-number-of-questions='0'\u003e \u003cstyle class='jdgm-temp-hiding-style'\u003e.jdgm-rev-widg{ display: none }\u003c\/style\u003e \u003cdiv class='jdgm-rev-widg__header'\u003e \u003ch2 class='jdgm-rev-widg__title'\u003eCustomer Reviews\u003c\/h2\u003e \u003cdiv class='jdgm-rev-widg__summary'\u003e \u003cdiv class='jdgm-rev-widg__summary-stars' aria-label='Average rating is 0.00 stars' role='img'\u003e \u003cspan class='jdgm-star jdgm--off'\u003e\u003c\/span\u003e\u003cspan class='jdgm-star jdgm--off'\u003e\u003c\/span\u003e\u003cspan class='jdgm-star jdgm--off'\u003e\u003c\/span\u003e\u003cspan class='jdgm-star jdgm--off'\u003e\u003c\/span\u003e\u003cspan class='jdgm-star jdgm--off'\u003e\u003c\/span\u003e \u003c\/div\u003e \u003cdiv class='jdgm-rev-widg__summary-text'\u003eBe the first to write a review\u003c\/div\u003e \u003c\/div\u003e \u003ca style='display: none' href='#' class='jdgm-write-rev-link' role='button'\u003eWrite a review\u003c\/a\u003e \u003cdiv class='jdgm-histogram jdgm-temp-hidden'\u003e \u003cdiv class='jdgm-histogram__row' data-rating='5' data-frequency='0' data-percentage='0'\u003e \u003cdiv class='jdgm-histogram__star' role='button' aria-label=\"0% (0) reviews with 5 star rating\" tabindex='0' \u003e\u003cspan class='jdgm-star jdgm--on'\u003e\u003c\/span\u003e\u003cspan class='jdgm-star jdgm--on'\u003e\u003c\/span\u003e\u003cspan class='jdgm-star jdgm--on'\u003e\u003c\/span\u003e\u003cspan class='jdgm-star jdgm--on'\u003e\u003c\/span\u003e\u003cspan class='jdgm-star jdgm--on'\u003e\u003c\/span\u003e\u003c\/div\u003e \u003cdiv class='jdgm-histogram__bar'\u003e \u003cdiv class='jdgm-histogram__bar-content' style='width: 0%;'\u003e \u003c\/div\u003e \u003c\/div\u003e \u003cdiv class='jdgm-histogram__percentage'\u003e0%\u003c\/div\u003e \u003cdiv class='jdgm-histogram__frequency'\u003e(0)\u003c\/div\u003e \u003c\/div\u003e \u003cdiv class='jdgm-histogram__row' data-rating='4' data-frequency='0' data-percentage='0'\u003e \u003cdiv class='jdgm-histogram__star' role='button' aria-label=\"0% (0) reviews with 4 star rating\" tabindex='0' \u003e\u003cspan class='jdgm-star jdgm--on'\u003e\u003c\/span\u003e\u003cspan class='jdgm-star jdgm--on'\u003e\u003c\/span\u003e\u003cspan class='jdgm-star jdgm--on'\u003e\u003c\/span\u003e\u003cspan class='jdgm-star jdgm--on'\u003e\u003c\/span\u003e\u003cspan class='jdgm-star jdgm--off'\u003e\u003c\/span\u003e\u003c\/div\u003e \u003cdiv class='jdgm-histogram__bar'\u003e \u003cdiv class='jdgm-histogram__bar-content' style='width: 0%;'\u003e \u003c\/div\u003e \u003c\/div\u003e \u003cdiv class='jdgm-histogram__percentage'\u003e0%\u003c\/div\u003e \u003cdiv class='jdgm-histogram__frequency'\u003e(0)\u003c\/div\u003e \u003c\/div\u003e \u003cdiv class='jdgm-histogram__row' data-rating='3' data-frequency='0' data-percentage='0'\u003e \u003cdiv class='jdgm-histogram__star' role='button' aria-label=\"0% (0) reviews with 3 star rating\" tabindex='0' \u003e\u003cspan class='jdgm-star jdgm--on'\u003e\u003c\/span\u003e\u003cspan class='jdgm-star jdgm--on'\u003e\u003c\/span\u003e\u003cspan class='jdgm-star jdgm--on'\u003e\u003c\/span\u003e\u003cspan class='jdgm-star jdgm--off'\u003e\u003c\/span\u003e\u003cspan class='jdgm-star jdgm--off'\u003e\u003c\/span\u003e\u003c\/div\u003e \u003cdiv class='jdgm-histogram__bar'\u003e \u003cdiv class='jdgm-histogram__bar-content' style='width: 0%;'\u003e \u003c\/div\u003e \u003c\/div\u003e \u003cdiv class='jdgm-histogram__percentage'\u003e0%\u003c\/div\u003e \u003cdiv class='jdgm-histogram__frequency'\u003e(0)\u003c\/div\u003e \u003c\/div\u003e \u003cdiv class='jdgm-histogram__row' data-rating='2' data-frequency='0' data-percentage='0'\u003e \u003cdiv class='jdgm-histogram__star' role='button' aria-label=\"0% (0) reviews with 2 star rating\" tabindex='0' \u003e\u003cspan class='jdgm-star jdgm--on'\u003e\u003c\/span\u003e\u003cspan class='jdgm-star jdgm--on'\u003e\u003c\/span\u003e\u003cspan class='jdgm-star jdgm--off'\u003e\u003c\/span\u003e\u003cspan class='jdgm-star jdgm--off'\u003e\u003c\/span\u003e\u003cspan class='jdgm-star jdgm--off'\u003e\u003c\/span\u003e\u003c\/div\u003e \u003cdiv class='jdgm-histogram__bar'\u003e \u003cdiv class='jdgm-histogram__bar-content' style='width: 0%;'\u003e \u003c\/div\u003e \u003c\/div\u003e \u003cdiv class='jdgm-histogram__percentage'\u003e0%\u003c\/div\u003e \u003cdiv class='jdgm-histogram__frequency'\u003e(0)\u003c\/div\u003e \u003c\/div\u003e \u003cdiv class='jdgm-histogram__row' data-rating='1' data-frequency='0' data-percentage='0'\u003e \u003cdiv class='jdgm-histogram__star' role='button' aria-label=\"0% (0) reviews with 1 star rating\" tabindex='0' \u003e\u003cspan class='jdgm-star jdgm--on'\u003e\u003c\/span\u003e\u003cspan class='jdgm-star jdgm--off'\u003e\u003c\/span\u003e\u003cspan class='jdgm-star jdgm--off'\u003e\u003c\/span\u003e\u003cspan class='jdgm-star jdgm--off'\u003e\u003c\/span\u003e\u003cspan class='jdgm-star jdgm--off'\u003e\u003c\/span\u003e\u003c\/div\u003e \u003cdiv class='jdgm-histogram__bar'\u003e \u003cdiv class='jdgm-histogram__bar-content' style='width: 0%;'\u003e \u003c\/div\u003e \u003c\/div\u003e \u003cdiv class='jdgm-histogram__percentage'\u003e0%\u003c\/div\u003e \u003cdiv class='jdgm-histogram__frequency'\u003e(0)\u003c\/div\u003e \u003c\/div\u003e \u003cdiv class='jdgm-histogram__row jdgm-histogram__clear-filter' data-rating=null tabindex='0'\u003e\u003c\/div\u003e \u003c\/div\u003e \u003cdiv class='jdgm-rev-widg__sort-wrapper'\u003e\u003c\/div\u003e \u003c\/div\u003e \u003cdiv class='jdgm-rev-widg__body'\u003e \u003cdiv class='jdgm-rev-widg__reviews'\u003e\u003c\/div\u003e \u003cdiv class='jdgm-paginate' data-per-page='10' data-url='https:\/\/api.judge.me\/reviews\/reviews_for_widget' style=\"display: none;\"\u003e\u003c\/div\u003e \u003c\/div\u003e \u003cdiv class='jdgm-rev-widg__paginate-spinner-wrapper'\u003e \u003cdiv class='jdgm-spinner'\u003e\u003c\/div\u003e \u003c\/div\u003e \u003c\/div\u003e"},"collections":[{"id":281712427197,"handle":"breastfeeding","title":"Breastfeeding","updated_at":"2026-06-12T19:10:26+08:00","body_html":"","published_at":"2021-12-20T14:19:33+08:00","sort_order":"best-selling","template_suffix":"breastfeeding-collection","disjunctive":false,"rules":[{"column":"tag","relation":"equals","condition":"Breastfeeding"}],"published_scope":"global","image":{"created_at":"2024-05-06T11:59:34+08:00","alt":"Breastfeeding - The Birth Store","width":620,"height":635,"src":"\/\/www.thebirthstore.com.au\/cdn\/shop\/collections\/breastfeeding-793872.jpg?v=1714967974"}},{"id":261657460925,"handle":"buy","title":"Buy","updated_at":"2026-06-12T19:10:26+08:00","body_html":"\u003cp\u003eBrowse all of our pregnancy, labour \u0026amp; birth, postpartum and baby essentials here.\u003cbr\u003e\u003c\/p\u003e\n\u003cp\u003e\u003cspan\u003eYou can even buy now and pay later with Afterpay!\u003c\/span\u003e\u003c\/p\u003e","published_at":"2021-03-10T12:05:31+08:00","sort_order":"best-selling","template_suffix":"shop-all-collection","disjunctive":false,"rules":[{"column":"title","relation":"not_contains","condition":"Hire"}],"published_scope":"global","image":{"created_at":"2024-05-06T11:59:42+08:00","alt":"Buy - The Birth Store","width":2048,"height":2048,"src":"\/\/www.thebirthstore.com.au\/cdn\/shop\/collections\/buy-964856.jpg?v=1714967982"}},{"id":292919476413,"handle":"lactation-products","title":"Lactation Products","updated_at":"2026-06-12T19:10:26+08:00","body_html":"","published_at":"2023-03-22T12:22:41+08:00","sort_order":"best-selling","template_suffix":"lactation-products-collec","disjunctive":false,"rules":[{"column":"tag","relation":"equals","condition":"Lactation Products"}],"published_scope":"global","image":{"created_at":"2024-05-06T12:00:19+08:00","alt":"Lactation Products - The Birth Store","width":1034,"height":922,"src":"\/\/www.thebirthstore.com.au\/cdn\/shop\/collections\/lactation-products-752907.jpg?v=1714968019"}},{"id":261658083517,"handle":"post-partum","title":"Postpartum","updated_at":"2026-06-12T19:10:26+08:00","body_html":"\u003cp\u003eShop your postpartum and hospital bag essentials below. Looking for something we don't currently stock? Please reach out and let us know.\u003cbr\u003e\u003c\/p\u003e\n\u003cp\u003e\u003cspan\u003eYou can even buy now and pay later with Afterpay!\u003c\/span\u003e\u003c\/p\u003e","published_at":"2021-03-10T12:33:47+08:00","sort_order":"best-selling","template_suffix":"postpartum-collection","disjunctive":false,"rules":[{"column":"tag","relation":"equals","condition":"Post-Partum"}],"published_scope":"global","image":{"created_at":"2024-05-06T12:00:36+08:00","alt":"Postpartum - The Birth Store","width":611,"height":702,"src":"\/\/www.thebirthstore.com.au\/cdn\/shop\/collections\/postpartum-150119.jpg?v=1714968037"}},{"id":291456483517,"handle":"shop-all","title":"Shop All - Mum","updated_at":"2026-06-12T19:10:26+08:00","body_html":"","published_at":"2022-12-23T22:04:39+08:00","sort_order":"best-selling","template_suffix":"shop-all-collection","disjunctive":false,"rules":[{"column":"variant_price","relation":"greater_than","condition":"1"},{"column":"title","relation":"not_contains","condition":"Batteries"},{"column":"tag","relation":"equals","condition":"Mum"}],"published_scope":"global","image":{"created_at":"2024-05-06T12:00:54+08:00","alt":"Shop All - The Birth Store","width":1365,"height":2048,"src":"\/\/www.thebirthstore.com.au\/cdn\/shop\/collections\/shop-all-693176.jpg?v=1714968055"}},{"id":310045933757,"handle":"shop-all-sale","title":"Shop All Sale","updated_at":"2026-06-12T19:10:26+08:00","body_html":"","published_at":"2024-11-12T13:22:43+08:00","sort_order":"alpha-asc","template_suffix":"","disjunctive":true,"rules":[{"column":"tag","relation":"equals","condition":"Bundles"},{"column":"vendor","relation":"equals","condition":"Franjos Kitchen"},{"column":"vendor","relation":"equals","condition":"Adored Illustrations"},{"column":"vendor","relation":"equals","condition":"Amazing Oils"},{"column":"vendor","relation":"equals","condition":"Ice Ice Booby"},{"column":"vendor","relation":"equals","condition":"Made to Milk"},{"column":"vendor","relation":"equals","condition":"Milky Goodness"},{"column":"vendor","relation":"equals","condition":"Seasons of Mama"},{"column":"vendor","relation":"equals","condition":"Silverette"},{"column":"vendor","relation":"equals","condition":"Snuggle Hunny"},{"column":"vendor","relation":"equals","condition":"Yung Bod"},{"column":"vendor","relation":"equals","condition":"Bare Love"},{"column":"vendor","relation":"equals","condition":"Haakaa"},{"column":"vendor","relation":"equals","condition":"Mere Botanicals"},{"column":"vendor","relation":"equals","condition":"The Birth Store Hire"},{"column":"vendor","relation":"equals","condition":"The Birth Store"}],"published_scope":"global","image":{"created_at":"2024-11-13T10:58:16+08:00","alt":"Shop All Sale - The Birth Store","width":2048,"height":1365,"src":"\/\/www.thebirthstore.com.au\/cdn\/shop\/collections\/shop-all-sale-297361.jpg?v=1731466697"}}]}
{"item":{"id":7322176880829,"title":"Lactamo Breastfeeding Ball","handle":"lactamo-breastfeeding-ball","description":"\u003cp\u003e\u003cspan data-mce-fragment=\"1\"\u003eHere to help with breastfeeding. The Lactamo breastfeeding ball facilitates breast massage with temperature. This combination helps with common breastfeeding problems including oversupply, undersupply, blocked ducts and engorgement. Heatable, coolable and reusable.\u003c\/span\u003e\u003c\/p\u003e\n\u003cp class=\"h5\"\u003e\u003cstrong\u003eHOW LACTAMO WORKS\u003c\/strong\u003e\u003c\/p\u003e\n\u003cp class=\"h3\"\u003eTemperature, movement + compression\u003c\/p\u003e\n\u003cdiv class=\"rte background-media-text__subtext\"\u003e\n\u003cp\u003eLactamo is a soft sphere with hollow surface lumps filled with gel. Lactamo can be heated or cooled and has been specifically developed for breastfeeding.\u003c\/p\u003e\n\u003c\/div\u003e\n\u003cp class=\"h3\"\u003e\u003cstrong\u003eUsing temperature\u003c\/strong\u003e\u003c\/p\u003e\n\u003cdiv class=\"rte featured-row__subtext\"\u003e\n\u003cp\u003eLactamo is a soft ball specifically designed for breast tissue. It can be heated or cooled (depending on requirements) and is applied directly to breast tissue. Lactamo can be used before, during or after breastfeeding, in the shower, and with massage oils. Lactamo is heated by submerging it in boiling water for 3 minutes. Lactamo can also be heated in a conventional steam steriliser for one cycle. Lactamo can be cooled in the freezer (preferably for at least 2 hours), or in a glass of iced water for 3 minutes.\u003c\/p\u003e\n\u003cp class=\"h3\"\u003e\u003cstrong\u003eMASSAGE\u003c\/strong\u003e\u003c\/p\u003e\n\u003cdiv class=\"rte featured-row__subtext\"\u003e\n\u003cp\u003eFor a few minutes before a feed, roll heated Lactamo over the surface of the breast, always massaging towards the nipple, applying firm but comfortable pressure to the breast.\u003c\/p\u003e\n\u003c\/div\u003e\n\u003c\/div\u003e","published_at":"2022-08-16T18:58:21+08:00","created_at":"2022-08-16T18:58:18+08:00","vendor":"Lactamo","type":"","tags":["Breastfeeding","Hospital Bag","Mastitis","Mum","Pain Relief"],"price":5995,"price_min":5995,"price_max":5995,"available":true,"price_varies":false,"compare_at_price":null,"compare_at_price_min":0,"compare_at_price_max":0,"compare_at_price_varies":false,"variants":[{"id":42216760606909,"title":"Default Title","option1":"Default Title","option2":null,"option3":null,"sku":"","requires_shipping":true,"taxable":false,"featured_image":null,"available":true,"name":"Lactamo Breastfeeding Ball","public_title":null,"options":["Default Title"],"price":5995,"weight":110,"compare_at_price":null,"inventory_management":"shopify","barcode":"60606909","requires_selling_plan":false,"selling_plan_allocations":[],"quantity_rule":{"min":1,"max":null,"increment":1}}],"images":["\/\/www.thebirthstore.com.au\/cdn\/shop\/files\/lactamo-breastfeeding-ball-232873.jpg?v=1714967990","\/\/www.thebirthstore.com.au\/cdn\/shop\/files\/lactamo-breastfeeding-ball-196985.jpg?v=1714967990","\/\/www.thebirthstore.com.au\/cdn\/shop\/files\/lactamo-breastfeeding-ball-742109.jpg?v=1714967990","\/\/www.thebirthstore.com.au\/cdn\/shop\/files\/lactamo-breastfeeding-ball-898235.jpg?v=1714967990","\/\/www.thebirthstore.com.au\/cdn\/shop\/files\/lactamo-breastfeeding-ball-295185.jpg?v=1714967990","\/\/www.thebirthstore.com.au\/cdn\/shop\/files\/lactamo-breastfeeding-ball-787505.jpg?v=1714967990","\/\/www.thebirthstore.com.au\/cdn\/shop\/files\/lactamo-breastfeeding-ball-122129.jpg?v=1714967990","\/\/www.thebirthstore.com.au\/cdn\/shop\/files\/lactamo-breastfeeding-ball-732452.jpg?v=1714967990"],"featured_image":"\/\/www.thebirthstore.com.au\/cdn\/shop\/files\/lactamo-breastfeeding-ball-232873.jpg?v=1714967990","options":["Title"],"media":[{"alt":"Lactamo Breastfeeding Ball - The Birth Store-Lactamo","id":27007590629565,"position":1,"preview_image":{"aspect_ratio":1.0,"height":887,"width":887,"src":"\/\/www.thebirthstore.com.au\/cdn\/shop\/files\/lactamo-breastfeeding-ball-232873.jpg?v=1714967990"},"aspect_ratio":1.0,"height":887,"media_type":"image","src":"\/\/www.thebirthstore.com.au\/cdn\/shop\/files\/lactamo-breastfeeding-ball-232873.jpg?v=1714967990","width":887},{"alt":"Lactamo Breastfeeding Ball - The Birth Store-Lactamo","id":27007590695101,"position":2,"preview_image":{"aspect_ratio":1.073,"height":713,"width":765,"src":"\/\/www.thebirthstore.com.au\/cdn\/shop\/files\/lactamo-breastfeeding-ball-196985.jpg?v=1714967990"},"aspect_ratio":1.073,"height":713,"media_type":"image","src":"\/\/www.thebirthstore.com.au\/cdn\/shop\/files\/lactamo-breastfeeding-ball-196985.jpg?v=1714967990","width":765},{"alt":"Lactamo Breastfeeding Ball - The Birth Store-Lactamo","id":27007590727869,"position":3,"preview_image":{"aspect_ratio":1.514,"height":327,"width":495,"src":"\/\/www.thebirthstore.com.au\/cdn\/shop\/files\/lactamo-breastfeeding-ball-742109.jpg?v=1714967990"},"aspect_ratio":1.514,"height":327,"media_type":"image","src":"\/\/www.thebirthstore.com.au\/cdn\/shop\/files\/lactamo-breastfeeding-ball-742109.jpg?v=1714967990","width":495},{"alt":"Lactamo Breastfeeding Ball - The Birth Store-Lactamo","id":27007590793405,"position":4,"preview_image":{"aspect_ratio":1.014,"height":487,"width":494,"src":"\/\/www.thebirthstore.com.au\/cdn\/shop\/files\/lactamo-breastfeeding-ball-898235.jpg?v=1714967990"},"aspect_ratio":1.014,"height":487,"media_type":"image","src":"\/\/www.thebirthstore.com.au\/cdn\/shop\/files\/lactamo-breastfeeding-ball-898235.jpg?v=1714967990","width":494},{"alt":"Lactamo Breastfeeding Ball - The Birth Store-Lactamo","id":27007590858941,"position":5,"preview_image":{"aspect_ratio":1.015,"height":751,"width":762,"src":"\/\/www.thebirthstore.com.au\/cdn\/shop\/files\/lactamo-breastfeeding-ball-295185.jpg?v=1714967990"},"aspect_ratio":1.015,"height":751,"media_type":"image","src":"\/\/www.thebirthstore.com.au\/cdn\/shop\/files\/lactamo-breastfeeding-ball-295185.jpg?v=1714967990","width":762},{"alt":"Lactamo Breastfeeding Ball - The Birth Store-Lactamo","id":27007590924477,"position":6,"preview_image":{"aspect_ratio":1.388,"height":549,"width":762,"src":"\/\/www.thebirthstore.com.au\/cdn\/shop\/files\/lactamo-breastfeeding-ball-787505.jpg?v=1714967990"},"aspect_ratio":1.388,"height":549,"media_type":"image","src":"\/\/www.thebirthstore.com.au\/cdn\/shop\/files\/lactamo-breastfeeding-ball-787505.jpg?v=1714967990","width":762},{"alt":"Lactamo Breastfeeding Ball - The Birth Store-Lactamo","id":27007590990013,"position":7,"preview_image":{"aspect_ratio":1.436,"height":307,"width":441,"src":"\/\/www.thebirthstore.com.au\/cdn\/shop\/files\/lactamo-breastfeeding-ball-122129.jpg?v=1714967990"},"aspect_ratio":1.436,"height":307,"media_type":"image","src":"\/\/www.thebirthstore.com.au\/cdn\/shop\/files\/lactamo-breastfeeding-ball-122129.jpg?v=1714967990","width":441},{"alt":"Lactamo Breastfeeding Ball - The Birth Store-Lactamo","id":27007591055549,"position":8,"preview_image":{"aspect_ratio":1.434,"height":309,"width":443,"src":"\/\/www.thebirthstore.com.au\/cdn\/shop\/files\/lactamo-breastfeeding-ball-732452.jpg?v=1714967990"},"aspect_ratio":1.434,"height":309,"media_type":"image","src":"\/\/www.thebirthstore.com.au\/cdn\/shop\/files\/lactamo-breastfeeding-ball-732452.jpg?v=1714967990","width":443}],"requires_selling_plan":false,"selling_plan_groups":[],"content":"\u003cp\u003e\u003cspan data-mce-fragment=\"1\"\u003eHere to help with breastfeeding. The Lactamo breastfeeding ball facilitates breast massage with temperature. This combination helps with common breastfeeding problems including oversupply, undersupply, blocked ducts and engorgement. Heatable, coolable and reusable.\u003c\/span\u003e\u003c\/p\u003e\n\u003cp class=\"h5\"\u003e\u003cstrong\u003eHOW LACTAMO WORKS\u003c\/strong\u003e\u003c\/p\u003e\n\u003cp class=\"h3\"\u003eTemperature, movement + compression\u003c\/p\u003e\n\u003cdiv class=\"rte background-media-text__subtext\"\u003e\n\u003cp\u003eLactamo is a soft sphere with hollow surface lumps filled with gel. Lactamo can be heated or cooled and has been specifically developed for breastfeeding.\u003c\/p\u003e\n\u003c\/div\u003e\n\u003cp class=\"h3\"\u003e\u003cstrong\u003eUsing temperature\u003c\/strong\u003e\u003c\/p\u003e\n\u003cdiv class=\"rte featured-row__subtext\"\u003e\n\u003cp\u003eLactamo is a soft ball specifically designed for breast tissue. It can be heated or cooled (depending on requirements) and is applied directly to breast tissue. Lactamo can be used before, during or after breastfeeding, in the shower, and with massage oils. Lactamo is heated by submerging it in boiling water for 3 minutes. Lactamo can also be heated in a conventional steam steriliser for one cycle. Lactamo can be cooled in the freezer (preferably for at least 2 hours), or in a glass of iced water for 3 minutes.\u003c\/p\u003e\n\u003cp class=\"h3\"\u003e\u003cstrong\u003eMASSAGE\u003c\/strong\u003e\u003c\/p\u003e\n\u003cdiv class=\"rte featured-row__subtext\"\u003e\n\u003cp\u003eFor a few minutes before a feed, roll heated Lactamo over the surface of the breast, always massaging towards the nipple, applying firm but comfortable pressure to the breast.\u003c\/p\u003e\n\u003c\/div\u003e\n\u003c\/div\u003e"},"options":[{"name":"Title","position":1,"values":["Default Title"]}],"custom_metafields":{},"metafields":{"badge":"\u003cdiv style='display:none' class='jdgm-prev-badge' data-average-rating='0.00' data-number-of-reviews='0' data-number-of-questions='0'\u003e \u003cspan class='jdgm-prev-badge__stars' data-score='0.00' tabindex='0' aria-label='0.00 stars' role='button'\u003e \u003cspan class='jdgm-star jdgm--off'\u003e\u003c\/span\u003e\u003cspan class='jdgm-star jdgm--off'\u003e\u003c\/span\u003e\u003cspan class='jdgm-star jdgm--off'\u003e\u003c\/span\u003e\u003cspan class='jdgm-star jdgm--off'\u003e\u003c\/span\u003e\u003cspan class='jdgm-star jdgm--off'\u003e\u003c\/span\u003e \u003c\/span\u003e \u003cspan class='jdgm-prev-badge__text'\u003e No reviews \u003c\/span\u003e \u003c\/div\u003e","widget":"\u003cdiv class='jdgm-rev-widg' data-updated-at='2025-06-13T16:12:10Z' data-average-rating='0.00' data-number-of-reviews='0' data-number-of-questions='0'\u003e \u003cstyle class='jdgm-temp-hiding-style'\u003e.jdgm-rev-widg{ display: none }\u003c\/style\u003e \u003cdiv class='jdgm-rev-widg__header'\u003e \u003ch2 class='jdgm-rev-widg__title'\u003eCustomer Reviews\u003c\/h2\u003e \u003cdiv class='jdgm-rev-widg__summary'\u003e \u003cdiv class='jdgm-rev-widg__summary-stars' aria-label='Average rating is 0.00 stars' role='img'\u003e \u003cspan class='jdgm-star jdgm--off'\u003e\u003c\/span\u003e\u003cspan class='jdgm-star jdgm--off'\u003e\u003c\/span\u003e\u003cspan class='jdgm-star jdgm--off'\u003e\u003c\/span\u003e\u003cspan class='jdgm-star jdgm--off'\u003e\u003c\/span\u003e\u003cspan class='jdgm-star jdgm--off'\u003e\u003c\/span\u003e \u003c\/div\u003e \u003cdiv class='jdgm-rev-widg__summary-text'\u003eBe the first to write a review\u003c\/div\u003e \u003c\/div\u003e \u003ca style='display: none' href='#' class='jdgm-write-rev-link' role='button'\u003eWrite a review\u003c\/a\u003e \u003cdiv class='jdgm-histogram jdgm-temp-hidden'\u003e \u003cdiv class='jdgm-histogram__row' data-rating='5' data-frequency='0' data-percentage='0'\u003e \u003cdiv class='jdgm-histogram__star' role='button' aria-label=\"0% (0) reviews with 5 star rating\" tabindex='0' \u003e\u003cspan class='jdgm-star jdgm--on'\u003e\u003c\/span\u003e\u003cspan class='jdgm-star jdgm--on'\u003e\u003c\/span\u003e\u003cspan class='jdgm-star jdgm--on'\u003e\u003c\/span\u003e\u003cspan class='jdgm-star jdgm--on'\u003e\u003c\/span\u003e\u003cspan class='jdgm-star jdgm--on'\u003e\u003c\/span\u003e\u003c\/div\u003e \u003cdiv class='jdgm-histogram__bar'\u003e \u003cdiv class='jdgm-histogram__bar-content' style='width: 0%;'\u003e \u003c\/div\u003e \u003c\/div\u003e \u003cdiv class='jdgm-histogram__percentage'\u003e0%\u003c\/div\u003e \u003cdiv class='jdgm-histogram__frequency'\u003e(0)\u003c\/div\u003e \u003c\/div\u003e \u003cdiv class='jdgm-histogram__row' data-rating='4' data-frequency='0' data-percentage='0'\u003e \u003cdiv class='jdgm-histogram__star' role='button' aria-label=\"0% (0) reviews with 4 star rating\" tabindex='0' \u003e\u003cspan class='jdgm-star jdgm--on'\u003e\u003c\/span\u003e\u003cspan class='jdgm-star jdgm--on'\u003e\u003c\/span\u003e\u003cspan class='jdgm-star jdgm--on'\u003e\u003c\/span\u003e\u003cspan class='jdgm-star jdgm--on'\u003e\u003c\/span\u003e\u003cspan class='jdgm-star jdgm--off'\u003e\u003c\/span\u003e\u003c\/div\u003e \u003cdiv class='jdgm-histogram__bar'\u003e \u003cdiv class='jdgm-histogram__bar-content' style='width: 0%;'\u003e \u003c\/div\u003e \u003c\/div\u003e \u003cdiv class='jdgm-histogram__percentage'\u003e0%\u003c\/div\u003e \u003cdiv class='jdgm-histogram__frequency'\u003e(0)\u003c\/div\u003e \u003c\/div\u003e \u003cdiv class='jdgm-histogram__row' data-rating='3' data-frequency='0' data-percentage='0'\u003e \u003cdiv class='jdgm-histogram__star' role='button' aria-label=\"0% (0) reviews with 3 star rating\" tabindex='0' \u003e\u003cspan class='jdgm-star jdgm--on'\u003e\u003c\/span\u003e\u003cspan class='jdgm-star jdgm--on'\u003e\u003c\/span\u003e\u003cspan class='jdgm-star jdgm--on'\u003e\u003c\/span\u003e\u003cspan class='jdgm-star jdgm--off'\u003e\u003c\/span\u003e\u003cspan class='jdgm-star jdgm--off'\u003e\u003c\/span\u003e\u003c\/div\u003e \u003cdiv class='jdgm-histogram__bar'\u003e \u003cdiv class='jdgm-histogram__bar-content' style='width: 0%;'\u003e \u003c\/div\u003e \u003c\/div\u003e \u003cdiv class='jdgm-histogram__percentage'\u003e0%\u003c\/div\u003e \u003cdiv class='jdgm-histogram__frequency'\u003e(0)\u003c\/div\u003e \u003c\/div\u003e \u003cdiv class='jdgm-histogram__row' data-rating='2' data-frequency='0' data-percentage='0'\u003e \u003cdiv class='jdgm-histogram__star' role='button' aria-label=\"0% (0) reviews with 2 star rating\" tabindex='0' \u003e\u003cspan class='jdgm-star jdgm--on'\u003e\u003c\/span\u003e\u003cspan class='jdgm-star jdgm--on'\u003e\u003c\/span\u003e\u003cspan class='jdgm-star jdgm--off'\u003e\u003c\/span\u003e\u003cspan class='jdgm-star jdgm--off'\u003e\u003c\/span\u003e\u003cspan class='jdgm-star jdgm--off'\u003e\u003c\/span\u003e\u003c\/div\u003e \u003cdiv class='jdgm-histogram__bar'\u003e \u003cdiv class='jdgm-histogram__bar-content' style='width: 0%;'\u003e \u003c\/div\u003e \u003c\/div\u003e \u003cdiv class='jdgm-histogram__percentage'\u003e0%\u003c\/div\u003e \u003cdiv class='jdgm-histogram__frequency'\u003e(0)\u003c\/div\u003e \u003c\/div\u003e \u003cdiv class='jdgm-histogram__row' data-rating='1' data-frequency='0' data-percentage='0'\u003e \u003cdiv class='jdgm-histogram__star' role='button' aria-label=\"0% (0) reviews with 1 star rating\" tabindex='0' \u003e\u003cspan class='jdgm-star jdgm--on'\u003e\u003c\/span\u003e\u003cspan class='jdgm-star jdgm--off'\u003e\u003c\/span\u003e\u003cspan class='jdgm-star jdgm--off'\u003e\u003c\/span\u003e\u003cspan class='jdgm-star jdgm--off'\u003e\u003c\/span\u003e\u003cspan class='jdgm-star jdgm--off'\u003e\u003c\/span\u003e\u003c\/div\u003e \u003cdiv class='jdgm-histogram__bar'\u003e \u003cdiv class='jdgm-histogram__bar-content' style='width: 0%;'\u003e \u003c\/div\u003e \u003c\/div\u003e \u003cdiv class='jdgm-histogram__percentage'\u003e0%\u003c\/div\u003e \u003cdiv class='jdgm-histogram__frequency'\u003e(0)\u003c\/div\u003e \u003c\/div\u003e \u003cdiv class='jdgm-histogram__row jdgm-histogram__clear-filter' data-rating=null tabindex='0'\u003e\u003c\/div\u003e \u003c\/div\u003e \u003cdiv class='jdgm-rev-widg__sort-wrapper'\u003e\u003c\/div\u003e \u003c\/div\u003e \u003cdiv class='jdgm-rev-widg__body'\u003e \u003cdiv class='jdgm-rev-widg__reviews'\u003e\u003c\/div\u003e \u003cdiv class='jdgm-paginate' data-per-page='10' data-url='https:\/\/api.judge.me\/reviews\/reviews_for_widget' style=\"display: none;\"\u003e\u003c\/div\u003e \u003c\/div\u003e \u003cdiv class='jdgm-rev-widg__paginate-spinner-wrapper'\u003e \u003cdiv class='jdgm-spinner'\u003e\u003c\/div\u003e \u003c\/div\u003e \u003c\/div\u003e"},"collections":[{"id":281712427197,"handle":"breastfeeding","title":"Breastfeeding","updated_at":"2026-06-12T19:10:26+08:00","body_html":"","published_at":"2021-12-20T14:19:33+08:00","sort_order":"best-selling","template_suffix":"breastfeeding-collection","disjunctive":false,"rules":[{"column":"tag","relation":"equals","condition":"Breastfeeding"}],"published_scope":"global","image":{"created_at":"2024-05-06T11:59:34+08:00","alt":"Breastfeeding - The Birth Store","width":620,"height":635,"src":"\/\/www.thebirthstore.com.au\/cdn\/shop\/collections\/breastfeeding-793872.jpg?v=1714967974"}},{"id":261657460925,"handle":"buy","title":"Buy","updated_at":"2026-06-12T19:10:26+08:00","body_html":"\u003cp\u003eBrowse all of our pregnancy, labour \u0026amp; birth, postpartum and baby essentials here.\u003cbr\u003e\u003c\/p\u003e\n\u003cp\u003e\u003cspan\u003eYou can even buy now and pay later with Afterpay!\u003c\/span\u003e\u003c\/p\u003e","published_at":"2021-03-10T12:05:31+08:00","sort_order":"best-selling","template_suffix":"shop-all-collection","disjunctive":false,"rules":[{"column":"title","relation":"not_contains","condition":"Hire"}],"published_scope":"global","image":{"created_at":"2024-05-06T11:59:42+08:00","alt":"Buy - The Birth Store","width":2048,"height":2048,"src":"\/\/www.thebirthstore.com.au\/cdn\/shop\/collections\/buy-964856.jpg?v=1714967982"}},{"id":337429201085,"handle":"hospital-bag","title":"Hospital Bag","updated_at":"2026-06-12T19:10:26+08:00","body_html":"","published_at":"2026-06-03T11:36:29+08:00","sort_order":"most-relevant","template_suffix":"","disjunctive":false,"rules":[{"column":"tag","relation":"equals","condition":"Hospital Bag"}],"published_scope":"global"},{"id":290869313725,"handle":"mastitis-blocked-ducts","title":"Mastitis \u0026 Blocked Ducts","updated_at":"2026-06-12T19:10:26+08:00","body_html":"","published_at":"2022-11-17T10:50:01+08:00","sort_order":"best-selling","template_suffix":"swaddles-collection","disjunctive":false,"rules":[{"column":"tag","relation":"equals","condition":"Mastitis"}],"published_scope":"global","image":{"created_at":"2024-05-06T12:00:21+08:00","alt":"Mastitis \u0026 Blocked Ducts - The Birth Store","width":494,"height":487,"src":"\/\/www.thebirthstore.com.au\/cdn\/shop\/collections\/mastitis-blocked-ducts-488726.jpg?v=1714968021"}},{"id":281712591037,"handle":"pain-relief","title":"Pain Relief","updated_at":"2026-06-12T19:10:26+08:00","body_html":"","published_at":"2021-12-20T14:22:45+08:00","sort_order":"best-selling","template_suffix":"pain-relief-collection","disjunctive":false,"rules":[{"column":"tag","relation":"equals","condition":"Pain Relief"}],"published_scope":"global","image":{"created_at":"2024-05-06T12:00:27+08:00","alt":"Pain Relief - The Birth Store","width":1365,"height":2048,"src":"\/\/www.thebirthstore.com.au\/cdn\/shop\/collections\/pain-relief-878865.jpg?v=1714968027"}},{"id":291456483517,"handle":"shop-all","title":"Shop All - Mum","updated_at":"2026-06-12T19:10:26+08:00","body_html":"","published_at":"2022-12-23T22:04:39+08:00","sort_order":"best-selling","template_suffix":"shop-all-collection","disjunctive":false,"rules":[{"column":"variant_price","relation":"greater_than","condition":"1"},{"column":"title","relation":"not_contains","condition":"Batteries"},{"column":"tag","relation":"equals","condition":"Mum"}],"published_scope":"global","image":{"created_at":"2024-05-06T12:00:54+08:00","alt":"Shop All - The Birth Store","width":1365,"height":2048,"src":"\/\/www.thebirthstore.com.au\/cdn\/shop\/collections\/shop-all-693176.jpg?v=1714968055"}}]}
{"item":{"id":7897784385725,"title":"Nourishing Noodles","handle":"nourishing-noodles","description":"\u003cp\u003e\u003cspan\u003eA quick and easy snack or meal ready in minutes.\u003c\/span\u003e\u003c\/p\u003e\n\u003cp\u003e\u003cspan\u003eThese noodles have been developed to replenish the vital substances lost during pregnancy and postpartum, using the principles of \u003cu\u003eChinese Dietary Therapy\u003c\/u\u003e.\u003c\/span\u003e\u003c\/p\u003e\n\u003cp\u003e \u003c\/p\u003e\n\u003cul\u003e\n\u003cli\u003eMade with bone broth powder rich in minerals and gut nourishing properties\u003c\/li\u003e\n\u003cli\u003eContains Ginger for digestive support in Chinese Medicine\u003c\/li\u003e\n\u003cli\u003eContains Black sesame seeds for blood nourishing in Chinese Medicine\u003c\/li\u003e\n\u003cli\u003eGluten free\u003c\/li\u003e\n\u003cli\u003eDairy free\u003c\/li\u003e\n\u003c\/ul\u003e\n\u003cp\u003e \u003c\/p\u003e\n\u003cp\u003e\u003cspan\u003e\u003cu\u003eChinese Dietary Therapy\u003c\/u\u003e\u003c\/span\u003e\u003c\/p\u003e\n\u003cp\u003e\u003cspan\u003eIn traditional dietary therapy, all natural foods have their own unique properties. They are categorised based on their innate temperature, the organs they affect and the direction in which they move or affect the flow of Qi and Blood\u003c\/span\u003e\u003c\/p\u003e\n\u003c!----\u003e","published_at":"2024-10-15T10:29:56+08:00","created_at":"2024-10-15T10:20:29+08:00","vendor":"Flourish In Natal","type":"","tags":["Breastfeeding","Mum","Post-Partum","Pregnancy","Pregnancy Health"],"price":895,"price_min":895,"price_max":895,"available":true,"price_varies":false,"compare_at_price":null,"compare_at_price_min":0,"compare_at_price_max":0,"compare_at_price_varies":false,"variants":[{"id":44564600357053,"title":"Chicken, Ginger and Black Sesame","option1":"Chicken, Ginger and Black Sesame","option2":null,"option3":null,"sku":"","requires_shipping":true,"taxable":false,"featured_image":{"id":35537663295677,"product_id":7897784385725,"position":4,"created_at":"2024-10-15T16:30:10+08:00","updated_at":"2025-09-25T21:47:41+08:00","alt":"Nourishing Noodles - The Birth Store - Flourish In Natal","width":333,"height":500,"src":"\/\/www.thebirthstore.com.au\/cdn\/shop\/files\/nourishing-noodles-197930.webp?v=1758808061","variant_ids":[44564600357053]},"available":false,"name":"Nourishing Noodles - Chicken, Ginger and Black Sesame","public_title":"Chicken, Ginger and Black Sesame","options":["Chicken, Ginger and Black Sesame"],"price":895,"weight":246,"compare_at_price":null,"inventory_management":"shopify","barcode":"00357053","featured_media":{"alt":"Nourishing Noodles - The Birth Store - Flourish In Natal","id":27785477816509,"position":4,"preview_image":{"aspect_ratio":0.666,"height":500,"width":333,"src":"\/\/www.thebirthstore.com.au\/cdn\/shop\/files\/nourishing-noodles-197930.webp?v=1758808061"}},"requires_selling_plan":false,"selling_plan_allocations":[],"quantity_rule":{"min":1,"max":null,"increment":1}},{"id":44564606484669,"title":"Beef, Ginger and Black Sesame","option1":"Beef, Ginger and Black Sesame","option2":null,"option3":null,"sku":"","requires_shipping":true,"taxable":false,"featured_image":{"id":35537663164605,"product_id":7897784385725,"position":2,"created_at":"2024-10-15T16:30:10+08:00","updated_at":"2025-09-25T21:47:41+08:00","alt":"Nourishing Noodles - The Birth Store - Flourish In Natal","width":333,"height":500,"src":"\/\/www.thebirthstore.com.au\/cdn\/shop\/files\/nourishing-noodles-679819.webp?v=1758808061","variant_ids":[44564606484669]},"available":true,"name":"Nourishing Noodles - Beef, Ginger and Black Sesame","public_title":"Beef, Ginger and Black Sesame","options":["Beef, Ginger and Black Sesame"],"price":895,"weight":246,"compare_at_price":null,"inventory_management":"shopify","barcode":"06484669","featured_media":{"alt":"Nourishing Noodles - The Birth Store - Flourish In Natal","id":27785477718205,"position":2,"preview_image":{"aspect_ratio":0.666,"height":500,"width":333,"src":"\/\/www.thebirthstore.com.au\/cdn\/shop\/files\/nourishing-noodles-679819.webp?v=1758808061"}},"requires_selling_plan":false,"selling_plan_allocations":[],"quantity_rule":{"min":1,"max":null,"increment":1}}],"images":["\/\/www.thebirthstore.com.au\/cdn\/shop\/files\/nourishing-noodles-2778820.png?v=1758829418","\/\/www.thebirthstore.com.au\/cdn\/shop\/files\/nourishing-noodles-679819.webp?v=1758808061","\/\/www.thebirthstore.com.au\/cdn\/shop\/files\/nourishing-noodles-759435.webp?v=1758808061","\/\/www.thebirthstore.com.au\/cdn\/shop\/files\/nourishing-noodles-197930.webp?v=1758808061","\/\/www.thebirthstore.com.au\/cdn\/shop\/files\/nourishing-noodles-157277.webp?v=1758808061"],"featured_image":"\/\/www.thebirthstore.com.au\/cdn\/shop\/files\/nourishing-noodles-2778820.png?v=1758829418","options":["Flavour"],"media":[{"alt":"Nourishing Noodles - The Birth Store - Flourish In Natal","id":29672244805821,"position":1,"preview_image":{"aspect_ratio":1.0,"height":1080,"width":1080,"src":"\/\/www.thebirthstore.com.au\/cdn\/shop\/files\/nourishing-noodles-2778820.png?v=1758829418"},"aspect_ratio":1.0,"height":1080,"media_type":"image","src":"\/\/www.thebirthstore.com.au\/cdn\/shop\/files\/nourishing-noodles-2778820.png?v=1758829418","width":1080},{"alt":"Nourishing Noodles - The Birth Store - Flourish In Natal","id":27785477718205,"position":2,"preview_image":{"aspect_ratio":0.666,"height":500,"width":333,"src":"\/\/www.thebirthstore.com.au\/cdn\/shop\/files\/nourishing-noodles-679819.webp?v=1758808061"},"aspect_ratio":0.666,"height":500,"media_type":"image","src":"\/\/www.thebirthstore.com.au\/cdn\/shop\/files\/nourishing-noodles-679819.webp?v=1758808061","width":333},{"alt":"Nourishing Noodles - The Birth Store - Flourish In Natal","id":27785477750973,"position":3,"preview_image":{"aspect_ratio":1.0,"height":500,"width":500,"src":"\/\/www.thebirthstore.com.au\/cdn\/shop\/files\/nourishing-noodles-759435.webp?v=1758808061"},"aspect_ratio":1.0,"height":500,"media_type":"image","src":"\/\/www.thebirthstore.com.au\/cdn\/shop\/files\/nourishing-noodles-759435.webp?v=1758808061","width":500},{"alt":"Nourishing Noodles - The Birth Store - Flourish In Natal","id":27785477816509,"position":4,"preview_image":{"aspect_ratio":0.666,"height":500,"width":333,"src":"\/\/www.thebirthstore.com.au\/cdn\/shop\/files\/nourishing-noodles-197930.webp?v=1758808061"},"aspect_ratio":0.666,"height":500,"media_type":"image","src":"\/\/www.thebirthstore.com.au\/cdn\/shop\/files\/nourishing-noodles-197930.webp?v=1758808061","width":333},{"alt":"Nourishing Noodles - The Birth Store - Flourish In Natal","id":27785477914813,"position":5,"preview_image":{"aspect_ratio":1.0,"height":500,"width":500,"src":"\/\/www.thebirthstore.com.au\/cdn\/shop\/files\/nourishing-noodles-157277.webp?v=1758808061"},"aspect_ratio":1.0,"height":500,"media_type":"image","src":"\/\/www.thebirthstore.com.au\/cdn\/shop\/files\/nourishing-noodles-157277.webp?v=1758808061","width":500}],"requires_selling_plan":false,"selling_plan_groups":[],"content":"\u003cp\u003e\u003cspan\u003eA quick and easy snack or meal ready in minutes.\u003c\/span\u003e\u003c\/p\u003e\n\u003cp\u003e\u003cspan\u003eThese noodles have been developed to replenish the vital substances lost during pregnancy and postpartum, using the principles of \u003cu\u003eChinese Dietary Therapy\u003c\/u\u003e.\u003c\/span\u003e\u003c\/p\u003e\n\u003cp\u003e \u003c\/p\u003e\n\u003cul\u003e\n\u003cli\u003eMade with bone broth powder rich in minerals and gut nourishing properties\u003c\/li\u003e\n\u003cli\u003eContains Ginger for digestive support in Chinese Medicine\u003c\/li\u003e\n\u003cli\u003eContains Black sesame seeds for blood nourishing in Chinese Medicine\u003c\/li\u003e\n\u003cli\u003eGluten free\u003c\/li\u003e\n\u003cli\u003eDairy free\u003c\/li\u003e\n\u003c\/ul\u003e\n\u003cp\u003e \u003c\/p\u003e\n\u003cp\u003e\u003cspan\u003e\u003cu\u003eChinese Dietary Therapy\u003c\/u\u003e\u003c\/span\u003e\u003c\/p\u003e\n\u003cp\u003e\u003cspan\u003eIn traditional dietary therapy, all natural foods have their own unique properties. They are categorised based on their innate temperature, the organs they affect and the direction in which they move or affect the flow of Qi and Blood\u003c\/span\u003e\u003c\/p\u003e\n\u003c!----\u003e"},"options":[{"name":"Flavour","position":1,"values":["Chicken, Ginger and Black Sesame","Beef, Ginger and Black Sesame"]}],"custom_metafields":{},"metafields":{"badge":"\u003cdiv style='display:none' class='jdgm-prev-badge' data-average-rating='0.00' data-number-of-reviews='0' data-number-of-questions='0'\u003e \u003cspan class='jdgm-prev-badge__stars' data-score='0.00' tabindex='0' aria-label='0.00 stars' role='button'\u003e \u003cspan class='jdgm-star jdgm--off'\u003e\u003c\/span\u003e\u003cspan class='jdgm-star jdgm--off'\u003e\u003c\/span\u003e\u003cspan class='jdgm-star jdgm--off'\u003e\u003c\/span\u003e\u003cspan class='jdgm-star jdgm--off'\u003e\u003c\/span\u003e\u003cspan class='jdgm-star jdgm--off'\u003e\u003c\/span\u003e \u003c\/span\u003e \u003cspan class='jdgm-prev-badge__text'\u003e No reviews \u003c\/span\u003e \u003c\/div\u003e","review_snippet_widget":"\u003cdiv class='jdgm-widget jdgm-review-snippet-widget'\u003e \u003cstyle\u003e\n .jdgm-review-snippet-widget{position:relative}.jdgm-review-snippet-widget:hover{cursor:pointer}@media only screen and (max-width: 767px){.jdgm-review-snippet-widget .jdgm-rev-snippet-widget__cards-container{left:unset;right:unset}}.jdgm-review-snippet-widget .jdgm-rev-snippet-card{background:#fff}.jdgm-review-snippet-widget .jdgm-star{color:#399}.jdgm-review-snippet-widget .jdgm-rev-snippet-card{border-radius:8px;background:#fff}.jdgm-review-snippet-widget .jdgm-rev-snippet-card__rev-prod-wrapper{border-radius:8px}.jdgm-review-snippet-widget .jdgm-rev-snippet-card__rev-content-wrapper{max-width:360px}.jdgm-review-snippet-widget .jdgm-rev-snippet-widget__prev-btn,.jdgm-review-snippet-widget .jdgm-rev-snippet-widget__next-btn{border-radius:50%;background:#fff}.jdgm-review-snippet-widget .jdgm-rev-snippet-widget__prev-btn\u003esvg,.jdgm-review-snippet-widget .jdgm-rev-snippet-widget__next-btn\u003esvg{fill:#000}.jdgm-review-snippet-widget .jdgm-rev-snippet-widget__prev-btn{left:0;top:40%}.jdgm-review-snippet-widget .jdgm-rev-snippet-widget__next-btn{right:0;top:40%}.jdgm-full-rev-modal.review-snippet-widget .jm-mfp-content{border-radius:8px}.jdgm-full-rev-modal.review-snippet-widget .jdgm-full-rev__icon{border-radius:8px}.jdgm-full-rev-modal.review-snippet-widget .jdgm-full-rev[data-verified-buyer=\"true\"] .jdgm-full-rev__icon::after{border-radius:8px}.jdgm-full-rev-modal.review-snippet-widget .jdgm-rev__buyer-badge{border-radius:calc( 8px \/ 2 )}.jdgm-full-rev-modal.review-snippet-widget .jdgm-full-rev__pic-img{border-radius:8px}.jdgm-full-rev-modal.review-snippet-widget .jdgm-full-rev__reply{border-radius:8px}.jdgm-full-rev-modal.review-snippet-widget .jdgm-full-rev__replier::before{content:'thebirthstore.com.au'}.jdgm-full-rev-modal.review-snippet-widget .jdgm-full-rev__product-button{border-radius:calc( 8px * 6 )}\n\n \u003c\/style\u003e \u003ci class=\"jdgm-rev-snippet-widget__prev-btn\" style='display: none;'\u003e \u003csvg xmlns=\"http:\/\/www.w3.org\/2000\/svg\" height=\"12\" viewBox=\"0 0 8 12\" width=\"8\" fill=\"#000\"\u003e\u003cpath d=\"M3.09961 6.00005L6.99961 9.90005C7.18294 10.0834 7.27461 10.3167 7.27461 10.6C7.27461 10.8834 7.18294 11.1167 6.99961 11.3C6.81628 11.4834 6.58294 11.575 6.29961 11.575C6.01628 11.575 5.78294 11.4834 5.59961 11.3L0.999609 6.70005C0.899609 6.60005 0.828776 6.49172 0.787109 6.37505C0.745443 6.25838 0.724609 6.13338 0.724609 6.00005C0.724609 5.86672 0.745443 5.74172 0.787109 5.62505C0.828776 5.50838 0.899609 5.40005 0.999609 5.30005L5.59961 0.700049C5.78294 0.516715 6.01628 0.425049 6.29961 0.425049C6.58294 0.425049 6.81628 0.516715 6.99961 0.700049C7.18294 0.883382 7.27461 1.11672 7.27461 1.40005C7.27461 1.68338 7.18294 1.91672 6.99961 2.10005L3.09961 6.00005Z\"\/\u003e\u003c\/svg\u003e \u003c\/i\u003e \u003ci class=\"jdgm-rev-snippet-widget__next-btn\" style='display: none;'\u003e \u003csvg xmlns=\"http:\/\/www.w3.org\/2000\/svg\" height=\"12\" viewBox=\"0 0 8 12\" width=\"8\" fill=\"#000\"\u003e\u003cpath d=\"M4.89961 6.00005L0.999609 2.10005C0.816276 1.91672 0.724609 1.68338 0.724609 1.40005C0.724609 1.11672 0.816276 0.883382 0.999609 0.700049C1.18294 0.516715 1.41628 0.425049 1.69961 0.425049C1.98294 0.425049 2.21628 0.516715 2.39961 0.700049L6.99961 5.30005C7.09961 5.40005 7.17044 5.50838 7.21211 5.62505C7.25378 5.74172 7.27461 5.86672 7.27461 6.00005C7.27461 6.13338 7.25378 6.25838 7.21211 6.37505C7.17044 6.49172 7.09961 6.60005 6.99961 6.70005L2.39961 11.3C2.21628 11.4834 1.98294 11.575 1.69961 11.575C1.41628 11.575 1.18294 11.4834 0.999609 11.3C0.816276 11.1167 0.724609 10.8834 0.724609 10.6C0.724609 10.3167 0.816276 10.0834 0.999609 9.90005L4.89961 6.00005Z\"\/\u003e\u003c\/svg\u003e \u003c\/i\u003e \u003cdiv style=\"overflow: hidden;\"\u003e \u003cdiv class='jdgm-rev-snippet-widget__cards-container'\u003e \u003cdiv class='jdgm-rev-snippet-card' data-review-id='e7b9d08b-2518-4851-b106-22b181600a64' style='display: none;'\u003e \u003cdiv class=\"jdgm-rev-snippet-card__rev-prod-wrapper\"\u003e \u003ca class='jdgm-rev-snippet-card__rev-content-wrapper jdgm-rev-snippet-card__full-review-link' style='text-decoration: none; color: inherit;padding: 0 34px;' role='button' data-review-id='e7b9d08b-2518-4851-b106-22b181600a64'\u003e \u003cdiv class='jdgm-rev-snippet-card__rev-header'\u003e \u003cdiv class='jdgm-rev-snippet-card__rev-rating' aria-label='5 stars' role='img'\u003e \u003cspan class='jdgm-star jdgm--on'\u003e\u003c\/span\u003e\u003cspan class='jdgm-star jdgm--on'\u003e\u003c\/span\u003e\u003cspan class='jdgm-star jdgm--on'\u003e\u003c\/span\u003e\u003cspan class='jdgm-star jdgm--on'\u003e\u003c\/span\u003e\u003cspan class='jdgm-star jdgm--on'\u003e\u003c\/span\u003e \u003c\/div\u003e \u003cdiv class='jdgm-rev-snippet-card__reviewer'\u003e Rebecca Paust \u003c\/div\u003e \u003c\/div\u003e \u003cdiv class='jdgm-rev-snippet-card__rev-content'\u003e \u003cspan class='jdgm-rev-snippet-card__rev-body'\u003e \u003cp\u003eI tried the Deluxe Hot Chocolate and oh my goodness it’s amazing! It’s increased my supply like you wouldn’t believe, and the flavour is enjoyable compared to other lactation products that leave a funny aftertaste.\u003c\/p\u003e \u003c\/span\u003e \u003c\/div\u003e \u003c\/a\u003e \u003c\/div\u003e \u003c\/div\u003e \u003c\/div\u003e \u003c\/div\u003e \u003c\/div\u003e","widget":"\u003cdiv class='jdgm-rev-widg' data-updated-at='2025-06-13T16:13:40Z' data-average-rating='0.00' data-number-of-reviews='0' data-number-of-questions='0'\u003e \u003cstyle class='jdgm-temp-hiding-style'\u003e.jdgm-rev-widg{ display: none }\u003c\/style\u003e \u003cdiv class='jdgm-rev-widg__header'\u003e \u003ch2 class='jdgm-rev-widg__title'\u003eCustomer Reviews\u003c\/h2\u003e \u003cdiv class='jdgm-rev-widg__summary'\u003e \u003cdiv class='jdgm-rev-widg__summary-stars' aria-label='Average rating is 0.00 stars' role='img'\u003e \u003cspan class='jdgm-star jdgm--off'\u003e\u003c\/span\u003e\u003cspan class='jdgm-star jdgm--off'\u003e\u003c\/span\u003e\u003cspan class='jdgm-star jdgm--off'\u003e\u003c\/span\u003e\u003cspan class='jdgm-star jdgm--off'\u003e\u003c\/span\u003e\u003cspan class='jdgm-star jdgm--off'\u003e\u003c\/span\u003e \u003c\/div\u003e \u003cdiv class='jdgm-rev-widg__summary-text'\u003eBe the first to write a review\u003c\/div\u003e \u003c\/div\u003e \u003ca style='display: none' href='#' class='jdgm-write-rev-link' role='button'\u003eWrite a review\u003c\/a\u003e \u003cdiv class='jdgm-histogram jdgm-temp-hidden'\u003e \u003cdiv class='jdgm-histogram__row' data-rating='5' data-frequency='0' data-percentage='0'\u003e \u003cdiv class='jdgm-histogram__star' role='button' aria-label=\"0% (0) reviews with 5 star rating\" tabindex='0' \u003e\u003cspan class='jdgm-star jdgm--on'\u003e\u003c\/span\u003e\u003cspan class='jdgm-star jdgm--on'\u003e\u003c\/span\u003e\u003cspan class='jdgm-star jdgm--on'\u003e\u003c\/span\u003e\u003cspan class='jdgm-star jdgm--on'\u003e\u003c\/span\u003e\u003cspan class='jdgm-star jdgm--on'\u003e\u003c\/span\u003e\u003c\/div\u003e \u003cdiv class='jdgm-histogram__bar'\u003e \u003cdiv class='jdgm-histogram__bar-content' style='width: 0%;'\u003e \u003c\/div\u003e \u003c\/div\u003e \u003cdiv class='jdgm-histogram__percentage'\u003e0%\u003c\/div\u003e \u003cdiv class='jdgm-histogram__frequency'\u003e(0)\u003c\/div\u003e \u003c\/div\u003e \u003cdiv class='jdgm-histogram__row' data-rating='4' data-frequency='0' data-percentage='0'\u003e \u003cdiv class='jdgm-histogram__star' role='button' aria-label=\"0% (0) reviews with 4 star rating\" tabindex='0' \u003e\u003cspan class='jdgm-star jdgm--on'\u003e\u003c\/span\u003e\u003cspan class='jdgm-star jdgm--on'\u003e\u003c\/span\u003e\u003cspan class='jdgm-star jdgm--on'\u003e\u003c\/span\u003e\u003cspan class='jdgm-star jdgm--on'\u003e\u003c\/span\u003e\u003cspan class='jdgm-star jdgm--off'\u003e\u003c\/span\u003e\u003c\/div\u003e \u003cdiv class='jdgm-histogram__bar'\u003e \u003cdiv class='jdgm-histogram__bar-content' style='width: 0%;'\u003e \u003c\/div\u003e \u003c\/div\u003e \u003cdiv class='jdgm-histogram__percentage'\u003e0%\u003c\/div\u003e \u003cdiv class='jdgm-histogram__frequency'\u003e(0)\u003c\/div\u003e \u003c\/div\u003e \u003cdiv class='jdgm-histogram__row' data-rating='3' data-frequency='0' data-percentage='0'\u003e \u003cdiv class='jdgm-histogram__star' role='button' aria-label=\"0% (0) reviews with 3 star rating\" tabindex='0' \u003e\u003cspan class='jdgm-star jdgm--on'\u003e\u003c\/span\u003e\u003cspan class='jdgm-star jdgm--on'\u003e\u003c\/span\u003e\u003cspan class='jdgm-star jdgm--on'\u003e\u003c\/span\u003e\u003cspan class='jdgm-star jdgm--off'\u003e\u003c\/span\u003e\u003cspan class='jdgm-star jdgm--off'\u003e\u003c\/span\u003e\u003c\/div\u003e \u003cdiv class='jdgm-histogram__bar'\u003e \u003cdiv class='jdgm-histogram__bar-content' style='width: 0%;'\u003e \u003c\/div\u003e \u003c\/div\u003e \u003cdiv class='jdgm-histogram__percentage'\u003e0%\u003c\/div\u003e \u003cdiv class='jdgm-histogram__frequency'\u003e(0)\u003c\/div\u003e \u003c\/div\u003e \u003cdiv class='jdgm-histogram__row' data-rating='2' data-frequency='0' data-percentage='0'\u003e \u003cdiv class='jdgm-histogram__star' role='button' aria-label=\"0% (0) reviews with 2 star rating\" tabindex='0' \u003e\u003cspan class='jdgm-star jdgm--on'\u003e\u003c\/span\u003e\u003cspan class='jdgm-star jdgm--on'\u003e\u003c\/span\u003e\u003cspan class='jdgm-star jdgm--off'\u003e\u003c\/span\u003e\u003cspan class='jdgm-star jdgm--off'\u003e\u003c\/span\u003e\u003cspan class='jdgm-star jdgm--off'\u003e\u003c\/span\u003e\u003c\/div\u003e \u003cdiv class='jdgm-histogram__bar'\u003e \u003cdiv class='jdgm-histogram__bar-content' style='width: 0%;'\u003e \u003c\/div\u003e \u003c\/div\u003e \u003cdiv class='jdgm-histogram__percentage'\u003e0%\u003c\/div\u003e \u003cdiv class='jdgm-histogram__frequency'\u003e(0)\u003c\/div\u003e \u003c\/div\u003e \u003cdiv class='jdgm-histogram__row' data-rating='1' data-frequency='0' data-percentage='0'\u003e \u003cdiv class='jdgm-histogram__star' role='button' aria-label=\"0% (0) reviews with 1 star rating\" tabindex='0' \u003e\u003cspan class='jdgm-star jdgm--on'\u003e\u003c\/span\u003e\u003cspan class='jdgm-star jdgm--off'\u003e\u003c\/span\u003e\u003cspan class='jdgm-star jdgm--off'\u003e\u003c\/span\u003e\u003cspan class='jdgm-star jdgm--off'\u003e\u003c\/span\u003e\u003cspan class='jdgm-star jdgm--off'\u003e\u003c\/span\u003e\u003c\/div\u003e \u003cdiv class='jdgm-histogram__bar'\u003e \u003cdiv class='jdgm-histogram__bar-content' style='width: 0%;'\u003e \u003c\/div\u003e \u003c\/div\u003e \u003cdiv class='jdgm-histogram__percentage'\u003e0%\u003c\/div\u003e \u003cdiv class='jdgm-histogram__frequency'\u003e(0)\u003c\/div\u003e \u003c\/div\u003e \u003cdiv class='jdgm-histogram__row jdgm-histogram__clear-filter' data-rating=null tabindex='0'\u003e\u003c\/div\u003e \u003c\/div\u003e \u003cdiv class='jdgm-rev-widg__sort-wrapper'\u003e\u003c\/div\u003e \u003c\/div\u003e \u003cdiv class='jdgm-rev-widg__body'\u003e \u003cdiv class='jdgm-rev-widg__reviews'\u003e\u003c\/div\u003e \u003cdiv class='jdgm-paginate' data-per-page='10' data-url='https:\/\/api.judge.me\/reviews\/reviews_for_widget' style=\"display: none;\"\u003e\u003c\/div\u003e \u003c\/div\u003e \u003cdiv class='jdgm-rev-widg__paginate-spinner-wrapper'\u003e \u003cdiv class='jdgm-spinner'\u003e\u003c\/div\u003e \u003c\/div\u003e \u003c\/div\u003e"},"collections":[{"id":281712427197,"handle":"breastfeeding","title":"Breastfeeding","updated_at":"2026-06-12T19:10:26+08:00","body_html":"","published_at":"2021-12-20T14:19:33+08:00","sort_order":"best-selling","template_suffix":"breastfeeding-collection","disjunctive":false,"rules":[{"column":"tag","relation":"equals","condition":"Breastfeeding"}],"published_scope":"global","image":{"created_at":"2024-05-06T11:59:34+08:00","alt":"Breastfeeding - The Birth Store","width":620,"height":635,"src":"\/\/www.thebirthstore.com.au\/cdn\/shop\/collections\/breastfeeding-793872.jpg?v=1714967974"}},{"id":261657460925,"handle":"buy","title":"Buy","updated_at":"2026-06-12T19:10:26+08:00","body_html":"\u003cp\u003eBrowse all of our pregnancy, labour \u0026amp; birth, postpartum and baby essentials here.\u003cbr\u003e\u003c\/p\u003e\n\u003cp\u003e\u003cspan\u003eYou can even buy now and pay later with Afterpay!\u003c\/span\u003e\u003c\/p\u003e","published_at":"2021-03-10T12:05:31+08:00","sort_order":"best-selling","template_suffix":"shop-all-collection","disjunctive":false,"rules":[{"column":"title","relation":"not_contains","condition":"Hire"}],"published_scope":"global","image":{"created_at":"2024-05-06T11:59:42+08:00","alt":"Buy - The Birth Store","width":2048,"height":2048,"src":"\/\/www.thebirthstore.com.au\/cdn\/shop\/collections\/buy-964856.jpg?v=1714967982"}},{"id":261658083517,"handle":"post-partum","title":"Postpartum","updated_at":"2026-06-12T19:10:26+08:00","body_html":"\u003cp\u003eShop your postpartum and hospital bag essentials below. Looking for something we don't currently stock? Please reach out and let us know.\u003cbr\u003e\u003c\/p\u003e\n\u003cp\u003e\u003cspan\u003eYou can even buy now and pay later with Afterpay!\u003c\/span\u003e\u003c\/p\u003e","published_at":"2021-03-10T12:33:47+08:00","sort_order":"best-selling","template_suffix":"postpartum-collection","disjunctive":false,"rules":[{"column":"tag","relation":"equals","condition":"Post-Partum"}],"published_scope":"global","image":{"created_at":"2024-05-06T12:00:36+08:00","alt":"Postpartum - The Birth Store","width":611,"height":702,"src":"\/\/www.thebirthstore.com.au\/cdn\/shop\/collections\/postpartum-150119.jpg?v=1714968037"}},{"id":261658149053,"handle":"pregnancy-and-maternity-products","title":"Pregnancy","updated_at":"2026-06-12T19:10:26+08:00","body_html":"\u003cp\u003eShop your pregnancy essentials below. Looking for something we don't currently stock? Please reach out and let us know.\u003cbr\u003e\u003c\/p\u003e\n\u003cp\u003e\u003cspan\u003eYou can even buy now and pay later with Afterpay!\u003c\/span\u003e\u003c\/p\u003e","published_at":"2021-03-10T12:34:22+08:00","sort_order":"best-selling","template_suffix":"pregnancy-collection","disjunctive":false,"rules":[{"column":"tag","relation":"equals","condition":"Pregnancy"}],"published_scope":"global","image":{"created_at":"2024-05-06T12:00:40+08:00","alt":"Pregnancy - The Birth Store","width":1024,"height":1536,"src":"\/\/www.thebirthstore.com.au\/cdn\/shop\/collections\/pregnancy-899677.jpg?v=1714968040"}},{"id":295224901821,"handle":"pregnancy-health","title":"Pregnancy Health","updated_at":"2026-06-12T19:10:26+08:00","body_html":"","published_at":"2023-11-10T20:48:51+08:00","sort_order":"best-selling","template_suffix":"swaddles-collection","disjunctive":false,"rules":[{"column":"tag","relation":"equals","condition":"Pregnancy Health"}],"published_scope":"global","image":{"created_at":"2024-05-06T12:00:41+08:00","alt":"Pregnancy Health - The Birth Store","width":608,"height":410,"src":"\/\/www.thebirthstore.com.au\/cdn\/shop\/collections\/pregnancy-health-343983.jpg?v=1714968042"}},{"id":326523846845,"handle":"pregnancy-health-1","updated_at":"2026-06-12T19:10:26+08:00","published_at":"2025-10-30T10:44:54+08:00","sort_order":"best-selling","template_suffix":"","published_scope":"global","title":"Pregnancy Health","body_html":"","image":{"created_at":"2025-11-20T21:33:56+08:00","alt":"Pregnancy Health - The Birth Store","width":522,"height":525,"src":"\/\/www.thebirthstore.com.au\/cdn\/shop\/collections\/pregnancy-health-1617860.jpg?v=1763645636"}},{"id":291456483517,"handle":"shop-all","title":"Shop All - Mum","updated_at":"2026-06-12T19:10:26+08:00","body_html":"","published_at":"2022-12-23T22:04:39+08:00","sort_order":"best-selling","template_suffix":"shop-all-collection","disjunctive":false,"rules":[{"column":"variant_price","relation":"greater_than","condition":"1"},{"column":"title","relation":"not_contains","condition":"Batteries"},{"column":"tag","relation":"equals","condition":"Mum"}],"published_scope":"global","image":{"created_at":"2024-05-06T12:00:54+08:00","alt":"Shop All - The Birth Store","width":1365,"height":2048,"src":"\/\/www.thebirthstore.com.au\/cdn\/shop\/collections\/shop-all-693176.jpg?v=1714968055"}}]}
{"item":{"id":7483878670525,"title":"Nipple Shields - 2 Pack","handle":"haakaa-nipple-shields-2-pack","description":"\u003cp data-mce-fragment=\"1\"\u003eAs we all know breastfeeding can require a bit of practice for most mums. During this time of learning your nipples can become sore and raw - we have the perfect solution!\u003c\/p\u003e\n\u003cp class=\"p2\" data-mce-fragment=\"1\"\u003eThe\u003cstrong data-mce-fragment=\"1\"\u003e\u003cspan data-mce-fragment=\"1\"\u003e \u003c\/span\u003eHaakaa Silicone Nipple Shields\u003c\/strong\u003e\u003cspan data-mce-fragment=\"1\"\u003e \u003c\/span\u003eare an effective tool for helping mums who are having latch-on issues related to a premature or ill infant, flat or inverted nipples, tongue\/lip tie, an overactive let-down or simply just getting used to the whole breastfeeding action.\u003c\/p\u003e\n\u003cp class=\"p2\" data-mce-fragment=\"1\"\u003eBeing ultra-thin the soft silicone moulds to your breast also warm with your body proving a natural and comforting feel for both mum and baby.\u003c\/p\u003e\n\u003cul data-mce-fragment=\"1\"\u003e\n\u003cli data-mce-fragment=\"1\"\u003eFor latch-on difficulties or flat and inverted nipples to help mums continue breastfeeding\u003c\/li\u003e\n\u003cli data-mce-fragment=\"1\"\u003eThe unique shape and super thin silicone allow for more skin contact between mum and baby. Also warms with mum's body temperature for a natural feel\u003c\/li\u003e\n\u003cli data-mce-fragment=\"1\"\u003eUltra-thin, super-soft, flexible 100% food-grade silicone\u003c\/li\u003e\n\u003cli data-mce-fragment=\"1\"\u003eBPA and BPS Free\u003c\/li\u003e\n\u003cli data-mce-fragment=\"1\"\u003eIncludes two shields and a protective case\u003c\/li\u003e\n\u003c\/ul\u003e","published_at":"2023-06-08T15:49:30+08:00","created_at":"2023-06-08T15:49:30+08:00","vendor":"Haakaa","type":"","tags":["Breastfeeding","Cracked Nipples","Hospital Bag","Mum"],"price":2290,"price_min":2290,"price_max":2290,"available":true,"price_varies":false,"compare_at_price":null,"compare_at_price_min":0,"compare_at_price_max":0,"compare_at_price_varies":false,"variants":[{"id":44395319525565,"title":"18mm","option1":"18mm","option2":null,"option3":null,"sku":"","requires_shipping":true,"taxable":false,"featured_image":{"id":34641024909501,"product_id":7483878670525,"position":2,"created_at":"2024-05-06T12:00:03+08:00","updated_at":"2024-05-06T12:00:03+08:00","alt":"Nipple Shields - 2 Pack - The Birth Store-Haakaa","width":1080,"height":1080,"src":"\/\/www.thebirthstore.com.au\/cdn\/shop\/files\/nipple-shields-2-pack-304253.jpg?v=1714968003","variant_ids":[44395319525565]},"available":false,"name":"Nipple Shields - 2 Pack - 18mm","public_title":"18mm","options":["18mm"],"price":2290,"weight":44,"compare_at_price":null,"inventory_management":"shopify","barcode":"48985277","featured_media":{"alt":"Nipple Shields - 2 Pack - The Birth Store-Haakaa","id":27007593939133,"position":2,"preview_image":{"aspect_ratio":1.0,"height":1080,"width":1080,"src":"\/\/www.thebirthstore.com.au\/cdn\/shop\/files\/nipple-shields-2-pack-304253.jpg?v=1714968003"}},"requires_selling_plan":false,"selling_plan_allocations":[],"quantity_rule":{"min":1,"max":null,"increment":1}},{"id":44395319558333,"title":"24mm","option1":"24mm","option2":null,"option3":null,"sku":"","requires_shipping":true,"taxable":false,"featured_image":{"id":34641024876733,"product_id":7483878670525,"position":1,"created_at":"2024-05-06T12:00:02+08:00","updated_at":"2024-05-06T12:00:03+08:00","alt":"Nipple Shields - 2 Pack - The Birth Store-Haakaa","width":1080,"height":1080,"src":"\/\/www.thebirthstore.com.au\/cdn\/shop\/files\/nipple-shields-2-pack-157417.jpg?v=1714968003","variant_ids":[44395319558333]},"available":true,"name":"Nipple Shields - 2 Pack - 24mm","public_title":"24mm","options":["24mm"],"price":2290,"weight":44,"compare_at_price":null,"inventory_management":"shopify","barcode":"19558333","featured_media":{"alt":"Nipple Shields - 2 Pack - The Birth Store-Haakaa","id":27007593873597,"position":1,"preview_image":{"aspect_ratio":1.0,"height":1080,"width":1080,"src":"\/\/www.thebirthstore.com.au\/cdn\/shop\/files\/nipple-shields-2-pack-157417.jpg?v=1714968003"}},"requires_selling_plan":false,"selling_plan_allocations":[],"quantity_rule":{"min":1,"max":null,"increment":1}}],"images":["\/\/www.thebirthstore.com.au\/cdn\/shop\/files\/nipple-shields-2-pack-157417.jpg?v=1714968003","\/\/www.thebirthstore.com.au\/cdn\/shop\/files\/nipple-shields-2-pack-304253.jpg?v=1714968003","\/\/www.thebirthstore.com.au\/cdn\/shop\/files\/nipple-shields-2-pack-147409.jpg?v=1714968003"],"featured_image":"\/\/www.thebirthstore.com.au\/cdn\/shop\/files\/nipple-shields-2-pack-157417.jpg?v=1714968003","options":["Size"],"media":[{"alt":"Nipple Shields - 2 Pack - The Birth Store-Haakaa","id":27007593873597,"position":1,"preview_image":{"aspect_ratio":1.0,"height":1080,"width":1080,"src":"\/\/www.thebirthstore.com.au\/cdn\/shop\/files\/nipple-shields-2-pack-157417.jpg?v=1714968003"},"aspect_ratio":1.0,"height":1080,"media_type":"image","src":"\/\/www.thebirthstore.com.au\/cdn\/shop\/files\/nipple-shields-2-pack-157417.jpg?v=1714968003","width":1080},{"alt":"Nipple Shields - 2 Pack - The Birth Store-Haakaa","id":27007593939133,"position":2,"preview_image":{"aspect_ratio":1.0,"height":1080,"width":1080,"src":"\/\/www.thebirthstore.com.au\/cdn\/shop\/files\/nipple-shields-2-pack-304253.jpg?v=1714968003"},"aspect_ratio":1.0,"height":1080,"media_type":"image","src":"\/\/www.thebirthstore.com.au\/cdn\/shop\/files\/nipple-shields-2-pack-304253.jpg?v=1714968003","width":1080},{"alt":"Nipple Shields - 2 Pack - The Birth Store-Haakaa","id":27007593971901,"position":3,"preview_image":{"aspect_ratio":1.0,"height":1080,"width":1080,"src":"\/\/www.thebirthstore.com.au\/cdn\/shop\/files\/nipple-shields-2-pack-147409.jpg?v=1714968003"},"aspect_ratio":1.0,"height":1080,"media_type":"image","src":"\/\/www.thebirthstore.com.au\/cdn\/shop\/files\/nipple-shields-2-pack-147409.jpg?v=1714968003","width":1080}],"requires_selling_plan":false,"selling_plan_groups":[],"content":"\u003cp data-mce-fragment=\"1\"\u003eAs we all know breastfeeding can require a bit of practice for most mums. During this time of learning your nipples can become sore and raw - we have the perfect solution!\u003c\/p\u003e\n\u003cp class=\"p2\" data-mce-fragment=\"1\"\u003eThe\u003cstrong data-mce-fragment=\"1\"\u003e\u003cspan data-mce-fragment=\"1\"\u003e \u003c\/span\u003eHaakaa Silicone Nipple Shields\u003c\/strong\u003e\u003cspan data-mce-fragment=\"1\"\u003e \u003c\/span\u003eare an effective tool for helping mums who are having latch-on issues related to a premature or ill infant, flat or inverted nipples, tongue\/lip tie, an overactive let-down or simply just getting used to the whole breastfeeding action.\u003c\/p\u003e\n\u003cp class=\"p2\" data-mce-fragment=\"1\"\u003eBeing ultra-thin the soft silicone moulds to your breast also warm with your body proving a natural and comforting feel for both mum and baby.\u003c\/p\u003e\n\u003cul data-mce-fragment=\"1\"\u003e\n\u003cli data-mce-fragment=\"1\"\u003eFor latch-on difficulties or flat and inverted nipples to help mums continue breastfeeding\u003c\/li\u003e\n\u003cli data-mce-fragment=\"1\"\u003eThe unique shape and super thin silicone allow for more skin contact between mum and baby. Also warms with mum's body temperature for a natural feel\u003c\/li\u003e\n\u003cli data-mce-fragment=\"1\"\u003eUltra-thin, super-soft, flexible 100% food-grade silicone\u003c\/li\u003e\n\u003cli data-mce-fragment=\"1\"\u003eBPA and BPS Free\u003c\/li\u003e\n\u003cli data-mce-fragment=\"1\"\u003eIncludes two shields and a protective case\u003c\/li\u003e\n\u003c\/ul\u003e"},"options":[{"name":"Size","position":1,"values":["18mm","24mm"]}],"custom_metafields":{},"metafields":{"badge":"\u003cdiv style='display:none' class='jdgm-prev-badge' data-average-rating='0.00' data-number-of-reviews='0' data-number-of-questions='0'\u003e \u003cspan class='jdgm-prev-badge__stars' data-score='0.00' tabindex='0' aria-label='0.00 stars' role='button'\u003e \u003cspan class='jdgm-star jdgm--off'\u003e\u003c\/span\u003e\u003cspan class='jdgm-star jdgm--off'\u003e\u003c\/span\u003e\u003cspan class='jdgm-star jdgm--off'\u003e\u003c\/span\u003e\u003cspan class='jdgm-star jdgm--off'\u003e\u003c\/span\u003e\u003cspan class='jdgm-star jdgm--off'\u003e\u003c\/span\u003e \u003c\/span\u003e \u003cspan class='jdgm-prev-badge__text'\u003e No reviews \u003c\/span\u003e \u003c\/div\u003e","widget":"\u003cdiv class='jdgm-rev-widg' data-updated-at='2025-06-13T16:12:53Z' data-average-rating='0.00' data-number-of-reviews='0' data-number-of-questions='0'\u003e \u003cstyle class='jdgm-temp-hiding-style'\u003e.jdgm-rev-widg{ display: none }\u003c\/style\u003e \u003cdiv class='jdgm-rev-widg__header'\u003e \u003ch2 class='jdgm-rev-widg__title'\u003eCustomer Reviews\u003c\/h2\u003e \u003cdiv class='jdgm-rev-widg__summary'\u003e \u003cdiv class='jdgm-rev-widg__summary-stars' aria-label='Average rating is 0.00 stars' role='img'\u003e \u003cspan class='jdgm-star jdgm--off'\u003e\u003c\/span\u003e\u003cspan class='jdgm-star jdgm--off'\u003e\u003c\/span\u003e\u003cspan class='jdgm-star jdgm--off'\u003e\u003c\/span\u003e\u003cspan class='jdgm-star jdgm--off'\u003e\u003c\/span\u003e\u003cspan class='jdgm-star jdgm--off'\u003e\u003c\/span\u003e \u003c\/div\u003e \u003cdiv class='jdgm-rev-widg__summary-text'\u003eBe the first to write a review\u003c\/div\u003e \u003c\/div\u003e \u003ca style='display: none' href='#' class='jdgm-write-rev-link' role='button'\u003eWrite a review\u003c\/a\u003e \u003cdiv class='jdgm-histogram jdgm-temp-hidden'\u003e \u003cdiv class='jdgm-histogram__row' data-rating='5' data-frequency='0' data-percentage='0'\u003e \u003cdiv class='jdgm-histogram__star' role='button' aria-label=\"0% (0) reviews with 5 star rating\" tabindex='0' \u003e\u003cspan class='jdgm-star jdgm--on'\u003e\u003c\/span\u003e\u003cspan class='jdgm-star jdgm--on'\u003e\u003c\/span\u003e\u003cspan class='jdgm-star jdgm--on'\u003e\u003c\/span\u003e\u003cspan class='jdgm-star jdgm--on'\u003e\u003c\/span\u003e\u003cspan class='jdgm-star jdgm--on'\u003e\u003c\/span\u003e\u003c\/div\u003e \u003cdiv class='jdgm-histogram__bar'\u003e \u003cdiv class='jdgm-histogram__bar-content' style='width: 0%;'\u003e \u003c\/div\u003e \u003c\/div\u003e \u003cdiv class='jdgm-histogram__percentage'\u003e0%\u003c\/div\u003e \u003cdiv class='jdgm-histogram__frequency'\u003e(0)\u003c\/div\u003e \u003c\/div\u003e \u003cdiv class='jdgm-histogram__row' data-rating='4' data-frequency='0' data-percentage='0'\u003e \u003cdiv class='jdgm-histogram__star' role='button' aria-label=\"0% (0) reviews with 4 star rating\" tabindex='0' \u003e\u003cspan class='jdgm-star jdgm--on'\u003e\u003c\/span\u003e\u003cspan class='jdgm-star jdgm--on'\u003e\u003c\/span\u003e\u003cspan class='jdgm-star jdgm--on'\u003e\u003c\/span\u003e\u003cspan class='jdgm-star jdgm--on'\u003e\u003c\/span\u003e\u003cspan class='jdgm-star jdgm--off'\u003e\u003c\/span\u003e\u003c\/div\u003e \u003cdiv class='jdgm-histogram__bar'\u003e \u003cdiv class='jdgm-histogram__bar-content' style='width: 0%;'\u003e \u003c\/div\u003e \u003c\/div\u003e \u003cdiv class='jdgm-histogram__percentage'\u003e0%\u003c\/div\u003e \u003cdiv class='jdgm-histogram__frequency'\u003e(0)\u003c\/div\u003e \u003c\/div\u003e \u003cdiv class='jdgm-histogram__row' data-rating='3' data-frequency='0' data-percentage='0'\u003e \u003cdiv class='jdgm-histogram__star' role='button' aria-label=\"0% (0) reviews with 3 star rating\" tabindex='0' \u003e\u003cspan class='jdgm-star jdgm--on'\u003e\u003c\/span\u003e\u003cspan class='jdgm-star jdgm--on'\u003e\u003c\/span\u003e\u003cspan class='jdgm-star jdgm--on'\u003e\u003c\/span\u003e\u003cspan class='jdgm-star jdgm--off'\u003e\u003c\/span\u003e\u003cspan class='jdgm-star jdgm--off'\u003e\u003c\/span\u003e\u003c\/div\u003e \u003cdiv class='jdgm-histogram__bar'\u003e \u003cdiv class='jdgm-histogram__bar-content' style='width: 0%;'\u003e \u003c\/div\u003e \u003c\/div\u003e \u003cdiv class='jdgm-histogram__percentage'\u003e0%\u003c\/div\u003e \u003cdiv class='jdgm-histogram__frequency'\u003e(0)\u003c\/div\u003e \u003c\/div\u003e \u003cdiv class='jdgm-histogram__row' data-rating='2' data-frequency='0' data-percentage='0'\u003e \u003cdiv class='jdgm-histogram__star' role='button' aria-label=\"0% (0) reviews with 2 star rating\" tabindex='0' \u003e\u003cspan class='jdgm-star jdgm--on'\u003e\u003c\/span\u003e\u003cspan class='jdgm-star jdgm--on'\u003e\u003c\/span\u003e\u003cspan class='jdgm-star jdgm--off'\u003e\u003c\/span\u003e\u003cspan class='jdgm-star jdgm--off'\u003e\u003c\/span\u003e\u003cspan class='jdgm-star jdgm--off'\u003e\u003c\/span\u003e\u003c\/div\u003e \u003cdiv class='jdgm-histogram__bar'\u003e \u003cdiv class='jdgm-histogram__bar-content' style='width: 0%;'\u003e \u003c\/div\u003e \u003c\/div\u003e \u003cdiv class='jdgm-histogram__percentage'\u003e0%\u003c\/div\u003e \u003cdiv class='jdgm-histogram__frequency'\u003e(0)\u003c\/div\u003e \u003c\/div\u003e \u003cdiv class='jdgm-histogram__row' data-rating='1' data-frequency='0' data-percentage='0'\u003e \u003cdiv class='jdgm-histogram__star' role='button' aria-label=\"0% (0) reviews with 1 star rating\" tabindex='0' \u003e\u003cspan class='jdgm-star jdgm--on'\u003e\u003c\/span\u003e\u003cspan class='jdgm-star jdgm--off'\u003e\u003c\/span\u003e\u003cspan class='jdgm-star jdgm--off'\u003e\u003c\/span\u003e\u003cspan class='jdgm-star jdgm--off'\u003e\u003c\/span\u003e\u003cspan class='jdgm-star jdgm--off'\u003e\u003c\/span\u003e\u003c\/div\u003e \u003cdiv class='jdgm-histogram__bar'\u003e \u003cdiv class='jdgm-histogram__bar-content' style='width: 0%;'\u003e \u003c\/div\u003e \u003c\/div\u003e \u003cdiv class='jdgm-histogram__percentage'\u003e0%\u003c\/div\u003e \u003cdiv class='jdgm-histogram__frequency'\u003e(0)\u003c\/div\u003e \u003c\/div\u003e \u003cdiv class='jdgm-histogram__row jdgm-histogram__clear-filter' data-rating=null tabindex='0'\u003e\u003c\/div\u003e \u003c\/div\u003e \u003cdiv class='jdgm-rev-widg__sort-wrapper'\u003e\u003c\/div\u003e \u003c\/div\u003e \u003cdiv class='jdgm-rev-widg__body'\u003e \u003cdiv class='jdgm-rev-widg__reviews'\u003e\u003c\/div\u003e \u003cdiv class='jdgm-paginate' data-per-page='10' data-url='https:\/\/api.judge.me\/reviews\/reviews_for_widget' style=\"display: none;\"\u003e\u003c\/div\u003e \u003c\/div\u003e \u003cdiv class='jdgm-rev-widg__paginate-spinner-wrapper'\u003e \u003cdiv class='jdgm-spinner'\u003e\u003c\/div\u003e \u003c\/div\u003e \u003c\/div\u003e"},"collections":[{"id":281712427197,"handle":"breastfeeding","title":"Breastfeeding","updated_at":"2026-06-12T19:10:26+08:00","body_html":"","published_at":"2021-12-20T14:19:33+08:00","sort_order":"best-selling","template_suffix":"breastfeeding-collection","disjunctive":false,"rules":[{"column":"tag","relation":"equals","condition":"Breastfeeding"}],"published_scope":"global","image":{"created_at":"2024-05-06T11:59:34+08:00","alt":"Breastfeeding - The Birth Store","width":620,"height":635,"src":"\/\/www.thebirthstore.com.au\/cdn\/shop\/collections\/breastfeeding-793872.jpg?v=1714967974"}},{"id":261657460925,"handle":"buy","title":"Buy","updated_at":"2026-06-12T19:10:26+08:00","body_html":"\u003cp\u003eBrowse all of our pregnancy, labour \u0026amp; birth, postpartum and baby essentials here.\u003cbr\u003e\u003c\/p\u003e\n\u003cp\u003e\u003cspan\u003eYou can even buy now and pay later with Afterpay!\u003c\/span\u003e\u003c\/p\u003e","published_at":"2021-03-10T12:05:31+08:00","sort_order":"best-selling","template_suffix":"shop-all-collection","disjunctive":false,"rules":[{"column":"title","relation":"not_contains","condition":"Hire"}],"published_scope":"global","image":{"created_at":"2024-05-06T11:59:42+08:00","alt":"Buy - The Birth Store","width":2048,"height":2048,"src":"\/\/www.thebirthstore.com.au\/cdn\/shop\/collections\/buy-964856.jpg?v=1714967982"}},{"id":294349865149,"handle":"cracked-nipples","title":"Cracked Nipples","updated_at":"2026-06-02T19:09:48+08:00","body_html":"","published_at":"2023-09-21T14:03:02+08:00","sort_order":"best-selling","template_suffix":"swaddles-collection","disjunctive":false,"rules":[{"column":"tag","relation":"equals","condition":"Cracked Nipples"}],"published_scope":"global","image":{"created_at":"2024-05-06T11:59:53+08:00","alt":"Cracked Nipples - The Birth Store","width":1050,"height":1050,"src":"\/\/www.thebirthstore.com.au\/cdn\/shop\/collections\/cracked-nipples-166971.jpg?v=1714967994"}},{"id":337429201085,"handle":"hospital-bag","title":"Hospital Bag","updated_at":"2026-06-12T19:10:26+08:00","body_html":"","published_at":"2026-06-03T11:36:29+08:00","sort_order":"most-relevant","template_suffix":"","disjunctive":false,"rules":[{"column":"tag","relation":"equals","condition":"Hospital Bag"}],"published_scope":"global"},{"id":291456483517,"handle":"shop-all","title":"Shop All - Mum","updated_at":"2026-06-12T19:10:26+08:00","body_html":"","published_at":"2022-12-23T22:04:39+08:00","sort_order":"best-selling","template_suffix":"shop-all-collection","disjunctive":false,"rules":[{"column":"variant_price","relation":"greater_than","condition":"1"},{"column":"title","relation":"not_contains","condition":"Batteries"},{"column":"tag","relation":"equals","condition":"Mum"}],"published_scope":"global","image":{"created_at":"2024-05-06T12:00:54+08:00","alt":"Shop All - The Birth Store","width":1365,"height":2048,"src":"\/\/www.thebirthstore.com.au\/cdn\/shop\/collections\/shop-all-693176.jpg?v=1714968055"}},{"id":310045933757,"handle":"shop-all-sale","title":"Shop All Sale","updated_at":"2026-06-12T19:10:26+08:00","body_html":"","published_at":"2024-11-12T13:22:43+08:00","sort_order":"alpha-asc","template_suffix":"","disjunctive":true,"rules":[{"column":"tag","relation":"equals","condition":"Bundles"},{"column":"vendor","relation":"equals","condition":"Franjos Kitchen"},{"column":"vendor","relation":"equals","condition":"Adored Illustrations"},{"column":"vendor","relation":"equals","condition":"Amazing Oils"},{"column":"vendor","relation":"equals","condition":"Ice Ice Booby"},{"column":"vendor","relation":"equals","condition":"Made to Milk"},{"column":"vendor","relation":"equals","condition":"Milky Goodness"},{"column":"vendor","relation":"equals","condition":"Seasons of Mama"},{"column":"vendor","relation":"equals","condition":"Silverette"},{"column":"vendor","relation":"equals","condition":"Snuggle Hunny"},{"column":"vendor","relation":"equals","condition":"Yung Bod"},{"column":"vendor","relation":"equals","condition":"Bare Love"},{"column":"vendor","relation":"equals","condition":"Haakaa"},{"column":"vendor","relation":"equals","condition":"Mere Botanicals"},{"column":"vendor","relation":"equals","condition":"The Birth Store Hire"},{"column":"vendor","relation":"equals","condition":"The Birth Store"}],"published_scope":"global","image":{"created_at":"2024-11-13T10:58:16+08:00","alt":"Shop All Sale - The Birth Store","width":2048,"height":1365,"src":"\/\/www.thebirthstore.com.au\/cdn\/shop\/collections\/shop-all-sale-297361.jpg?v=1731466697"}}]}
{"item":{"id":7897760989373,"title":"Cookie Mixes","handle":"choc-beetroot-cookie-mix","description":"\u003cp\u003e\u003cspan\u003eThese cookies have been developed to replenish the vital substances lost during pregnancy and postpartum, using the principals of Chinese Dietary Therapy*.\u003c\/span\u003e\u003c\/p\u003e\n\u003cul\u003e\n\u003cli\u003e\u003cspan\u003eSource of protein, fibre and essential fatty acids\u003c\/span\u003e\u003c\/li\u003e\n\u003cli\u003eOrganic and natural ingredients\u003c\/li\u003e\n\u003cli\u003e\u003cspan\u003eContain galactagogues** (Almond and Flax) supporting breastmilk production\u003c\/span\u003e\u003c\/li\u003e\n\u003cli\u003e\u003cspan\u003eGluten free\u003c\/span\u003e\u003c\/li\u003e\n\u003cli\u003e\u003cspan\u003eDairy free (if made with coconut oil)\u003c\/span\u003e\u003c\/li\u003e\n\u003cli\u003e\u003cspan\u003eEach pack makes 15 cookies\u003c\/span\u003e\u003c\/li\u003e\n\u003c\/ul\u003e\n\u003cp\u003e \u003c\/p\u003e\n\u003cp\u003e\u003cstrong\u003e\u003cspan\u003e*Chinese Dietary Therapy\u003c\/span\u003e\u003c\/strong\u003e\u003c\/p\u003e\n\u003cp\u003e\u003cspan\u003eIn traditional dietary therapy, all natural foods have their own unique properties. They are categorised based on their innate temperature, the organs they affect and the direction in which they move or affect the flow of Qi and Blood.\u003c\/span\u003e\u003c\/p\u003e\n\u003cp\u003e \u003c\/p\u003e\n\u003cp\u003e\u003cspan\u003e\u003cstrong\u003e**Galactagogues\u003c\/strong\u003e\u003cstrong\u003e \u003c\/strong\u003eare foods, herbs or medications that may help to increase breastmilk supply.\u003c\/span\u003e\u003c\/p\u003e\n\u003c!----\u003e","published_at":"2024-10-15T10:10:32+08:00","created_at":"2024-10-15T09:48:43+08:00","vendor":"Flourish In Natal","type":"","tags":["Breastfeeding","Lactation Products","Mum","Post-Partum","Pregnancy","Pregnancy Health"],"price":1995,"price_min":1995,"price_max":1995,"available":true,"price_varies":false,"compare_at_price":null,"compare_at_price_min":0,"compare_at_price_max":0,"compare_at_price_varies":false,"variants":[{"id":44564556120253,"title":"Choc Beetroot","option1":"Choc Beetroot","option2":null,"option3":null,"sku":"","requires_shipping":true,"taxable":false,"featured_image":{"id":38738697158845,"product_id":7897760989373,"position":9,"created_at":"2025-11-02T22:25:34+08:00","updated_at":"2025-11-03T12:22:54+08:00","alt":"Cookie Mixes - The Birth Store - Flourish In Natal","width":1080,"height":1080,"src":"\/\/www.thebirthstore.com.au\/cdn\/shop\/files\/cookie-mixes-8332575.png?v=1762143774","variant_ids":[44564556120253]},"available":true,"name":"Cookie Mixes - Choc Beetroot","public_title":"Choc Beetroot","options":["Choc Beetroot"],"price":1995,"weight":477,"compare_at_price":null,"inventory_management":"shopify","barcode":"56120253","featured_media":{"alt":"Cookie Mixes - The Birth Store - Flourish In Natal","id":29988417601725,"position":9,"preview_image":{"aspect_ratio":1.0,"height":1080,"width":1080,"src":"\/\/www.thebirthstore.com.au\/cdn\/shop\/files\/cookie-mixes-8332575.png?v=1762143774"}},"requires_selling_plan":false,"selling_plan_allocations":[],"quantity_rule":{"min":1,"max":null,"increment":1}},{"id":44564556153021,"title":"Spiced Goji","option1":"Spiced Goji","option2":null,"option3":null,"sku":"","requires_shipping":true,"taxable":false,"featured_image":{"id":38738699714749,"product_id":7897760989373,"position":10,"created_at":"2025-11-02T22:26:55+08:00","updated_at":"2025-11-03T12:22:54+08:00","alt":"Cookie Mixes - The Birth Store - Flourish In Natal","width":1080,"height":1080,"src":"\/\/www.thebirthstore.com.au\/cdn\/shop\/files\/cookie-mixes-6660648.png?v=1762143774","variant_ids":[44564556153021]},"available":false,"name":"Cookie Mixes - Spiced Goji","public_title":"Spiced Goji","options":["Spiced Goji"],"price":1995,"weight":477,"compare_at_price":null,"inventory_management":"shopify","barcode":"56153021","featured_media":{"alt":"Cookie Mixes - The Birth Store - Flourish In Natal","id":29988419371197,"position":10,"preview_image":{"aspect_ratio":1.0,"height":1080,"width":1080,"src":"\/\/www.thebirthstore.com.au\/cdn\/shop\/files\/cookie-mixes-6660648.png?v=1762143774"}},"requires_selling_plan":false,"selling_plan_allocations":[],"quantity_rule":{"min":1,"max":null,"increment":1}},{"id":44564556185789,"title":"Honey Sesame","option1":"Honey Sesame","option2":null,"option3":null,"sku":"","requires_shipping":true,"taxable":false,"featured_image":{"id":38738694504637,"product_id":7897760989373,"position":11,"created_at":"2025-11-02T22:24:32+08:00","updated_at":"2025-11-03T12:22:54+08:00","alt":"Cookie Mixes - The Birth Store - Flourish In Natal","width":1080,"height":1080,"src":"\/\/www.thebirthstore.com.au\/cdn\/shop\/files\/cookie-mixes-4759715.png?v=1762143774","variant_ids":[44564556185789]},"available":true,"name":"Cookie Mixes - Honey Sesame","public_title":"Honey Sesame","options":["Honey Sesame"],"price":1995,"weight":477,"compare_at_price":null,"inventory_management":"shopify","barcode":"56185789","featured_media":{"alt":"Cookie Mixes - The Birth Store - Flourish In Natal","id":29988415897789,"position":11,"preview_image":{"aspect_ratio":1.0,"height":1080,"width":1080,"src":"\/\/www.thebirthstore.com.au\/cdn\/shop\/files\/cookie-mixes-4759715.png?v=1762143774"}},"requires_selling_plan":false,"selling_plan_allocations":[],"quantity_rule":{"min":1,"max":null,"increment":1}}],"images":["\/\/www.thebirthstore.com.au\/cdn\/shop\/files\/cookie-mixes-5041346.png?v=1758829420","\/\/www.thebirthstore.com.au\/cdn\/shop\/files\/cookie-mixes-756323.jpg?v=1758805486","\/\/www.thebirthstore.com.au\/cdn\/shop\/files\/cookie-mixes-860331.webp?v=1758805486","\/\/www.thebirthstore.com.au\/cdn\/shop\/files\/cookie-mixes-197488.webp?v=1758805486","\/\/www.thebirthstore.com.au\/cdn\/shop\/files\/cookie-mixes-560065.webp?v=1758805486","\/\/www.thebirthstore.com.au\/cdn\/shop\/files\/cookie-mixes-464124.webp?v=1758805486","\/\/www.thebirthstore.com.au\/cdn\/shop\/files\/cookie-mixes-544068.webp?v=1758805486","\/\/www.thebirthstore.com.au\/cdn\/shop\/files\/cookie-mixes-831285.webp?v=1758805486","\/\/www.thebirthstore.com.au\/cdn\/shop\/files\/cookie-mixes-8332575.png?v=1762143774","\/\/www.thebirthstore.com.au\/cdn\/shop\/files\/cookie-mixes-6660648.png?v=1762143774","\/\/www.thebirthstore.com.au\/cdn\/shop\/files\/cookie-mixes-4759715.png?v=1762143774"],"featured_image":"\/\/www.thebirthstore.com.au\/cdn\/shop\/files\/cookie-mixes-5041346.png?v=1758829420","options":["Flavour "],"media":[{"alt":"Cookie Mixes - The Birth Store - Flourish In Natal","id":29672046002365,"position":1,"preview_image":{"aspect_ratio":1.0,"height":1080,"width":1080,"src":"\/\/www.thebirthstore.com.au\/cdn\/shop\/files\/cookie-mixes-5041346.png?v=1758829420"},"aspect_ratio":1.0,"height":1080,"media_type":"image","src":"\/\/www.thebirthstore.com.au\/cdn\/shop\/files\/cookie-mixes-5041346.png?v=1758829420","width":1080},{"alt":"Cookie Mixes - The Birth Store - Flourish In Natal","id":27785479094461,"position":2,"preview_image":{"aspect_ratio":1.0,"height":535,"width":535,"src":"\/\/www.thebirthstore.com.au\/cdn\/shop\/files\/cookie-mixes-756323.jpg?v=1758805486"},"aspect_ratio":1.0,"height":535,"media_type":"image","src":"\/\/www.thebirthstore.com.au\/cdn\/shop\/files\/cookie-mixes-756323.jpg?v=1758805486","width":535},{"alt":"Cookie Mixes - The Birth Store - Flourish In Natal","id":27785478930621,"position":3,"preview_image":{"aspect_ratio":1.0,"height":500,"width":500,"src":"\/\/www.thebirthstore.com.au\/cdn\/shop\/files\/cookie-mixes-860331.webp?v=1758805486"},"aspect_ratio":1.0,"height":500,"media_type":"image","src":"\/\/www.thebirthstore.com.au\/cdn\/shop\/files\/cookie-mixes-860331.webp?v=1758805486","width":500},{"alt":"Cookie Mixes - The Birth Store - Flourish In Natal","id":27785478963389,"position":4,"preview_image":{"aspect_ratio":1.0,"height":500,"width":500,"src":"\/\/www.thebirthstore.com.au\/cdn\/shop\/files\/cookie-mixes-197488.webp?v=1758805486"},"aspect_ratio":1.0,"height":500,"media_type":"image","src":"\/\/www.thebirthstore.com.au\/cdn\/shop\/files\/cookie-mixes-197488.webp?v=1758805486","width":500},{"alt":"Cookie Mixes - The Birth Store - Flourish In Natal","id":27785478996157,"position":5,"preview_image":{"aspect_ratio":1.0,"height":500,"width":500,"src":"\/\/www.thebirthstore.com.au\/cdn\/shop\/files\/cookie-mixes-560065.webp?v=1758805486"},"aspect_ratio":1.0,"height":500,"media_type":"image","src":"\/\/www.thebirthstore.com.au\/cdn\/shop\/files\/cookie-mixes-560065.webp?v=1758805486","width":500},{"alt":"Cookie Mixes - The Birth Store - Flourish In Natal","id":27785479028925,"position":6,"preview_image":{"aspect_ratio":1.0,"height":500,"width":500,"src":"\/\/www.thebirthstore.com.au\/cdn\/shop\/files\/cookie-mixes-464124.webp?v=1758805486"},"aspect_ratio":1.0,"height":500,"media_type":"image","src":"\/\/www.thebirthstore.com.au\/cdn\/shop\/files\/cookie-mixes-464124.webp?v=1758805486","width":500},{"alt":"Cookie Mixes - The Birth Store - Flourish In Natal","id":27785479127229,"position":7,"preview_image":{"aspect_ratio":0.666,"height":500,"width":333,"src":"\/\/www.thebirthstore.com.au\/cdn\/shop\/files\/cookie-mixes-544068.webp?v=1758805486"},"aspect_ratio":0.666,"height":500,"media_type":"image","src":"\/\/www.thebirthstore.com.au\/cdn\/shop\/files\/cookie-mixes-544068.webp?v=1758805486","width":333},{"alt":"Cookie Mixes - The Birth Store - Flourish In Natal","id":27785479159997,"position":8,"preview_image":{"aspect_ratio":1.0,"height":500,"width":500,"src":"\/\/www.thebirthstore.com.au\/cdn\/shop\/files\/cookie-mixes-831285.webp?v=1758805486"},"aspect_ratio":1.0,"height":500,"media_type":"image","src":"\/\/www.thebirthstore.com.au\/cdn\/shop\/files\/cookie-mixes-831285.webp?v=1758805486","width":500},{"alt":"Cookie Mixes - The Birth Store - Flourish In Natal","id":29988417601725,"position":9,"preview_image":{"aspect_ratio":1.0,"height":1080,"width":1080,"src":"\/\/www.thebirthstore.com.au\/cdn\/shop\/files\/cookie-mixes-8332575.png?v=1762143774"},"aspect_ratio":1.0,"height":1080,"media_type":"image","src":"\/\/www.thebirthstore.com.au\/cdn\/shop\/files\/cookie-mixes-8332575.png?v=1762143774","width":1080},{"alt":"Cookie Mixes - The Birth Store - Flourish In Natal","id":29988419371197,"position":10,"preview_image":{"aspect_ratio":1.0,"height":1080,"width":1080,"src":"\/\/www.thebirthstore.com.au\/cdn\/shop\/files\/cookie-mixes-6660648.png?v=1762143774"},"aspect_ratio":1.0,"height":1080,"media_type":"image","src":"\/\/www.thebirthstore.com.au\/cdn\/shop\/files\/cookie-mixes-6660648.png?v=1762143774","width":1080},{"alt":"Cookie Mixes - The Birth Store - Flourish In Natal","id":29988415897789,"position":11,"preview_image":{"aspect_ratio":1.0,"height":1080,"width":1080,"src":"\/\/www.thebirthstore.com.au\/cdn\/shop\/files\/cookie-mixes-4759715.png?v=1762143774"},"aspect_ratio":1.0,"height":1080,"media_type":"image","src":"\/\/www.thebirthstore.com.au\/cdn\/shop\/files\/cookie-mixes-4759715.png?v=1762143774","width":1080}],"requires_selling_plan":false,"selling_plan_groups":[],"content":"\u003cp\u003e\u003cspan\u003eThese cookies have been developed to replenish the vital substances lost during pregnancy and postpartum, using the principals of Chinese Dietary Therapy*.\u003c\/span\u003e\u003c\/p\u003e\n\u003cul\u003e\n\u003cli\u003e\u003cspan\u003eSource of protein, fibre and essential fatty acids\u003c\/span\u003e\u003c\/li\u003e\n\u003cli\u003eOrganic and natural ingredients\u003c\/li\u003e\n\u003cli\u003e\u003cspan\u003eContain galactagogues** (Almond and Flax) supporting breastmilk production\u003c\/span\u003e\u003c\/li\u003e\n\u003cli\u003e\u003cspan\u003eGluten free\u003c\/span\u003e\u003c\/li\u003e\n\u003cli\u003e\u003cspan\u003eDairy free (if made with coconut oil)\u003c\/span\u003e\u003c\/li\u003e\n\u003cli\u003e\u003cspan\u003eEach pack makes 15 cookies\u003c\/span\u003e\u003c\/li\u003e\n\u003c\/ul\u003e\n\u003cp\u003e \u003c\/p\u003e\n\u003cp\u003e\u003cstrong\u003e\u003cspan\u003e*Chinese Dietary Therapy\u003c\/span\u003e\u003c\/strong\u003e\u003c\/p\u003e\n\u003cp\u003e\u003cspan\u003eIn traditional dietary therapy, all natural foods have their own unique properties. They are categorised based on their innate temperature, the organs they affect and the direction in which they move or affect the flow of Qi and Blood.\u003c\/span\u003e\u003c\/p\u003e\n\u003cp\u003e \u003c\/p\u003e\n\u003cp\u003e\u003cspan\u003e\u003cstrong\u003e**Galactagogues\u003c\/strong\u003e\u003cstrong\u003e \u003c\/strong\u003eare foods, herbs or medications that may help to increase breastmilk supply.\u003c\/span\u003e\u003c\/p\u003e\n\u003c!----\u003e"},"options":[{"name":"Flavour ","position":1,"values":["Choc Beetroot","Spiced Goji","Honey Sesame"]}],"custom_metafields":{},"metafields":{"badge":"\u003cdiv style='display:none' class='jdgm-prev-badge' data-average-rating='0.00' data-number-of-reviews='0' data-number-of-questions='0'\u003e \u003cspan class='jdgm-prev-badge__stars' data-score='0.00' tabindex='0' aria-label='0.00 stars' role='button'\u003e \u003cspan class='jdgm-star jdgm--off'\u003e\u003c\/span\u003e\u003cspan class='jdgm-star jdgm--off'\u003e\u003c\/span\u003e\u003cspan class='jdgm-star jdgm--off'\u003e\u003c\/span\u003e\u003cspan class='jdgm-star jdgm--off'\u003e\u003c\/span\u003e\u003cspan class='jdgm-star jdgm--off'\u003e\u003c\/span\u003e \u003c\/span\u003e \u003cspan class='jdgm-prev-badge__text'\u003e No reviews \u003c\/span\u003e \u003c\/div\u003e","review_snippet_widget":"\u003cdiv class='jdgm-widget jdgm-review-snippet-widget'\u003e \u003cstyle\u003e\n .jdgm-review-snippet-widget{position:relative}.jdgm-review-snippet-widget:hover{cursor:pointer}@media only screen and (max-width: 767px){.jdgm-review-snippet-widget .jdgm-rev-snippet-widget__cards-container{left:unset;right:unset}}.jdgm-review-snippet-widget .jdgm-rev-snippet-card{background:#fff}.jdgm-review-snippet-widget .jdgm-star{color:#399}.jdgm-review-snippet-widget .jdgm-rev-snippet-card{border-radius:8px;background:#fff}.jdgm-review-snippet-widget .jdgm-rev-snippet-card__rev-prod-wrapper{border-radius:8px}.jdgm-review-snippet-widget .jdgm-rev-snippet-card__rev-content-wrapper{max-width:360px}.jdgm-review-snippet-widget .jdgm-rev-snippet-widget__prev-btn,.jdgm-review-snippet-widget .jdgm-rev-snippet-widget__next-btn{border-radius:50%;background:#fff}.jdgm-review-snippet-widget .jdgm-rev-snippet-widget__prev-btn\u003esvg,.jdgm-review-snippet-widget .jdgm-rev-snippet-widget__next-btn\u003esvg{fill:#000}.jdgm-review-snippet-widget .jdgm-rev-snippet-widget__prev-btn{left:0;top:40%}.jdgm-review-snippet-widget .jdgm-rev-snippet-widget__next-btn{right:0;top:40%}.jdgm-full-rev-modal.review-snippet-widget .jm-mfp-content{border-radius:8px}.jdgm-full-rev-modal.review-snippet-widget .jdgm-full-rev__icon{border-radius:8px}.jdgm-full-rev-modal.review-snippet-widget .jdgm-full-rev[data-verified-buyer=\"true\"] .jdgm-full-rev__icon::after{border-radius:8px}.jdgm-full-rev-modal.review-snippet-widget .jdgm-rev__buyer-badge{border-radius:calc( 8px \/ 2 )}.jdgm-full-rev-modal.review-snippet-widget .jdgm-full-rev__pic-img{border-radius:8px}.jdgm-full-rev-modal.review-snippet-widget .jdgm-full-rev__reply{border-radius:8px}.jdgm-full-rev-modal.review-snippet-widget .jdgm-full-rev__replier::before{content:'thebirthstore.com.au'}.jdgm-full-rev-modal.review-snippet-widget .jdgm-full-rev__product-button{border-radius:calc( 8px * 6 )}\n\n \u003c\/style\u003e \u003ci class=\"jdgm-rev-snippet-widget__prev-btn\" style='display: none;'\u003e \u003csvg xmlns=\"http:\/\/www.w3.org\/2000\/svg\" height=\"12\" viewBox=\"0 0 8 12\" width=\"8\" fill=\"#000\"\u003e\u003cpath d=\"M3.09961 6.00005L6.99961 9.90005C7.18294 10.0834 7.27461 10.3167 7.27461 10.6C7.27461 10.8834 7.18294 11.1167 6.99961 11.3C6.81628 11.4834 6.58294 11.575 6.29961 11.575C6.01628 11.575 5.78294 11.4834 5.59961 11.3L0.999609 6.70005C0.899609 6.60005 0.828776 6.49172 0.787109 6.37505C0.745443 6.25838 0.724609 6.13338 0.724609 6.00005C0.724609 5.86672 0.745443 5.74172 0.787109 5.62505C0.828776 5.50838 0.899609 5.40005 0.999609 5.30005L5.59961 0.700049C5.78294 0.516715 6.01628 0.425049 6.29961 0.425049C6.58294 0.425049 6.81628 0.516715 6.99961 0.700049C7.18294 0.883382 7.27461 1.11672 7.27461 1.40005C7.27461 1.68338 7.18294 1.91672 6.99961 2.10005L3.09961 6.00005Z\"\/\u003e\u003c\/svg\u003e \u003c\/i\u003e \u003ci class=\"jdgm-rev-snippet-widget__next-btn\" style='display: none;'\u003e \u003csvg xmlns=\"http:\/\/www.w3.org\/2000\/svg\" height=\"12\" viewBox=\"0 0 8 12\" width=\"8\" fill=\"#000\"\u003e\u003cpath d=\"M4.89961 6.00005L0.999609 2.10005C0.816276 1.91672 0.724609 1.68338 0.724609 1.40005C0.724609 1.11672 0.816276 0.883382 0.999609 0.700049C1.18294 0.516715 1.41628 0.425049 1.69961 0.425049C1.98294 0.425049 2.21628 0.516715 2.39961 0.700049L6.99961 5.30005C7.09961 5.40005 7.17044 5.50838 7.21211 5.62505C7.25378 5.74172 7.27461 5.86672 7.27461 6.00005C7.27461 6.13338 7.25378 6.25838 7.21211 6.37505C7.17044 6.49172 7.09961 6.60005 6.99961 6.70005L2.39961 11.3C2.21628 11.4834 1.98294 11.575 1.69961 11.575C1.41628 11.575 1.18294 11.4834 0.999609 11.3C0.816276 11.1167 0.724609 10.8834 0.724609 10.6C0.724609 10.3167 0.816276 10.0834 0.999609 9.90005L4.89961 6.00005Z\"\/\u003e\u003c\/svg\u003e \u003c\/i\u003e \u003cdiv style=\"overflow: hidden;\"\u003e \u003cdiv class='jdgm-rev-snippet-widget__cards-container'\u003e \u003cdiv class='jdgm-rev-snippet-card' data-review-id='e7b9d08b-2518-4851-b106-22b181600a64' style='display: none;'\u003e \u003cdiv class=\"jdgm-rev-snippet-card__rev-prod-wrapper\"\u003e \u003ca class='jdgm-rev-snippet-card__rev-content-wrapper jdgm-rev-snippet-card__full-review-link' style='text-decoration: none; color: inherit;padding: 0 34px;' role='button' data-review-id='e7b9d08b-2518-4851-b106-22b181600a64'\u003e \u003cdiv class='jdgm-rev-snippet-card__rev-header'\u003e \u003cdiv class='jdgm-rev-snippet-card__rev-rating' aria-label='5 stars' role='img'\u003e \u003cspan class='jdgm-star jdgm--on'\u003e\u003c\/span\u003e\u003cspan class='jdgm-star jdgm--on'\u003e\u003c\/span\u003e\u003cspan class='jdgm-star jdgm--on'\u003e\u003c\/span\u003e\u003cspan class='jdgm-star jdgm--on'\u003e\u003c\/span\u003e\u003cspan class='jdgm-star jdgm--on'\u003e\u003c\/span\u003e \u003c\/div\u003e \u003cdiv class='jdgm-rev-snippet-card__reviewer'\u003e Rebecca Paust \u003c\/div\u003e \u003c\/div\u003e \u003cdiv class='jdgm-rev-snippet-card__rev-content'\u003e \u003cspan class='jdgm-rev-snippet-card__rev-body'\u003e \u003cp\u003eI tried the Deluxe Hot Chocolate and oh my goodness it’s amazing! It’s increased my supply like you wouldn’t believe, and the flavour is enjoyable compared to other lactation products that leave a funny aftertaste.\u003c\/p\u003e \u003c\/span\u003e \u003c\/div\u003e \u003c\/a\u003e \u003c\/div\u003e \u003c\/div\u003e \u003c\/div\u003e \u003c\/div\u003e \u003c\/div\u003e","widget":"\u003cdiv class='jdgm-rev-widg' data-updated-at='2025-06-13T16:13:40Z' data-average-rating='0.00' data-number-of-reviews='0' data-number-of-questions='0'\u003e \u003cstyle class='jdgm-temp-hiding-style'\u003e.jdgm-rev-widg{ display: none }\u003c\/style\u003e \u003cdiv class='jdgm-rev-widg__header'\u003e \u003ch2 class='jdgm-rev-widg__title'\u003eCustomer Reviews\u003c\/h2\u003e \u003cdiv class='jdgm-rev-widg__summary'\u003e \u003cdiv class='jdgm-rev-widg__summary-stars' aria-label='Average rating is 0.00 stars' role='img'\u003e \u003cspan class='jdgm-star jdgm--off'\u003e\u003c\/span\u003e\u003cspan class='jdgm-star jdgm--off'\u003e\u003c\/span\u003e\u003cspan class='jdgm-star jdgm--off'\u003e\u003c\/span\u003e\u003cspan class='jdgm-star jdgm--off'\u003e\u003c\/span\u003e\u003cspan class='jdgm-star jdgm--off'\u003e\u003c\/span\u003e \u003c\/div\u003e \u003cdiv class='jdgm-rev-widg__summary-text'\u003eBe the first to write a review\u003c\/div\u003e \u003c\/div\u003e \u003ca style='display: none' href='#' class='jdgm-write-rev-link' role='button'\u003eWrite a review\u003c\/a\u003e \u003cdiv class='jdgm-histogram jdgm-temp-hidden'\u003e \u003cdiv class='jdgm-histogram__row' data-rating='5' data-frequency='0' data-percentage='0'\u003e \u003cdiv class='jdgm-histogram__star' role='button' aria-label=\"0% (0) reviews with 5 star rating\" tabindex='0' \u003e\u003cspan class='jdgm-star jdgm--on'\u003e\u003c\/span\u003e\u003cspan class='jdgm-star jdgm--on'\u003e\u003c\/span\u003e\u003cspan class='jdgm-star jdgm--on'\u003e\u003c\/span\u003e\u003cspan class='jdgm-star jdgm--on'\u003e\u003c\/span\u003e\u003cspan class='jdgm-star jdgm--on'\u003e\u003c\/span\u003e\u003c\/div\u003e \u003cdiv class='jdgm-histogram__bar'\u003e \u003cdiv class='jdgm-histogram__bar-content' style='width: 0%;'\u003e \u003c\/div\u003e \u003c\/div\u003e \u003cdiv class='jdgm-histogram__percentage'\u003e0%\u003c\/div\u003e \u003cdiv class='jdgm-histogram__frequency'\u003e(0)\u003c\/div\u003e \u003c\/div\u003e \u003cdiv class='jdgm-histogram__row' data-rating='4' data-frequency='0' data-percentage='0'\u003e \u003cdiv class='jdgm-histogram__star' role='button' aria-label=\"0% (0) reviews with 4 star rating\" tabindex='0' \u003e\u003cspan class='jdgm-star jdgm--on'\u003e\u003c\/span\u003e\u003cspan class='jdgm-star jdgm--on'\u003e\u003c\/span\u003e\u003cspan class='jdgm-star jdgm--on'\u003e\u003c\/span\u003e\u003cspan class='jdgm-star jdgm--on'\u003e\u003c\/span\u003e\u003cspan class='jdgm-star jdgm--off'\u003e\u003c\/span\u003e\u003c\/div\u003e \u003cdiv class='jdgm-histogram__bar'\u003e \u003cdiv class='jdgm-histogram__bar-content' style='width: 0%;'\u003e \u003c\/div\u003e \u003c\/div\u003e \u003cdiv class='jdgm-histogram__percentage'\u003e0%\u003c\/div\u003e \u003cdiv class='jdgm-histogram__frequency'\u003e(0)\u003c\/div\u003e \u003c\/div\u003e \u003cdiv class='jdgm-histogram__row' data-rating='3' data-frequency='0' data-percentage='0'\u003e \u003cdiv class='jdgm-histogram__star' role='button' aria-label=\"0% (0) reviews with 3 star rating\" tabindex='0' \u003e\u003cspan class='jdgm-star jdgm--on'\u003e\u003c\/span\u003e\u003cspan class='jdgm-star jdgm--on'\u003e\u003c\/span\u003e\u003cspan class='jdgm-star jdgm--on'\u003e\u003c\/span\u003e\u003cspan class='jdgm-star jdgm--off'\u003e\u003c\/span\u003e\u003cspan class='jdgm-star jdgm--off'\u003e\u003c\/span\u003e\u003c\/div\u003e \u003cdiv class='jdgm-histogram__bar'\u003e \u003cdiv class='jdgm-histogram__bar-content' style='width: 0%;'\u003e \u003c\/div\u003e \u003c\/div\u003e \u003cdiv class='jdgm-histogram__percentage'\u003e0%\u003c\/div\u003e \u003cdiv class='jdgm-histogram__frequency'\u003e(0)\u003c\/div\u003e \u003c\/div\u003e \u003cdiv class='jdgm-histogram__row' data-rating='2' data-frequency='0' data-percentage='0'\u003e \u003cdiv class='jdgm-histogram__star' role='button' aria-label=\"0% (0) reviews with 2 star rating\" tabindex='0' \u003e\u003cspan class='jdgm-star jdgm--on'\u003e\u003c\/span\u003e\u003cspan class='jdgm-star jdgm--on'\u003e\u003c\/span\u003e\u003cspan class='jdgm-star jdgm--off'\u003e\u003c\/span\u003e\u003cspan class='jdgm-star jdgm--off'\u003e\u003c\/span\u003e\u003cspan class='jdgm-star jdgm--off'\u003e\u003c\/span\u003e\u003c\/div\u003e \u003cdiv class='jdgm-histogram__bar'\u003e \u003cdiv class='jdgm-histogram__bar-content' style='width: 0%;'\u003e \u003c\/div\u003e \u003c\/div\u003e \u003cdiv class='jdgm-histogram__percentage'\u003e0%\u003c\/div\u003e \u003cdiv class='jdgm-histogram__frequency'\u003e(0)\u003c\/div\u003e \u003c\/div\u003e \u003cdiv class='jdgm-histogram__row' data-rating='1' data-frequency='0' data-percentage='0'\u003e \u003cdiv class='jdgm-histogram__star' role='button' aria-label=\"0% (0) reviews with 1 star rating\" tabindex='0' \u003e\u003cspan class='jdgm-star jdgm--on'\u003e\u003c\/span\u003e\u003cspan class='jdgm-star jdgm--off'\u003e\u003c\/span\u003e\u003cspan class='jdgm-star jdgm--off'\u003e\u003c\/span\u003e\u003cspan class='jdgm-star jdgm--off'\u003e\u003c\/span\u003e\u003cspan class='jdgm-star jdgm--off'\u003e\u003c\/span\u003e\u003c\/div\u003e \u003cdiv class='jdgm-histogram__bar'\u003e \u003cdiv class='jdgm-histogram__bar-content' style='width: 0%;'\u003e \u003c\/div\u003e \u003c\/div\u003e \u003cdiv class='jdgm-histogram__percentage'\u003e0%\u003c\/div\u003e \u003cdiv class='jdgm-histogram__frequency'\u003e(0)\u003c\/div\u003e \u003c\/div\u003e \u003cdiv class='jdgm-histogram__row jdgm-histogram__clear-filter' data-rating=null tabindex='0'\u003e\u003c\/div\u003e \u003c\/div\u003e \u003cdiv class='jdgm-rev-widg__sort-wrapper'\u003e\u003c\/div\u003e \u003c\/div\u003e \u003cdiv class='jdgm-rev-widg__body'\u003e \u003cdiv class='jdgm-rev-widg__reviews'\u003e\u003c\/div\u003e \u003cdiv class='jdgm-paginate' data-per-page='10' data-url='https:\/\/api.judge.me\/reviews\/reviews_for_widget' style=\"display: none;\"\u003e\u003c\/div\u003e \u003c\/div\u003e \u003cdiv class='jdgm-rev-widg__paginate-spinner-wrapper'\u003e \u003cdiv class='jdgm-spinner'\u003e\u003c\/div\u003e \u003c\/div\u003e \u003c\/div\u003e"},"collections":[{"id":281712427197,"handle":"breastfeeding","title":"Breastfeeding","updated_at":"2026-06-12T19:10:26+08:00","body_html":"","published_at":"2021-12-20T14:19:33+08:00","sort_order":"best-selling","template_suffix":"breastfeeding-collection","disjunctive":false,"rules":[{"column":"tag","relation":"equals","condition":"Breastfeeding"}],"published_scope":"global","image":{"created_at":"2024-05-06T11:59:34+08:00","alt":"Breastfeeding - The Birth Store","width":620,"height":635,"src":"\/\/www.thebirthstore.com.au\/cdn\/shop\/collections\/breastfeeding-793872.jpg?v=1714967974"}},{"id":261657460925,"handle":"buy","title":"Buy","updated_at":"2026-06-12T19:10:26+08:00","body_html":"\u003cp\u003eBrowse all of our pregnancy, labour \u0026amp; birth, postpartum and baby essentials here.\u003cbr\u003e\u003c\/p\u003e\n\u003cp\u003e\u003cspan\u003eYou can even buy now and pay later with Afterpay!\u003c\/span\u003e\u003c\/p\u003e","published_at":"2021-03-10T12:05:31+08:00","sort_order":"best-selling","template_suffix":"shop-all-collection","disjunctive":false,"rules":[{"column":"title","relation":"not_contains","condition":"Hire"}],"published_scope":"global","image":{"created_at":"2024-05-06T11:59:42+08:00","alt":"Buy - The Birth Store","width":2048,"height":2048,"src":"\/\/www.thebirthstore.com.au\/cdn\/shop\/collections\/buy-964856.jpg?v=1714967982"}},{"id":292919476413,"handle":"lactation-products","title":"Lactation Products","updated_at":"2026-06-12T19:10:26+08:00","body_html":"","published_at":"2023-03-22T12:22:41+08:00","sort_order":"best-selling","template_suffix":"lactation-products-collec","disjunctive":false,"rules":[{"column":"tag","relation":"equals","condition":"Lactation Products"}],"published_scope":"global","image":{"created_at":"2024-05-06T12:00:19+08:00","alt":"Lactation Products - The Birth Store","width":1034,"height":922,"src":"\/\/www.thebirthstore.com.au\/cdn\/shop\/collections\/lactation-products-752907.jpg?v=1714968019"}},{"id":261658083517,"handle":"post-partum","title":"Postpartum","updated_at":"2026-06-12T19:10:26+08:00","body_html":"\u003cp\u003eShop your postpartum and hospital bag essentials below. Looking for something we don't currently stock? Please reach out and let us know.\u003cbr\u003e\u003c\/p\u003e\n\u003cp\u003e\u003cspan\u003eYou can even buy now and pay later with Afterpay!\u003c\/span\u003e\u003c\/p\u003e","published_at":"2021-03-10T12:33:47+08:00","sort_order":"best-selling","template_suffix":"postpartum-collection","disjunctive":false,"rules":[{"column":"tag","relation":"equals","condition":"Post-Partum"}],"published_scope":"global","image":{"created_at":"2024-05-06T12:00:36+08:00","alt":"Postpartum - The Birth Store","width":611,"height":702,"src":"\/\/www.thebirthstore.com.au\/cdn\/shop\/collections\/postpartum-150119.jpg?v=1714968037"}},{"id":261658149053,"handle":"pregnancy-and-maternity-products","title":"Pregnancy","updated_at":"2026-06-12T19:10:26+08:00","body_html":"\u003cp\u003eShop your pregnancy essentials below. Looking for something we don't currently stock? Please reach out and let us know.\u003cbr\u003e\u003c\/p\u003e\n\u003cp\u003e\u003cspan\u003eYou can even buy now and pay later with Afterpay!\u003c\/span\u003e\u003c\/p\u003e","published_at":"2021-03-10T12:34:22+08:00","sort_order":"best-selling","template_suffix":"pregnancy-collection","disjunctive":false,"rules":[{"column":"tag","relation":"equals","condition":"Pregnancy"}],"published_scope":"global","image":{"created_at":"2024-05-06T12:00:40+08:00","alt":"Pregnancy - The Birth Store","width":1024,"height":1536,"src":"\/\/www.thebirthstore.com.au\/cdn\/shop\/collections\/pregnancy-899677.jpg?v=1714968040"}},{"id":295224901821,"handle":"pregnancy-health","title":"Pregnancy Health","updated_at":"2026-06-12T19:10:26+08:00","body_html":"","published_at":"2023-11-10T20:48:51+08:00","sort_order":"best-selling","template_suffix":"swaddles-collection","disjunctive":false,"rules":[{"column":"tag","relation":"equals","condition":"Pregnancy Health"}],"published_scope":"global","image":{"created_at":"2024-05-06T12:00:41+08:00","alt":"Pregnancy Health - The Birth Store","width":608,"height":410,"src":"\/\/www.thebirthstore.com.au\/cdn\/shop\/collections\/pregnancy-health-343983.jpg?v=1714968042"}},{"id":326523846845,"handle":"pregnancy-health-1","updated_at":"2026-06-12T19:10:26+08:00","published_at":"2025-10-30T10:44:54+08:00","sort_order":"best-selling","template_suffix":"","published_scope":"global","title":"Pregnancy Health","body_html":"","image":{"created_at":"2025-11-20T21:33:56+08:00","alt":"Pregnancy Health - The Birth Store","width":522,"height":525,"src":"\/\/www.thebirthstore.com.au\/cdn\/shop\/collections\/pregnancy-health-1617860.jpg?v=1763645636"}},{"id":291456483517,"handle":"shop-all","title":"Shop All - Mum","updated_at":"2026-06-12T19:10:26+08:00","body_html":"","published_at":"2022-12-23T22:04:39+08:00","sort_order":"best-selling","template_suffix":"shop-all-collection","disjunctive":false,"rules":[{"column":"variant_price","relation":"greater_than","condition":"1"},{"column":"title","relation":"not_contains","condition":"Batteries"},{"column":"tag","relation":"equals","condition":"Mum"}],"published_scope":"global","image":{"created_at":"2024-05-06T12:00:54+08:00","alt":"Shop All - The Birth Store","width":1365,"height":2048,"src":"\/\/www.thebirthstore.com.au\/cdn\/shop\/collections\/shop-all-693176.jpg?v=1714968055"}}]}
{"item":{"id":8109040894141,"title":"Reusable Nursing Pads","handle":"portable-change-mat-copy","description":"\u003cp\u003eOur 3 Set pack of Sunflower Nursing Pads help new Mum's avoid surprise leaks on the go and are designed to sit seamlessly inside a bra or nursing top. Kindly crafted from super soft bamboo and eco-friendly rPET, our Nursing Pads are OEKO-TEX Standard 100 Certified and contain no harmful chemicals. Nursing pads are 11cm in diameter.\u003c\/p\u003e\n\u003cp\u003eThis set of 3 contains 6 total nursing pads.\u003c\/p\u003e","published_at":"2025-11-06T22:19:16+08:00","created_at":"2025-10-16T11:19:33+08:00","vendor":"Econaps","type":"","tags":["Baby Shower Gifts - Mum","Breastfeeding","Hospital Bag","Lactation Products","Mum","Post-Partum"],"price":2495,"price_min":2495,"price_max":2495,"available":true,"price_varies":false,"compare_at_price":null,"compare_at_price_min":0,"compare_at_price_max":0,"compare_at_price_varies":false,"variants":[{"id":45792554483901,"title":"Snow White","option1":"Snow White","option2":null,"option3":null,"sku":null,"requires_shipping":true,"taxable":false,"featured_image":{"id":38581714190525,"product_id":8109040894141,"position":3,"created_at":"2025-10-16T11:38:01+08:00","updated_at":"2025-11-07T08:32:14+08:00","alt":"Reusable Nursing Pads - The Birth Store - Econaps","width":1200,"height":1200,"src":"\/\/www.thebirthstore.com.au\/cdn\/shop\/files\/reusable-nursing-pads-4504345.webp?v=1762475534","variant_ids":[45792554483901]},"available":false,"name":"Reusable Nursing Pads - Snow White","public_title":"Snow White","options":["Snow White"],"price":2495,"weight":80,"compare_at_price":null,"inventory_management":"shopify","barcode":"54483901","featured_media":{"alt":"Reusable Nursing Pads - The Birth Store - Econaps","id":29841089167549,"position":3,"preview_image":{"aspect_ratio":1.0,"height":1200,"width":1200,"src":"\/\/www.thebirthstore.com.au\/cdn\/shop\/files\/reusable-nursing-pads-4504345.webp?v=1762475534"}},"requires_selling_plan":false,"selling_plan_allocations":[],"quantity_rule":{"min":1,"max":null,"increment":1}},{"id":45792554516669,"title":"Cocoa","option1":"Cocoa","option2":null,"option3":null,"sku":null,"requires_shipping":true,"taxable":false,"featured_image":{"id":38581717860541,"product_id":8109040894141,"position":4,"created_at":"2025-10-16T11:38:14+08:00","updated_at":"2025-11-07T08:32:14+08:00","alt":"Reusable Nursing Pads - The Birth Store - Econaps","width":1200,"height":1200,"src":"\/\/www.thebirthstore.com.au\/cdn\/shop\/files\/reusable-nursing-pads-7181162.webp?v=1762475534","variant_ids":[45792554516669]},"available":true,"name":"Reusable Nursing Pads - Cocoa","public_title":"Cocoa","options":["Cocoa"],"price":2495,"weight":80,"compare_at_price":null,"inventory_management":"shopify","barcode":"54516669","featured_media":{"alt":"Reusable Nursing Pads - The Birth Store - Econaps","id":29841092640957,"position":4,"preview_image":{"aspect_ratio":1.0,"height":1200,"width":1200,"src":"\/\/www.thebirthstore.com.au\/cdn\/shop\/files\/reusable-nursing-pads-7181162.webp?v=1762475534"}},"requires_selling_plan":false,"selling_plan_allocations":[],"quantity_rule":{"min":1,"max":null,"increment":1}},{"id":45792554549437,"title":"Sunflower","option1":"Sunflower","option2":null,"option3":null,"sku":null,"requires_shipping":true,"taxable":false,"featured_image":{"id":38581721366717,"product_id":8109040894141,"position":5,"created_at":"2025-10-16T11:38:26+08:00","updated_at":"2025-11-07T08:32:14+08:00","alt":"Reusable Nursing Pads - The Birth Store - Econaps","width":1200,"height":1200,"src":"\/\/www.thebirthstore.com.au\/cdn\/shop\/files\/reusable-nursing-pads-8155422.webp?v=1762475534","variant_ids":[45792554549437]},"available":true,"name":"Reusable Nursing Pads - Sunflower","public_title":"Sunflower","options":["Sunflower"],"price":2495,"weight":80,"compare_at_price":null,"inventory_management":"shopify","barcode":"54549437","featured_media":{"alt":"Reusable Nursing Pads - The Birth Store - Econaps","id":29841096343741,"position":5,"preview_image":{"aspect_ratio":1.0,"height":1200,"width":1200,"src":"\/\/www.thebirthstore.com.au\/cdn\/shop\/files\/reusable-nursing-pads-8155422.webp?v=1762475534"}},"requires_selling_plan":false,"selling_plan_allocations":[],"quantity_rule":{"min":1,"max":null,"increment":1}},{"id":45792554582205,"title":"Olive","option1":"Olive","option2":null,"option3":null,"sku":null,"requires_shipping":true,"taxable":false,"featured_image":{"id":38581856862397,"product_id":8109040894141,"position":6,"created_at":"2025-10-16T11:46:18+08:00","updated_at":"2025-11-07T08:32:14+08:00","alt":"Reusable Nursing Pads - The Birth Store - Econaps","width":1200,"height":1200,"src":"\/\/www.thebirthstore.com.au\/cdn\/shop\/files\/reusable-nursing-pads-1325013.webp?v=1762475534","variant_ids":[45792554582205]},"available":false,"name":"Reusable Nursing Pads - Olive","public_title":"Olive","options":["Olive"],"price":2495,"weight":80,"compare_at_price":null,"inventory_management":"shopify","barcode":"54582205","featured_media":{"alt":"Reusable Nursing Pads - The Birth Store - Econaps","id":29841231511741,"position":6,"preview_image":{"aspect_ratio":1.0,"height":1200,"width":1200,"src":"\/\/www.thebirthstore.com.au\/cdn\/shop\/files\/reusable-nursing-pads-1325013.webp?v=1762475534"}},"requires_selling_plan":false,"selling_plan_allocations":[],"quantity_rule":{"min":1,"max":null,"increment":1}},{"id":45792554614973,"title":"Sienna","option1":"Sienna","option2":null,"option3":null,"sku":null,"requires_shipping":true,"taxable":false,"featured_image":{"id":38581870624957,"product_id":8109040894141,"position":7,"created_at":"2025-10-16T11:47:09+08:00","updated_at":"2025-11-07T08:32:14+08:00","alt":"Reusable Nursing Pads - The Birth Store - Econaps","width":1200,"height":1200,"src":"\/\/www.thebirthstore.com.au\/cdn\/shop\/files\/reusable-nursing-pads-1044858.webp?v=1762475534","variant_ids":[45792554614973]},"available":true,"name":"Reusable Nursing Pads - Sienna","public_title":"Sienna","options":["Sienna"],"price":2495,"weight":80,"compare_at_price":null,"inventory_management":"shopify","barcode":"54614973","featured_media":{"alt":"Reusable Nursing Pads - The Birth Store - Econaps","id":29841244881085,"position":7,"preview_image":{"aspect_ratio":1.0,"height":1200,"width":1200,"src":"\/\/www.thebirthstore.com.au\/cdn\/shop\/files\/reusable-nursing-pads-1044858.webp?v=1762475534"}},"requires_selling_plan":false,"selling_plan_allocations":[],"quantity_rule":{"min":1,"max":null,"increment":1}},{"id":45792554647741,"title":"Sepia","option1":"Sepia","option2":null,"option3":null,"sku":null,"requires_shipping":true,"taxable":false,"featured_image":{"id":38581874688189,"product_id":8109040894141,"position":8,"created_at":"2025-10-16T11:47:25+08:00","updated_at":"2025-11-07T08:32:15+08:00","alt":"Reusable Nursing Pads - The Birth Store - Econaps","width":1200,"height":1200,"src":"\/\/www.thebirthstore.com.au\/cdn\/shop\/files\/reusable-nursing-pads-4808730.webp?v=1762475535","variant_ids":[45792554647741]},"available":true,"name":"Reusable Nursing Pads - Sepia","public_title":"Sepia","options":["Sepia"],"price":2495,"weight":80,"compare_at_price":null,"inventory_management":"shopify","barcode":"54647741","featured_media":{"alt":"Reusable Nursing Pads - The Birth Store - Econaps","id":29841249534141,"position":8,"preview_image":{"aspect_ratio":1.0,"height":1200,"width":1200,"src":"\/\/www.thebirthstore.com.au\/cdn\/shop\/files\/reusable-nursing-pads-4808730.webp?v=1762475535"}},"requires_selling_plan":false,"selling_plan_allocations":[],"quantity_rule":{"min":1,"max":null,"increment":1}},{"id":45792554680509,"title":"Milk","option1":"Milk","option2":null,"option3":null,"sku":null,"requires_shipping":true,"taxable":false,"featured_image":{"id":38581880717501,"product_id":8109040894141,"position":9,"created_at":"2025-10-16T11:47:42+08:00","updated_at":"2025-11-07T08:32:15+08:00","alt":"Reusable Nursing Pads - The Birth Store - Econaps","width":1200,"height":1200,"src":"\/\/www.thebirthstore.com.au\/cdn\/shop\/files\/reusable-nursing-pads-1855319.webp?v=1762475535","variant_ids":[45792554680509]},"available":false,"name":"Reusable Nursing Pads - Milk","public_title":"Milk","options":["Milk"],"price":2495,"weight":80,"compare_at_price":null,"inventory_management":"shopify","barcode":"54680509","featured_media":{"alt":"Reusable Nursing Pads - The Birth Store - Econaps","id":29841255563453,"position":9,"preview_image":{"aspect_ratio":1.0,"height":1200,"width":1200,"src":"\/\/www.thebirthstore.com.au\/cdn\/shop\/files\/reusable-nursing-pads-1855319.webp?v=1762475535"}},"requires_selling_plan":false,"selling_plan_allocations":[],"quantity_rule":{"min":1,"max":null,"increment":1}}],"images":["\/\/www.thebirthstore.com.au\/cdn\/shop\/files\/reusable-nursing-pads-6130084.webp?v=1762475533","\/\/www.thebirthstore.com.au\/cdn\/shop\/files\/reusable-nursing-pads-3007634.webp?v=1762475533","\/\/www.thebirthstore.com.au\/cdn\/shop\/files\/reusable-nursing-pads-4504345.webp?v=1762475534","\/\/www.thebirthstore.com.au\/cdn\/shop\/files\/reusable-nursing-pads-7181162.webp?v=1762475534","\/\/www.thebirthstore.com.au\/cdn\/shop\/files\/reusable-nursing-pads-8155422.webp?v=1762475534","\/\/www.thebirthstore.com.au\/cdn\/shop\/files\/reusable-nursing-pads-1325013.webp?v=1762475534","\/\/www.thebirthstore.com.au\/cdn\/shop\/files\/reusable-nursing-pads-1044858.webp?v=1762475534","\/\/www.thebirthstore.com.au\/cdn\/shop\/files\/reusable-nursing-pads-4808730.webp?v=1762475535","\/\/www.thebirthstore.com.au\/cdn\/shop\/files\/reusable-nursing-pads-1855319.webp?v=1762475535"],"featured_image":"\/\/www.thebirthstore.com.au\/cdn\/shop\/files\/reusable-nursing-pads-6130084.webp?v=1762475533","options":["Colour"],"media":[{"alt":"Reusable Nursing Pads - The Birth Store - Econaps","id":29841284497597,"position":1,"preview_image":{"aspect_ratio":1.0,"height":1200,"width":1200,"src":"\/\/www.thebirthstore.com.au\/cdn\/shop\/files\/reusable-nursing-pads-6130084.webp?v=1762475533"},"aspect_ratio":1.0,"height":1200,"media_type":"image","src":"\/\/www.thebirthstore.com.au\/cdn\/shop\/files\/reusable-nursing-pads-6130084.webp?v=1762475533","width":1200},{"alt":"Reusable Nursing Pads - The Birth Store - Econaps","id":29841285873853,"position":2,"preview_image":{"aspect_ratio":1.0,"height":1080,"width":1080,"src":"\/\/www.thebirthstore.com.au\/cdn\/shop\/files\/reusable-nursing-pads-3007634.webp?v=1762475533"},"aspect_ratio":1.0,"height":1080,"media_type":"image","src":"\/\/www.thebirthstore.com.au\/cdn\/shop\/files\/reusable-nursing-pads-3007634.webp?v=1762475533","width":1080},{"alt":"Reusable Nursing Pads - The Birth Store - Econaps","id":29841089167549,"position":3,"preview_image":{"aspect_ratio":1.0,"height":1200,"width":1200,"src":"\/\/www.thebirthstore.com.au\/cdn\/shop\/files\/reusable-nursing-pads-4504345.webp?v=1762475534"},"aspect_ratio":1.0,"height":1200,"media_type":"image","src":"\/\/www.thebirthstore.com.au\/cdn\/shop\/files\/reusable-nursing-pads-4504345.webp?v=1762475534","width":1200},{"alt":"Reusable Nursing Pads - The Birth Store - Econaps","id":29841092640957,"position":4,"preview_image":{"aspect_ratio":1.0,"height":1200,"width":1200,"src":"\/\/www.thebirthstore.com.au\/cdn\/shop\/files\/reusable-nursing-pads-7181162.webp?v=1762475534"},"aspect_ratio":1.0,"height":1200,"media_type":"image","src":"\/\/www.thebirthstore.com.au\/cdn\/shop\/files\/reusable-nursing-pads-7181162.webp?v=1762475534","width":1200},{"alt":"Reusable Nursing Pads - The Birth Store - Econaps","id":29841096343741,"position":5,"preview_image":{"aspect_ratio":1.0,"height":1200,"width":1200,"src":"\/\/www.thebirthstore.com.au\/cdn\/shop\/files\/reusable-nursing-pads-8155422.webp?v=1762475534"},"aspect_ratio":1.0,"height":1200,"media_type":"image","src":"\/\/www.thebirthstore.com.au\/cdn\/shop\/files\/reusable-nursing-pads-8155422.webp?v=1762475534","width":1200},{"alt":"Reusable Nursing Pads - The Birth Store - Econaps","id":29841231511741,"position":6,"preview_image":{"aspect_ratio":1.0,"height":1200,"width":1200,"src":"\/\/www.thebirthstore.com.au\/cdn\/shop\/files\/reusable-nursing-pads-1325013.webp?v=1762475534"},"aspect_ratio":1.0,"height":1200,"media_type":"image","src":"\/\/www.thebirthstore.com.au\/cdn\/shop\/files\/reusable-nursing-pads-1325013.webp?v=1762475534","width":1200},{"alt":"Reusable Nursing Pads - The Birth Store - Econaps","id":29841244881085,"position":7,"preview_image":{"aspect_ratio":1.0,"height":1200,"width":1200,"src":"\/\/www.thebirthstore.com.au\/cdn\/shop\/files\/reusable-nursing-pads-1044858.webp?v=1762475534"},"aspect_ratio":1.0,"height":1200,"media_type":"image","src":"\/\/www.thebirthstore.com.au\/cdn\/shop\/files\/reusable-nursing-pads-1044858.webp?v=1762475534","width":1200},{"alt":"Reusable Nursing Pads - The Birth Store - Econaps","id":29841249534141,"position":8,"preview_image":{"aspect_ratio":1.0,"height":1200,"width":1200,"src":"\/\/www.thebirthstore.com.au\/cdn\/shop\/files\/reusable-nursing-pads-4808730.webp?v=1762475535"},"aspect_ratio":1.0,"height":1200,"media_type":"image","src":"\/\/www.thebirthstore.com.au\/cdn\/shop\/files\/reusable-nursing-pads-4808730.webp?v=1762475535","width":1200},{"alt":"Reusable Nursing Pads - The Birth Store - Econaps","id":29841255563453,"position":9,"preview_image":{"aspect_ratio":1.0,"height":1200,"width":1200,"src":"\/\/www.thebirthstore.com.au\/cdn\/shop\/files\/reusable-nursing-pads-1855319.webp?v=1762475535"},"aspect_ratio":1.0,"height":1200,"media_type":"image","src":"\/\/www.thebirthstore.com.au\/cdn\/shop\/files\/reusable-nursing-pads-1855319.webp?v=1762475535","width":1200}],"requires_selling_plan":false,"selling_plan_groups":[],"content":"\u003cp\u003eOur 3 Set pack of Sunflower Nursing Pads help new Mum's avoid surprise leaks on the go and are designed to sit seamlessly inside a bra or nursing top. Kindly crafted from super soft bamboo and eco-friendly rPET, our Nursing Pads are OEKO-TEX Standard 100 Certified and contain no harmful chemicals. Nursing pads are 11cm in diameter.\u003c\/p\u003e\n\u003cp\u003eThis set of 3 contains 6 total nursing pads.\u003c\/p\u003e"},"options":[{"name":"Colour","position":1,"values":["Snow White","Cocoa","Sunflower","Olive","Sienna","Sepia","Milk"]}],"custom_metafields":{},"metafields":{"badge":"\u003cdiv style='display:none' class='jdgm-prev-badge' data-average-rating='0.00' data-number-of-reviews='0' data-number-of-questions='0'\u003e \u003cspan class='jdgm-prev-badge__stars' data-score='0.00' tabindex='0' aria-label='0.00 stars' role='button'\u003e \u003cspan class='jdgm-star jdgm--off'\u003e\u003c\/span\u003e\u003cspan class='jdgm-star jdgm--off'\u003e\u003c\/span\u003e\u003cspan class='jdgm-star jdgm--off'\u003e\u003c\/span\u003e\u003cspan class='jdgm-star jdgm--off'\u003e\u003c\/span\u003e\u003cspan class='jdgm-star jdgm--off'\u003e\u003c\/span\u003e \u003c\/span\u003e \u003cspan class='jdgm-prev-badge__text'\u003e No reviews \u003c\/span\u003e \u003c\/div\u003e","widget":"\u003cdiv class='jdgm-rev-widg' data-updated-at='2025-11-06T14:20:56Z' data-average-rating='0.00' data-number-of-reviews='0' data-number-of-questions='0' data-image-url='https:\/\/cdn.shopify.com\/s\/files\/1\/0527\/3393\/5805\/files\/EcoNaps-Snow-White-Nursing-Pad-Set-3.webp?v=1760586575'\u003e \u003cstyle class='jdgm-temp-hiding-style'\u003e.jdgm-rev-widg{ display: none }\u003c\/style\u003e \u003cdiv class='jdgm-rev-widg__header'\u003e \u003ch2 class='jdgm-rev-widg__title'\u003eCustomer Reviews\u003c\/h2\u003e \u003cdiv class='jdgm-rev-widg__summary'\u003e \u003cdiv class='jdgm-rev-widg__summary-stars' aria-label='Average rating is 0.00 stars' role='img'\u003e \u003cspan class='jdgm-star jdgm--off'\u003e\u003c\/span\u003e\u003cspan class='jdgm-star jdgm--off'\u003e\u003c\/span\u003e\u003cspan class='jdgm-star jdgm--off'\u003e\u003c\/span\u003e\u003cspan class='jdgm-star jdgm--off'\u003e\u003c\/span\u003e\u003cspan class='jdgm-star jdgm--off'\u003e\u003c\/span\u003e \u003c\/div\u003e \u003cdiv class='jdgm-rev-widg__summary-text'\u003eBe the first to write a review\u003c\/div\u003e \u003c\/div\u003e \u003ca style='display: none' href='#' class='jdgm-write-rev-link' role='button'\u003eWrite a review\u003c\/a\u003e \u003cdiv class='jdgm-histogram jdgm-temp-hidden'\u003e \u003cdiv class='jdgm-histogram__row' data-rating='5' data-frequency='0' data-percentage='0'\u003e \u003cdiv class='jdgm-histogram__star' role='button' aria-label=\"0% (0) reviews with 5 star rating\" tabindex='0' \u003e\u003cspan class='jdgm-star jdgm--on'\u003e\u003c\/span\u003e\u003cspan class='jdgm-star jdgm--on'\u003e\u003c\/span\u003e\u003cspan class='jdgm-star jdgm--on'\u003e\u003c\/span\u003e\u003cspan class='jdgm-star jdgm--on'\u003e\u003c\/span\u003e\u003cspan class='jdgm-star jdgm--on'\u003e\u003c\/span\u003e\u003c\/div\u003e \u003cdiv class='jdgm-histogram__bar'\u003e \u003cdiv class='jdgm-histogram__bar-content' style='width: 0%;'\u003e \u003c\/div\u003e \u003c\/div\u003e \u003cdiv class='jdgm-histogram__percentage'\u003e0%\u003c\/div\u003e \u003cdiv class='jdgm-histogram__frequency'\u003e(0)\u003c\/div\u003e \u003c\/div\u003e \u003cdiv class='jdgm-histogram__row' data-rating='4' data-frequency='0' data-percentage='0'\u003e \u003cdiv class='jdgm-histogram__star' role='button' aria-label=\"0% (0) reviews with 4 star rating\" tabindex='0' \u003e\u003cspan class='jdgm-star jdgm--on'\u003e\u003c\/span\u003e\u003cspan class='jdgm-star jdgm--on'\u003e\u003c\/span\u003e\u003cspan class='jdgm-star jdgm--on'\u003e\u003c\/span\u003e\u003cspan class='jdgm-star jdgm--on'\u003e\u003c\/span\u003e\u003cspan class='jdgm-star jdgm--off'\u003e\u003c\/span\u003e\u003c\/div\u003e \u003cdiv class='jdgm-histogram__bar'\u003e \u003cdiv class='jdgm-histogram__bar-content' style='width: 0%;'\u003e \u003c\/div\u003e \u003c\/div\u003e \u003cdiv class='jdgm-histogram__percentage'\u003e0%\u003c\/div\u003e \u003cdiv class='jdgm-histogram__frequency'\u003e(0)\u003c\/div\u003e \u003c\/div\u003e \u003cdiv class='jdgm-histogram__row' data-rating='3' data-frequency='0' data-percentage='0'\u003e \u003cdiv class='jdgm-histogram__star' role='button' aria-label=\"0% (0) reviews with 3 star rating\" tabindex='0' \u003e\u003cspan class='jdgm-star jdgm--on'\u003e\u003c\/span\u003e\u003cspan class='jdgm-star jdgm--on'\u003e\u003c\/span\u003e\u003cspan class='jdgm-star jdgm--on'\u003e\u003c\/span\u003e\u003cspan class='jdgm-star jdgm--off'\u003e\u003c\/span\u003e\u003cspan class='jdgm-star jdgm--off'\u003e\u003c\/span\u003e\u003c\/div\u003e \u003cdiv class='jdgm-histogram__bar'\u003e \u003cdiv class='jdgm-histogram__bar-content' style='width: 0%;'\u003e \u003c\/div\u003e \u003c\/div\u003e \u003cdiv class='jdgm-histogram__percentage'\u003e0%\u003c\/div\u003e \u003cdiv class='jdgm-histogram__frequency'\u003e(0)\u003c\/div\u003e \u003c\/div\u003e \u003cdiv class='jdgm-histogram__row' data-rating='2' data-frequency='0' data-percentage='0'\u003e \u003cdiv class='jdgm-histogram__star' role='button' aria-label=\"0% (0) reviews with 2 star rating\" tabindex='0' \u003e\u003cspan class='jdgm-star jdgm--on'\u003e\u003c\/span\u003e\u003cspan class='jdgm-star jdgm--on'\u003e\u003c\/span\u003e\u003cspan class='jdgm-star jdgm--off'\u003e\u003c\/span\u003e\u003cspan class='jdgm-star jdgm--off'\u003e\u003c\/span\u003e\u003cspan class='jdgm-star jdgm--off'\u003e\u003c\/span\u003e\u003c\/div\u003e \u003cdiv class='jdgm-histogram__bar'\u003e \u003cdiv class='jdgm-histogram__bar-content' style='width: 0%;'\u003e \u003c\/div\u003e \u003c\/div\u003e \u003cdiv class='jdgm-histogram__percentage'\u003e0%\u003c\/div\u003e \u003cdiv class='jdgm-histogram__frequency'\u003e(0)\u003c\/div\u003e \u003c\/div\u003e \u003cdiv class='jdgm-histogram__row' data-rating='1' data-frequency='0' data-percentage='0'\u003e \u003cdiv class='jdgm-histogram__star' role='button' aria-label=\"0% (0) reviews with 1 star rating\" tabindex='0' \u003e\u003cspan class='jdgm-star jdgm--on'\u003e\u003c\/span\u003e\u003cspan class='jdgm-star jdgm--off'\u003e\u003c\/span\u003e\u003cspan class='jdgm-star jdgm--off'\u003e\u003c\/span\u003e\u003cspan class='jdgm-star jdgm--off'\u003e\u003c\/span\u003e\u003cspan class='jdgm-star jdgm--off'\u003e\u003c\/span\u003e\u003c\/div\u003e \u003cdiv class='jdgm-histogram__bar'\u003e \u003cdiv class='jdgm-histogram__bar-content' style='width: 0%;'\u003e \u003c\/div\u003e \u003c\/div\u003e \u003cdiv class='jdgm-histogram__percentage'\u003e0%\u003c\/div\u003e \u003cdiv class='jdgm-histogram__frequency'\u003e(0)\u003c\/div\u003e \u003c\/div\u003e \u003cdiv class='jdgm-histogram__row jdgm-histogram__clear-filter' data-rating=null tabindex='0'\u003e\u003c\/div\u003e \u003c\/div\u003e \u003cdiv class='jdgm-rev-widg__sort-wrapper'\u003e\u003c\/div\u003e \u003c\/div\u003e \u003cdiv class='jdgm-rev-widg__body'\u003e \u003cdiv class='jdgm-rev-widg__reviews'\u003e\u003c\/div\u003e \u003cdiv class='jdgm-paginate' data-per-page='10' data-url='https:\/\/api.judge.me\/reviews\/reviews_for_widget' style=\"display: none;\"\u003e\u003c\/div\u003e \u003c\/div\u003e \u003cdiv class='jdgm-rev-widg__paginate-spinner-wrapper'\u003e \u003cdiv class='jdgm-spinner'\u003e\u003c\/div\u003e \u003c\/div\u003e \u003c\/div\u003e"},"collections":[{"id":281356533949,"handle":"baby-shower-gifts","title":"Baby Shower Gifts - Mum","updated_at":"2026-06-12T19:10:25+08:00","body_html":"\u003cp\u003eLooking for a unique baby shower gift? Or an all-in-one bundle pack to suit all your needs? We've got just the thing!\u003c\/p\u003e","published_at":"2021-12-06T13:43:56+08:00","sort_order":"best-selling","template_suffix":"baby-shower-gifts","disjunctive":true,"rules":[{"column":"tag","relation":"equals","condition":"Baby Shower Gifts - Mum"},{"column":"tag","relation":"equals","condition":"Gift Card"}],"published_scope":"global","image":{"created_at":"2024-05-06T11:59:28+08:00","alt":"Baby Shower Gifts - The Birth Store","width":1200,"height":1800,"src":"\/\/www.thebirthstore.com.au\/cdn\/shop\/collections\/baby-shower-gifts-401770.jpg?v=1761791272"}},{"id":281712427197,"handle":"breastfeeding","title":"Breastfeeding","updated_at":"2026-06-12T19:10:26+08:00","body_html":"","published_at":"2021-12-20T14:19:33+08:00","sort_order":"best-selling","template_suffix":"breastfeeding-collection","disjunctive":false,"rules":[{"column":"tag","relation":"equals","condition":"Breastfeeding"}],"published_scope":"global","image":{"created_at":"2024-05-06T11:59:34+08:00","alt":"Breastfeeding - The Birth Store","width":620,"height":635,"src":"\/\/www.thebirthstore.com.au\/cdn\/shop\/collections\/breastfeeding-793872.jpg?v=1714967974"}},{"id":261657460925,"handle":"buy","title":"Buy","updated_at":"2026-06-12T19:10:26+08:00","body_html":"\u003cp\u003eBrowse all of our pregnancy, labour \u0026amp; birth, postpartum and baby essentials here.\u003cbr\u003e\u003c\/p\u003e\n\u003cp\u003e\u003cspan\u003eYou can even buy now and pay later with Afterpay!\u003c\/span\u003e\u003c\/p\u003e","published_at":"2021-03-10T12:05:31+08:00","sort_order":"best-selling","template_suffix":"shop-all-collection","disjunctive":false,"rules":[{"column":"title","relation":"not_contains","condition":"Hire"}],"published_scope":"global","image":{"created_at":"2024-05-06T11:59:42+08:00","alt":"Buy - The Birth Store","width":2048,"height":2048,"src":"\/\/www.thebirthstore.com.au\/cdn\/shop\/collections\/buy-964856.jpg?v=1714967982"}},{"id":337429201085,"handle":"hospital-bag","title":"Hospital Bag","updated_at":"2026-06-12T19:10:26+08:00","body_html":"","published_at":"2026-06-03T11:36:29+08:00","sort_order":"most-relevant","template_suffix":"","disjunctive":false,"rules":[{"column":"tag","relation":"equals","condition":"Hospital Bag"}],"published_scope":"global"},{"id":292919476413,"handle":"lactation-products","title":"Lactation Products","updated_at":"2026-06-12T19:10:26+08:00","body_html":"","published_at":"2023-03-22T12:22:41+08:00","sort_order":"best-selling","template_suffix":"lactation-products-collec","disjunctive":false,"rules":[{"column":"tag","relation":"equals","condition":"Lactation Products"}],"published_scope":"global","image":{"created_at":"2024-05-06T12:00:19+08:00","alt":"Lactation Products - The Birth Store","width":1034,"height":922,"src":"\/\/www.thebirthstore.com.au\/cdn\/shop\/collections\/lactation-products-752907.jpg?v=1714968019"}},{"id":261658083517,"handle":"post-partum","title":"Postpartum","updated_at":"2026-06-12T19:10:26+08:00","body_html":"\u003cp\u003eShop your postpartum and hospital bag essentials below. Looking for something we don't currently stock? Please reach out and let us know.\u003cbr\u003e\u003c\/p\u003e\n\u003cp\u003e\u003cspan\u003eYou can even buy now and pay later with Afterpay!\u003c\/span\u003e\u003c\/p\u003e","published_at":"2021-03-10T12:33:47+08:00","sort_order":"best-selling","template_suffix":"postpartum-collection","disjunctive":false,"rules":[{"column":"tag","relation":"equals","condition":"Post-Partum"}],"published_scope":"global","image":{"created_at":"2024-05-06T12:00:36+08:00","alt":"Postpartum - The Birth Store","width":611,"height":702,"src":"\/\/www.thebirthstore.com.au\/cdn\/shop\/collections\/postpartum-150119.jpg?v=1714968037"}},{"id":291456483517,"handle":"shop-all","title":"Shop All - Mum","updated_at":"2026-06-12T19:10:26+08:00","body_html":"","published_at":"2022-12-23T22:04:39+08:00","sort_order":"best-selling","template_suffix":"shop-all-collection","disjunctive":false,"rules":[{"column":"variant_price","relation":"greater_than","condition":"1"},{"column":"title","relation":"not_contains","condition":"Batteries"},{"column":"tag","relation":"equals","condition":"Mum"}],"published_scope":"global","image":{"created_at":"2024-05-06T12:00:54+08:00","alt":"Shop All - The Birth Store","width":1365,"height":2048,"src":"\/\/www.thebirthstore.com.au\/cdn\/shop\/collections\/shop-all-693176.jpg?v=1714968055"}}]}
{"item":{"id":7483877261501,"title":"Breastfeeding Nipple Shield - 1pc","handle":"haakaa-breastfeeding-nipple-shield-1pc","description":"\u003cdiv id=\"s-ce7ccc34-31d3-4b20-94eb-80f5e4d4bb3d\" class=\"shg-c shg-align-center\" data-mce-fragment=\"1\"\u003e\n\u003cdiv class=\"shogun-heading-component\" data-mce-fragment=\"1\"\u003e\n\u003ch2 data-mce-fragment=\"1\"\u003eThe Haakaa Breastfeeding Nipple Shield! A world 1st design made of 100% soft silicone. An extended teat puts space between your nipple \u0026amp; baby's mouth.\u003c\/h2\u003e\n\u003c\/div\u003e\n\u003c\/div\u003e\n\u003cdiv id=\"s-2d13688d-9f80-44db-ba59-35f9921b1be0\" class=\"shg-c\" data-mce-fragment=\"1\"\u003e\n\u003cdiv class=\"shg-rich-text shg-theme-text-content\" data-mce-fragment=\"1\"\u003e\n\u003cp data-mce-fragment=\"1\"\u003eIf your little one bites down, pulls away, or if you have inverted or cracked nipples, you will still be able to breastfeed with ease and comfort. Our Nipple Shields suction onto your breast, giving you a hands-free breastfeeding experience.\u003c\/p\u003e\n\u003cp data-mce-fragment=\"1\"\u003eAvailable with a round or triangle base, the Haakaa Breastfeeding Nipple Shield allows all mums to experience the beauty of breastfeeding without the worry of discomfort and pain! The round base is larger and suctions on more easily, making it more suited for those who are new to using nipple shields. The triangle base is smaller, but allows for more skin-to-skin contact, making it more suited for those who are more experienced with using nipple shields.\u003c\/p\u003e\n\u003cp data-mce-fragment=\"1\"\u003eWe offer two teat shapes: the orthodontic teat and the nipple teat. The orthodontic teat is thumb-shaped to replicate the shape of a mother's nipple during breastfeeding, making it more readily accepted by your baby. The nipple teat replicates the silicone teat of a baby bottle and is better suited to help your baby transition from breast to bottle.\u003c\/p\u003e\n\u003cp data-mce-fragment=\"1\"\u003eThe Orthodontic Breastfeeding Nipple Shields have an opening that's 28mm in diameter and the Bottle Breastfeeding Nipple Shields have an opening that's 23mm in diameter for your nipple.\u003c\/p\u003e\n\u003cp data-mce-fragment=\"1\"\u003eThis product is designed for mothers who are physically unable to breastfeed due to sore, cracked nipples and should only be used in the interim before returning to natural breastfeeding once your nipple has healed. If you are able to breastfeed successfully and experience slight discomfort, we suggest using the Haakaa traditional nipple shields as a protective alternative if your nipples become raw and sore.\u003c\/p\u003e\n\u003cp data-mce-fragment=\"1\"\u003eIncludes one shield and a protective case for storage.\u003c\/p\u003e\n\u003cul data-mce-fragment=\"1\"\u003e\n\u003cli data-mce-fragment=\"1\"\u003e\u003cspan data-mce-fragment=\"1\"\u003ePatented one-piece design with no joints, cracks or edges.\u003c\/span\u003e\u003c\/li\u003e\n\u003cli data-mce-fragment=\"1\"\u003e\u003cspan data-mce-fragment=\"1\"\u003eNipple design allows babies to mimic a natural sucking rhythm, making it easier for babies that have difficulty latching.\u003c\/span\u003e\u003c\/li\u003e\n\u003cli data-mce-fragment=\"1\"\u003e\u003cspan data-mce-fragment=\"1\"\u003eSuctions on to all breast shapes, making it easier for new mums to use and enjoy a hands-free breastfeeding experience.\u003c\/span\u003e\u003c\/li\u003e\n\u003cli data-mce-fragment=\"1\"\u003e\u003cspan data-mce-fragment=\"1\"\u003eThe anti-slip ridged outer edge make the nipple shield easier to hold while the baby is feeding.\u003c\/span\u003e\u003c\/li\u003e\n\u003cli data-mce-fragment=\"1\"\u003e\u003cspan data-mce-fragment=\"1\"\u003eAnti-colic and variable flow nipple allows baby to drink continuously without gasping for air or drinking bubbles and prevents them from choking if milk flows too fast.\u003c\/span\u003e\u003c\/li\u003e\n\u003cli data-mce-fragment=\"1\"\u003e\u003cspan data-mce-fragment=\"1\"\u003eSpace between mum’s nipple and the nipple shield head prevents baby from biting the nipple.\u003c\/span\u003e\u003c\/li\u003e\n\u003cli data-mce-fragment=\"1\"\u003e\u003cspan data-mce-fragment=\"1\"\u003eBPA, PVC and phthalate-free.\u003c\/span\u003e\u003c\/li\u003e\n\u003c\/ul\u003e\n\u003c\/div\u003e\n\u003c\/div\u003e","published_at":"2023-06-08T15:44:20+08:00","created_at":"2023-06-08T15:44:20+08:00","vendor":"Haakaa","type":"","tags":["Breastfeeding","Cracked Nipples","Hospital Bag","Mum","Post-Partum"],"price":2600,"price_min":2600,"price_max":2600,"available":true,"price_varies":false,"compare_at_price":null,"compare_at_price_min":0,"compare_at_price_max":0,"compare_at_price_varies":false,"variants":[{"id":42868442529981,"title":"Round","option1":"Round","option2":null,"option3":null,"sku":"","requires_shipping":true,"taxable":false,"featured_image":{"id":34641011212477,"product_id":7483877261501,"position":1,"created_at":"2024-05-06T11:59:10+08:00","updated_at":"2024-05-06T11:59:10+08:00","alt":"Breastfeeding Nipple Shield - 1pc - The Birth Store-Haakaa","width":1080,"height":1080,"src":"\/\/www.thebirthstore.com.au\/cdn\/shop\/files\/breastfeeding-nipple-shield-1pc-429407.jpg?v=1714967950","variant_ids":[42868442529981]},"available":true,"name":"Breastfeeding Nipple Shield - 1pc - Round","public_title":"Round","options":["Round"],"price":2600,"weight":87,"compare_at_price":null,"inventory_management":"shopify","barcode":"42529981","featured_media":{"alt":"Breastfeeding Nipple Shield - 1pc - The Birth Store-Haakaa","id":27007580176573,"position":1,"preview_image":{"aspect_ratio":1.0,"height":1080,"width":1080,"src":"\/\/www.thebirthstore.com.au\/cdn\/shop\/files\/breastfeeding-nipple-shield-1pc-429407.jpg?v=1714967950"}},"requires_selling_plan":false,"selling_plan_allocations":[],"quantity_rule":{"min":1,"max":null,"increment":1}},{"id":42868442562749,"title":"Orthodontic Triangle","option1":"Orthodontic Triangle","option2":null,"option3":null,"sku":"","requires_shipping":true,"taxable":false,"featured_image":{"id":34641011278013,"product_id":7483877261501,"position":3,"created_at":"2024-05-06T11:59:10+08:00","updated_at":"2024-05-06T11:59:11+08:00","alt":"Breastfeeding Nipple Shield - 1pc - The Birth Store-Haakaa","width":1080,"height":1080,"src":"\/\/www.thebirthstore.com.au\/cdn\/shop\/files\/breastfeeding-nipple-shield-1pc-148677.jpg?v=1714967951","variant_ids":[42868442562749]},"available":true,"name":"Breastfeeding Nipple Shield - 1pc - Orthodontic Triangle","public_title":"Orthodontic Triangle","options":["Orthodontic Triangle"],"price":2600,"weight":87,"compare_at_price":null,"inventory_management":"shopify","barcode":"42562749","featured_media":{"alt":"Breastfeeding Nipple Shield - 1pc - The Birth Store-Haakaa","id":27007580242109,"position":3,"preview_image":{"aspect_ratio":1.0,"height":1080,"width":1080,"src":"\/\/www.thebirthstore.com.au\/cdn\/shop\/files\/breastfeeding-nipple-shield-1pc-148677.jpg?v=1714967951"}},"requires_selling_plan":false,"selling_plan_allocations":[],"quantity_rule":{"min":1,"max":null,"increment":1}},{"id":42868442595517,"title":"Orthodontic Round","option1":"Orthodontic Round","option2":null,"option3":null,"sku":"","requires_shipping":true,"taxable":false,"featured_image":{"id":34641011310781,"product_id":7483877261501,"position":4,"created_at":"2024-05-06T11:59:11+08:00","updated_at":"2024-05-06T11:59:11+08:00","alt":"Breastfeeding Nipple Shield - 1pc - The Birth Store-Haakaa","width":1080,"height":1080,"src":"\/\/www.thebirthstore.com.au\/cdn\/shop\/files\/breastfeeding-nipple-shield-1pc-178483.jpg?v=1714967951","variant_ids":[42868442595517]},"available":true,"name":"Breastfeeding Nipple Shield - 1pc - Orthodontic Round","public_title":"Orthodontic Round","options":["Orthodontic Round"],"price":2600,"weight":87,"compare_at_price":null,"inventory_management":"shopify","barcode":"42595517","featured_media":{"alt":"Breastfeeding Nipple Shield - 1pc - The Birth Store-Haakaa","id":27007580274877,"position":4,"preview_image":{"aspect_ratio":1.0,"height":1080,"width":1080,"src":"\/\/www.thebirthstore.com.au\/cdn\/shop\/files\/breastfeeding-nipple-shield-1pc-178483.jpg?v=1714967951"}},"requires_selling_plan":false,"selling_plan_allocations":[],"quantity_rule":{"min":1,"max":null,"increment":1}}],"images":["\/\/www.thebirthstore.com.au\/cdn\/shop\/files\/breastfeeding-nipple-shield-1pc-429407.jpg?v=1714967950","\/\/www.thebirthstore.com.au\/cdn\/shop\/files\/breastfeeding-nipple-shield-1pc-135216.jpg?v=1714967950","\/\/www.thebirthstore.com.au\/cdn\/shop\/files\/breastfeeding-nipple-shield-1pc-148677.jpg?v=1714967951","\/\/www.thebirthstore.com.au\/cdn\/shop\/files\/breastfeeding-nipple-shield-1pc-178483.jpg?v=1714967951"],"featured_image":"\/\/www.thebirthstore.com.au\/cdn\/shop\/files\/breastfeeding-nipple-shield-1pc-429407.jpg?v=1714967950","options":["Shape"],"media":[{"alt":"Breastfeeding Nipple Shield - 1pc - The Birth Store-Haakaa","id":27007580176573,"position":1,"preview_image":{"aspect_ratio":1.0,"height":1080,"width":1080,"src":"\/\/www.thebirthstore.com.au\/cdn\/shop\/files\/breastfeeding-nipple-shield-1pc-429407.jpg?v=1714967950"},"aspect_ratio":1.0,"height":1080,"media_type":"image","src":"\/\/www.thebirthstore.com.au\/cdn\/shop\/files\/breastfeeding-nipple-shield-1pc-429407.jpg?v=1714967950","width":1080},{"alt":"Breastfeeding Nipple Shield - 1pc - The Birth Store-Haakaa","id":27007580209341,"position":2,"preview_image":{"aspect_ratio":1.0,"height":1000,"width":1000,"src":"\/\/www.thebirthstore.com.au\/cdn\/shop\/files\/breastfeeding-nipple-shield-1pc-135216.jpg?v=1714967950"},"aspect_ratio":1.0,"height":1000,"media_type":"image","src":"\/\/www.thebirthstore.com.au\/cdn\/shop\/files\/breastfeeding-nipple-shield-1pc-135216.jpg?v=1714967950","width":1000},{"alt":"Breastfeeding Nipple Shield - 1pc - The Birth Store-Haakaa","id":27007580242109,"position":3,"preview_image":{"aspect_ratio":1.0,"height":1080,"width":1080,"src":"\/\/www.thebirthstore.com.au\/cdn\/shop\/files\/breastfeeding-nipple-shield-1pc-148677.jpg?v=1714967951"},"aspect_ratio":1.0,"height":1080,"media_type":"image","src":"\/\/www.thebirthstore.com.au\/cdn\/shop\/files\/breastfeeding-nipple-shield-1pc-148677.jpg?v=1714967951","width":1080},{"alt":"Breastfeeding Nipple Shield - 1pc - The Birth Store-Haakaa","id":27007580274877,"position":4,"preview_image":{"aspect_ratio":1.0,"height":1080,"width":1080,"src":"\/\/www.thebirthstore.com.au\/cdn\/shop\/files\/breastfeeding-nipple-shield-1pc-178483.jpg?v=1714967951"},"aspect_ratio":1.0,"height":1080,"media_type":"image","src":"\/\/www.thebirthstore.com.au\/cdn\/shop\/files\/breastfeeding-nipple-shield-1pc-178483.jpg?v=1714967951","width":1080}],"requires_selling_plan":false,"selling_plan_groups":[],"content":"\u003cdiv id=\"s-ce7ccc34-31d3-4b20-94eb-80f5e4d4bb3d\" class=\"shg-c shg-align-center\" data-mce-fragment=\"1\"\u003e\n\u003cdiv class=\"shogun-heading-component\" data-mce-fragment=\"1\"\u003e\n\u003ch2 data-mce-fragment=\"1\"\u003eThe Haakaa Breastfeeding Nipple Shield! A world 1st design made of 100% soft silicone. An extended teat puts space between your nipple \u0026amp; baby's mouth.\u003c\/h2\u003e\n\u003c\/div\u003e\n\u003c\/div\u003e\n\u003cdiv id=\"s-2d13688d-9f80-44db-ba59-35f9921b1be0\" class=\"shg-c\" data-mce-fragment=\"1\"\u003e\n\u003cdiv class=\"shg-rich-text shg-theme-text-content\" data-mce-fragment=\"1\"\u003e\n\u003cp data-mce-fragment=\"1\"\u003eIf your little one bites down, pulls away, or if you have inverted or cracked nipples, you will still be able to breastfeed with ease and comfort. Our Nipple Shields suction onto your breast, giving you a hands-free breastfeeding experience.\u003c\/p\u003e\n\u003cp data-mce-fragment=\"1\"\u003eAvailable with a round or triangle base, the Haakaa Breastfeeding Nipple Shield allows all mums to experience the beauty of breastfeeding without the worry of discomfort and pain! The round base is larger and suctions on more easily, making it more suited for those who are new to using nipple shields. The triangle base is smaller, but allows for more skin-to-skin contact, making it more suited for those who are more experienced with using nipple shields.\u003c\/p\u003e\n\u003cp data-mce-fragment=\"1\"\u003eWe offer two teat shapes: the orthodontic teat and the nipple teat. The orthodontic teat is thumb-shaped to replicate the shape of a mother's nipple during breastfeeding, making it more readily accepted by your baby. The nipple teat replicates the silicone teat of a baby bottle and is better suited to help your baby transition from breast to bottle.\u003c\/p\u003e\n\u003cp data-mce-fragment=\"1\"\u003eThe Orthodontic Breastfeeding Nipple Shields have an opening that's 28mm in diameter and the Bottle Breastfeeding Nipple Shields have an opening that's 23mm in diameter for your nipple.\u003c\/p\u003e\n\u003cp data-mce-fragment=\"1\"\u003eThis product is designed for mothers who are physically unable to breastfeed due to sore, cracked nipples and should only be used in the interim before returning to natural breastfeeding once your nipple has healed. If you are able to breastfeed successfully and experience slight discomfort, we suggest using the Haakaa traditional nipple shields as a protective alternative if your nipples become raw and sore.\u003c\/p\u003e\n\u003cp data-mce-fragment=\"1\"\u003eIncludes one shield and a protective case for storage.\u003c\/p\u003e\n\u003cul data-mce-fragment=\"1\"\u003e\n\u003cli data-mce-fragment=\"1\"\u003e\u003cspan data-mce-fragment=\"1\"\u003ePatented one-piece design with no joints, cracks or edges.\u003c\/span\u003e\u003c\/li\u003e\n\u003cli data-mce-fragment=\"1\"\u003e\u003cspan data-mce-fragment=\"1\"\u003eNipple design allows babies to mimic a natural sucking rhythm, making it easier for babies that have difficulty latching.\u003c\/span\u003e\u003c\/li\u003e\n\u003cli data-mce-fragment=\"1\"\u003e\u003cspan data-mce-fragment=\"1\"\u003eSuctions on to all breast shapes, making it easier for new mums to use and enjoy a hands-free breastfeeding experience.\u003c\/span\u003e\u003c\/li\u003e\n\u003cli data-mce-fragment=\"1\"\u003e\u003cspan data-mce-fragment=\"1\"\u003eThe anti-slip ridged outer edge make the nipple shield easier to hold while the baby is feeding.\u003c\/span\u003e\u003c\/li\u003e\n\u003cli data-mce-fragment=\"1\"\u003e\u003cspan data-mce-fragment=\"1\"\u003eAnti-colic and variable flow nipple allows baby to drink continuously without gasping for air or drinking bubbles and prevents them from choking if milk flows too fast.\u003c\/span\u003e\u003c\/li\u003e\n\u003cli data-mce-fragment=\"1\"\u003e\u003cspan data-mce-fragment=\"1\"\u003eSpace between mum’s nipple and the nipple shield head prevents baby from biting the nipple.\u003c\/span\u003e\u003c\/li\u003e\n\u003cli data-mce-fragment=\"1\"\u003e\u003cspan data-mce-fragment=\"1\"\u003eBPA, PVC and phthalate-free.\u003c\/span\u003e\u003c\/li\u003e\n\u003c\/ul\u003e\n\u003c\/div\u003e\n\u003c\/div\u003e"},"options":[{"name":"Shape","position":1,"values":["Round","Orthodontic Triangle","Orthodontic Round"]}],"custom_metafields":{},"metafields":{"badge":"\u003cdiv style='display:none' class='jdgm-prev-badge' data-average-rating='0.00' data-number-of-reviews='0' data-number-of-questions='0'\u003e \u003cspan class='jdgm-prev-badge__stars' data-score='0.00' tabindex='0' aria-label='0.00 stars' role='button'\u003e \u003cspan class='jdgm-star jdgm--off'\u003e\u003c\/span\u003e\u003cspan class='jdgm-star jdgm--off'\u003e\u003c\/span\u003e\u003cspan class='jdgm-star jdgm--off'\u003e\u003c\/span\u003e\u003cspan class='jdgm-star jdgm--off'\u003e\u003c\/span\u003e\u003cspan class='jdgm-star jdgm--off'\u003e\u003c\/span\u003e \u003c\/span\u003e \u003cspan class='jdgm-prev-badge__text'\u003e No reviews \u003c\/span\u003e \u003c\/div\u003e","widget":"\u003cdiv class='jdgm-rev-widg' data-updated-at='2025-06-13T16:12:53Z' data-average-rating='0.00' data-number-of-reviews='0' data-number-of-questions='0'\u003e \u003cstyle class='jdgm-temp-hiding-style'\u003e.jdgm-rev-widg{ display: none }\u003c\/style\u003e \u003cdiv class='jdgm-rev-widg__header'\u003e \u003ch2 class='jdgm-rev-widg__title'\u003eCustomer Reviews\u003c\/h2\u003e \u003cdiv class='jdgm-rev-widg__summary'\u003e \u003cdiv class='jdgm-rev-widg__summary-stars' aria-label='Average rating is 0.00 stars' role='img'\u003e \u003cspan class='jdgm-star jdgm--off'\u003e\u003c\/span\u003e\u003cspan class='jdgm-star jdgm--off'\u003e\u003c\/span\u003e\u003cspan class='jdgm-star jdgm--off'\u003e\u003c\/span\u003e\u003cspan class='jdgm-star jdgm--off'\u003e\u003c\/span\u003e\u003cspan class='jdgm-star jdgm--off'\u003e\u003c\/span\u003e \u003c\/div\u003e \u003cdiv class='jdgm-rev-widg__summary-text'\u003eBe the first to write a review\u003c\/div\u003e \u003c\/div\u003e \u003ca style='display: none' href='#' class='jdgm-write-rev-link' role='button'\u003eWrite a review\u003c\/a\u003e \u003cdiv class='jdgm-histogram jdgm-temp-hidden'\u003e \u003cdiv class='jdgm-histogram__row' data-rating='5' data-frequency='0' data-percentage='0'\u003e \u003cdiv class='jdgm-histogram__star' role='button' aria-label=\"0% (0) reviews with 5 star rating\" tabindex='0' \u003e\u003cspan class='jdgm-star jdgm--on'\u003e\u003c\/span\u003e\u003cspan class='jdgm-star jdgm--on'\u003e\u003c\/span\u003e\u003cspan class='jdgm-star jdgm--on'\u003e\u003c\/span\u003e\u003cspan class='jdgm-star jdgm--on'\u003e\u003c\/span\u003e\u003cspan class='jdgm-star jdgm--on'\u003e\u003c\/span\u003e\u003c\/div\u003e \u003cdiv class='jdgm-histogram__bar'\u003e \u003cdiv class='jdgm-histogram__bar-content' style='width: 0%;'\u003e \u003c\/div\u003e \u003c\/div\u003e \u003cdiv class='jdgm-histogram__percentage'\u003e0%\u003c\/div\u003e \u003cdiv class='jdgm-histogram__frequency'\u003e(0)\u003c\/div\u003e \u003c\/div\u003e \u003cdiv class='jdgm-histogram__row' data-rating='4' data-frequency='0' data-percentage='0'\u003e \u003cdiv class='jdgm-histogram__star' role='button' aria-label=\"0% (0) reviews with 4 star rating\" tabindex='0' \u003e\u003cspan class='jdgm-star jdgm--on'\u003e\u003c\/span\u003e\u003cspan class='jdgm-star jdgm--on'\u003e\u003c\/span\u003e\u003cspan class='jdgm-star jdgm--on'\u003e\u003c\/span\u003e\u003cspan class='jdgm-star jdgm--on'\u003e\u003c\/span\u003e\u003cspan class='jdgm-star jdgm--off'\u003e\u003c\/span\u003e\u003c\/div\u003e \u003cdiv class='jdgm-histogram__bar'\u003e \u003cdiv class='jdgm-histogram__bar-content' style='width: 0%;'\u003e \u003c\/div\u003e \u003c\/div\u003e \u003cdiv class='jdgm-histogram__percentage'\u003e0%\u003c\/div\u003e \u003cdiv class='jdgm-histogram__frequency'\u003e(0)\u003c\/div\u003e \u003c\/div\u003e \u003cdiv class='jdgm-histogram__row' data-rating='3' data-frequency='0' data-percentage='0'\u003e \u003cdiv class='jdgm-histogram__star' role='button' aria-label=\"0% (0) reviews with 3 star rating\" tabindex='0' \u003e\u003cspan class='jdgm-star jdgm--on'\u003e\u003c\/span\u003e\u003cspan class='jdgm-star jdgm--on'\u003e\u003c\/span\u003e\u003cspan class='jdgm-star jdgm--on'\u003e\u003c\/span\u003e\u003cspan class='jdgm-star jdgm--off'\u003e\u003c\/span\u003e\u003cspan class='jdgm-star jdgm--off'\u003e\u003c\/span\u003e\u003c\/div\u003e \u003cdiv class='jdgm-histogram__bar'\u003e \u003cdiv class='jdgm-histogram__bar-content' style='width: 0%;'\u003e \u003c\/div\u003e \u003c\/div\u003e \u003cdiv class='jdgm-histogram__percentage'\u003e0%\u003c\/div\u003e \u003cdiv class='jdgm-histogram__frequency'\u003e(0)\u003c\/div\u003e \u003c\/div\u003e \u003cdiv class='jdgm-histogram__row' data-rating='2' data-frequency='0' data-percentage='0'\u003e \u003cdiv class='jdgm-histogram__star' role='button' aria-label=\"0% (0) reviews with 2 star rating\" tabindex='0' \u003e\u003cspan class='jdgm-star jdgm--on'\u003e\u003c\/span\u003e\u003cspan class='jdgm-star jdgm--on'\u003e\u003c\/span\u003e\u003cspan class='jdgm-star jdgm--off'\u003e\u003c\/span\u003e\u003cspan class='jdgm-star jdgm--off'\u003e\u003c\/span\u003e\u003cspan class='jdgm-star jdgm--off'\u003e\u003c\/span\u003e\u003c\/div\u003e \u003cdiv class='jdgm-histogram__bar'\u003e \u003cdiv class='jdgm-histogram__bar-content' style='width: 0%;'\u003e \u003c\/div\u003e \u003c\/div\u003e \u003cdiv class='jdgm-histogram__percentage'\u003e0%\u003c\/div\u003e \u003cdiv class='jdgm-histogram__frequency'\u003e(0)\u003c\/div\u003e \u003c\/div\u003e \u003cdiv class='jdgm-histogram__row' data-rating='1' data-frequency='0' data-percentage='0'\u003e \u003cdiv class='jdgm-histogram__star' role='button' aria-label=\"0% (0) reviews with 1 star rating\" tabindex='0' \u003e\u003cspan class='jdgm-star jdgm--on'\u003e\u003c\/span\u003e\u003cspan class='jdgm-star jdgm--off'\u003e\u003c\/span\u003e\u003cspan class='jdgm-star jdgm--off'\u003e\u003c\/span\u003e\u003cspan class='jdgm-star jdgm--off'\u003e\u003c\/span\u003e\u003cspan class='jdgm-star jdgm--off'\u003e\u003c\/span\u003e\u003c\/div\u003e \u003cdiv class='jdgm-histogram__bar'\u003e \u003cdiv class='jdgm-histogram__bar-content' style='width: 0%;'\u003e \u003c\/div\u003e \u003c\/div\u003e \u003cdiv class='jdgm-histogram__percentage'\u003e0%\u003c\/div\u003e \u003cdiv class='jdgm-histogram__frequency'\u003e(0)\u003c\/div\u003e \u003c\/div\u003e \u003cdiv class='jdgm-histogram__row jdgm-histogram__clear-filter' data-rating=null tabindex='0'\u003e\u003c\/div\u003e \u003c\/div\u003e \u003cdiv class='jdgm-rev-widg__sort-wrapper'\u003e\u003c\/div\u003e \u003c\/div\u003e \u003cdiv class='jdgm-rev-widg__body'\u003e \u003cdiv class='jdgm-rev-widg__reviews'\u003e\u003c\/div\u003e \u003cdiv class='jdgm-paginate' data-per-page='10' data-url='https:\/\/api.judge.me\/reviews\/reviews_for_widget' style=\"display: none;\"\u003e\u003c\/div\u003e \u003c\/div\u003e \u003cdiv class='jdgm-rev-widg__paginate-spinner-wrapper'\u003e \u003cdiv class='jdgm-spinner'\u003e\u003c\/div\u003e \u003c\/div\u003e \u003c\/div\u003e"},"collections":[{"id":281712427197,"handle":"breastfeeding","title":"Breastfeeding","updated_at":"2026-06-12T19:10:26+08:00","body_html":"","published_at":"2021-12-20T14:19:33+08:00","sort_order":"best-selling","template_suffix":"breastfeeding-collection","disjunctive":false,"rules":[{"column":"tag","relation":"equals","condition":"Breastfeeding"}],"published_scope":"global","image":{"created_at":"2024-05-06T11:59:34+08:00","alt":"Breastfeeding - The Birth Store","width":620,"height":635,"src":"\/\/www.thebirthstore.com.au\/cdn\/shop\/collections\/breastfeeding-793872.jpg?v=1714967974"}},{"id":261657460925,"handle":"buy","title":"Buy","updated_at":"2026-06-12T19:10:26+08:00","body_html":"\u003cp\u003eBrowse all of our pregnancy, labour \u0026amp; birth, postpartum and baby essentials here.\u003cbr\u003e\u003c\/p\u003e\n\u003cp\u003e\u003cspan\u003eYou can even buy now and pay later with Afterpay!\u003c\/span\u003e\u003c\/p\u003e","published_at":"2021-03-10T12:05:31+08:00","sort_order":"best-selling","template_suffix":"shop-all-collection","disjunctive":false,"rules":[{"column":"title","relation":"not_contains","condition":"Hire"}],"published_scope":"global","image":{"created_at":"2024-05-06T11:59:42+08:00","alt":"Buy - The Birth Store","width":2048,"height":2048,"src":"\/\/www.thebirthstore.com.au\/cdn\/shop\/collections\/buy-964856.jpg?v=1714967982"}},{"id":294349865149,"handle":"cracked-nipples","title":"Cracked Nipples","updated_at":"2026-06-02T19:09:48+08:00","body_html":"","published_at":"2023-09-21T14:03:02+08:00","sort_order":"best-selling","template_suffix":"swaddles-collection","disjunctive":false,"rules":[{"column":"tag","relation":"equals","condition":"Cracked Nipples"}],"published_scope":"global","image":{"created_at":"2024-05-06T11:59:53+08:00","alt":"Cracked Nipples - The Birth Store","width":1050,"height":1050,"src":"\/\/www.thebirthstore.com.au\/cdn\/shop\/collections\/cracked-nipples-166971.jpg?v=1714967994"}},{"id":337429201085,"handle":"hospital-bag","title":"Hospital Bag","updated_at":"2026-06-12T19:10:26+08:00","body_html":"","published_at":"2026-06-03T11:36:29+08:00","sort_order":"most-relevant","template_suffix":"","disjunctive":false,"rules":[{"column":"tag","relation":"equals","condition":"Hospital Bag"}],"published_scope":"global"},{"id":261658083517,"handle":"post-partum","title":"Postpartum","updated_at":"2026-06-12T19:10:26+08:00","body_html":"\u003cp\u003eShop your postpartum and hospital bag essentials below. Looking for something we don't currently stock? Please reach out and let us know.\u003cbr\u003e\u003c\/p\u003e\n\u003cp\u003e\u003cspan\u003eYou can even buy now and pay later with Afterpay!\u003c\/span\u003e\u003c\/p\u003e","published_at":"2021-03-10T12:33:47+08:00","sort_order":"best-selling","template_suffix":"postpartum-collection","disjunctive":false,"rules":[{"column":"tag","relation":"equals","condition":"Post-Partum"}],"published_scope":"global","image":{"created_at":"2024-05-06T12:00:36+08:00","alt":"Postpartum - The Birth Store","width":611,"height":702,"src":"\/\/www.thebirthstore.com.au\/cdn\/shop\/collections\/postpartum-150119.jpg?v=1714968037"}},{"id":291456483517,"handle":"shop-all","title":"Shop All - Mum","updated_at":"2026-06-12T19:10:26+08:00","body_html":"","published_at":"2022-12-23T22:04:39+08:00","sort_order":"best-selling","template_suffix":"shop-all-collection","disjunctive":false,"rules":[{"column":"variant_price","relation":"greater_than","condition":"1"},{"column":"title","relation":"not_contains","condition":"Batteries"},{"column":"tag","relation":"equals","condition":"Mum"}],"published_scope":"global","image":{"created_at":"2024-05-06T12:00:54+08:00","alt":"Shop All - The Birth Store","width":1365,"height":2048,"src":"\/\/www.thebirthstore.com.au\/cdn\/shop\/collections\/shop-all-693176.jpg?v=1714968055"}},{"id":310045933757,"handle":"shop-all-sale","title":"Shop All Sale","updated_at":"2026-06-12T19:10:26+08:00","body_html":"","published_at":"2024-11-12T13:22:43+08:00","sort_order":"alpha-asc","template_suffix":"","disjunctive":true,"rules":[{"column":"tag","relation":"equals","condition":"Bundles"},{"column":"vendor","relation":"equals","condition":"Franjos Kitchen"},{"column":"vendor","relation":"equals","condition":"Adored Illustrations"},{"column":"vendor","relation":"equals","condition":"Amazing Oils"},{"column":"vendor","relation":"equals","condition":"Ice Ice Booby"},{"column":"vendor","relation":"equals","condition":"Made to Milk"},{"column":"vendor","relation":"equals","condition":"Milky Goodness"},{"column":"vendor","relation":"equals","condition":"Seasons of Mama"},{"column":"vendor","relation":"equals","condition":"Silverette"},{"column":"vendor","relation":"equals","condition":"Snuggle Hunny"},{"column":"vendor","relation":"equals","condition":"Yung Bod"},{"column":"vendor","relation":"equals","condition":"Bare Love"},{"column":"vendor","relation":"equals","condition":"Haakaa"},{"column":"vendor","relation":"equals","condition":"Mere Botanicals"},{"column":"vendor","relation":"equals","condition":"The Birth Store Hire"},{"column":"vendor","relation":"equals","condition":"The Birth Store"}],"published_scope":"global","image":{"created_at":"2024-11-13T10:58:16+08:00","alt":"Shop All Sale - The Birth Store","width":2048,"height":1365,"src":"\/\/www.thebirthstore.com.au\/cdn\/shop\/collections\/shop-all-sale-297361.jpg?v=1731466697"}}]}
{"item":{"id":7457506328765,"title":"Nourished Postpartum Guide","handle":"nourished-postpartum-guide","description":"\u003cp\u003eThe Postpartum Survival Guide that every new mum needs.\u003c\/p\u003e\n\u003cp\u003eYou're all prepared for baby, but what about you, Mama? Pregnancy and birth place huge demands on your body, but did you know that some key nutrients are in even higher demand after birth!\u003c\/p\u003e\n\u003cp\u003eWithout proper restoration of lost nutrients, conditions like postpartum depletion can creep in (hello Mama rage). Add sleep deprivation into the mix and you have a recipe for disaster!\u003c\/p\u003e\n\u003cp\u003eMamas often don't get the support or education they need to feel their best after pregnancy but Nourished Postpartum is changing that. Don't wait until you're feeling exhausted and depleted, thrive through your fourth trimester and motherhood with the tools and knowledge to support your postpartum health.\u003c\/p\u003e\n\u003cp\u003eIt could be the best thing you do for your baby - and we promise the sleepless nights will be so much easier.\u003c\/p\u003e\n\u003cp\u003e \u003c\/p\u003e\n\u003cp\u003e\u003cstrong\u003eWHAT'S INCLUDED?\u003c\/strong\u003e\u003c\/p\u003e\n\u003cp class=\"p1\"\u003e\u003cspan\u003e✓ Empowering education about what to expect in the fourth trimester.\u003c\/span\u003e\u003c\/p\u003e\n\u003cp class=\"p1\"\u003e\u003cspan\u003e✓ Learn about your post-birth hormones and how to use food as medicine to treat common postpartum concerns.\u003c\/span\u003e\u003c\/p\u003e\n\u003cp class=\"p1\"\u003e\u003cspan\u003e✓ 60+ nourishing, no-fuss naturopath designed recipes.\u003c\/span\u003e\u003c\/p\u003e\n\u003cp class=\"p1\"\u003e\u003cspan\u003e✓ One-handed snacks, freezer favourites and warming meals loaded with nourishment for the week post-birth.\u003c\/span\u003e\u003c\/p\u003e\n\u003cp class=\"p1\"\u003e\u003cspan\u003e✓ QR codes taking you to exclusive web pages with even more education and tools.\u003c\/span\u003e\u003c\/p\u003e\n\u003cp class=\"p1\"\u003e\u003cspan\u003e✓ Essential Postpartum checklist to help you prepare for newborn life.\u003c\/span\u003e\u003c\/p\u003e\n\u003cp class=\"p1\"\u003e\u003cspan\u003e✓ Recipe categories include: Vegan, Gluten-Free, Dairy-Free, Colic Baby Friendly.\u003c\/span\u003e\u003c\/p\u003e\n\u003cp class=\"p1\"\u003e\u003cspan\u003e+ more!\u003c\/span\u003e\u003c\/p\u003e\n\u003cp class=\"p1\"\u003e \u003c\/p\u003e\n\u003cp class=\"p1\"\u003e\u003cstrong\u003eTHE BLURB: \u003c\/strong\u003e\u003c\/p\u003e\n\u003cp class=\"p1\"\u003e\u003cspan\u003eMotherhood is challenging on the best of days, however motherhood whilst chronically fatigued is a recipe for disaster!\u003c\/span\u003e\u003c\/p\u003e\n\u003cp class=\"p1\"\u003e\u003cspan\u003eThe founders of Mothers Mylk shed light on the seriously neglected 'fourth trimester' in their educational and deliciously styled cookbook.\u003c\/span\u003e\u003c\/p\u003e\n\u003cp class=\"p1\"\u003e\u003cspan\u003eEnter motherhood empowered with the knowledge and tools to support your postpartum health. Learn the basics of nutrition, how to use food as medicine to treat common postpartum concerns (bye-bye baby brain!), find out what to expect from your hormones post-birth, and discover what postpartum is like in different cultures around the world.\u003c\/span\u003e\u003c\/p\u003e\n\u003cp class=\"p1\"\u003e\u003cspan\u003eEnjoy 60 nourishing, no-fuss naturopath designed recipes, including plenty of one-handed snacks, freezer favourites and warming foods, loaded with nourishment for the week post-birth. All recipes are designed with time in mind for busy mamas and aid to promote postpartum healing.\u003c\/span\u003e\u003c\/p\u003e\n\u003cp class=\"p1\"\u003e\u003cspan\u003eNourished Postpartum will be your fourth trimester survival guide!\u003c\/span\u003e\u003c\/p\u003e\n\u003cp class=\"p1\"\u003e\u003cspan\u003e\u003cbr\u003e\u003cstrong\u003eQUESTIONS:\u003c\/strong\u003e\u003c\/span\u003e\u003c\/p\u003e\n\u003cp class=\"p1\"\u003e\u003cspan\u003e\u003cstrong\u003eWhat if I am no longer in the fourth trimester?\u003c\/strong\u003e\u003c\/span\u003e\u003c\/p\u003e\n\u003cp class=\"p1\"\u003e\u003cspan\u003eThe information within the book is suitable for any stage of your postpartum journey!\u003c\/span\u003e\u003c\/p\u003e\n\u003cp class=\"p1\"\u003e\u003cspan\u003eWe have designed Nourished Postpartum to encourage pregnant mama's to plan ahead for the sometimes difficult fourth trimester to help make the transition into motherhood just that bit easier. However, the recipes and information included are applicable to any stage of your motherhood journey.\u003c\/span\u003e\u003c\/p\u003e\n\u003cp class=\"p1\"\u003e\u003cspan\u003e\u003cstrong\u003eI'm Gluten-Free, are the recipes suitable?\u003c\/strong\u003e\u003c\/span\u003e\u003c\/p\u003e\n\u003cp class=\"p1\"\u003e\u003cspan\u003eAbsolutely! 53 of the 63 recipes included are Gluten-Free or provide a Gluten-Free Option.\u003c\/span\u003e\u003c\/p\u003e\n\u003cp class=\"p1\"\u003e\u003cspan\u003e\u003cstrong\u003eI'm vegan, are the recipes suitable?\u003c\/strong\u003e\u003c\/span\u003e\u003c\/p\u003e\n\u003cp class=\"p1\"\u003e\u003cspan\u003eYes! We have accommodated for most dietry requirements including those who are Vegan. 34 of the 63 recipes included are Vegan or provide a Vegan Option.\u003c\/span\u003e\u003c\/p\u003e\n\u003cp class=\"p1\"\u003e\u003cspan\u003e\u003cstrong\u003eI'm vegetarian, are the recipes suitable?\u003c\/strong\u003e\u003c\/span\u003e\u003c\/p\u003e\n\u003cp class=\"p1\"\u003e\u003cspan\u003eDefinitely! 53 of the 63 recipes included are Vegetarian or provide a Vegetarian Option.\u003c\/span\u003e\u003c\/p\u003e\n\u003cp class=\"p1\"\u003e \u003c\/p\u003e\n\u003cp class=\"p1\"\u003e\u003cspan\u003e\u003cstrong\u003eDISCLAIMER: \u003c\/strong\u003eThe information contained in this book complies with Australian health regulations only. The authors have made every effort to ensure that the information provided in this book complies with the Australian health regulations. The authors take no responsibility for the accuracy or legal compliance of the information in other countries. Products referred to in this book may not be available in other countries outside of Australia\u003c\/span\u003e\u003c\/p\u003e\n\u003cp class=\"p1\"\u003e\u003cspan\u003e✓ Self-published by Mothers Mylk™\u003c\/span\u003e\u003c\/p\u003e\n\u003cp class=\"p1\"\u003e\u003cspan\u003e✓ First Edition, 2022 (Australia \u0026amp; New Zealand)\u003c\/span\u003e\u003c\/p\u003e\n\u003cp class=\"p1\"\u003e\u003cspan\u003e✓ ISBN 978-0-646-84969-0\u003c\/span\u003e\u003c\/p\u003e\n\u003cp class=\"p1\"\u003e\u003cspan\u003e✓ Printed in Australia\u003c\/span\u003e\u003c\/p\u003e","published_at":"2023-03-27T13:00:18+08:00","created_at":"2023-03-27T13:00:18+08:00","vendor":"Mother's Mylk","type":"","tags":["Baby Shower Gifts - Mum","Books","Breastfeeding","Mum","Post-Partum"],"price":6500,"price_min":6500,"price_max":6500,"available":true,"price_varies":false,"compare_at_price":null,"compare_at_price_min":0,"compare_at_price_max":0,"compare_at_price_varies":false,"variants":[{"id":42747716862141,"title":"Default Title","option1":"Default Title","option2":null,"option3":null,"sku":"","requires_shipping":true,"taxable":false,"featured_image":null,"available":true,"name":"Nourished Postpartum Guide","public_title":null,"options":["Default Title"],"price":6500,"weight":633,"compare_at_price":null,"inventory_management":"shopify","barcode":"16862141","requires_selling_plan":false,"selling_plan_allocations":[],"quantity_rule":{"min":1,"max":null,"increment":1}}],"images":["\/\/www.thebirthstore.com.au\/cdn\/shop\/files\/nourished-postpartum-guide-625848.jpg?v=1714968011","\/\/www.thebirthstore.com.au\/cdn\/shop\/files\/nourished-postpartum-guide-509183.jpg?v=1714968011","\/\/www.thebirthstore.com.au\/cdn\/shop\/files\/nourished-postpartum-guide-721436.jpg?v=1714968011","\/\/www.thebirthstore.com.au\/cdn\/shop\/files\/nourished-postpartum-guide-692126.gif?v=1714968011","\/\/www.thebirthstore.com.au\/cdn\/shop\/files\/nourished-postpartum-guide-147600.jpg?v=1714968011","\/\/www.thebirthstore.com.au\/cdn\/shop\/files\/nourished-postpartum-guide-744795.jpg?v=1714968011","\/\/www.thebirthstore.com.au\/cdn\/shop\/files\/nourished-postpartum-guide-324992.jpg?v=1714968011","\/\/www.thebirthstore.com.au\/cdn\/shop\/files\/nourished-postpartum-guide-186068.jpg?v=1714968011","\/\/www.thebirthstore.com.au\/cdn\/shop\/files\/nourished-postpartum-guide-899421.jpg?v=1714968011"],"featured_image":"\/\/www.thebirthstore.com.au\/cdn\/shop\/files\/nourished-postpartum-guide-625848.jpg?v=1714968011","options":["Title"],"media":[{"alt":"Nourished Postpartum Guide - The Birth Store-Mother's Mylk","id":27007596462269,"position":1,"preview_image":{"aspect_ratio":1.0,"height":2048,"width":2048,"src":"\/\/www.thebirthstore.com.au\/cdn\/shop\/files\/nourished-postpartum-guide-625848.jpg?v=1714968011"},"aspect_ratio":1.0,"height":2048,"media_type":"image","src":"\/\/www.thebirthstore.com.au\/cdn\/shop\/files\/nourished-postpartum-guide-625848.jpg?v=1714968011","width":2048},{"alt":"Nourished Postpartum Guide - The Birth Store-Mother's Mylk","id":27007596495037,"position":2,"preview_image":{"aspect_ratio":0.762,"height":1417,"width":1080,"src":"\/\/www.thebirthstore.com.au\/cdn\/shop\/files\/nourished-postpartum-guide-509183.jpg?v=1714968011"},"aspect_ratio":0.762,"height":1417,"media_type":"image","src":"\/\/www.thebirthstore.com.au\/cdn\/shop\/files\/nourished-postpartum-guide-509183.jpg?v=1714968011","width":1080},{"alt":"Nourished Postpartum Guide - The Birth Store-Mother's Mylk","id":27007596527805,"position":3,"preview_image":{"aspect_ratio":1.0,"height":1100,"width":1100,"src":"\/\/www.thebirthstore.com.au\/cdn\/shop\/files\/nourished-postpartum-guide-721436.jpg?v=1714968011"},"aspect_ratio":1.0,"height":1100,"media_type":"image","src":"\/\/www.thebirthstore.com.au\/cdn\/shop\/files\/nourished-postpartum-guide-721436.jpg?v=1714968011","width":1100},{"alt":"Nourished Postpartum Guide - The Birth Store-Mother's Mylk","id":27007596560573,"position":4,"preview_image":{"aspect_ratio":1.0,"height":566,"width":566,"src":"\/\/www.thebirthstore.com.au\/cdn\/shop\/files\/nourished-postpartum-guide-692126.gif?v=1714968011"},"aspect_ratio":1.0,"height":566,"media_type":"image","src":"\/\/www.thebirthstore.com.au\/cdn\/shop\/files\/nourished-postpartum-guide-692126.gif?v=1714968011","width":566},{"alt":"Nourished Postpartum Guide - The Birth Store-Mother's Mylk","id":27007596593341,"position":5,"preview_image":{"aspect_ratio":1.0,"height":1100,"width":1100,"src":"\/\/www.thebirthstore.com.au\/cdn\/shop\/files\/nourished-postpartum-guide-147600.jpg?v=1714968011"},"aspect_ratio":1.0,"height":1100,"media_type":"image","src":"\/\/www.thebirthstore.com.au\/cdn\/shop\/files\/nourished-postpartum-guide-147600.jpg?v=1714968011","width":1100},{"alt":"Nourished Postpartum Guide - The Birth Store-Mother's Mylk","id":27007596626109,"position":6,"preview_image":{"aspect_ratio":1.0,"height":1100,"width":1100,"src":"\/\/www.thebirthstore.com.au\/cdn\/shop\/files\/nourished-postpartum-guide-744795.jpg?v=1714968011"},"aspect_ratio":1.0,"height":1100,"media_type":"image","src":"\/\/www.thebirthstore.com.au\/cdn\/shop\/files\/nourished-postpartum-guide-744795.jpg?v=1714968011","width":1100},{"alt":"Nourished Postpartum Guide - The Birth Store-Mother's Mylk","id":27007596658877,"position":7,"preview_image":{"aspect_ratio":1.0,"height":1100,"width":1100,"src":"\/\/www.thebirthstore.com.au\/cdn\/shop\/files\/nourished-postpartum-guide-324992.jpg?v=1714968011"},"aspect_ratio":1.0,"height":1100,"media_type":"image","src":"\/\/www.thebirthstore.com.au\/cdn\/shop\/files\/nourished-postpartum-guide-324992.jpg?v=1714968011","width":1100},{"alt":"Nourished Postpartum Guide - The Birth Store-Mother's Mylk","id":27007596691645,"position":8,"preview_image":{"aspect_ratio":1.0,"height":1100,"width":1100,"src":"\/\/www.thebirthstore.com.au\/cdn\/shop\/files\/nourished-postpartum-guide-186068.jpg?v=1714968011"},"aspect_ratio":1.0,"height":1100,"media_type":"image","src":"\/\/www.thebirthstore.com.au\/cdn\/shop\/files\/nourished-postpartum-guide-186068.jpg?v=1714968011","width":1100},{"alt":"Nourished Postpartum Guide - The Birth Store-Mother's Mylk","id":27007596724413,"position":9,"preview_image":{"aspect_ratio":1.0,"height":1100,"width":1100,"src":"\/\/www.thebirthstore.com.au\/cdn\/shop\/files\/nourished-postpartum-guide-899421.jpg?v=1714968011"},"aspect_ratio":1.0,"height":1100,"media_type":"image","src":"\/\/www.thebirthstore.com.au\/cdn\/shop\/files\/nourished-postpartum-guide-899421.jpg?v=1714968011","width":1100}],"requires_selling_plan":false,"selling_plan_groups":[],"content":"\u003cp\u003eThe Postpartum Survival Guide that every new mum needs.\u003c\/p\u003e\n\u003cp\u003eYou're all prepared for baby, but what about you, Mama? Pregnancy and birth place huge demands on your body, but did you know that some key nutrients are in even higher demand after birth!\u003c\/p\u003e\n\u003cp\u003eWithout proper restoration of lost nutrients, conditions like postpartum depletion can creep in (hello Mama rage). Add sleep deprivation into the mix and you have a recipe for disaster!\u003c\/p\u003e\n\u003cp\u003eMamas often don't get the support or education they need to feel their best after pregnancy but Nourished Postpartum is changing that. Don't wait until you're feeling exhausted and depleted, thrive through your fourth trimester and motherhood with the tools and knowledge to support your postpartum health.\u003c\/p\u003e\n\u003cp\u003eIt could be the best thing you do for your baby - and we promise the sleepless nights will be so much easier.\u003c\/p\u003e\n\u003cp\u003e \u003c\/p\u003e\n\u003cp\u003e\u003cstrong\u003eWHAT'S INCLUDED?\u003c\/strong\u003e\u003c\/p\u003e\n\u003cp class=\"p1\"\u003e\u003cspan\u003e✓ Empowering education about what to expect in the fourth trimester.\u003c\/span\u003e\u003c\/p\u003e\n\u003cp class=\"p1\"\u003e\u003cspan\u003e✓ Learn about your post-birth hormones and how to use food as medicine to treat common postpartum concerns.\u003c\/span\u003e\u003c\/p\u003e\n\u003cp class=\"p1\"\u003e\u003cspan\u003e✓ 60+ nourishing, no-fuss naturopath designed recipes.\u003c\/span\u003e\u003c\/p\u003e\n\u003cp class=\"p1\"\u003e\u003cspan\u003e✓ One-handed snacks, freezer favourites and warming meals loaded with nourishment for the week post-birth.\u003c\/span\u003e\u003c\/p\u003e\n\u003cp class=\"p1\"\u003e\u003cspan\u003e✓ QR codes taking you to exclusive web pages with even more education and tools.\u003c\/span\u003e\u003c\/p\u003e\n\u003cp class=\"p1\"\u003e\u003cspan\u003e✓ Essential Postpartum checklist to help you prepare for newborn life.\u003c\/span\u003e\u003c\/p\u003e\n\u003cp class=\"p1\"\u003e\u003cspan\u003e✓ Recipe categories include: Vegan, Gluten-Free, Dairy-Free, Colic Baby Friendly.\u003c\/span\u003e\u003c\/p\u003e\n\u003cp class=\"p1\"\u003e\u003cspan\u003e+ more!\u003c\/span\u003e\u003c\/p\u003e\n\u003cp class=\"p1\"\u003e \u003c\/p\u003e\n\u003cp class=\"p1\"\u003e\u003cstrong\u003eTHE BLURB: \u003c\/strong\u003e\u003c\/p\u003e\n\u003cp class=\"p1\"\u003e\u003cspan\u003eMotherhood is challenging on the best of days, however motherhood whilst chronically fatigued is a recipe for disaster!\u003c\/span\u003e\u003c\/p\u003e\n\u003cp class=\"p1\"\u003e\u003cspan\u003eThe founders of Mothers Mylk shed light on the seriously neglected 'fourth trimester' in their educational and deliciously styled cookbook.\u003c\/span\u003e\u003c\/p\u003e\n\u003cp class=\"p1\"\u003e\u003cspan\u003eEnter motherhood empowered with the knowledge and tools to support your postpartum health. Learn the basics of nutrition, how to use food as medicine to treat common postpartum concerns (bye-bye baby brain!), find out what to expect from your hormones post-birth, and discover what postpartum is like in different cultures around the world.\u003c\/span\u003e\u003c\/p\u003e\n\u003cp class=\"p1\"\u003e\u003cspan\u003eEnjoy 60 nourishing, no-fuss naturopath designed recipes, including plenty of one-handed snacks, freezer favourites and warming foods, loaded with nourishment for the week post-birth. All recipes are designed with time in mind for busy mamas and aid to promote postpartum healing.\u003c\/span\u003e\u003c\/p\u003e\n\u003cp class=\"p1\"\u003e\u003cspan\u003eNourished Postpartum will be your fourth trimester survival guide!\u003c\/span\u003e\u003c\/p\u003e\n\u003cp class=\"p1\"\u003e\u003cspan\u003e\u003cbr\u003e\u003cstrong\u003eQUESTIONS:\u003c\/strong\u003e\u003c\/span\u003e\u003c\/p\u003e\n\u003cp class=\"p1\"\u003e\u003cspan\u003e\u003cstrong\u003eWhat if I am no longer in the fourth trimester?\u003c\/strong\u003e\u003c\/span\u003e\u003c\/p\u003e\n\u003cp class=\"p1\"\u003e\u003cspan\u003eThe information within the book is suitable for any stage of your postpartum journey!\u003c\/span\u003e\u003c\/p\u003e\n\u003cp class=\"p1\"\u003e\u003cspan\u003eWe have designed Nourished Postpartum to encourage pregnant mama's to plan ahead for the sometimes difficult fourth trimester to help make the transition into motherhood just that bit easier. However, the recipes and information included are applicable to any stage of your motherhood journey.\u003c\/span\u003e\u003c\/p\u003e\n\u003cp class=\"p1\"\u003e\u003cspan\u003e\u003cstrong\u003eI'm Gluten-Free, are the recipes suitable?\u003c\/strong\u003e\u003c\/span\u003e\u003c\/p\u003e\n\u003cp class=\"p1\"\u003e\u003cspan\u003eAbsolutely! 53 of the 63 recipes included are Gluten-Free or provide a Gluten-Free Option.\u003c\/span\u003e\u003c\/p\u003e\n\u003cp class=\"p1\"\u003e\u003cspan\u003e\u003cstrong\u003eI'm vegan, are the recipes suitable?\u003c\/strong\u003e\u003c\/span\u003e\u003c\/p\u003e\n\u003cp class=\"p1\"\u003e\u003cspan\u003eYes! We have accommodated for most dietry requirements including those who are Vegan. 34 of the 63 recipes included are Vegan or provide a Vegan Option.\u003c\/span\u003e\u003c\/p\u003e\n\u003cp class=\"p1\"\u003e\u003cspan\u003e\u003cstrong\u003eI'm vegetarian, are the recipes suitable?\u003c\/strong\u003e\u003c\/span\u003e\u003c\/p\u003e\n\u003cp class=\"p1\"\u003e\u003cspan\u003eDefinitely! 53 of the 63 recipes included are Vegetarian or provide a Vegetarian Option.\u003c\/span\u003e\u003c\/p\u003e\n\u003cp class=\"p1\"\u003e \u003c\/p\u003e\n\u003cp class=\"p1\"\u003e\u003cspan\u003e\u003cstrong\u003eDISCLAIMER: \u003c\/strong\u003eThe information contained in this book complies with Australian health regulations only. The authors have made every effort to ensure that the information provided in this book complies with the Australian health regulations. The authors take no responsibility for the accuracy or legal compliance of the information in other countries. Products referred to in this book may not be available in other countries outside of Australia\u003c\/span\u003e\u003c\/p\u003e\n\u003cp class=\"p1\"\u003e\u003cspan\u003e✓ Self-published by Mothers Mylk™\u003c\/span\u003e\u003c\/p\u003e\n\u003cp class=\"p1\"\u003e\u003cspan\u003e✓ First Edition, 2022 (Australia \u0026amp; New Zealand)\u003c\/span\u003e\u003c\/p\u003e\n\u003cp class=\"p1\"\u003e\u003cspan\u003e✓ ISBN 978-0-646-84969-0\u003c\/span\u003e\u003c\/p\u003e\n\u003cp class=\"p1\"\u003e\u003cspan\u003e✓ Printed in Australia\u003c\/span\u003e\u003c\/p\u003e"},"options":[{"name":"Title","position":1,"values":["Default Title"]}],"custom_metafields":{},"metafields":{"badge":"\u003cdiv style='display:none' class='jdgm-prev-badge' data-average-rating='0.00' data-number-of-reviews='0' data-number-of-questions='0'\u003e \u003cspan class='jdgm-prev-badge__stars' data-score='0.00' tabindex='0' aria-label='0.00 stars' role='button'\u003e \u003cspan class='jdgm-star jdgm--off'\u003e\u003c\/span\u003e\u003cspan class='jdgm-star jdgm--off'\u003e\u003c\/span\u003e\u003cspan class='jdgm-star jdgm--off'\u003e\u003c\/span\u003e\u003cspan class='jdgm-star jdgm--off'\u003e\u003c\/span\u003e\u003cspan class='jdgm-star jdgm--off'\u003e\u003c\/span\u003e \u003c\/span\u003e \u003cspan class='jdgm-prev-badge__text'\u003e No reviews \u003c\/span\u003e \u003c\/div\u003e","widget":"\u003cdiv class='jdgm-rev-widg' data-updated-at='2025-06-13T16:12:53Z' data-average-rating='0.00' data-number-of-reviews='0' data-number-of-questions='0'\u003e \u003cstyle class='jdgm-temp-hiding-style'\u003e.jdgm-rev-widg{ display: none }\u003c\/style\u003e \u003cdiv class='jdgm-rev-widg__header'\u003e \u003ch2 class='jdgm-rev-widg__title'\u003eCustomer Reviews\u003c\/h2\u003e \u003cdiv class='jdgm-rev-widg__summary'\u003e \u003cdiv class='jdgm-rev-widg__summary-stars' aria-label='Average rating is 0.00 stars' role='img'\u003e \u003cspan class='jdgm-star jdgm--off'\u003e\u003c\/span\u003e\u003cspan class='jdgm-star jdgm--off'\u003e\u003c\/span\u003e\u003cspan class='jdgm-star jdgm--off'\u003e\u003c\/span\u003e\u003cspan class='jdgm-star jdgm--off'\u003e\u003c\/span\u003e\u003cspan class='jdgm-star jdgm--off'\u003e\u003c\/span\u003e \u003c\/div\u003e \u003cdiv class='jdgm-rev-widg__summary-text'\u003eBe the first to write a review\u003c\/div\u003e \u003c\/div\u003e \u003ca style='display: none' href='#' class='jdgm-write-rev-link' role='button'\u003eWrite a review\u003c\/a\u003e \u003cdiv class='jdgm-histogram jdgm-temp-hidden'\u003e \u003cdiv class='jdgm-histogram__row' data-rating='5' data-frequency='0' data-percentage='0'\u003e \u003cdiv class='jdgm-histogram__star' role='button' aria-label=\"0% (0) reviews with 5 star rating\" tabindex='0' \u003e\u003cspan class='jdgm-star jdgm--on'\u003e\u003c\/span\u003e\u003cspan class='jdgm-star jdgm--on'\u003e\u003c\/span\u003e\u003cspan class='jdgm-star jdgm--on'\u003e\u003c\/span\u003e\u003cspan class='jdgm-star jdgm--on'\u003e\u003c\/span\u003e\u003cspan class='jdgm-star jdgm--on'\u003e\u003c\/span\u003e\u003c\/div\u003e \u003cdiv class='jdgm-histogram__bar'\u003e \u003cdiv class='jdgm-histogram__bar-content' style='width: 0%;'\u003e \u003c\/div\u003e \u003c\/div\u003e \u003cdiv class='jdgm-histogram__percentage'\u003e0%\u003c\/div\u003e \u003cdiv class='jdgm-histogram__frequency'\u003e(0)\u003c\/div\u003e \u003c\/div\u003e \u003cdiv class='jdgm-histogram__row' data-rating='4' data-frequency='0' data-percentage='0'\u003e \u003cdiv class='jdgm-histogram__star' role='button' aria-label=\"0% (0) reviews with 4 star rating\" tabindex='0' \u003e\u003cspan class='jdgm-star jdgm--on'\u003e\u003c\/span\u003e\u003cspan class='jdgm-star jdgm--on'\u003e\u003c\/span\u003e\u003cspan class='jdgm-star jdgm--on'\u003e\u003c\/span\u003e\u003cspan class='jdgm-star jdgm--on'\u003e\u003c\/span\u003e\u003cspan class='jdgm-star jdgm--off'\u003e\u003c\/span\u003e\u003c\/div\u003e \u003cdiv class='jdgm-histogram__bar'\u003e \u003cdiv class='jdgm-histogram__bar-content' style='width: 0%;'\u003e \u003c\/div\u003e \u003c\/div\u003e \u003cdiv class='jdgm-histogram__percentage'\u003e0%\u003c\/div\u003e \u003cdiv class='jdgm-histogram__frequency'\u003e(0)\u003c\/div\u003e \u003c\/div\u003e \u003cdiv class='jdgm-histogram__row' data-rating='3' data-frequency='0' data-percentage='0'\u003e \u003cdiv class='jdgm-histogram__star' role='button' aria-label=\"0% (0) reviews with 3 star rating\" tabindex='0' \u003e\u003cspan class='jdgm-star jdgm--on'\u003e\u003c\/span\u003e\u003cspan class='jdgm-star jdgm--on'\u003e\u003c\/span\u003e\u003cspan class='jdgm-star jdgm--on'\u003e\u003c\/span\u003e\u003cspan class='jdgm-star jdgm--off'\u003e\u003c\/span\u003e\u003cspan class='jdgm-star jdgm--off'\u003e\u003c\/span\u003e\u003c\/div\u003e \u003cdiv class='jdgm-histogram__bar'\u003e \u003cdiv class='jdgm-histogram__bar-content' style='width: 0%;'\u003e \u003c\/div\u003e \u003c\/div\u003e \u003cdiv class='jdgm-histogram__percentage'\u003e0%\u003c\/div\u003e \u003cdiv class='jdgm-histogram__frequency'\u003e(0)\u003c\/div\u003e \u003c\/div\u003e \u003cdiv class='jdgm-histogram__row' data-rating='2' data-frequency='0' data-percentage='0'\u003e \u003cdiv class='jdgm-histogram__star' role='button' aria-label=\"0% (0) reviews with 2 star rating\" tabindex='0' \u003e\u003cspan class='jdgm-star jdgm--on'\u003e\u003c\/span\u003e\u003cspan class='jdgm-star jdgm--on'\u003e\u003c\/span\u003e\u003cspan class='jdgm-star jdgm--off'\u003e\u003c\/span\u003e\u003cspan class='jdgm-star jdgm--off'\u003e\u003c\/span\u003e\u003cspan class='jdgm-star jdgm--off'\u003e\u003c\/span\u003e\u003c\/div\u003e \u003cdiv class='jdgm-histogram__bar'\u003e \u003cdiv class='jdgm-histogram__bar-content' style='width: 0%;'\u003e \u003c\/div\u003e \u003c\/div\u003e \u003cdiv class='jdgm-histogram__percentage'\u003e0%\u003c\/div\u003e \u003cdiv class='jdgm-histogram__frequency'\u003e(0)\u003c\/div\u003e \u003c\/div\u003e \u003cdiv class='jdgm-histogram__row' data-rating='1' data-frequency='0' data-percentage='0'\u003e \u003cdiv class='jdgm-histogram__star' role='button' aria-label=\"0% (0) reviews with 1 star rating\" tabindex='0' \u003e\u003cspan class='jdgm-star jdgm--on'\u003e\u003c\/span\u003e\u003cspan class='jdgm-star jdgm--off'\u003e\u003c\/span\u003e\u003cspan class='jdgm-star jdgm--off'\u003e\u003c\/span\u003e\u003cspan class='jdgm-star jdgm--off'\u003e\u003c\/span\u003e\u003cspan class='jdgm-star jdgm--off'\u003e\u003c\/span\u003e\u003c\/div\u003e \u003cdiv class='jdgm-histogram__bar'\u003e \u003cdiv class='jdgm-histogram__bar-content' style='width: 0%;'\u003e \u003c\/div\u003e \u003c\/div\u003e \u003cdiv class='jdgm-histogram__percentage'\u003e0%\u003c\/div\u003e \u003cdiv class='jdgm-histogram__frequency'\u003e(0)\u003c\/div\u003e \u003c\/div\u003e \u003cdiv class='jdgm-histogram__row jdgm-histogram__clear-filter' data-rating=null tabindex='0'\u003e\u003c\/div\u003e \u003c\/div\u003e \u003cdiv class='jdgm-rev-widg__sort-wrapper'\u003e\u003c\/div\u003e \u003c\/div\u003e \u003cdiv class='jdgm-rev-widg__body'\u003e \u003cdiv class='jdgm-rev-widg__reviews'\u003e\u003c\/div\u003e \u003cdiv class='jdgm-paginate' data-per-page='10' data-url='https:\/\/api.judge.me\/reviews\/reviews_for_widget' style=\"display: none;\"\u003e\u003c\/div\u003e \u003c\/div\u003e \u003cdiv class='jdgm-rev-widg__paginate-spinner-wrapper'\u003e \u003cdiv class='jdgm-spinner'\u003e\u003c\/div\u003e \u003c\/div\u003e \u003c\/div\u003e"},"collections":[{"id":281356533949,"handle":"baby-shower-gifts","title":"Baby Shower Gifts - Mum","updated_at":"2026-06-12T19:10:25+08:00","body_html":"\u003cp\u003eLooking for a unique baby shower gift? Or an all-in-one bundle pack to suit all your needs? We've got just the thing!\u003c\/p\u003e","published_at":"2021-12-06T13:43:56+08:00","sort_order":"best-selling","template_suffix":"baby-shower-gifts","disjunctive":true,"rules":[{"column":"tag","relation":"equals","condition":"Baby Shower Gifts - Mum"},{"column":"tag","relation":"equals","condition":"Gift Card"}],"published_scope":"global","image":{"created_at":"2024-05-06T11:59:28+08:00","alt":"Baby Shower Gifts - The Birth Store","width":1200,"height":1800,"src":"\/\/www.thebirthstore.com.au\/cdn\/shop\/collections\/baby-shower-gifts-401770.jpg?v=1761791272"}},{"id":293669077181,"handle":"books","title":"Books","updated_at":"2026-06-10T14:07:06+08:00","body_html":"","published_at":"2023-06-08T21:27:34+08:00","sort_order":"best-selling","template_suffix":"swaddles-collection","disjunctive":false,"rules":[{"column":"tag","relation":"equals","condition":"Books"}],"published_scope":"global","image":{"created_at":"2024-05-06T11:59:31+08:00","alt":"Books - The Birth Store","width":1476,"height":2048,"src":"\/\/www.thebirthstore.com.au\/cdn\/shop\/collections\/books-814717.jpg?v=1714967972"}},{"id":281712427197,"handle":"breastfeeding","title":"Breastfeeding","updated_at":"2026-06-12T19:10:26+08:00","body_html":"","published_at":"2021-12-20T14:19:33+08:00","sort_order":"best-selling","template_suffix":"breastfeeding-collection","disjunctive":false,"rules":[{"column":"tag","relation":"equals","condition":"Breastfeeding"}],"published_scope":"global","image":{"created_at":"2024-05-06T11:59:34+08:00","alt":"Breastfeeding - The Birth Store","width":620,"height":635,"src":"\/\/www.thebirthstore.com.au\/cdn\/shop\/collections\/breastfeeding-793872.jpg?v=1714967974"}},{"id":261657460925,"handle":"buy","title":"Buy","updated_at":"2026-06-12T19:10:26+08:00","body_html":"\u003cp\u003eBrowse all of our pregnancy, labour \u0026amp; birth, postpartum and baby essentials here.\u003cbr\u003e\u003c\/p\u003e\n\u003cp\u003e\u003cspan\u003eYou can even buy now and pay later with Afterpay!\u003c\/span\u003e\u003c\/p\u003e","published_at":"2021-03-10T12:05:31+08:00","sort_order":"best-selling","template_suffix":"shop-all-collection","disjunctive":false,"rules":[{"column":"title","relation":"not_contains","condition":"Hire"}],"published_scope":"global","image":{"created_at":"2024-05-06T11:59:42+08:00","alt":"Buy - The Birth Store","width":2048,"height":2048,"src":"\/\/www.thebirthstore.com.au\/cdn\/shop\/collections\/buy-964856.jpg?v=1714967982"}},{"id":261658083517,"handle":"post-partum","title":"Postpartum","updated_at":"2026-06-12T19:10:26+08:00","body_html":"\u003cp\u003eShop your postpartum and hospital bag essentials below. Looking for something we don't currently stock? Please reach out and let us know.\u003cbr\u003e\u003c\/p\u003e\n\u003cp\u003e\u003cspan\u003eYou can even buy now and pay later with Afterpay!\u003c\/span\u003e\u003c\/p\u003e","published_at":"2021-03-10T12:33:47+08:00","sort_order":"best-selling","template_suffix":"postpartum-collection","disjunctive":false,"rules":[{"column":"tag","relation":"equals","condition":"Post-Partum"}],"published_scope":"global","image":{"created_at":"2024-05-06T12:00:36+08:00","alt":"Postpartum - The Birth Store","width":611,"height":702,"src":"\/\/www.thebirthstore.com.au\/cdn\/shop\/collections\/postpartum-150119.jpg?v=1714968037"}},{"id":291456483517,"handle":"shop-all","title":"Shop All - Mum","updated_at":"2026-06-12T19:10:26+08:00","body_html":"","published_at":"2022-12-23T22:04:39+08:00","sort_order":"best-selling","template_suffix":"shop-all-collection","disjunctive":false,"rules":[{"column":"variant_price","relation":"greater_than","condition":"1"},{"column":"title","relation":"not_contains","condition":"Batteries"},{"column":"tag","relation":"equals","condition":"Mum"}],"published_scope":"global","image":{"created_at":"2024-05-06T12:00:54+08:00","alt":"Shop All - The Birth Store","width":1365,"height":2048,"src":"\/\/www.thebirthstore.com.au\/cdn\/shop\/collections\/shop-all-693176.jpg?v=1714968055"}}]}
{"item":{"id":7483879555261,"title":"Silicone Inverted Nipple Aspirators (2pcs)","handle":"inverted-nipple-correctors-2-pack","description":"\u003ch2 data-mce-fragment=\"1\"\u003eInverted Nipple Aspirators\u003c\/h2\u003e\n\u003cp\u003e\u003cstrong\u003eHaakaa Nipple Aspirators are a patented design. \u003c\/strong\u003e\u003c\/p\u003e\n\u003cp\u003eIf you're a mama encountering issues breastfeeding due to flat or inverted nipples, our Silicone Nipple Aspirators may be just the solution for you.\u003cbr\u003e\u003c\/p\u003e\n\u003cp\u003eHaakaa Silicone Nipple Aspirators are made from 100% non-toxic silicone and are designed to gently pull your nipple outwards using suction. Simply place over your nipple before breastfeeding and push the top of the a\u003cspan\u003espirators\u003c\/span\u003e\u003cspan\u003e \u003c\/span\u003edown to create suction. The suction will gently draw your nipple, making latching a breeze!\u003c\/p\u003e\n\u003cp\u003e\u003cspan\u003eMother's nipples come in many shapes and sizes, and while many nipples protrude outwards making latching easy, there is also a high percentage of women with flat or inverted nipples who require \u003c\/span\u003e\u003cspan\u003ea bit of\u003c\/span\u003e\u003cspan\u003e assistance. \u003c\/span\u003e\u003cspan\u003eI\u003c\/span\u003e\u003cspan\u003ef your baby is struggling to latch onto a flat or inverted nipple, our nipple aspirators are the perfect solution!\u003c\/span\u003e\u003c\/p\u003e\n\u003cp\u003e\u003cstrong\u003e\u003cem\u003eEach package comes with 2 x Silicone Inverted Nipple Aspirators.\u003c\/em\u003e\u003c\/strong\u003e\u003c\/p\u003e\n\u003cp\u003e\u003cstrong\u003eNOTE: Results are not permanent and need to be repeated before each feed. A\u003cspan\u003espirators \u003c\/span\u003eneeds to be removed from the nipple before feeding.\u003c\/strong\u003e\u003c\/p\u003e","published_at":"2023-06-08T15:52:35+08:00","created_at":"2023-06-08T15:52:35+08:00","vendor":"Haakaa","type":"","tags":["Breastfeeding","Hospital Bag","Lactation Products","Mum"],"price":2650,"price_min":2650,"price_max":2650,"available":true,"price_varies":false,"compare_at_price":null,"compare_at_price_min":0,"compare_at_price_max":0,"compare_at_price_varies":false,"variants":[{"id":42868452753597,"title":"Default Title","option1":"Default Title","option2":null,"option3":null,"sku":"","requires_shipping":true,"taxable":false,"featured_image":null,"available":true,"name":"Silicone Inverted Nipple Aspirators (2pcs)","public_title":null,"options":["Default Title"],"price":2650,"weight":35,"compare_at_price":null,"inventory_management":"shopify","barcode":"52753597","requires_selling_plan":false,"selling_plan_allocations":[],"quantity_rule":{"min":1,"max":null,"increment":1}}],"images":["\/\/www.thebirthstore.com.au\/cdn\/shop\/files\/silicone-inverted-nipple-aspirators-2pcs-6905308.png?v=1758829421","\/\/www.thebirthstore.com.au\/cdn\/shop\/files\/silicone-inverted-nipple-aspirators-2pcs-844614.jpg?v=1758808190","\/\/www.thebirthstore.com.au\/cdn\/shop\/files\/inverted-nipple-correctors-2-pack-802486.jpg?v=1758808190","\/\/www.thebirthstore.com.au\/cdn\/shop\/files\/silicone-inverted-nipple-aspirators-2pcs-195789.jpg?v=1758808190","\/\/www.thebirthstore.com.au\/cdn\/shop\/files\/silicone-inverted-nipple-aspirators-2pcs-896370.jpg?v=1758808190","\/\/www.thebirthstore.com.au\/cdn\/shop\/files\/silicone-inverted-nipple-aspirators-2pcs-257946.jpg?v=1758808190"],"featured_image":"\/\/www.thebirthstore.com.au\/cdn\/shop\/files\/silicone-inverted-nipple-aspirators-2pcs-6905308.png?v=1758829421","options":["Title"],"media":[{"alt":"Silicone Inverted Nipple Aspirators (2pcs) - The Birth Store - Haakaa","id":29672254537917,"position":1,"preview_image":{"aspect_ratio":1.0,"height":1080,"width":1080,"src":"\/\/www.thebirthstore.com.au\/cdn\/shop\/files\/silicone-inverted-nipple-aspirators-2pcs-6905308.png?v=1758829421"},"aspect_ratio":1.0,"height":1080,"media_type":"image","src":"\/\/www.thebirthstore.com.au\/cdn\/shop\/files\/silicone-inverted-nipple-aspirators-2pcs-6905308.png?v=1758829421","width":1080},{"alt":"Silicone Inverted Nipple Aspirators (2pcs) - The Birth Store - Haakaa","id":27643734786237,"position":2,"preview_image":{"aspect_ratio":1.0,"height":1000,"width":1000,"src":"\/\/www.thebirthstore.com.au\/cdn\/shop\/files\/silicone-inverted-nipple-aspirators-2pcs-844614.jpg?v=1758808190"},"aspect_ratio":1.0,"height":1000,"media_type":"image","src":"\/\/www.thebirthstore.com.au\/cdn\/shop\/files\/silicone-inverted-nipple-aspirators-2pcs-844614.jpg?v=1758808190","width":1000},{"alt":"Inverted Nipple Correctors - 2 Pack - The Birth Store-Haakaa","id":27007586205885,"position":3,"preview_image":{"aspect_ratio":1.0,"height":1080,"width":1080,"src":"\/\/www.thebirthstore.com.au\/cdn\/shop\/files\/inverted-nipple-correctors-2-pack-802486.jpg?v=1758808190"},"aspect_ratio":1.0,"height":1080,"media_type":"image","src":"\/\/www.thebirthstore.com.au\/cdn\/shop\/files\/inverted-nipple-correctors-2-pack-802486.jpg?v=1758808190","width":1080},{"alt":"Silicone Inverted Nipple Aspirators (2pcs) - The Birth Store - Haakaa","id":27643734819005,"position":4,"preview_image":{"aspect_ratio":1.0,"height":1000,"width":1000,"src":"\/\/www.thebirthstore.com.au\/cdn\/shop\/files\/silicone-inverted-nipple-aspirators-2pcs-195789.jpg?v=1758808190"},"aspect_ratio":1.0,"height":1000,"media_type":"image","src":"\/\/www.thebirthstore.com.au\/cdn\/shop\/files\/silicone-inverted-nipple-aspirators-2pcs-195789.jpg?v=1758808190","width":1000},{"alt":"Silicone Inverted Nipple Aspirators (2pcs) - The Birth Store - Haakaa","id":27643734851773,"position":5,"preview_image":{"aspect_ratio":1.0,"height":1000,"width":1000,"src":"\/\/www.thebirthstore.com.au\/cdn\/shop\/files\/silicone-inverted-nipple-aspirators-2pcs-896370.jpg?v=1758808190"},"aspect_ratio":1.0,"height":1000,"media_type":"image","src":"\/\/www.thebirthstore.com.au\/cdn\/shop\/files\/silicone-inverted-nipple-aspirators-2pcs-896370.jpg?v=1758808190","width":1000},{"alt":"Silicone Inverted Nipple Aspirators (2pcs) - The Birth Store - Haakaa","id":27643734884541,"position":6,"preview_image":{"aspect_ratio":1.0,"height":250,"width":250,"src":"\/\/www.thebirthstore.com.au\/cdn\/shop\/files\/silicone-inverted-nipple-aspirators-2pcs-257946.jpg?v=1758808190"},"aspect_ratio":1.0,"height":250,"media_type":"image","src":"\/\/www.thebirthstore.com.au\/cdn\/shop\/files\/silicone-inverted-nipple-aspirators-2pcs-257946.jpg?v=1758808190","width":250}],"requires_selling_plan":false,"selling_plan_groups":[],"content":"\u003ch2 data-mce-fragment=\"1\"\u003eInverted Nipple Aspirators\u003c\/h2\u003e\n\u003cp\u003e\u003cstrong\u003eHaakaa Nipple Aspirators are a patented design. \u003c\/strong\u003e\u003c\/p\u003e\n\u003cp\u003eIf you're a mama encountering issues breastfeeding due to flat or inverted nipples, our Silicone Nipple Aspirators may be just the solution for you.\u003cbr\u003e\u003c\/p\u003e\n\u003cp\u003eHaakaa Silicone Nipple Aspirators are made from 100% non-toxic silicone and are designed to gently pull your nipple outwards using suction. Simply place over your nipple before breastfeeding and push the top of the a\u003cspan\u003espirators\u003c\/span\u003e\u003cspan\u003e \u003c\/span\u003edown to create suction. The suction will gently draw your nipple, making latching a breeze!\u003c\/p\u003e\n\u003cp\u003e\u003cspan\u003eMother's nipples come in many shapes and sizes, and while many nipples protrude outwards making latching easy, there is also a high percentage of women with flat or inverted nipples who require \u003c\/span\u003e\u003cspan\u003ea bit of\u003c\/span\u003e\u003cspan\u003e assistance. \u003c\/span\u003e\u003cspan\u003eI\u003c\/span\u003e\u003cspan\u003ef your baby is struggling to latch onto a flat or inverted nipple, our nipple aspirators are the perfect solution!\u003c\/span\u003e\u003c\/p\u003e\n\u003cp\u003e\u003cstrong\u003e\u003cem\u003eEach package comes with 2 x Silicone Inverted Nipple Aspirators.\u003c\/em\u003e\u003c\/strong\u003e\u003c\/p\u003e\n\u003cp\u003e\u003cstrong\u003eNOTE: Results are not permanent and need to be repeated before each feed. A\u003cspan\u003espirators \u003c\/span\u003eneeds to be removed from the nipple before feeding.\u003c\/strong\u003e\u003c\/p\u003e"},"options":[{"name":"Title","position":1,"values":["Default Title"]}],"custom_metafields":{},"metafields":{"badge":"\u003cdiv style='display:none' class='jdgm-prev-badge' data-average-rating='0.00' data-number-of-reviews='0' data-number-of-questions='0'\u003e \u003cspan class='jdgm-prev-badge__stars' data-score='0.00' tabindex='0' aria-label='0.00 stars' role='button'\u003e \u003cspan class='jdgm-star jdgm--off'\u003e\u003c\/span\u003e\u003cspan class='jdgm-star jdgm--off'\u003e\u003c\/span\u003e\u003cspan class='jdgm-star jdgm--off'\u003e\u003c\/span\u003e\u003cspan class='jdgm-star jdgm--off'\u003e\u003c\/span\u003e\u003cspan class='jdgm-star jdgm--off'\u003e\u003c\/span\u003e \u003c\/span\u003e \u003cspan class='jdgm-prev-badge__text'\u003e No reviews \u003c\/span\u003e \u003c\/div\u003e","widget":"\u003cdiv class='jdgm-rev-widg' data-updated-at='2025-06-13T16:12:53Z' data-average-rating='0.00' data-number-of-reviews='0' data-number-of-questions='0'\u003e \u003cstyle class='jdgm-temp-hiding-style'\u003e.jdgm-rev-widg{ display: none }\u003c\/style\u003e \u003cdiv class='jdgm-rev-widg__header'\u003e \u003ch2 class='jdgm-rev-widg__title'\u003eCustomer Reviews\u003c\/h2\u003e \u003cdiv class='jdgm-rev-widg__summary'\u003e \u003cdiv class='jdgm-rev-widg__summary-stars' aria-label='Average rating is 0.00 stars' role='img'\u003e \u003cspan class='jdgm-star jdgm--off'\u003e\u003c\/span\u003e\u003cspan class='jdgm-star jdgm--off'\u003e\u003c\/span\u003e\u003cspan class='jdgm-star jdgm--off'\u003e\u003c\/span\u003e\u003cspan class='jdgm-star jdgm--off'\u003e\u003c\/span\u003e\u003cspan class='jdgm-star jdgm--off'\u003e\u003c\/span\u003e \u003c\/div\u003e \u003cdiv class='jdgm-rev-widg__summary-text'\u003eBe the first to write a review\u003c\/div\u003e \u003c\/div\u003e \u003ca style='display: none' href='#' class='jdgm-write-rev-link' role='button'\u003eWrite a review\u003c\/a\u003e \u003cdiv class='jdgm-histogram jdgm-temp-hidden'\u003e \u003cdiv class='jdgm-histogram__row' data-rating='5' data-frequency='0' data-percentage='0'\u003e \u003cdiv class='jdgm-histogram__star' role='button' aria-label=\"0% (0) reviews with 5 star rating\" tabindex='0' \u003e\u003cspan class='jdgm-star jdgm--on'\u003e\u003c\/span\u003e\u003cspan class='jdgm-star jdgm--on'\u003e\u003c\/span\u003e\u003cspan class='jdgm-star jdgm--on'\u003e\u003c\/span\u003e\u003cspan class='jdgm-star jdgm--on'\u003e\u003c\/span\u003e\u003cspan class='jdgm-star jdgm--on'\u003e\u003c\/span\u003e\u003c\/div\u003e \u003cdiv class='jdgm-histogram__bar'\u003e \u003cdiv class='jdgm-histogram__bar-content' style='width: 0%;'\u003e \u003c\/div\u003e \u003c\/div\u003e \u003cdiv class='jdgm-histogram__percentage'\u003e0%\u003c\/div\u003e \u003cdiv class='jdgm-histogram__frequency'\u003e(0)\u003c\/div\u003e \u003c\/div\u003e \u003cdiv class='jdgm-histogram__row' data-rating='4' data-frequency='0' data-percentage='0'\u003e \u003cdiv class='jdgm-histogram__star' role='button' aria-label=\"0% (0) reviews with 4 star rating\" tabindex='0' \u003e\u003cspan class='jdgm-star jdgm--on'\u003e\u003c\/span\u003e\u003cspan class='jdgm-star jdgm--on'\u003e\u003c\/span\u003e\u003cspan class='jdgm-star jdgm--on'\u003e\u003c\/span\u003e\u003cspan class='jdgm-star jdgm--on'\u003e\u003c\/span\u003e\u003cspan class='jdgm-star jdgm--off'\u003e\u003c\/span\u003e\u003c\/div\u003e \u003cdiv class='jdgm-histogram__bar'\u003e \u003cdiv class='jdgm-histogram__bar-content' style='width: 0%;'\u003e \u003c\/div\u003e \u003c\/div\u003e \u003cdiv class='jdgm-histogram__percentage'\u003e0%\u003c\/div\u003e \u003cdiv class='jdgm-histogram__frequency'\u003e(0)\u003c\/div\u003e \u003c\/div\u003e \u003cdiv class='jdgm-histogram__row' data-rating='3' data-frequency='0' data-percentage='0'\u003e \u003cdiv class='jdgm-histogram__star' role='button' aria-label=\"0% (0) reviews with 3 star rating\" tabindex='0' \u003e\u003cspan class='jdgm-star jdgm--on'\u003e\u003c\/span\u003e\u003cspan class='jdgm-star jdgm--on'\u003e\u003c\/span\u003e\u003cspan class='jdgm-star jdgm--on'\u003e\u003c\/span\u003e\u003cspan class='jdgm-star jdgm--off'\u003e\u003c\/span\u003e\u003cspan class='jdgm-star jdgm--off'\u003e\u003c\/span\u003e\u003c\/div\u003e \u003cdiv class='jdgm-histogram__bar'\u003e \u003cdiv class='jdgm-histogram__bar-content' style='width: 0%;'\u003e \u003c\/div\u003e \u003c\/div\u003e \u003cdiv class='jdgm-histogram__percentage'\u003e0%\u003c\/div\u003e \u003cdiv class='jdgm-histogram__frequency'\u003e(0)\u003c\/div\u003e \u003c\/div\u003e \u003cdiv class='jdgm-histogram__row' data-rating='2' data-frequency='0' data-percentage='0'\u003e \u003cdiv class='jdgm-histogram__star' role='button' aria-label=\"0% (0) reviews with 2 star rating\" tabindex='0' \u003e\u003cspan class='jdgm-star jdgm--on'\u003e\u003c\/span\u003e\u003cspan class='jdgm-star jdgm--on'\u003e\u003c\/span\u003e\u003cspan class='jdgm-star jdgm--off'\u003e\u003c\/span\u003e\u003cspan class='jdgm-star jdgm--off'\u003e\u003c\/span\u003e\u003cspan class='jdgm-star jdgm--off'\u003e\u003c\/span\u003e\u003c\/div\u003e \u003cdiv class='jdgm-histogram__bar'\u003e \u003cdiv class='jdgm-histogram__bar-content' style='width: 0%;'\u003e \u003c\/div\u003e \u003c\/div\u003e \u003cdiv class='jdgm-histogram__percentage'\u003e0%\u003c\/div\u003e \u003cdiv class='jdgm-histogram__frequency'\u003e(0)\u003c\/div\u003e \u003c\/div\u003e \u003cdiv class='jdgm-histogram__row' data-rating='1' data-frequency='0' data-percentage='0'\u003e \u003cdiv class='jdgm-histogram__star' role='button' aria-label=\"0% (0) reviews with 1 star rating\" tabindex='0' \u003e\u003cspan class='jdgm-star jdgm--on'\u003e\u003c\/span\u003e\u003cspan class='jdgm-star jdgm--off'\u003e\u003c\/span\u003e\u003cspan class='jdgm-star jdgm--off'\u003e\u003c\/span\u003e\u003cspan class='jdgm-star jdgm--off'\u003e\u003c\/span\u003e\u003cspan class='jdgm-star jdgm--off'\u003e\u003c\/span\u003e\u003c\/div\u003e \u003cdiv class='jdgm-histogram__bar'\u003e \u003cdiv class='jdgm-histogram__bar-content' style='width: 0%;'\u003e \u003c\/div\u003e \u003c\/div\u003e \u003cdiv class='jdgm-histogram__percentage'\u003e0%\u003c\/div\u003e \u003cdiv class='jdgm-histogram__frequency'\u003e(0)\u003c\/div\u003e \u003c\/div\u003e \u003cdiv class='jdgm-histogram__row jdgm-histogram__clear-filter' data-rating=null tabindex='0'\u003e\u003c\/div\u003e \u003c\/div\u003e \u003cdiv class='jdgm-rev-widg__sort-wrapper'\u003e\u003c\/div\u003e \u003c\/div\u003e \u003cdiv class='jdgm-rev-widg__body'\u003e \u003cdiv class='jdgm-rev-widg__reviews'\u003e\u003c\/div\u003e \u003cdiv class='jdgm-paginate' data-per-page='10' data-url='https:\/\/api.judge.me\/reviews\/reviews_for_widget' style=\"display: none;\"\u003e\u003c\/div\u003e \u003c\/div\u003e \u003cdiv class='jdgm-rev-widg__paginate-spinner-wrapper'\u003e \u003cdiv class='jdgm-spinner'\u003e\u003c\/div\u003e \u003c\/div\u003e \u003c\/div\u003e"},"collections":[{"id":281712427197,"handle":"breastfeeding","title":"Breastfeeding","updated_at":"2026-06-12T19:10:26+08:00","body_html":"","published_at":"2021-12-20T14:19:33+08:00","sort_order":"best-selling","template_suffix":"breastfeeding-collection","disjunctive":false,"rules":[{"column":"tag","relation":"equals","condition":"Breastfeeding"}],"published_scope":"global","image":{"created_at":"2024-05-06T11:59:34+08:00","alt":"Breastfeeding - The Birth Store","width":620,"height":635,"src":"\/\/www.thebirthstore.com.au\/cdn\/shop\/collections\/breastfeeding-793872.jpg?v=1714967974"}},{"id":261657460925,"handle":"buy","title":"Buy","updated_at":"2026-06-12T19:10:26+08:00","body_html":"\u003cp\u003eBrowse all of our pregnancy, labour \u0026amp; birth, postpartum and baby essentials here.\u003cbr\u003e\u003c\/p\u003e\n\u003cp\u003e\u003cspan\u003eYou can even buy now and pay later with Afterpay!\u003c\/span\u003e\u003c\/p\u003e","published_at":"2021-03-10T12:05:31+08:00","sort_order":"best-selling","template_suffix":"shop-all-collection","disjunctive":false,"rules":[{"column":"title","relation":"not_contains","condition":"Hire"}],"published_scope":"global","image":{"created_at":"2024-05-06T11:59:42+08:00","alt":"Buy - The Birth Store","width":2048,"height":2048,"src":"\/\/www.thebirthstore.com.au\/cdn\/shop\/collections\/buy-964856.jpg?v=1714967982"}},{"id":337429201085,"handle":"hospital-bag","title":"Hospital Bag","updated_at":"2026-06-12T19:10:26+08:00","body_html":"","published_at":"2026-06-03T11:36:29+08:00","sort_order":"most-relevant","template_suffix":"","disjunctive":false,"rules":[{"column":"tag","relation":"equals","condition":"Hospital Bag"}],"published_scope":"global"},{"id":292919476413,"handle":"lactation-products","title":"Lactation Products","updated_at":"2026-06-12T19:10:26+08:00","body_html":"","published_at":"2023-03-22T12:22:41+08:00","sort_order":"best-selling","template_suffix":"lactation-products-collec","disjunctive":false,"rules":[{"column":"tag","relation":"equals","condition":"Lactation Products"}],"published_scope":"global","image":{"created_at":"2024-05-06T12:00:19+08:00","alt":"Lactation Products - The Birth Store","width":1034,"height":922,"src":"\/\/www.thebirthstore.com.au\/cdn\/shop\/collections\/lactation-products-752907.jpg?v=1714968019"}},{"id":291456483517,"handle":"shop-all","title":"Shop All - Mum","updated_at":"2026-06-12T19:10:26+08:00","body_html":"","published_at":"2022-12-23T22:04:39+08:00","sort_order":"best-selling","template_suffix":"shop-all-collection","disjunctive":false,"rules":[{"column":"variant_price","relation":"greater_than","condition":"1"},{"column":"title","relation":"not_contains","condition":"Batteries"},{"column":"tag","relation":"equals","condition":"Mum"}],"published_scope":"global","image":{"created_at":"2024-05-06T12:00:54+08:00","alt":"Shop All - The Birth Store","width":1365,"height":2048,"src":"\/\/www.thebirthstore.com.au\/cdn\/shop\/collections\/shop-all-693176.jpg?v=1714968055"}},{"id":310045933757,"handle":"shop-all-sale","title":"Shop All Sale","updated_at":"2026-06-12T19:10:26+08:00","body_html":"","published_at":"2024-11-12T13:22:43+08:00","sort_order":"alpha-asc","template_suffix":"","disjunctive":true,"rules":[{"column":"tag","relation":"equals","condition":"Bundles"},{"column":"vendor","relation":"equals","condition":"Franjos Kitchen"},{"column":"vendor","relation":"equals","condition":"Adored Illustrations"},{"column":"vendor","relation":"equals","condition":"Amazing Oils"},{"column":"vendor","relation":"equals","condition":"Ice Ice Booby"},{"column":"vendor","relation":"equals","condition":"Made to Milk"},{"column":"vendor","relation":"equals","condition":"Milky Goodness"},{"column":"vendor","relation":"equals","condition":"Seasons of Mama"},{"column":"vendor","relation":"equals","condition":"Silverette"},{"column":"vendor","relation":"equals","condition":"Snuggle Hunny"},{"column":"vendor","relation":"equals","condition":"Yung Bod"},{"column":"vendor","relation":"equals","condition":"Bare Love"},{"column":"vendor","relation":"equals","condition":"Haakaa"},{"column":"vendor","relation":"equals","condition":"Mere Botanicals"},{"column":"vendor","relation":"equals","condition":"The Birth Store Hire"},{"column":"vendor","relation":"equals","condition":"The Birth Store"}],"published_scope":"global","image":{"created_at":"2024-11-13T10:58:16+08:00","alt":"Shop All Sale - The Birth Store","width":2048,"height":1365,"src":"\/\/www.thebirthstore.com.au\/cdn\/shop\/collections\/shop-all-sale-297361.jpg?v=1731466697"}}]}
{"item":{"id":7455713001661,"title":"Reusable Breastmilk Storage Bags - 2 Pack","handle":"reusable-breastmilk-storage-bags","description":"\u003ch2 class=\"h1\" data-mce-fragment=\"1\"\u003eSafe \u0026amp; Convenient\u003c\/h2\u003e\n\u003cdiv class=\"rich-text__text rte\" data-mce-fragment=\"1\"\u003e\n\u003cp data-mce-fragment=\"1\"\u003eGet your breastfeeding journey started in the best way possible with Made to Milk's Reusable Breast Milk Storage Bags!\u003c\/p\u003e\n\u003cp data-mce-fragment=\"1\"\u003eSave the world one breastmilk storage bag at a time!\u003c\/p\u003e\n\u003cp data-mce-fragment=\"1\"\u003eMade to Milk's brand spanking new silicone breastmilk storage bags are the perfect way to store your breastmilk in a super safe and convenient way. Silicone is naturally bacteria resistant and helps to keep milk fresher for longer. What a win!\u003c\/p\u003e\n\u003ch2 class=\"image-with-text__heading h1\"\u003eFeatures:\u003c\/h2\u003e\n\u003cdiv class=\"image-with-text__text rte\"\u003e\n\u003cp\u003eMade to Milk's bags are made from food-grade silicone, have a 240ml capacity and are completely leak-proof! Trust us, we’ve put them to the test. \u003c\/p\u003e\n\u003cp\u003eThe best part - once your breastfeeding journey is over these awesome bags keep on providing as the perfect storage for snacks, yoghurts, etc. while on the go with your little one.\u003c\/p\u003e\n\u003cp\u003eMade to Milk breastmilk storage bags are super easy to sterilise; and are dishwasher and freezer safe. They also feature a unique lock slider to keep milk secure while at home or on-the-go. And they stand upright for easy pouring and have a measuring tool on the rear - I mean, how could this get any better. Really.\u003c\/p\u003e\n\u003cp\u003eEach box comes with a set of two silicone storage bags + lock sliders.\u003c\/p\u003e\n\u003ch2 class=\"image-with-text__heading h1\"\u003eCleaning:\u003c\/h2\u003e\n\u003cdiv class=\"image-with-text__text rte\"\u003e\n\u003cp\u003eAlways first sterilise the silicone milk storage bag in a pot of boiling water for 2-3mins.\u003c\/p\u003e\n\u003cp\u003e\u003cbr\u003eThe simplest way to clean your milk storage bags is to hand wash with dish soap and warm water and let air dry. Some scented washing detergents may leave a residue or odour on the silicone so we like to recommend using products with little to no scent if possible.\u003c\/p\u003e\n\u003cp\u003e\u003cbr\u003ePlease note that using phosphate-free dishwashing soap may cause silicone to hold certain smells\/taste. This is not considered a risk to your infant or toddler and can be minimised by adding some white vinegar to your boiling water when sterilising.\u003c\/p\u003e\n\u003c\/div\u003e\n\u003c\/div\u003e\n\u003c\/div\u003e","published_at":"2023-03-22T21:39:22+08:00","created_at":"2023-03-22T21:39:22+08:00","vendor":"Made to Milk","type":"","tags":["Breastfeeding","Labour Preparation","Labour Progression","Lactation Products","Mum","Post-Partum"],"price":2695,"price_min":2695,"price_max":2695,"available":true,"price_varies":false,"compare_at_price":null,"compare_at_price_min":0,"compare_at_price_max":0,"compare_at_price_varies":false,"variants":[{"id":42740425785533,"title":"Pink","option1":"Pink","option2":null,"option3":null,"sku":"","requires_shipping":true,"taxable":false,"featured_image":{"id":34641029071037,"product_id":7455713001661,"position":4,"created_at":"2024-05-06T12:00:21+08:00","updated_at":"2024-05-06T12:00:21+08:00","alt":"Reusable Breastmilk Storage Bags - 2 Pack - The Birth Store-Made to Milk","width":540,"height":540,"src":"\/\/www.thebirthstore.com.au\/cdn\/shop\/files\/reusable-breastmilk-storage-bags-2-pack-780525.jpg?v=1714968021","variant_ids":[42740425785533]},"available":true,"name":"Reusable Breastmilk Storage Bags - 2 Pack - Pink","public_title":"Pink","options":["Pink"],"price":2695,"weight":111,"compare_at_price":null,"inventory_management":"shopify","barcode":"25785533","featured_media":{"alt":"Reusable Breastmilk Storage Bags - 2 Pack - The Birth Store-Made to Milk","id":27007598067901,"position":4,"preview_image":{"aspect_ratio":1.0,"height":540,"width":540,"src":"\/\/www.thebirthstore.com.au\/cdn\/shop\/files\/reusable-breastmilk-storage-bags-2-pack-780525.jpg?v=1714968021"}},"requires_selling_plan":false,"selling_plan_allocations":[],"quantity_rule":{"min":1,"max":null,"increment":1}},{"id":42740425818301,"title":"Blue","option1":"Blue","option2":null,"option3":null,"sku":"","requires_shipping":true,"taxable":false,"featured_image":{"id":34641029038269,"product_id":7455713001661,"position":3,"created_at":"2024-05-06T12:00:21+08:00","updated_at":"2024-05-06T12:00:21+08:00","alt":"Reusable Breastmilk Storage Bags - 2 Pack - The Birth Store-Made to Milk","width":540,"height":540,"src":"\/\/www.thebirthstore.com.au\/cdn\/shop\/files\/reusable-breastmilk-storage-bags-2-pack-131550.jpg?v=1714968021","variant_ids":[42740425818301]},"available":true,"name":"Reusable Breastmilk Storage Bags - 2 Pack - Blue","public_title":"Blue","options":["Blue"],"price":2695,"weight":111,"compare_at_price":null,"inventory_management":"shopify","barcode":"25818301","featured_media":{"alt":"Reusable Breastmilk Storage Bags - 2 Pack - The Birth Store-Made to Milk","id":27007598035133,"position":3,"preview_image":{"aspect_ratio":1.0,"height":540,"width":540,"src":"\/\/www.thebirthstore.com.au\/cdn\/shop\/files\/reusable-breastmilk-storage-bags-2-pack-131550.jpg?v=1714968021"}},"requires_selling_plan":false,"selling_plan_allocations":[],"quantity_rule":{"min":1,"max":null,"increment":1}}],"images":["\/\/www.thebirthstore.com.au\/cdn\/shop\/files\/reusable-breastmilk-storage-bags-2-pack-220676.jpg?v=1714968021","\/\/www.thebirthstore.com.au\/cdn\/shop\/files\/reusable-breastmilk-storage-bags-2-pack-621816.jpg?v=1714968021","\/\/www.thebirthstore.com.au\/cdn\/shop\/files\/reusable-breastmilk-storage-bags-2-pack-131550.jpg?v=1714968021","\/\/www.thebirthstore.com.au\/cdn\/shop\/files\/reusable-breastmilk-storage-bags-2-pack-780525.jpg?v=1714968021","\/\/www.thebirthstore.com.au\/cdn\/shop\/files\/reusable-breastmilk-storage-bags-2-pack-247199.jpg?v=1714968021","\/\/www.thebirthstore.com.au\/cdn\/shop\/files\/reusable-breastmilk-storage-bags-2-pack-331358.jpg?v=1714968021"],"featured_image":"\/\/www.thebirthstore.com.au\/cdn\/shop\/files\/reusable-breastmilk-storage-bags-2-pack-220676.jpg?v=1714968021","options":["Colour"],"media":[{"alt":"Reusable Breastmilk Storage Bags - 2 Pack - The Birth Store-Made to Milk","id":27007597969597,"position":1,"preview_image":{"aspect_ratio":1.0,"height":2048,"width":2048,"src":"\/\/www.thebirthstore.com.au\/cdn\/shop\/files\/reusable-breastmilk-storage-bags-2-pack-220676.jpg?v=1714968021"},"aspect_ratio":1.0,"height":2048,"media_type":"image","src":"\/\/www.thebirthstore.com.au\/cdn\/shop\/files\/reusable-breastmilk-storage-bags-2-pack-220676.jpg?v=1714968021","width":2048},{"alt":"Reusable Breastmilk Storage Bags - 2 Pack - The Birth Store-Made to Milk","id":27007598002365,"position":2,"preview_image":{"aspect_ratio":1.0,"height":540,"width":540,"src":"\/\/www.thebirthstore.com.au\/cdn\/shop\/files\/reusable-breastmilk-storage-bags-2-pack-621816.jpg?v=1714968021"},"aspect_ratio":1.0,"height":540,"media_type":"image","src":"\/\/www.thebirthstore.com.au\/cdn\/shop\/files\/reusable-breastmilk-storage-bags-2-pack-621816.jpg?v=1714968021","width":540},{"alt":"Reusable Breastmilk Storage Bags - 2 Pack - The Birth Store-Made to Milk","id":27007598035133,"position":3,"preview_image":{"aspect_ratio":1.0,"height":540,"width":540,"src":"\/\/www.thebirthstore.com.au\/cdn\/shop\/files\/reusable-breastmilk-storage-bags-2-pack-131550.jpg?v=1714968021"},"aspect_ratio":1.0,"height":540,"media_type":"image","src":"\/\/www.thebirthstore.com.au\/cdn\/shop\/files\/reusable-breastmilk-storage-bags-2-pack-131550.jpg?v=1714968021","width":540},{"alt":"Reusable Breastmilk Storage Bags - 2 Pack - The Birth Store-Made to Milk","id":27007598067901,"position":4,"preview_image":{"aspect_ratio":1.0,"height":540,"width":540,"src":"\/\/www.thebirthstore.com.au\/cdn\/shop\/files\/reusable-breastmilk-storage-bags-2-pack-780525.jpg?v=1714968021"},"aspect_ratio":1.0,"height":540,"media_type":"image","src":"\/\/www.thebirthstore.com.au\/cdn\/shop\/files\/reusable-breastmilk-storage-bags-2-pack-780525.jpg?v=1714968021","width":540},{"alt":"Reusable Breastmilk Storage Bags - 2 Pack - The Birth Store-Made to Milk","id":27007598133437,"position":5,"preview_image":{"aspect_ratio":1.0,"height":540,"width":540,"src":"\/\/www.thebirthstore.com.au\/cdn\/shop\/files\/reusable-breastmilk-storage-bags-2-pack-247199.jpg?v=1714968021"},"aspect_ratio":1.0,"height":540,"media_type":"image","src":"\/\/www.thebirthstore.com.au\/cdn\/shop\/files\/reusable-breastmilk-storage-bags-2-pack-247199.jpg?v=1714968021","width":540},{"alt":"Reusable Breastmilk Storage Bags - 2 Pack - The Birth Store-Made to Milk","id":27007598198973,"position":6,"preview_image":{"aspect_ratio":1.0,"height":540,"width":540,"src":"\/\/www.thebirthstore.com.au\/cdn\/shop\/files\/reusable-breastmilk-storage-bags-2-pack-331358.jpg?v=1714968021"},"aspect_ratio":1.0,"height":540,"media_type":"image","src":"\/\/www.thebirthstore.com.au\/cdn\/shop\/files\/reusable-breastmilk-storage-bags-2-pack-331358.jpg?v=1714968021","width":540}],"requires_selling_plan":false,"selling_plan_groups":[],"content":"\u003ch2 class=\"h1\" data-mce-fragment=\"1\"\u003eSafe \u0026amp; Convenient\u003c\/h2\u003e\n\u003cdiv class=\"rich-text__text rte\" data-mce-fragment=\"1\"\u003e\n\u003cp data-mce-fragment=\"1\"\u003eGet your breastfeeding journey started in the best way possible with Made to Milk's Reusable Breast Milk Storage Bags!\u003c\/p\u003e\n\u003cp data-mce-fragment=\"1\"\u003eSave the world one breastmilk storage bag at a time!\u003c\/p\u003e\n\u003cp data-mce-fragment=\"1\"\u003eMade to Milk's brand spanking new silicone breastmilk storage bags are the perfect way to store your breastmilk in a super safe and convenient way. Silicone is naturally bacteria resistant and helps to keep milk fresher for longer. What a win!\u003c\/p\u003e\n\u003ch2 class=\"image-with-text__heading h1\"\u003eFeatures:\u003c\/h2\u003e\n\u003cdiv class=\"image-with-text__text rte\"\u003e\n\u003cp\u003eMade to Milk's bags are made from food-grade silicone, have a 240ml capacity and are completely leak-proof! Trust us, we’ve put them to the test. \u003c\/p\u003e\n\u003cp\u003eThe best part - once your breastfeeding journey is over these awesome bags keep on providing as the perfect storage for snacks, yoghurts, etc. while on the go with your little one.\u003c\/p\u003e\n\u003cp\u003eMade to Milk breastmilk storage bags are super easy to sterilise; and are dishwasher and freezer safe. They also feature a unique lock slider to keep milk secure while at home or on-the-go. And they stand upright for easy pouring and have a measuring tool on the rear - I mean, how could this get any better. Really.\u003c\/p\u003e\n\u003cp\u003eEach box comes with a set of two silicone storage bags + lock sliders.\u003c\/p\u003e\n\u003ch2 class=\"image-with-text__heading h1\"\u003eCleaning:\u003c\/h2\u003e\n\u003cdiv class=\"image-with-text__text rte\"\u003e\n\u003cp\u003eAlways first sterilise the silicone milk storage bag in a pot of boiling water for 2-3mins.\u003c\/p\u003e\n\u003cp\u003e\u003cbr\u003eThe simplest way to clean your milk storage bags is to hand wash with dish soap and warm water and let air dry. Some scented washing detergents may leave a residue or odour on the silicone so we like to recommend using products with little to no scent if possible.\u003c\/p\u003e\n\u003cp\u003e\u003cbr\u003ePlease note that using phosphate-free dishwashing soap may cause silicone to hold certain smells\/taste. This is not considered a risk to your infant or toddler and can be minimised by adding some white vinegar to your boiling water when sterilising.\u003c\/p\u003e\n\u003c\/div\u003e\n\u003c\/div\u003e\n\u003c\/div\u003e"},"options":[{"name":"Colour","position":1,"values":["Pink","Blue"]}],"custom_metafields":{},"metafields":{"badge":"\u003cdiv style='display:none' class='jdgm-prev-badge' data-average-rating='0.00' data-number-of-reviews='0' data-number-of-questions='0'\u003e \u003cspan class='jdgm-prev-badge__stars' data-score='0.00' tabindex='0' aria-label='0.00 stars' role='button'\u003e \u003cspan class='jdgm-star jdgm--off'\u003e\u003c\/span\u003e\u003cspan class='jdgm-star jdgm--off'\u003e\u003c\/span\u003e\u003cspan class='jdgm-star jdgm--off'\u003e\u003c\/span\u003e\u003cspan class='jdgm-star jdgm--off'\u003e\u003c\/span\u003e\u003cspan class='jdgm-star jdgm--off'\u003e\u003c\/span\u003e \u003c\/span\u003e \u003cspan class='jdgm-prev-badge__text'\u003e No reviews \u003c\/span\u003e \u003c\/div\u003e","widget":"\u003cdiv class='jdgm-rev-widg' data-updated-at='2025-06-13T16:12:53Z' data-average-rating='0.00' data-number-of-reviews='0' data-number-of-questions='0'\u003e \u003cstyle class='jdgm-temp-hiding-style'\u003e.jdgm-rev-widg{ display: none }\u003c\/style\u003e \u003cdiv class='jdgm-rev-widg__header'\u003e \u003ch2 class='jdgm-rev-widg__title'\u003eCustomer Reviews\u003c\/h2\u003e \u003cdiv class='jdgm-rev-widg__summary'\u003e \u003cdiv class='jdgm-rev-widg__summary-stars' aria-label='Average rating is 0.00 stars' role='img'\u003e \u003cspan class='jdgm-star jdgm--off'\u003e\u003c\/span\u003e\u003cspan class='jdgm-star jdgm--off'\u003e\u003c\/span\u003e\u003cspan class='jdgm-star jdgm--off'\u003e\u003c\/span\u003e\u003cspan class='jdgm-star jdgm--off'\u003e\u003c\/span\u003e\u003cspan class='jdgm-star jdgm--off'\u003e\u003c\/span\u003e \u003c\/div\u003e \u003cdiv class='jdgm-rev-widg__summary-text'\u003eBe the first to write a review\u003c\/div\u003e \u003c\/div\u003e \u003ca style='display: none' href='#' class='jdgm-write-rev-link' role='button'\u003eWrite a review\u003c\/a\u003e \u003cdiv class='jdgm-histogram jdgm-temp-hidden'\u003e \u003cdiv class='jdgm-histogram__row' data-rating='5' data-frequency='0' data-percentage='0'\u003e \u003cdiv class='jdgm-histogram__star' role='button' aria-label=\"0% (0) reviews with 5 star rating\" tabindex='0' \u003e\u003cspan class='jdgm-star jdgm--on'\u003e\u003c\/span\u003e\u003cspan class='jdgm-star jdgm--on'\u003e\u003c\/span\u003e\u003cspan class='jdgm-star jdgm--on'\u003e\u003c\/span\u003e\u003cspan class='jdgm-star jdgm--on'\u003e\u003c\/span\u003e\u003cspan class='jdgm-star jdgm--on'\u003e\u003c\/span\u003e\u003c\/div\u003e \u003cdiv class='jdgm-histogram__bar'\u003e \u003cdiv class='jdgm-histogram__bar-content' style='width: 0%;'\u003e \u003c\/div\u003e \u003c\/div\u003e \u003cdiv class='jdgm-histogram__percentage'\u003e0%\u003c\/div\u003e \u003cdiv class='jdgm-histogram__frequency'\u003e(0)\u003c\/div\u003e \u003c\/div\u003e \u003cdiv class='jdgm-histogram__row' data-rating='4' data-frequency='0' data-percentage='0'\u003e \u003cdiv class='jdgm-histogram__star' role='button' aria-label=\"0% (0) reviews with 4 star rating\" tabindex='0' \u003e\u003cspan class='jdgm-star jdgm--on'\u003e\u003c\/span\u003e\u003cspan class='jdgm-star jdgm--on'\u003e\u003c\/span\u003e\u003cspan class='jdgm-star jdgm--on'\u003e\u003c\/span\u003e\u003cspan class='jdgm-star jdgm--on'\u003e\u003c\/span\u003e\u003cspan class='jdgm-star jdgm--off'\u003e\u003c\/span\u003e\u003c\/div\u003e \u003cdiv class='jdgm-histogram__bar'\u003e \u003cdiv class='jdgm-histogram__bar-content' style='width: 0%;'\u003e \u003c\/div\u003e \u003c\/div\u003e \u003cdiv class='jdgm-histogram__percentage'\u003e0%\u003c\/div\u003e \u003cdiv class='jdgm-histogram__frequency'\u003e(0)\u003c\/div\u003e \u003c\/div\u003e \u003cdiv class='jdgm-histogram__row' data-rating='3' data-frequency='0' data-percentage='0'\u003e \u003cdiv class='jdgm-histogram__star' role='button' aria-label=\"0% (0) reviews with 3 star rating\" tabindex='0' \u003e\u003cspan class='jdgm-star jdgm--on'\u003e\u003c\/span\u003e\u003cspan class='jdgm-star jdgm--on'\u003e\u003c\/span\u003e\u003cspan class='jdgm-star jdgm--on'\u003e\u003c\/span\u003e\u003cspan class='jdgm-star jdgm--off'\u003e\u003c\/span\u003e\u003cspan class='jdgm-star jdgm--off'\u003e\u003c\/span\u003e\u003c\/div\u003e \u003cdiv class='jdgm-histogram__bar'\u003e \u003cdiv class='jdgm-histogram__bar-content' style='width: 0%;'\u003e \u003c\/div\u003e \u003c\/div\u003e \u003cdiv class='jdgm-histogram__percentage'\u003e0%\u003c\/div\u003e \u003cdiv class='jdgm-histogram__frequency'\u003e(0)\u003c\/div\u003e \u003c\/div\u003e \u003cdiv class='jdgm-histogram__row' data-rating='2' data-frequency='0' data-percentage='0'\u003e \u003cdiv class='jdgm-histogram__star' role='button' aria-label=\"0% (0) reviews with 2 star rating\" tabindex='0' \u003e\u003cspan class='jdgm-star jdgm--on'\u003e\u003c\/span\u003e\u003cspan class='jdgm-star jdgm--on'\u003e\u003c\/span\u003e\u003cspan class='jdgm-star jdgm--off'\u003e\u003c\/span\u003e\u003cspan class='jdgm-star jdgm--off'\u003e\u003c\/span\u003e\u003cspan class='jdgm-star jdgm--off'\u003e\u003c\/span\u003e\u003c\/div\u003e \u003cdiv class='jdgm-histogram__bar'\u003e \u003cdiv class='jdgm-histogram__bar-content' style='width: 0%;'\u003e \u003c\/div\u003e \u003c\/div\u003e \u003cdiv class='jdgm-histogram__percentage'\u003e0%\u003c\/div\u003e \u003cdiv class='jdgm-histogram__frequency'\u003e(0)\u003c\/div\u003e \u003c\/div\u003e \u003cdiv class='jdgm-histogram__row' data-rating='1' data-frequency='0' data-percentage='0'\u003e \u003cdiv class='jdgm-histogram__star' role='button' aria-label=\"0% (0) reviews with 1 star rating\" tabindex='0' \u003e\u003cspan class='jdgm-star jdgm--on'\u003e\u003c\/span\u003e\u003cspan class='jdgm-star jdgm--off'\u003e\u003c\/span\u003e\u003cspan class='jdgm-star jdgm--off'\u003e\u003c\/span\u003e\u003cspan class='jdgm-star jdgm--off'\u003e\u003c\/span\u003e\u003cspan class='jdgm-star jdgm--off'\u003e\u003c\/span\u003e\u003c\/div\u003e \u003cdiv class='jdgm-histogram__bar'\u003e \u003cdiv class='jdgm-histogram__bar-content' style='width: 0%;'\u003e \u003c\/div\u003e \u003c\/div\u003e \u003cdiv class='jdgm-histogram__percentage'\u003e0%\u003c\/div\u003e \u003cdiv class='jdgm-histogram__frequency'\u003e(0)\u003c\/div\u003e \u003c\/div\u003e \u003cdiv class='jdgm-histogram__row jdgm-histogram__clear-filter' data-rating=null tabindex='0'\u003e\u003c\/div\u003e \u003c\/div\u003e \u003cdiv class='jdgm-rev-widg__sort-wrapper'\u003e\u003c\/div\u003e \u003c\/div\u003e \u003cdiv class='jdgm-rev-widg__body'\u003e \u003cdiv class='jdgm-rev-widg__reviews'\u003e\u003c\/div\u003e \u003cdiv class='jdgm-paginate' data-per-page='10' data-url='https:\/\/api.judge.me\/reviews\/reviews_for_widget' style=\"display: none;\"\u003e\u003c\/div\u003e \u003c\/div\u003e \u003cdiv class='jdgm-rev-widg__paginate-spinner-wrapper'\u003e \u003cdiv class='jdgm-spinner'\u003e\u003c\/div\u003e \u003c\/div\u003e \u003c\/div\u003e"},"collections":[{"id":281712427197,"handle":"breastfeeding","title":"Breastfeeding","updated_at":"2026-06-12T19:10:26+08:00","body_html":"","published_at":"2021-12-20T14:19:33+08:00","sort_order":"best-selling","template_suffix":"breastfeeding-collection","disjunctive":false,"rules":[{"column":"tag","relation":"equals","condition":"Breastfeeding"}],"published_scope":"global","image":{"created_at":"2024-05-06T11:59:34+08:00","alt":"Breastfeeding - The Birth Store","width":620,"height":635,"src":"\/\/www.thebirthstore.com.au\/cdn\/shop\/collections\/breastfeeding-793872.jpg?v=1714967974"}},{"id":261657460925,"handle":"buy","title":"Buy","updated_at":"2026-06-12T19:10:26+08:00","body_html":"\u003cp\u003eBrowse all of our pregnancy, labour \u0026amp; birth, postpartum and baby essentials here.\u003cbr\u003e\u003c\/p\u003e\n\u003cp\u003e\u003cspan\u003eYou can even buy now and pay later with Afterpay!\u003c\/span\u003e\u003c\/p\u003e","published_at":"2021-03-10T12:05:31+08:00","sort_order":"best-selling","template_suffix":"shop-all-collection","disjunctive":false,"rules":[{"column":"title","relation":"not_contains","condition":"Hire"}],"published_scope":"global","image":{"created_at":"2024-05-06T11:59:42+08:00","alt":"Buy - The Birth Store","width":2048,"height":2048,"src":"\/\/www.thebirthstore.com.au\/cdn\/shop\/collections\/buy-964856.jpg?v=1714967982"}},{"id":281712558269,"handle":"labour-aids","title":"Labour Aids","updated_at":"2026-06-12T19:10:26+08:00","body_html":"","published_at":"2021-12-20T14:22:16+08:00","sort_order":"best-selling","template_suffix":"labour-aids-collection","disjunctive":false,"rules":[{"column":"tag","relation":"equals","condition":"Labour Progression"}],"published_scope":"global","image":{"created_at":"2024-05-06T12:00:11+08:00","alt":"Labour Aids - The Birth Store","width":1365,"height":2048,"src":"\/\/www.thebirthstore.com.au\/cdn\/shop\/collections\/labour-aids-211824.jpg?v=1714968012"}},{"id":281712525501,"handle":"labour-preparation","title":"Labour Preparation","updated_at":"2026-06-12T19:10:26+08:00","body_html":"","published_at":"2021-12-20T14:20:12+08:00","sort_order":"best-selling","template_suffix":"labour-preparation-collec","disjunctive":false,"rules":[{"column":"tag","relation":"equals","condition":"Labour Preparation"}],"published_scope":"global","image":{"created_at":"2024-05-06T12:00:13+08:00","alt":"Labour Preparation - The Birth Store","width":1024,"height":1536,"src":"\/\/www.thebirthstore.com.au\/cdn\/shop\/collections\/labour-preparation-271961.jpg?v=1714968013"}},{"id":292919476413,"handle":"lactation-products","title":"Lactation Products","updated_at":"2026-06-12T19:10:26+08:00","body_html":"","published_at":"2023-03-22T12:22:41+08:00","sort_order":"best-selling","template_suffix":"lactation-products-collec","disjunctive":false,"rules":[{"column":"tag","relation":"equals","condition":"Lactation Products"}],"published_scope":"global","image":{"created_at":"2024-05-06T12:00:19+08:00","alt":"Lactation Products - The Birth Store","width":1034,"height":922,"src":"\/\/www.thebirthstore.com.au\/cdn\/shop\/collections\/lactation-products-752907.jpg?v=1714968019"}},{"id":261658083517,"handle":"post-partum","title":"Postpartum","updated_at":"2026-06-12T19:10:26+08:00","body_html":"\u003cp\u003eShop your postpartum and hospital bag essentials below. Looking for something we don't currently stock? Please reach out and let us know.\u003cbr\u003e\u003c\/p\u003e\n\u003cp\u003e\u003cspan\u003eYou can even buy now and pay later with Afterpay!\u003c\/span\u003e\u003c\/p\u003e","published_at":"2021-03-10T12:33:47+08:00","sort_order":"best-selling","template_suffix":"postpartum-collection","disjunctive":false,"rules":[{"column":"tag","relation":"equals","condition":"Post-Partum"}],"published_scope":"global","image":{"created_at":"2024-05-06T12:00:36+08:00","alt":"Postpartum - The Birth Store","width":611,"height":702,"src":"\/\/www.thebirthstore.com.au\/cdn\/shop\/collections\/postpartum-150119.jpg?v=1714968037"}},{"id":291456483517,"handle":"shop-all","title":"Shop All - Mum","updated_at":"2026-06-12T19:10:26+08:00","body_html":"","published_at":"2022-12-23T22:04:39+08:00","sort_order":"best-selling","template_suffix":"shop-all-collection","disjunctive":false,"rules":[{"column":"variant_price","relation":"greater_than","condition":"1"},{"column":"title","relation":"not_contains","condition":"Batteries"},{"column":"tag","relation":"equals","condition":"Mum"}],"published_scope":"global","image":{"created_at":"2024-05-06T12:00:54+08:00","alt":"Shop All - The Birth Store","width":1365,"height":2048,"src":"\/\/www.thebirthstore.com.au\/cdn\/shop\/collections\/shop-all-693176.jpg?v=1714968055"}},{"id":310045933757,"handle":"shop-all-sale","title":"Shop All Sale","updated_at":"2026-06-12T19:10:26+08:00","body_html":"","published_at":"2024-11-12T13:22:43+08:00","sort_order":"alpha-asc","template_suffix":"","disjunctive":true,"rules":[{"column":"tag","relation":"equals","condition":"Bundles"},{"column":"vendor","relation":"equals","condition":"Franjos Kitchen"},{"column":"vendor","relation":"equals","condition":"Adored Illustrations"},{"column":"vendor","relation":"equals","condition":"Amazing Oils"},{"column":"vendor","relation":"equals","condition":"Ice Ice Booby"},{"column":"vendor","relation":"equals","condition":"Made to Milk"},{"column":"vendor","relation":"equals","condition":"Milky Goodness"},{"column":"vendor","relation":"equals","condition":"Seasons of Mama"},{"column":"vendor","relation":"equals","condition":"Silverette"},{"column":"vendor","relation":"equals","condition":"Snuggle Hunny"},{"column":"vendor","relation":"equals","condition":"Yung Bod"},{"column":"vendor","relation":"equals","condition":"Bare Love"},{"column":"vendor","relation":"equals","condition":"Haakaa"},{"column":"vendor","relation":"equals","condition":"Mere Botanicals"},{"column":"vendor","relation":"equals","condition":"The Birth Store Hire"},{"column":"vendor","relation":"equals","condition":"The Birth Store"}],"published_scope":"global","image":{"created_at":"2024-11-13T10:58:16+08:00","alt":"Shop All Sale - The Birth Store","width":2048,"height":1365,"src":"\/\/www.thebirthstore.com.au\/cdn\/shop\/collections\/shop-all-sale-297361.jpg?v=1731466697"}}]}
{"item":{"id":7753761849533,"title":"Moode Prenatal Vitamin","handle":"moode-prenatal-vitamin","description":"\u003cp data-mce-fragment=\"1\"\u003e60 flavourless hard capsules. Vegan and free from gluten, dairy, soy, sulfites, artificial flavours and GMOs. Australian made.\u003c\/p\u003e\n\u003cp data-mce-fragment=\"1\"\u003eWe’re famous for:\u003c\/p\u003e\n\u003cul data-mce-fragment=\"1\"\u003e\n\u003cli data-mce-fragment=\"1\"\u003eMini- capsules. So they’re always easy to swallow\u003c\/li\u003e\n\u003cli data-mce-fragment=\"1\"\u003eFolinic acid, for its increased bioavailability\u003c\/li\u003e\n\u003cli data-mce-fragment=\"1\"\u003eChampioning Choline, with 300mg in every dose\u003c\/li\u003e\n\u003cli data-mce-fragment=\"1\"\u003eIron free formulation, avoiding gastrointestinal upset\u003c\/li\u003e\n\u003cli data-mce-fragment=\"1\"\u003eConsidering nausea (and not adding to it)\u003c\/li\u003e\n\u003c\/ul\u003e\n\u003cp data-mce-fragment=\"1\"\u003eBest taken 3+ months before conception, and right throughout pregnancy, postpartum and breastfeeding.\u003c\/p\u003e\n\u003cp data-mce-fragment=\"1\"\u003eAlways read the label and follow the directions for use.\u003c\/p\u003e\n\u003c!----\u003e","published_at":"2024-05-27T11:21:26+08:00","created_at":"2024-05-18T11:40:02+08:00","vendor":"Moode","type":"","tags":["Breastfeeding","Bundles","Mum","Pre-Conception","Pregnancy","Pregnancy Health"],"price":5600,"price_min":5600,"price_max":23800,"available":true,"price_varies":true,"compare_at_price":null,"compare_at_price_min":0,"compare_at_price_max":0,"compare_at_price_varies":false,"variants":[{"id":43940607557821,"title":"1 Pack","option1":"1 Pack","option2":null,"option3":null,"sku":"","requires_shipping":true,"taxable":false,"featured_image":null,"available":true,"name":"Moode Prenatal Vitamin - 1 Pack","public_title":"1 Pack","options":["1 Pack"],"price":5600,"weight":85,"compare_at_price":null,"inventory_management":"shopify","barcode":"07557821","requires_selling_plan":false,"selling_plan_allocations":[],"quantity_rule":{"min":1,"max":null,"increment":1}},{"id":43940607393981,"title":"3 Pack","option1":"3 Pack","option2":null,"option3":null,"sku":"","requires_shipping":true,"taxable":false,"featured_image":null,"available":true,"name":"Moode Prenatal Vitamin - 3 Pack","public_title":"3 Pack","options":["3 Pack"],"price":15200,"weight":85,"compare_at_price":null,"inventory_management":"shopify","barcode":"07393981","requires_selling_plan":false,"selling_plan_allocations":[],"quantity_rule":{"min":1,"max":null,"increment":1}},{"id":43940607426749,"title":"5 Pack","option1":"5 Pack","option2":null,"option3":null,"sku":"","requires_shipping":true,"taxable":false,"featured_image":null,"available":true,"name":"Moode Prenatal Vitamin - 5 Pack","public_title":"5 Pack","options":["5 Pack"],"price":23800,"weight":85,"compare_at_price":null,"inventory_management":"shopify","barcode":"07426749","requires_selling_plan":false,"selling_plan_allocations":[],"quantity_rule":{"min":1,"max":null,"increment":1}}],"images":["\/\/www.thebirthstore.com.au\/cdn\/shop\/files\/3_Flavours_to_choose_from_13.png?v=1763527420","\/\/www.thebirthstore.com.au\/cdn\/shop\/files\/moode-prenatal-vitamin-7137092.jpg?v=1763562955","\/\/www.thebirthstore.com.au\/cdn\/shop\/files\/moode-prenatal-vitamin-2933155.jpg?v=1763562954","\/\/www.thebirthstore.com.au\/cdn\/shop\/files\/moode-prenatal-vitamin-4065182.jpg?v=1763562956","\/\/www.thebirthstore.com.au\/cdn\/shop\/files\/moode-prenatal-vitamin-7273534.jpg?v=1763562955"],"featured_image":"\/\/www.thebirthstore.com.au\/cdn\/shop\/files\/3_Flavours_to_choose_from_13.png?v=1763527420","options":["Size"],"media":[{"alt":null,"id":30155224285373,"position":1,"preview_image":{"aspect_ratio":1.0,"height":1080,"width":1080,"src":"\/\/www.thebirthstore.com.au\/cdn\/shop\/files\/3_Flavours_to_choose_from_13.png?v=1763527420"},"aspect_ratio":1.0,"height":1080,"media_type":"image","src":"\/\/www.thebirthstore.com.au\/cdn\/shop\/files\/3_Flavours_to_choose_from_13.png?v=1763527420","width":1080},{"alt":"Moode Prenatal Vitamin - The Birth Store - Moode","id":30154584064189,"position":2,"preview_image":{"aspect_ratio":1.5,"height":1365,"width":2048,"src":"\/\/www.thebirthstore.com.au\/cdn\/shop\/files\/moode-prenatal-vitamin-7137092.jpg?v=1763562955"},"aspect_ratio":1.5,"height":1365,"media_type":"image","src":"\/\/www.thebirthstore.com.au\/cdn\/shop\/files\/moode-prenatal-vitamin-7137092.jpg?v=1763562955","width":2048},{"alt":"Moode Prenatal Vitamin - The Birth Store - Moode","id":30154584129725,"position":3,"preview_image":{"aspect_ratio":0.8,"height":1436,"width":1149,"src":"\/\/www.thebirthstore.com.au\/cdn\/shop\/files\/moode-prenatal-vitamin-2933155.jpg?v=1763562954"},"aspect_ratio":0.8,"height":1436,"media_type":"image","src":"\/\/www.thebirthstore.com.au\/cdn\/shop\/files\/moode-prenatal-vitamin-2933155.jpg?v=1763562954","width":1149},{"alt":"Moode Prenatal Vitamin - The Birth Store - Moode","id":30154584096957,"position":4,"preview_image":{"aspect_ratio":0.667,"height":2048,"width":1365,"src":"\/\/www.thebirthstore.com.au\/cdn\/shop\/files\/moode-prenatal-vitamin-4065182.jpg?v=1763562956"},"aspect_ratio":0.667,"height":2048,"media_type":"image","src":"\/\/www.thebirthstore.com.au\/cdn\/shop\/files\/moode-prenatal-vitamin-4065182.jpg?v=1763562956","width":1365},{"alt":"Moode Prenatal Vitamin - The Birth Store - Moode","id":30154584162493,"position":5,"preview_image":{"aspect_ratio":0.8,"height":2048,"width":1638,"src":"\/\/www.thebirthstore.com.au\/cdn\/shop\/files\/moode-prenatal-vitamin-7273534.jpg?v=1763562955"},"aspect_ratio":0.8,"height":2048,"media_type":"image","src":"\/\/www.thebirthstore.com.au\/cdn\/shop\/files\/moode-prenatal-vitamin-7273534.jpg?v=1763562955","width":1638}],"requires_selling_plan":false,"selling_plan_groups":[],"content":"\u003cp data-mce-fragment=\"1\"\u003e60 flavourless hard capsules. Vegan and free from gluten, dairy, soy, sulfites, artificial flavours and GMOs. Australian made.\u003c\/p\u003e\n\u003cp data-mce-fragment=\"1\"\u003eWe’re famous for:\u003c\/p\u003e\n\u003cul data-mce-fragment=\"1\"\u003e\n\u003cli data-mce-fragment=\"1\"\u003eMini- capsules. So they’re always easy to swallow\u003c\/li\u003e\n\u003cli data-mce-fragment=\"1\"\u003eFolinic acid, for its increased bioavailability\u003c\/li\u003e\n\u003cli data-mce-fragment=\"1\"\u003eChampioning Choline, with 300mg in every dose\u003c\/li\u003e\n\u003cli data-mce-fragment=\"1\"\u003eIron free formulation, avoiding gastrointestinal upset\u003c\/li\u003e\n\u003cli data-mce-fragment=\"1\"\u003eConsidering nausea (and not adding to it)\u003c\/li\u003e\n\u003c\/ul\u003e\n\u003cp data-mce-fragment=\"1\"\u003eBest taken 3+ months before conception, and right throughout pregnancy, postpartum and breastfeeding.\u003c\/p\u003e\n\u003cp data-mce-fragment=\"1\"\u003eAlways read the label and follow the directions for use.\u003c\/p\u003e\n\u003c!----\u003e"},"options":[{"name":"Size","position":1,"values":["1 Pack","3 Pack","5 Pack"]}],"custom_metafields":{},"metafields":{"badge":"\u003cdiv style='display:none' class='jdgm-prev-badge' data-average-rating='0.00' data-number-of-reviews='0' data-number-of-questions='0'\u003e \u003cspan class='jdgm-prev-badge__stars' data-score='0.00' tabindex='0' aria-label='0.00 stars' role='button'\u003e \u003cspan class='jdgm-star jdgm--off'\u003e\u003c\/span\u003e\u003cspan class='jdgm-star jdgm--off'\u003e\u003c\/span\u003e\u003cspan class='jdgm-star jdgm--off'\u003e\u003c\/span\u003e\u003cspan class='jdgm-star jdgm--off'\u003e\u003c\/span\u003e\u003cspan class='jdgm-star jdgm--off'\u003e\u003c\/span\u003e \u003c\/span\u003e \u003cspan class='jdgm-prev-badge__text'\u003e No reviews \u003c\/span\u003e \u003c\/div\u003e","widget":"\u003cdiv class='jdgm-rev-widg' data-updated-at='2025-06-13T16:13:40Z' data-average-rating='0.00' data-number-of-reviews='0' data-number-of-questions='0'\u003e \u003cstyle class='jdgm-temp-hiding-style'\u003e.jdgm-rev-widg{ display: none }\u003c\/style\u003e \u003cdiv class='jdgm-rev-widg__header'\u003e \u003ch2 class='jdgm-rev-widg__title'\u003eCustomer Reviews\u003c\/h2\u003e \u003cdiv class='jdgm-rev-widg__summary'\u003e \u003cdiv class='jdgm-rev-widg__summary-stars' aria-label='Average rating is 0.00 stars' role='img'\u003e \u003cspan class='jdgm-star jdgm--off'\u003e\u003c\/span\u003e\u003cspan class='jdgm-star jdgm--off'\u003e\u003c\/span\u003e\u003cspan class='jdgm-star jdgm--off'\u003e\u003c\/span\u003e\u003cspan class='jdgm-star jdgm--off'\u003e\u003c\/span\u003e\u003cspan class='jdgm-star jdgm--off'\u003e\u003c\/span\u003e \u003c\/div\u003e \u003cdiv class='jdgm-rev-widg__summary-text'\u003eBe the first to write a review\u003c\/div\u003e \u003c\/div\u003e \u003ca style='display: none' href='#' class='jdgm-write-rev-link' role='button'\u003eWrite a review\u003c\/a\u003e \u003cdiv class='jdgm-histogram jdgm-temp-hidden'\u003e \u003cdiv class='jdgm-histogram__row' data-rating='5' data-frequency='0' data-percentage='0'\u003e \u003cdiv class='jdgm-histogram__star' role='button' aria-label=\"0% (0) reviews with 5 star rating\" tabindex='0' \u003e\u003cspan class='jdgm-star jdgm--on'\u003e\u003c\/span\u003e\u003cspan class='jdgm-star jdgm--on'\u003e\u003c\/span\u003e\u003cspan class='jdgm-star jdgm--on'\u003e\u003c\/span\u003e\u003cspan class='jdgm-star jdgm--on'\u003e\u003c\/span\u003e\u003cspan class='jdgm-star jdgm--on'\u003e\u003c\/span\u003e\u003c\/div\u003e \u003cdiv class='jdgm-histogram__bar'\u003e \u003cdiv class='jdgm-histogram__bar-content' style='width: 0%;'\u003e \u003c\/div\u003e \u003c\/div\u003e \u003cdiv class='jdgm-histogram__percentage'\u003e0%\u003c\/div\u003e \u003cdiv class='jdgm-histogram__frequency'\u003e(0)\u003c\/div\u003e \u003c\/div\u003e \u003cdiv class='jdgm-histogram__row' data-rating='4' data-frequency='0' data-percentage='0'\u003e \u003cdiv class='jdgm-histogram__star' role='button' aria-label=\"0% (0) reviews with 4 star rating\" tabindex='0' \u003e\u003cspan class='jdgm-star jdgm--on'\u003e\u003c\/span\u003e\u003cspan class='jdgm-star jdgm--on'\u003e\u003c\/span\u003e\u003cspan class='jdgm-star jdgm--on'\u003e\u003c\/span\u003e\u003cspan class='jdgm-star jdgm--on'\u003e\u003c\/span\u003e\u003cspan class='jdgm-star jdgm--off'\u003e\u003c\/span\u003e\u003c\/div\u003e \u003cdiv class='jdgm-histogram__bar'\u003e \u003cdiv class='jdgm-histogram__bar-content' style='width: 0%;'\u003e \u003c\/div\u003e \u003c\/div\u003e \u003cdiv class='jdgm-histogram__percentage'\u003e0%\u003c\/div\u003e \u003cdiv class='jdgm-histogram__frequency'\u003e(0)\u003c\/div\u003e \u003c\/div\u003e \u003cdiv class='jdgm-histogram__row' data-rating='3' data-frequency='0' data-percentage='0'\u003e \u003cdiv class='jdgm-histogram__star' role='button' aria-label=\"0% (0) reviews with 3 star rating\" tabindex='0' \u003e\u003cspan class='jdgm-star jdgm--on'\u003e\u003c\/span\u003e\u003cspan class='jdgm-star jdgm--on'\u003e\u003c\/span\u003e\u003cspan class='jdgm-star jdgm--on'\u003e\u003c\/span\u003e\u003cspan class='jdgm-star jdgm--off'\u003e\u003c\/span\u003e\u003cspan class='jdgm-star jdgm--off'\u003e\u003c\/span\u003e\u003c\/div\u003e \u003cdiv class='jdgm-histogram__bar'\u003e \u003cdiv class='jdgm-histogram__bar-content' style='width: 0%;'\u003e \u003c\/div\u003e \u003c\/div\u003e \u003cdiv class='jdgm-histogram__percentage'\u003e0%\u003c\/div\u003e \u003cdiv class='jdgm-histogram__frequency'\u003e(0)\u003c\/div\u003e \u003c\/div\u003e \u003cdiv class='jdgm-histogram__row' data-rating='2' data-frequency='0' data-percentage='0'\u003e \u003cdiv class='jdgm-histogram__star' role='button' aria-label=\"0% (0) reviews with 2 star rating\" tabindex='0' \u003e\u003cspan class='jdgm-star jdgm--on'\u003e\u003c\/span\u003e\u003cspan class='jdgm-star jdgm--on'\u003e\u003c\/span\u003e\u003cspan class='jdgm-star jdgm--off'\u003e\u003c\/span\u003e\u003cspan class='jdgm-star jdgm--off'\u003e\u003c\/span\u003e\u003cspan class='jdgm-star jdgm--off'\u003e\u003c\/span\u003e\u003c\/div\u003e \u003cdiv class='jdgm-histogram__bar'\u003e \u003cdiv class='jdgm-histogram__bar-content' style='width: 0%;'\u003e \u003c\/div\u003e \u003c\/div\u003e \u003cdiv class='jdgm-histogram__percentage'\u003e0%\u003c\/div\u003e \u003cdiv class='jdgm-histogram__frequency'\u003e(0)\u003c\/div\u003e \u003c\/div\u003e \u003cdiv class='jdgm-histogram__row' data-rating='1' data-frequency='0' data-percentage='0'\u003e \u003cdiv class='jdgm-histogram__star' role='button' aria-label=\"0% (0) reviews with 1 star rating\" tabindex='0' \u003e\u003cspan class='jdgm-star jdgm--on'\u003e\u003c\/span\u003e\u003cspan class='jdgm-star jdgm--off'\u003e\u003c\/span\u003e\u003cspan class='jdgm-star jdgm--off'\u003e\u003c\/span\u003e\u003cspan class='jdgm-star jdgm--off'\u003e\u003c\/span\u003e\u003cspan class='jdgm-star jdgm--off'\u003e\u003c\/span\u003e\u003c\/div\u003e \u003cdiv class='jdgm-histogram__bar'\u003e \u003cdiv class='jdgm-histogram__bar-content' style='width: 0%;'\u003e \u003c\/div\u003e \u003c\/div\u003e \u003cdiv class='jdgm-histogram__percentage'\u003e0%\u003c\/div\u003e \u003cdiv class='jdgm-histogram__frequency'\u003e(0)\u003c\/div\u003e \u003c\/div\u003e \u003cdiv class='jdgm-histogram__row jdgm-histogram__clear-filter' data-rating=null tabindex='0'\u003e\u003c\/div\u003e \u003c\/div\u003e \u003cdiv class='jdgm-rev-widg__sort-wrapper'\u003e\u003c\/div\u003e \u003c\/div\u003e \u003cdiv class='jdgm-rev-widg__body'\u003e \u003cdiv class='jdgm-rev-widg__reviews'\u003e\u003c\/div\u003e \u003cdiv class='jdgm-paginate' data-per-page='10' data-url='https:\/\/api.judge.me\/reviews\/reviews_for_widget' style=\"display: none;\"\u003e\u003c\/div\u003e \u003c\/div\u003e \u003cdiv class='jdgm-rev-widg__paginate-spinner-wrapper'\u003e \u003cdiv class='jdgm-spinner'\u003e\u003c\/div\u003e \u003c\/div\u003e \u003c\/div\u003e"},"collections":[{"id":281712427197,"handle":"breastfeeding","title":"Breastfeeding","updated_at":"2026-06-12T19:10:26+08:00","body_html":"","published_at":"2021-12-20T14:19:33+08:00","sort_order":"best-selling","template_suffix":"breastfeeding-collection","disjunctive":false,"rules":[{"column":"tag","relation":"equals","condition":"Breastfeeding"}],"published_scope":"global","image":{"created_at":"2024-05-06T11:59:34+08:00","alt":"Breastfeeding - The Birth Store","width":620,"height":635,"src":"\/\/www.thebirthstore.com.au\/cdn\/shop\/collections\/breastfeeding-793872.jpg?v=1714967974"}},{"id":283018526909,"handle":"bundles","title":"Bundles","updated_at":"2026-06-08T10:44:13+08:00","body_html":"\u003cp\u003eMake shopping for your bump, birth and beyond easier with our bundle packs. With a pack available for every stage, you can get everything you need with no fuss and with our bundle packs, you even save money.\u003c\/p\u003e","published_at":"2022-02-01T22:33:09+08:00","sort_order":"best-selling","template_suffix":"swaddles-collection","disjunctive":false,"rules":[{"column":"tag","relation":"equals","condition":"Bundles"}],"published_scope":"global","image":{"created_at":"2024-05-06T11:59:39+08:00","alt":"Bundles - The Birth Store","width":2048,"height":1365,"src":"\/\/www.thebirthstore.com.au\/cdn\/shop\/collections\/bundles-299009.jpg?v=1714967980"}},{"id":261657460925,"handle":"buy","title":"Buy","updated_at":"2026-06-12T19:10:26+08:00","body_html":"\u003cp\u003eBrowse all of our pregnancy, labour \u0026amp; birth, postpartum and baby essentials here.\u003cbr\u003e\u003c\/p\u003e\n\u003cp\u003e\u003cspan\u003eYou can even buy now and pay later with Afterpay!\u003c\/span\u003e\u003c\/p\u003e","published_at":"2021-03-10T12:05:31+08:00","sort_order":"best-selling","template_suffix":"shop-all-collection","disjunctive":false,"rules":[{"column":"title","relation":"not_contains","condition":"Hire"}],"published_scope":"global","image":{"created_at":"2024-05-06T11:59:42+08:00","alt":"Buy - The Birth Store","width":2048,"height":2048,"src":"\/\/www.thebirthstore.com.au\/cdn\/shop\/collections\/buy-964856.jpg?v=1714967982"}},{"id":261658149053,"handle":"pregnancy-and-maternity-products","title":"Pregnancy","updated_at":"2026-06-12T19:10:26+08:00","body_html":"\u003cp\u003eShop your pregnancy essentials below. Looking for something we don't currently stock? Please reach out and let us know.\u003cbr\u003e\u003c\/p\u003e\n\u003cp\u003e\u003cspan\u003eYou can even buy now and pay later with Afterpay!\u003c\/span\u003e\u003c\/p\u003e","published_at":"2021-03-10T12:34:22+08:00","sort_order":"best-selling","template_suffix":"pregnancy-collection","disjunctive":false,"rules":[{"column":"tag","relation":"equals","condition":"Pregnancy"}],"published_scope":"global","image":{"created_at":"2024-05-06T12:00:40+08:00","alt":"Pregnancy - The Birth Store","width":1024,"height":1536,"src":"\/\/www.thebirthstore.com.au\/cdn\/shop\/collections\/pregnancy-899677.jpg?v=1714968040"}},{"id":295224901821,"handle":"pregnancy-health","title":"Pregnancy Health","updated_at":"2026-06-12T19:10:26+08:00","body_html":"","published_at":"2023-11-10T20:48:51+08:00","sort_order":"best-selling","template_suffix":"swaddles-collection","disjunctive":false,"rules":[{"column":"tag","relation":"equals","condition":"Pregnancy Health"}],"published_scope":"global","image":{"created_at":"2024-05-06T12:00:41+08:00","alt":"Pregnancy Health - The Birth Store","width":608,"height":410,"src":"\/\/www.thebirthstore.com.au\/cdn\/shop\/collections\/pregnancy-health-343983.jpg?v=1714968042"}},{"id":326523846845,"handle":"pregnancy-health-1","updated_at":"2026-06-12T19:10:26+08:00","published_at":"2025-10-30T10:44:54+08:00","sort_order":"best-selling","template_suffix":"","published_scope":"global","title":"Pregnancy Health","body_html":"","image":{"created_at":"2025-11-20T21:33:56+08:00","alt":"Pregnancy Health - The Birth Store","width":522,"height":525,"src":"\/\/www.thebirthstore.com.au\/cdn\/shop\/collections\/pregnancy-health-1617860.jpg?v=1763645636"}},{"id":291456483517,"handle":"shop-all","title":"Shop All - Mum","updated_at":"2026-06-12T19:10:26+08:00","body_html":"","published_at":"2022-12-23T22:04:39+08:00","sort_order":"best-selling","template_suffix":"shop-all-collection","disjunctive":false,"rules":[{"column":"variant_price","relation":"greater_than","condition":"1"},{"column":"title","relation":"not_contains","condition":"Batteries"},{"column":"tag","relation":"equals","condition":"Mum"}],"published_scope":"global","image":{"created_at":"2024-05-06T12:00:54+08:00","alt":"Shop All - The Birth Store","width":1365,"height":2048,"src":"\/\/www.thebirthstore.com.au\/cdn\/shop\/collections\/shop-all-693176.jpg?v=1714968055"}},{"id":310045933757,"handle":"shop-all-sale","title":"Shop All Sale","updated_at":"2026-06-12T19:10:26+08:00","body_html":"","published_at":"2024-11-12T13:22:43+08:00","sort_order":"alpha-asc","template_suffix":"","disjunctive":true,"rules":[{"column":"tag","relation":"equals","condition":"Bundles"},{"column":"vendor","relation":"equals","condition":"Franjos Kitchen"},{"column":"vendor","relation":"equals","condition":"Adored Illustrations"},{"column":"vendor","relation":"equals","condition":"Amazing Oils"},{"column":"vendor","relation":"equals","condition":"Ice Ice Booby"},{"column":"vendor","relation":"equals","condition":"Made to Milk"},{"column":"vendor","relation":"equals","condition":"Milky Goodness"},{"column":"vendor","relation":"equals","condition":"Seasons of Mama"},{"column":"vendor","relation":"equals","condition":"Silverette"},{"column":"vendor","relation":"equals","condition":"Snuggle Hunny"},{"column":"vendor","relation":"equals","condition":"Yung Bod"},{"column":"vendor","relation":"equals","condition":"Bare Love"},{"column":"vendor","relation":"equals","condition":"Haakaa"},{"column":"vendor","relation":"equals","condition":"Mere Botanicals"},{"column":"vendor","relation":"equals","condition":"The Birth Store Hire"},{"column":"vendor","relation":"equals","condition":"The Birth Store"}],"published_scope":"global","image":{"created_at":"2024-11-13T10:58:16+08:00","alt":"Shop All Sale - The Birth Store","width":2048,"height":1365,"src":"\/\/www.thebirthstore.com.au\/cdn\/shop\/collections\/shop-all-sale-297361.jpg?v=1731466697"}}]}
{"item":{"id":7897779273917,"title":"Red Date Goji Bliss Ball Mix","handle":"bliss-ball-mixes","description":"\u003cp\u003e\u003cspan\u003eThese Bliss balls have been developed to replenish the vital substances lost during pregnancy and postpartum, using the principles of \u003cu\u003eChinese Dietary Therapy\u003c\/u\u003e.\u003c\/span\u003e\u003c\/p\u003e\n\u003cp\u003e \u003c\/p\u003e\n\u003cul\u003e\n\u003cli\u003eSource of protein, fibre and essential fatty acids\u003c\/li\u003e\n\u003cli\u003eOrganic and natural ingredients\u003c\/li\u003e\n\u003cli\u003eContain Red Dates (Jujube)* to nourish Blood, strengthen digestive Qi and calm the mind in Chinese Medicine\u003c\/li\u003e\n\u003cli\u003eContain Go Ji Berries for blood nourishing properties in Chinese medicine\u003c\/li\u003e\n\u003cli\u003eNothing to add, just blend and roll into balls\u003c\/li\u003e\n\u003cli\u003eMakes 12 balls\u003c\/li\u003e\n\u003cli\u003eGluten free\u003c\/li\u003e\n\u003cli\u003eDairy free\u003c\/li\u003e\n\u003c\/ul\u003e\n\u003cp\u003e \u003c\/p\u003e\n\u003cp\u003e\u003cspan\u003e*Red Dates (Jujube) are commonly used in traditional cooking and feature in postpartum recovery recipes. They are a nutritional powerhouse rich in antioxidant compounds and contain high levels of vitamin C. Their high fibre content also supports digestive health.\u003c\/span\u003e\u003c\/p\u003e\n\u003cp\u003e \u003c\/p\u003e\n\u003cp\u003e\u003cspan\u003e\u003cu\u003eChinese Dietary Therapy\u003c\/u\u003e\u003c\/span\u003e\u003c\/p\u003e\n\u003cp\u003e\u003cspan\u003eIn traditional dietary therapy, all natural foods have their own unique properties. They are categorised based on their innate temperature, the organs they affect and the direction in which they move or affect the flow of Qi and Blood.\u003c\/span\u003e\u003c\/p\u003e\n\u003c!----\u003e","published_at":"2024-10-15T10:20:00+08:00","created_at":"2024-10-15T10:11:54+08:00","vendor":"Flourish In Natal","type":"","tags":["Breastfeeding","Lactation Products","Mum","Post-Partum","Pregnancy","Pregnancy Health"],"price":1695,"price_min":1695,"price_max":1695,"available":true,"price_varies":false,"compare_at_price":null,"compare_at_price_min":0,"compare_at_price_max":0,"compare_at_price_varies":false,"variants":[{"id":44564590592189,"title":"Default Title","option1":"Default Title","option2":null,"option3":null,"sku":"","requires_shipping":true,"taxable":false,"featured_image":null,"available":true,"name":"Red Date Goji Bliss Ball Mix","public_title":null,"options":["Default Title"],"price":1695,"weight":246,"compare_at_price":null,"inventory_management":"shopify","barcode":"90592189","requires_selling_plan":false,"selling_plan_allocations":[],"quantity_rule":{"min":1,"max":null,"increment":1}}],"images":["\/\/www.thebirthstore.com.au\/cdn\/shop\/files\/red-date-goji-bliss-ball-mix-1544012.png?v=1758829418","\/\/www.thebirthstore.com.au\/cdn\/shop\/files\/bliss-ball-mixes-966391.webp?v=1758804673","\/\/www.thebirthstore.com.au\/cdn\/shop\/files\/bliss-ball-mixes-746258.webp?v=1758804673"],"featured_image":"\/\/www.thebirthstore.com.au\/cdn\/shop\/files\/red-date-goji-bliss-ball-mix-1544012.png?v=1758829418","options":["Title"],"media":[{"alt":"Red Date Goji Bliss Ball Mix - The Birth Store - Flourish In Natal","id":29671987642557,"position":1,"preview_image":{"aspect_ratio":1.0,"height":1080,"width":1080,"src":"\/\/www.thebirthstore.com.au\/cdn\/shop\/files\/red-date-goji-bliss-ball-mix-1544012.png?v=1758829418"},"aspect_ratio":1.0,"height":1080,"media_type":"image","src":"\/\/www.thebirthstore.com.au\/cdn\/shop\/files\/red-date-goji-bliss-ball-mix-1544012.png?v=1758829418","width":1080},{"alt":"Bliss Ball Mixes - The Birth Store - Flourish In Natal","id":27785477521597,"position":2,"preview_image":{"aspect_ratio":0.8,"height":500,"width":400,"src":"\/\/www.thebirthstore.com.au\/cdn\/shop\/files\/bliss-ball-mixes-966391.webp?v=1758804673"},"aspect_ratio":0.8,"height":500,"media_type":"image","src":"\/\/www.thebirthstore.com.au\/cdn\/shop\/files\/bliss-ball-mixes-966391.webp?v=1758804673","width":400},{"alt":"Bliss Ball Mixes - The Birth Store - Flourish In Natal","id":27785477488829,"position":3,"preview_image":{"aspect_ratio":1.0,"height":500,"width":500,"src":"\/\/www.thebirthstore.com.au\/cdn\/shop\/files\/bliss-ball-mixes-746258.webp?v=1758804673"},"aspect_ratio":1.0,"height":500,"media_type":"image","src":"\/\/www.thebirthstore.com.au\/cdn\/shop\/files\/bliss-ball-mixes-746258.webp?v=1758804673","width":500}],"requires_selling_plan":false,"selling_plan_groups":[],"content":"\u003cp\u003e\u003cspan\u003eThese Bliss balls have been developed to replenish the vital substances lost during pregnancy and postpartum, using the principles of \u003cu\u003eChinese Dietary Therapy\u003c\/u\u003e.\u003c\/span\u003e\u003c\/p\u003e\n\u003cp\u003e \u003c\/p\u003e\n\u003cul\u003e\n\u003cli\u003eSource of protein, fibre and essential fatty acids\u003c\/li\u003e\n\u003cli\u003eOrganic and natural ingredients\u003c\/li\u003e\n\u003cli\u003eContain Red Dates (Jujube)* to nourish Blood, strengthen digestive Qi and calm the mind in Chinese Medicine\u003c\/li\u003e\n\u003cli\u003eContain Go Ji Berries for blood nourishing properties in Chinese medicine\u003c\/li\u003e\n\u003cli\u003eNothing to add, just blend and roll into balls\u003c\/li\u003e\n\u003cli\u003eMakes 12 balls\u003c\/li\u003e\n\u003cli\u003eGluten free\u003c\/li\u003e\n\u003cli\u003eDairy free\u003c\/li\u003e\n\u003c\/ul\u003e\n\u003cp\u003e \u003c\/p\u003e\n\u003cp\u003e\u003cspan\u003e*Red Dates (Jujube) are commonly used in traditional cooking and feature in postpartum recovery recipes. They are a nutritional powerhouse rich in antioxidant compounds and contain high levels of vitamin C. Their high fibre content also supports digestive health.\u003c\/span\u003e\u003c\/p\u003e\n\u003cp\u003e \u003c\/p\u003e\n\u003cp\u003e\u003cspan\u003e\u003cu\u003eChinese Dietary Therapy\u003c\/u\u003e\u003c\/span\u003e\u003c\/p\u003e\n\u003cp\u003e\u003cspan\u003eIn traditional dietary therapy, all natural foods have their own unique properties. They are categorised based on their innate temperature, the organs they affect and the direction in which they move or affect the flow of Qi and Blood.\u003c\/span\u003e\u003c\/p\u003e\n\u003c!----\u003e"},"options":[{"name":"Title","position":1,"values":["Default Title"]}],"custom_metafields":{},"metafields":{"badge":"\u003cdiv style='display:none' class='jdgm-prev-badge' data-average-rating='5.00' data-number-of-reviews='1' data-number-of-questions='0'\u003e \u003cspan class='jdgm-prev-badge__stars' data-score='5.00' tabindex='0' aria-label='5.00 stars' role='button'\u003e \u003cspan class='jdgm-star jdgm--on'\u003e\u003c\/span\u003e\u003cspan class='jdgm-star jdgm--on'\u003e\u003c\/span\u003e\u003cspan class='jdgm-star jdgm--on'\u003e\u003c\/span\u003e\u003cspan class='jdgm-star jdgm--on'\u003e\u003c\/span\u003e\u003cspan class='jdgm-star jdgm--on'\u003e\u003c\/span\u003e \u003c\/span\u003e \u003cspan class='jdgm-prev-badge__text'\u003e 1 review \u003c\/span\u003e \u003c\/div\u003e","review_snippet_widget":"\u003cdiv class='jdgm-widget jdgm-review-snippet-widget'\u003e \u003cstyle\u003e\n .jdgm-review-snippet-widget{position:relative}.jdgm-review-snippet-widget:hover{cursor:pointer}@media only screen and (max-width: 767px){.jdgm-review-snippet-widget .jdgm-rev-snippet-widget__cards-container{left:unset;right:unset}}.jdgm-review-snippet-widget .jdgm-rev-snippet-card{background:#fff}.jdgm-review-snippet-widget .jdgm-star{color:#399}.jdgm-review-snippet-widget .jdgm-rev-snippet-card{border-radius:8px;background:#fff}.jdgm-review-snippet-widget .jdgm-rev-snippet-card__rev-prod-wrapper{border-radius:8px}.jdgm-review-snippet-widget .jdgm-rev-snippet-card__rev-content-wrapper{max-width:360px}.jdgm-review-snippet-widget .jdgm-rev-snippet-widget__prev-btn,.jdgm-review-snippet-widget .jdgm-rev-snippet-widget__next-btn{border-radius:50%;background:#fff}.jdgm-review-snippet-widget .jdgm-rev-snippet-widget__prev-btn\u003esvg,.jdgm-review-snippet-widget .jdgm-rev-snippet-widget__next-btn\u003esvg{fill:#000}.jdgm-review-snippet-widget .jdgm-rev-snippet-widget__prev-btn{left:0;top:40%}.jdgm-review-snippet-widget .jdgm-rev-snippet-widget__next-btn{right:0;top:40%}.jdgm-full-rev-modal.review-snippet-widget .jm-mfp-content{border-radius:8px}.jdgm-full-rev-modal.review-snippet-widget .jdgm-full-rev__icon{border-radius:8px}.jdgm-full-rev-modal.review-snippet-widget .jdgm-full-rev[data-verified-buyer=\"true\"] .jdgm-full-rev__icon::after{border-radius:8px}.jdgm-full-rev-modal.review-snippet-widget .jdgm-rev__buyer-badge{border-radius:calc( 8px \/ 2 )}.jdgm-full-rev-modal.review-snippet-widget .jdgm-full-rev__pic-img{border-radius:8px}.jdgm-full-rev-modal.review-snippet-widget .jdgm-full-rev__reply{border-radius:8px}.jdgm-full-rev-modal.review-snippet-widget .jdgm-full-rev__replier::before{content:'thebirthstore.com.au'}.jdgm-full-rev-modal.review-snippet-widget .jdgm-full-rev__product-button{border-radius:calc( 8px * 6 )}\n\n \u003c\/style\u003e \u003ci class=\"jdgm-rev-snippet-widget__prev-btn\" style='display: none;'\u003e \u003csvg xmlns=\"http:\/\/www.w3.org\/2000\/svg\" height=\"12\" viewBox=\"0 0 8 12\" width=\"8\" fill=\"#000\"\u003e\u003cpath d=\"M3.09961 6.00005L6.99961 9.90005C7.18294 10.0834 7.27461 10.3167 7.27461 10.6C7.27461 10.8834 7.18294 11.1167 6.99961 11.3C6.81628 11.4834 6.58294 11.575 6.29961 11.575C6.01628 11.575 5.78294 11.4834 5.59961 11.3L0.999609 6.70005C0.899609 6.60005 0.828776 6.49172 0.787109 6.37505C0.745443 6.25838 0.724609 6.13338 0.724609 6.00005C0.724609 5.86672 0.745443 5.74172 0.787109 5.62505C0.828776 5.50838 0.899609 5.40005 0.999609 5.30005L5.59961 0.700049C5.78294 0.516715 6.01628 0.425049 6.29961 0.425049C6.58294 0.425049 6.81628 0.516715 6.99961 0.700049C7.18294 0.883382 7.27461 1.11672 7.27461 1.40005C7.27461 1.68338 7.18294 1.91672 6.99961 2.10005L3.09961 6.00005Z\"\/\u003e\u003c\/svg\u003e \u003c\/i\u003e \u003ci class=\"jdgm-rev-snippet-widget__next-btn\" style='display: none;'\u003e \u003csvg xmlns=\"http:\/\/www.w3.org\/2000\/svg\" height=\"12\" viewBox=\"0 0 8 12\" width=\"8\" fill=\"#000\"\u003e\u003cpath d=\"M4.89961 6.00005L0.999609 2.10005C0.816276 1.91672 0.724609 1.68338 0.724609 1.40005C0.724609 1.11672 0.816276 0.883382 0.999609 0.700049C1.18294 0.516715 1.41628 0.425049 1.69961 0.425049C1.98294 0.425049 2.21628 0.516715 2.39961 0.700049L6.99961 5.30005C7.09961 5.40005 7.17044 5.50838 7.21211 5.62505C7.25378 5.74172 7.27461 5.86672 7.27461 6.00005C7.27461 6.13338 7.25378 6.25838 7.21211 6.37505C7.17044 6.49172 7.09961 6.60005 6.99961 6.70005L2.39961 11.3C2.21628 11.4834 1.98294 11.575 1.69961 11.575C1.41628 11.575 1.18294 11.4834 0.999609 11.3C0.816276 11.1167 0.724609 10.8834 0.724609 10.6C0.724609 10.3167 0.816276 10.0834 0.999609 9.90005L4.89961 6.00005Z\"\/\u003e\u003c\/svg\u003e \u003c\/i\u003e \u003cdiv style=\"overflow: hidden;\"\u003e \u003cdiv class='jdgm-rev-snippet-widget__cards-container'\u003e \u003cdiv class='jdgm-rev-snippet-card' data-review-id='e7b9d08b-2518-4851-b106-22b181600a64' style='display: none;'\u003e \u003cdiv class=\"jdgm-rev-snippet-card__rev-prod-wrapper\"\u003e \u003ca class='jdgm-rev-snippet-card__rev-content-wrapper jdgm-rev-snippet-card__full-review-link' style='text-decoration: none; color: inherit;padding: 0 34px;' role='button' data-review-id='e7b9d08b-2518-4851-b106-22b181600a64'\u003e \u003cdiv class='jdgm-rev-snippet-card__rev-header'\u003e \u003cdiv class='jdgm-rev-snippet-card__rev-rating' aria-label='5 stars' role='img'\u003e \u003cspan class='jdgm-star jdgm--on'\u003e\u003c\/span\u003e\u003cspan class='jdgm-star jdgm--on'\u003e\u003c\/span\u003e\u003cspan class='jdgm-star jdgm--on'\u003e\u003c\/span\u003e\u003cspan class='jdgm-star jdgm--on'\u003e\u003c\/span\u003e\u003cspan class='jdgm-star jdgm--on'\u003e\u003c\/span\u003e \u003c\/div\u003e \u003cdiv class='jdgm-rev-snippet-card__reviewer'\u003e Rebecca Paust \u003c\/div\u003e \u003c\/div\u003e \u003cdiv class='jdgm-rev-snippet-card__rev-content'\u003e \u003cspan class='jdgm-rev-snippet-card__rev-body'\u003e \u003cp\u003eI tried the Deluxe Hot Chocolate and oh my goodness it’s amazing! It’s increased my supply like you wouldn’t believe, and the flavour is enjoyable compared to other lactation products that leave a funny aftertaste.\u003c\/p\u003e \u003c\/span\u003e \u003c\/div\u003e \u003c\/a\u003e \u003c\/div\u003e \u003c\/div\u003e \u003c\/div\u003e \u003c\/div\u003e \u003c\/div\u003e","widget":"\u003cdiv class='jdgm-rev-widg' data-updated-at='2026-03-20T10:54:07Z' data-average-rating='5.00' data-number-of-reviews='1' data-number-of-questions='0' data-image-url='https:\/\/cdn.shopify.com\/s\/files\/1\/0527\/3393\/5805\/files\/red-date-goji-bliss-ball-mix-1544012.png?v=1758829418'\u003e \u003cstyle class='jdgm-temp-hiding-style'\u003e.jdgm-rev-widg{ display: none }\u003c\/style\u003e \u003cdiv class='jdgm-rev-widg__header'\u003e \u003ch2 class='jdgm-rev-widg__title'\u003eCustomer Reviews\u003c\/h2\u003e \u003cdiv class='jdgm-rev-widg__summary'\u003e \u003cdiv class='jdgm-rev-widg__summary-stars' aria-label='Average rating is 5.00 stars' role='img'\u003e \u003cspan class='jdgm-star jdgm--on'\u003e\u003c\/span\u003e\u003cspan class='jdgm-star jdgm--on'\u003e\u003c\/span\u003e\u003cspan class='jdgm-star jdgm--on'\u003e\u003c\/span\u003e\u003cspan class='jdgm-star jdgm--on'\u003e\u003c\/span\u003e\u003cspan class='jdgm-star jdgm--on'\u003e\u003c\/span\u003e \u003c\/div\u003e \u003cdiv class='jdgm-rev-widg__summary-text'\u003eBased on 1 review\u003c\/div\u003e \u003c\/div\u003e \u003ca style='display: none' href='#' class='jdgm-write-rev-link' role='button'\u003eWrite a review\u003c\/a\u003e \u003cdiv class='jdgm-histogram jdgm-temp-hidden'\u003e \u003cdiv class='jdgm-histogram__row' data-rating='5' data-frequency='1' data-percentage='100'\u003e \u003cdiv class='jdgm-histogram__star' role='button' aria-label=\"100% (1) reviews with 5 star rating\" tabindex='0' \u003e\u003cspan class='jdgm-star jdgm--on'\u003e\u003c\/span\u003e\u003cspan class='jdgm-star jdgm--on'\u003e\u003c\/span\u003e\u003cspan class='jdgm-star jdgm--on'\u003e\u003c\/span\u003e\u003cspan class='jdgm-star jdgm--on'\u003e\u003c\/span\u003e\u003cspan class='jdgm-star jdgm--on'\u003e\u003c\/span\u003e\u003c\/div\u003e \u003cdiv class='jdgm-histogram__bar'\u003e \u003cdiv class='jdgm-histogram__bar-content' style='width: 100%;'\u003e \u003c\/div\u003e \u003c\/div\u003e \u003cdiv class='jdgm-histogram__percentage'\u003e100%\u003c\/div\u003e \u003cdiv class='jdgm-histogram__frequency'\u003e(1)\u003c\/div\u003e \u003c\/div\u003e \u003cdiv class='jdgm-histogram__row' data-rating='4' data-frequency='0' data-percentage='0'\u003e \u003cdiv class='jdgm-histogram__star' role='button' aria-label=\"0% (0) reviews with 4 star rating\" tabindex='0' \u003e\u003cspan class='jdgm-star jdgm--on'\u003e\u003c\/span\u003e\u003cspan class='jdgm-star jdgm--on'\u003e\u003c\/span\u003e\u003cspan class='jdgm-star jdgm--on'\u003e\u003c\/span\u003e\u003cspan class='jdgm-star jdgm--on'\u003e\u003c\/span\u003e\u003cspan class='jdgm-star jdgm--off'\u003e\u003c\/span\u003e\u003c\/div\u003e \u003cdiv class='jdgm-histogram__bar'\u003e \u003cdiv class='jdgm-histogram__bar-content' style='width: 0%;'\u003e \u003c\/div\u003e \u003c\/div\u003e \u003cdiv class='jdgm-histogram__percentage'\u003e0%\u003c\/div\u003e \u003cdiv class='jdgm-histogram__frequency'\u003e(0)\u003c\/div\u003e \u003c\/div\u003e \u003cdiv class='jdgm-histogram__row' data-rating='3' data-frequency='0' data-percentage='0'\u003e \u003cdiv class='jdgm-histogram__star' role='button' aria-label=\"0% (0) reviews with 3 star rating\" tabindex='0' \u003e\u003cspan class='jdgm-star jdgm--on'\u003e\u003c\/span\u003e\u003cspan class='jdgm-star jdgm--on'\u003e\u003c\/span\u003e\u003cspan class='jdgm-star jdgm--on'\u003e\u003c\/span\u003e\u003cspan class='jdgm-star jdgm--off'\u003e\u003c\/span\u003e\u003cspan class='jdgm-star jdgm--off'\u003e\u003c\/span\u003e\u003c\/div\u003e \u003cdiv class='jdgm-histogram__bar'\u003e \u003cdiv class='jdgm-histogram__bar-content' style='width: 0%;'\u003e \u003c\/div\u003e \u003c\/div\u003e \u003cdiv class='jdgm-histogram__percentage'\u003e0%\u003c\/div\u003e \u003cdiv class='jdgm-histogram__frequency'\u003e(0)\u003c\/div\u003e \u003c\/div\u003e \u003cdiv class='jdgm-histogram__row' data-rating='2' data-frequency='0' data-percentage='0'\u003e \u003cdiv class='jdgm-histogram__star' role='button' aria-label=\"0% (0) reviews with 2 star rating\" tabindex='0' \u003e\u003cspan class='jdgm-star jdgm--on'\u003e\u003c\/span\u003e\u003cspan class='jdgm-star jdgm--on'\u003e\u003c\/span\u003e\u003cspan class='jdgm-star jdgm--off'\u003e\u003c\/span\u003e\u003cspan class='jdgm-star jdgm--off'\u003e\u003c\/span\u003e\u003cspan class='jdgm-star jdgm--off'\u003e\u003c\/span\u003e\u003c\/div\u003e \u003cdiv class='jdgm-histogram__bar'\u003e \u003cdiv class='jdgm-histogram__bar-content' style='width: 0%;'\u003e \u003c\/div\u003e \u003c\/div\u003e \u003cdiv class='jdgm-histogram__percentage'\u003e0%\u003c\/div\u003e \u003cdiv class='jdgm-histogram__frequency'\u003e(0)\u003c\/div\u003e \u003c\/div\u003e \u003cdiv class='jdgm-histogram__row' data-rating='1' data-frequency='0' data-percentage='0'\u003e \u003cdiv class='jdgm-histogram__star' role='button' aria-label=\"0% (0) reviews with 1 star rating\" tabindex='0' \u003e\u003cspan class='jdgm-star jdgm--on'\u003e\u003c\/span\u003e\u003cspan class='jdgm-star jdgm--off'\u003e\u003c\/span\u003e\u003cspan class='jdgm-star jdgm--off'\u003e\u003c\/span\u003e\u003cspan class='jdgm-star jdgm--off'\u003e\u003c\/span\u003e\u003cspan class='jdgm-star jdgm--off'\u003e\u003c\/span\u003e\u003c\/div\u003e \u003cdiv class='jdgm-histogram__bar'\u003e \u003cdiv class='jdgm-histogram__bar-content' style='width: 0%;'\u003e \u003c\/div\u003e \u003c\/div\u003e \u003cdiv class='jdgm-histogram__percentage'\u003e0%\u003c\/div\u003e \u003cdiv class='jdgm-histogram__frequency'\u003e(0)\u003c\/div\u003e \u003c\/div\u003e \u003cdiv class='jdgm-histogram__row jdgm-histogram__clear-filter' data-rating=null tabindex='0'\u003e\u003c\/div\u003e \u003c\/div\u003e \u003cdiv class='jdgm-rev-widg__sort-wrapper'\u003e\u003c\/div\u003e \u003c\/div\u003e \u003cdiv class='jdgm-rev-widg__body'\u003e \u003cdiv class='jdgm-rev-widg__reviews'\u003e\u003cdiv class='jdgm-rev jdgm-divider-top' data-verified-buyer='true' data-review-id='4362a9a4-5607-48e6-a1cf-c3b3bd53c711' data-review-language='' data-product-title='Red Date Goji Bliss Ball Mix' data-product-url='\/products\/bliss-ball-mixes' data-thumb-up-count='0' data-thumb-down-count='0'\u003e \u003cdiv class='jdgm-rev__header'\u003e \u003cdiv class='jdgm-rev__icon' \u003e E \u003c\/div\u003e \u003cspan class='jdgm-rev__rating' data-score='5' tabindex='0' aria-label='5 star review' role='img'\u003e \u003cspan class='jdgm-star jdgm--on'\u003e\u003c\/span\u003e\u003cspan class='jdgm-star jdgm--on'\u003e\u003c\/span\u003e\u003cspan class='jdgm-star jdgm--on'\u003e\u003c\/span\u003e\u003cspan class='jdgm-star jdgm--on'\u003e\u003c\/span\u003e\u003cspan class='jdgm-star jdgm--on'\u003e\u003c\/span\u003e \u003c\/span\u003e \u003cspan class='jdgm-rev__timestamp jdgm-spinner' data-content='2025-11-19 18:11:43 UTC'\u003e\u003c\/span\u003e \u003cdiv class='jdgm-rev__br'\u003e\u003c\/div\u003e \u003cspan class='jdgm-rev__buyer-badge-wrapper'\u003e \u003cspan class='jdgm-rev__buyer-badge'\u003e\u003c\/span\u003e \u003c\/span\u003e \u003cspan class='jdgm-rev__author-wrapper'\u003e \u003cspan class='jdgm-rev__author'\u003eEllie\u003c\/span\u003e \u003cspan class='jdgm-rev__location' \u003e \u003c\/span\u003e \u003c\/span\u003e \u003c\/div\u003e \u003cdiv class='jdgm-rev__content'\u003e \u003cdiv class='jdgm-rev__custom-form'\u003e \u003c\/div\u003e \u003cb class='jdgm-rev__title'\u003eRed Date Goji Bliss Ball Mix\u003c\/b\u003e \u003cdiv class='jdgm-rev__body'\u003e\u003cp\u003eSo easy to make and they taste amazing. Such a great, quick go to snack when your arms are busy with your little boob barnacle.\u003c\/p\u003e\u003c\/div\u003e \u003cdiv class='jdgm-rev__pics'\u003e \u003c\/div\u003e \u003cdiv class='jdgm-rev__vids'\u003e \u003c\/div\u003e \u003cdiv class='jdgm-rev__transparency-badge-wrapper'\u003e \u003cdiv class='jdgm-rev__transparency-badge' data-badge-type=review_collected_via_store_invitation\u003e\u003c\/div\u003e \u003c\/div\u003e \u003c\/div\u003e \u003cdiv class='jdgm-rev__actions'\u003e \u003cdiv class='jdgm-rev__social'\u003e\u003c\/div\u003e \u003cdiv class='jdgm-rev__votes'\u003e\u003c\/div\u003e \u003c\/div\u003e \u003cdiv class='jdgm-rev__reply'\u003e \u003cdiv class='jdgm-rev__replier-wrapper'\u003e \u003cb class='jdgm-rev__replier'\u003e\u003c\/b\u003e \u003c\/div\u003e \u003cdiv class='jdgm-rev__reply-content'\u003e\u003cp\u003eWe’re so glad you loved them, Ellie. ❤️ It means so much to hear they’re an easy and tasty go-to, especially during those busy moments with your little one. Thank you for sharing.\u003c\/p\u003e\u003c\/div\u003e \u003c\/div\u003e \u003c\/div\u003e\u003c\/div\u003e \u003cdiv class='jdgm-paginate' data-per-page='10' data-url='https:\/\/api.judge.me\/reviews\/reviews_for_widget' style=\"display: none;\"\u003e\u003c\/div\u003e \u003c\/div\u003e \u003cdiv class='jdgm-rev-widg__paginate-spinner-wrapper'\u003e \u003cdiv class='jdgm-spinner'\u003e\u003c\/div\u003e \u003c\/div\u003e \u003c\/div\u003e"},"collections":[{"id":281712427197,"handle":"breastfeeding","title":"Breastfeeding","updated_at":"2026-06-12T19:10:26+08:00","body_html":"","published_at":"2021-12-20T14:19:33+08:00","sort_order":"best-selling","template_suffix":"breastfeeding-collection","disjunctive":false,"rules":[{"column":"tag","relation":"equals","condition":"Breastfeeding"}],"published_scope":"global","image":{"created_at":"2024-05-06T11:59:34+08:00","alt":"Breastfeeding - The Birth Store","width":620,"height":635,"src":"\/\/www.thebirthstore.com.au\/cdn\/shop\/collections\/breastfeeding-793872.jpg?v=1714967974"}},{"id":261657460925,"handle":"buy","title":"Buy","updated_at":"2026-06-12T19:10:26+08:00","body_html":"\u003cp\u003eBrowse all of our pregnancy, labour \u0026amp; birth, postpartum and baby essentials here.\u003cbr\u003e\u003c\/p\u003e\n\u003cp\u003e\u003cspan\u003eYou can even buy now and pay later with Afterpay!\u003c\/span\u003e\u003c\/p\u003e","published_at":"2021-03-10T12:05:31+08:00","sort_order":"best-selling","template_suffix":"shop-all-collection","disjunctive":false,"rules":[{"column":"title","relation":"not_contains","condition":"Hire"}],"published_scope":"global","image":{"created_at":"2024-05-06T11:59:42+08:00","alt":"Buy - The Birth Store","width":2048,"height":2048,"src":"\/\/www.thebirthstore.com.au\/cdn\/shop\/collections\/buy-964856.jpg?v=1714967982"}},{"id":292919476413,"handle":"lactation-products","title":"Lactation Products","updated_at":"2026-06-12T19:10:26+08:00","body_html":"","published_at":"2023-03-22T12:22:41+08:00","sort_order":"best-selling","template_suffix":"lactation-products-collec","disjunctive":false,"rules":[{"column":"tag","relation":"equals","condition":"Lactation Products"}],"published_scope":"global","image":{"created_at":"2024-05-06T12:00:19+08:00","alt":"Lactation Products - The Birth Store","width":1034,"height":922,"src":"\/\/www.thebirthstore.com.au\/cdn\/shop\/collections\/lactation-products-752907.jpg?v=1714968019"}},{"id":261658083517,"handle":"post-partum","title":"Postpartum","updated_at":"2026-06-12T19:10:26+08:00","body_html":"\u003cp\u003eShop your postpartum and hospital bag essentials below. Looking for something we don't currently stock? Please reach out and let us know.\u003cbr\u003e\u003c\/p\u003e\n\u003cp\u003e\u003cspan\u003eYou can even buy now and pay later with Afterpay!\u003c\/span\u003e\u003c\/p\u003e","published_at":"2021-03-10T12:33:47+08:00","sort_order":"best-selling","template_suffix":"postpartum-collection","disjunctive":false,"rules":[{"column":"tag","relation":"equals","condition":"Post-Partum"}],"published_scope":"global","image":{"created_at":"2024-05-06T12:00:36+08:00","alt":"Postpartum - The Birth Store","width":611,"height":702,"src":"\/\/www.thebirthstore.com.au\/cdn\/shop\/collections\/postpartum-150119.jpg?v=1714968037"}},{"id":261658149053,"handle":"pregnancy-and-maternity-products","title":"Pregnancy","updated_at":"2026-06-12T19:10:26+08:00","body_html":"\u003cp\u003eShop your pregnancy essentials below. Looking for something we don't currently stock? Please reach out and let us know.\u003cbr\u003e\u003c\/p\u003e\n\u003cp\u003e\u003cspan\u003eYou can even buy now and pay later with Afterpay!\u003c\/span\u003e\u003c\/p\u003e","published_at":"2021-03-10T12:34:22+08:00","sort_order":"best-selling","template_suffix":"pregnancy-collection","disjunctive":false,"rules":[{"column":"tag","relation":"equals","condition":"Pregnancy"}],"published_scope":"global","image":{"created_at":"2024-05-06T12:00:40+08:00","alt":"Pregnancy - The Birth Store","width":1024,"height":1536,"src":"\/\/www.thebirthstore.com.au\/cdn\/shop\/collections\/pregnancy-899677.jpg?v=1714968040"}},{"id":295224901821,"handle":"pregnancy-health","title":"Pregnancy Health","updated_at":"2026-06-12T19:10:26+08:00","body_html":"","published_at":"2023-11-10T20:48:51+08:00","sort_order":"best-selling","template_suffix":"swaddles-collection","disjunctive":false,"rules":[{"column":"tag","relation":"equals","condition":"Pregnancy Health"}],"published_scope":"global","image":{"created_at":"2024-05-06T12:00:41+08:00","alt":"Pregnancy Health - The Birth Store","width":608,"height":410,"src":"\/\/www.thebirthstore.com.au\/cdn\/shop\/collections\/pregnancy-health-343983.jpg?v=1714968042"}},{"id":326523846845,"handle":"pregnancy-health-1","updated_at":"2026-06-12T19:10:26+08:00","published_at":"2025-10-30T10:44:54+08:00","sort_order":"best-selling","template_suffix":"","published_scope":"global","title":"Pregnancy Health","body_html":"","image":{"created_at":"2025-11-20T21:33:56+08:00","alt":"Pregnancy Health - The Birth Store","width":522,"height":525,"src":"\/\/www.thebirthstore.com.au\/cdn\/shop\/collections\/pregnancy-health-1617860.jpg?v=1763645636"}},{"id":291456483517,"handle":"shop-all","title":"Shop All - Mum","updated_at":"2026-06-12T19:10:26+08:00","body_html":"","published_at":"2022-12-23T22:04:39+08:00","sort_order":"best-selling","template_suffix":"shop-all-collection","disjunctive":false,"rules":[{"column":"variant_price","relation":"greater_than","condition":"1"},{"column":"title","relation":"not_contains","condition":"Batteries"},{"column":"tag","relation":"equals","condition":"Mum"}],"published_scope":"global","image":{"created_at":"2024-05-06T12:00:54+08:00","alt":"Shop All - The Birth Store","width":1365,"height":2048,"src":"\/\/www.thebirthstore.com.au\/cdn\/shop\/collections\/shop-all-693176.jpg?v=1714968055"}}]}
{"item":{"id":7469967474877,"title":"Frill Breastfeeding Singlet","handle":"frill-breastfeeding-singlet","description":"\u003cp\u003eWe are taking LUXE breastfeeding wear to a whole new level!\u003c\/p\u003e\n\u003cp\u003eDress it up or down, the versatility is the winner! The first of its kind, this sophisticated beauty has a built in bra with fitted, stretchy fabric that will keep you feeling supported in the right places.\u003c\/p\u003e\n\u003cp\u003eSquare neck line with easy button shoulder studs provides bub easy access for feeding and you the privacy \u0026amp; convenience you need.\u003c\/p\u003e\n\u003cp\u003eThere is no need to raise your top to expose your tummy, it has extra length to tuck in if you wish \u0026amp; an extra hem tag to show its quality. No one can tell this is a breastfeeding friendly banger!\u003c\/p\u003e\n\u003cp\u003e- Breathable light weight 180gsm\u003c\/p\u003e\n\u003cp\u003e- 95% Cotton, 5% Spandex\u003c\/p\u003e\n\u003cp\u003e Our models are wearing size S (8) \u0026amp; 2XL (16). True to size.\u003c\/p\u003e\n\u003cp\u003e\u003cspan data-mce-fragment=\"1\"\u003eThis product is stocked at a 3\u003c\/span\u003e\u003csup data-mce-fragment=\"1\"\u003erd\u003c\/sup\u003e\u003cspan data-mce-fragment=\"1\"\u003e party warehouse, if ordering with other products you’ll receive two packages. This product will have a turn around time of 10 days if pickup is selected on checkout. Any questions, please contact us \u003ca title=\"Contact Us\" href=\"https:\/\/www.thebirthstore.com.au\/pages\/contact-us\" data-mce-fragment=\"1\" data-mce-href=\"https:\/\/www.thebirthstore.com.au\/pages\/contact-us\" target=\"_blank\"\u003ehere\u003c\/a\u003e.\u003c\/span\u003e\u003c\/p\u003e","published_at":"2025-11-07T11:44:09+08:00","created_at":"2023-05-03T11:03:08+08:00","vendor":"Gold Miilk","type":"","tags":["Baby Shower Gifts - Mum","Breastfeeding","Breastfeeding Clothing","Hospital Bag","Mum"],"price":5299,"price_min":5299,"price_max":5299,"available":true,"price_varies":false,"compare_at_price":null,"compare_at_price_min":0,"compare_at_price_max":0,"compare_at_price_varies":false,"variants":[{"id":42808429969597,"title":"XS (6) \/ Black","option1":"XS (6)","option2":"Black","option3":null,"sku":"","requires_shipping":true,"taxable":false,"featured_image":{"id":34641019895997,"product_id":7469967474877,"position":1,"created_at":"2024-05-06T11:59:48+08:00","updated_at":"2024-05-06T11:59:48+08:00","alt":"Frill Breastfeeding Singlet - The Birth Store-Gold Miilk","width":1080,"height":1080,"src":"\/\/www.thebirthstore.com.au\/cdn\/shop\/files\/frill-breastfeeding-singlet-568549.jpg?v=1714967988","variant_ids":[42808429969597,42808430002365,42808430035133,42808430067901,42808430100669,42808430133437,42808430166205,42808430198973]},"available":false,"name":"Frill Breastfeeding Singlet - XS (6) \/ Black","public_title":"XS (6) \/ Black","options":["XS (6)","Black"],"price":5299,"weight":0,"compare_at_price":null,"inventory_management":"shopify","barcode":"29969597","featured_media":{"alt":"Frill Breastfeeding Singlet - The Birth Store-Gold Miilk","id":27007588827325,"position":1,"preview_image":{"aspect_ratio":1.0,"height":1080,"width":1080,"src":"\/\/www.thebirthstore.com.au\/cdn\/shop\/files\/frill-breastfeeding-singlet-568549.jpg?v=1714967988"}},"requires_selling_plan":false,"selling_plan_allocations":[],"quantity_rule":{"min":1,"max":null,"increment":1}},{"id":42808430002365,"title":"S (8) \/ Black","option1":"S (8)","option2":"Black","option3":null,"sku":"","requires_shipping":true,"taxable":false,"featured_image":{"id":34641019895997,"product_id":7469967474877,"position":1,"created_at":"2024-05-06T11:59:48+08:00","updated_at":"2024-05-06T11:59:48+08:00","alt":"Frill Breastfeeding Singlet - The Birth Store-Gold Miilk","width":1080,"height":1080,"src":"\/\/www.thebirthstore.com.au\/cdn\/shop\/files\/frill-breastfeeding-singlet-568549.jpg?v=1714967988","variant_ids":[42808429969597,42808430002365,42808430035133,42808430067901,42808430100669,42808430133437,42808430166205,42808430198973]},"available":false,"name":"Frill Breastfeeding Singlet - S (8) \/ Black","public_title":"S (8) \/ Black","options":["S (8)","Black"],"price":5299,"weight":0,"compare_at_price":null,"inventory_management":"shopify","barcode":"30002365","featured_media":{"alt":"Frill Breastfeeding Singlet - The Birth Store-Gold Miilk","id":27007588827325,"position":1,"preview_image":{"aspect_ratio":1.0,"height":1080,"width":1080,"src":"\/\/www.thebirthstore.com.au\/cdn\/shop\/files\/frill-breastfeeding-singlet-568549.jpg?v=1714967988"}},"requires_selling_plan":false,"selling_plan_allocations":[],"quantity_rule":{"min":1,"max":null,"increment":1}},{"id":42808430035133,"title":"M (10) \/ Black","option1":"M (10)","option2":"Black","option3":null,"sku":"","requires_shipping":true,"taxable":false,"featured_image":{"id":34641019895997,"product_id":7469967474877,"position":1,"created_at":"2024-05-06T11:59:48+08:00","updated_at":"2024-05-06T11:59:48+08:00","alt":"Frill Breastfeeding Singlet - The Birth Store-Gold Miilk","width":1080,"height":1080,"src":"\/\/www.thebirthstore.com.au\/cdn\/shop\/files\/frill-breastfeeding-singlet-568549.jpg?v=1714967988","variant_ids":[42808429969597,42808430002365,42808430035133,42808430067901,42808430100669,42808430133437,42808430166205,42808430198973]},"available":false,"name":"Frill Breastfeeding Singlet - M (10) \/ Black","public_title":"M (10) \/ Black","options":["M (10)","Black"],"price":5299,"weight":0,"compare_at_price":null,"inventory_management":"shopify","barcode":"30035133","featured_media":{"alt":"Frill Breastfeeding Singlet - The Birth Store-Gold Miilk","id":27007588827325,"position":1,"preview_image":{"aspect_ratio":1.0,"height":1080,"width":1080,"src":"\/\/www.thebirthstore.com.au\/cdn\/shop\/files\/frill-breastfeeding-singlet-568549.jpg?v=1714967988"}},"requires_selling_plan":false,"selling_plan_allocations":[],"quantity_rule":{"min":1,"max":null,"increment":1}},{"id":42808430067901,"title":"L (12) \/ Black","option1":"L (12)","option2":"Black","option3":null,"sku":"","requires_shipping":true,"taxable":false,"featured_image":{"id":34641019895997,"product_id":7469967474877,"position":1,"created_at":"2024-05-06T11:59:48+08:00","updated_at":"2024-05-06T11:59:48+08:00","alt":"Frill Breastfeeding Singlet - The Birth Store-Gold Miilk","width":1080,"height":1080,"src":"\/\/www.thebirthstore.com.au\/cdn\/shop\/files\/frill-breastfeeding-singlet-568549.jpg?v=1714967988","variant_ids":[42808429969597,42808430002365,42808430035133,42808430067901,42808430100669,42808430133437,42808430166205,42808430198973]},"available":false,"name":"Frill Breastfeeding Singlet - L (12) \/ Black","public_title":"L (12) \/ Black","options":["L (12)","Black"],"price":5299,"weight":0,"compare_at_price":null,"inventory_management":"shopify","barcode":"30067901","featured_media":{"alt":"Frill Breastfeeding Singlet - The Birth Store-Gold Miilk","id":27007588827325,"position":1,"preview_image":{"aspect_ratio":1.0,"height":1080,"width":1080,"src":"\/\/www.thebirthstore.com.au\/cdn\/shop\/files\/frill-breastfeeding-singlet-568549.jpg?v=1714967988"}},"requires_selling_plan":false,"selling_plan_allocations":[],"quantity_rule":{"min":1,"max":null,"increment":1}},{"id":42808430100669,"title":"XL (14) \/ Black","option1":"XL (14)","option2":"Black","option3":null,"sku":"","requires_shipping":true,"taxable":false,"featured_image":{"id":34641019895997,"product_id":7469967474877,"position":1,"created_at":"2024-05-06T11:59:48+08:00","updated_at":"2024-05-06T11:59:48+08:00","alt":"Frill Breastfeeding Singlet - The Birth Store-Gold Miilk","width":1080,"height":1080,"src":"\/\/www.thebirthstore.com.au\/cdn\/shop\/files\/frill-breastfeeding-singlet-568549.jpg?v=1714967988","variant_ids":[42808429969597,42808430002365,42808430035133,42808430067901,42808430100669,42808430133437,42808430166205,42808430198973]},"available":false,"name":"Frill Breastfeeding Singlet - XL (14) \/ Black","public_title":"XL (14) \/ Black","options":["XL (14)","Black"],"price":5299,"weight":0,"compare_at_price":null,"inventory_management":"shopify","barcode":"30100669","featured_media":{"alt":"Frill Breastfeeding Singlet - The Birth Store-Gold Miilk","id":27007588827325,"position":1,"preview_image":{"aspect_ratio":1.0,"height":1080,"width":1080,"src":"\/\/www.thebirthstore.com.au\/cdn\/shop\/files\/frill-breastfeeding-singlet-568549.jpg?v=1714967988"}},"requires_selling_plan":false,"selling_plan_allocations":[],"quantity_rule":{"min":1,"max":null,"increment":1}},{"id":42808430133437,"title":"2XL (16) \/ Black","option1":"2XL (16)","option2":"Black","option3":null,"sku":"","requires_shipping":true,"taxable":false,"featured_image":{"id":34641019895997,"product_id":7469967474877,"position":1,"created_at":"2024-05-06T11:59:48+08:00","updated_at":"2024-05-06T11:59:48+08:00","alt":"Frill Breastfeeding Singlet - The Birth Store-Gold Miilk","width":1080,"height":1080,"src":"\/\/www.thebirthstore.com.au\/cdn\/shop\/files\/frill-breastfeeding-singlet-568549.jpg?v=1714967988","variant_ids":[42808429969597,42808430002365,42808430035133,42808430067901,42808430100669,42808430133437,42808430166205,42808430198973]},"available":true,"name":"Frill Breastfeeding Singlet - 2XL (16) \/ Black","public_title":"2XL (16) \/ Black","options":["2XL (16)","Black"],"price":5299,"weight":0,"compare_at_price":null,"inventory_management":"shopify","barcode":"30133437","featured_media":{"alt":"Frill Breastfeeding Singlet - The Birth Store-Gold Miilk","id":27007588827325,"position":1,"preview_image":{"aspect_ratio":1.0,"height":1080,"width":1080,"src":"\/\/www.thebirthstore.com.au\/cdn\/shop\/files\/frill-breastfeeding-singlet-568549.jpg?v=1714967988"}},"requires_selling_plan":false,"selling_plan_allocations":[],"quantity_rule":{"min":1,"max":null,"increment":1}},{"id":42808430166205,"title":"3XL (18) \/ Black","option1":"3XL (18)","option2":"Black","option3":null,"sku":"","requires_shipping":true,"taxable":false,"featured_image":{"id":34641019895997,"product_id":7469967474877,"position":1,"created_at":"2024-05-06T11:59:48+08:00","updated_at":"2024-05-06T11:59:48+08:00","alt":"Frill Breastfeeding Singlet - The Birth Store-Gold Miilk","width":1080,"height":1080,"src":"\/\/www.thebirthstore.com.au\/cdn\/shop\/files\/frill-breastfeeding-singlet-568549.jpg?v=1714967988","variant_ids":[42808429969597,42808430002365,42808430035133,42808430067901,42808430100669,42808430133437,42808430166205,42808430198973]},"available":false,"name":"Frill Breastfeeding Singlet - 3XL (18) \/ Black","public_title":"3XL (18) \/ Black","options":["3XL (18)","Black"],"price":5299,"weight":0,"compare_at_price":null,"inventory_management":"shopify","barcode":"30166205","featured_media":{"alt":"Frill Breastfeeding Singlet - The Birth Store-Gold Miilk","id":27007588827325,"position":1,"preview_image":{"aspect_ratio":1.0,"height":1080,"width":1080,"src":"\/\/www.thebirthstore.com.au\/cdn\/shop\/files\/frill-breastfeeding-singlet-568549.jpg?v=1714967988"}},"requires_selling_plan":false,"selling_plan_allocations":[],"quantity_rule":{"min":1,"max":null,"increment":1}},{"id":42808430198973,"title":"4XL (20) \/ Black","option1":"4XL (20)","option2":"Black","option3":null,"sku":"","requires_shipping":true,"taxable":false,"featured_image":{"id":34641019895997,"product_id":7469967474877,"position":1,"created_at":"2024-05-06T11:59:48+08:00","updated_at":"2024-05-06T11:59:48+08:00","alt":"Frill Breastfeeding Singlet - The Birth Store-Gold Miilk","width":1080,"height":1080,"src":"\/\/www.thebirthstore.com.au\/cdn\/shop\/files\/frill-breastfeeding-singlet-568549.jpg?v=1714967988","variant_ids":[42808429969597,42808430002365,42808430035133,42808430067901,42808430100669,42808430133437,42808430166205,42808430198973]},"available":false,"name":"Frill Breastfeeding Singlet - 4XL (20) \/ Black","public_title":"4XL (20) \/ Black","options":["4XL (20)","Black"],"price":5299,"weight":0,"compare_at_price":null,"inventory_management":"shopify","barcode":"30198973","featured_media":{"alt":"Frill Breastfeeding Singlet - The Birth Store-Gold Miilk","id":27007588827325,"position":1,"preview_image":{"aspect_ratio":1.0,"height":1080,"width":1080,"src":"\/\/www.thebirthstore.com.au\/cdn\/shop\/files\/frill-breastfeeding-singlet-568549.jpg?v=1714967988"}},"requires_selling_plan":false,"selling_plan_allocations":[],"quantity_rule":{"min":1,"max":null,"increment":1}},{"id":43728301949117,"title":"XS (6) \/ Watermelon","option1":"XS (6)","option2":"Watermelon","option3":null,"sku":"","requires_shipping":true,"taxable":false,"featured_image":{"id":38738751160509,"product_id":7469967474877,"position":22,"created_at":"2025-11-02T22:42:33+08:00","updated_at":"2025-11-08T07:28:09+08:00","alt":"Frill Breastfeeding Singlet - The Birth Store - Gold Miilk","width":1080,"height":1080,"src":"\/\/www.thebirthstore.com.au\/cdn\/shop\/files\/frill-breastfeeding-singlet-7941025.png?v=1762558089","variant_ids":[43728301949117,43728302014653,43728302080189,43728302145725,43728302211261,43728302276797,43728302342333,43728302407869]},"available":false,"name":"Frill Breastfeeding Singlet - XS (6) \/ Watermelon","public_title":"XS (6) \/ Watermelon","options":["XS (6)","Watermelon"],"price":5299,"weight":0,"compare_at_price":null,"inventory_management":"shopify","barcode":"01949117","featured_media":{"alt":"Frill Breastfeeding Singlet - The Birth Store - Gold Miilk","id":29988455809213,"position":22,"preview_image":{"aspect_ratio":1.0,"height":1080,"width":1080,"src":"\/\/www.thebirthstore.com.au\/cdn\/shop\/files\/frill-breastfeeding-singlet-7941025.png?v=1762558089"}},"requires_selling_plan":false,"selling_plan_allocations":[],"quantity_rule":{"min":1,"max":null,"increment":1}},{"id":43728302014653,"title":"S (8) \/ Watermelon","option1":"S (8)","option2":"Watermelon","option3":null,"sku":"","requires_shipping":true,"taxable":false,"featured_image":{"id":38738751160509,"product_id":7469967474877,"position":22,"created_at":"2025-11-02T22:42:33+08:00","updated_at":"2025-11-08T07:28:09+08:00","alt":"Frill Breastfeeding Singlet - The Birth Store - Gold Miilk","width":1080,"height":1080,"src":"\/\/www.thebirthstore.com.au\/cdn\/shop\/files\/frill-breastfeeding-singlet-7941025.png?v=1762558089","variant_ids":[43728301949117,43728302014653,43728302080189,43728302145725,43728302211261,43728302276797,43728302342333,43728302407869]},"available":true,"name":"Frill Breastfeeding Singlet - S (8) \/ Watermelon","public_title":"S (8) \/ Watermelon","options":["S (8)","Watermelon"],"price":5299,"weight":0,"compare_at_price":null,"inventory_management":"shopify","barcode":"02014653","featured_media":{"alt":"Frill Breastfeeding Singlet - The Birth Store - Gold Miilk","id":29988455809213,"position":22,"preview_image":{"aspect_ratio":1.0,"height":1080,"width":1080,"src":"\/\/www.thebirthstore.com.au\/cdn\/shop\/files\/frill-breastfeeding-singlet-7941025.png?v=1762558089"}},"requires_selling_plan":false,"selling_plan_allocations":[],"quantity_rule":{"min":1,"max":null,"increment":1}},{"id":43728302080189,"title":"M (10) \/ Watermelon","option1":"M (10)","option2":"Watermelon","option3":null,"sku":"","requires_shipping":true,"taxable":false,"featured_image":{"id":38738751160509,"product_id":7469967474877,"position":22,"created_at":"2025-11-02T22:42:33+08:00","updated_at":"2025-11-08T07:28:09+08:00","alt":"Frill Breastfeeding Singlet - The Birth Store - Gold Miilk","width":1080,"height":1080,"src":"\/\/www.thebirthstore.com.au\/cdn\/shop\/files\/frill-breastfeeding-singlet-7941025.png?v=1762558089","variant_ids":[43728301949117,43728302014653,43728302080189,43728302145725,43728302211261,43728302276797,43728302342333,43728302407869]},"available":false,"name":"Frill Breastfeeding Singlet - M (10) \/ Watermelon","public_title":"M (10) \/ Watermelon","options":["M (10)","Watermelon"],"price":5299,"weight":0,"compare_at_price":null,"inventory_management":"shopify","barcode":"02080189","featured_media":{"alt":"Frill Breastfeeding Singlet - The Birth Store - Gold Miilk","id":29988455809213,"position":22,"preview_image":{"aspect_ratio":1.0,"height":1080,"width":1080,"src":"\/\/www.thebirthstore.com.au\/cdn\/shop\/files\/frill-breastfeeding-singlet-7941025.png?v=1762558089"}},"requires_selling_plan":false,"selling_plan_allocations":[],"quantity_rule":{"min":1,"max":null,"increment":1}},{"id":43728302145725,"title":"L (12) \/ Watermelon","option1":"L (12)","option2":"Watermelon","option3":null,"sku":"","requires_shipping":true,"taxable":false,"featured_image":{"id":38738751160509,"product_id":7469967474877,"position":22,"created_at":"2025-11-02T22:42:33+08:00","updated_at":"2025-11-08T07:28:09+08:00","alt":"Frill Breastfeeding Singlet - The Birth Store - Gold Miilk","width":1080,"height":1080,"src":"\/\/www.thebirthstore.com.au\/cdn\/shop\/files\/frill-breastfeeding-singlet-7941025.png?v=1762558089","variant_ids":[43728301949117,43728302014653,43728302080189,43728302145725,43728302211261,43728302276797,43728302342333,43728302407869]},"available":false,"name":"Frill Breastfeeding Singlet - L (12) \/ Watermelon","public_title":"L (12) \/ Watermelon","options":["L (12)","Watermelon"],"price":5299,"weight":0,"compare_at_price":null,"inventory_management":"shopify","barcode":"02145725","featured_media":{"alt":"Frill Breastfeeding Singlet - The Birth Store - Gold Miilk","id":29988455809213,"position":22,"preview_image":{"aspect_ratio":1.0,"height":1080,"width":1080,"src":"\/\/www.thebirthstore.com.au\/cdn\/shop\/files\/frill-breastfeeding-singlet-7941025.png?v=1762558089"}},"requires_selling_plan":false,"selling_plan_allocations":[],"quantity_rule":{"min":1,"max":null,"increment":1}},{"id":43728302211261,"title":"XL (14) \/ Watermelon","option1":"XL (14)","option2":"Watermelon","option3":null,"sku":"","requires_shipping":true,"taxable":false,"featured_image":{"id":38738751160509,"product_id":7469967474877,"position":22,"created_at":"2025-11-02T22:42:33+08:00","updated_at":"2025-11-08T07:28:09+08:00","alt":"Frill Breastfeeding Singlet - The Birth Store - Gold Miilk","width":1080,"height":1080,"src":"\/\/www.thebirthstore.com.au\/cdn\/shop\/files\/frill-breastfeeding-singlet-7941025.png?v=1762558089","variant_ids":[43728301949117,43728302014653,43728302080189,43728302145725,43728302211261,43728302276797,43728302342333,43728302407869]},"available":false,"name":"Frill Breastfeeding Singlet - XL (14) \/ Watermelon","public_title":"XL (14) \/ Watermelon","options":["XL (14)","Watermelon"],"price":5299,"weight":0,"compare_at_price":null,"inventory_management":"shopify","barcode":"02211261","featured_media":{"alt":"Frill Breastfeeding Singlet - The Birth Store - Gold Miilk","id":29988455809213,"position":22,"preview_image":{"aspect_ratio":1.0,"height":1080,"width":1080,"src":"\/\/www.thebirthstore.com.au\/cdn\/shop\/files\/frill-breastfeeding-singlet-7941025.png?v=1762558089"}},"requires_selling_plan":false,"selling_plan_allocations":[],"quantity_rule":{"min":1,"max":null,"increment":1}},{"id":43728302276797,"title":"2XL (16) \/ Watermelon","option1":"2XL (16)","option2":"Watermelon","option3":null,"sku":"","requires_shipping":true,"taxable":false,"featured_image":{"id":38738751160509,"product_id":7469967474877,"position":22,"created_at":"2025-11-02T22:42:33+08:00","updated_at":"2025-11-08T07:28:09+08:00","alt":"Frill Breastfeeding Singlet - The Birth Store - Gold Miilk","width":1080,"height":1080,"src":"\/\/www.thebirthstore.com.au\/cdn\/shop\/files\/frill-breastfeeding-singlet-7941025.png?v=1762558089","variant_ids":[43728301949117,43728302014653,43728302080189,43728302145725,43728302211261,43728302276797,43728302342333,43728302407869]},"available":false,"name":"Frill Breastfeeding Singlet - 2XL (16) \/ Watermelon","public_title":"2XL (16) \/ Watermelon","options":["2XL (16)","Watermelon"],"price":5299,"weight":0,"compare_at_price":null,"inventory_management":"shopify","barcode":"02276797","featured_media":{"alt":"Frill Breastfeeding Singlet - The Birth Store - Gold Miilk","id":29988455809213,"position":22,"preview_image":{"aspect_ratio":1.0,"height":1080,"width":1080,"src":"\/\/www.thebirthstore.com.au\/cdn\/shop\/files\/frill-breastfeeding-singlet-7941025.png?v=1762558089"}},"requires_selling_plan":false,"selling_plan_allocations":[],"quantity_rule":{"min":1,"max":null,"increment":1}},{"id":43728302342333,"title":"3XL (18) \/ Watermelon","option1":"3XL (18)","option2":"Watermelon","option3":null,"sku":"","requires_shipping":true,"taxable":false,"featured_image":{"id":38738751160509,"product_id":7469967474877,"position":22,"created_at":"2025-11-02T22:42:33+08:00","updated_at":"2025-11-08T07:28:09+08:00","alt":"Frill Breastfeeding Singlet - The Birth Store - Gold Miilk","width":1080,"height":1080,"src":"\/\/www.thebirthstore.com.au\/cdn\/shop\/files\/frill-breastfeeding-singlet-7941025.png?v=1762558089","variant_ids":[43728301949117,43728302014653,43728302080189,43728302145725,43728302211261,43728302276797,43728302342333,43728302407869]},"available":false,"name":"Frill Breastfeeding Singlet - 3XL (18) \/ Watermelon","public_title":"3XL (18) \/ Watermelon","options":["3XL (18)","Watermelon"],"price":5299,"weight":0,"compare_at_price":null,"inventory_management":"shopify","barcode":"02342333","featured_media":{"alt":"Frill Breastfeeding Singlet - The Birth Store - Gold Miilk","id":29988455809213,"position":22,"preview_image":{"aspect_ratio":1.0,"height":1080,"width":1080,"src":"\/\/www.thebirthstore.com.au\/cdn\/shop\/files\/frill-breastfeeding-singlet-7941025.png?v=1762558089"}},"requires_selling_plan":false,"selling_plan_allocations":[],"quantity_rule":{"min":1,"max":null,"increment":1}},{"id":43728302407869,"title":"4XL (20) \/ Watermelon","option1":"4XL (20)","option2":"Watermelon","option3":null,"sku":"","requires_shipping":true,"taxable":false,"featured_image":{"id":38738751160509,"product_id":7469967474877,"position":22,"created_at":"2025-11-02T22:42:33+08:00","updated_at":"2025-11-08T07:28:09+08:00","alt":"Frill Breastfeeding Singlet - The Birth Store - Gold Miilk","width":1080,"height":1080,"src":"\/\/www.thebirthstore.com.au\/cdn\/shop\/files\/frill-breastfeeding-singlet-7941025.png?v=1762558089","variant_ids":[43728301949117,43728302014653,43728302080189,43728302145725,43728302211261,43728302276797,43728302342333,43728302407869]},"available":false,"name":"Frill Breastfeeding Singlet - 4XL (20) \/ Watermelon","public_title":"4XL (20) \/ Watermelon","options":["4XL (20)","Watermelon"],"price":5299,"weight":0,"compare_at_price":null,"inventory_management":"shopify","barcode":"02407869","featured_media":{"alt":"Frill Breastfeeding Singlet - The Birth Store - Gold Miilk","id":29988455809213,"position":22,"preview_image":{"aspect_ratio":1.0,"height":1080,"width":1080,"src":"\/\/www.thebirthstore.com.au\/cdn\/shop\/files\/frill-breastfeeding-singlet-7941025.png?v=1762558089"}},"requires_selling_plan":false,"selling_plan_allocations":[],"quantity_rule":{"min":1,"max":null,"increment":1}}],"images":["\/\/www.thebirthstore.com.au\/cdn\/shop\/files\/frill-breastfeeding-singlet-568549.jpg?v=1714967988","\/\/www.thebirthstore.com.au\/cdn\/shop\/files\/frill-breastfeeding-singlet-399942.jpg?v=1714967988","\/\/www.thebirthstore.com.au\/cdn\/shop\/files\/frill-breastfeeding-singlet-848196.jpg?v=1714967988","\/\/www.thebirthstore.com.au\/cdn\/shop\/files\/frill-breastfeeding-singlet-181264.jpg?v=1714967988","\/\/www.thebirthstore.com.au\/cdn\/shop\/files\/frill-breastfeeding-singlet-665592.jpg?v=1714967988","\/\/www.thebirthstore.com.au\/cdn\/shop\/files\/frill-breastfeeding-singlet-284171.jpg?v=1714967988","\/\/www.thebirthstore.com.au\/cdn\/shop\/files\/frill-breastfeeding-singlet-961279.jpg?v=1714967988","\/\/www.thebirthstore.com.au\/cdn\/shop\/files\/frill-breastfeeding-singlet-986401.jpg?v=1714967988","\/\/www.thebirthstore.com.au\/cdn\/shop\/files\/frill-breastfeeding-singlet-588489.jpg?v=1714967988","\/\/www.thebirthstore.com.au\/cdn\/shop\/files\/frill-breastfeeding-singlet-352465.jpg?v=1714967988","\/\/www.thebirthstore.com.au\/cdn\/shop\/files\/frill-breastfeeding-singlet-344122.jpg?v=1714967988","\/\/www.thebirthstore.com.au\/cdn\/shop\/files\/frill-breastfeeding-singlet-772186.webp?v=1714967988","\/\/www.thebirthstore.com.au\/cdn\/shop\/files\/frill-breastfeeding-singlet-361299.webp?v=1714967988","\/\/www.thebirthstore.com.au\/cdn\/shop\/files\/frill-breastfeeding-singlet-859253.webp?v=1714967988","\/\/www.thebirthstore.com.au\/cdn\/shop\/files\/frill-breastfeeding-singlet-728393.webp?v=1714967989","\/\/www.thebirthstore.com.au\/cdn\/shop\/files\/frill-breastfeeding-singlet-198065.webp?v=1714967989","\/\/www.thebirthstore.com.au\/cdn\/shop\/files\/frill-breastfeeding-singlet-956139.webp?v=1714967989","\/\/www.thebirthstore.com.au\/cdn\/shop\/files\/frill-breastfeeding-singlet-932755.webp?v=1714967989","\/\/www.thebirthstore.com.au\/cdn\/shop\/files\/frill-breastfeeding-singlet-576017.webp?v=1714967989","\/\/www.thebirthstore.com.au\/cdn\/shop\/files\/frill-breastfeeding-singlet-607529.webp?v=1714967989","\/\/www.thebirthstore.com.au\/cdn\/shop\/files\/frill-breastfeeding-singlet-280100.webp?v=1714967989","\/\/www.thebirthstore.com.au\/cdn\/shop\/files\/frill-breastfeeding-singlet-7941025.png?v=1762558089"],"featured_image":"\/\/www.thebirthstore.com.au\/cdn\/shop\/files\/frill-breastfeeding-singlet-568549.jpg?v=1714967988","options":["Size","Colour"],"media":[{"alt":"Frill Breastfeeding Singlet - The Birth Store-Gold Miilk","id":27007588827325,"position":1,"preview_image":{"aspect_ratio":1.0,"height":1080,"width":1080,"src":"\/\/www.thebirthstore.com.au\/cdn\/shop\/files\/frill-breastfeeding-singlet-568549.jpg?v=1714967988"},"aspect_ratio":1.0,"height":1080,"media_type":"image","src":"\/\/www.thebirthstore.com.au\/cdn\/shop\/files\/frill-breastfeeding-singlet-568549.jpg?v=1714967988","width":1080},{"alt":"Frill Breastfeeding Singlet - The Birth Store-Gold Miilk","id":27007588991165,"position":2,"preview_image":{"aspect_ratio":1.0,"height":640,"width":640,"src":"\/\/www.thebirthstore.com.au\/cdn\/shop\/files\/frill-breastfeeding-singlet-399942.jpg?v=1714967988"},"aspect_ratio":1.0,"height":640,"media_type":"image","src":"\/\/www.thebirthstore.com.au\/cdn\/shop\/files\/frill-breastfeeding-singlet-399942.jpg?v=1714967988","width":640},{"alt":"Frill Breastfeeding Singlet - The Birth Store-Gold Miilk","id":27007589187773,"position":3,"preview_image":{"aspect_ratio":1.0,"height":640,"width":640,"src":"\/\/www.thebirthstore.com.au\/cdn\/shop\/files\/frill-breastfeeding-singlet-848196.jpg?v=1714967988"},"aspect_ratio":1.0,"height":640,"media_type":"image","src":"\/\/www.thebirthstore.com.au\/cdn\/shop\/files\/frill-breastfeeding-singlet-848196.jpg?v=1714967988","width":640},{"alt":"Frill Breastfeeding Singlet - The Birth Store-Gold Miilk","id":27007589253309,"position":4,"preview_image":{"aspect_ratio":1.0,"height":640,"width":640,"src":"\/\/www.thebirthstore.com.au\/cdn\/shop\/files\/frill-breastfeeding-singlet-181264.jpg?v=1714967988"},"aspect_ratio":1.0,"height":640,"media_type":"image","src":"\/\/www.thebirthstore.com.au\/cdn\/shop\/files\/frill-breastfeeding-singlet-181264.jpg?v=1714967988","width":640},{"alt":"Frill Breastfeeding Singlet - The Birth Store-Gold Miilk","id":27007589417149,"position":5,"preview_image":{"aspect_ratio":1.0,"height":640,"width":640,"src":"\/\/www.thebirthstore.com.au\/cdn\/shop\/files\/frill-breastfeeding-singlet-665592.jpg?v=1714967988"},"aspect_ratio":1.0,"height":640,"media_type":"image","src":"\/\/www.thebirthstore.com.au\/cdn\/shop\/files\/frill-breastfeeding-singlet-665592.jpg?v=1714967988","width":640},{"alt":"Frill Breastfeeding Singlet - The Birth Store-Gold Miilk","id":27007589515453,"position":6,"preview_image":{"aspect_ratio":0.667,"height":960,"width":640,"src":"\/\/www.thebirthstore.com.au\/cdn\/shop\/files\/frill-breastfeeding-singlet-284171.jpg?v=1714967988"},"aspect_ratio":0.667,"height":960,"media_type":"image","src":"\/\/www.thebirthstore.com.au\/cdn\/shop\/files\/frill-breastfeeding-singlet-284171.jpg?v=1714967988","width":640},{"alt":"Frill Breastfeeding Singlet - The Birth Store-Gold Miilk","id":27007589613757,"position":7,"preview_image":{"aspect_ratio":1.0,"height":587,"width":587,"src":"\/\/www.thebirthstore.com.au\/cdn\/shop\/files\/frill-breastfeeding-singlet-961279.jpg?v=1714967988"},"aspect_ratio":1.0,"height":587,"media_type":"image","src":"\/\/www.thebirthstore.com.au\/cdn\/shop\/files\/frill-breastfeeding-singlet-961279.jpg?v=1714967988","width":587},{"alt":"Frill Breastfeeding Singlet - The Birth Store-Gold Miilk","id":27007589712061,"position":8,"preview_image":{"aspect_ratio":1.0,"height":640,"width":640,"src":"\/\/www.thebirthstore.com.au\/cdn\/shop\/files\/frill-breastfeeding-singlet-986401.jpg?v=1714967988"},"aspect_ratio":1.0,"height":640,"media_type":"image","src":"\/\/www.thebirthstore.com.au\/cdn\/shop\/files\/frill-breastfeeding-singlet-986401.jpg?v=1714967988","width":640},{"alt":"Frill Breastfeeding Singlet - The Birth Store-Gold Miilk","id":27007589744829,"position":9,"preview_image":{"aspect_ratio":1.0,"height":700,"width":700,"src":"\/\/www.thebirthstore.com.au\/cdn\/shop\/files\/frill-breastfeeding-singlet-588489.jpg?v=1714967988"},"aspect_ratio":1.0,"height":700,"media_type":"image","src":"\/\/www.thebirthstore.com.au\/cdn\/shop\/files\/frill-breastfeeding-singlet-588489.jpg?v=1714967988","width":700},{"alt":"Frill Breastfeeding Singlet - The Birth Store-Gold Miilk","id":27007589777597,"position":10,"preview_image":{"aspect_ratio":1.0,"height":640,"width":640,"src":"\/\/www.thebirthstore.com.au\/cdn\/shop\/files\/frill-breastfeeding-singlet-352465.jpg?v=1714967988"},"aspect_ratio":1.0,"height":640,"media_type":"image","src":"\/\/www.thebirthstore.com.au\/cdn\/shop\/files\/frill-breastfeeding-singlet-352465.jpg?v=1714967988","width":640},{"alt":"Frill Breastfeeding Singlet - The Birth Store-Gold Miilk","id":27007589810365,"position":11,"preview_image":{"aspect_ratio":3.111,"height":225,"width":700,"src":"\/\/www.thebirthstore.com.au\/cdn\/shop\/files\/frill-breastfeeding-singlet-344122.jpg?v=1714967988"},"aspect_ratio":3.111,"height":225,"media_type":"image","src":"\/\/www.thebirthstore.com.au\/cdn\/shop\/files\/frill-breastfeeding-singlet-344122.jpg?v=1714967988","width":700},{"alt":"Frill Breastfeeding Singlet - The Birth Store-Gold Miilk","id":27007589875901,"position":12,"preview_image":{"aspect_ratio":0.75,"height":933,"width":700,"src":"\/\/www.thebirthstore.com.au\/cdn\/shop\/files\/frill-breastfeeding-singlet-772186.webp?v=1714967988"},"aspect_ratio":0.75,"height":933,"media_type":"image","src":"\/\/www.thebirthstore.com.au\/cdn\/shop\/files\/frill-breastfeeding-singlet-772186.webp?v=1714967988","width":700},{"alt":"Frill Breastfeeding Singlet - The Birth Store-Gold Miilk","id":27007589941437,"position":13,"preview_image":{"aspect_ratio":0.75,"height":80,"width":60,"src":"\/\/www.thebirthstore.com.au\/cdn\/shop\/files\/frill-breastfeeding-singlet-361299.webp?v=1714967988"},"aspect_ratio":0.75,"height":80,"media_type":"image","src":"\/\/www.thebirthstore.com.au\/cdn\/shop\/files\/frill-breastfeeding-singlet-361299.webp?v=1714967988","width":60},{"alt":"Frill Breastfeeding Singlet - The Birth Store-Gold Miilk","id":27007590006973,"position":14,"preview_image":{"aspect_ratio":0.75,"height":80,"width":60,"src":"\/\/www.thebirthstore.com.au\/cdn\/shop\/files\/frill-breastfeeding-singlet-859253.webp?v=1714967988"},"aspect_ratio":0.75,"height":80,"media_type":"image","src":"\/\/www.thebirthstore.com.au\/cdn\/shop\/files\/frill-breastfeeding-singlet-859253.webp?v=1714967988","width":60},{"alt":"Frill Breastfeeding Singlet - The Birth Store-Gold Miilk","id":27007590072509,"position":15,"preview_image":{"aspect_ratio":0.75,"height":80,"width":60,"src":"\/\/www.thebirthstore.com.au\/cdn\/shop\/files\/frill-breastfeeding-singlet-728393.webp?v=1714967989"},"aspect_ratio":0.75,"height":80,"media_type":"image","src":"\/\/www.thebirthstore.com.au\/cdn\/shop\/files\/frill-breastfeeding-singlet-728393.webp?v=1714967989","width":60},{"alt":"Frill Breastfeeding Singlet - The Birth Store-Gold Miilk","id":27007590138045,"position":16,"preview_image":{"aspect_ratio":0.75,"height":933,"width":700,"src":"\/\/www.thebirthstore.com.au\/cdn\/shop\/files\/frill-breastfeeding-singlet-198065.webp?v=1714967989"},"aspect_ratio":0.75,"height":933,"media_type":"image","src":"\/\/www.thebirthstore.com.au\/cdn\/shop\/files\/frill-breastfeeding-singlet-198065.webp?v=1714967989","width":700},{"alt":"Frill Breastfeeding Singlet - The Birth Store-Gold Miilk","id":27007590170813,"position":17,"preview_image":{"aspect_ratio":0.75,"height":933,"width":700,"src":"\/\/www.thebirthstore.com.au\/cdn\/shop\/files\/frill-breastfeeding-singlet-956139.webp?v=1714967989"},"aspect_ratio":0.75,"height":933,"media_type":"image","src":"\/\/www.thebirthstore.com.au\/cdn\/shop\/files\/frill-breastfeeding-singlet-956139.webp?v=1714967989","width":700},{"alt":"Frill Breastfeeding Singlet - The Birth Store-Gold Miilk","id":27007590203581,"position":18,"preview_image":{"aspect_ratio":0.75,"height":933,"width":700,"src":"\/\/www.thebirthstore.com.au\/cdn\/shop\/files\/frill-breastfeeding-singlet-932755.webp?v=1714967989"},"aspect_ratio":0.75,"height":933,"media_type":"image","src":"\/\/www.thebirthstore.com.au\/cdn\/shop\/files\/frill-breastfeeding-singlet-932755.webp?v=1714967989","width":700},{"alt":"Frill Breastfeeding Singlet - The Birth Store-Gold Miilk","id":27007590236349,"position":19,"preview_image":{"aspect_ratio":0.75,"height":80,"width":60,"src":"\/\/www.thebirthstore.com.au\/cdn\/shop\/files\/frill-breastfeeding-singlet-576017.webp?v=1714967989"},"aspect_ratio":0.75,"height":80,"media_type":"image","src":"\/\/www.thebirthstore.com.au\/cdn\/shop\/files\/frill-breastfeeding-singlet-576017.webp?v=1714967989","width":60},{"alt":"Frill Breastfeeding Singlet - The Birth Store-Gold Miilk","id":27007590269117,"position":20,"preview_image":{"aspect_ratio":0.75,"height":933,"width":700,"src":"\/\/www.thebirthstore.com.au\/cdn\/shop\/files\/frill-breastfeeding-singlet-607529.webp?v=1714967989"},"aspect_ratio":0.75,"height":933,"media_type":"image","src":"\/\/www.thebirthstore.com.au\/cdn\/shop\/files\/frill-breastfeeding-singlet-607529.webp?v=1714967989","width":700},{"alt":"Frill Breastfeeding Singlet - The Birth Store-Gold Miilk","id":27007590367421,"position":21,"preview_image":{"aspect_ratio":0.75,"height":933,"width":700,"src":"\/\/www.thebirthstore.com.au\/cdn\/shop\/files\/frill-breastfeeding-singlet-280100.webp?v=1714967989"},"aspect_ratio":0.75,"height":933,"media_type":"image","src":"\/\/www.thebirthstore.com.au\/cdn\/shop\/files\/frill-breastfeeding-singlet-280100.webp?v=1714967989","width":700},{"alt":"Frill Breastfeeding Singlet - The Birth Store - Gold Miilk","id":29988455809213,"position":22,"preview_image":{"aspect_ratio":1.0,"height":1080,"width":1080,"src":"\/\/www.thebirthstore.com.au\/cdn\/shop\/files\/frill-breastfeeding-singlet-7941025.png?v=1762558089"},"aspect_ratio":1.0,"height":1080,"media_type":"image","src":"\/\/www.thebirthstore.com.au\/cdn\/shop\/files\/frill-breastfeeding-singlet-7941025.png?v=1762558089","width":1080}],"requires_selling_plan":false,"selling_plan_groups":[],"content":"\u003cp\u003eWe are taking LUXE breastfeeding wear to a whole new level!\u003c\/p\u003e\n\u003cp\u003eDress it up or down, the versatility is the winner! The first of its kind, this sophisticated beauty has a built in bra with fitted, stretchy fabric that will keep you feeling supported in the right places.\u003c\/p\u003e\n\u003cp\u003eSquare neck line with easy button shoulder studs provides bub easy access for feeding and you the privacy \u0026amp; convenience you need.\u003c\/p\u003e\n\u003cp\u003eThere is no need to raise your top to expose your tummy, it has extra length to tuck in if you wish \u0026amp; an extra hem tag to show its quality. No one can tell this is a breastfeeding friendly banger!\u003c\/p\u003e\n\u003cp\u003e- Breathable light weight 180gsm\u003c\/p\u003e\n\u003cp\u003e- 95% Cotton, 5% Spandex\u003c\/p\u003e\n\u003cp\u003e Our models are wearing size S (8) \u0026amp; 2XL (16). True to size.\u003c\/p\u003e\n\u003cp\u003e\u003cspan data-mce-fragment=\"1\"\u003eThis product is stocked at a 3\u003c\/span\u003e\u003csup data-mce-fragment=\"1\"\u003erd\u003c\/sup\u003e\u003cspan data-mce-fragment=\"1\"\u003e party warehouse, if ordering with other products you’ll receive two packages. This product will have a turn around time of 10 days if pickup is selected on checkout. Any questions, please contact us \u003ca title=\"Contact Us\" href=\"https:\/\/www.thebirthstore.com.au\/pages\/contact-us\" data-mce-fragment=\"1\" data-mce-href=\"https:\/\/www.thebirthstore.com.au\/pages\/contact-us\" target=\"_blank\"\u003ehere\u003c\/a\u003e.\u003c\/span\u003e\u003c\/p\u003e"},"options":[{"name":"Size","position":1,"values":["XS (6)","S (8)","M (10)","L (12)","XL (14)","2XL (16)","3XL (18)","4XL (20)"]},{"name":"Colour","position":2,"values":["Black","Watermelon"]}],"custom_metafields":{},"metafields":{"badge":"\u003cdiv style='display:none' class='jdgm-prev-badge' data-average-rating='0.00' data-number-of-reviews='0' data-number-of-questions='0'\u003e \u003cspan class='jdgm-prev-badge__stars' data-score='0.00' tabindex='0' aria-label='0.00 stars' role='button'\u003e \u003cspan class='jdgm-star jdgm--off'\u003e\u003c\/span\u003e\u003cspan class='jdgm-star jdgm--off'\u003e\u003c\/span\u003e\u003cspan class='jdgm-star jdgm--off'\u003e\u003c\/span\u003e\u003cspan class='jdgm-star jdgm--off'\u003e\u003c\/span\u003e\u003cspan class='jdgm-star jdgm--off'\u003e\u003c\/span\u003e \u003c\/span\u003e \u003cspan class='jdgm-prev-badge__text'\u003e No reviews \u003c\/span\u003e \u003c\/div\u003e","widget":"\u003cdiv class='jdgm-rev-widg' data-updated-at='2025-11-07T03:44:12Z' data-average-rating='0.00' data-number-of-reviews='0' data-number-of-questions='0' data-image-url='https:\/\/cdn.shopify.com\/s\/files\/1\/0527\/3393\/5805\/files\/frill-breastfeeding-singlet-568549.jpg?v=1714967988'\u003e \u003cstyle class='jdgm-temp-hiding-style'\u003e.jdgm-rev-widg{ display: none }\u003c\/style\u003e \u003cdiv class='jdgm-rev-widg__header'\u003e \u003ch2 class='jdgm-rev-widg__title'\u003eCustomer Reviews\u003c\/h2\u003e \u003cdiv class='jdgm-rev-widg__summary'\u003e \u003cdiv class='jdgm-rev-widg__summary-stars' aria-label='Average rating is 0.00 stars' role='img'\u003e \u003cspan class='jdgm-star jdgm--off'\u003e\u003c\/span\u003e\u003cspan class='jdgm-star jdgm--off'\u003e\u003c\/span\u003e\u003cspan class='jdgm-star jdgm--off'\u003e\u003c\/span\u003e\u003cspan class='jdgm-star jdgm--off'\u003e\u003c\/span\u003e\u003cspan class='jdgm-star jdgm--off'\u003e\u003c\/span\u003e \u003c\/div\u003e \u003cdiv class='jdgm-rev-widg__summary-text'\u003eBe the first to write a review\u003c\/div\u003e \u003c\/div\u003e \u003ca style='display: none' href='#' class='jdgm-write-rev-link' role='button'\u003eWrite a review\u003c\/a\u003e \u003cdiv class='jdgm-histogram jdgm-temp-hidden'\u003e \u003cdiv class='jdgm-histogram__row' data-rating='5' data-frequency='0' data-percentage='0'\u003e \u003cdiv class='jdgm-histogram__star' role='button' aria-label=\"0% (0) reviews with 5 star rating\" tabindex='0' \u003e\u003cspan class='jdgm-star jdgm--on'\u003e\u003c\/span\u003e\u003cspan class='jdgm-star jdgm--on'\u003e\u003c\/span\u003e\u003cspan class='jdgm-star jdgm--on'\u003e\u003c\/span\u003e\u003cspan class='jdgm-star jdgm--on'\u003e\u003c\/span\u003e\u003cspan class='jdgm-star jdgm--on'\u003e\u003c\/span\u003e\u003c\/div\u003e \u003cdiv class='jdgm-histogram__bar'\u003e \u003cdiv class='jdgm-histogram__bar-content' style='width: 0%;'\u003e \u003c\/div\u003e \u003c\/div\u003e \u003cdiv class='jdgm-histogram__percentage'\u003e0%\u003c\/div\u003e \u003cdiv class='jdgm-histogram__frequency'\u003e(0)\u003c\/div\u003e \u003c\/div\u003e \u003cdiv class='jdgm-histogram__row' data-rating='4' data-frequency='0' data-percentage='0'\u003e \u003cdiv class='jdgm-histogram__star' role='button' aria-label=\"0% (0) reviews with 4 star rating\" tabindex='0' \u003e\u003cspan class='jdgm-star jdgm--on'\u003e\u003c\/span\u003e\u003cspan class='jdgm-star jdgm--on'\u003e\u003c\/span\u003e\u003cspan class='jdgm-star jdgm--on'\u003e\u003c\/span\u003e\u003cspan class='jdgm-star jdgm--on'\u003e\u003c\/span\u003e\u003cspan class='jdgm-star jdgm--off'\u003e\u003c\/span\u003e\u003c\/div\u003e \u003cdiv class='jdgm-histogram__bar'\u003e \u003cdiv class='jdgm-histogram__bar-content' style='width: 0%;'\u003e \u003c\/div\u003e \u003c\/div\u003e \u003cdiv class='jdgm-histogram__percentage'\u003e0%\u003c\/div\u003e \u003cdiv class='jdgm-histogram__frequency'\u003e(0)\u003c\/div\u003e \u003c\/div\u003e \u003cdiv class='jdgm-histogram__row' data-rating='3' data-frequency='0' data-percentage='0'\u003e \u003cdiv class='jdgm-histogram__star' role='button' aria-label=\"0% (0) reviews with 3 star rating\" tabindex='0' \u003e\u003cspan class='jdgm-star jdgm--on'\u003e\u003c\/span\u003e\u003cspan class='jdgm-star jdgm--on'\u003e\u003c\/span\u003e\u003cspan class='jdgm-star jdgm--on'\u003e\u003c\/span\u003e\u003cspan class='jdgm-star jdgm--off'\u003e\u003c\/span\u003e\u003cspan class='jdgm-star jdgm--off'\u003e\u003c\/span\u003e\u003c\/div\u003e \u003cdiv class='jdgm-histogram__bar'\u003e \u003cdiv class='jdgm-histogram__bar-content' style='width: 0%;'\u003e \u003c\/div\u003e \u003c\/div\u003e \u003cdiv class='jdgm-histogram__percentage'\u003e0%\u003c\/div\u003e \u003cdiv class='jdgm-histogram__frequency'\u003e(0)\u003c\/div\u003e \u003c\/div\u003e \u003cdiv class='jdgm-histogram__row' data-rating='2' data-frequency='0' data-percentage='0'\u003e \u003cdiv class='jdgm-histogram__star' role='button' aria-label=\"0% (0) reviews with 2 star rating\" tabindex='0' \u003e\u003cspan class='jdgm-star jdgm--on'\u003e\u003c\/span\u003e\u003cspan class='jdgm-star jdgm--on'\u003e\u003c\/span\u003e\u003cspan class='jdgm-star jdgm--off'\u003e\u003c\/span\u003e\u003cspan class='jdgm-star jdgm--off'\u003e\u003c\/span\u003e\u003cspan class='jdgm-star jdgm--off'\u003e\u003c\/span\u003e\u003c\/div\u003e \u003cdiv class='jdgm-histogram__bar'\u003e \u003cdiv class='jdgm-histogram__bar-content' style='width: 0%;'\u003e \u003c\/div\u003e \u003c\/div\u003e \u003cdiv class='jdgm-histogram__percentage'\u003e0%\u003c\/div\u003e \u003cdiv class='jdgm-histogram__frequency'\u003e(0)\u003c\/div\u003e \u003c\/div\u003e \u003cdiv class='jdgm-histogram__row' data-rating='1' data-frequency='0' data-percentage='0'\u003e \u003cdiv class='jdgm-histogram__star' role='button' aria-label=\"0% (0) reviews with 1 star rating\" tabindex='0' \u003e\u003cspan class='jdgm-star jdgm--on'\u003e\u003c\/span\u003e\u003cspan class='jdgm-star jdgm--off'\u003e\u003c\/span\u003e\u003cspan class='jdgm-star jdgm--off'\u003e\u003c\/span\u003e\u003cspan class='jdgm-star jdgm--off'\u003e\u003c\/span\u003e\u003cspan class='jdgm-star jdgm--off'\u003e\u003c\/span\u003e\u003c\/div\u003e \u003cdiv class='jdgm-histogram__bar'\u003e \u003cdiv class='jdgm-histogram__bar-content' style='width: 0%;'\u003e \u003c\/div\u003e \u003c\/div\u003e \u003cdiv class='jdgm-histogram__percentage'\u003e0%\u003c\/div\u003e \u003cdiv class='jdgm-histogram__frequency'\u003e(0)\u003c\/div\u003e \u003c\/div\u003e \u003cdiv class='jdgm-histogram__row jdgm-histogram__clear-filter' data-rating=null tabindex='0'\u003e\u003c\/div\u003e \u003c\/div\u003e \u003cdiv class='jdgm-rev-widg__sort-wrapper'\u003e\u003c\/div\u003e \u003c\/div\u003e \u003cdiv class='jdgm-rev-widg__body'\u003e \u003cdiv class='jdgm-rev-widg__reviews'\u003e\u003c\/div\u003e \u003cdiv class='jdgm-paginate' data-per-page='10' data-url='https:\/\/api.judge.me\/reviews\/reviews_for_widget' style=\"display: none;\"\u003e\u003c\/div\u003e \u003c\/div\u003e \u003cdiv class='jdgm-rev-widg__paginate-spinner-wrapper'\u003e \u003cdiv class='jdgm-spinner'\u003e\u003c\/div\u003e \u003c\/div\u003e \u003c\/div\u003e"},"collections":[{"id":281356533949,"handle":"baby-shower-gifts","title":"Baby Shower Gifts - Mum","updated_at":"2026-06-12T19:10:25+08:00","body_html":"\u003cp\u003eLooking for a unique baby shower gift? Or an all-in-one bundle pack to suit all your needs? We've got just the thing!\u003c\/p\u003e","published_at":"2021-12-06T13:43:56+08:00","sort_order":"best-selling","template_suffix":"baby-shower-gifts","disjunctive":true,"rules":[{"column":"tag","relation":"equals","condition":"Baby Shower Gifts - Mum"},{"column":"tag","relation":"equals","condition":"Gift Card"}],"published_scope":"global","image":{"created_at":"2024-05-06T11:59:28+08:00","alt":"Baby Shower Gifts - The Birth Store","width":1200,"height":1800,"src":"\/\/www.thebirthstore.com.au\/cdn\/shop\/collections\/baby-shower-gifts-401770.jpg?v=1761791272"}},{"id":281712427197,"handle":"breastfeeding","title":"Breastfeeding","updated_at":"2026-06-12T19:10:26+08:00","body_html":"","published_at":"2021-12-20T14:19:33+08:00","sort_order":"best-selling","template_suffix":"breastfeeding-collection","disjunctive":false,"rules":[{"column":"tag","relation":"equals","condition":"Breastfeeding"}],"published_scope":"global","image":{"created_at":"2024-05-06T11:59:34+08:00","alt":"Breastfeeding - The Birth Store","width":620,"height":635,"src":"\/\/www.thebirthstore.com.au\/cdn\/shop\/collections\/breastfeeding-793872.jpg?v=1714967974"}},{"id":293308989629,"handle":"breastfeeding-clothing","title":"Breastfeeding Clothing","updated_at":"2026-05-27T00:53:21+08:00","body_html":"","published_at":"2023-05-03T11:40:00+08:00","sort_order":"best-selling","template_suffix":"swaddles-collection","disjunctive":false,"rules":[{"column":"tag","relation":"equals","condition":"Breastfeeding Clothing"}],"published_scope":"global","image":{"created_at":"2024-05-06T11:59:36+08:00","alt":"Breastfeeding Clothing - The Birth Store","width":569,"height":674,"src":"\/\/www.thebirthstore.com.au\/cdn\/shop\/collections\/breastfeeding-clothing-671936.jpg?v=1714967977"}},{"id":261657460925,"handle":"buy","title":"Buy","updated_at":"2026-06-12T19:10:26+08:00","body_html":"\u003cp\u003eBrowse all of our pregnancy, labour \u0026amp; birth, postpartum and baby essentials here.\u003cbr\u003e\u003c\/p\u003e\n\u003cp\u003e\u003cspan\u003eYou can even buy now and pay later with Afterpay!\u003c\/span\u003e\u003c\/p\u003e","published_at":"2021-03-10T12:05:31+08:00","sort_order":"best-selling","template_suffix":"shop-all-collection","disjunctive":false,"rules":[{"column":"title","relation":"not_contains","condition":"Hire"}],"published_scope":"global","image":{"created_at":"2024-05-06T11:59:42+08:00","alt":"Buy - The Birth Store","width":2048,"height":2048,"src":"\/\/www.thebirthstore.com.au\/cdn\/shop\/collections\/buy-964856.jpg?v=1714967982"}},{"id":293309022397,"handle":"clothing","title":"Clothing","updated_at":"2026-05-30T19:08:46+08:00","body_html":"","published_at":"2023-05-03T11:41:12+08:00","sort_order":"best-selling","template_suffix":"swaddles-collection","disjunctive":true,"rules":[{"column":"tag","relation":"equals","condition":"Breastfeeding Clothing"},{"column":"tag","relation":"equals","condition":"Support Clothing"}],"published_scope":"global","image":{"created_at":"2024-05-06T11:59:52+08:00","alt":"Clothing - The Birth Store","width":676,"height":581,"src":"\/\/www.thebirthstore.com.au\/cdn\/shop\/collections\/clothing-483293.jpg?v=1714967992"}},{"id":337429201085,"handle":"hospital-bag","title":"Hospital Bag","updated_at":"2026-06-12T19:10:26+08:00","body_html":"","published_at":"2026-06-03T11:36:29+08:00","sort_order":"most-relevant","template_suffix":"","disjunctive":false,"rules":[{"column":"tag","relation":"equals","condition":"Hospital Bag"}],"published_scope":"global"},{"id":291456483517,"handle":"shop-all","title":"Shop All - Mum","updated_at":"2026-06-12T19:10:26+08:00","body_html":"","published_at":"2022-12-23T22:04:39+08:00","sort_order":"best-selling","template_suffix":"shop-all-collection","disjunctive":false,"rules":[{"column":"variant_price","relation":"greater_than","condition":"1"},{"column":"title","relation":"not_contains","condition":"Batteries"},{"column":"tag","relation":"equals","condition":"Mum"}],"published_scope":"global","image":{"created_at":"2024-05-06T12:00:54+08:00","alt":"Shop All - The Birth Store","width":1365,"height":2048,"src":"\/\/www.thebirthstore.com.au\/cdn\/shop\/collections\/shop-all-693176.jpg?v=1714968055"}}]}
{"item":{"id":8208165241021,"title":"Shell Wearable Silicone Breast Pumps","handle":"shell-wearable-silicone-breast-pumps","description":"\u003cp\u003e\u003cspan\u003eBreast pump, milk collector - why not both? We're introducing you to the Shell Wearable Silicone Pump, a convenient blend of our OG Silicone Breast Pumps and the Ladybug Milk Collector! This nifty little device acts as a wearable shell pump, making it ideal for those days you need to pump but have things to do. Simply press the back and attach it to your breast, pop your bra back on, and get on with your day! You can regulate the suction strength with a quick adjustment of the valve. On the other hand, if you just want to catch a bit of that leakage, pop out the plug so there's no suction, put the Shell into your bra, and passively collect what's leaking out already! It's a win-win for you, no matter your needs. The Shell lies flat on its back when it's time to be emptied, preventing any milk spills, and the easy-pour outlet lets you transfer your precious liquid gold into a bottle or storage container without any mess. Easy to use, easy to clean, the Haakaa Shell is the perfect option for mums who need both a pump and a collector.\u003c\/span\u003e\u003c\/p\u003e","published_at":"2026-02-09T13:41:00+08:00","created_at":"2026-02-09T13:33:26+08:00","vendor":"Haakaa","type":"","tags":["Breastfeeding","Cracked Nipples","Mum","Post-Partum"],"price":2999,"price_min":2999,"price_max":5599,"available":true,"price_varies":true,"compare_at_price":null,"compare_at_price_min":0,"compare_at_price_max":0,"compare_at_price_varies":false,"variants":[{"id":46392128241853,"title":"1pc \/ 75mls","option1":"1pc","option2":"75mls","option3":null,"sku":null,"requires_shipping":true,"taxable":false,"featured_image":{"id":39544064606397,"product_id":8208165241021,"position":5,"created_at":"2026-02-09T13:41:26+08:00","updated_at":"2026-03-27T10:35:10+08:00","alt":"Shell Wearable Silicone Breast Pumps - The Birth Store - Haakaa","width":1000,"height":1000,"src":"\/\/www.thebirthstore.com.au\/cdn\/shop\/files\/shell-wearable-silicone-breast-pumps-4809011.webp?v=1774578910","variant_ids":[46392128241853,46392128635069]},"available":true,"name":"Shell Wearable Silicone Breast Pumps - 1pc \/ 75mls","public_title":"1pc \/ 75mls","options":["1pc","75mls"],"price":2999,"weight":110,"compare_at_price":null,"inventory_management":"shopify","barcode":"28241853","featured_media":{"alt":"Shell Wearable Silicone Breast Pumps - The Birth Store - Haakaa","id":30723125706941,"position":5,"preview_image":{"aspect_ratio":1.0,"height":1000,"width":1000,"src":"\/\/www.thebirthstore.com.au\/cdn\/shop\/files\/shell-wearable-silicone-breast-pumps-4809011.webp?v=1774578910"}},"requires_selling_plan":false,"selling_plan_allocations":[],"quantity_rule":{"min":1,"max":null,"increment":1}},{"id":46392128635069,"title":"1pc \/ 120ml","option1":"1pc","option2":"120ml","option3":null,"sku":null,"requires_shipping":true,"taxable":false,"featured_image":{"id":39544064606397,"product_id":8208165241021,"position":5,"created_at":"2026-02-09T13:41:26+08:00","updated_at":"2026-03-27T10:35:10+08:00","alt":"Shell Wearable Silicone Breast Pumps - The Birth Store - Haakaa","width":1000,"height":1000,"src":"\/\/www.thebirthstore.com.au\/cdn\/shop\/files\/shell-wearable-silicone-breast-pumps-4809011.webp?v=1774578910","variant_ids":[46392128241853,46392128635069]},"available":true,"name":"Shell Wearable Silicone Breast Pumps - 1pc \/ 120ml","public_title":"1pc \/ 120ml","options":["1pc","120ml"],"price":3199,"weight":163,"compare_at_price":null,"inventory_management":"shopify","barcode":"28635069","featured_media":{"alt":"Shell Wearable Silicone Breast Pumps - The Birth Store - Haakaa","id":30723125706941,"position":5,"preview_image":{"aspect_ratio":1.0,"height":1000,"width":1000,"src":"\/\/www.thebirthstore.com.au\/cdn\/shop\/files\/shell-wearable-silicone-breast-pumps-4809011.webp?v=1774578910"}},"requires_selling_plan":false,"selling_plan_allocations":[],"quantity_rule":{"min":1,"max":null,"increment":1}},{"id":46392128667837,"title":"2pcs \/ 75mls","option1":"2pcs","option2":"75mls","option3":null,"sku":null,"requires_shipping":true,"taxable":false,"featured_image":{"id":39544042979517,"product_id":8208165241021,"position":3,"created_at":"2026-02-09T13:35:57+08:00","updated_at":"2026-03-27T10:36:42+08:00","alt":"Shell Wearable Silicone Breast Pumps - The Birth Store - Haakaa","width":1000,"height":1000,"src":"\/\/www.thebirthstore.com.au\/cdn\/shop\/files\/shell-wearable-silicone-breast-pumps-4915867.webp?v=1774579002","variant_ids":[46392128667837,46392128700605]},"available":true,"name":"Shell Wearable Silicone Breast Pumps - 2pcs \/ 75mls","public_title":"2pcs \/ 75mls","options":["2pcs","75mls"],"price":5499,"weight":207,"compare_at_price":null,"inventory_management":"shopify","barcode":"28667837","featured_media":{"alt":"Shell Wearable Silicone Breast Pumps - The Birth Store - Haakaa","id":30723121348797,"position":3,"preview_image":{"aspect_ratio":1.0,"height":1000,"width":1000,"src":"\/\/www.thebirthstore.com.au\/cdn\/shop\/files\/shell-wearable-silicone-breast-pumps-4915867.webp?v=1774579002"}},"requires_selling_plan":false,"selling_plan_allocations":[],"quantity_rule":{"min":1,"max":null,"increment":1}},{"id":46392128700605,"title":"2pcs \/ 120ml","option1":"2pcs","option2":"120ml","option3":null,"sku":null,"requires_shipping":true,"taxable":false,"featured_image":{"id":39544042979517,"product_id":8208165241021,"position":3,"created_at":"2026-02-09T13:35:57+08:00","updated_at":"2026-03-27T10:36:42+08:00","alt":"Shell Wearable Silicone Breast Pumps - The Birth Store - Haakaa","width":1000,"height":1000,"src":"\/\/www.thebirthstore.com.au\/cdn\/shop\/files\/shell-wearable-silicone-breast-pumps-4915867.webp?v=1774579002","variant_ids":[46392128667837,46392128700605]},"available":true,"name":"Shell Wearable Silicone Breast Pumps - 2pcs \/ 120ml","public_title":"2pcs \/ 120ml","options":["2pcs","120ml"],"price":5599,"weight":306,"compare_at_price":null,"inventory_management":"shopify","barcode":"28700605","featured_media":{"alt":"Shell Wearable Silicone Breast Pumps - The Birth Store - Haakaa","id":30723121348797,"position":3,"preview_image":{"aspect_ratio":1.0,"height":1000,"width":1000,"src":"\/\/www.thebirthstore.com.au\/cdn\/shop\/files\/shell-wearable-silicone-breast-pumps-4915867.webp?v=1774579002"}},"requires_selling_plan":false,"selling_plan_allocations":[],"quantity_rule":{"min":1,"max":null,"increment":1}}],"images":["\/\/www.thebirthstore.com.au\/cdn\/shop\/files\/shell-wearable-silicone-breast-pumps-3784947.webp?v=1770688868","\/\/www.thebirthstore.com.au\/cdn\/shop\/files\/shell-wearable-silicone-breast-pumps-5153409.webp?v=1770688868","\/\/www.thebirthstore.com.au\/cdn\/shop\/files\/shell-wearable-silicone-breast-pumps-4915867.webp?v=1774579002","\/\/www.thebirthstore.com.au\/cdn\/shop\/files\/shell-wearable-silicone-breast-pumps-2014779.webp?v=1770688869","\/\/www.thebirthstore.com.au\/cdn\/shop\/files\/shell-wearable-silicone-breast-pumps-4809011.webp?v=1774578910"],"featured_image":"\/\/www.thebirthstore.com.au\/cdn\/shop\/files\/shell-wearable-silicone-breast-pumps-3784947.webp?v=1770688868","options":["Quantity ","Size"],"media":[{"alt":"Shell Wearable Silicone Breast Pumps - The Birth Store - Haakaa","id":30723121283261,"position":1,"preview_image":{"aspect_ratio":1.0,"height":1000,"width":1000,"src":"\/\/www.thebirthstore.com.au\/cdn\/shop\/files\/shell-wearable-silicone-breast-pumps-3784947.webp?v=1770688868"},"aspect_ratio":1.0,"height":1000,"media_type":"image","src":"\/\/www.thebirthstore.com.au\/cdn\/shop\/files\/shell-wearable-silicone-breast-pumps-3784947.webp?v=1770688868","width":1000},{"alt":"Shell Wearable Silicone Breast Pumps - The Birth Store - Haakaa","id":30723121316029,"position":2,"preview_image":{"aspect_ratio":1.0,"height":1000,"width":1000,"src":"\/\/www.thebirthstore.com.au\/cdn\/shop\/files\/shell-wearable-silicone-breast-pumps-5153409.webp?v=1770688868"},"aspect_ratio":1.0,"height":1000,"media_type":"image","src":"\/\/www.thebirthstore.com.au\/cdn\/shop\/files\/shell-wearable-silicone-breast-pumps-5153409.webp?v=1770688868","width":1000},{"alt":"Shell Wearable Silicone Breast Pumps - The Birth Store - Haakaa","id":30723121348797,"position":3,"preview_image":{"aspect_ratio":1.0,"height":1000,"width":1000,"src":"\/\/www.thebirthstore.com.au\/cdn\/shop\/files\/shell-wearable-silicone-breast-pumps-4915867.webp?v=1774579002"},"aspect_ratio":1.0,"height":1000,"media_type":"image","src":"\/\/www.thebirthstore.com.au\/cdn\/shop\/files\/shell-wearable-silicone-breast-pumps-4915867.webp?v=1774579002","width":1000},{"alt":"Shell Wearable Silicone Breast Pumps - The Birth Store - Haakaa","id":30723125346493,"position":4,"preview_image":{"aspect_ratio":1.0,"height":1000,"width":1000,"src":"\/\/www.thebirthstore.com.au\/cdn\/shop\/files\/shell-wearable-silicone-breast-pumps-2014779.webp?v=1770688869"},"aspect_ratio":1.0,"height":1000,"media_type":"image","src":"\/\/www.thebirthstore.com.au\/cdn\/shop\/files\/shell-wearable-silicone-breast-pumps-2014779.webp?v=1770688869","width":1000},{"alt":"Shell Wearable Silicone Breast Pumps - The Birth Store - Haakaa","id":30723125706941,"position":5,"preview_image":{"aspect_ratio":1.0,"height":1000,"width":1000,"src":"\/\/www.thebirthstore.com.au\/cdn\/shop\/files\/shell-wearable-silicone-breast-pumps-4809011.webp?v=1774578910"},"aspect_ratio":1.0,"height":1000,"media_type":"image","src":"\/\/www.thebirthstore.com.au\/cdn\/shop\/files\/shell-wearable-silicone-breast-pumps-4809011.webp?v=1774578910","width":1000}],"requires_selling_plan":false,"selling_plan_groups":[],"content":"\u003cp\u003e\u003cspan\u003eBreast pump, milk collector - why not both? We're introducing you to the Shell Wearable Silicone Pump, a convenient blend of our OG Silicone Breast Pumps and the Ladybug Milk Collector! This nifty little device acts as a wearable shell pump, making it ideal for those days you need to pump but have things to do. Simply press the back and attach it to your breast, pop your bra back on, and get on with your day! You can regulate the suction strength with a quick adjustment of the valve. On the other hand, if you just want to catch a bit of that leakage, pop out the plug so there's no suction, put the Shell into your bra, and passively collect what's leaking out already! It's a win-win for you, no matter your needs. The Shell lies flat on its back when it's time to be emptied, preventing any milk spills, and the easy-pour outlet lets you transfer your precious liquid gold into a bottle or storage container without any mess. Easy to use, easy to clean, the Haakaa Shell is the perfect option for mums who need both a pump and a collector.\u003c\/span\u003e\u003c\/p\u003e"},"options":[{"name":"Quantity ","position":1,"values":["1pc","2pcs"]},{"name":"Size","position":2,"values":["75mls","120ml"]}],"custom_metafields":{},"metafields":{"badge":"\u003cdiv style='display:none' class='jdgm-prev-badge' data-average-rating='0.00' data-number-of-reviews='0' data-number-of-questions='0'\u003e \u003cspan class='jdgm-prev-badge__stars' data-score='0.00' tabindex='0' aria-label='0.00 stars' role='button'\u003e \u003cspan class='jdgm-star jdgm--off'\u003e\u003c\/span\u003e\u003cspan class='jdgm-star jdgm--off'\u003e\u003c\/span\u003e\u003cspan class='jdgm-star jdgm--off'\u003e\u003c\/span\u003e\u003cspan class='jdgm-star jdgm--off'\u003e\u003c\/span\u003e\u003cspan class='jdgm-star jdgm--off'\u003e\u003c\/span\u003e \u003c\/span\u003e \u003cspan class='jdgm-prev-badge__text'\u003e No reviews \u003c\/span\u003e \u003c\/div\u003e","widget":"\u003cdiv class='jdgm-rev-widg' data-updated-at='2026-02-09T05:42:10Z' data-average-rating='0.00' data-number-of-reviews='0' data-number-of-questions='0' data-image-url='https:\/\/cdn.shopify.com\/s\/files\/1\/0527\/3393\/5805\/files\/4_1500x_6e39ff40-73b7-44d3-ac20-f92c59965469.webp?v=1770615358'\u003e \u003cstyle class='jdgm-temp-hiding-style'\u003e.jdgm-rev-widg{ display: none }\u003c\/style\u003e \u003cdiv class='jdgm-rev-widg__header'\u003e \u003ch2 class='jdgm-rev-widg__title'\u003eCustomer Reviews\u003c\/h2\u003e \u003cdiv class='jdgm-rev-widg__summary'\u003e \u003cdiv class='jdgm-rev-widg__summary-stars' aria-label='Average rating is 0.00 stars' role='img'\u003e \u003cspan class='jdgm-star jdgm--off'\u003e\u003c\/span\u003e\u003cspan class='jdgm-star jdgm--off'\u003e\u003c\/span\u003e\u003cspan class='jdgm-star jdgm--off'\u003e\u003c\/span\u003e\u003cspan class='jdgm-star jdgm--off'\u003e\u003c\/span\u003e\u003cspan class='jdgm-star jdgm--off'\u003e\u003c\/span\u003e \u003c\/div\u003e \u003cdiv class='jdgm-rev-widg__summary-text'\u003eBe the first to write a review\u003c\/div\u003e \u003c\/div\u003e \u003ca style='display: none' href='#' class='jdgm-write-rev-link' role='button'\u003eWrite a review\u003c\/a\u003e \u003cdiv class='jdgm-histogram jdgm-temp-hidden'\u003e \u003cdiv class='jdgm-histogram__row' data-rating='5' data-frequency='0' data-percentage='0'\u003e \u003cdiv class='jdgm-histogram__star' role='button' aria-label=\"0% (0) reviews with 5 star rating\" tabindex='0' \u003e\u003cspan class='jdgm-star jdgm--on'\u003e\u003c\/span\u003e\u003cspan class='jdgm-star jdgm--on'\u003e\u003c\/span\u003e\u003cspan class='jdgm-star jdgm--on'\u003e\u003c\/span\u003e\u003cspan class='jdgm-star jdgm--on'\u003e\u003c\/span\u003e\u003cspan class='jdgm-star jdgm--on'\u003e\u003c\/span\u003e\u003c\/div\u003e \u003cdiv class='jdgm-histogram__bar'\u003e \u003cdiv class='jdgm-histogram__bar-content' style='width: 0%;'\u003e \u003c\/div\u003e \u003c\/div\u003e \u003cdiv class='jdgm-histogram__percentage'\u003e0%\u003c\/div\u003e \u003cdiv class='jdgm-histogram__frequency'\u003e(0)\u003c\/div\u003e \u003c\/div\u003e \u003cdiv class='jdgm-histogram__row' data-rating='4' data-frequency='0' data-percentage='0'\u003e \u003cdiv class='jdgm-histogram__star' role='button' aria-label=\"0% (0) reviews with 4 star rating\" tabindex='0' \u003e\u003cspan class='jdgm-star jdgm--on'\u003e\u003c\/span\u003e\u003cspan class='jdgm-star jdgm--on'\u003e\u003c\/span\u003e\u003cspan class='jdgm-star jdgm--on'\u003e\u003c\/span\u003e\u003cspan class='jdgm-star jdgm--on'\u003e\u003c\/span\u003e\u003cspan class='jdgm-star jdgm--off'\u003e\u003c\/span\u003e\u003c\/div\u003e \u003cdiv class='jdgm-histogram__bar'\u003e \u003cdiv class='jdgm-histogram__bar-content' style='width: 0%;'\u003e \u003c\/div\u003e \u003c\/div\u003e \u003cdiv class='jdgm-histogram__percentage'\u003e0%\u003c\/div\u003e \u003cdiv class='jdgm-histogram__frequency'\u003e(0)\u003c\/div\u003e \u003c\/div\u003e \u003cdiv class='jdgm-histogram__row' data-rating='3' data-frequency='0' data-percentage='0'\u003e \u003cdiv class='jdgm-histogram__star' role='button' aria-label=\"0% (0) reviews with 3 star rating\" tabindex='0' \u003e\u003cspan class='jdgm-star jdgm--on'\u003e\u003c\/span\u003e\u003cspan class='jdgm-star jdgm--on'\u003e\u003c\/span\u003e\u003cspan class='jdgm-star jdgm--on'\u003e\u003c\/span\u003e\u003cspan class='jdgm-star jdgm--off'\u003e\u003c\/span\u003e\u003cspan class='jdgm-star jdgm--off'\u003e\u003c\/span\u003e\u003c\/div\u003e \u003cdiv class='jdgm-histogram__bar'\u003e \u003cdiv class='jdgm-histogram__bar-content' style='width: 0%;'\u003e \u003c\/div\u003e \u003c\/div\u003e \u003cdiv class='jdgm-histogram__percentage'\u003e0%\u003c\/div\u003e \u003cdiv class='jdgm-histogram__frequency'\u003e(0)\u003c\/div\u003e \u003c\/div\u003e \u003cdiv class='jdgm-histogram__row' data-rating='2' data-frequency='0' data-percentage='0'\u003e \u003cdiv class='jdgm-histogram__star' role='button' aria-label=\"0% (0) reviews with 2 star rating\" tabindex='0' \u003e\u003cspan class='jdgm-star jdgm--on'\u003e\u003c\/span\u003e\u003cspan class='jdgm-star jdgm--on'\u003e\u003c\/span\u003e\u003cspan class='jdgm-star jdgm--off'\u003e\u003c\/span\u003e\u003cspan class='jdgm-star jdgm--off'\u003e\u003c\/span\u003e\u003cspan class='jdgm-star jdgm--off'\u003e\u003c\/span\u003e\u003c\/div\u003e \u003cdiv class='jdgm-histogram__bar'\u003e \u003cdiv class='jdgm-histogram__bar-content' style='width: 0%;'\u003e \u003c\/div\u003e \u003c\/div\u003e \u003cdiv class='jdgm-histogram__percentage'\u003e0%\u003c\/div\u003e \u003cdiv class='jdgm-histogram__frequency'\u003e(0)\u003c\/div\u003e \u003c\/div\u003e \u003cdiv class='jdgm-histogram__row' data-rating='1' data-frequency='0' data-percentage='0'\u003e \u003cdiv class='jdgm-histogram__star' role='button' aria-label=\"0% (0) reviews with 1 star rating\" tabindex='0' \u003e\u003cspan class='jdgm-star jdgm--on'\u003e\u003c\/span\u003e\u003cspan class='jdgm-star jdgm--off'\u003e\u003c\/span\u003e\u003cspan class='jdgm-star jdgm--off'\u003e\u003c\/span\u003e\u003cspan class='jdgm-star jdgm--off'\u003e\u003c\/span\u003e\u003cspan class='jdgm-star jdgm--off'\u003e\u003c\/span\u003e\u003c\/div\u003e \u003cdiv class='jdgm-histogram__bar'\u003e \u003cdiv class='jdgm-histogram__bar-content' style='width: 0%;'\u003e \u003c\/div\u003e \u003c\/div\u003e \u003cdiv class='jdgm-histogram__percentage'\u003e0%\u003c\/div\u003e \u003cdiv class='jdgm-histogram__frequency'\u003e(0)\u003c\/div\u003e \u003c\/div\u003e \u003cdiv class='jdgm-histogram__row jdgm-histogram__clear-filter' data-rating=null tabindex='0'\u003e\u003c\/div\u003e \u003c\/div\u003e \u003cdiv class='jdgm-rev-widg__sort-wrapper'\u003e\u003c\/div\u003e \u003c\/div\u003e \u003cdiv class='jdgm-rev-widg__body'\u003e \u003cdiv class='jdgm-rev-widg__reviews'\u003e\u003c\/div\u003e \u003cdiv class='jdgm-paginate' data-per-page='10' data-url='https:\/\/api.judge.me\/reviews\/reviews_for_widget' style=\"display: none;\"\u003e\u003c\/div\u003e \u003c\/div\u003e \u003cdiv class='jdgm-rev-widg__paginate-spinner-wrapper'\u003e \u003cdiv class='jdgm-spinner'\u003e\u003c\/div\u003e \u003c\/div\u003e \u003c\/div\u003e"},"collections":[{"id":281712427197,"handle":"breastfeeding","title":"Breastfeeding","updated_at":"2026-06-12T19:10:26+08:00","body_html":"","published_at":"2021-12-20T14:19:33+08:00","sort_order":"best-selling","template_suffix":"breastfeeding-collection","disjunctive":false,"rules":[{"column":"tag","relation":"equals","condition":"Breastfeeding"}],"published_scope":"global","image":{"created_at":"2024-05-06T11:59:34+08:00","alt":"Breastfeeding - The Birth Store","width":620,"height":635,"src":"\/\/www.thebirthstore.com.au\/cdn\/shop\/collections\/breastfeeding-793872.jpg?v=1714967974"}},{"id":261657460925,"handle":"buy","title":"Buy","updated_at":"2026-06-12T19:10:26+08:00","body_html":"\u003cp\u003eBrowse all of our pregnancy, labour \u0026amp; birth, postpartum and baby essentials here.\u003cbr\u003e\u003c\/p\u003e\n\u003cp\u003e\u003cspan\u003eYou can even buy now and pay later with Afterpay!\u003c\/span\u003e\u003c\/p\u003e","published_at":"2021-03-10T12:05:31+08:00","sort_order":"best-selling","template_suffix":"shop-all-collection","disjunctive":false,"rules":[{"column":"title","relation":"not_contains","condition":"Hire"}],"published_scope":"global","image":{"created_at":"2024-05-06T11:59:42+08:00","alt":"Buy - The Birth Store","width":2048,"height":2048,"src":"\/\/www.thebirthstore.com.au\/cdn\/shop\/collections\/buy-964856.jpg?v=1714967982"}},{"id":294349865149,"handle":"cracked-nipples","title":"Cracked Nipples","updated_at":"2026-06-02T19:09:48+08:00","body_html":"","published_at":"2023-09-21T14:03:02+08:00","sort_order":"best-selling","template_suffix":"swaddles-collection","disjunctive":false,"rules":[{"column":"tag","relation":"equals","condition":"Cracked Nipples"}],"published_scope":"global","image":{"created_at":"2024-05-06T11:59:53+08:00","alt":"Cracked Nipples - The Birth Store","width":1050,"height":1050,"src":"\/\/www.thebirthstore.com.au\/cdn\/shop\/collections\/cracked-nipples-166971.jpg?v=1714967994"}},{"id":261658083517,"handle":"post-partum","title":"Postpartum","updated_at":"2026-06-12T19:10:26+08:00","body_html":"\u003cp\u003eShop your postpartum and hospital bag essentials below. Looking for something we don't currently stock? Please reach out and let us know.\u003cbr\u003e\u003c\/p\u003e\n\u003cp\u003e\u003cspan\u003eYou can even buy now and pay later with Afterpay!\u003c\/span\u003e\u003c\/p\u003e","published_at":"2021-03-10T12:33:47+08:00","sort_order":"best-selling","template_suffix":"postpartum-collection","disjunctive":false,"rules":[{"column":"tag","relation":"equals","condition":"Post-Partum"}],"published_scope":"global","image":{"created_at":"2024-05-06T12:00:36+08:00","alt":"Postpartum - The Birth Store","width":611,"height":702,"src":"\/\/www.thebirthstore.com.au\/cdn\/shop\/collections\/postpartum-150119.jpg?v=1714968037"}},{"id":291456483517,"handle":"shop-all","title":"Shop All - Mum","updated_at":"2026-06-12T19:10:26+08:00","body_html":"","published_at":"2022-12-23T22:04:39+08:00","sort_order":"best-selling","template_suffix":"shop-all-collection","disjunctive":false,"rules":[{"column":"variant_price","relation":"greater_than","condition":"1"},{"column":"title","relation":"not_contains","condition":"Batteries"},{"column":"tag","relation":"equals","condition":"Mum"}],"published_scope":"global","image":{"created_at":"2024-05-06T12:00:54+08:00","alt":"Shop All - The Birth Store","width":1365,"height":2048,"src":"\/\/www.thebirthstore.com.au\/cdn\/shop\/collections\/shop-all-693176.jpg?v=1714968055"}},{"id":310045933757,"handle":"shop-all-sale","title":"Shop All Sale","updated_at":"2026-06-12T19:10:26+08:00","body_html":"","published_at":"2024-11-12T13:22:43+08:00","sort_order":"alpha-asc","template_suffix":"","disjunctive":true,"rules":[{"column":"tag","relation":"equals","condition":"Bundles"},{"column":"vendor","relation":"equals","condition":"Franjos Kitchen"},{"column":"vendor","relation":"equals","condition":"Adored Illustrations"},{"column":"vendor","relation":"equals","condition":"Amazing Oils"},{"column":"vendor","relation":"equals","condition":"Ice Ice Booby"},{"column":"vendor","relation":"equals","condition":"Made to Milk"},{"column":"vendor","relation":"equals","condition":"Milky Goodness"},{"column":"vendor","relation":"equals","condition":"Seasons of Mama"},{"column":"vendor","relation":"equals","condition":"Silverette"},{"column":"vendor","relation":"equals","condition":"Snuggle Hunny"},{"column":"vendor","relation":"equals","condition":"Yung Bod"},{"column":"vendor","relation":"equals","condition":"Bare Love"},{"column":"vendor","relation":"equals","condition":"Haakaa"},{"column":"vendor","relation":"equals","condition":"Mere Botanicals"},{"column":"vendor","relation":"equals","condition":"The Birth Store Hire"},{"column":"vendor","relation":"equals","condition":"The Birth Store"}],"published_scope":"global","image":{"created_at":"2024-11-13T10:58:16+08:00","alt":"Shop All Sale - The Birth Store","width":2048,"height":1365,"src":"\/\/www.thebirthstore.com.au\/cdn\/shop\/collections\/shop-all-sale-297361.jpg?v=1731466697"}}]}
{"item":{"id":8212484554941,"title":"Flange Insert","handle":"flange-insert","description":"\u003cp\u003eUniversal Inserts, giving tailored comfort for a better expressing experience. Achieving the right flange fit is essential for both comfort and efficiency when using your breast pump. Zen Mumma Flange Inserts are designed to nest inside the main 24mm (24mm insert for the 27mm) flange, creating a personalised fit that supports gentle, effective milk flow. Made from soft, BPA-free silicone, these inserts help reduce friction and improve suction seal. These inserts can not only fit into the Zen Mumma Wearables, but many types of pumps.\u003cbr\u003e\u003c\/p\u003e","published_at":"2026-02-16T13:39:03+08:00","created_at":"2026-02-16T13:04:48+08:00","vendor":"Zen Mumma","type":"","tags":["Breastfeeding","Hospital Bag","Mum"],"price":800,"price_min":800,"price_max":800,"available":true,"price_varies":false,"compare_at_price":null,"compare_at_price_min":0,"compare_at_price_max":0,"compare_at_price_varies":false,"variants":[{"id":46405801410749,"title":"13mm","option1":"13mm","option2":null,"option3":null,"sku":null,"requires_shipping":true,"taxable":false,"featured_image":null,"available":true,"name":"Flange Insert - 13mm","public_title":"13mm","options":["13mm"],"price":800,"weight":20,"compare_at_price":null,"inventory_management":"shopify","barcode":"01410749","requires_selling_plan":false,"selling_plan_allocations":[],"quantity_rule":{"min":1,"max":null,"increment":1}},{"id":46405801443517,"title":"15mm","option1":"15mm","option2":null,"option3":null,"sku":null,"requires_shipping":true,"taxable":false,"featured_image":null,"available":true,"name":"Flange Insert - 15mm","public_title":"15mm","options":["15mm"],"price":800,"weight":20,"compare_at_price":null,"inventory_management":"shopify","barcode":"01443517","requires_selling_plan":false,"selling_plan_allocations":[],"quantity_rule":{"min":1,"max":null,"increment":1}},{"id":46405801476285,"title":"17mm","option1":"17mm","option2":null,"option3":null,"sku":null,"requires_shipping":true,"taxable":false,"featured_image":null,"available":true,"name":"Flange Insert - 17mm","public_title":"17mm","options":["17mm"],"price":800,"weight":20,"compare_at_price":null,"inventory_management":"shopify","barcode":"01476285","requires_selling_plan":false,"selling_plan_allocations":[],"quantity_rule":{"min":1,"max":null,"increment":1}},{"id":46405801509053,"title":"19mm","option1":"19mm","option2":null,"option3":null,"sku":null,"requires_shipping":true,"taxable":false,"featured_image":null,"available":true,"name":"Flange Insert - 19mm","public_title":"19mm","options":["19mm"],"price":800,"weight":20,"compare_at_price":null,"inventory_management":"shopify","barcode":"01509053","requires_selling_plan":false,"selling_plan_allocations":[],"quantity_rule":{"min":1,"max":null,"increment":1}},{"id":46405801541821,"title":"21mm","option1":"21mm","option2":null,"option3":null,"sku":null,"requires_shipping":true,"taxable":false,"featured_image":null,"available":true,"name":"Flange Insert - 21mm","public_title":"21mm","options":["21mm"],"price":800,"weight":20,"compare_at_price":null,"inventory_management":"shopify","barcode":"01541821","requires_selling_plan":false,"selling_plan_allocations":[],"quantity_rule":{"min":1,"max":null,"increment":1}}],"images":["\/\/www.thebirthstore.com.au\/cdn\/shop\/files\/flange-insert-8450095.jpg?v=1774579096","\/\/www.thebirthstore.com.au\/cdn\/shop\/files\/flange-insert-7719486.jpg?v=1771268887"],"featured_image":"\/\/www.thebirthstore.com.au\/cdn\/shop\/files\/flange-insert-8450095.jpg?v=1774579096","options":["Size"],"media":[{"alt":"Flange Insert - The Birth Store - Zen Mumma","id":30768213196989,"position":1,"preview_image":{"aspect_ratio":0.962,"height":1995,"width":1920,"src":"\/\/www.thebirthstore.com.au\/cdn\/shop\/files\/flange-insert-8450095.jpg?v=1774579096"},"aspect_ratio":0.962,"height":1995,"media_type":"image","src":"\/\/www.thebirthstore.com.au\/cdn\/shop\/files\/flange-insert-8450095.jpg?v=1774579096","width":1920},{"alt":"Flange Insert - The Birth Store - Zen Mumma","id":30768215064765,"position":2,"preview_image":{"aspect_ratio":0.89,"height":2048,"width":1822,"src":"\/\/www.thebirthstore.com.au\/cdn\/shop\/files\/flange-insert-7719486.jpg?v=1771268887"},"aspect_ratio":0.89,"height":2048,"media_type":"image","src":"\/\/www.thebirthstore.com.au\/cdn\/shop\/files\/flange-insert-7719486.jpg?v=1771268887","width":1822}],"requires_selling_plan":false,"selling_plan_groups":[],"content":"\u003cp\u003eUniversal Inserts, giving tailored comfort for a better expressing experience. Achieving the right flange fit is essential for both comfort and efficiency when using your breast pump. Zen Mumma Flange Inserts are designed to nest inside the main 24mm (24mm insert for the 27mm) flange, creating a personalised fit that supports gentle, effective milk flow. Made from soft, BPA-free silicone, these inserts help reduce friction and improve suction seal. These inserts can not only fit into the Zen Mumma Wearables, but many types of pumps.\u003cbr\u003e\u003c\/p\u003e"},"options":[{"name":"Size","position":1,"values":["13mm","15mm","17mm","19mm","21mm"]}],"custom_metafields":{},"metafields":{"badge":"\u003cdiv style='display:none' class='jdgm-prev-badge' data-average-rating='0.00' data-number-of-reviews='0' data-number-of-questions='0'\u003e \u003cspan class='jdgm-prev-badge__stars' data-score='0.00' tabindex='0' aria-label='0.00 stars' role='button'\u003e \u003cspan class='jdgm-star jdgm--off'\u003e\u003c\/span\u003e\u003cspan class='jdgm-star jdgm--off'\u003e\u003c\/span\u003e\u003cspan class='jdgm-star jdgm--off'\u003e\u003c\/span\u003e\u003cspan class='jdgm-star jdgm--off'\u003e\u003c\/span\u003e\u003cspan class='jdgm-star jdgm--off'\u003e\u003c\/span\u003e \u003c\/span\u003e \u003cspan class='jdgm-prev-badge__text'\u003e No reviews \u003c\/span\u003e \u003c\/div\u003e","widget":"\u003cdiv class='jdgm-rev-widg' data-updated-at='2026-02-16T05:39:05Z' data-average-rating='0.00' data-number-of-reviews='0' data-number-of-questions='0' data-image-url='https:\/\/cdn.shopify.com\/s\/files\/1\/0527\/3393\/5805\/files\/7d20d5e5-ea96-4f46-88ab-02f3ed7b7d11.jpg?v=1771219080'\u003e \u003cstyle class='jdgm-temp-hiding-style'\u003e.jdgm-rev-widg{ display: none }\u003c\/style\u003e \u003cdiv class='jdgm-rev-widg__header'\u003e \u003ch2 class='jdgm-rev-widg__title'\u003eCustomer Reviews\u003c\/h2\u003e \u003cdiv class='jdgm-rev-widg__summary'\u003e \u003cdiv class='jdgm-rev-widg__summary-stars' aria-label='Average rating is 0.00 stars' role='img'\u003e \u003cspan class='jdgm-star jdgm--off'\u003e\u003c\/span\u003e\u003cspan class='jdgm-star jdgm--off'\u003e\u003c\/span\u003e\u003cspan class='jdgm-star jdgm--off'\u003e\u003c\/span\u003e\u003cspan class='jdgm-star jdgm--off'\u003e\u003c\/span\u003e\u003cspan class='jdgm-star jdgm--off'\u003e\u003c\/span\u003e \u003c\/div\u003e \u003cdiv class='jdgm-rev-widg__summary-text'\u003eBe the first to write a review\u003c\/div\u003e \u003c\/div\u003e \u003ca style='display: none' href='#' class='jdgm-write-rev-link' role='button'\u003eWrite a review\u003c\/a\u003e \u003cdiv class='jdgm-histogram jdgm-temp-hidden'\u003e \u003cdiv class='jdgm-histogram__row' data-rating='5' data-frequency='0' data-percentage='0'\u003e \u003cdiv class='jdgm-histogram__star' role='button' aria-label=\"0% (0) reviews with 5 star rating\" tabindex='0' \u003e\u003cspan class='jdgm-star jdgm--on'\u003e\u003c\/span\u003e\u003cspan class='jdgm-star jdgm--on'\u003e\u003c\/span\u003e\u003cspan class='jdgm-star jdgm--on'\u003e\u003c\/span\u003e\u003cspan class='jdgm-star jdgm--on'\u003e\u003c\/span\u003e\u003cspan class='jdgm-star jdgm--on'\u003e\u003c\/span\u003e\u003c\/div\u003e \u003cdiv class='jdgm-histogram__bar'\u003e \u003cdiv class='jdgm-histogram__bar-content' style='width: 0%;'\u003e \u003c\/div\u003e \u003c\/div\u003e \u003cdiv class='jdgm-histogram__percentage'\u003e0%\u003c\/div\u003e \u003cdiv class='jdgm-histogram__frequency'\u003e(0)\u003c\/div\u003e \u003c\/div\u003e \u003cdiv class='jdgm-histogram__row' data-rating='4' data-frequency='0' data-percentage='0'\u003e \u003cdiv class='jdgm-histogram__star' role='button' aria-label=\"0% (0) reviews with 4 star rating\" tabindex='0' \u003e\u003cspan class='jdgm-star jdgm--on'\u003e\u003c\/span\u003e\u003cspan class='jdgm-star jdgm--on'\u003e\u003c\/span\u003e\u003cspan class='jdgm-star jdgm--on'\u003e\u003c\/span\u003e\u003cspan class='jdgm-star jdgm--on'\u003e\u003c\/span\u003e\u003cspan class='jdgm-star jdgm--off'\u003e\u003c\/span\u003e\u003c\/div\u003e \u003cdiv class='jdgm-histogram__bar'\u003e \u003cdiv class='jdgm-histogram__bar-content' style='width: 0%;'\u003e \u003c\/div\u003e \u003c\/div\u003e \u003cdiv class='jdgm-histogram__percentage'\u003e0%\u003c\/div\u003e \u003cdiv class='jdgm-histogram__frequency'\u003e(0)\u003c\/div\u003e \u003c\/div\u003e \u003cdiv class='jdgm-histogram__row' data-rating='3' data-frequency='0' data-percentage='0'\u003e \u003cdiv class='jdgm-histogram__star' role='button' aria-label=\"0% (0) reviews with 3 star rating\" tabindex='0' \u003e\u003cspan class='jdgm-star jdgm--on'\u003e\u003c\/span\u003e\u003cspan class='jdgm-star jdgm--on'\u003e\u003c\/span\u003e\u003cspan class='jdgm-star jdgm--on'\u003e\u003c\/span\u003e\u003cspan class='jdgm-star jdgm--off'\u003e\u003c\/span\u003e\u003cspan class='jdgm-star jdgm--off'\u003e\u003c\/span\u003e\u003c\/div\u003e \u003cdiv class='jdgm-histogram__bar'\u003e \u003cdiv class='jdgm-histogram__bar-content' style='width: 0%;'\u003e \u003c\/div\u003e \u003c\/div\u003e \u003cdiv class='jdgm-histogram__percentage'\u003e0%\u003c\/div\u003e \u003cdiv class='jdgm-histogram__frequency'\u003e(0)\u003c\/div\u003e \u003c\/div\u003e \u003cdiv class='jdgm-histogram__row' data-rating='2' data-frequency='0' data-percentage='0'\u003e \u003cdiv class='jdgm-histogram__star' role='button' aria-label=\"0% (0) reviews with 2 star rating\" tabindex='0' \u003e\u003cspan class='jdgm-star jdgm--on'\u003e\u003c\/span\u003e\u003cspan class='jdgm-star jdgm--on'\u003e\u003c\/span\u003e\u003cspan class='jdgm-star jdgm--off'\u003e\u003c\/span\u003e\u003cspan class='jdgm-star jdgm--off'\u003e\u003c\/span\u003e\u003cspan class='jdgm-star jdgm--off'\u003e\u003c\/span\u003e\u003c\/div\u003e \u003cdiv class='jdgm-histogram__bar'\u003e \u003cdiv class='jdgm-histogram__bar-content' style='width: 0%;'\u003e \u003c\/div\u003e \u003c\/div\u003e \u003cdiv class='jdgm-histogram__percentage'\u003e0%\u003c\/div\u003e \u003cdiv class='jdgm-histogram__frequency'\u003e(0)\u003c\/div\u003e \u003c\/div\u003e \u003cdiv class='jdgm-histogram__row' data-rating='1' data-frequency='0' data-percentage='0'\u003e \u003cdiv class='jdgm-histogram__star' role='button' aria-label=\"0% (0) reviews with 1 star rating\" tabindex='0' \u003e\u003cspan class='jdgm-star jdgm--on'\u003e\u003c\/span\u003e\u003cspan class='jdgm-star jdgm--off'\u003e\u003c\/span\u003e\u003cspan class='jdgm-star jdgm--off'\u003e\u003c\/span\u003e\u003cspan class='jdgm-star jdgm--off'\u003e\u003c\/span\u003e\u003cspan class='jdgm-star jdgm--off'\u003e\u003c\/span\u003e\u003c\/div\u003e \u003cdiv class='jdgm-histogram__bar'\u003e \u003cdiv class='jdgm-histogram__bar-content' style='width: 0%;'\u003e \u003c\/div\u003e \u003c\/div\u003e \u003cdiv class='jdgm-histogram__percentage'\u003e0%\u003c\/div\u003e \u003cdiv class='jdgm-histogram__frequency'\u003e(0)\u003c\/div\u003e \u003c\/div\u003e \u003cdiv class='jdgm-histogram__row jdgm-histogram__clear-filter' data-rating=null tabindex='0'\u003e\u003c\/div\u003e \u003c\/div\u003e \u003cdiv class='jdgm-rev-widg__sort-wrapper'\u003e\u003c\/div\u003e \u003c\/div\u003e \u003cdiv class='jdgm-rev-widg__body'\u003e \u003cdiv class='jdgm-rev-widg__reviews'\u003e\u003c\/div\u003e \u003cdiv class='jdgm-paginate' data-per-page='10' data-url='https:\/\/api.judge.me\/reviews\/reviews_for_widget' style=\"display: none;\"\u003e\u003c\/div\u003e \u003c\/div\u003e \u003cdiv class='jdgm-rev-widg__paginate-spinner-wrapper'\u003e \u003cdiv class='jdgm-spinner'\u003e\u003c\/div\u003e \u003c\/div\u003e \u003c\/div\u003e"},"collections":[{"id":281712427197,"handle":"breastfeeding","title":"Breastfeeding","updated_at":"2026-06-12T19:10:26+08:00","body_html":"","published_at":"2021-12-20T14:19:33+08:00","sort_order":"best-selling","template_suffix":"breastfeeding-collection","disjunctive":false,"rules":[{"column":"tag","relation":"equals","condition":"Breastfeeding"}],"published_scope":"global","image":{"created_at":"2024-05-06T11:59:34+08:00","alt":"Breastfeeding - The Birth Store","width":620,"height":635,"src":"\/\/www.thebirthstore.com.au\/cdn\/shop\/collections\/breastfeeding-793872.jpg?v=1714967974"}},{"id":261657460925,"handle":"buy","title":"Buy","updated_at":"2026-06-12T19:10:26+08:00","body_html":"\u003cp\u003eBrowse all of our pregnancy, labour \u0026amp; birth, postpartum and baby essentials here.\u003cbr\u003e\u003c\/p\u003e\n\u003cp\u003e\u003cspan\u003eYou can even buy now and pay later with Afterpay!\u003c\/span\u003e\u003c\/p\u003e","published_at":"2021-03-10T12:05:31+08:00","sort_order":"best-selling","template_suffix":"shop-all-collection","disjunctive":false,"rules":[{"column":"title","relation":"not_contains","condition":"Hire"}],"published_scope":"global","image":{"created_at":"2024-05-06T11:59:42+08:00","alt":"Buy - The Birth Store","width":2048,"height":2048,"src":"\/\/www.thebirthstore.com.au\/cdn\/shop\/collections\/buy-964856.jpg?v=1714967982"}},{"id":337429201085,"handle":"hospital-bag","title":"Hospital Bag","updated_at":"2026-06-12T19:10:26+08:00","body_html":"","published_at":"2026-06-03T11:36:29+08:00","sort_order":"most-relevant","template_suffix":"","disjunctive":false,"rules":[{"column":"tag","relation":"equals","condition":"Hospital Bag"}],"published_scope":"global"},{"id":291456483517,"handle":"shop-all","title":"Shop All - Mum","updated_at":"2026-06-12T19:10:26+08:00","body_html":"","published_at":"2022-12-23T22:04:39+08:00","sort_order":"best-selling","template_suffix":"shop-all-collection","disjunctive":false,"rules":[{"column":"variant_price","relation":"greater_than","condition":"1"},{"column":"title","relation":"not_contains","condition":"Batteries"},{"column":"tag","relation":"equals","condition":"Mum"}],"published_scope":"global","image":{"created_at":"2024-05-06T12:00:54+08:00","alt":"Shop All - The Birth Store","width":1365,"height":2048,"src":"\/\/www.thebirthstore.com.au\/cdn\/shop\/collections\/shop-all-693176.jpg?v=1714968055"}}]}
{"item":{"id":8130025095357,"title":"Breastfeeding Tee","handle":"breastfeeding-tee","description":"\u003cdiv class=\"jdgm-rev__body\"\u003e\n\u003cp\u003e\u003cem\u003eThis is the best quality t-shirt I have ever bought, and the fact it’s breastfeeding friendly too? Even better! Probably could have sized down but being plus size, it makes it easier for feeding for it to be a bit bigger. Highly recommend! - Charlotte\u003c\/em\u003e\u003c\/p\u003e\n\u003cp\u003e \u003c\/p\u003e\n\u003c\/div\u003e\n\u003cp\u003eIntroducing the first size inclusive breastfeeding tee, ranging from XS-6XL. \u003c\/p\u003e\n\u003cp\u003eThis collection of breastfeeding tees features a simple embroidered logo on the front.\u003cbr\u003e\u003c\/p\u003e\n\u003cp\u003eThe tee features a curved hem, with two invisible zips for easy and discreet access when feeding. The fabric is 220gsm, and 95% Cotton \u0026amp; 5% Spandex.\u003c\/p\u003e\n\u003cp\u003e\u003cstrong\u003eModel Information:\u003c\/strong\u003e\u003c\/p\u003e\n\u003cul\u003e\n\u003cli\u003e\n\u003cstrong\u003eSize Worn:\u003c\/strong\u003e\u003cspan\u003e \u003c\/span\u003eXL around a 14-16 They are a true to size fit.\u003c\/li\u003e\n\u003c\/ul\u003e\n\u003cp\u003e\u003cstrong\u003eApprox. garment measurements in cm:\u003c\/strong\u003e\u003c\/p\u003e\n\u003cp\u003e\u003cspan\u003eThese tees are designed to be a true fit, in most cases you can stick with your regular size. \u003c\/span\u003e\u003cspan\u003e If you prefer an oversized fit, we recommend sizing up. \u003c\/span\u003e\u003c\/p\u003e\n\u003cdiv class=\"flex-1 overflow-hidden\"\u003e\n\u003cdiv class=\"h-full\"\u003e\n\u003cdiv class=\"react-scroll-to-bottom--css-twmwd-79elbk h-full\"\u003e\n\u003cdiv class=\"react-scroll-to-bottom--css-twmwd-1n7m0yu\"\u003e\n\u003cdiv class=\"flex flex-col text-sm md:pb-9\"\u003e\n\u003carticle data-scroll-anchor=\"true\" data-testid=\"conversation-turn-7\" dir=\"auto\" class=\"w-full text-token-text-primary focus-visible:outline-2 focus-visible:outline-offset-[-4px]\" tabindex=\"0\"\u003e\n\u003cdiv class=\"text-base py-[18px] px-3 md:px-4 m-auto md:px-5\"\u003e\n\u003cdiv class=\"mx-auto flex flex-1 gap-4 text-base md:gap-5 lg:gap-6 md:max-w-3xl\"\u003e\n\u003cdiv class=\"group\/conversation-turn relative flex w-full min-w-0 flex-col agent-turn\"\u003e\n\u003cdiv class=\"flex-col gap-1 md:gap-3\"\u003e\n\u003cdiv class=\"flex max-w-full flex-col flex-grow\"\u003e\n\u003cdiv class=\"min-h-[20px] text-message flex w-full flex-col items-end gap-2 break-words [.text-message+\u0026amp;]:mt-5 overflow-x-auto whitespace-pre-wrap\" dir=\"auto\" data-message-id=\"2ff8d175-80d9-4490-8924-f36e768e13a0\" data-message-author-role=\"assistant\"\u003e\n\u003cdiv class=\"flex w-full flex-col gap-1 empty:hidden first:pt-[3px]\"\u003e\n\u003cul\u003e\n\u003cli\u003e220gsm\u003c\/li\u003e\n\u003cli\u003e95% Cotton 5% Spandex\u003c\/li\u003e\n\u003c\/ul\u003e\n\u003c\/div\u003e\n\u003c\/div\u003e\n\u003c\/div\u003e\n\u003c\/div\u003e\n\u003c\/div\u003e\n\u003c\/div\u003e\n\u003c\/div\u003e\n\u003c\/article\u003e\n\u003c\/div\u003e\n\u003c\/div\u003e\n\u003c\/div\u003e\n\u003c\/div\u003e\n\u003c\/div\u003e\n\u003ctable width=\"100%\"\u003e\n\u003ctbody\u003e\n\u003ctr\u003e\n\u003ctd\u003eBF Tee\u003c\/td\u003e\n\u003ctd\u003e Bust \u003c\/td\u003e\n\u003ctd\u003e Bottom\u003c\/td\u003e\n\u003ctd\u003eLength \u003c\/td\u003e\n\u003c\/tr\u003e\n\u003ctr\u003e\n\u003ctd\u003eXS - 6\/8\u003c\/td\u003e\n\u003ctd\u003e 96\u003c\/td\u003e\n\u003ctd\u003e100\u003c\/td\u003e\n\u003ctd\u003e67\u003c\/td\u003e\n\u003c\/tr\u003e\n\u003ctr\u003e\n\u003ctd\u003eS - 8-10\u003c\/td\u003e\n\u003ctd\u003e101\u003c\/td\u003e\n\u003ctd\u003e105\u003c\/td\u003e\n\u003ctd\u003e68\u003c\/td\u003e\n\u003c\/tr\u003e\n\u003ctr\u003e\n\u003ctd\u003eM - 10-12\u003c\/td\u003e\n\u003ctd\u003e106\u003c\/td\u003e\n\u003ctd\u003e110\u003c\/td\u003e\n\u003ctd\u003e69\u003c\/td\u003e\n\u003c\/tr\u003e\n\u003ctr\u003e\n\u003ctd\u003eL - 12-14\u003c\/td\u003e\n\u003ctd\u003e111\u003c\/td\u003e\n\u003ctd\u003e115\u003c\/td\u003e\n\u003ctd\u003e70\u003c\/td\u003e\n\u003c\/tr\u003e\n\u003ctr\u003e\n\u003ctd\u003eXL - 14-16\u003c\/td\u003e\n\u003ctd\u003e116\u003c\/td\u003e\n\u003ctd\u003e120\u003c\/td\u003e\n\u003ctd\u003e71\u003c\/td\u003e\n\u003c\/tr\u003e\n\u003ctr\u003e\n\u003ctd\u003e2XL -16-18\u003c\/td\u003e\n\u003ctd\u003e121\u003c\/td\u003e\n\u003ctd\u003e125\u003c\/td\u003e\n\u003ctd\u003e72\u003c\/td\u003e\n\u003c\/tr\u003e\n\u003ctr\u003e\n\u003ctd\u003e3XL -18-20\u003c\/td\u003e\n\u003ctd\u003e126\u003c\/td\u003e\n\u003ctd\u003e130\u003c\/td\u003e\n\u003ctd\u003e73\u003c\/td\u003e\n\u003c\/tr\u003e\n\u003ctr\u003e\n\u003ctd\u003e4XL 20-22\u003c\/td\u003e\n\u003ctd\u003e131\u003c\/td\u003e\n\u003ctd\u003e135\u003c\/td\u003e\n\u003ctd\u003e74\u003c\/td\u003e\n\u003c\/tr\u003e\n\u003ctr\u003e\n\u003ctd\u003e5XL -22-24\u003c\/td\u003e\n\u003ctd\u003e136\u003c\/td\u003e\n\u003ctd\u003e140\u003c\/td\u003e\n\u003ctd\u003e75\u003c\/td\u003e\n\u003c\/tr\u003e\n\u003ctr\u003e\n\u003ctd\u003e6XL -24-26\u003c\/td\u003e\n\u003ctd\u003e141\u003c\/td\u003e\n\u003ctd\u003e145\u003c\/td\u003e\n\u003ctd\u003e76\u003c\/td\u003e\n\u003c\/tr\u003e\n\u003c\/tbody\u003e\n\u003c\/table\u003e","published_at":"2025-11-07T11:13:09+08:00","created_at":"2025-11-05T14:01:00+08:00","vendor":"Rumi + Sol","type":"","tags":["Baby Shower Gifts - Mum","Breastfeeding","Breastfeeding Clothing","Mum"],"price":5999,"price_min":5999,"price_max":5999,"available":true,"price_varies":false,"compare_at_price":null,"compare_at_price_min":0,"compare_at_price_max":0,"compare_at_price_varies":false,"variants":[{"id":45877790572733,"title":"Black \/ XS","option1":"Black","option2":"XS","option3":null,"sku":null,"requires_shipping":true,"taxable":false,"featured_image":{"id":38794530947261,"product_id":8130025095357,"position":1,"created_at":"2025-11-07T11:38:59+08:00","updated_at":"2025-11-08T07:28:00+08:00","alt":"Breastfeeding Tee - The Birth Store - Rumi + Sol","width":1080,"height":1080,"src":"\/\/www.thebirthstore.com.au\/cdn\/shop\/files\/breastfeeding-tee-6975681.png?v=1762558080","variant_ids":[45877790572733,45877790605501,45877790638269,45877790671037,45877790703805,45877790736573,45877790769341,45877790802109,45877790834877,45877790867645]},"available":true,"name":"Breastfeeding Tee - Black \/ XS","public_title":"Black \/ XS","options":["Black","XS"],"price":5999,"weight":0,"compare_at_price":null,"inventory_management":"shopify","barcode":"90572733","featured_media":{"alt":"Breastfeeding Tee - The Birth Store - Rumi + Sol","id":30038773629117,"position":1,"preview_image":{"aspect_ratio":1.0,"height":1080,"width":1080,"src":"\/\/www.thebirthstore.com.au\/cdn\/shop\/files\/breastfeeding-tee-6975681.png?v=1762558080"}},"requires_selling_plan":false,"selling_plan_allocations":[],"quantity_rule":{"min":1,"max":null,"increment":1}},{"id":45877790605501,"title":"Black \/ S","option1":"Black","option2":"S","option3":null,"sku":null,"requires_shipping":true,"taxable":false,"featured_image":{"id":38794530947261,"product_id":8130025095357,"position":1,"created_at":"2025-11-07T11:38:59+08:00","updated_at":"2025-11-08T07:28:00+08:00","alt":"Breastfeeding Tee - The Birth Store - Rumi + Sol","width":1080,"height":1080,"src":"\/\/www.thebirthstore.com.au\/cdn\/shop\/files\/breastfeeding-tee-6975681.png?v=1762558080","variant_ids":[45877790572733,45877790605501,45877790638269,45877790671037,45877790703805,45877790736573,45877790769341,45877790802109,45877790834877,45877790867645]},"available":true,"name":"Breastfeeding Tee - Black \/ S","public_title":"Black \/ S","options":["Black","S"],"price":5999,"weight":0,"compare_at_price":null,"inventory_management":"shopify","barcode":"90605501","featured_media":{"alt":"Breastfeeding Tee - The Birth Store - Rumi + Sol","id":30038773629117,"position":1,"preview_image":{"aspect_ratio":1.0,"height":1080,"width":1080,"src":"\/\/www.thebirthstore.com.au\/cdn\/shop\/files\/breastfeeding-tee-6975681.png?v=1762558080"}},"requires_selling_plan":false,"selling_plan_allocations":[],"quantity_rule":{"min":1,"max":null,"increment":1}},{"id":45877790638269,"title":"Black \/ M","option1":"Black","option2":"M","option3":null,"sku":null,"requires_shipping":true,"taxable":false,"featured_image":{"id":38794530947261,"product_id":8130025095357,"position":1,"created_at":"2025-11-07T11:38:59+08:00","updated_at":"2025-11-08T07:28:00+08:00","alt":"Breastfeeding Tee - The Birth Store - Rumi + Sol","width":1080,"height":1080,"src":"\/\/www.thebirthstore.com.au\/cdn\/shop\/files\/breastfeeding-tee-6975681.png?v=1762558080","variant_ids":[45877790572733,45877790605501,45877790638269,45877790671037,45877790703805,45877790736573,45877790769341,45877790802109,45877790834877,45877790867645]},"available":false,"name":"Breastfeeding Tee - Black \/ M","public_title":"Black \/ M","options":["Black","M"],"price":5999,"weight":0,"compare_at_price":null,"inventory_management":"shopify","barcode":"90638269","featured_media":{"alt":"Breastfeeding Tee - The Birth Store - Rumi + Sol","id":30038773629117,"position":1,"preview_image":{"aspect_ratio":1.0,"height":1080,"width":1080,"src":"\/\/www.thebirthstore.com.au\/cdn\/shop\/files\/breastfeeding-tee-6975681.png?v=1762558080"}},"requires_selling_plan":false,"selling_plan_allocations":[],"quantity_rule":{"min":1,"max":null,"increment":1}},{"id":45877790671037,"title":"Black \/ L","option1":"Black","option2":"L","option3":null,"sku":null,"requires_shipping":true,"taxable":false,"featured_image":{"id":38794530947261,"product_id":8130025095357,"position":1,"created_at":"2025-11-07T11:38:59+08:00","updated_at":"2025-11-08T07:28:00+08:00","alt":"Breastfeeding Tee - The Birth Store - Rumi + Sol","width":1080,"height":1080,"src":"\/\/www.thebirthstore.com.au\/cdn\/shop\/files\/breastfeeding-tee-6975681.png?v=1762558080","variant_ids":[45877790572733,45877790605501,45877790638269,45877790671037,45877790703805,45877790736573,45877790769341,45877790802109,45877790834877,45877790867645]},"available":false,"name":"Breastfeeding Tee - Black \/ L","public_title":"Black \/ L","options":["Black","L"],"price":5999,"weight":0,"compare_at_price":null,"inventory_management":"shopify","barcode":"90671037","featured_media":{"alt":"Breastfeeding Tee - The Birth Store - Rumi + Sol","id":30038773629117,"position":1,"preview_image":{"aspect_ratio":1.0,"height":1080,"width":1080,"src":"\/\/www.thebirthstore.com.au\/cdn\/shop\/files\/breastfeeding-tee-6975681.png?v=1762558080"}},"requires_selling_plan":false,"selling_plan_allocations":[],"quantity_rule":{"min":1,"max":null,"increment":1}},{"id":45877790703805,"title":"Black \/ XL","option1":"Black","option2":"XL","option3":null,"sku":null,"requires_shipping":true,"taxable":false,"featured_image":{"id":38794530947261,"product_id":8130025095357,"position":1,"created_at":"2025-11-07T11:38:59+08:00","updated_at":"2025-11-08T07:28:00+08:00","alt":"Breastfeeding Tee - The Birth Store - Rumi + Sol","width":1080,"height":1080,"src":"\/\/www.thebirthstore.com.au\/cdn\/shop\/files\/breastfeeding-tee-6975681.png?v=1762558080","variant_ids":[45877790572733,45877790605501,45877790638269,45877790671037,45877790703805,45877790736573,45877790769341,45877790802109,45877790834877,45877790867645]},"available":true,"name":"Breastfeeding Tee - Black \/ XL","public_title":"Black \/ XL","options":["Black","XL"],"price":5999,"weight":0,"compare_at_price":null,"inventory_management":"shopify","barcode":"90703805","featured_media":{"alt":"Breastfeeding Tee - The Birth Store - Rumi + Sol","id":30038773629117,"position":1,"preview_image":{"aspect_ratio":1.0,"height":1080,"width":1080,"src":"\/\/www.thebirthstore.com.au\/cdn\/shop\/files\/breastfeeding-tee-6975681.png?v=1762558080"}},"requires_selling_plan":false,"selling_plan_allocations":[],"quantity_rule":{"min":1,"max":null,"increment":1}},{"id":45877790736573,"title":"Black \/ 2XL","option1":"Black","option2":"2XL","option3":null,"sku":null,"requires_shipping":true,"taxable":false,"featured_image":{"id":38794530947261,"product_id":8130025095357,"position":1,"created_at":"2025-11-07T11:38:59+08:00","updated_at":"2025-11-08T07:28:00+08:00","alt":"Breastfeeding Tee - The Birth Store - Rumi + Sol","width":1080,"height":1080,"src":"\/\/www.thebirthstore.com.au\/cdn\/shop\/files\/breastfeeding-tee-6975681.png?v=1762558080","variant_ids":[45877790572733,45877790605501,45877790638269,45877790671037,45877790703805,45877790736573,45877790769341,45877790802109,45877790834877,45877790867645]},"available":true,"name":"Breastfeeding Tee - Black \/ 2XL","public_title":"Black \/ 2XL","options":["Black","2XL"],"price":5999,"weight":0,"compare_at_price":null,"inventory_management":"shopify","barcode":"90736573","featured_media":{"alt":"Breastfeeding Tee - The Birth Store - Rumi + Sol","id":30038773629117,"position":1,"preview_image":{"aspect_ratio":1.0,"height":1080,"width":1080,"src":"\/\/www.thebirthstore.com.au\/cdn\/shop\/files\/breastfeeding-tee-6975681.png?v=1762558080"}},"requires_selling_plan":false,"selling_plan_allocations":[],"quantity_rule":{"min":1,"max":null,"increment":1}},{"id":45877790769341,"title":"Black \/ 3XL","option1":"Black","option2":"3XL","option3":null,"sku":null,"requires_shipping":true,"taxable":false,"featured_image":{"id":38794530947261,"product_id":8130025095357,"position":1,"created_at":"2025-11-07T11:38:59+08:00","updated_at":"2025-11-08T07:28:00+08:00","alt":"Breastfeeding Tee - The Birth Store - Rumi + Sol","width":1080,"height":1080,"src":"\/\/www.thebirthstore.com.au\/cdn\/shop\/files\/breastfeeding-tee-6975681.png?v=1762558080","variant_ids":[45877790572733,45877790605501,45877790638269,45877790671037,45877790703805,45877790736573,45877790769341,45877790802109,45877790834877,45877790867645]},"available":true,"name":"Breastfeeding Tee - Black \/ 3XL","public_title":"Black \/ 3XL","options":["Black","3XL"],"price":5999,"weight":0,"compare_at_price":null,"inventory_management":"shopify","barcode":"90769341","featured_media":{"alt":"Breastfeeding Tee - The Birth Store - Rumi + Sol","id":30038773629117,"position":1,"preview_image":{"aspect_ratio":1.0,"height":1080,"width":1080,"src":"\/\/www.thebirthstore.com.au\/cdn\/shop\/files\/breastfeeding-tee-6975681.png?v=1762558080"}},"requires_selling_plan":false,"selling_plan_allocations":[],"quantity_rule":{"min":1,"max":null,"increment":1}},{"id":45877790802109,"title":"Black \/ 4XL","option1":"Black","option2":"4XL","option3":null,"sku":null,"requires_shipping":true,"taxable":false,"featured_image":{"id":38794530947261,"product_id":8130025095357,"position":1,"created_at":"2025-11-07T11:38:59+08:00","updated_at":"2025-11-08T07:28:00+08:00","alt":"Breastfeeding Tee - The Birth Store - Rumi + Sol","width":1080,"height":1080,"src":"\/\/www.thebirthstore.com.au\/cdn\/shop\/files\/breastfeeding-tee-6975681.png?v=1762558080","variant_ids":[45877790572733,45877790605501,45877790638269,45877790671037,45877790703805,45877790736573,45877790769341,45877790802109,45877790834877,45877790867645]},"available":true,"name":"Breastfeeding Tee - Black \/ 4XL","public_title":"Black \/ 4XL","options":["Black","4XL"],"price":5999,"weight":0,"compare_at_price":null,"inventory_management":"shopify","barcode":"90802109","featured_media":{"alt":"Breastfeeding Tee - The Birth Store - Rumi + Sol","id":30038773629117,"position":1,"preview_image":{"aspect_ratio":1.0,"height":1080,"width":1080,"src":"\/\/www.thebirthstore.com.au\/cdn\/shop\/files\/breastfeeding-tee-6975681.png?v=1762558080"}},"requires_selling_plan":false,"selling_plan_allocations":[],"quantity_rule":{"min":1,"max":null,"increment":1}},{"id":45877790834877,"title":"Black \/ 5XL","option1":"Black","option2":"5XL","option3":null,"sku":null,"requires_shipping":true,"taxable":false,"featured_image":{"id":38794530947261,"product_id":8130025095357,"position":1,"created_at":"2025-11-07T11:38:59+08:00","updated_at":"2025-11-08T07:28:00+08:00","alt":"Breastfeeding Tee - The Birth Store - Rumi + Sol","width":1080,"height":1080,"src":"\/\/www.thebirthstore.com.au\/cdn\/shop\/files\/breastfeeding-tee-6975681.png?v=1762558080","variant_ids":[45877790572733,45877790605501,45877790638269,45877790671037,45877790703805,45877790736573,45877790769341,45877790802109,45877790834877,45877790867645]},"available":false,"name":"Breastfeeding Tee - Black \/ 5XL","public_title":"Black \/ 5XL","options":["Black","5XL"],"price":5999,"weight":0,"compare_at_price":null,"inventory_management":"shopify","barcode":"90834877","featured_media":{"alt":"Breastfeeding Tee - The Birth Store - Rumi + Sol","id":30038773629117,"position":1,"preview_image":{"aspect_ratio":1.0,"height":1080,"width":1080,"src":"\/\/www.thebirthstore.com.au\/cdn\/shop\/files\/breastfeeding-tee-6975681.png?v=1762558080"}},"requires_selling_plan":false,"selling_plan_allocations":[],"quantity_rule":{"min":1,"max":null,"increment":1}},{"id":45877790867645,"title":"Black \/ 6XL","option1":"Black","option2":"6XL","option3":null,"sku":null,"requires_shipping":true,"taxable":false,"featured_image":{"id":38794530947261,"product_id":8130025095357,"position":1,"created_at":"2025-11-07T11:38:59+08:00","updated_at":"2025-11-08T07:28:00+08:00","alt":"Breastfeeding Tee - The Birth Store - Rumi + Sol","width":1080,"height":1080,"src":"\/\/www.thebirthstore.com.au\/cdn\/shop\/files\/breastfeeding-tee-6975681.png?v=1762558080","variant_ids":[45877790572733,45877790605501,45877790638269,45877790671037,45877790703805,45877790736573,45877790769341,45877790802109,45877790834877,45877790867645]},"available":false,"name":"Breastfeeding Tee - Black \/ 6XL","public_title":"Black \/ 6XL","options":["Black","6XL"],"price":5999,"weight":0,"compare_at_price":null,"inventory_management":"shopify","barcode":"90867645","featured_media":{"alt":"Breastfeeding Tee - The Birth Store - Rumi + Sol","id":30038773629117,"position":1,"preview_image":{"aspect_ratio":1.0,"height":1080,"width":1080,"src":"\/\/www.thebirthstore.com.au\/cdn\/shop\/files\/breastfeeding-tee-6975681.png?v=1762558080"}},"requires_selling_plan":false,"selling_plan_allocations":[],"quantity_rule":{"min":1,"max":null,"increment":1}},{"id":45877790900413,"title":"Pink \/ XS","option1":"Pink","option2":"XS","option3":null,"sku":null,"requires_shipping":true,"taxable":false,"featured_image":{"id":38794525573309,"product_id":8130025095357,"position":2,"created_at":"2025-11-07T11:34:13+08:00","updated_at":"2025-11-08T07:28:00+08:00","alt":"Breastfeeding Tee - The Birth Store - Rumi + Sol","width":1080,"height":1080,"src":"\/\/www.thebirthstore.com.au\/cdn\/shop\/files\/breastfeeding-tee-8872935.png?v=1762558080","variant_ids":[45877790900413,45877790933181,45877790965949,45877790998717,45877791031485,45877791064253,45877791097021,45877791129789,45877791162557,45877791195325]},"available":true,"name":"Breastfeeding Tee - Pink \/ XS","public_title":"Pink \/ XS","options":["Pink","XS"],"price":5999,"weight":0,"compare_at_price":null,"inventory_management":"shopify","barcode":"90900413","featured_media":{"alt":"Breastfeeding Tee - The Birth Store - Rumi + Sol","id":30038768255165,"position":2,"preview_image":{"aspect_ratio":1.0,"height":1080,"width":1080,"src":"\/\/www.thebirthstore.com.au\/cdn\/shop\/files\/breastfeeding-tee-8872935.png?v=1762558080"}},"requires_selling_plan":false,"selling_plan_allocations":[],"quantity_rule":{"min":1,"max":null,"increment":1}},{"id":45877790933181,"title":"Pink \/ S","option1":"Pink","option2":"S","option3":null,"sku":null,"requires_shipping":true,"taxable":false,"featured_image":{"id":38794525573309,"product_id":8130025095357,"position":2,"created_at":"2025-11-07T11:34:13+08:00","updated_at":"2025-11-08T07:28:00+08:00","alt":"Breastfeeding Tee - The Birth Store - Rumi + Sol","width":1080,"height":1080,"src":"\/\/www.thebirthstore.com.au\/cdn\/shop\/files\/breastfeeding-tee-8872935.png?v=1762558080","variant_ids":[45877790900413,45877790933181,45877790965949,45877790998717,45877791031485,45877791064253,45877791097021,45877791129789,45877791162557,45877791195325]},"available":true,"name":"Breastfeeding Tee - Pink \/ S","public_title":"Pink \/ S","options":["Pink","S"],"price":5999,"weight":0,"compare_at_price":null,"inventory_management":"shopify","barcode":"90933181","featured_media":{"alt":"Breastfeeding Tee - The Birth Store - Rumi + Sol","id":30038768255165,"position":2,"preview_image":{"aspect_ratio":1.0,"height":1080,"width":1080,"src":"\/\/www.thebirthstore.com.au\/cdn\/shop\/files\/breastfeeding-tee-8872935.png?v=1762558080"}},"requires_selling_plan":false,"selling_plan_allocations":[],"quantity_rule":{"min":1,"max":null,"increment":1}},{"id":45877790965949,"title":"Pink \/ M","option1":"Pink","option2":"M","option3":null,"sku":null,"requires_shipping":true,"taxable":false,"featured_image":{"id":38794525573309,"product_id":8130025095357,"position":2,"created_at":"2025-11-07T11:34:13+08:00","updated_at":"2025-11-08T07:28:00+08:00","alt":"Breastfeeding Tee - The Birth Store - Rumi + Sol","width":1080,"height":1080,"src":"\/\/www.thebirthstore.com.au\/cdn\/shop\/files\/breastfeeding-tee-8872935.png?v=1762558080","variant_ids":[45877790900413,45877790933181,45877790965949,45877790998717,45877791031485,45877791064253,45877791097021,45877791129789,45877791162557,45877791195325]},"available":false,"name":"Breastfeeding Tee - Pink \/ M","public_title":"Pink \/ M","options":["Pink","M"],"price":5999,"weight":0,"compare_at_price":null,"inventory_management":"shopify","barcode":"90965949","featured_media":{"alt":"Breastfeeding Tee - The Birth Store - Rumi + Sol","id":30038768255165,"position":2,"preview_image":{"aspect_ratio":1.0,"height":1080,"width":1080,"src":"\/\/www.thebirthstore.com.au\/cdn\/shop\/files\/breastfeeding-tee-8872935.png?v=1762558080"}},"requires_selling_plan":false,"selling_plan_allocations":[],"quantity_rule":{"min":1,"max":null,"increment":1}},{"id":45877790998717,"title":"Pink \/ L","option1":"Pink","option2":"L","option3":null,"sku":null,"requires_shipping":true,"taxable":false,"featured_image":{"id":38794525573309,"product_id":8130025095357,"position":2,"created_at":"2025-11-07T11:34:13+08:00","updated_at":"2025-11-08T07:28:00+08:00","alt":"Breastfeeding Tee - The Birth Store - Rumi + Sol","width":1080,"height":1080,"src":"\/\/www.thebirthstore.com.au\/cdn\/shop\/files\/breastfeeding-tee-8872935.png?v=1762558080","variant_ids":[45877790900413,45877790933181,45877790965949,45877790998717,45877791031485,45877791064253,45877791097021,45877791129789,45877791162557,45877791195325]},"available":true,"name":"Breastfeeding Tee - Pink \/ L","public_title":"Pink \/ L","options":["Pink","L"],"price":5999,"weight":0,"compare_at_price":null,"inventory_management":"shopify","barcode":"90998717","featured_media":{"alt":"Breastfeeding Tee - The Birth Store - Rumi + Sol","id":30038768255165,"position":2,"preview_image":{"aspect_ratio":1.0,"height":1080,"width":1080,"src":"\/\/www.thebirthstore.com.au\/cdn\/shop\/files\/breastfeeding-tee-8872935.png?v=1762558080"}},"requires_selling_plan":false,"selling_plan_allocations":[],"quantity_rule":{"min":1,"max":null,"increment":1}},{"id":45877791031485,"title":"Pink \/ XL","option1":"Pink","option2":"XL","option3":null,"sku":null,"requires_shipping":true,"taxable":false,"featured_image":{"id":38794525573309,"product_id":8130025095357,"position":2,"created_at":"2025-11-07T11:34:13+08:00","updated_at":"2025-11-08T07:28:00+08:00","alt":"Breastfeeding Tee - The Birth Store - Rumi + Sol","width":1080,"height":1080,"src":"\/\/www.thebirthstore.com.au\/cdn\/shop\/files\/breastfeeding-tee-8872935.png?v=1762558080","variant_ids":[45877790900413,45877790933181,45877790965949,45877790998717,45877791031485,45877791064253,45877791097021,45877791129789,45877791162557,45877791195325]},"available":true,"name":"Breastfeeding Tee - Pink \/ XL","public_title":"Pink \/ XL","options":["Pink","XL"],"price":5999,"weight":0,"compare_at_price":null,"inventory_management":"shopify","barcode":"91031485","featured_media":{"alt":"Breastfeeding Tee - The Birth Store - Rumi + Sol","id":30038768255165,"position":2,"preview_image":{"aspect_ratio":1.0,"height":1080,"width":1080,"src":"\/\/www.thebirthstore.com.au\/cdn\/shop\/files\/breastfeeding-tee-8872935.png?v=1762558080"}},"requires_selling_plan":false,"selling_plan_allocations":[],"quantity_rule":{"min":1,"max":null,"increment":1}},{"id":45877791064253,"title":"Pink \/ 2XL","option1":"Pink","option2":"2XL","option3":null,"sku":null,"requires_shipping":true,"taxable":false,"featured_image":{"id":38794525573309,"product_id":8130025095357,"position":2,"created_at":"2025-11-07T11:34:13+08:00","updated_at":"2025-11-08T07:28:00+08:00","alt":"Breastfeeding Tee - The Birth Store - Rumi + Sol","width":1080,"height":1080,"src":"\/\/www.thebirthstore.com.au\/cdn\/shop\/files\/breastfeeding-tee-8872935.png?v=1762558080","variant_ids":[45877790900413,45877790933181,45877790965949,45877790998717,45877791031485,45877791064253,45877791097021,45877791129789,45877791162557,45877791195325]},"available":false,"name":"Breastfeeding Tee - Pink \/ 2XL","public_title":"Pink \/ 2XL","options":["Pink","2XL"],"price":5999,"weight":0,"compare_at_price":null,"inventory_management":"shopify","barcode":"91064253","featured_media":{"alt":"Breastfeeding Tee - The Birth Store - Rumi + Sol","id":30038768255165,"position":2,"preview_image":{"aspect_ratio":1.0,"height":1080,"width":1080,"src":"\/\/www.thebirthstore.com.au\/cdn\/shop\/files\/breastfeeding-tee-8872935.png?v=1762558080"}},"requires_selling_plan":false,"selling_plan_allocations":[],"quantity_rule":{"min":1,"max":null,"increment":1}},{"id":45877791097021,"title":"Pink \/ 3XL","option1":"Pink","option2":"3XL","option3":null,"sku":null,"requires_shipping":true,"taxable":false,"featured_image":{"id":38794525573309,"product_id":8130025095357,"position":2,"created_at":"2025-11-07T11:34:13+08:00","updated_at":"2025-11-08T07:28:00+08:00","alt":"Breastfeeding Tee - The Birth Store - Rumi + Sol","width":1080,"height":1080,"src":"\/\/www.thebirthstore.com.au\/cdn\/shop\/files\/breastfeeding-tee-8872935.png?v=1762558080","variant_ids":[45877790900413,45877790933181,45877790965949,45877790998717,45877791031485,45877791064253,45877791097021,45877791129789,45877791162557,45877791195325]},"available":true,"name":"Breastfeeding Tee - Pink \/ 3XL","public_title":"Pink \/ 3XL","options":["Pink","3XL"],"price":5999,"weight":0,"compare_at_price":null,"inventory_management":"shopify","barcode":"91097021","featured_media":{"alt":"Breastfeeding Tee - The Birth Store - Rumi + Sol","id":30038768255165,"position":2,"preview_image":{"aspect_ratio":1.0,"height":1080,"width":1080,"src":"\/\/www.thebirthstore.com.au\/cdn\/shop\/files\/breastfeeding-tee-8872935.png?v=1762558080"}},"requires_selling_plan":false,"selling_plan_allocations":[],"quantity_rule":{"min":1,"max":null,"increment":1}},{"id":45877791129789,"title":"Pink \/ 4XL","option1":"Pink","option2":"4XL","option3":null,"sku":null,"requires_shipping":true,"taxable":false,"featured_image":{"id":38794525573309,"product_id":8130025095357,"position":2,"created_at":"2025-11-07T11:34:13+08:00","updated_at":"2025-11-08T07:28:00+08:00","alt":"Breastfeeding Tee - The Birth Store - Rumi + Sol","width":1080,"height":1080,"src":"\/\/www.thebirthstore.com.au\/cdn\/shop\/files\/breastfeeding-tee-8872935.png?v=1762558080","variant_ids":[45877790900413,45877790933181,45877790965949,45877790998717,45877791031485,45877791064253,45877791097021,45877791129789,45877791162557,45877791195325]},"available":true,"name":"Breastfeeding Tee - Pink \/ 4XL","public_title":"Pink \/ 4XL","options":["Pink","4XL"],"price":5999,"weight":0,"compare_at_price":null,"inventory_management":"shopify","barcode":"91129789","featured_media":{"alt":"Breastfeeding Tee - The Birth Store - Rumi + Sol","id":30038768255165,"position":2,"preview_image":{"aspect_ratio":1.0,"height":1080,"width":1080,"src":"\/\/www.thebirthstore.com.au\/cdn\/shop\/files\/breastfeeding-tee-8872935.png?v=1762558080"}},"requires_selling_plan":false,"selling_plan_allocations":[],"quantity_rule":{"min":1,"max":null,"increment":1}},{"id":45877791162557,"title":"Pink \/ 5XL","option1":"Pink","option2":"5XL","option3":null,"sku":null,"requires_shipping":true,"taxable":false,"featured_image":{"id":38794525573309,"product_id":8130025095357,"position":2,"created_at":"2025-11-07T11:34:13+08:00","updated_at":"2025-11-08T07:28:00+08:00","alt":"Breastfeeding Tee - The Birth Store - Rumi + Sol","width":1080,"height":1080,"src":"\/\/www.thebirthstore.com.au\/cdn\/shop\/files\/breastfeeding-tee-8872935.png?v=1762558080","variant_ids":[45877790900413,45877790933181,45877790965949,45877790998717,45877791031485,45877791064253,45877791097021,45877791129789,45877791162557,45877791195325]},"available":true,"name":"Breastfeeding Tee - Pink \/ 5XL","public_title":"Pink \/ 5XL","options":["Pink","5XL"],"price":5999,"weight":0,"compare_at_price":null,"inventory_management":"shopify","barcode":"91162557","featured_media":{"alt":"Breastfeeding Tee - The Birth Store - Rumi + Sol","id":30038768255165,"position":2,"preview_image":{"aspect_ratio":1.0,"height":1080,"width":1080,"src":"\/\/www.thebirthstore.com.au\/cdn\/shop\/files\/breastfeeding-tee-8872935.png?v=1762558080"}},"requires_selling_plan":false,"selling_plan_allocations":[],"quantity_rule":{"min":1,"max":null,"increment":1}},{"id":45877791195325,"title":"Pink \/ 6XL","option1":"Pink","option2":"6XL","option3":null,"sku":null,"requires_shipping":true,"taxable":false,"featured_image":{"id":38794525573309,"product_id":8130025095357,"position":2,"created_at":"2025-11-07T11:34:13+08:00","updated_at":"2025-11-08T07:28:00+08:00","alt":"Breastfeeding Tee - The Birth Store - Rumi + Sol","width":1080,"height":1080,"src":"\/\/www.thebirthstore.com.au\/cdn\/shop\/files\/breastfeeding-tee-8872935.png?v=1762558080","variant_ids":[45877790900413,45877790933181,45877790965949,45877790998717,45877791031485,45877791064253,45877791097021,45877791129789,45877791162557,45877791195325]},"available":false,"name":"Breastfeeding Tee - Pink \/ 6XL","public_title":"Pink \/ 6XL","options":["Pink","6XL"],"price":5999,"weight":0,"compare_at_price":null,"inventory_management":"shopify","barcode":"91195325","featured_media":{"alt":"Breastfeeding Tee - The Birth Store - Rumi + Sol","id":30038768255165,"position":2,"preview_image":{"aspect_ratio":1.0,"height":1080,"width":1080,"src":"\/\/www.thebirthstore.com.au\/cdn\/shop\/files\/breastfeeding-tee-8872935.png?v=1762558080"}},"requires_selling_plan":false,"selling_plan_allocations":[],"quantity_rule":{"min":1,"max":null,"increment":1}},{"id":45877791228093,"title":"Powder Blue \/ XS","option1":"Powder Blue","option2":"XS","option3":null,"sku":null,"requires_shipping":true,"taxable":false,"featured_image":{"id":38794528555197,"product_id":8130025095357,"position":3,"created_at":"2025-11-07T11:36:16+08:00","updated_at":"2025-11-08T07:28:00+08:00","alt":"Breastfeeding Tee - The Birth Store - Rumi + Sol","width":1080,"height":1080,"src":"\/\/www.thebirthstore.com.au\/cdn\/shop\/files\/breastfeeding-tee-8346192.png?v=1762558080","variant_ids":[45877791228093,45877791260861,45877791293629,45877791326397,45877791359165,45877791391933,45877791424701,45877791457469,45877791490237,45877791523005]},"available":true,"name":"Breastfeeding Tee - Powder Blue \/ XS","public_title":"Powder Blue \/ XS","options":["Powder Blue","XS"],"price":5999,"weight":0,"compare_at_price":null,"inventory_management":"shopify","barcode":"91228093","featured_media":{"alt":"Breastfeeding Tee - The Birth Store - Rumi + Sol","id":30038771237053,"position":3,"preview_image":{"aspect_ratio":1.0,"height":1080,"width":1080,"src":"\/\/www.thebirthstore.com.au\/cdn\/shop\/files\/breastfeeding-tee-8346192.png?v=1762558080"}},"requires_selling_plan":false,"selling_plan_allocations":[],"quantity_rule":{"min":1,"max":null,"increment":1}},{"id":45877791260861,"title":"Powder Blue \/ S","option1":"Powder Blue","option2":"S","option3":null,"sku":null,"requires_shipping":true,"taxable":false,"featured_image":{"id":38794528555197,"product_id":8130025095357,"position":3,"created_at":"2025-11-07T11:36:16+08:00","updated_at":"2025-11-08T07:28:00+08:00","alt":"Breastfeeding Tee - The Birth Store - Rumi + Sol","width":1080,"height":1080,"src":"\/\/www.thebirthstore.com.au\/cdn\/shop\/files\/breastfeeding-tee-8346192.png?v=1762558080","variant_ids":[45877791228093,45877791260861,45877791293629,45877791326397,45877791359165,45877791391933,45877791424701,45877791457469,45877791490237,45877791523005]},"available":false,"name":"Breastfeeding Tee - Powder Blue \/ S","public_title":"Powder Blue \/ S","options":["Powder Blue","S"],"price":5999,"weight":0,"compare_at_price":null,"inventory_management":"shopify","barcode":"91260861","featured_media":{"alt":"Breastfeeding Tee - The Birth Store - Rumi + Sol","id":30038771237053,"position":3,"preview_image":{"aspect_ratio":1.0,"height":1080,"width":1080,"src":"\/\/www.thebirthstore.com.au\/cdn\/shop\/files\/breastfeeding-tee-8346192.png?v=1762558080"}},"requires_selling_plan":false,"selling_plan_allocations":[],"quantity_rule":{"min":1,"max":null,"increment":1}},{"id":45877791293629,"title":"Powder Blue \/ M","option1":"Powder Blue","option2":"M","option3":null,"sku":null,"requires_shipping":true,"taxable":false,"featured_image":{"id":38794528555197,"product_id":8130025095357,"position":3,"created_at":"2025-11-07T11:36:16+08:00","updated_at":"2025-11-08T07:28:00+08:00","alt":"Breastfeeding Tee - The Birth Store - Rumi + Sol","width":1080,"height":1080,"src":"\/\/www.thebirthstore.com.au\/cdn\/shop\/files\/breastfeeding-tee-8346192.png?v=1762558080","variant_ids":[45877791228093,45877791260861,45877791293629,45877791326397,45877791359165,45877791391933,45877791424701,45877791457469,45877791490237,45877791523005]},"available":true,"name":"Breastfeeding Tee - Powder Blue \/ M","public_title":"Powder Blue \/ M","options":["Powder Blue","M"],"price":5999,"weight":0,"compare_at_price":null,"inventory_management":"shopify","barcode":"91293629","featured_media":{"alt":"Breastfeeding Tee - The Birth Store - Rumi + Sol","id":30038771237053,"position":3,"preview_image":{"aspect_ratio":1.0,"height":1080,"width":1080,"src":"\/\/www.thebirthstore.com.au\/cdn\/shop\/files\/breastfeeding-tee-8346192.png?v=1762558080"}},"requires_selling_plan":false,"selling_plan_allocations":[],"quantity_rule":{"min":1,"max":null,"increment":1}},{"id":45877791326397,"title":"Powder Blue \/ L","option1":"Powder Blue","option2":"L","option3":null,"sku":null,"requires_shipping":true,"taxable":false,"featured_image":{"id":38794528555197,"product_id":8130025095357,"position":3,"created_at":"2025-11-07T11:36:16+08:00","updated_at":"2025-11-08T07:28:00+08:00","alt":"Breastfeeding Tee - The Birth Store - Rumi + Sol","width":1080,"height":1080,"src":"\/\/www.thebirthstore.com.au\/cdn\/shop\/files\/breastfeeding-tee-8346192.png?v=1762558080","variant_ids":[45877791228093,45877791260861,45877791293629,45877791326397,45877791359165,45877791391933,45877791424701,45877791457469,45877791490237,45877791523005]},"available":false,"name":"Breastfeeding Tee - Powder Blue \/ L","public_title":"Powder Blue \/ L","options":["Powder Blue","L"],"price":5999,"weight":0,"compare_at_price":null,"inventory_management":"shopify","barcode":"91326397","featured_media":{"alt":"Breastfeeding Tee - The Birth Store - Rumi + Sol","id":30038771237053,"position":3,"preview_image":{"aspect_ratio":1.0,"height":1080,"width":1080,"src":"\/\/www.thebirthstore.com.au\/cdn\/shop\/files\/breastfeeding-tee-8346192.png?v=1762558080"}},"requires_selling_plan":false,"selling_plan_allocations":[],"quantity_rule":{"min":1,"max":null,"increment":1}},{"id":45877791359165,"title":"Powder Blue \/ XL","option1":"Powder Blue","option2":"XL","option3":null,"sku":null,"requires_shipping":true,"taxable":false,"featured_image":{"id":38794528555197,"product_id":8130025095357,"position":3,"created_at":"2025-11-07T11:36:16+08:00","updated_at":"2025-11-08T07:28:00+08:00","alt":"Breastfeeding Tee - The Birth Store - Rumi + Sol","width":1080,"height":1080,"src":"\/\/www.thebirthstore.com.au\/cdn\/shop\/files\/breastfeeding-tee-8346192.png?v=1762558080","variant_ids":[45877791228093,45877791260861,45877791293629,45877791326397,45877791359165,45877791391933,45877791424701,45877791457469,45877791490237,45877791523005]},"available":true,"name":"Breastfeeding Tee - Powder Blue \/ XL","public_title":"Powder Blue \/ XL","options":["Powder Blue","XL"],"price":5999,"weight":0,"compare_at_price":null,"inventory_management":"shopify","barcode":"91359165","featured_media":{"alt":"Breastfeeding Tee - The Birth Store - Rumi + Sol","id":30038771237053,"position":3,"preview_image":{"aspect_ratio":1.0,"height":1080,"width":1080,"src":"\/\/www.thebirthstore.com.au\/cdn\/shop\/files\/breastfeeding-tee-8346192.png?v=1762558080"}},"requires_selling_plan":false,"selling_plan_allocations":[],"quantity_rule":{"min":1,"max":null,"increment":1}},{"id":45877791391933,"title":"Powder Blue \/ 2XL","option1":"Powder Blue","option2":"2XL","option3":null,"sku":null,"requires_shipping":true,"taxable":false,"featured_image":{"id":38794528555197,"product_id":8130025095357,"position":3,"created_at":"2025-11-07T11:36:16+08:00","updated_at":"2025-11-08T07:28:00+08:00","alt":"Breastfeeding Tee - The Birth Store - Rumi + Sol","width":1080,"height":1080,"src":"\/\/www.thebirthstore.com.au\/cdn\/shop\/files\/breastfeeding-tee-8346192.png?v=1762558080","variant_ids":[45877791228093,45877791260861,45877791293629,45877791326397,45877791359165,45877791391933,45877791424701,45877791457469,45877791490237,45877791523005]},"available":false,"name":"Breastfeeding Tee - Powder Blue \/ 2XL","public_title":"Powder Blue \/ 2XL","options":["Powder Blue","2XL"],"price":5999,"weight":0,"compare_at_price":null,"inventory_management":"shopify","barcode":"91391933","featured_media":{"alt":"Breastfeeding Tee - The Birth Store - Rumi + Sol","id":30038771237053,"position":3,"preview_image":{"aspect_ratio":1.0,"height":1080,"width":1080,"src":"\/\/www.thebirthstore.com.au\/cdn\/shop\/files\/breastfeeding-tee-8346192.png?v=1762558080"}},"requires_selling_plan":false,"selling_plan_allocations":[],"quantity_rule":{"min":1,"max":null,"increment":1}},{"id":45877791424701,"title":"Powder Blue \/ 3XL","option1":"Powder Blue","option2":"3XL","option3":null,"sku":null,"requires_shipping":true,"taxable":false,"featured_image":{"id":38794528555197,"product_id":8130025095357,"position":3,"created_at":"2025-11-07T11:36:16+08:00","updated_at":"2025-11-08T07:28:00+08:00","alt":"Breastfeeding Tee - The Birth Store - Rumi + Sol","width":1080,"height":1080,"src":"\/\/www.thebirthstore.com.au\/cdn\/shop\/files\/breastfeeding-tee-8346192.png?v=1762558080","variant_ids":[45877791228093,45877791260861,45877791293629,45877791326397,45877791359165,45877791391933,45877791424701,45877791457469,45877791490237,45877791523005]},"available":true,"name":"Breastfeeding Tee - Powder Blue \/ 3XL","public_title":"Powder Blue \/ 3XL","options":["Powder Blue","3XL"],"price":5999,"weight":0,"compare_at_price":null,"inventory_management":"shopify","barcode":"91424701","featured_media":{"alt":"Breastfeeding Tee - The Birth Store - Rumi + Sol","id":30038771237053,"position":3,"preview_image":{"aspect_ratio":1.0,"height":1080,"width":1080,"src":"\/\/www.thebirthstore.com.au\/cdn\/shop\/files\/breastfeeding-tee-8346192.png?v=1762558080"}},"requires_selling_plan":false,"selling_plan_allocations":[],"quantity_rule":{"min":1,"max":null,"increment":1}},{"id":45877791457469,"title":"Powder Blue \/ 4XL","option1":"Powder Blue","option2":"4XL","option3":null,"sku":null,"requires_shipping":true,"taxable":false,"featured_image":{"id":38794528555197,"product_id":8130025095357,"position":3,"created_at":"2025-11-07T11:36:16+08:00","updated_at":"2025-11-08T07:28:00+08:00","alt":"Breastfeeding Tee - The Birth Store - Rumi + Sol","width":1080,"height":1080,"src":"\/\/www.thebirthstore.com.au\/cdn\/shop\/files\/breastfeeding-tee-8346192.png?v=1762558080","variant_ids":[45877791228093,45877791260861,45877791293629,45877791326397,45877791359165,45877791391933,45877791424701,45877791457469,45877791490237,45877791523005]},"available":false,"name":"Breastfeeding Tee - Powder Blue \/ 4XL","public_title":"Powder Blue \/ 4XL","options":["Powder Blue","4XL"],"price":5999,"weight":0,"compare_at_price":null,"inventory_management":"shopify","barcode":"91457469","featured_media":{"alt":"Breastfeeding Tee - The Birth Store - Rumi + Sol","id":30038771237053,"position":3,"preview_image":{"aspect_ratio":1.0,"height":1080,"width":1080,"src":"\/\/www.thebirthstore.com.au\/cdn\/shop\/files\/breastfeeding-tee-8346192.png?v=1762558080"}},"requires_selling_plan":false,"selling_plan_allocations":[],"quantity_rule":{"min":1,"max":null,"increment":1}},{"id":45877791490237,"title":"Powder Blue \/ 5XL","option1":"Powder Blue","option2":"5XL","option3":null,"sku":null,"requires_shipping":true,"taxable":false,"featured_image":{"id":38794528555197,"product_id":8130025095357,"position":3,"created_at":"2025-11-07T11:36:16+08:00","updated_at":"2025-11-08T07:28:00+08:00","alt":"Breastfeeding Tee - The Birth Store - Rumi + Sol","width":1080,"height":1080,"src":"\/\/www.thebirthstore.com.au\/cdn\/shop\/files\/breastfeeding-tee-8346192.png?v=1762558080","variant_ids":[45877791228093,45877791260861,45877791293629,45877791326397,45877791359165,45877791391933,45877791424701,45877791457469,45877791490237,45877791523005]},"available":false,"name":"Breastfeeding Tee - Powder Blue \/ 5XL","public_title":"Powder Blue \/ 5XL","options":["Powder Blue","5XL"],"price":5999,"weight":0,"compare_at_price":null,"inventory_management":"shopify","barcode":"91490237","featured_media":{"alt":"Breastfeeding Tee - The Birth Store - Rumi + Sol","id":30038771237053,"position":3,"preview_image":{"aspect_ratio":1.0,"height":1080,"width":1080,"src":"\/\/www.thebirthstore.com.au\/cdn\/shop\/files\/breastfeeding-tee-8346192.png?v=1762558080"}},"requires_selling_plan":false,"selling_plan_allocations":[],"quantity_rule":{"min":1,"max":null,"increment":1}},{"id":45877791523005,"title":"Powder Blue \/ 6XL","option1":"Powder Blue","option2":"6XL","option3":null,"sku":null,"requires_shipping":true,"taxable":false,"featured_image":{"id":38794528555197,"product_id":8130025095357,"position":3,"created_at":"2025-11-07T11:36:16+08:00","updated_at":"2025-11-08T07:28:00+08:00","alt":"Breastfeeding Tee - The Birth Store - Rumi + Sol","width":1080,"height":1080,"src":"\/\/www.thebirthstore.com.au\/cdn\/shop\/files\/breastfeeding-tee-8346192.png?v=1762558080","variant_ids":[45877791228093,45877791260861,45877791293629,45877791326397,45877791359165,45877791391933,45877791424701,45877791457469,45877791490237,45877791523005]},"available":false,"name":"Breastfeeding Tee - Powder Blue \/ 6XL","public_title":"Powder Blue \/ 6XL","options":["Powder Blue","6XL"],"price":5999,"weight":0,"compare_at_price":null,"inventory_management":"shopify","barcode":"91523005","featured_media":{"alt":"Breastfeeding Tee - The Birth Store - Rumi + Sol","id":30038771237053,"position":3,"preview_image":{"aspect_ratio":1.0,"height":1080,"width":1080,"src":"\/\/www.thebirthstore.com.au\/cdn\/shop\/files\/breastfeeding-tee-8346192.png?v=1762558080"}},"requires_selling_plan":false,"selling_plan_allocations":[],"quantity_rule":{"min":1,"max":null,"increment":1}},{"id":45877791555773,"title":"Purple \/ XS","option1":"Purple","option2":"XS","option3":null,"sku":null,"requires_shipping":true,"taxable":false,"featured_image":{"id":38794518593725,"product_id":8130025095357,"position":4,"created_at":"2025-11-07T11:31:34+08:00","updated_at":"2025-11-08T07:28:01+08:00","alt":"Breastfeeding Tee - The Birth Store - Rumi + Sol","width":1080,"height":1080,"src":"\/\/www.thebirthstore.com.au\/cdn\/shop\/files\/breastfeeding-tee-3353121.png?v=1762558081","variant_ids":[45877791555773,45877791588541,45877791621309,45877791654077,45877791686845,45877791719613,45877791752381,45877791785149,45877791817917,45877791850685]},"available":true,"name":"Breastfeeding Tee - Purple \/ XS","public_title":"Purple \/ XS","options":["Purple","XS"],"price":5999,"weight":0,"compare_at_price":null,"inventory_management":"shopify","barcode":"91555773","featured_media":{"alt":"Breastfeeding Tee - The Birth Store - Rumi + Sol","id":30038761275581,"position":4,"preview_image":{"aspect_ratio":1.0,"height":1080,"width":1080,"src":"\/\/www.thebirthstore.com.au\/cdn\/shop\/files\/breastfeeding-tee-3353121.png?v=1762558081"}},"requires_selling_plan":false,"selling_plan_allocations":[],"quantity_rule":{"min":1,"max":null,"increment":1}},{"id":45877791588541,"title":"Purple \/ S","option1":"Purple","option2":"S","option3":null,"sku":null,"requires_shipping":true,"taxable":false,"featured_image":{"id":38794518593725,"product_id":8130025095357,"position":4,"created_at":"2025-11-07T11:31:34+08:00","updated_at":"2025-11-08T07:28:01+08:00","alt":"Breastfeeding Tee - The Birth Store - Rumi + Sol","width":1080,"height":1080,"src":"\/\/www.thebirthstore.com.au\/cdn\/shop\/files\/breastfeeding-tee-3353121.png?v=1762558081","variant_ids":[45877791555773,45877791588541,45877791621309,45877791654077,45877791686845,45877791719613,45877791752381,45877791785149,45877791817917,45877791850685]},"available":false,"name":"Breastfeeding Tee - Purple \/ S","public_title":"Purple \/ S","options":["Purple","S"],"price":5999,"weight":0,"compare_at_price":null,"inventory_management":"shopify","barcode":"91588541","featured_media":{"alt":"Breastfeeding Tee - The Birth Store - Rumi + Sol","id":30038761275581,"position":4,"preview_image":{"aspect_ratio":1.0,"height":1080,"width":1080,"src":"\/\/www.thebirthstore.com.au\/cdn\/shop\/files\/breastfeeding-tee-3353121.png?v=1762558081"}},"requires_selling_plan":false,"selling_plan_allocations":[],"quantity_rule":{"min":1,"max":null,"increment":1}},{"id":45877791621309,"title":"Purple \/ M","option1":"Purple","option2":"M","option3":null,"sku":null,"requires_shipping":true,"taxable":false,"featured_image":{"id":38794518593725,"product_id":8130025095357,"position":4,"created_at":"2025-11-07T11:31:34+08:00","updated_at":"2025-11-08T07:28:01+08:00","alt":"Breastfeeding Tee - The Birth Store - Rumi + Sol","width":1080,"height":1080,"src":"\/\/www.thebirthstore.com.au\/cdn\/shop\/files\/breastfeeding-tee-3353121.png?v=1762558081","variant_ids":[45877791555773,45877791588541,45877791621309,45877791654077,45877791686845,45877791719613,45877791752381,45877791785149,45877791817917,45877791850685]},"available":false,"name":"Breastfeeding Tee - Purple \/ M","public_title":"Purple \/ M","options":["Purple","M"],"price":5999,"weight":0,"compare_at_price":null,"inventory_management":"shopify","barcode":"91621309","featured_media":{"alt":"Breastfeeding Tee - The Birth Store - Rumi + Sol","id":30038761275581,"position":4,"preview_image":{"aspect_ratio":1.0,"height":1080,"width":1080,"src":"\/\/www.thebirthstore.com.au\/cdn\/shop\/files\/breastfeeding-tee-3353121.png?v=1762558081"}},"requires_selling_plan":false,"selling_plan_allocations":[],"quantity_rule":{"min":1,"max":null,"increment":1}},{"id":45877791654077,"title":"Purple \/ L","option1":"Purple","option2":"L","option3":null,"sku":null,"requires_shipping":true,"taxable":false,"featured_image":{"id":38794518593725,"product_id":8130025095357,"position":4,"created_at":"2025-11-07T11:31:34+08:00","updated_at":"2025-11-08T07:28:01+08:00","alt":"Breastfeeding Tee - The Birth Store - Rumi + Sol","width":1080,"height":1080,"src":"\/\/www.thebirthstore.com.au\/cdn\/shop\/files\/breastfeeding-tee-3353121.png?v=1762558081","variant_ids":[45877791555773,45877791588541,45877791621309,45877791654077,45877791686845,45877791719613,45877791752381,45877791785149,45877791817917,45877791850685]},"available":true,"name":"Breastfeeding Tee - Purple \/ L","public_title":"Purple \/ L","options":["Purple","L"],"price":5999,"weight":0,"compare_at_price":null,"inventory_management":"shopify","barcode":"91654077","featured_media":{"alt":"Breastfeeding Tee - The Birth Store - Rumi + Sol","id":30038761275581,"position":4,"preview_image":{"aspect_ratio":1.0,"height":1080,"width":1080,"src":"\/\/www.thebirthstore.com.au\/cdn\/shop\/files\/breastfeeding-tee-3353121.png?v=1762558081"}},"requires_selling_plan":false,"selling_plan_allocations":[],"quantity_rule":{"min":1,"max":null,"increment":1}},{"id":45877791686845,"title":"Purple \/ XL","option1":"Purple","option2":"XL","option3":null,"sku":null,"requires_shipping":true,"taxable":false,"featured_image":{"id":38794518593725,"product_id":8130025095357,"position":4,"created_at":"2025-11-07T11:31:34+08:00","updated_at":"2025-11-08T07:28:01+08:00","alt":"Breastfeeding Tee - The Birth Store - Rumi + Sol","width":1080,"height":1080,"src":"\/\/www.thebirthstore.com.au\/cdn\/shop\/files\/breastfeeding-tee-3353121.png?v=1762558081","variant_ids":[45877791555773,45877791588541,45877791621309,45877791654077,45877791686845,45877791719613,45877791752381,45877791785149,45877791817917,45877791850685]},"available":true,"name":"Breastfeeding Tee - Purple \/ XL","public_title":"Purple \/ XL","options":["Purple","XL"],"price":5999,"weight":0,"compare_at_price":null,"inventory_management":"shopify","barcode":"91686845","featured_media":{"alt":"Breastfeeding Tee - The Birth Store - Rumi + Sol","id":30038761275581,"position":4,"preview_image":{"aspect_ratio":1.0,"height":1080,"width":1080,"src":"\/\/www.thebirthstore.com.au\/cdn\/shop\/files\/breastfeeding-tee-3353121.png?v=1762558081"}},"requires_selling_plan":false,"selling_plan_allocations":[],"quantity_rule":{"min":1,"max":null,"increment":1}},{"id":45877791719613,"title":"Purple \/ 2XL","option1":"Purple","option2":"2XL","option3":null,"sku":null,"requires_shipping":true,"taxable":false,"featured_image":{"id":38794518593725,"product_id":8130025095357,"position":4,"created_at":"2025-11-07T11:31:34+08:00","updated_at":"2025-11-08T07:28:01+08:00","alt":"Breastfeeding Tee - The Birth Store - Rumi + Sol","width":1080,"height":1080,"src":"\/\/www.thebirthstore.com.au\/cdn\/shop\/files\/breastfeeding-tee-3353121.png?v=1762558081","variant_ids":[45877791555773,45877791588541,45877791621309,45877791654077,45877791686845,45877791719613,45877791752381,45877791785149,45877791817917,45877791850685]},"available":true,"name":"Breastfeeding Tee - Purple \/ 2XL","public_title":"Purple \/ 2XL","options":["Purple","2XL"],"price":5999,"weight":0,"compare_at_price":null,"inventory_management":"shopify","barcode":"91719613","featured_media":{"alt":"Breastfeeding Tee - The Birth Store - Rumi + Sol","id":30038761275581,"position":4,"preview_image":{"aspect_ratio":1.0,"height":1080,"width":1080,"src":"\/\/www.thebirthstore.com.au\/cdn\/shop\/files\/breastfeeding-tee-3353121.png?v=1762558081"}},"requires_selling_plan":false,"selling_plan_allocations":[],"quantity_rule":{"min":1,"max":null,"increment":1}},{"id":45877791752381,"title":"Purple \/ 3XL","option1":"Purple","option2":"3XL","option3":null,"sku":null,"requires_shipping":true,"taxable":false,"featured_image":{"id":38794518593725,"product_id":8130025095357,"position":4,"created_at":"2025-11-07T11:31:34+08:00","updated_at":"2025-11-08T07:28:01+08:00","alt":"Breastfeeding Tee - The Birth Store - Rumi + Sol","width":1080,"height":1080,"src":"\/\/www.thebirthstore.com.au\/cdn\/shop\/files\/breastfeeding-tee-3353121.png?v=1762558081","variant_ids":[45877791555773,45877791588541,45877791621309,45877791654077,45877791686845,45877791719613,45877791752381,45877791785149,45877791817917,45877791850685]},"available":true,"name":"Breastfeeding Tee - Purple \/ 3XL","public_title":"Purple \/ 3XL","options":["Purple","3XL"],"price":5999,"weight":0,"compare_at_price":null,"inventory_management":"shopify","barcode":"91752381","featured_media":{"alt":"Breastfeeding Tee - The Birth Store - Rumi + Sol","id":30038761275581,"position":4,"preview_image":{"aspect_ratio":1.0,"height":1080,"width":1080,"src":"\/\/www.thebirthstore.com.au\/cdn\/shop\/files\/breastfeeding-tee-3353121.png?v=1762558081"}},"requires_selling_plan":false,"selling_plan_allocations":[],"quantity_rule":{"min":1,"max":null,"increment":1}},{"id":45877791785149,"title":"Purple \/ 4XL","option1":"Purple","option2":"4XL","option3":null,"sku":null,"requires_shipping":true,"taxable":false,"featured_image":{"id":38794518593725,"product_id":8130025095357,"position":4,"created_at":"2025-11-07T11:31:34+08:00","updated_at":"2025-11-08T07:28:01+08:00","alt":"Breastfeeding Tee - The Birth Store - Rumi + Sol","width":1080,"height":1080,"src":"\/\/www.thebirthstore.com.au\/cdn\/shop\/files\/breastfeeding-tee-3353121.png?v=1762558081","variant_ids":[45877791555773,45877791588541,45877791621309,45877791654077,45877791686845,45877791719613,45877791752381,45877791785149,45877791817917,45877791850685]},"available":false,"name":"Breastfeeding Tee - Purple \/ 4XL","public_title":"Purple \/ 4XL","options":["Purple","4XL"],"price":5999,"weight":0,"compare_at_price":null,"inventory_management":"shopify","barcode":"91785149","featured_media":{"alt":"Breastfeeding Tee - The Birth Store - Rumi + Sol","id":30038761275581,"position":4,"preview_image":{"aspect_ratio":1.0,"height":1080,"width":1080,"src":"\/\/www.thebirthstore.com.au\/cdn\/shop\/files\/breastfeeding-tee-3353121.png?v=1762558081"}},"requires_selling_plan":false,"selling_plan_allocations":[],"quantity_rule":{"min":1,"max":null,"increment":1}},{"id":45877791817917,"title":"Purple \/ 5XL","option1":"Purple","option2":"5XL","option3":null,"sku":null,"requires_shipping":true,"taxable":false,"featured_image":{"id":38794518593725,"product_id":8130025095357,"position":4,"created_at":"2025-11-07T11:31:34+08:00","updated_at":"2025-11-08T07:28:01+08:00","alt":"Breastfeeding Tee - The Birth Store - Rumi + Sol","width":1080,"height":1080,"src":"\/\/www.thebirthstore.com.au\/cdn\/shop\/files\/breastfeeding-tee-3353121.png?v=1762558081","variant_ids":[45877791555773,45877791588541,45877791621309,45877791654077,45877791686845,45877791719613,45877791752381,45877791785149,45877791817917,45877791850685]},"available":false,"name":"Breastfeeding Tee - Purple \/ 5XL","public_title":"Purple \/ 5XL","options":["Purple","5XL"],"price":5999,"weight":0,"compare_at_price":null,"inventory_management":"shopify","barcode":"91817917","featured_media":{"alt":"Breastfeeding Tee - The Birth Store - Rumi + Sol","id":30038761275581,"position":4,"preview_image":{"aspect_ratio":1.0,"height":1080,"width":1080,"src":"\/\/www.thebirthstore.com.au\/cdn\/shop\/files\/breastfeeding-tee-3353121.png?v=1762558081"}},"requires_selling_plan":false,"selling_plan_allocations":[],"quantity_rule":{"min":1,"max":null,"increment":1}},{"id":45877791850685,"title":"Purple \/ 6XL","option1":"Purple","option2":"6XL","option3":null,"sku":null,"requires_shipping":true,"taxable":false,"featured_image":{"id":38794518593725,"product_id":8130025095357,"position":4,"created_at":"2025-11-07T11:31:34+08:00","updated_at":"2025-11-08T07:28:01+08:00","alt":"Breastfeeding Tee - The Birth Store - Rumi + Sol","width":1080,"height":1080,"src":"\/\/www.thebirthstore.com.au\/cdn\/shop\/files\/breastfeeding-tee-3353121.png?v=1762558081","variant_ids":[45877791555773,45877791588541,45877791621309,45877791654077,45877791686845,45877791719613,45877791752381,45877791785149,45877791817917,45877791850685]},"available":true,"name":"Breastfeeding Tee - Purple \/ 6XL","public_title":"Purple \/ 6XL","options":["Purple","6XL"],"price":5999,"weight":0,"compare_at_price":null,"inventory_management":"shopify","barcode":"91850685","featured_media":{"alt":"Breastfeeding Tee - The Birth Store - Rumi + Sol","id":30038761275581,"position":4,"preview_image":{"aspect_ratio":1.0,"height":1080,"width":1080,"src":"\/\/www.thebirthstore.com.au\/cdn\/shop\/files\/breastfeeding-tee-3353121.png?v=1762558081"}},"requires_selling_plan":false,"selling_plan_allocations":[],"quantity_rule":{"min":1,"max":null,"increment":1}}],"images":["\/\/www.thebirthstore.com.au\/cdn\/shop\/files\/breastfeeding-tee-6975681.png?v=1762558080","\/\/www.thebirthstore.com.au\/cdn\/shop\/files\/breastfeeding-tee-8872935.png?v=1762558080","\/\/www.thebirthstore.com.au\/cdn\/shop\/files\/breastfeeding-tee-8346192.png?v=1762558080","\/\/www.thebirthstore.com.au\/cdn\/shop\/files\/breastfeeding-tee-3353121.png?v=1762558081","\/\/www.thebirthstore.com.au\/cdn\/shop\/files\/breastfeeding-tee-9251028.jpg?v=1762558080","\/\/www.thebirthstore.com.au\/cdn\/shop\/files\/breastfeeding-tee-9540492.png?v=1762558081","\/\/www.thebirthstore.com.au\/cdn\/shop\/files\/breastfeeding-tee-7414994.png?v=1762558081","\/\/www.thebirthstore.com.au\/cdn\/shop\/files\/breastfeeding-tee-4401040.jpg?v=1762558081","\/\/www.thebirthstore.com.au\/cdn\/shop\/files\/breastfeeding-tee-5972726.png?v=1762558081","\/\/www.thebirthstore.com.au\/cdn\/shop\/files\/breastfeeding-tee-7103276.png?v=1762558081","\/\/www.thebirthstore.com.au\/cdn\/shop\/files\/breastfeeding-tee-1462127.png?v=1762558143","\/\/www.thebirthstore.com.au\/cdn\/shop\/files\/breastfeeding-tee-1495724.jpg?v=1762558143","\/\/www.thebirthstore.com.au\/cdn\/shop\/files\/breastfeeding-tee-6161982.png?v=1762558144","\/\/www.thebirthstore.com.au\/cdn\/shop\/files\/breastfeeding-tee-7783237.png?v=1762558144"],"featured_image":"\/\/www.thebirthstore.com.au\/cdn\/shop\/files\/breastfeeding-tee-6975681.png?v=1762558080","options":["Colour","Size"],"media":[{"alt":"Breastfeeding Tee - The Birth Store - Rumi + Sol","id":30038773629117,"position":1,"preview_image":{"aspect_ratio":1.0,"height":1080,"width":1080,"src":"\/\/www.thebirthstore.com.au\/cdn\/shop\/files\/breastfeeding-tee-6975681.png?v=1762558080"},"aspect_ratio":1.0,"height":1080,"media_type":"image","src":"\/\/www.thebirthstore.com.au\/cdn\/shop\/files\/breastfeeding-tee-6975681.png?v=1762558080","width":1080},{"alt":"Breastfeeding Tee - The Birth Store - Rumi + Sol","id":30038768255165,"position":2,"preview_image":{"aspect_ratio":1.0,"height":1080,"width":1080,"src":"\/\/www.thebirthstore.com.au\/cdn\/shop\/files\/breastfeeding-tee-8872935.png?v=1762558080"},"aspect_ratio":1.0,"height":1080,"media_type":"image","src":"\/\/www.thebirthstore.com.au\/cdn\/shop\/files\/breastfeeding-tee-8872935.png?v=1762558080","width":1080},{"alt":"Breastfeeding Tee - The Birth Store - Rumi + Sol","id":30038771237053,"position":3,"preview_image":{"aspect_ratio":1.0,"height":1080,"width":1080,"src":"\/\/www.thebirthstore.com.au\/cdn\/shop\/files\/breastfeeding-tee-8346192.png?v=1762558080"},"aspect_ratio":1.0,"height":1080,"media_type":"image","src":"\/\/www.thebirthstore.com.au\/cdn\/shop\/files\/breastfeeding-tee-8346192.png?v=1762558080","width":1080},{"alt":"Breastfeeding Tee - The Birth Store - Rumi + Sol","id":30038761275581,"position":4,"preview_image":{"aspect_ratio":1.0,"height":1080,"width":1080,"src":"\/\/www.thebirthstore.com.au\/cdn\/shop\/files\/breastfeeding-tee-3353121.png?v=1762558081"},"aspect_ratio":1.0,"height":1080,"media_type":"image","src":"\/\/www.thebirthstore.com.au\/cdn\/shop\/files\/breastfeeding-tee-3353121.png?v=1762558081","width":1080},{"alt":"Breastfeeding Tee - The Birth Store - Rumi + Sol","id":30038716055741,"position":5,"preview_image":{"aspect_ratio":0.667,"height":2048,"width":1365,"src":"\/\/www.thebirthstore.com.au\/cdn\/shop\/files\/breastfeeding-tee-9251028.jpg?v=1762558080"},"aspect_ratio":0.667,"height":2048,"media_type":"image","src":"\/\/www.thebirthstore.com.au\/cdn\/shop\/files\/breastfeeding-tee-9251028.jpg?v=1762558080","width":1365},{"alt":"Breastfeeding Tee - The Birth Store - Rumi + Sol","id":30038721265853,"position":6,"preview_image":{"aspect_ratio":1.0,"height":1080,"width":1080,"src":"\/\/www.thebirthstore.com.au\/cdn\/shop\/files\/breastfeeding-tee-9540492.png?v=1762558081"},"aspect_ratio":1.0,"height":1080,"media_type":"image","src":"\/\/www.thebirthstore.com.au\/cdn\/shop\/files\/breastfeeding-tee-9540492.png?v=1762558081","width":1080},{"alt":"Breastfeeding Tee - The Birth Store - Rumi + Sol","id":30038731161789,"position":7,"preview_image":{"aspect_ratio":1.0,"height":1080,"width":1080,"src":"\/\/www.thebirthstore.com.au\/cdn\/shop\/files\/breastfeeding-tee-7414994.png?v=1762558081"},"aspect_ratio":1.0,"height":1080,"media_type":"image","src":"\/\/www.thebirthstore.com.au\/cdn\/shop\/files\/breastfeeding-tee-7414994.png?v=1762558081","width":1080},{"alt":"Breastfeeding Tee - The Birth Store - Rumi + Sol","id":30038738600125,"position":8,"preview_image":{"aspect_ratio":1.0,"height":1080,"width":1080,"src":"\/\/www.thebirthstore.com.au\/cdn\/shop\/files\/breastfeeding-tee-4401040.jpg?v=1762558081"},"aspect_ratio":1.0,"height":1080,"media_type":"image","src":"\/\/www.thebirthstore.com.au\/cdn\/shop\/files\/breastfeeding-tee-4401040.jpg?v=1762558081","width":1080},{"alt":"Breastfeeding Tee - The Birth Store - Rumi + Sol","id":30038763962557,"position":9,"preview_image":{"aspect_ratio":1.0,"height":1080,"width":1080,"src":"\/\/www.thebirthstore.com.au\/cdn\/shop\/files\/breastfeeding-tee-5972726.png?v=1762558081"},"aspect_ratio":1.0,"height":1080,"media_type":"image","src":"\/\/www.thebirthstore.com.au\/cdn\/shop\/files\/breastfeeding-tee-5972726.png?v=1762558081","width":1080},{"alt":"Breastfeeding Tee - The Birth Store - Rumi + Sol","id":30038764552381,"position":10,"preview_image":{"aspect_ratio":1.0,"height":1080,"width":1080,"src":"\/\/www.thebirthstore.com.au\/cdn\/shop\/files\/breastfeeding-tee-7103276.png?v=1762558081"},"aspect_ratio":1.0,"height":1080,"media_type":"image","src":"\/\/www.thebirthstore.com.au\/cdn\/shop\/files\/breastfeeding-tee-7103276.png?v=1762558081","width":1080},{"alt":"Breastfeeding Tee - The Birth Store - Rumi + Sol","id":30038770745533,"position":11,"preview_image":{"aspect_ratio":0.715,"height":1080,"width":772,"src":"\/\/www.thebirthstore.com.au\/cdn\/shop\/files\/breastfeeding-tee-1462127.png?v=1762558143"},"aspect_ratio":0.715,"height":1080,"media_type":"image","src":"\/\/www.thebirthstore.com.au\/cdn\/shop\/files\/breastfeeding-tee-1462127.png?v=1762558143","width":772},{"alt":"Breastfeeding Tee - The Birth Store - Rumi + Sol","id":30038772973757,"position":12,"preview_image":{"aspect_ratio":0.667,"height":2048,"width":1365,"src":"\/\/www.thebirthstore.com.au\/cdn\/shop\/files\/breastfeeding-tee-1495724.jpg?v=1762558143"},"aspect_ratio":0.667,"height":2048,"media_type":"image","src":"\/\/www.thebirthstore.com.au\/cdn\/shop\/files\/breastfeeding-tee-1495724.jpg?v=1762558143","width":1365},{"alt":"Breastfeeding Tee - The Birth Store - Rumi + Sol","id":30038773268669,"position":13,"preview_image":{"aspect_ratio":1.0,"height":1080,"width":1080,"src":"\/\/www.thebirthstore.com.au\/cdn\/shop\/files\/breastfeeding-tee-6161982.png?v=1762558144"},"aspect_ratio":1.0,"height":1080,"media_type":"image","src":"\/\/www.thebirthstore.com.au\/cdn\/shop\/files\/breastfeeding-tee-6161982.png?v=1762558144","width":1080},{"alt":"Breastfeeding Tee - The Birth Store - Rumi + Sol","id":30038773432509,"position":14,"preview_image":{"aspect_ratio":1.0,"height":1080,"width":1080,"src":"\/\/www.thebirthstore.com.au\/cdn\/shop\/files\/breastfeeding-tee-7783237.png?v=1762558144"},"aspect_ratio":1.0,"height":1080,"media_type":"image","src":"\/\/www.thebirthstore.com.au\/cdn\/shop\/files\/breastfeeding-tee-7783237.png?v=1762558144","width":1080}],"requires_selling_plan":false,"selling_plan_groups":[],"content":"\u003cdiv class=\"jdgm-rev__body\"\u003e\n\u003cp\u003e\u003cem\u003eThis is the best quality t-shirt I have ever bought, and the fact it’s breastfeeding friendly too? Even better! Probably could have sized down but being plus size, it makes it easier for feeding for it to be a bit bigger. Highly recommend! - Charlotte\u003c\/em\u003e\u003c\/p\u003e\n\u003cp\u003e \u003c\/p\u003e\n\u003c\/div\u003e\n\u003cp\u003eIntroducing the first size inclusive breastfeeding tee, ranging from XS-6XL. \u003c\/p\u003e\n\u003cp\u003eThis collection of breastfeeding tees features a simple embroidered logo on the front.\u003cbr\u003e\u003c\/p\u003e\n\u003cp\u003eThe tee features a curved hem, with two invisible zips for easy and discreet access when feeding. The fabric is 220gsm, and 95% Cotton \u0026amp; 5% Spandex.\u003c\/p\u003e\n\u003cp\u003e\u003cstrong\u003eModel Information:\u003c\/strong\u003e\u003c\/p\u003e\n\u003cul\u003e\n\u003cli\u003e\n\u003cstrong\u003eSize Worn:\u003c\/strong\u003e\u003cspan\u003e \u003c\/span\u003eXL around a 14-16 They are a true to size fit.\u003c\/li\u003e\n\u003c\/ul\u003e\n\u003cp\u003e\u003cstrong\u003eApprox. garment measurements in cm:\u003c\/strong\u003e\u003c\/p\u003e\n\u003cp\u003e\u003cspan\u003eThese tees are designed to be a true fit, in most cases you can stick with your regular size. \u003c\/span\u003e\u003cspan\u003e If you prefer an oversized fit, we recommend sizing up. \u003c\/span\u003e\u003c\/p\u003e\n\u003cdiv class=\"flex-1 overflow-hidden\"\u003e\n\u003cdiv class=\"h-full\"\u003e\n\u003cdiv class=\"react-scroll-to-bottom--css-twmwd-79elbk h-full\"\u003e\n\u003cdiv class=\"react-scroll-to-bottom--css-twmwd-1n7m0yu\"\u003e\n\u003cdiv class=\"flex flex-col text-sm md:pb-9\"\u003e\n\u003carticle data-scroll-anchor=\"true\" data-testid=\"conversation-turn-7\" dir=\"auto\" class=\"w-full text-token-text-primary focus-visible:outline-2 focus-visible:outline-offset-[-4px]\" tabindex=\"0\"\u003e\n\u003cdiv class=\"text-base py-[18px] px-3 md:px-4 m-auto md:px-5\"\u003e\n\u003cdiv class=\"mx-auto flex flex-1 gap-4 text-base md:gap-5 lg:gap-6 md:max-w-3xl\"\u003e\n\u003cdiv class=\"group\/conversation-turn relative flex w-full min-w-0 flex-col agent-turn\"\u003e\n\u003cdiv class=\"flex-col gap-1 md:gap-3\"\u003e\n\u003cdiv class=\"flex max-w-full flex-col flex-grow\"\u003e\n\u003cdiv class=\"min-h-[20px] text-message flex w-full flex-col items-end gap-2 break-words [.text-message+\u0026amp;]:mt-5 overflow-x-auto whitespace-pre-wrap\" dir=\"auto\" data-message-id=\"2ff8d175-80d9-4490-8924-f36e768e13a0\" data-message-author-role=\"assistant\"\u003e\n\u003cdiv class=\"flex w-full flex-col gap-1 empty:hidden first:pt-[3px]\"\u003e\n\u003cul\u003e\n\u003cli\u003e220gsm\u003c\/li\u003e\n\u003cli\u003e95% Cotton 5% Spandex\u003c\/li\u003e\n\u003c\/ul\u003e\n\u003c\/div\u003e\n\u003c\/div\u003e\n\u003c\/div\u003e\n\u003c\/div\u003e\n\u003c\/div\u003e\n\u003c\/div\u003e\n\u003c\/div\u003e\n\u003c\/article\u003e\n\u003c\/div\u003e\n\u003c\/div\u003e\n\u003c\/div\u003e\n\u003c\/div\u003e\n\u003c\/div\u003e\n\u003ctable width=\"100%\"\u003e\n\u003ctbody\u003e\n\u003ctr\u003e\n\u003ctd\u003eBF Tee\u003c\/td\u003e\n\u003ctd\u003e Bust \u003c\/td\u003e\n\u003ctd\u003e Bottom\u003c\/td\u003e\n\u003ctd\u003eLength \u003c\/td\u003e\n\u003c\/tr\u003e\n\u003ctr\u003e\n\u003ctd\u003eXS - 6\/8\u003c\/td\u003e\n\u003ctd\u003e 96\u003c\/td\u003e\n\u003ctd\u003e100\u003c\/td\u003e\n\u003ctd\u003e67\u003c\/td\u003e\n\u003c\/tr\u003e\n\u003ctr\u003e\n\u003ctd\u003eS - 8-10\u003c\/td\u003e\n\u003ctd\u003e101\u003c\/td\u003e\n\u003ctd\u003e105\u003c\/td\u003e\n\u003ctd\u003e68\u003c\/td\u003e\n\u003c\/tr\u003e\n\u003ctr\u003e\n\u003ctd\u003eM - 10-12\u003c\/td\u003e\n\u003ctd\u003e106\u003c\/td\u003e\n\u003ctd\u003e110\u003c\/td\u003e\n\u003ctd\u003e69\u003c\/td\u003e\n\u003c\/tr\u003e\n\u003ctr\u003e\n\u003ctd\u003eL - 12-14\u003c\/td\u003e\n\u003ctd\u003e111\u003c\/td\u003e\n\u003ctd\u003e115\u003c\/td\u003e\n\u003ctd\u003e70\u003c\/td\u003e\n\u003c\/tr\u003e\n\u003ctr\u003e\n\u003ctd\u003eXL - 14-16\u003c\/td\u003e\n\u003ctd\u003e116\u003c\/td\u003e\n\u003ctd\u003e120\u003c\/td\u003e\n\u003ctd\u003e71\u003c\/td\u003e\n\u003c\/tr\u003e\n\u003ctr\u003e\n\u003ctd\u003e2XL -16-18\u003c\/td\u003e\n\u003ctd\u003e121\u003c\/td\u003e\n\u003ctd\u003e125\u003c\/td\u003e\n\u003ctd\u003e72\u003c\/td\u003e\n\u003c\/tr\u003e\n\u003ctr\u003e\n\u003ctd\u003e3XL -18-20\u003c\/td\u003e\n\u003ctd\u003e126\u003c\/td\u003e\n\u003ctd\u003e130\u003c\/td\u003e\n\u003ctd\u003e73\u003c\/td\u003e\n\u003c\/tr\u003e\n\u003ctr\u003e\n\u003ctd\u003e4XL 20-22\u003c\/td\u003e\n\u003ctd\u003e131\u003c\/td\u003e\n\u003ctd\u003e135\u003c\/td\u003e\n\u003ctd\u003e74\u003c\/td\u003e\n\u003c\/tr\u003e\n\u003ctr\u003e\n\u003ctd\u003e5XL -22-24\u003c\/td\u003e\n\u003ctd\u003e136\u003c\/td\u003e\n\u003ctd\u003e140\u003c\/td\u003e\n\u003ctd\u003e75\u003c\/td\u003e\n\u003c\/tr\u003e\n\u003ctr\u003e\n\u003ctd\u003e6XL -24-26\u003c\/td\u003e\n\u003ctd\u003e141\u003c\/td\u003e\n\u003ctd\u003e145\u003c\/td\u003e\n\u003ctd\u003e76\u003c\/td\u003e\n\u003c\/tr\u003e\n\u003c\/tbody\u003e\n\u003c\/table\u003e"},"options":[{"name":"Colour","position":1,"values":["Black","Pink","Powder Blue","Purple"]},{"name":"Size","position":2,"values":["XS","S","M","L","XL","2XL","3XL","4XL","5XL","6XL"]}],"custom_metafields":{},"metafields":{"badge":"\u003cdiv style='display:none' class='jdgm-prev-badge' data-average-rating='0.00' data-number-of-reviews='0' data-number-of-questions='0'\u003e \u003cspan class='jdgm-prev-badge__stars' data-score='0.00' tabindex='0' aria-label='0.00 stars' role='button'\u003e \u003cspan class='jdgm-star jdgm--off'\u003e\u003c\/span\u003e\u003cspan class='jdgm-star jdgm--off'\u003e\u003c\/span\u003e\u003cspan class='jdgm-star jdgm--off'\u003e\u003c\/span\u003e\u003cspan class='jdgm-star jdgm--off'\u003e\u003c\/span\u003e\u003cspan class='jdgm-star jdgm--off'\u003e\u003c\/span\u003e \u003c\/span\u003e \u003cspan class='jdgm-prev-badge__text'\u003e No reviews \u003c\/span\u003e \u003c\/div\u003e","widget":"\u003cdiv class='jdgm-rev-widg' data-updated-at='2025-11-07T03:13:11Z' data-average-rating='0.00' data-number-of-reviews='0' data-number-of-questions='0' data-image-url=''\u003e \u003cstyle class='jdgm-temp-hiding-style'\u003e.jdgm-rev-widg{ display: none }\u003c\/style\u003e \u003cdiv class='jdgm-rev-widg__header'\u003e \u003ch2 class='jdgm-rev-widg__title'\u003eCustomer Reviews\u003c\/h2\u003e \u003cdiv class='jdgm-rev-widg__summary'\u003e \u003cdiv class='jdgm-rev-widg__summary-stars' aria-label='Average rating is 0.00 stars' role='img'\u003e \u003cspan class='jdgm-star jdgm--off'\u003e\u003c\/span\u003e\u003cspan class='jdgm-star jdgm--off'\u003e\u003c\/span\u003e\u003cspan class='jdgm-star jdgm--off'\u003e\u003c\/span\u003e\u003cspan class='jdgm-star jdgm--off'\u003e\u003c\/span\u003e\u003cspan class='jdgm-star jdgm--off'\u003e\u003c\/span\u003e \u003c\/div\u003e \u003cdiv class='jdgm-rev-widg__summary-text'\u003eBe the first to write a review\u003c\/div\u003e \u003c\/div\u003e \u003ca style='display: none' href='#' class='jdgm-write-rev-link' role='button'\u003eWrite a review\u003c\/a\u003e \u003cdiv class='jdgm-histogram jdgm-temp-hidden'\u003e \u003cdiv class='jdgm-histogram__row' data-rating='5' data-frequency='0' data-percentage='0'\u003e \u003cdiv class='jdgm-histogram__star' role='button' aria-label=\"0% (0) reviews with 5 star rating\" tabindex='0' \u003e\u003cspan class='jdgm-star jdgm--on'\u003e\u003c\/span\u003e\u003cspan class='jdgm-star jdgm--on'\u003e\u003c\/span\u003e\u003cspan class='jdgm-star jdgm--on'\u003e\u003c\/span\u003e\u003cspan class='jdgm-star jdgm--on'\u003e\u003c\/span\u003e\u003cspan class='jdgm-star jdgm--on'\u003e\u003c\/span\u003e\u003c\/div\u003e \u003cdiv class='jdgm-histogram__bar'\u003e \u003cdiv class='jdgm-histogram__bar-content' style='width: 0%;'\u003e \u003c\/div\u003e \u003c\/div\u003e \u003cdiv class='jdgm-histogram__percentage'\u003e0%\u003c\/div\u003e \u003cdiv class='jdgm-histogram__frequency'\u003e(0)\u003c\/div\u003e \u003c\/div\u003e \u003cdiv class='jdgm-histogram__row' data-rating='4' data-frequency='0' data-percentage='0'\u003e \u003cdiv class='jdgm-histogram__star' role='button' aria-label=\"0% (0) reviews with 4 star rating\" tabindex='0' \u003e\u003cspan class='jdgm-star jdgm--on'\u003e\u003c\/span\u003e\u003cspan class='jdgm-star jdgm--on'\u003e\u003c\/span\u003e\u003cspan class='jdgm-star jdgm--on'\u003e\u003c\/span\u003e\u003cspan class='jdgm-star jdgm--on'\u003e\u003c\/span\u003e\u003cspan class='jdgm-star jdgm--off'\u003e\u003c\/span\u003e\u003c\/div\u003e \u003cdiv class='jdgm-histogram__bar'\u003e \u003cdiv class='jdgm-histogram__bar-content' style='width: 0%;'\u003e \u003c\/div\u003e \u003c\/div\u003e \u003cdiv class='jdgm-histogram__percentage'\u003e0%\u003c\/div\u003e \u003cdiv class='jdgm-histogram__frequency'\u003e(0)\u003c\/div\u003e \u003c\/div\u003e \u003cdiv class='jdgm-histogram__row' data-rating='3' data-frequency='0' data-percentage='0'\u003e \u003cdiv class='jdgm-histogram__star' role='button' aria-label=\"0% (0) reviews with 3 star rating\" tabindex='0' \u003e\u003cspan class='jdgm-star jdgm--on'\u003e\u003c\/span\u003e\u003cspan class='jdgm-star jdgm--on'\u003e\u003c\/span\u003e\u003cspan class='jdgm-star jdgm--on'\u003e\u003c\/span\u003e\u003cspan class='jdgm-star jdgm--off'\u003e\u003c\/span\u003e\u003cspan class='jdgm-star jdgm--off'\u003e\u003c\/span\u003e\u003c\/div\u003e \u003cdiv class='jdgm-histogram__bar'\u003e \u003cdiv class='jdgm-histogram__bar-content' style='width: 0%;'\u003e \u003c\/div\u003e \u003c\/div\u003e \u003cdiv class='jdgm-histogram__percentage'\u003e0%\u003c\/div\u003e \u003cdiv class='jdgm-histogram__frequency'\u003e(0)\u003c\/div\u003e \u003c\/div\u003e \u003cdiv class='jdgm-histogram__row' data-rating='2' data-frequency='0' data-percentage='0'\u003e \u003cdiv class='jdgm-histogram__star' role='button' aria-label=\"0% (0) reviews with 2 star rating\" tabindex='0' \u003e\u003cspan class='jdgm-star jdgm--on'\u003e\u003c\/span\u003e\u003cspan class='jdgm-star jdgm--on'\u003e\u003c\/span\u003e\u003cspan class='jdgm-star jdgm--off'\u003e\u003c\/span\u003e\u003cspan class='jdgm-star jdgm--off'\u003e\u003c\/span\u003e\u003cspan class='jdgm-star jdgm--off'\u003e\u003c\/span\u003e\u003c\/div\u003e \u003cdiv class='jdgm-histogram__bar'\u003e \u003cdiv class='jdgm-histogram__bar-content' style='width: 0%;'\u003e \u003c\/div\u003e \u003c\/div\u003e \u003cdiv class='jdgm-histogram__percentage'\u003e0%\u003c\/div\u003e \u003cdiv class='jdgm-histogram__frequency'\u003e(0)\u003c\/div\u003e \u003c\/div\u003e \u003cdiv class='jdgm-histogram__row' data-rating='1' data-frequency='0' data-percentage='0'\u003e \u003cdiv class='jdgm-histogram__star' role='button' aria-label=\"0% (0) reviews with 1 star rating\" tabindex='0' \u003e\u003cspan class='jdgm-star jdgm--on'\u003e\u003c\/span\u003e\u003cspan class='jdgm-star jdgm--off'\u003e\u003c\/span\u003e\u003cspan class='jdgm-star jdgm--off'\u003e\u003c\/span\u003e\u003cspan class='jdgm-star jdgm--off'\u003e\u003c\/span\u003e\u003cspan class='jdgm-star jdgm--off'\u003e\u003c\/span\u003e\u003c\/div\u003e \u003cdiv class='jdgm-histogram__bar'\u003e \u003cdiv class='jdgm-histogram__bar-content' style='width: 0%;'\u003e \u003c\/div\u003e \u003c\/div\u003e \u003cdiv class='jdgm-histogram__percentage'\u003e0%\u003c\/div\u003e \u003cdiv class='jdgm-histogram__frequency'\u003e(0)\u003c\/div\u003e \u003c\/div\u003e \u003cdiv class='jdgm-histogram__row jdgm-histogram__clear-filter' data-rating=null tabindex='0'\u003e\u003c\/div\u003e \u003c\/div\u003e \u003cdiv class='jdgm-rev-widg__sort-wrapper'\u003e\u003c\/div\u003e \u003c\/div\u003e \u003cdiv class='jdgm-rev-widg__body'\u003e \u003cdiv class='jdgm-rev-widg__reviews'\u003e\u003c\/div\u003e \u003cdiv class='jdgm-paginate' data-per-page='10' data-url='https:\/\/api.judge.me\/reviews\/reviews_for_widget' style=\"display: none;\"\u003e\u003c\/div\u003e \u003c\/div\u003e \u003cdiv class='jdgm-rev-widg__paginate-spinner-wrapper'\u003e \u003cdiv class='jdgm-spinner'\u003e\u003c\/div\u003e \u003c\/div\u003e \u003c\/div\u003e"},"collections":[{"id":281356533949,"handle":"baby-shower-gifts","title":"Baby Shower Gifts - Mum","updated_at":"2026-06-12T19:10:25+08:00","body_html":"\u003cp\u003eLooking for a unique baby shower gift? Or an all-in-one bundle pack to suit all your needs? We've got just the thing!\u003c\/p\u003e","published_at":"2021-12-06T13:43:56+08:00","sort_order":"best-selling","template_suffix":"baby-shower-gifts","disjunctive":true,"rules":[{"column":"tag","relation":"equals","condition":"Baby Shower Gifts - Mum"},{"column":"tag","relation":"equals","condition":"Gift Card"}],"published_scope":"global","image":{"created_at":"2024-05-06T11:59:28+08:00","alt":"Baby Shower Gifts - The Birth Store","width":1200,"height":1800,"src":"\/\/www.thebirthstore.com.au\/cdn\/shop\/collections\/baby-shower-gifts-401770.jpg?v=1761791272"}},{"id":281712427197,"handle":"breastfeeding","title":"Breastfeeding","updated_at":"2026-06-12T19:10:26+08:00","body_html":"","published_at":"2021-12-20T14:19:33+08:00","sort_order":"best-selling","template_suffix":"breastfeeding-collection","disjunctive":false,"rules":[{"column":"tag","relation":"equals","condition":"Breastfeeding"}],"published_scope":"global","image":{"created_at":"2024-05-06T11:59:34+08:00","alt":"Breastfeeding - The Birth Store","width":620,"height":635,"src":"\/\/www.thebirthstore.com.au\/cdn\/shop\/collections\/breastfeeding-793872.jpg?v=1714967974"}},{"id":293308989629,"handle":"breastfeeding-clothing","title":"Breastfeeding Clothing","updated_at":"2026-05-27T00:53:21+08:00","body_html":"","published_at":"2023-05-03T11:40:00+08:00","sort_order":"best-selling","template_suffix":"swaddles-collection","disjunctive":false,"rules":[{"column":"tag","relation":"equals","condition":"Breastfeeding Clothing"}],"published_scope":"global","image":{"created_at":"2024-05-06T11:59:36+08:00","alt":"Breastfeeding Clothing - The Birth Store","width":569,"height":674,"src":"\/\/www.thebirthstore.com.au\/cdn\/shop\/collections\/breastfeeding-clothing-671936.jpg?v=1714967977"}},{"id":261657460925,"handle":"buy","title":"Buy","updated_at":"2026-06-12T19:10:26+08:00","body_html":"\u003cp\u003eBrowse all of our pregnancy, labour \u0026amp; birth, postpartum and baby essentials here.\u003cbr\u003e\u003c\/p\u003e\n\u003cp\u003e\u003cspan\u003eYou can even buy now and pay later with Afterpay!\u003c\/span\u003e\u003c\/p\u003e","published_at":"2021-03-10T12:05:31+08:00","sort_order":"best-selling","template_suffix":"shop-all-collection","disjunctive":false,"rules":[{"column":"title","relation":"not_contains","condition":"Hire"}],"published_scope":"global","image":{"created_at":"2024-05-06T11:59:42+08:00","alt":"Buy - The Birth Store","width":2048,"height":2048,"src":"\/\/www.thebirthstore.com.au\/cdn\/shop\/collections\/buy-964856.jpg?v=1714967982"}},{"id":293309022397,"handle":"clothing","title":"Clothing","updated_at":"2026-05-30T19:08:46+08:00","body_html":"","published_at":"2023-05-03T11:41:12+08:00","sort_order":"best-selling","template_suffix":"swaddles-collection","disjunctive":true,"rules":[{"column":"tag","relation":"equals","condition":"Breastfeeding Clothing"},{"column":"tag","relation":"equals","condition":"Support Clothing"}],"published_scope":"global","image":{"created_at":"2024-05-06T11:59:52+08:00","alt":"Clothing - The Birth Store","width":676,"height":581,"src":"\/\/www.thebirthstore.com.au\/cdn\/shop\/collections\/clothing-483293.jpg?v=1714967992"}},{"id":291456483517,"handle":"shop-all","title":"Shop All - Mum","updated_at":"2026-06-12T19:10:26+08:00","body_html":"","published_at":"2022-12-23T22:04:39+08:00","sort_order":"best-selling","template_suffix":"shop-all-collection","disjunctive":false,"rules":[{"column":"variant_price","relation":"greater_than","condition":"1"},{"column":"title","relation":"not_contains","condition":"Batteries"},{"column":"tag","relation":"equals","condition":"Mum"}],"published_scope":"global","image":{"created_at":"2024-05-06T12:00:54+08:00","alt":"Shop All - The Birth Store","width":1365,"height":2048,"src":"\/\/www.thebirthstore.com.au\/cdn\/shop\/collections\/shop-all-693176.jpg?v=1714968055"}}]}
{"item":{"id":7469970391229,"title":"Classic Black Breastfeeding Dress","handle":"classic-black-breastfeeding-dress","description":"\u003cp data-mce-fragment=\"1\"\u003e\u003cspan data-mce-fragment=\"1\"\u003eIf you are breastfeeding, you need an everyday breastfeeding dress! AND Its black so hides that you haven't washed it for a week. \u003c\/span\u003e\u003c\/p\u003e\n\u003cp data-mce-fragment=\"1\"\u003e\u003cspan data-mce-fragment=\"1\"\u003eMade one inch longer than your normal T-shirt dress, it features e\u003c\/span\u003exceptional quality with a slightly scoop hem \u0026amp; thicker fabric ensuring a great finish to its fit for all shapes \u0026amp; sizes. A small label is added on the outer hem to enhance value \u0026amp; display pride.\u003c\/p\u003e\n\u003cp data-mce-fragment=\"1\"\u003eFor minimal exposure, our breastfeeding dress has two invisible zips for easy access to feed anywhere, more discreetly therefore comfortably \u0026amp; confidently.\u003c\/p\u003e\n\u003cul data-mce-fragment=\"1\"\u003e\n\u003cli data-mce-fragment=\"1\"\u003e220gsm\u003c\/li\u003e\n\u003cli data-mce-fragment=\"1\"\u003e95% Cotton 5% Spandex \u003c\/li\u003e\n\u003c\/ul\u003e","published_at":"2025-11-07T11:44:26+08:00","created_at":"2023-05-03T11:34:48+08:00","vendor":"Gold Miilk","type":"","tags":["Baby Shower Gifts","Baby Shower Gifts - Mum","Breastfeeding","Breastfeeding Clothing","Hospital Bag","Mum"],"price":6499,"price_min":6499,"price_max":6499,"available":true,"price_varies":false,"compare_at_price":null,"compare_at_price_min":0,"compare_at_price_max":0,"compare_at_price_varies":false,"variants":[{"id":42808461983933,"title":"S (8)","option1":"S (8)","option2":null,"option3":null,"sku":"","requires_shipping":true,"taxable":false,"featured_image":null,"available":true,"name":"Classic Black Breastfeeding Dress - S (8)","public_title":"S (8)","options":["S (8)"],"price":6499,"weight":10,"compare_at_price":null,"inventory_management":"shopify","barcode":"61983933","requires_selling_plan":false,"selling_plan_allocations":[],"quantity_rule":{"min":1,"max":null,"increment":1}},{"id":42808462016701,"title":"M (10)","option1":"M (10)","option2":null,"option3":null,"sku":"","requires_shipping":true,"taxable":false,"featured_image":null,"available":true,"name":"Classic Black Breastfeeding Dress - M (10)","public_title":"M (10)","options":["M (10)"],"price":6499,"weight":10,"compare_at_price":null,"inventory_management":"shopify","barcode":"62016701","requires_selling_plan":false,"selling_plan_allocations":[],"quantity_rule":{"min":1,"max":null,"increment":1}},{"id":42808462049469,"title":"L (12)","option1":"L (12)","option2":null,"option3":null,"sku":"","requires_shipping":true,"taxable":false,"featured_image":null,"available":true,"name":"Classic Black Breastfeeding Dress - L (12)","public_title":"L (12)","options":["L (12)"],"price":6499,"weight":10,"compare_at_price":null,"inventory_management":"shopify","barcode":"62049469","requires_selling_plan":false,"selling_plan_allocations":[],"quantity_rule":{"min":1,"max":null,"increment":1}},{"id":42808462082237,"title":"XL (14)","option1":"XL (14)","option2":null,"option3":null,"sku":"","requires_shipping":true,"taxable":false,"featured_image":null,"available":true,"name":"Classic Black Breastfeeding Dress - XL (14)","public_title":"XL (14)","options":["XL (14)"],"price":6499,"weight":10,"compare_at_price":null,"inventory_management":"shopify","barcode":"62082237","requires_selling_plan":false,"selling_plan_allocations":[],"quantity_rule":{"min":1,"max":null,"increment":1}},{"id":42808462115005,"title":"2XL (16)","option1":"2XL (16)","option2":null,"option3":null,"sku":"","requires_shipping":true,"taxable":false,"featured_image":null,"available":true,"name":"Classic Black Breastfeeding Dress - 2XL (16)","public_title":"2XL (16)","options":["2XL (16)"],"price":6499,"weight":10,"compare_at_price":null,"inventory_management":"shopify","barcode":"62115005","requires_selling_plan":false,"selling_plan_allocations":[],"quantity_rule":{"min":1,"max":null,"increment":1}},{"id":42808462147773,"title":"3XL (18)","option1":"3XL (18)","option2":null,"option3":null,"sku":"","requires_shipping":true,"taxable":false,"featured_image":null,"available":true,"name":"Classic Black Breastfeeding Dress - 3XL (18)","public_title":"3XL (18)","options":["3XL (18)"],"price":6499,"weight":10,"compare_at_price":null,"inventory_management":"shopify","barcode":"62147773","requires_selling_plan":false,"selling_plan_allocations":[],"quantity_rule":{"min":1,"max":null,"increment":1}},{"id":42808462180541,"title":"4XL (20)","option1":"4XL (20)","option2":null,"option3":null,"sku":"","requires_shipping":true,"taxable":false,"featured_image":null,"available":true,"name":"Classic Black Breastfeeding Dress - 4XL (20)","public_title":"4XL (20)","options":["4XL (20)"],"price":6499,"weight":10,"compare_at_price":null,"inventory_management":"shopify","barcode":"62180541","requires_selling_plan":false,"selling_plan_allocations":[],"quantity_rule":{"min":1,"max":null,"increment":1}},{"id":45877593866429,"title":"5XL (22)","option1":"5XL (22)","option2":null,"option3":null,"sku":null,"requires_shipping":true,"taxable":false,"featured_image":null,"available":true,"name":"Classic Black Breastfeeding Dress - 5XL (22)","public_title":"5XL (22)","options":["5XL (22)"],"price":6499,"weight":10,"compare_at_price":null,"inventory_management":"shopify","barcode":"93866429","requires_selling_plan":false,"selling_plan_allocations":[],"quantity_rule":{"min":1,"max":null,"increment":1}}],"images":["\/\/www.thebirthstore.com.au\/cdn\/shop\/files\/classic-black-breastfeeding-dress-496207.jpg?v=1714967961","\/\/www.thebirthstore.com.au\/cdn\/shop\/files\/classic-black-breastfeeding-dress-620129.jpg?v=1714967961","\/\/www.thebirthstore.com.au\/cdn\/shop\/files\/classic-black-breastfeeding-dress-108215.jpg?v=1714967961","\/\/www.thebirthstore.com.au\/cdn\/shop\/files\/classic-black-breastfeeding-dress-752671.jpg?v=1714967961","\/\/www.thebirthstore.com.au\/cdn\/shop\/files\/classic-black-breastfeeding-dress-261014.jpg?v=1714967961","\/\/www.thebirthstore.com.au\/cdn\/shop\/files\/classic-black-breastfeeding-dress-169524.jpg?v=1714967961","\/\/www.thebirthstore.com.au\/cdn\/shop\/files\/classic-black-breastfeeding-dress-506931.jpg?v=1714967961","\/\/www.thebirthstore.com.au\/cdn\/shop\/files\/classic-black-breastfeeding-dress-718577.jpg?v=1714967961","\/\/www.thebirthstore.com.au\/cdn\/shop\/files\/classic-black-breastfeeding-dress-872804.jpg?v=1714967961","\/\/www.thebirthstore.com.au\/cdn\/shop\/files\/classic-black-breastfeeding-dress-309917.png?v=1714967961"],"featured_image":"\/\/www.thebirthstore.com.au\/cdn\/shop\/files\/classic-black-breastfeeding-dress-496207.jpg?v=1714967961","options":["Size"],"media":[{"alt":"Classic Black Breastfeeding Dress - The Birth Store-Gold Miilk","id":27007583256765,"position":1,"preview_image":{"aspect_ratio":1.0,"height":1080,"width":1080,"src":"\/\/www.thebirthstore.com.au\/cdn\/shop\/files\/classic-black-breastfeeding-dress-496207.jpg?v=1714967961"},"aspect_ratio":1.0,"height":1080,"media_type":"image","src":"\/\/www.thebirthstore.com.au\/cdn\/shop\/files\/classic-black-breastfeeding-dress-496207.jpg?v=1714967961","width":1080},{"alt":"Classic Black Breastfeeding Dress - The Birth Store-Gold Miilk","id":27007583355069,"position":2,"preview_image":{"aspect_ratio":0.667,"height":1050,"width":700,"src":"\/\/www.thebirthstore.com.au\/cdn\/shop\/files\/classic-black-breastfeeding-dress-620129.jpg?v=1714967961"},"aspect_ratio":0.667,"height":1050,"media_type":"image","src":"\/\/www.thebirthstore.com.au\/cdn\/shop\/files\/classic-black-breastfeeding-dress-620129.jpg?v=1714967961","width":700},{"alt":"Classic Black Breastfeeding Dress - The Birth Store-Gold Miilk","id":27007583420605,"position":3,"preview_image":{"aspect_ratio":0.667,"height":1050,"width":700,"src":"\/\/www.thebirthstore.com.au\/cdn\/shop\/files\/classic-black-breastfeeding-dress-108215.jpg?v=1714967961"},"aspect_ratio":0.667,"height":1050,"media_type":"image","src":"\/\/www.thebirthstore.com.au\/cdn\/shop\/files\/classic-black-breastfeeding-dress-108215.jpg?v=1714967961","width":700},{"alt":"Classic Black Breastfeeding Dress - The Birth Store-Gold Miilk","id":27007583453373,"position":4,"preview_image":{"aspect_ratio":0.909,"height":770,"width":700,"src":"\/\/www.thebirthstore.com.au\/cdn\/shop\/files\/classic-black-breastfeeding-dress-752671.jpg?v=1714967961"},"aspect_ratio":0.909,"height":770,"media_type":"image","src":"\/\/www.thebirthstore.com.au\/cdn\/shop\/files\/classic-black-breastfeeding-dress-752671.jpg?v=1714967961","width":700},{"alt":"Classic Black Breastfeeding Dress - The Birth Store-Gold Miilk","id":27007583486141,"position":5,"preview_image":{"aspect_ratio":0.667,"height":960,"width":640,"src":"\/\/www.thebirthstore.com.au\/cdn\/shop\/files\/classic-black-breastfeeding-dress-261014.jpg?v=1714967961"},"aspect_ratio":0.667,"height":960,"media_type":"image","src":"\/\/www.thebirthstore.com.au\/cdn\/shop\/files\/classic-black-breastfeeding-dress-261014.jpg?v=1714967961","width":640},{"alt":"Classic Black Breastfeeding Dress - The Birth Store-Gold Miilk","id":27007583518909,"position":6,"preview_image":{"aspect_ratio":1.333,"height":525,"width":700,"src":"\/\/www.thebirthstore.com.au\/cdn\/shop\/files\/classic-black-breastfeeding-dress-169524.jpg?v=1714967961"},"aspect_ratio":1.333,"height":525,"media_type":"image","src":"\/\/www.thebirthstore.com.au\/cdn\/shop\/files\/classic-black-breastfeeding-dress-169524.jpg?v=1714967961","width":700},{"alt":"Classic Black Breastfeeding Dress - The Birth Store-Gold Miilk","id":27007583584445,"position":7,"preview_image":{"aspect_ratio":0.667,"height":1050,"width":700,"src":"\/\/www.thebirthstore.com.au\/cdn\/shop\/files\/classic-black-breastfeeding-dress-506931.jpg?v=1714967961"},"aspect_ratio":0.667,"height":1050,"media_type":"image","src":"\/\/www.thebirthstore.com.au\/cdn\/shop\/files\/classic-black-breastfeeding-dress-506931.jpg?v=1714967961","width":700},{"alt":"Classic Black Breastfeeding Dress - The Birth Store-Gold Miilk","id":27007583617213,"position":8,"preview_image":{"aspect_ratio":0.667,"height":960,"width":640,"src":"\/\/www.thebirthstore.com.au\/cdn\/shop\/files\/classic-black-breastfeeding-dress-718577.jpg?v=1714967961"},"aspect_ratio":0.667,"height":960,"media_type":"image","src":"\/\/www.thebirthstore.com.au\/cdn\/shop\/files\/classic-black-breastfeeding-dress-718577.jpg?v=1714967961","width":640},{"alt":"Classic Black Breastfeeding Dress - The Birth Store-Gold Miilk","id":27007583649981,"position":9,"preview_image":{"aspect_ratio":0.667,"height":960,"width":640,"src":"\/\/www.thebirthstore.com.au\/cdn\/shop\/files\/classic-black-breastfeeding-dress-872804.jpg?v=1714967961"},"aspect_ratio":0.667,"height":960,"media_type":"image","src":"\/\/www.thebirthstore.com.au\/cdn\/shop\/files\/classic-black-breastfeeding-dress-872804.jpg?v=1714967961","width":640},{"alt":"Classic Black Breastfeeding Dress - The Birth Store-Gold Miilk","id":27007583682749,"position":10,"preview_image":{"aspect_ratio":1.264,"height":554,"width":700,"src":"\/\/www.thebirthstore.com.au\/cdn\/shop\/files\/classic-black-breastfeeding-dress-309917.png?v=1714967961"},"aspect_ratio":1.264,"height":554,"media_type":"image","src":"\/\/www.thebirthstore.com.au\/cdn\/shop\/files\/classic-black-breastfeeding-dress-309917.png?v=1714967961","width":700}],"requires_selling_plan":false,"selling_plan_groups":[],"content":"\u003cp data-mce-fragment=\"1\"\u003e\u003cspan data-mce-fragment=\"1\"\u003eIf you are breastfeeding, you need an everyday breastfeeding dress! AND Its black so hides that you haven't washed it for a week. \u003c\/span\u003e\u003c\/p\u003e\n\u003cp data-mce-fragment=\"1\"\u003e\u003cspan data-mce-fragment=\"1\"\u003eMade one inch longer than your normal T-shirt dress, it features e\u003c\/span\u003exceptional quality with a slightly scoop hem \u0026amp; thicker fabric ensuring a great finish to its fit for all shapes \u0026amp; sizes. A small label is added on the outer hem to enhance value \u0026amp; display pride.\u003c\/p\u003e\n\u003cp data-mce-fragment=\"1\"\u003eFor minimal exposure, our breastfeeding dress has two invisible zips for easy access to feed anywhere, more discreetly therefore comfortably \u0026amp; confidently.\u003c\/p\u003e\n\u003cul data-mce-fragment=\"1\"\u003e\n\u003cli data-mce-fragment=\"1\"\u003e220gsm\u003c\/li\u003e\n\u003cli data-mce-fragment=\"1\"\u003e95% Cotton 5% Spandex \u003c\/li\u003e\n\u003c\/ul\u003e"},"options":[{"name":"Size","position":1,"values":["S (8)","M (10)","L (12)","XL (14)","2XL (16)","3XL (18)","4XL (20)","5XL (22)"]}],"custom_metafields":{},"metafields":{"badge":"\u003cdiv style='display:none' class='jdgm-prev-badge' data-average-rating='0.00' data-number-of-reviews='0' data-number-of-questions='0'\u003e \u003cspan class='jdgm-prev-badge__stars' data-score='0.00' tabindex='0' aria-label='0.00 stars' role='button'\u003e \u003cspan class='jdgm-star jdgm--off'\u003e\u003c\/span\u003e\u003cspan class='jdgm-star jdgm--off'\u003e\u003c\/span\u003e\u003cspan class='jdgm-star jdgm--off'\u003e\u003c\/span\u003e\u003cspan class='jdgm-star jdgm--off'\u003e\u003c\/span\u003e\u003cspan class='jdgm-star jdgm--off'\u003e\u003c\/span\u003e \u003c\/span\u003e \u003cspan class='jdgm-prev-badge__text'\u003e No reviews \u003c\/span\u003e \u003c\/div\u003e","widget":"\u003cdiv class='jdgm-rev-widg' data-updated-at='2025-11-07T03:44:33Z' data-average-rating='0.00' data-number-of-reviews='0' data-number-of-questions='0' data-image-url='https:\/\/cdn.shopify.com\/s\/files\/1\/0527\/3393\/5805\/files\/classic-black-breastfeeding-dress-496207.jpg?v=1714967961'\u003e \u003cstyle class='jdgm-temp-hiding-style'\u003e.jdgm-rev-widg{ display: none }\u003c\/style\u003e \u003cdiv class='jdgm-rev-widg__header'\u003e \u003ch2 class='jdgm-rev-widg__title'\u003eCustomer Reviews\u003c\/h2\u003e \u003cdiv class='jdgm-rev-widg__summary'\u003e \u003cdiv class='jdgm-rev-widg__summary-stars' aria-label='Average rating is 0.00 stars' role='img'\u003e \u003cspan class='jdgm-star jdgm--off'\u003e\u003c\/span\u003e\u003cspan class='jdgm-star jdgm--off'\u003e\u003c\/span\u003e\u003cspan class='jdgm-star jdgm--off'\u003e\u003c\/span\u003e\u003cspan class='jdgm-star jdgm--off'\u003e\u003c\/span\u003e\u003cspan class='jdgm-star jdgm--off'\u003e\u003c\/span\u003e \u003c\/div\u003e \u003cdiv class='jdgm-rev-widg__summary-text'\u003eBe the first to write a review\u003c\/div\u003e \u003c\/div\u003e \u003ca style='display: none' href='#' class='jdgm-write-rev-link' role='button'\u003eWrite a review\u003c\/a\u003e \u003cdiv class='jdgm-histogram jdgm-temp-hidden'\u003e \u003cdiv class='jdgm-histogram__row' data-rating='5' data-frequency='0' data-percentage='0'\u003e \u003cdiv class='jdgm-histogram__star' role='button' aria-label=\"0% (0) reviews with 5 star rating\" tabindex='0' \u003e\u003cspan class='jdgm-star jdgm--on'\u003e\u003c\/span\u003e\u003cspan class='jdgm-star jdgm--on'\u003e\u003c\/span\u003e\u003cspan class='jdgm-star jdgm--on'\u003e\u003c\/span\u003e\u003cspan class='jdgm-star jdgm--on'\u003e\u003c\/span\u003e\u003cspan class='jdgm-star jdgm--on'\u003e\u003c\/span\u003e\u003c\/div\u003e \u003cdiv class='jdgm-histogram__bar'\u003e \u003cdiv class='jdgm-histogram__bar-content' style='width: 0%;'\u003e \u003c\/div\u003e \u003c\/div\u003e \u003cdiv class='jdgm-histogram__percentage'\u003e0%\u003c\/div\u003e \u003cdiv class='jdgm-histogram__frequency'\u003e(0)\u003c\/div\u003e \u003c\/div\u003e \u003cdiv class='jdgm-histogram__row' data-rating='4' data-frequency='0' data-percentage='0'\u003e \u003cdiv class='jdgm-histogram__star' role='button' aria-label=\"0% (0) reviews with 4 star rating\" tabindex='0' \u003e\u003cspan class='jdgm-star jdgm--on'\u003e\u003c\/span\u003e\u003cspan class='jdgm-star jdgm--on'\u003e\u003c\/span\u003e\u003cspan class='jdgm-star jdgm--on'\u003e\u003c\/span\u003e\u003cspan class='jdgm-star jdgm--on'\u003e\u003c\/span\u003e\u003cspan class='jdgm-star jdgm--off'\u003e\u003c\/span\u003e\u003c\/div\u003e \u003cdiv class='jdgm-histogram__bar'\u003e \u003cdiv class='jdgm-histogram__bar-content' style='width: 0%;'\u003e \u003c\/div\u003e \u003c\/div\u003e \u003cdiv class='jdgm-histogram__percentage'\u003e0%\u003c\/div\u003e \u003cdiv class='jdgm-histogram__frequency'\u003e(0)\u003c\/div\u003e \u003c\/div\u003e \u003cdiv class='jdgm-histogram__row' data-rating='3' data-frequency='0' data-percentage='0'\u003e \u003cdiv class='jdgm-histogram__star' role='button' aria-label=\"0% (0) reviews with 3 star rating\" tabindex='0' \u003e\u003cspan class='jdgm-star jdgm--on'\u003e\u003c\/span\u003e\u003cspan class='jdgm-star jdgm--on'\u003e\u003c\/span\u003e\u003cspan class='jdgm-star jdgm--on'\u003e\u003c\/span\u003e\u003cspan class='jdgm-star jdgm--off'\u003e\u003c\/span\u003e\u003cspan class='jdgm-star jdgm--off'\u003e\u003c\/span\u003e\u003c\/div\u003e \u003cdiv class='jdgm-histogram__bar'\u003e \u003cdiv class='jdgm-histogram__bar-content' style='width: 0%;'\u003e \u003c\/div\u003e \u003c\/div\u003e \u003cdiv class='jdgm-histogram__percentage'\u003e0%\u003c\/div\u003e \u003cdiv class='jdgm-histogram__frequency'\u003e(0)\u003c\/div\u003e \u003c\/div\u003e \u003cdiv class='jdgm-histogram__row' data-rating='2' data-frequency='0' data-percentage='0'\u003e \u003cdiv class='jdgm-histogram__star' role='button' aria-label=\"0% (0) reviews with 2 star rating\" tabindex='0' \u003e\u003cspan class='jdgm-star jdgm--on'\u003e\u003c\/span\u003e\u003cspan class='jdgm-star jdgm--on'\u003e\u003c\/span\u003e\u003cspan class='jdgm-star jdgm--off'\u003e\u003c\/span\u003e\u003cspan class='jdgm-star jdgm--off'\u003e\u003c\/span\u003e\u003cspan class='jdgm-star jdgm--off'\u003e\u003c\/span\u003e\u003c\/div\u003e \u003cdiv class='jdgm-histogram__bar'\u003e \u003cdiv class='jdgm-histogram__bar-content' style='width: 0%;'\u003e \u003c\/div\u003e \u003c\/div\u003e \u003cdiv class='jdgm-histogram__percentage'\u003e0%\u003c\/div\u003e \u003cdiv class='jdgm-histogram__frequency'\u003e(0)\u003c\/div\u003e \u003c\/div\u003e \u003cdiv class='jdgm-histogram__row' data-rating='1' data-frequency='0' data-percentage='0'\u003e \u003cdiv class='jdgm-histogram__star' role='button' aria-label=\"0% (0) reviews with 1 star rating\" tabindex='0' \u003e\u003cspan class='jdgm-star jdgm--on'\u003e\u003c\/span\u003e\u003cspan class='jdgm-star jdgm--off'\u003e\u003c\/span\u003e\u003cspan class='jdgm-star jdgm--off'\u003e\u003c\/span\u003e\u003cspan class='jdgm-star jdgm--off'\u003e\u003c\/span\u003e\u003cspan class='jdgm-star jdgm--off'\u003e\u003c\/span\u003e\u003c\/div\u003e \u003cdiv class='jdgm-histogram__bar'\u003e \u003cdiv class='jdgm-histogram__bar-content' style='width: 0%;'\u003e \u003c\/div\u003e \u003c\/div\u003e \u003cdiv class='jdgm-histogram__percentage'\u003e0%\u003c\/div\u003e \u003cdiv class='jdgm-histogram__frequency'\u003e(0)\u003c\/div\u003e \u003c\/div\u003e \u003cdiv class='jdgm-histogram__row jdgm-histogram__clear-filter' data-rating=null tabindex='0'\u003e\u003c\/div\u003e \u003c\/div\u003e \u003cdiv class='jdgm-rev-widg__sort-wrapper'\u003e\u003c\/div\u003e \u003c\/div\u003e \u003cdiv class='jdgm-rev-widg__body'\u003e \u003cdiv class='jdgm-rev-widg__reviews'\u003e\u003c\/div\u003e \u003cdiv class='jdgm-paginate' data-per-page='10' data-url='https:\/\/api.judge.me\/reviews\/reviews_for_widget' style=\"display: none;\"\u003e\u003c\/div\u003e \u003c\/div\u003e \u003cdiv class='jdgm-rev-widg__paginate-spinner-wrapper'\u003e \u003cdiv class='jdgm-spinner'\u003e\u003c\/div\u003e \u003c\/div\u003e \u003c\/div\u003e"},"collections":[{"id":281356533949,"handle":"baby-shower-gifts","title":"Baby Shower Gifts - Mum","updated_at":"2026-06-12T19:10:25+08:00","body_html":"\u003cp\u003eLooking for a unique baby shower gift? Or an all-in-one bundle pack to suit all your needs? We've got just the thing!\u003c\/p\u003e","published_at":"2021-12-06T13:43:56+08:00","sort_order":"best-selling","template_suffix":"baby-shower-gifts","disjunctive":true,"rules":[{"column":"tag","relation":"equals","condition":"Baby Shower Gifts - Mum"},{"column":"tag","relation":"equals","condition":"Gift Card"}],"published_scope":"global","image":{"created_at":"2024-05-06T11:59:28+08:00","alt":"Baby Shower Gifts - The Birth Store","width":1200,"height":1800,"src":"\/\/www.thebirthstore.com.au\/cdn\/shop\/collections\/baby-shower-gifts-401770.jpg?v=1761791272"}},{"id":281712427197,"handle":"breastfeeding","title":"Breastfeeding","updated_at":"2026-06-12T19:10:26+08:00","body_html":"","published_at":"2021-12-20T14:19:33+08:00","sort_order":"best-selling","template_suffix":"breastfeeding-collection","disjunctive":false,"rules":[{"column":"tag","relation":"equals","condition":"Breastfeeding"}],"published_scope":"global","image":{"created_at":"2024-05-06T11:59:34+08:00","alt":"Breastfeeding - The Birth Store","width":620,"height":635,"src":"\/\/www.thebirthstore.com.au\/cdn\/shop\/collections\/breastfeeding-793872.jpg?v=1714967974"}},{"id":293308989629,"handle":"breastfeeding-clothing","title":"Breastfeeding Clothing","updated_at":"2026-05-27T00:53:21+08:00","body_html":"","published_at":"2023-05-03T11:40:00+08:00","sort_order":"best-selling","template_suffix":"swaddles-collection","disjunctive":false,"rules":[{"column":"tag","relation":"equals","condition":"Breastfeeding Clothing"}],"published_scope":"global","image":{"created_at":"2024-05-06T11:59:36+08:00","alt":"Breastfeeding Clothing - The Birth Store","width":569,"height":674,"src":"\/\/www.thebirthstore.com.au\/cdn\/shop\/collections\/breastfeeding-clothing-671936.jpg?v=1714967977"}},{"id":261657460925,"handle":"buy","title":"Buy","updated_at":"2026-06-12T19:10:26+08:00","body_html":"\u003cp\u003eBrowse all of our pregnancy, labour \u0026amp; birth, postpartum and baby essentials here.\u003cbr\u003e\u003c\/p\u003e\n\u003cp\u003e\u003cspan\u003eYou can even buy now and pay later with Afterpay!\u003c\/span\u003e\u003c\/p\u003e","published_at":"2021-03-10T12:05:31+08:00","sort_order":"best-selling","template_suffix":"shop-all-collection","disjunctive":false,"rules":[{"column":"title","relation":"not_contains","condition":"Hire"}],"published_scope":"global","image":{"created_at":"2024-05-06T11:59:42+08:00","alt":"Buy - The Birth Store","width":2048,"height":2048,"src":"\/\/www.thebirthstore.com.au\/cdn\/shop\/collections\/buy-964856.jpg?v=1714967982"}},{"id":293309022397,"handle":"clothing","title":"Clothing","updated_at":"2026-05-30T19:08:46+08:00","body_html":"","published_at":"2023-05-03T11:41:12+08:00","sort_order":"best-selling","template_suffix":"swaddles-collection","disjunctive":true,"rules":[{"column":"tag","relation":"equals","condition":"Breastfeeding Clothing"},{"column":"tag","relation":"equals","condition":"Support Clothing"}],"published_scope":"global","image":{"created_at":"2024-05-06T11:59:52+08:00","alt":"Clothing - The Birth Store","width":676,"height":581,"src":"\/\/www.thebirthstore.com.au\/cdn\/shop\/collections\/clothing-483293.jpg?v=1714967992"}},{"id":337429201085,"handle":"hospital-bag","title":"Hospital Bag","updated_at":"2026-06-12T19:10:26+08:00","body_html":"","published_at":"2026-06-03T11:36:29+08:00","sort_order":"most-relevant","template_suffix":"","disjunctive":false,"rules":[{"column":"tag","relation":"equals","condition":"Hospital Bag"}],"published_scope":"global"},{"id":291456483517,"handle":"shop-all","title":"Shop All - Mum","updated_at":"2026-06-12T19:10:26+08:00","body_html":"","published_at":"2022-12-23T22:04:39+08:00","sort_order":"best-selling","template_suffix":"shop-all-collection","disjunctive":false,"rules":[{"column":"variant_price","relation":"greater_than","condition":"1"},{"column":"title","relation":"not_contains","condition":"Batteries"},{"column":"tag","relation":"equals","condition":"Mum"}],"published_scope":"global","image":{"created_at":"2024-05-06T12:00:54+08:00","alt":"Shop All - The Birth Store","width":1365,"height":2048,"src":"\/\/www.thebirthstore.com.au\/cdn\/shop\/collections\/shop-all-693176.jpg?v=1714968055"}}]}
{"item":{"id":8238042022077,"title":"Zen Mumma Connect Wearable Breast Pump","handle":"zen-mumma-connect-wearable-breast-pump","description":"","published_at":"2026-03-18T13:14:21+08:00","created_at":"2026-03-18T13:14:21+08:00","vendor":"Zen Mumma","type":"","tags":["Baby Shower Gifts - Mum","Breastfeeding","Hospital Bag","Mum","new"],"price":18590,"price_min":18590,"price_max":32890,"available":true,"price_varies":true,"compare_at_price":null,"compare_at_price_min":0,"compare_at_price_max":0,"compare_at_price_varies":false,"variants":[{"id":46513140793533,"title":"Double","option1":"Double","option2":null,"option3":null,"sku":null,"requires_shipping":true,"taxable":true,"featured_image":{"id":39883024957629,"product_id":8238042022077,"position":1,"created_at":"2026-03-25T10:15:15+08:00","updated_at":"2026-03-25T13:51:08+08:00","alt":"Zen Mumma Connect Wearable Breast Pump - The Birth Store - Zen Mumma","width":1080,"height":1080,"src":"\/\/www.thebirthstore.com.au\/cdn\/shop\/files\/zen-mumma-connect-wearable-breast-pump-2604116.png?v=1774417868","variant_ids":[46513140793533]},"available":true,"name":"Zen Mumma Connect Wearable Breast Pump - Double","public_title":"Double","options":["Double"],"price":32890,"weight":0,"compare_at_price":null,"inventory_management":"shopify","barcode":"40793533","featured_media":{"alt":"Zen Mumma Connect Wearable Breast Pump - The Birth Store - Zen Mumma","id":31030327574717,"position":1,"preview_image":{"aspect_ratio":1.0,"height":1080,"width":1080,"src":"\/\/www.thebirthstore.com.au\/cdn\/shop\/files\/zen-mumma-connect-wearable-breast-pump-2604116.png?v=1774417868"}},"requires_selling_plan":false,"selling_plan_allocations":[],"quantity_rule":{"min":1,"max":null,"increment":1}},{"id":46513140760765,"title":"Single","option1":"Single","option2":null,"option3":null,"sku":null,"requires_shipping":true,"taxable":true,"featured_image":{"id":40102820085949,"product_id":8238042022077,"position":3,"created_at":"2026-04-23T10:47:17+08:00","updated_at":"2026-04-24T07:18:07+08:00","alt":"Zen Mumma Connect Wearable Breast Pump - The Birth Store - Zen Mumma","width":1080,"height":1080,"src":"\/\/www.thebirthstore.com.au\/cdn\/shop\/files\/zen-mumma-connect-wearable-breast-pump-7753952.png?v=1776986287","variant_ids":[46513140760765]},"available":true,"name":"Zen Mumma Connect Wearable Breast Pump - Single","public_title":"Single","options":["Single"],"price":18590,"weight":0,"compare_at_price":null,"inventory_management":"shopify","barcode":"40760765","featured_media":{"alt":"Zen Mumma Connect Wearable Breast Pump - The Birth Store - Zen Mumma","id":31222956196029,"position":3,"preview_image":{"aspect_ratio":1.0,"height":1080,"width":1080,"src":"\/\/www.thebirthstore.com.au\/cdn\/shop\/files\/zen-mumma-connect-wearable-breast-pump-7753952.png?v=1776986287"}},"requires_selling_plan":false,"selling_plan_allocations":[],"quantity_rule":{"min":1,"max":null,"increment":1}}],"images":["\/\/www.thebirthstore.com.au\/cdn\/shop\/files\/zen-mumma-connect-wearable-breast-pump-2604116.png?v=1774417868","\/\/www.thebirthstore.com.au\/cdn\/shop\/files\/zen-mumma-connect-wearable-breast-pump-5914898.png?v=1776986287","\/\/www.thebirthstore.com.au\/cdn\/shop\/files\/zen-mumma-connect-wearable-breast-pump-7753952.png?v=1776986287","\/\/www.thebirthstore.com.au\/cdn\/shop\/files\/zen-mumma-connect-wearable-breast-pump-4142569.png?v=1774417868","\/\/www.thebirthstore.com.au\/cdn\/shop\/files\/zen-mumma-connect-wearable-breast-pump-6250971.png?v=1774417868"],"featured_image":"\/\/www.thebirthstore.com.au\/cdn\/shop\/files\/zen-mumma-connect-wearable-breast-pump-2604116.png?v=1774417868","options":["Bundle Type"],"media":[{"alt":"Zen Mumma Connect Wearable Breast Pump - The Birth Store - Zen Mumma","id":31030327574717,"position":1,"preview_image":{"aspect_ratio":1.0,"height":1080,"width":1080,"src":"\/\/www.thebirthstore.com.au\/cdn\/shop\/files\/zen-mumma-connect-wearable-breast-pump-2604116.png?v=1774417868"},"aspect_ratio":1.0,"height":1080,"media_type":"image","src":"\/\/www.thebirthstore.com.au\/cdn\/shop\/files\/zen-mumma-connect-wearable-breast-pump-2604116.png?v=1774417868","width":1080},{"alt":"Zen Mumma Connect Wearable Breast Pump - The Birth Store - Zen Mumma","id":31222949314749,"position":2,"preview_image":{"aspect_ratio":1.0,"height":1080,"width":1080,"src":"\/\/www.thebirthstore.com.au\/cdn\/shop\/files\/zen-mumma-connect-wearable-breast-pump-5914898.png?v=1776986287"},"aspect_ratio":1.0,"height":1080,"media_type":"image","src":"\/\/www.thebirthstore.com.au\/cdn\/shop\/files\/zen-mumma-connect-wearable-breast-pump-5914898.png?v=1776986287","width":1080},{"alt":"Zen Mumma Connect Wearable Breast Pump - The Birth Store - Zen Mumma","id":31222956196029,"position":3,"preview_image":{"aspect_ratio":1.0,"height":1080,"width":1080,"src":"\/\/www.thebirthstore.com.au\/cdn\/shop\/files\/zen-mumma-connect-wearable-breast-pump-7753952.png?v=1776986287"},"aspect_ratio":1.0,"height":1080,"media_type":"image","src":"\/\/www.thebirthstore.com.au\/cdn\/shop\/files\/zen-mumma-connect-wearable-breast-pump-7753952.png?v=1776986287","width":1080},{"alt":"Zen Mumma Connect Wearable Breast Pump - The Birth Store - Zen Mumma","id":31030327509181,"position":4,"preview_image":{"aspect_ratio":1.0,"height":1080,"width":1080,"src":"\/\/www.thebirthstore.com.au\/cdn\/shop\/files\/zen-mumma-connect-wearable-breast-pump-4142569.png?v=1774417868"},"aspect_ratio":1.0,"height":1080,"media_type":"image","src":"\/\/www.thebirthstore.com.au\/cdn\/shop\/files\/zen-mumma-connect-wearable-breast-pump-4142569.png?v=1774417868","width":1080},{"alt":"Zen Mumma Connect Wearable Breast Pump - The Birth Store - Zen Mumma","id":31030327541949,"position":5,"preview_image":{"aspect_ratio":1.0,"height":1080,"width":1080,"src":"\/\/www.thebirthstore.com.au\/cdn\/shop\/files\/zen-mumma-connect-wearable-breast-pump-6250971.png?v=1774417868"},"aspect_ratio":1.0,"height":1080,"media_type":"image","src":"\/\/www.thebirthstore.com.au\/cdn\/shop\/files\/zen-mumma-connect-wearable-breast-pump-6250971.png?v=1774417868","width":1080}],"requires_selling_plan":false,"selling_plan_groups":[],"content":""},"options":[{"name":"Bundle Type","position":1,"values":["Double","Single"]}],"custom_metafields":{},"metafields":{"badge":"\u003cdiv style='display:none' class='jdgm-prev-badge' data-average-rating='0.00' data-number-of-reviews='0' data-number-of-questions='0'\u003e \u003cspan class='jdgm-prev-badge__stars' data-score='0.00' tabindex='0' aria-label='0.00 stars' role='button'\u003e \u003cspan class='jdgm-star jdgm--off'\u003e\u003c\/span\u003e\u003cspan class='jdgm-star jdgm--off'\u003e\u003c\/span\u003e\u003cspan class='jdgm-star jdgm--off'\u003e\u003c\/span\u003e\u003cspan class='jdgm-star jdgm--off'\u003e\u003c\/span\u003e\u003cspan class='jdgm-star jdgm--off'\u003e\u003c\/span\u003e \u003c\/span\u003e \u003cspan class='jdgm-prev-badge__text'\u003e No reviews \u003c\/span\u003e \u003c\/div\u003e","widget":"\u003cdiv class='jdgm-rev-widg' data-updated-at='2026-03-18T05:14:31Z' data-average-rating='0.00' data-number-of-reviews='0' data-number-of-questions='0' data-image-url=''\u003e \u003cstyle class='jdgm-temp-hiding-style'\u003e.jdgm-rev-widg{ display: none }\u003c\/style\u003e \u003cdiv class='jdgm-rev-widg__header'\u003e \u003ch2 class='jdgm-rev-widg__title'\u003eCustomer Reviews\u003c\/h2\u003e \u003cdiv class='jdgm-rev-widg__summary'\u003e \u003cdiv class='jdgm-rev-widg__summary-stars' aria-label='Average rating is 0.00 stars' role='img'\u003e \u003cspan class='jdgm-star jdgm--off'\u003e\u003c\/span\u003e\u003cspan class='jdgm-star jdgm--off'\u003e\u003c\/span\u003e\u003cspan class='jdgm-star jdgm--off'\u003e\u003c\/span\u003e\u003cspan class='jdgm-star jdgm--off'\u003e\u003c\/span\u003e\u003cspan class='jdgm-star jdgm--off'\u003e\u003c\/span\u003e \u003c\/div\u003e \u003cdiv class='jdgm-rev-widg__summary-text'\u003eBe the first to write a review\u003c\/div\u003e \u003c\/div\u003e \u003ca style='display: none' href='#' class='jdgm-write-rev-link' role='button'\u003eWrite a review\u003c\/a\u003e \u003cdiv class='jdgm-histogram jdgm-temp-hidden'\u003e \u003cdiv class='jdgm-histogram__row' data-rating='5' data-frequency='0' data-percentage='0'\u003e \u003cdiv class='jdgm-histogram__star' role='button' aria-label=\"0% (0) reviews with 5 star rating\" tabindex='0' \u003e\u003cspan class='jdgm-star jdgm--on'\u003e\u003c\/span\u003e\u003cspan class='jdgm-star jdgm--on'\u003e\u003c\/span\u003e\u003cspan class='jdgm-star jdgm--on'\u003e\u003c\/span\u003e\u003cspan class='jdgm-star jdgm--on'\u003e\u003c\/span\u003e\u003cspan class='jdgm-star jdgm--on'\u003e\u003c\/span\u003e\u003c\/div\u003e \u003cdiv class='jdgm-histogram__bar'\u003e \u003cdiv class='jdgm-histogram__bar-content' style='width: 0%;'\u003e \u003c\/div\u003e \u003c\/div\u003e \u003cdiv class='jdgm-histogram__percentage'\u003e0%\u003c\/div\u003e \u003cdiv class='jdgm-histogram__frequency'\u003e(0)\u003c\/div\u003e \u003c\/div\u003e \u003cdiv class='jdgm-histogram__row' data-rating='4' data-frequency='0' data-percentage='0'\u003e \u003cdiv class='jdgm-histogram__star' role='button' aria-label=\"0% (0) reviews with 4 star rating\" tabindex='0' \u003e\u003cspan class='jdgm-star jdgm--on'\u003e\u003c\/span\u003e\u003cspan class='jdgm-star jdgm--on'\u003e\u003c\/span\u003e\u003cspan class='jdgm-star jdgm--on'\u003e\u003c\/span\u003e\u003cspan class='jdgm-star jdgm--on'\u003e\u003c\/span\u003e\u003cspan class='jdgm-star jdgm--off'\u003e\u003c\/span\u003e\u003c\/div\u003e \u003cdiv class='jdgm-histogram__bar'\u003e \u003cdiv class='jdgm-histogram__bar-content' style='width: 0%;'\u003e \u003c\/div\u003e \u003c\/div\u003e \u003cdiv class='jdgm-histogram__percentage'\u003e0%\u003c\/div\u003e \u003cdiv class='jdgm-histogram__frequency'\u003e(0)\u003c\/div\u003e \u003c\/div\u003e \u003cdiv class='jdgm-histogram__row' data-rating='3' data-frequency='0' data-percentage='0'\u003e \u003cdiv class='jdgm-histogram__star' role='button' aria-label=\"0% (0) reviews with 3 star rating\" tabindex='0' \u003e\u003cspan class='jdgm-star jdgm--on'\u003e\u003c\/span\u003e\u003cspan class='jdgm-star jdgm--on'\u003e\u003c\/span\u003e\u003cspan class='jdgm-star jdgm--on'\u003e\u003c\/span\u003e\u003cspan class='jdgm-star jdgm--off'\u003e\u003c\/span\u003e\u003cspan class='jdgm-star jdgm--off'\u003e\u003c\/span\u003e\u003c\/div\u003e \u003cdiv class='jdgm-histogram__bar'\u003e \u003cdiv class='jdgm-histogram__bar-content' style='width: 0%;'\u003e \u003c\/div\u003e \u003c\/div\u003e \u003cdiv class='jdgm-histogram__percentage'\u003e0%\u003c\/div\u003e \u003cdiv class='jdgm-histogram__frequency'\u003e(0)\u003c\/div\u003e \u003c\/div\u003e \u003cdiv class='jdgm-histogram__row' data-rating='2' data-frequency='0' data-percentage='0'\u003e \u003cdiv class='jdgm-histogram__star' role='button' aria-label=\"0% (0) reviews with 2 star rating\" tabindex='0' \u003e\u003cspan class='jdgm-star jdgm--on'\u003e\u003c\/span\u003e\u003cspan class='jdgm-star jdgm--on'\u003e\u003c\/span\u003e\u003cspan class='jdgm-star jdgm--off'\u003e\u003c\/span\u003e\u003cspan class='jdgm-star jdgm--off'\u003e\u003c\/span\u003e\u003cspan class='jdgm-star jdgm--off'\u003e\u003c\/span\u003e\u003c\/div\u003e \u003cdiv class='jdgm-histogram__bar'\u003e \u003cdiv class='jdgm-histogram__bar-content' style='width: 0%;'\u003e \u003c\/div\u003e \u003c\/div\u003e \u003cdiv class='jdgm-histogram__percentage'\u003e0%\u003c\/div\u003e \u003cdiv class='jdgm-histogram__frequency'\u003e(0)\u003c\/div\u003e \u003c\/div\u003e \u003cdiv class='jdgm-histogram__row' data-rating='1' data-frequency='0' data-percentage='0'\u003e \u003cdiv class='jdgm-histogram__star' role='button' aria-label=\"0% (0) reviews with 1 star rating\" tabindex='0' \u003e\u003cspan class='jdgm-star jdgm--on'\u003e\u003c\/span\u003e\u003cspan class='jdgm-star jdgm--off'\u003e\u003c\/span\u003e\u003cspan class='jdgm-star jdgm--off'\u003e\u003c\/span\u003e\u003cspan class='jdgm-star jdgm--off'\u003e\u003c\/span\u003e\u003cspan class='jdgm-star jdgm--off'\u003e\u003c\/span\u003e\u003c\/div\u003e \u003cdiv class='jdgm-histogram__bar'\u003e \u003cdiv class='jdgm-histogram__bar-content' style='width: 0%;'\u003e \u003c\/div\u003e \u003c\/div\u003e \u003cdiv class='jdgm-histogram__percentage'\u003e0%\u003c\/div\u003e \u003cdiv class='jdgm-histogram__frequency'\u003e(0)\u003c\/div\u003e \u003c\/div\u003e \u003cdiv class='jdgm-histogram__row jdgm-histogram__clear-filter' data-rating=null tabindex='0'\u003e\u003c\/div\u003e \u003c\/div\u003e \u003cdiv class='jdgm-rev-widg__sort-wrapper'\u003e\u003c\/div\u003e \u003c\/div\u003e \u003cdiv class='jdgm-rev-widg__body'\u003e \u003cdiv class='jdgm-rev-widg__reviews'\u003e\u003c\/div\u003e \u003cdiv class='jdgm-paginate' data-per-page='10' data-url='https:\/\/api.judge.me\/reviews\/reviews_for_widget' style=\"display: none;\"\u003e\u003c\/div\u003e \u003c\/div\u003e \u003cdiv class='jdgm-rev-widg__paginate-spinner-wrapper'\u003e \u003cdiv class='jdgm-spinner'\u003e\u003c\/div\u003e \u003c\/div\u003e \u003c\/div\u003e"},"collections":[{"id":281356533949,"handle":"baby-shower-gifts","title":"Baby Shower Gifts - Mum","updated_at":"2026-06-12T19:10:25+08:00","body_html":"\u003cp\u003eLooking for a unique baby shower gift? Or an all-in-one bundle pack to suit all your needs? We've got just the thing!\u003c\/p\u003e","published_at":"2021-12-06T13:43:56+08:00","sort_order":"best-selling","template_suffix":"baby-shower-gifts","disjunctive":true,"rules":[{"column":"tag","relation":"equals","condition":"Baby Shower Gifts - Mum"},{"column":"tag","relation":"equals","condition":"Gift Card"}],"published_scope":"global","image":{"created_at":"2024-05-06T11:59:28+08:00","alt":"Baby Shower Gifts - The Birth Store","width":1200,"height":1800,"src":"\/\/www.thebirthstore.com.au\/cdn\/shop\/collections\/baby-shower-gifts-401770.jpg?v=1761791272"}},{"id":281712427197,"handle":"breastfeeding","title":"Breastfeeding","updated_at":"2026-06-12T19:10:26+08:00","body_html":"","published_at":"2021-12-20T14:19:33+08:00","sort_order":"best-selling","template_suffix":"breastfeeding-collection","disjunctive":false,"rules":[{"column":"tag","relation":"equals","condition":"Breastfeeding"}],"published_scope":"global","image":{"created_at":"2024-05-06T11:59:34+08:00","alt":"Breastfeeding - The Birth Store","width":620,"height":635,"src":"\/\/www.thebirthstore.com.au\/cdn\/shop\/collections\/breastfeeding-793872.jpg?v=1714967974"}},{"id":261657460925,"handle":"buy","title":"Buy","updated_at":"2026-06-12T19:10:26+08:00","body_html":"\u003cp\u003eBrowse all of our pregnancy, labour \u0026amp; birth, postpartum and baby essentials here.\u003cbr\u003e\u003c\/p\u003e\n\u003cp\u003e\u003cspan\u003eYou can even buy now and pay later with Afterpay!\u003c\/span\u003e\u003c\/p\u003e","published_at":"2021-03-10T12:05:31+08:00","sort_order":"best-selling","template_suffix":"shop-all-collection","disjunctive":false,"rules":[{"column":"title","relation":"not_contains","condition":"Hire"}],"published_scope":"global","image":{"created_at":"2024-05-06T11:59:42+08:00","alt":"Buy - The Birth Store","width":2048,"height":2048,"src":"\/\/www.thebirthstore.com.au\/cdn\/shop\/collections\/buy-964856.jpg?v=1714967982"}},{"id":337429201085,"handle":"hospital-bag","title":"Hospital Bag","updated_at":"2026-06-12T19:10:26+08:00","body_html":"","published_at":"2026-06-03T11:36:29+08:00","sort_order":"most-relevant","template_suffix":"","disjunctive":false,"rules":[{"column":"tag","relation":"equals","condition":"Hospital Bag"}],"published_scope":"global"},{"id":291456483517,"handle":"shop-all","title":"Shop All - Mum","updated_at":"2026-06-12T19:10:26+08:00","body_html":"","published_at":"2022-12-23T22:04:39+08:00","sort_order":"best-selling","template_suffix":"shop-all-collection","disjunctive":false,"rules":[{"column":"variant_price","relation":"greater_than","condition":"1"},{"column":"title","relation":"not_contains","condition":"Batteries"},{"column":"tag","relation":"equals","condition":"Mum"}],"published_scope":"global","image":{"created_at":"2024-05-06T12:00:54+08:00","alt":"Shop All - The Birth Store","width":1365,"height":2048,"src":"\/\/www.thebirthstore.com.au\/cdn\/shop\/collections\/shop-all-693176.jpg?v=1714968055"}}]}
{"item":{"id":8202011738301,"title":"Supplemental Feeding Kit","handle":"haakaa-generation-2-silicone-breast-pump-with-suction-base-copy","description":"\u003cp\u003eA gentle, supportive way to nourish your baby while staying\u003cbr\u003econnected at the breast.\u003cbr\u003eThe Zen Mumma Supplemental Feeding Kit is designed to help\u003cbr\u003eyou offer your baby extra milk — expressed breast milk or formula\u003cbr\u003e— while still keeping them at the breast, supporting bonding,\u003cbr\u003estimulation, and the natural rhythm of breastfeeding.\u003cbr\u003eThis simple, lightweight system provides controlled milk flow\u003cbr\u003ethrough soft tubing, making it ideal for mums navigating low\u003cbr\u003esupply, weight gain concerns, slow or learning latches, or\u003cbr\u003etemporary feeding challenges. It helps your baby receive the\u003cbr\u003enourishment they need while maintaining breast stimulation and\u003cbr\u003ecloseness — a nurturing combination that supports both comfort\u003cbr\u003eand milk production.\u003c\/p\u003e\n\u003cp\u003e\u003cbr\u003eInclusions:\u003cbr\u003eNeck Lanyard – used to hang the bottle around your neck.\u003cbr\u003eMilk Bottle – holds expressed breast milk or formula.\u003cbr\u003e2 × Catheters (Tubes) – deliver milk to your nipple (one spare\u003cbr\u003eincluded).\u003cbr\u003eValve Retainer – connects the tubing and helps control milk\u003cbr\u003eflow.\u003cbr\u003eConnecting Ring – secures the valve and tubing to the bottle.\u003cbr\u003eMedical Tape – for gently securing the tube in place on your\u003cbr\u003ebreast.\u003c\/p\u003e","published_at":"2026-02-16T13:00:25+08:00","created_at":"2026-01-31T12:46:08+08:00","vendor":"Zen Mumma","type":"","tags":["Breastfeeding","Hospital Bag"],"price":4900,"price_min":4900,"price_max":4900,"available":true,"price_varies":false,"compare_at_price":null,"compare_at_price_min":0,"compare_at_price_max":0,"compare_at_price_varies":false,"variants":[{"id":46368342212797,"title":"Default Title","option1":"Default Title","option2":null,"option3":null,"sku":null,"requires_shipping":true,"taxable":false,"featured_image":null,"available":true,"name":"Supplemental Feeding Kit","public_title":null,"options":["Default Title"],"price":4900,"weight":65,"compare_at_price":null,"inventory_management":"shopify","barcode":"42212797","requires_selling_plan":false,"selling_plan_allocations":[],"quantity_rule":{"min":1,"max":null,"increment":1}}],"images":["\/\/www.thebirthstore.com.au\/cdn\/shop\/files\/supplemental-feeding-kit-6765040.jpg?v=1774579186"],"featured_image":"\/\/www.thebirthstore.com.au\/cdn\/shop\/files\/supplemental-feeding-kit-6765040.jpg?v=1774579186","options":["Title"],"media":[{"alt":"Supplemental Feeding Kit - The Birth Store - Zen Mumma","id":30708509311165,"position":1,"preview_image":{"aspect_ratio":0.897,"height":2048,"width":1838,"src":"\/\/www.thebirthstore.com.au\/cdn\/shop\/files\/supplemental-feeding-kit-6765040.jpg?v=1774579186"},"aspect_ratio":0.897,"height":2048,"media_type":"image","src":"\/\/www.thebirthstore.com.au\/cdn\/shop\/files\/supplemental-feeding-kit-6765040.jpg?v=1774579186","width":1838}],"requires_selling_plan":false,"selling_plan_groups":[],"content":"\u003cp\u003eA gentle, supportive way to nourish your baby while staying\u003cbr\u003econnected at the breast.\u003cbr\u003eThe Zen Mumma Supplemental Feeding Kit is designed to help\u003cbr\u003eyou offer your baby extra milk — expressed breast milk or formula\u003cbr\u003e— while still keeping them at the breast, supporting bonding,\u003cbr\u003estimulation, and the natural rhythm of breastfeeding.\u003cbr\u003eThis simple, lightweight system provides controlled milk flow\u003cbr\u003ethrough soft tubing, making it ideal for mums navigating low\u003cbr\u003esupply, weight gain concerns, slow or learning latches, or\u003cbr\u003etemporary feeding challenges. It helps your baby receive the\u003cbr\u003enourishment they need while maintaining breast stimulation and\u003cbr\u003ecloseness — a nurturing combination that supports both comfort\u003cbr\u003eand milk production.\u003c\/p\u003e\n\u003cp\u003e\u003cbr\u003eInclusions:\u003cbr\u003eNeck Lanyard – used to hang the bottle around your neck.\u003cbr\u003eMilk Bottle – holds expressed breast milk or formula.\u003cbr\u003e2 × Catheters (Tubes) – deliver milk to your nipple (one spare\u003cbr\u003eincluded).\u003cbr\u003eValve Retainer – connects the tubing and helps control milk\u003cbr\u003eflow.\u003cbr\u003eConnecting Ring – secures the valve and tubing to the bottle.\u003cbr\u003eMedical Tape – for gently securing the tube in place on your\u003cbr\u003ebreast.\u003c\/p\u003e"},"options":[{"name":"Title","position":1,"values":["Default Title"]}],"custom_metafields":{},"metafields":{"badge":"\u003cdiv style='display:none' class='jdgm-prev-badge' data-average-rating='0.00' data-number-of-reviews='0' data-number-of-questions='0'\u003e \u003cspan class='jdgm-prev-badge__stars' data-score='0.00' tabindex='0' aria-label='0.00 stars' role='button'\u003e \u003cspan class='jdgm-star jdgm--off'\u003e\u003c\/span\u003e\u003cspan class='jdgm-star jdgm--off'\u003e\u003c\/span\u003e\u003cspan class='jdgm-star jdgm--off'\u003e\u003c\/span\u003e\u003cspan class='jdgm-star jdgm--off'\u003e\u003c\/span\u003e\u003cspan class='jdgm-star jdgm--off'\u003e\u003c\/span\u003e \u003c\/span\u003e \u003cspan class='jdgm-prev-badge__text'\u003e No reviews \u003c\/span\u003e \u003c\/div\u003e","widget":"\u003cdiv class='jdgm-rev-widg' data-updated-at='2026-02-16T05:02:58Z' data-average-rating='0.00' data-number-of-reviews='0' data-number-of-questions='0' data-image-url='https:\/\/cdn.shopify.com\/s\/files\/1\/0527\/3393\/5805\/files\/Supp.FeedingKit.jpg?v=1770357890'\u003e \u003cstyle class='jdgm-temp-hiding-style'\u003e.jdgm-rev-widg{ display: none }\u003c\/style\u003e \u003cdiv class='jdgm-rev-widg__header'\u003e \u003ch2 class='jdgm-rev-widg__title'\u003eCustomer Reviews\u003c\/h2\u003e \u003cdiv class='jdgm-rev-widg__summary'\u003e \u003cdiv class='jdgm-rev-widg__summary-stars' aria-label='Average rating is 0.00 stars' role='img'\u003e \u003cspan class='jdgm-star jdgm--off'\u003e\u003c\/span\u003e\u003cspan class='jdgm-star jdgm--off'\u003e\u003c\/span\u003e\u003cspan class='jdgm-star jdgm--off'\u003e\u003c\/span\u003e\u003cspan class='jdgm-star jdgm--off'\u003e\u003c\/span\u003e\u003cspan class='jdgm-star jdgm--off'\u003e\u003c\/span\u003e \u003c\/div\u003e \u003cdiv class='jdgm-rev-widg__summary-text'\u003eBe the first to write a review\u003c\/div\u003e \u003c\/div\u003e \u003ca style='display: none' href='#' class='jdgm-write-rev-link' role='button'\u003eWrite a review\u003c\/a\u003e \u003cdiv class='jdgm-histogram jdgm-temp-hidden'\u003e \u003cdiv class='jdgm-histogram__row' data-rating='5' data-frequency='0' data-percentage='0'\u003e \u003cdiv class='jdgm-histogram__star' role='button' aria-label=\"0% (0) reviews with 5 star rating\" tabindex='0' \u003e\u003cspan class='jdgm-star jdgm--on'\u003e\u003c\/span\u003e\u003cspan class='jdgm-star jdgm--on'\u003e\u003c\/span\u003e\u003cspan class='jdgm-star jdgm--on'\u003e\u003c\/span\u003e\u003cspan class='jdgm-star jdgm--on'\u003e\u003c\/span\u003e\u003cspan class='jdgm-star jdgm--on'\u003e\u003c\/span\u003e\u003c\/div\u003e \u003cdiv class='jdgm-histogram__bar'\u003e \u003cdiv class='jdgm-histogram__bar-content' style='width: 0%;'\u003e \u003c\/div\u003e \u003c\/div\u003e \u003cdiv class='jdgm-histogram__percentage'\u003e0%\u003c\/div\u003e \u003cdiv class='jdgm-histogram__frequency'\u003e(0)\u003c\/div\u003e \u003c\/div\u003e \u003cdiv class='jdgm-histogram__row' data-rating='4' data-frequency='0' data-percentage='0'\u003e \u003cdiv class='jdgm-histogram__star' role='button' aria-label=\"0% (0) reviews with 4 star rating\" tabindex='0' \u003e\u003cspan class='jdgm-star jdgm--on'\u003e\u003c\/span\u003e\u003cspan class='jdgm-star jdgm--on'\u003e\u003c\/span\u003e\u003cspan class='jdgm-star jdgm--on'\u003e\u003c\/span\u003e\u003cspan class='jdgm-star jdgm--on'\u003e\u003c\/span\u003e\u003cspan class='jdgm-star jdgm--off'\u003e\u003c\/span\u003e\u003c\/div\u003e \u003cdiv class='jdgm-histogram__bar'\u003e \u003cdiv class='jdgm-histogram__bar-content' style='width: 0%;'\u003e \u003c\/div\u003e \u003c\/div\u003e \u003cdiv class='jdgm-histogram__percentage'\u003e0%\u003c\/div\u003e \u003cdiv class='jdgm-histogram__frequency'\u003e(0)\u003c\/div\u003e \u003c\/div\u003e \u003cdiv class='jdgm-histogram__row' data-rating='3' data-frequency='0' data-percentage='0'\u003e \u003cdiv class='jdgm-histogram__star' role='button' aria-label=\"0% (0) reviews with 3 star rating\" tabindex='0' \u003e\u003cspan class='jdgm-star jdgm--on'\u003e\u003c\/span\u003e\u003cspan class='jdgm-star jdgm--on'\u003e\u003c\/span\u003e\u003cspan class='jdgm-star jdgm--on'\u003e\u003c\/span\u003e\u003cspan class='jdgm-star jdgm--off'\u003e\u003c\/span\u003e\u003cspan class='jdgm-star jdgm--off'\u003e\u003c\/span\u003e\u003c\/div\u003e \u003cdiv class='jdgm-histogram__bar'\u003e \u003cdiv class='jdgm-histogram__bar-content' style='width: 0%;'\u003e \u003c\/div\u003e \u003c\/div\u003e \u003cdiv class='jdgm-histogram__percentage'\u003e0%\u003c\/div\u003e \u003cdiv class='jdgm-histogram__frequency'\u003e(0)\u003c\/div\u003e \u003c\/div\u003e \u003cdiv class='jdgm-histogram__row' data-rating='2' data-frequency='0' data-percentage='0'\u003e \u003cdiv class='jdgm-histogram__star' role='button' aria-label=\"0% (0) reviews with 2 star rating\" tabindex='0' \u003e\u003cspan class='jdgm-star jdgm--on'\u003e\u003c\/span\u003e\u003cspan class='jdgm-star jdgm--on'\u003e\u003c\/span\u003e\u003cspan class='jdgm-star jdgm--off'\u003e\u003c\/span\u003e\u003cspan class='jdgm-star jdgm--off'\u003e\u003c\/span\u003e\u003cspan class='jdgm-star jdgm--off'\u003e\u003c\/span\u003e\u003c\/div\u003e \u003cdiv class='jdgm-histogram__bar'\u003e \u003cdiv class='jdgm-histogram__bar-content' style='width: 0%;'\u003e \u003c\/div\u003e \u003c\/div\u003e \u003cdiv class='jdgm-histogram__percentage'\u003e0%\u003c\/div\u003e \u003cdiv class='jdgm-histogram__frequency'\u003e(0)\u003c\/div\u003e \u003c\/div\u003e \u003cdiv class='jdgm-histogram__row' data-rating='1' data-frequency='0' data-percentage='0'\u003e \u003cdiv class='jdgm-histogram__star' role='button' aria-label=\"0% (0) reviews with 1 star rating\" tabindex='0' \u003e\u003cspan class='jdgm-star jdgm--on'\u003e\u003c\/span\u003e\u003cspan class='jdgm-star jdgm--off'\u003e\u003c\/span\u003e\u003cspan class='jdgm-star jdgm--off'\u003e\u003c\/span\u003e\u003cspan class='jdgm-star jdgm--off'\u003e\u003c\/span\u003e\u003cspan class='jdgm-star jdgm--off'\u003e\u003c\/span\u003e\u003c\/div\u003e \u003cdiv class='jdgm-histogram__bar'\u003e \u003cdiv class='jdgm-histogram__bar-content' style='width: 0%;'\u003e \u003c\/div\u003e \u003c\/div\u003e \u003cdiv class='jdgm-histogram__percentage'\u003e0%\u003c\/div\u003e \u003cdiv class='jdgm-histogram__frequency'\u003e(0)\u003c\/div\u003e \u003c\/div\u003e \u003cdiv class='jdgm-histogram__row jdgm-histogram__clear-filter' data-rating=null tabindex='0'\u003e\u003c\/div\u003e \u003c\/div\u003e \u003cdiv class='jdgm-rev-widg__sort-wrapper'\u003e\u003c\/div\u003e \u003c\/div\u003e \u003cdiv class='jdgm-rev-widg__body'\u003e \u003cdiv class='jdgm-rev-widg__reviews'\u003e\u003c\/div\u003e \u003cdiv class='jdgm-paginate' data-per-page='10' data-url='https:\/\/api.judge.me\/reviews\/reviews_for_widget' style=\"display: none;\"\u003e\u003c\/div\u003e \u003c\/div\u003e \u003cdiv class='jdgm-rev-widg__paginate-spinner-wrapper'\u003e \u003cdiv class='jdgm-spinner'\u003e\u003c\/div\u003e \u003c\/div\u003e \u003c\/div\u003e"},"collections":[{"id":281712427197,"handle":"breastfeeding","title":"Breastfeeding","updated_at":"2026-06-12T19:10:26+08:00","body_html":"","published_at":"2021-12-20T14:19:33+08:00","sort_order":"best-selling","template_suffix":"breastfeeding-collection","disjunctive":false,"rules":[{"column":"tag","relation":"equals","condition":"Breastfeeding"}],"published_scope":"global","image":{"created_at":"2024-05-06T11:59:34+08:00","alt":"Breastfeeding - The Birth Store","width":620,"height":635,"src":"\/\/www.thebirthstore.com.au\/cdn\/shop\/collections\/breastfeeding-793872.jpg?v=1714967974"}},{"id":261657460925,"handle":"buy","title":"Buy","updated_at":"2026-06-12T19:10:26+08:00","body_html":"\u003cp\u003eBrowse all of our pregnancy, labour \u0026amp; birth, postpartum and baby essentials here.\u003cbr\u003e\u003c\/p\u003e\n\u003cp\u003e\u003cspan\u003eYou can even buy now and pay later with Afterpay!\u003c\/span\u003e\u003c\/p\u003e","published_at":"2021-03-10T12:05:31+08:00","sort_order":"best-selling","template_suffix":"shop-all-collection","disjunctive":false,"rules":[{"column":"title","relation":"not_contains","condition":"Hire"}],"published_scope":"global","image":{"created_at":"2024-05-06T11:59:42+08:00","alt":"Buy - The Birth Store","width":2048,"height":2048,"src":"\/\/www.thebirthstore.com.au\/cdn\/shop\/collections\/buy-964856.jpg?v=1714967982"}},{"id":337429201085,"handle":"hospital-bag","title":"Hospital Bag","updated_at":"2026-06-12T19:10:26+08:00","body_html":"","published_at":"2026-06-03T11:36:29+08:00","sort_order":"most-relevant","template_suffix":"","disjunctive":false,"rules":[{"column":"tag","relation":"equals","condition":"Hospital Bag"}],"published_scope":"global"}]}
{"item":{"id":8184409686205,"title":"Breastfeeding Vitality","handle":"post-birth-vitality-copy","description":"\u003cp\u003eOur\u003cstrong\u003e\u003cspan\u003e \u003c\/span\u003eBreastfeeding Vitality\u003cspan\u003e \u003c\/span\u003e\u003c\/strong\u003ewholefood vitamin and superfood blend nourishes and supports breastfeeding mums to help you get the nutrients and energy you need. \u003c\/p\u003e\n\u003cp\u003ePacked full of 100% pure wholefood vitamins and minerals, Traditional Chinese medicine herbs, plant protein, super greens plus superfoods traditionally used to support longer-lasting energy, mood, hormone regulation, sleep, immunity and a healthy milk supply.\u003c\/p\u003e\n\u003cp\u003eFormulated using Ancient Wisdom + Evidence Based Nutrition to nourish Qi (vital energy) and Blood, assist stress and fatigue as well as providing up to 100% of the RDI for key nutrients including B \u0026amp; C vitamins, iron, zinc, calcium and magnesium. \u003c\/p\u003e\n\u003cp\u003eVanilla in flavour, enjoy daily with your favourite milk, water or add to a smoothie. 100% natural \u0026amp; organic. Vegan, No gluten, dairy, soy, added sugar, GMos. additives, fillers or synthetics. \u003c\/p\u003e\n\u003cp\u003e\u003cstrong\u003e\u003ci\u003e*This product is not recommended for use during pregnancy. \u003c\/i\u003e\u003c\/strong\u003e\u003c\/p\u003e","published_at":"2026-01-14T09:44:13+08:00","created_at":"2026-01-12T10:51:22+08:00","vendor":"HQ Health","type":"","tags":["Baby Shower Gifts - Mum","Breastfeeding","Mum"],"price":6995,"price_min":6995,"price_max":6995,"available":true,"price_varies":false,"compare_at_price":null,"compare_at_price_min":0,"compare_at_price_max":0,"compare_at_price_varies":false,"variants":[{"id":46291068190909,"title":"Default Title","option1":"Default Title","option2":null,"option3":null,"sku":null,"requires_shipping":true,"taxable":false,"featured_image":null,"available":true,"name":"Breastfeeding Vitality","public_title":null,"options":["Default Title"],"price":6995,"weight":175,"compare_at_price":null,"inventory_management":"shopify","barcode":"68190909","requires_selling_plan":false,"selling_plan_allocations":[],"quantity_rule":{"min":1,"max":null,"increment":1}}],"images":["\/\/www.thebirthstore.com.au\/cdn\/shop\/files\/breastfeeding-vitality-5460174.webp?v=1768368779","\/\/www.thebirthstore.com.au\/cdn\/shop\/files\/breastfeeding-vitality-2946812.webp?v=1768368779","\/\/www.thebirthstore.com.au\/cdn\/shop\/files\/breastfeeding-vitality-3044199.webp?v=1768368780"],"featured_image":"\/\/www.thebirthstore.com.au\/cdn\/shop\/files\/breastfeeding-vitality-5460174.webp?v=1768368779","options":["Title"],"media":[{"alt":"Breastfeeding Vitality - The Birth Store - HQ Health","id":30493657399485,"position":1,"preview_image":{"aspect_ratio":1.0,"height":525,"width":525,"src":"\/\/www.thebirthstore.com.au\/cdn\/shop\/files\/breastfeeding-vitality-5460174.webp?v=1768368779"},"aspect_ratio":1.0,"height":525,"media_type":"image","src":"\/\/www.thebirthstore.com.au\/cdn\/shop\/files\/breastfeeding-vitality-5460174.webp?v=1768368779","width":525},{"alt":"Breastfeeding Vitality - The Birth Store - HQ Health","id":30493660414141,"position":2,"preview_image":{"aspect_ratio":1.429,"height":525,"width":750,"src":"\/\/www.thebirthstore.com.au\/cdn\/shop\/files\/breastfeeding-vitality-2946812.webp?v=1768368779"},"aspect_ratio":1.429,"height":525,"media_type":"image","src":"\/\/www.thebirthstore.com.au\/cdn\/shop\/files\/breastfeeding-vitality-2946812.webp?v=1768368779","width":750},{"alt":"Breastfeeding Vitality - The Birth Store - HQ Health","id":30493673980093,"position":3,"preview_image":{"aspect_ratio":1.429,"height":525,"width":750,"src":"\/\/www.thebirthstore.com.au\/cdn\/shop\/files\/breastfeeding-vitality-3044199.webp?v=1768368780"},"aspect_ratio":1.429,"height":525,"media_type":"image","src":"\/\/www.thebirthstore.com.au\/cdn\/shop\/files\/breastfeeding-vitality-3044199.webp?v=1768368780","width":750}],"requires_selling_plan":false,"selling_plan_groups":[],"content":"\u003cp\u003eOur\u003cstrong\u003e\u003cspan\u003e \u003c\/span\u003eBreastfeeding Vitality\u003cspan\u003e \u003c\/span\u003e\u003c\/strong\u003ewholefood vitamin and superfood blend nourishes and supports breastfeeding mums to help you get the nutrients and energy you need. \u003c\/p\u003e\n\u003cp\u003ePacked full of 100% pure wholefood vitamins and minerals, Traditional Chinese medicine herbs, plant protein, super greens plus superfoods traditionally used to support longer-lasting energy, mood, hormone regulation, sleep, immunity and a healthy milk supply.\u003c\/p\u003e\n\u003cp\u003eFormulated using Ancient Wisdom + Evidence Based Nutrition to nourish Qi (vital energy) and Blood, assist stress and fatigue as well as providing up to 100% of the RDI for key nutrients including B \u0026amp; C vitamins, iron, zinc, calcium and magnesium. \u003c\/p\u003e\n\u003cp\u003eVanilla in flavour, enjoy daily with your favourite milk, water or add to a smoothie. 100% natural \u0026amp; organic. Vegan, No gluten, dairy, soy, added sugar, GMos. additives, fillers or synthetics. \u003c\/p\u003e\n\u003cp\u003e\u003cstrong\u003e\u003ci\u003e*This product is not recommended for use during pregnancy. \u003c\/i\u003e\u003c\/strong\u003e\u003c\/p\u003e"},"options":[{"name":"Title","position":1,"values":["Default Title"]}],"custom_metafields":{},"metafields":{"badge":"\u003cdiv style='display:none' class='jdgm-prev-badge' data-average-rating='0.00' data-number-of-reviews='0' data-number-of-questions='0'\u003e \u003cspan class='jdgm-prev-badge__stars' data-score='0.00' tabindex='0' aria-label='0.00 stars' role='button'\u003e \u003cspan class='jdgm-star jdgm--off'\u003e\u003c\/span\u003e\u003cspan class='jdgm-star jdgm--off'\u003e\u003c\/span\u003e\u003cspan class='jdgm-star jdgm--off'\u003e\u003c\/span\u003e\u003cspan class='jdgm-star jdgm--off'\u003e\u003c\/span\u003e\u003cspan class='jdgm-star jdgm--off'\u003e\u003c\/span\u003e \u003c\/span\u003e \u003cspan class='jdgm-prev-badge__text'\u003e No reviews \u003c\/span\u003e \u003c\/div\u003e","widget":"\u003cdiv class='jdgm-rev-widg' data-updated-at='2026-01-14T01:44:16Z' data-average-rating='0.00' data-number-of-reviews='0' data-number-of-questions='0' data-image-url='https:\/\/cdn.shopify.com\/s\/files\/1\/0527\/3393\/5805\/files\/IMG_7076_1024x1024_7a9f2b05-f48a-4c37-b3c4-97bb7660ee45.webp?v=1768355039'\u003e \u003cstyle class='jdgm-temp-hiding-style'\u003e.jdgm-rev-widg{ display: none }\u003c\/style\u003e \u003cdiv class='jdgm-rev-widg__header'\u003e \u003ch2 class='jdgm-rev-widg__title'\u003eCustomer Reviews\u003c\/h2\u003e \u003cdiv class='jdgm-rev-widg__summary'\u003e \u003cdiv class='jdgm-rev-widg__summary-stars' aria-label='Average rating is 0.00 stars' role='img'\u003e \u003cspan class='jdgm-star jdgm--off'\u003e\u003c\/span\u003e\u003cspan class='jdgm-star jdgm--off'\u003e\u003c\/span\u003e\u003cspan class='jdgm-star jdgm--off'\u003e\u003c\/span\u003e\u003cspan class='jdgm-star jdgm--off'\u003e\u003c\/span\u003e\u003cspan class='jdgm-star jdgm--off'\u003e\u003c\/span\u003e \u003c\/div\u003e \u003cdiv class='jdgm-rev-widg__summary-text'\u003eBe the first to write a review\u003c\/div\u003e \u003c\/div\u003e \u003ca style='display: none' href='#' class='jdgm-write-rev-link' role='button'\u003eWrite a review\u003c\/a\u003e \u003cdiv class='jdgm-histogram jdgm-temp-hidden'\u003e \u003cdiv class='jdgm-histogram__row' data-rating='5' data-frequency='0' data-percentage='0'\u003e \u003cdiv class='jdgm-histogram__star' role='button' aria-label=\"0% (0) reviews with 5 star rating\" tabindex='0' \u003e\u003cspan class='jdgm-star jdgm--on'\u003e\u003c\/span\u003e\u003cspan class='jdgm-star jdgm--on'\u003e\u003c\/span\u003e\u003cspan class='jdgm-star jdgm--on'\u003e\u003c\/span\u003e\u003cspan class='jdgm-star jdgm--on'\u003e\u003c\/span\u003e\u003cspan class='jdgm-star jdgm--on'\u003e\u003c\/span\u003e\u003c\/div\u003e \u003cdiv class='jdgm-histogram__bar'\u003e \u003cdiv class='jdgm-histogram__bar-content' style='width: 0%;'\u003e \u003c\/div\u003e \u003c\/div\u003e \u003cdiv class='jdgm-histogram__percentage'\u003e0%\u003c\/div\u003e \u003cdiv class='jdgm-histogram__frequency'\u003e(0)\u003c\/div\u003e \u003c\/div\u003e \u003cdiv class='jdgm-histogram__row' data-rating='4' data-frequency='0' data-percentage='0'\u003e \u003cdiv class='jdgm-histogram__star' role='button' aria-label=\"0% (0) reviews with 4 star rating\" tabindex='0' \u003e\u003cspan class='jdgm-star jdgm--on'\u003e\u003c\/span\u003e\u003cspan class='jdgm-star jdgm--on'\u003e\u003c\/span\u003e\u003cspan class='jdgm-star jdgm--on'\u003e\u003c\/span\u003e\u003cspan class='jdgm-star jdgm--on'\u003e\u003c\/span\u003e\u003cspan class='jdgm-star jdgm--off'\u003e\u003c\/span\u003e\u003c\/div\u003e \u003cdiv class='jdgm-histogram__bar'\u003e \u003cdiv class='jdgm-histogram__bar-content' style='width: 0%;'\u003e \u003c\/div\u003e \u003c\/div\u003e \u003cdiv class='jdgm-histogram__percentage'\u003e0%\u003c\/div\u003e \u003cdiv class='jdgm-histogram__frequency'\u003e(0)\u003c\/div\u003e \u003c\/div\u003e \u003cdiv class='jdgm-histogram__row' data-rating='3' data-frequency='0' data-percentage='0'\u003e \u003cdiv class='jdgm-histogram__star' role='button' aria-label=\"0% (0) reviews with 3 star rating\" tabindex='0' \u003e\u003cspan class='jdgm-star jdgm--on'\u003e\u003c\/span\u003e\u003cspan class='jdgm-star jdgm--on'\u003e\u003c\/span\u003e\u003cspan class='jdgm-star jdgm--on'\u003e\u003c\/span\u003e\u003cspan class='jdgm-star jdgm--off'\u003e\u003c\/span\u003e\u003cspan class='jdgm-star jdgm--off'\u003e\u003c\/span\u003e\u003c\/div\u003e \u003cdiv class='jdgm-histogram__bar'\u003e \u003cdiv class='jdgm-histogram__bar-content' style='width: 0%;'\u003e \u003c\/div\u003e \u003c\/div\u003e \u003cdiv class='jdgm-histogram__percentage'\u003e0%\u003c\/div\u003e \u003cdiv class='jdgm-histogram__frequency'\u003e(0)\u003c\/div\u003e \u003c\/div\u003e \u003cdiv class='jdgm-histogram__row' data-rating='2' data-frequency='0' data-percentage='0'\u003e \u003cdiv class='jdgm-histogram__star' role='button' aria-label=\"0% (0) reviews with 2 star rating\" tabindex='0' \u003e\u003cspan class='jdgm-star jdgm--on'\u003e\u003c\/span\u003e\u003cspan class='jdgm-star jdgm--on'\u003e\u003c\/span\u003e\u003cspan class='jdgm-star jdgm--off'\u003e\u003c\/span\u003e\u003cspan class='jdgm-star jdgm--off'\u003e\u003c\/span\u003e\u003cspan class='jdgm-star jdgm--off'\u003e\u003c\/span\u003e\u003c\/div\u003e \u003cdiv class='jdgm-histogram__bar'\u003e \u003cdiv class='jdgm-histogram__bar-content' style='width: 0%;'\u003e \u003c\/div\u003e \u003c\/div\u003e \u003cdiv class='jdgm-histogram__percentage'\u003e0%\u003c\/div\u003e \u003cdiv class='jdgm-histogram__frequency'\u003e(0)\u003c\/div\u003e \u003c\/div\u003e \u003cdiv class='jdgm-histogram__row' data-rating='1' data-frequency='0' data-percentage='0'\u003e \u003cdiv class='jdgm-histogram__star' role='button' aria-label=\"0% (0) reviews with 1 star rating\" tabindex='0' \u003e\u003cspan class='jdgm-star jdgm--on'\u003e\u003c\/span\u003e\u003cspan class='jdgm-star jdgm--off'\u003e\u003c\/span\u003e\u003cspan class='jdgm-star jdgm--off'\u003e\u003c\/span\u003e\u003cspan class='jdgm-star jdgm--off'\u003e\u003c\/span\u003e\u003cspan class='jdgm-star jdgm--off'\u003e\u003c\/span\u003e\u003c\/div\u003e \u003cdiv class='jdgm-histogram__bar'\u003e \u003cdiv class='jdgm-histogram__bar-content' style='width: 0%;'\u003e \u003c\/div\u003e \u003c\/div\u003e \u003cdiv class='jdgm-histogram__percentage'\u003e0%\u003c\/div\u003e \u003cdiv class='jdgm-histogram__frequency'\u003e(0)\u003c\/div\u003e \u003c\/div\u003e \u003cdiv class='jdgm-histogram__row jdgm-histogram__clear-filter' data-rating=null tabindex='0'\u003e\u003c\/div\u003e \u003c\/div\u003e \u003cdiv class='jdgm-rev-widg__sort-wrapper'\u003e\u003c\/div\u003e \u003c\/div\u003e \u003cdiv class='jdgm-rev-widg__body'\u003e \u003cdiv class='jdgm-rev-widg__reviews'\u003e\u003c\/div\u003e \u003cdiv class='jdgm-paginate' data-per-page='10' data-url='https:\/\/api.judge.me\/reviews\/reviews_for_widget' style=\"display: none;\"\u003e\u003c\/div\u003e \u003c\/div\u003e \u003cdiv class='jdgm-rev-widg__paginate-spinner-wrapper'\u003e \u003cdiv class='jdgm-spinner'\u003e\u003c\/div\u003e \u003c\/div\u003e \u003c\/div\u003e"},"collections":[{"id":281356533949,"handle":"baby-shower-gifts","title":"Baby Shower Gifts - Mum","updated_at":"2026-06-12T19:10:25+08:00","body_html":"\u003cp\u003eLooking for a unique baby shower gift? Or an all-in-one bundle pack to suit all your needs? We've got just the thing!\u003c\/p\u003e","published_at":"2021-12-06T13:43:56+08:00","sort_order":"best-selling","template_suffix":"baby-shower-gifts","disjunctive":true,"rules":[{"column":"tag","relation":"equals","condition":"Baby Shower Gifts - Mum"},{"column":"tag","relation":"equals","condition":"Gift Card"}],"published_scope":"global","image":{"created_at":"2024-05-06T11:59:28+08:00","alt":"Baby Shower Gifts - The Birth Store","width":1200,"height":1800,"src":"\/\/www.thebirthstore.com.au\/cdn\/shop\/collections\/baby-shower-gifts-401770.jpg?v=1761791272"}},{"id":281712427197,"handle":"breastfeeding","title":"Breastfeeding","updated_at":"2026-06-12T19:10:26+08:00","body_html":"","published_at":"2021-12-20T14:19:33+08:00","sort_order":"best-selling","template_suffix":"breastfeeding-collection","disjunctive":false,"rules":[{"column":"tag","relation":"equals","condition":"Breastfeeding"}],"published_scope":"global","image":{"created_at":"2024-05-06T11:59:34+08:00","alt":"Breastfeeding - The Birth Store","width":620,"height":635,"src":"\/\/www.thebirthstore.com.au\/cdn\/shop\/collections\/breastfeeding-793872.jpg?v=1714967974"}},{"id":261657460925,"handle":"buy","title":"Buy","updated_at":"2026-06-12T19:10:26+08:00","body_html":"\u003cp\u003eBrowse all of our pregnancy, labour \u0026amp; birth, postpartum and baby essentials here.\u003cbr\u003e\u003c\/p\u003e\n\u003cp\u003e\u003cspan\u003eYou can even buy now and pay later with Afterpay!\u003c\/span\u003e\u003c\/p\u003e","published_at":"2021-03-10T12:05:31+08:00","sort_order":"best-selling","template_suffix":"shop-all-collection","disjunctive":false,"rules":[{"column":"title","relation":"not_contains","condition":"Hire"}],"published_scope":"global","image":{"created_at":"2024-05-06T11:59:42+08:00","alt":"Buy - The Birth Store","width":2048,"height":2048,"src":"\/\/www.thebirthstore.com.au\/cdn\/shop\/collections\/buy-964856.jpg?v=1714967982"}},{"id":326523846845,"handle":"pregnancy-health-1","updated_at":"2026-06-12T19:10:26+08:00","published_at":"2025-10-30T10:44:54+08:00","sort_order":"best-selling","template_suffix":"","published_scope":"global","title":"Pregnancy Health","body_html":"","image":{"created_at":"2025-11-20T21:33:56+08:00","alt":"Pregnancy Health - The Birth Store","width":522,"height":525,"src":"\/\/www.thebirthstore.com.au\/cdn\/shop\/collections\/pregnancy-health-1617860.jpg?v=1763645636"}},{"id":291456483517,"handle":"shop-all","title":"Shop All - Mum","updated_at":"2026-06-12T19:10:26+08:00","body_html":"","published_at":"2022-12-23T22:04:39+08:00","sort_order":"best-selling","template_suffix":"shop-all-collection","disjunctive":false,"rules":[{"column":"variant_price","relation":"greater_than","condition":"1"},{"column":"title","relation":"not_contains","condition":"Batteries"},{"column":"tag","relation":"equals","condition":"Mum"}],"published_scope":"global","image":{"created_at":"2024-05-06T12:00:54+08:00","alt":"Shop All - The Birth Store","width":1365,"height":2048,"src":"\/\/www.thebirthstore.com.au\/cdn\/shop\/collections\/shop-all-693176.jpg?v=1714968055"}}]}
{"item":{"id":8184397168829,"title":"Post Birth Vitality","handle":"motherhood-glow-collagen-copy","description":"\u003ch3\u003ePost Birth Vitality is the postpartum care every new mum needs.\u003c\/h3\u003e\n\u003cp\u003eA premium blend of\u003cspan\u003e \u003c\/span\u003e\u003cspan\u003eTraditional Chinese Medicine herbs, \u003c\/span\u003ebioactive wholefood vitamins + minerals and superfoods to nourish and support new mums in the first 6+ months post birth with:\u003c\/p\u003e\n\u003cul\u003e\n\u003cli\u003epostpartum recovery \u003c\/li\u003e\n\u003cli\u003ehormone regulation\u003c\/li\u003e\n\u003cli\u003eenergy \u0026amp; vitality\u003c\/li\u003e\n\u003cli\u003emood \u0026amp; mental performance\u003c\/li\u003e\n\u003cli\u003ea healthy milk supply\u003c\/li\u003e\n\u003cli\u003enutrients you need\u003c\/li\u003e\n\u003c\/ul\u003e\n\u003cp\u003e\u003cspan\u003eBased on the Traditional Chinese Medicine concept of The Golden Month to nourish and care for mums postpartum, \u003c\/span\u003e\u003cstrong\u003ePost Birth Vitality\u003c\/strong\u003e\u003cspan\u003e uses Traditional Chinese Medicine herbs \u003c\/span\u003e\u003cspan\u003eto replenish Qi (vital energy), blood and calm the mind plus \u003c\/span\u003e\u003cspan\u003ewholefood vitamins, minerals and superfoods to help give new mums the postpartum support they need. \u003c\/span\u003e\u003c\/p\u003e\n\u003cdiv class=\"product-page--description\"\u003e\n\u003cdiv class=\"rte-content\" itemprop=\"description\"\u003e\n\u003cp\u003eGolden chai latte flavour. Nourishing and warming in your favourite milk. \u003c\/p\u003e\n\u003cp\u003e*\u003cspan\u003e \u003c\/span\u003e\u003ci\u003e\u003cstrong\u003eThis product is not recommended for use during pregnancy. \u003c\/strong\u003e\u003c\/i\u003e\u003c\/p\u003e\n\u003c\/div\u003e\n\u003c\/div\u003e","published_at":"2026-01-14T09:43:24+08:00","created_at":"2026-01-12T10:38:43+08:00","vendor":"HQ Health","type":"","tags":["Baby Shower Gifts - Mum","Breastfeeding","Mum","Post-Partum"],"price":6995,"price_min":6995,"price_max":6995,"available":true,"price_varies":false,"compare_at_price":null,"compare_at_price_min":0,"compare_at_price_max":0,"compare_at_price_varies":false,"variants":[{"id":46291038339261,"title":"Default Title","option1":"Default Title","option2":null,"option3":null,"sku":null,"requires_shipping":true,"taxable":false,"featured_image":null,"available":true,"name":"Post Birth Vitality","public_title":null,"options":["Default Title"],"price":6995,"weight":175,"compare_at_price":null,"inventory_management":"shopify","barcode":"38339261","requires_selling_plan":false,"selling_plan_allocations":[],"quantity_rule":{"min":1,"max":null,"increment":1}}],"images":["\/\/www.thebirthstore.com.au\/cdn\/shop\/files\/post-birth-vitality-9351931.webp?v=1768368779","\/\/www.thebirthstore.com.au\/cdn\/shop\/files\/post-birth-vitality-9037545.webp?v=1768368780","\/\/www.thebirthstore.com.au\/cdn\/shop\/files\/post-birth-vitality-7802617.webp?v=1768368780"],"featured_image":"\/\/www.thebirthstore.com.au\/cdn\/shop\/files\/post-birth-vitality-9351931.webp?v=1768368779","options":["Title"],"media":[{"alt":"Post Birth Vitality - The Birth Store - HQ Health","id":30493573578941,"position":1,"preview_image":{"aspect_ratio":1.0,"height":525,"width":525,"src":"\/\/www.thebirthstore.com.au\/cdn\/shop\/files\/post-birth-vitality-9351931.webp?v=1768368779"},"aspect_ratio":1.0,"height":525,"media_type":"image","src":"\/\/www.thebirthstore.com.au\/cdn\/shop\/files\/post-birth-vitality-9351931.webp?v=1768368779","width":525},{"alt":"Post Birth Vitality - The Birth Store - HQ Health","id":30493512335549,"position":2,"preview_image":{"aspect_ratio":1.429,"height":525,"width":750,"src":"\/\/www.thebirthstore.com.au\/cdn\/shop\/files\/post-birth-vitality-9037545.webp?v=1768368780"},"aspect_ratio":1.429,"height":525,"media_type":"image","src":"\/\/www.thebirthstore.com.au\/cdn\/shop\/files\/post-birth-vitality-9037545.webp?v=1768368780","width":750},{"alt":"Post Birth Vitality - The Birth Store - HQ Health","id":30493521969341,"position":3,"preview_image":{"aspect_ratio":1.429,"height":525,"width":750,"src":"\/\/www.thebirthstore.com.au\/cdn\/shop\/files\/post-birth-vitality-7802617.webp?v=1768368780"},"aspect_ratio":1.429,"height":525,"media_type":"image","src":"\/\/www.thebirthstore.com.au\/cdn\/shop\/files\/post-birth-vitality-7802617.webp?v=1768368780","width":750}],"requires_selling_plan":false,"selling_plan_groups":[],"content":"\u003ch3\u003ePost Birth Vitality is the postpartum care every new mum needs.\u003c\/h3\u003e\n\u003cp\u003eA premium blend of\u003cspan\u003e \u003c\/span\u003e\u003cspan\u003eTraditional Chinese Medicine herbs, \u003c\/span\u003ebioactive wholefood vitamins + minerals and superfoods to nourish and support new mums in the first 6+ months post birth with:\u003c\/p\u003e\n\u003cul\u003e\n\u003cli\u003epostpartum recovery \u003c\/li\u003e\n\u003cli\u003ehormone regulation\u003c\/li\u003e\n\u003cli\u003eenergy \u0026amp; vitality\u003c\/li\u003e\n\u003cli\u003emood \u0026amp; mental performance\u003c\/li\u003e\n\u003cli\u003ea healthy milk supply\u003c\/li\u003e\n\u003cli\u003enutrients you need\u003c\/li\u003e\n\u003c\/ul\u003e\n\u003cp\u003e\u003cspan\u003eBased on the Traditional Chinese Medicine concept of The Golden Month to nourish and care for mums postpartum, \u003c\/span\u003e\u003cstrong\u003ePost Birth Vitality\u003c\/strong\u003e\u003cspan\u003e uses Traditional Chinese Medicine herbs \u003c\/span\u003e\u003cspan\u003eto replenish Qi (vital energy), blood and calm the mind plus \u003c\/span\u003e\u003cspan\u003ewholefood vitamins, minerals and superfoods to help give new mums the postpartum support they need. \u003c\/span\u003e\u003c\/p\u003e\n\u003cdiv class=\"product-page--description\"\u003e\n\u003cdiv class=\"rte-content\" itemprop=\"description\"\u003e\n\u003cp\u003eGolden chai latte flavour. Nourishing and warming in your favourite milk. \u003c\/p\u003e\n\u003cp\u003e*\u003cspan\u003e \u003c\/span\u003e\u003ci\u003e\u003cstrong\u003eThis product is not recommended for use during pregnancy. \u003c\/strong\u003e\u003c\/i\u003e\u003c\/p\u003e\n\u003c\/div\u003e\n\u003c\/div\u003e"},"options":[{"name":"Title","position":1,"values":["Default Title"]}],"custom_metafields":{},"metafields":{"badge":"\u003cdiv style='display:none' class='jdgm-prev-badge' data-average-rating='0.00' data-number-of-reviews='0' data-number-of-questions='0'\u003e \u003cspan class='jdgm-prev-badge__stars' data-score='0.00' tabindex='0' aria-label='0.00 stars' role='button'\u003e \u003cspan class='jdgm-star jdgm--off'\u003e\u003c\/span\u003e\u003cspan class='jdgm-star jdgm--off'\u003e\u003c\/span\u003e\u003cspan class='jdgm-star jdgm--off'\u003e\u003c\/span\u003e\u003cspan class='jdgm-star jdgm--off'\u003e\u003c\/span\u003e\u003cspan class='jdgm-star jdgm--off'\u003e\u003c\/span\u003e \u003c\/span\u003e \u003cspan class='jdgm-prev-badge__text'\u003e No reviews \u003c\/span\u003e \u003c\/div\u003e","widget":"\u003cdiv class='jdgm-rev-widg' data-updated-at='2026-01-14T01:43:26Z' data-average-rating='0.00' data-number-of-reviews='0' data-number-of-questions='0' data-image-url='https:\/\/cdn.shopify.com\/s\/files\/1\/0527\/3393\/5805\/files\/IMG_7067_1024x1024_1d284644-6f3b-4134-a743-0581181dbacf.webp?v=1768354987'\u003e \u003cstyle class='jdgm-temp-hiding-style'\u003e.jdgm-rev-widg{ display: none }\u003c\/style\u003e \u003cdiv class='jdgm-rev-widg__header'\u003e \u003ch2 class='jdgm-rev-widg__title'\u003eCustomer Reviews\u003c\/h2\u003e \u003cdiv class='jdgm-rev-widg__summary'\u003e \u003cdiv class='jdgm-rev-widg__summary-stars' aria-label='Average rating is 0.00 stars' role='img'\u003e \u003cspan class='jdgm-star jdgm--off'\u003e\u003c\/span\u003e\u003cspan class='jdgm-star jdgm--off'\u003e\u003c\/span\u003e\u003cspan class='jdgm-star jdgm--off'\u003e\u003c\/span\u003e\u003cspan class='jdgm-star jdgm--off'\u003e\u003c\/span\u003e\u003cspan class='jdgm-star jdgm--off'\u003e\u003c\/span\u003e \u003c\/div\u003e \u003cdiv class='jdgm-rev-widg__summary-text'\u003eBe the first to write a review\u003c\/div\u003e \u003c\/div\u003e \u003ca style='display: none' href='#' class='jdgm-write-rev-link' role='button'\u003eWrite a review\u003c\/a\u003e \u003cdiv class='jdgm-histogram jdgm-temp-hidden'\u003e \u003cdiv class='jdgm-histogram__row' data-rating='5' data-frequency='0' data-percentage='0'\u003e \u003cdiv class='jdgm-histogram__star' role='button' aria-label=\"0% (0) reviews with 5 star rating\" tabindex='0' \u003e\u003cspan class='jdgm-star jdgm--on'\u003e\u003c\/span\u003e\u003cspan class='jdgm-star jdgm--on'\u003e\u003c\/span\u003e\u003cspan class='jdgm-star jdgm--on'\u003e\u003c\/span\u003e\u003cspan class='jdgm-star jdgm--on'\u003e\u003c\/span\u003e\u003cspan class='jdgm-star jdgm--on'\u003e\u003c\/span\u003e\u003c\/div\u003e \u003cdiv class='jdgm-histogram__bar'\u003e \u003cdiv class='jdgm-histogram__bar-content' style='width: 0%;'\u003e \u003c\/div\u003e \u003c\/div\u003e \u003cdiv class='jdgm-histogram__percentage'\u003e0%\u003c\/div\u003e \u003cdiv class='jdgm-histogram__frequency'\u003e(0)\u003c\/div\u003e \u003c\/div\u003e \u003cdiv class='jdgm-histogram__row' data-rating='4' data-frequency='0' data-percentage='0'\u003e \u003cdiv class='jdgm-histogram__star' role='button' aria-label=\"0% (0) reviews with 4 star rating\" tabindex='0' \u003e\u003cspan class='jdgm-star jdgm--on'\u003e\u003c\/span\u003e\u003cspan class='jdgm-star jdgm--on'\u003e\u003c\/span\u003e\u003cspan class='jdgm-star jdgm--on'\u003e\u003c\/span\u003e\u003cspan class='jdgm-star jdgm--on'\u003e\u003c\/span\u003e\u003cspan class='jdgm-star jdgm--off'\u003e\u003c\/span\u003e\u003c\/div\u003e \u003cdiv class='jdgm-histogram__bar'\u003e \u003cdiv class='jdgm-histogram__bar-content' style='width: 0%;'\u003e \u003c\/div\u003e \u003c\/div\u003e \u003cdiv class='jdgm-histogram__percentage'\u003e0%\u003c\/div\u003e \u003cdiv class='jdgm-histogram__frequency'\u003e(0)\u003c\/div\u003e \u003c\/div\u003e \u003cdiv class='jdgm-histogram__row' data-rating='3' data-frequency='0' data-percentage='0'\u003e \u003cdiv class='jdgm-histogram__star' role='button' aria-label=\"0% (0) reviews with 3 star rating\" tabindex='0' \u003e\u003cspan class='jdgm-star jdgm--on'\u003e\u003c\/span\u003e\u003cspan class='jdgm-star jdgm--on'\u003e\u003c\/span\u003e\u003cspan class='jdgm-star jdgm--on'\u003e\u003c\/span\u003e\u003cspan class='jdgm-star jdgm--off'\u003e\u003c\/span\u003e\u003cspan class='jdgm-star jdgm--off'\u003e\u003c\/span\u003e\u003c\/div\u003e \u003cdiv class='jdgm-histogram__bar'\u003e \u003cdiv class='jdgm-histogram__bar-content' style='width: 0%;'\u003e \u003c\/div\u003e \u003c\/div\u003e \u003cdiv class='jdgm-histogram__percentage'\u003e0%\u003c\/div\u003e \u003cdiv class='jdgm-histogram__frequency'\u003e(0)\u003c\/div\u003e \u003c\/div\u003e \u003cdiv class='jdgm-histogram__row' data-rating='2' data-frequency='0' data-percentage='0'\u003e \u003cdiv class='jdgm-histogram__star' role='button' aria-label=\"0% (0) reviews with 2 star rating\" tabindex='0' \u003e\u003cspan class='jdgm-star jdgm--on'\u003e\u003c\/span\u003e\u003cspan class='jdgm-star jdgm--on'\u003e\u003c\/span\u003e\u003cspan class='jdgm-star jdgm--off'\u003e\u003c\/span\u003e\u003cspan class='jdgm-star jdgm--off'\u003e\u003c\/span\u003e\u003cspan class='jdgm-star jdgm--off'\u003e\u003c\/span\u003e\u003c\/div\u003e \u003cdiv class='jdgm-histogram__bar'\u003e \u003cdiv class='jdgm-histogram__bar-content' style='width: 0%;'\u003e \u003c\/div\u003e \u003c\/div\u003e \u003cdiv class='jdgm-histogram__percentage'\u003e0%\u003c\/div\u003e \u003cdiv class='jdgm-histogram__frequency'\u003e(0)\u003c\/div\u003e \u003c\/div\u003e \u003cdiv class='jdgm-histogram__row' data-rating='1' data-frequency='0' data-percentage='0'\u003e \u003cdiv class='jdgm-histogram__star' role='button' aria-label=\"0% (0) reviews with 1 star rating\" tabindex='0' \u003e\u003cspan class='jdgm-star jdgm--on'\u003e\u003c\/span\u003e\u003cspan class='jdgm-star jdgm--off'\u003e\u003c\/span\u003e\u003cspan class='jdgm-star jdgm--off'\u003e\u003c\/span\u003e\u003cspan class='jdgm-star jdgm--off'\u003e\u003c\/span\u003e\u003cspan class='jdgm-star jdgm--off'\u003e\u003c\/span\u003e\u003c\/div\u003e \u003cdiv class='jdgm-histogram__bar'\u003e \u003cdiv class='jdgm-histogram__bar-content' style='width: 0%;'\u003e \u003c\/div\u003e \u003c\/div\u003e \u003cdiv class='jdgm-histogram__percentage'\u003e0%\u003c\/div\u003e \u003cdiv class='jdgm-histogram__frequency'\u003e(0)\u003c\/div\u003e \u003c\/div\u003e \u003cdiv class='jdgm-histogram__row jdgm-histogram__clear-filter' data-rating=null tabindex='0'\u003e\u003c\/div\u003e \u003c\/div\u003e \u003cdiv class='jdgm-rev-widg__sort-wrapper'\u003e\u003c\/div\u003e \u003c\/div\u003e \u003cdiv class='jdgm-rev-widg__body'\u003e \u003cdiv class='jdgm-rev-widg__reviews'\u003e\u003c\/div\u003e \u003cdiv class='jdgm-paginate' data-per-page='10' data-url='https:\/\/api.judge.me\/reviews\/reviews_for_widget' style=\"display: none;\"\u003e\u003c\/div\u003e \u003c\/div\u003e \u003cdiv class='jdgm-rev-widg__paginate-spinner-wrapper'\u003e \u003cdiv class='jdgm-spinner'\u003e\u003c\/div\u003e \u003c\/div\u003e \u003c\/div\u003e"},"collections":[{"id":281356533949,"handle":"baby-shower-gifts","title":"Baby Shower Gifts - Mum","updated_at":"2026-06-12T19:10:25+08:00","body_html":"\u003cp\u003eLooking for a unique baby shower gift? Or an all-in-one bundle pack to suit all your needs? We've got just the thing!\u003c\/p\u003e","published_at":"2021-12-06T13:43:56+08:00","sort_order":"best-selling","template_suffix":"baby-shower-gifts","disjunctive":true,"rules":[{"column":"tag","relation":"equals","condition":"Baby Shower Gifts - Mum"},{"column":"tag","relation":"equals","condition":"Gift Card"}],"published_scope":"global","image":{"created_at":"2024-05-06T11:59:28+08:00","alt":"Baby Shower Gifts - The Birth Store","width":1200,"height":1800,"src":"\/\/www.thebirthstore.com.au\/cdn\/shop\/collections\/baby-shower-gifts-401770.jpg?v=1761791272"}},{"id":281712427197,"handle":"breastfeeding","title":"Breastfeeding","updated_at":"2026-06-12T19:10:26+08:00","body_html":"","published_at":"2021-12-20T14:19:33+08:00","sort_order":"best-selling","template_suffix":"breastfeeding-collection","disjunctive":false,"rules":[{"column":"tag","relation":"equals","condition":"Breastfeeding"}],"published_scope":"global","image":{"created_at":"2024-05-06T11:59:34+08:00","alt":"Breastfeeding - The Birth Store","width":620,"height":635,"src":"\/\/www.thebirthstore.com.au\/cdn\/shop\/collections\/breastfeeding-793872.jpg?v=1714967974"}},{"id":261657460925,"handle":"buy","title":"Buy","updated_at":"2026-06-12T19:10:26+08:00","body_html":"\u003cp\u003eBrowse all of our pregnancy, labour \u0026amp; birth, postpartum and baby essentials here.\u003cbr\u003e\u003c\/p\u003e\n\u003cp\u003e\u003cspan\u003eYou can even buy now and pay later with Afterpay!\u003c\/span\u003e\u003c\/p\u003e","published_at":"2021-03-10T12:05:31+08:00","sort_order":"best-selling","template_suffix":"shop-all-collection","disjunctive":false,"rules":[{"column":"title","relation":"not_contains","condition":"Hire"}],"published_scope":"global","image":{"created_at":"2024-05-06T11:59:42+08:00","alt":"Buy - The Birth Store","width":2048,"height":2048,"src":"\/\/www.thebirthstore.com.au\/cdn\/shop\/collections\/buy-964856.jpg?v=1714967982"}},{"id":261658083517,"handle":"post-partum","title":"Postpartum","updated_at":"2026-06-12T19:10:26+08:00","body_html":"\u003cp\u003eShop your postpartum and hospital bag essentials below. Looking for something we don't currently stock? Please reach out and let us know.\u003cbr\u003e\u003c\/p\u003e\n\u003cp\u003e\u003cspan\u003eYou can even buy now and pay later with Afterpay!\u003c\/span\u003e\u003c\/p\u003e","published_at":"2021-03-10T12:33:47+08:00","sort_order":"best-selling","template_suffix":"postpartum-collection","disjunctive":false,"rules":[{"column":"tag","relation":"equals","condition":"Post-Partum"}],"published_scope":"global","image":{"created_at":"2024-05-06T12:00:36+08:00","alt":"Postpartum - The Birth Store","width":611,"height":702,"src":"\/\/www.thebirthstore.com.au\/cdn\/shop\/collections\/postpartum-150119.jpg?v=1714968037"}},{"id":326523846845,"handle":"pregnancy-health-1","updated_at":"2026-06-12T19:10:26+08:00","published_at":"2025-10-30T10:44:54+08:00","sort_order":"best-selling","template_suffix":"","published_scope":"global","title":"Pregnancy Health","body_html":"","image":{"created_at":"2025-11-20T21:33:56+08:00","alt":"Pregnancy Health - The Birth Store","width":522,"height":525,"src":"\/\/www.thebirthstore.com.au\/cdn\/shop\/collections\/pregnancy-health-1617860.jpg?v=1763645636"}},{"id":291456483517,"handle":"shop-all","title":"Shop All - Mum","updated_at":"2026-06-12T19:10:26+08:00","body_html":"","published_at":"2022-12-23T22:04:39+08:00","sort_order":"best-selling","template_suffix":"shop-all-collection","disjunctive":false,"rules":[{"column":"variant_price","relation":"greater_than","condition":"1"},{"column":"title","relation":"not_contains","condition":"Batteries"},{"column":"tag","relation":"equals","condition":"Mum"}],"published_scope":"global","image":{"created_at":"2024-05-06T12:00:54+08:00","alt":"Shop All - The Birth Store","width":1365,"height":2048,"src":"\/\/www.thebirthstore.com.au\/cdn\/shop\/collections\/shop-all-693176.jpg?v=1714968055"}}]}
{"item":{"id":8184388419773,"title":"Motherhood Glow Collagen","handle":"pregnancy-vitality-copy","description":"\u003cp\u003e\u003cstrong\u003eMotherhood Glow is a ‘supercharged’ premium collagen powder to support healthy hair, skin + nails and help meet the increased nutritional demands of pregnancy, postpartum and breastfeeding.\u003c\/strong\u003e\u003c\/p\u003e\n\u003cp\u003eMany women don't meet their protein needs during pregnancy and postpartum. Postpartum, collagen and protein are important to support tissue building and repair, wound healing, postpartum hair loss and healthy glowing skin. Breastfeeding mamas also need extra protein daily which helps promote a healthy milk supply. \u003c\/p\u003e\n\u003cp\u003eDuring pregnancy protein needs increase from 46g up to 100g a day to support your baby's development and growth of your breast and uterine tissue. Collagen is also needed for your joints, pelvic floor tissue and skin elasticity. \u003c\/p\u003e\n\u003cp\u003eCollagen and protein is also important postpartum to help tissue building and repair for postpartum healing as well as supporting postpartum hair loss and healthy glowing skin. \u003c\/p\u003e\n\u003cp\u003eMotherhood Glow is our modern ‘supercharged’ version of traditional bone broth formulated specifically for pregnancy, postpartum and breastfeeding - with bioactive hydrolysed collagen peptides to help you get the collagen and protein you need it has 12g per serve. Plus 14 + organic wholefood vitamins and minerals to support healthy hair, skin, nails, gut healing, improve skin elasticity and hydration. \u003cspan\u003e With\u003c\/span\u003e\u003cspan\u003e \u003c\/span\u003eTraditional Chinese medicine superfood shiitake mushroom to nourish Qi (Vitality) and skin. Motherhood Glow is full of amino acids such as glycine, glutamine, proline which are essential for tissue healing, gut health and reducing inflammation.\u003c\/p\u003e\n\u003cp\u003eOur hydrolysed collagen is halal and ethically sourced from Australian grass-fed, pasture-raised, hormone-free bovines. Combining the wisdom of Traditional Chinese medicine + Evidence Based Nutrition our Motherhood Glow collagen supports health and wellness during pregnancy, postpartum, breastfeeding and beyond. Use Motherhood Glow to support all stages of your motherhood journey.\u003c\/p\u003e\n\u003cp\u003eVanilla Flavour.\u003c\/p\u003e\n\u003cul\u003e\n\u003cli\u003e\u003cstrong\u003e100% natural ingredients - no additives, no synthetics, no hidden nasties\u003c\/strong\u003e\u003c\/li\u003e\n\u003cli\u003e\u003cstrong\u003eGluten free, dairy free, soy free, no added sugar, non-GMO\u003c\/strong\u003e\u003c\/li\u003e\n\u003cli\u003e\u003cstrong\u003eMicrobiology and heavy metal tested. Made in Australia.\u003c\/strong\u003e\u003c\/li\u003e\n\u003c\/ul\u003e","published_at":"2026-01-14T09:42:01+08:00","created_at":"2026-01-12T10:28:58+08:00","vendor":"HQ Health","type":"","tags":["Baby Shower Gifts - Mum","Breastfeeding","Mum","Pregnancy","Pregnancy Health"],"price":6495,"price_min":6495,"price_max":6495,"available":true,"price_varies":false,"compare_at_price":null,"compare_at_price_min":0,"compare_at_price_max":0,"compare_at_price_varies":false,"variants":[{"id":46291017629885,"title":"Default Title","option1":"Default Title","option2":null,"option3":null,"sku":null,"requires_shipping":true,"taxable":false,"featured_image":null,"available":true,"name":"Motherhood Glow Collagen","public_title":null,"options":["Default Title"],"price":6495,"weight":325,"compare_at_price":null,"inventory_management":"shopify","barcode":"17629885","requires_selling_plan":false,"selling_plan_allocations":[],"quantity_rule":{"min":1,"max":null,"increment":1}}],"images":["\/\/www.thebirthstore.com.au\/cdn\/shop\/files\/motherhood-glow-collagen-3616991.webp?v=1768368780","\/\/www.thebirthstore.com.au\/cdn\/shop\/files\/motherhood-glow-collagen-8005893.webp?v=1768368781","\/\/www.thebirthstore.com.au\/cdn\/shop\/files\/motherhood-glow-collagen-4375516.webp?v=1768368781"],"featured_image":"\/\/www.thebirthstore.com.au\/cdn\/shop\/files\/motherhood-glow-collagen-3616991.webp?v=1768368780","options":["Title"],"media":[{"alt":"Motherhood Glow Collagen - The Birth Store - HQ Health","id":30493390766269,"position":1,"preview_image":{"aspect_ratio":1.0,"height":525,"width":525,"src":"\/\/www.thebirthstore.com.au\/cdn\/shop\/files\/motherhood-glow-collagen-3616991.webp?v=1768368780"},"aspect_ratio":1.0,"height":525,"media_type":"image","src":"\/\/www.thebirthstore.com.au\/cdn\/shop\/files\/motherhood-glow-collagen-3616991.webp?v=1768368780","width":525},{"alt":"Motherhood Glow Collagen - The Birth Store - HQ Health","id":30493395288253,"position":2,"preview_image":{"aspect_ratio":1.429,"height":525,"width":750,"src":"\/\/www.thebirthstore.com.au\/cdn\/shop\/files\/motherhood-glow-collagen-8005893.webp?v=1768368781"},"aspect_ratio":1.429,"height":525,"media_type":"image","src":"\/\/www.thebirthstore.com.au\/cdn\/shop\/files\/motherhood-glow-collagen-8005893.webp?v=1768368781","width":750},{"alt":"Motherhood Glow Collagen - The Birth Store - HQ Health","id":30493390700733,"position":3,"preview_image":{"aspect_ratio":1.429,"height":525,"width":750,"src":"\/\/www.thebirthstore.com.au\/cdn\/shop\/files\/motherhood-glow-collagen-4375516.webp?v=1768368781"},"aspect_ratio":1.429,"height":525,"media_type":"image","src":"\/\/www.thebirthstore.com.au\/cdn\/shop\/files\/motherhood-glow-collagen-4375516.webp?v=1768368781","width":750}],"requires_selling_plan":false,"selling_plan_groups":[],"content":"\u003cp\u003e\u003cstrong\u003eMotherhood Glow is a ‘supercharged’ premium collagen powder to support healthy hair, skin + nails and help meet the increased nutritional demands of pregnancy, postpartum and breastfeeding.\u003c\/strong\u003e\u003c\/p\u003e\n\u003cp\u003eMany women don't meet their protein needs during pregnancy and postpartum. Postpartum, collagen and protein are important to support tissue building and repair, wound healing, postpartum hair loss and healthy glowing skin. Breastfeeding mamas also need extra protein daily which helps promote a healthy milk supply. \u003c\/p\u003e\n\u003cp\u003eDuring pregnancy protein needs increase from 46g up to 100g a day to support your baby's development and growth of your breast and uterine tissue. Collagen is also needed for your joints, pelvic floor tissue and skin elasticity. \u003c\/p\u003e\n\u003cp\u003eCollagen and protein is also important postpartum to help tissue building and repair for postpartum healing as well as supporting postpartum hair loss and healthy glowing skin. \u003c\/p\u003e\n\u003cp\u003eMotherhood Glow is our modern ‘supercharged’ version of traditional bone broth formulated specifically for pregnancy, postpartum and breastfeeding - with bioactive hydrolysed collagen peptides to help you get the collagen and protein you need it has 12g per serve. Plus 14 + organic wholefood vitamins and minerals to support healthy hair, skin, nails, gut healing, improve skin elasticity and hydration. \u003cspan\u003e With\u003c\/span\u003e\u003cspan\u003e \u003c\/span\u003eTraditional Chinese medicine superfood shiitake mushroom to nourish Qi (Vitality) and skin. Motherhood Glow is full of amino acids such as glycine, glutamine, proline which are essential for tissue healing, gut health and reducing inflammation.\u003c\/p\u003e\n\u003cp\u003eOur hydrolysed collagen is halal and ethically sourced from Australian grass-fed, pasture-raised, hormone-free bovines. Combining the wisdom of Traditional Chinese medicine + Evidence Based Nutrition our Motherhood Glow collagen supports health and wellness during pregnancy, postpartum, breastfeeding and beyond. Use Motherhood Glow to support all stages of your motherhood journey.\u003c\/p\u003e\n\u003cp\u003eVanilla Flavour.\u003c\/p\u003e\n\u003cul\u003e\n\u003cli\u003e\u003cstrong\u003e100% natural ingredients - no additives, no synthetics, no hidden nasties\u003c\/strong\u003e\u003c\/li\u003e\n\u003cli\u003e\u003cstrong\u003eGluten free, dairy free, soy free, no added sugar, non-GMO\u003c\/strong\u003e\u003c\/li\u003e\n\u003cli\u003e\u003cstrong\u003eMicrobiology and heavy metal tested. Made in Australia.\u003c\/strong\u003e\u003c\/li\u003e\n\u003c\/ul\u003e"},"options":[{"name":"Title","position":1,"values":["Default Title"]}],"custom_metafields":{},"metafields":{"badge":"\u003cdiv style='display:none' class='jdgm-prev-badge' data-average-rating='0.00' data-number-of-reviews='0' data-number-of-questions='0'\u003e \u003cspan class='jdgm-prev-badge__stars' data-score='0.00' tabindex='0' aria-label='0.00 stars' role='button'\u003e \u003cspan class='jdgm-star jdgm--off'\u003e\u003c\/span\u003e\u003cspan class='jdgm-star jdgm--off'\u003e\u003c\/span\u003e\u003cspan class='jdgm-star jdgm--off'\u003e\u003c\/span\u003e\u003cspan class='jdgm-star jdgm--off'\u003e\u003c\/span\u003e\u003cspan class='jdgm-star jdgm--off'\u003e\u003c\/span\u003e \u003c\/span\u003e \u003cspan class='jdgm-prev-badge__text'\u003e No reviews \u003c\/span\u003e \u003c\/div\u003e","widget":"\u003cdiv class='jdgm-rev-widg' data-updated-at='2026-01-14T01:42:03Z' data-average-rating='0.00' data-number-of-reviews='0' data-number-of-questions='0' data-image-url='https:\/\/cdn.shopify.com\/s\/files\/1\/0527\/3393\/5805\/files\/IMG_70732_1024x1024_944d3dae-81ae-46b4-95e2-81983a8e298d.webp?v=1768354911'\u003e \u003cstyle class='jdgm-temp-hiding-style'\u003e.jdgm-rev-widg{ display: none }\u003c\/style\u003e \u003cdiv class='jdgm-rev-widg__header'\u003e \u003ch2 class='jdgm-rev-widg__title'\u003eCustomer Reviews\u003c\/h2\u003e \u003cdiv class='jdgm-rev-widg__summary'\u003e \u003cdiv class='jdgm-rev-widg__summary-stars' aria-label='Average rating is 0.00 stars' role='img'\u003e \u003cspan class='jdgm-star jdgm--off'\u003e\u003c\/span\u003e\u003cspan class='jdgm-star jdgm--off'\u003e\u003c\/span\u003e\u003cspan class='jdgm-star jdgm--off'\u003e\u003c\/span\u003e\u003cspan class='jdgm-star jdgm--off'\u003e\u003c\/span\u003e\u003cspan class='jdgm-star jdgm--off'\u003e\u003c\/span\u003e \u003c\/div\u003e \u003cdiv class='jdgm-rev-widg__summary-text'\u003eBe the first to write a review\u003c\/div\u003e \u003c\/div\u003e \u003ca style='display: none' href='#' class='jdgm-write-rev-link' role='button'\u003eWrite a review\u003c\/a\u003e \u003cdiv class='jdgm-histogram jdgm-temp-hidden'\u003e \u003cdiv class='jdgm-histogram__row' data-rating='5' data-frequency='0' data-percentage='0'\u003e \u003cdiv class='jdgm-histogram__star' role='button' aria-label=\"0% (0) reviews with 5 star rating\" tabindex='0' \u003e\u003cspan class='jdgm-star jdgm--on'\u003e\u003c\/span\u003e\u003cspan class='jdgm-star jdgm--on'\u003e\u003c\/span\u003e\u003cspan class='jdgm-star jdgm--on'\u003e\u003c\/span\u003e\u003cspan class='jdgm-star jdgm--on'\u003e\u003c\/span\u003e\u003cspan class='jdgm-star jdgm--on'\u003e\u003c\/span\u003e\u003c\/div\u003e \u003cdiv class='jdgm-histogram__bar'\u003e \u003cdiv class='jdgm-histogram__bar-content' style='width: 0%;'\u003e \u003c\/div\u003e \u003c\/div\u003e \u003cdiv class='jdgm-histogram__percentage'\u003e0%\u003c\/div\u003e \u003cdiv class='jdgm-histogram__frequency'\u003e(0)\u003c\/div\u003e \u003c\/div\u003e \u003cdiv class='jdgm-histogram__row' data-rating='4' data-frequency='0' data-percentage='0'\u003e \u003cdiv class='jdgm-histogram__star' role='button' aria-label=\"0% (0) reviews with 4 star rating\" tabindex='0' \u003e\u003cspan class='jdgm-star jdgm--on'\u003e\u003c\/span\u003e\u003cspan class='jdgm-star jdgm--on'\u003e\u003c\/span\u003e\u003cspan class='jdgm-star jdgm--on'\u003e\u003c\/span\u003e\u003cspan class='jdgm-star jdgm--on'\u003e\u003c\/span\u003e\u003cspan class='jdgm-star jdgm--off'\u003e\u003c\/span\u003e\u003c\/div\u003e \u003cdiv class='jdgm-histogram__bar'\u003e \u003cdiv class='jdgm-histogram__bar-content' style='width: 0%;'\u003e \u003c\/div\u003e \u003c\/div\u003e \u003cdiv class='jdgm-histogram__percentage'\u003e0%\u003c\/div\u003e \u003cdiv class='jdgm-histogram__frequency'\u003e(0)\u003c\/div\u003e \u003c\/div\u003e \u003cdiv class='jdgm-histogram__row' data-rating='3' data-frequency='0' data-percentage='0'\u003e \u003cdiv class='jdgm-histogram__star' role='button' aria-label=\"0% (0) reviews with 3 star rating\" tabindex='0' \u003e\u003cspan class='jdgm-star jdgm--on'\u003e\u003c\/span\u003e\u003cspan class='jdgm-star jdgm--on'\u003e\u003c\/span\u003e\u003cspan class='jdgm-star jdgm--on'\u003e\u003c\/span\u003e\u003cspan class='jdgm-star jdgm--off'\u003e\u003c\/span\u003e\u003cspan class='jdgm-star jdgm--off'\u003e\u003c\/span\u003e\u003c\/div\u003e \u003cdiv class='jdgm-histogram__bar'\u003e \u003cdiv class='jdgm-histogram__bar-content' style='width: 0%;'\u003e \u003c\/div\u003e \u003c\/div\u003e \u003cdiv class='jdgm-histogram__percentage'\u003e0%\u003c\/div\u003e \u003cdiv class='jdgm-histogram__frequency'\u003e(0)\u003c\/div\u003e \u003c\/div\u003e \u003cdiv class='jdgm-histogram__row' data-rating='2' data-frequency='0' data-percentage='0'\u003e \u003cdiv class='jdgm-histogram__star' role='button' aria-label=\"0% (0) reviews with 2 star rating\" tabindex='0' \u003e\u003cspan class='jdgm-star jdgm--on'\u003e\u003c\/span\u003e\u003cspan class='jdgm-star jdgm--on'\u003e\u003c\/span\u003e\u003cspan class='jdgm-star jdgm--off'\u003e\u003c\/span\u003e\u003cspan class='jdgm-star jdgm--off'\u003e\u003c\/span\u003e\u003cspan class='jdgm-star jdgm--off'\u003e\u003c\/span\u003e\u003c\/div\u003e \u003cdiv class='jdgm-histogram__bar'\u003e \u003cdiv class='jdgm-histogram__bar-content' style='width: 0%;'\u003e \u003c\/div\u003e \u003c\/div\u003e \u003cdiv class='jdgm-histogram__percentage'\u003e0%\u003c\/div\u003e \u003cdiv class='jdgm-histogram__frequency'\u003e(0)\u003c\/div\u003e \u003c\/div\u003e \u003cdiv class='jdgm-histogram__row' data-rating='1' data-frequency='0' data-percentage='0'\u003e \u003cdiv class='jdgm-histogram__star' role='button' aria-label=\"0% (0) reviews with 1 star rating\" tabindex='0' \u003e\u003cspan class='jdgm-star jdgm--on'\u003e\u003c\/span\u003e\u003cspan class='jdgm-star jdgm--off'\u003e\u003c\/span\u003e\u003cspan class='jdgm-star jdgm--off'\u003e\u003c\/span\u003e\u003cspan class='jdgm-star jdgm--off'\u003e\u003c\/span\u003e\u003cspan class='jdgm-star jdgm--off'\u003e\u003c\/span\u003e\u003c\/div\u003e \u003cdiv class='jdgm-histogram__bar'\u003e \u003cdiv class='jdgm-histogram__bar-content' style='width: 0%;'\u003e \u003c\/div\u003e \u003c\/div\u003e \u003cdiv class='jdgm-histogram__percentage'\u003e0%\u003c\/div\u003e \u003cdiv class='jdgm-histogram__frequency'\u003e(0)\u003c\/div\u003e \u003c\/div\u003e \u003cdiv class='jdgm-histogram__row jdgm-histogram__clear-filter' data-rating=null tabindex='0'\u003e\u003c\/div\u003e \u003c\/div\u003e \u003cdiv class='jdgm-rev-widg__sort-wrapper'\u003e\u003c\/div\u003e \u003c\/div\u003e \u003cdiv class='jdgm-rev-widg__body'\u003e \u003cdiv class='jdgm-rev-widg__reviews'\u003e\u003c\/div\u003e \u003cdiv class='jdgm-paginate' data-per-page='10' data-url='https:\/\/api.judge.me\/reviews\/reviews_for_widget' style=\"display: none;\"\u003e\u003c\/div\u003e \u003c\/div\u003e \u003cdiv class='jdgm-rev-widg__paginate-spinner-wrapper'\u003e \u003cdiv class='jdgm-spinner'\u003e\u003c\/div\u003e \u003c\/div\u003e \u003c\/div\u003e"},"collections":[{"id":281356533949,"handle":"baby-shower-gifts","title":"Baby Shower Gifts - Mum","updated_at":"2026-06-12T19:10:25+08:00","body_html":"\u003cp\u003eLooking for a unique baby shower gift? Or an all-in-one bundle pack to suit all your needs? We've got just the thing!\u003c\/p\u003e","published_at":"2021-12-06T13:43:56+08:00","sort_order":"best-selling","template_suffix":"baby-shower-gifts","disjunctive":true,"rules":[{"column":"tag","relation":"equals","condition":"Baby Shower Gifts - Mum"},{"column":"tag","relation":"equals","condition":"Gift Card"}],"published_scope":"global","image":{"created_at":"2024-05-06T11:59:28+08:00","alt":"Baby Shower Gifts - The Birth Store","width":1200,"height":1800,"src":"\/\/www.thebirthstore.com.au\/cdn\/shop\/collections\/baby-shower-gifts-401770.jpg?v=1761791272"}},{"id":281712427197,"handle":"breastfeeding","title":"Breastfeeding","updated_at":"2026-06-12T19:10:26+08:00","body_html":"","published_at":"2021-12-20T14:19:33+08:00","sort_order":"best-selling","template_suffix":"breastfeeding-collection","disjunctive":false,"rules":[{"column":"tag","relation":"equals","condition":"Breastfeeding"}],"published_scope":"global","image":{"created_at":"2024-05-06T11:59:34+08:00","alt":"Breastfeeding - The Birth Store","width":620,"height":635,"src":"\/\/www.thebirthstore.com.au\/cdn\/shop\/collections\/breastfeeding-793872.jpg?v=1714967974"}},{"id":261657460925,"handle":"buy","title":"Buy","updated_at":"2026-06-12T19:10:26+08:00","body_html":"\u003cp\u003eBrowse all of our pregnancy, labour \u0026amp; birth, postpartum and baby essentials here.\u003cbr\u003e\u003c\/p\u003e\n\u003cp\u003e\u003cspan\u003eYou can even buy now and pay later with Afterpay!\u003c\/span\u003e\u003c\/p\u003e","published_at":"2021-03-10T12:05:31+08:00","sort_order":"best-selling","template_suffix":"shop-all-collection","disjunctive":false,"rules":[{"column":"title","relation":"not_contains","condition":"Hire"}],"published_scope":"global","image":{"created_at":"2024-05-06T11:59:42+08:00","alt":"Buy - The Birth Store","width":2048,"height":2048,"src":"\/\/www.thebirthstore.com.au\/cdn\/shop\/collections\/buy-964856.jpg?v=1714967982"}},{"id":261658149053,"handle":"pregnancy-and-maternity-products","title":"Pregnancy","updated_at":"2026-06-12T19:10:26+08:00","body_html":"\u003cp\u003eShop your pregnancy essentials below. Looking for something we don't currently stock? Please reach out and let us know.\u003cbr\u003e\u003c\/p\u003e\n\u003cp\u003e\u003cspan\u003eYou can even buy now and pay later with Afterpay!\u003c\/span\u003e\u003c\/p\u003e","published_at":"2021-03-10T12:34:22+08:00","sort_order":"best-selling","template_suffix":"pregnancy-collection","disjunctive":false,"rules":[{"column":"tag","relation":"equals","condition":"Pregnancy"}],"published_scope":"global","image":{"created_at":"2024-05-06T12:00:40+08:00","alt":"Pregnancy - The Birth Store","width":1024,"height":1536,"src":"\/\/www.thebirthstore.com.au\/cdn\/shop\/collections\/pregnancy-899677.jpg?v=1714968040"}},{"id":295224901821,"handle":"pregnancy-health","title":"Pregnancy Health","updated_at":"2026-06-12T19:10:26+08:00","body_html":"","published_at":"2023-11-10T20:48:51+08:00","sort_order":"best-selling","template_suffix":"swaddles-collection","disjunctive":false,"rules":[{"column":"tag","relation":"equals","condition":"Pregnancy Health"}],"published_scope":"global","image":{"created_at":"2024-05-06T12:00:41+08:00","alt":"Pregnancy Health - The Birth Store","width":608,"height":410,"src":"\/\/www.thebirthstore.com.au\/cdn\/shop\/collections\/pregnancy-health-343983.jpg?v=1714968042"}},{"id":326523846845,"handle":"pregnancy-health-1","updated_at":"2026-06-12T19:10:26+08:00","published_at":"2025-10-30T10:44:54+08:00","sort_order":"best-selling","template_suffix":"","published_scope":"global","title":"Pregnancy Health","body_html":"","image":{"created_at":"2025-11-20T21:33:56+08:00","alt":"Pregnancy Health - The Birth Store","width":522,"height":525,"src":"\/\/www.thebirthstore.com.au\/cdn\/shop\/collections\/pregnancy-health-1617860.jpg?v=1763645636"}},{"id":291456483517,"handle":"shop-all","title":"Shop All - Mum","updated_at":"2026-06-12T19:10:26+08:00","body_html":"","published_at":"2022-12-23T22:04:39+08:00","sort_order":"best-selling","template_suffix":"shop-all-collection","disjunctive":false,"rules":[{"column":"variant_price","relation":"greater_than","condition":"1"},{"column":"title","relation":"not_contains","condition":"Batteries"},{"column":"tag","relation":"equals","condition":"Mum"}],"published_scope":"global","image":{"created_at":"2024-05-06T12:00:54+08:00","alt":"Shop All - The Birth Store","width":1365,"height":2048,"src":"\/\/www.thebirthstore.com.au\/cdn\/shop\/collections\/shop-all-693176.jpg?v=1714968055"}}]}


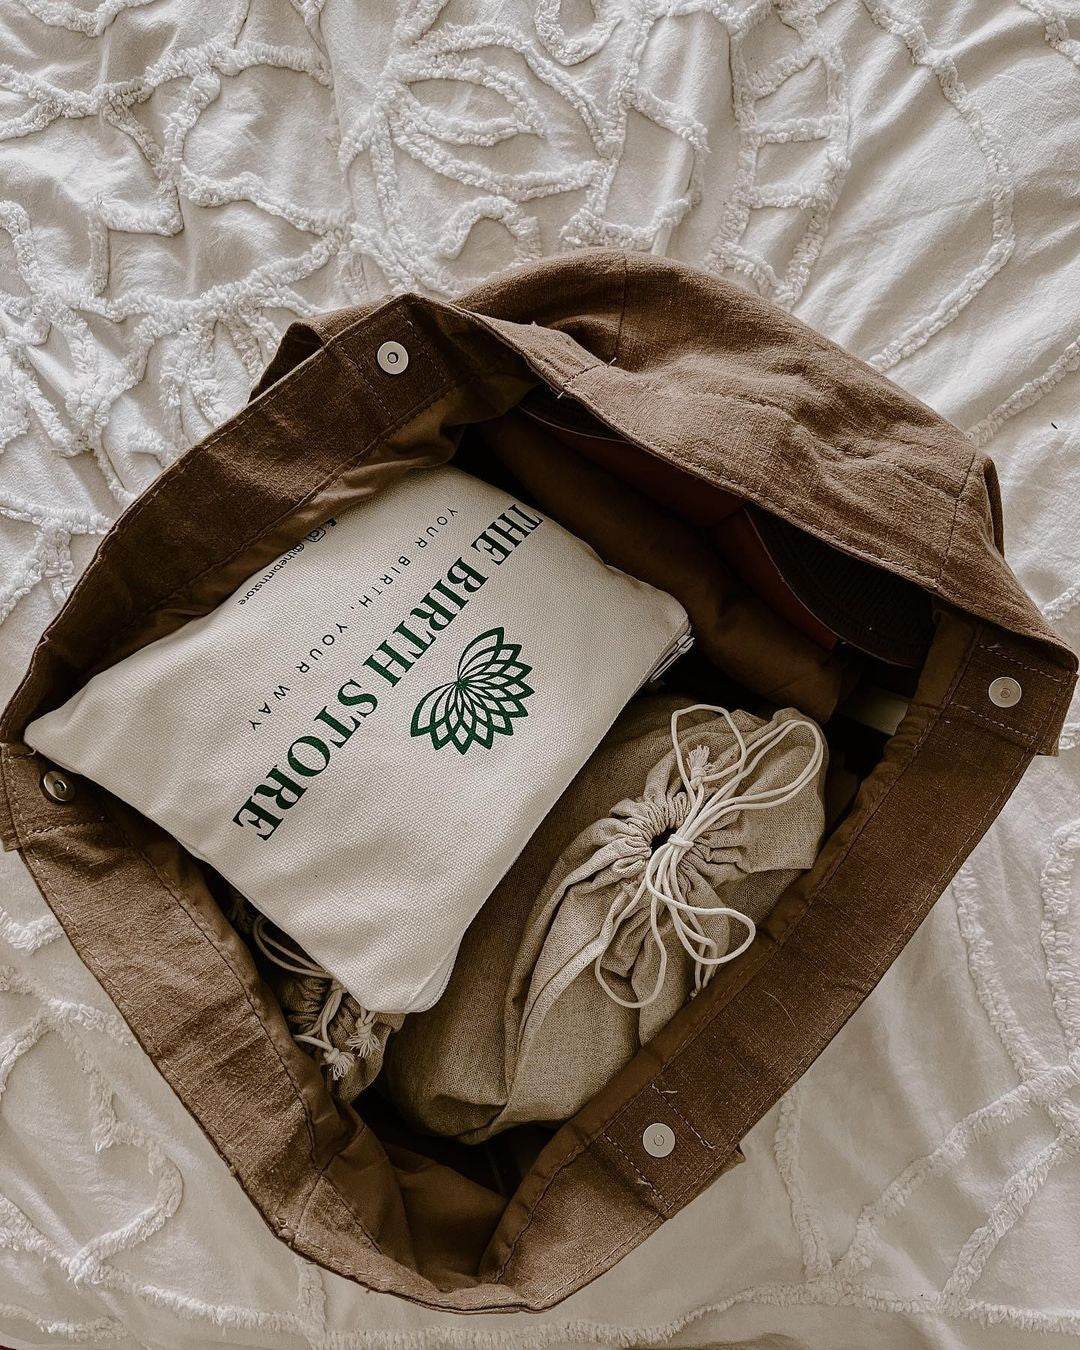
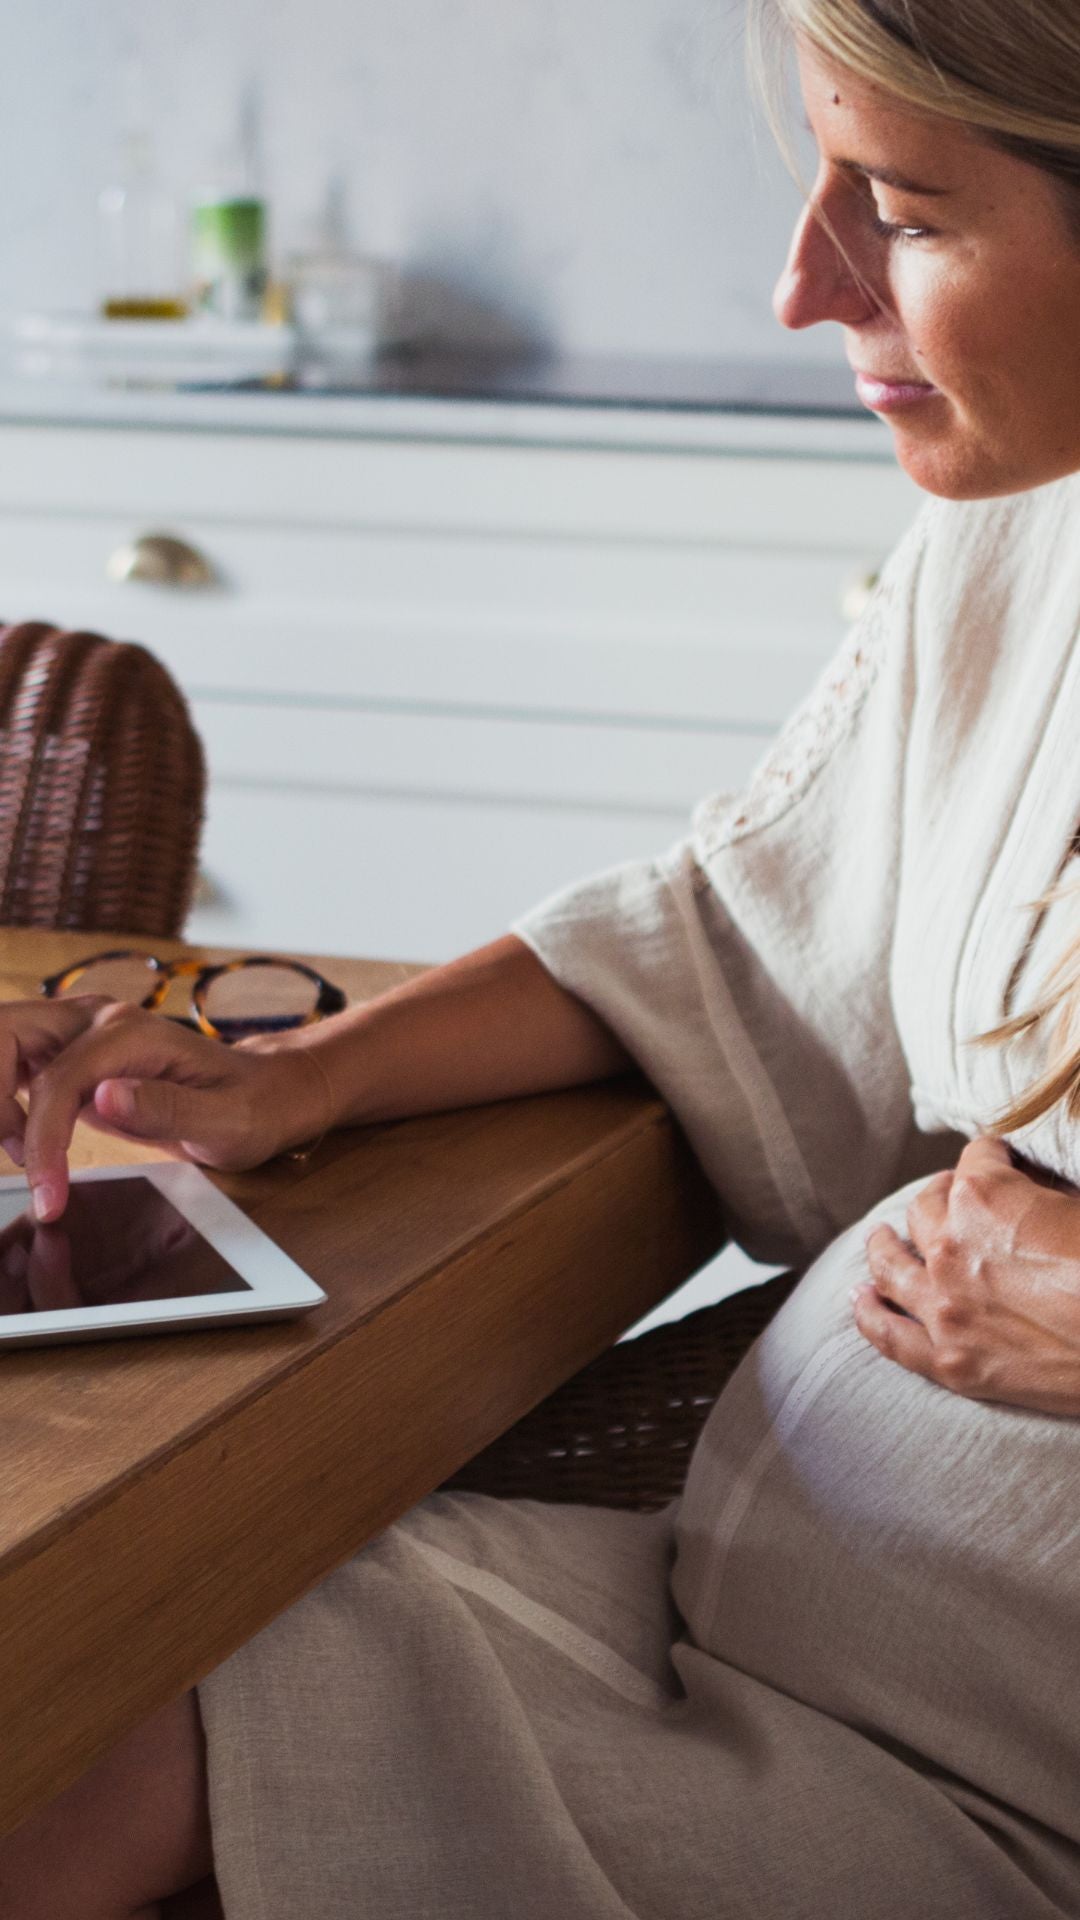

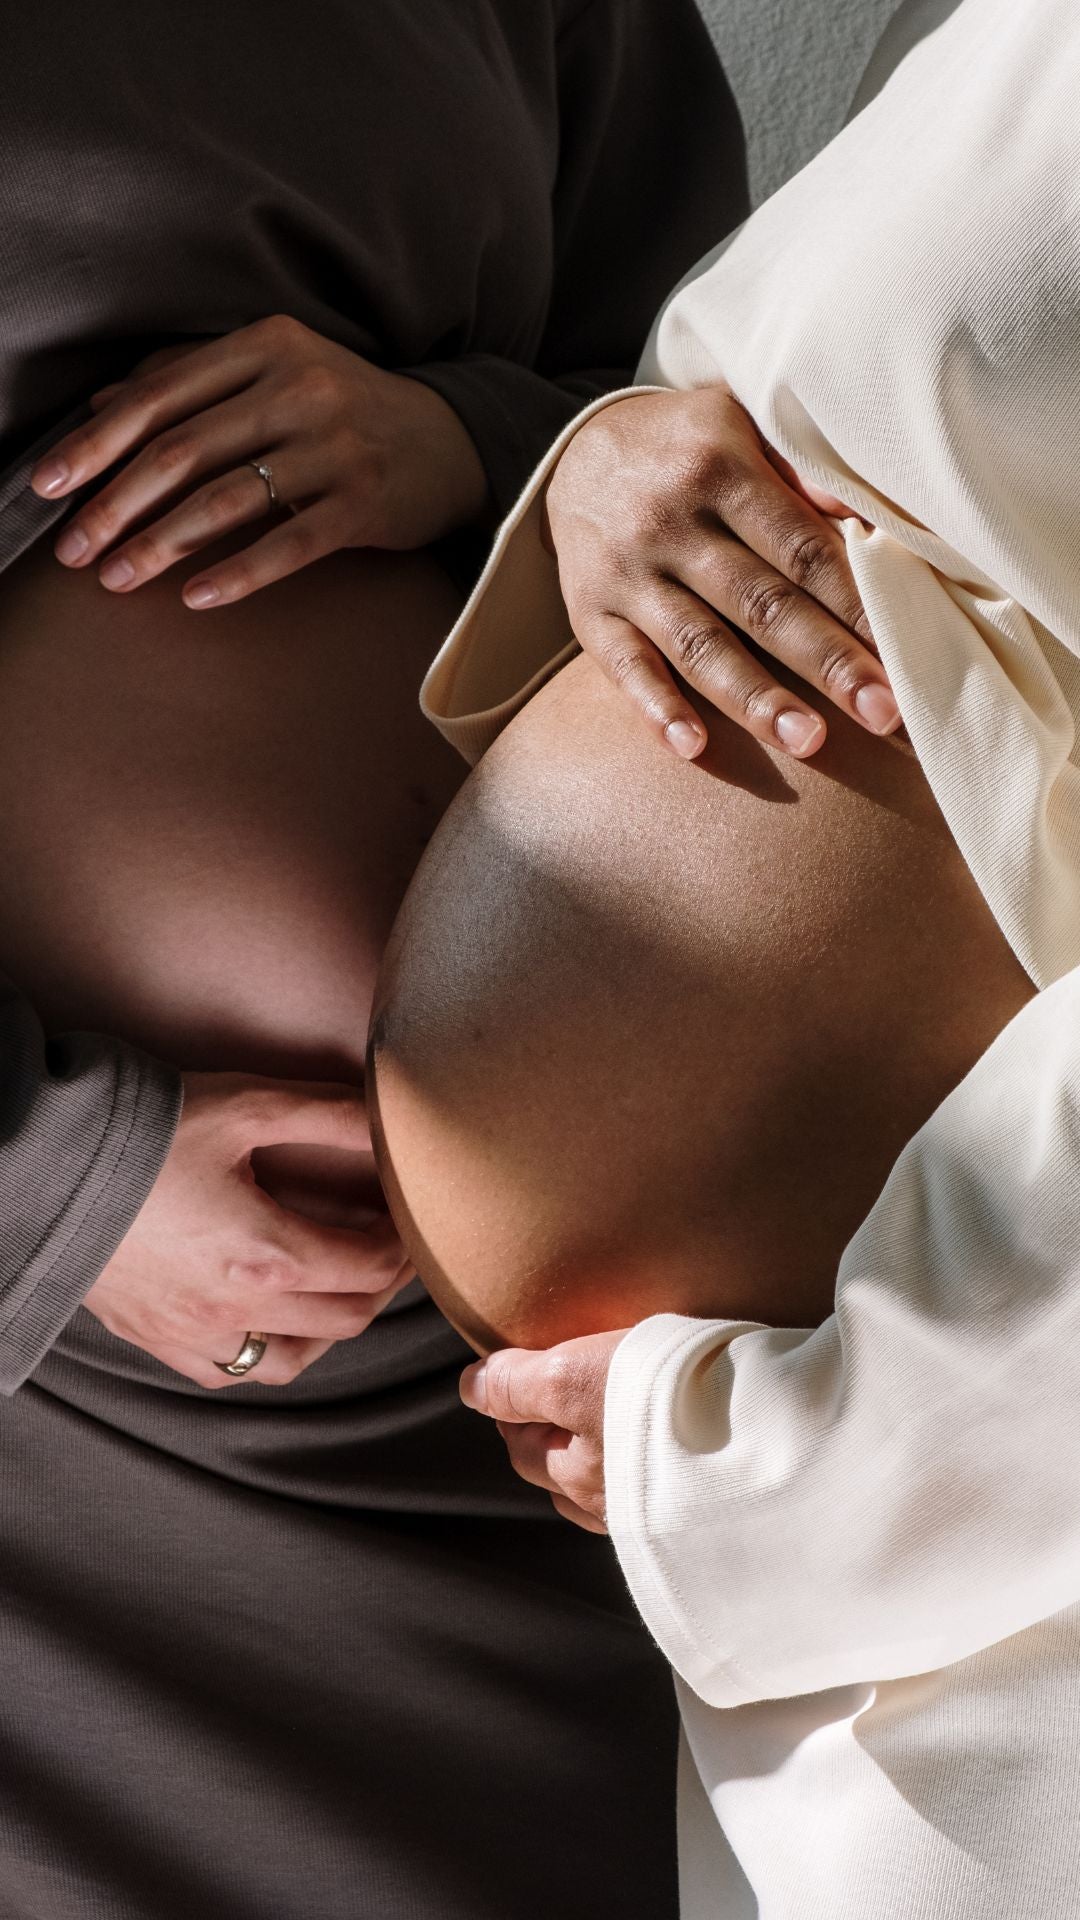
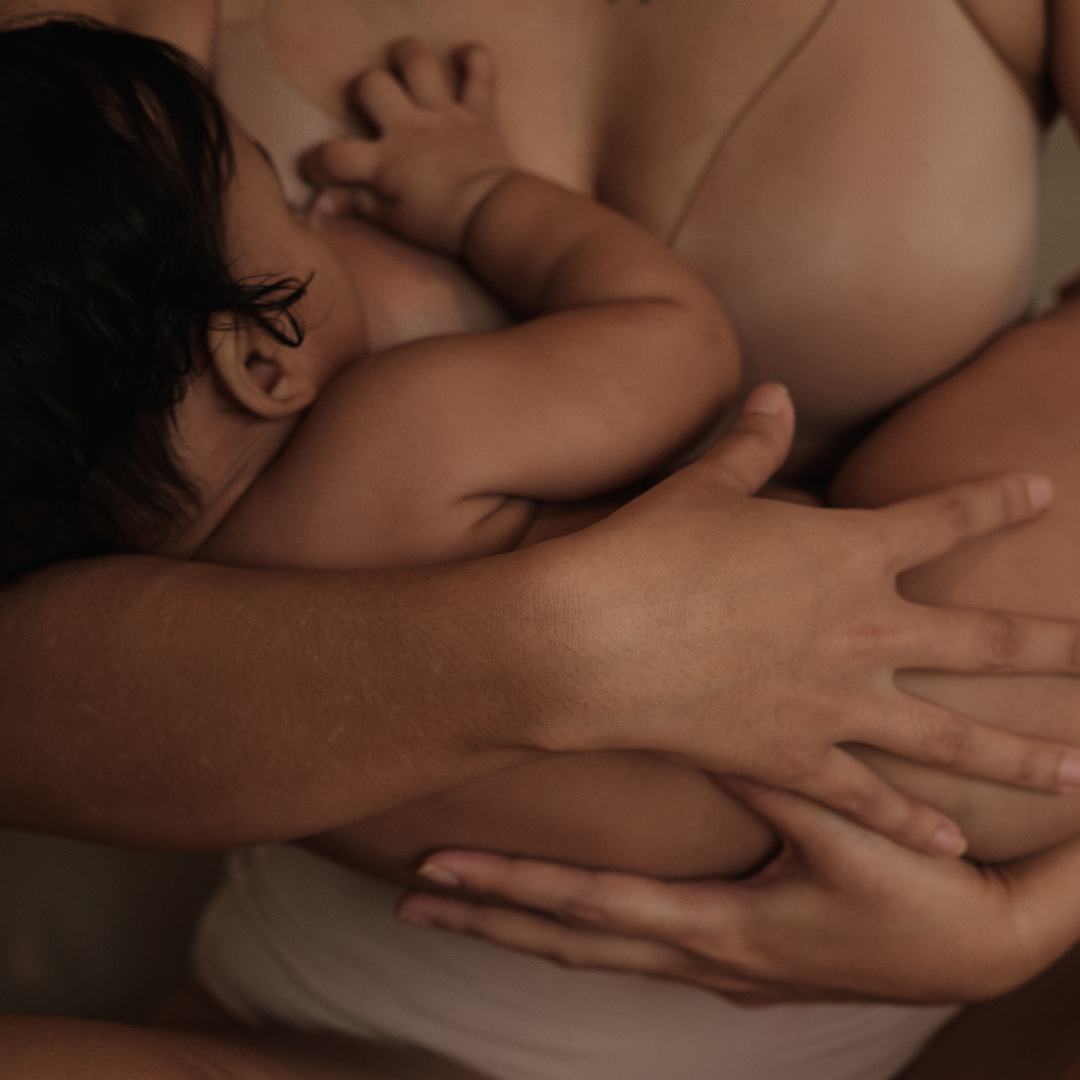


